Making stickers with a Cricut is one of the simplest tasks, especially when using the Print and Cut feature. Cricut guides you through the process, from loading your stickers to removing them from the cutting mat, making each step clear and straightforward. Even though Cricut’s software is user-friendly, we’ve put together a step-by-step tutorial to help you create your stickers.
1. Design Creation
Whether you want to make stickers from your photos, vinyl car decals, or sticker sheets for your business, the design is one of the most critical parts of the sticker creation process. If you already have your designs ready, you can skip this step.
We’ll start with a user-friendly, free program like Canva. To unlock all Canva’s features, you’ll need to register and activate your free trial.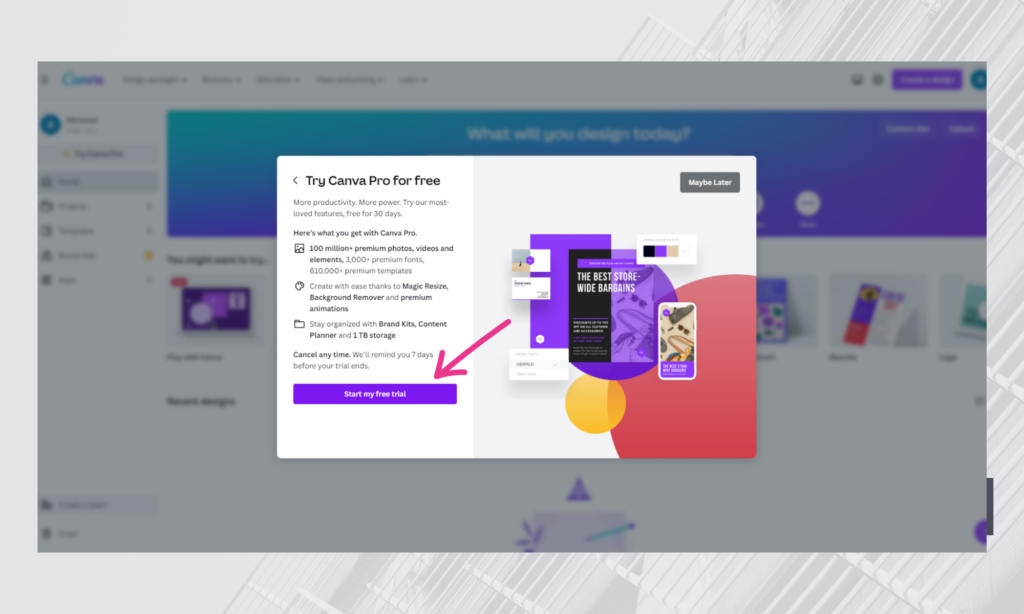
You can use other design software if you’re more familiar with them.
If you don’t have your own designs, you can use free images and stickers from Canva to create your sticker sheet. You can add your favorite quotes using Canva’s fonts or add your own images and photos.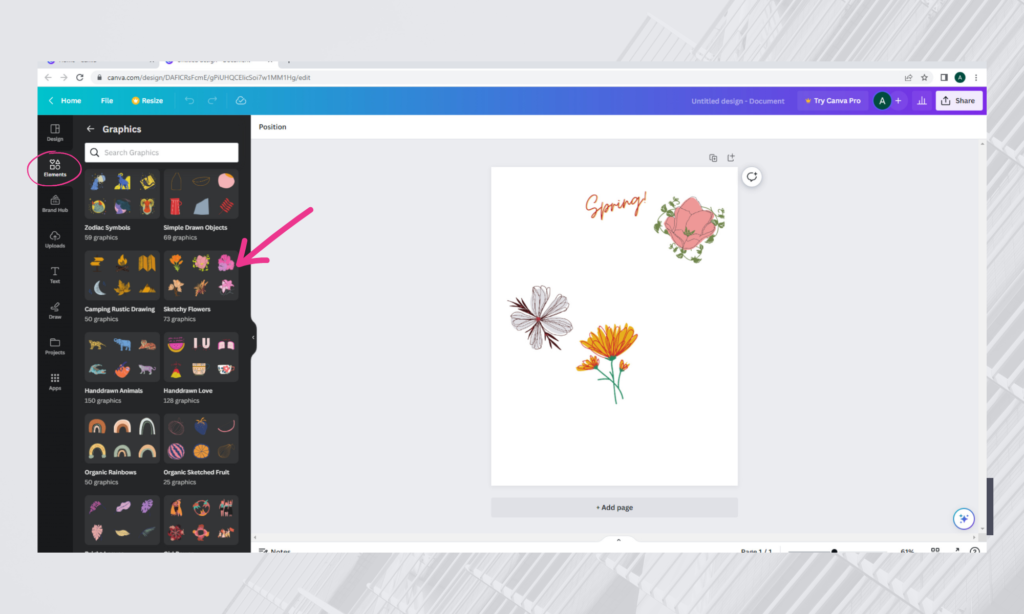
2. Fine-Tuning Your Design
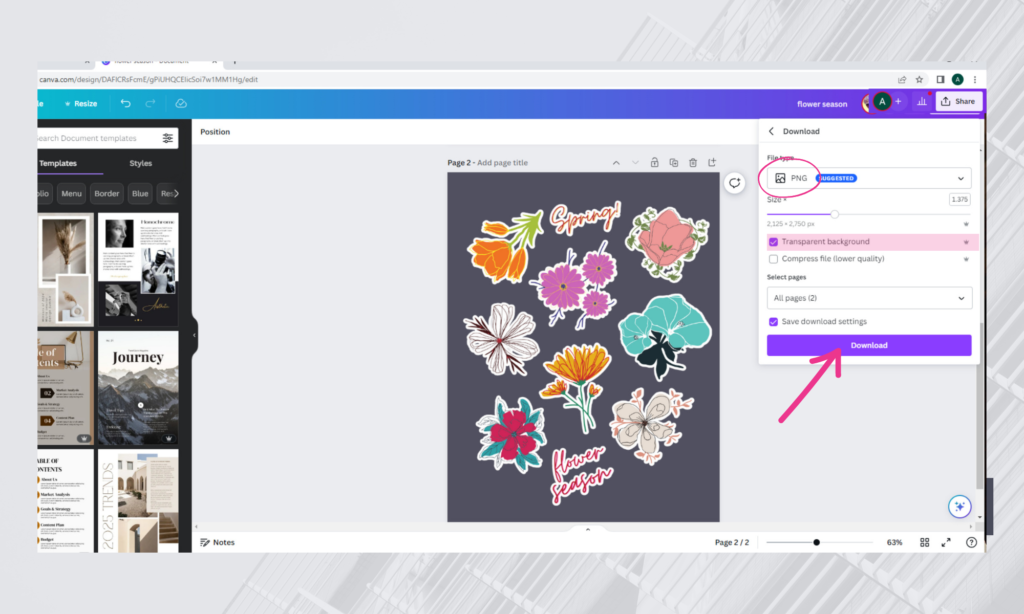
We’ll use a neat trick and export this page making sure to select “transparent background”.
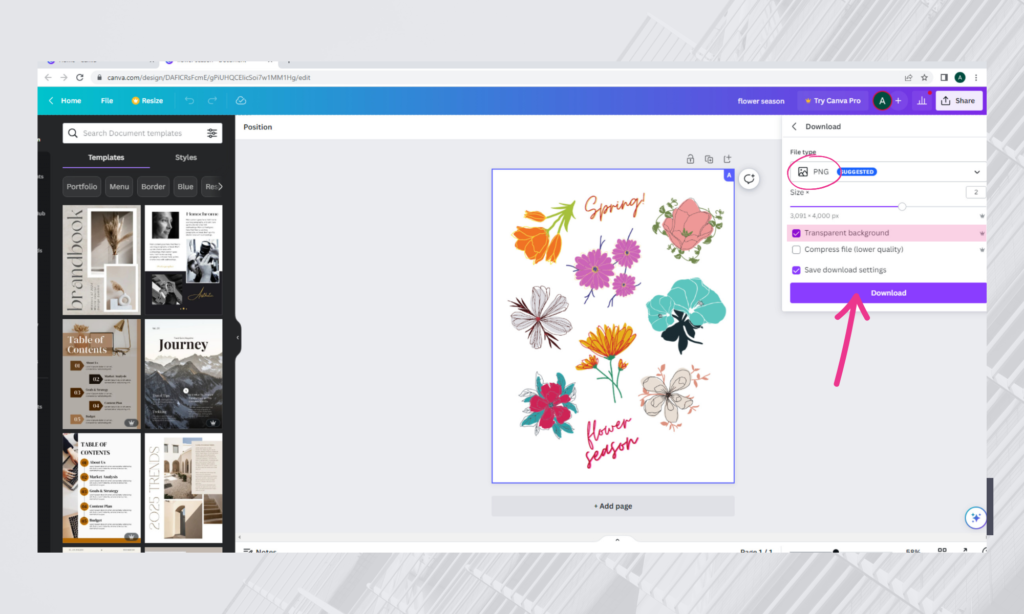
Export and download this image, then place it on a new page. This way, our sticker sheet has become a full image.
This is an optional step, to add the white outline that most stickers have, we’ll use another trick: go to the “Edit Image” section, select “Shadows”, and then “Glow”.
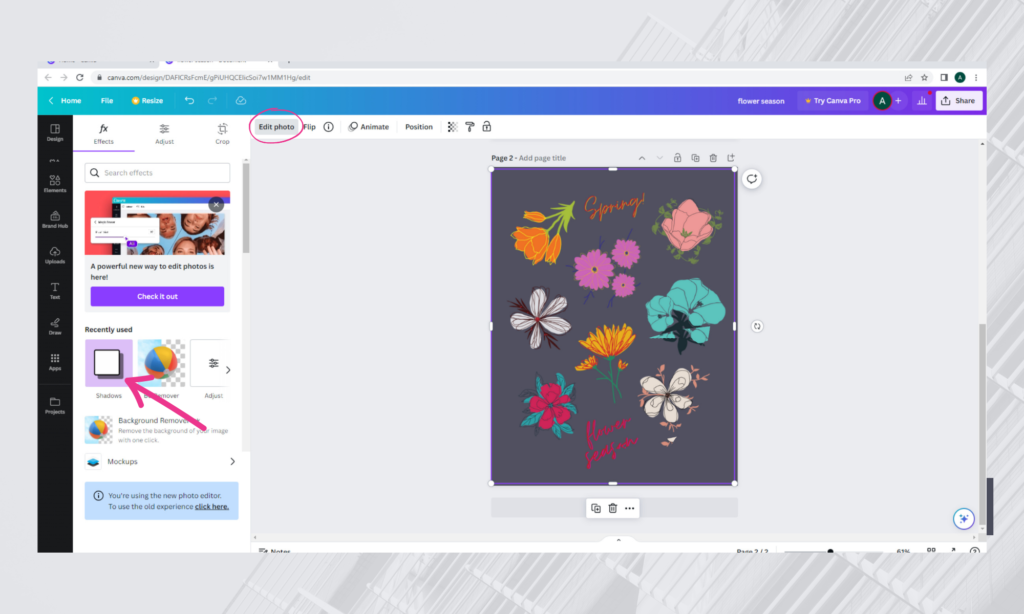
Change the blur to zero and adjust the size to your preference. Make sure to change the color from black to white and set the transparency to 100%.
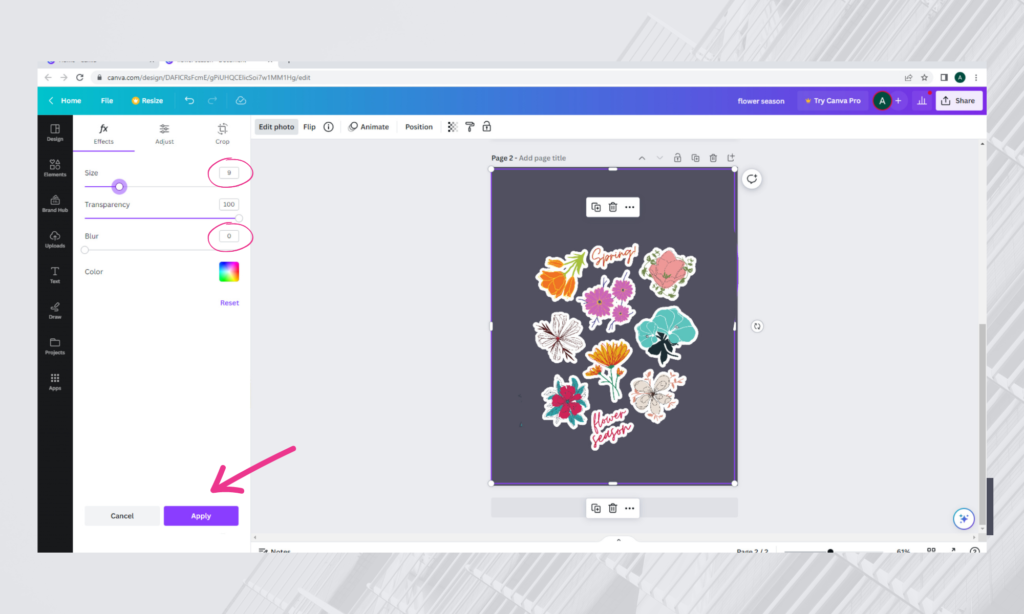
Apply the changes, and you’re ready to export your sticker sheet. Your image will probably shrink but don’t worry, just scale it again and it’ll be fine.
When exporting, I suggest choosing the PNG format, increasing the quality, and—this is very important—making sure to tick the box for “Transparent Background”.
3. Uploading Your Design to Cricut Design Space
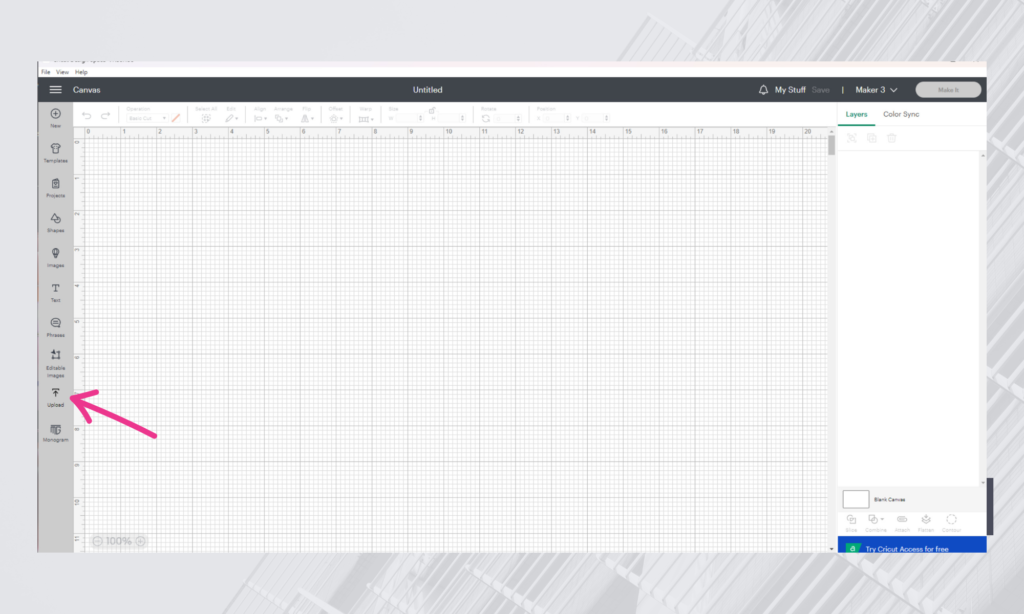
Once your image is ready with the desired outer outlining, it’s time to upload it to Cricut Design Space.
Open the program, go to “New Project” in the side panel, select “Upload”, and upload your design.
Then Cricut will ask us which type of image we’re uploading. We’re going to go ahead and select complex, then click continue.
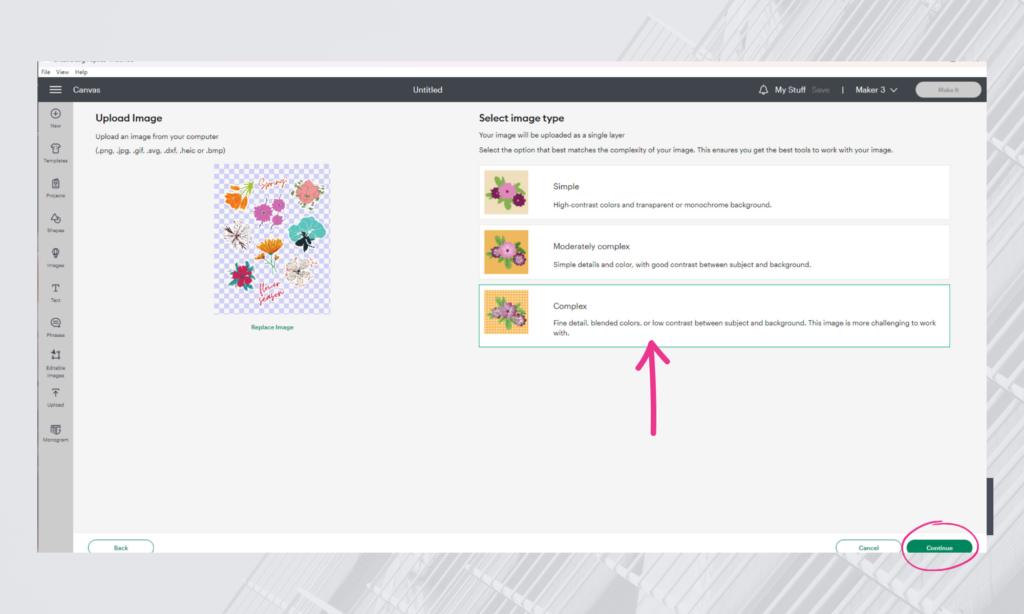
After that, you’ll see two options: “Cut” or “Print then Cut”. Select “Print then Cut” and click upload.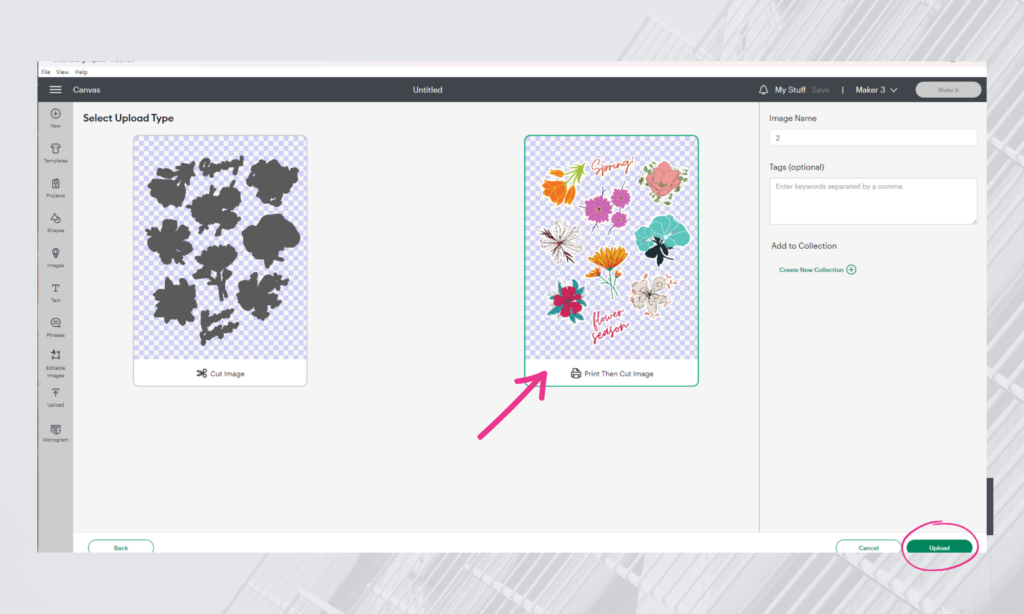
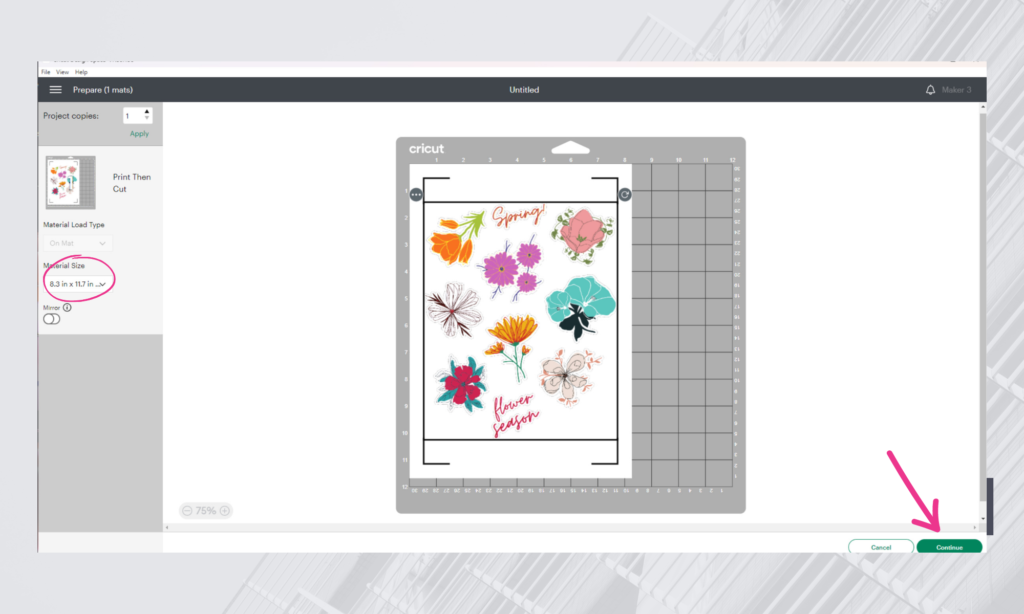
After your design has been uploaded, you may notice a small red exclamation mark on the right side (layer panel), indicating that our image is too large for Cricut’s Print and Cut limits.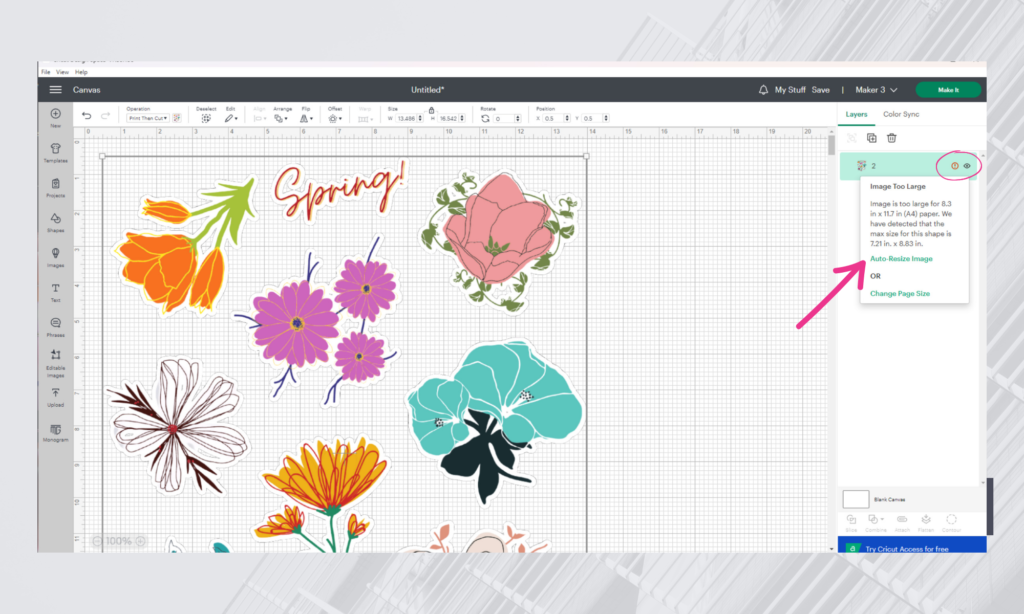
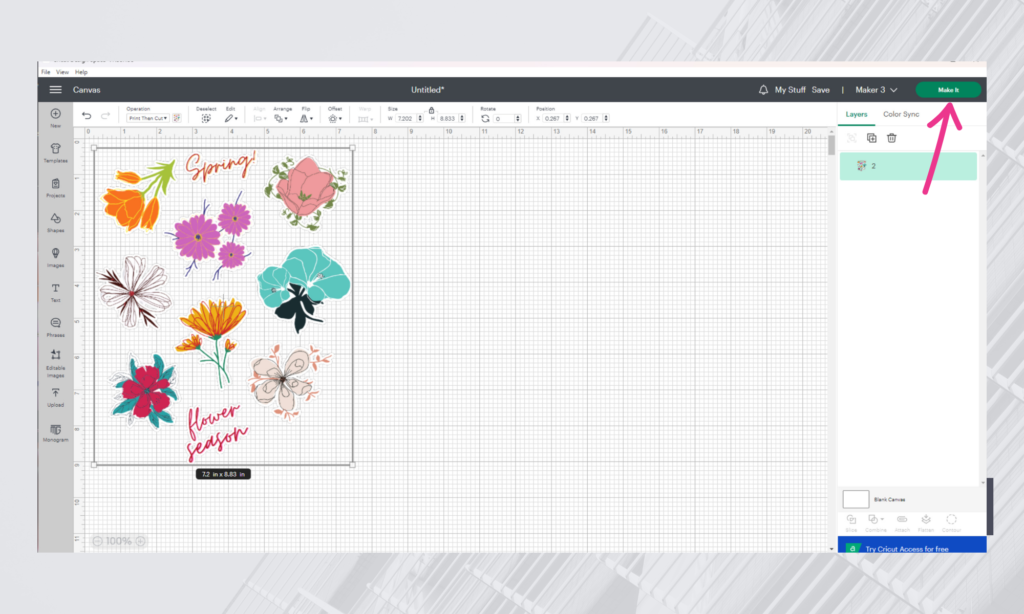
You can either manually adjust the size or let the program auto-adjust to the largest possible size. Once your design is ready, press the “Make It” button.
4. Printing and Cutting Your Stickers
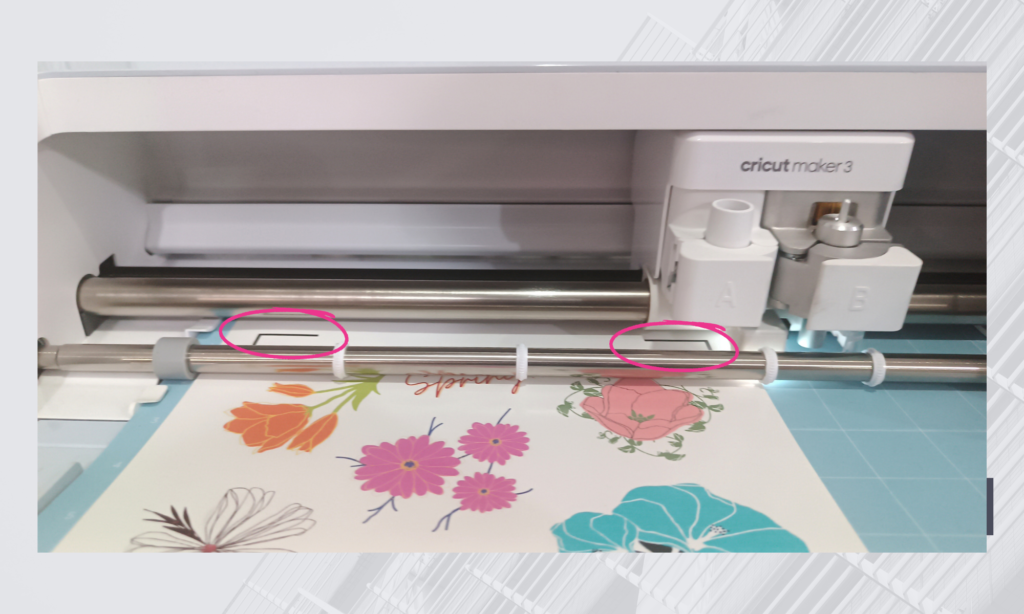
You’ll see some marks on the sides of your design—these are the registration lines that Cricut scans to ensure the most precise cut possible.
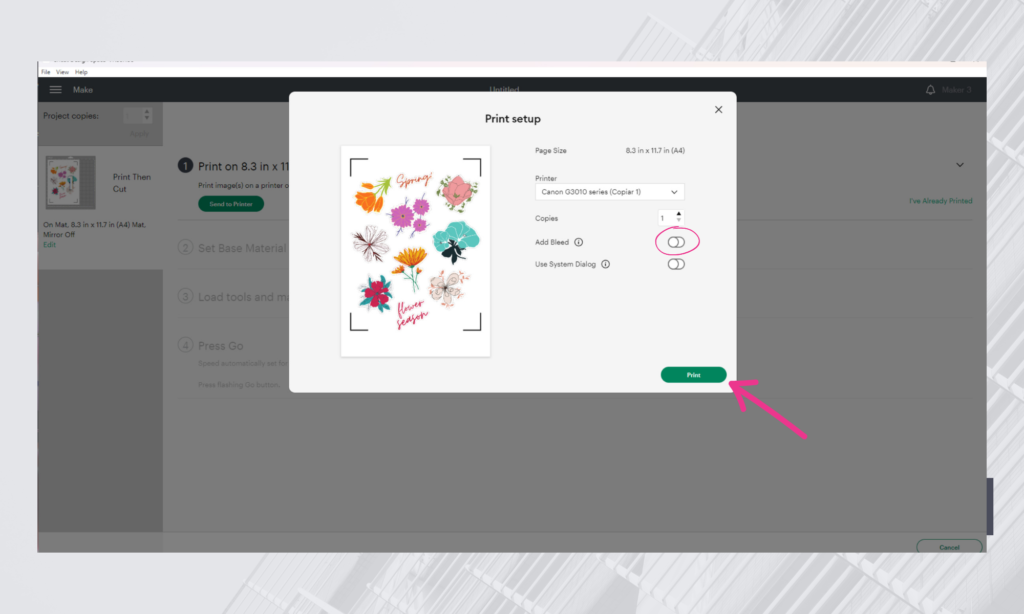
This begins the print and cut process for your stickers. First, select the printer you’re using, in this case, is a Canon G3010.
You have the option to select or deselect the “Bleed” option, which adds a border to your stickers. For the best-quality stickers, deselect this option, and the thick border will disappear.
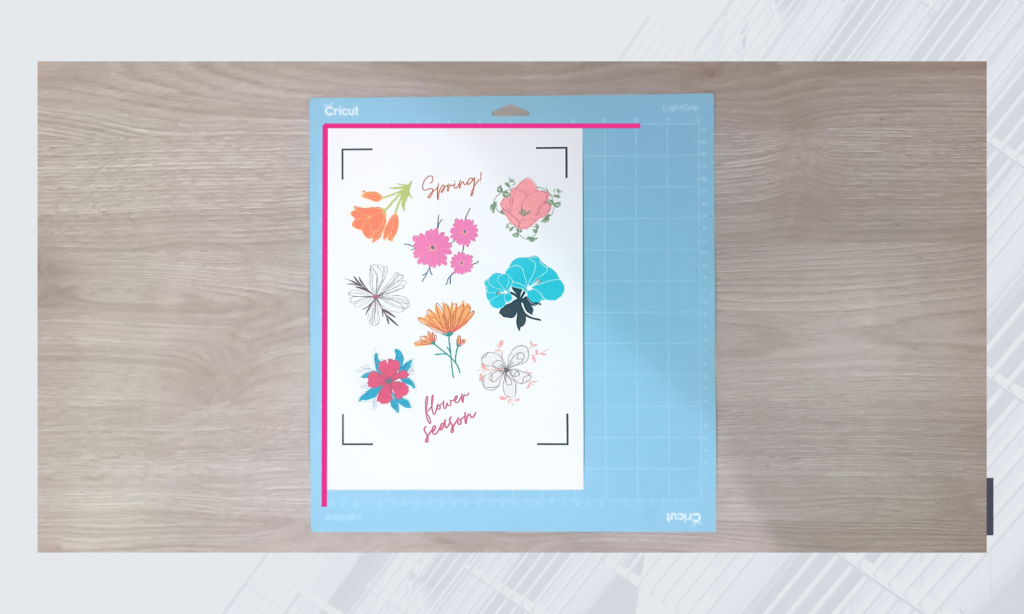
Once your sticker sheet is printed, let it dry, then carefully align it with the top left corner of your Cricut cutting mat.
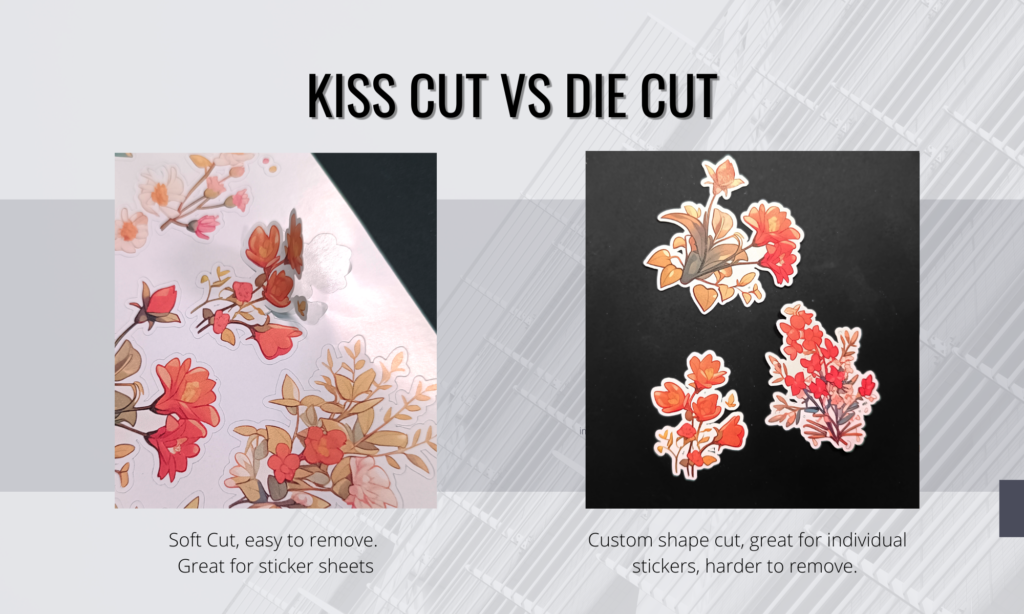
5. Choosing the Right Cut Type
For this project, we’ll use the Light Grip cutting mat (the blue one). You can choose between two main cut options: “Kiss Cut” (the stickers remain on the sheet and are easy to peel off) or “Die Cut” (the stickers are cut out individually).
To achieve these cuts, you’ll need to find the perfect machine setting. Some trial and error might be necessary, so I recommend doing some tests before making your cuts.
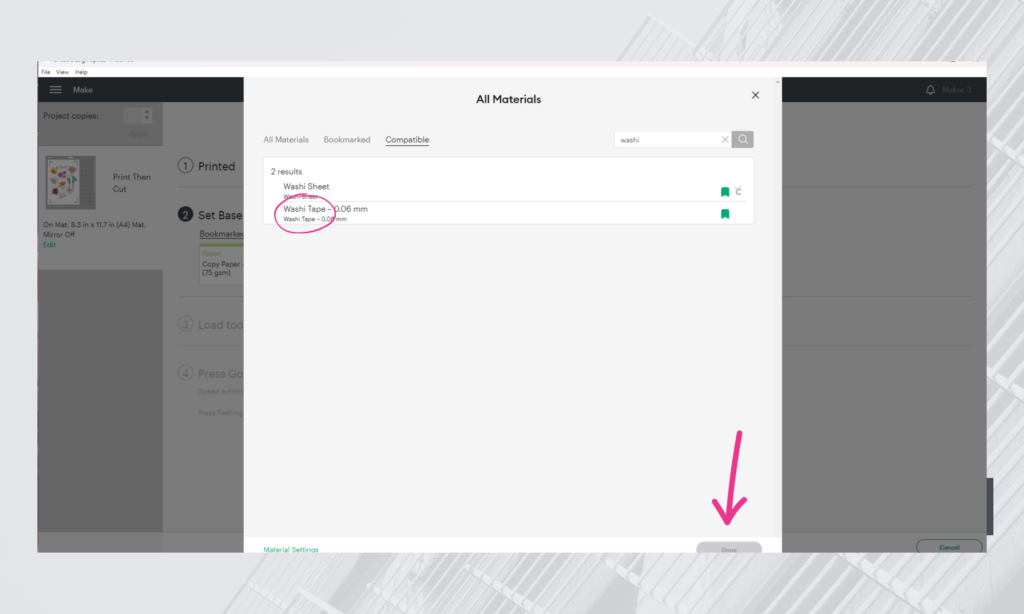
To achieve a “Kiss Cut,” certain materials can be selected from Cricut’s material library that will give you the cut you want. Here are some material settings you can try:
- Premium Vinyl
- Washi Tape
- Washi Sheet
- Sticky Note
- Rice Paper
- and Adhesive Foil
For a “Die Cut”, you’ll need to select “Sticker Paper” from the materials and adjust the cutting strenght according to the thickness of your paper—choose from Less, Default, or More.

6. Cutting Your Stickers
Load your cutting mat into the machine and press the “Load/Unload” button.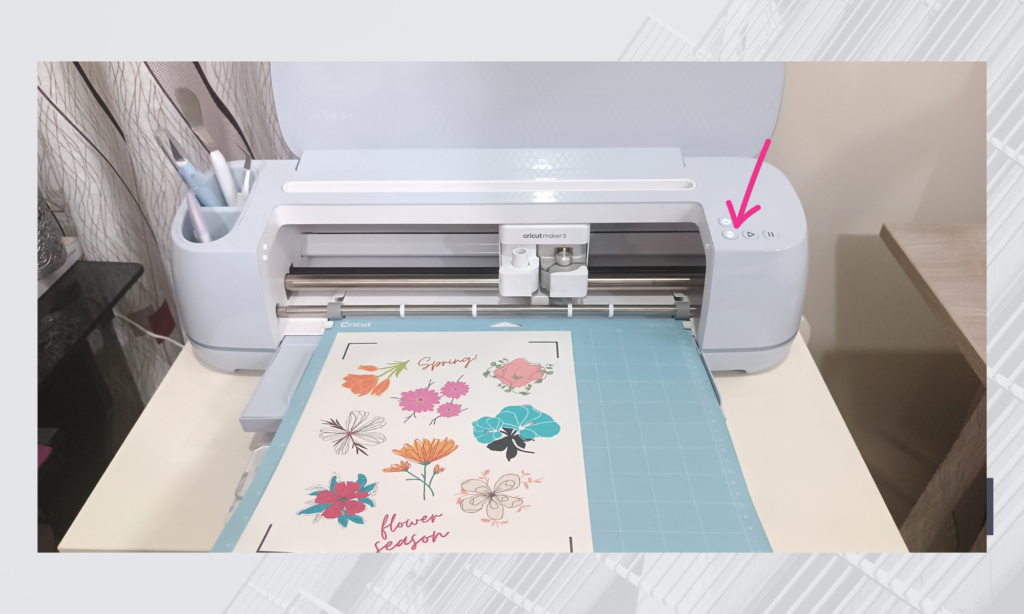
Your Cricut will scan the registration lines and the mat’s length to ensure maximum precision.
When it’s ready to cut, the “Cricut” button (also known as the “Go” button) will start flashing. Press this button, and the Cricut will begin cutting your stickers.
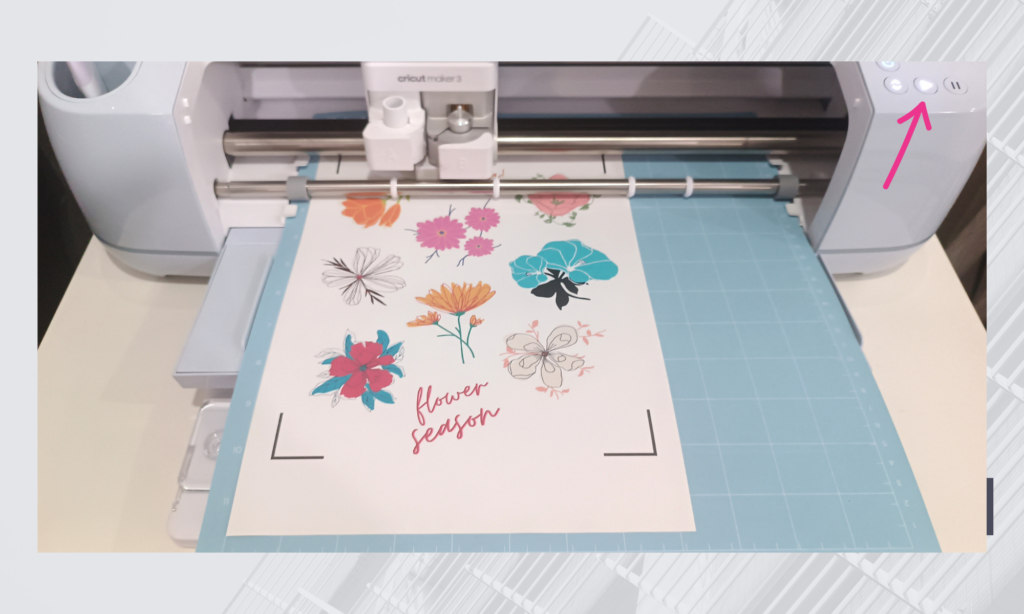
Once it’s done, press the “Load/Unload” button again to remove your cutting mat. Depending on the cut you’ve chosen, carefully remove the sticker sheet by bending the cutting mat instead of the sticker paper.
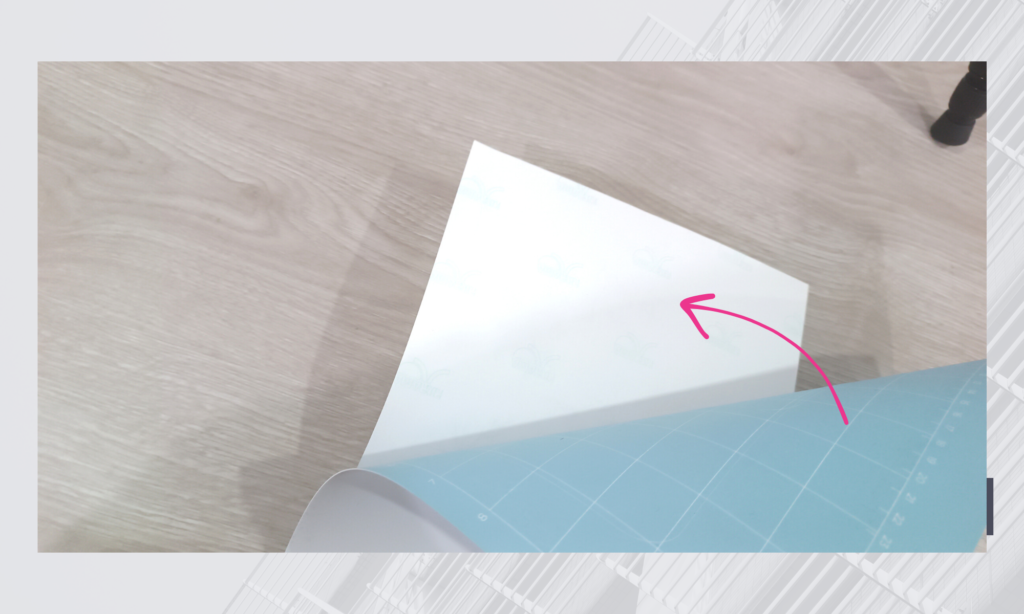
If you chose “Kiss Cut,” the paper should come off the cutting mat entirely intact—if not, you may need to adjust your blade’s cutting power to a lower setting.
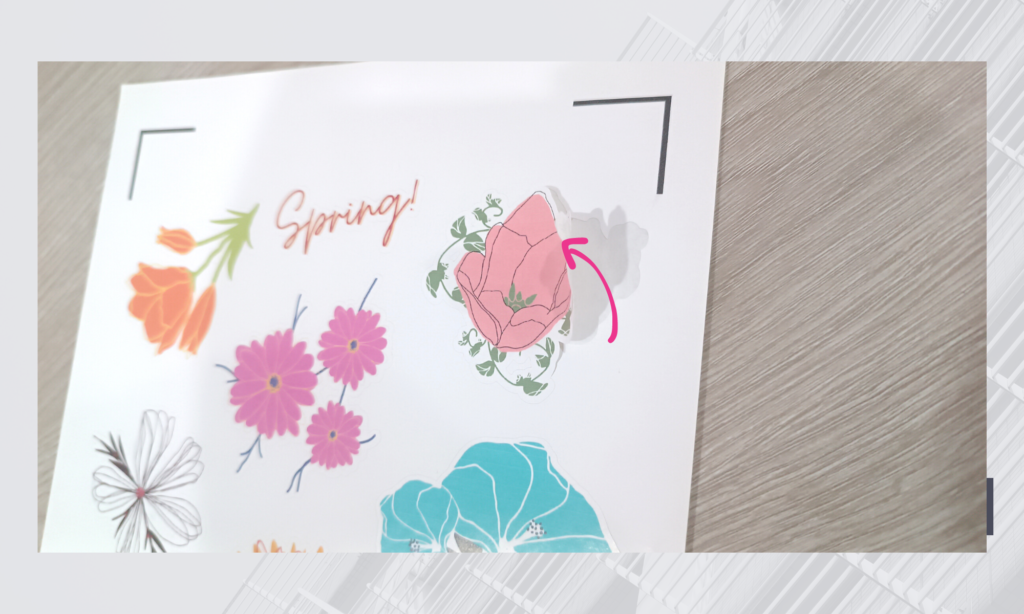
If you chose “Die Cut,” the paper around your designs should come off smoothly, with the designs remaining on the cutting mat. To remove them, use the weeding tool to gently lift the sticker paper from the cutting mat.
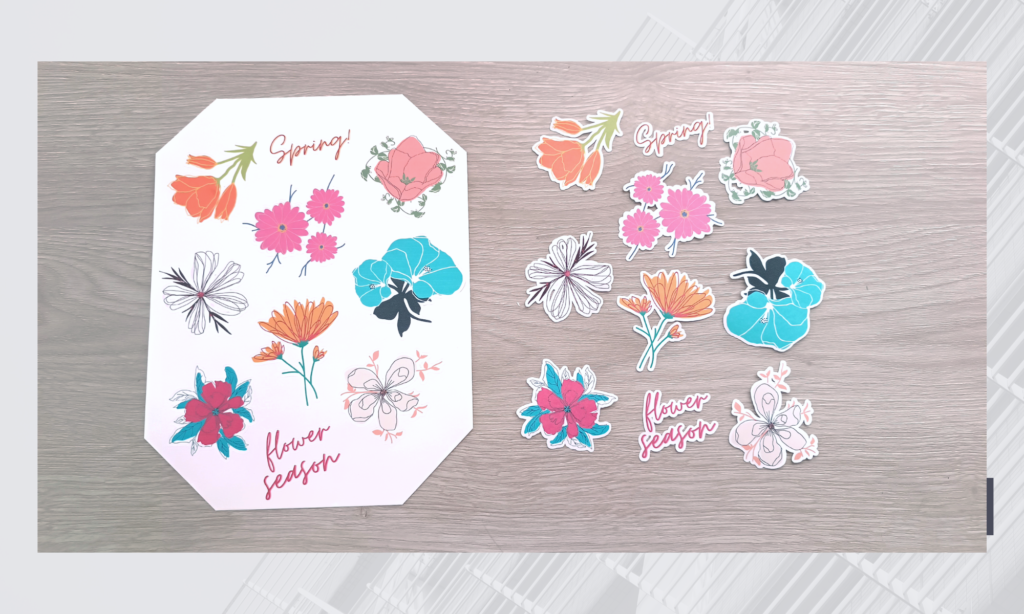

7. Finishing Touches
And there you have it, your stickers are ready! If you want to add an extra layer of protection, you can purchase a protective spray to make your stickers waterproof and UV-resistant.
To learn how to create a full page of stickers and not waste any material, check out our detailed article here.
I hope this guide helps you pick the perfect cutting machine for you. Thank you for reading, and until next time!