From intricate paper crafts to personalized vinyl decals, and even heat-transfer projects for custom apparel, Cricut machines empower you to produce professional-level crafts right from the comfort of your home.
They’re the silent companions for those midnight DIY inspirations and the ultimate sidekick for personalizing, decorating, and reinventing your world. Regardless of the project scale, Cricut’s suite of machines are designed to cater to all — whether you’re a crafting novice taking your first step or a seasoned pro looking to upscale your creations.
So, are you ready to embark on a journey where your imagination is the only limit? Let’s get started! In this article, we will guide you on how to use a Cricut machine, from the set up to your first project, and together, we’ll bring your unique creative vision to life.
1. – Introduction: Unboxing, Test Materials and First Cut
What you need:
- Internet Connection
- A PC, Laptop, iPad, Tablet or Smartphone
- A Cricut machine
- A table
The Unboxing: First Impressions
As you pop open the box of your brand-new machine, the first thing to greet you is a warm welcome message from the Cricut team.
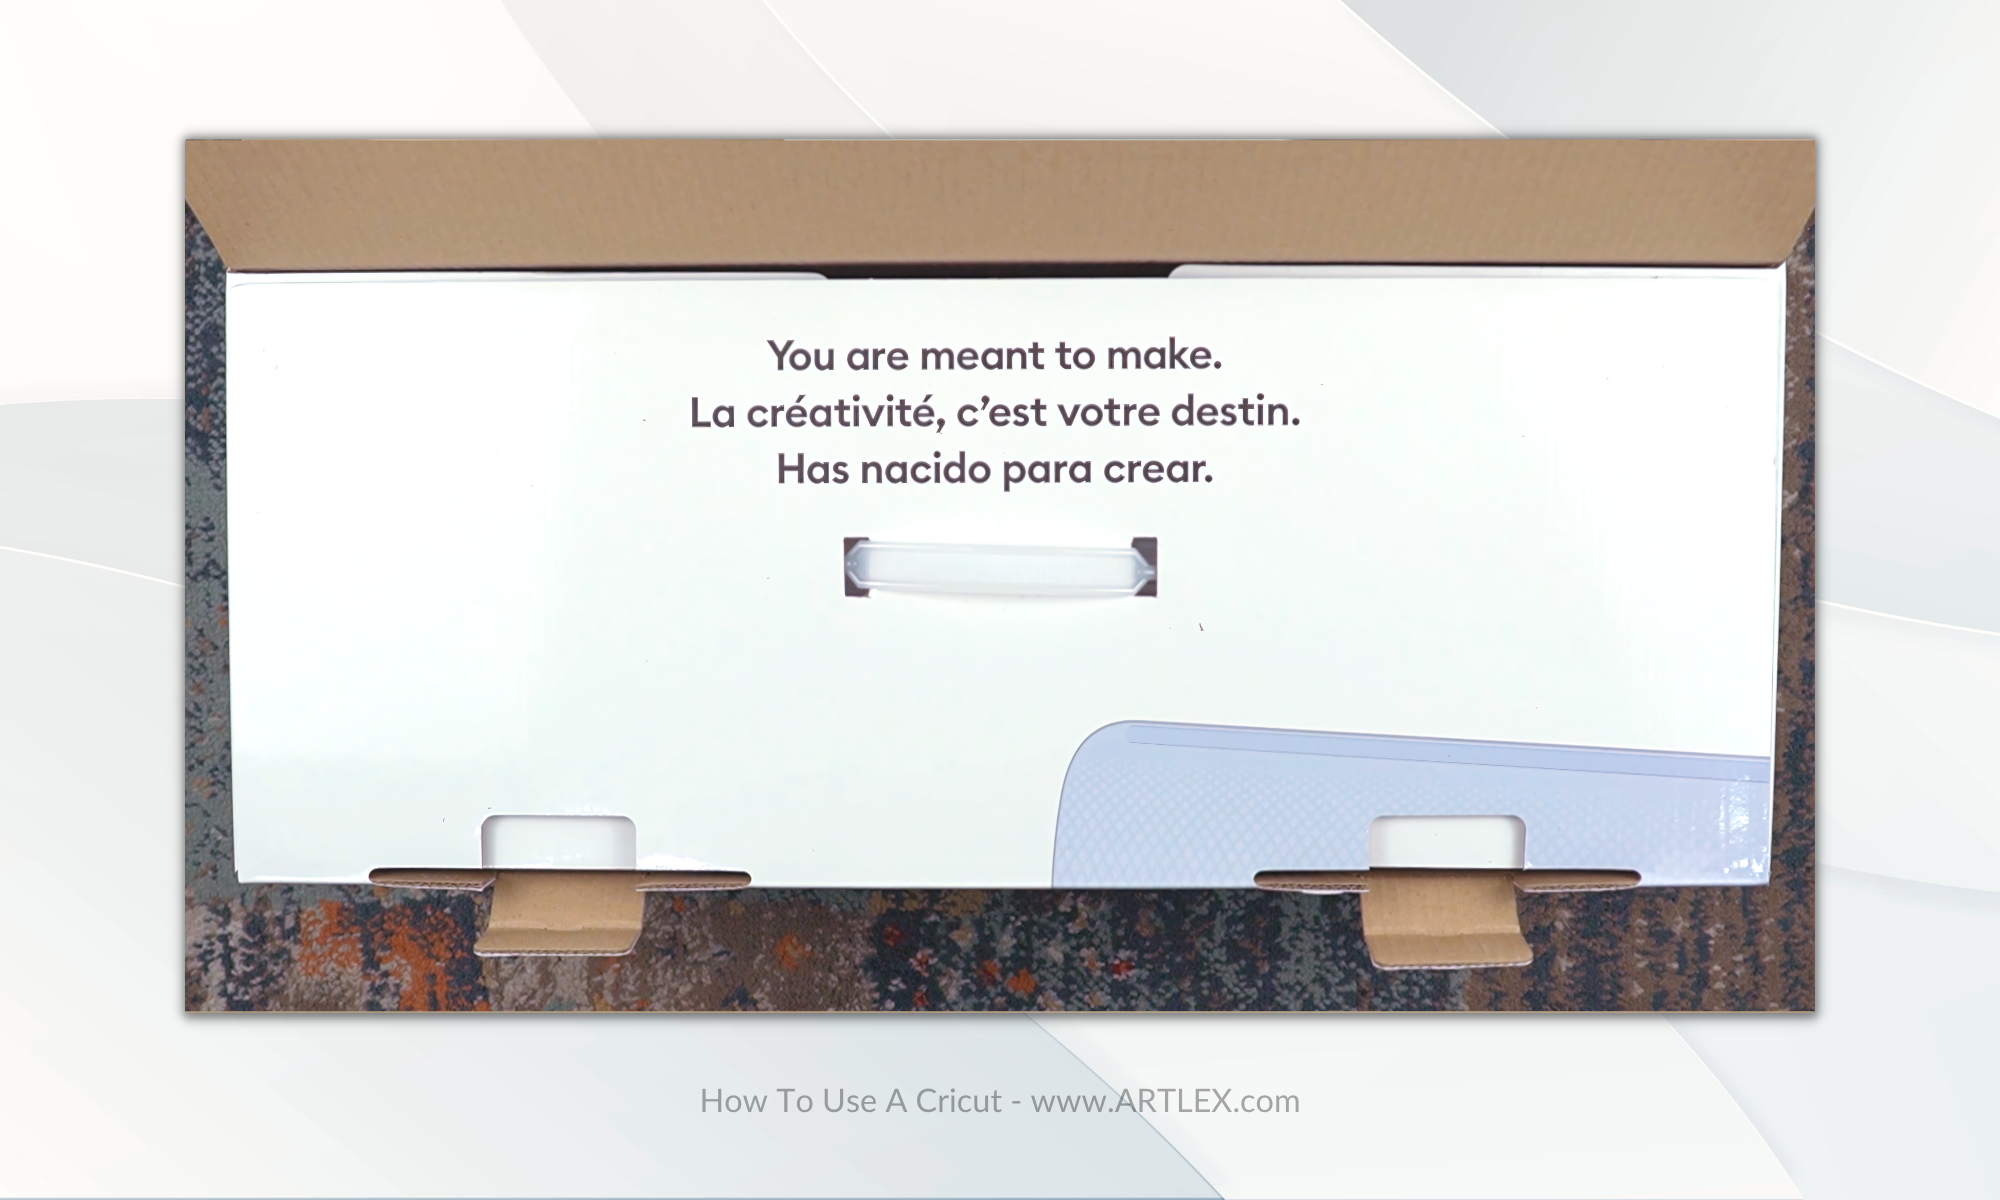
Inside this welcome message, you’ll find instructions on how to set up your machine, associate it with your account, and some basic usage instructions. Oh, and don’t forget about your warranty card!
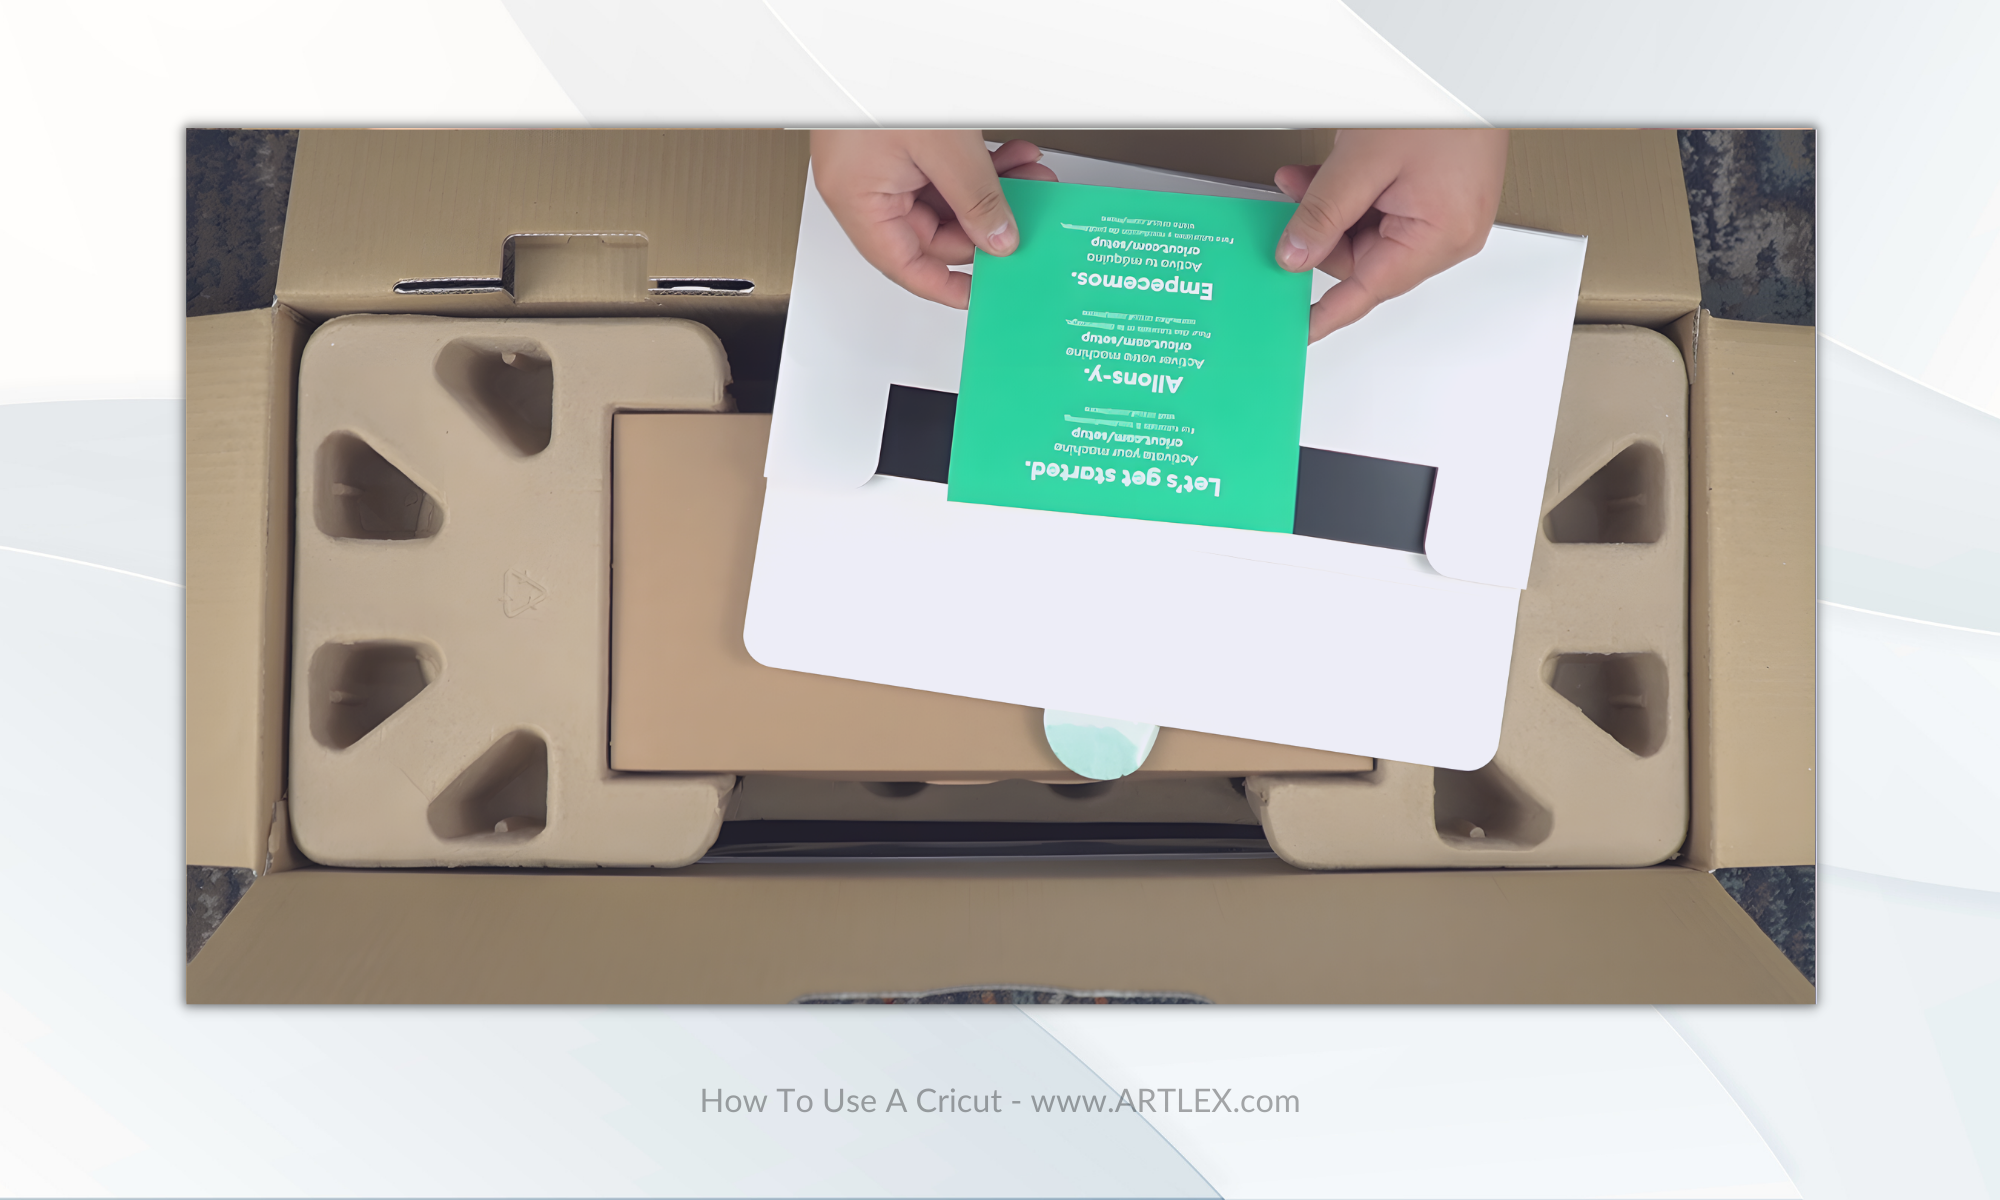
Depending on the specific machine you’ve chosen, you’ll also find some materials that will come in handy for testing out your new device.
For the purpose of this unboxing, we’re exploring the Cricut Maker 3. Just a heads up, this machine is capable of cutting without a mat, that’s why you won’t find any cutting mats in the box like with other machines- instead, you’ll discover some Smart Materials samples that are all set for you to kickstart your first projects.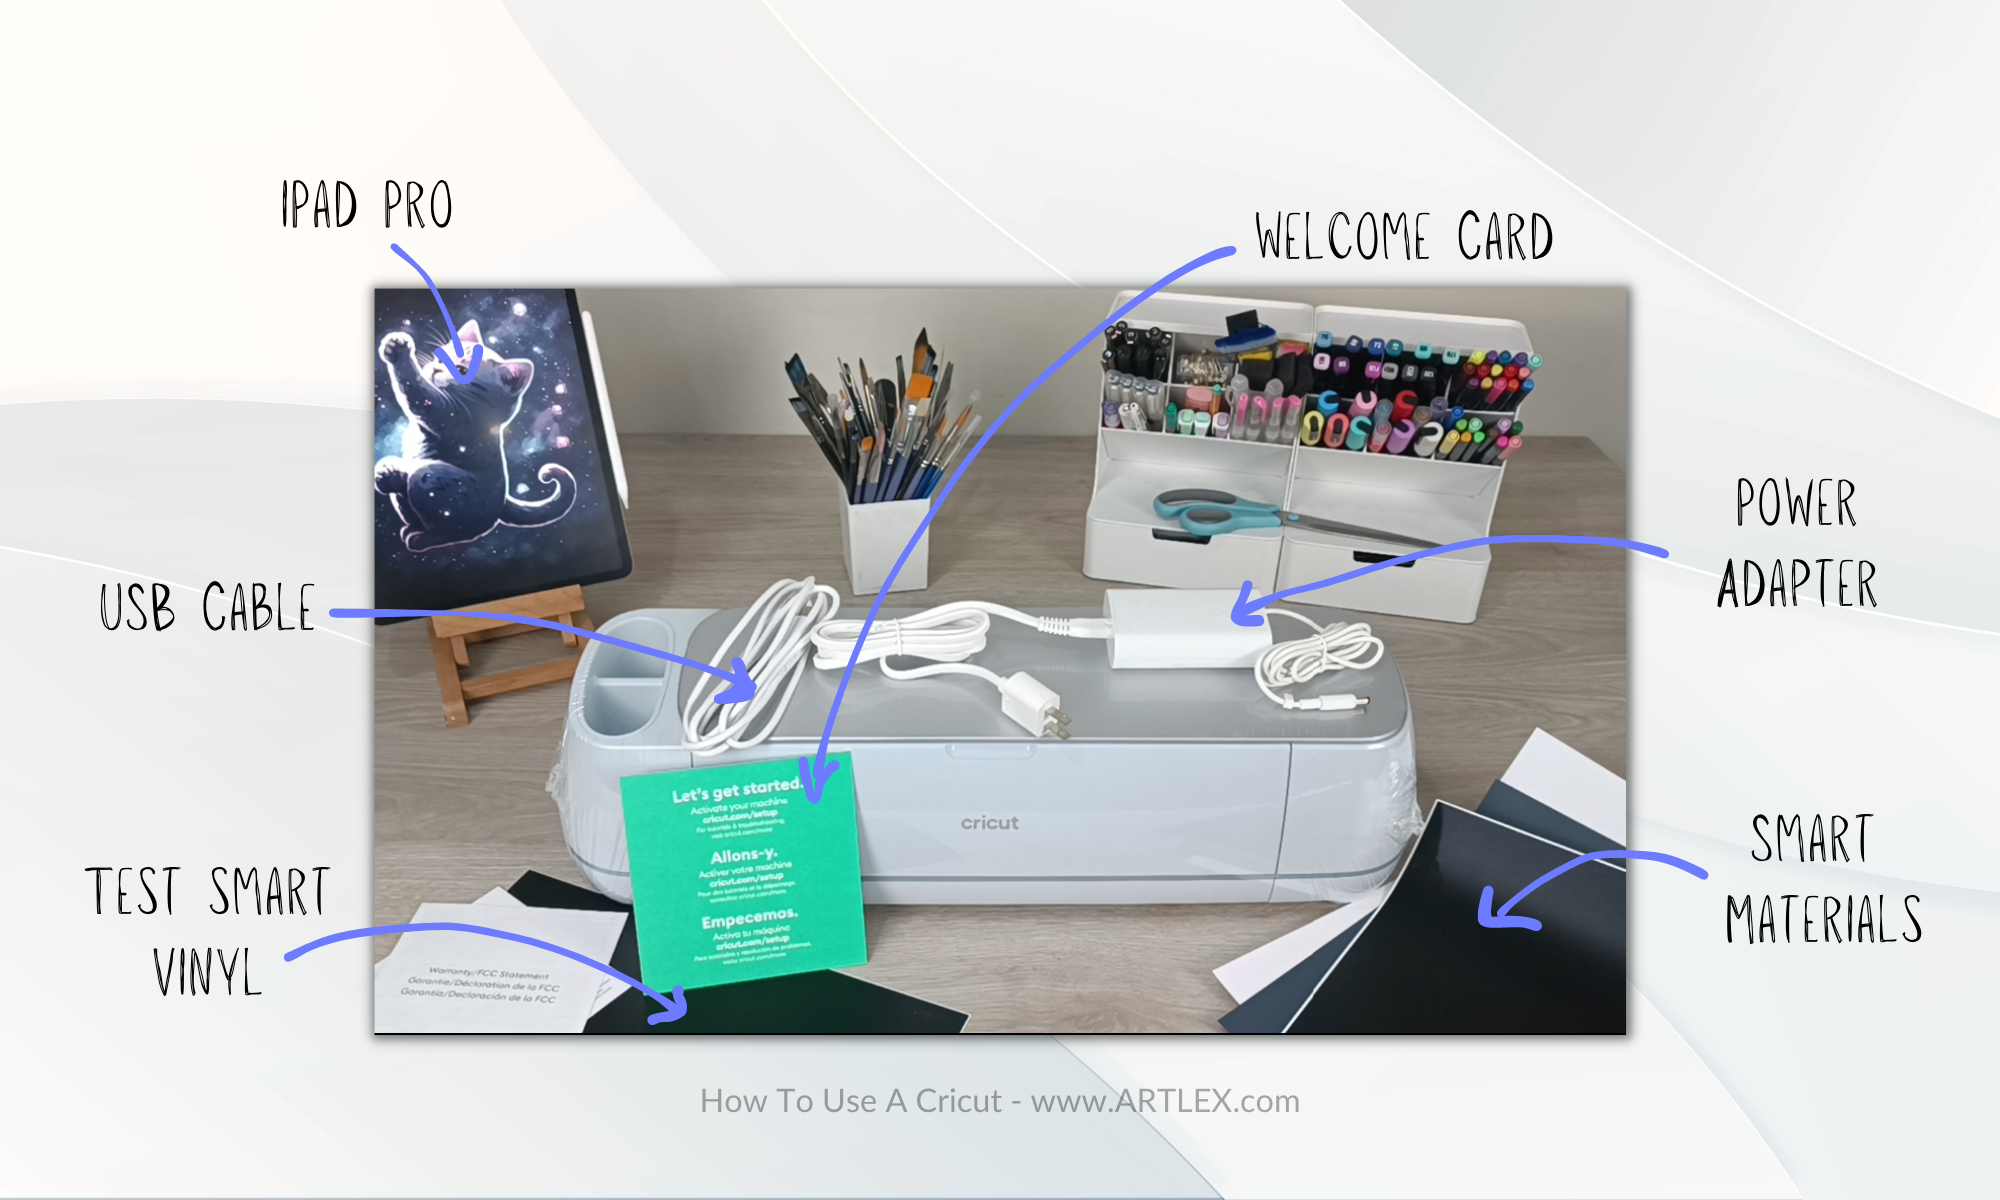 The Smart Materials that come with this machine include the Cricut Smart Sticker Cardstock, Smart Removable Vinyl, and Smart Heat Transfer Vinyl, you’ll also receive a sheet of transfer tape.
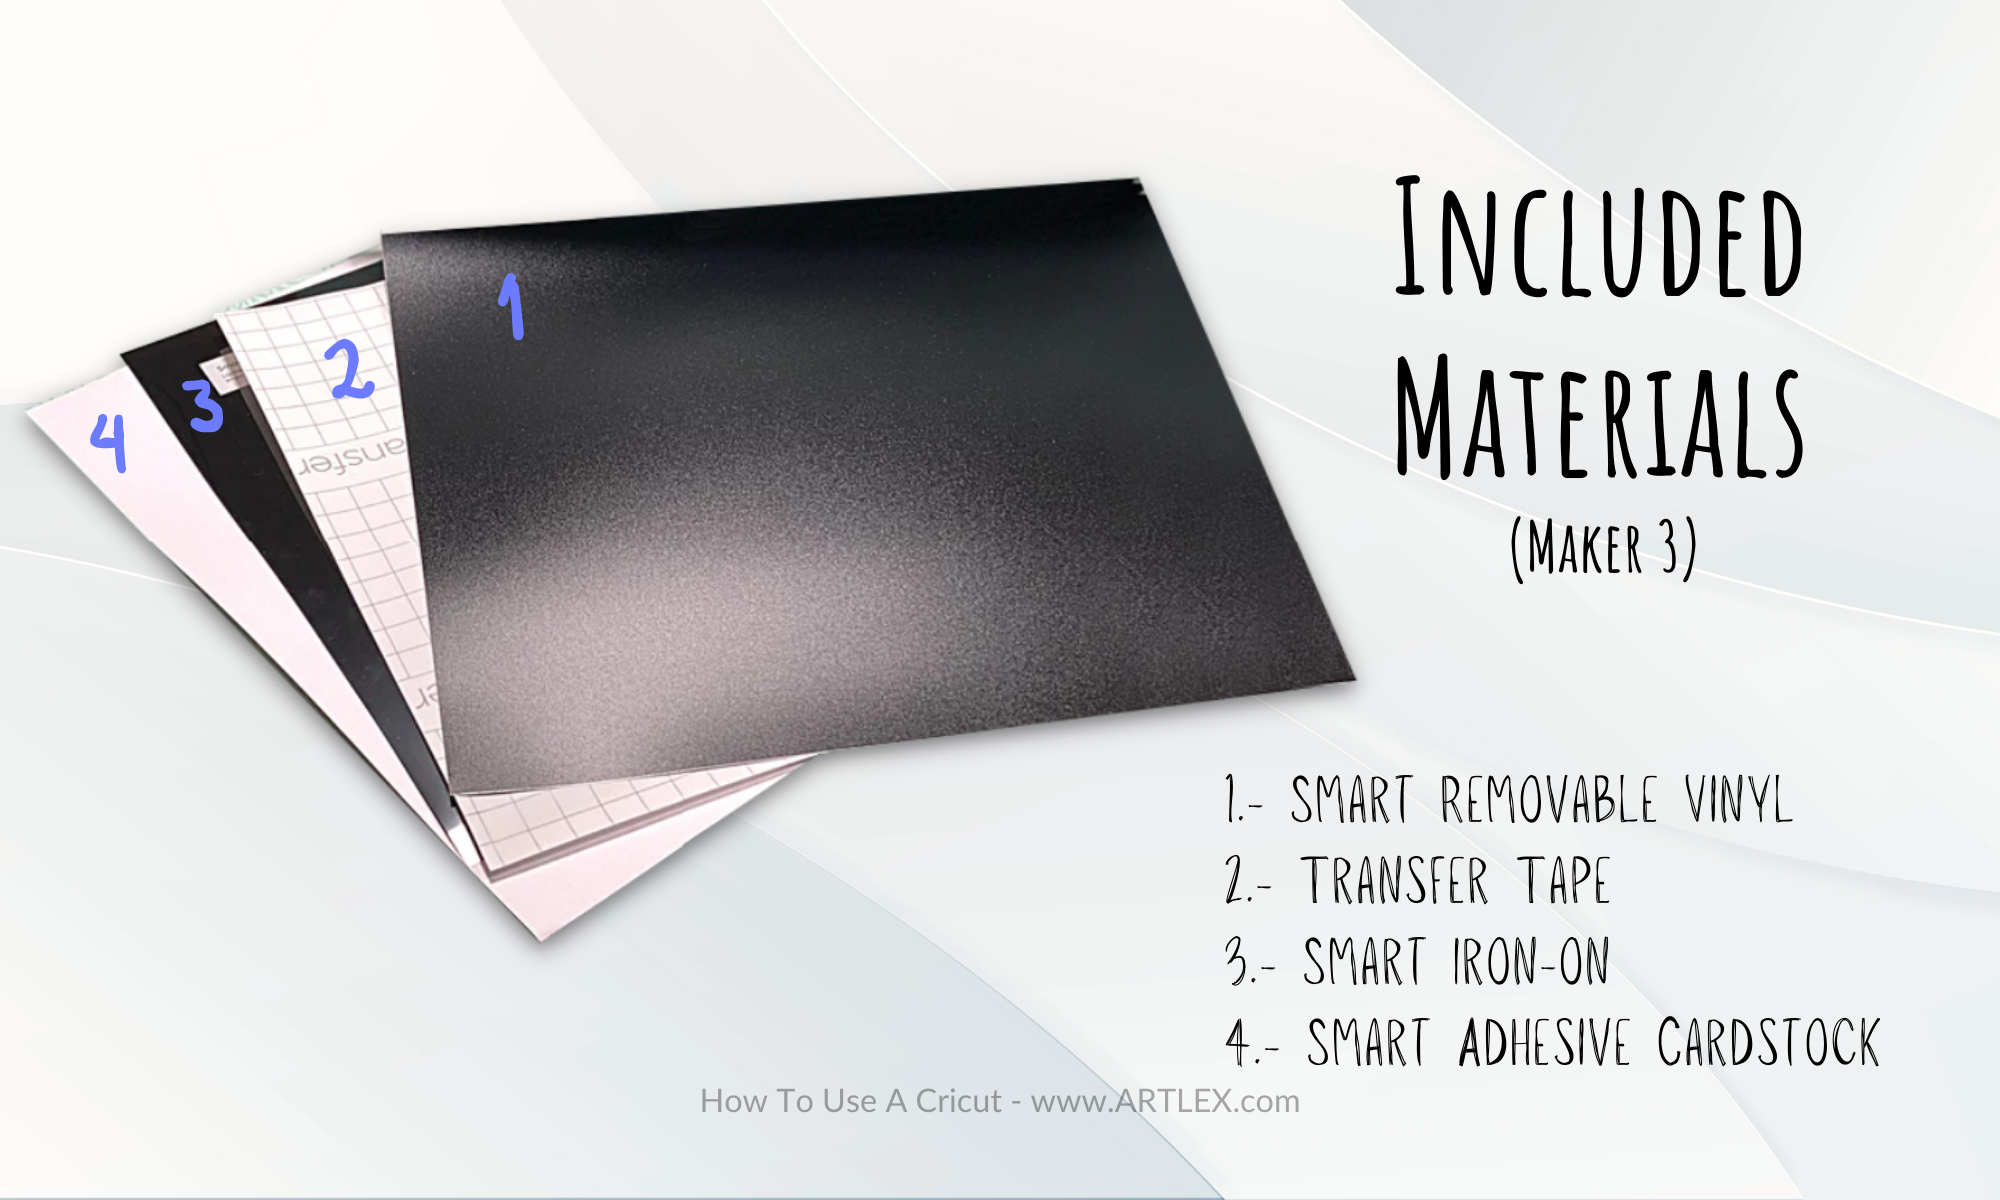
Plus, you’ll receive a small piece of permanent vinyl, which you’ll use to set up and test your machine for the very first cut.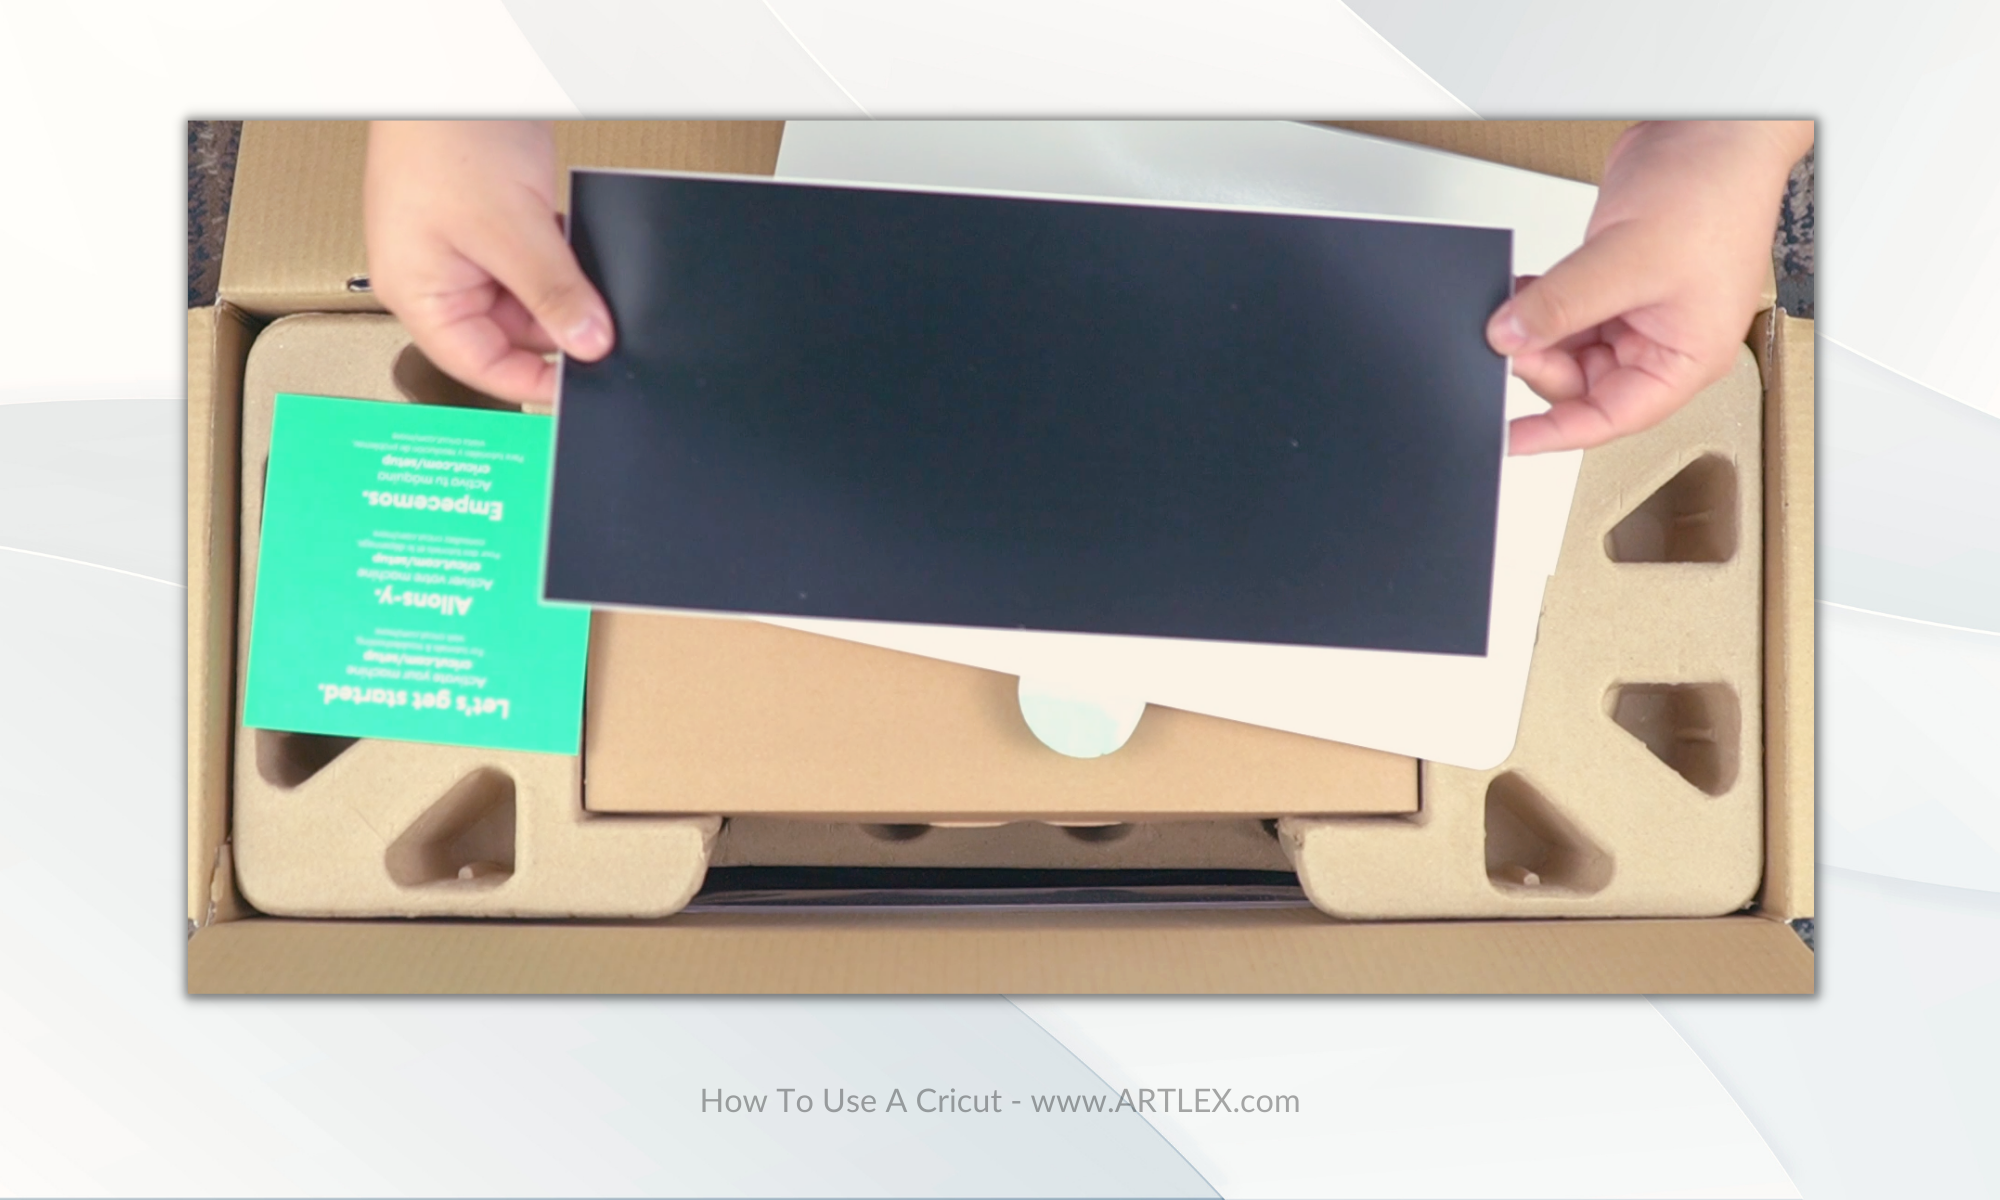
In this tutorial, we’ll also include a short video to show you how to set up your Cricut machine for the first time, how to use it, conduct the test cut, and how to wield it to create various projects.
The Set Up: Getting Everything Ready
You can do this process using your computer, tablet, or mobile phone, as long as you have a Bluetooth connection. Alternatively, you can connect your machine through a USB connection.
The first thing we need to do is head over to www.cricut.com/setup. Here, you’ll find two options to set up cutting machines or heat press machines. We’ll opt for the cutting machines setup. 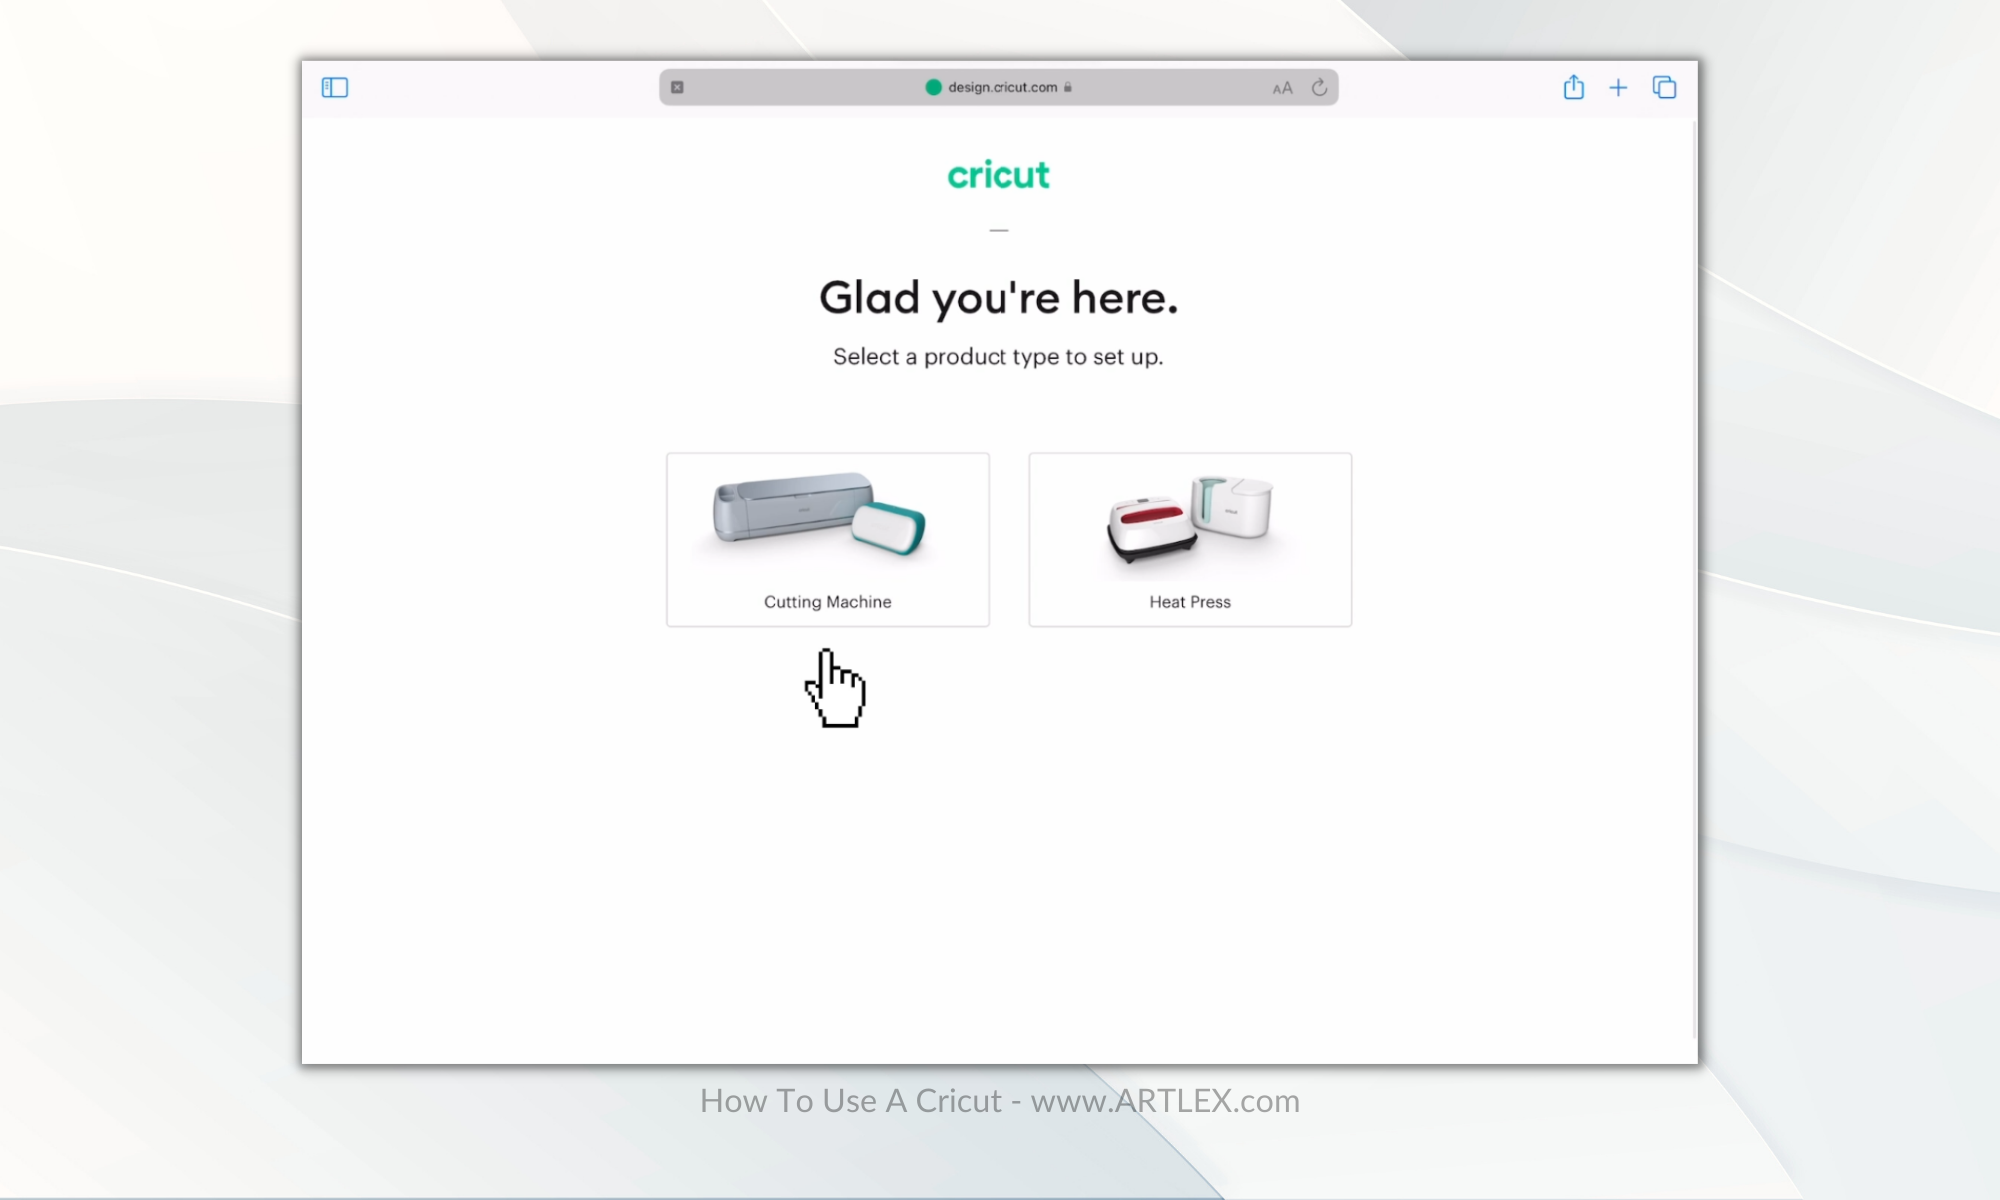
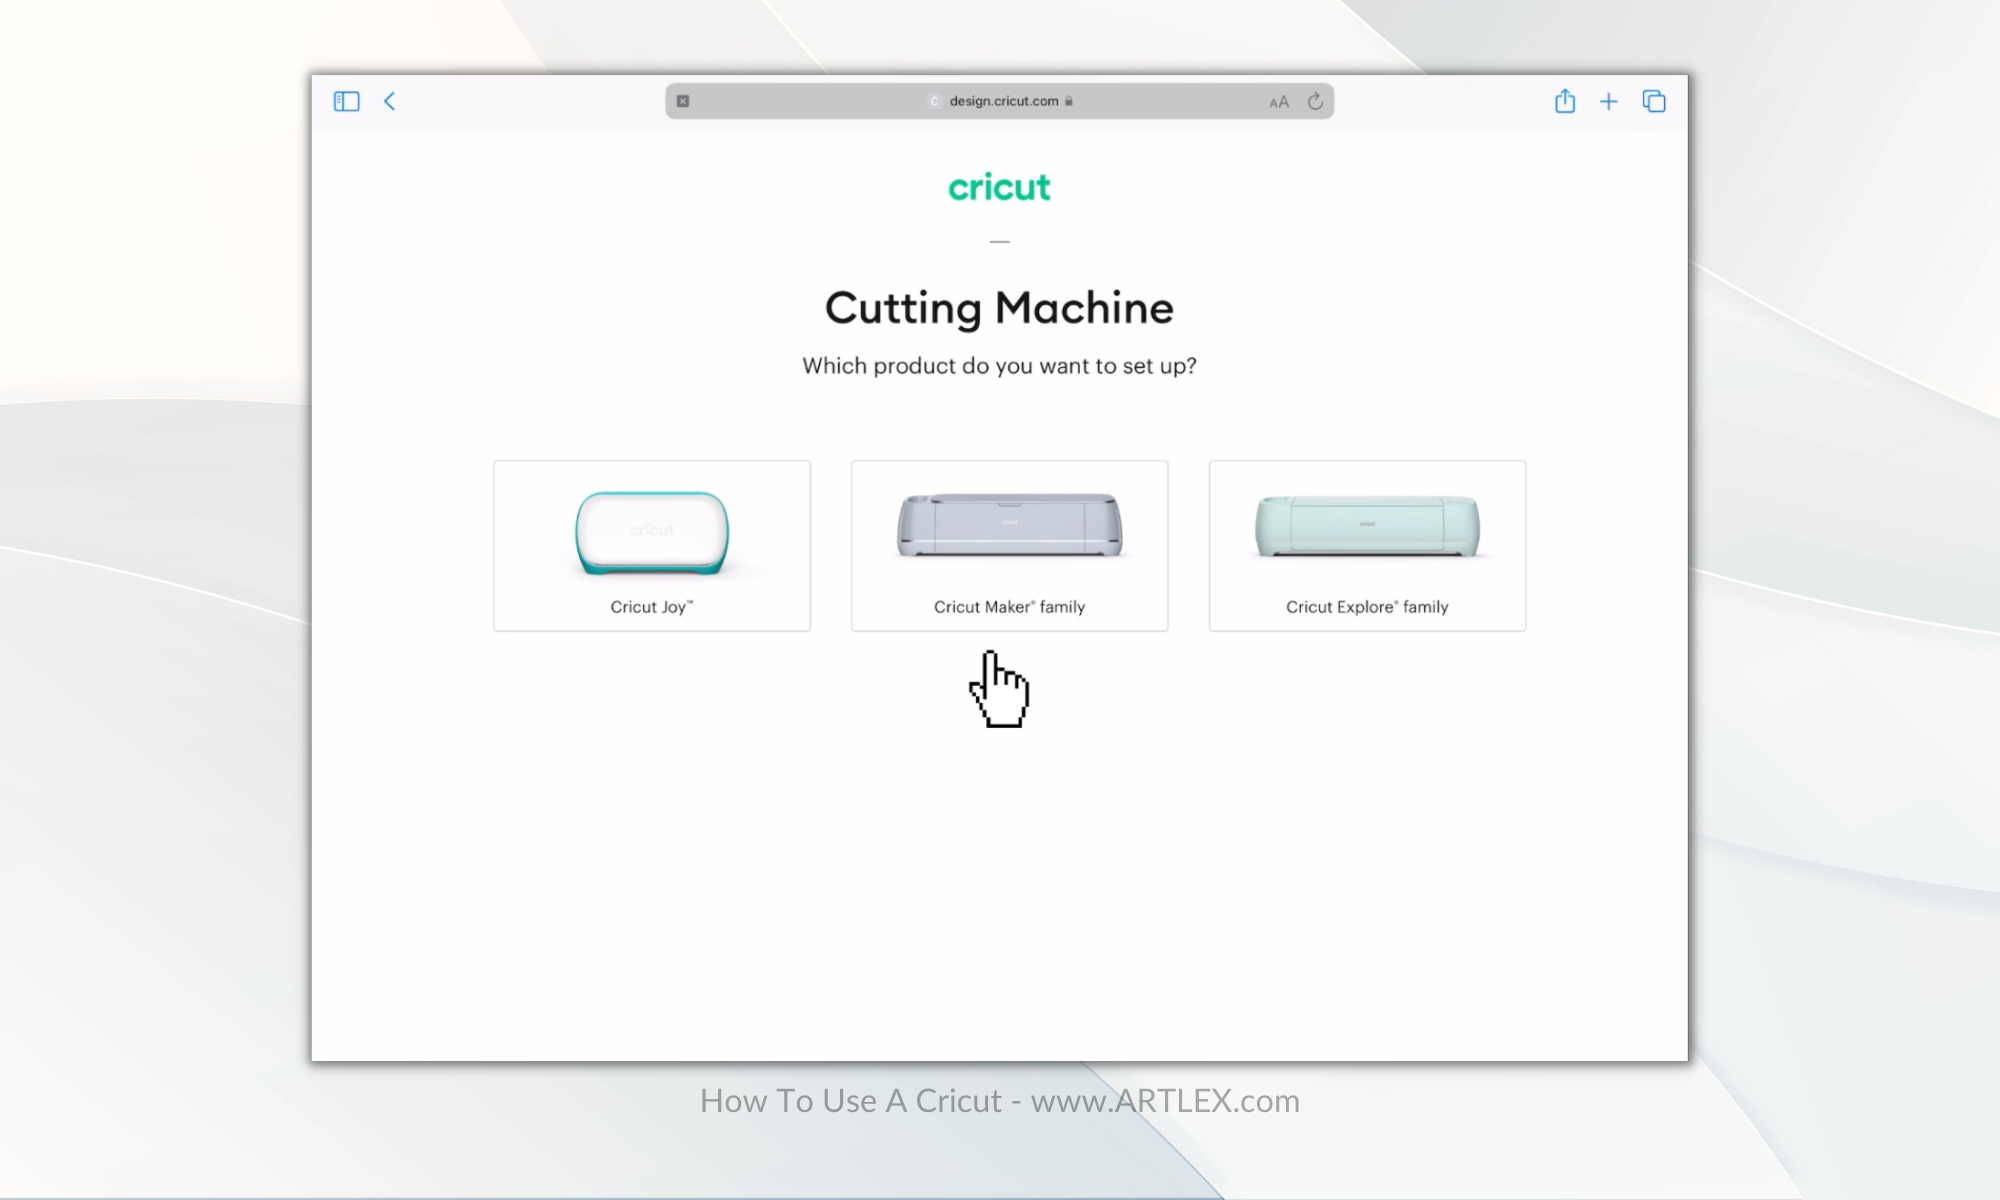
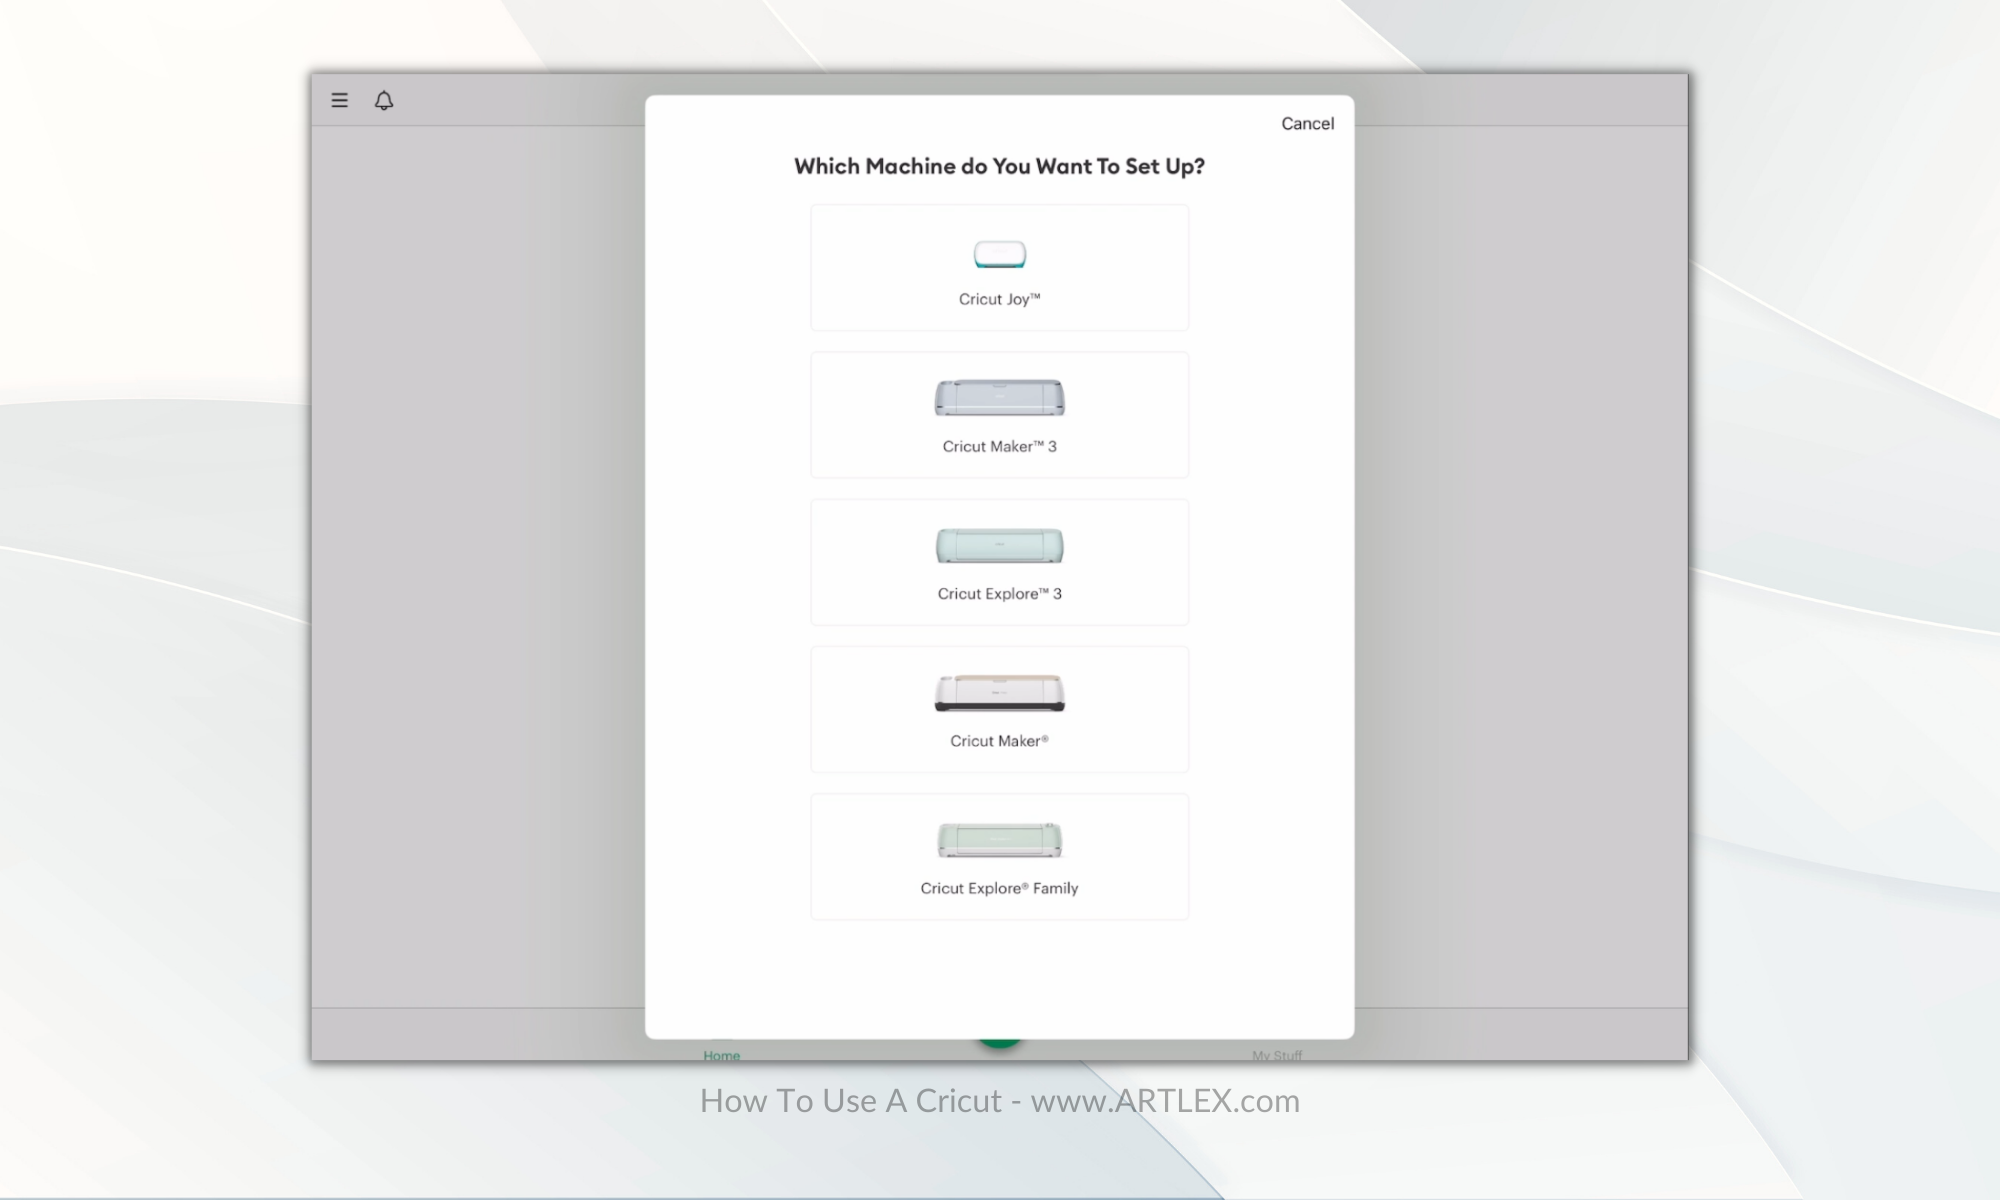
Upon selecting cutting machines, you’ll notice three options appearing: Cricut Joy, Cricut Explorer, and Cricut Maker.
When you select your cutting machine, you’ll be guided to a screen that asks you to install the Cricut Design Space desktop or app version.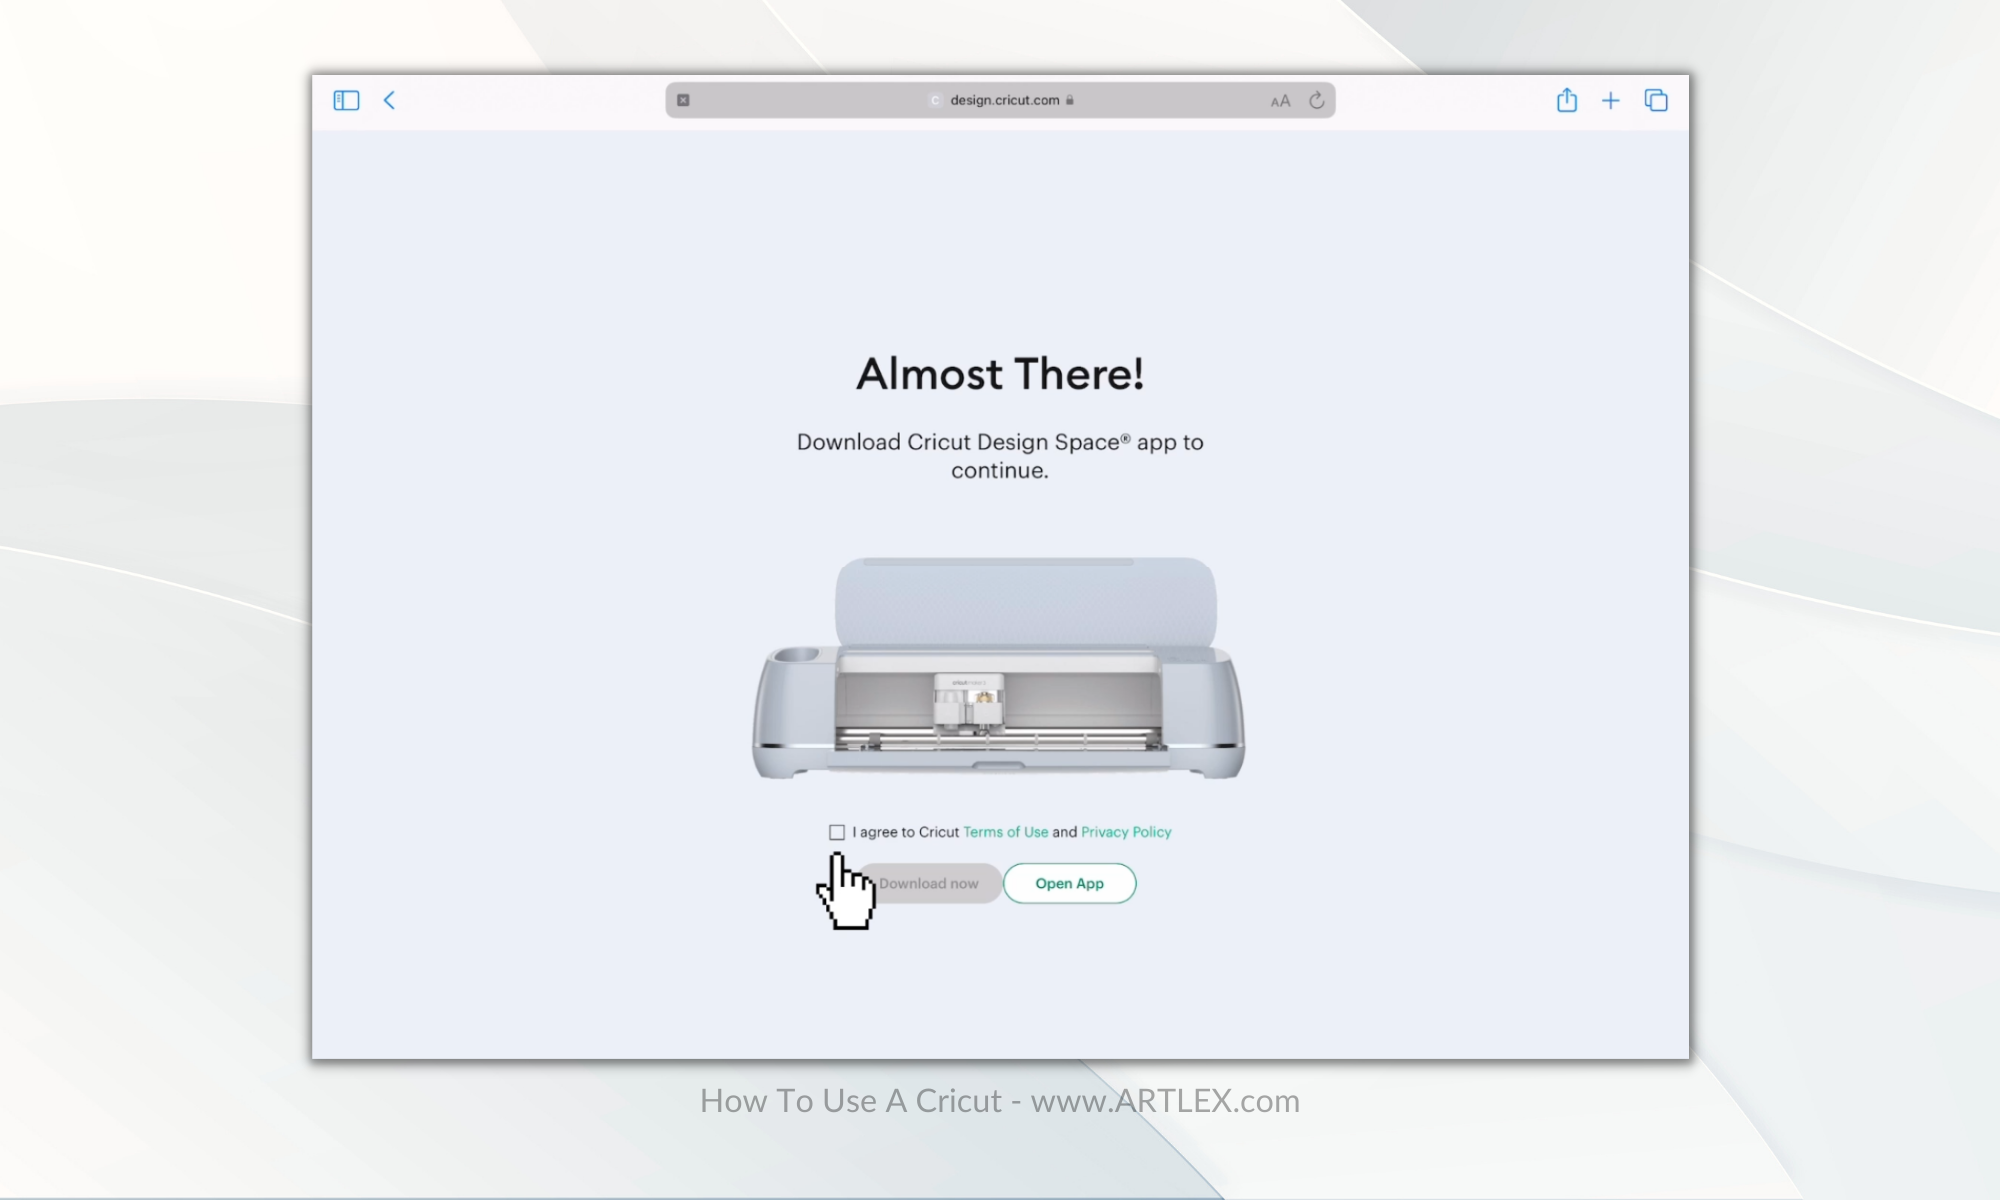
Once you have the app installed on your device, the setup process for your cutting machine begins.
As soon as you launch and open the application, you’ll see two options: set up the machine and sign in. 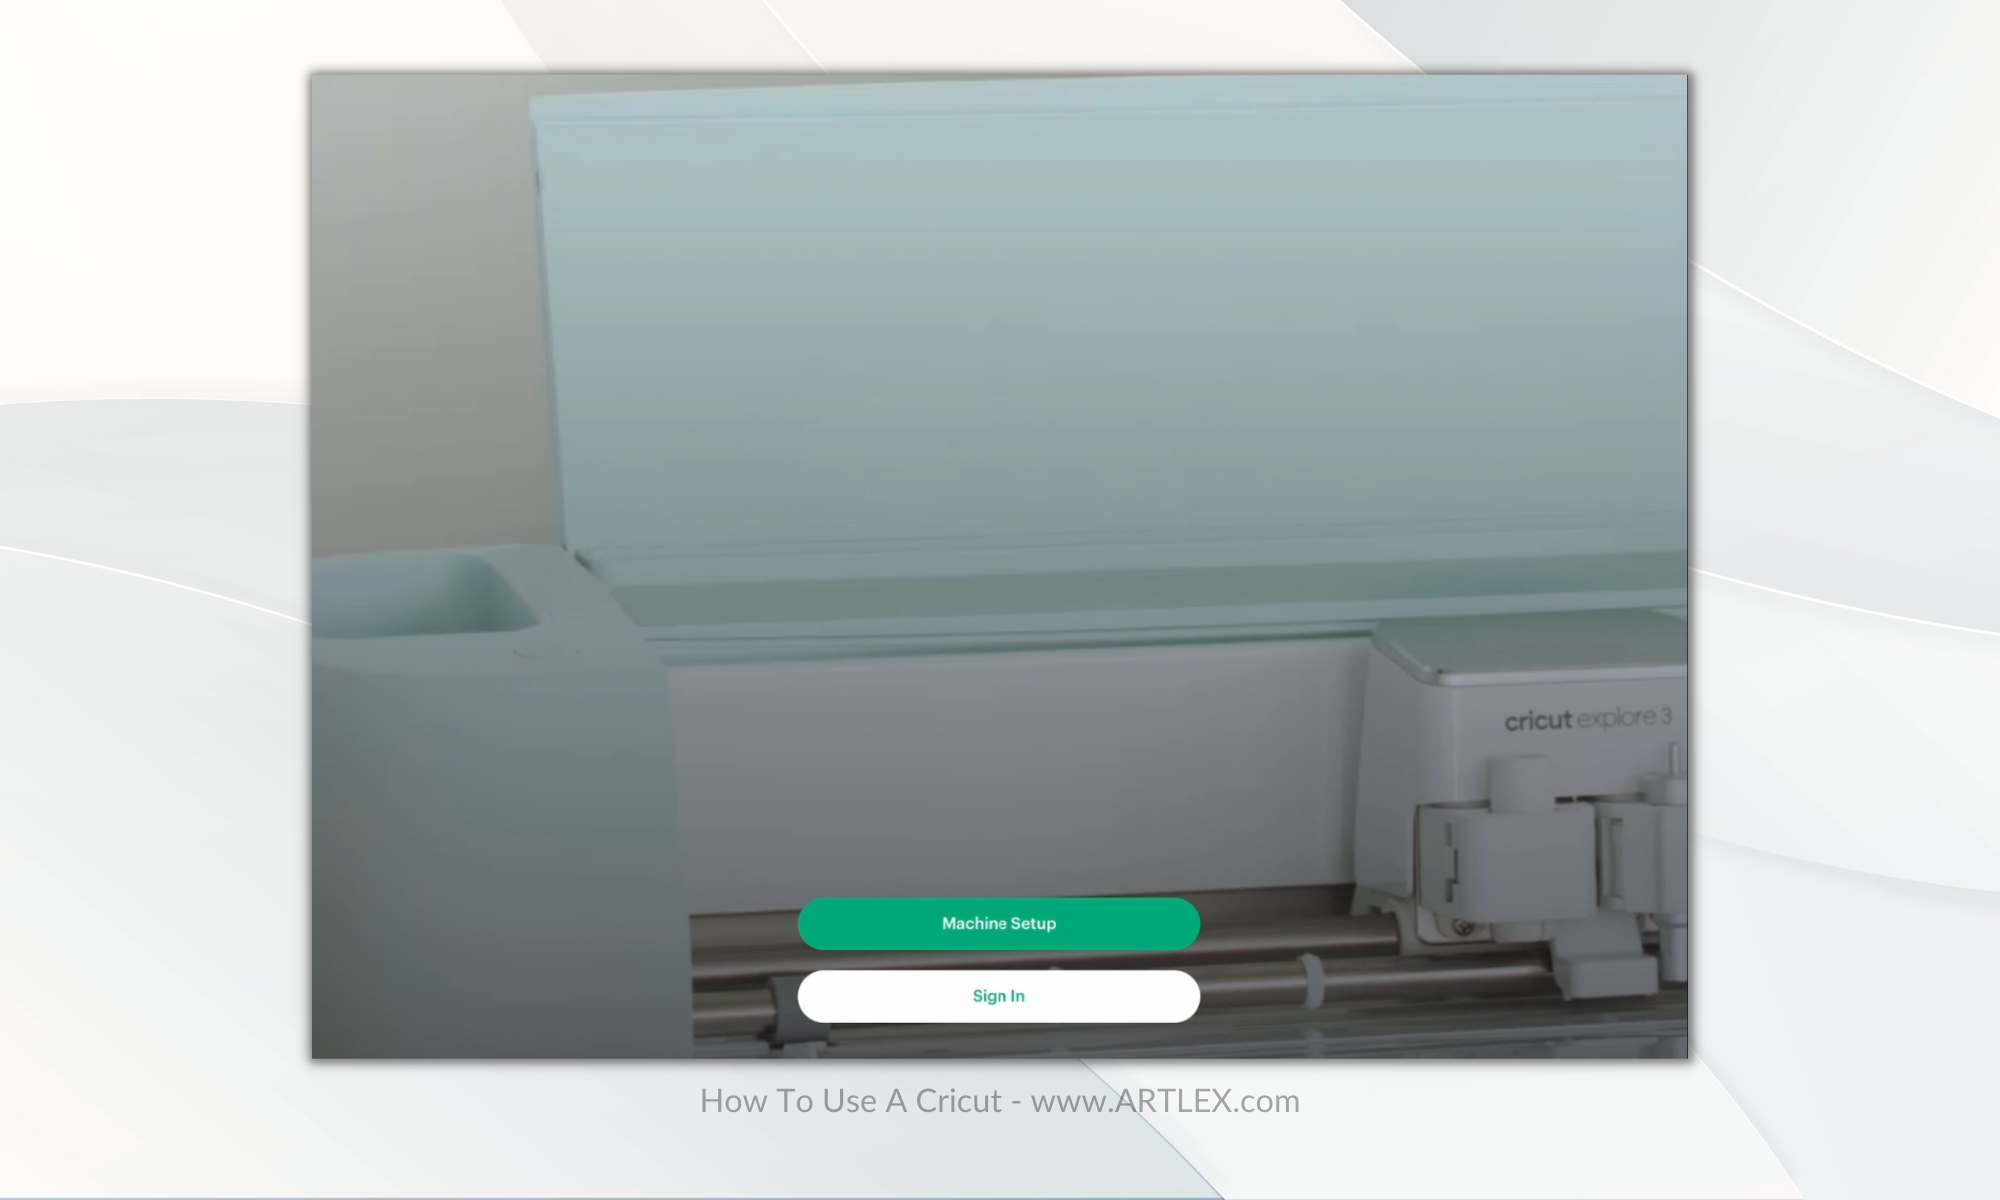
Before doing anything else, I recommend creating a Cricut account and getting familiar with the Cricut platform, however you can also create one at this point since pressing “set up machine” will take you to a screen that presents a form for creating an account. 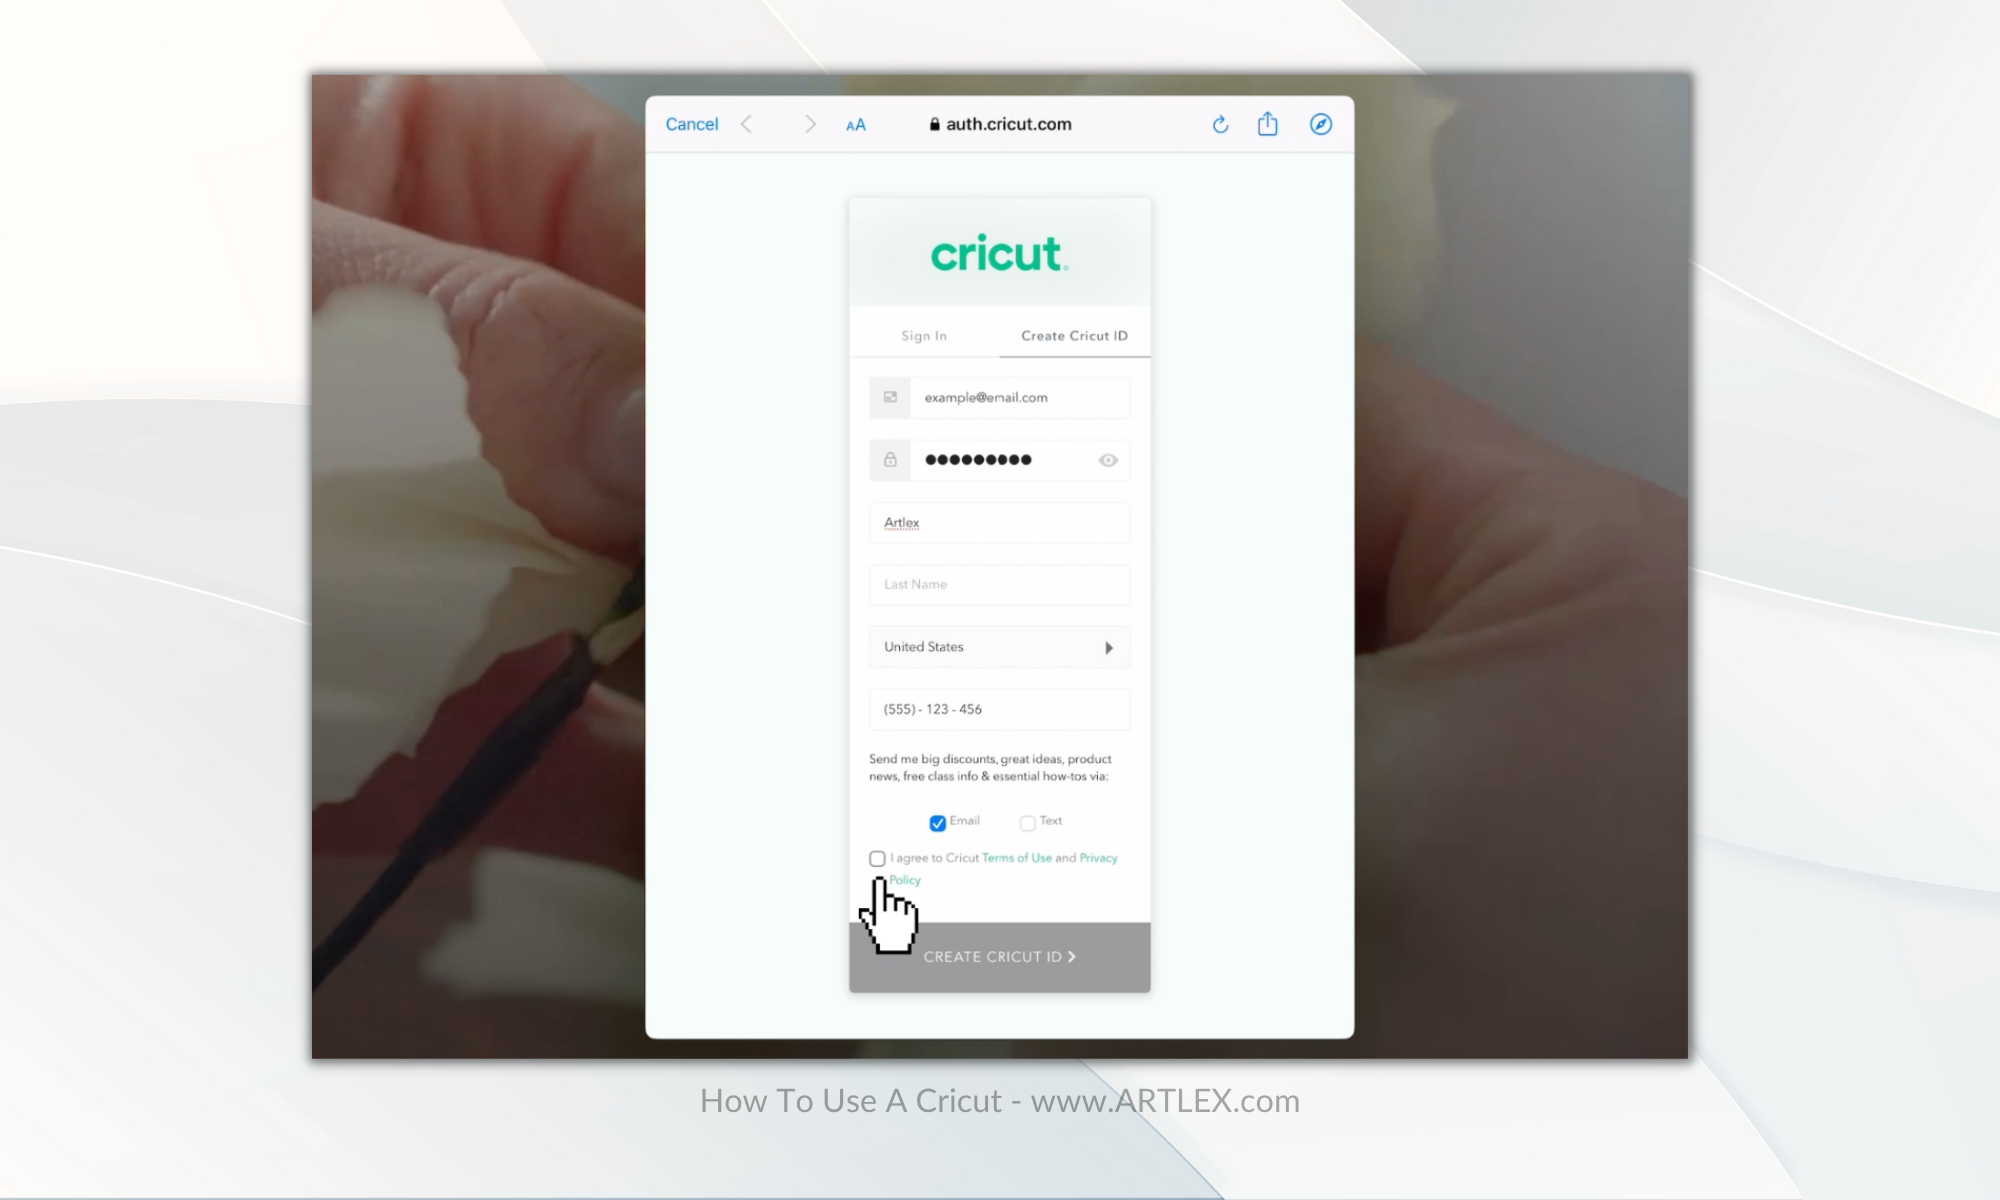
Use your email address to create a username and password for your new Cricut Design Space account.
Once again, a screen will pop asking you to choose your machine, in this case we’re setting up a Maker 3, so that’s what I’m going to pick.
If you’re using a desktop computer, you can use the included USB cable to connect your machine, however if you’re using bluetooth, then all you have to do is make sure your machine is plugged in and on, and near enough for your device to detect it.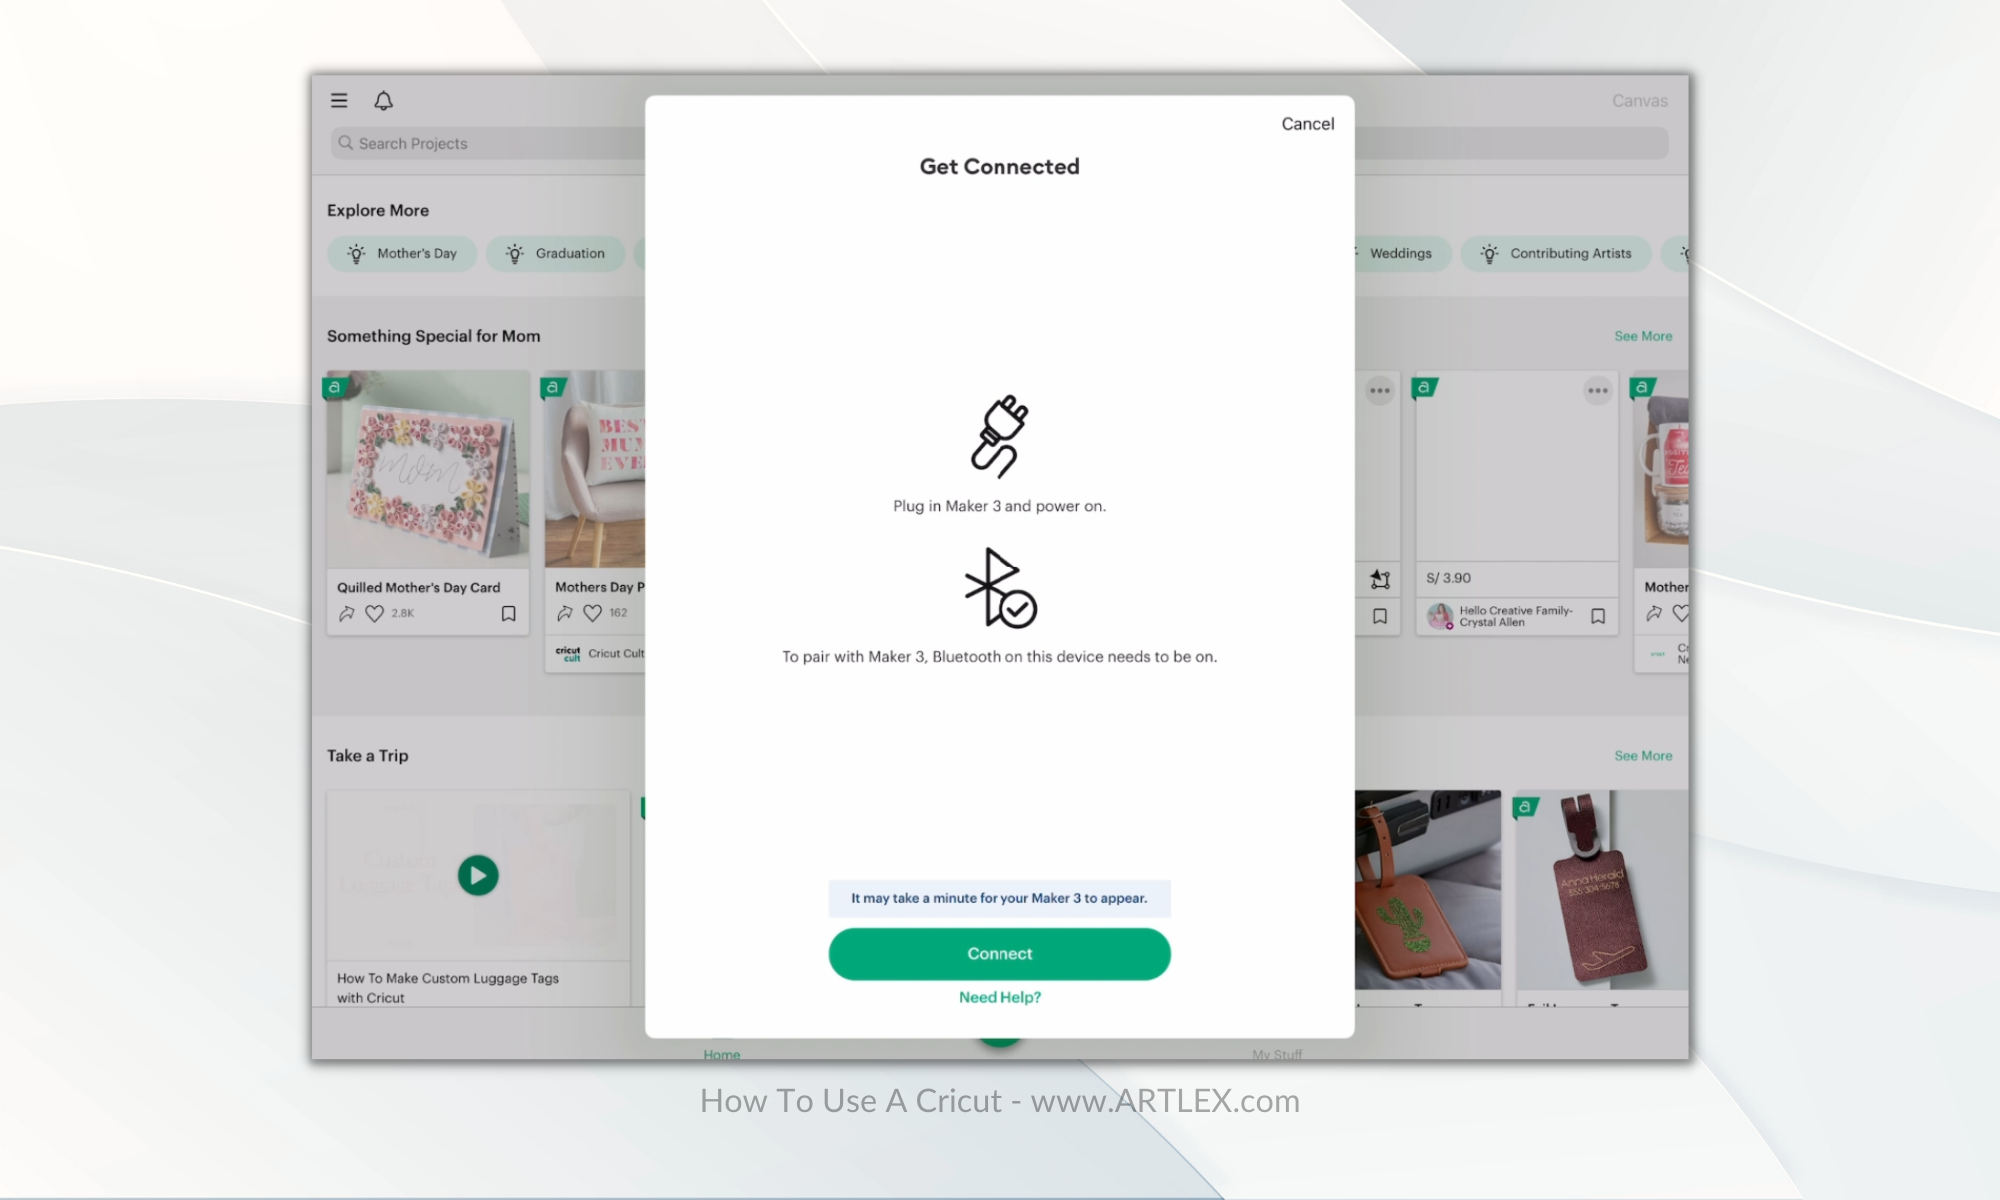 Press connect and go ahead with the activation process. You’ll have to accept Cricut’s terms and conditions in order to register your machine under your Cricut ID.
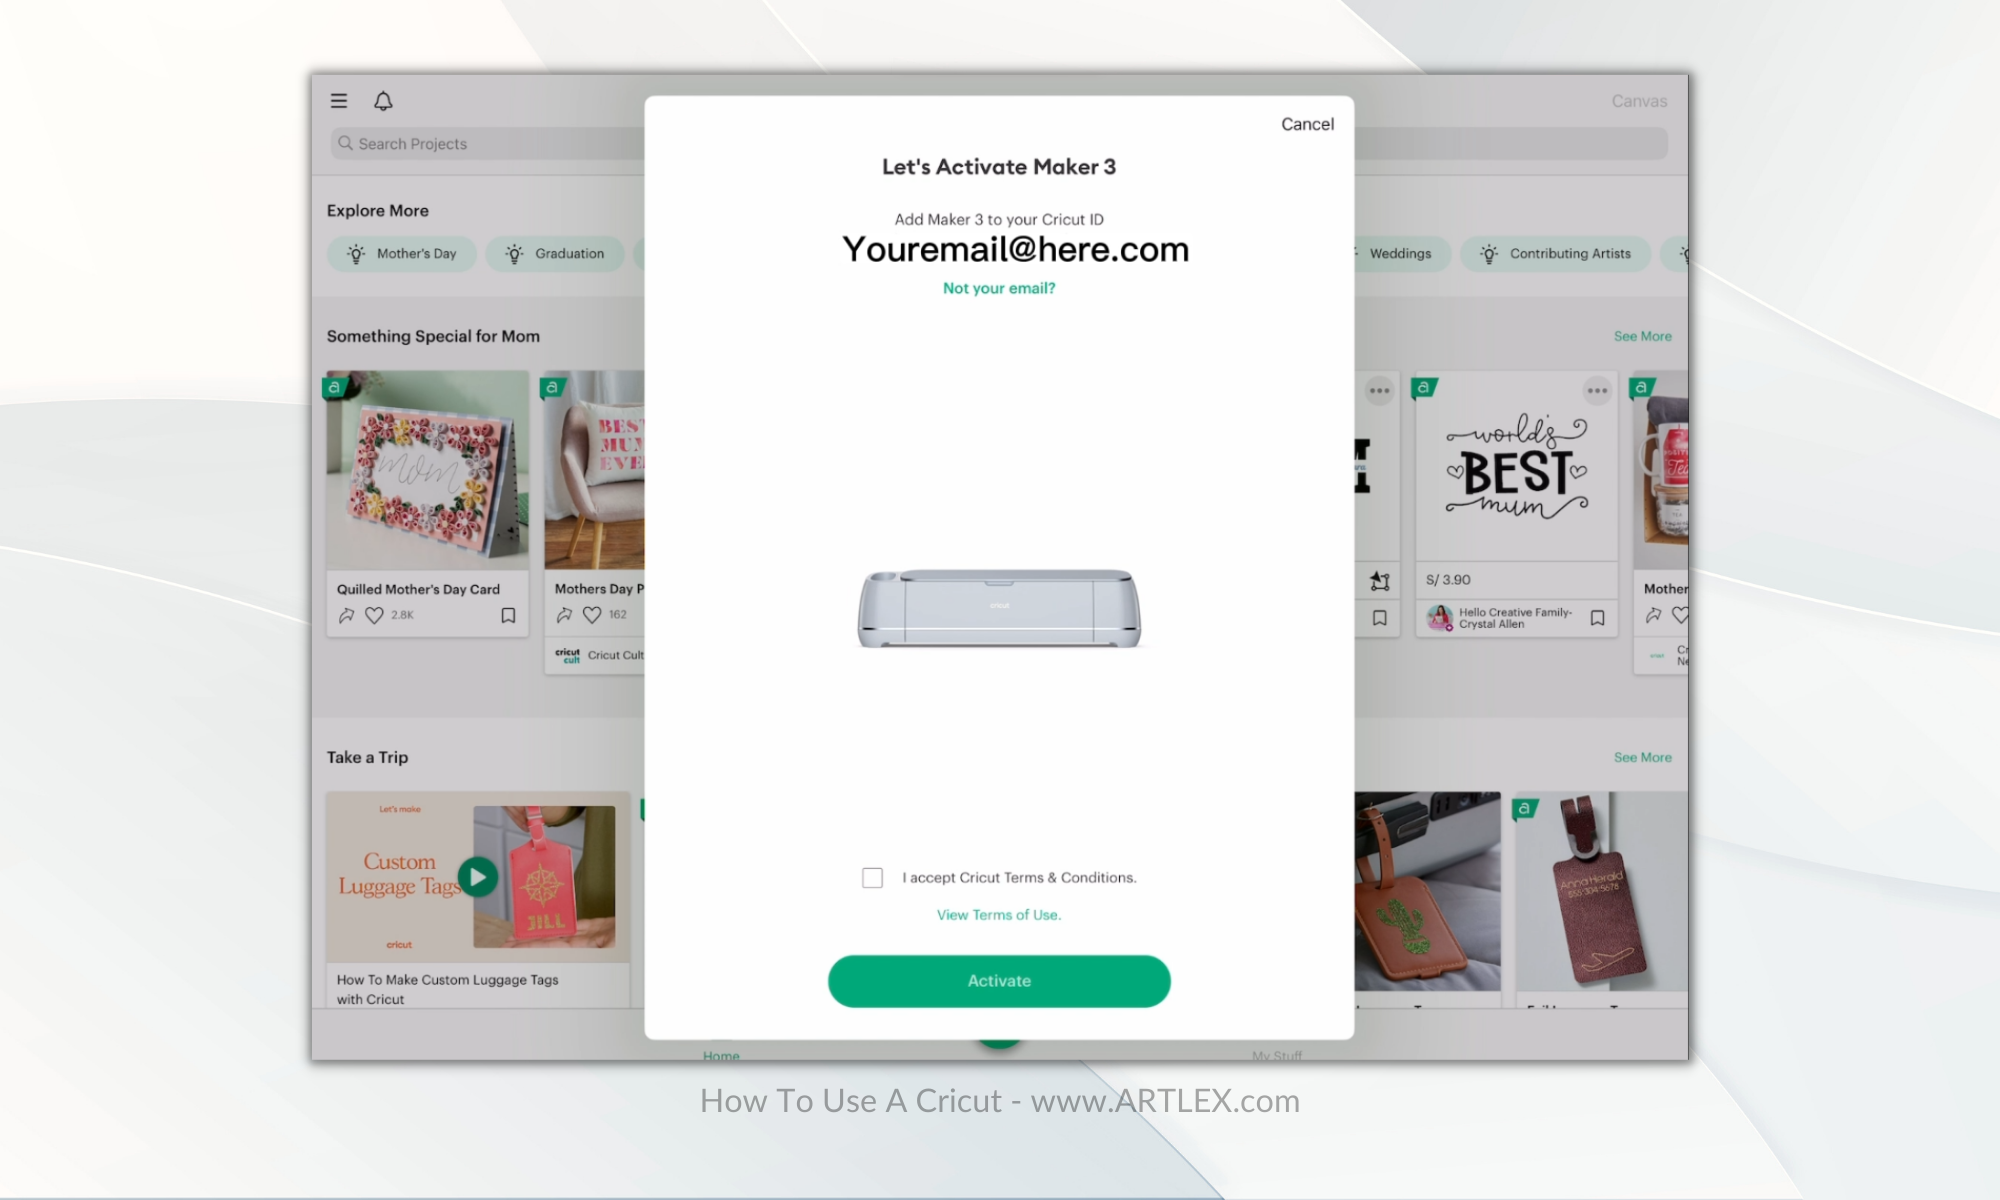
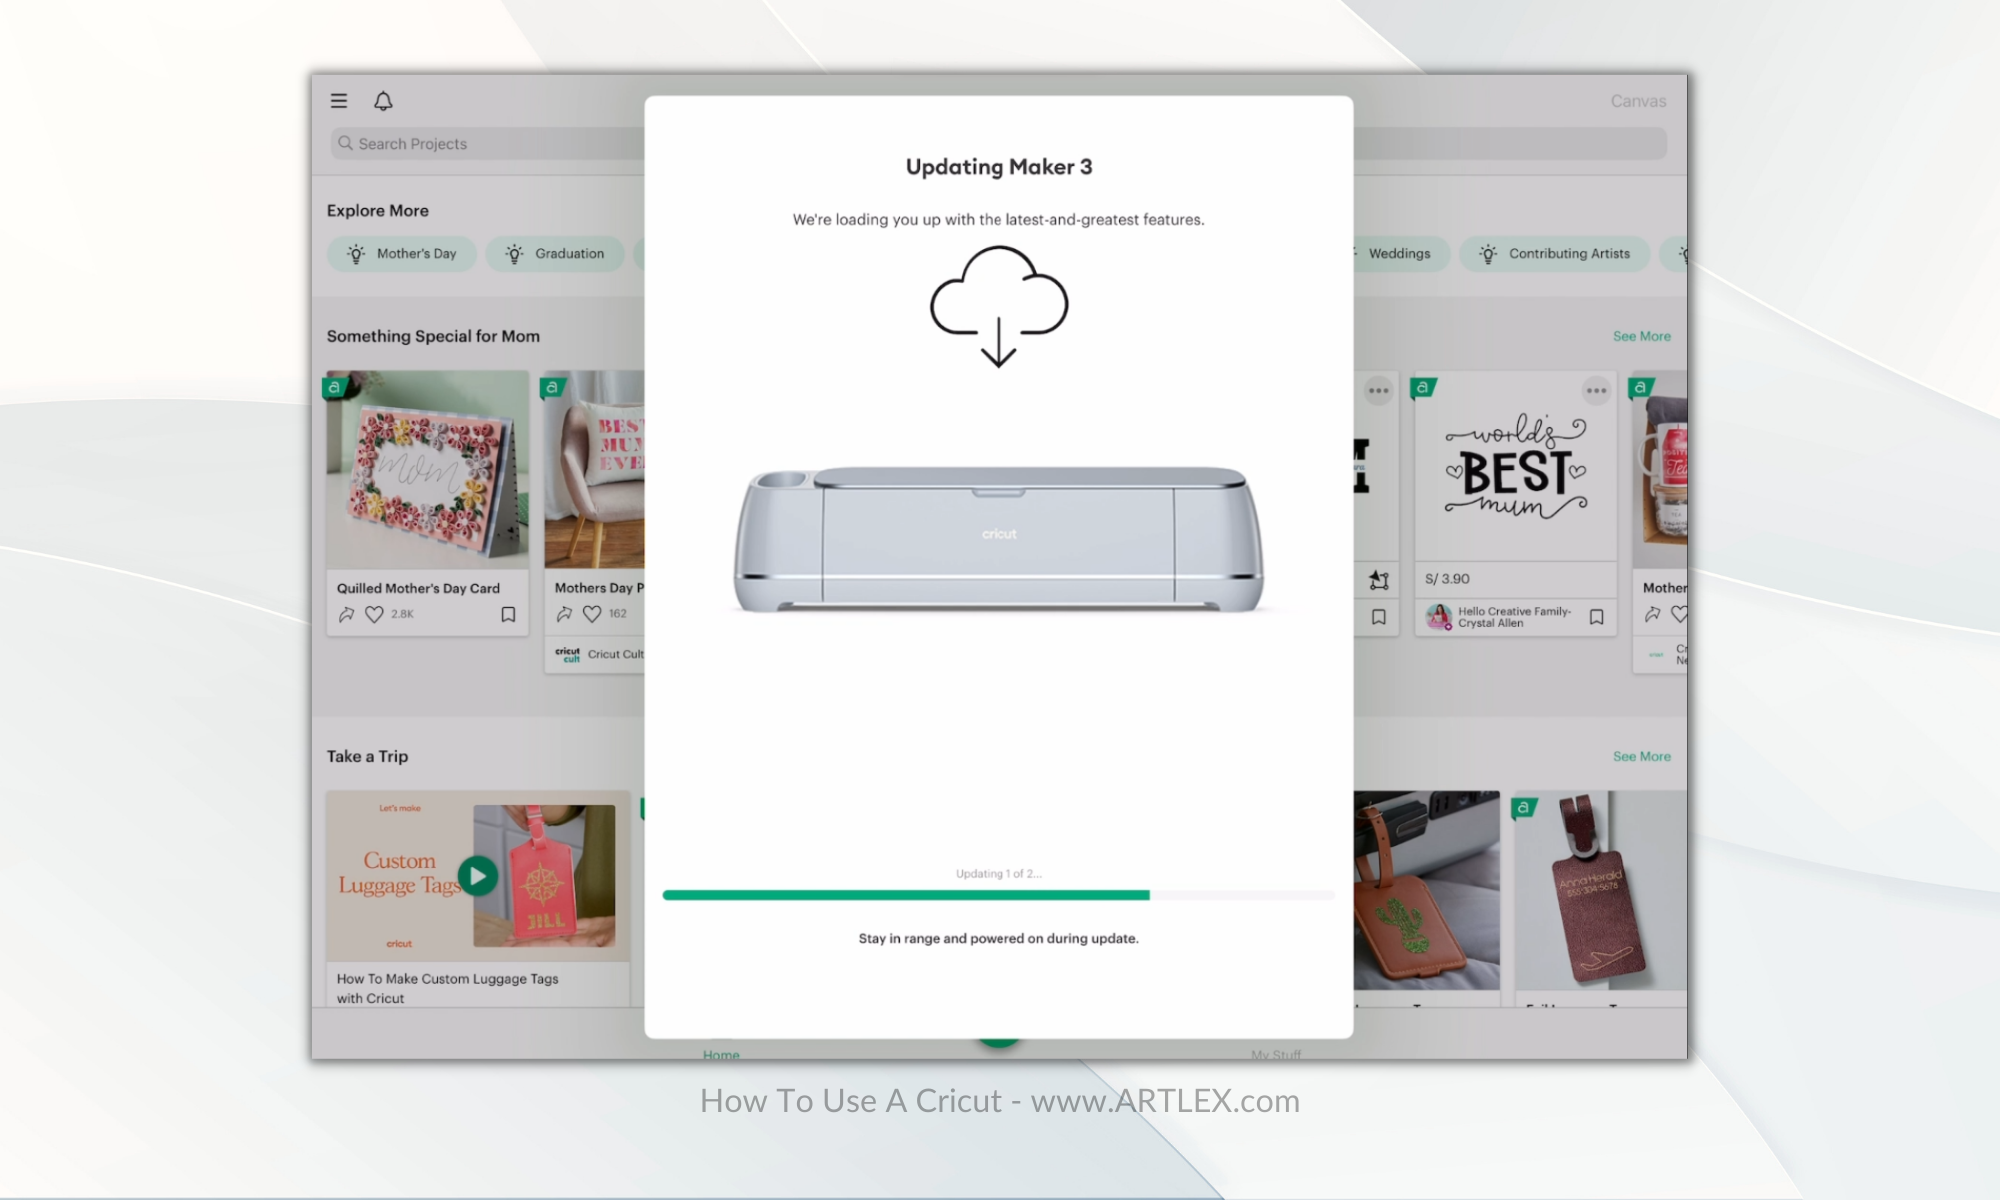
Your machine will connect to the internet and update itself, it might take a while so be patient.
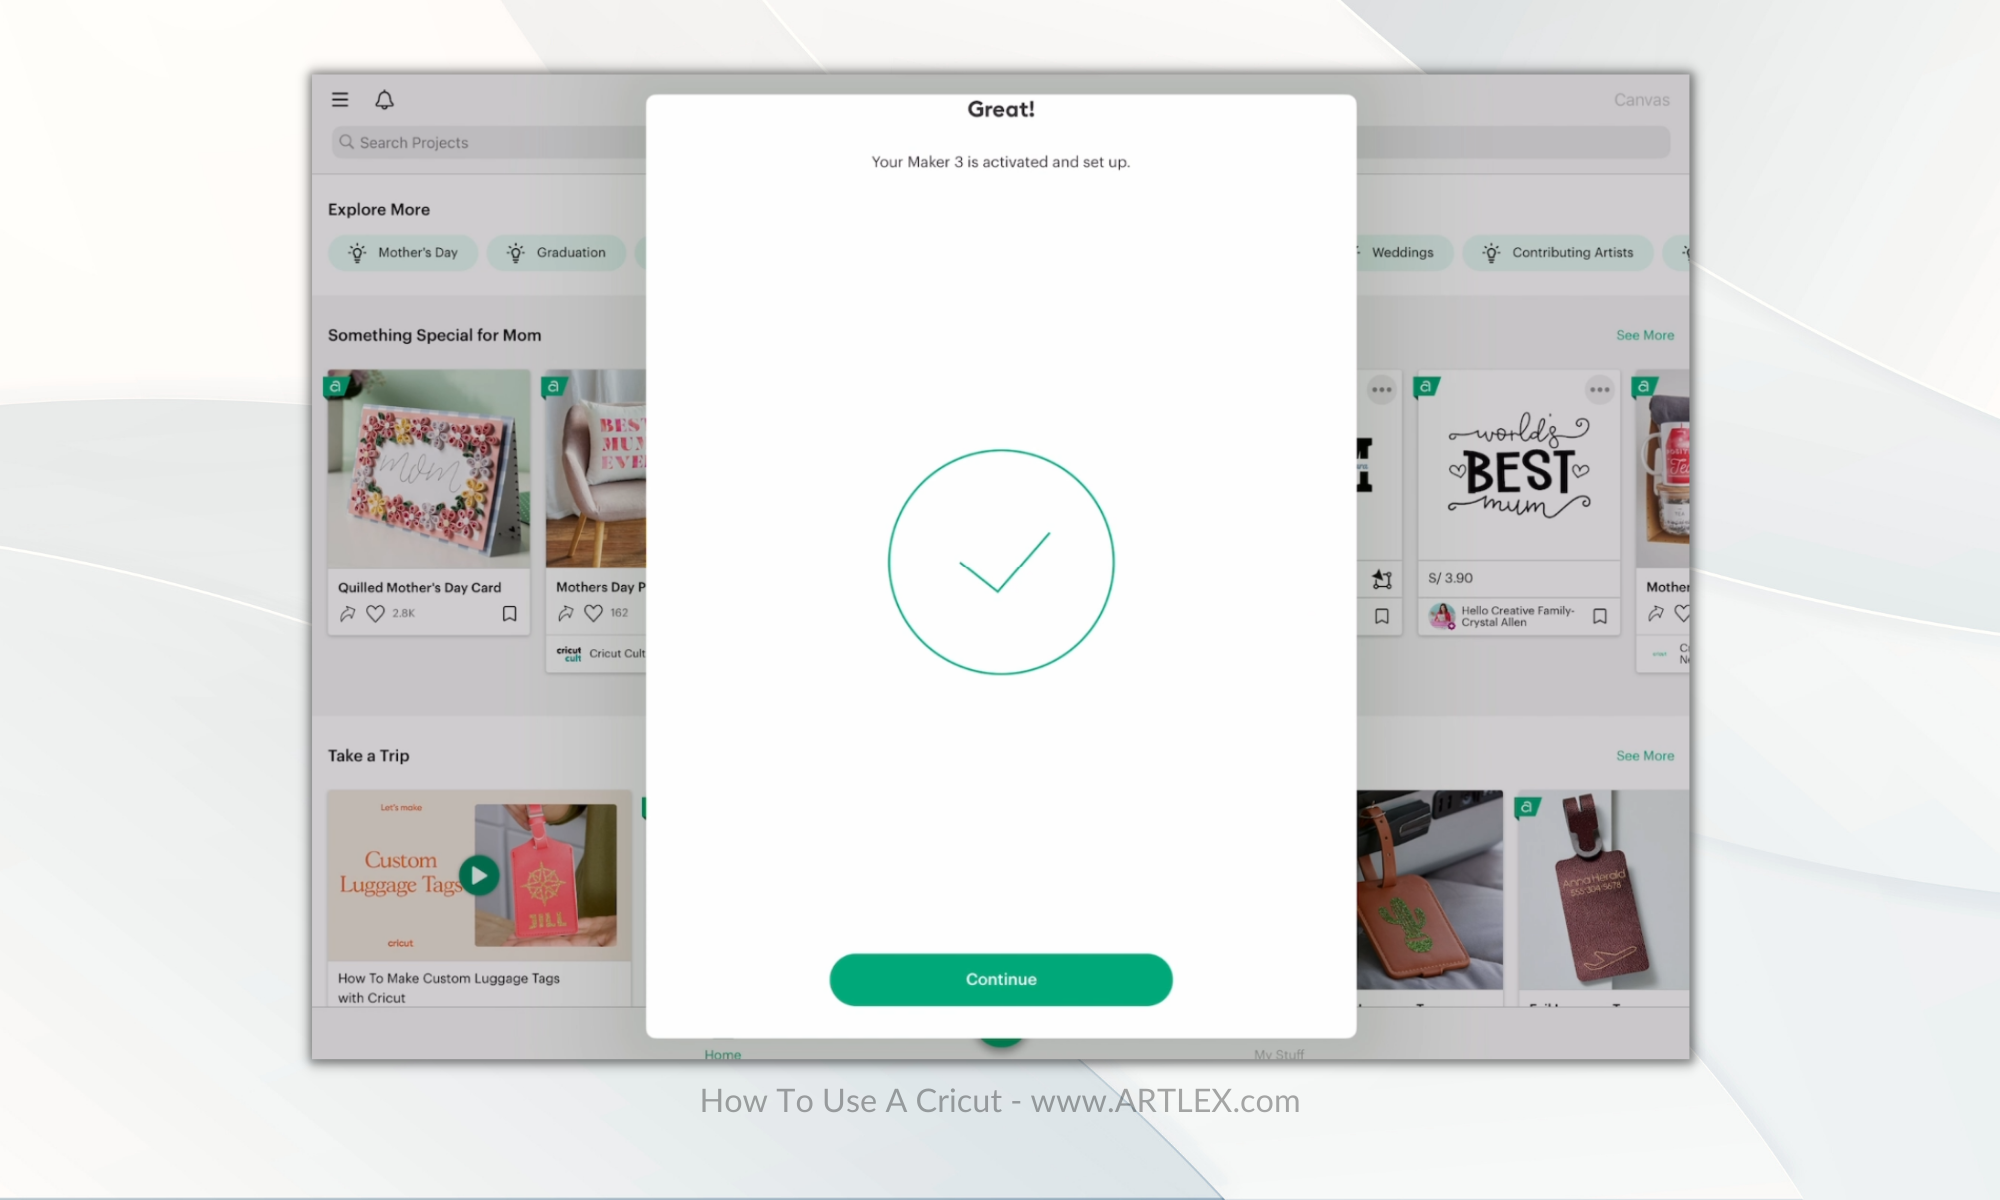
After this process, your machine is all set up and ready to work!
Cricut Access
A message will pop and give you the choice to join Cricut Access and start your free trial, which includes:
- Unlimited Access to Fonts and Images: Cricut Access offers over 100,000 images and more than 400 beautiful fonts that you can use in your designs.
- Exclusive Discounts: Cricut Access members enjoy 10% off all product purchases on Cricut.com and Design Space including machines, accessories, materials, and more. Some premium Cricut Access plans offer even more significant savings.
- Priority Member Care: Get quicker responses and top-notch assistance from Cricut’s Member Care team, which can help you tackle any issue that arises.
- Free Shipping: Depending on your subscription level, you could also be eligible for free shipping on orders over a certain amount.
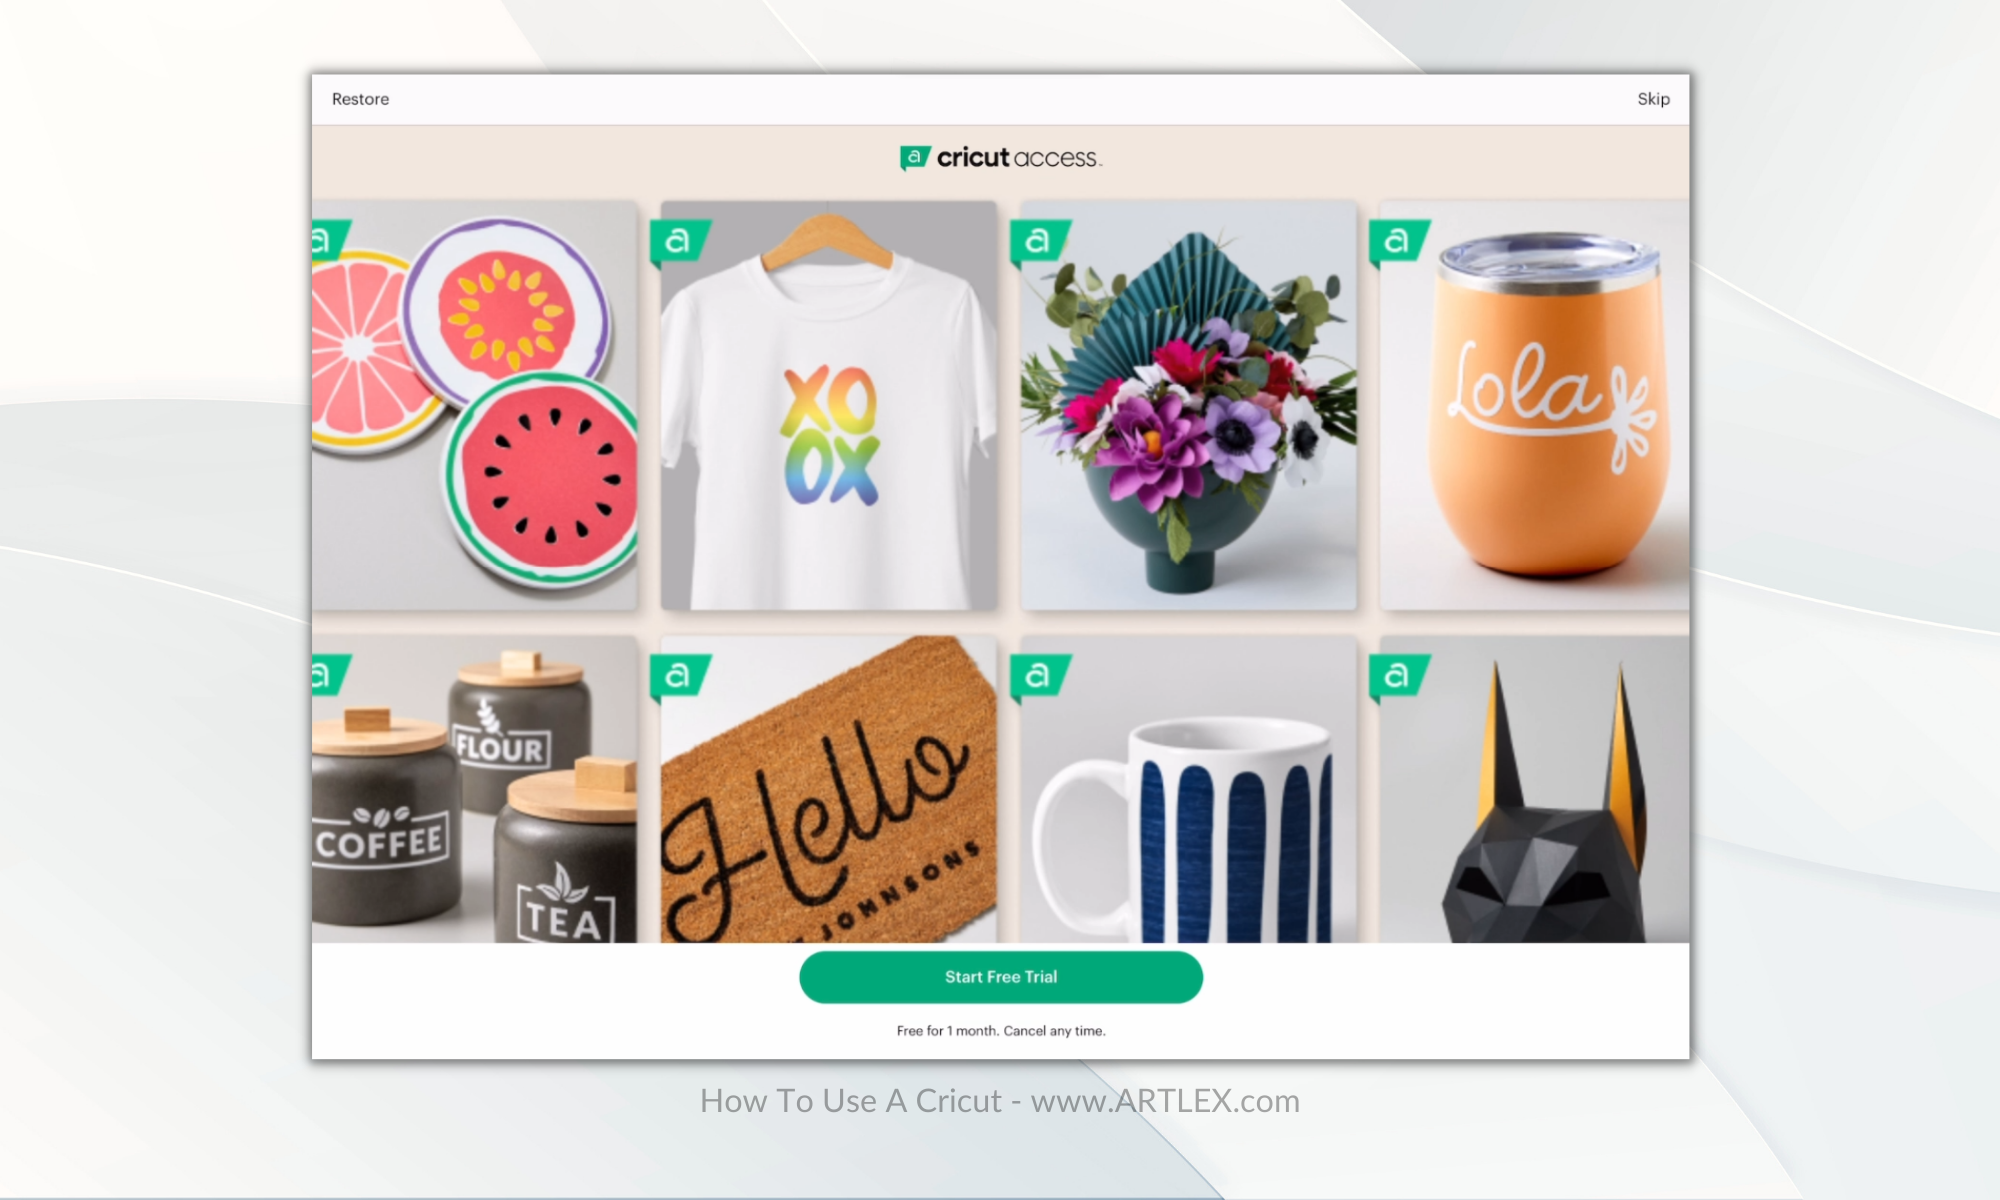
You can take it or leave it for later, however if you are ready to start your crafting journey with Cricut, I personally recommend this as it has lots of interesting stuff and gorgeous fonts for you to use.
The Test Cut
Now Cricut will ask you to do a test cut.
For this part, we’re going to use the small piece of vinyl included on the welcome package we opened first.
You can choose between four designs and Cricut will guide you through the cutting process step by step.

You can watch the video tutorial included with this article or follow the instructions on your screen.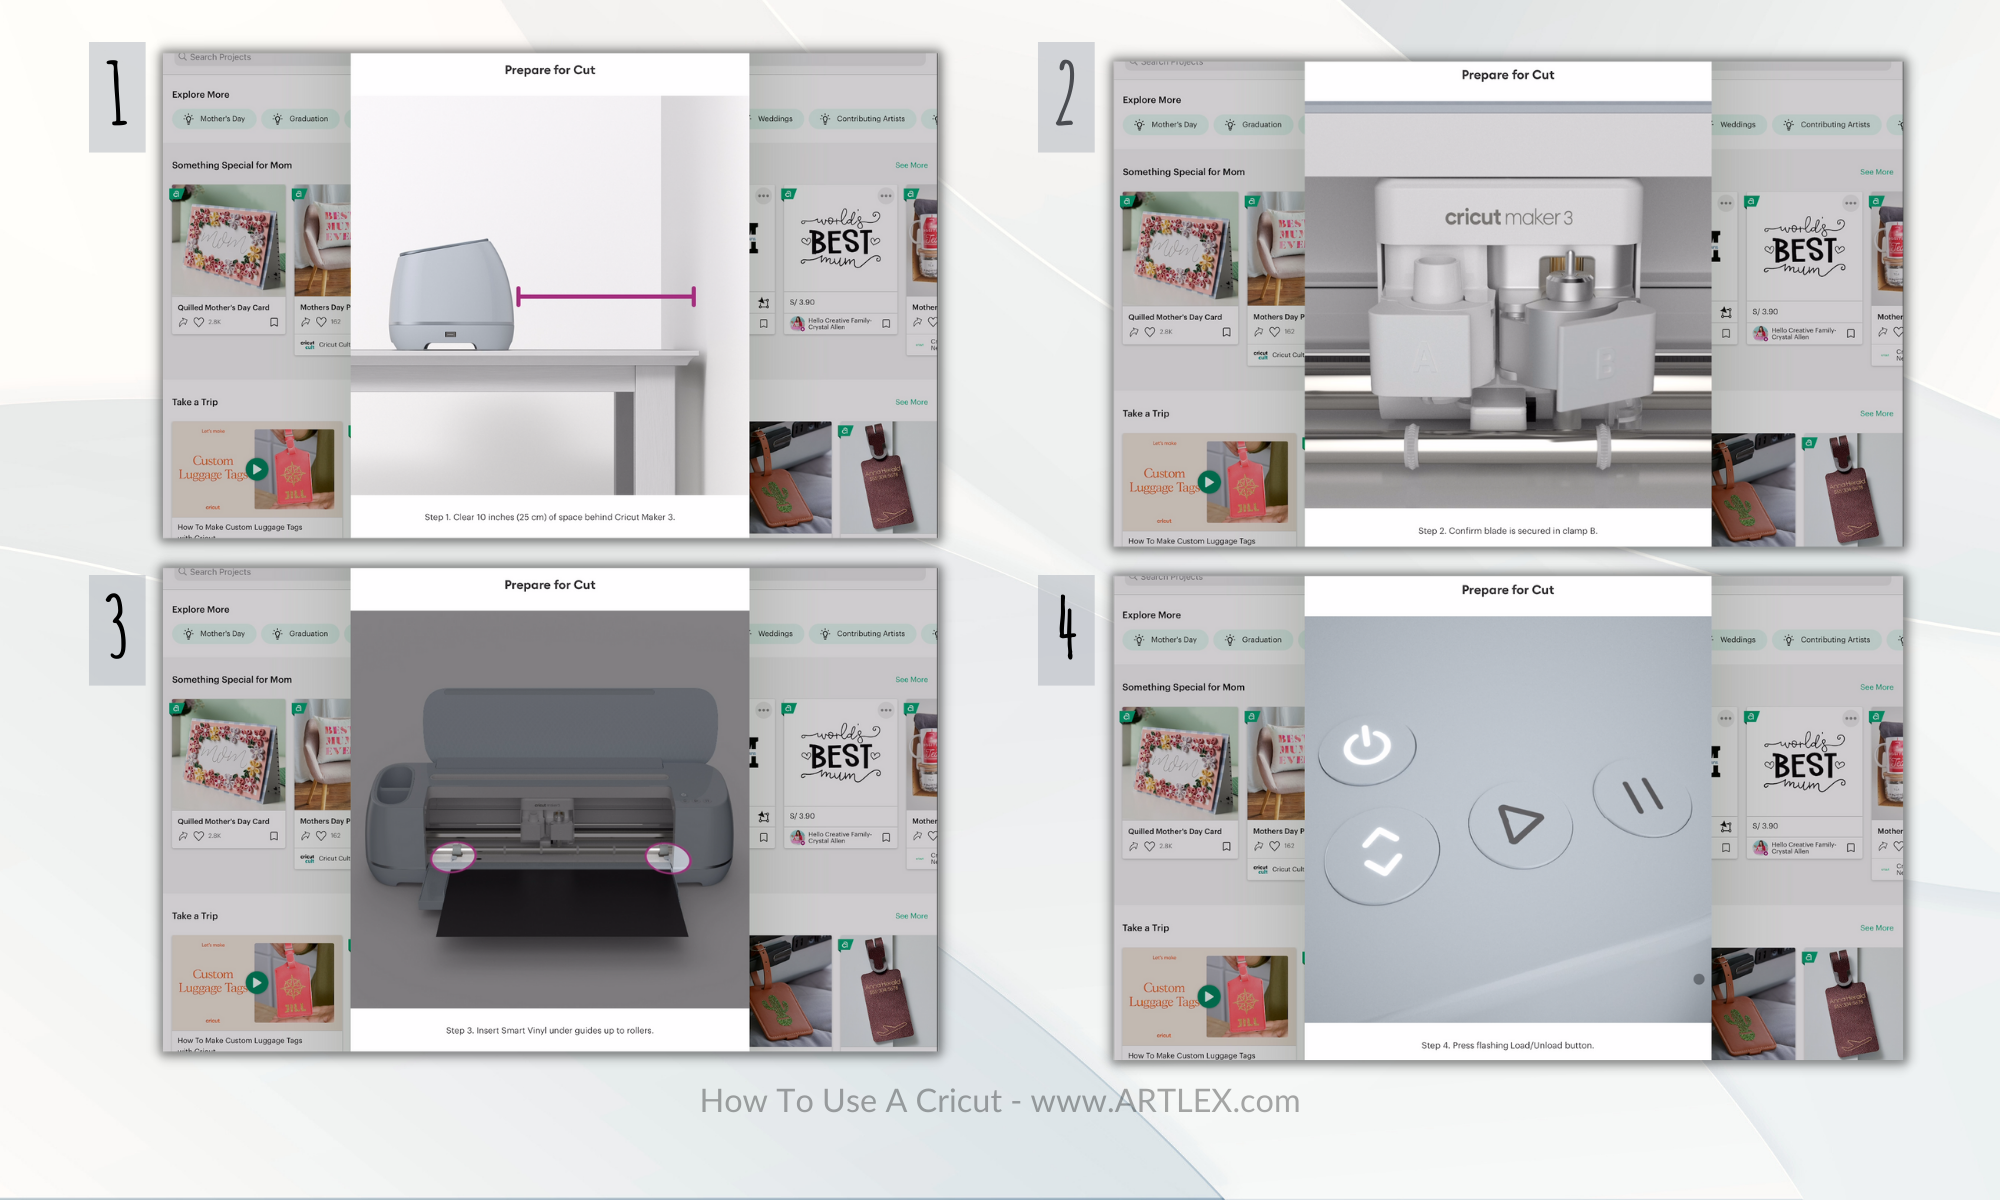
It’s quite simple, just make sure your blade is properly placed on the clamp B, place your smart vinyl piece under the guides, and then press the load button.
Your machine will load and measure your vinyl, and once it’s ready, the Go button will start flashing.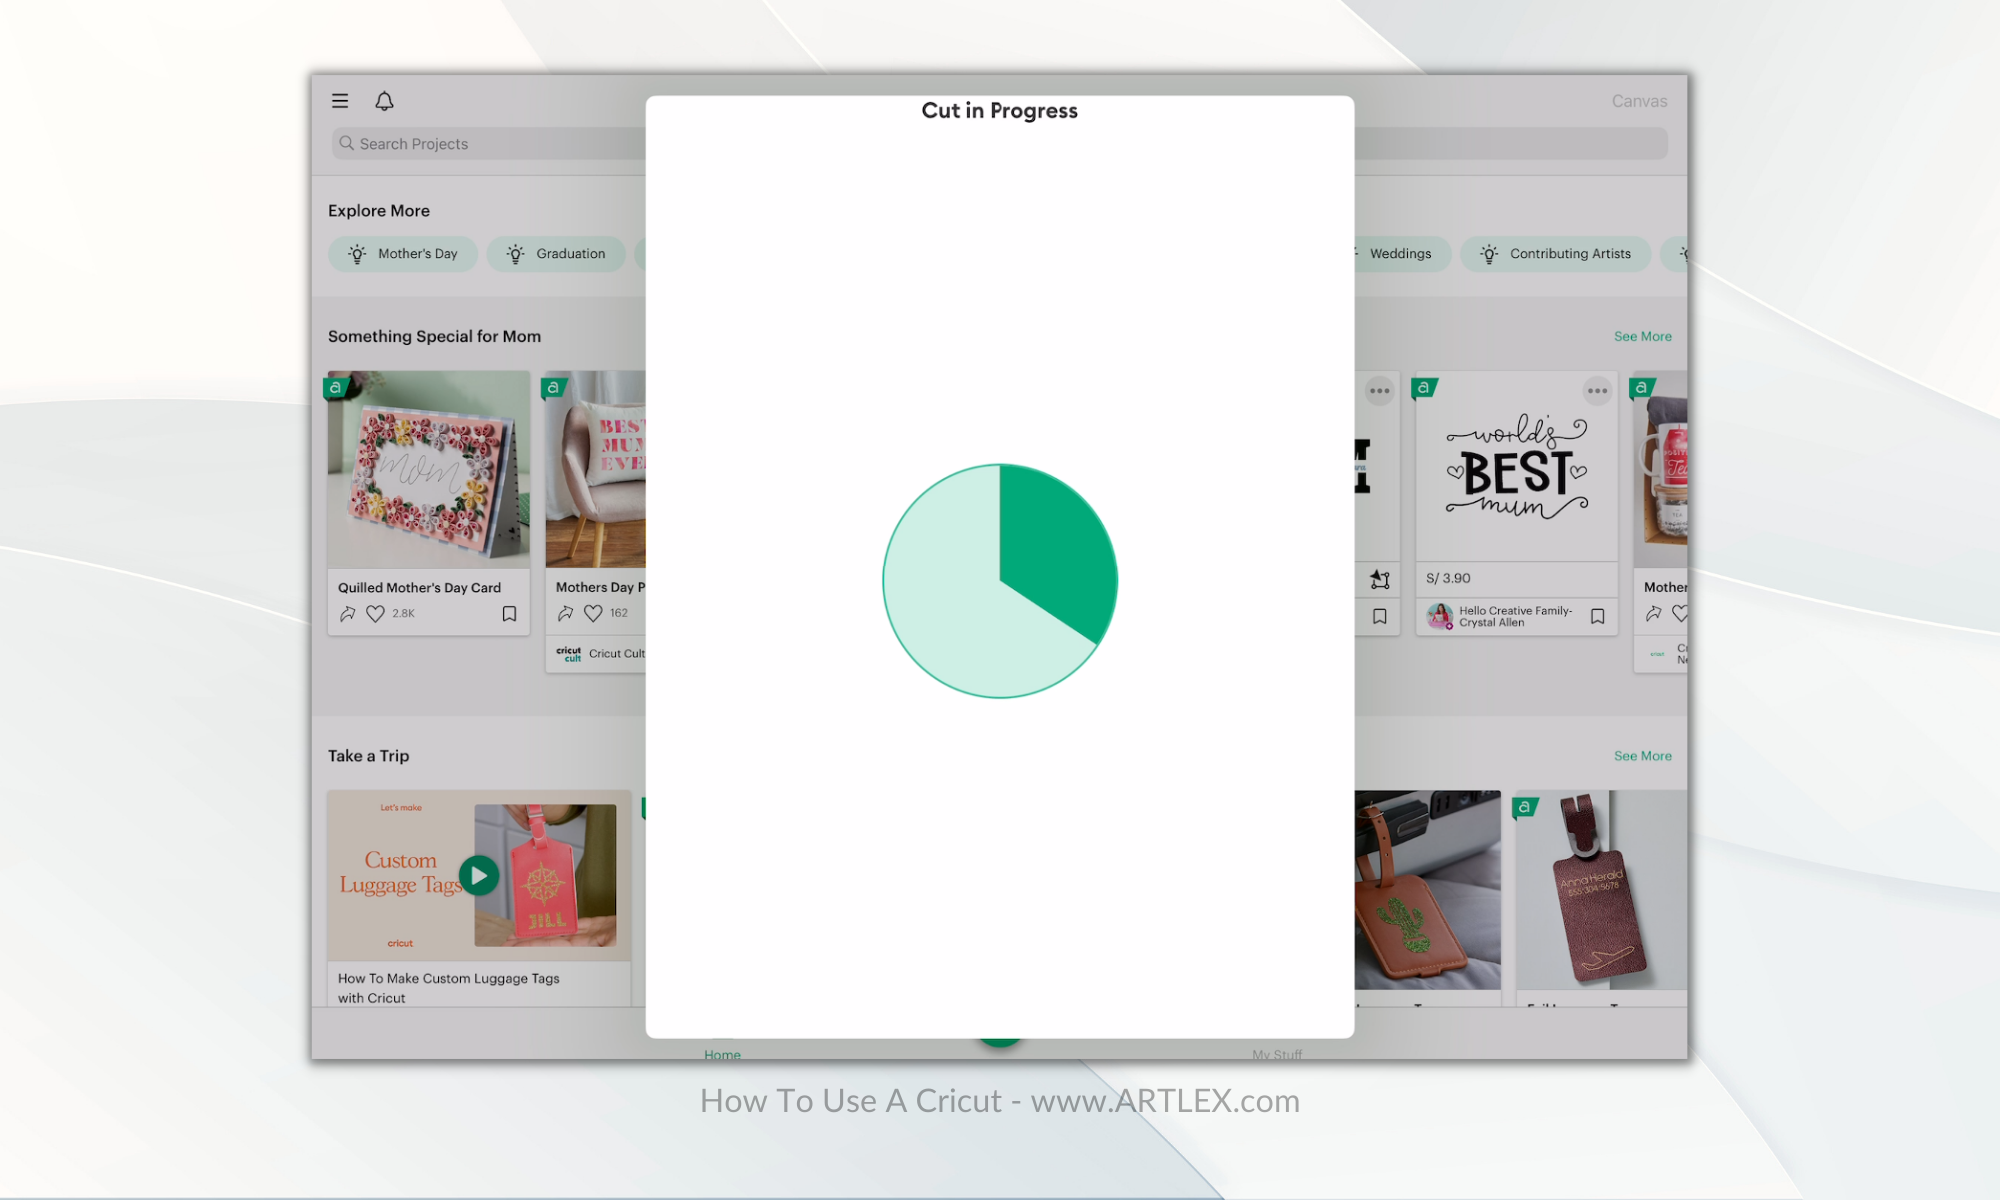
Once you press it, the cutting process will begin. Your machine will do it all and show you the progress on your screen.
When it’s done, press the load/unload button again and retrieve your vinyl.

Weeding Process
Now it’s time to get to work. The weeding process consists on removing the excess material from your cuts. There are some tools and hacks you can use for this process, however it’s quite simple and straightforward. We only reccomend you do it in a plenty iluminated room and use a tool with a sharp tip like a pin pen, a needle or a craft knife.
With a pointy tool, start removing the excess from your vinyl. I’m using a craft knife to show you that you don’t need fancy tools to do this part, however you must, get a pin pen or make one. It’s super easy and a great help!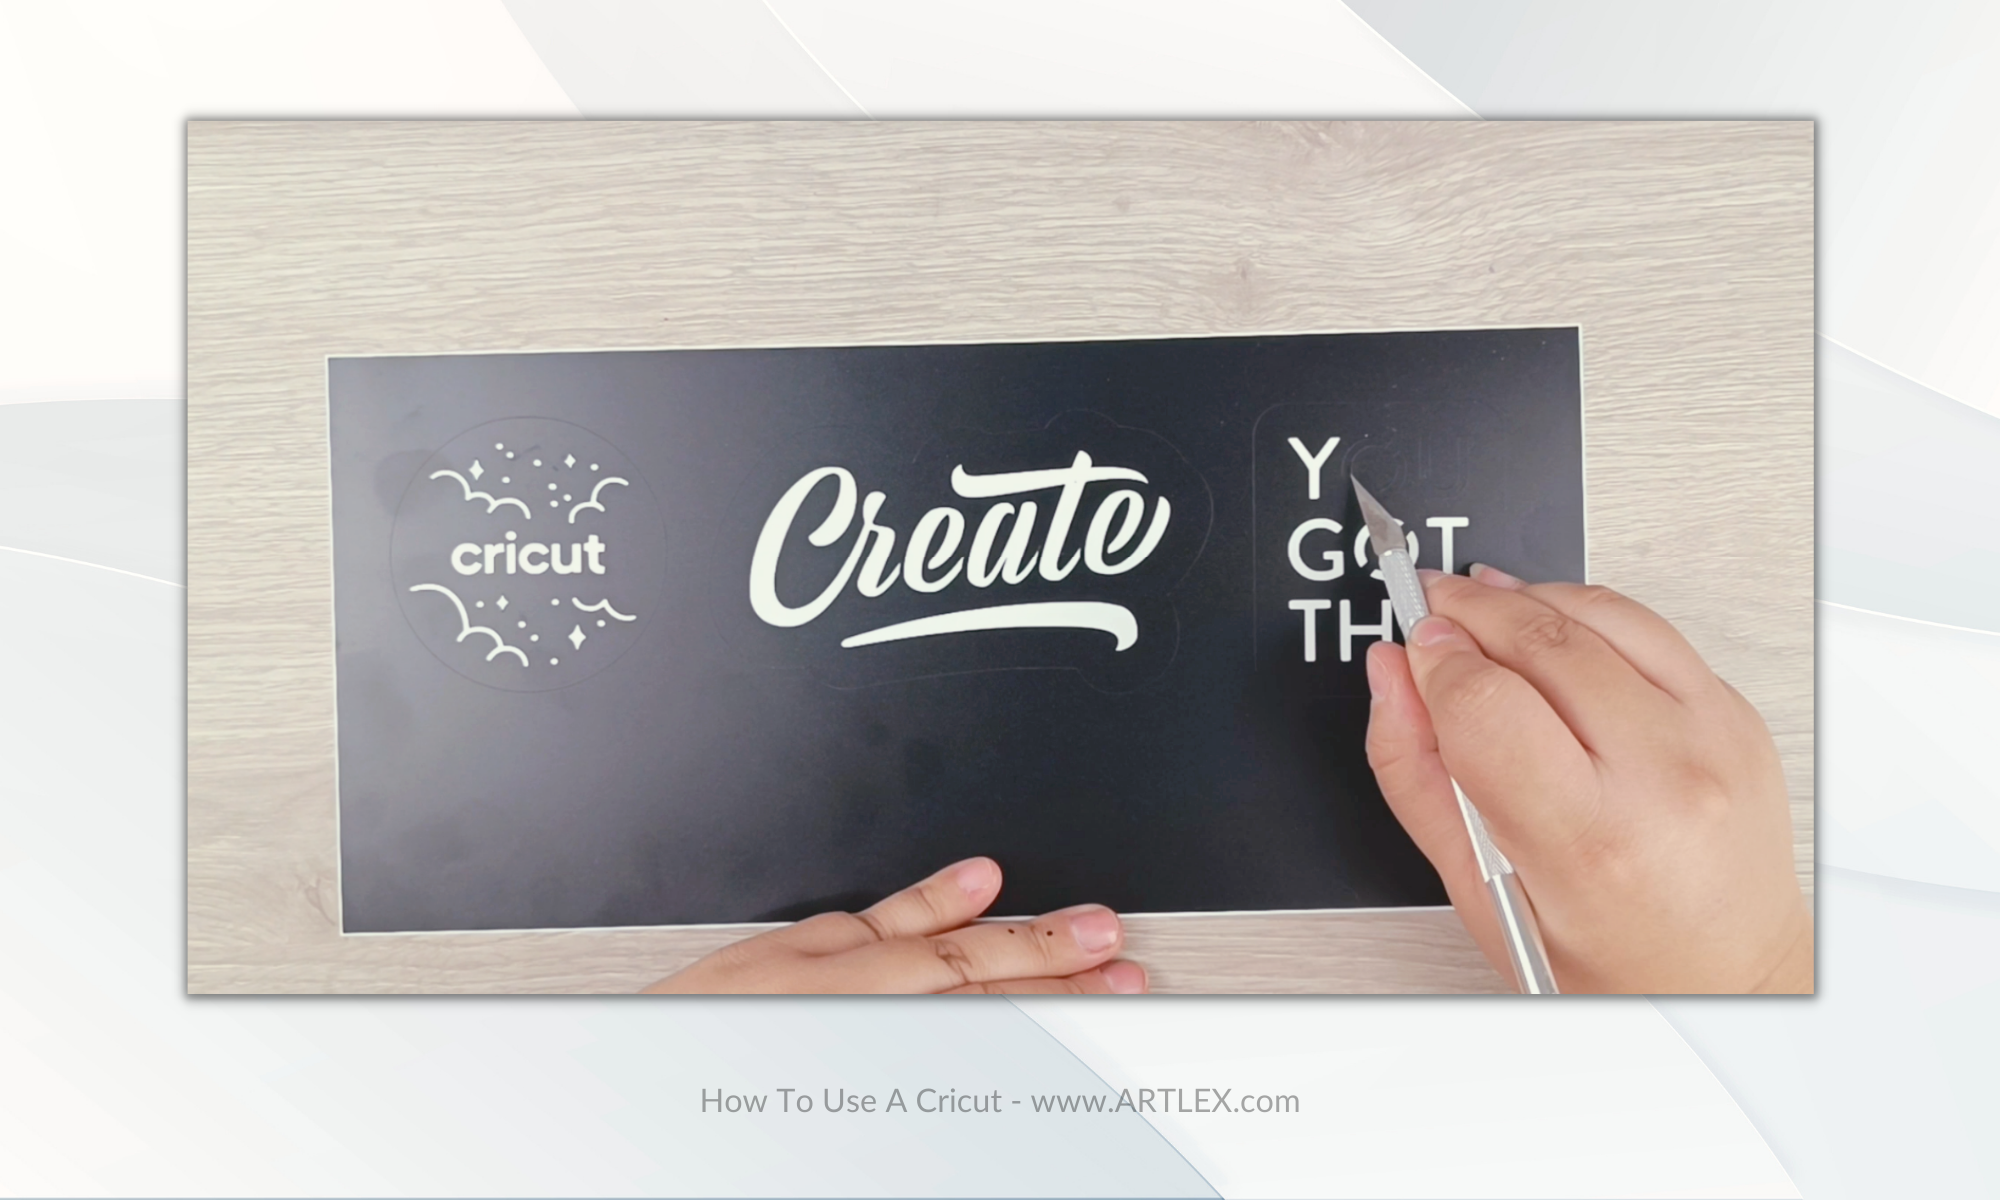
You can peel your stickers directly, however since vinyl is quite flexible, and sometimes it has a lot of details, we recommend you use transfer tape, which will make the process much easier. 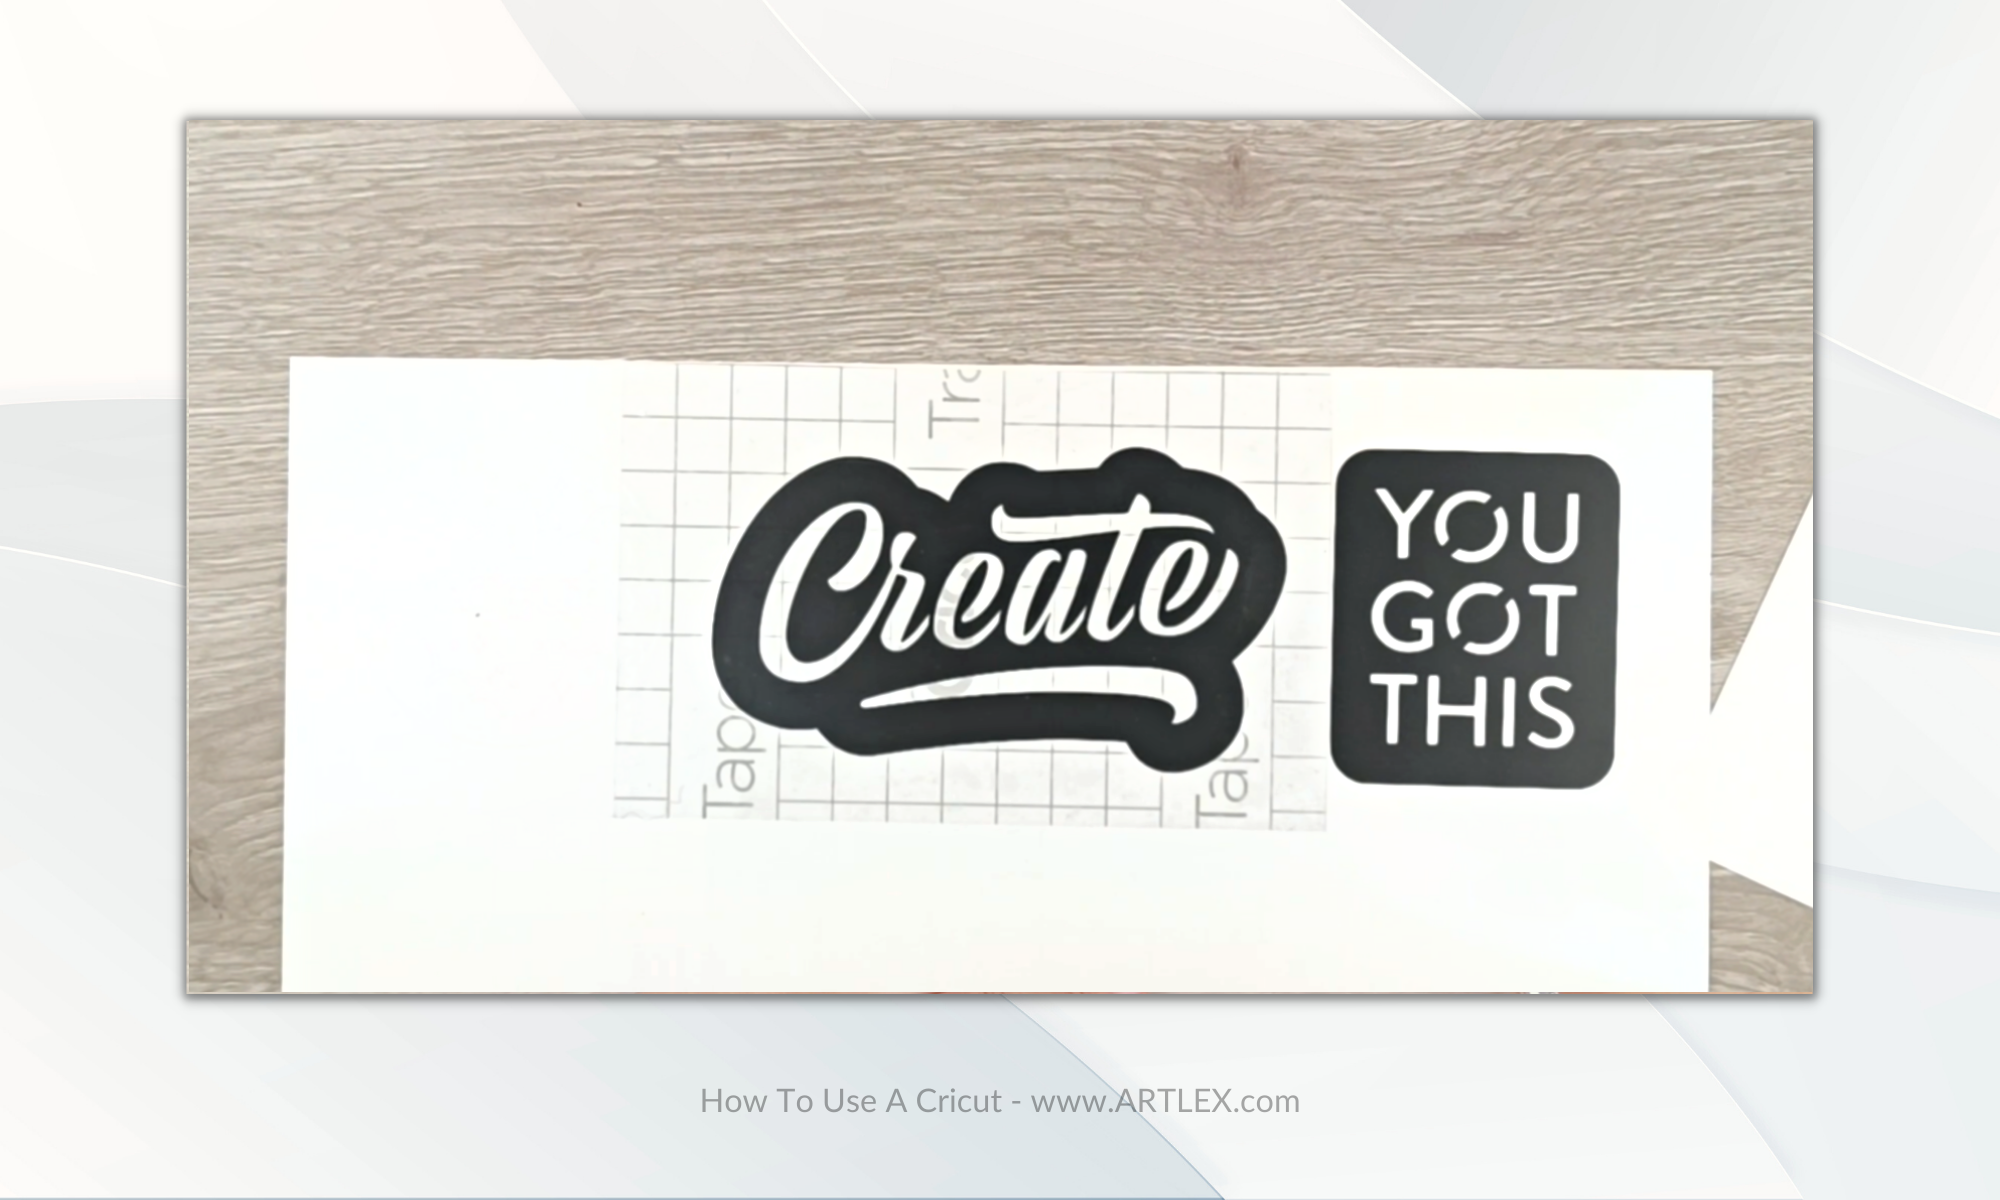
Use a burnishing tool or a rubber scraper to transfer your design to your blank (paper, cardstock, mug, vase, etc) and then peel it off.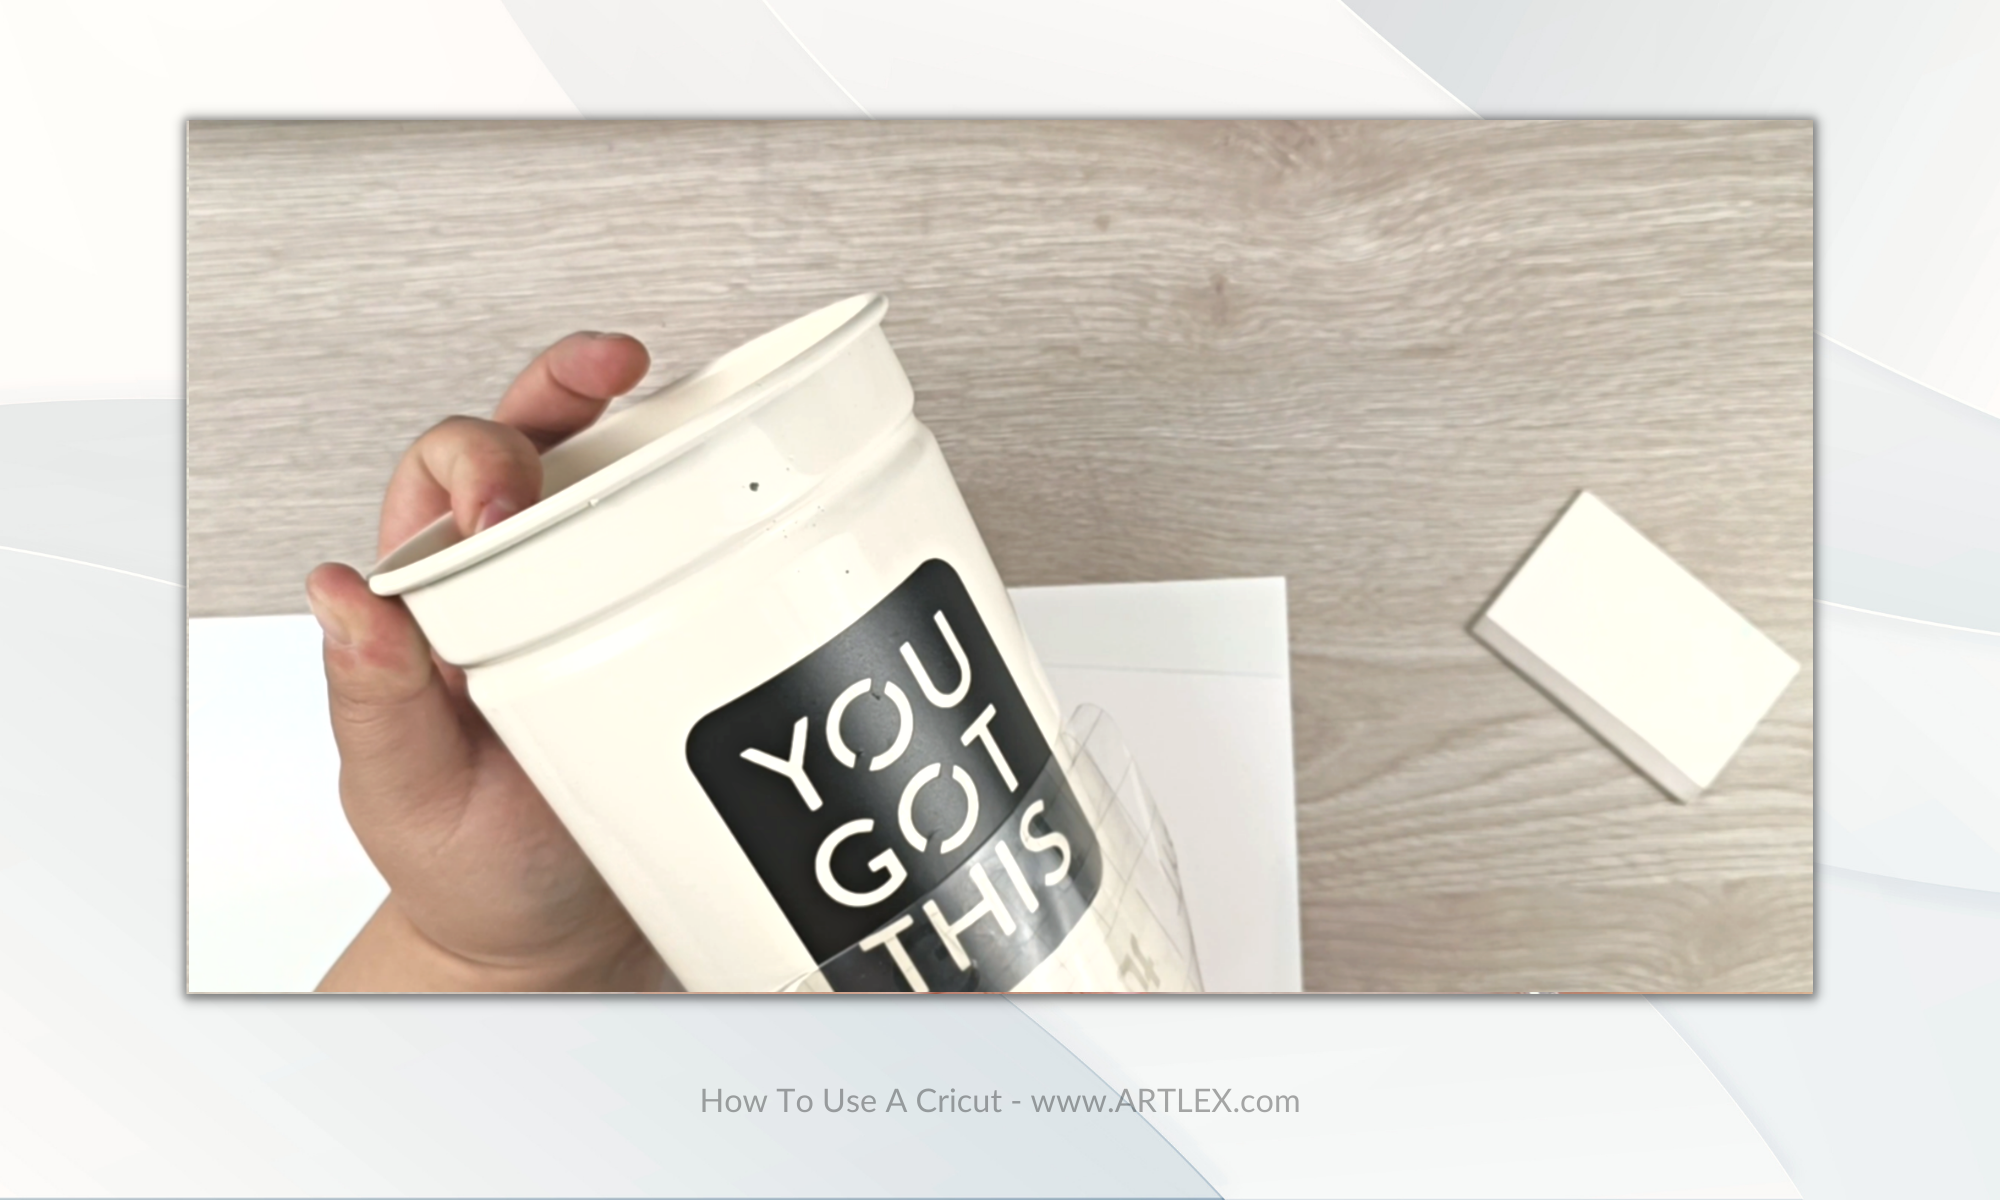
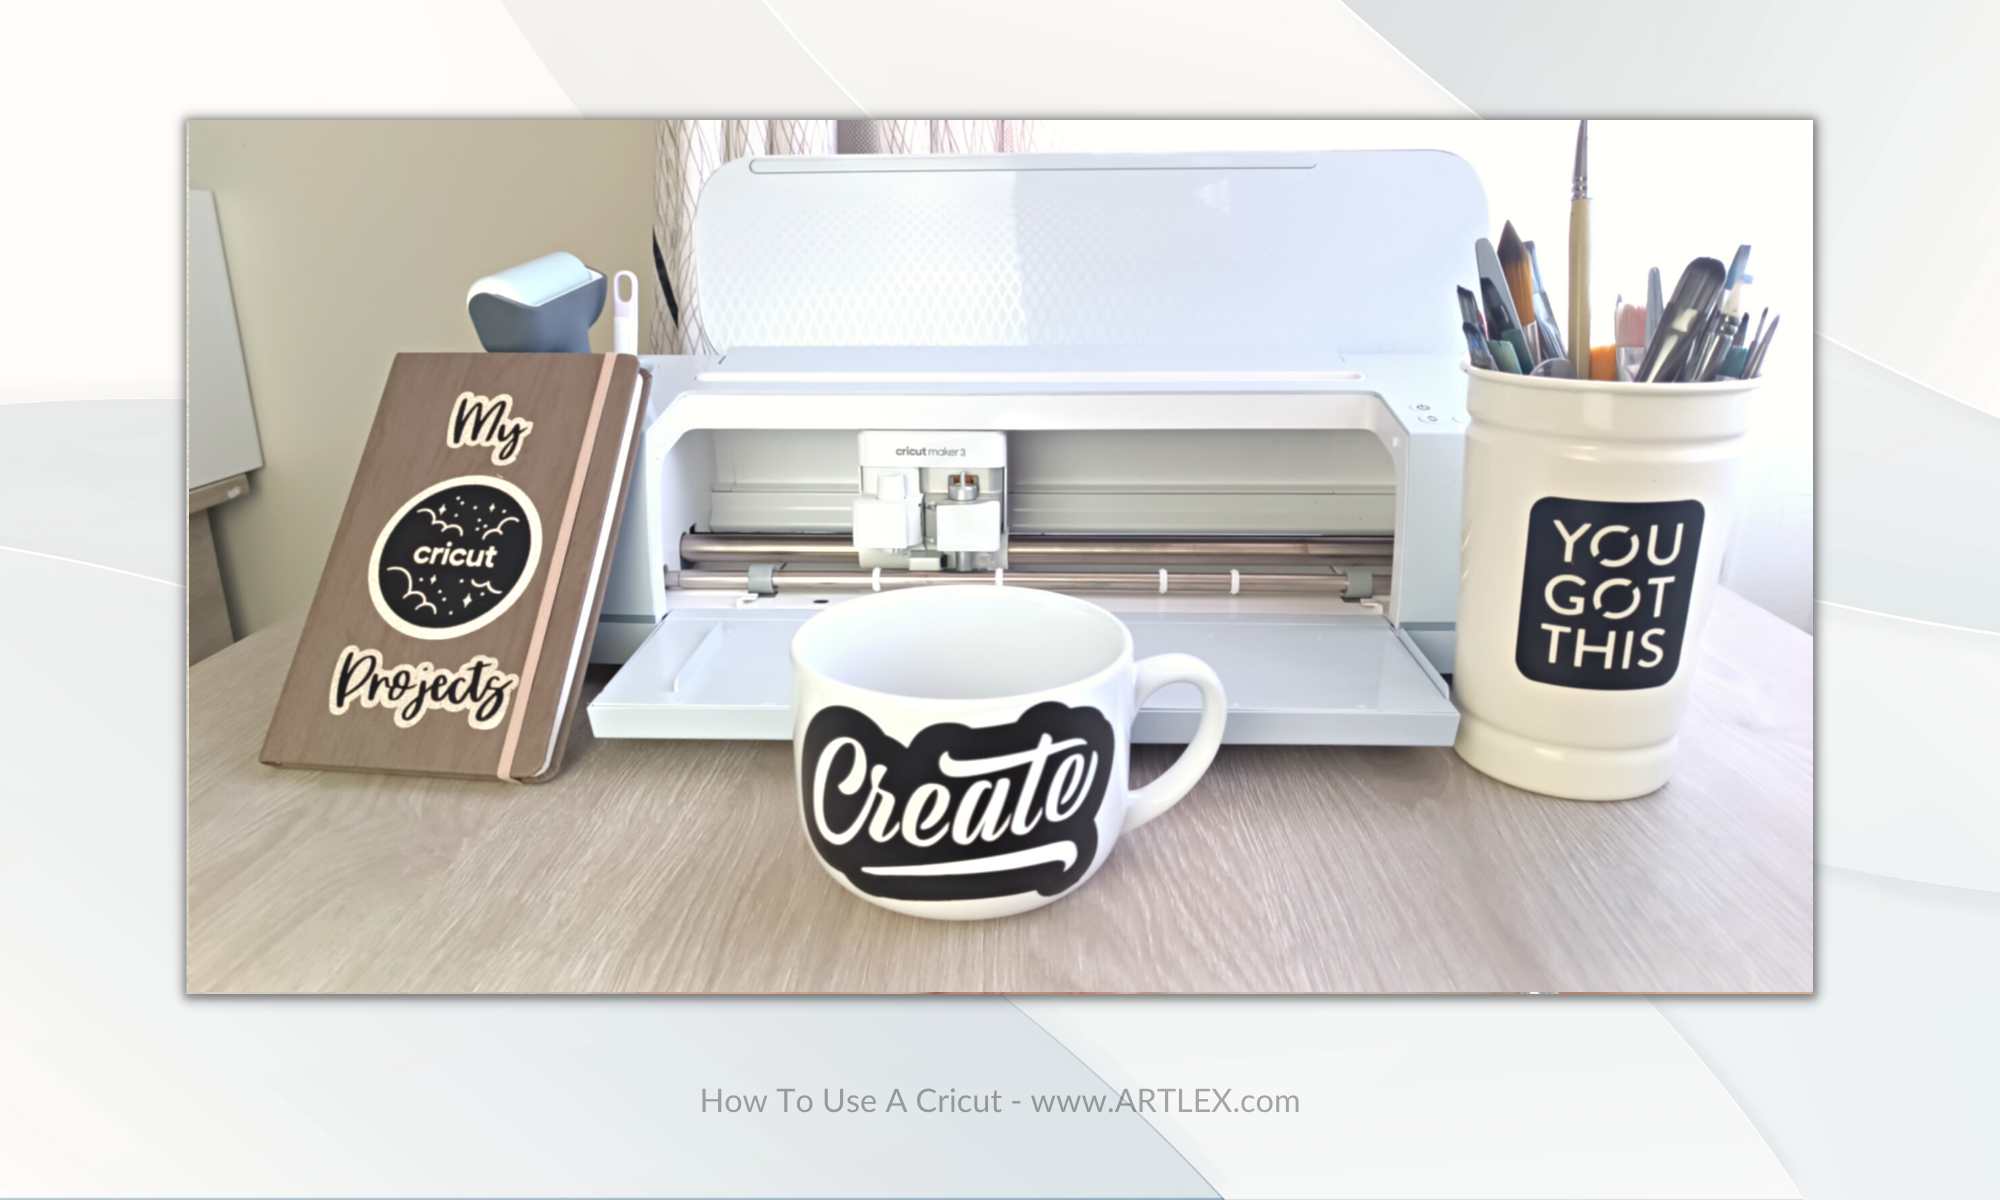
And that’s it. I personalized a few items, like a utensils holder from the dollar store for my brushes, a mug that I’ll have my daily coffee in and a small journal to keep track of my cricut projects this year.
And there you have it, you’re all set to dive into your Cricut journey!
Common Cricut Terminology
Now that we’ve set up our Cricut machine, we’re ready to start creating. There are thousands of online resources that you can use to learn and grow, however if you’re new to the crafting world, then you’ll need to add a couple terms to your vocabulary
- Design Space: Cricut’s proprietary software that allows you to design, arrange, and edit projects before sending them to the Cricut machine to be cut.
- SVG Files: Stands for Scalable Vector Graphics. These files are commonly used in Design Space to create intricate and detailed designs.
- Cartridges: Physical content packages that used to be necessary to use the Cricut machine. With modern Cricut machines and the use of Design Space, cartridges are no longer necessary, but can still be used if desired.
- Cutting Mat: The surface on which material is placed before being inserted into the Cricut machine for cutting. It is sticky to hold the material in place during the cutting process.
- Blades: The cutting component of the Cricut machine. Various types exist (e.g., fine-point, deep-cut, bonded fabric, etc.) and should be chosen based on the material you are cutting.
- Weeding: The process of removing the excess material (or “negative space”) from your design after it has been cut by the Cricut machine.
- Transfer Tape: A sticky material used to transfer vinyl cuts from the cutting mat to their final destination.
- Vinyl: A type of material that can be cut with the Cricut machine. It’s often used for making stickers, decals, and designs for T-shirts among other things.
- Iron-On: Also known as Heat Transfer Vinyl (HTV), this material is used to create designs that can be applied to fabric using heat.
- Score Line: This is a line created by the Cricut machine to indicate where a fold should be made on a material, typically paper or cardstock.
- Print Then Cut: A function in Design Space that allows you to print a design from your regular printer, then use the Cricut machine to cut it out.
- PNG Files: This type of file, standing for Portable Network Graphics, is typically used for images that have transparency, such as logos.
- JPG Files: Short for Joint Photographic Experts Group, these files are commonly used for photographs and other images with a lot of color variation.
- Smart Materials: A line of Cricut materials (vinyl, iron-on, and label vinyl) designed to work without a cutting mat.
- Infusible Ink: A type of ink that, when heat is applied, will infuse directly into your project material. It offers vibrant, seamless color that lasts.
- Cricut Pens: Pens designed for the Cricut machine that can be used for writing and drawing on certain project materials. They come in a variety of colors and thicknesses.
- Roll Holder: An accessory for the Cricut Maker 3 and Cricut Explore 3 which holds and cuts Smart Materials directly from the roll. It can also trim your material after cutting.
How to Use a Cricut Machine – FAQs
What materials can a Cricut machine cut?
A Cricut machine can cut a variety of materials such as cardstock, vinyl, iron-on, poster board, fabric, and more. However, the specific range of materials it can cut will depend on the model of the machine.
How do I connect my Cricut machine to my computer?
A: Most modern Cricut machines connect via a USB cable or through Bluetooth. You’ll then need to pair the machine with Cricut’s Design Space software on your computer.
Can I use my own images and fonts in Cricut’s Design Space?
Yes, Design Space allows you to upload your own images and fonts. You can use the ‘Upload’ button in Design Space to do this.
Do I need Internet access to use my Cricut machine?
You need Internet access to design and save new projects in Design Space. However, you can use Design Space in offline mode to cut previously saved projects.
Can I still use physical cartridges with my Cricut?
Yes, even though they are not required with modern Cricut machines, you can still use physical cartridges if you wish.
How often do I need to replace the cutting blade?
The lifespan of a cutting blade depends on the type of material you are cutting and how often you use the machine. When cuts are no longer crisp or clean, it’s typically time to replace the blade.
How do I clean my Cricut machine?
Use a small, soft brush or compressed air to gently remove debris from the machine. The cutting mat can be cleaned with warm soapy water.
What is weeding and why is it necessary?
Weeding is the process of removing the negative space from your cut design. It is necessary to reveal your completed project and prepare it for application or display.