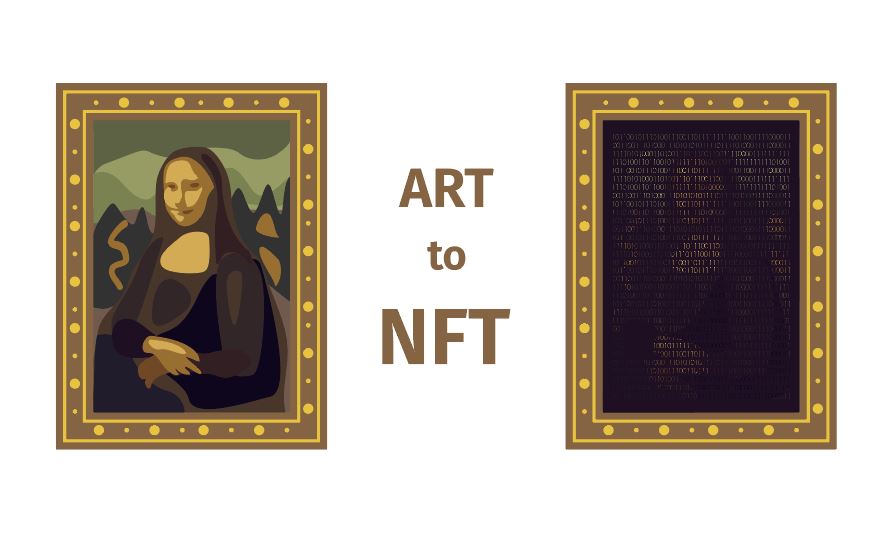
NFTs, or non-fungible tokens, are digital assets representing items from the real world, like art, music, or even videos. They’ve become trendy in the form of digital artwork. Even though these digital files, no one can destroy or duplicate them, and when you purchase an NFT, you’re the only person who wholly owns that file.
Recently, people have begun to collect NFTs like they would collect regular artwork and resell them for profit. Depending on the file, artists can even collect royalties each time their art is resold to someone else.
Given some of the mind-blowing prices that NFTs have sold at, this is good news for digital artists. So how do you even go about making and selling your own NFT art?
Here’s what artists should know about creating NFT art and making it profitable.
How to Make and Sell NFT Art in 2022How to Make and Sell NFT Art in 2022
Step 1: Pick or Create the Art That Will Serve as Your NFT
The first step as an artist is either creating or finding the piece of art that will serve as your NFT. The good news is that you don’t necessarily have to make a completely new piece of art. As long as you’ve got previous digital artwork you’d like to share with the world, you can move on to the next step toward selling your NFT.
Keep in mind that there are very few rules for what you can sell as an NFT. As long as the original content is yours, you can sell it.
While you won’t be able to sell a random meme or illustration you found online, you can sell your own digital art, songs, memes, and even recipes in an NFT marketplace.
Of course, if you’d rather create new artwork than sell an older one, you can do that as well. Since you can turn pretty much any digital file into an NFT, you don’t need to do anything special when you create your art.
Most marketplaces support traditional file types like:
- JPEGs
- TXT
- PNG
- MP3
- GIF
Step 2: Set Up Your Ethereum Wallet
The NFT market is centered around cryptocurrencies like Ethereum, so if you’re interested in selling one, you’ll need to set up your own digital wallet.
Not only will this allow you to pay the fees associated with hosting your NFT on a marketplace, but if someone does buy your art, you’ll be paid in cryptocurrency through your digital wallet.
Fortunately, there are plenty of different platforms that allow you to create digital wallets, and many of the major ones work with most marketplaces. Some of the most popular digital wallet platforms include:
Suppose you’re interested in buying NFTs as much as you are selling them. In that case, many digital wallets, like Coinbase, allow you to store any NFTs you purchase directly in the wallet so that you can view them anytime you’d like.
Step 3: Buy a Small Amount of ETH for Your Wallet
After setting up your digital wallet, the next step is purchasing a small amount of Ethereum to store in that wallet. While this may seem odd since you’re not the one buying NFTs, there’s good reason to do this. Most marketplaces have some sort of fees associated with selling your NFTs on their NFT platforms, so you’ll need at least a little ETH for selling.
The price of ETH can fluctuate by the day, but once you’ve picked a dollar amount you want to invest, you just need to purchase that amount of Ethereum.
The good news is that you probably won’t need to use a separate exchange platform to get your ETH. Most wallets, including MetaMask and Rainbow, allow you to purchase ETH directly, so there’s no need to make a separate transfer.
Of course, if the wallet you’ve chosen doesn’t allow for the direct purchase of Ethereum, you can always buy from other platforms you may already be familiar with – like Venmo or Paypal.
Step 4: Find an NFT Marketplace You Like
You’ve got your wallet set up, and you’ve purchased your crypto. The next step is finding a marketplace where you can sell your NFT. Like creating a digital wallet, there’s more than one platform to pick from. Some of the most popular platforms to market include the following.
Rarible
Having processed hundreds of millions of dollars in NFT sales, Rarible is not only one of the most popular choices for NFT marketplaces, but it’s also one of the most accessible too.
The setup is straightforward for beginners, and their minting process doesn’t require you to be particularly tech-savvy or know any code.
If you’re trying to sell an NFT that’s not a traditional piece of art like a song, recipe, or animation, Rarible places very few restrictions on what can sell in their NFT marketplace.
OpenSea
As one of the earliest marketplaces, OpenSea is definitely well-known as a platform to sell your NFTs, and you’ll find tokens that range from digital art to items from video games.
Unlike some marketplaces, it’s completely free to sign up for OpenSea, and there are no restrictions on who can be a seller, which is why it’s another good option for beginners dabbling in NFTs for the first time.
Like Rarible, OpenSea also has a lazy minting process for creating NFT art, so there’s no coding knowledge required. If you’re worried about having to pay costly fees to sell your NFT or host it on the platform, it’s essentially free to sell your NFT on OpenSea.
While there are fees associated with minting and selling it, the buyer is the one who ends up fronting the cost – not the seller.
SuperRare
If you’re a digital artist looking to become an NFT creator, SuperRare may be worth considering. Rather than cater to NFTs of every type, SuperRare is targeted at sellers who want to sell their digital art and buyers who wish to purchase it.
The downside to this platform is that the sign-up process isn’t as straightforward. Since the collection is highly-curated, you’ll actually need to apply for your work to be sold on the site. So, while you may have a better chance of having your work seen by buyers who want digital art, you may have to wait a little while before the site approves your application.
Step 5: Connect Your Wallet to the Marketplace
As you sign up for the marketplace, the platform will probably give you the option to connect your wallet. This isn’t a step you want to miss, especially if you want to begin uploading and minting NFTs right away.
Even if you’ve never done this before, most popular platforms have a straightforward process and should walk you through how to connect your wallet. Once you do that, you should be about all set to start uploading your digital files.
Step 6: Upload and Mint Your Digital File
Once you’re ready to start uploading, you can use the “Create” button on the marketplace to add your digital file to the site. As long as you’re using a file type that’s supported by the marketplace, this should only take a few clicks.
This step is also where you can choose whether you’d like to mint NFTs as one-of-a-kind pieces or if you’d like to make each one part of a more extensive collection. Many beginners like to mint their tokens as one-of-one pieces, which is no different than selling an original painting or illustration in real life.
If you’ve picked a platform where there are gas fees, you’ll usually need to pay those before minting is complete.
Step 7: Make a Title and Description
While some artists may want to gloss over this part, the title of your piece and its description are often what entices people to look a little closer at your NFT.
You’ll want a title that’s appealing and related to your artwork, and you should aim to keep your description as detailed as possible.
In the description, you may want to talk about the subject of the piece and any meanings behind it. You’re likely to see more sellers if they like the concept and execution of your art. Coming up with a theme for your NFT can also make it more popular.
Some of the most popular NFTs feature exciting and unique themes, like animals with clothes, football cards, or characters from films.
Step 8: Pick Your Price
While this may vary by platform, most NFT marketplaces allow you to sell your NFT in one of two ways – either at a fixed price or as an auction model. Fixed costs mean your NFT won’t sell until someone is willing to pay the listed purchase price.
Auctions, however, tend to be more appealing to artists since there’s a chance you could earn a lot more on your NFT than you initially thought. Auctions can also work in a couple of different ways too. You can allow sellers to make a bid, with the highest bid becoming the buyer.
Or, you can set your price higher, and as the auction goes on, the price will steadily decrease until someone is willing to pay that amount. To prevent the price from going too far below what you’re willing to sell, you can usually set a minimum.
As far as picking and setting your price (if you’ve decided to go with a fixed price), this is entirely up to you. While you can’t expect every NFT to make thousands or even hundreds of dollars, you should at least consider how much time you’ve spent on the original piece and how much the minting fees cost.
One-of-a-kind NFTs that are scarce tend to be priced a little higher as well as anything that comes with extra benefits like merchandise or unlockable content.
Step 9: Advertise Your Live NFT
Once your NFT has been minted and is now live as a token that people can purchase, you can’t always rely on people browsing the site to stumble upon your work. While some platforms may be better about pushing new artwork than others, it never hurts to do your own advertising either.
If you’re an artist that has an existing following on social media, you can always let your followers know that you’ve created an NFT that’s for sale. Or, even if you don’t have a ton of followers, it never hurts to share the listing on the social media platforms you are on. You never know what kind of traffic or potential buyers you may attract.
You can also leverage some of the existing communities that platforms like Rarible or SuperRare have. These platforms have their own discords, making it easier for artists to promote their NFTs to potential buyers.
Step 10: Make Sure You Check Back for Bids
Not all platforms will notify you if someone has placed a bid on your NFT, which is why it’s a good idea to check in yourself regularly. Anyone who views the listing can place a bid for your NFT, so even just checking your listing daily can ensure you catch any incoming requests.
If you do see any bids or action on your listing, you’ll have the opportunity as the artist to accept those bids. Or, if you’ve chosen a fixed price, you may just get notified that someone has purchased your artwork.
The benefit of using a popular NFT marketplace is that there’s not much hands-on work you’ve got to do after you list your token besides checking for bids. Once someone has purchased your work, the platform will handle the rest, and you should see the agreed-upon crypto enter your digital wallet.
Final Thoughts
It’s a common misconception that only tech-savvy artists and people can navigate NFTs and know how to create NFTs.
Although it can seem overwhelming if you’ve never dabbled in the world of NFTs before, the process is more straightforward than it looks. Depending on the platform you choose, it can take less than a day to upload, mint, and list your NFT art.