Drawing the head is one of the most challenging parts of a portrait. The proportions and shape of the head can sometimes be challenging to get just right.
Heads are typically drawn in profile, meaning we see the side view of their face, not their front view. When drawing heads from this perspective, it is important to remember that the proportions need to be adjusted so that they are not distorted from this angle.
In this lesson, we’ll cover the basics of how to draw a head from the side profile. Let’s start with guidelines and then show you some tips for proportions and other details.
What you’ll learn:
- Head proportions
- How to draw the head from the side profile
- How to shade the head
Materials needed:
- A piece of paper
- A 2H graphite pencil
- A 4B graphite pencil
- A soft blending tool
- An eraser or a kneaded eraser
- A ruler
- A compass
This is the head you’re going to draw: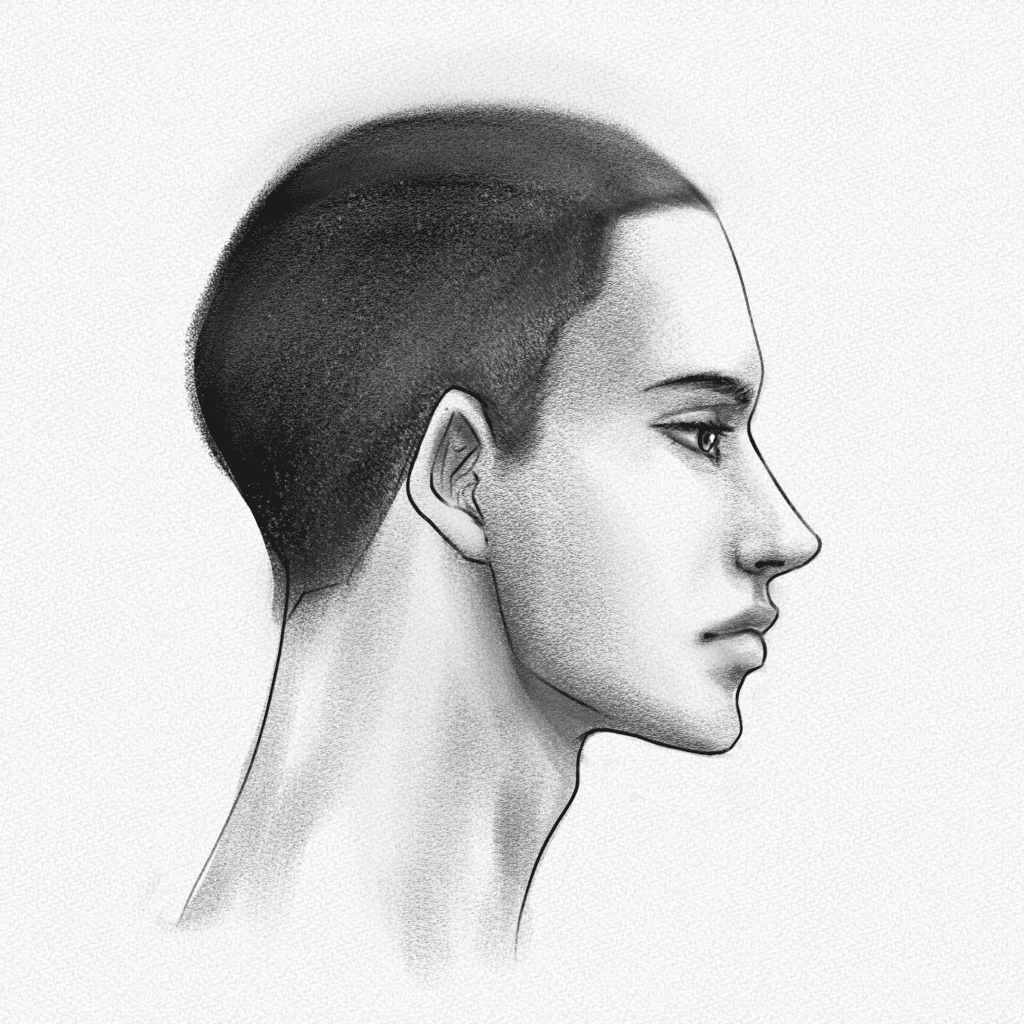
And these are all the steps we’ll walk you through: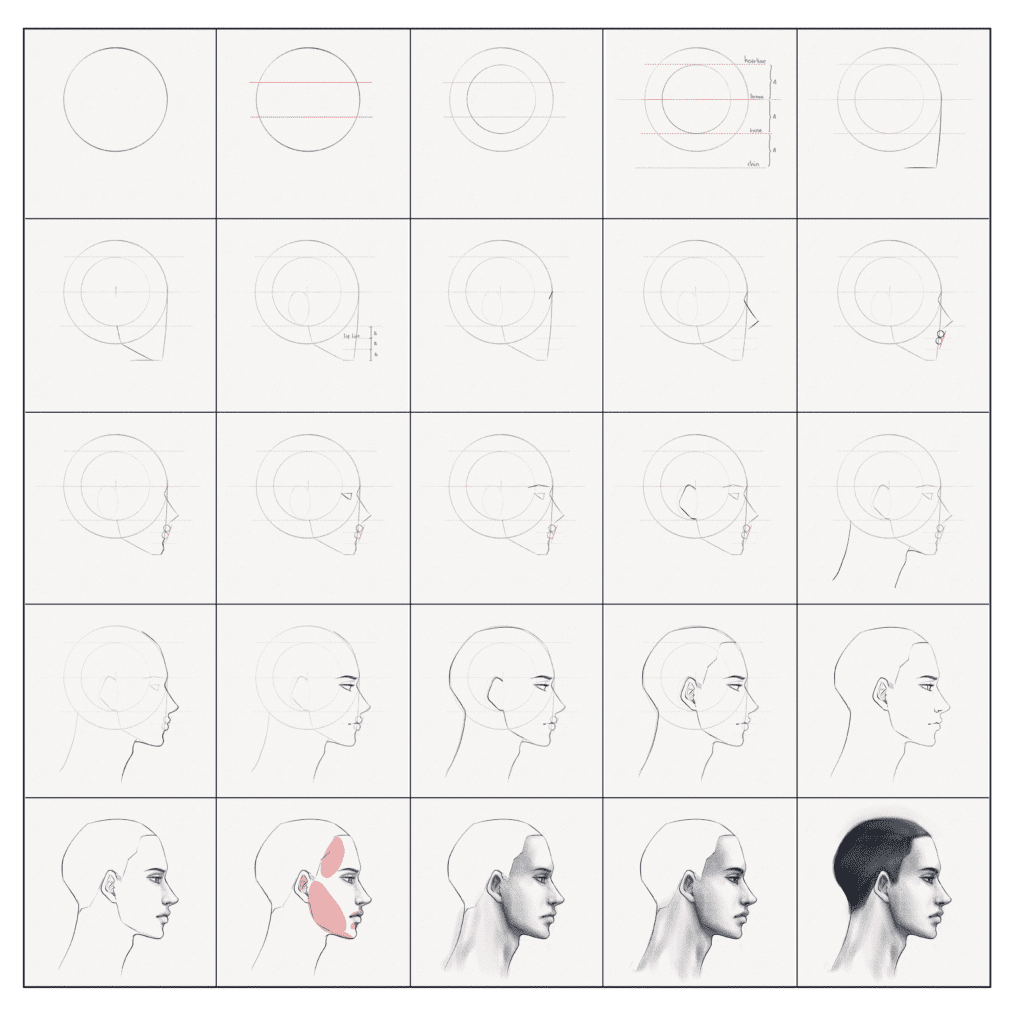
Section 1.- Head Proportions
Before drawing the side profile, we must go through the head proportions again. Proportions don’t change. However, it might be a bit difficult to translate the front view proportions onto the side view of the head, so keep reading and make sure to learn the steps in this section.
Step 1: Draw a circle
Although the head is not a perfect sphere, when drawing the side view, it is essential to have it as a base since we’re also drawing the back of the skull. With your 2H pencil and your compass, draw a circle on the upper part of your canvas. Make sure to leave space below for the neck and chin.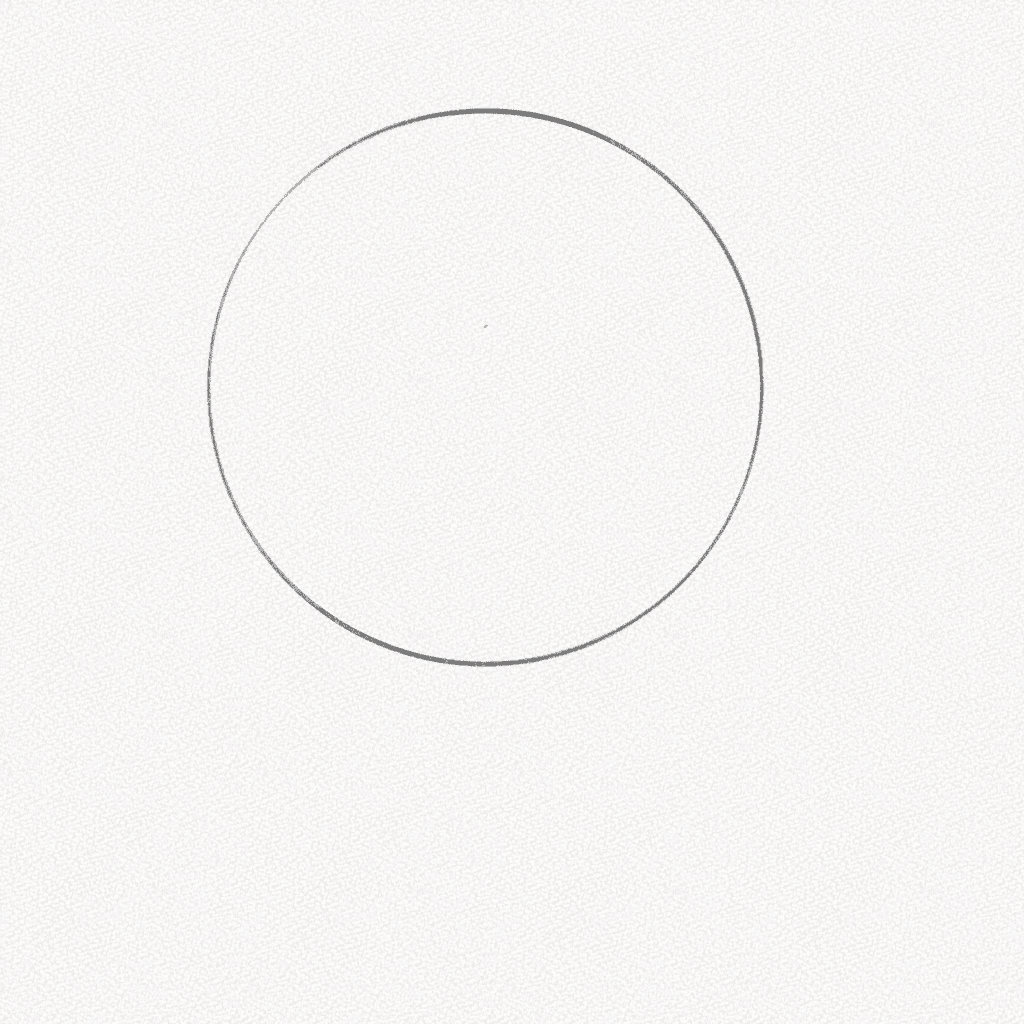
Step 2: Split your circle
Now, with the help of your ruler, split your circle into three equal parts. You don’t need to trace any line for this step, but make sure to remember the measure of the ⅔ of the head instead.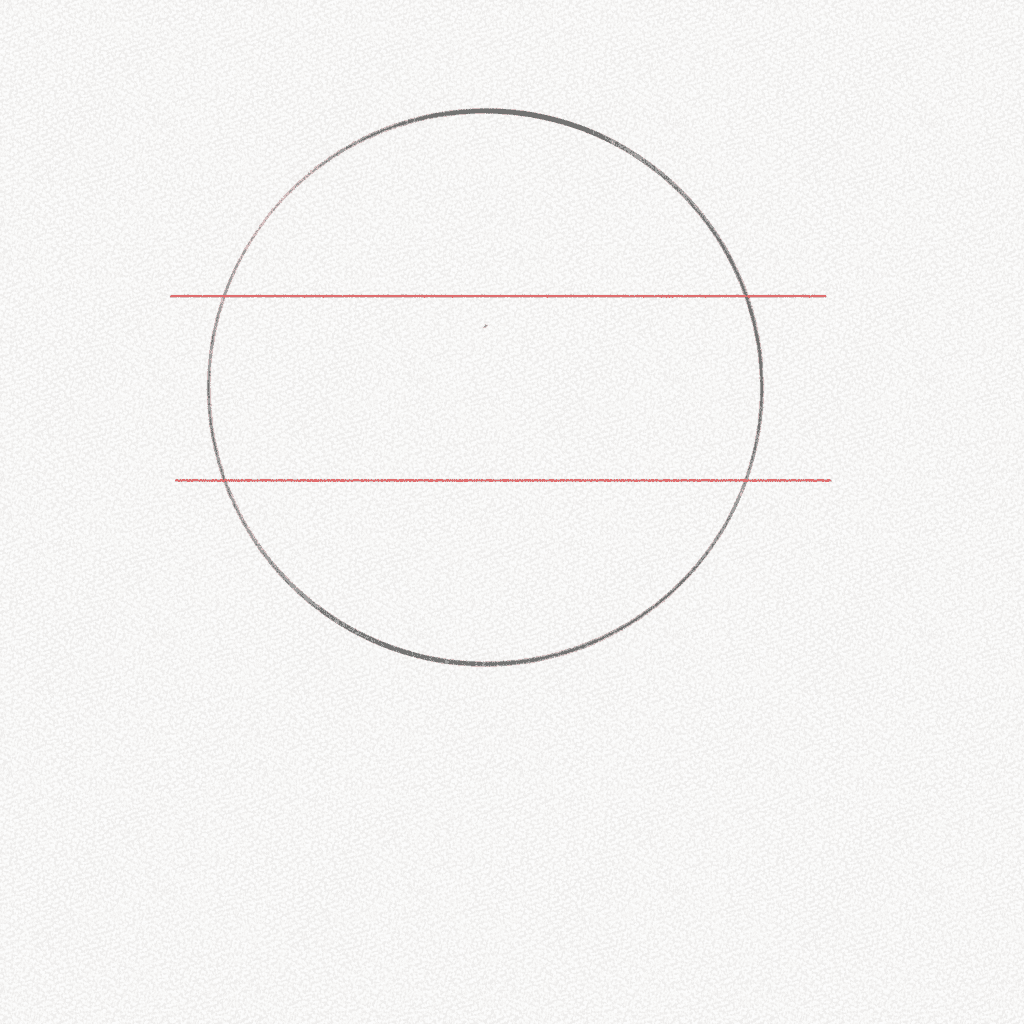
Step 3: Draw another circle
With your compass, draw another circle that’s ⅔ of the diameter of our first circle. Make sure to place it in the very middle. This will represent the flat plane of the sides of the head (the visible one)
Step 4: Set your proportions
This smaller circle is the one that will help us set our proportions right. The middle of it aligns with the brows, the top of it with the hairline, and the bottom aligns with the nose. We can also use the same measure to find the place of the chin. Make soft lines marking the position of each part of the head.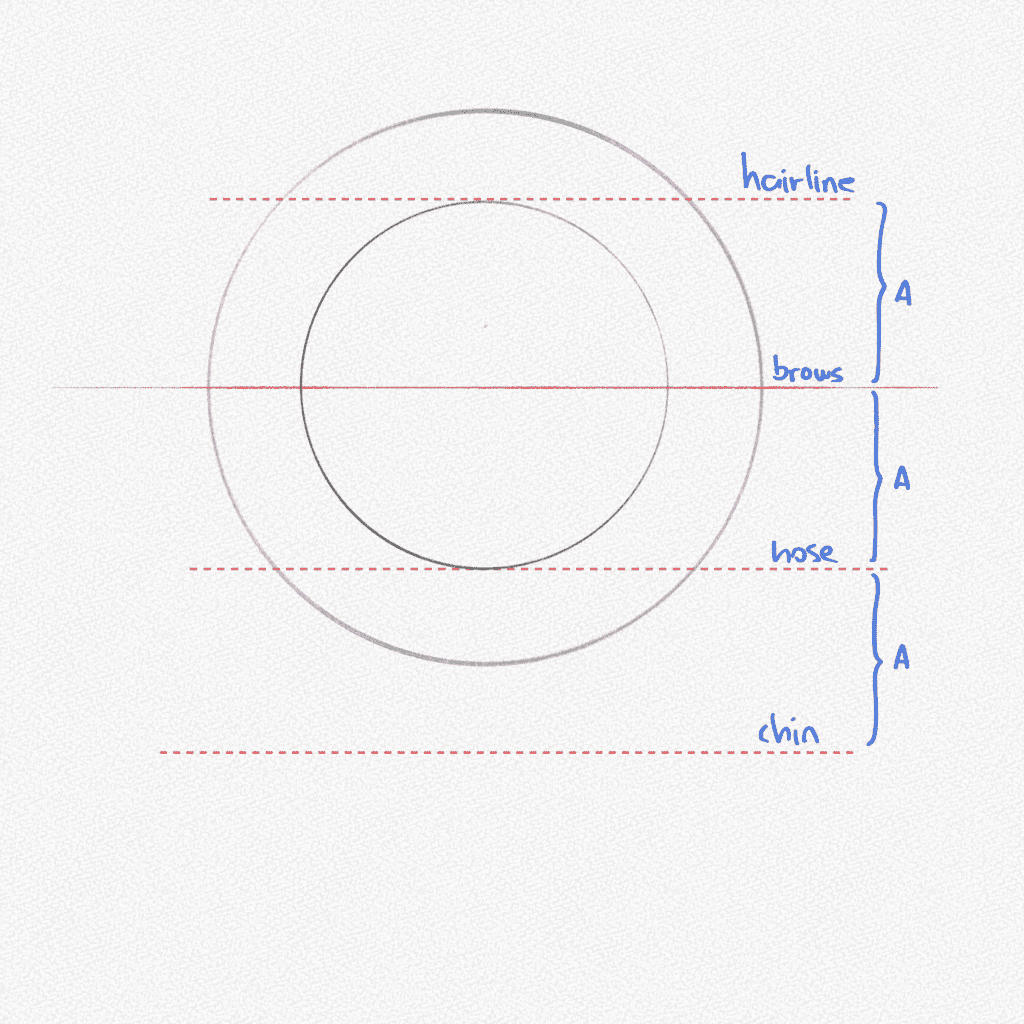
Step 5: Draw two lines
Draw a vertical line from the middle of the smaller circle to the chin line. Draw another smaller line marking the chin position.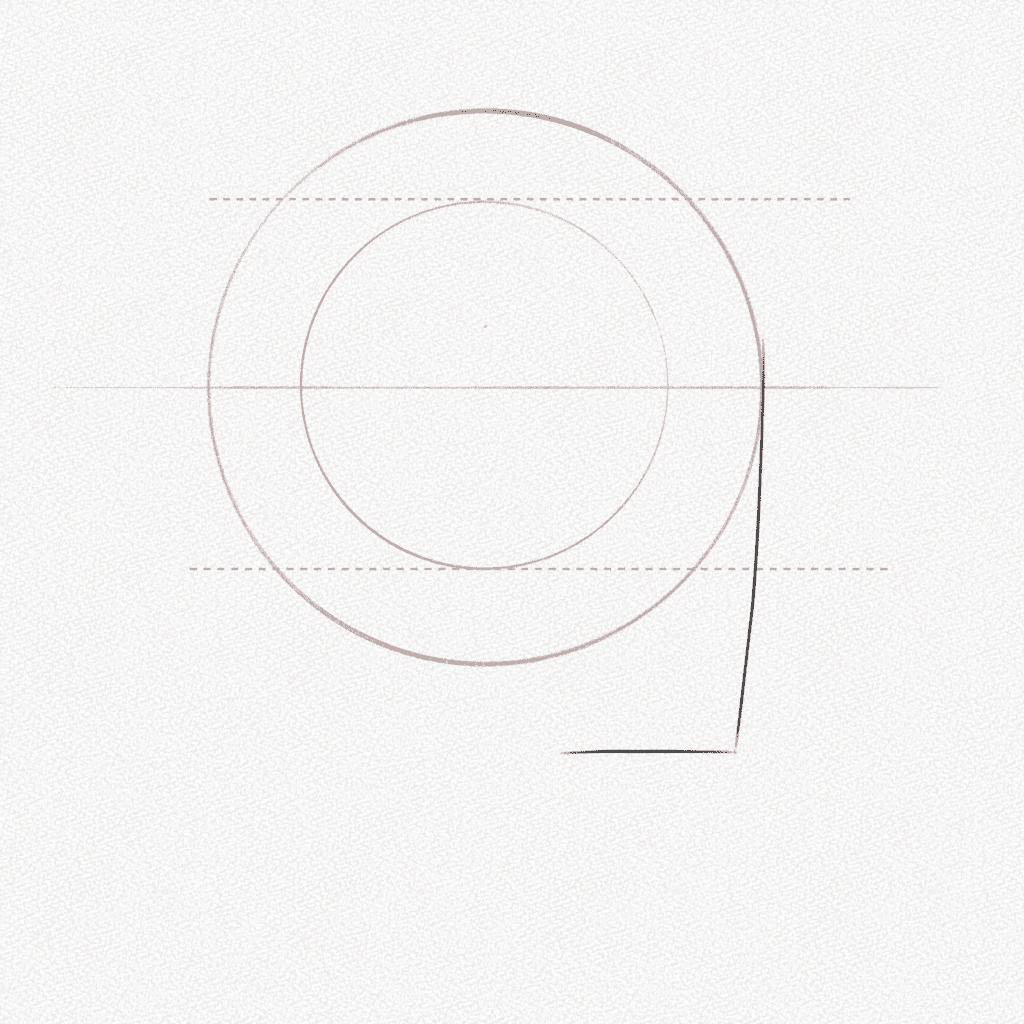
Step 6: Draw the jawline
There is no perfect way to draw the jawline since we are all different. However, an excellent way to do it is by drawing a slightly tilted line from the bottom of our circle (around the middle point) and another line connecting the first one to the chin.
Step 7: Proportions of the lips and the ear
We already know the lines where the hairline, eyebrows, nose, and chin sit. However, it is a vital part of the face proportions in the placement of the lips. For this step, we’re going to divide the lower section of the face into three equal parts, the upper line will be the lip line, and the second line will help us draw the chin’s angle.
For the ear, softly draw an ellipse behind the jaw lines. Make sure it’s the size of half of the inner circle.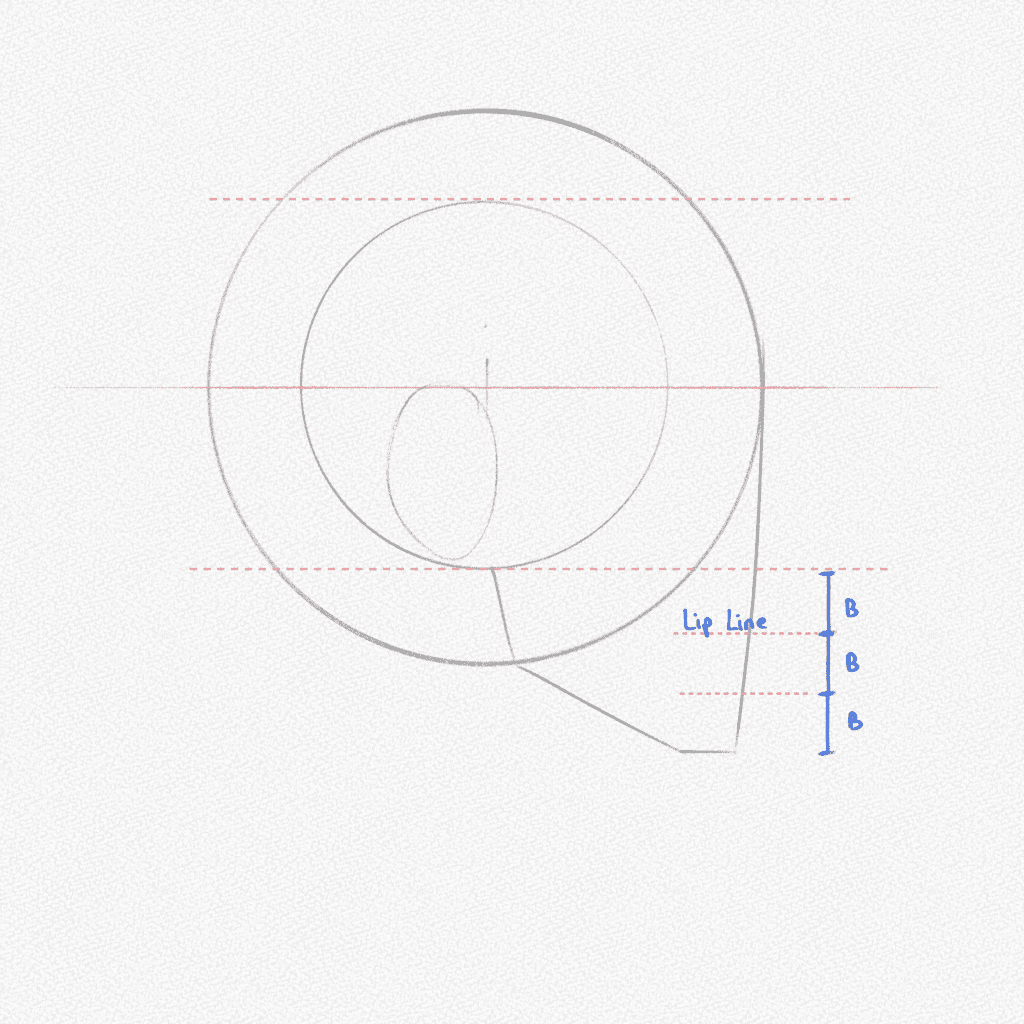
Step 8: Draw a small line
We’re now ready to start drawing the face. Draw a small line under the “brow line,” as shown in the diagram; the line’s angle will define the look of the person’s frown. Some people have deep frowns while some have flat ones, so this will be completely up to you.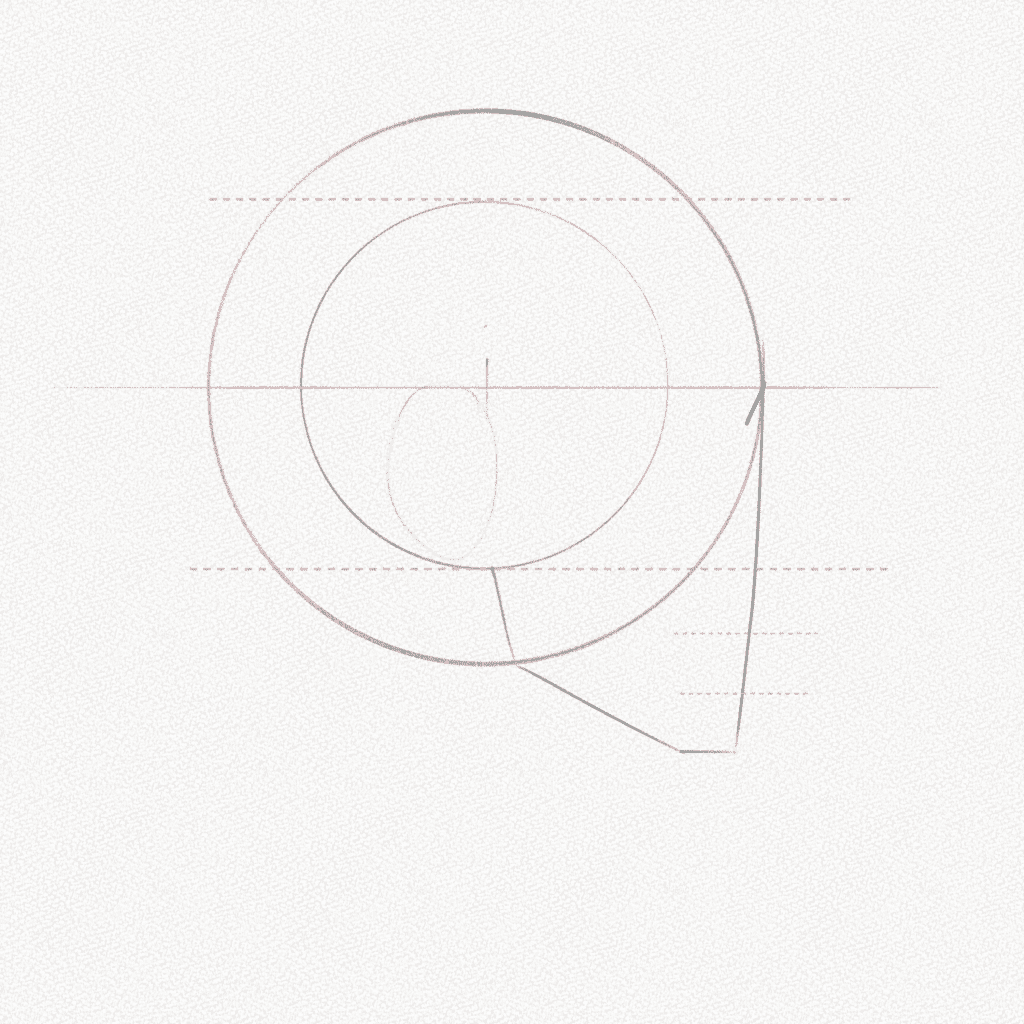
Step 9: Draw two lines
We’re now going for the nose. Draw a long line and then a smaller one to form the shape of the nose. You can check our “How to draw a Nose” article here for a more in-depth tutorial.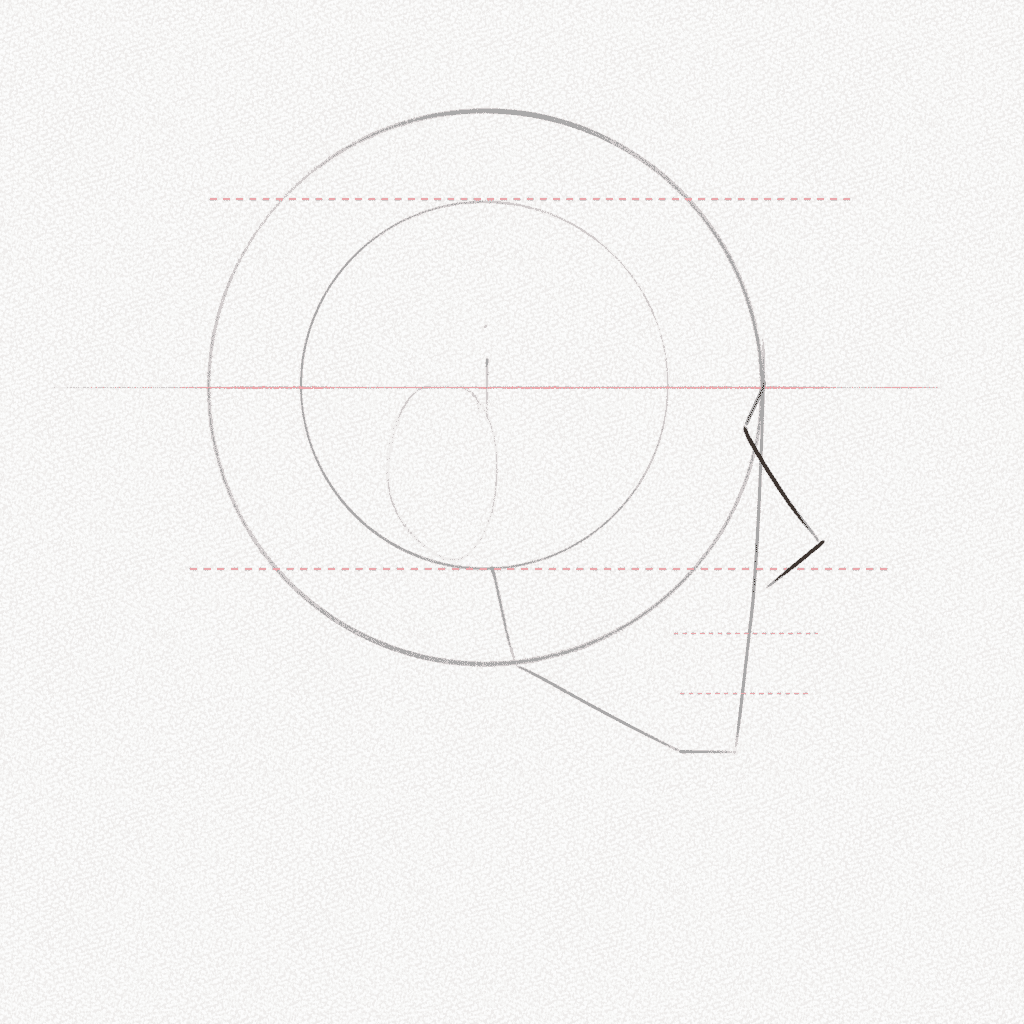
Step 10: Draw two circles
Draw two small circles above and below the lip line. These will give shape to the lips. Make sure the upper lip is slightly ahead of the bottom lip.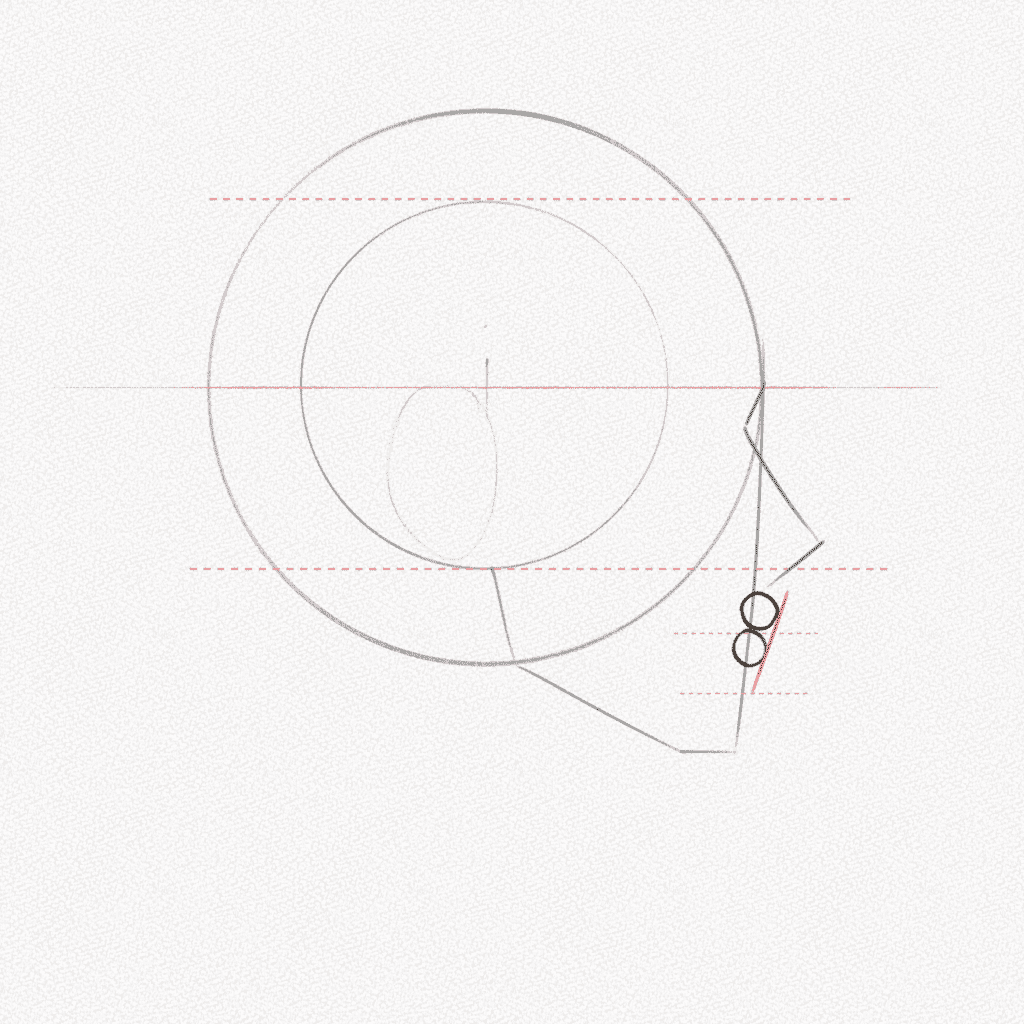
Step 11: Draw the chin
With a flat “S-like” shape, draw the chin, making sure the angle of the chin is at the same height as the lower guideline.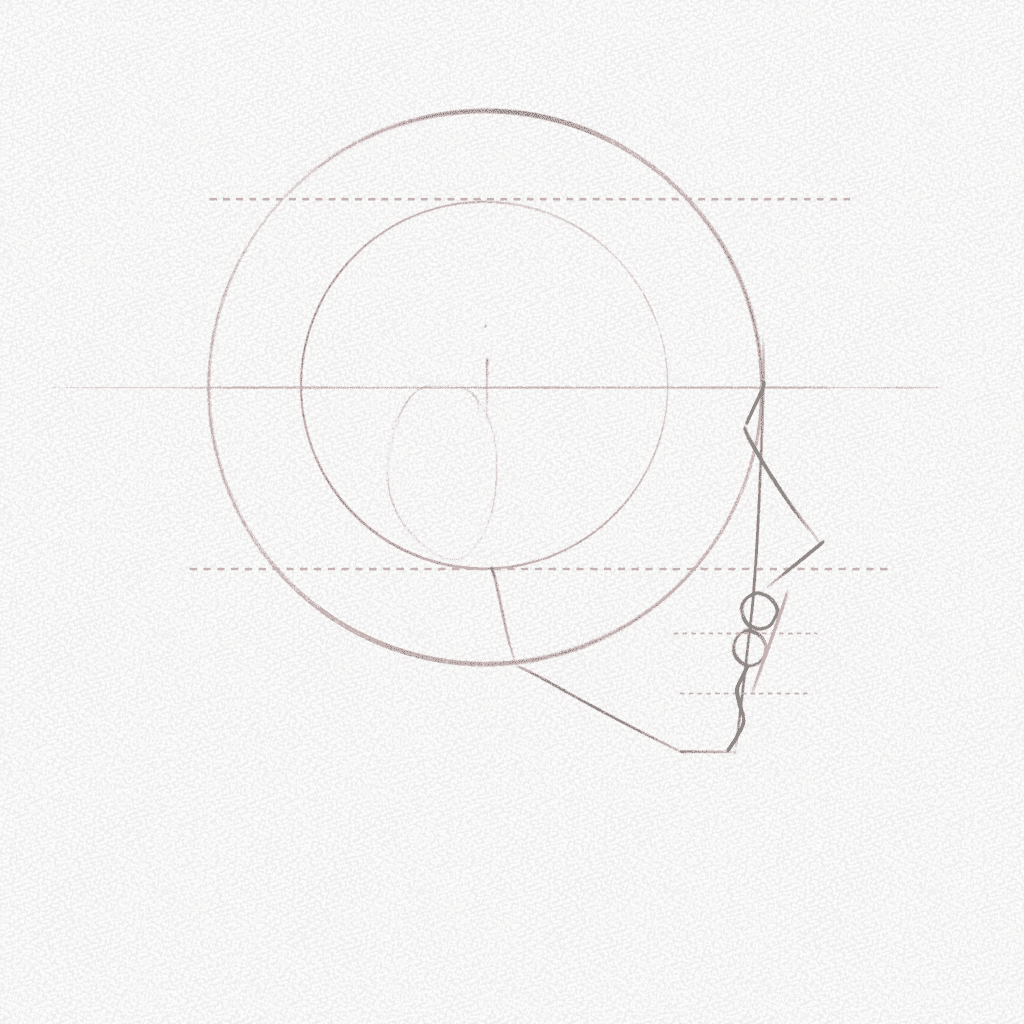
Step 12: Draw the eye
More than drawing the eye, we’ll mark its location on the face. The eye should fall around the same height as the frown angle and shouldn’t pass the inner circle of the head. Use a triangular shape to place on the face.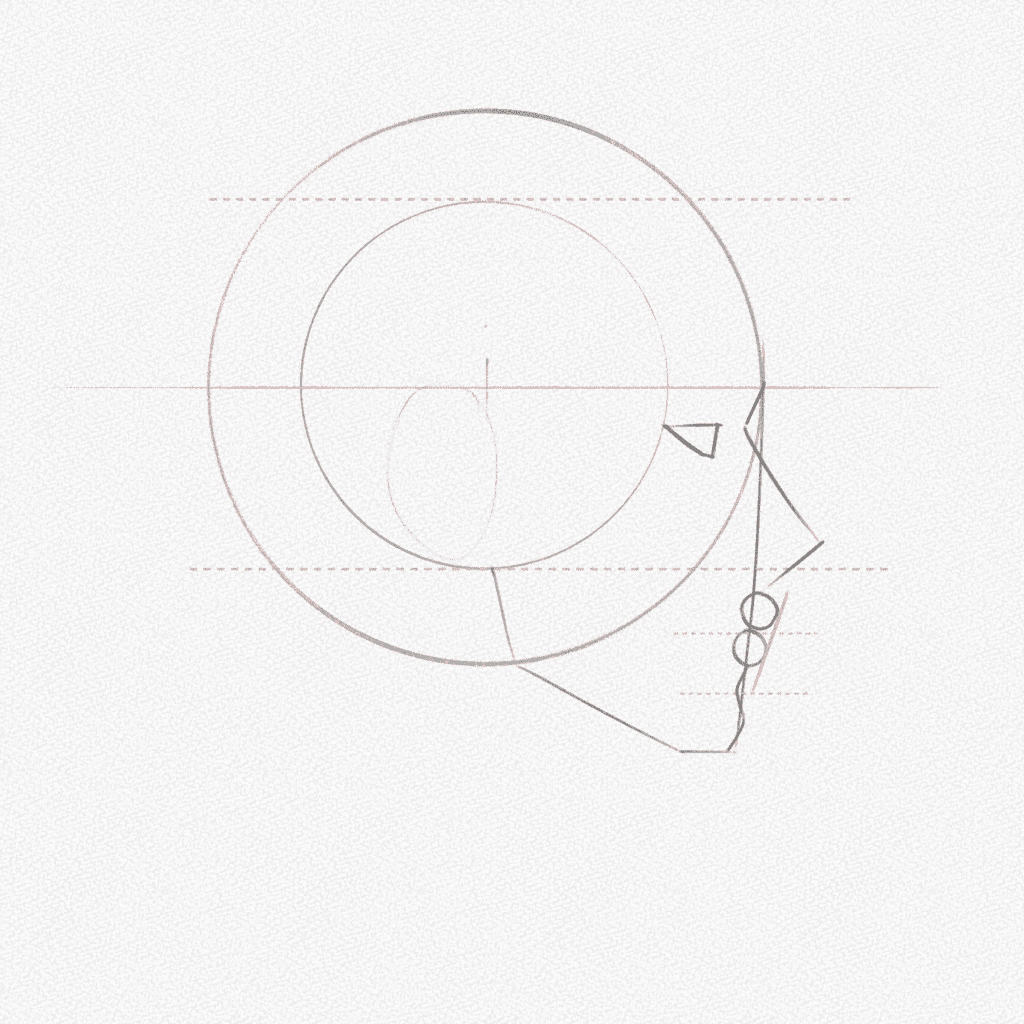
Step 13: Draw the brow
With two angled lines, place the eyebrow. You can change the shape of the brow by changing the angle and position of those lines. However, they shouldn’t be too much into the inner circle, and the pitch should never be too concave unless you want the face to have a strong expression.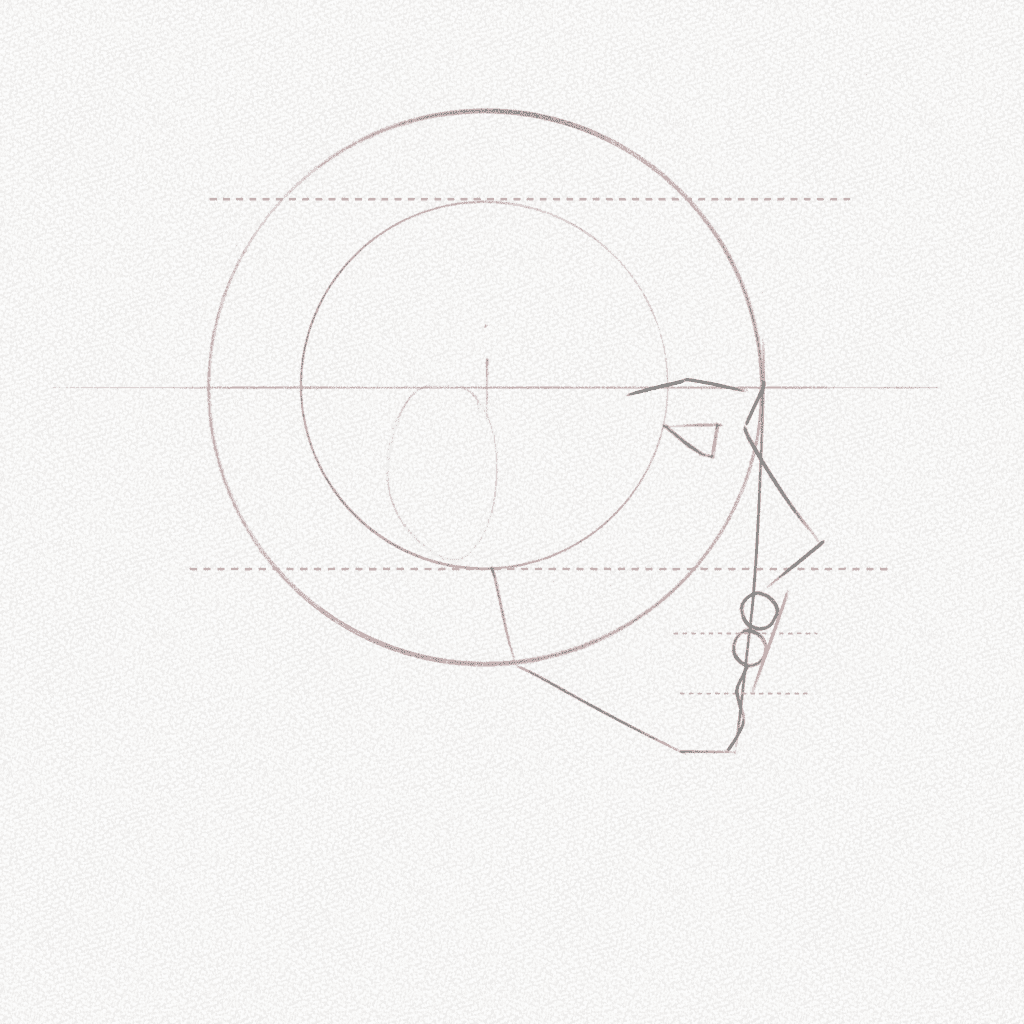
Step 14: Draw the ear
Follow the diagram and draw the shape of the ear. It doesn’t have to be perfect since all ears are different. However, it should follow this general shape and be the size shown below.
Step 15: Draw the neck
Now, add the neck. Add a small line connecting the neck to the chin, and you’re done! You can use a curved line for the back and a “bumpy” line for the front (the size of the Adam’s apple will be up to you, but it’s completely optional).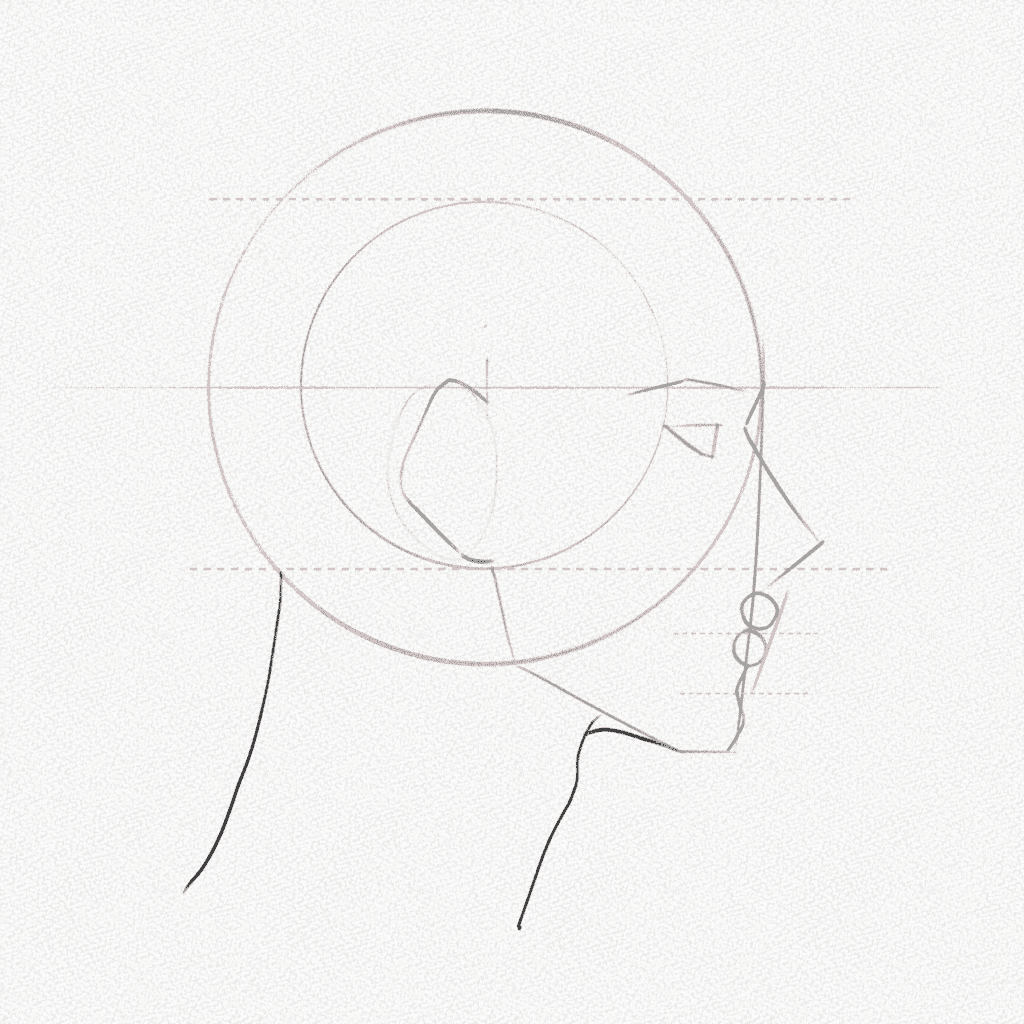
Section 2.- How to draw the head from the side profile
We have pretty much all our structure done. Now it’s time to erase our guidelines and start drawing the facial features!
Step 1: Outline the face
Since the structure is now done, the only thing left is to outline the face. There are parts of the face where the skin is tight and others where there is more flesh. For example, the frown and nose bridge don’t have that much flesh, so the structure’s shape is the same. However, the tip of the nose, the lips, and the chin have more flesh hence the roundness. 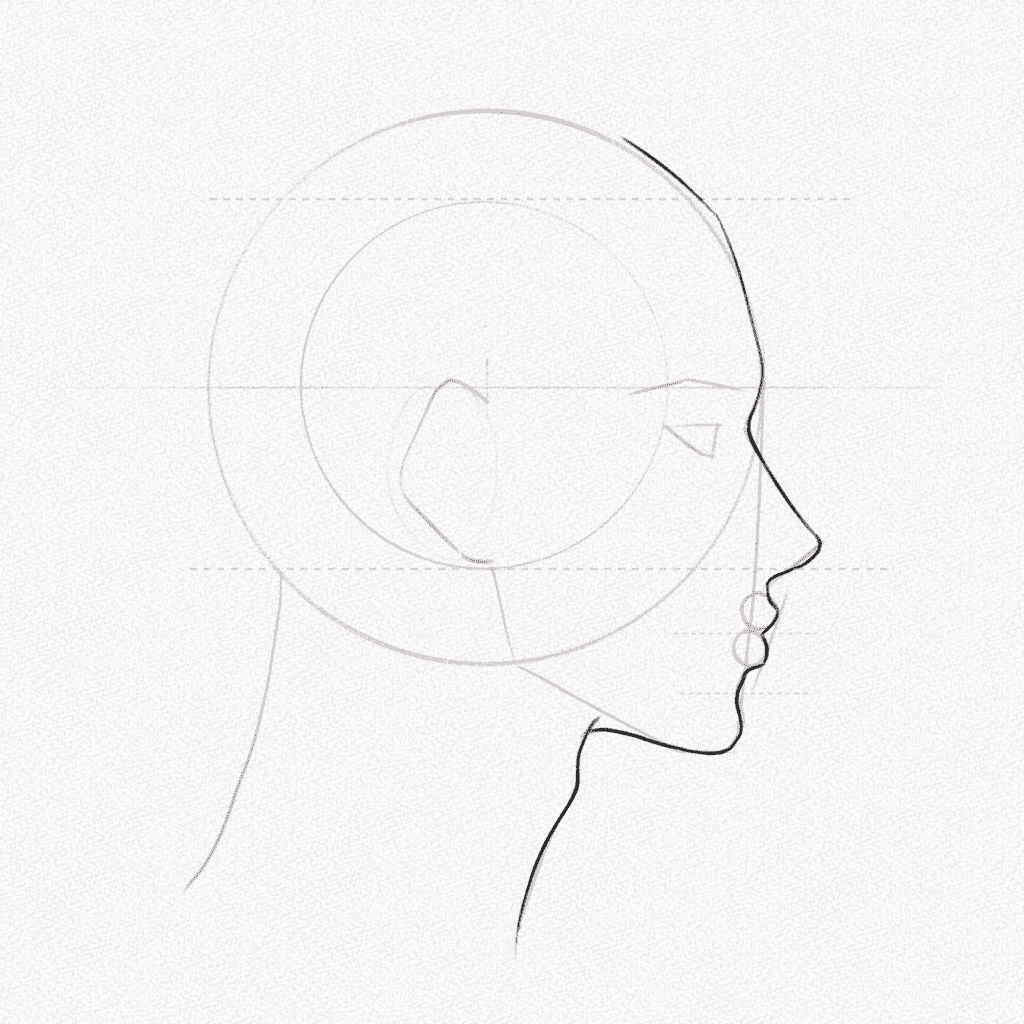
Step 2: Draw the eye and lip line
Now, let’s draw the eye and lip line. For a more in-depth tutorial, check our “How to Draw Eyes” article here. Draw the lip line, pulling the corner a little bit down.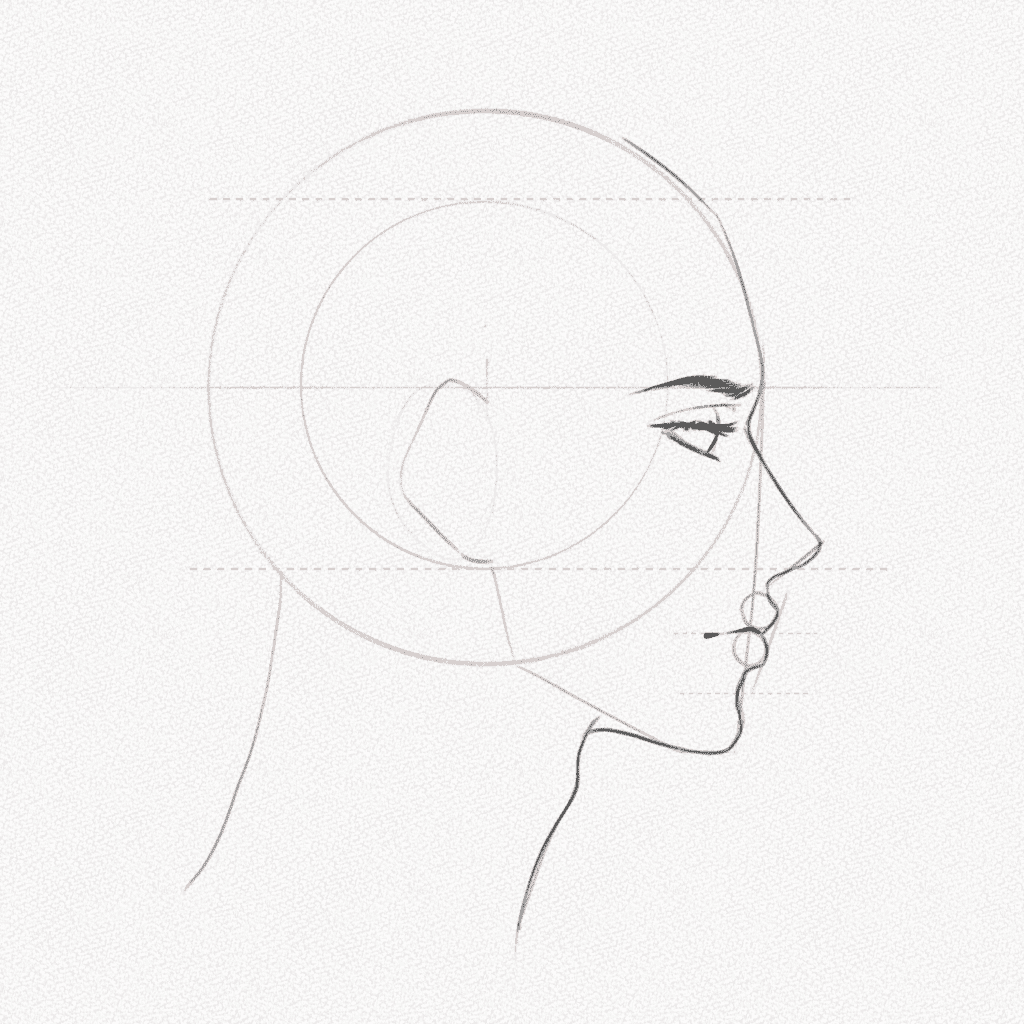
Step 7: Complete the head and draw the jawline
Now, complete the head. Check how I’m not following the circle perfectly but giving it a more irregular shape. Draw the jawline and ear exterior too.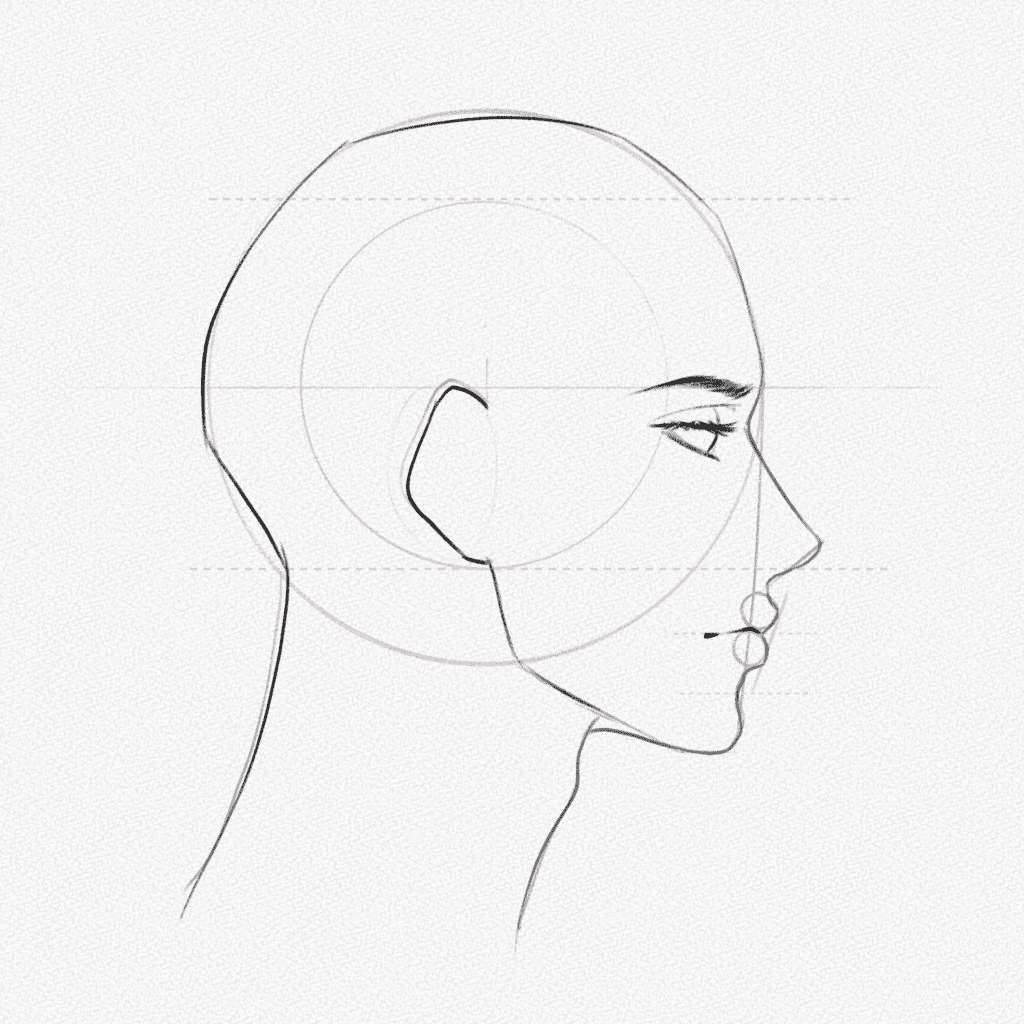
Step 8: Draw the hairline and complete the ear
Draw the hairline, follow your guidelines to place it correctly, and draw an elongated “Z” at the side. Complete the ear following the diagram.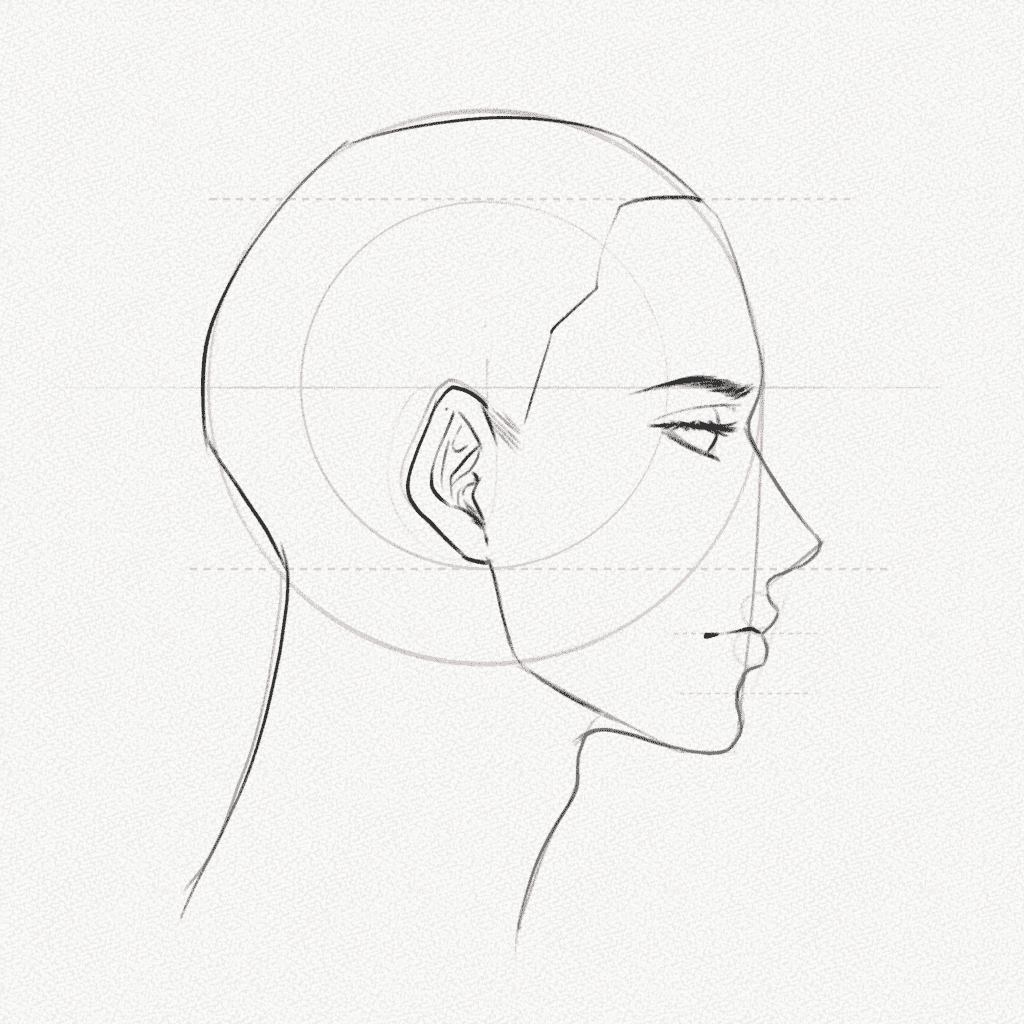
Step 9: Draw the iris and nostril
Draw the iris and add the nostril to the base of the nose. Carefully erase your guidelines and get ready to shade.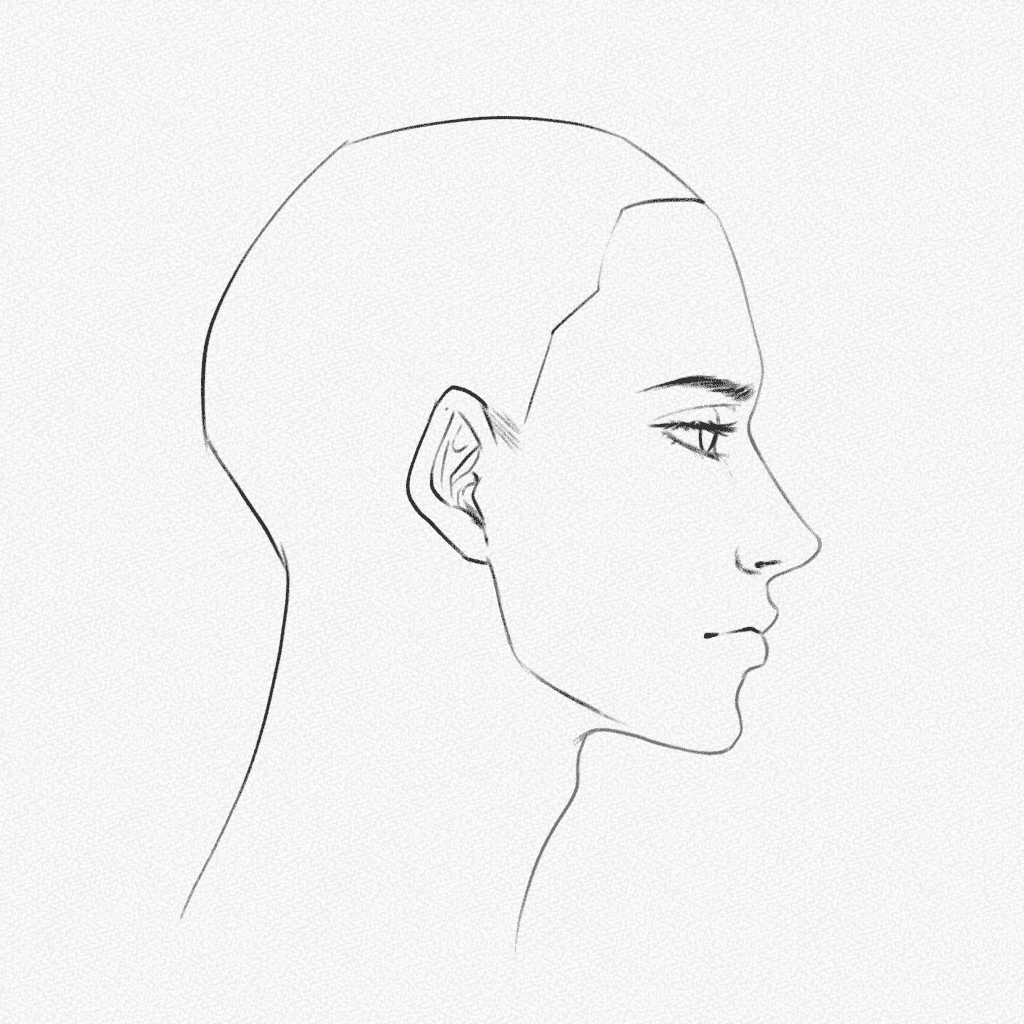
Section 3.- How to shade the head
For this section, we are going to use the 4B pencil, Kneaded eraser, 2H pencil, and your blending tools!
Step 1: Shade the facial features
Shade the facial features using what we learned in our previous tutorials. You can also use the diagram below to guide you or think about which areas are the darkest and which ones are most hit by the light.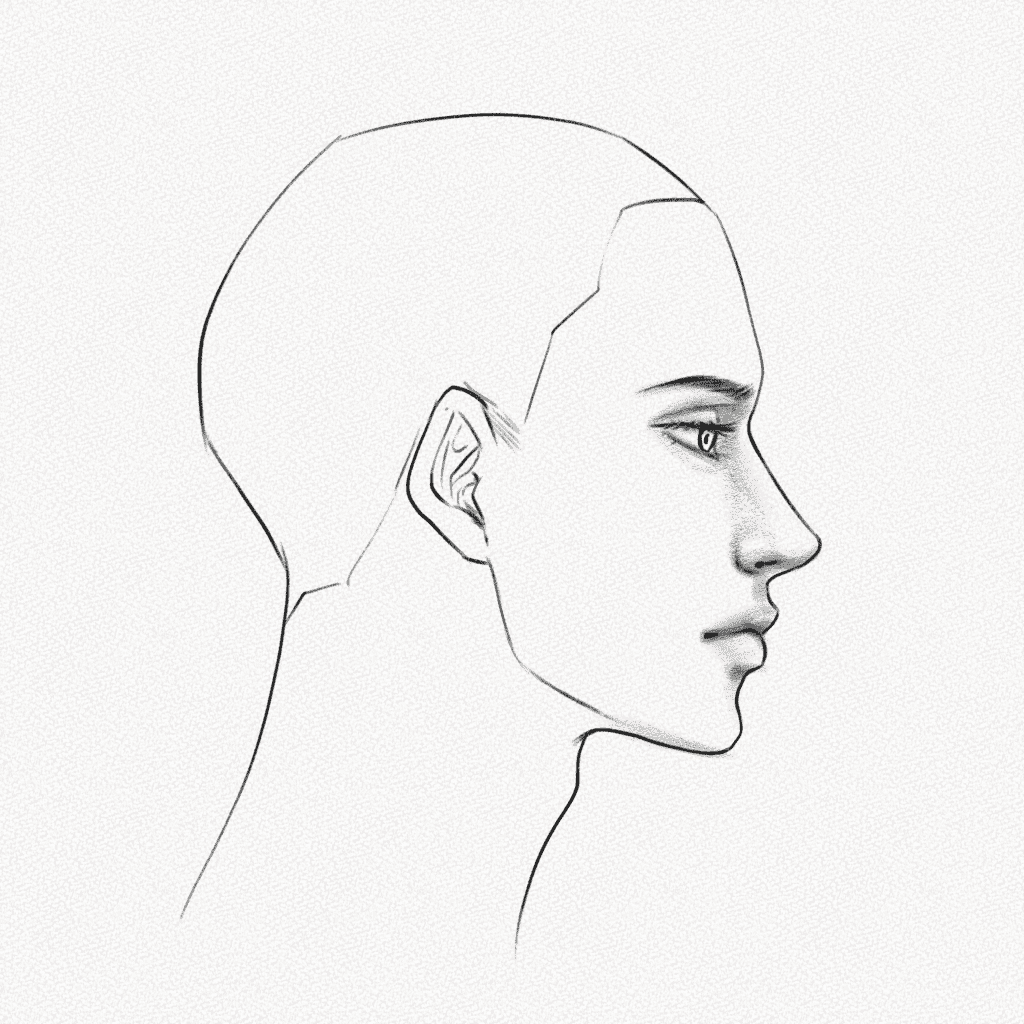
Step 2: Shade the face
Follow the diagram to shade the rest of the face. Fill the highlighted areas with your 2H graphite pencil and blend. Then add a bit more graphite to the jaw and neck.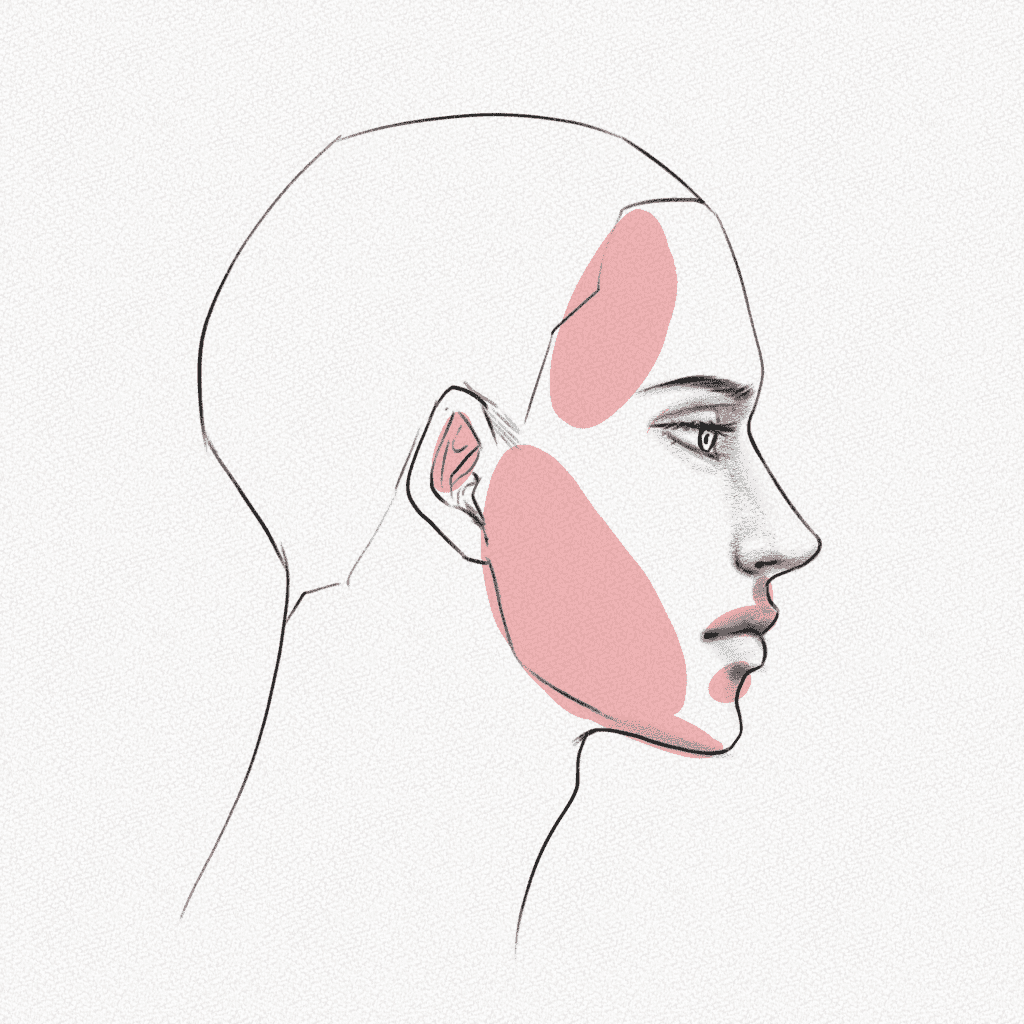

Step 3: Blend and add details
Use your blending tools to blend the graphite on the face. Add some more graphite to the darkest parts of the face and the iris. Leave a blank spot as a highlight and shade the nostril a bit more.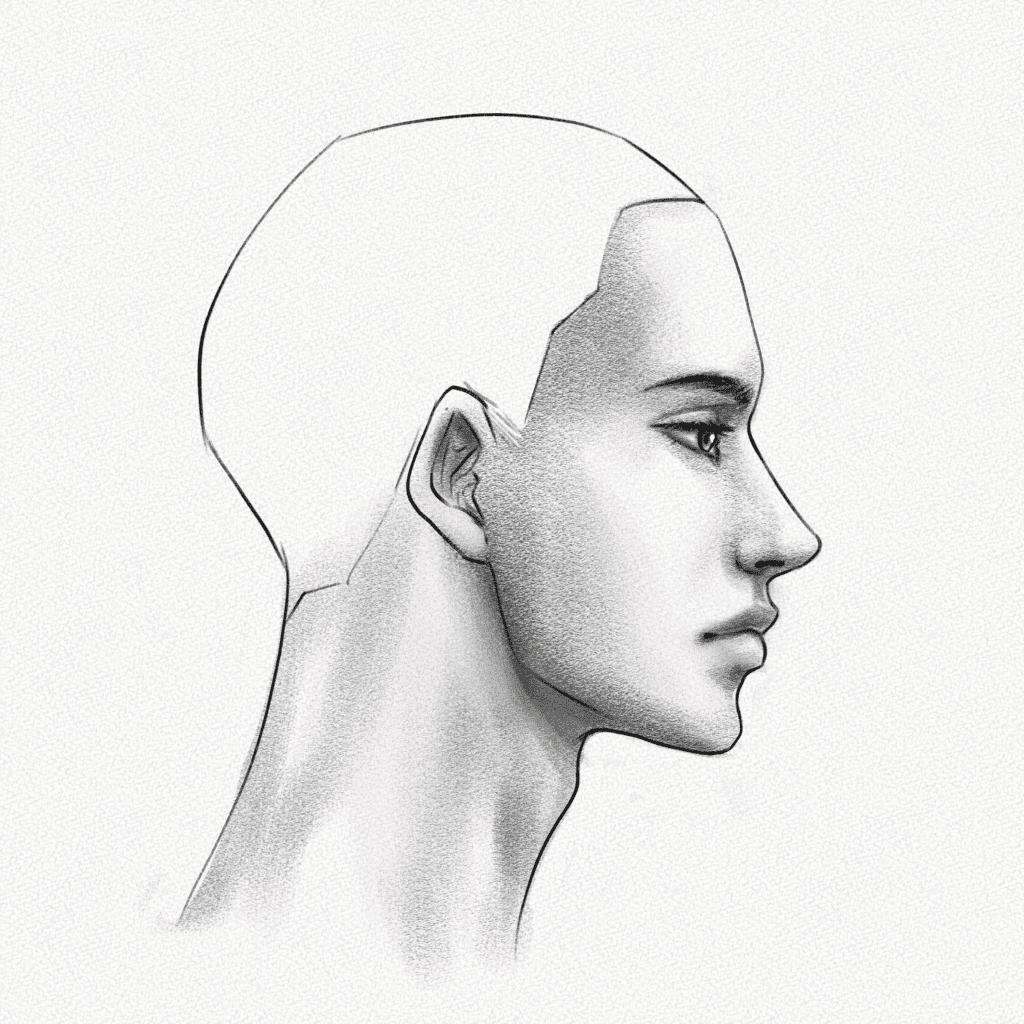
Step 4: Add the hair
For the hair, we’re going for a simple buzz cut. Fill the area with several layers of graphite, making the head’s top lighter than the head’s sides and back.
And that’s it. You’re done.
Thank you for following this tutorial. You did great!
I hope you learned something new today and that now you have a better grasp on how to draw and shade the head from the side profile.
Now you can make your own drawings by changing the facial features to your liking and playing a bit with the proportions.
Until next time!