The human face is fascinating. There is no perfect combination of features or proportions since beauty lies in the different textures, shapes, and volumes that make us unique.
Every part of the face creates a perfect combination with the others, and trying to use the same tutorial for different people it’s not going to work.
That’s why before trying to draw anything, we need to learn first about the structure behind it, especially if we’re talking about facial features.
What you’ll learn in this tutorial
- The anatomy and structure of the nose
- How to draw a nose from the front
- How to draw a nose from the side
- How to draw a nose from a ¾ angle
Materials Needed for this guide:
- A piece of paper
- A graphite pencil from the number 2H
- A graphite pencil from the numbers 2B to 4B
- A soft blending tool (brush/ towel paper)
- A regular eraser and an eraser for details (Tombow Zero Mono)
- A kneadable eraser
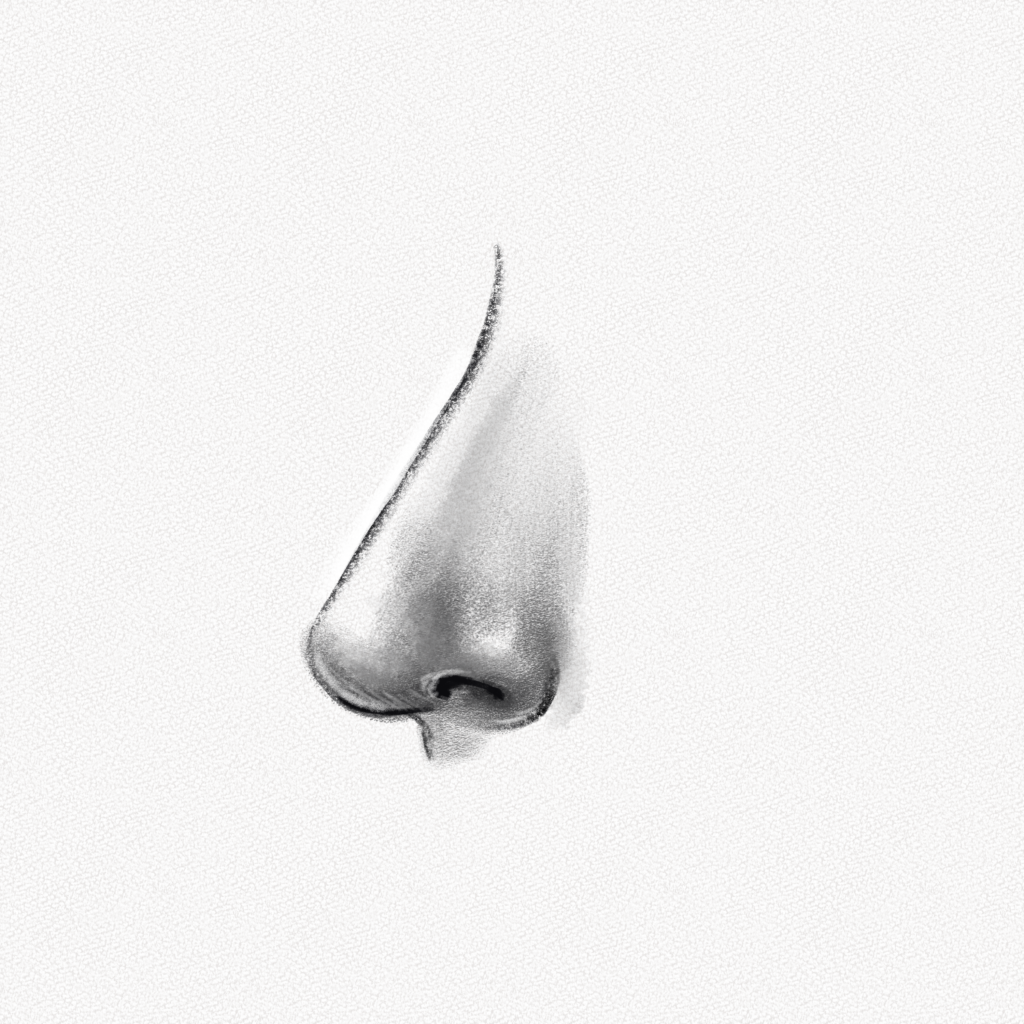
The nose you’re going to draw:
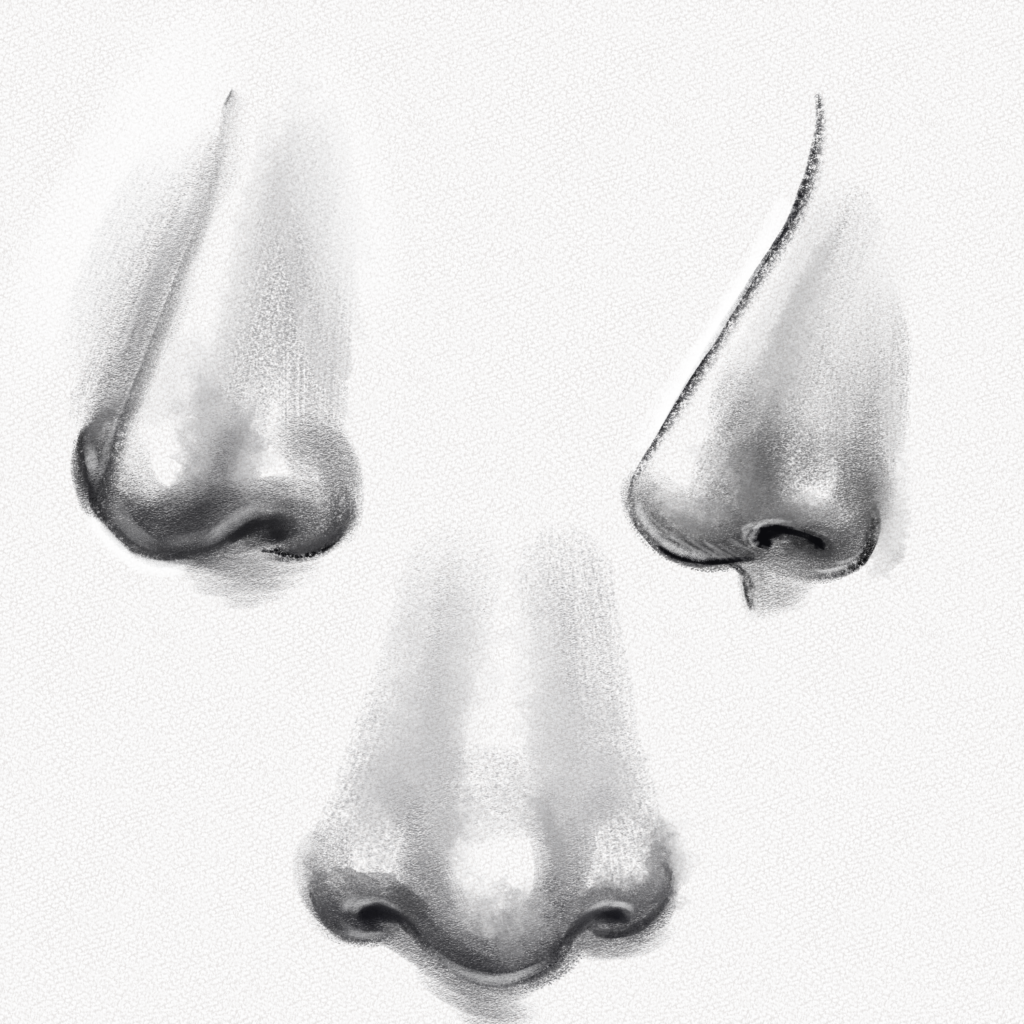
And here are all the steps we’ll walk you through:
Section 1: Structure of the Nose
Anatomy
If we see the anatomical structure of the nose, we’ll see a lot of planes and shapes that compose the nose. One of the most critical aspects of the nose is the nose bridge. The nasal bone connects to the septal cartilage and the alar cartilage, and according to the position, the shape can change from a pointy nose to a curved nose, etc.
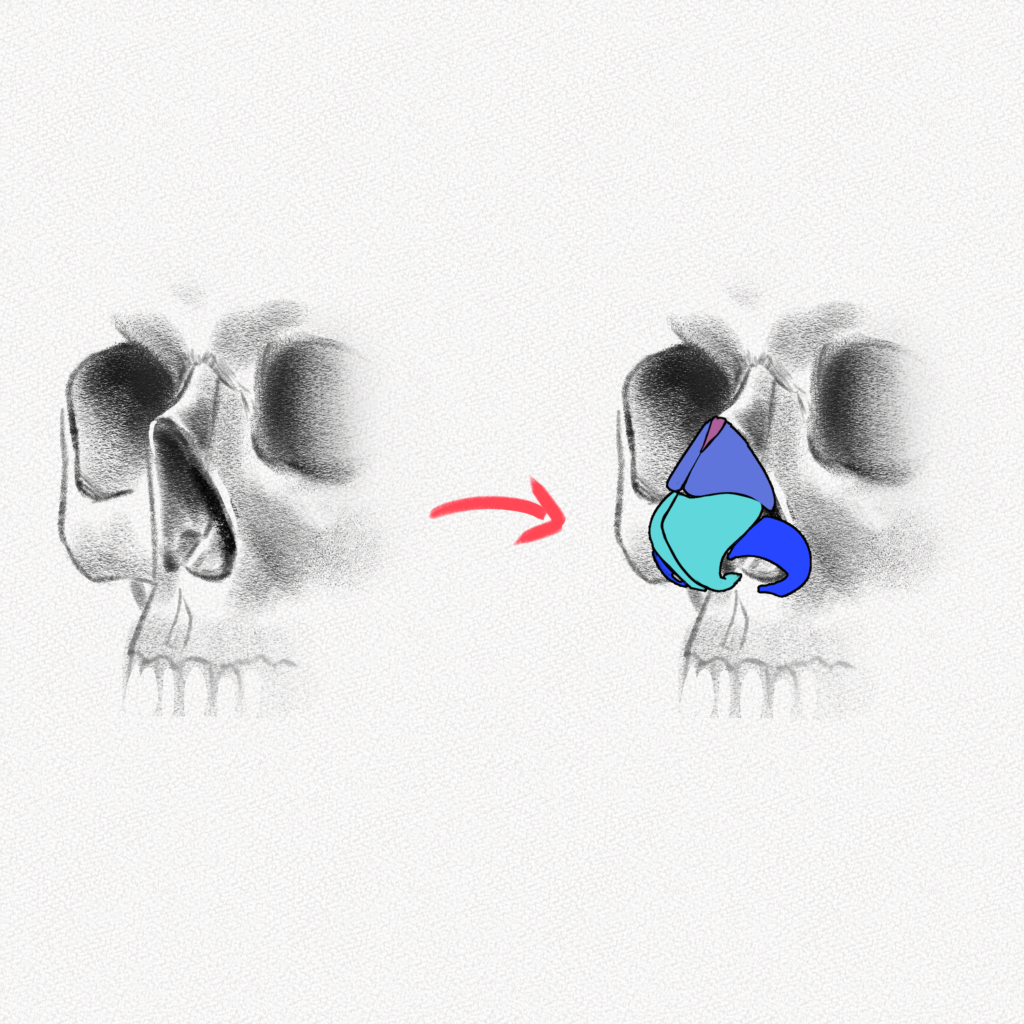
Planes
We can break down the nose into basic planes to know where the light and shadow go. Even if the light moves, we can use the same planes to shade the nose at any angle and light setting.
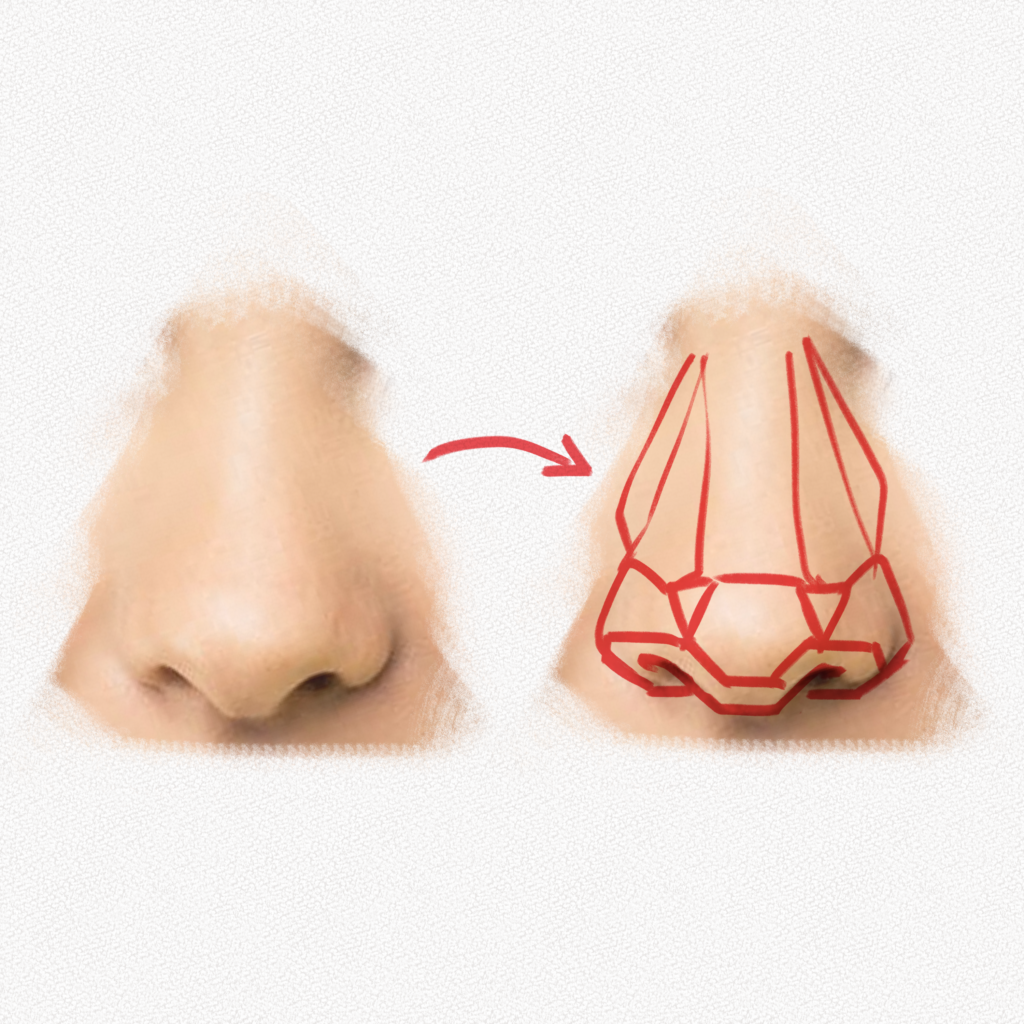
However, it does seem complicated having to draw the structure each time, so just keep it as a guide for the future.
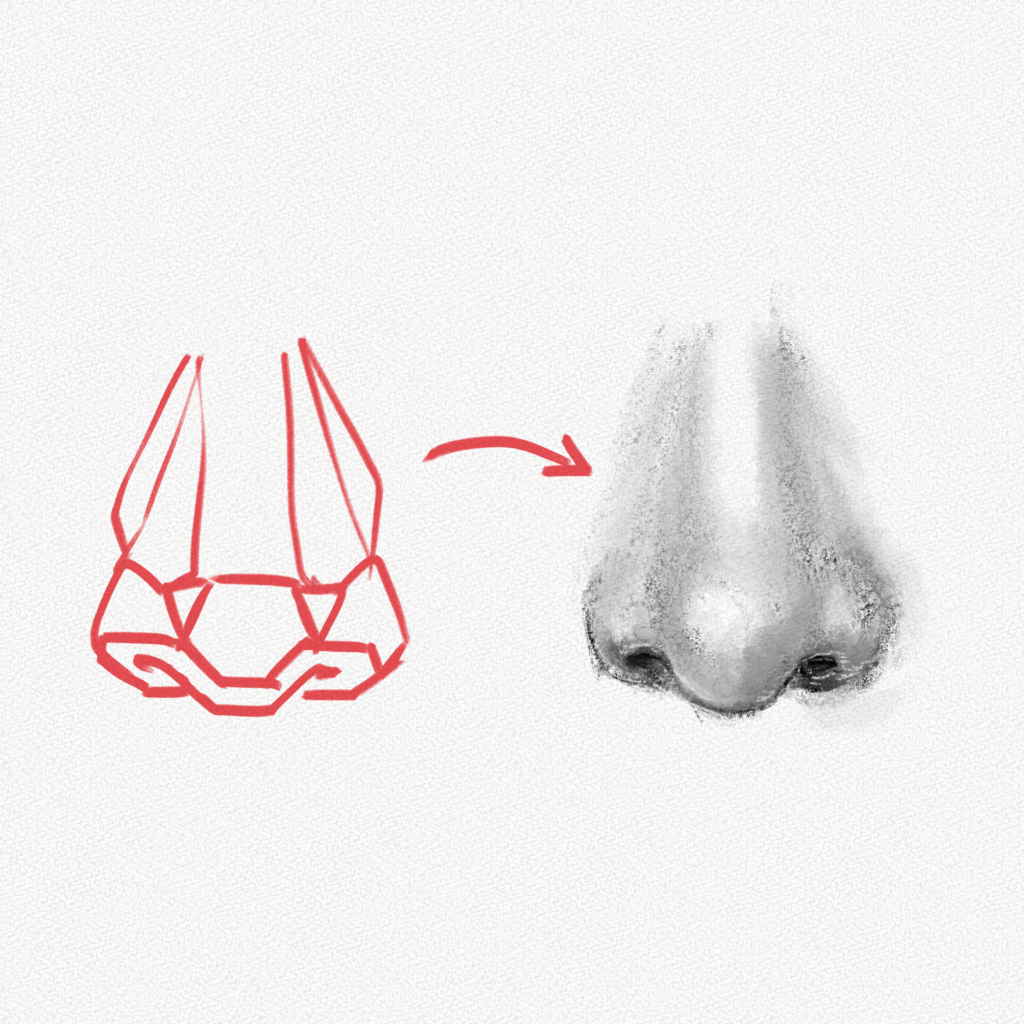
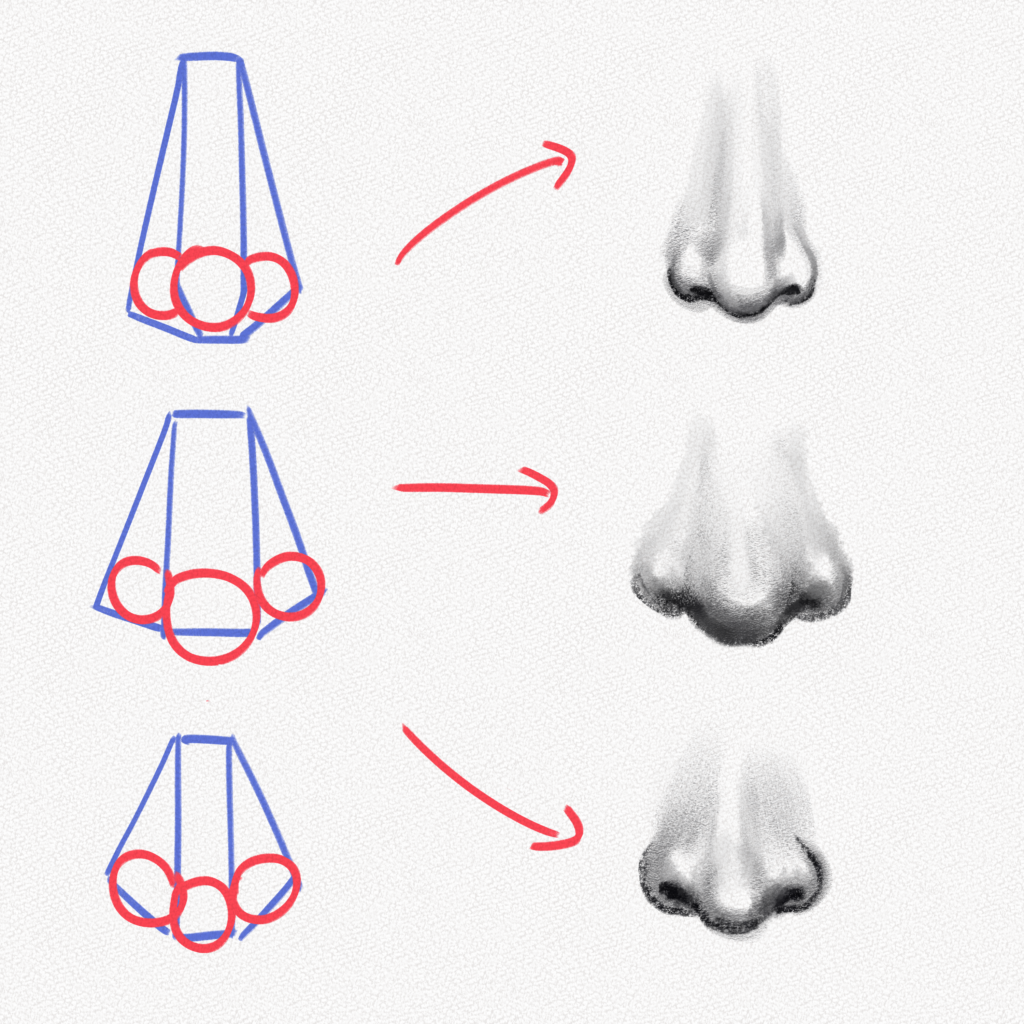
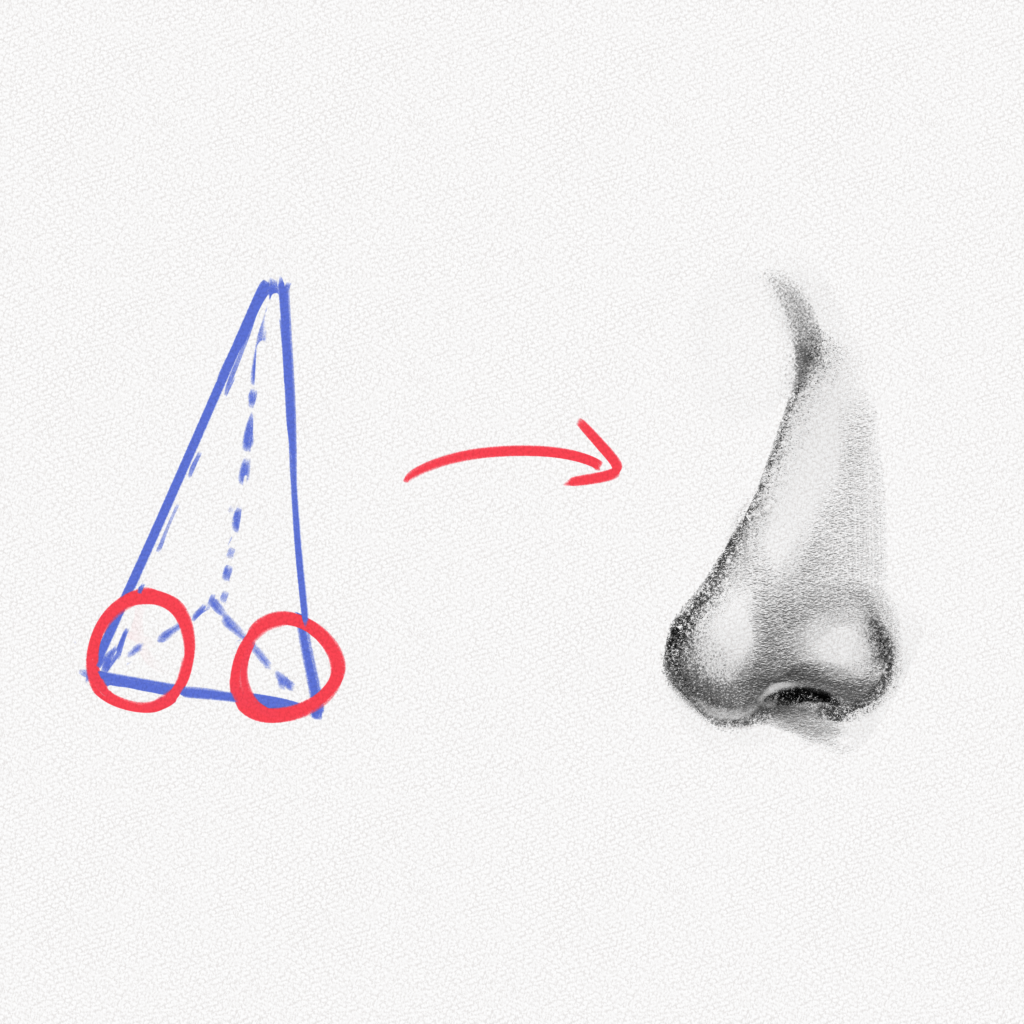
Basic shapes
In order to easily draw the nose, we need to take the structure and simplify it to its basic shapes. Here we can see how that complex structure turns into a much simpler and easy-to-remember shape that we can use to draw the nose from any angle.
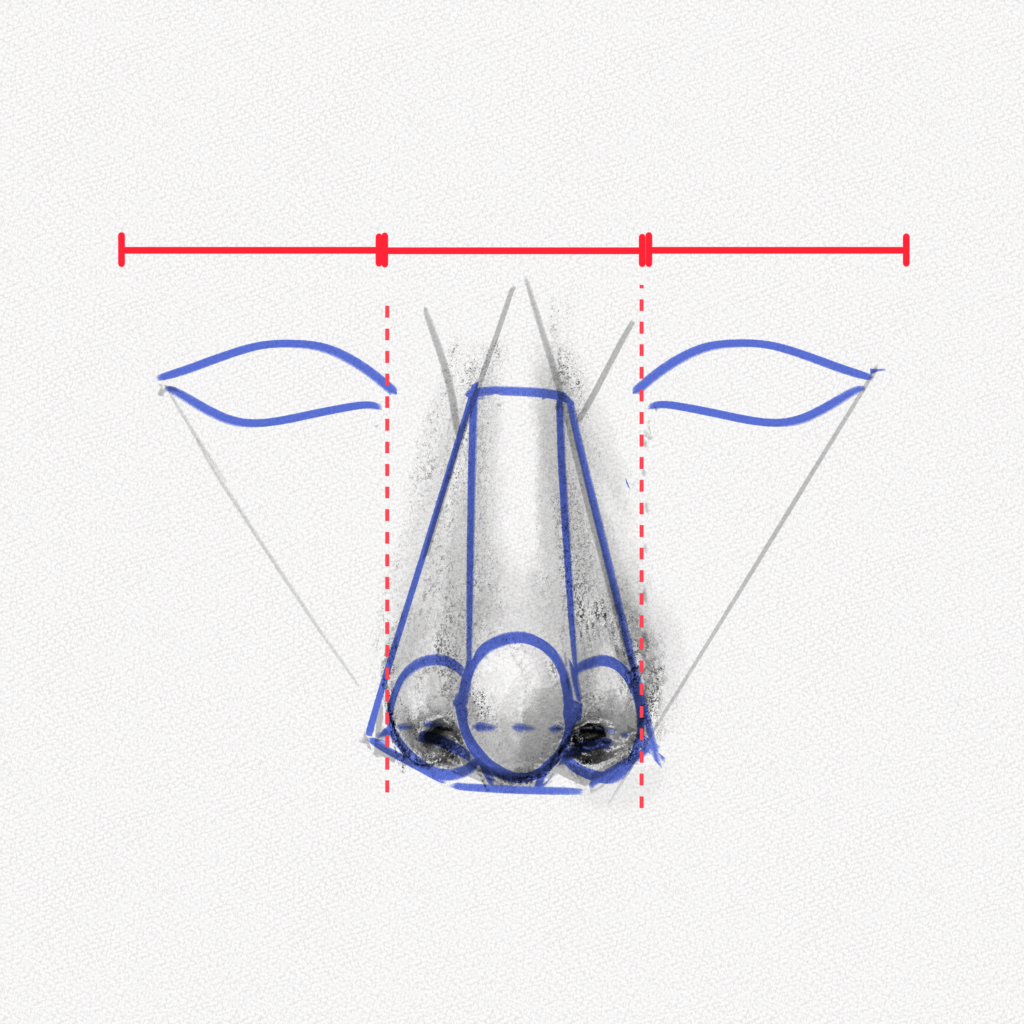
The nose and the face
Using our basic shapes, we can also easily position the nose in the face as long as we keep the proportions shown below.
Different types of noses
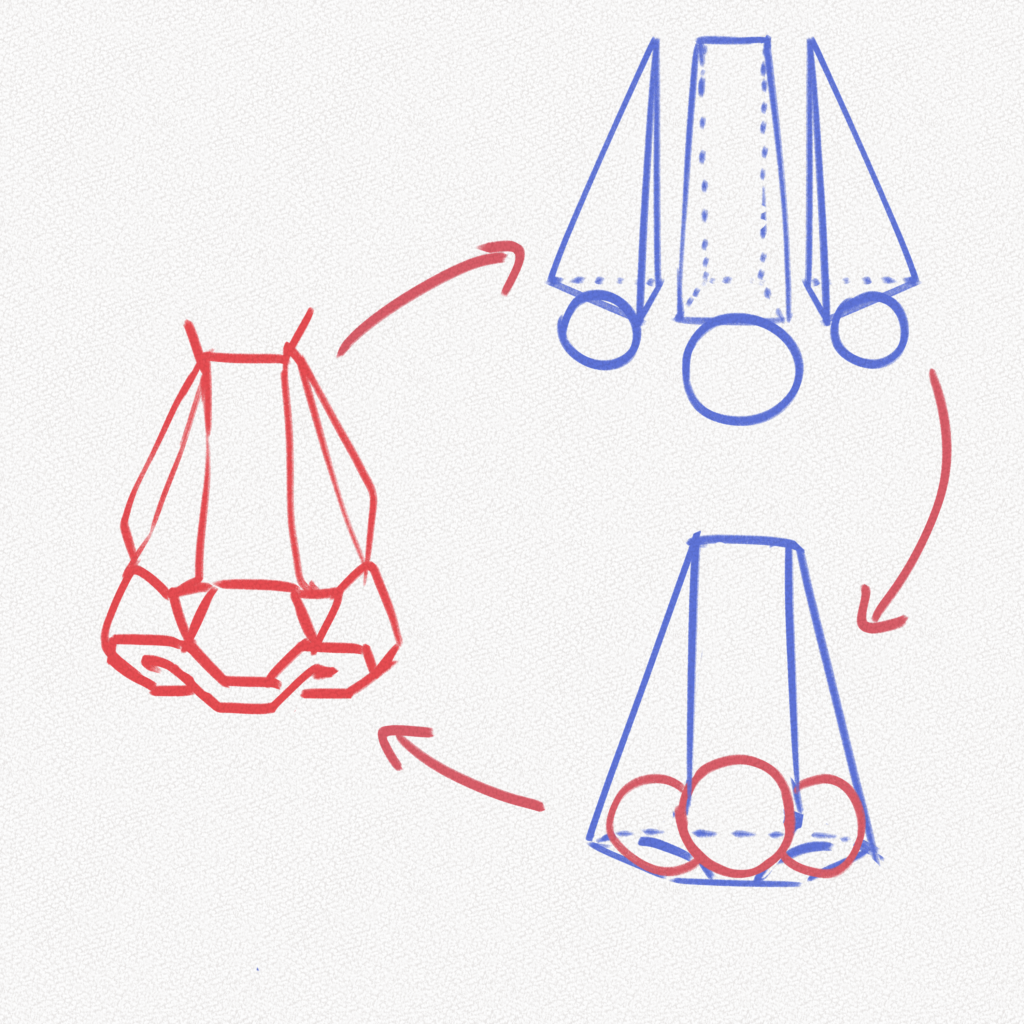
Every nose is different, and using the same mold for every nose is not right. An easy way to add variety to the nose is to change the basic shapes.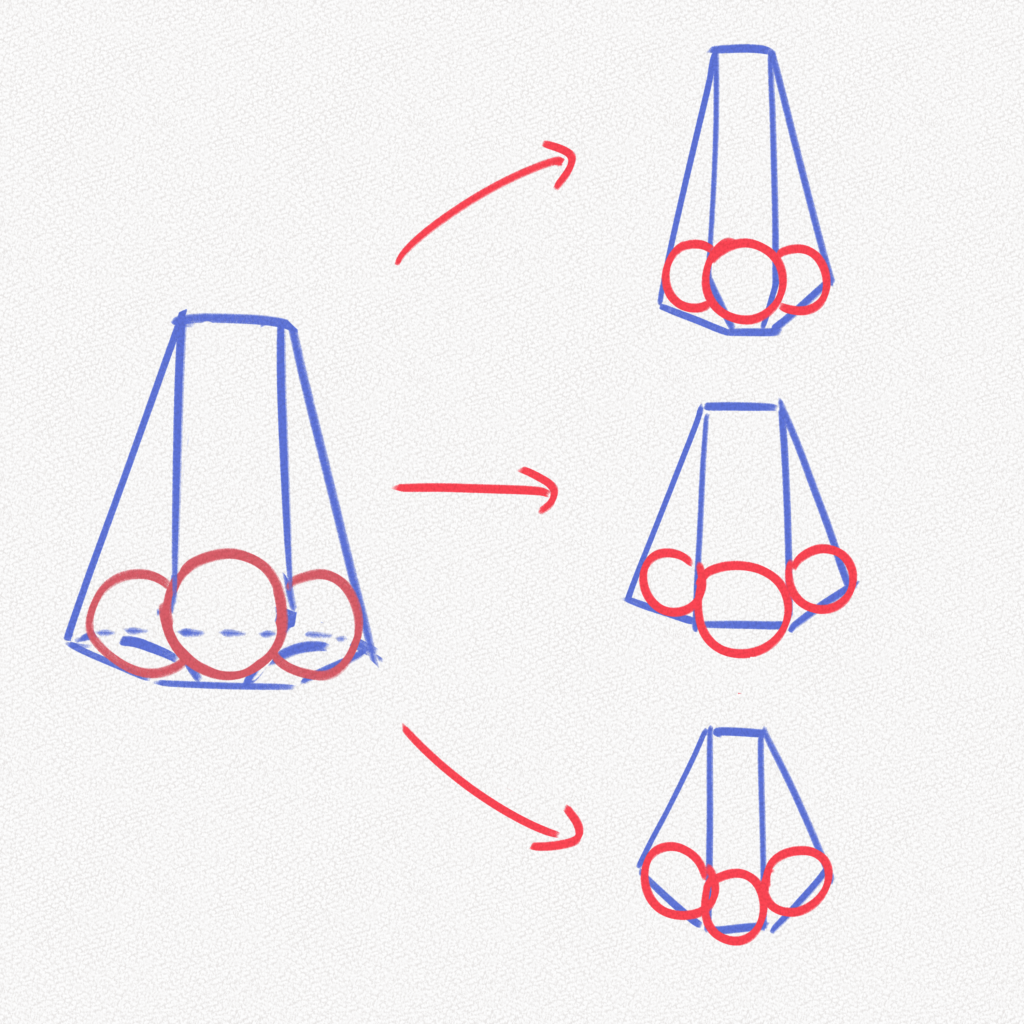
You can either thicken or slim out the angular shapes and change the sizes of the spheres that represent the tip and alae to make different noses.
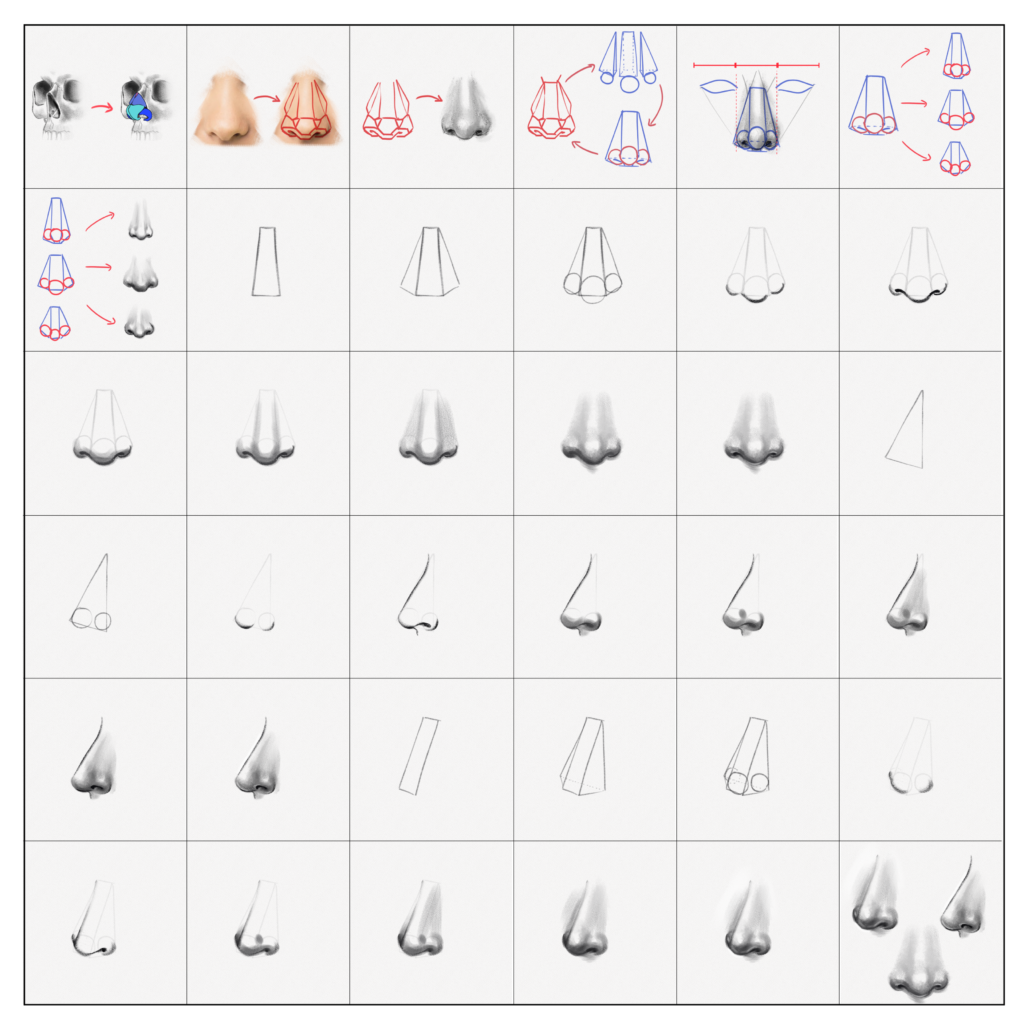
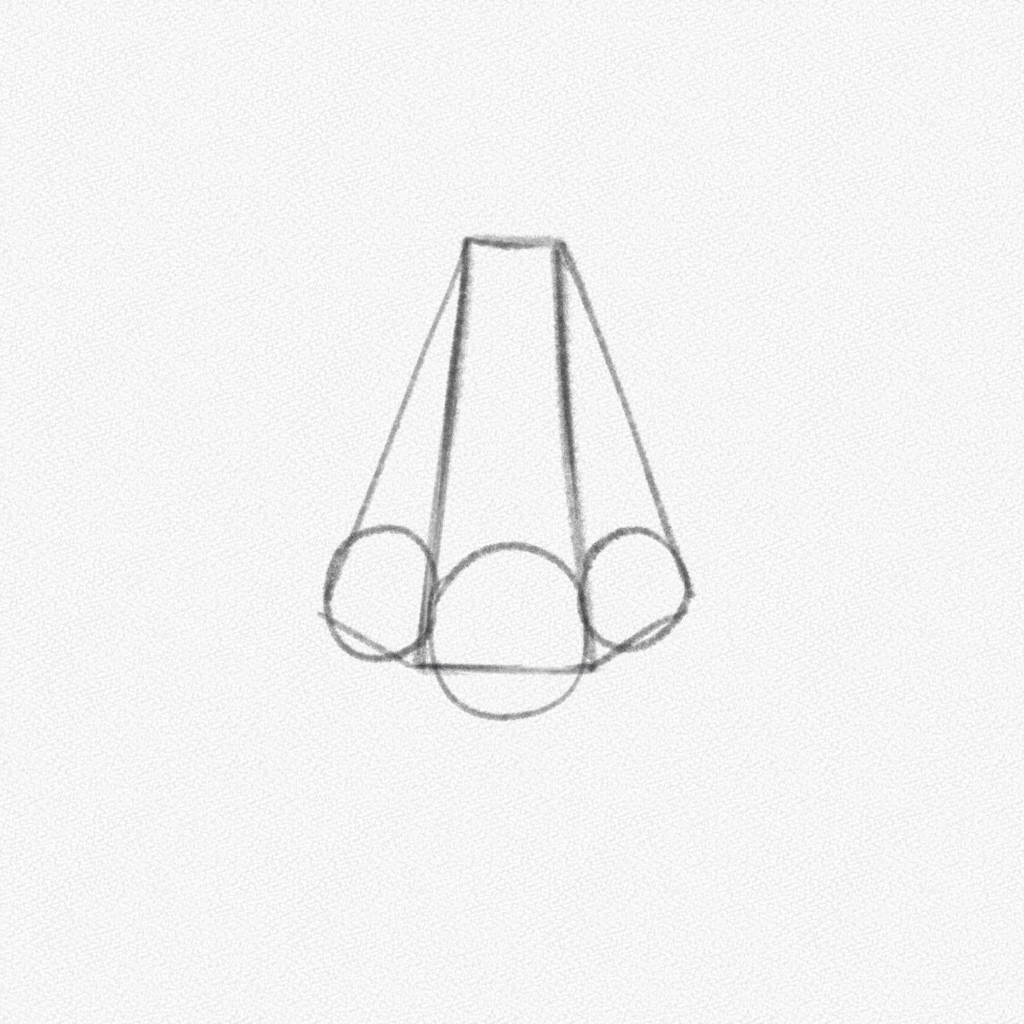
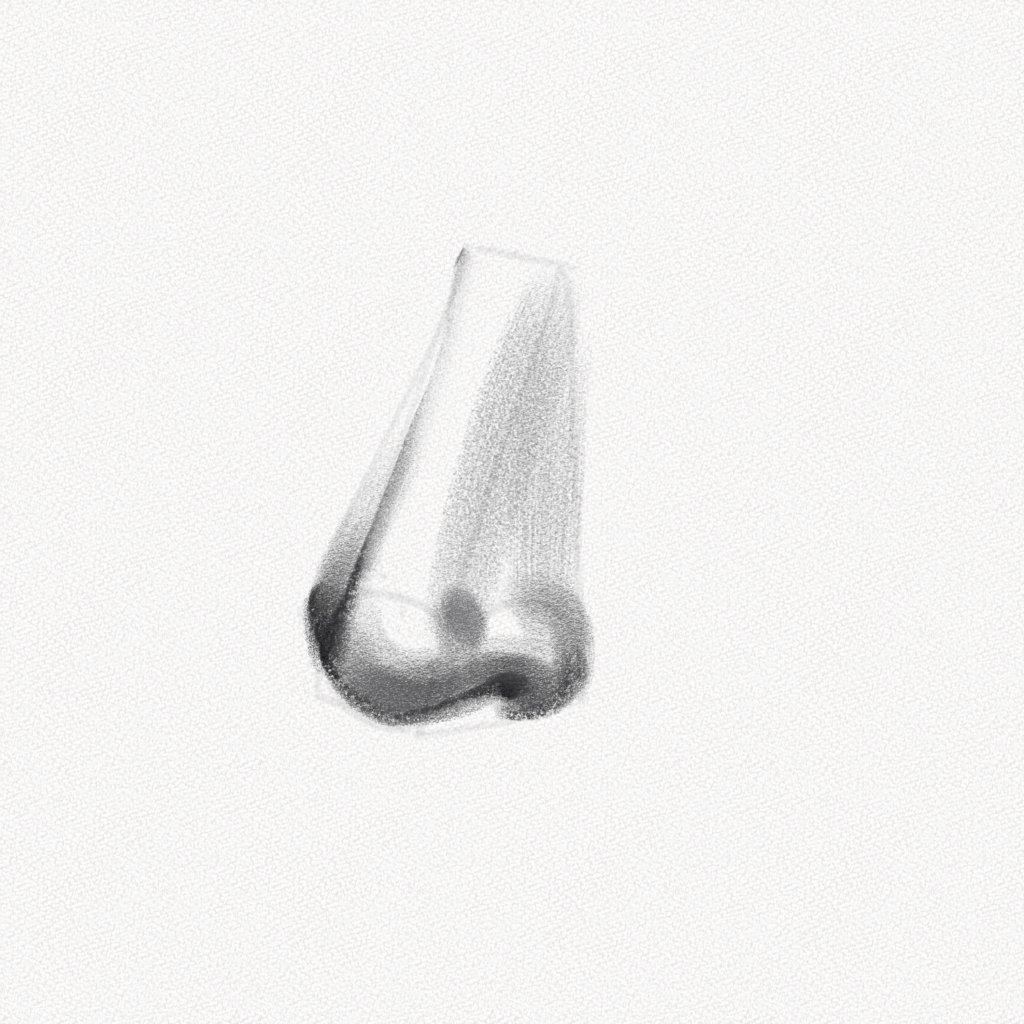
How to draw a nose from the front
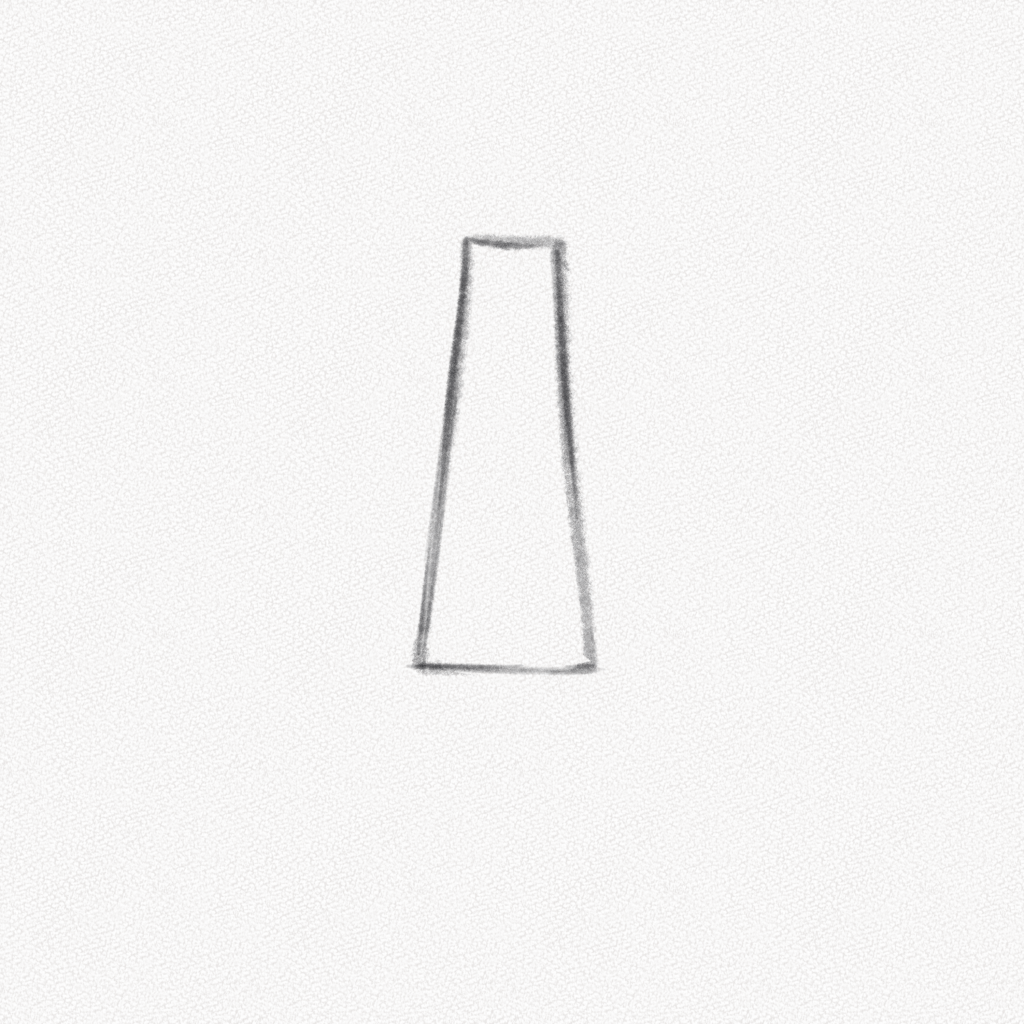
Step 1: Sketch the front
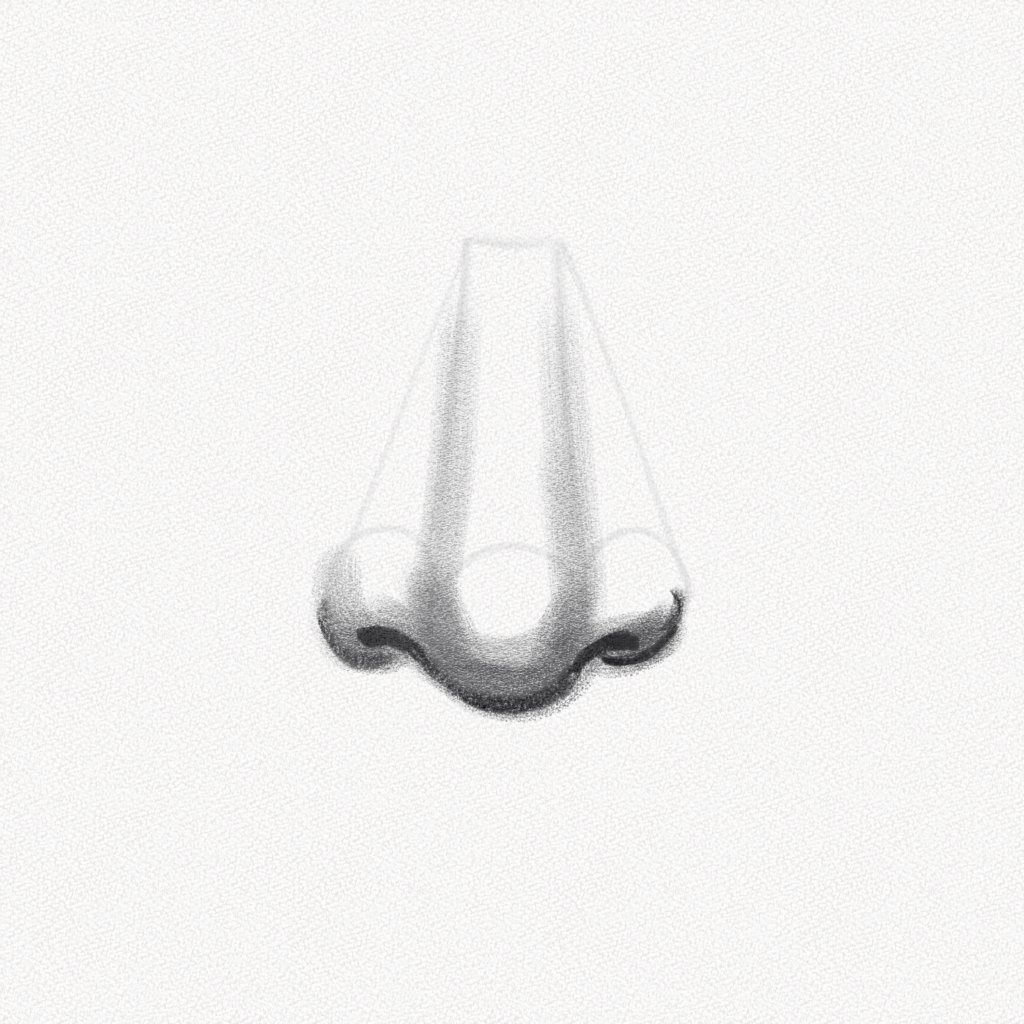
We are going to sketch the basic shapes for the front of our nose. It is s simple angled rectangle. Draw it according to the size you want to give your nose.
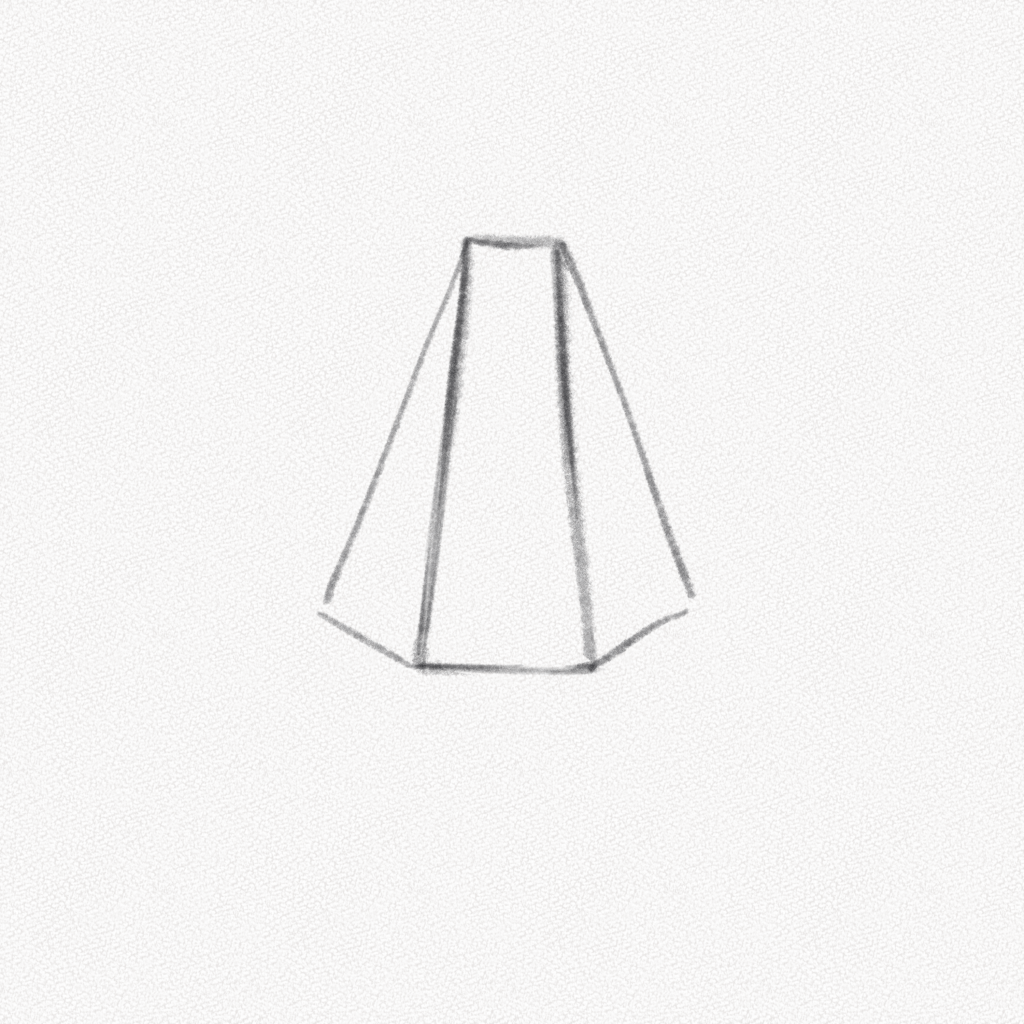
Step 2: Add the sides
Add two triangles for each side. Remember, those will define the width of your nose. Try to make them proportionate to the nose bridge.
Step 3: Add three circles
Add the circles that will determine the size of the nose tip and ALAE. To change the nose, you can move the circle’s position in order to make it a high nose.
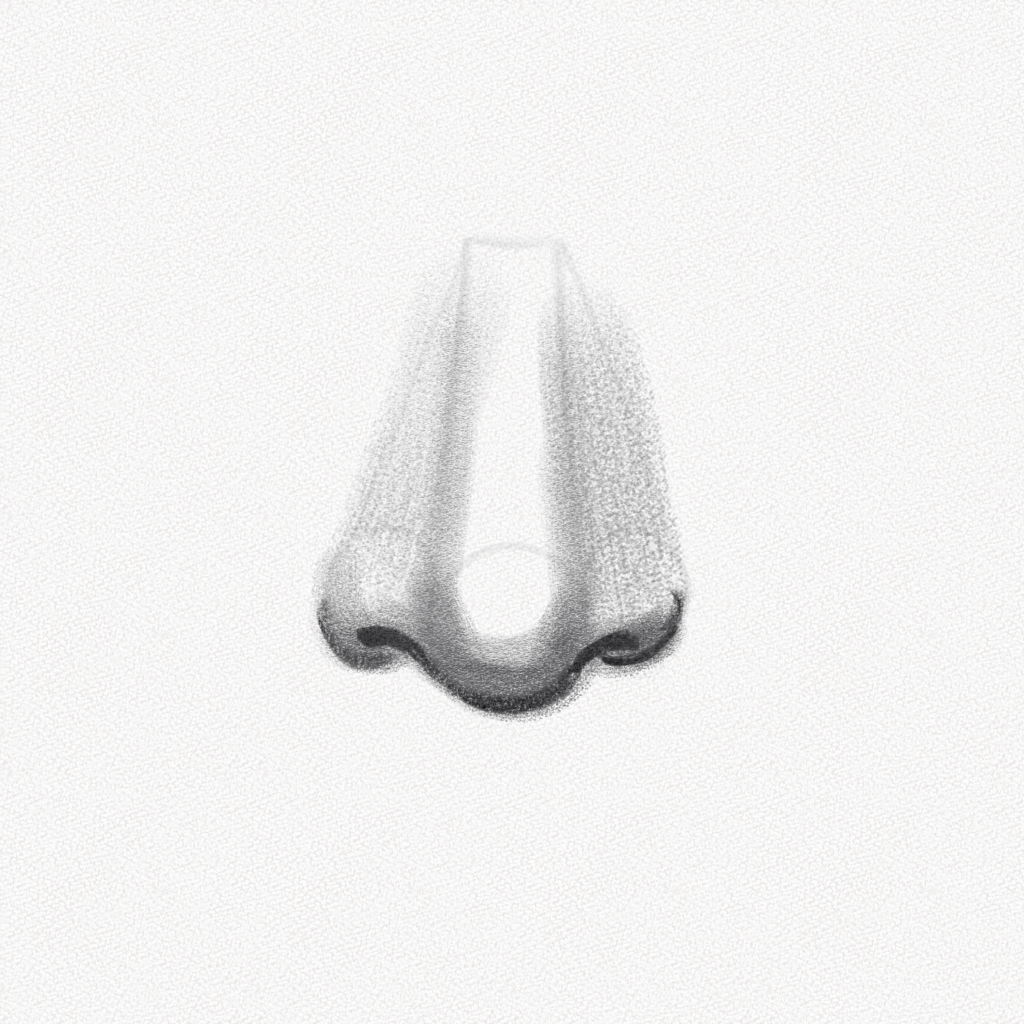
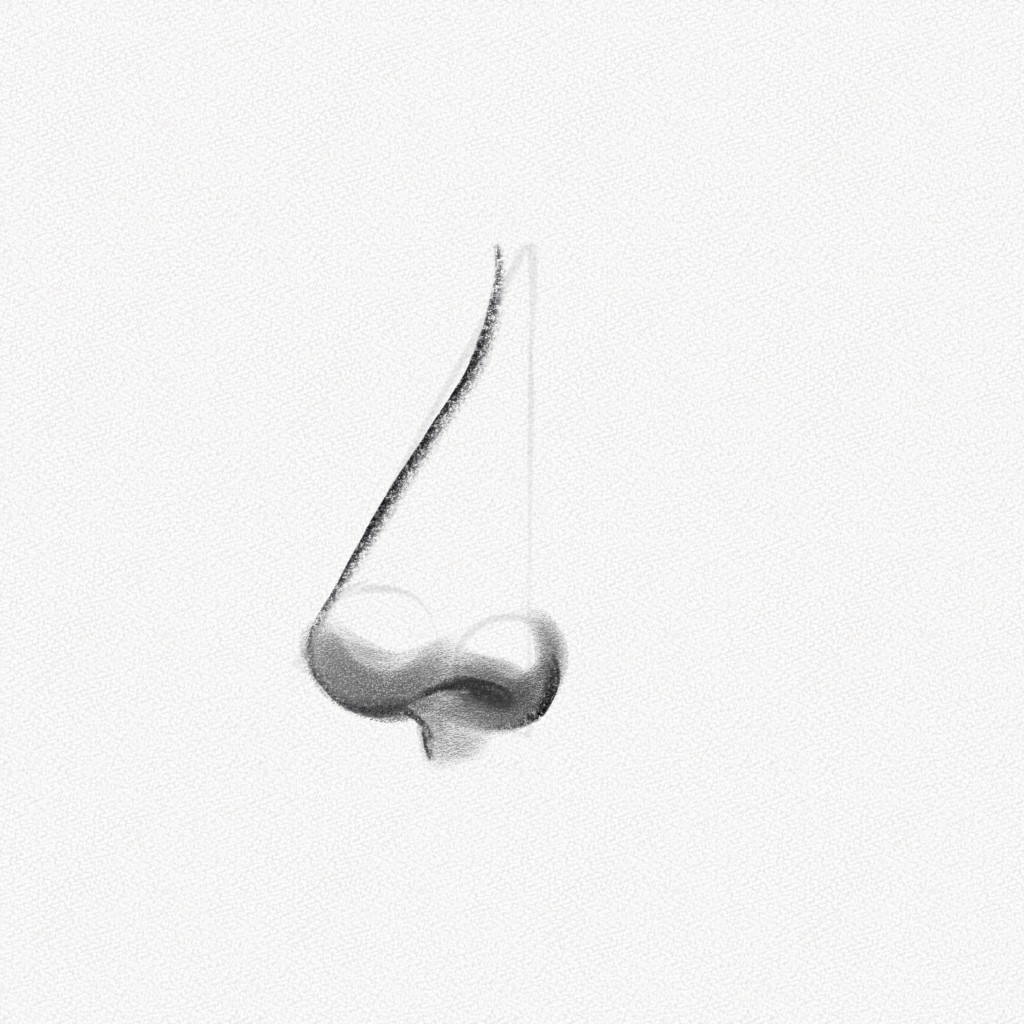
Step 4: Mark the darkest area
For this tutorial, the light is coming from above. The darkest area is the bad of the nose. Erase your guidelines so they are barely visible. Then, we’re going to use our 4B pencil to mark the base of our nose by outlining the base of the circles of our structure.
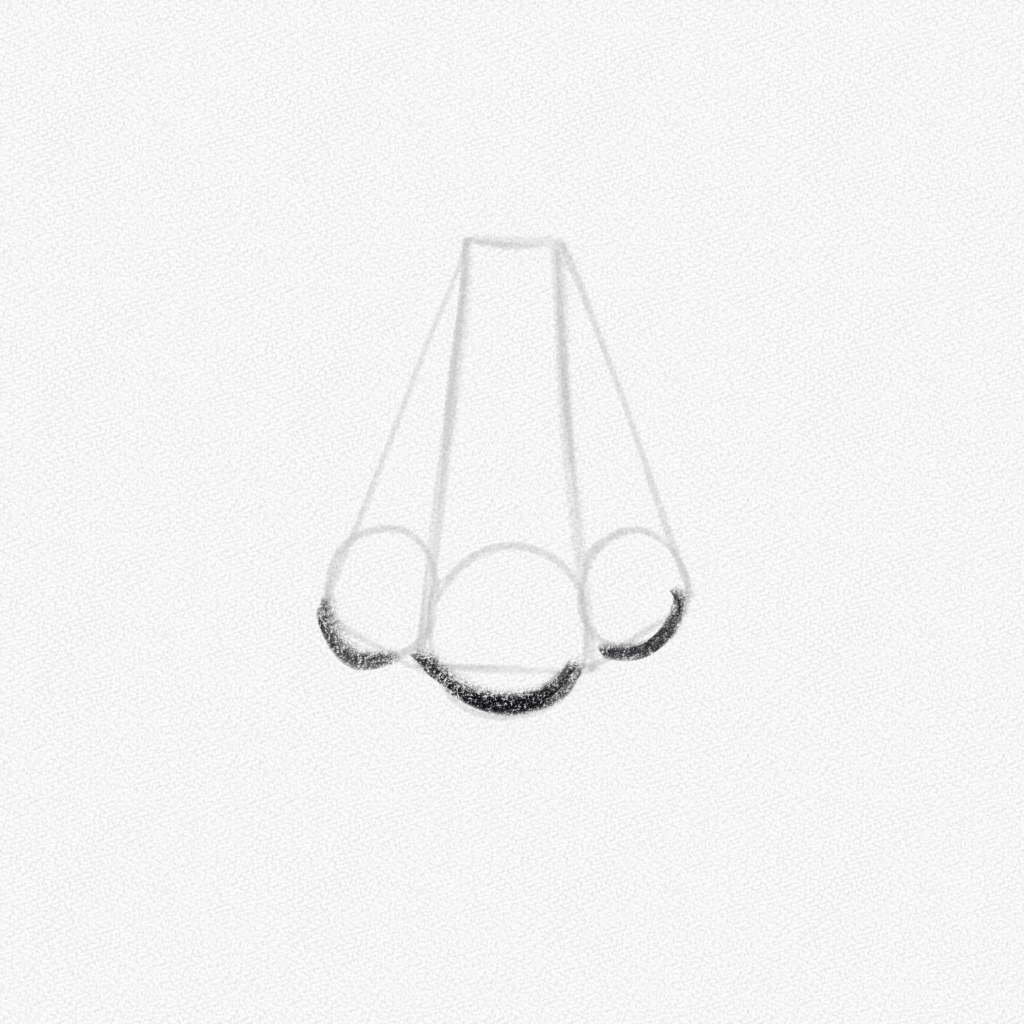
Step 5: Draw the nostrils
With our 4B pencil, we’re now going to add the nostrils to our drawing. Remember that the nostril shape changes according to the type of nose we’re drawing and that some people have bigger nostrils than others.
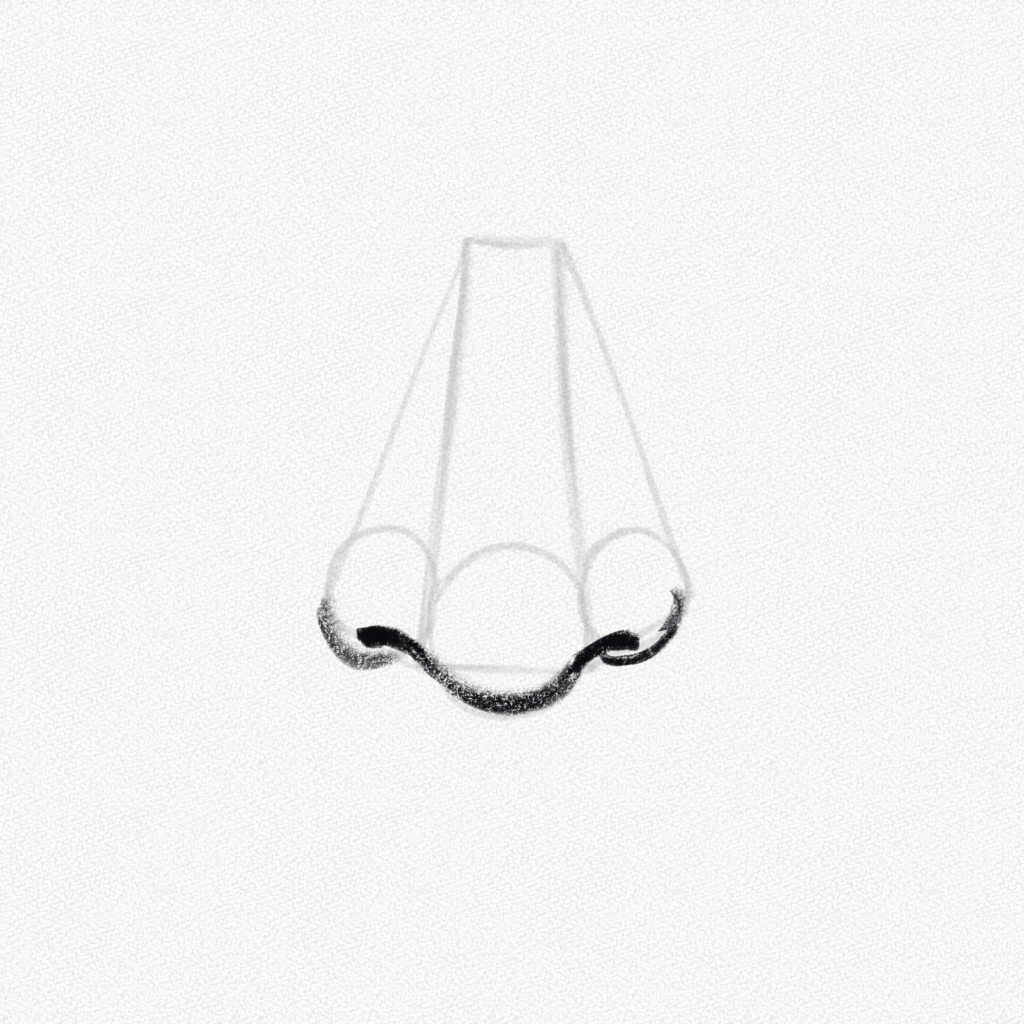
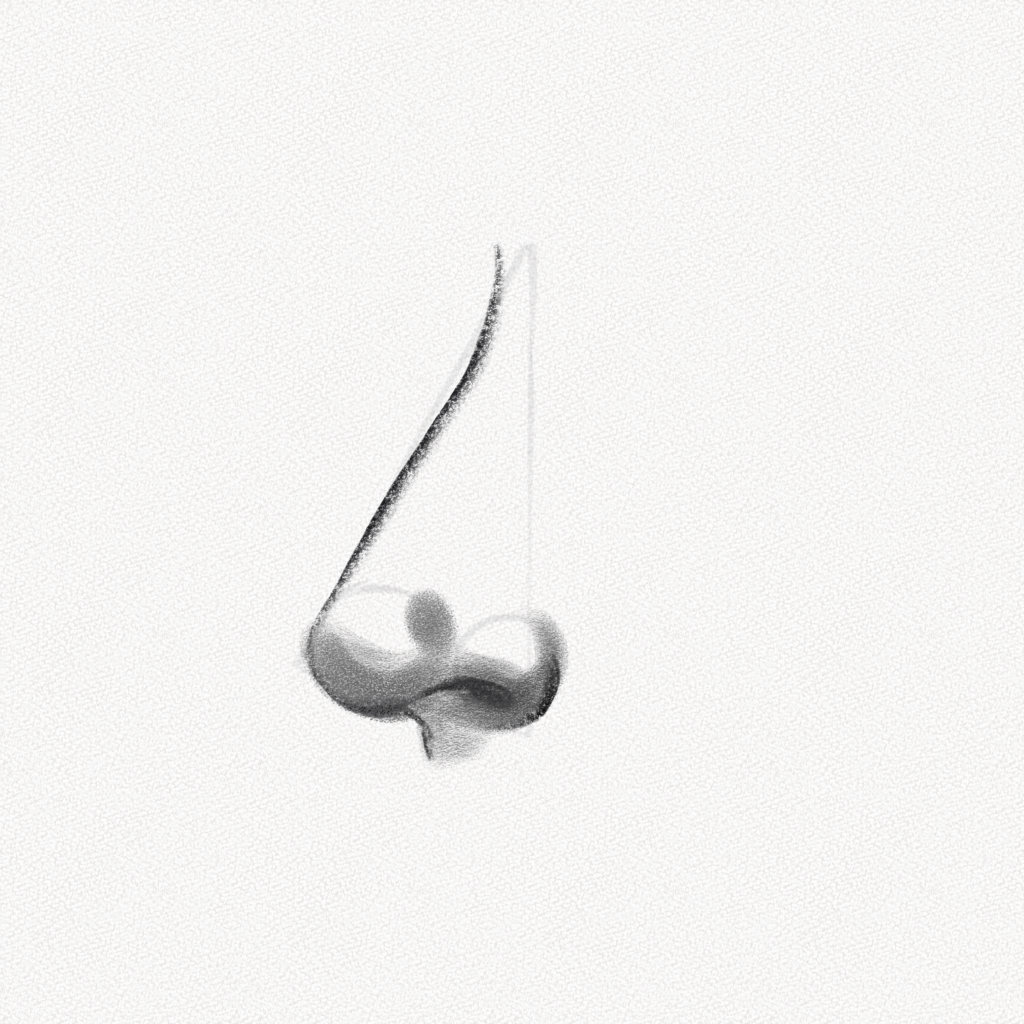
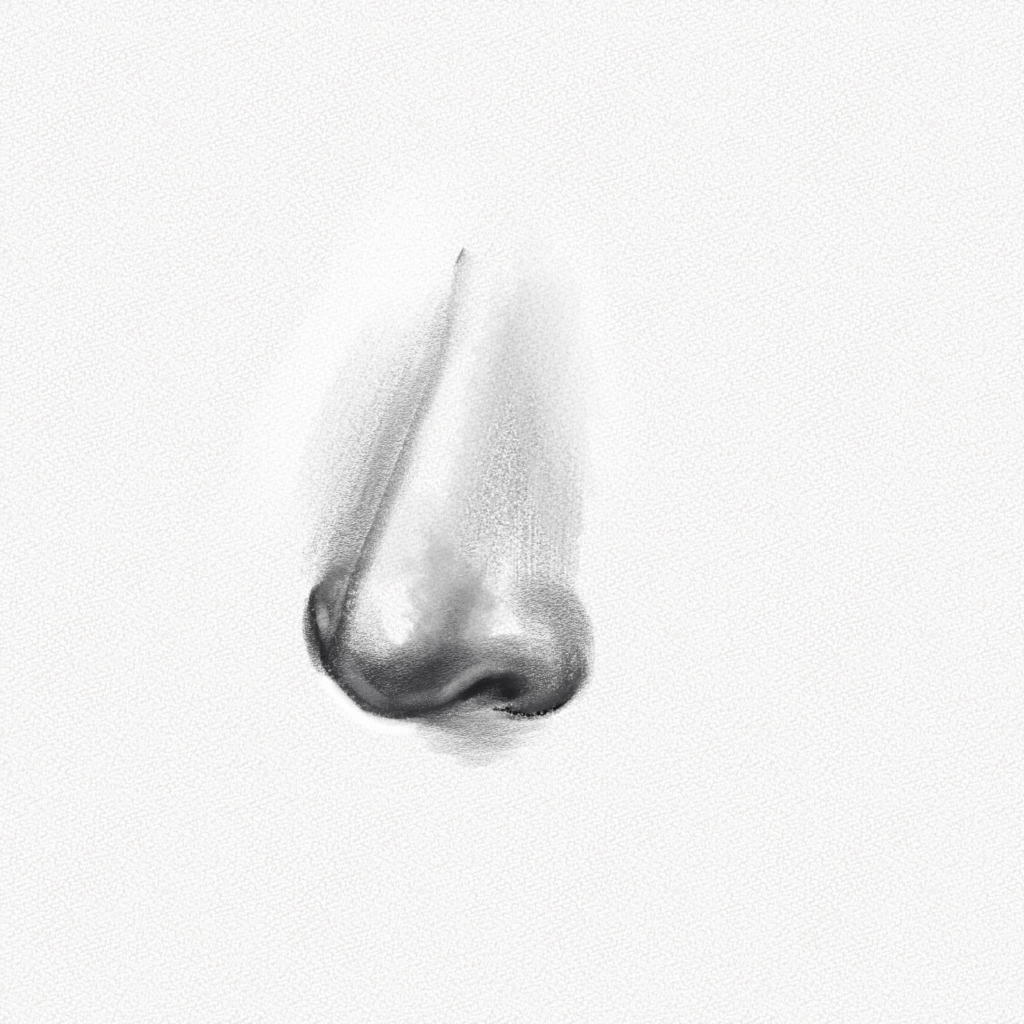
Step 6: Shade the darkest area
In this case, the darkest area is the base of the nose. We are going to shade this area with our 4B pencil, with soft and small circular movements, without applying too much pressure but with layers to add depth.
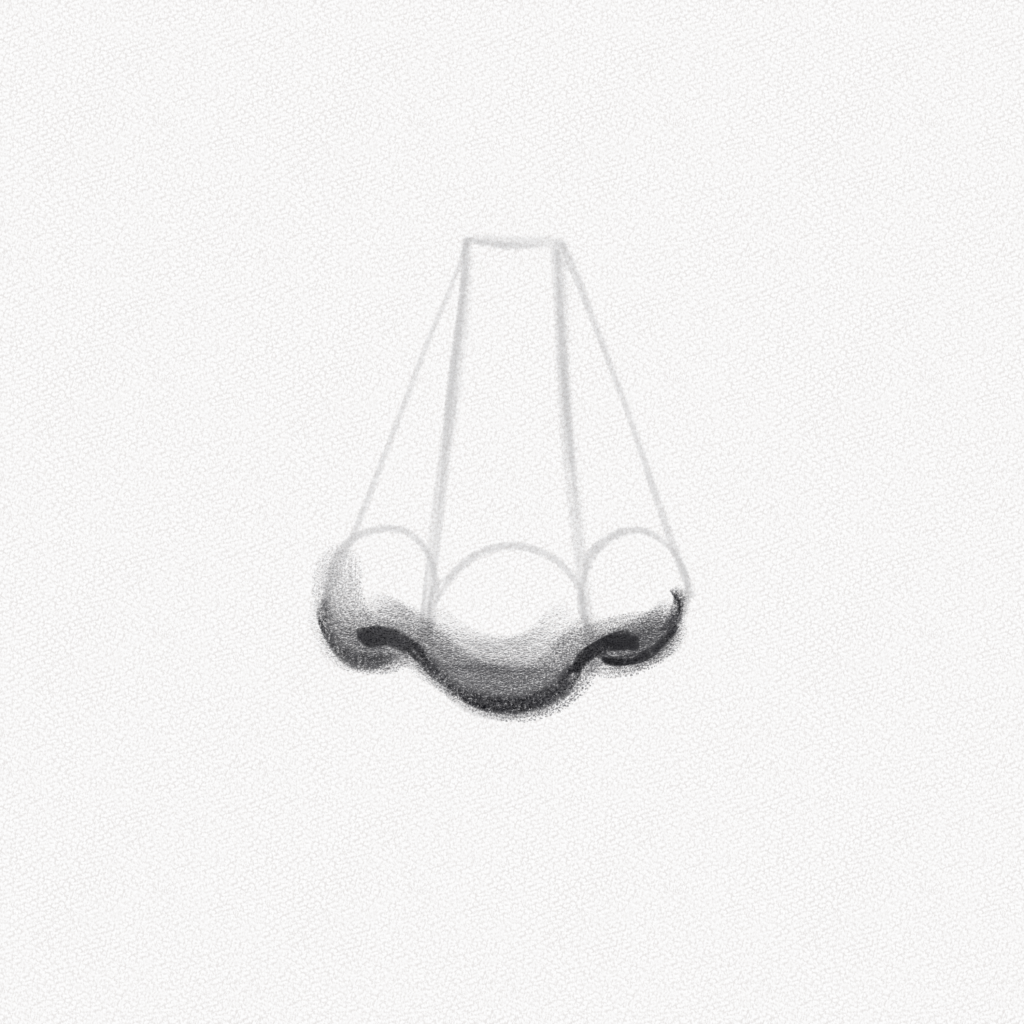
Step 7: Mark the nose bridge area
With the same technique from the previous step, we are going to shade the nose bridge area following our guidelines, but this time it won’t be as dark as the base.
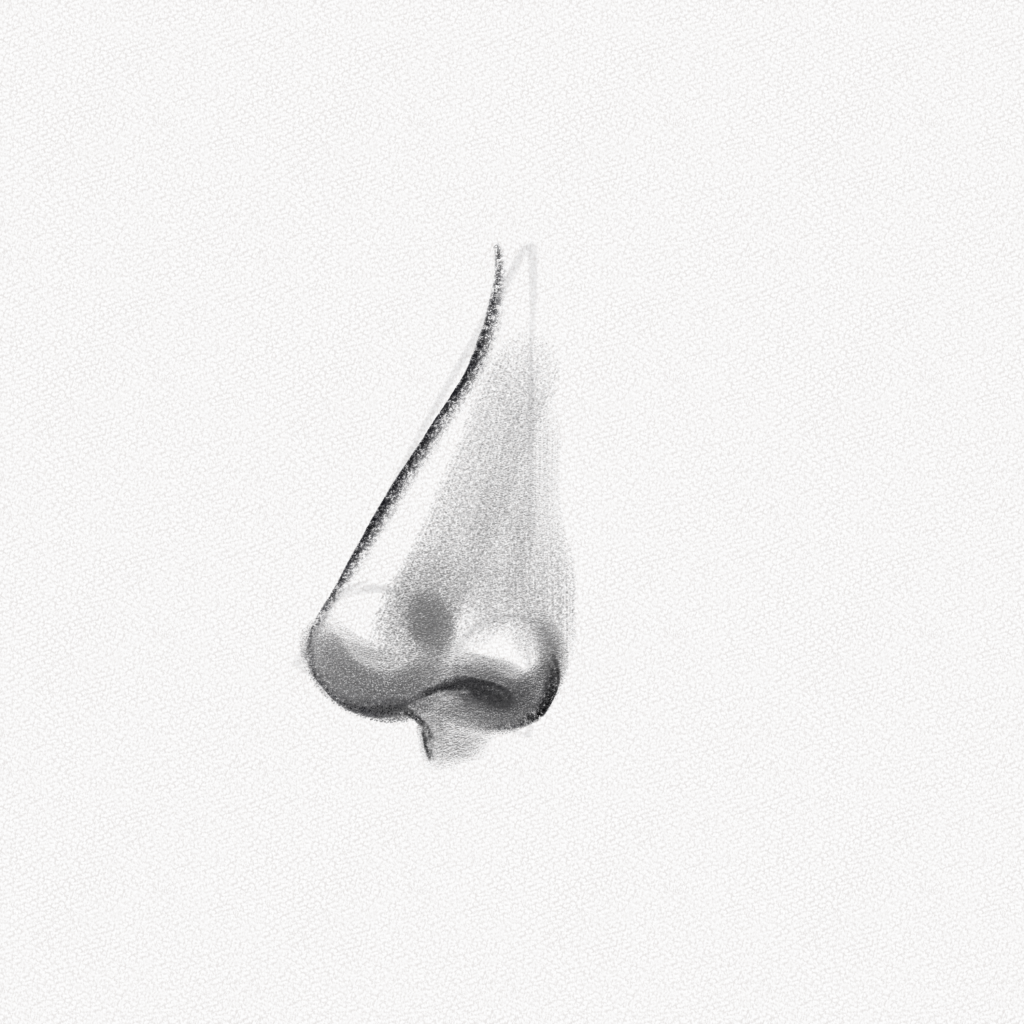
Step 8: Fill the sides of the nose
With our 4B pencil, we are going to very softly shade the sides of the nose, filling the space between the top and the base.
Step 9: Blend
With our blending tool, we’re now going to blend the areas we shaded, trying to follow the shape of the spheres, and using our kneadable eraser, we’re going to take away some graphite from the wings. We’re also going to blend towards the upper part of the tip, making sure it’s lightly shaded since that’s where the cartilage separates from the tip. It might not be so noticeable on all noses, but it is important to keep it in mind.
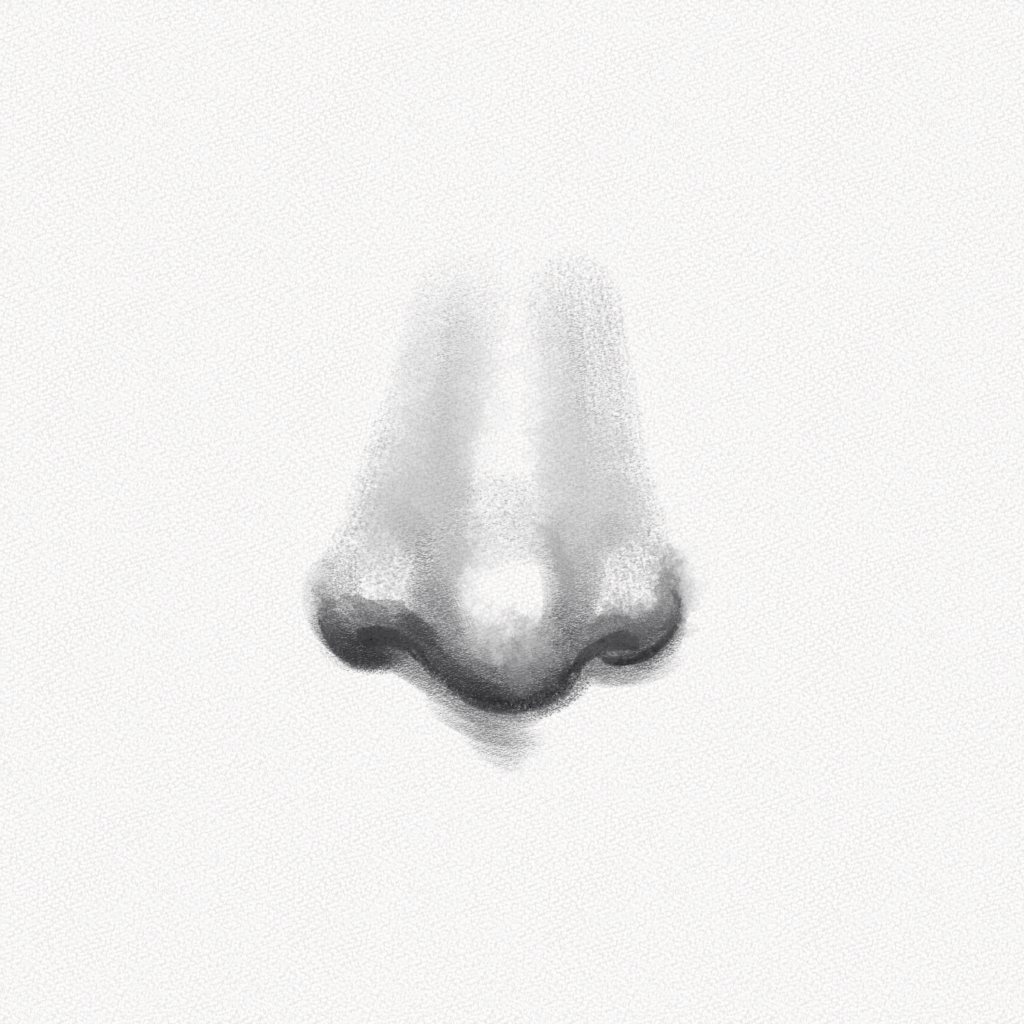
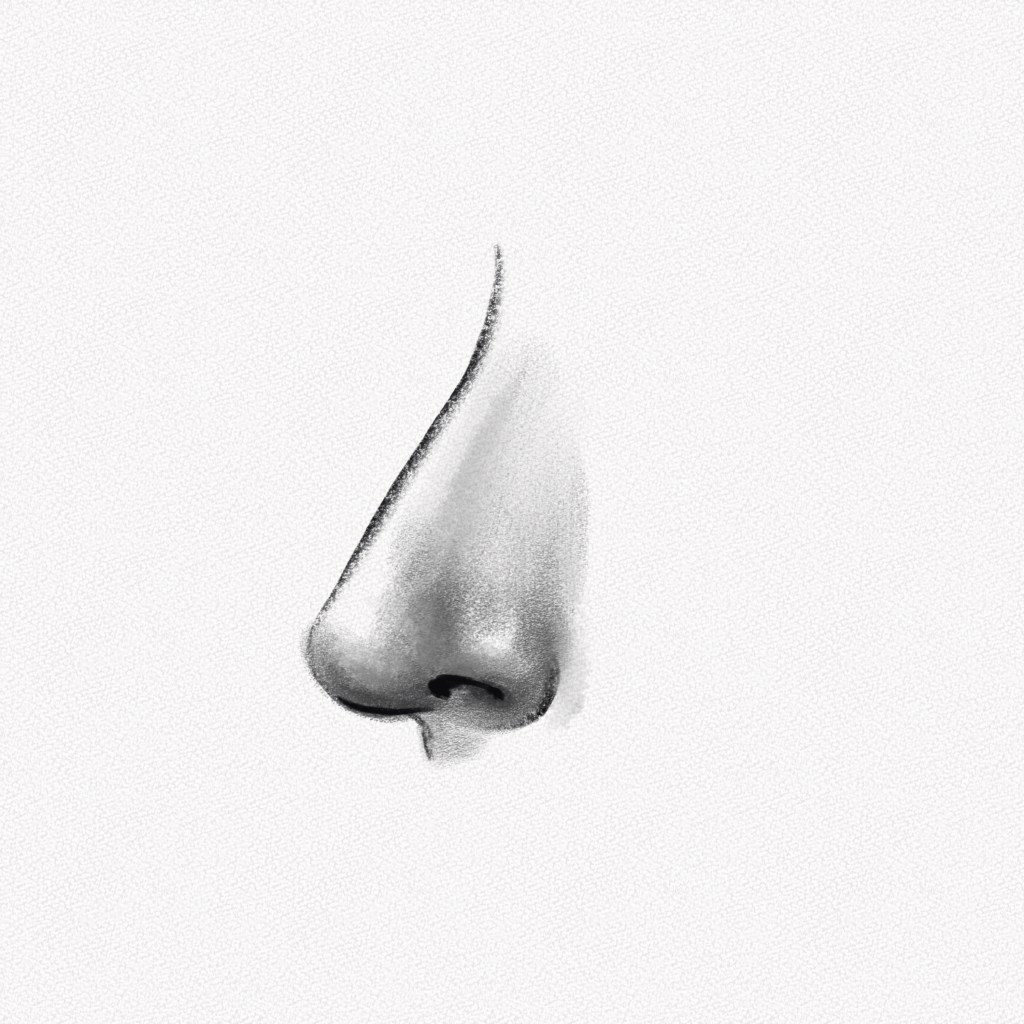
Step 10: Add Details
With our 4B pencil and applying a bit more pressure, we’re going to darken the nostrils to add more contrast to our nose. Then with our eraser, we’re going to take away some graphite from the center of the nose, the top of the nostrils, and the base of the nose. These highlights are due to the reflection of the light on the base of the nose. Don’t miss this store since this is what will give a more realistic effect to your drawing.

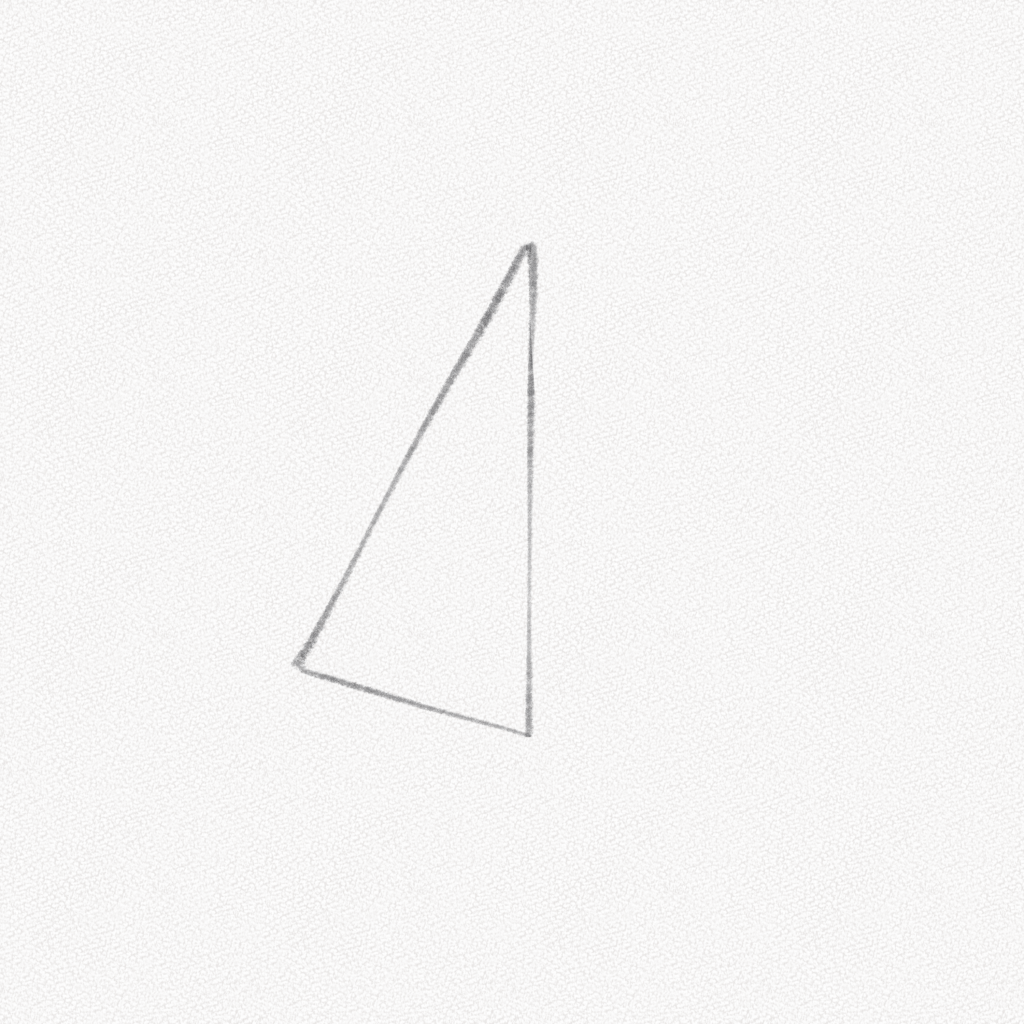
How To Draw A Nose From The Side
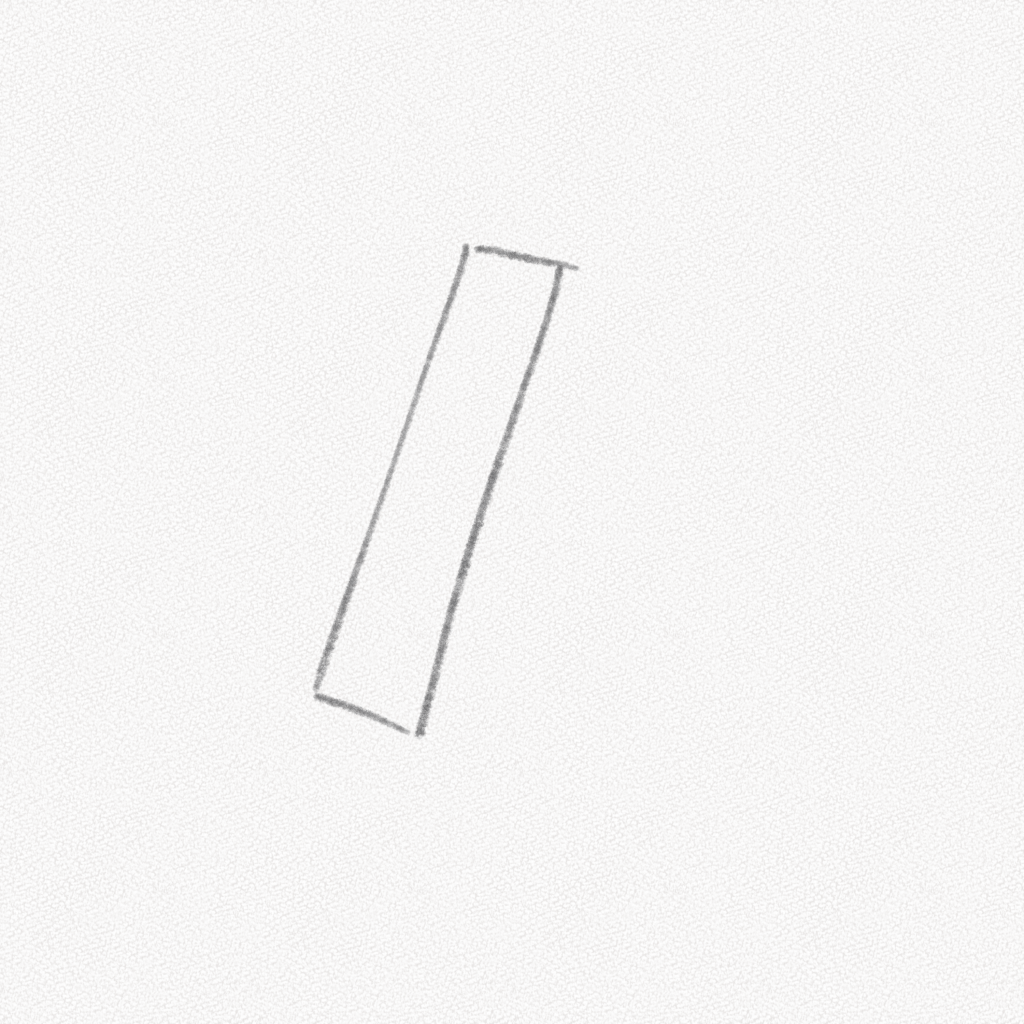
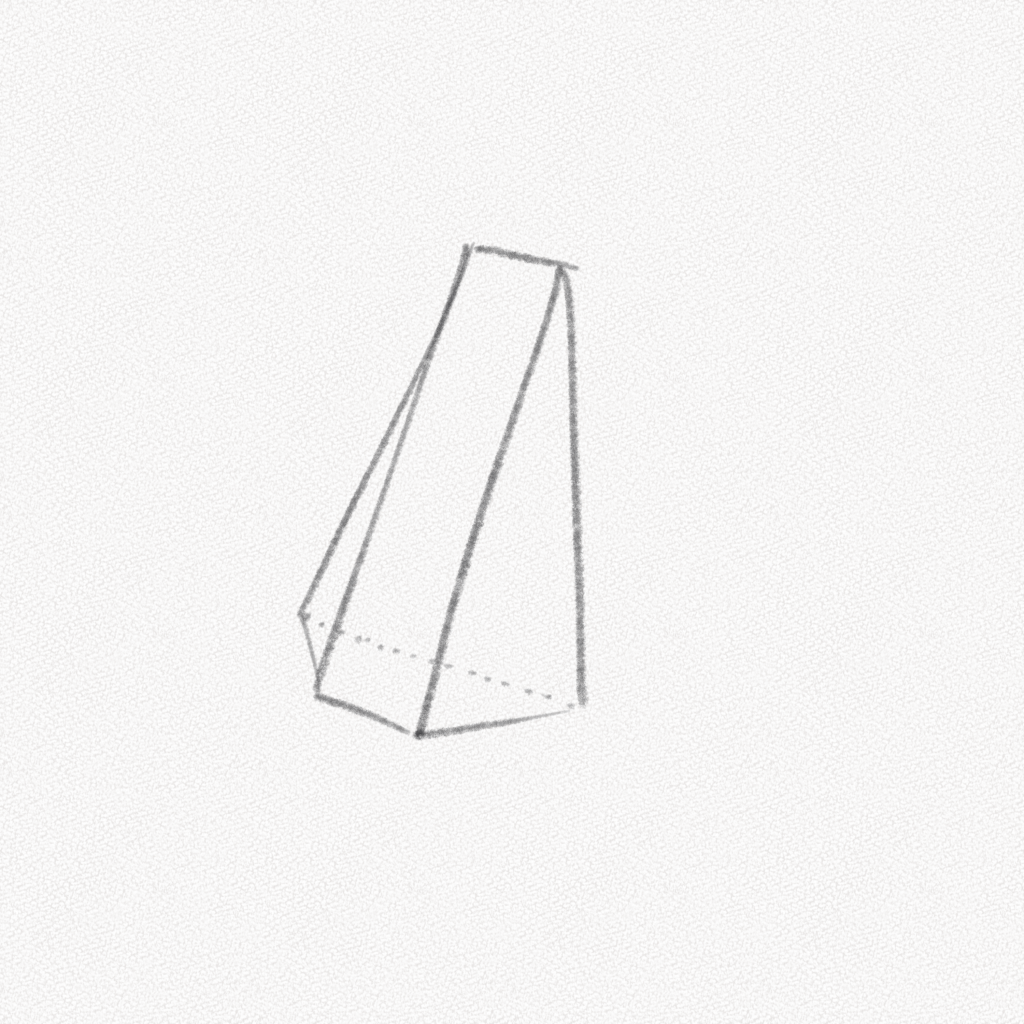
Step 1: Sketch the basic shapes
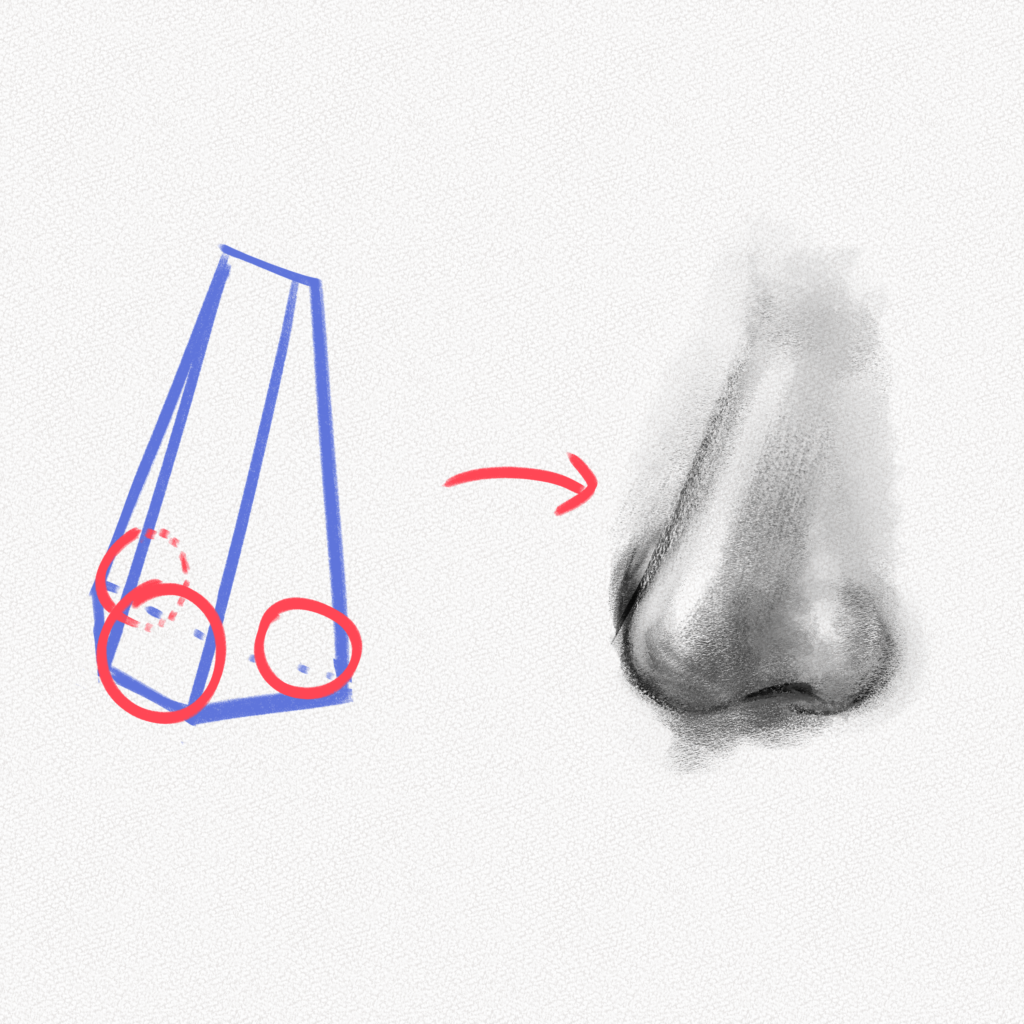
Since we’re drawing the nose side view, the shape we’re going to sketch with our 2H pencil is a triangle.
Step 2: Add two circles
Now for the tip and the visible wing, we are going to add the two circles that will be the base of our drawing.
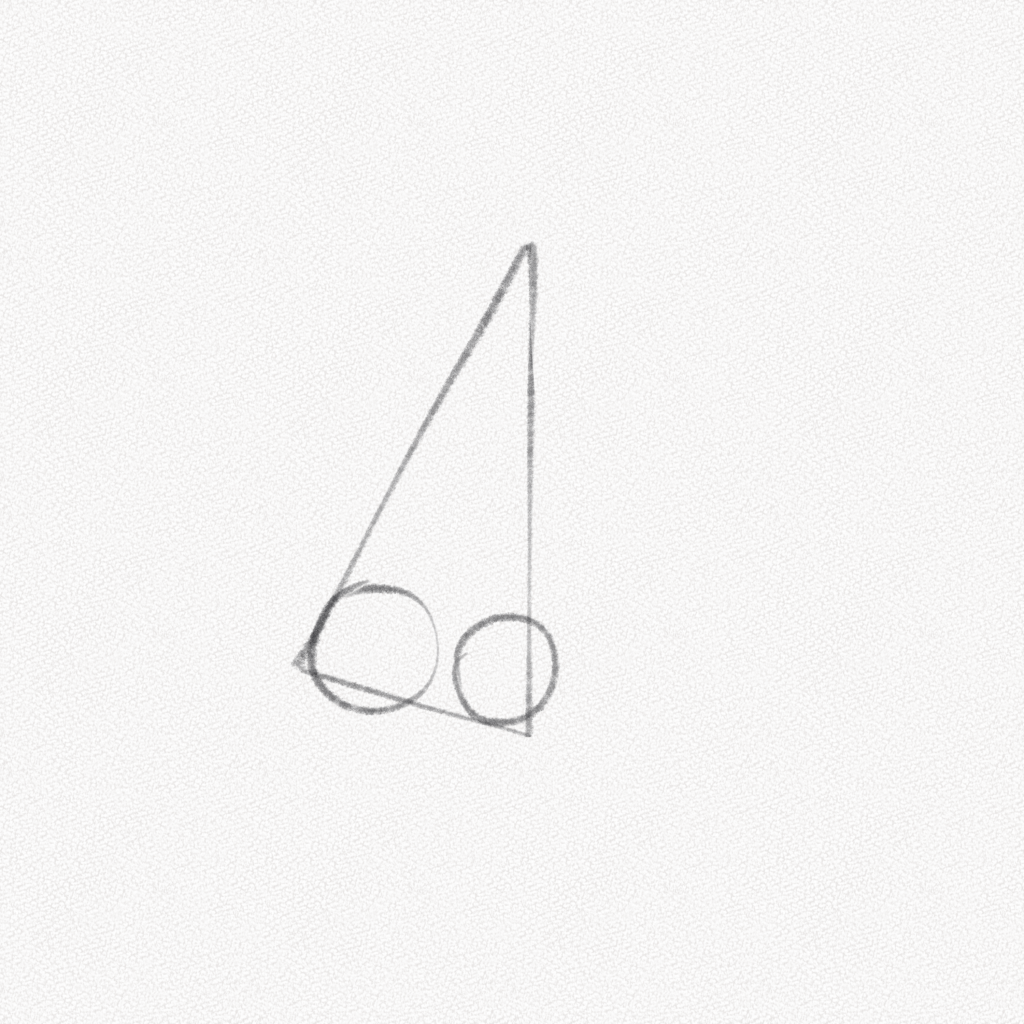
Step 3: Mark the base
Erase our guidelines so they’re barely visible, and after that, with our 4B pencil, we are going to shade the base of our two circles. This will be the darkest area of our nose.
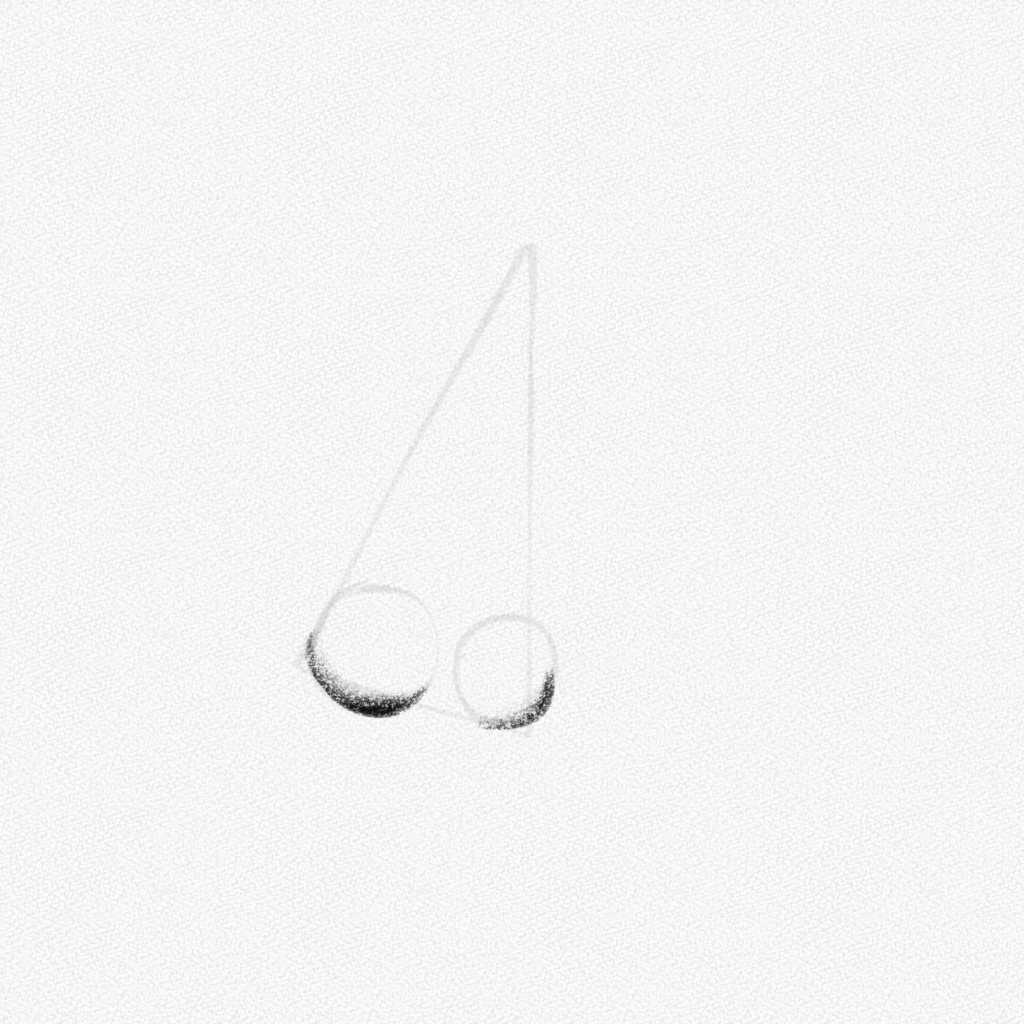
Step 4: Draw the nose bridge and nostrils
Now we’re going to draw the nose bridge and nostrils, try to use curvy organic lines for this step, and fill the nostril with two or three layers of graphite.
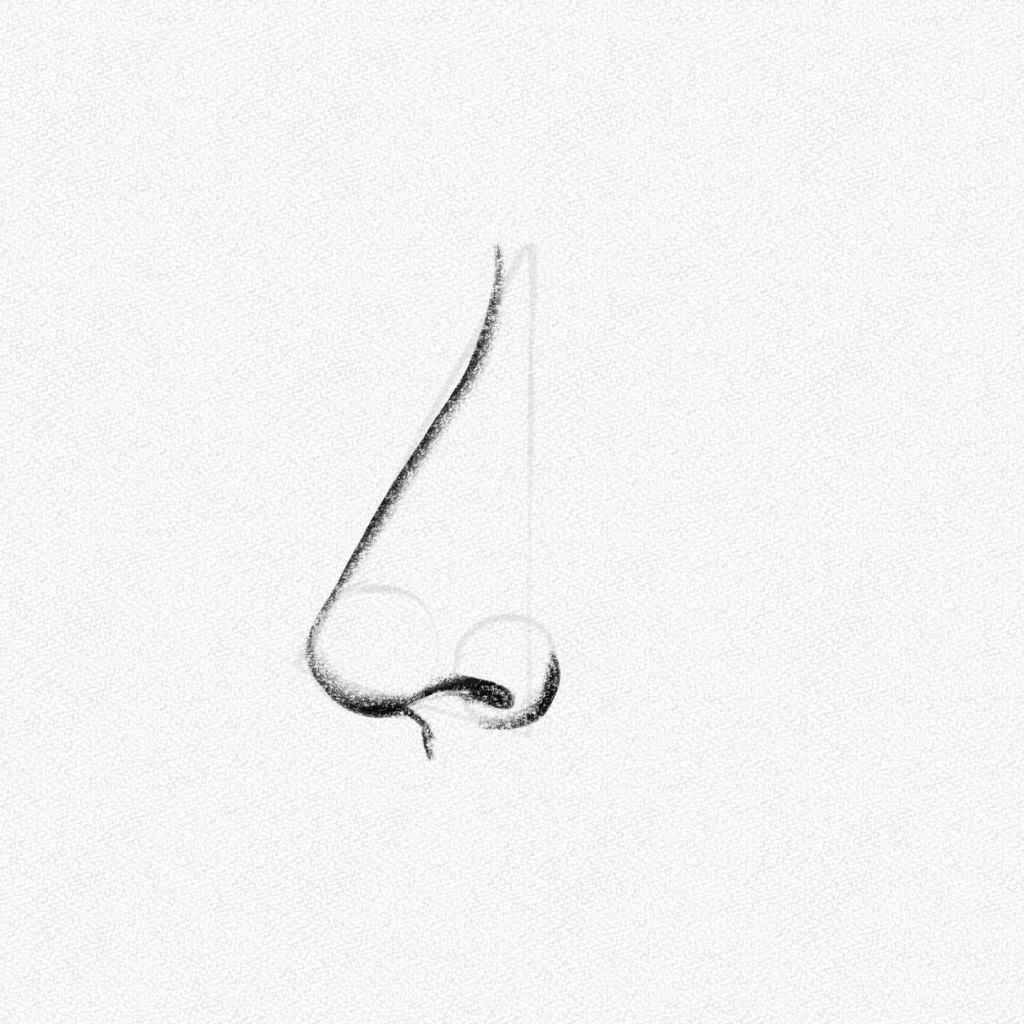
Step 5: Shade the base
With soft circular movements, we’re going to shade the base of our nose, as shown in the diagram.
Shape 6: Shade the minor plane of the nose
In the structure section, you can see two small triangles beside the tip of the nose. Those are the minor planes that connect the wings and define the tip. It might be hard to see in soft noses, but it still represents a very important part when shading.
Step 7: Fill the sides of the nose
Now, we’re going to fill the rest of the nose with graphite, use small circular movements, and not too much pressure since this is an area where the light hits as well.
Step 8: Blend
Now with our blending stump, we’re going to blend the graphite, giving the nose more volume.
Step 9: Details
With our precision eraser and kneadable eraser, let’s take away some graphite from the base of the nose, wing, and the top of the nostril. If you shaded the nose bridge, make sure to make that area the lightest since that’s where the light hits the most.
How to draw a nose from a ¾ angle
Step 1: Sketch the front of the nose
Since a ¾ angle from a front view is not too different from the side view, we’re going to use a different angle so it can be differentiated. With our 2H pencil, let’s sketch the rectangle that represents the nose bridge.
Step 2: Add the sides of the nose
Following the structure, we’re going to add the shapes that make the nose a three-dimensional object. To better visualize this shape, you can add the non-visible lines with dashed traces, which will help you as well with the perspective.
Step 3: Add three circles
Now we’re going to add the three circles that represent the wings of the nose and the tip. As in the previous step, you can draw the non-visible parts of the circles with dashed lines.
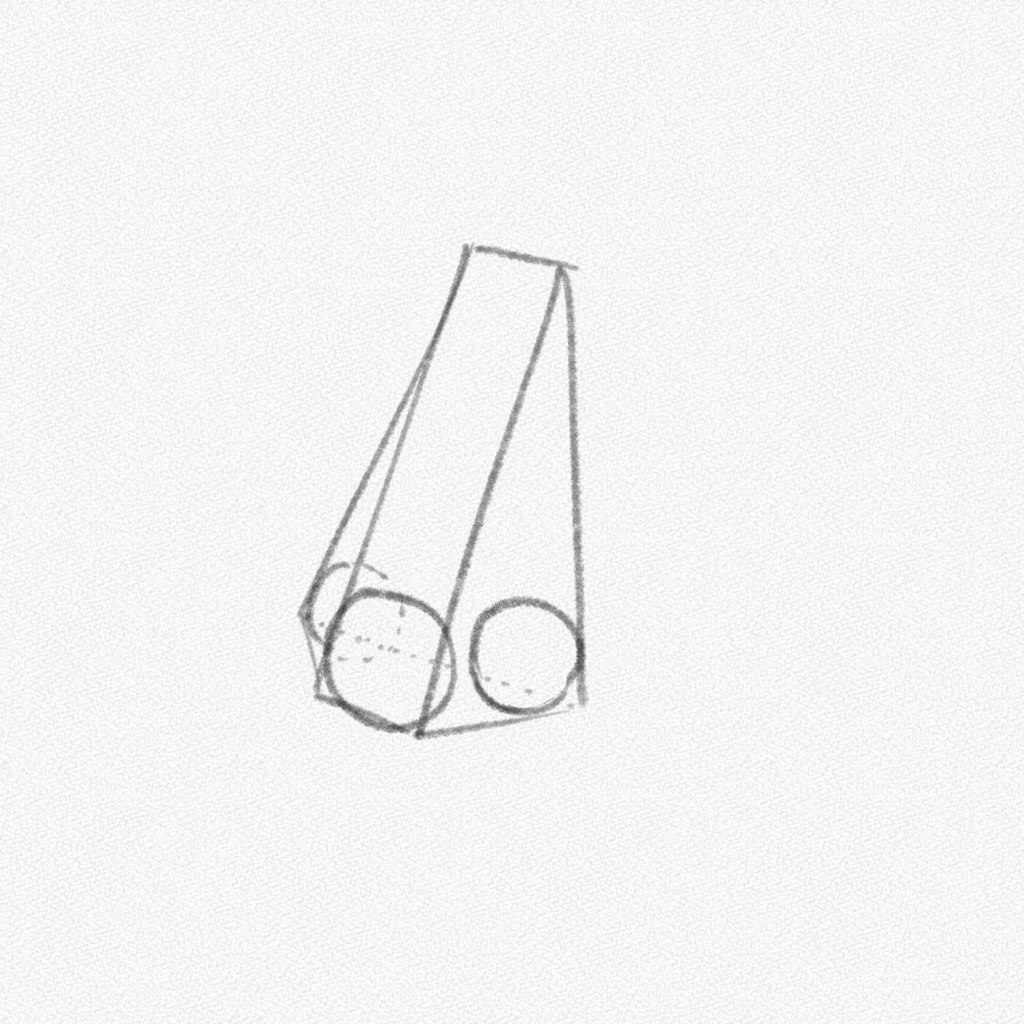
Step 4: Mark the base
Using our 4B pencil, we are going to shade the base of the circles; remember to only shade the visible part.
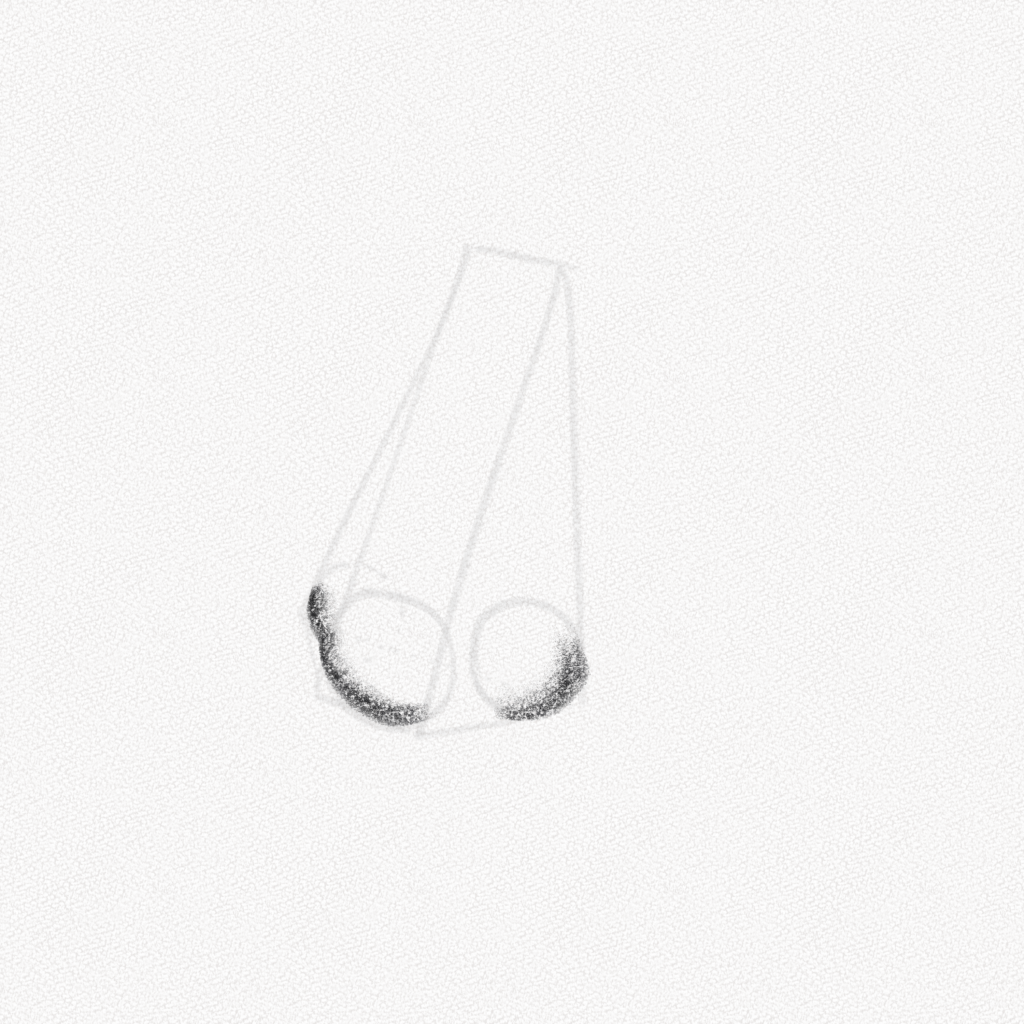
Step 5: Mark the nose bridge
Mark the nose bridge lightly. Since this is a ¾ view angle, there shouldn’t be that much of a difference between the values on both sides, so it’s better only to mark it lightly. Mark as well the nostrils. Keep in mind that depending on the type of nose, when drawing from this angle, some nostrils won’t be visible.
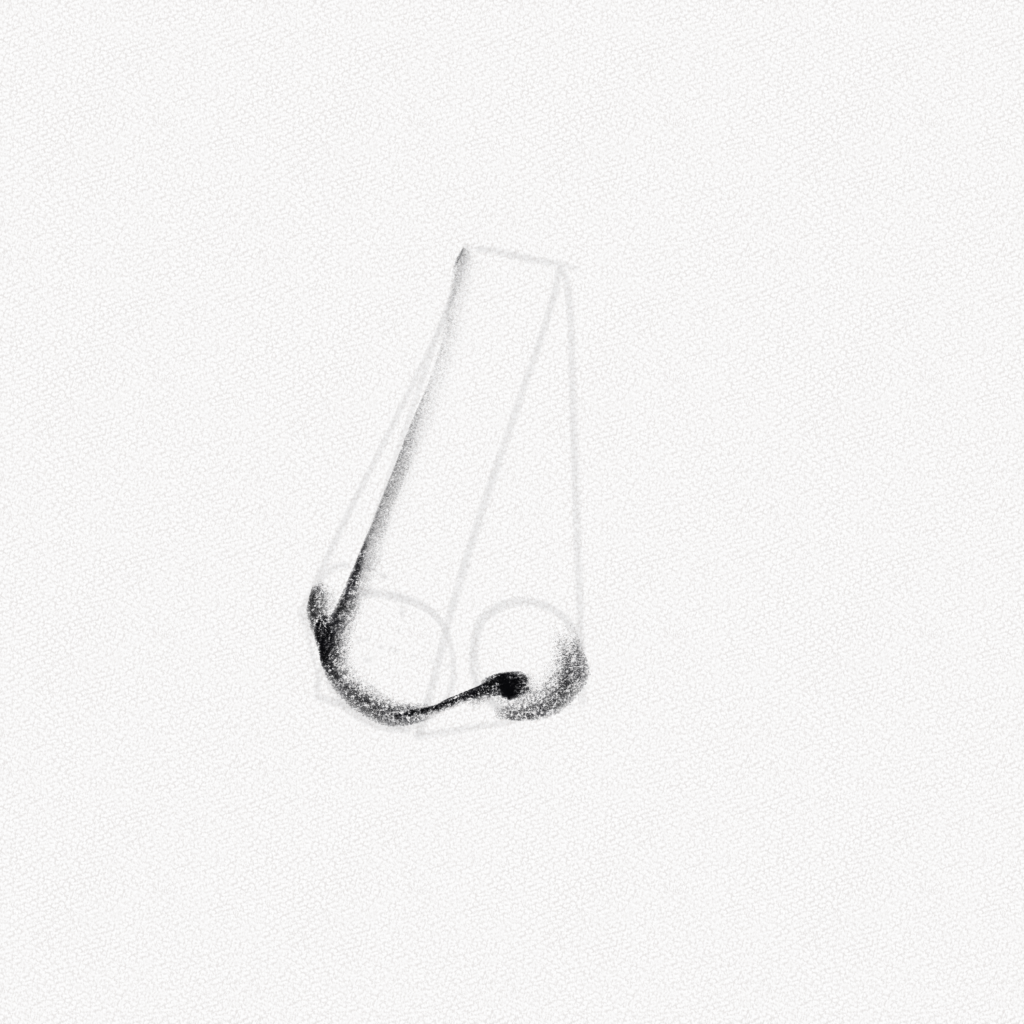
Step 6: Shade the base and the minor plane
Using our 4B pencil, we’re going to shade the base of the nose, building the graphite with layers and not applying too much pressure. Mark as well the minor plane of the nose. That small detail will give our nose more dimension and realism.
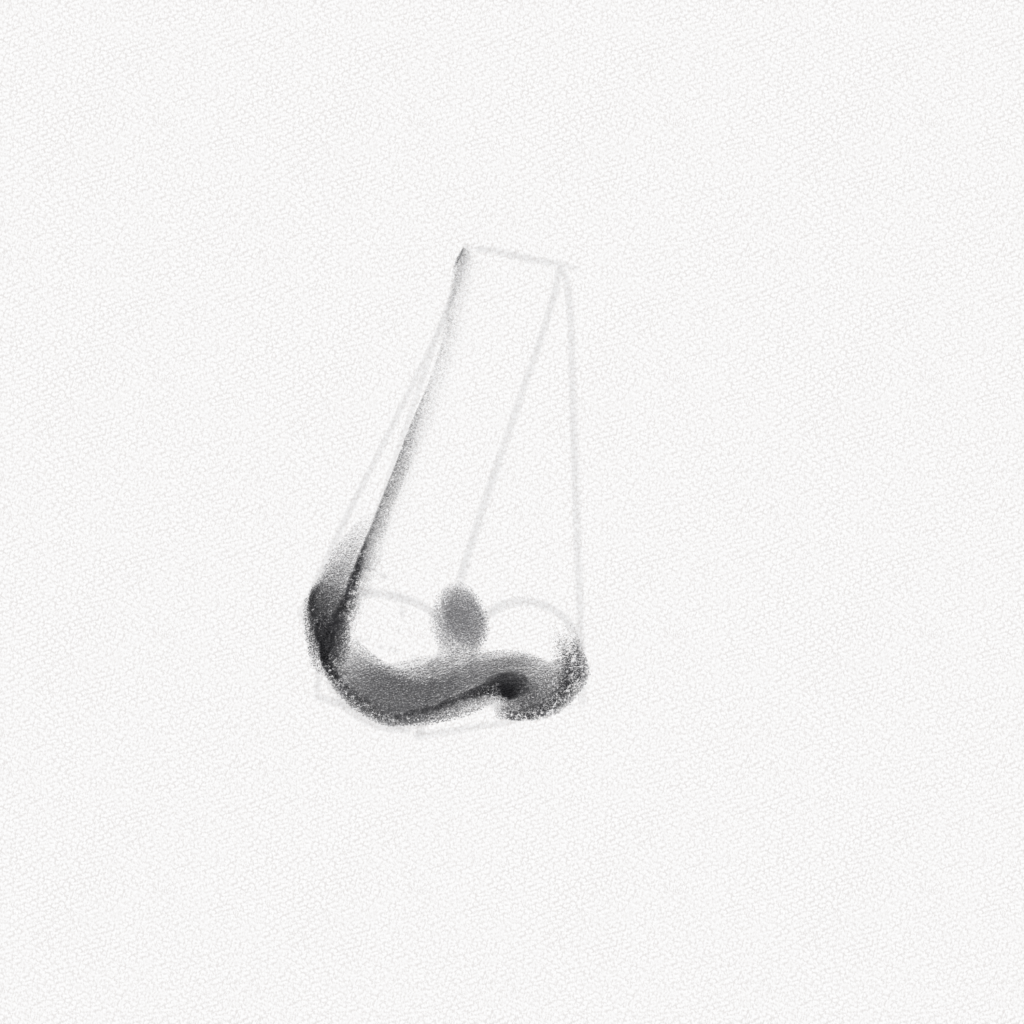
Step 7: Fill the sides of the nose
Shading softly, we are now going to fill the sides of the nose; remember that one of them is not fully visible, so avoid shading out of the area we marked with our guidelines.
Step 8: Blend
Now erase what’s left of our guidelines and blend the graphite as shown in the diagram. To add a more realistic touch, you can use your blending tool to add small portions of skin below and to the left of the nose.
Step 9: Details
With our precision and kneadable eraser, we’re going to take some graphite away from the base of the nose and the areas we over-shaded on the top bridge.
And that’s it! Thank you for following this tutorial. I hope h you learned a bit more about noses and learned how to draw and shade the nose from different angles.
Until next time!