The mouth is one of the most complex facial features. We use it for breathing, speaking, eating, and expressing ourselves, so making a tutorial for beginners where we cover all the anatomy, structure, and movement possibilities would be impossible.
However, we for sure can teach you the basics of how to draw lips, so keep reading and get ready to learn!
What you’ll learn in this guide:
- Anatomy behind the lips
- The basic structure of the lips
- How to draw lips step by step
The materials you’re going to need:
- A 2H graphite pencil
- A 4B graphite pencil
- A ruler
- A blending stump
- A precision eraser
- A white gel pen
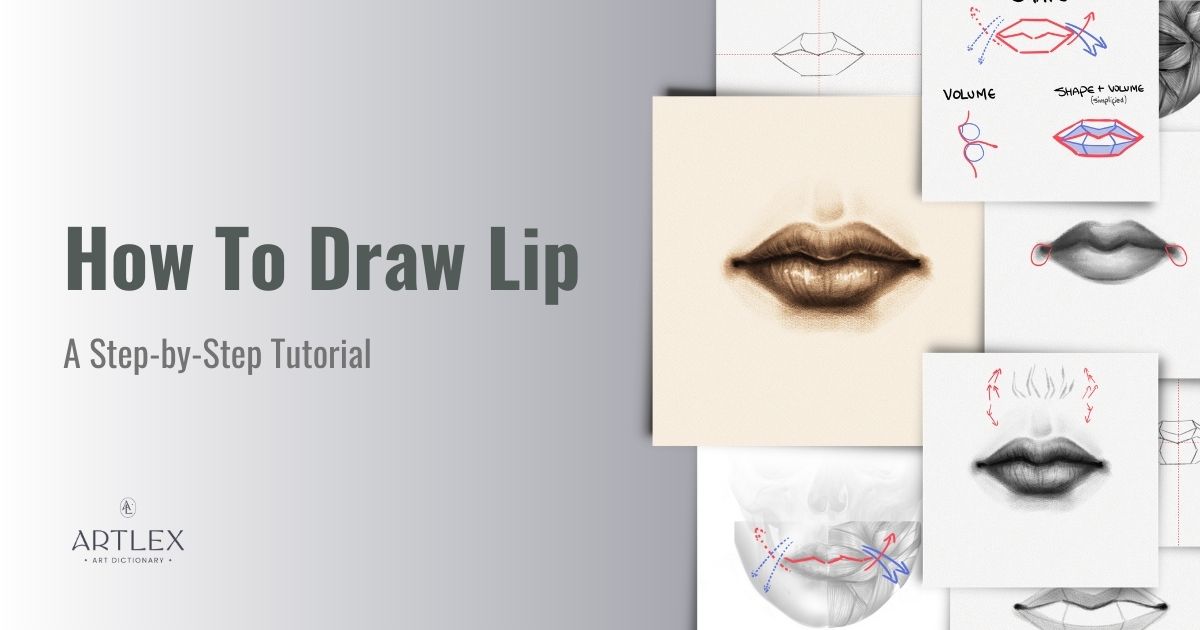
The lips you’re going to draw:
All the steps we’ll walk you through:
 How to
Let’s begin!
Section 1 — Anatomy
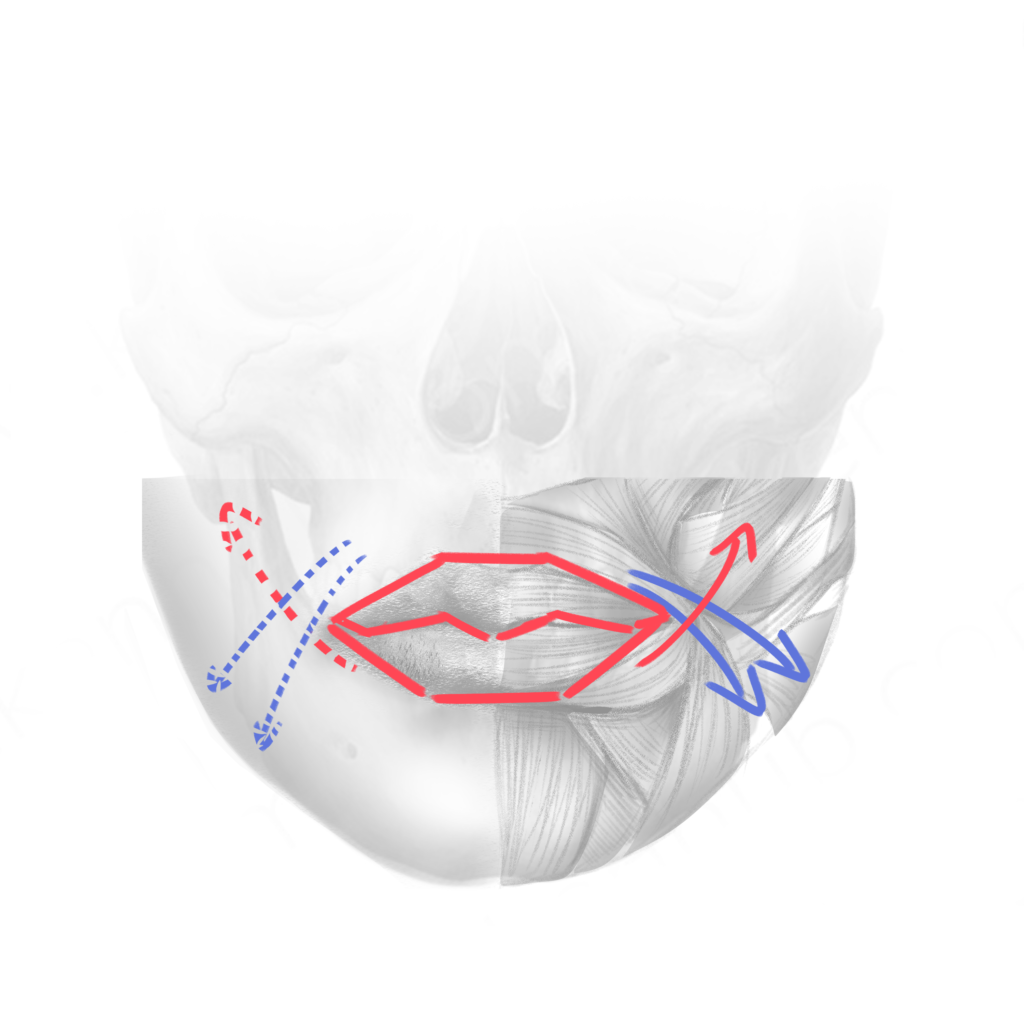
As we mentioned before, the anatomy behind the lips doesn’t only limit to the skull. Still, it’s made up of a large group of facial muscles responsible for the many activities we use our mouths for.
It is important to know the anatomy, of course, but as you can tell, the lips are not only made up of muscles but also of fat, skin, and connective tissue, giving them a very singular shape.
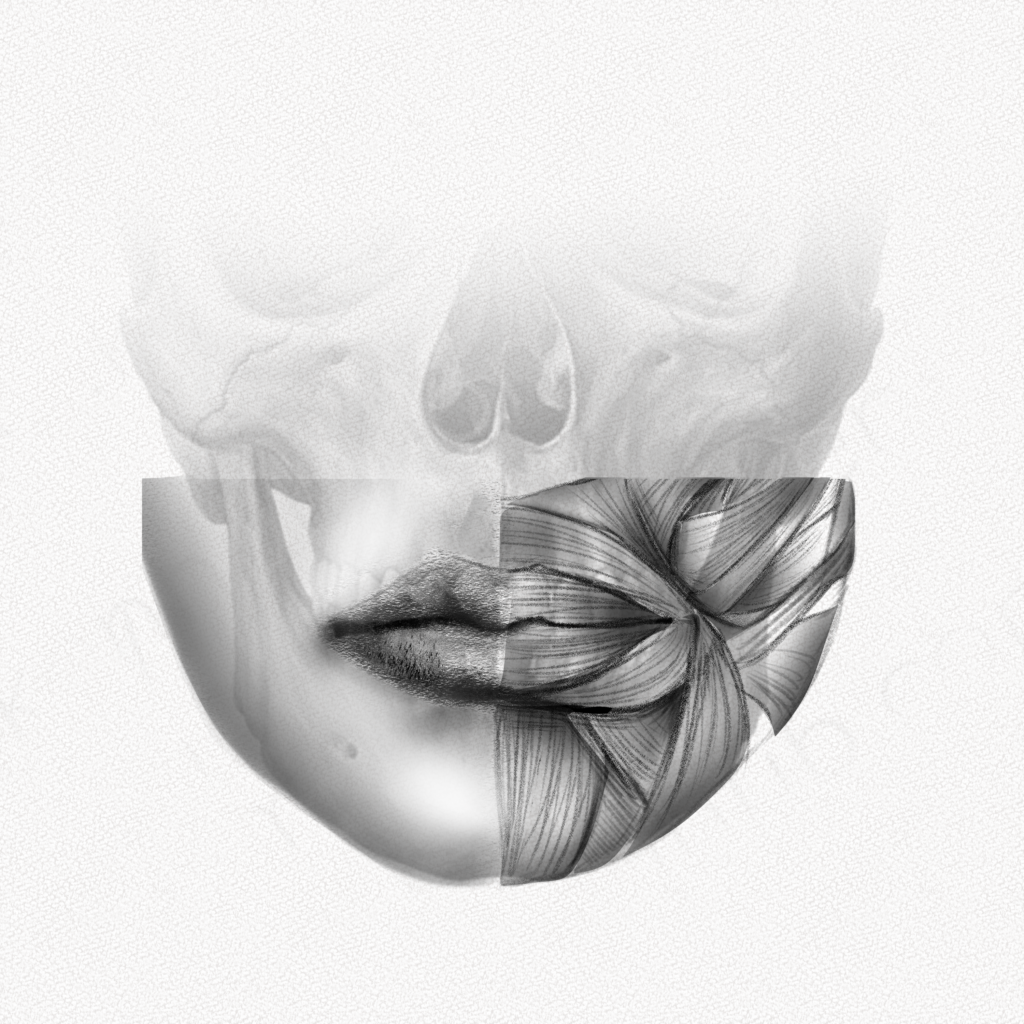
Also the lips are also affected by the jaw. The separation between them is a distinctive line that can be opened, stretched, or narrowed by moving the muscles around them, making them overlap in some cases (underbite).
Section 2 — Basic Structure of the lips
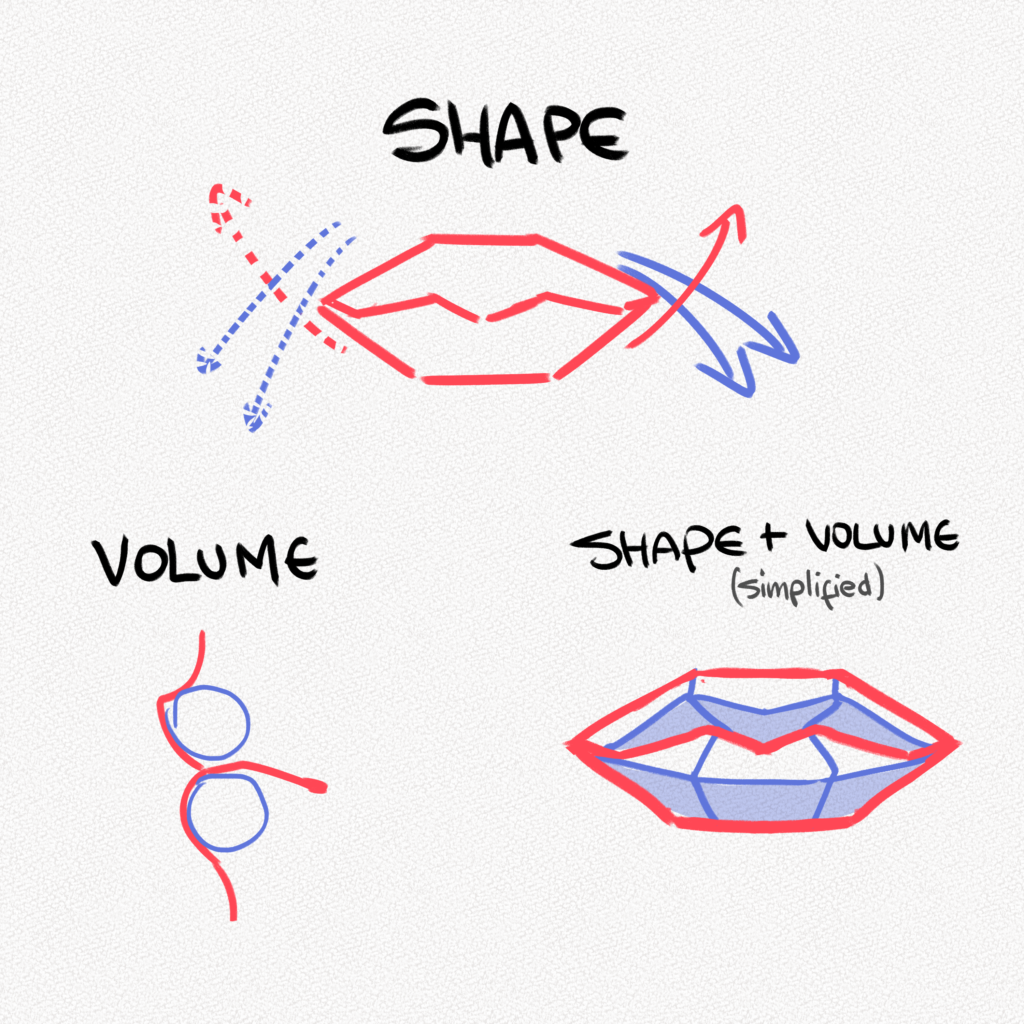
Since the lips and mouth, in general, are so complex, we are going to break down the structure into simple shapes to visualize it better when we’re drawing.
As you can see, we can pretty much define the shape of the lips as a hexagon divided by the line we indicated before (which will help us define the volume as well)
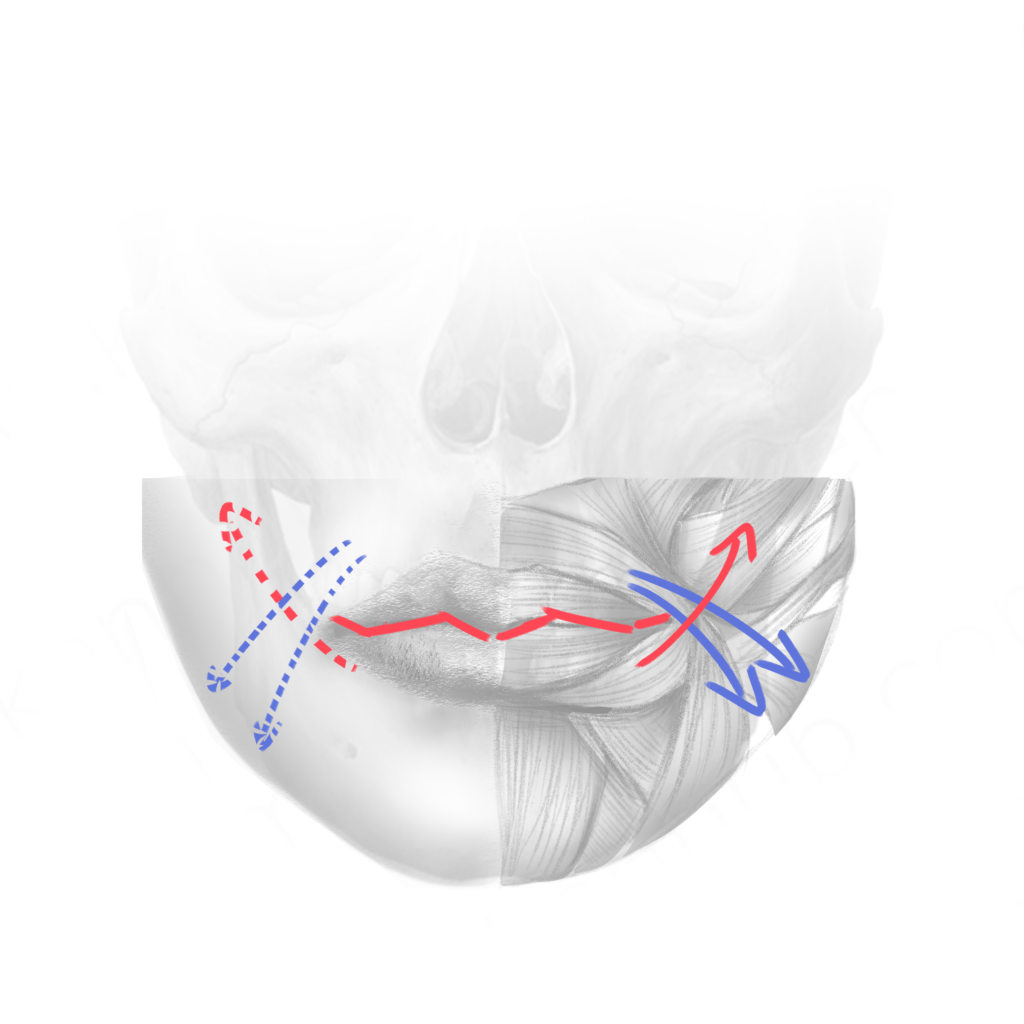
It is important to know that the line that separates both lips is not straight. We tend to accumulate a bit more fat in the middle of our upper lip so that volume presents in the shape of a curved line.
The red lines represent the muscle that pulls up the bottom lip, and the blue ones are the muscles that pull the top lip, causing small crevices in the mouth sides, which makes the characteristic M-like shape of the lips.
And that’s how we can simplify the mouth. However, we need to remember that the mouth also has volume and dimension, which can be appreciated when looking at it from the side. We can represent that with two circles from the side. However, from the front, the best way to represent the volume is by drawing two small lines on each side of each lip ash shown in the diagram.
Now that we have the basics down let’s start drawing our lips.
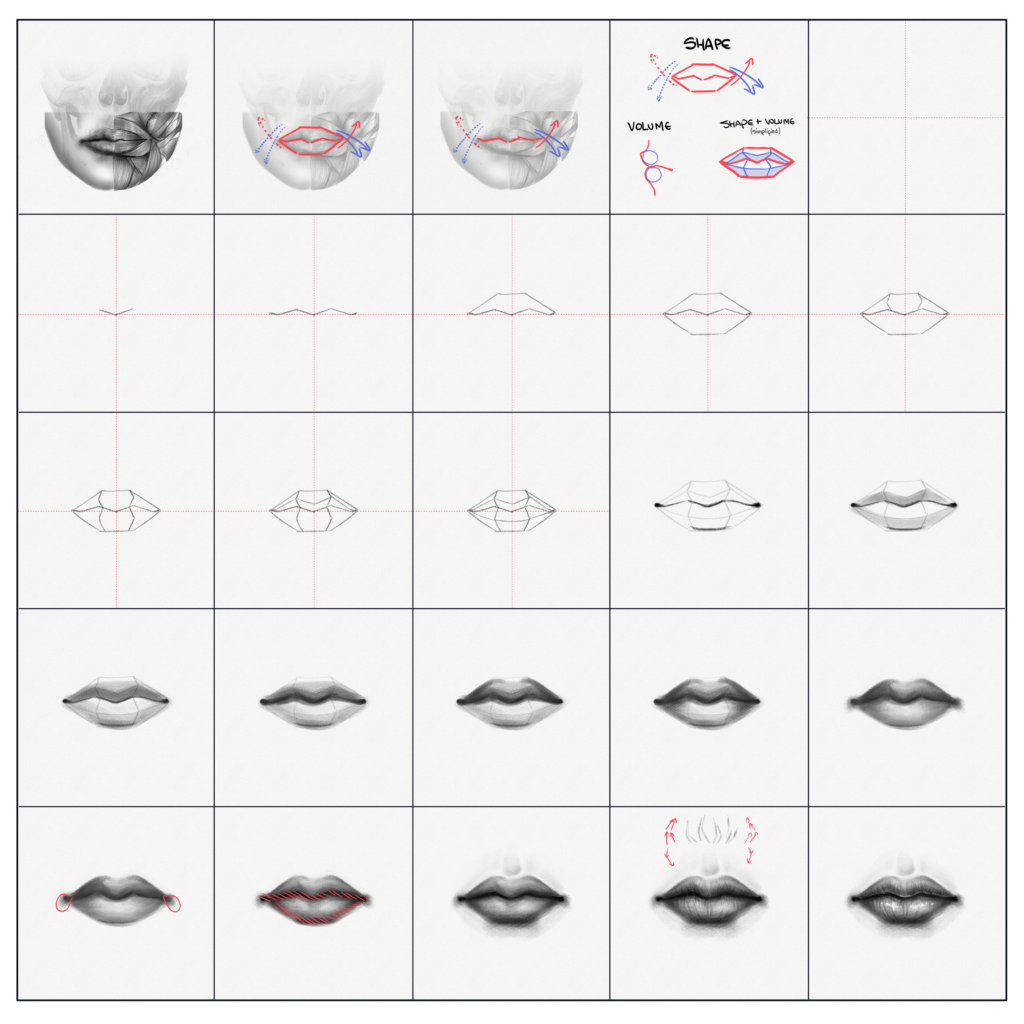
How To Draw Lips — Step-by-Step
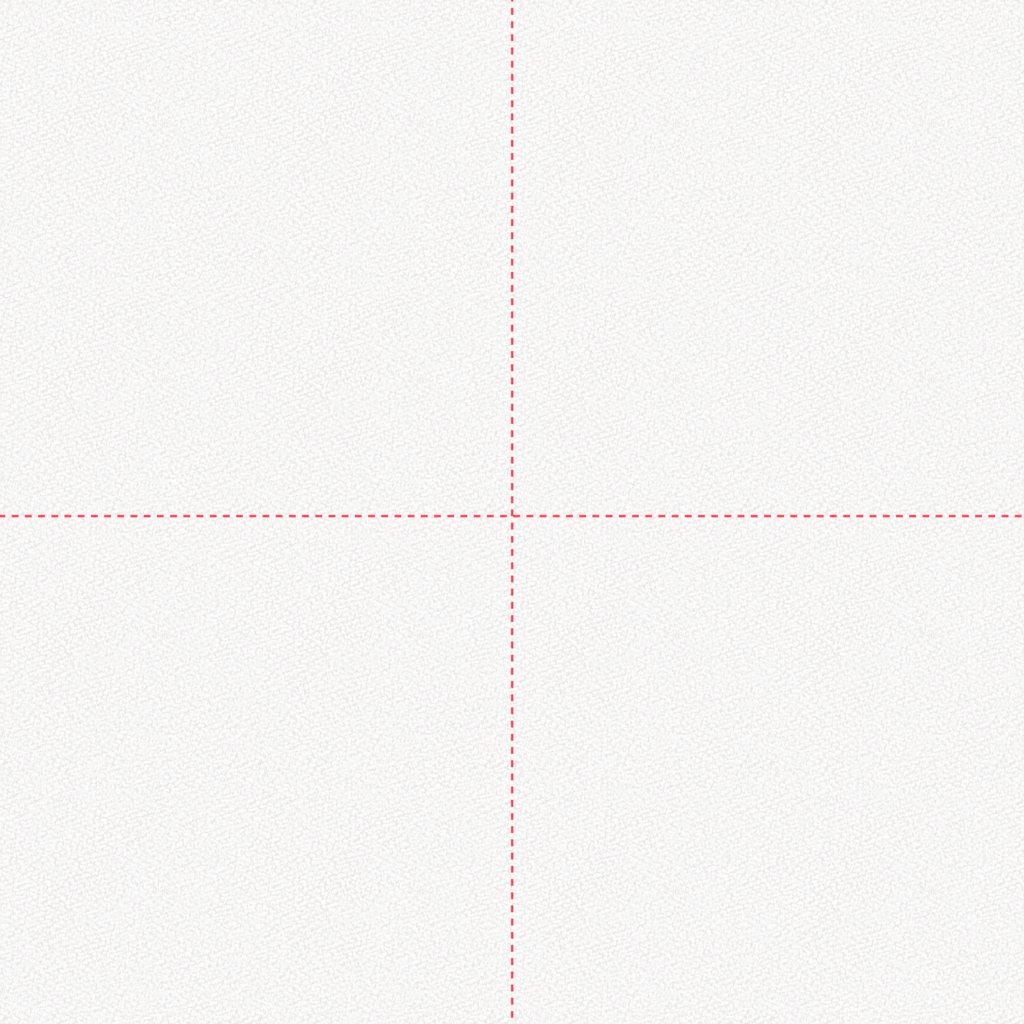
Step 1: Split your page into four equal parts
You can also draw a cross where you want to place your lips. It’s only to make symmetry easier.
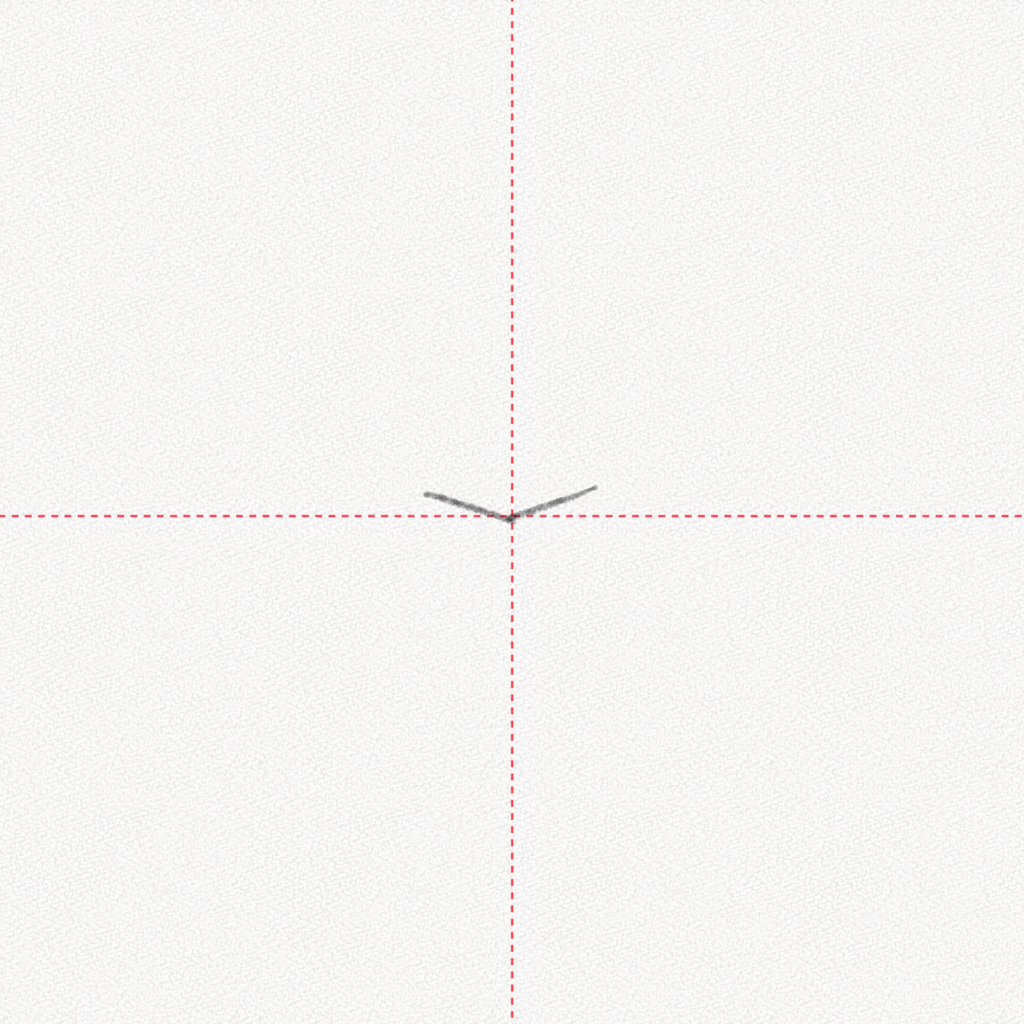
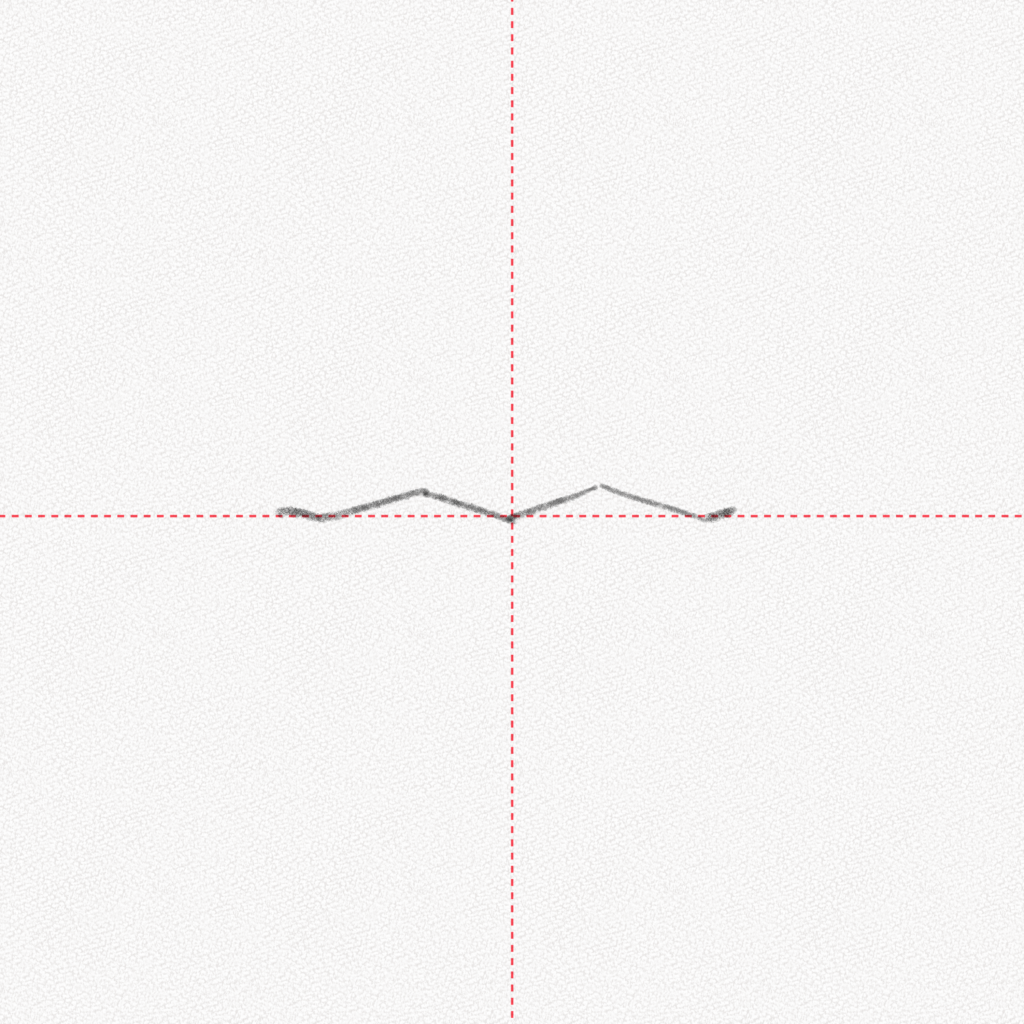
Step 2: Draw a V shape
Try to make it flatter than your regular V. This will be the center of our lips.
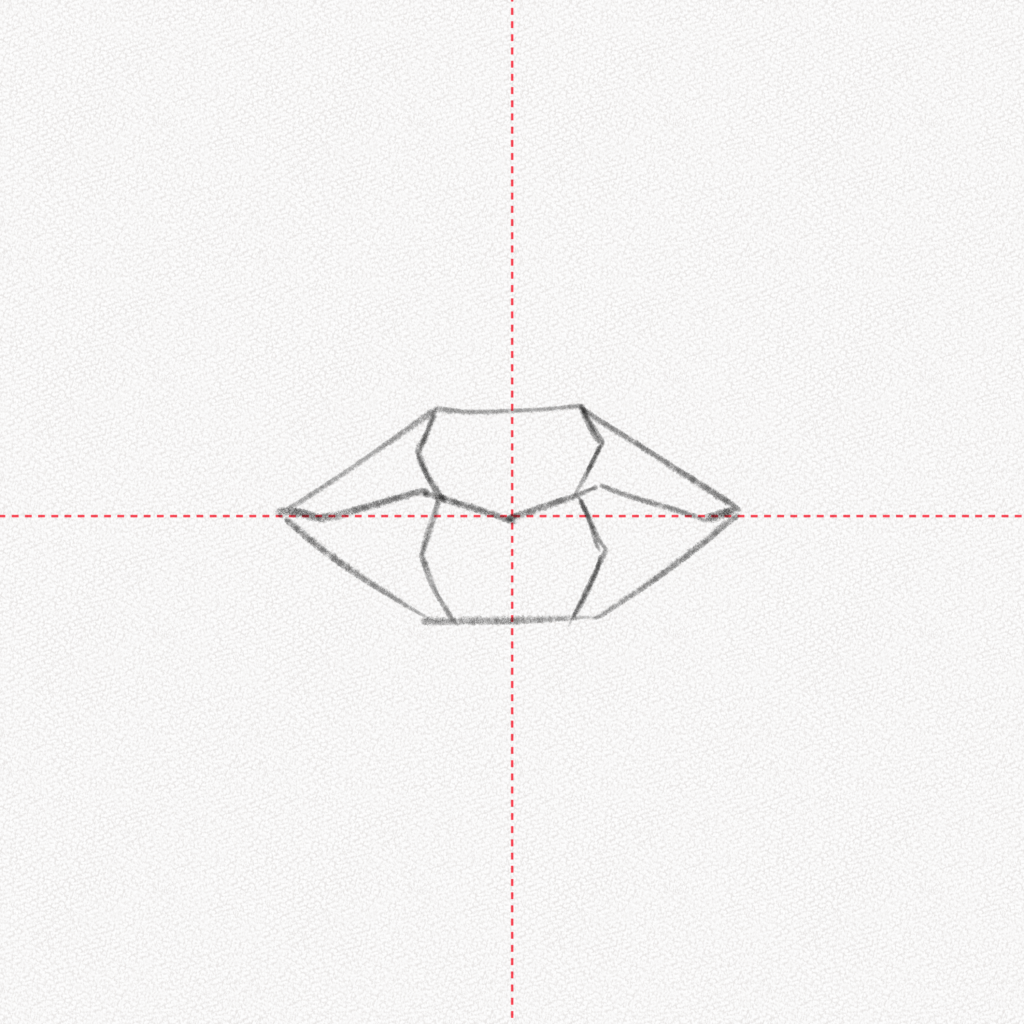
Step 3: Add four lines
Add two long lines to that V, make them flat and longer than the V lines, then add another two lines for the corners of the mouth.
Step 4: Draw the top
Draw the first half of the hexagon form in the top lip, do your best to make it symmetrical.
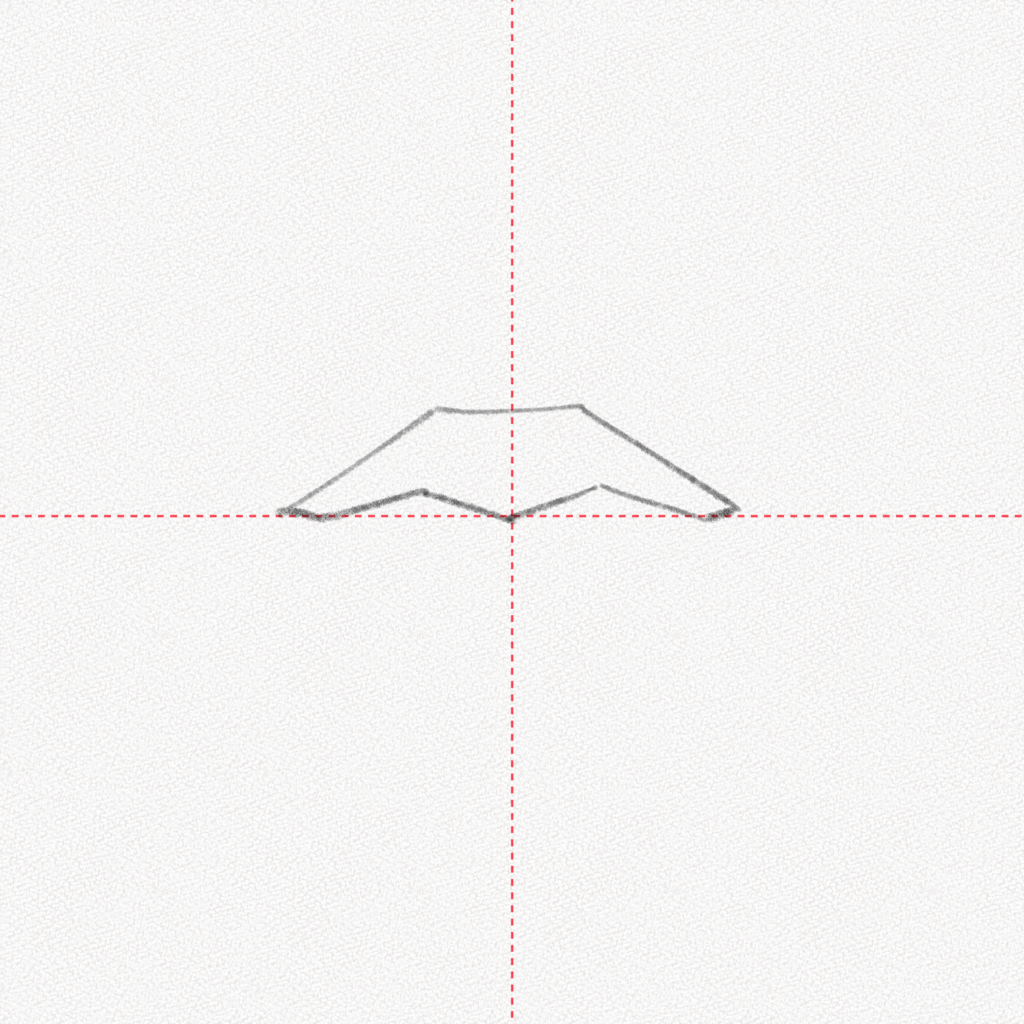
Step 5: Draw the bottom
Draw the second half of the hexagon form in the bottom lip, do your best to make it symmetrical.
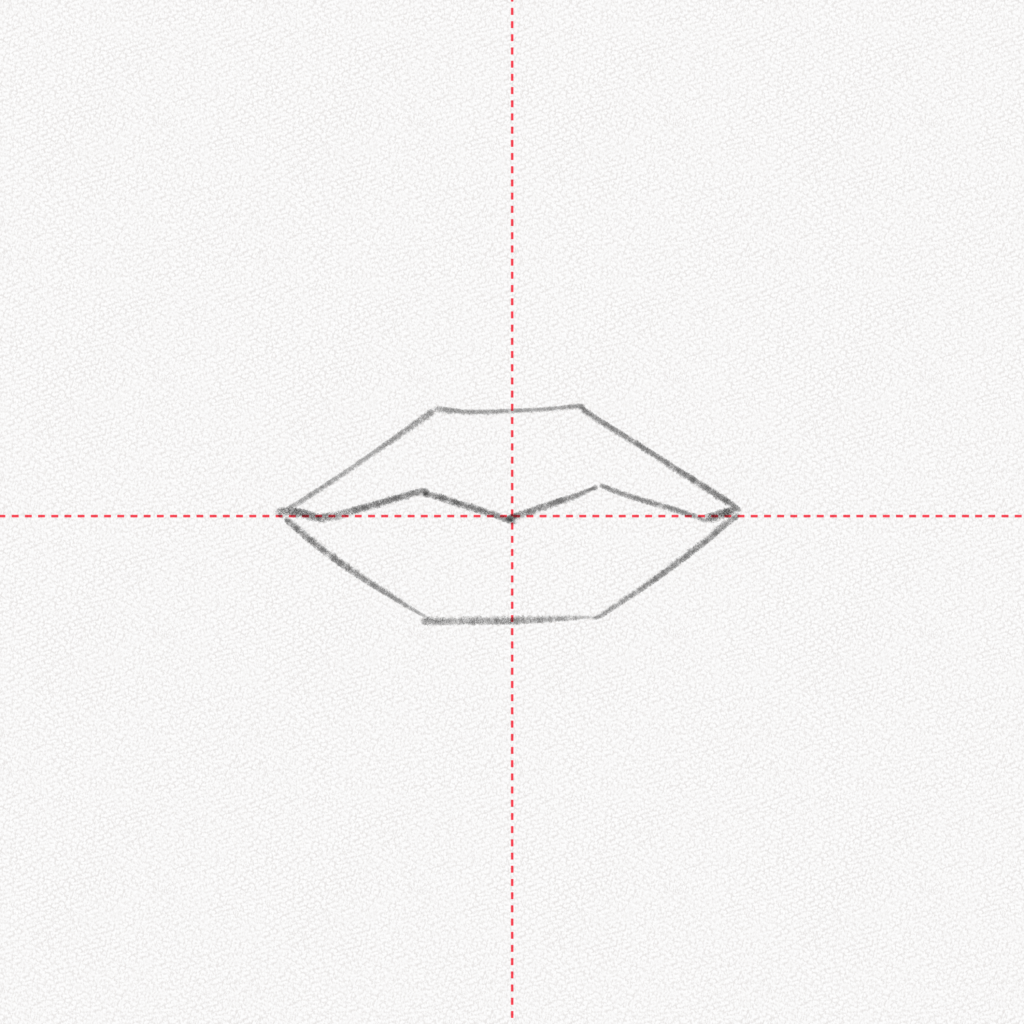
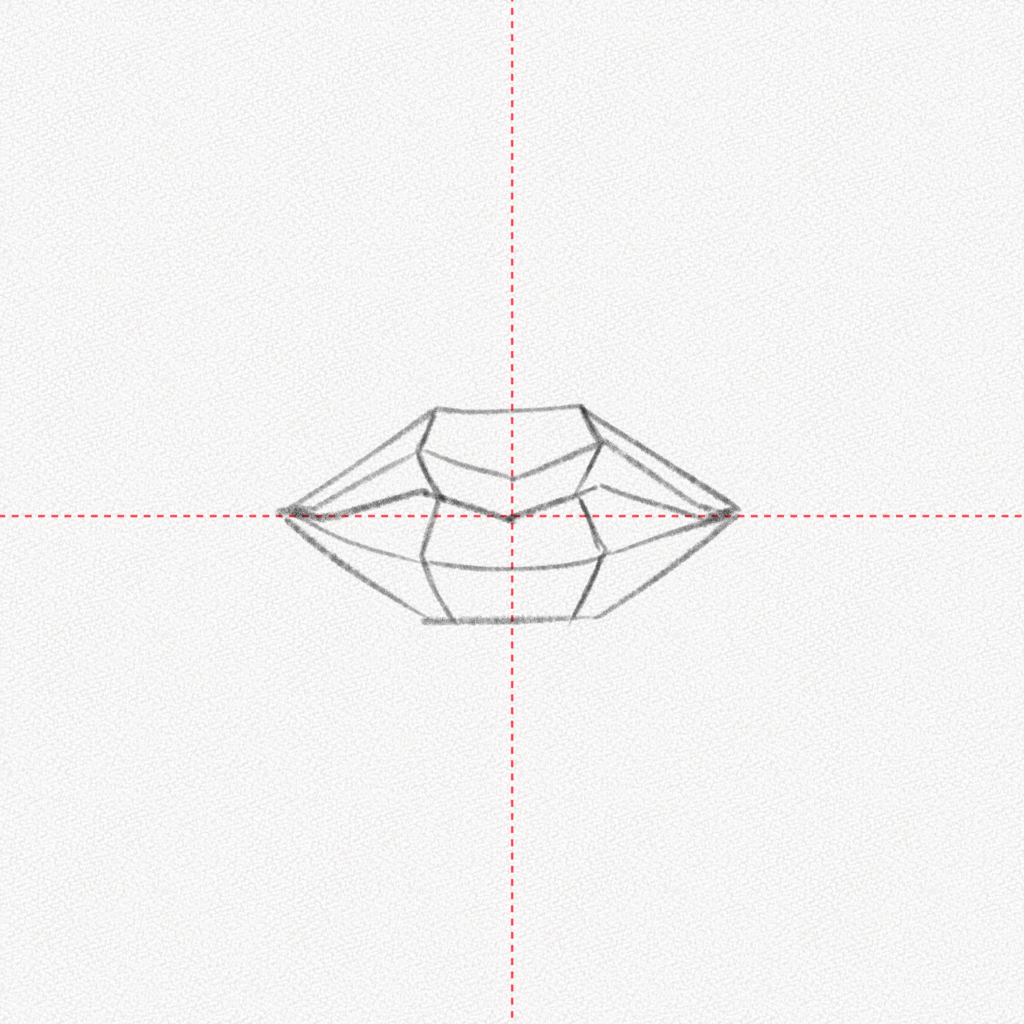
Step 6: Define the volume of the top lip
As shown in the diagram, add lines to define the volume of the top lip. You can change the angle of those lines to vary the shape of the lips.
Step 7: Define the volume of the bottom lip
Do the same for the bottom lip. Remember that angled lines mean more volume for the bottom lip.
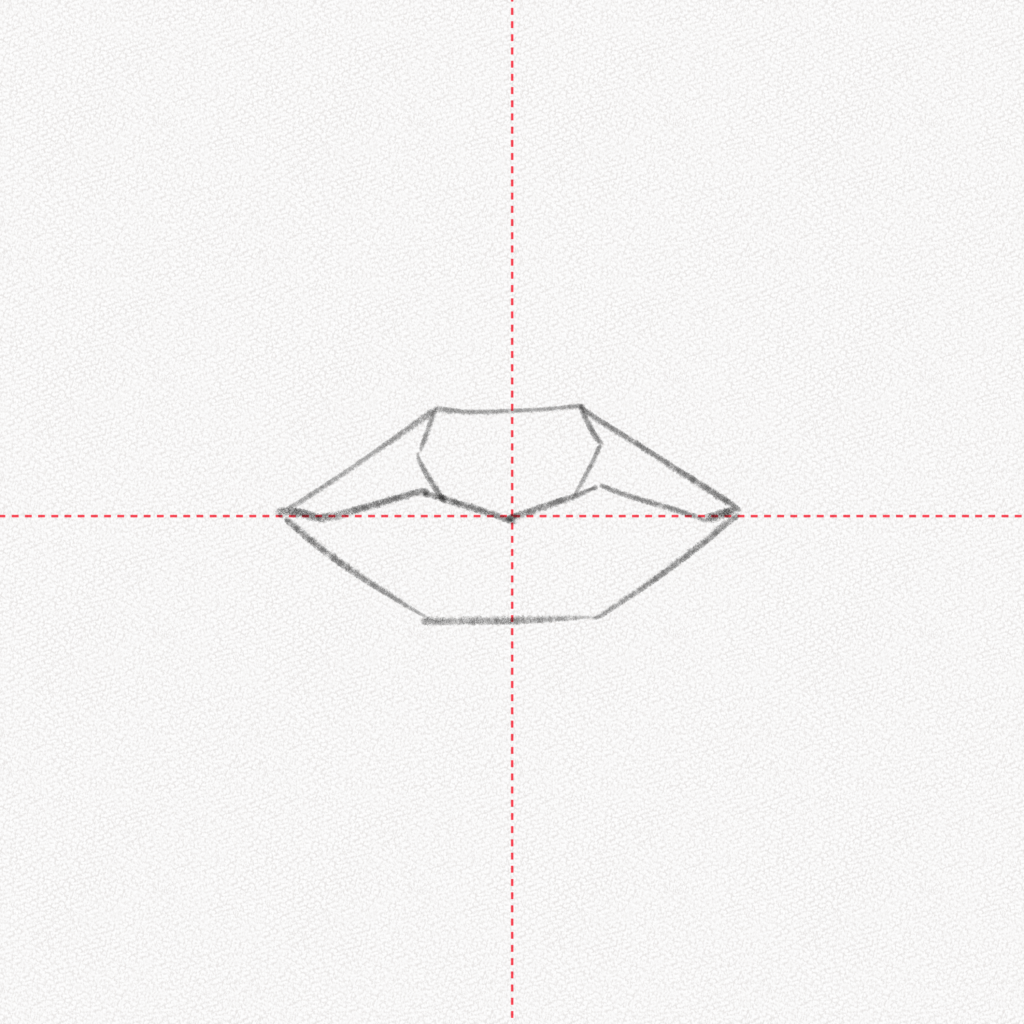
Step 8: Sketch the planes of the top lip
Now let’s sketch the planes for the top lip. The top lip shape is much more defined than the bottom lip, so the planes will be more angular.

Step 9: Sketch the places of the bottom lip
For the bottom lip, we will connect the middle parts with lines, giving it a round shape.
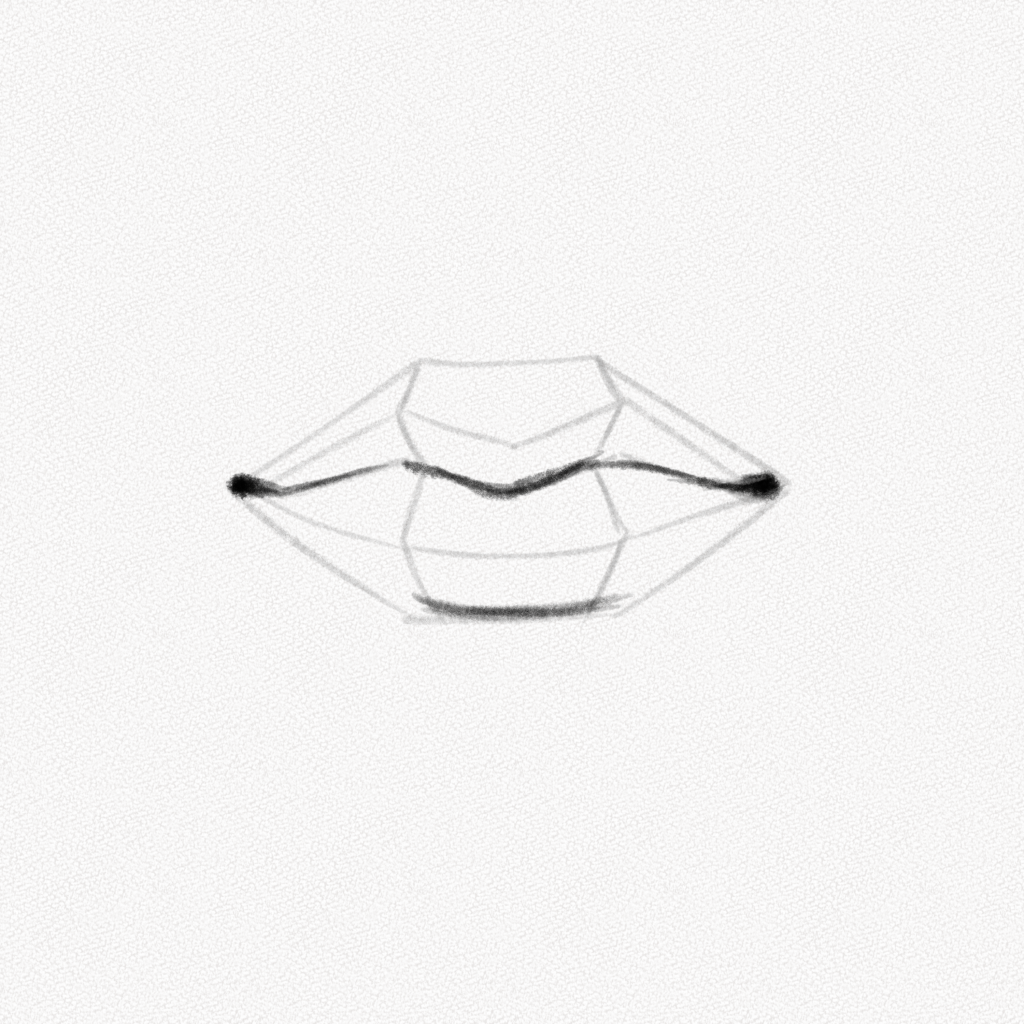
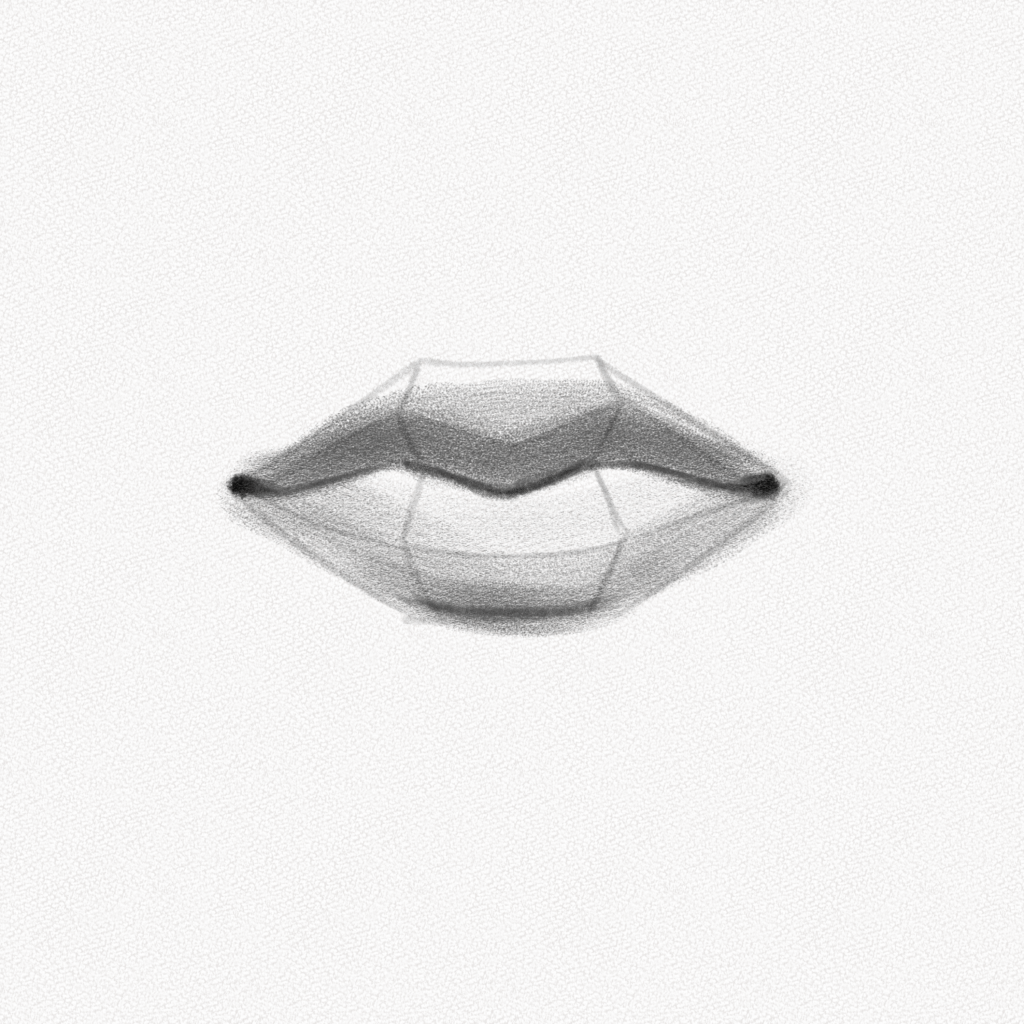
Step 10: Erase your guidelines and mark the darkest area
The most distinctive feature of the lips is, for sure, the line that separates them and the lower part of the bottom lip. After erasing our guidelines, using our 4B pencil, we are going to trace over our sketch with soft organic lines.
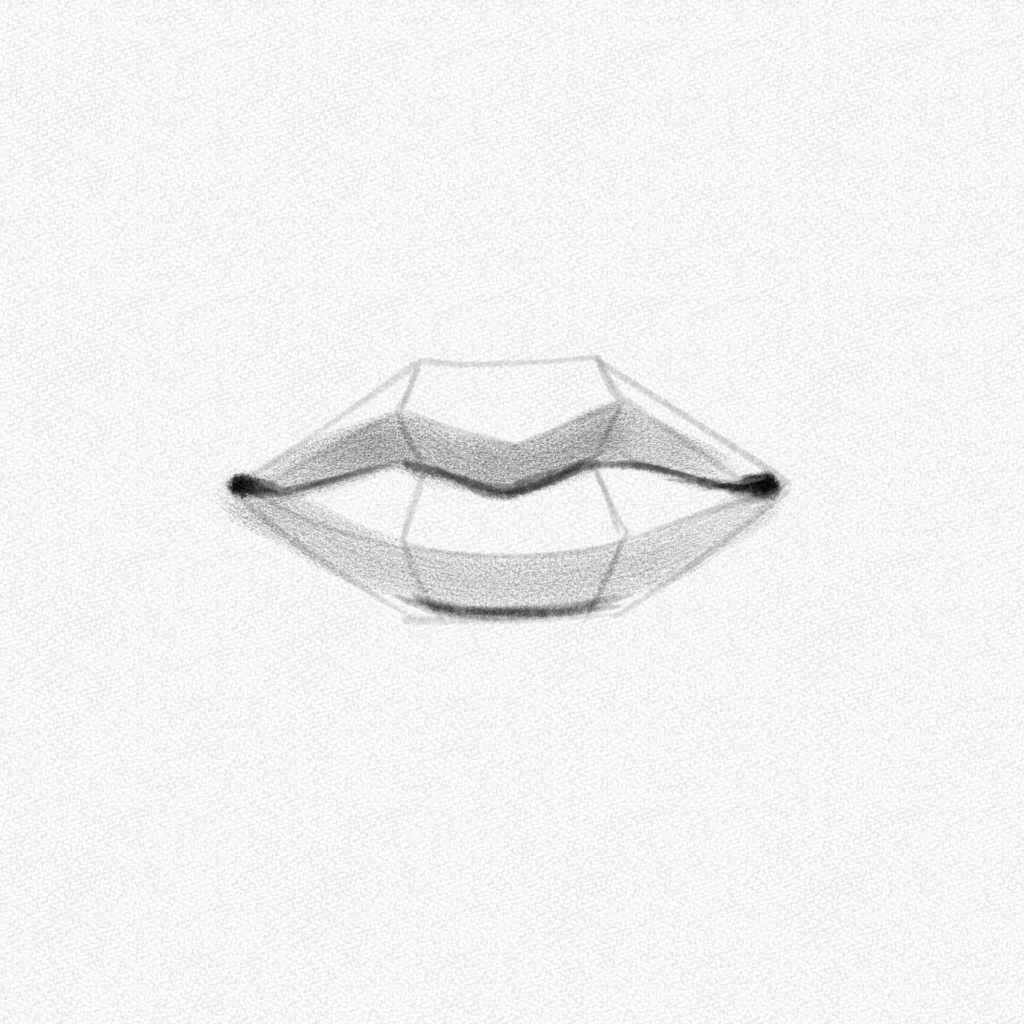
Step 11: Fill the darker planes
Using our 4B pencil with soft small circular movements, we are going to shade the lower part of both the top and bottom lip by softly applying two to three layers of graphite (the upper lip will always be darker, so apply an extra layer of graphite).
Step 12: Fill the lighter planes
Now let’s do the same for the upper part of both lips, but only apply one layer for both lips.
Step 13: Add contrast
After that, add a bit more graphite to the line that separates the lips, marking as well the part where the top lip casts a shadow on the bottom lip.
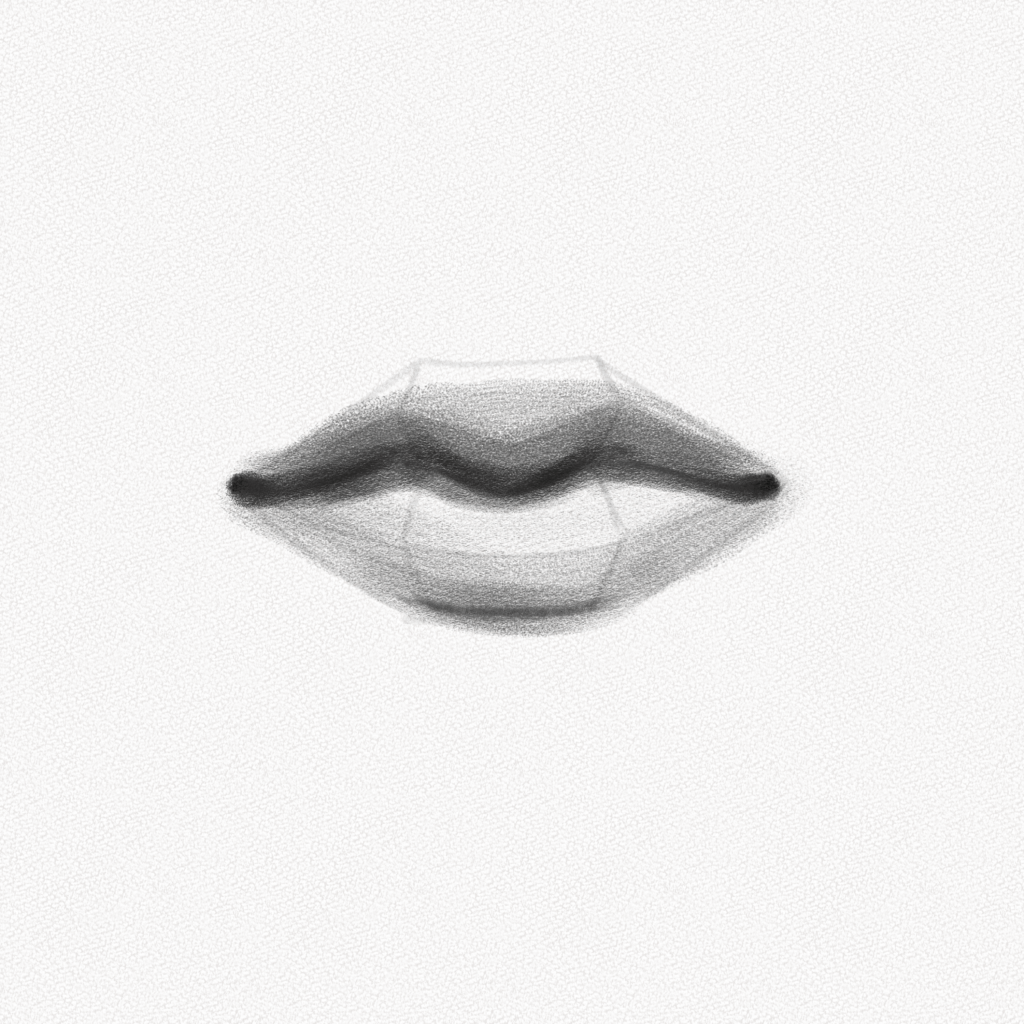
Step 14: Define the top lip
Add more graphite to the sides of the top lip, as shown below, but avoid the cupid’s bow.
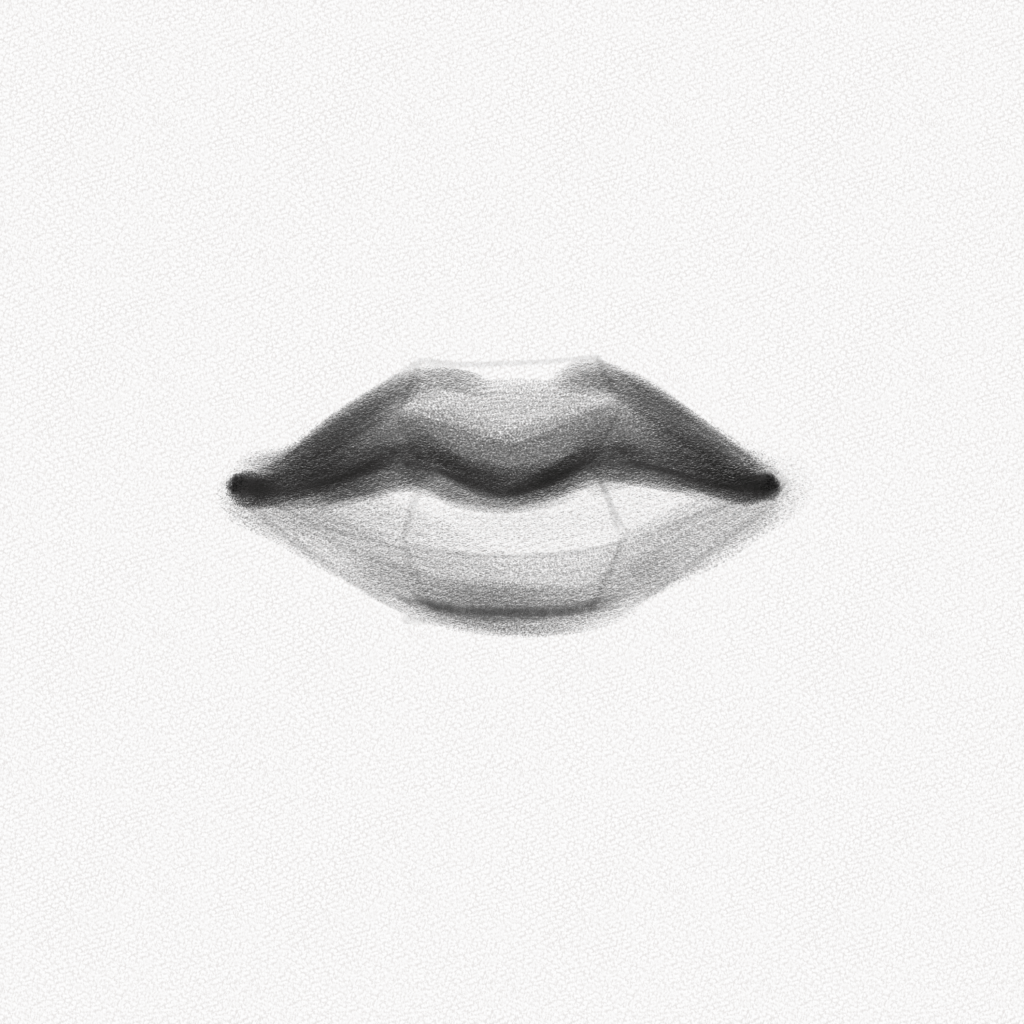
Step 15: Define the bottom lip
Do the same for the bottom lip but with fewer graphite layers since the bottom lip is always a shade lighter than the top lip.
Step 16: Blend
Using your blending stump, blend the graphite. You’ll notice how the separation line loses definition, don’t worry since we’ll fix that later.
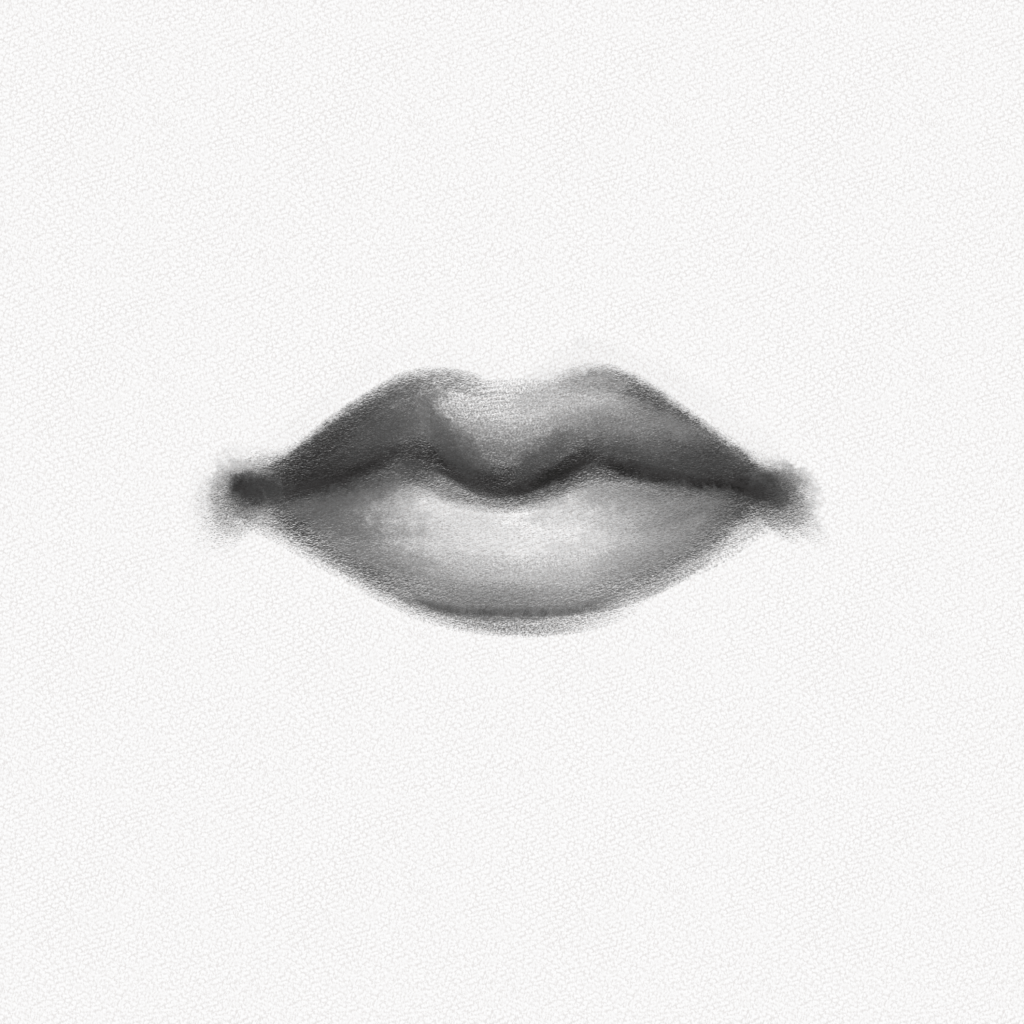
Step 17: Shade the highlighted area
With your blending stump, move some graphite to the highlighted area. This is where the facial muscles connect and will always have a small shadow.
Step 18: Add more graphite to the borders
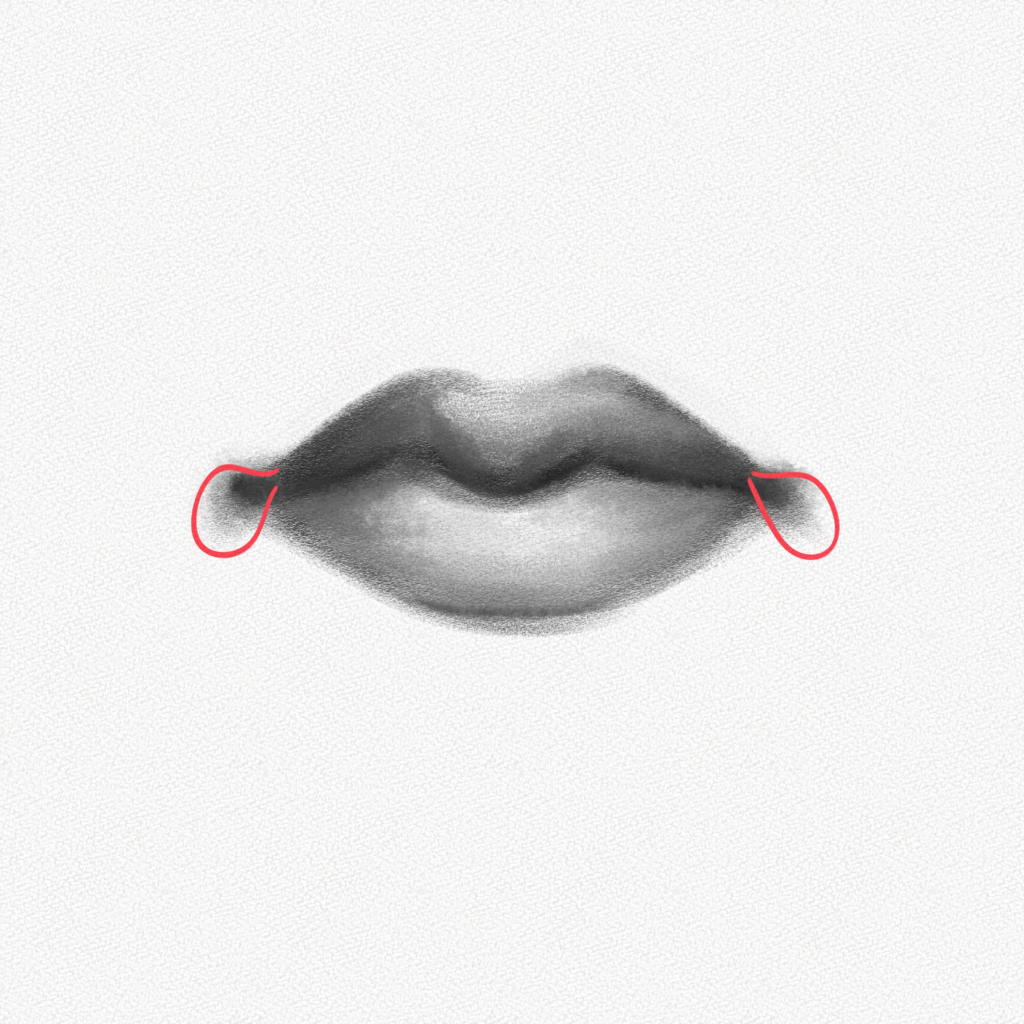
Now let’s define the corners of the mouth and the separation line we blended earlier. This step adds contrast to our lips. Do the same for the borders of the bottom lip.
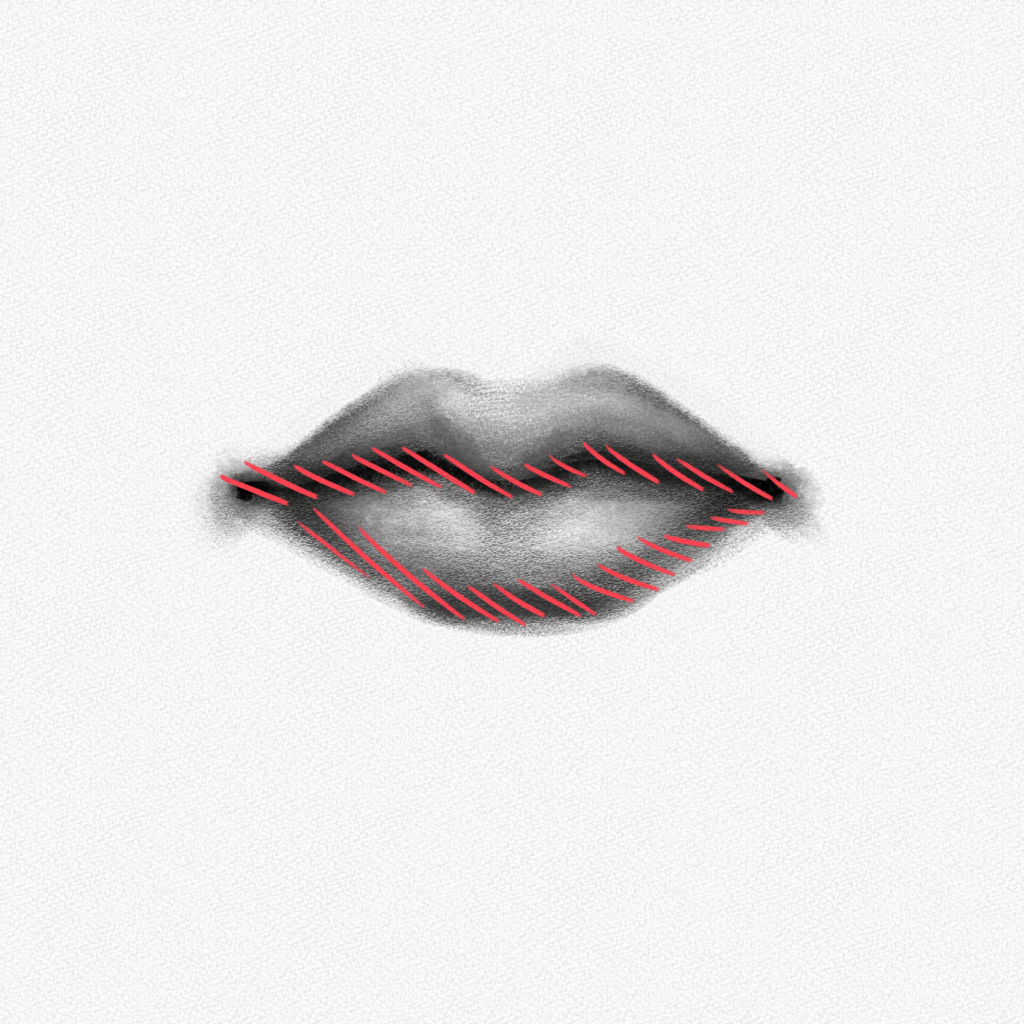
Step 19: Add details
With our 4B pencil, we are going to make some lines representing the lips’ wrinkles, following the diagram example for both the top and bottom lips.
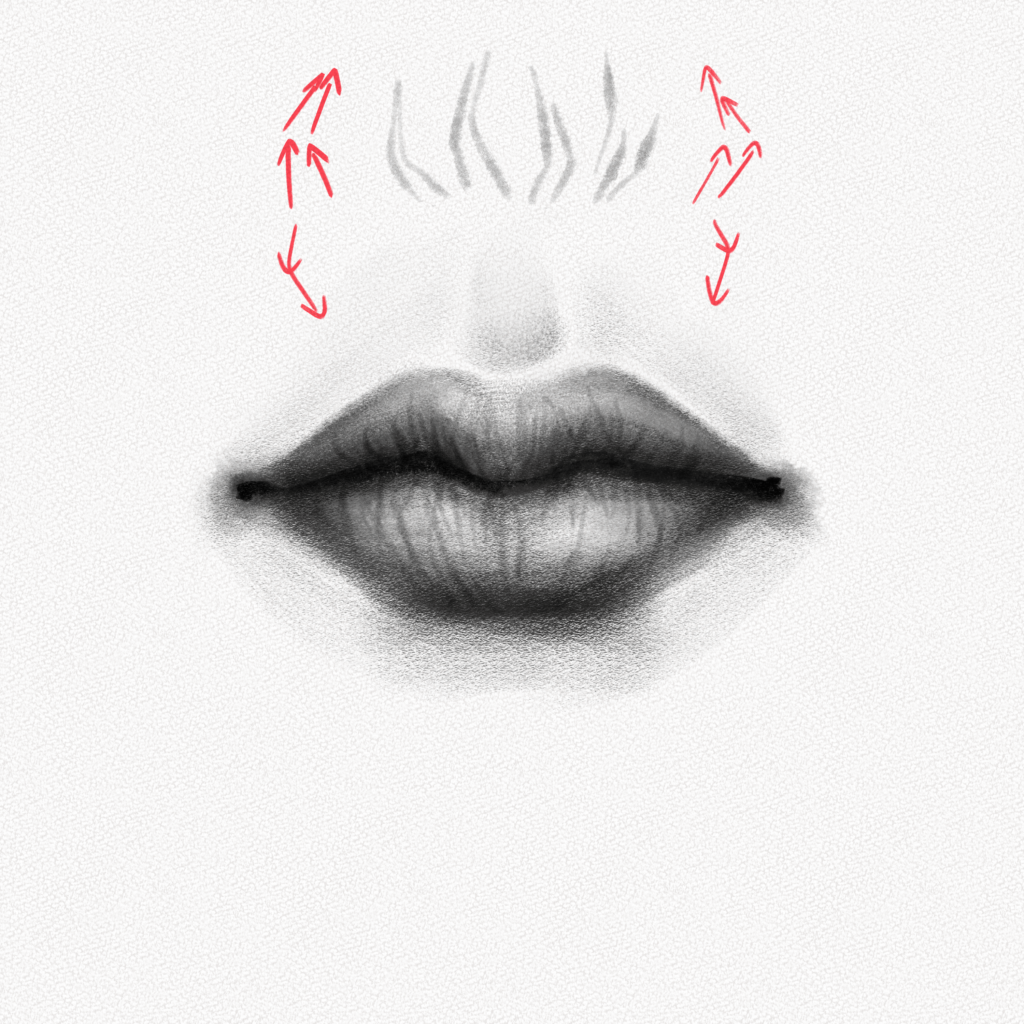
Step 20: Add highlights
With our precision eraser, we will take some graphite away from the base of the top lip (reflected light) and some minor touches for the lip wrinkles, and with our gel pen, we are going to add brighter highlights.
And that’s it. You did great!
Thank you for following this tutorial. I hope you learned a bit more today and that you had fun drawing the lips.
Until next time!