Anime has an incredible influence on our modern culture, especially on young artists’ generations, who have been inspired to pursue art as a career by Japanese comics and animations.
When we talk about anime, one of the most noticeable traits is the eyes. The feature that strikes the most when looking at an anime character is the curious and imaginative shape and color of the eyes. There are many styles of anime eyes, and although they look simple many have trouble when trying to draw them.
Behind all the stylization, sparkles, and thick lashes lies a solid foundation base of realism, anatomy, and design.
We recommend you to check our previous tutorial: How to Draw Eyes, where you’ll learn the fundamentals of drawing eyes, from the basic shapes behind the anatomy to the different types of eyes.
In this tutorial, we’ll learn how to draw, and detail anime eyes step by step.
What You’ll Learn in this Tutorial
- Basic shapes behind anime eyes
- Styles of anime eyes
- How to draw anime eyes step by step
Materials Needed for this Guide
- A piece of paper
- Graphite pencils from the gradation 2H, 4B, and 8B
- A compass
- A ruler
- A blending tool
- An eraser
- A white gel pen/fine liner
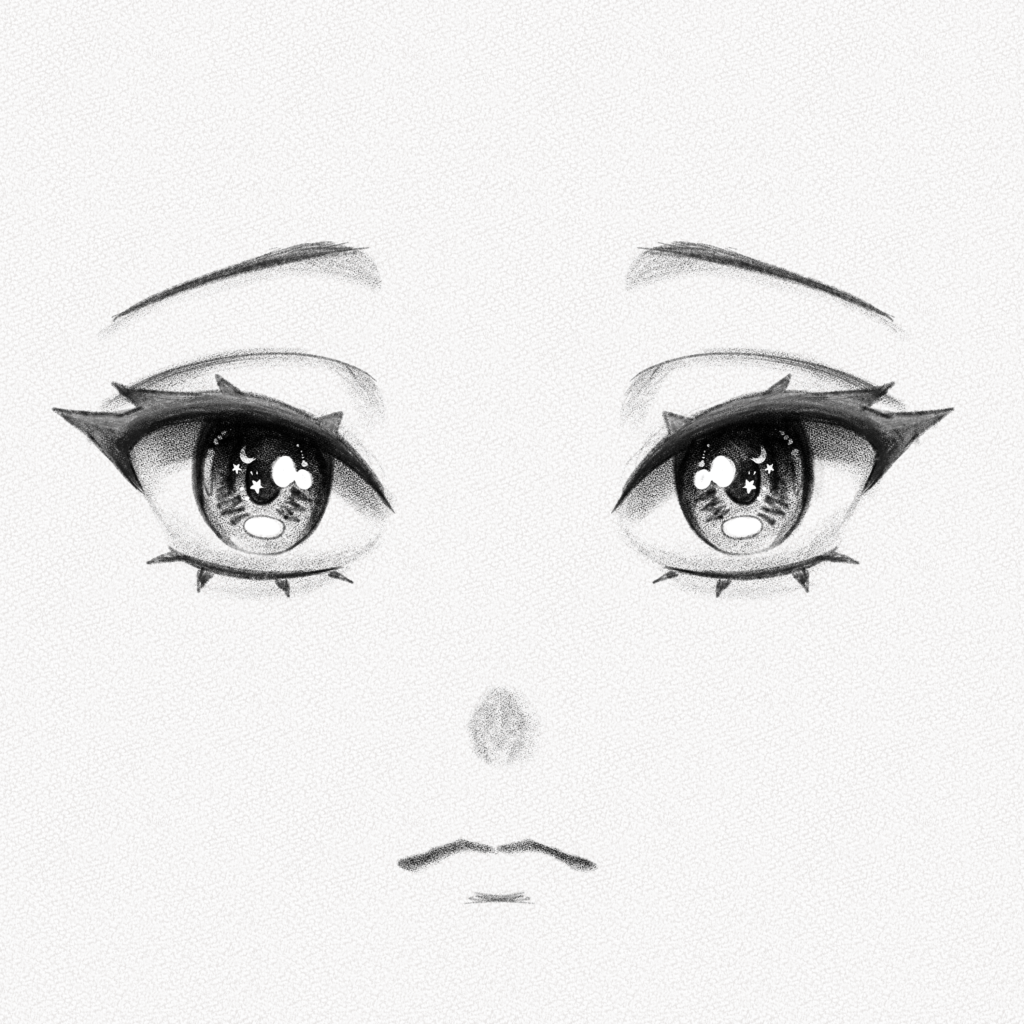
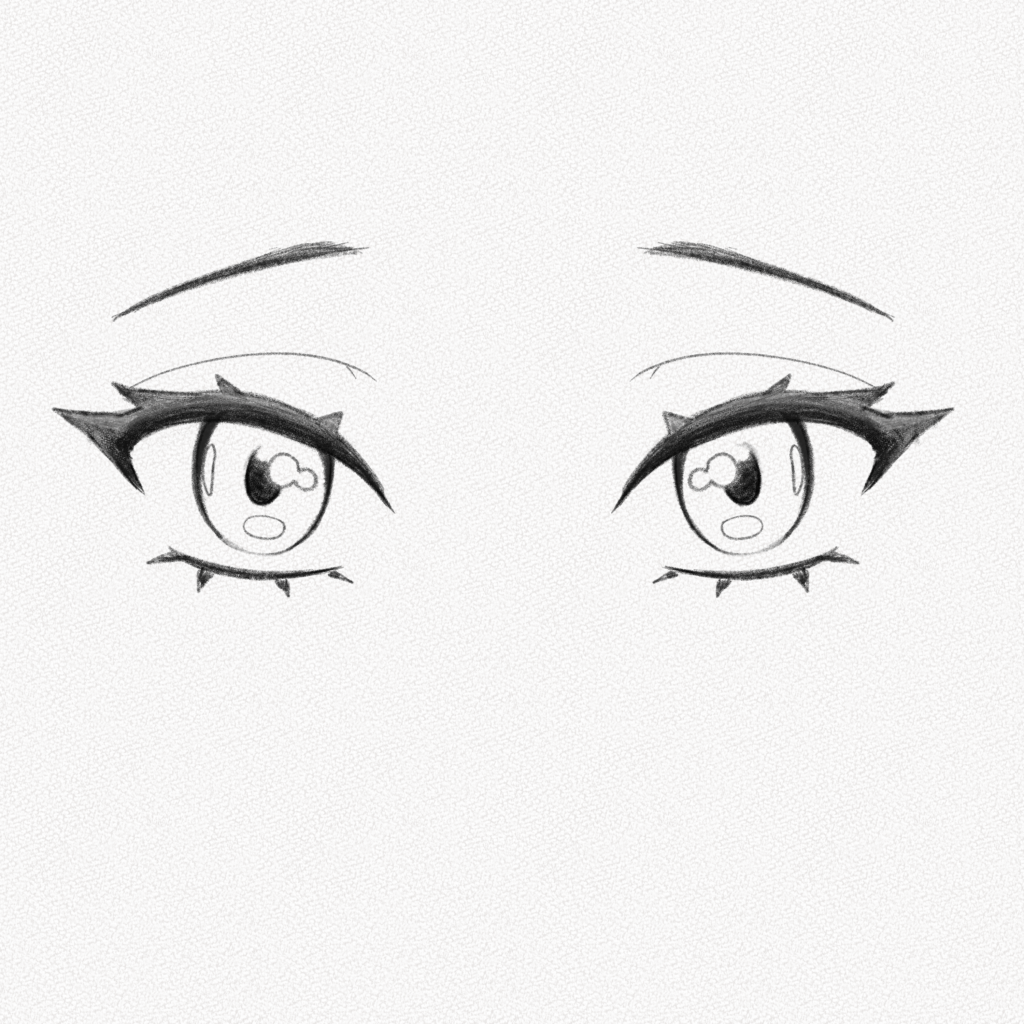
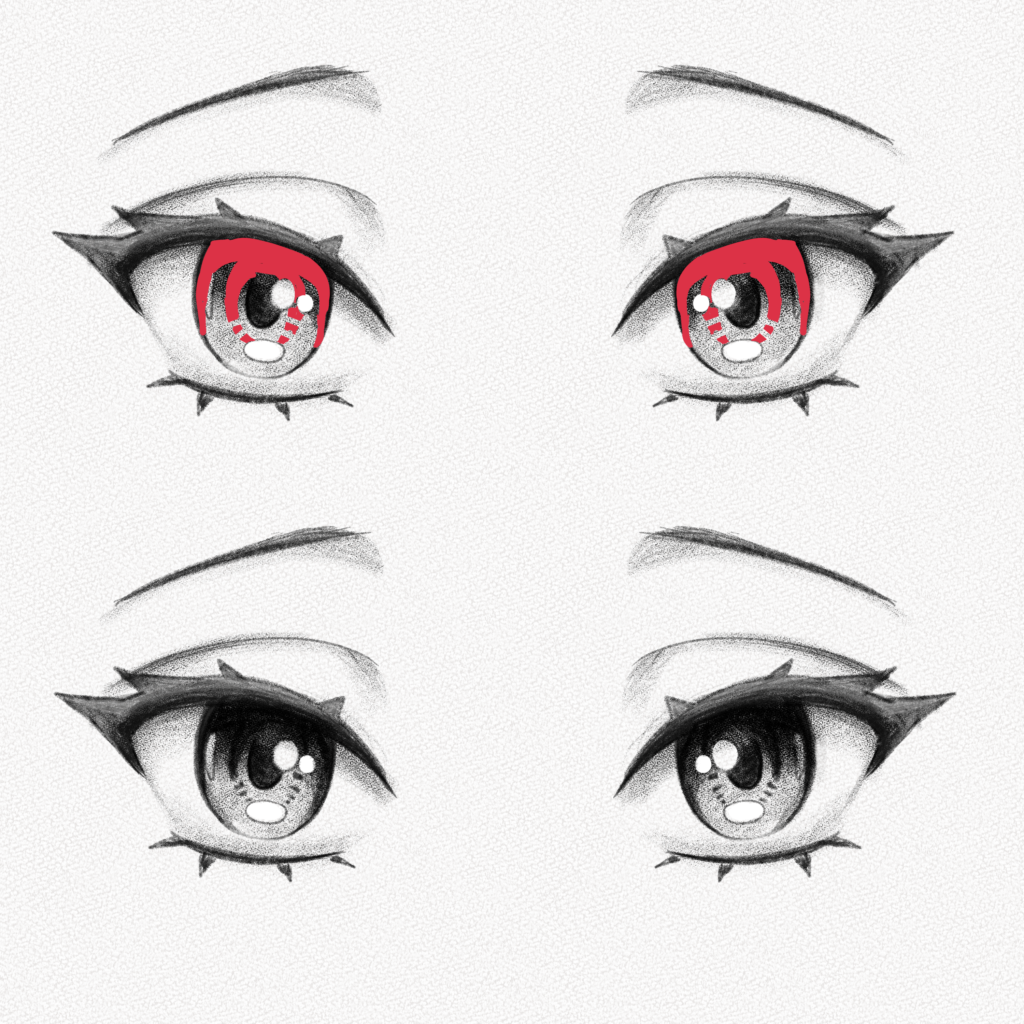
The eyes you’re going to draw:
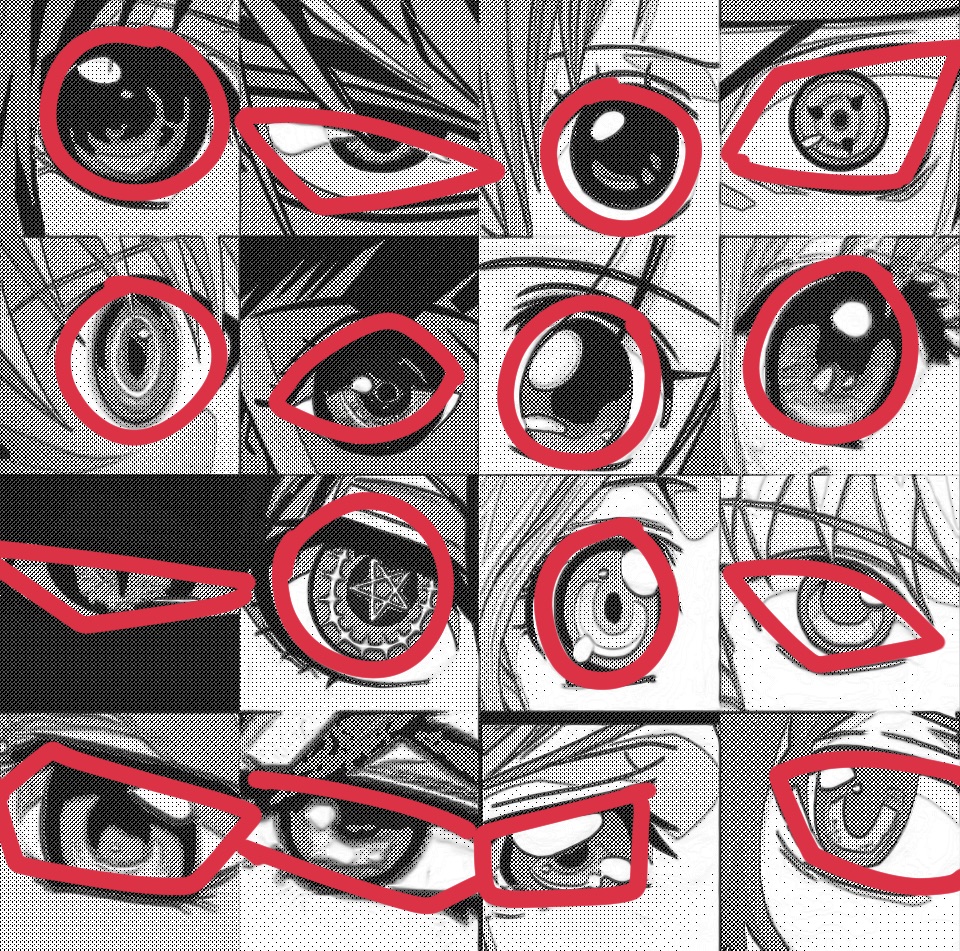
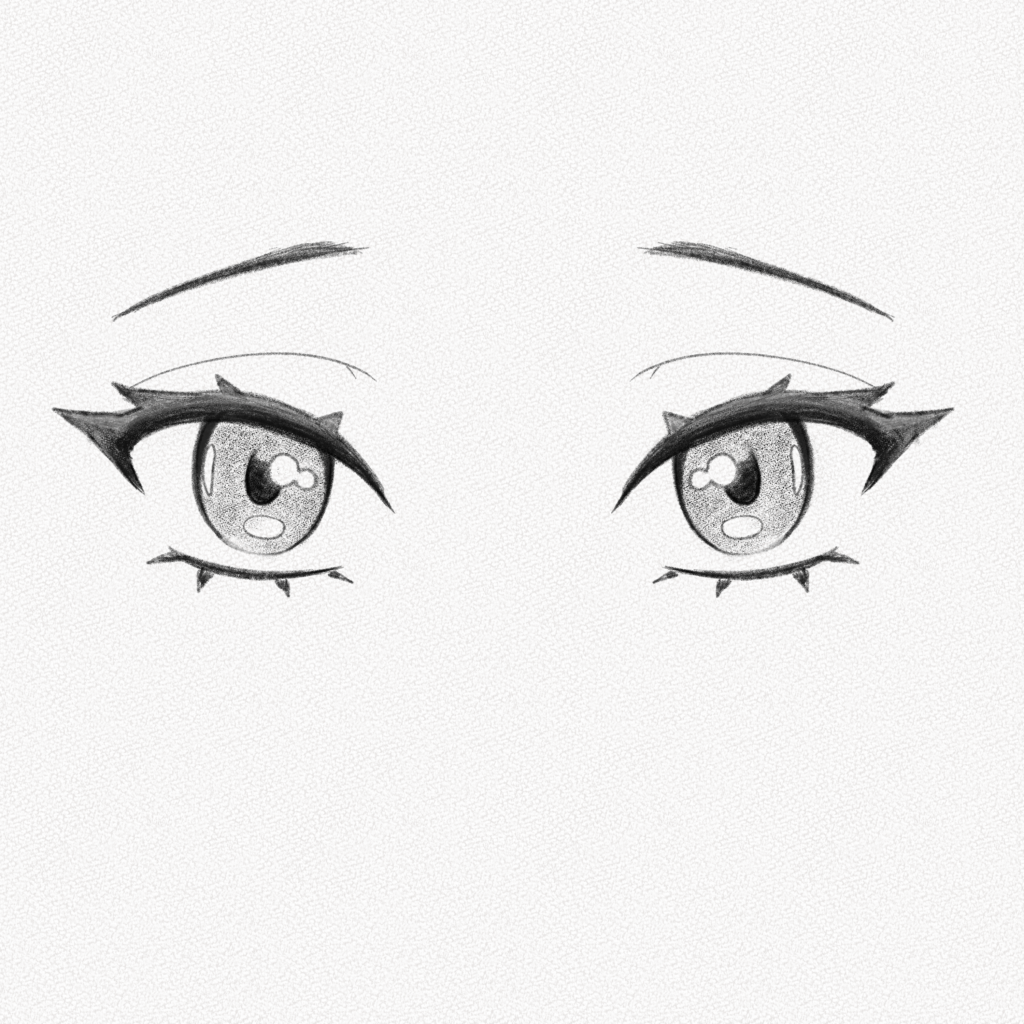
And these are all the steps we’ll walk you through!
Basic Shapes Behind Anime Eyes
There are many types of anime eyes. Even though they are all based on human eyes, the multiple levels of stylization the artists give them make it quite hard to figure out the structure behind them, so in order to learn, we have first to simplify the eyes into basic shapes.
The three basic shapes are round, rectangular, and triangular. Those shapes should be used as a reference and not as a drawing base.
The eyes lost most of their anatomical details like the waterline and lacrimal but kept the lashes and eyelids, which are simplified in lines and spiky shapes.
The iris also changes its shape from a perfect circle to an elongated oval or an irregular round shape, and the pupil follows the same pattern.
Though there are many anime art styles, the shape of the eyes is always associated with the character you’re drawing. For example:
- The rounder shapes are used to portray innocence, youth, positivity, and happiness.
- The rectangular shapes are used to portray responsibility, seriousness, and optimism.
- The sharp and elongated (triangular) shapes are used to portray maturity and adultness in the character, and some say that most characters with those kinds of eye shapes have experienced hardships.
Anime Art Styles
Every anime has a different art style, and that applies to the eyes as well; many anime’s most recognizable traits are the eyes of their protagonists since sometimes they present “powers” or “special characteristics” that make their eyes different from the rest (i.e., The Sharingan — Naruto, Demon Eyes — Kuroshitsuji, etc.)
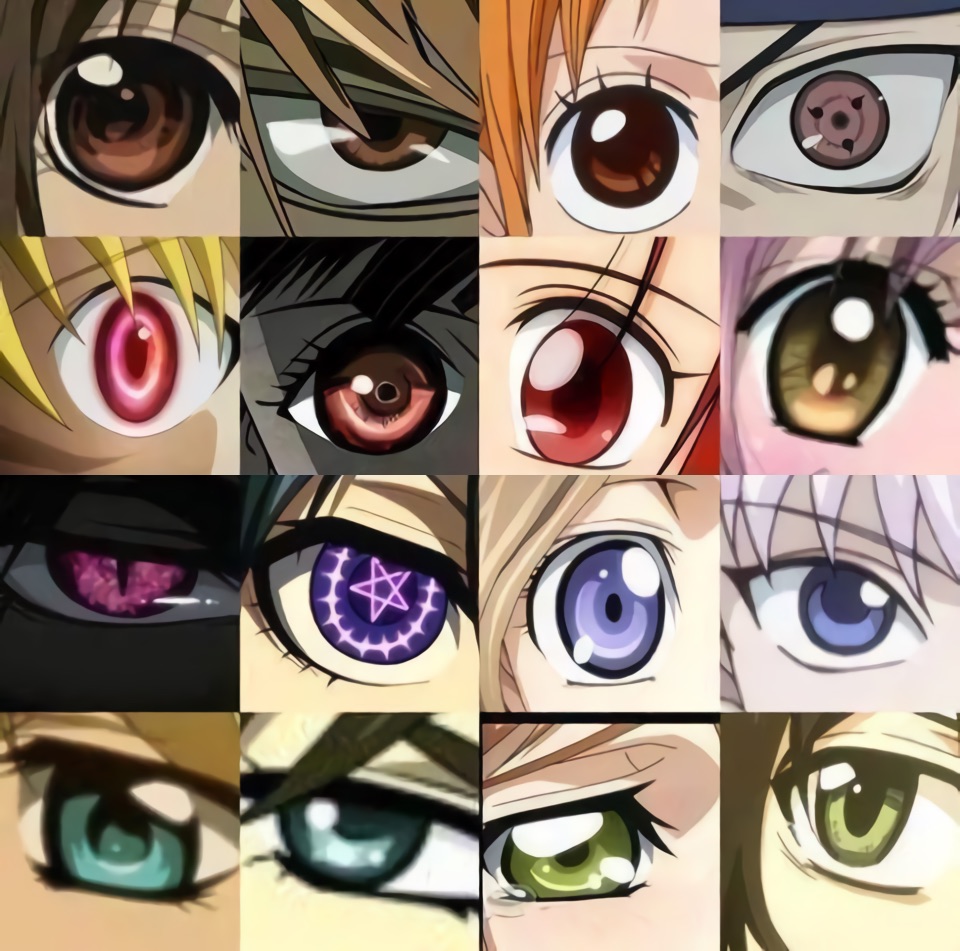
In this chart, you’ll be able to see many different art styles and probably identify some popular anime, so take a moment to identify the differences between each style and figure out the basic shapes behind them.
In order to draw anime eyes, imitating is key, so practice by copying the styles of your favorite anime and from animes that catch your attention, and once you’ve practiced enough, you’ll probably have already developed your own art style and will be able to draw anime eyes in your own unique style.
Check this article, “How To Find Your Art Style” to learn more about that matter.
How to Draw Anime Eyes Step by Step
In this guide, I’ll show you how to draw anime eyes in a particular style; however, you’ll be able to use the steps you learn here to draw any shape and style of eyes in the future.
Anime eyes are usually drawn with ink and alcohol-based markers or with digital painting software on a graphic tablet; however, not everybody has those materials.
Since a piece of paper and graphite pencils are the items most of us have at home, we are going to use them to draw our anime eyes.
Let me know in the comments if you’d like a tutorial with ink and markers or a digital art tutorial to draw anime eyes.
Let’s begin.
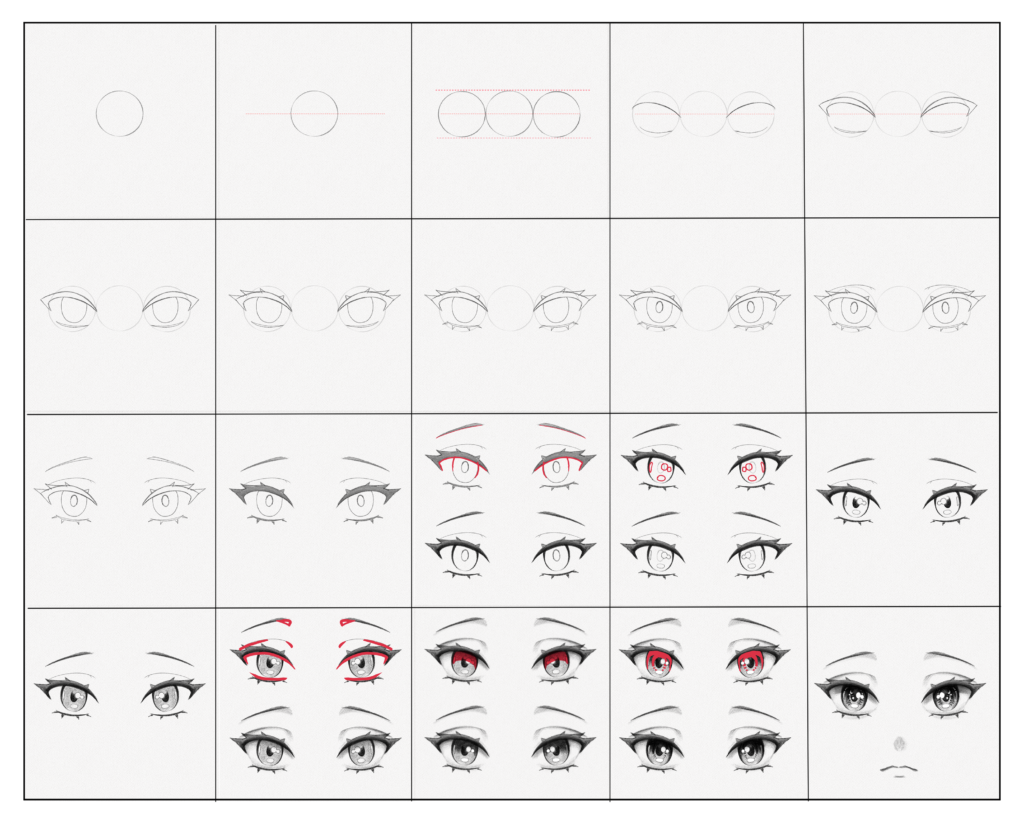
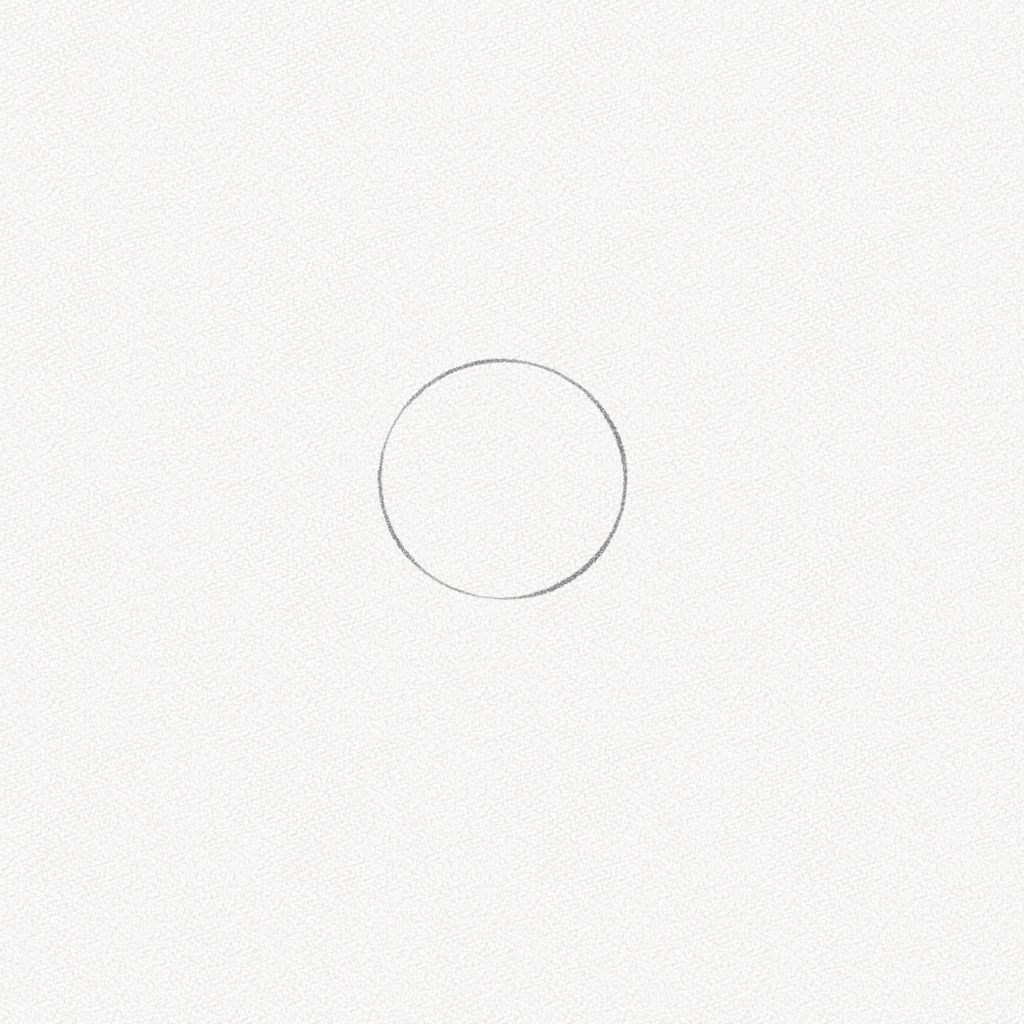
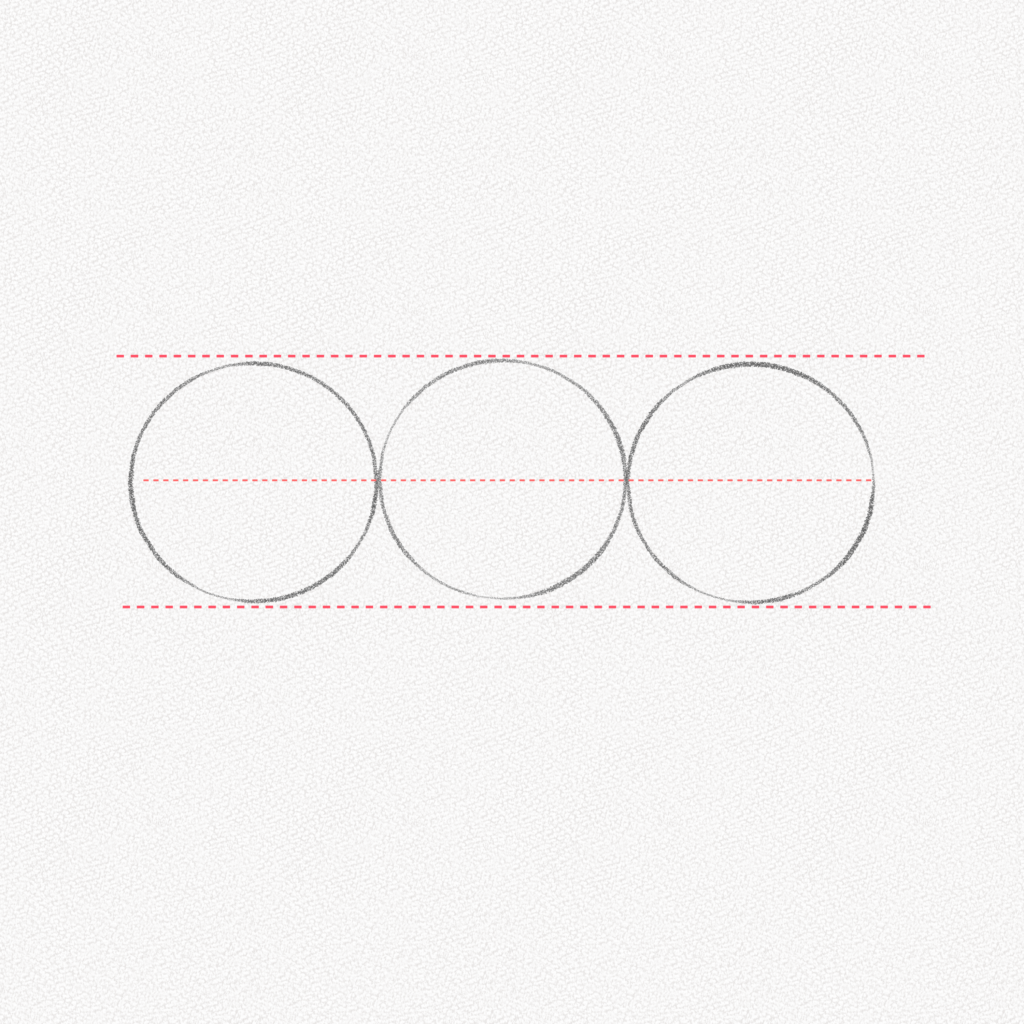
Step 1: Draw a Circle
Yes, a circle.
With your 2H pencil and the help of a compass (or a small circular object) softly draw a circle right in the middle of your paper.
Because no matter the shape we are going to use, we need circles to determine the distance between each eye, and this middle circle will be the position marker for the distance between both eyes.
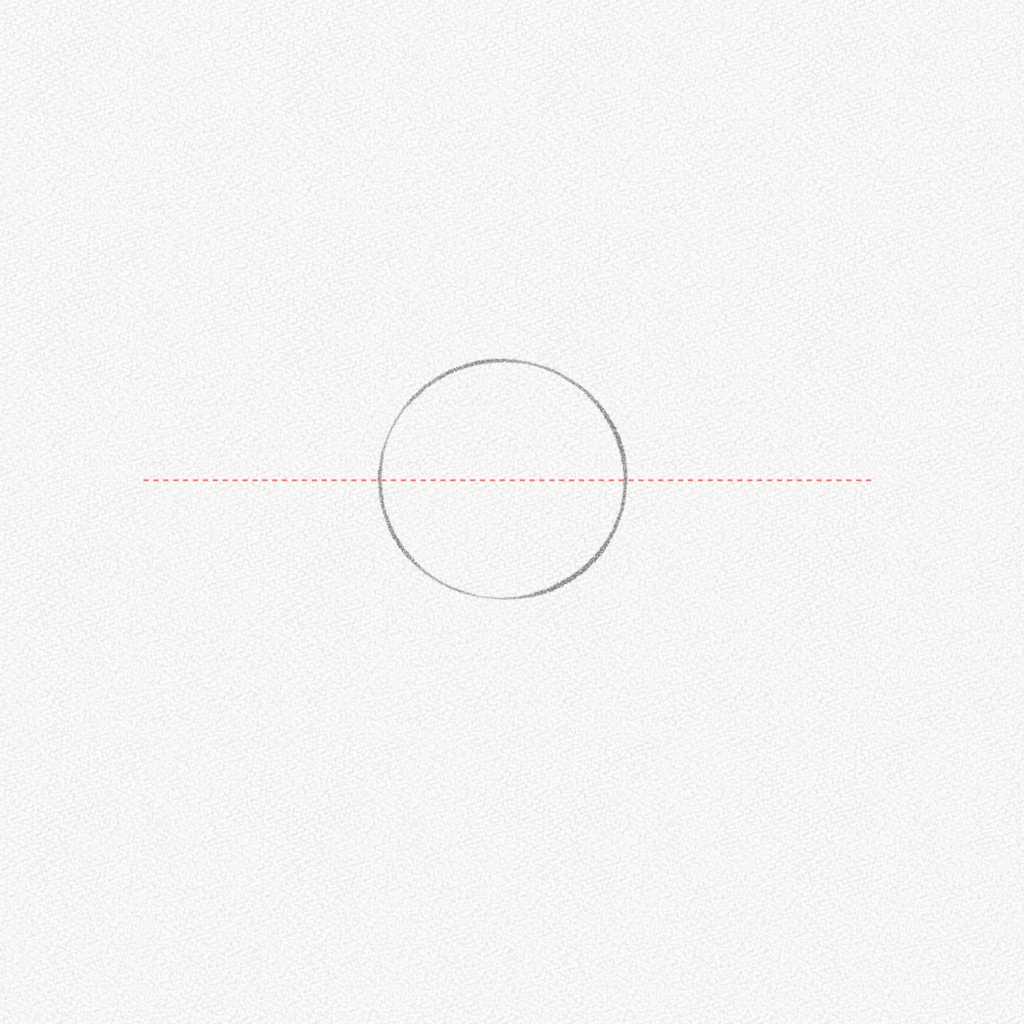
Step 2: Draw a Line
Find the middle point of the circle and trace a line. That line will help you draw another two circles, which will define the position of the eyes.
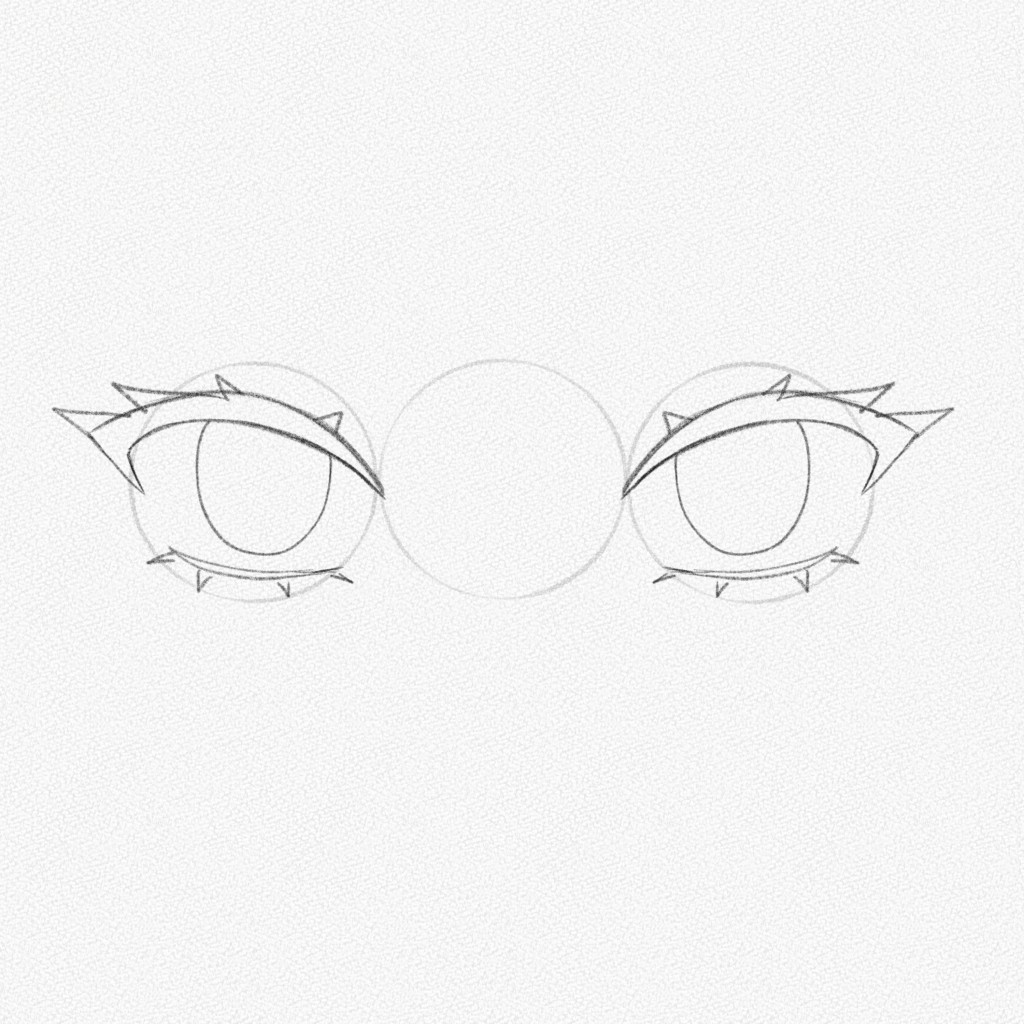
Step 3: Draw two circles
Draw the other two circles. Make sure they are aligned and are the size you want your eyes to be. Now it’s a good time to decide what shape you want your eyes to have. Remember that you can make your own variations and try new styles.
Step 4: Draw the upper and lower lashes
With two lines, draw the inner part of the upper and lower lashes, and try to use a soft curve for the upper lashes and a sharp short line for the lower lash line.
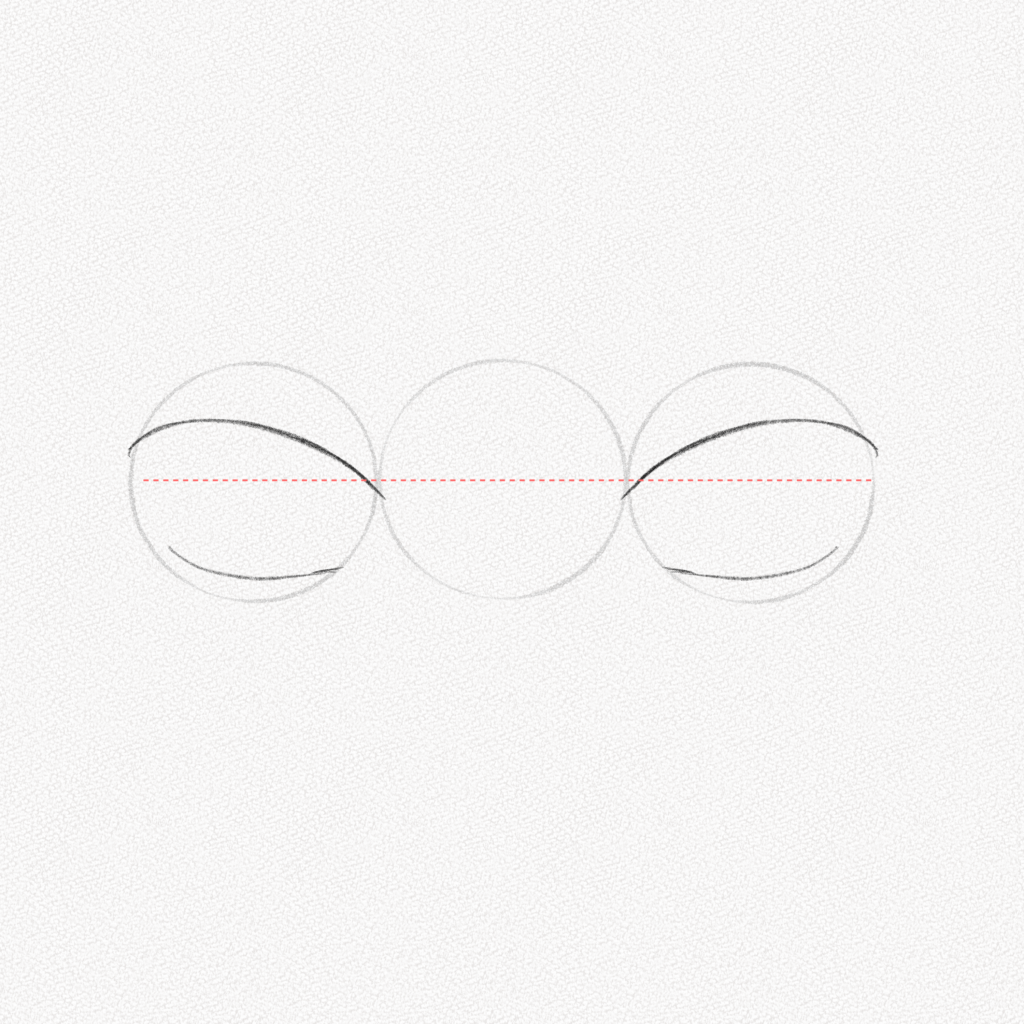
Step 5: Draw the lashes outline
Now we are going to give the eyelashes volume. As we would do with eyeliner, we are going to draw the lashes, for the upper eyelashes will always be way thicker than the lower lashes, so keep that in mind when drawing them.
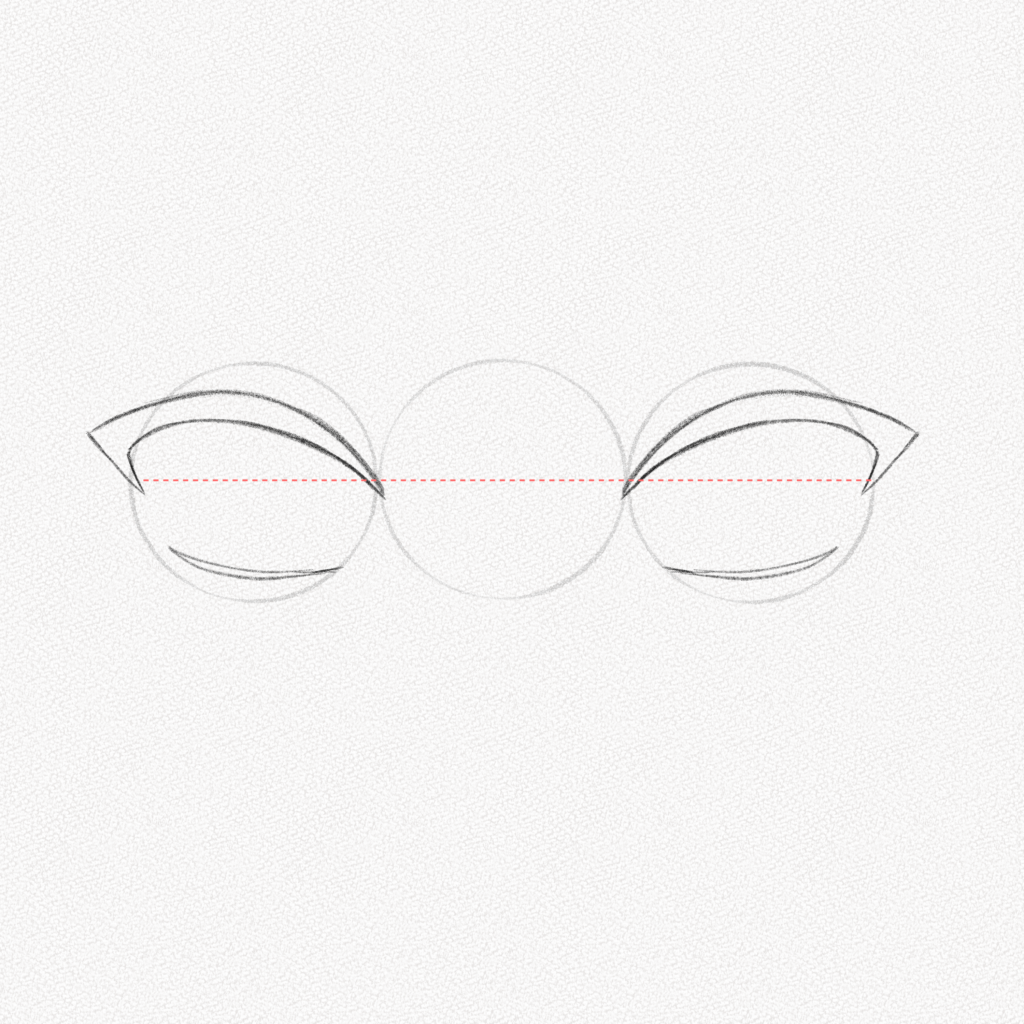
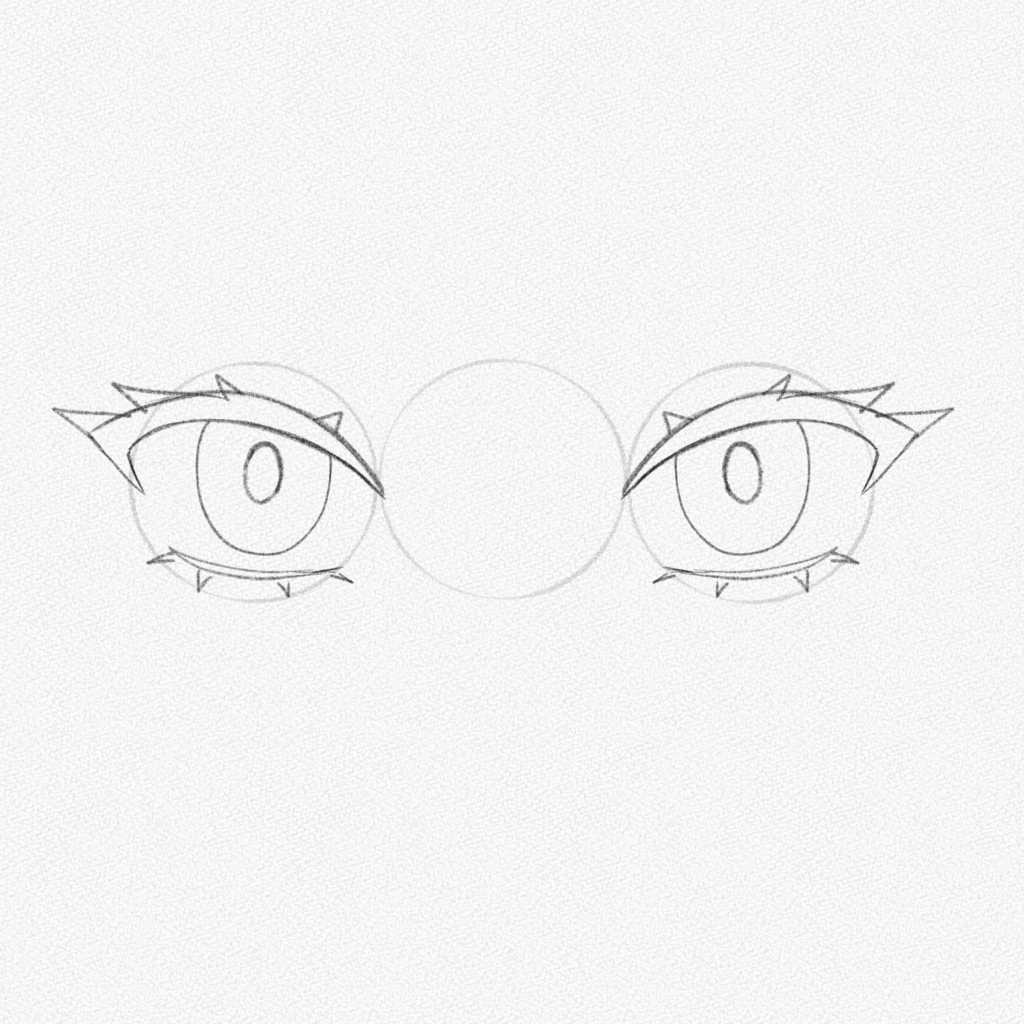
Step 6: Draw the Irises
Use two oval shapes for the irises. You can use the shape you like the best as long as it’s round, proportionate to the eye size, and mimics the iris.
Step 7: Detail the upper lashes
Using triangular spiky shapes, we are going to detail the lashes outline and try to make both eyes at the same time, so it looks symmetrical.

Step 8: Add the lower lashes
With small triangular shapes, you can now add the lower lashes; some styles don’t use lower lashes, some use only one, and some just use lashes for the corners. It will be all up to your taste.
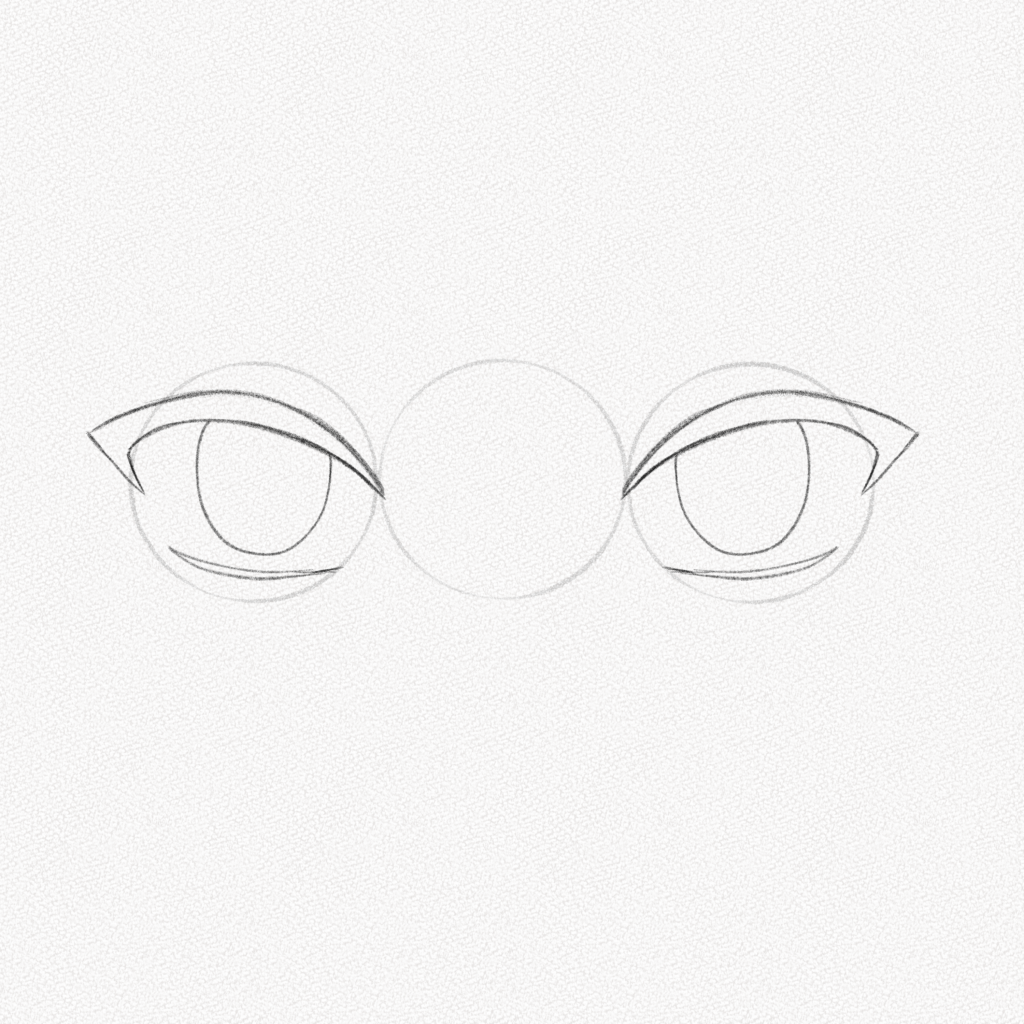
Step 9: Add the pupils
Now, in the middle of our iris, we are going to hint at the pupils’ shape. Try not to trace too hard since we are going to erase part of them later.
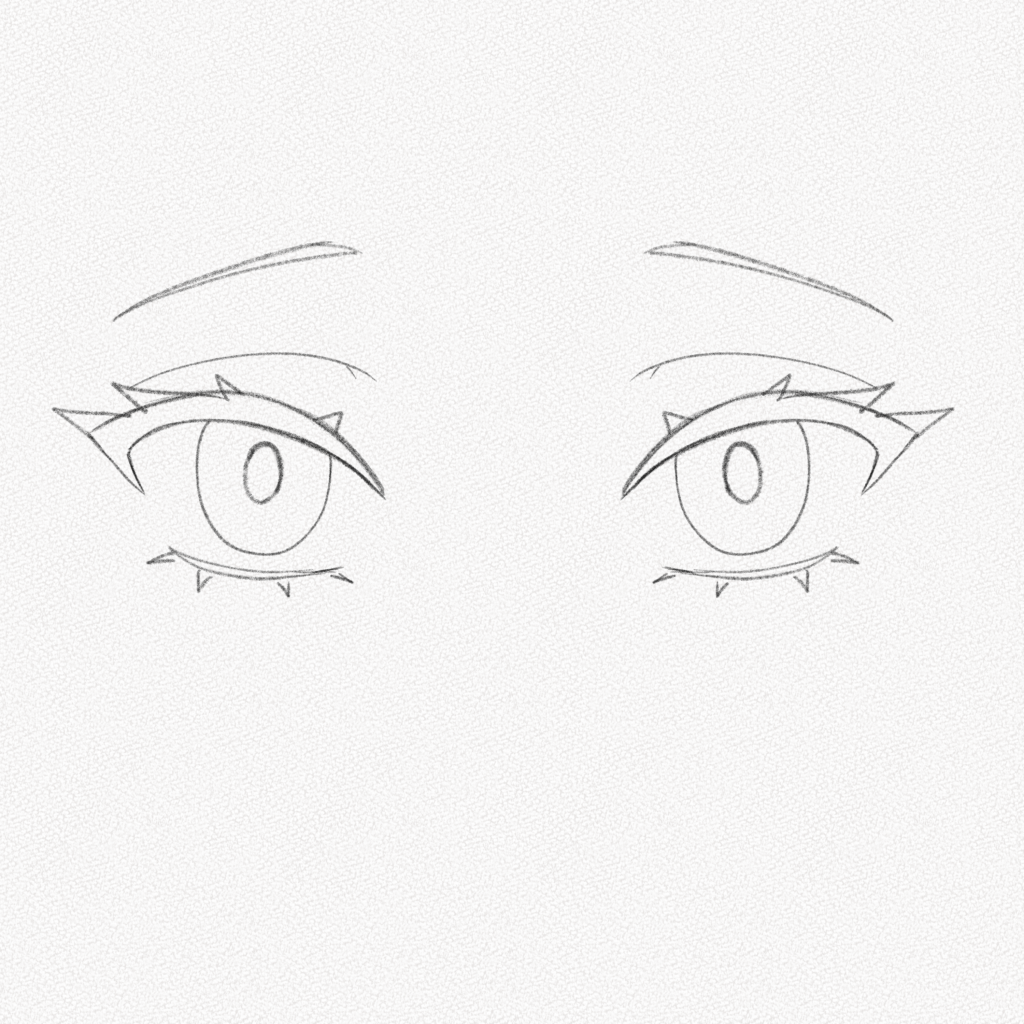
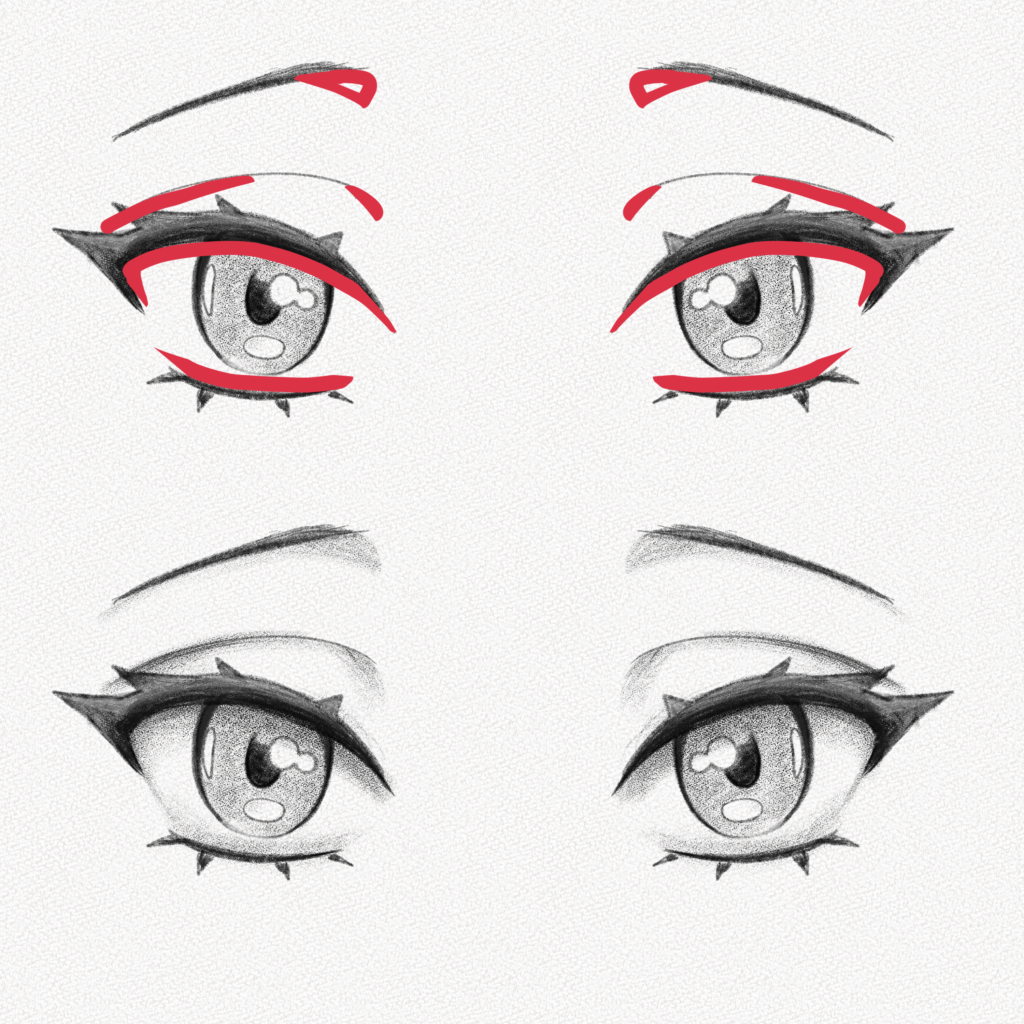
Step 10: Draw the eyelid
With a long curved horizontal line and a short vertical line, we are going to draw the eyelids of our eyes.

Step 11: Draw the eyebrows
For this step, we are going to erase our guidelines and add a couple of eyebrows to give our eyes emotion. Eyebrows in anime tend to be very thin, but we can always experiment with what we like.
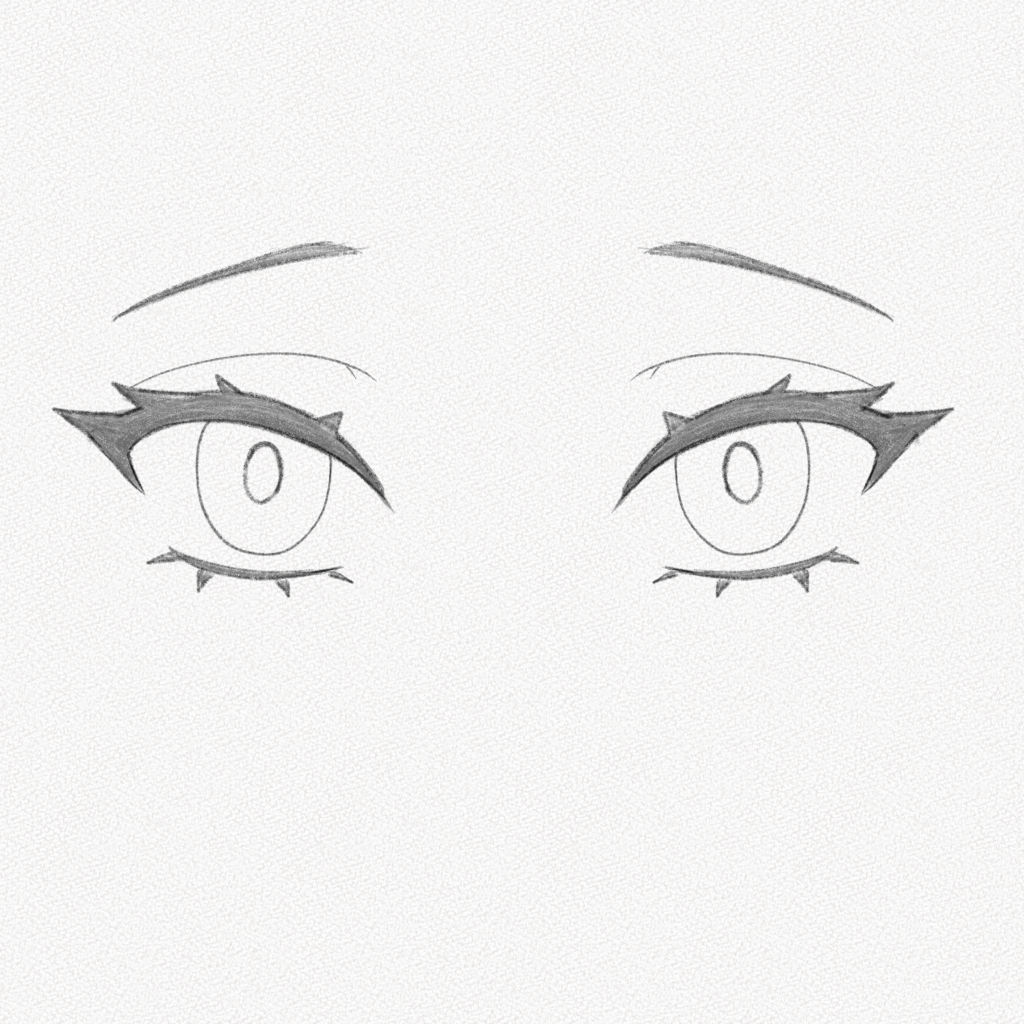
Step 12: Fill the lashes and brows
With our 4B pencil, we are going to softly fill our lashes and eyebrows. We are going to build layers, so it doesn’t need to be super dark from the beginning.
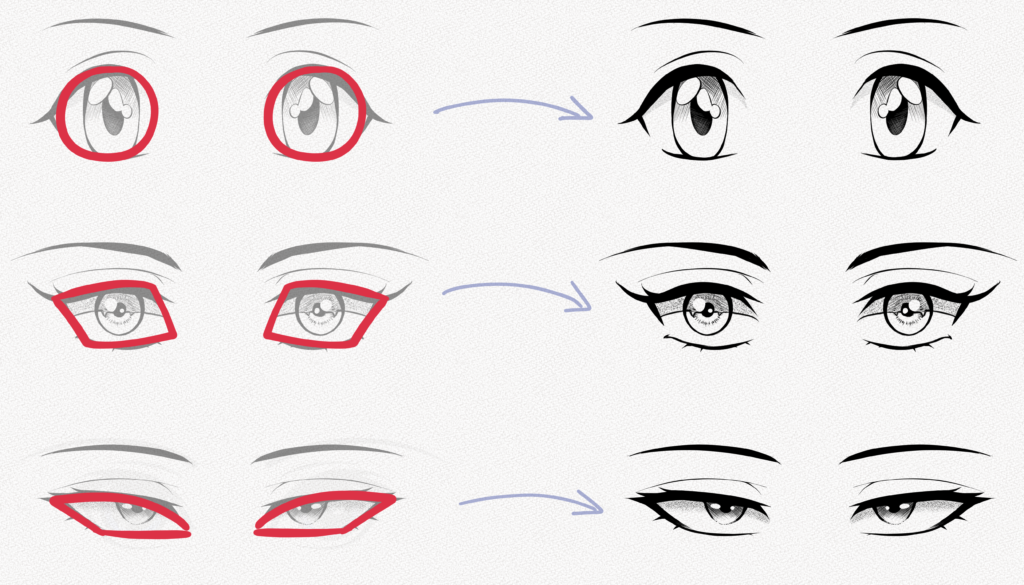
Step 13: Add Depth
Now we are carefully going to build depth with our 4B pencil in the highlighted areas, just as shown in the picture. The lines that are near the light should be kept thin and soft, and the lines that are in the dark need to be thick and dark.

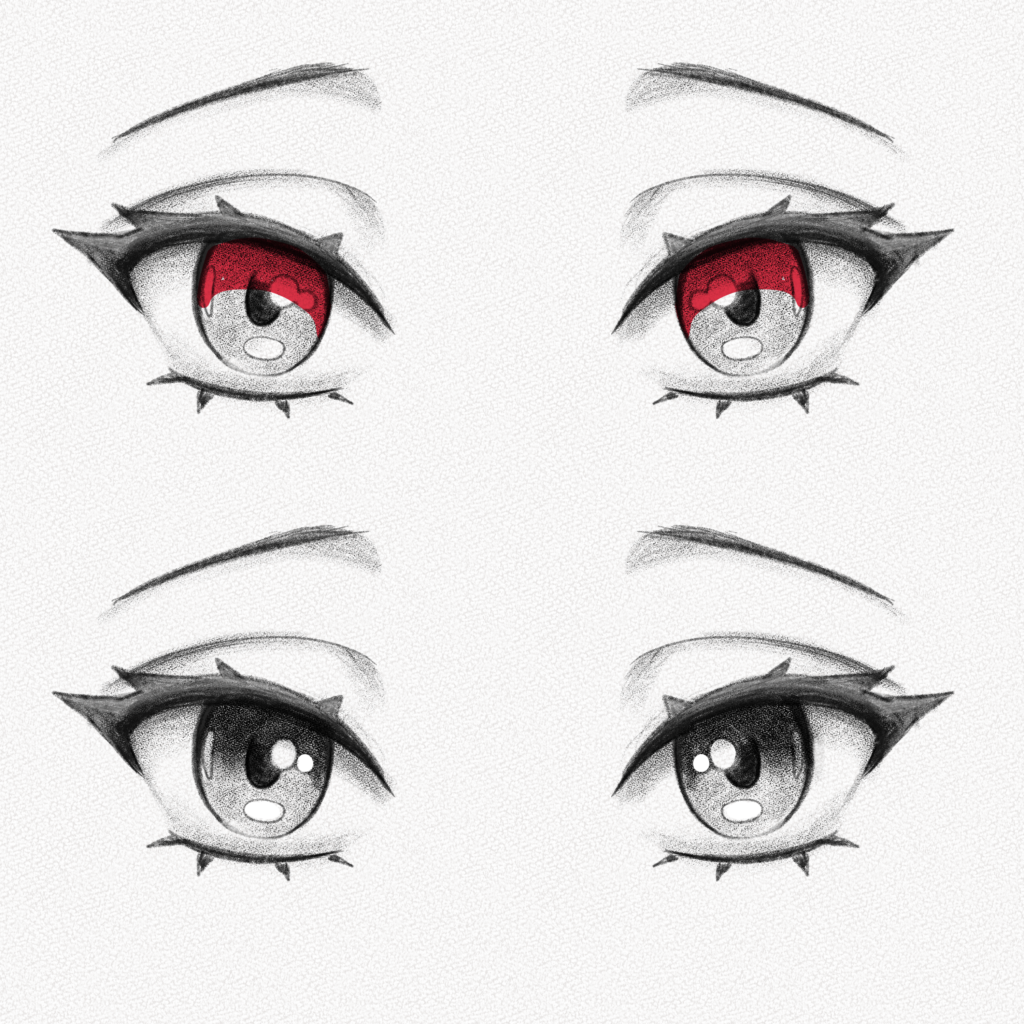
Step 14: Mark the highlights
Usually, highlights are done at the very end; however, since we’re using graphite, it’s better to add the highlights in an early stage so we can keep the area clean. I marked those spots since that’s where I’d like the light to hit the eyes, but you can always add them according to what you prefer. Remember that anime eyes’ highlights tend to be exaggerated, so play with the places and shapes.

Step 15: Shade the pupils
We are going to fill the pupils. For this part, we are going to use the 8B pencil since we need them to be the darkest shade. I left the upper part blank because I like when it merges with the iris, but it is a personal choice. You can shade it all.
Step 16: Shade the iris
For this step, we are going to use our 4B pencil and very softly fill all the iris leaving the highlights. Try to shade as softly and uniformly as possible since we are going to build more shading layers from here.
Step 17: Add shadows to the eye area
Anime eyes don’t follow realistic anatomy shading but a simplified and stylized version of it, so to add the shadows to our eyes, we are going to shade softly on the highlighted areas as shown in the picture.
Step 18: Shade the Iris — Part 1
We are now going to build layers of shade in our iris, shade the highlighted area with your 4B pencil, and build a small gradient in the iris. Remember to leave the highlights out.
Step 19: Shade the iris — Part 2
Now, with your 8B pencil, add another graphite layer in the highlighted areas. Anime irises can have a lot of details, shapes, and shading styles. This is my personal favorite; it’s simple to make and looks very nice.
Step 20: Be extra
Yes, be extra and with the white gel pen, add all the details you want. Having fun is an important part of the process, so just grab your tools and enjoy the process. I added some stars, extra highlights, and some dark zigzag shapes, and I’m very happy with the result.
And that’s it! Congrats, you made it to the end!. I hope you learned how to draw anime eyes and I hope you had fun in the process. Thank you for reading and until next time!