Braids are a popular hairstyle for people of many different backgrounds. They are a symbol of strength, beauty, and individuality. Some people use braids to signify their personality or mood, while others just like how they look at them. Braids can be worn by anyone with hair long enough to braid or have their hair braided.
Braiding one’s hair has been practiced in most African cultures since ancient times as an art form and a method to keep hair neat and tidy. It is also used as an expression of personal style that can be used to represent one’s mood or personality.
They are most commonly done with two strands of hair, and there are many different braids, such as the Dutch braid, French braid, fishtail braid, and more.
In this tutorial, we will learn about braids as we know them and the French braid.
What you’ll learn:
- The head and back
- How to draw braids
- How to draw French braids
Materials needed:
- A piece of paper
- A 0.5mm 2B mechanical pencil
- A 4B graphite pencil
- A 2.3mm Tombow Mono Zero eraser
- A blending stump
- An eraser or a kneaded eraser
- A ruler
These are the braids you’re going to draw: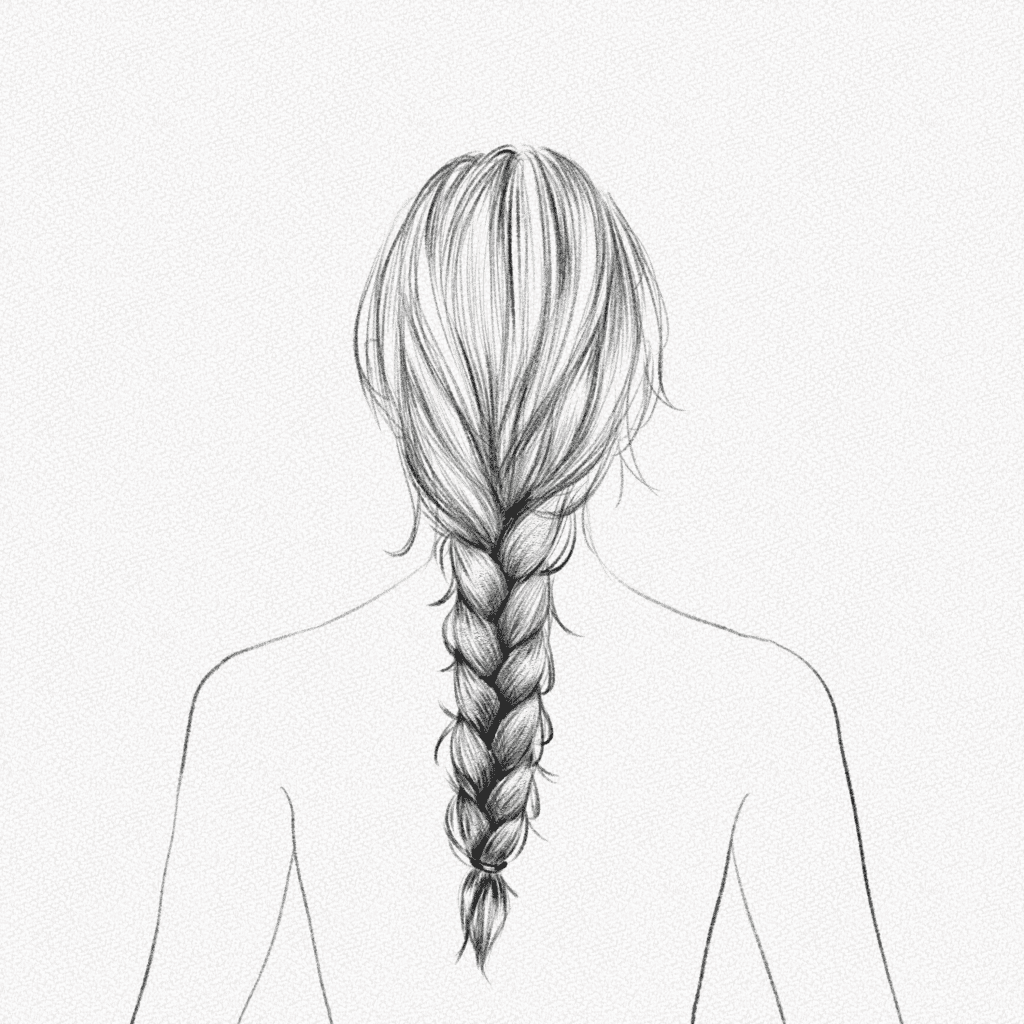
And these are all the steps we’ll walk you through:

Section 1.- The head and back
Many tutorials teach how to draw braids, but they show the hair strands only and not the way they attach to the head or the logic behind the hair moment.
In this section, we are not going to draw any braid yet. We will learn one of the easiest ways to build and draw the back view of the back, shoulders, and head so we have a base on which to draw our braids.
We will use our 0.5mm 2B mechanical pencil for this section.
Step 1: Draw two lines
For this step, we are going to split our canvas into four equal parts.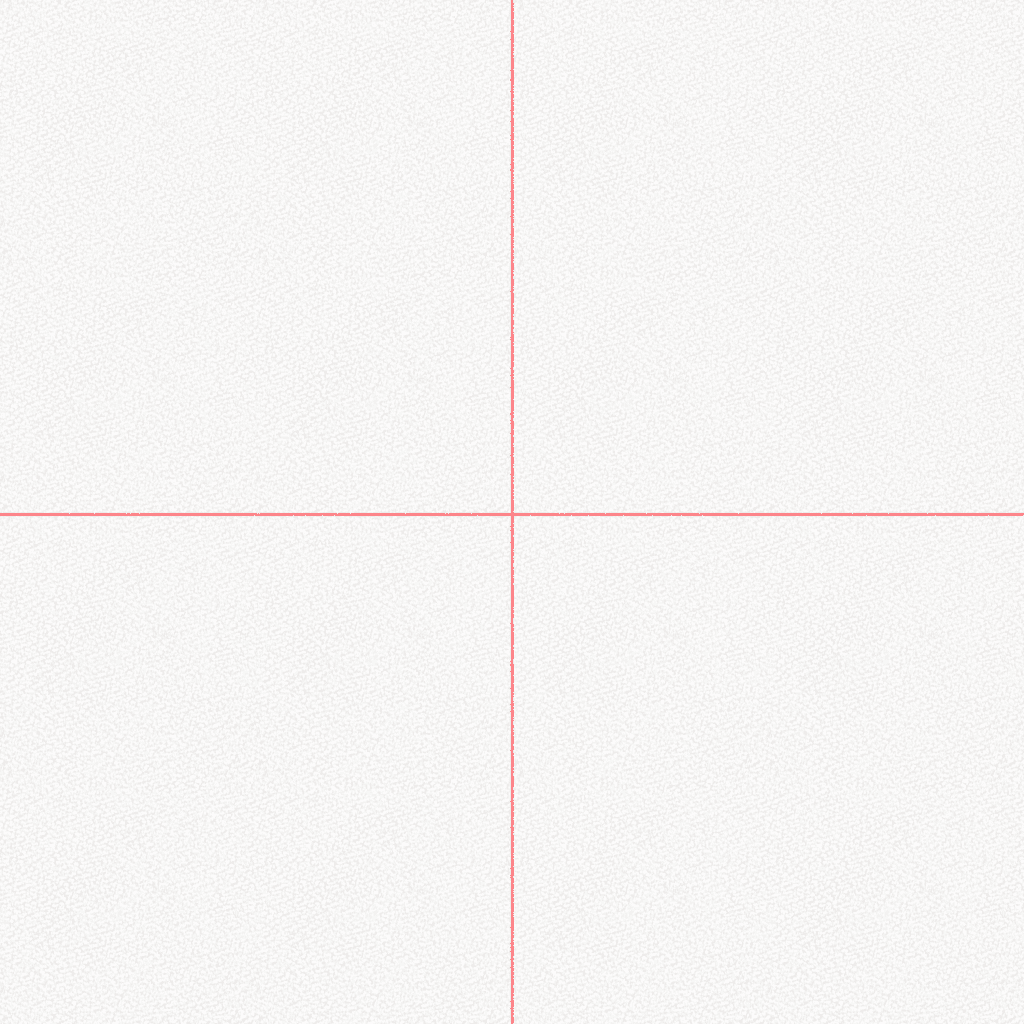
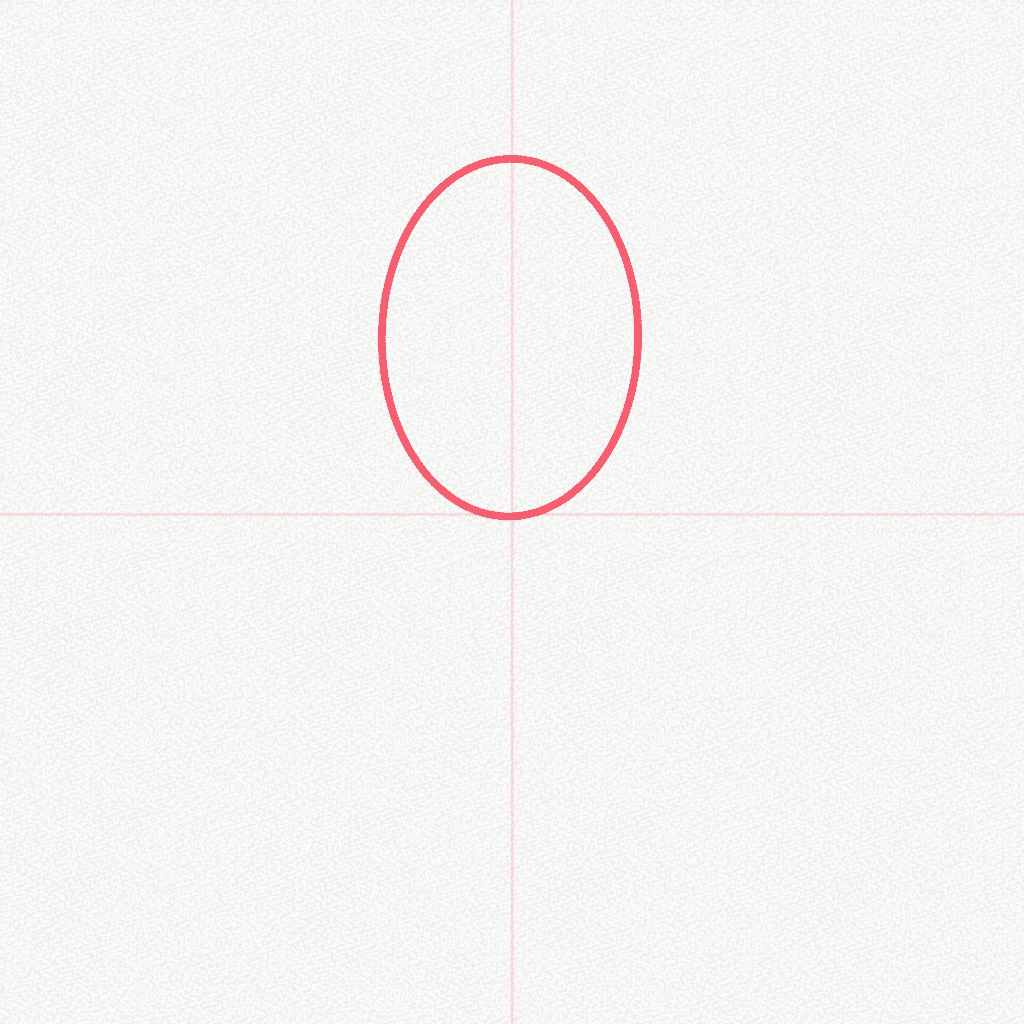
Step 2: Draw an oval
Draw a decent size oval on top of the horizontal line you drew in the previous step.
Step 3: Draw a rectangle
Using your guidelines, draw a rectangle that falls in the middle of them, as shown in the diagram. mnk9io,b87gv6ty9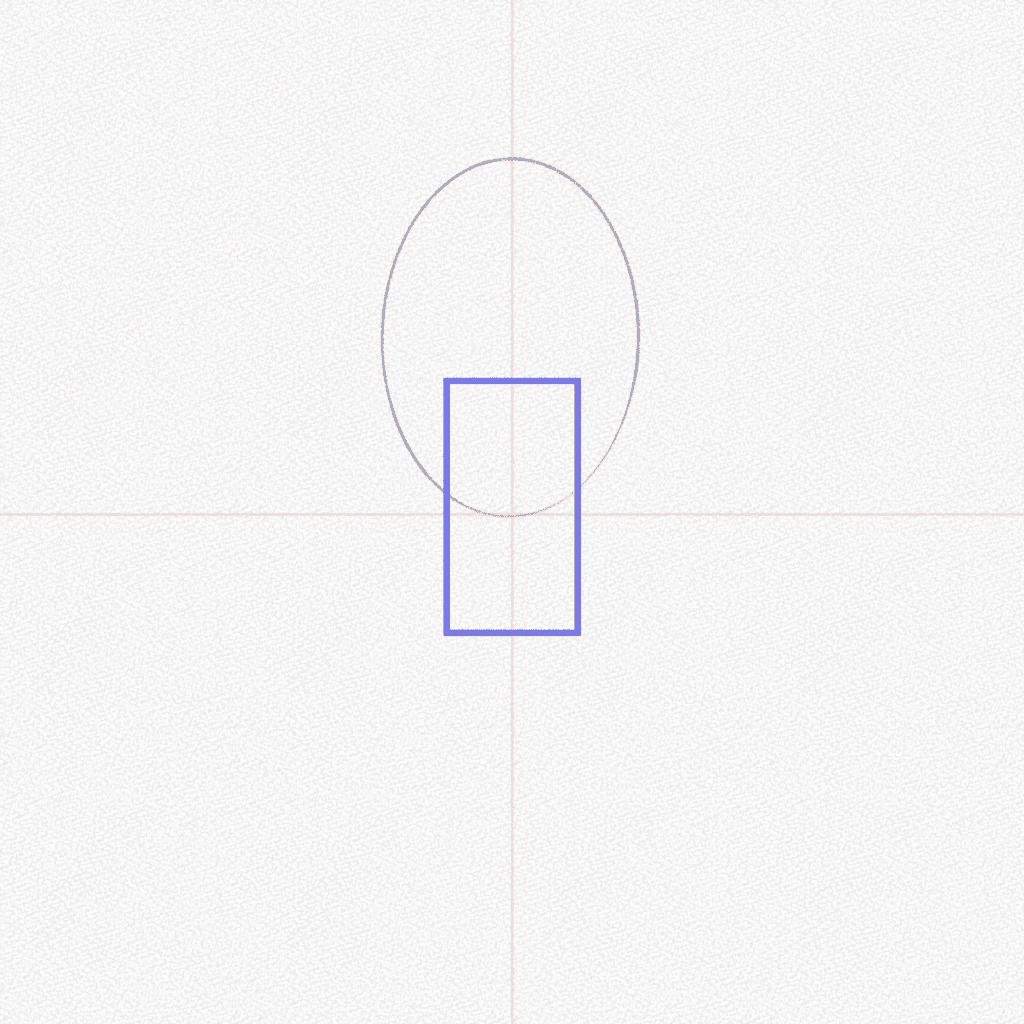
Step 4: Draw two triangles
Draw two smaller triangles on the sides of the rectangle.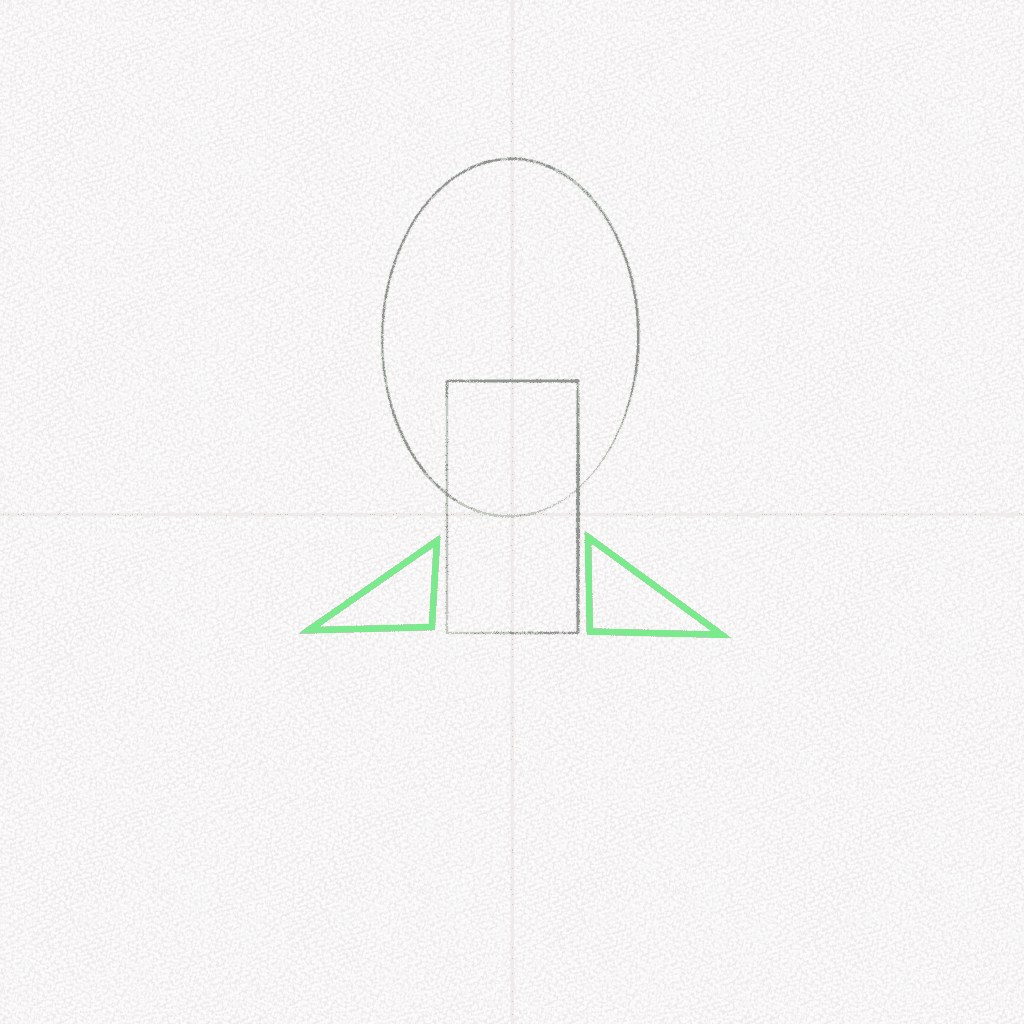
Step 5: Draw a wide trapezium
Draw a big wide trapezium. This will be the back of our base. 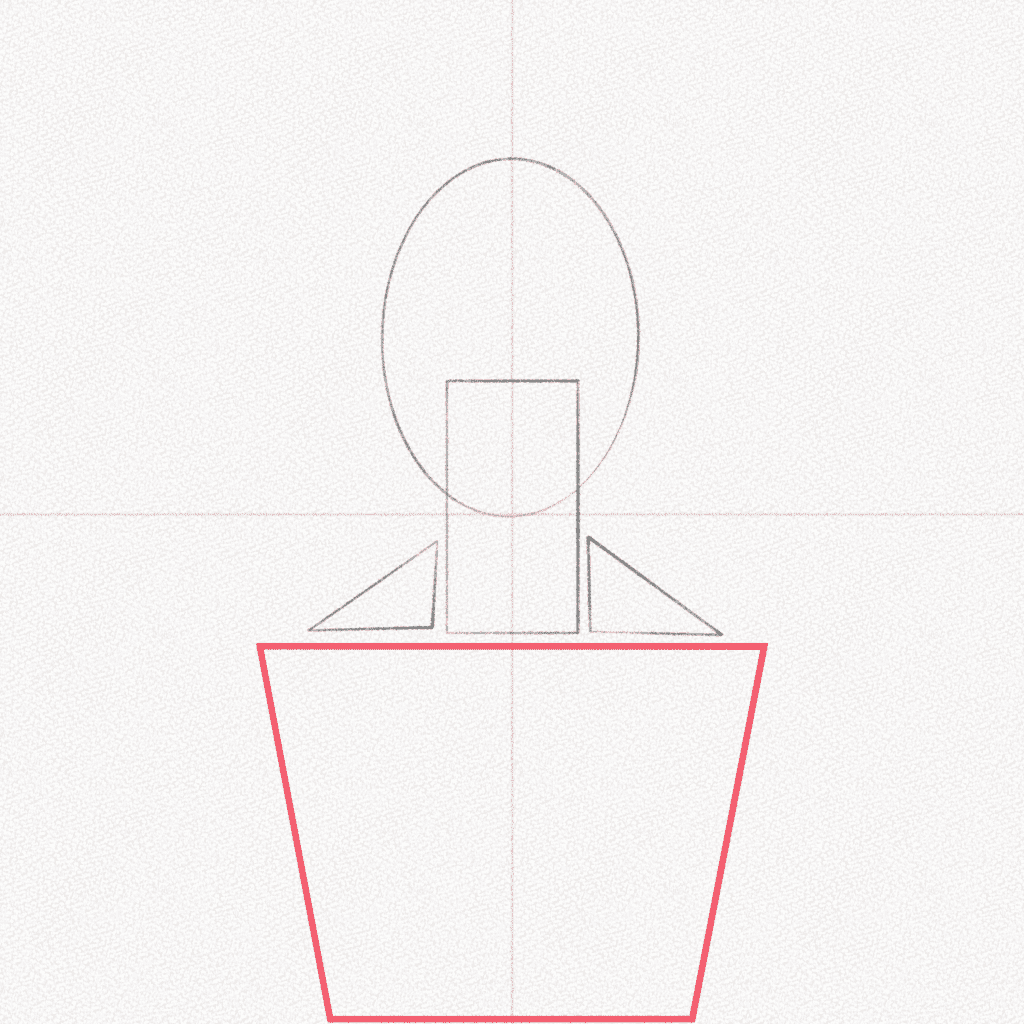
Step 6: Draw two circles
Draw two circles on the sides of the trapezium, as shown in the diagram.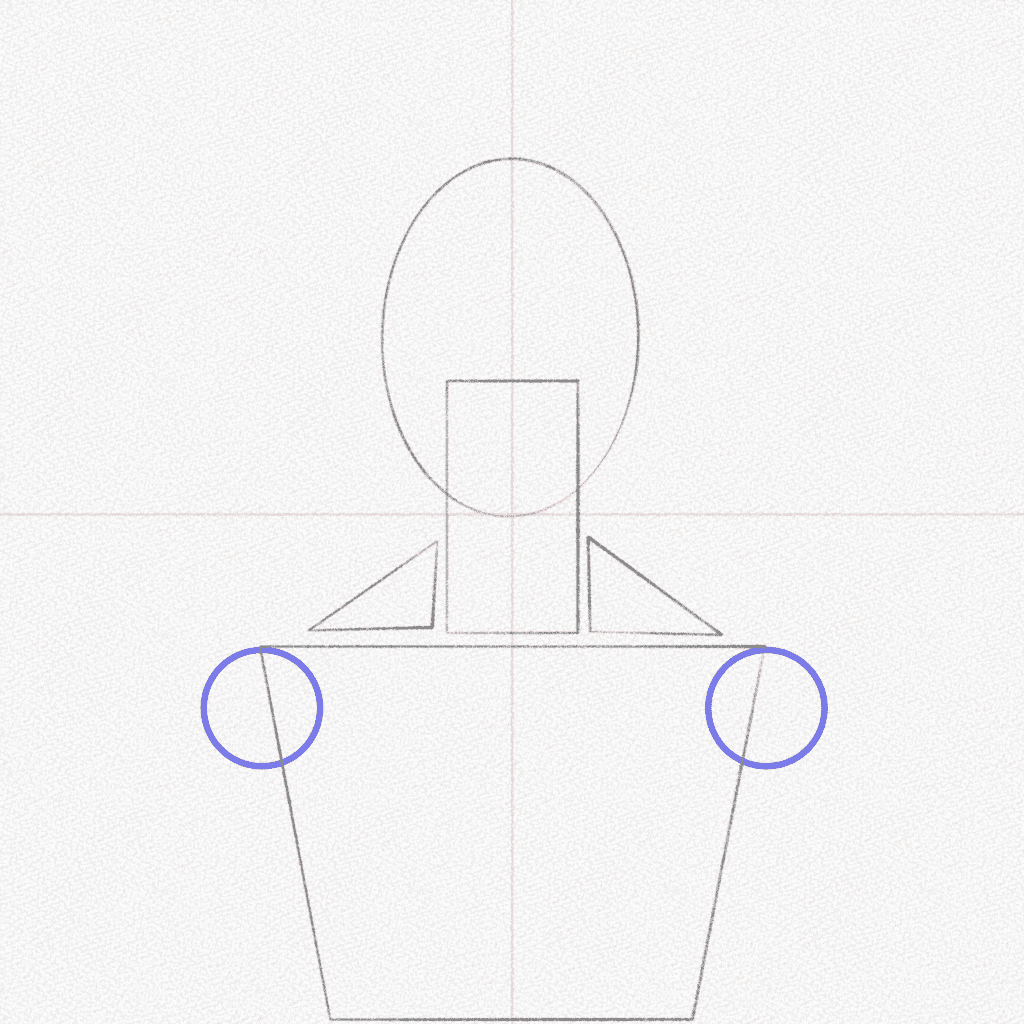
Step 7: Draw two rectangles
Draw another two rectangles that will form the arms of our base.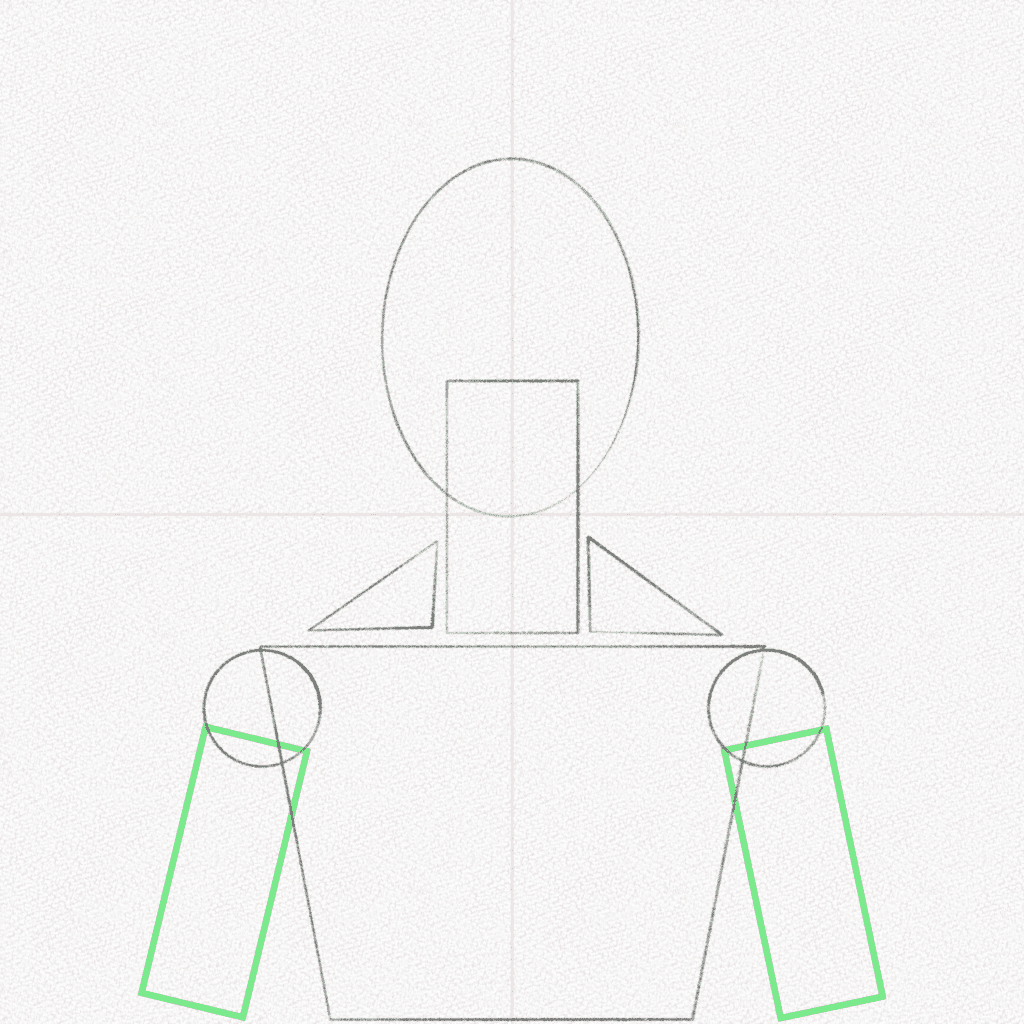
Step 8: Build the flesh around
Erase your guidelines and build the flesh around them. Use organic curve lines to give it a more realistic look.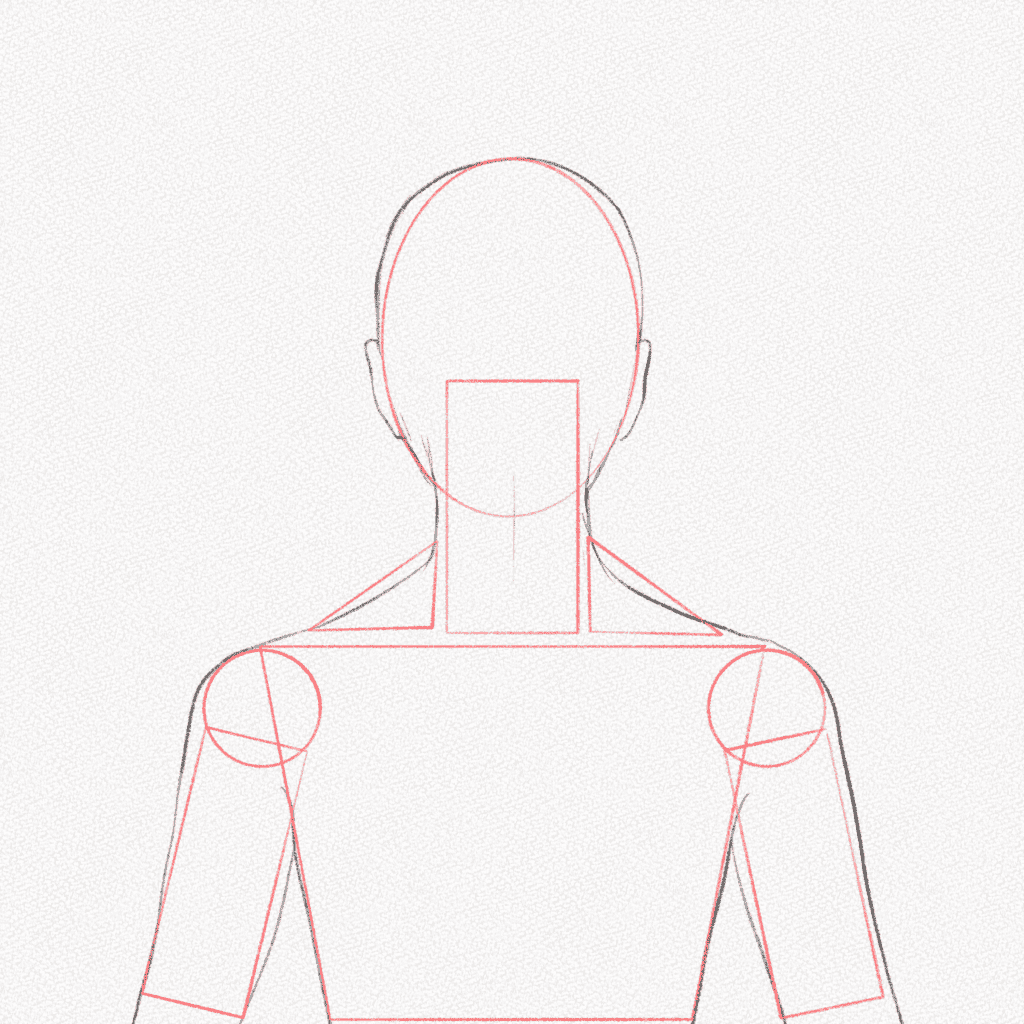
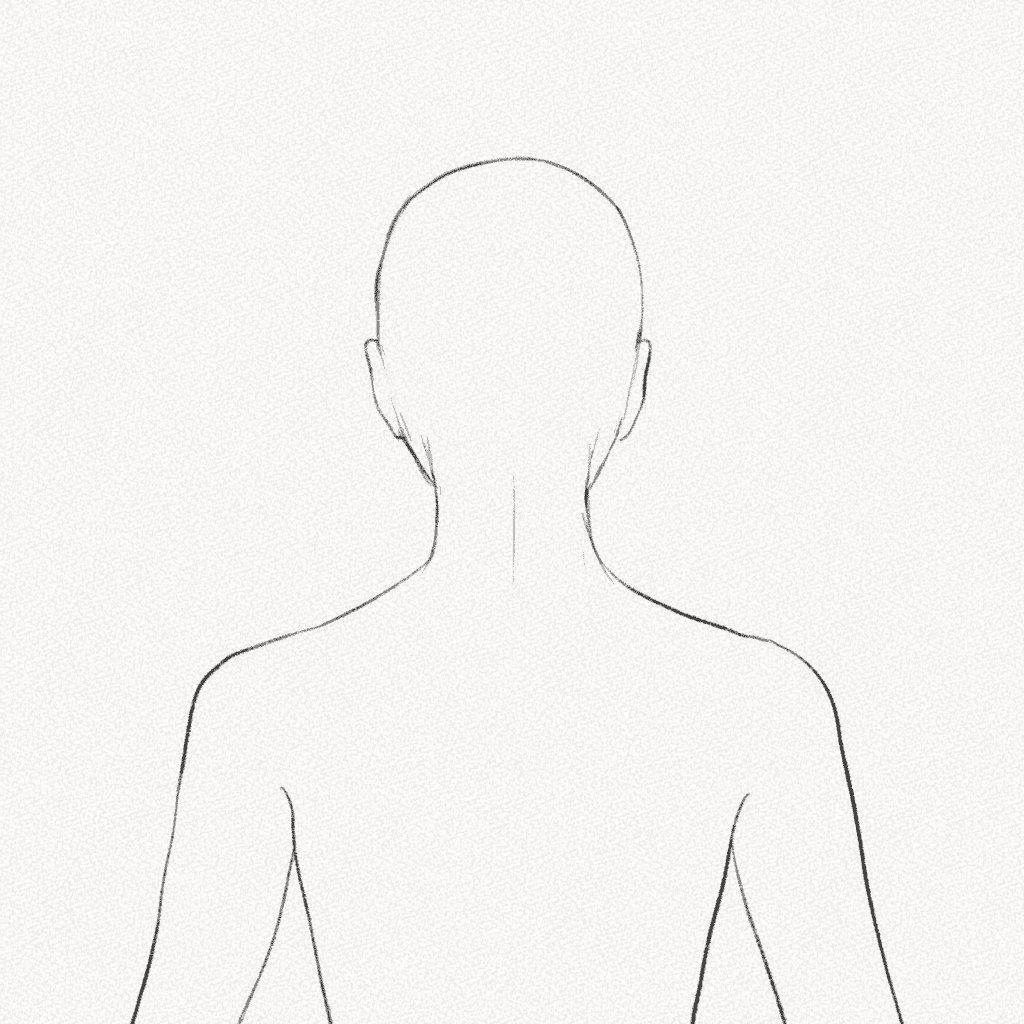
And that’s it, now you know how to build the back structure, and you can do it whenever you want to practice!
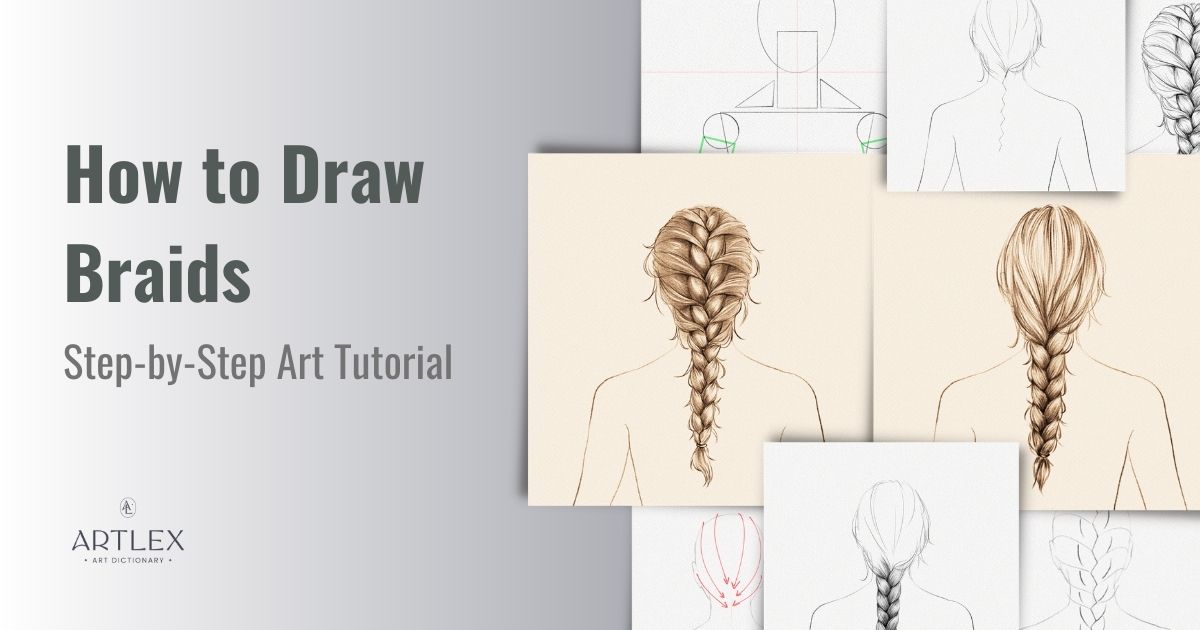
Section 2.- How to Draw Braids
In case you skipped the last section, you can always download the base image here.
Step 1: The direction of the hair
Hair, especially straight hair, is affected by gravity. That’s why when we braid our hair, the braids always go down, pulling hair that should flow around into a tight lump. Hair grows all over our head, so when pulled in one direction, the layers of hair that will determine the look on the back of our head are the ones that grow on the top.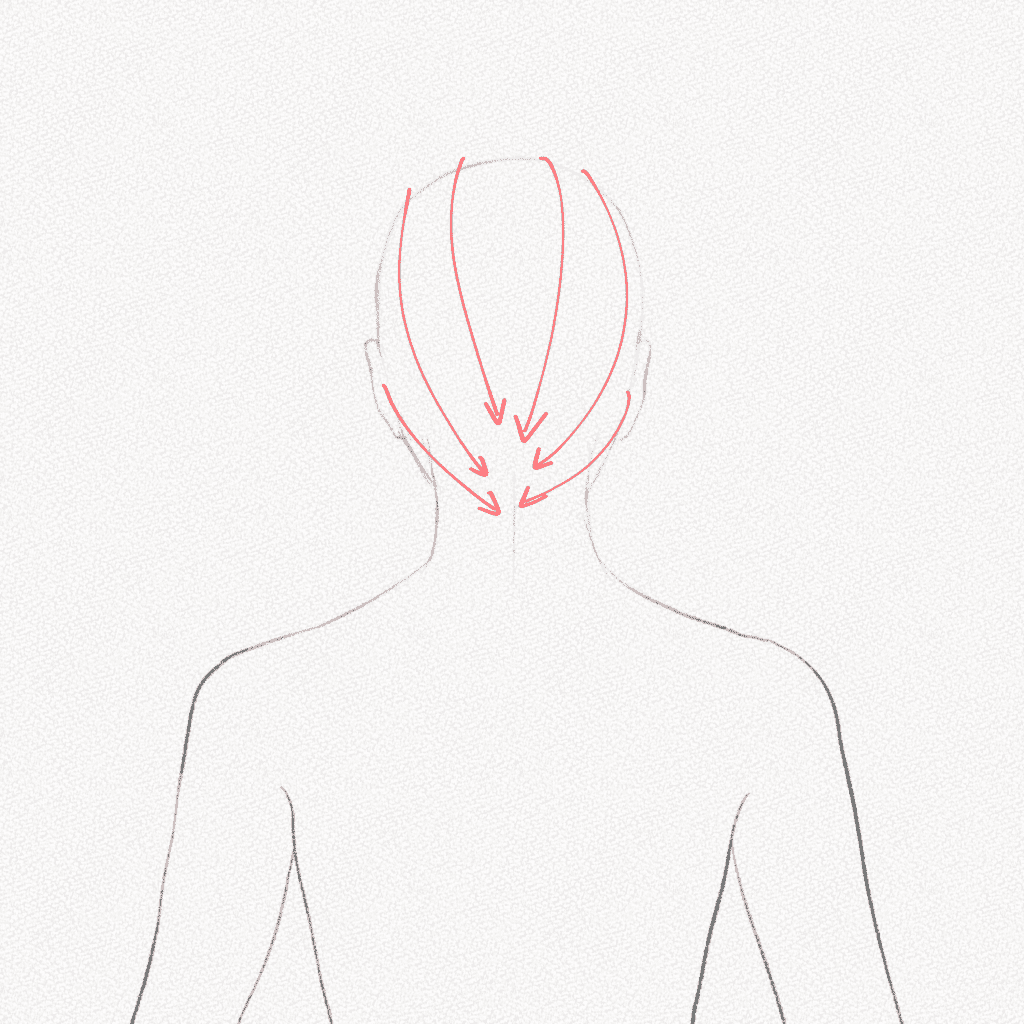
Since all the hair will be pulled into a braid, it’s only reasonable to see some wild hairs and thin strands flowing around unless we’re using hair products or the hair is wet. This small yet essential detail will bring our drawing to life.
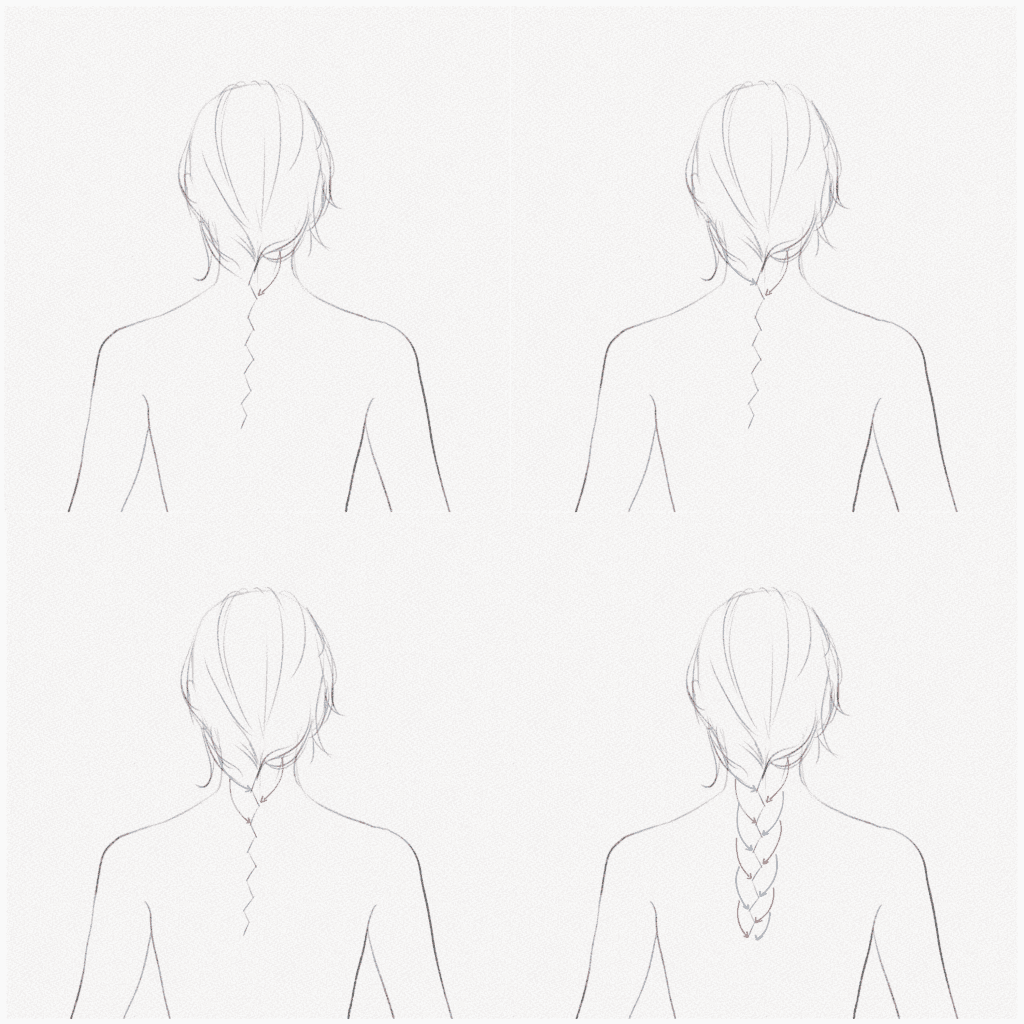
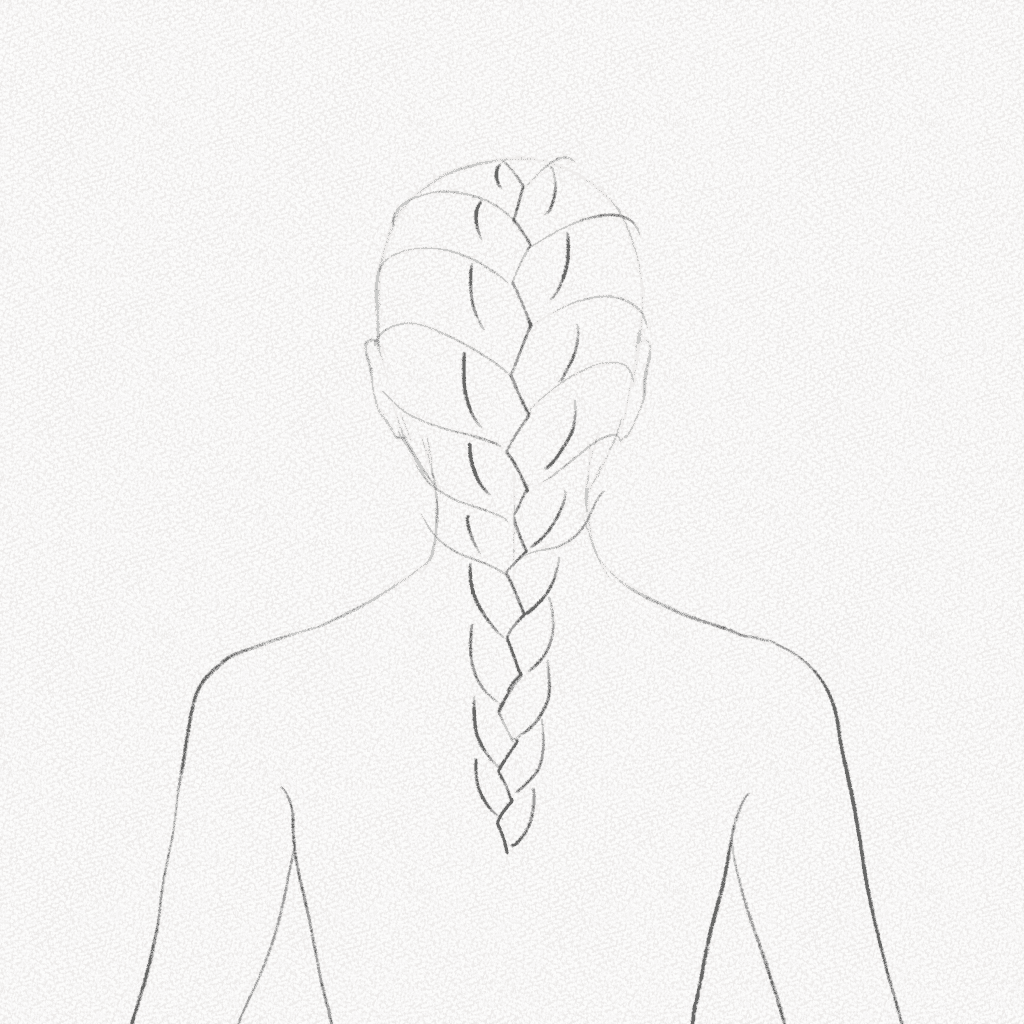
Step 2: The zigzag
Braids are made of intertwining thick strands of hair either on top or under another. It is quite hard to figure out where each strand goes, especially when drawing. To figure out the structure and shape better, we can use a zigzag as a base. It will keep our braids uniform. We can calculate the size and length of our braids, making the process so much easier. 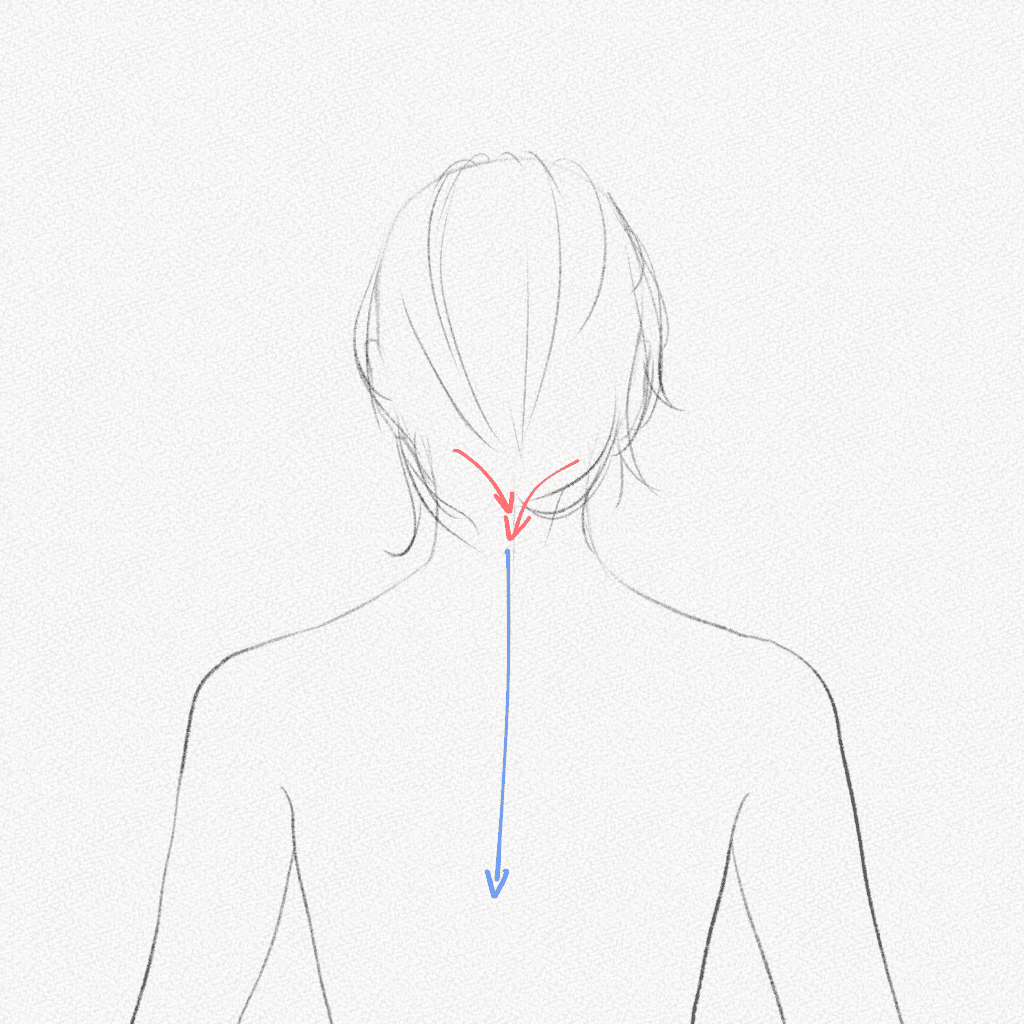

Step 3: The lines
The lines of the zigzag will be where each strand of hair disappears, so it’s only natural to pull small lines from the base of the head to the corners of the zigzag to draw the braid. Sounds easy, right? Well, many of us can get confused and mess up, so follow these diagrams if you can’t draw the whole braid in one go.
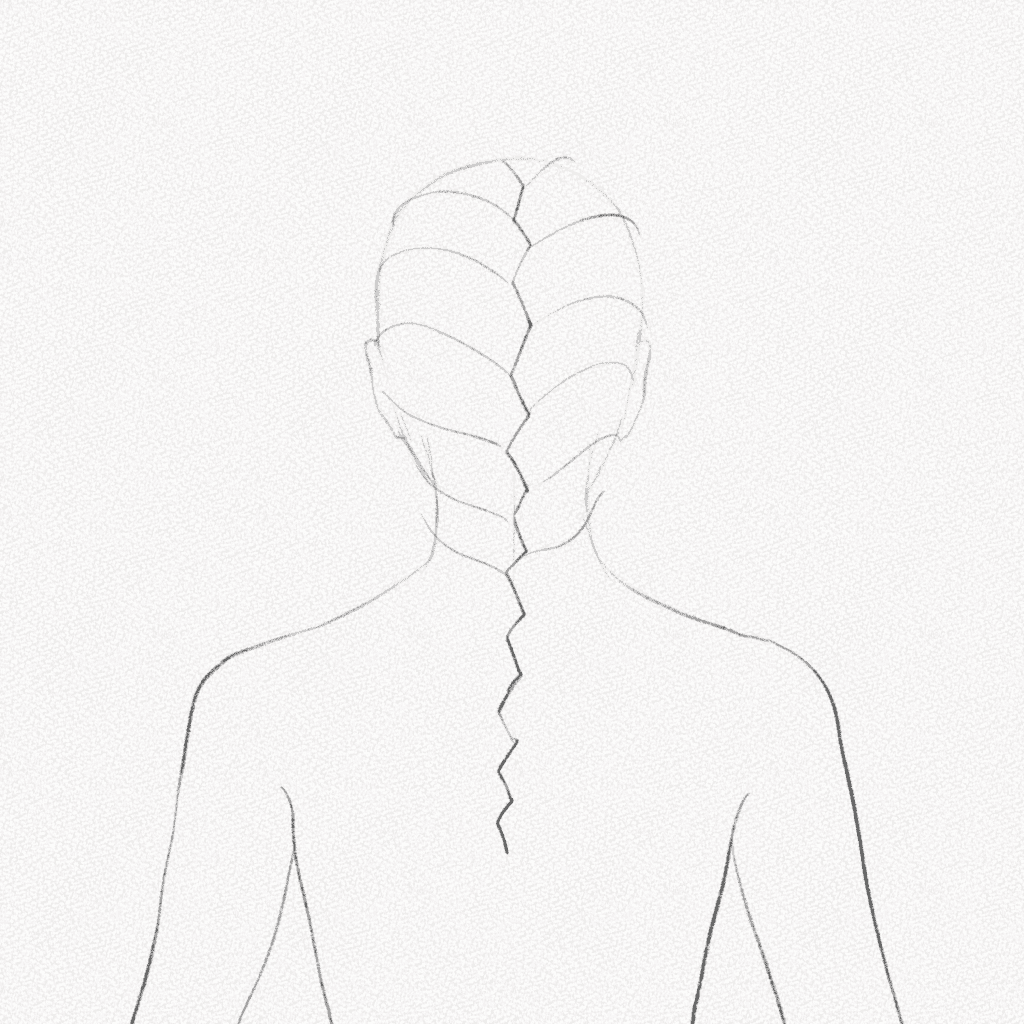
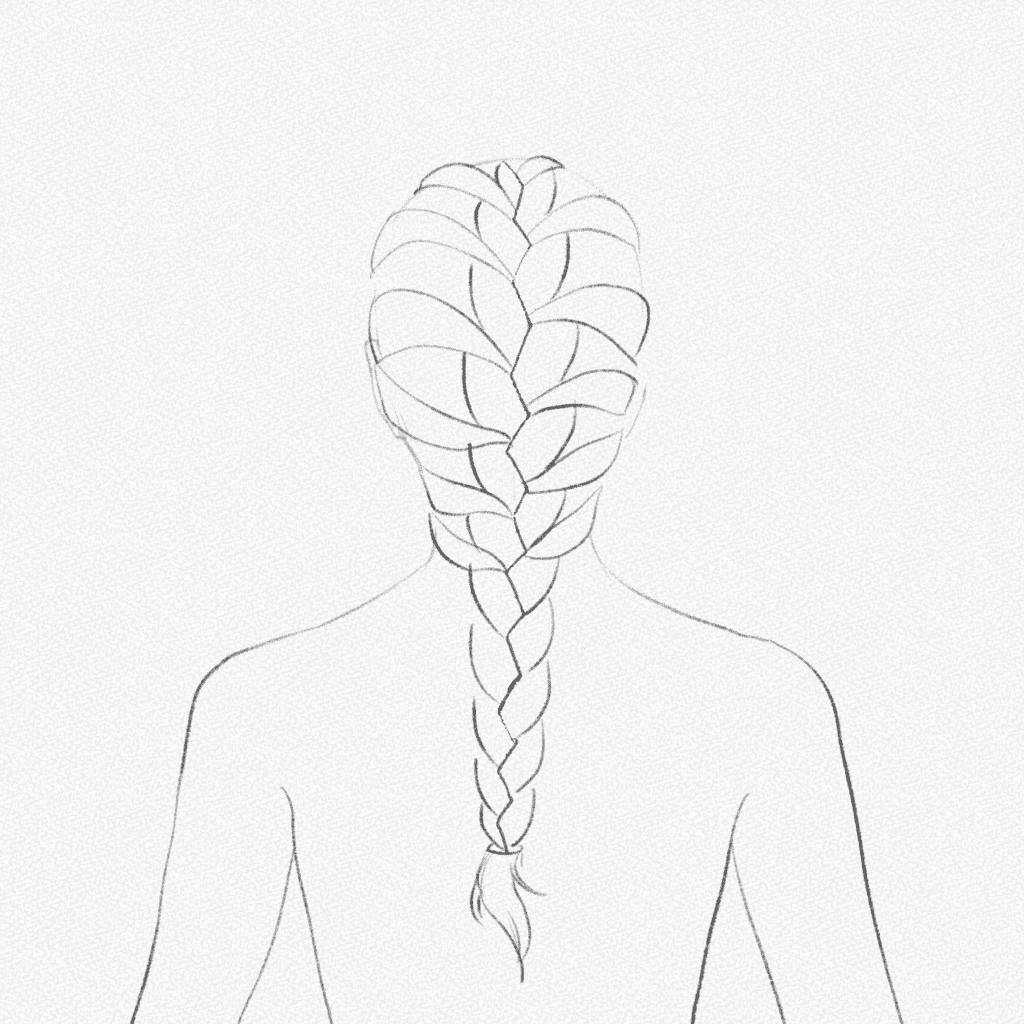
Step 4: Draw the braid
As we mentioned in the previous step, the hair disappears in the zigzag lines. That’s why to give it a much more realistic effect. We are going to pull small curved lines from the zigzag on each side of the braid. 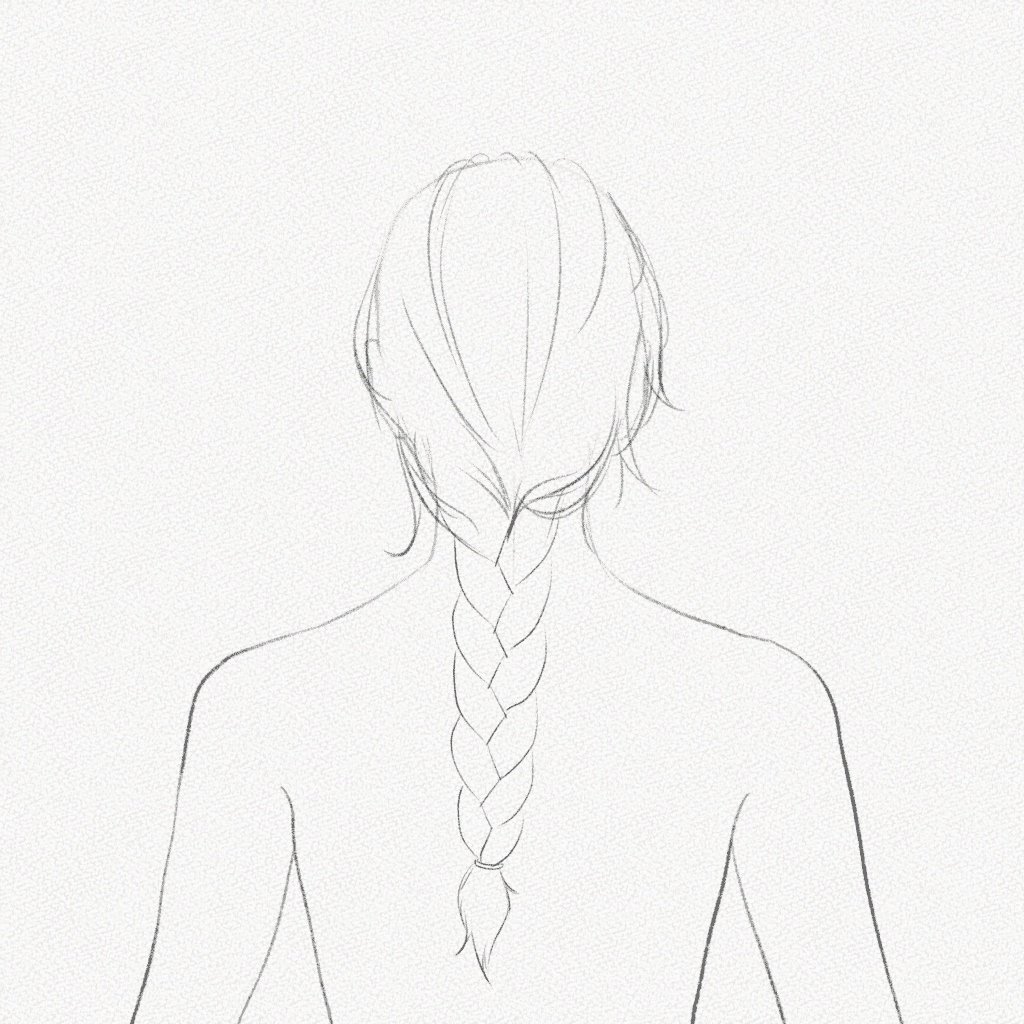
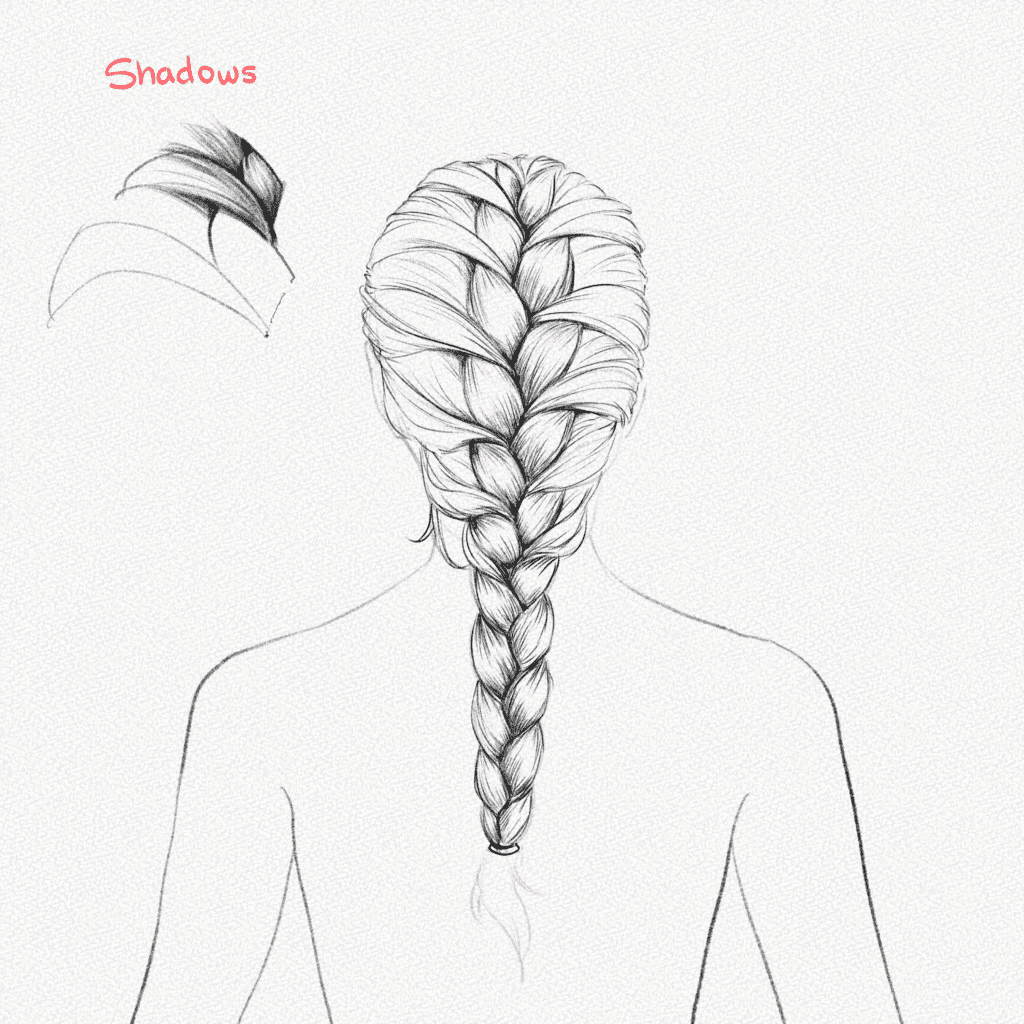
Step 5: Add shadows
Use your 2B 0.5 mechanical pencil to fill each strand with small lines (hairs) and your 4B pencil to shade as indicated in the diagram. The shadows will always be darker in the place where the hair goes under other strands (the zigzag). That’s where our darkest values will be.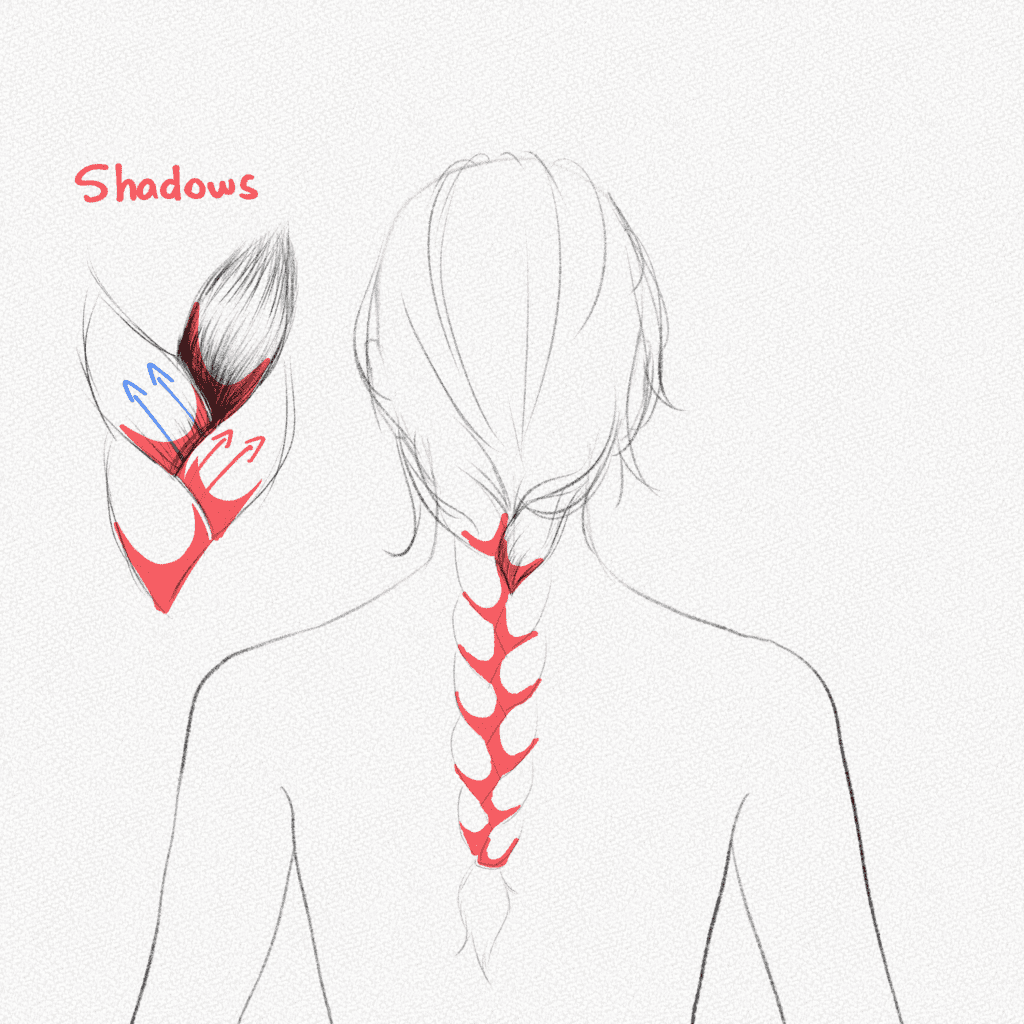
Step 6: Add loose strands
Add short loose strands to each side of the braid with your mechanical pencil and your 4B pencil that will give depth and thickness variation.
Step 7: Draw the hair
Now it’s time to draw the hair that’s on the head. Follow the direction of the hair shown in step one and pull small lines with your mechanical pencil as well as thick lines with your 4B pencil. You can check our “How to Draw Hair” article by tapping here for a more in-depth tutorial.
Section 3.- How to Draw a French Braid
Step 1: Draw the zigzag
French braids tend to start right on top of the head, so for this step we’re going to draw the zigzag following the direction of a straight line.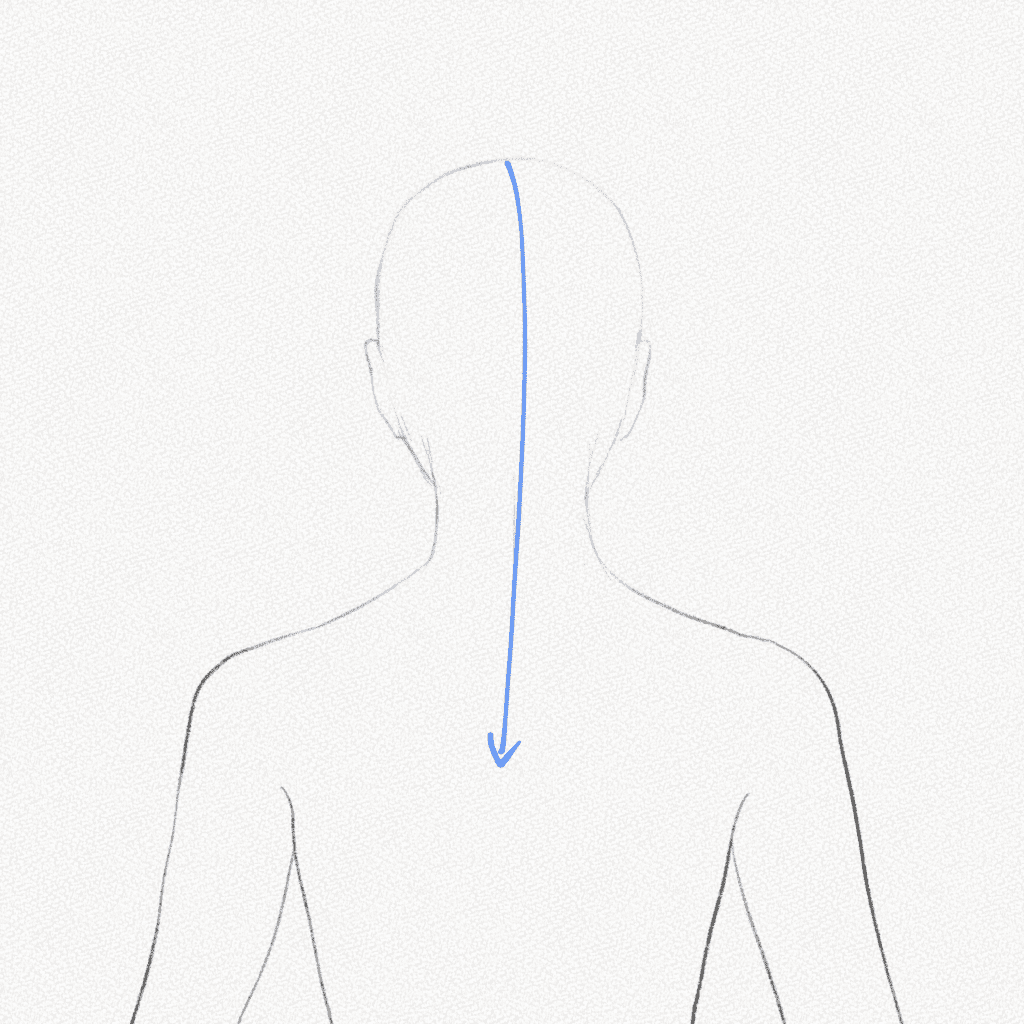
Step 2: Segment the hair
French braids pull segments from the hair towards the center of the braid, so first, we need to place those segments visually to build our braid correctly. You can go one by one, using curved lines for the top part and more loose lines for the base of the head.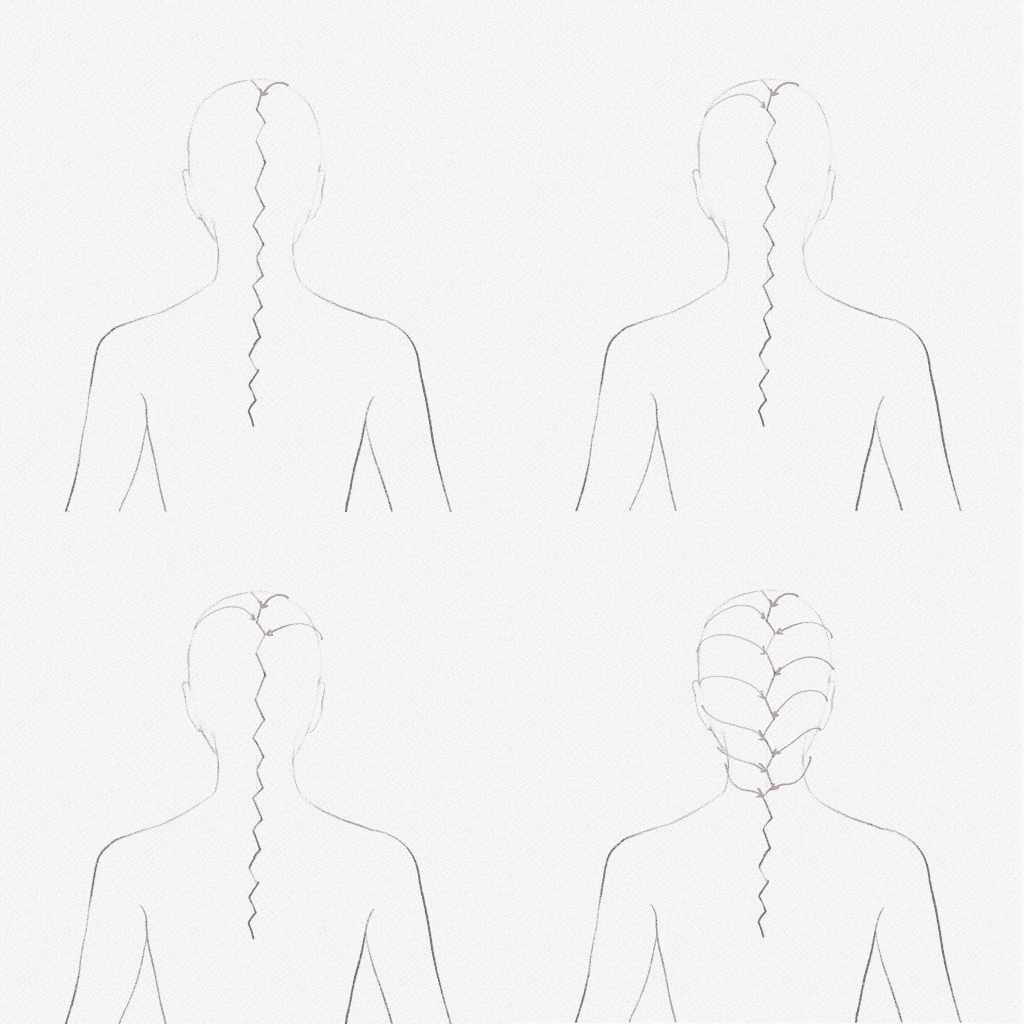
Step 3: Visualize and draw the center of the braid
Again, as mentioned, the braid strands start from the zigzag. However, for french braids, we need to leave a small section blank under each strand since there will be the strand that gets pulled from the head.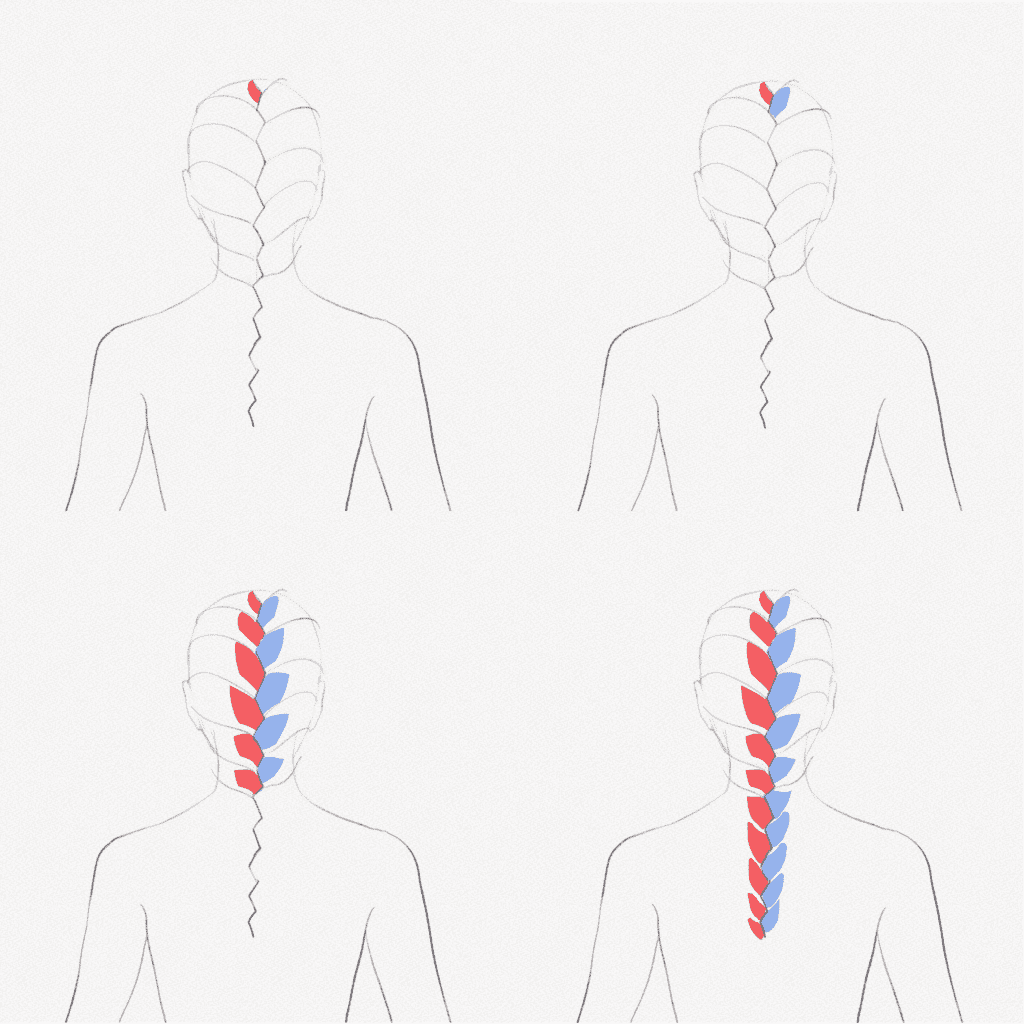
Step 4: Visualize and draw the sides of the braid
To better visualize the strands pulled from the head’s sides, draw them as solid shapes. 
Step 5: Draw the braid
Erase your sketch and start drawing the braid with your 0.5 mechanical pencils. Use small and long lines to add dynamism to the hair.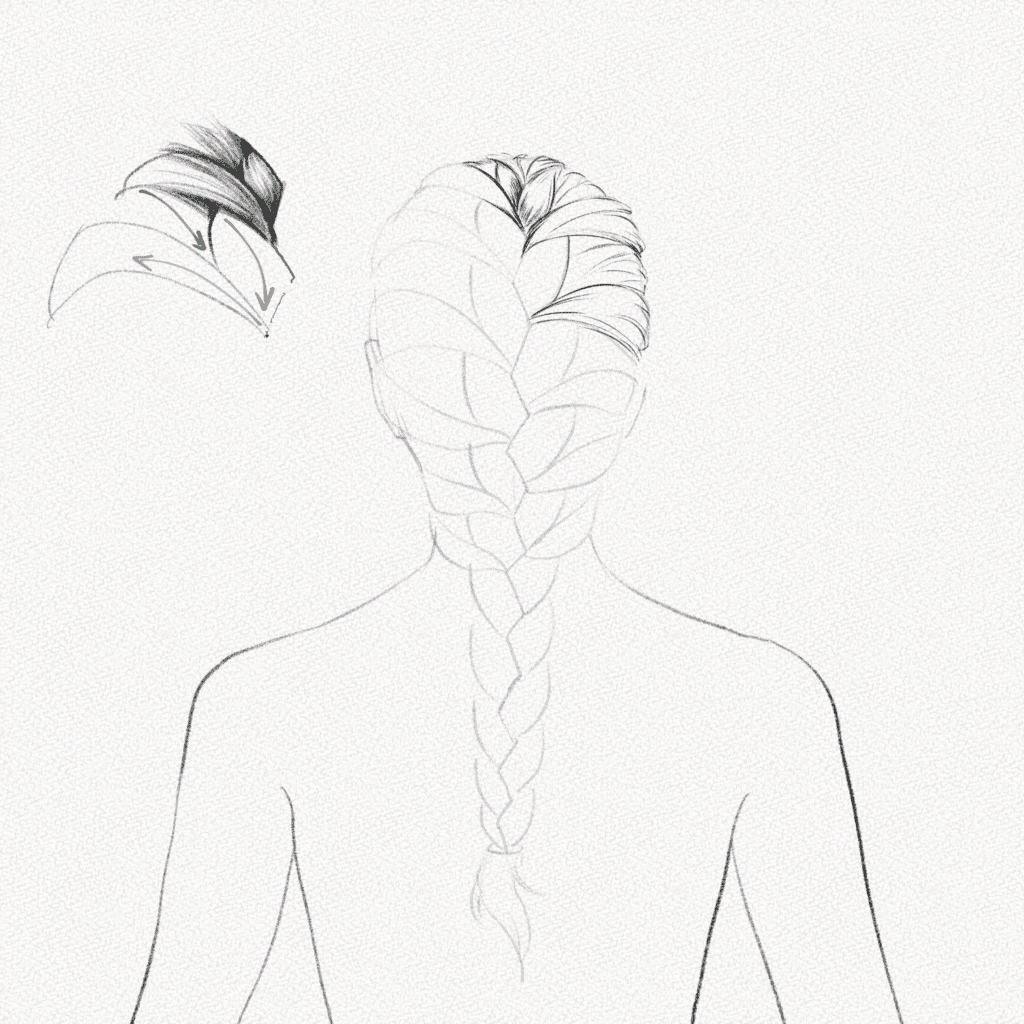
Step 6: Add some shadows
Remember that the strands from the sides overlap the middle ones, so the darkest values will be under the strands as well as on the zigzag (see Section 2).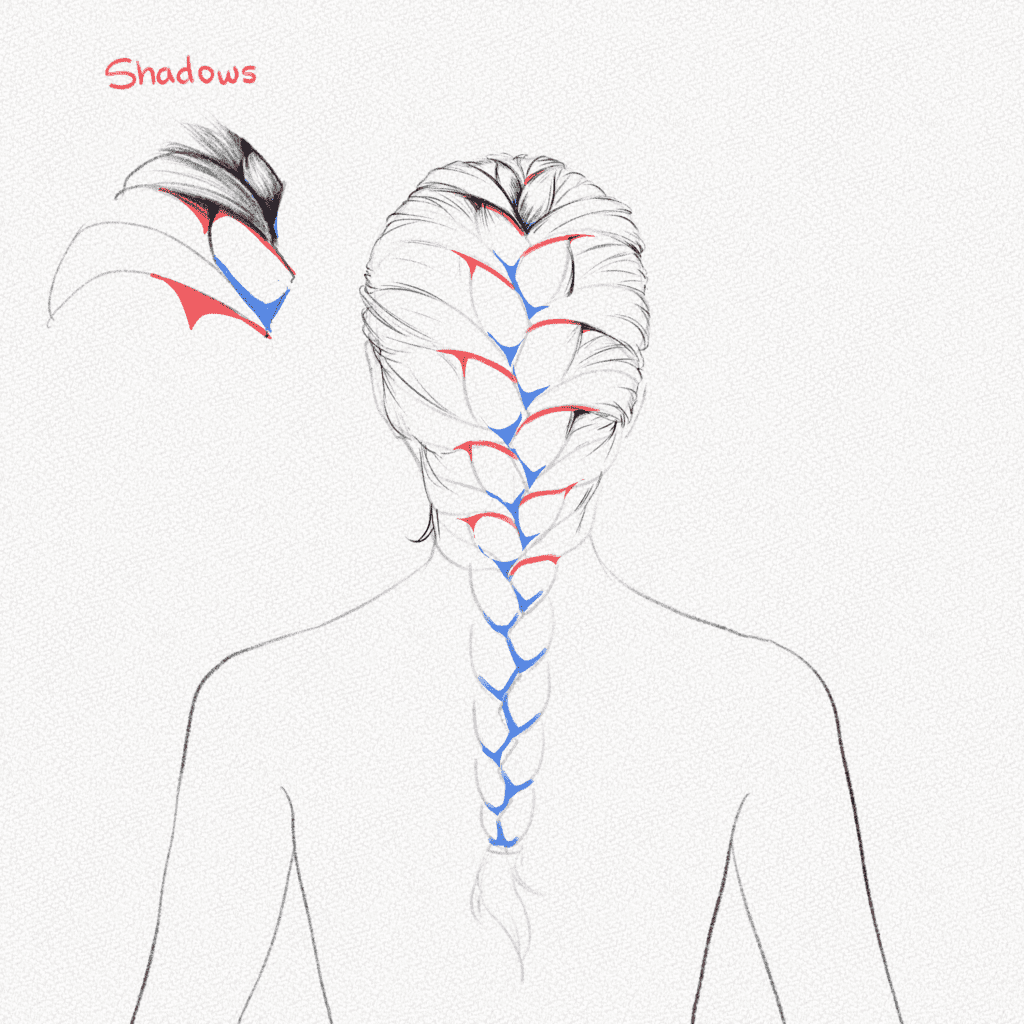
Step 7: Fill the sides with graphite
Using your 4B pencil fill the sides of the braid with a soft graphite layer. Do not worry about values or shadows yet.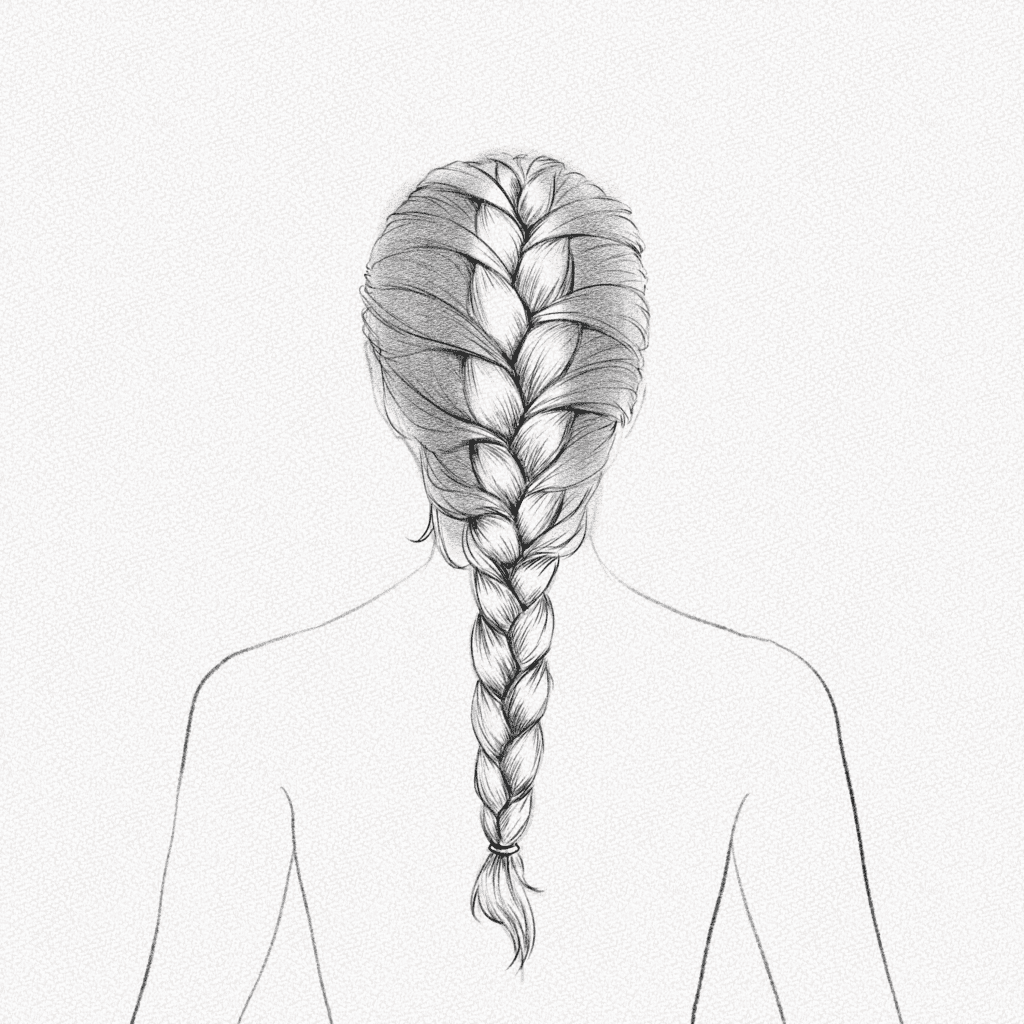
Step 8: Shade the braid
Using your 4B pencil, add more graphite to the braid, leaving some highlights in the middle of each small section.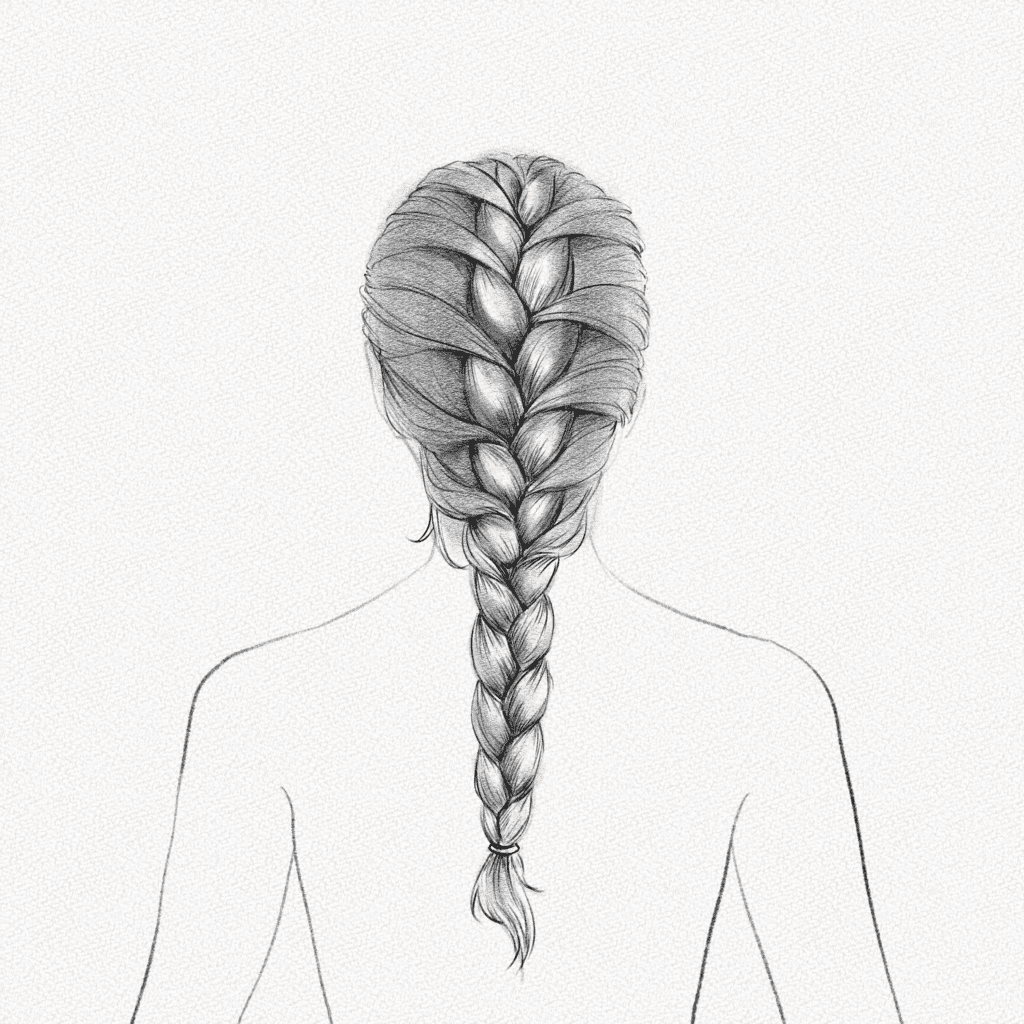
Step 9: Add highlights
Using your Tombow Mono Zero, remove some fine lines of graphite on the sides of the head, and follow the direction of each strand. 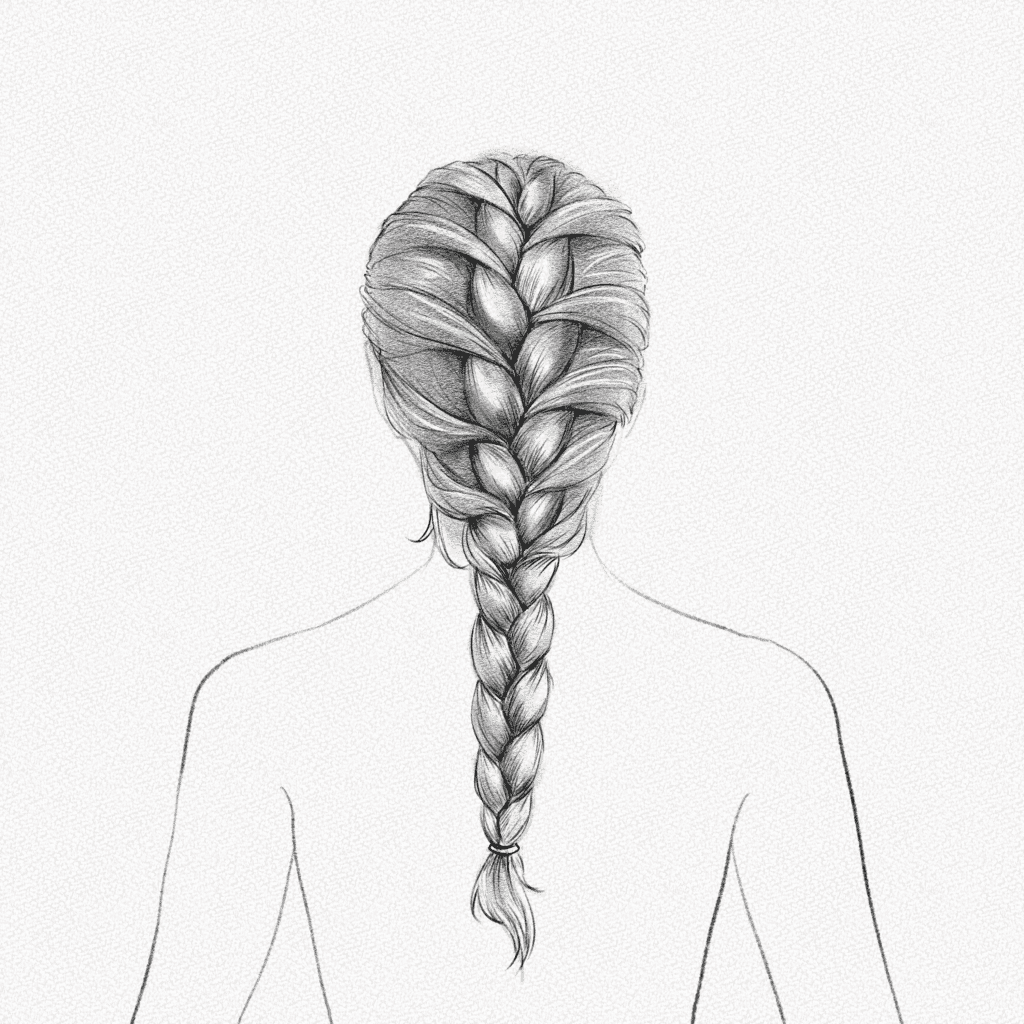
Step 10: Draw loose hairs
Add some loose small, and long hairs on the head and braid with your mechanical pencil for an extra touch of realism and fluidity.
And that’s it. You’re done.
Thank you for following this tutorial. You did great!
I hope you learned something new today and that now you have a better grasp on how to draw and shade braids.
Until next time!