Hair is a part of the body that is hard to ignore. It’s what makes us unique and sets us apart from one another. It’s an extension of who we are and how we want to be seen. Hair has long been used to express oneself in various cultures around the world, and it continues to be a way to do so in our society too.
Hair is also a fundamental part of human culture. Hair can represent social status, gender, ethnicity, and other features that are important to people. It is worn in different styles, colors, lengths, and textures.
Hair has always been present in art, being the common nightmare of the beginner artist. However, in this tutorial, you’re going to learn how to draw and shade hair in an easy way.
What you’ll learn:
- The head and hairline
- How to draw curly hair
- How to draw straight hair
Materials needed:
- A piece of paper
- A 0.5mm 2B mechanical pencil
- A 4B graphite pencil
- Powdered Graphite
- A 2.3mm Tombow Mono Zero eraser
- A blending stump
- An eraser or a kneaded eraser
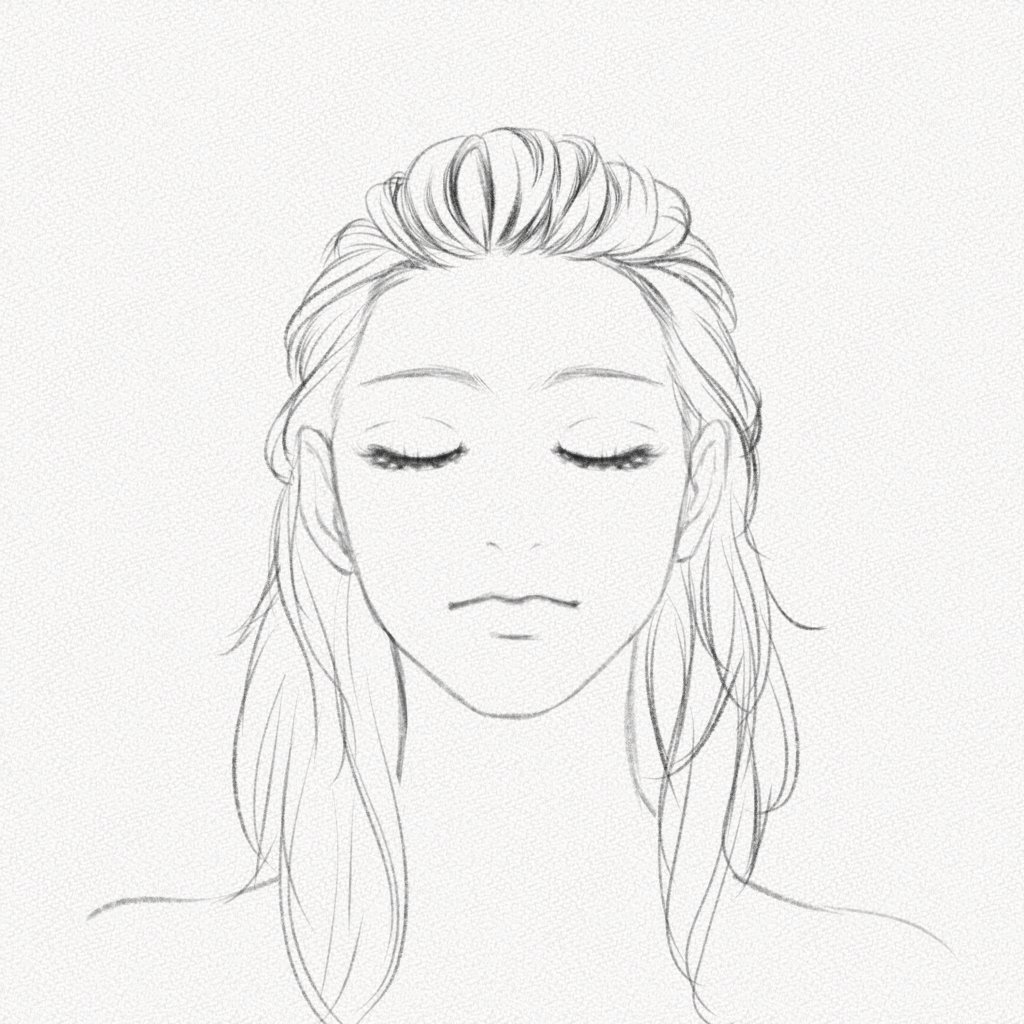
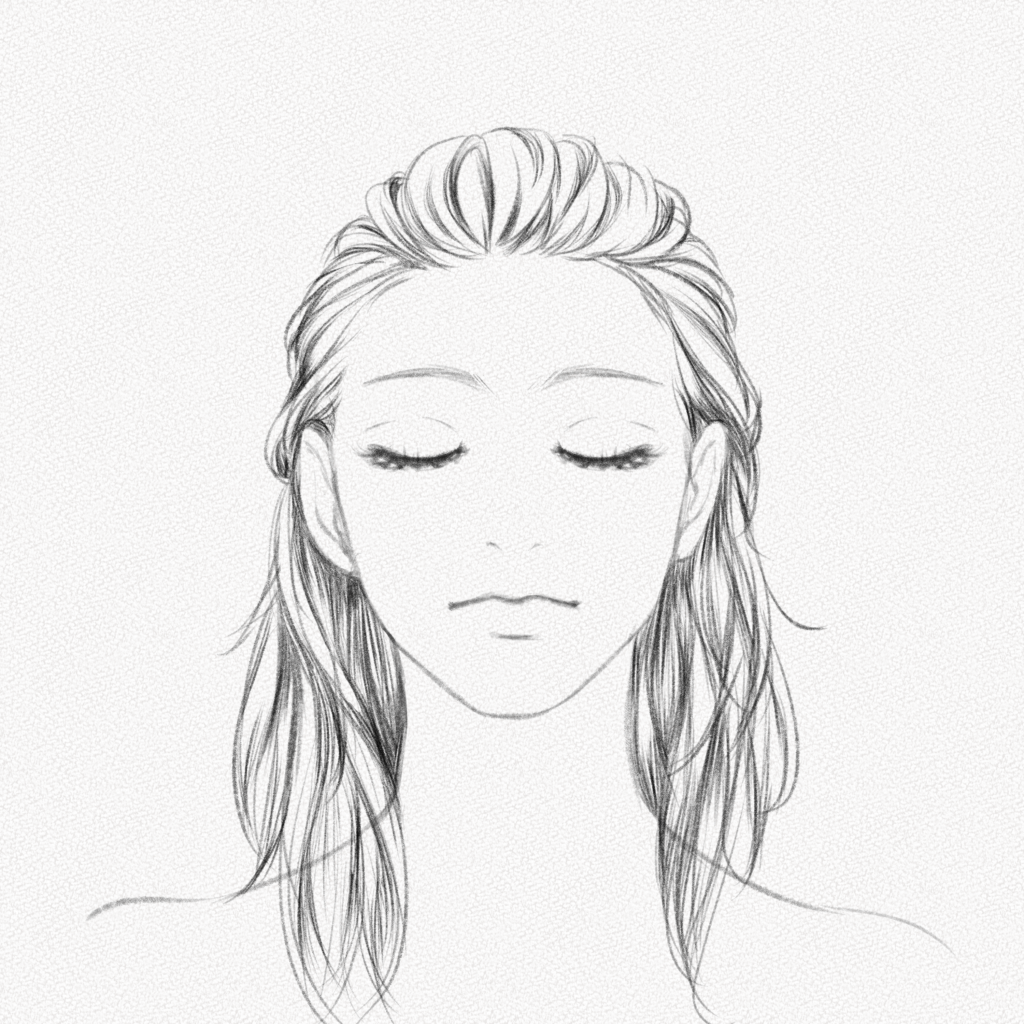
These are the hairstyles you’re going to draw:

And these are all the steps we’ll walk you through: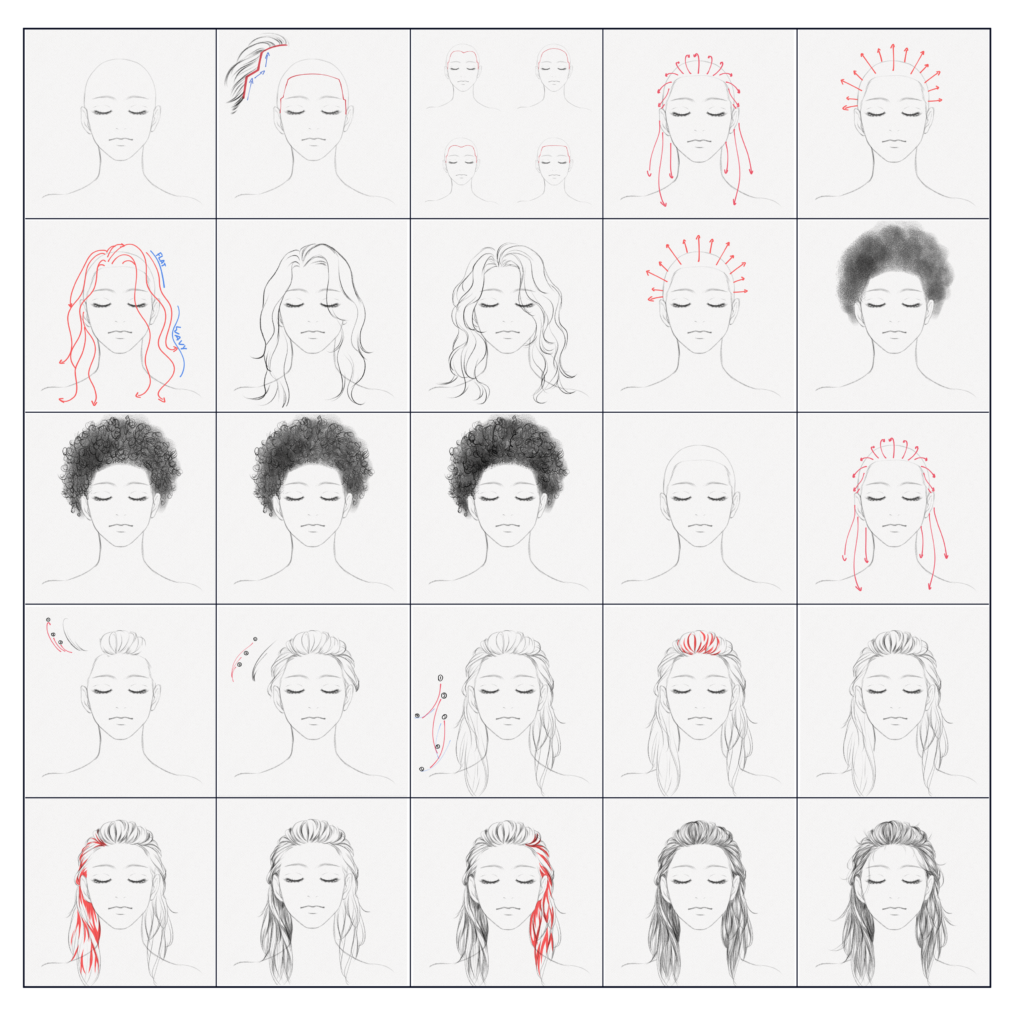
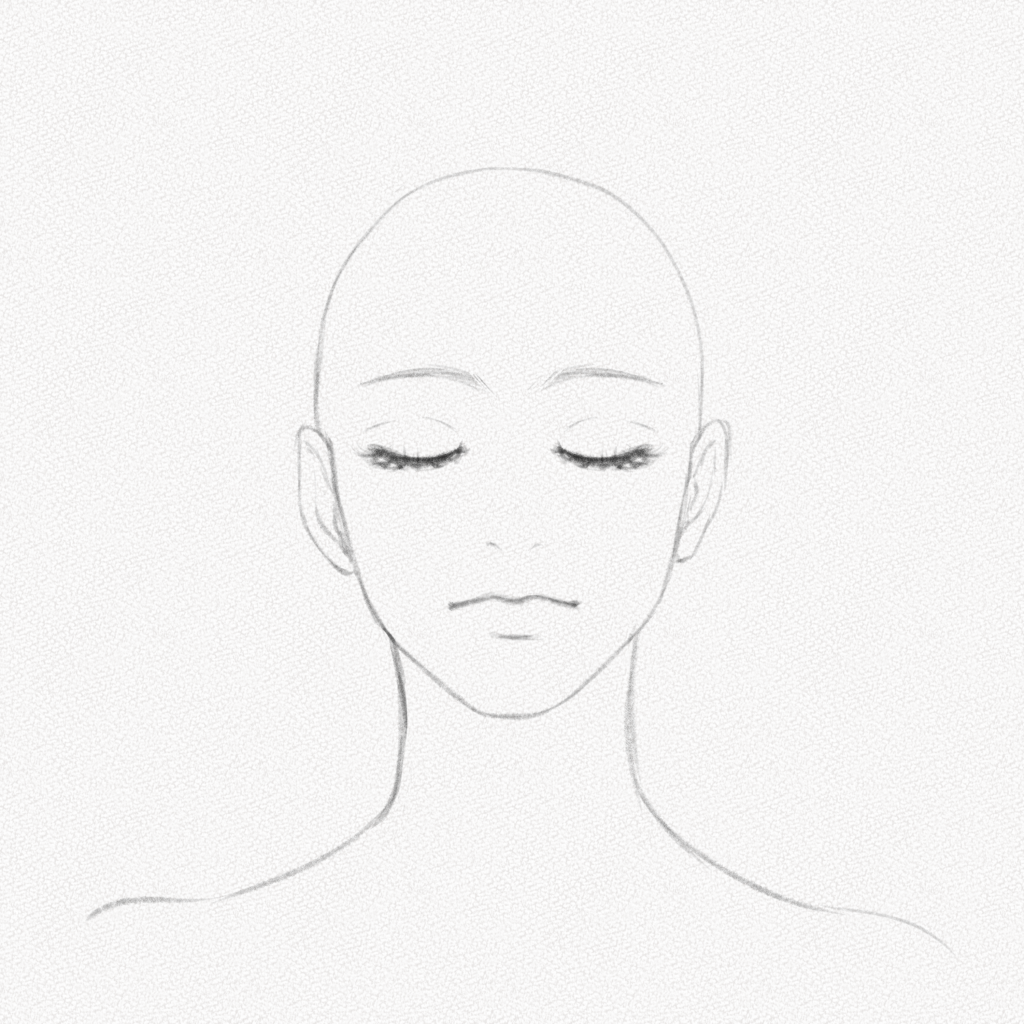
Section 1.- The head and hairline
Hair is not only about hair strands. It has to do a lot with the shape of the head and the position and type of hairline. For this section, we are going to use a head base, not only the head but also the neck and shoulders, since many hairstyles are shaped around the neck and shoulders.
The hairline
When thinking about the hairline, we should think about steps. Hairlines are not straight lines or fully curved lines (unless you’re balding). Most hairlines have some sort of “steps” like shapes on the sides of the head. The perspective and angle of the head might make them look smaller or narrow. However, the shape remains.
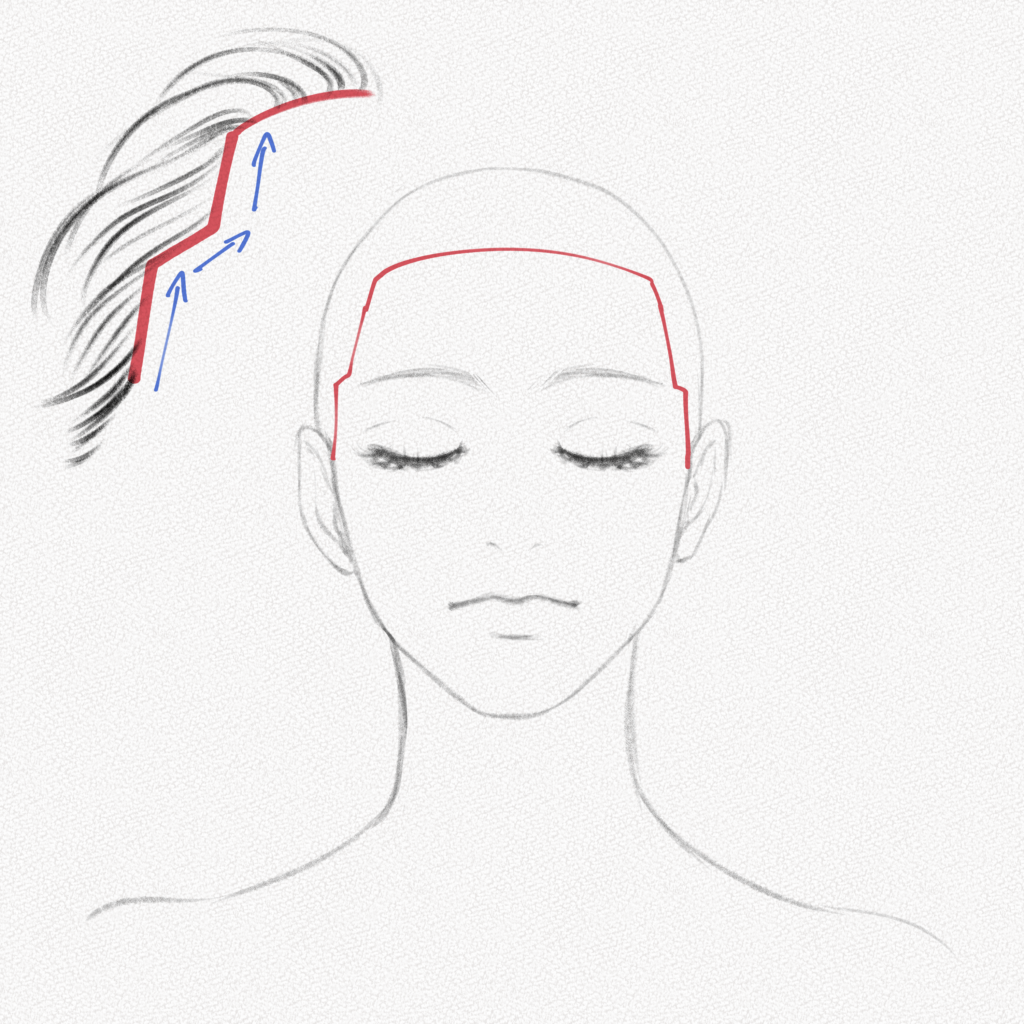
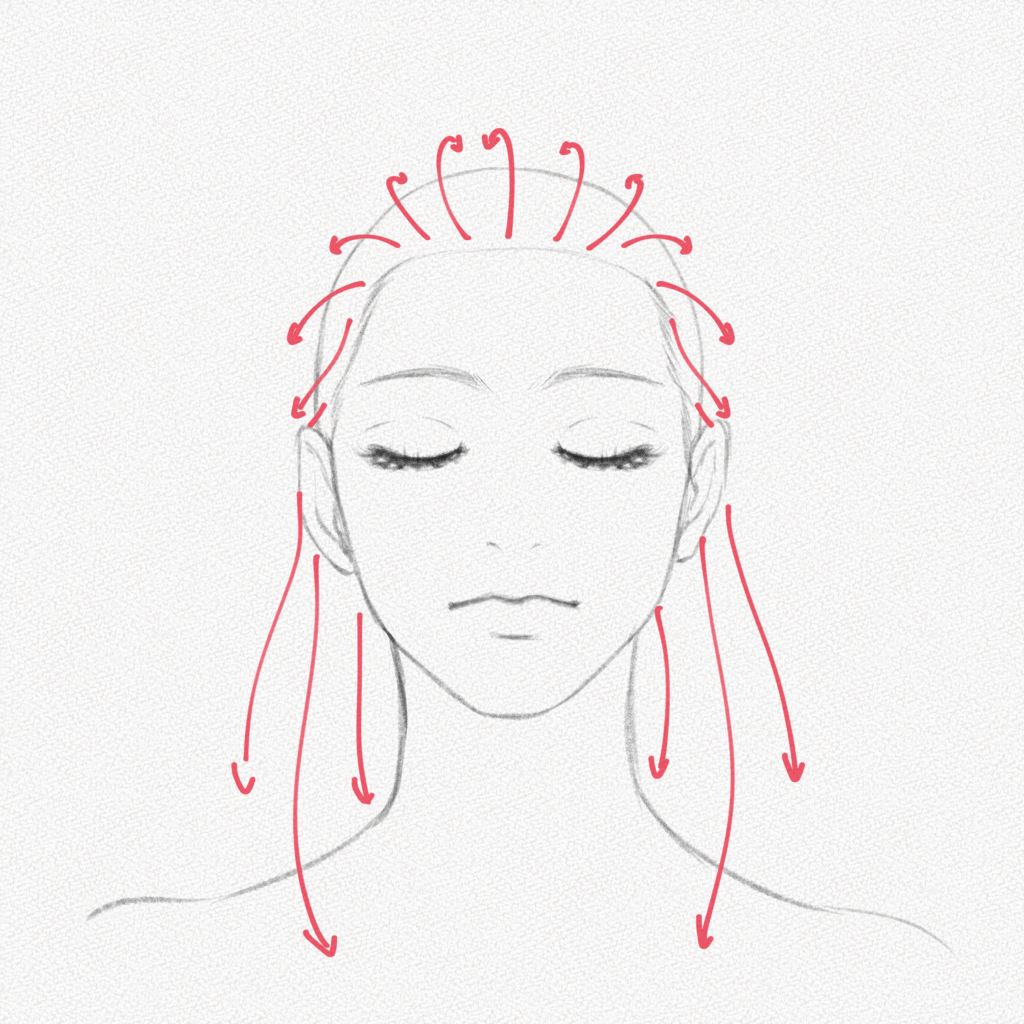
Hair is affected by gravity, so the hair on the sides tends to fall while the hair on top of the head goes slightly up and then down or to the sides.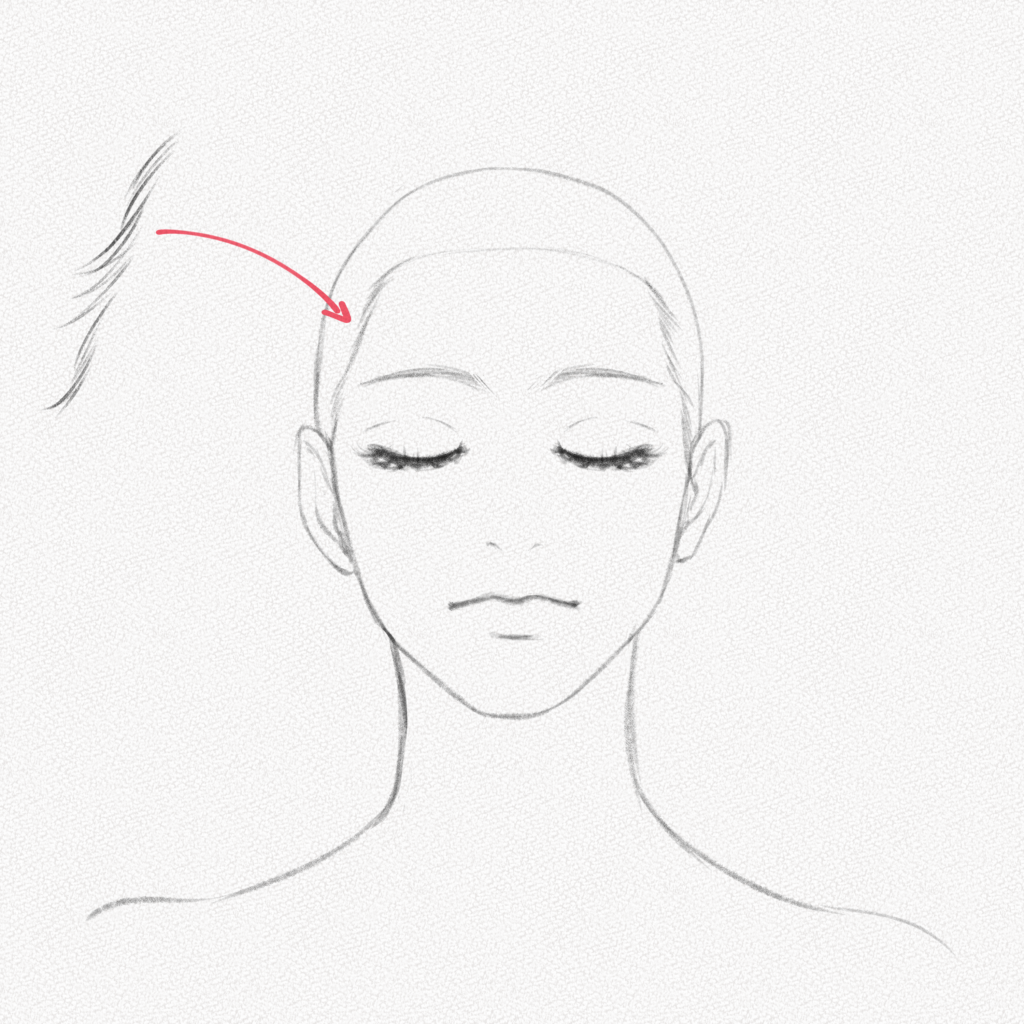
Types of Hairlines
Every hairline is different, but most fall within one of the following four groups: round, rectangular, widow, and receding. You can see how most of them still have the “steps” shape on the sides, and only the top part is different.

Types of Hair
There are also many types of hair, all of them with different colors, textures, and shapes. Here we’ll see the most common types of hair:
- Straight hair: The texture of straight hair makes it follow the shape of the head, it doesn’t have that much volume, but since it bounces a bit on top of the shoulders, some of the strands can appear a bit wavy.
 Curly Hair: Behaves in a completely different way than straight or wavy hair. Curly hair tends to have much more texture and even defy gravity. It has lots of volume.
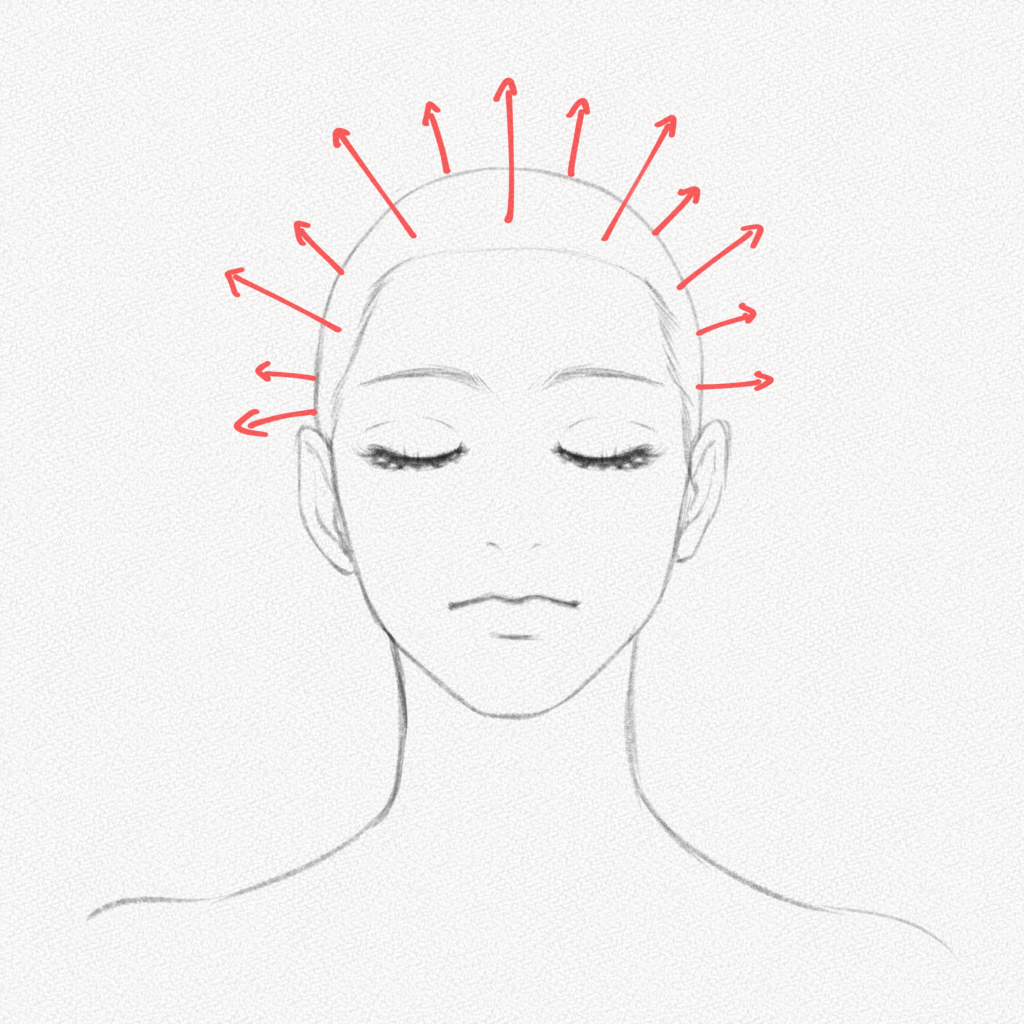
- Wavy hair: Although the top follows the shape of the head, wavy hair strands bounce on each other, so it has much more volume than straight hair, and the waves can go from soft to very strong. However, the pattern is the same.
Hair is so different from each other that using the same technique for every type of hair would be impossible. Each type needs its own technique, and some are easier and simpler while others take a long time to do.
In the following sections, we are going to use two shading techniques for the two types of hair we’ll be exploring. If you can, draw your own head base, but if what you’re looking for is pracrice, you can printe the one we have right here and draw on top of it.
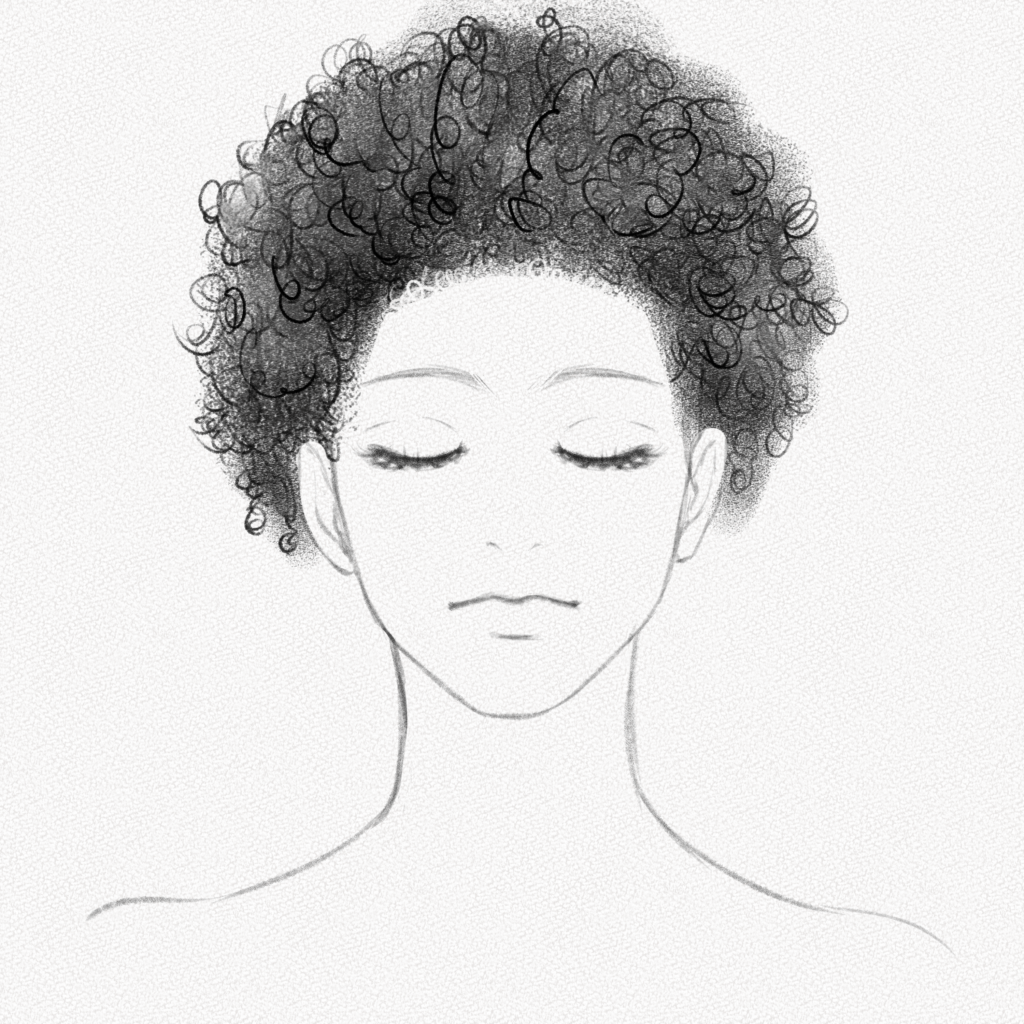
Section 2.- How to Draw Curly Hair
For this section, we will use our 4B pencil, powdered graphite, brush, blending stump, and kneaded eraser.
Step 1: Draw the hairline
Using our head as a base. We are going to draw the “steps” and work with a round hairline. Make it very, very light since we’re going to only use it as a reference.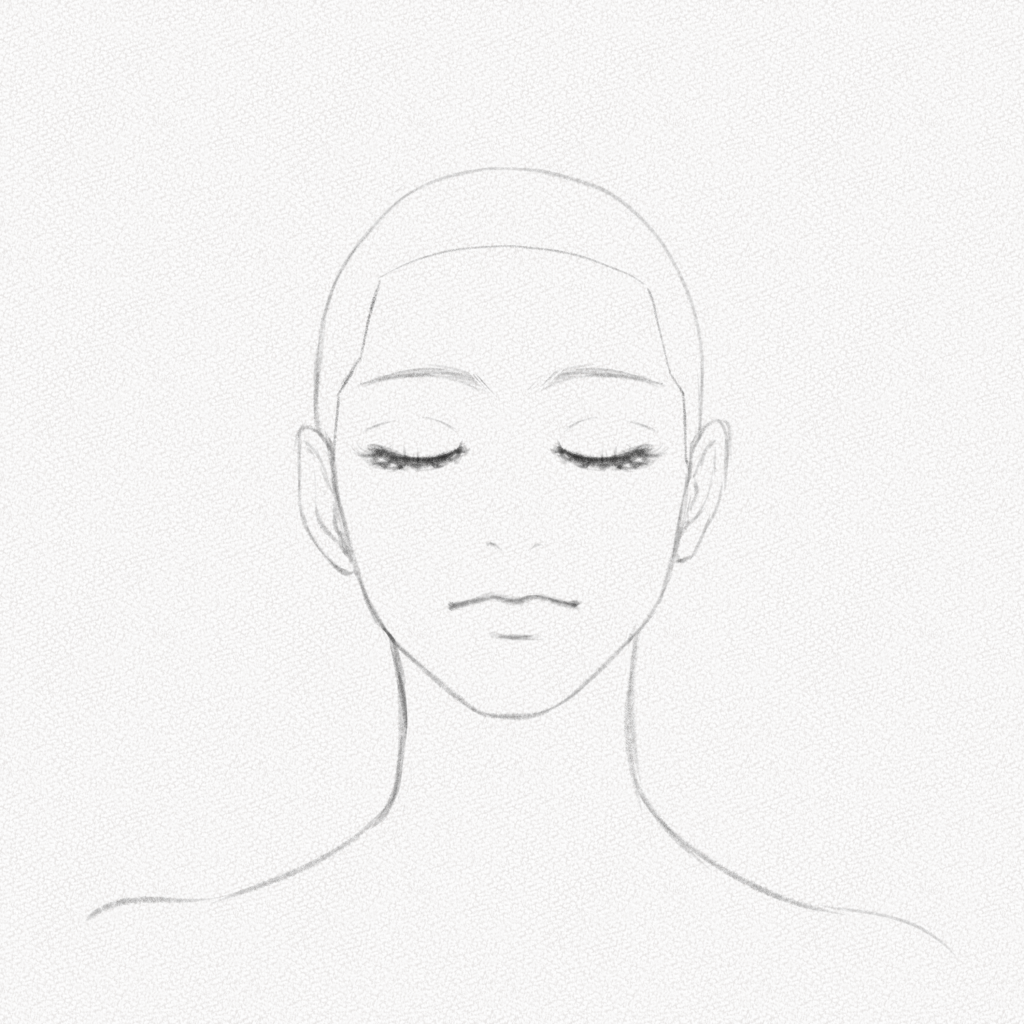
Step 2: Define the hair shape
With the powdered graphite and your brush, tap around the head to define the hair’s size and shape. Use significant circular movements to give it a “cloudy” effect.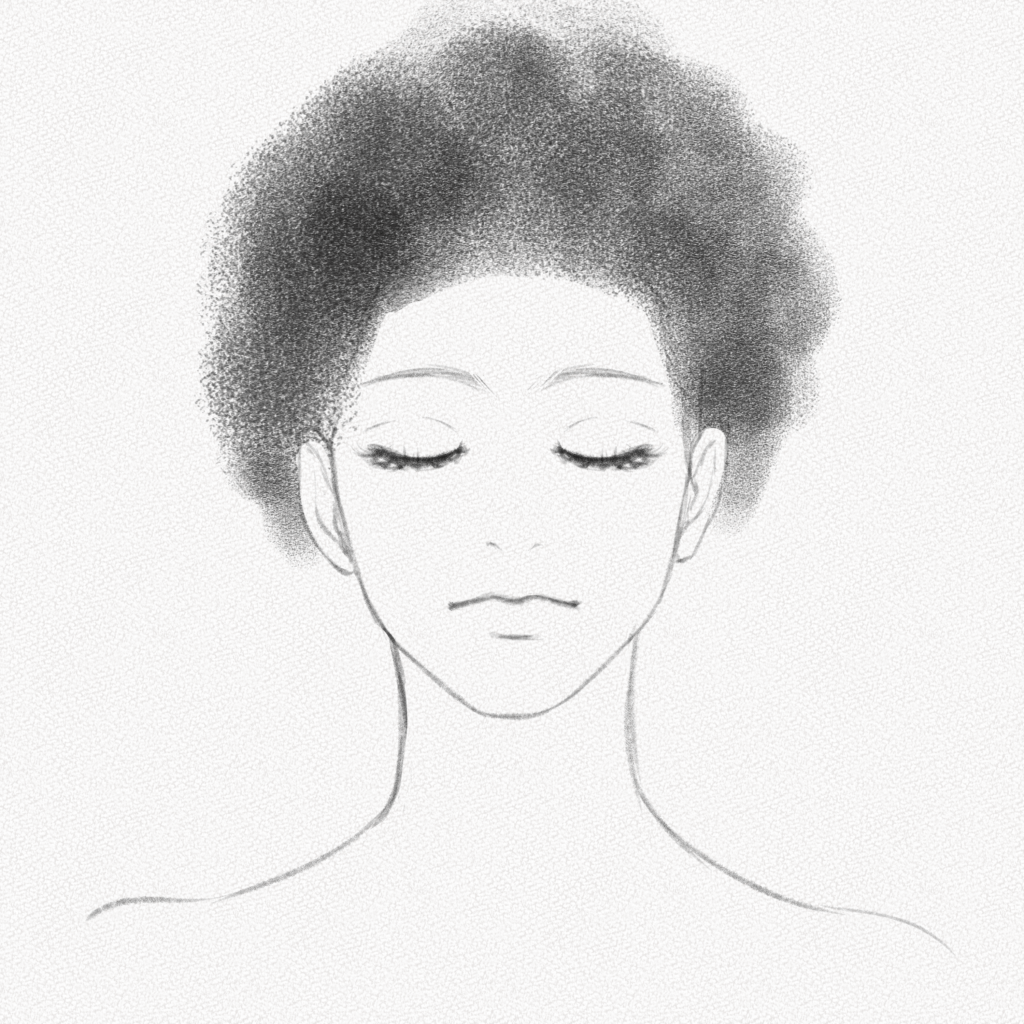
Step 7: Draw the curls
Curly hair, especially in this particular hairstyle, is quite messy and hard to draw if we focus only on details, so don’t sweat it, and with your 4B pencil, make many continuous circular shapes all over the hair. Make sure to fill it all and to make some of the curls noticeable outside of the hair shape.

Step 8: Blend
Take your blending stump and blend some of the hairs inside the primary shape. Curly hair is all about the contrast between details and lack of them, so don’t be afraid to blend!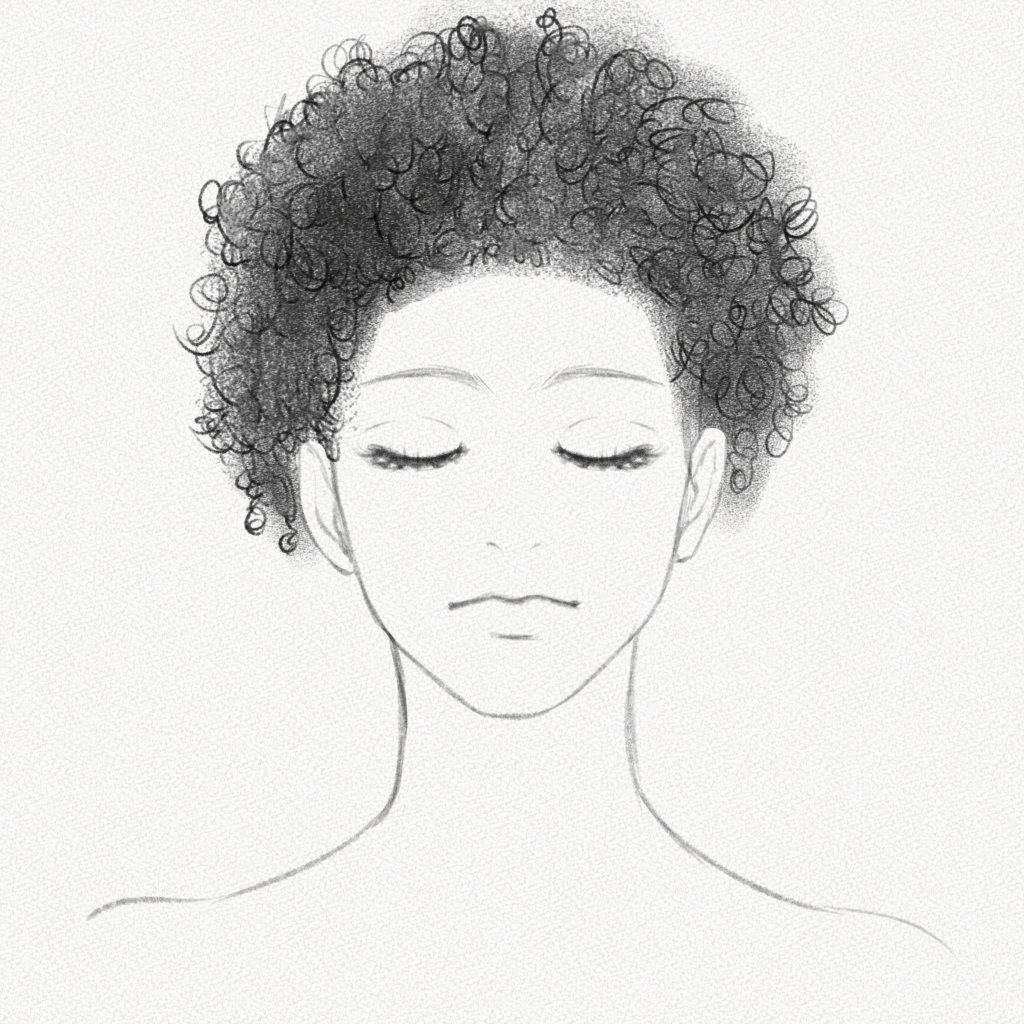
Step 9: Add more hairs
Using your 4B pencil, darken the areas closer to the head and add some extra hairs on the top of the blended areas. This will give the illusion of depth and add extra texture to your hair.
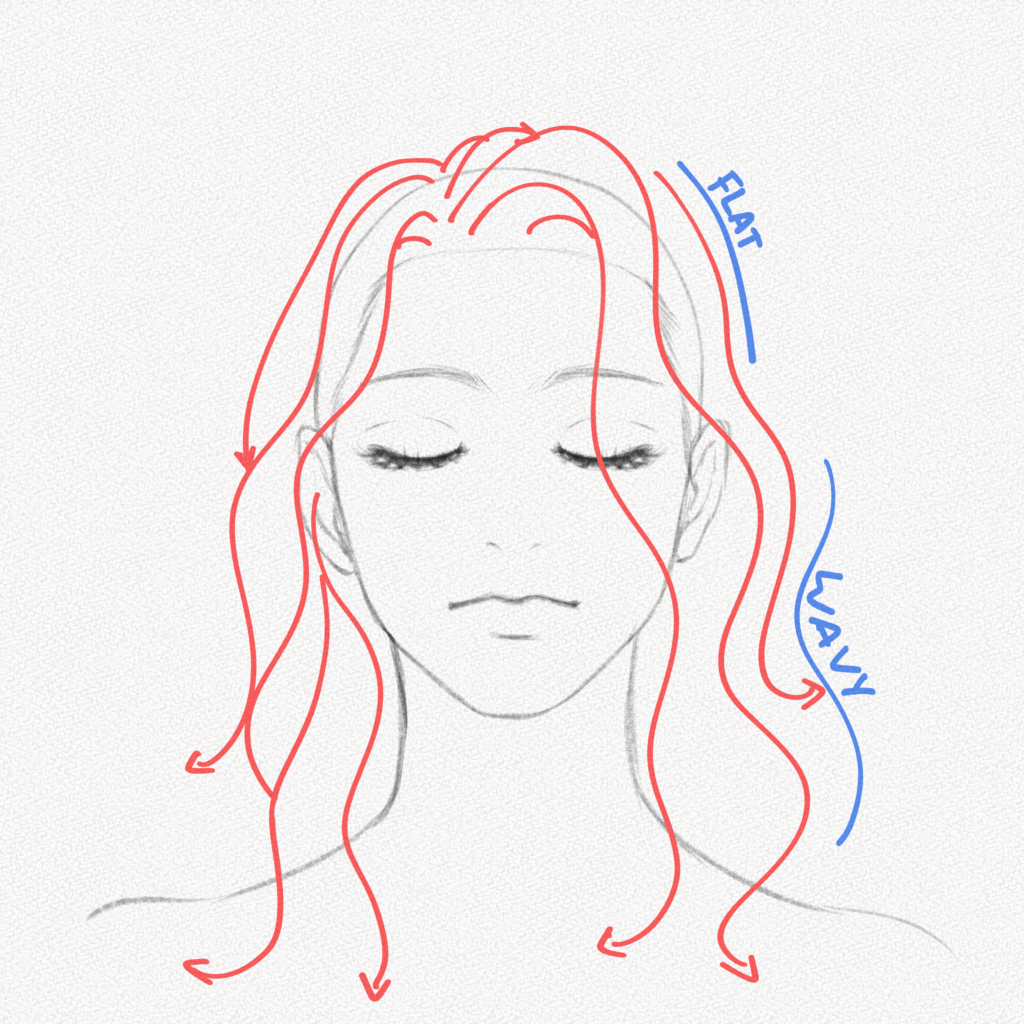
Section 3.- How to Draw Straight hair
For this section, we are going to use the 4B pencil, Tombow Mono Zero Eraser, mechanical pencil, and your blending stump!
Step 1: Draw the hairline
Again, with your mechanical pencil or your 4B pencil, mark the hairline position very softly.
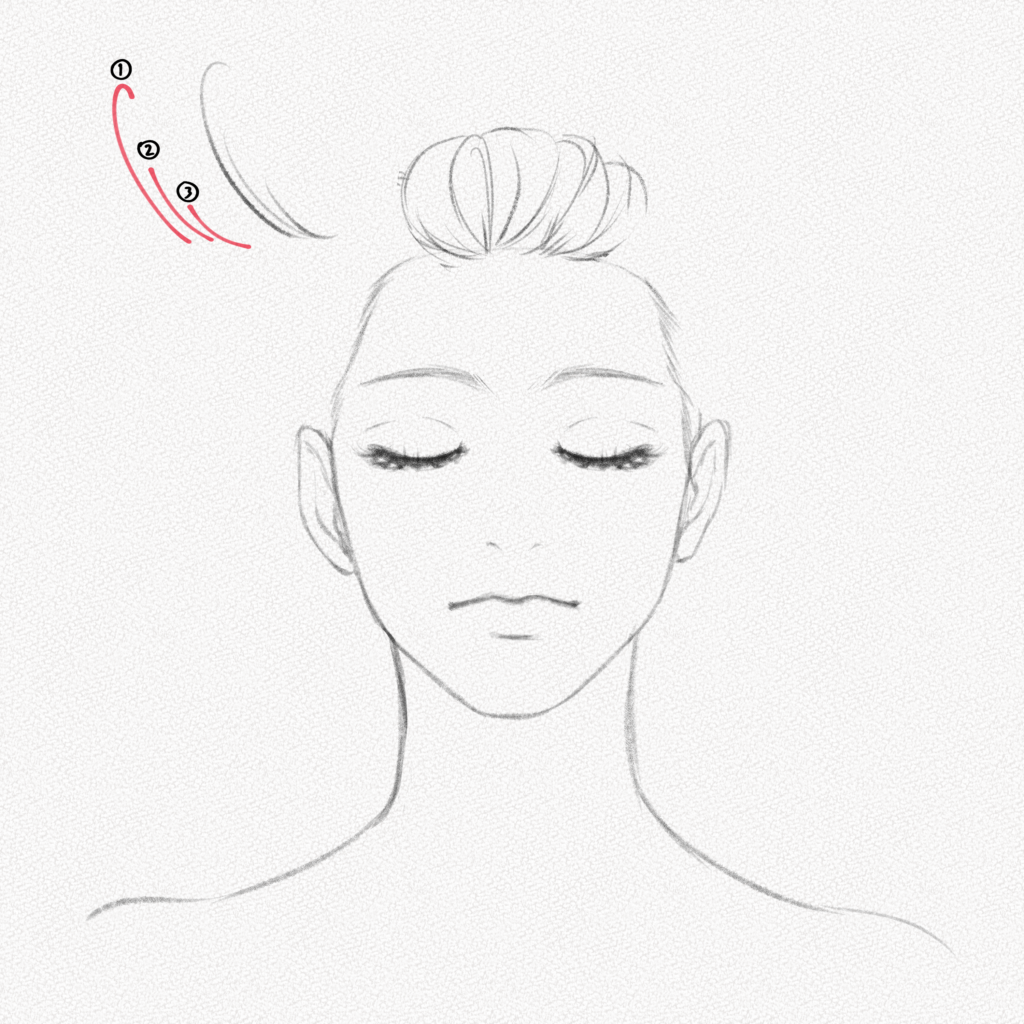
Step 11: Draw the sides
On the sides of the hairline, add small soft lines to hint at the beginning of the hair. Use the diagram below as a guide if you’re feeling lost.
Step 3: Follow the shape of the head and draw the top.
For this part, we’ll be using the diagram from section 1 and following the direction of the hair when pulled back.
For the top part, we are going to use loose “C” shapes, as shown in the diagram, following the direction of the arrows. For more fluid and dynamic hair, use three kinds of strokes. A big one, a medium and a small one.
Step 4: Draw the Sides
Hair is affected by gravity and, on the contrary, on the top of the head, the hair on the sides falls down. The small volume it can have is because of bouncing with the ears. Use several short, curved strands to give it a bit more volume but keep it close to the head.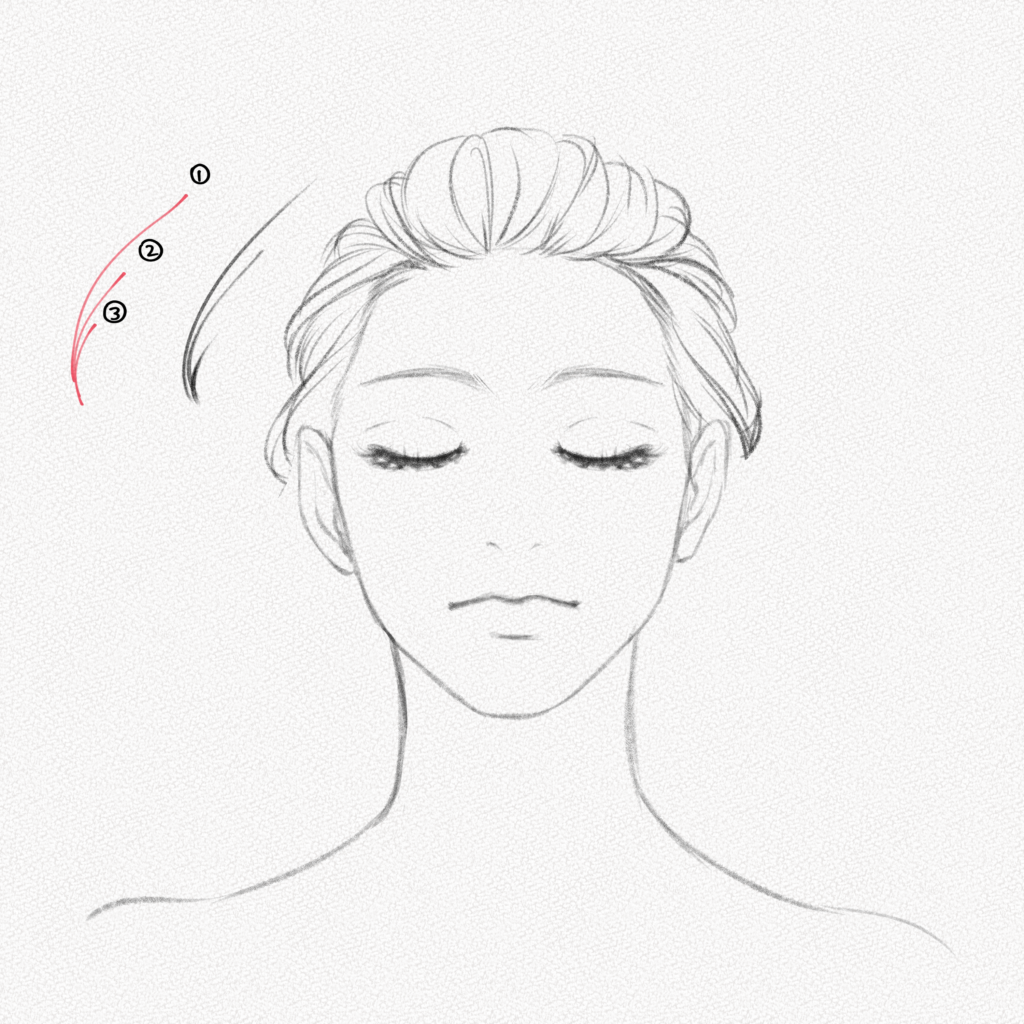
Step 5: Draw the bottom
Now draw long loose strands giving them a bit of volume near the shoulders. Keep the shapes consistent with the flow of the hair and add a couple of loose short hairs.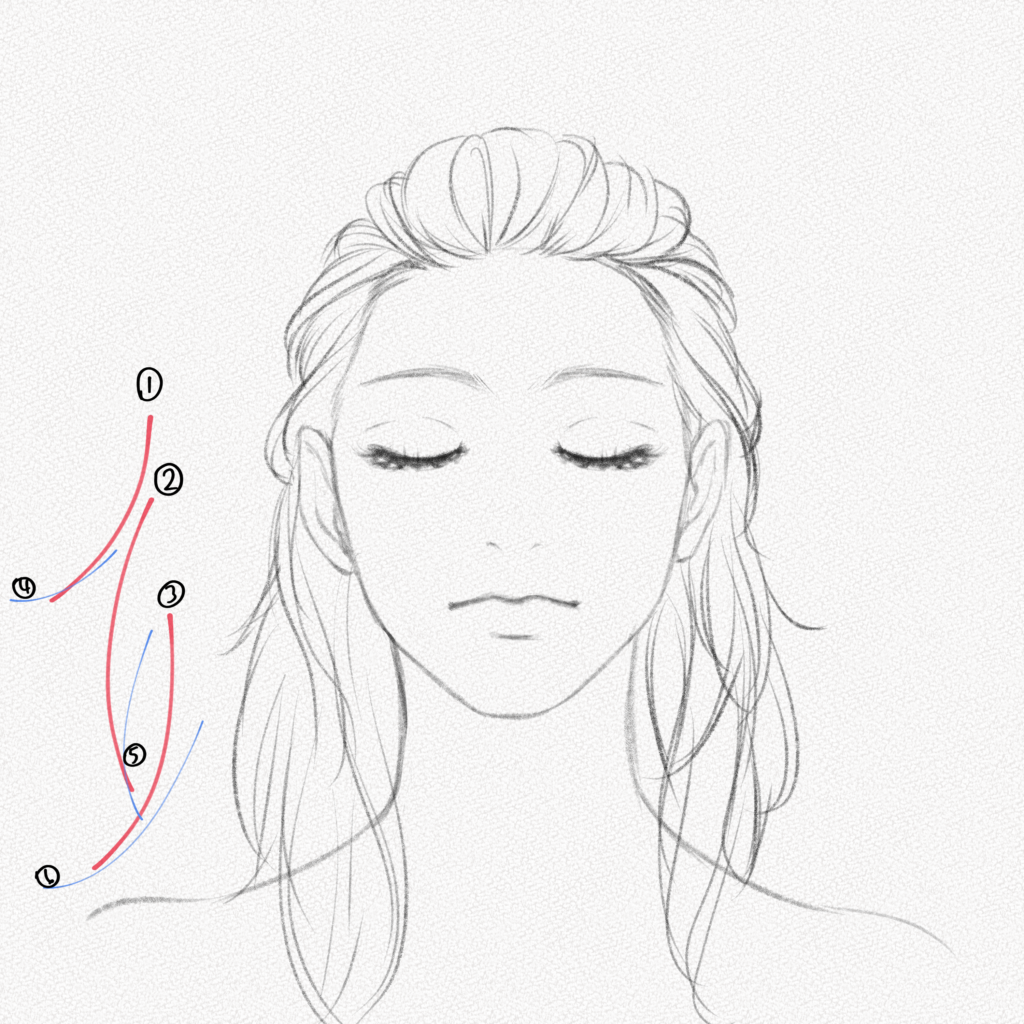
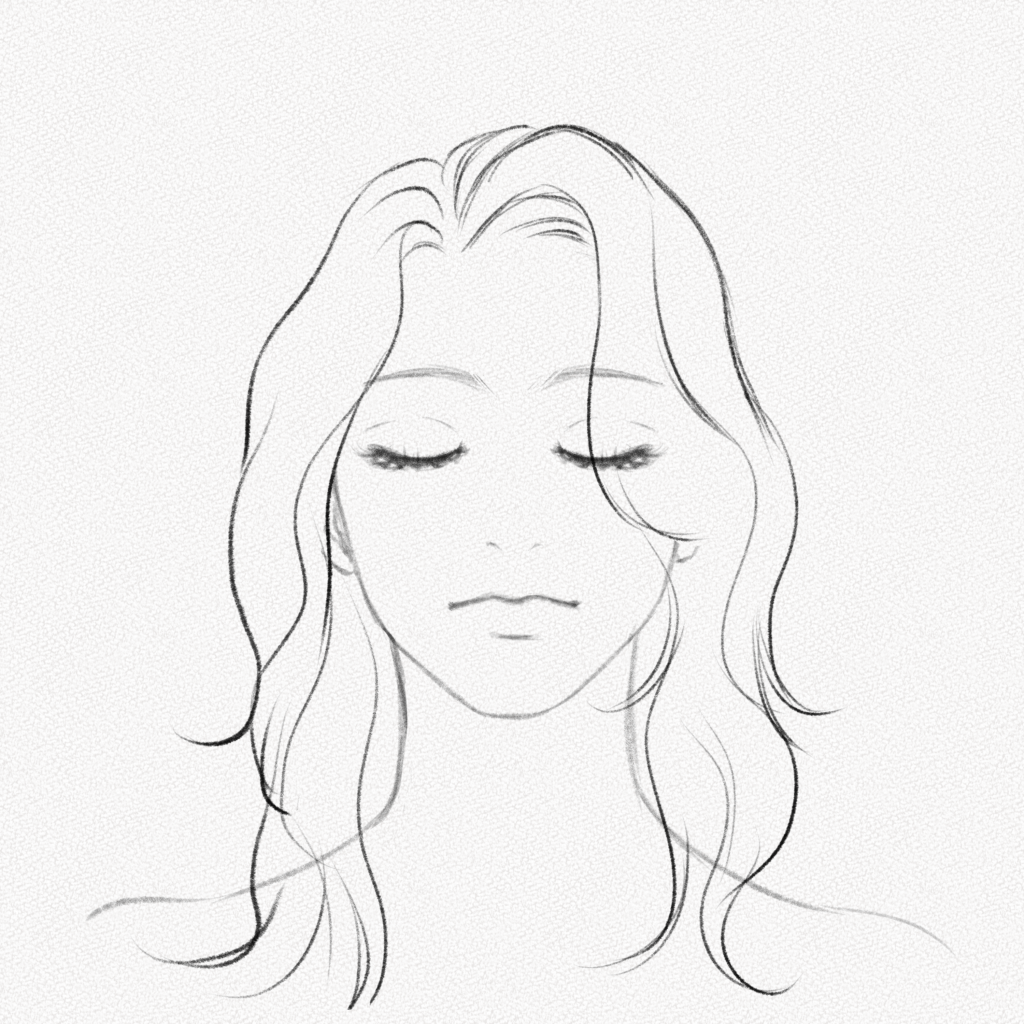
Step 6: Set the darkest values
One of the first lessons most artists learn is that we can’t draw every single strand of hair. Hair should be treated more like a shape or a concept. However, what do we do when we want to shade realistic hair? The initial step is to go for the darkest values. First, that way, it will be easier to separate the hair into locks and then fully shade it
Check the diagram and with your 4B pencil, darken the red areas. Note that those areas are places where the light doesn’t hit directly or where the hair overlaps.
Step 7: Repeat for the left
Do the same for the left side of the hair. You can use the diagram below if you’re feeling lost on where to put the darkest values. 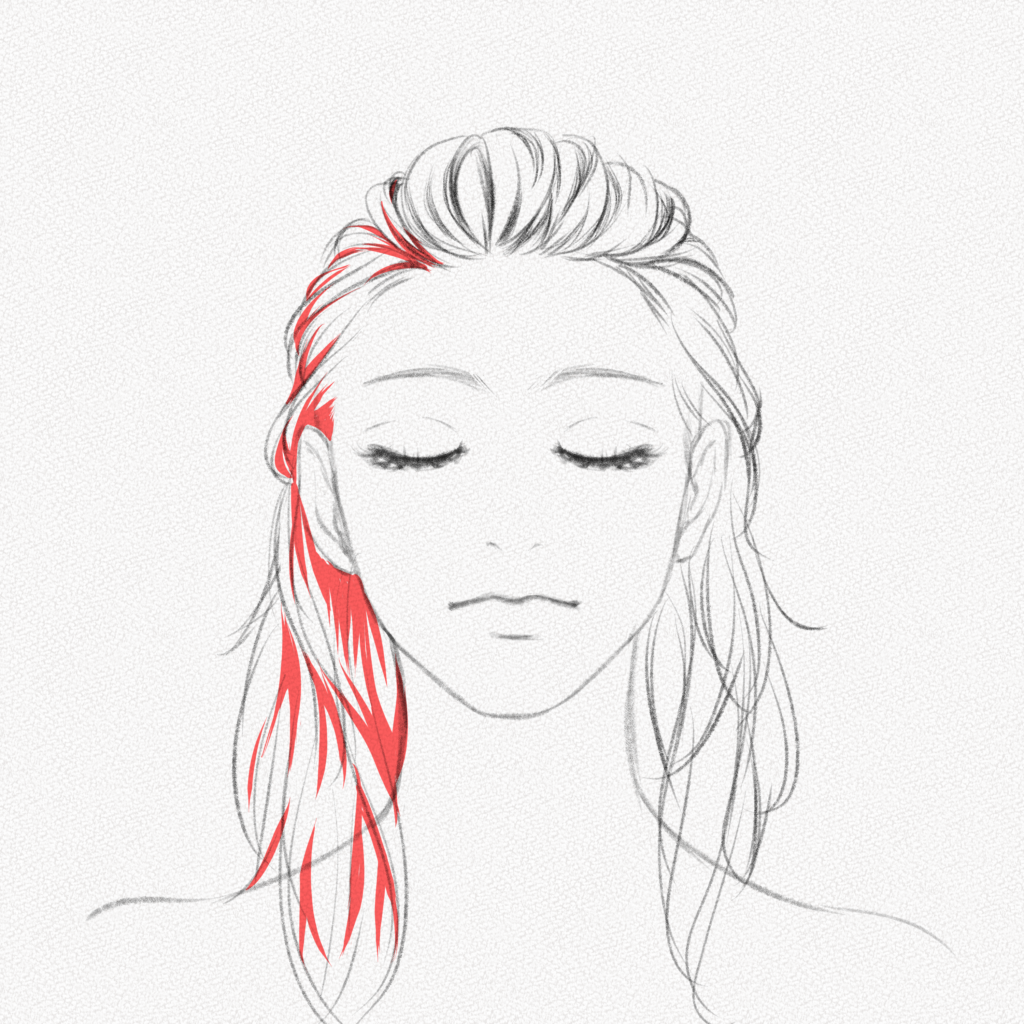
Step 8: Repeat for the right
Repeat the steps above for the other side, although symmetry looks nice. The beauty of hair lies in imperfections and asymmetry, so try to keep both sides different.
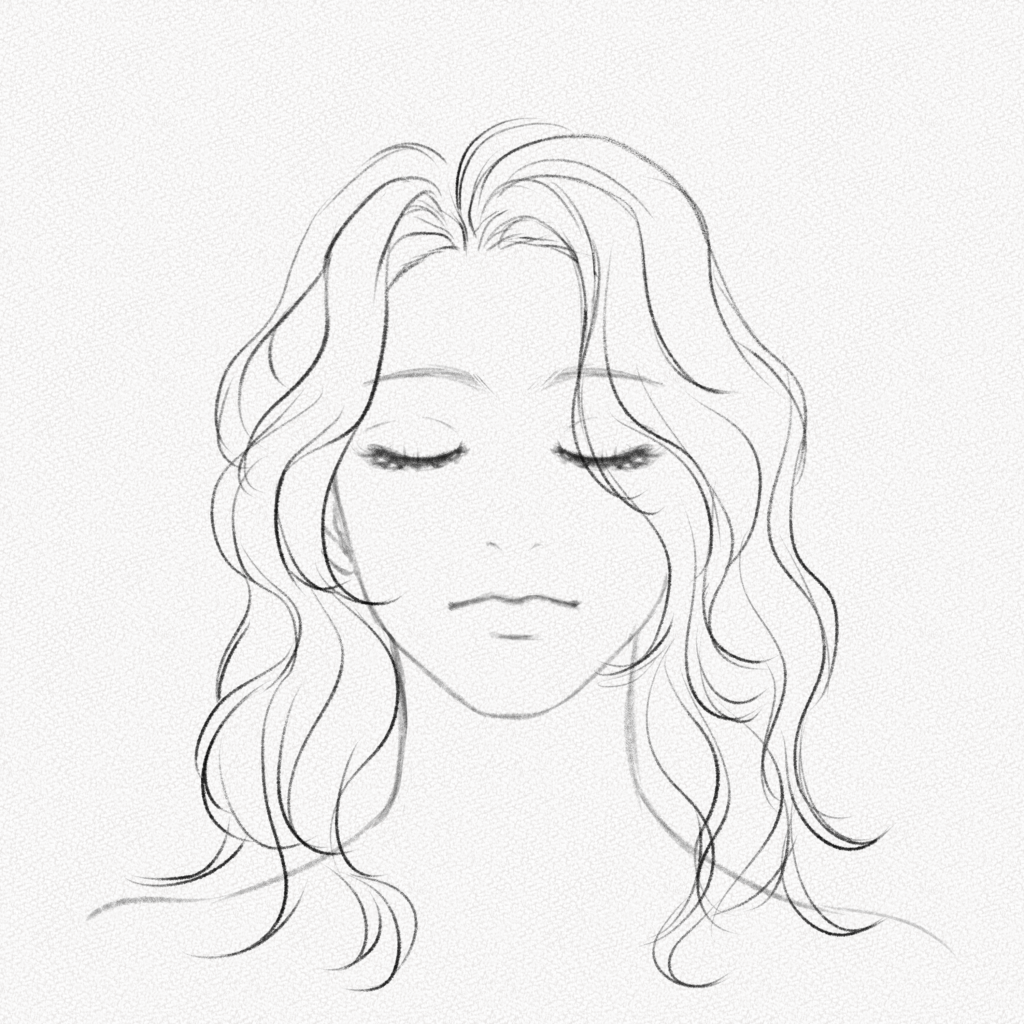
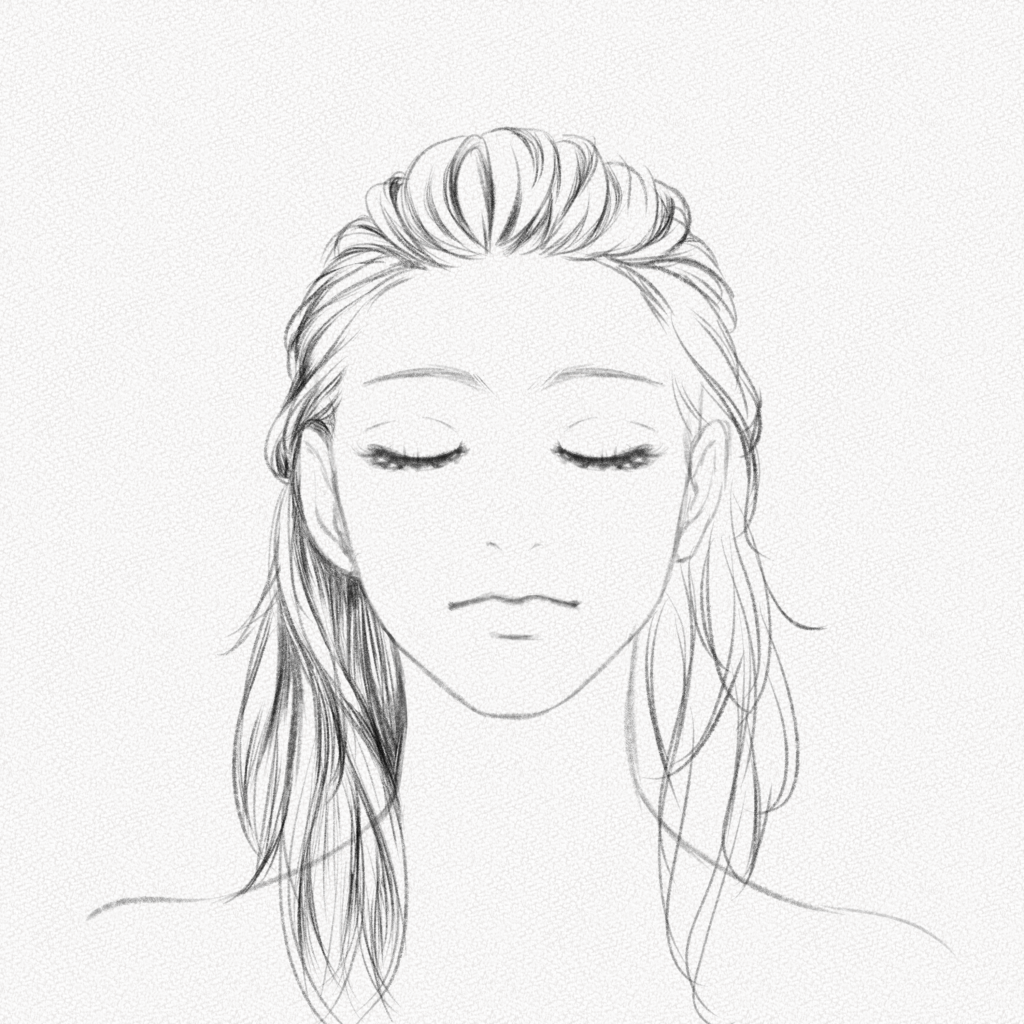
Step 9: Fill the locks
With your mechanical pencil, fill the locks with soft and small traces following the flow and movement of the hair. Apply more pressure and layers to the part right beside the neck and under the ear.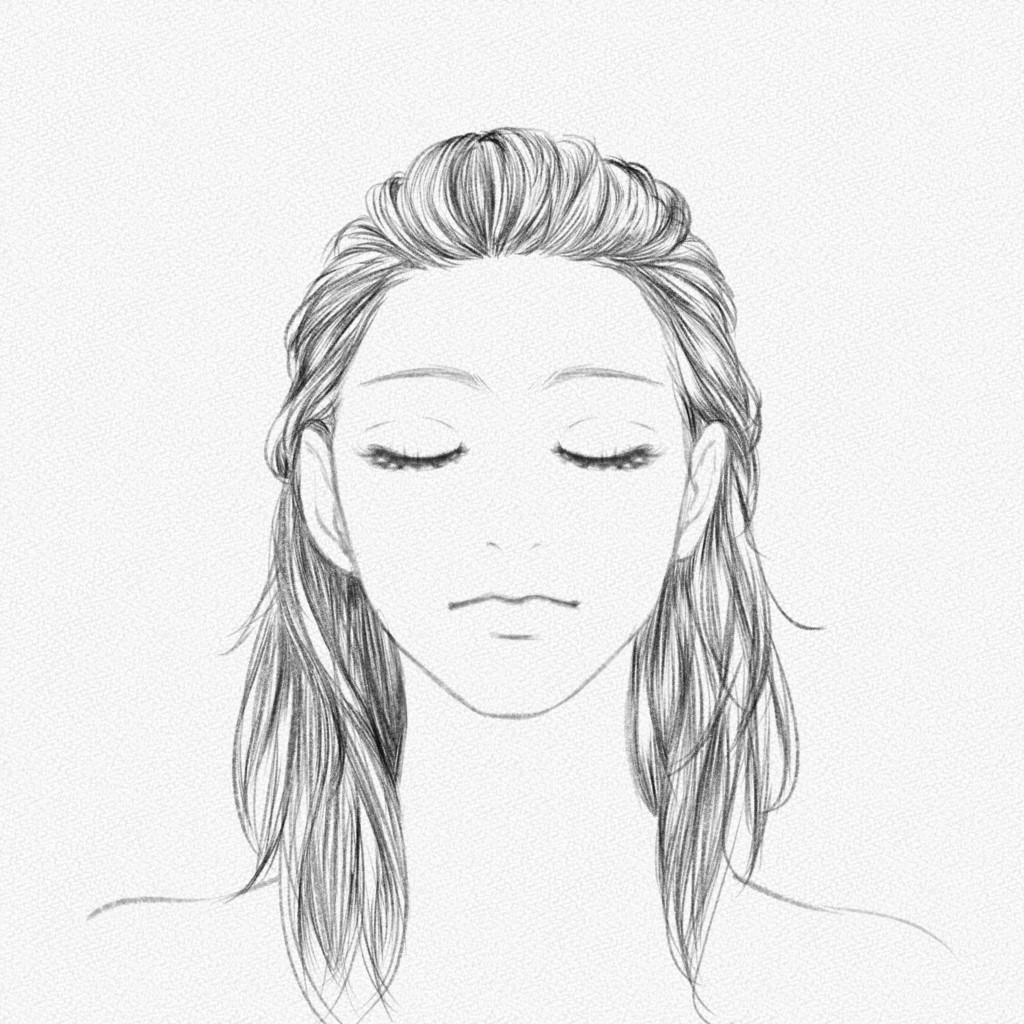
Step 19: Draw loose hairs
Add some loose small, and long hairs with your mechanical pencil for an extra touch of realism and fluidity.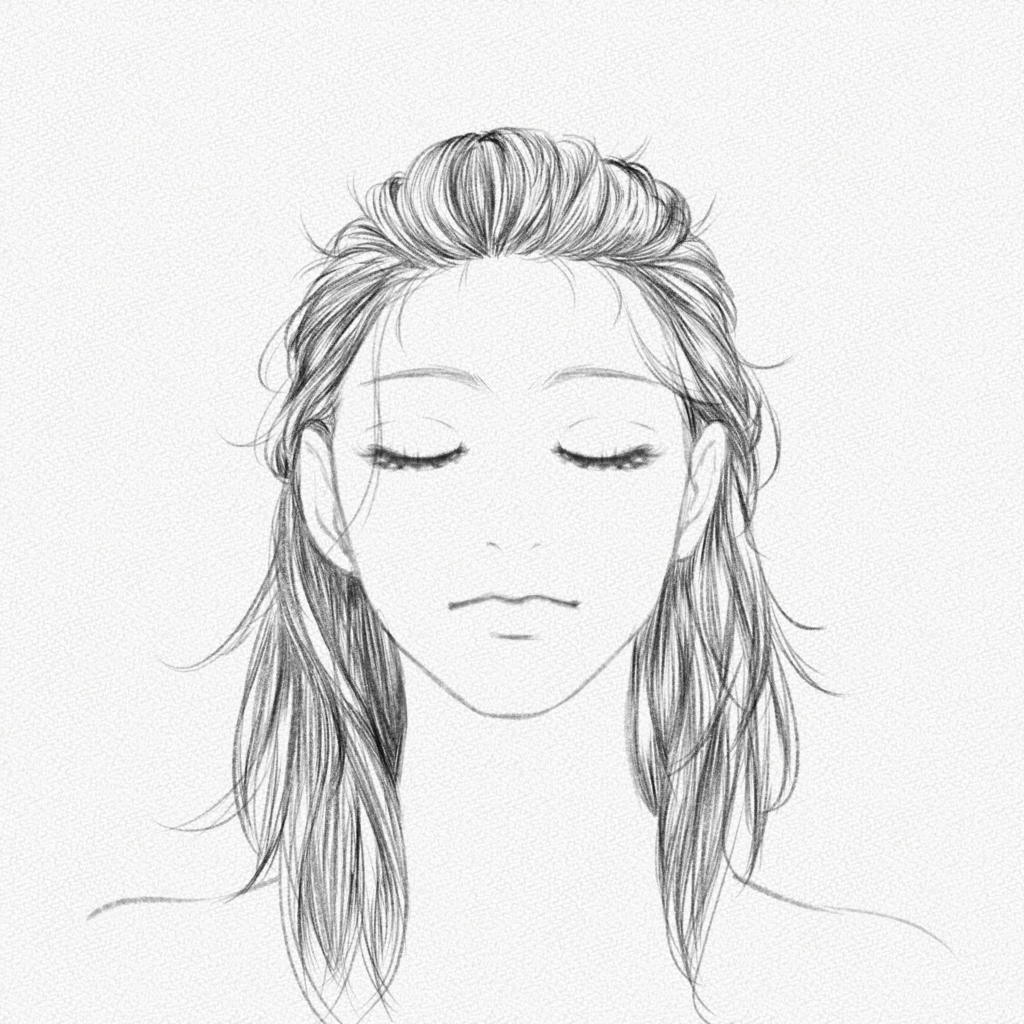
And that’s it. You’re done.
Thank you for following this tutorial; you did great!
I hope you learned something new today and that now you have a better grasp on how to draw and shade a hair.
Remember that while drawing and shading hair from imagination is possible, this tutorial can be used as an exercise to practice with real models or reference pictures and that the only way you’ll get better at drawing all kinds of hair is by practicing!
Until next time!