How to Draw a Skeleton Hand
Welcome to our tutorial on how to draw skeleton hands! Skeleton hands are a classic element of horror and gothic art, and they can add a creepy or macabre touch to your drawings. They can be a fun and spooky addition to your artwork, whether you’re creating a Halloween-themed picture or want to add some gothic flair to your art.
In this tutorial, we’ll cover the basic anatomy of the hand and how to use that knowledge to draw skeleton hands that look accurate and believable. Then we’ll guide you through the steps for drawing realistic skeleton hands using simple techniques and easy-to-follow instructions.
Whether you’re a beginner or an experienced artist, this tutorial will provide you with the tools and techniques you need to create stunning skeleton hands.
So grab your pencils, and let’s get started!
What you’ll learn:
- Structure and Anatomy of a Hand
- How to Draw and Shade Bones
- How To Draw a Skeleton Hand
Materials needed:
- A piece of paper
- A 2H graphite pencil
- A 6B graphite pencil
- A Blending stump
- An eraser or a kneaded eraser
- A Tombow Mono Zero 2.3mm
This is the Skeleton Hand you’re going to draw: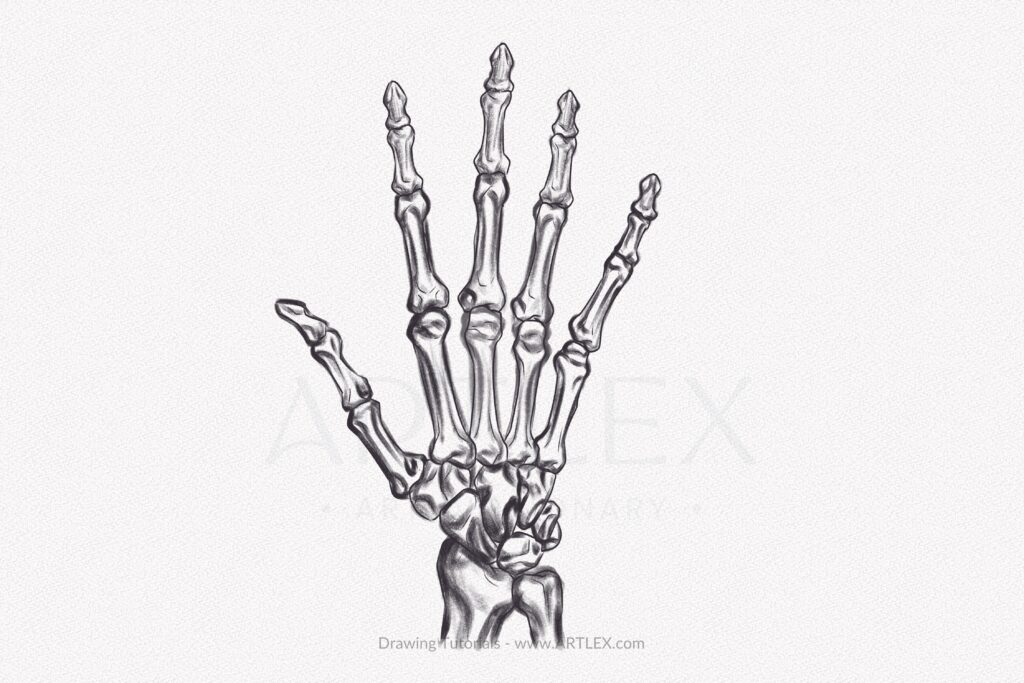
Section 1.- Structure and Anatomy of a Hand
In our previous “How to Draw Hands” tutorial, we learned how to simplify the hand into basic shapes that would help up draw the muscles and skin efficiently and accurately. It looked somewhat like this: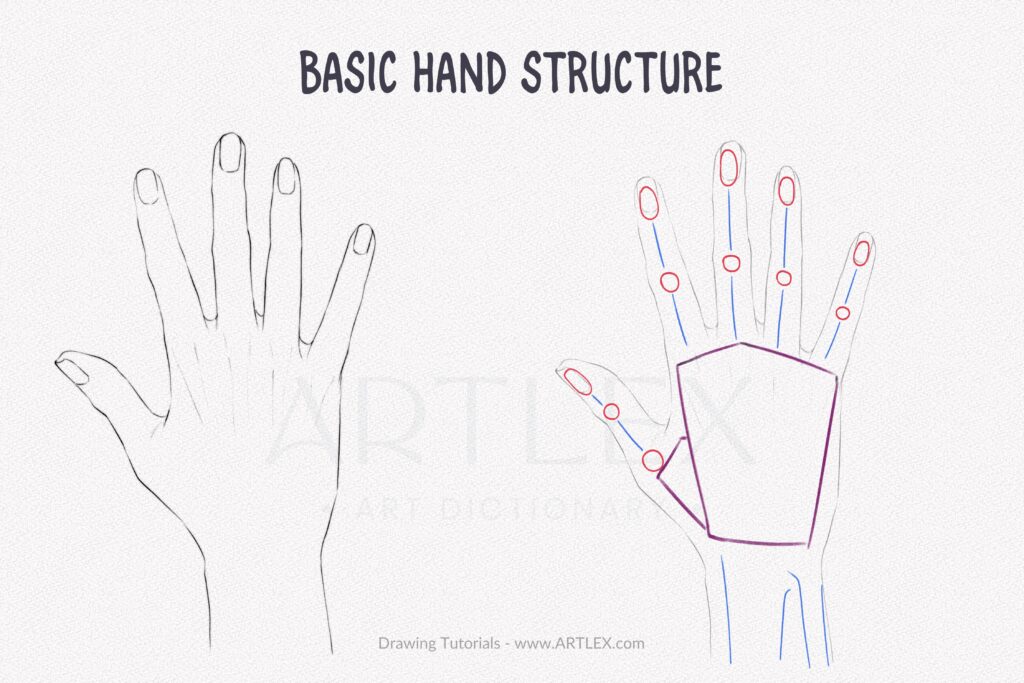
In this tutorial, we are going for the inner structure, so before jumping to draw the bones, let’s learn a bit more about them:
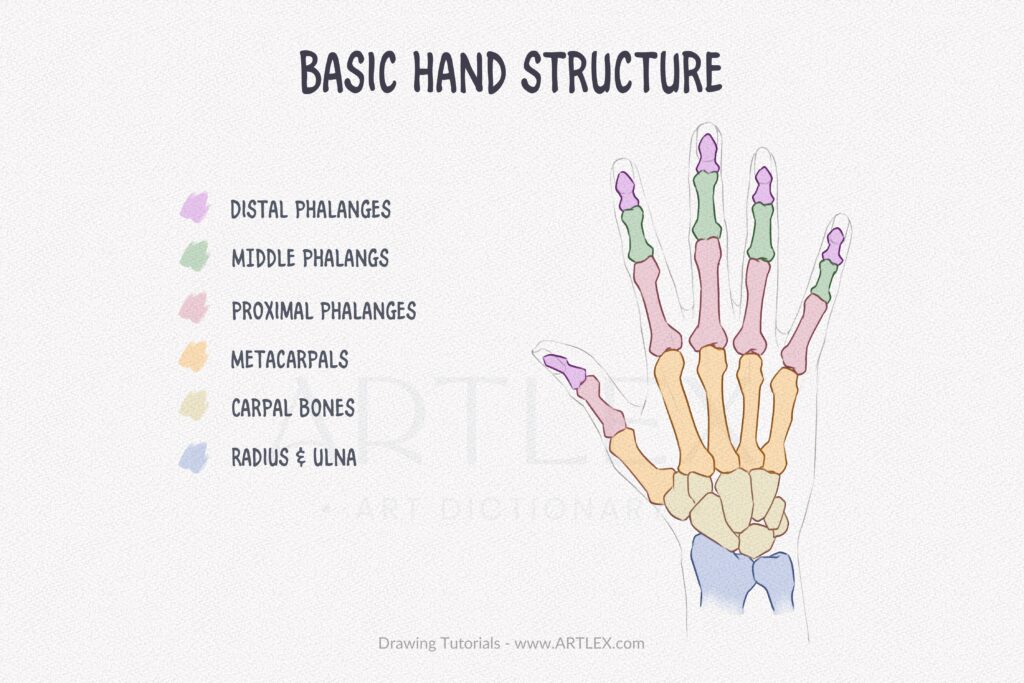
The Carpals:
These are the small bones that form the wrist. There are eight carpals in total: the scaphoid, lunate, triquetral, pisiform, trapezium, trapezoid, capitate, and hamate.
The Metacarpals:
These are the bones that connect the carpals to the fingers. There are five metacarpals, one for each finger.
The Phalanges:
These are the bones that make up the fingers and thumb. Each finger has three phalanges (proximal, middle, and distal), and the thumb has two.
The Arm Bones:
Then we have the arm bones (Radius and Ulna), which don’t necessarily form part of the hand’s structure but are very important and an excellent addition to the drawing.
Simplifying the Skeleton Hand
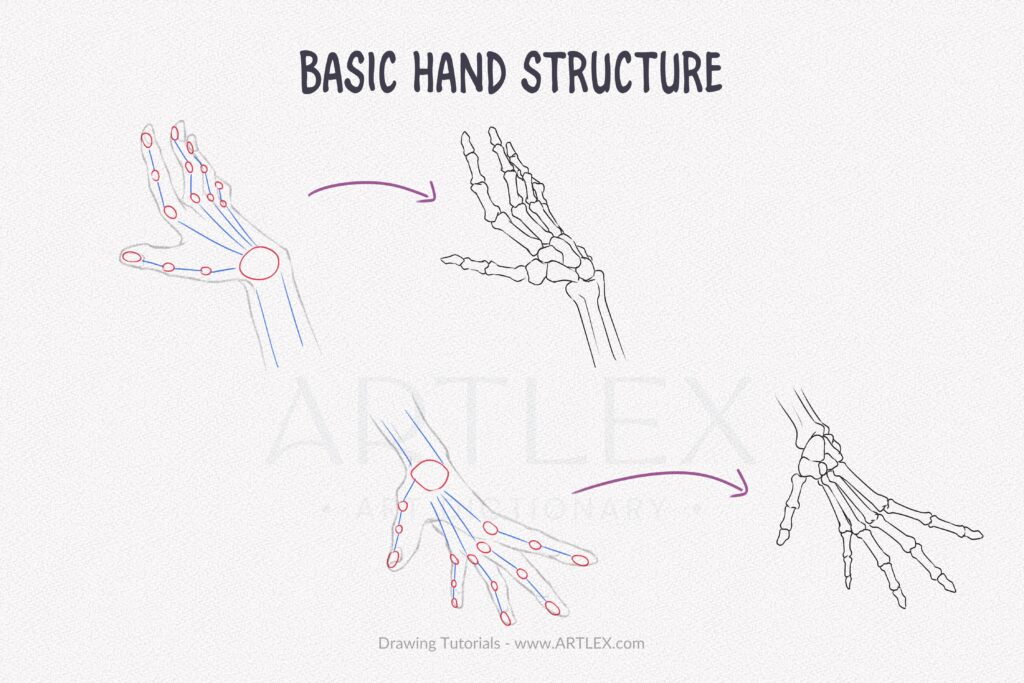
Looking at reference pictures is the quickest way to draw your own skeleton hand; however, if you want to learn how to draw a skeleton hand from different angles and apply this knowledge to your own art, then let’s take a minute and learn how to simplify the skeleton hand’s structure.
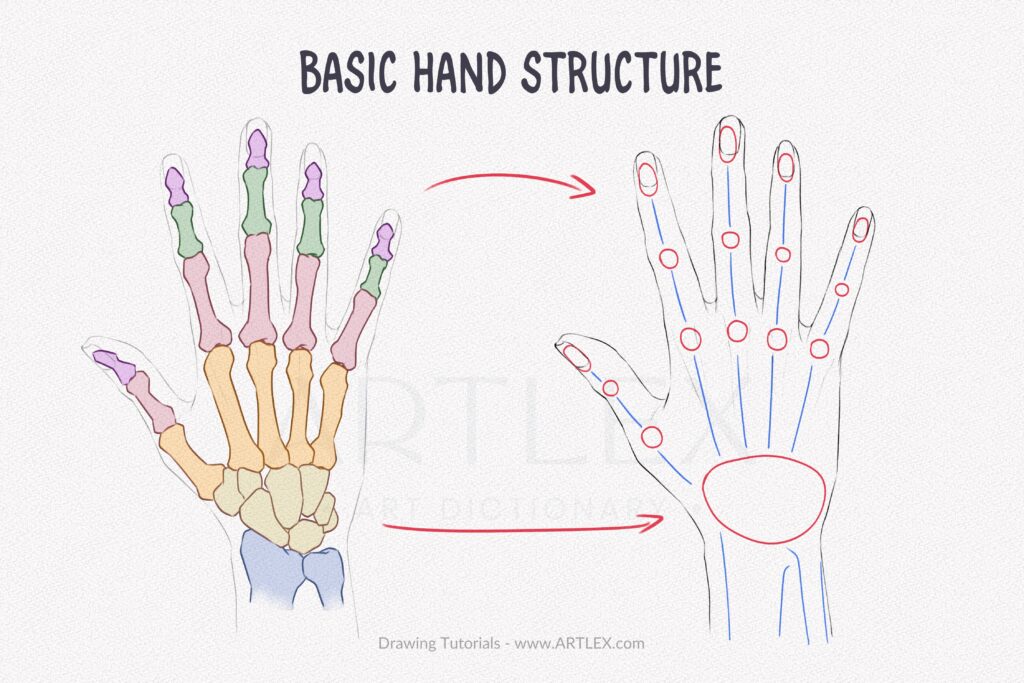
Instead of the box we used to draw replacing the carpals and metacarpals, we are going to draw a blob-like shape to represent the carpals and pull lines from it to represent the metacarpals:
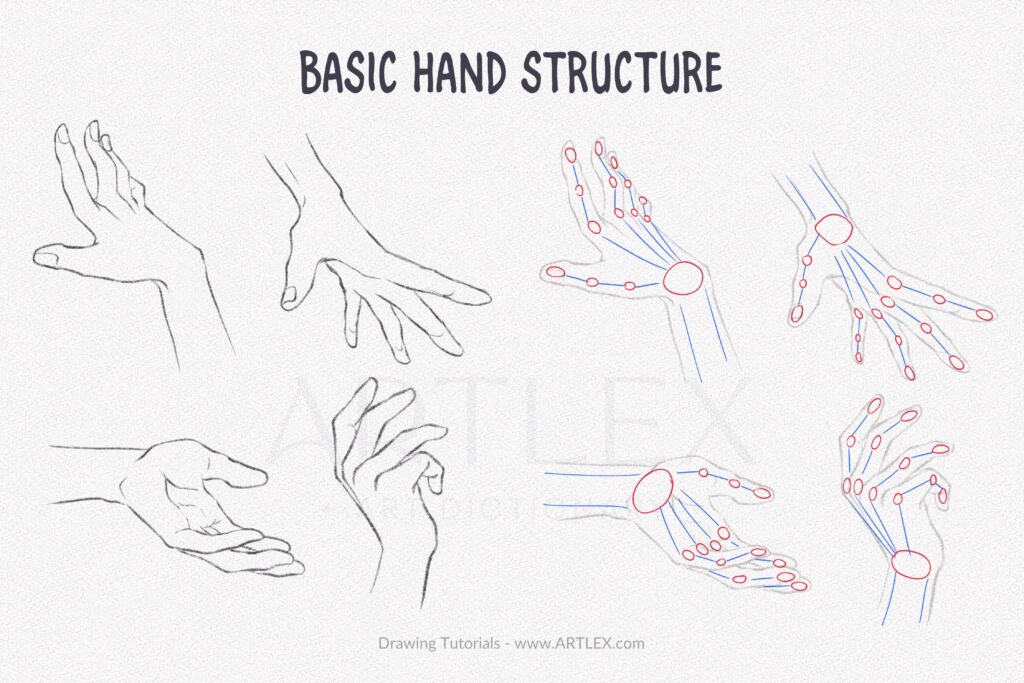
You can use your own hand as a reference or pull some references from the internet and then use this method to simplify them. Once you get a good grasp on the hand’s different poses, you can start adding the bones and details.
Section 2.- How To Draw and Shade Bones
To draw and shade the bones, we need to learn how to go from the basic shapes to the detailed and shaded final result in a few steps. Follow the diagrams below to learn how to draw each part of the hand.
Distal Phalange
The distal phalange is the bone located at the end of each finger, closest to the nail. It is the smallest of the three phalanges on each finger. The distal phalange is shaped like a cone, with a wide base that connects to the intermediate phalanx and a narrow tip that forms the fingertip.

When drawing skeleton hands, it is important to pay attention to the shape and placement of the distal phalanges, as they can affect the overall appearance and realism of the hand. For example, if the distal phalanges are too long or thin, the hand may look unnatural or disproportionate. On the other hand, if they are too short or thick, the hand may appear clumsy or awkward.
Middle Phalange
The intermediate phalanx (also known as the middle phalanx) is the bone located between the distal phalanx and the proximal phalanx.
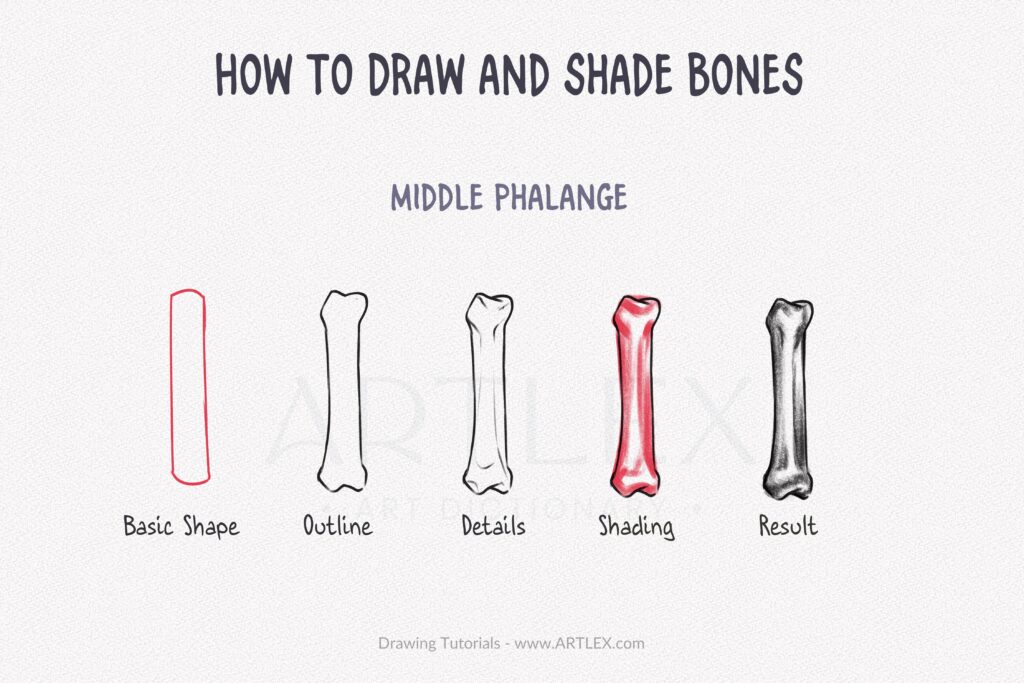
The intermediate phalanx is shaped like a cylinder, with a round or oval cross-section and a smooth surface. It is slightly smaller in size and less weight-bearing than the proximal phalanx but larger and stronger than the distal phalanx.
Proximal Phalange
The proximal phalanx is the bone located at the base of each finger, closest to the metacarpals. It is the largest of the three phalanges in each finger and is generally thicker and stronger than the other phalanges.
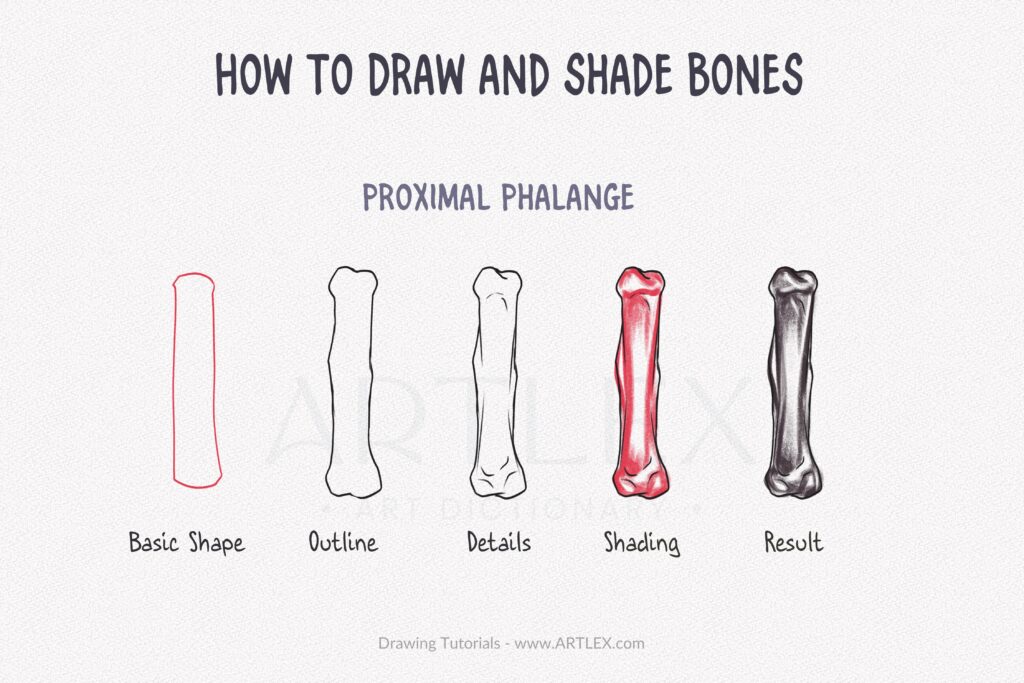
The proximal phalanx is shaped like a cylinder or a triangular prism, with a flat or slightly rounded top surface that articulates with the metacarpal bone of the hand and a round or oval cross-section.
Metacarpals:
The metacarpals are the bones that form the palm, connecting the wrist (carpals) to the fingers (phalanges). There are five metacarpals, one for each finger. 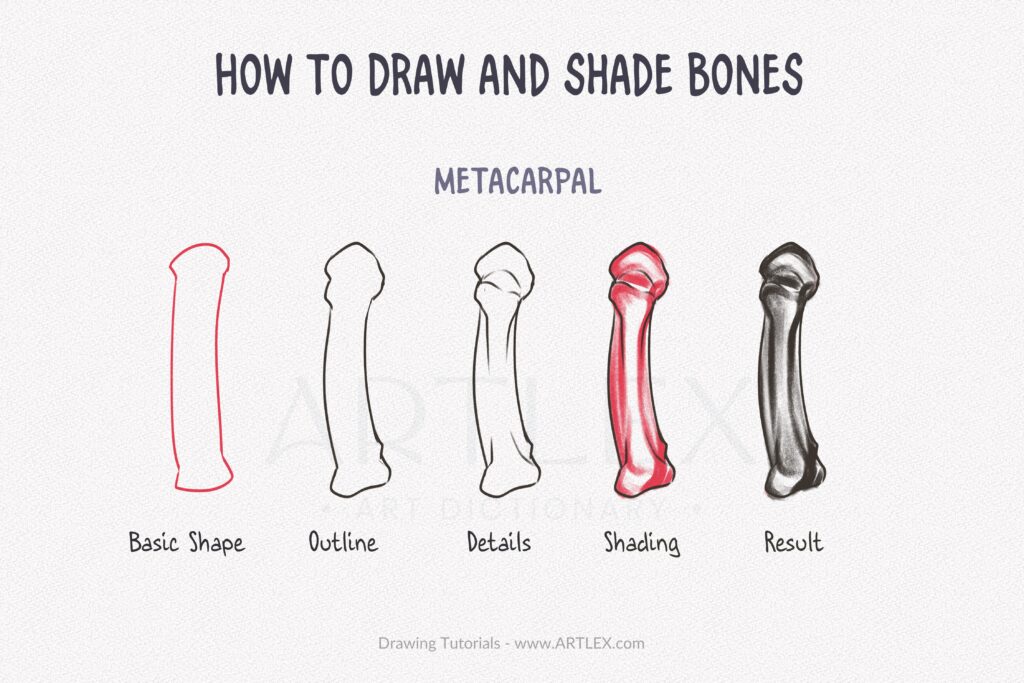
The metacarpals are elongated bones with a cylindrical shape, and they have a slightly curved or bowed shape when viewed from the side.
Carpal Bones:
The carpals are the bones that form the wrist, connecting the hand to the forearm. There are eight carpals in total, arranged in two rows of four bones each. The bones of the wrist are:
- Scaphoid: This bone is located on the thumb side of the wrist, and it articulates with the radius (one of the bones of the forearm) and the thumb’s metacarpal.
- Lunate: This bone is located behind the scaphoid and articulates with the radius and metacarpals of the index and middle fingers.
- Triquetral: This bone is located behind the lunate and articulates with the ulna (the other forearm bone) and the metacarpals of the middle and ring fingers.
- Pisiform: This bone is located on the little finger side of the wrist and articulates with the ulna and the metacarpal of the little finger.
- Trapezium: This bone is located on the thumb side of the wrist, and it articulates with the scaphoid and the thumb’s metacarpal.
- Trapezoid: This bone is located behind the trapezium and articulates with the metacarpals of the index and middle fingers.
- Capitate: This bone is located behind the trapezoid, and it articulates with the metacarpals of the middle, ring, and little fingers.
- Hamate: This bone is located on the little finger side of the wrist and articulates with the ring’s metacarpals and little fingers.
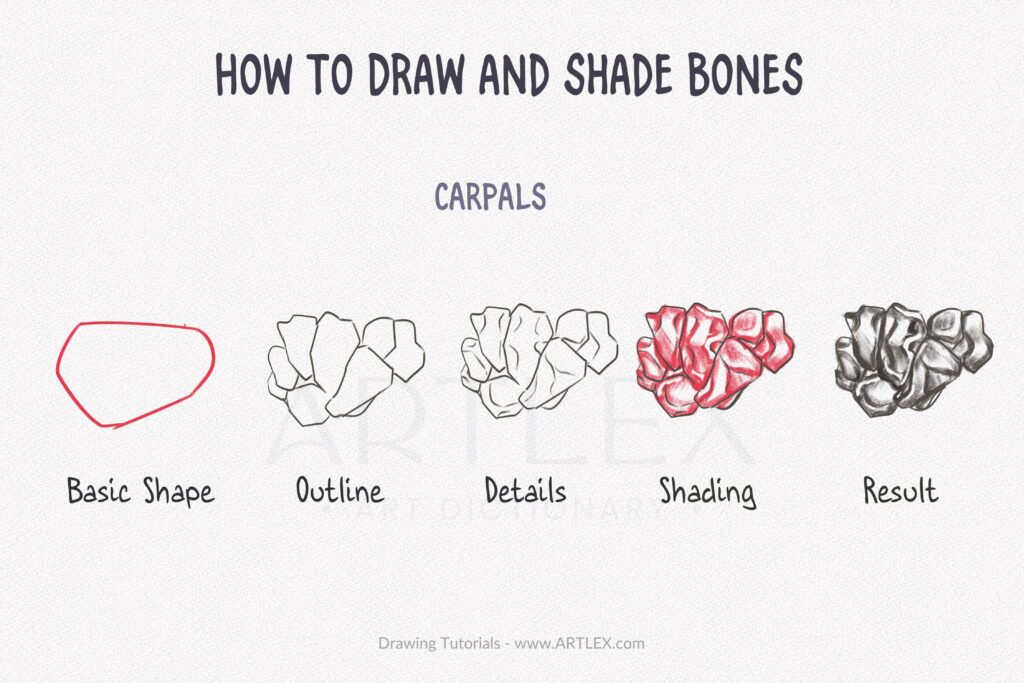
The carpals are small, irregularly shaped bones with smooth surfaces. They are arranged in a complex pattern and allow the hand to move and bend in a wide range of ways.
How To Draw a Skeleton Hand Step-by-Step
For this part of the tutorial, we are going to use our 2H pencil and softly sketch the basic shapes of the hand.
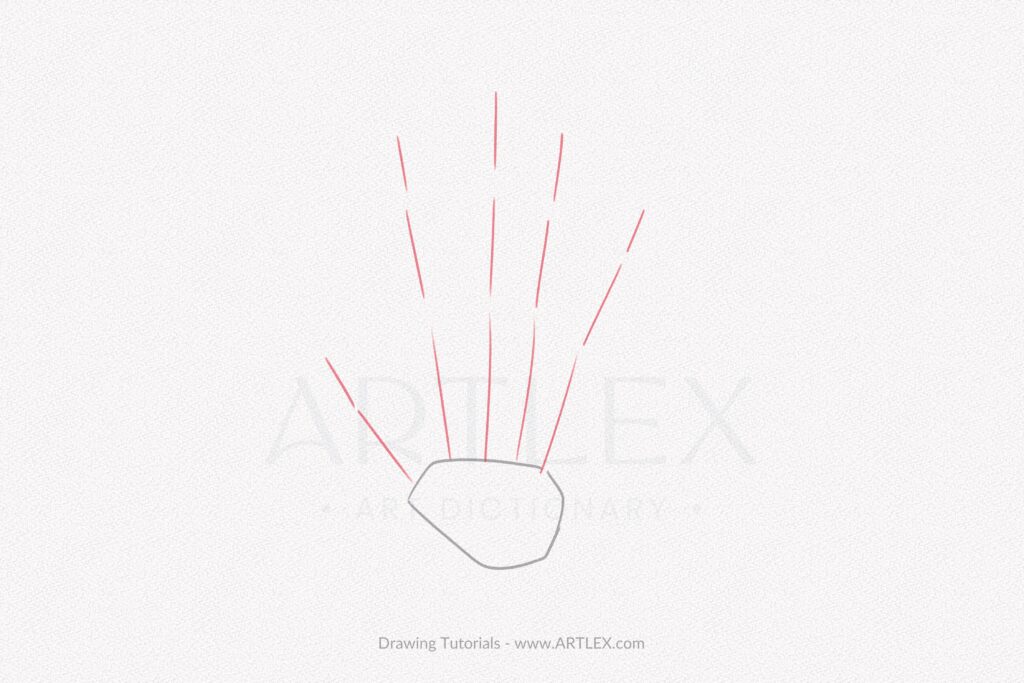
Step 1: Draw the Carpals Structure
Draw an irregular shape for the place where the carpal bones are situated.
Step 2: Draw lines to determine the fingers’ positions
This step is helpful for both the hand we are drawing in this tutorial and any hand position you want to draw. Pull lines from the carpal’s structure to determine the position of the fingers. Remember, the thumb bones have a wider movement range than the other fingers.
Optional Steps: Sketch the phalanges’ basic shapes
This step is optional since you can jump straight to drawing the bones’ outlines. However, if this is your first time, I advise you to follow them to improve your grasp on proportions and sizes.
Once again, use your 2H pencil to lightly sketch the basic shapes of the phalanges, going from the metacarpals to the distal phalanges: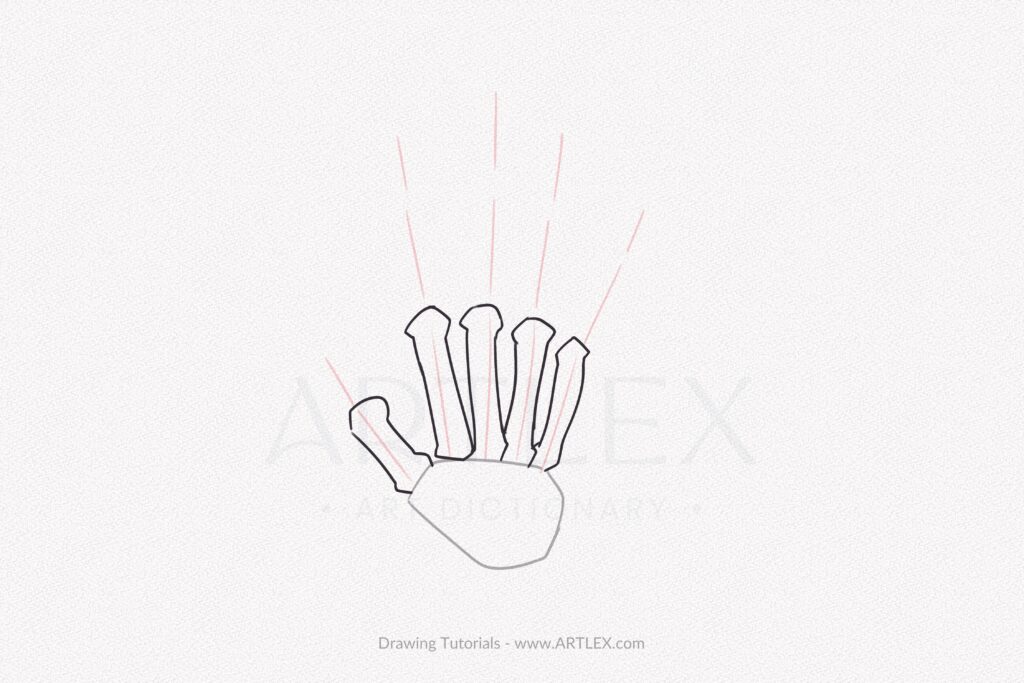
Now that we have them all done, using your 4B pencil for the next steps since we’ll be drawing the outlines and shading the bones.
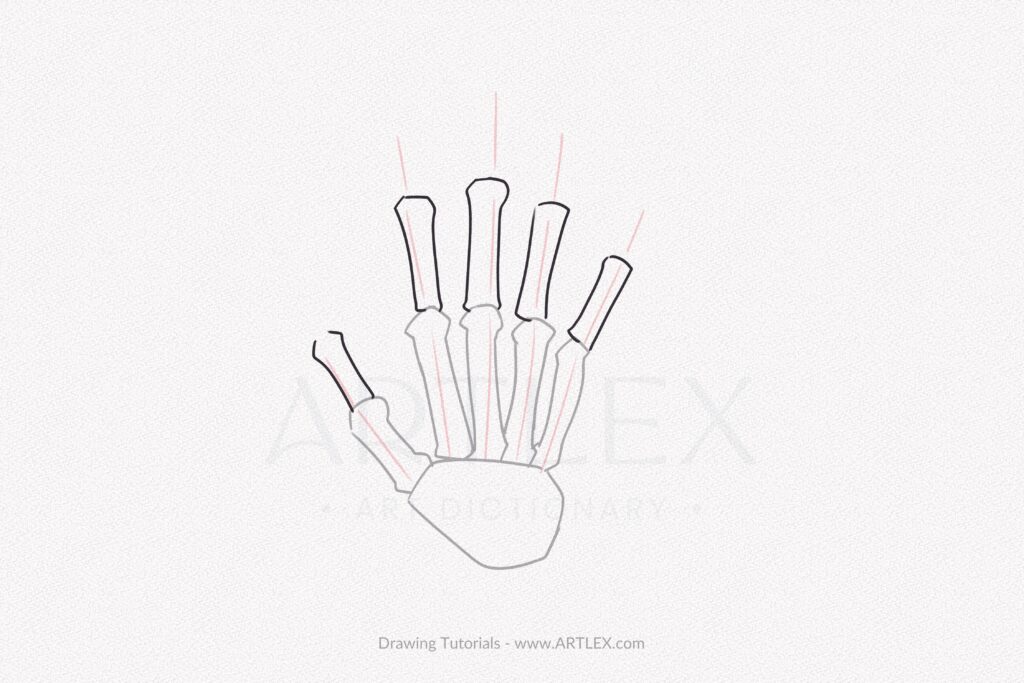
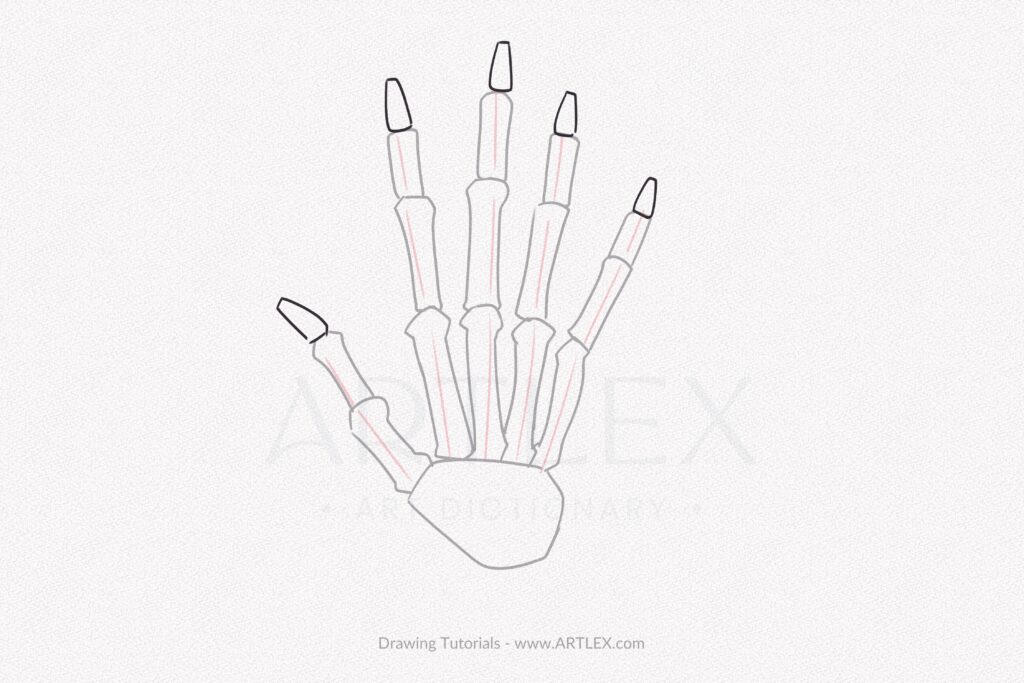
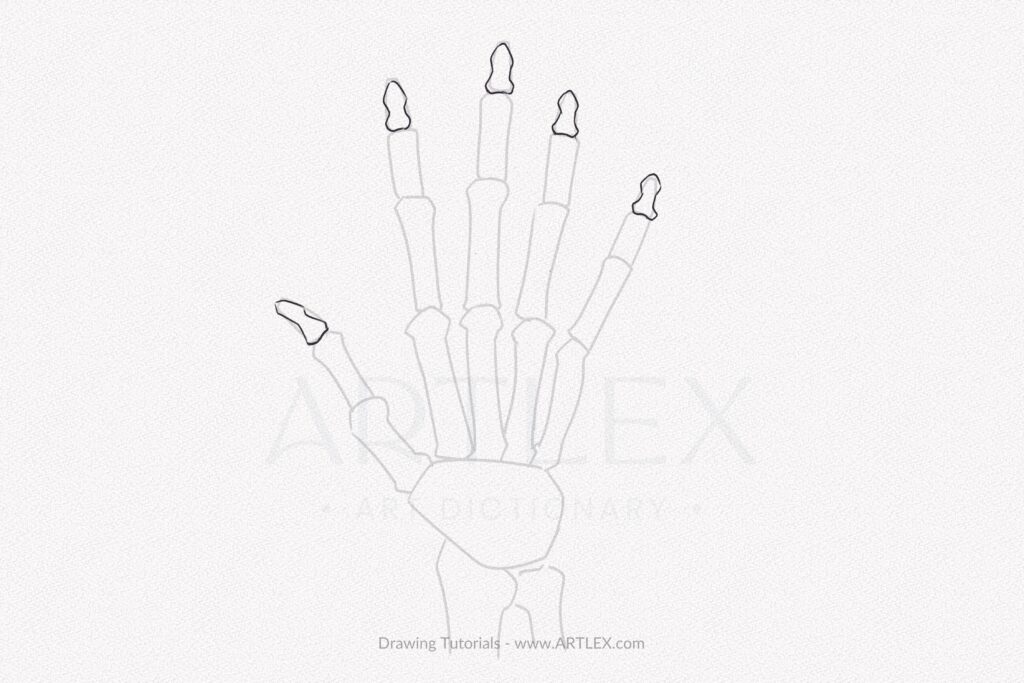
Step 3: Draw the distal phalanges
Outline the distal phalanges as shown in section 2:
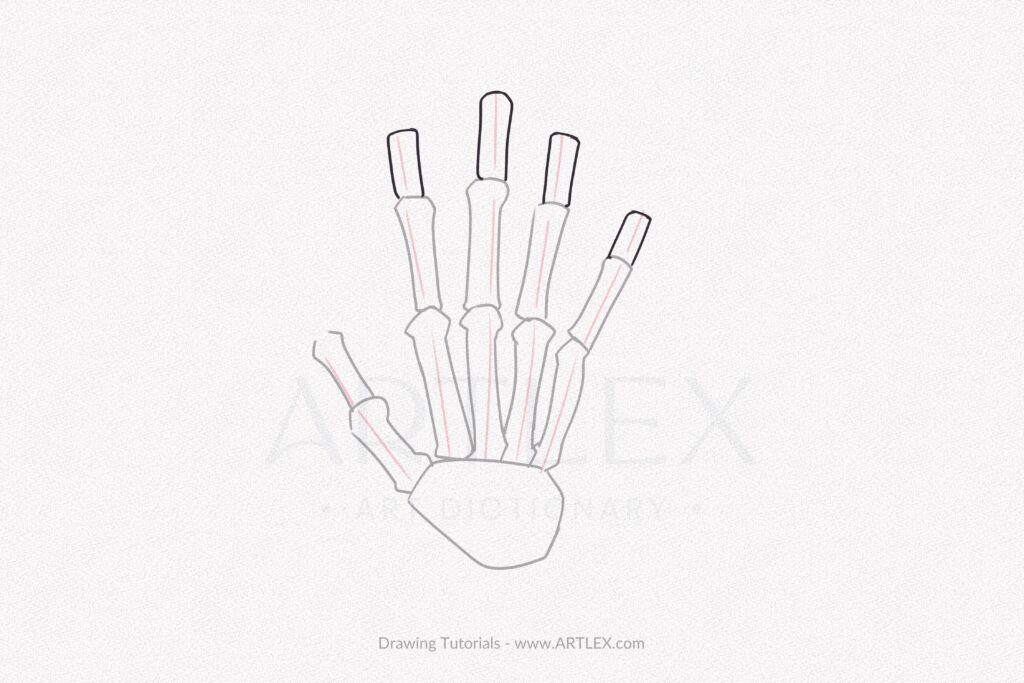
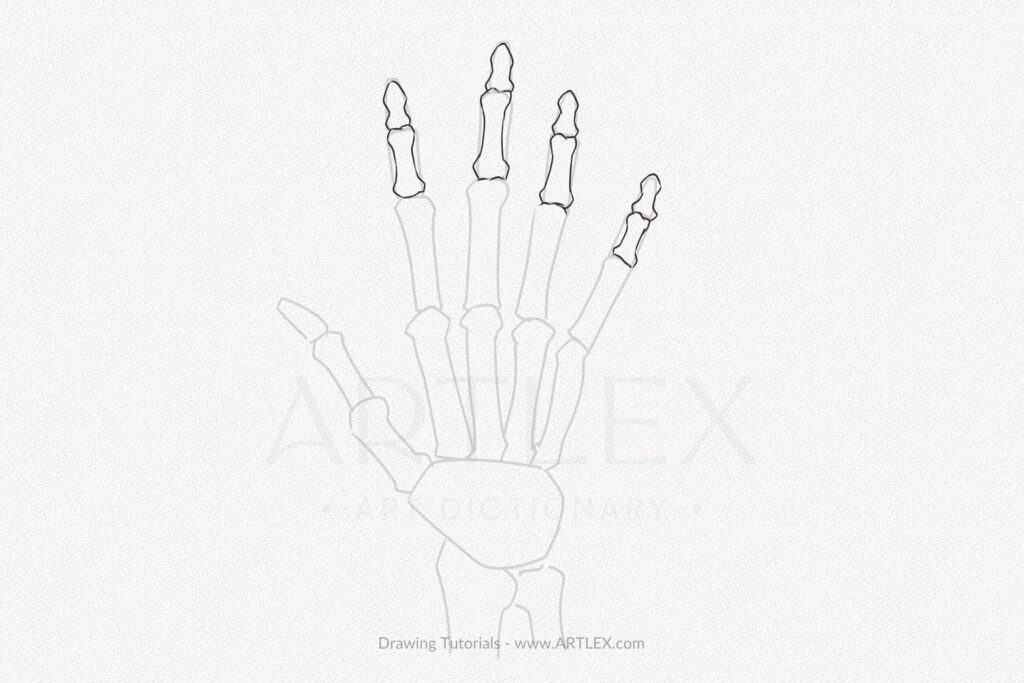
Step 4: Draw the middle phalanges
Outline the middle phalanges as shown in section 2:
Step 5: Draw the proximal phalanges
Outline the proximal phalanges as shown in section 2: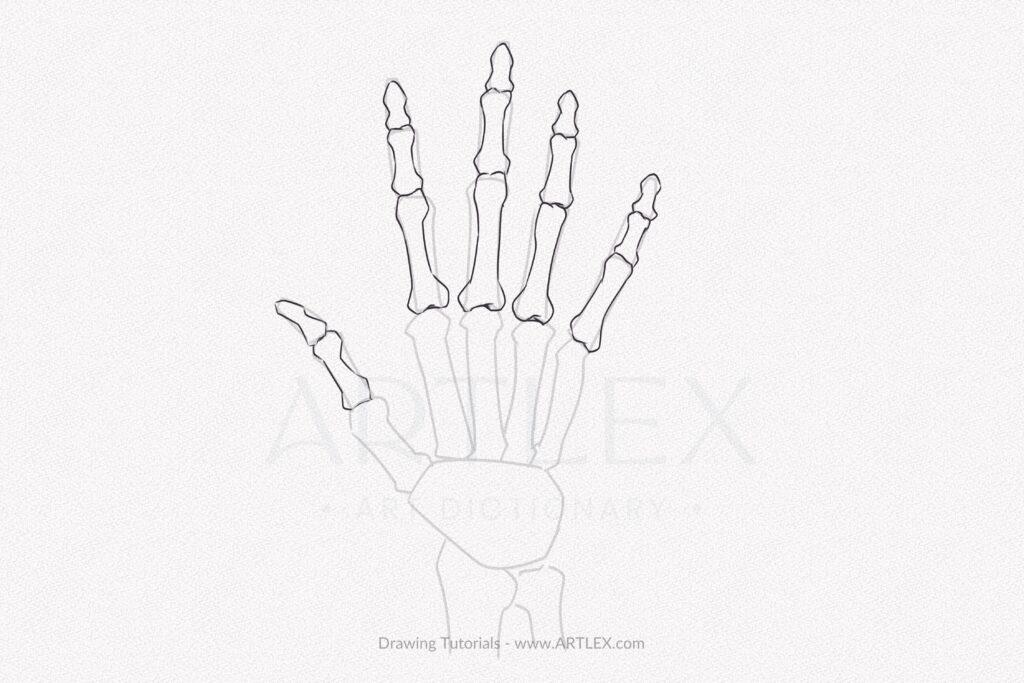
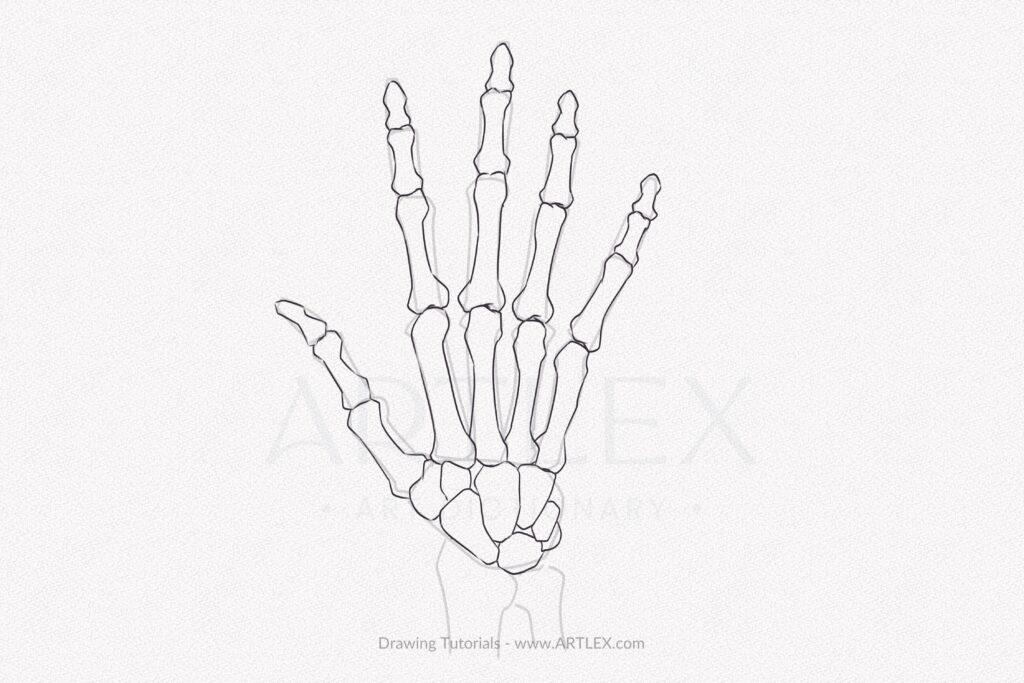
Step 6: Draw the metacarpals
Outline the metacarpals as shown in section 2:

Step 7: Draw the carpal bones
Now for the carpal bones, you will probably need to look at some references at the beginning. However, you can use section 2 as a guide for the carpal bones’ position and range of movement.
Step 8: Draw the Radio and Ulna
Now, add the Radio and Ulna. Remember, these bones are separated from each other and articulate around the carpal bones to give a hand and forearm a broader range of movement.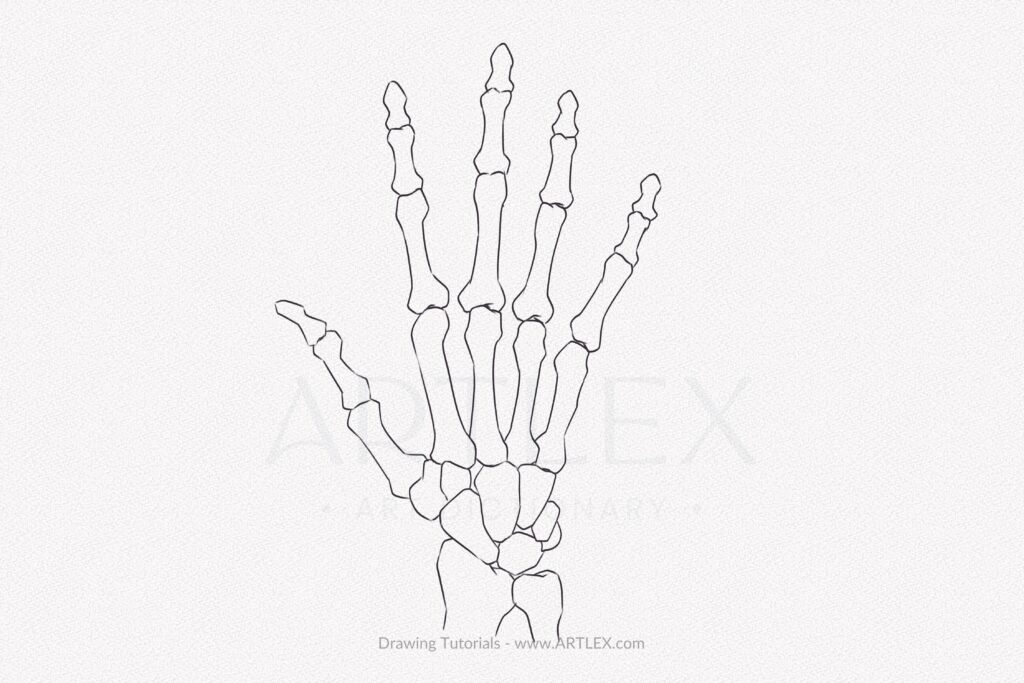
Step 9: Add Details to the Bones
Determining the volumes and shapes of the bones is quite easy if we want to go for a straightforward approach. However, for a more realistic effect, you can use the diagrams in section 2 to guide you and draw the details and sectioning of each bone.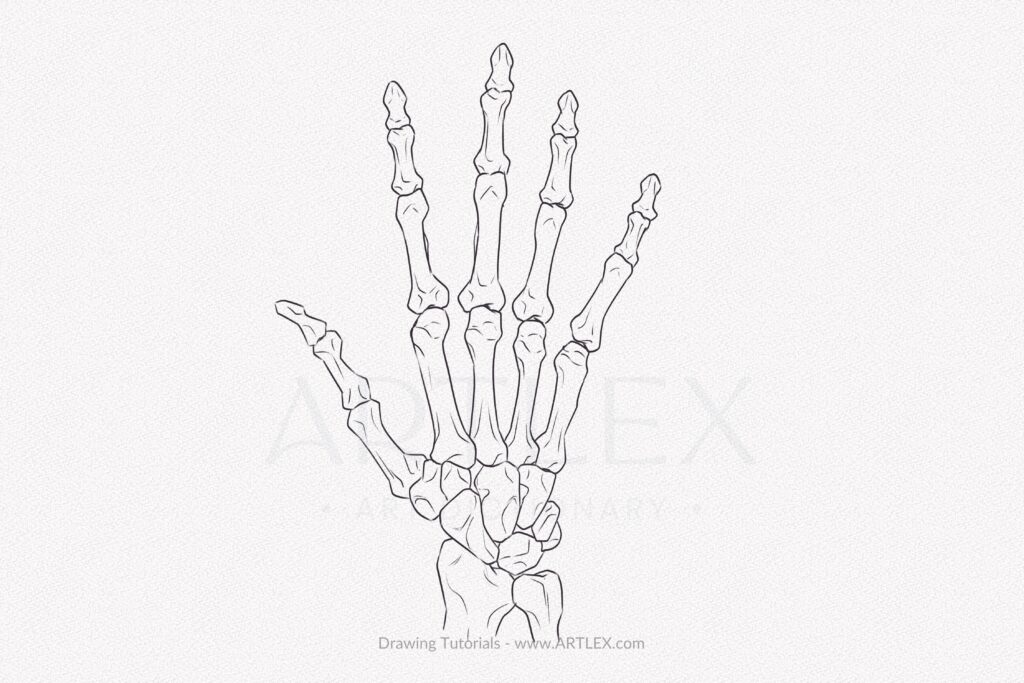
Step 10: Shade the Phalanges
For this step, we are going to use our 2H pencil, 4B Pencil, and a blending stump.
Using the diagrams in section 2, we are going to set the darkest areas for our bones and fill them softly with our 4B pencil. Then we are going to start belonging to give the bones uniformity. 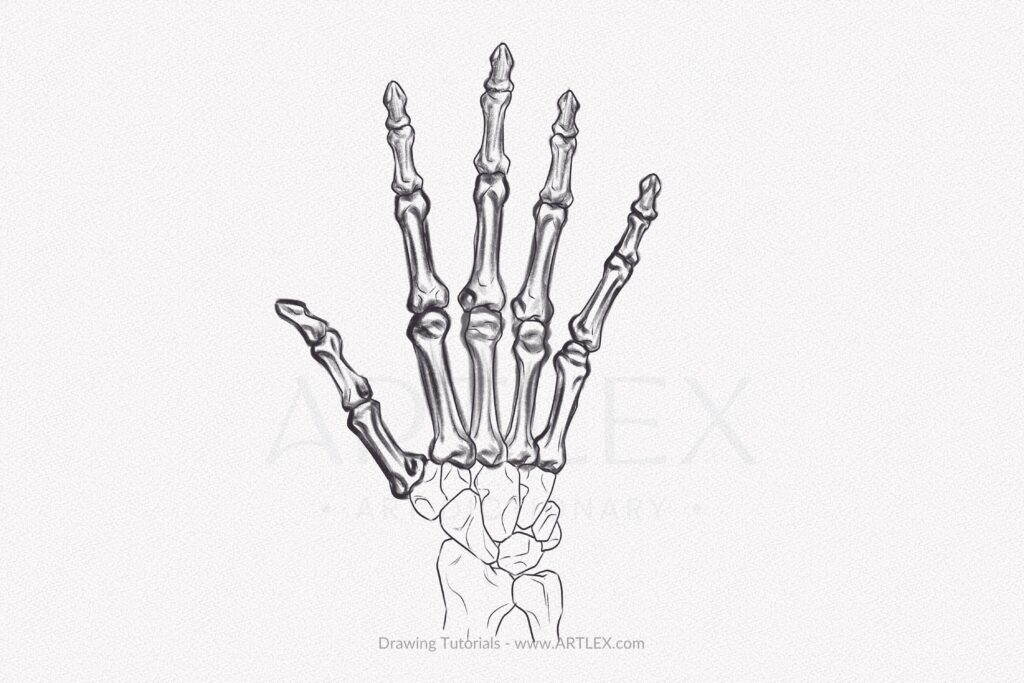
Applying more pressure, we are going to outline the bones and remark on the darkest areas, especially near the articulations and borders of the phalanges.
Step 11: Shade the Carpal Bones
The carpal bones are a set of complex structures, which shading can change with the movement of the hand, so if you don’t get them completely right on your first try, don’t worry and keep practicing!
Again, use section 2 as a reference if you need help.
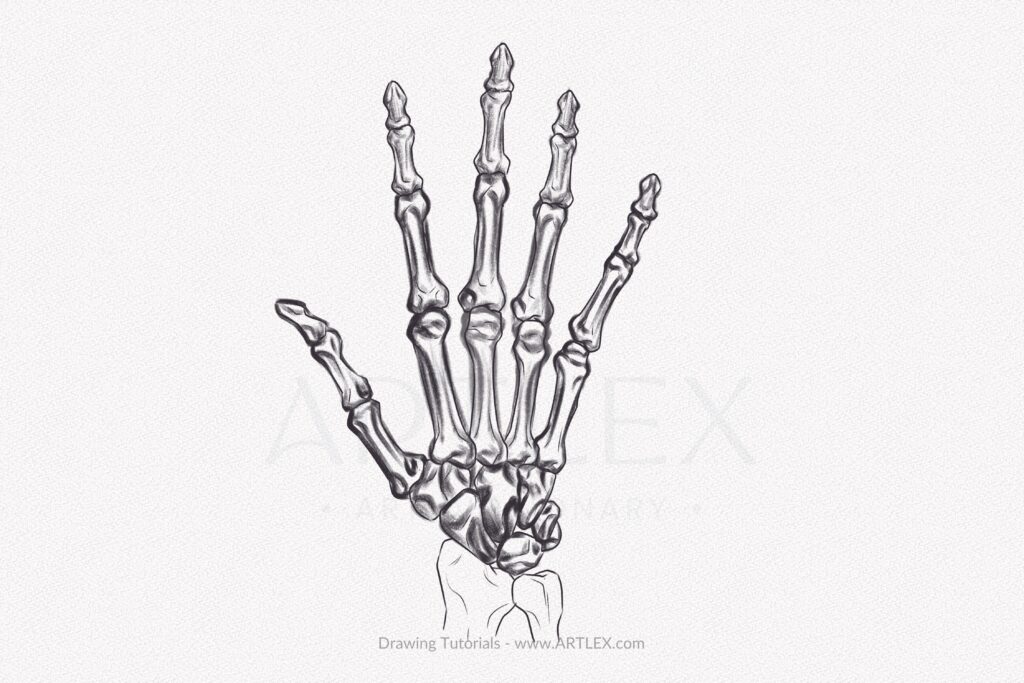
Step 12: Shade the forearm bones
Using your 4B pencil once again, start shading the radio and ulna, applying soft layers of graphite and blending after each step.
Finish your skeleton hand by applying a bit more pressure towards the borders and the areas that need the carpal bones,
And that’s it. You’re done.
Thank you for following this tutorial. You did great!
I hope you found it helpful and that you now feel more confident in your ability to create realistic and convincing skeleton hands in your artwork.
Remember, drawing is a skill that takes time and practice to develop, so don’t be discouraged if your first attempts don’t look exactly how you want them to. Keep experimenting, and keep learning from your mistakes.
Happy drawing, until next time!