Welcome to this bear drawing tutorial! Drawing a bear can be challenging, but with some basic knowledge and a few tips and tricks, you can create a beautiful and realistic bear in a few steps.
Bears have been a constant subject in art throughout history, present from prehistoric times these beautiful animals have been used as symbols of power, strength, and wisdom, and they remain present even in modern days being the subject of many movies, TV series, and other popular media.
In this tutorial, we will explore the anatomy of a bear and different techniques for capturing its unique characteristics on paper.
So, let’s get started, grab your supplies and get ready to draw!
What you will learn:
-
Structure of a Bear’s Body
-
How to Draw a Bear
-
How to Shade a Bear
Materials needed:
-
A piece of paper
-
A 2B and 6B graphite pencil
-
A blending stump
-
A Tombow Mono Zero 2.3mm eraser
-
A kneaded eraser
-
Graphite powder
-
A soft brush
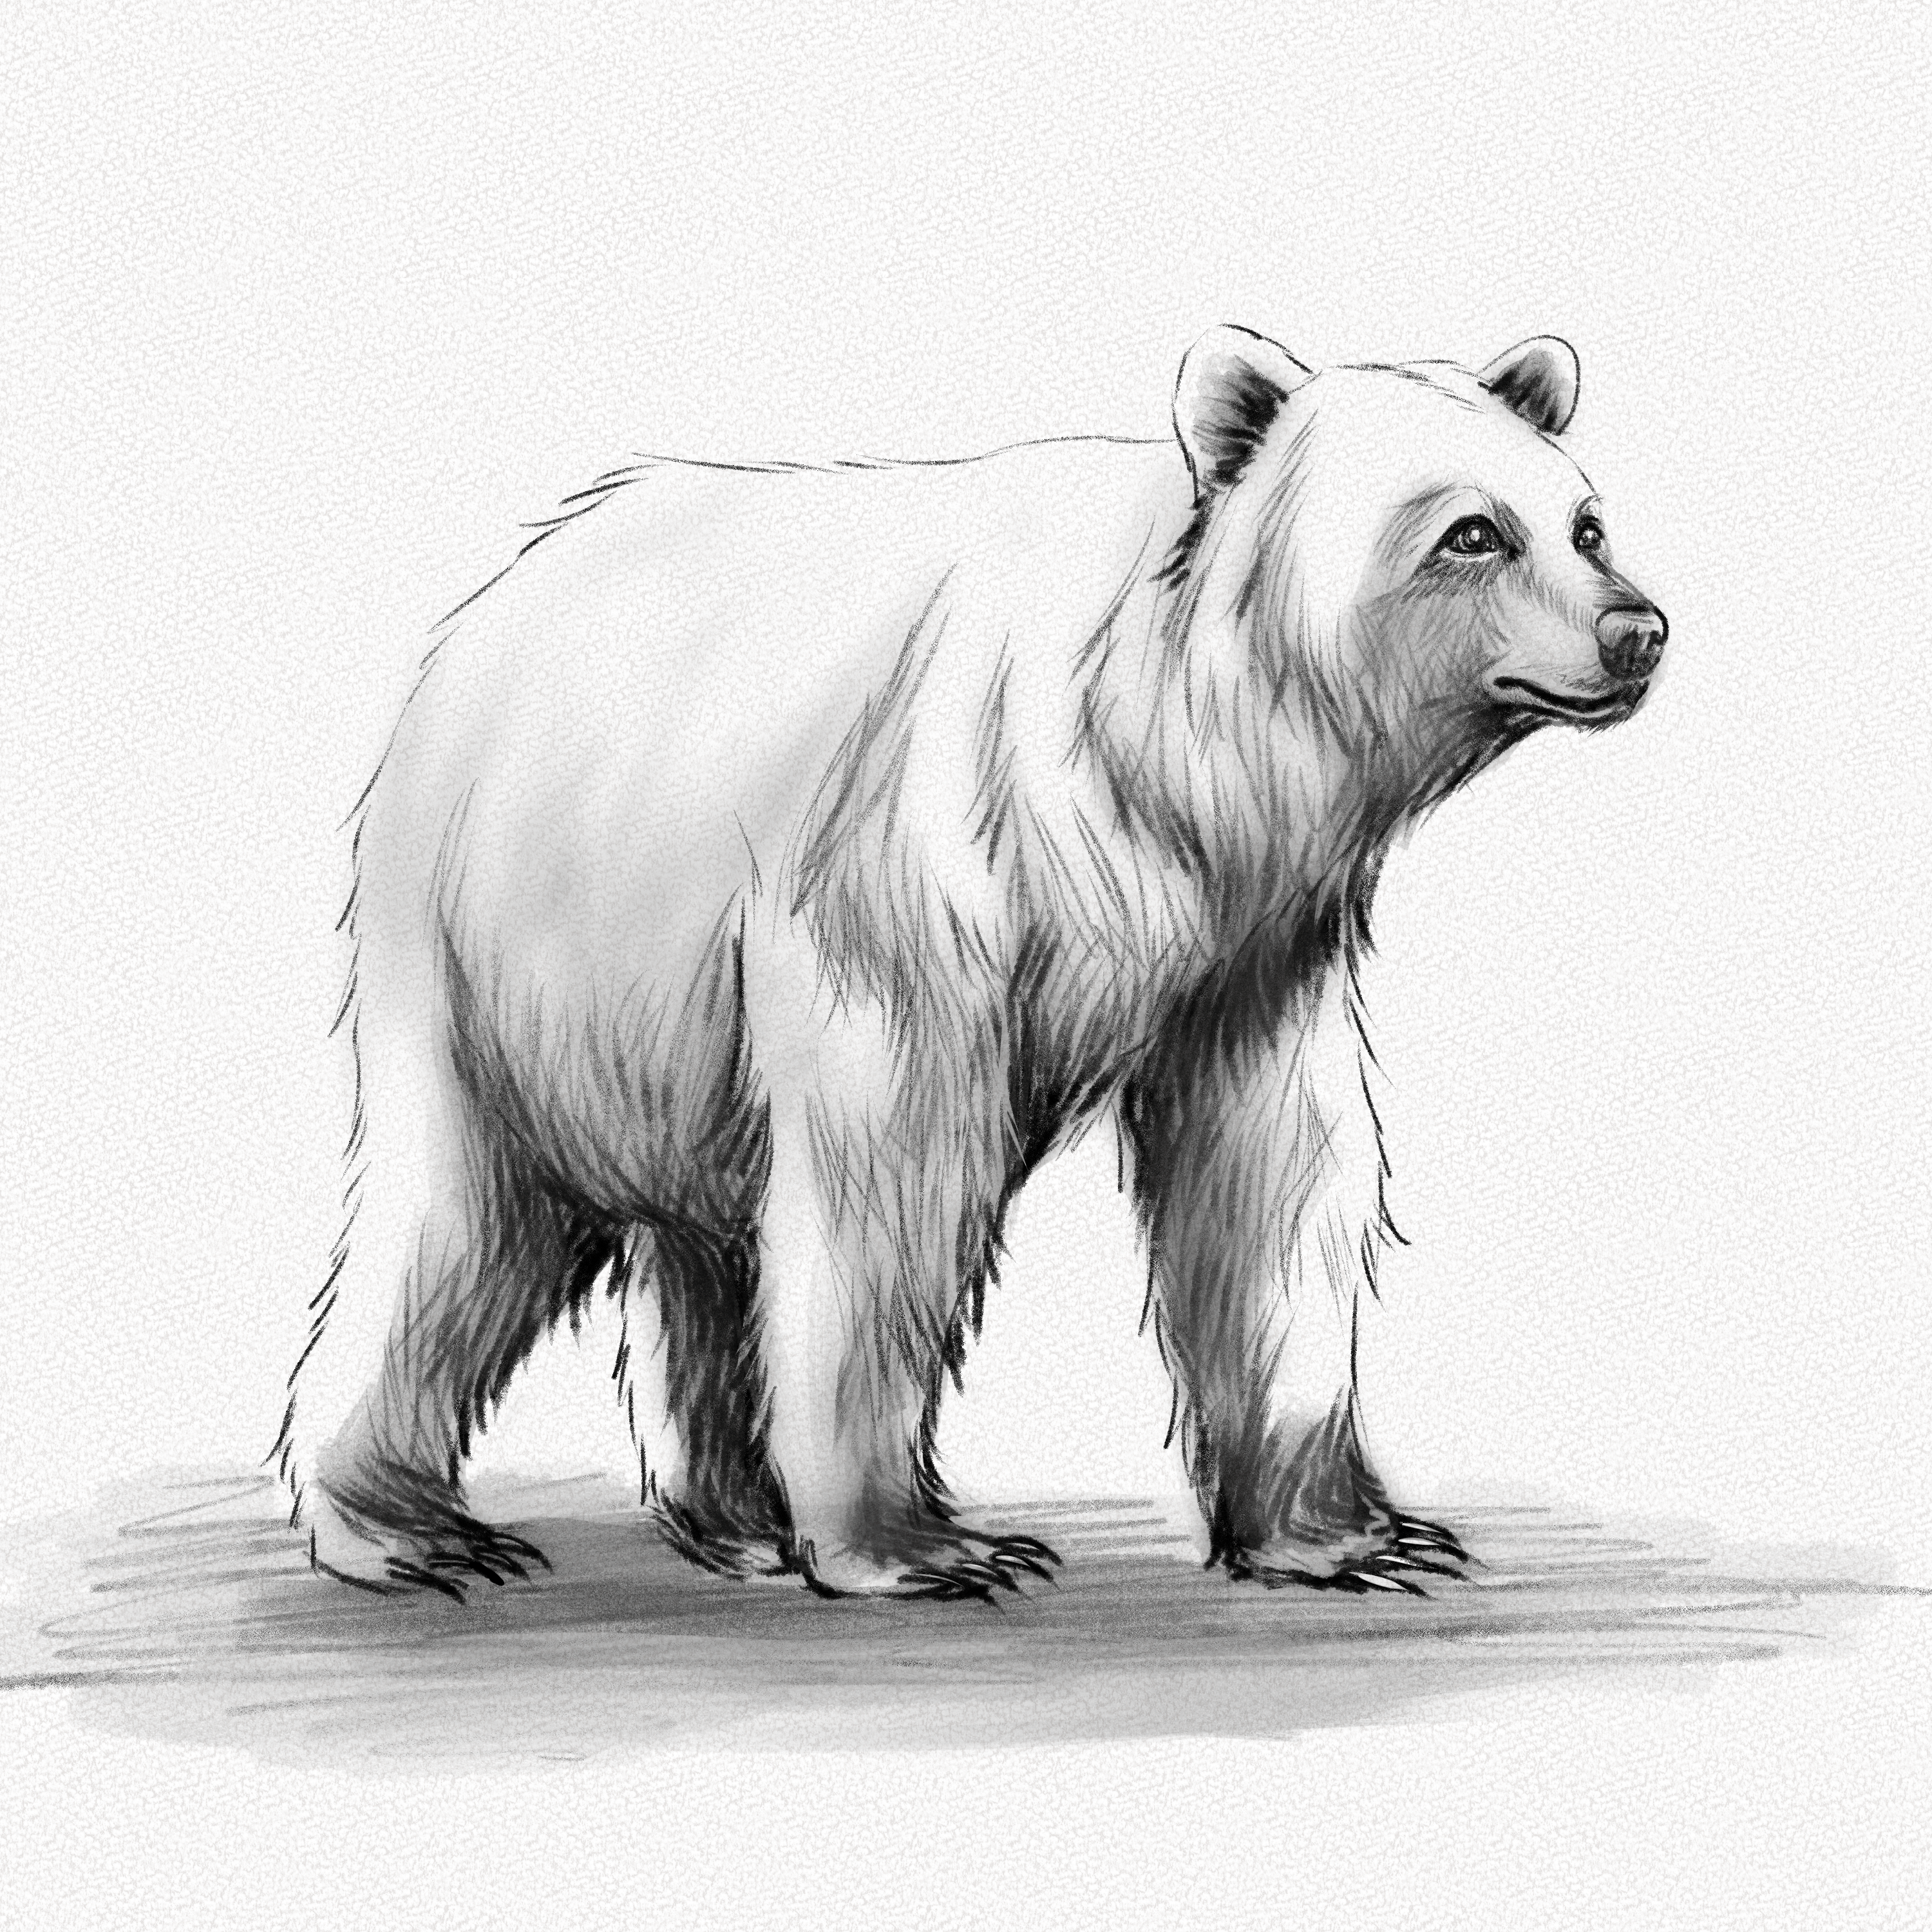
This is the bear you will be drawing:
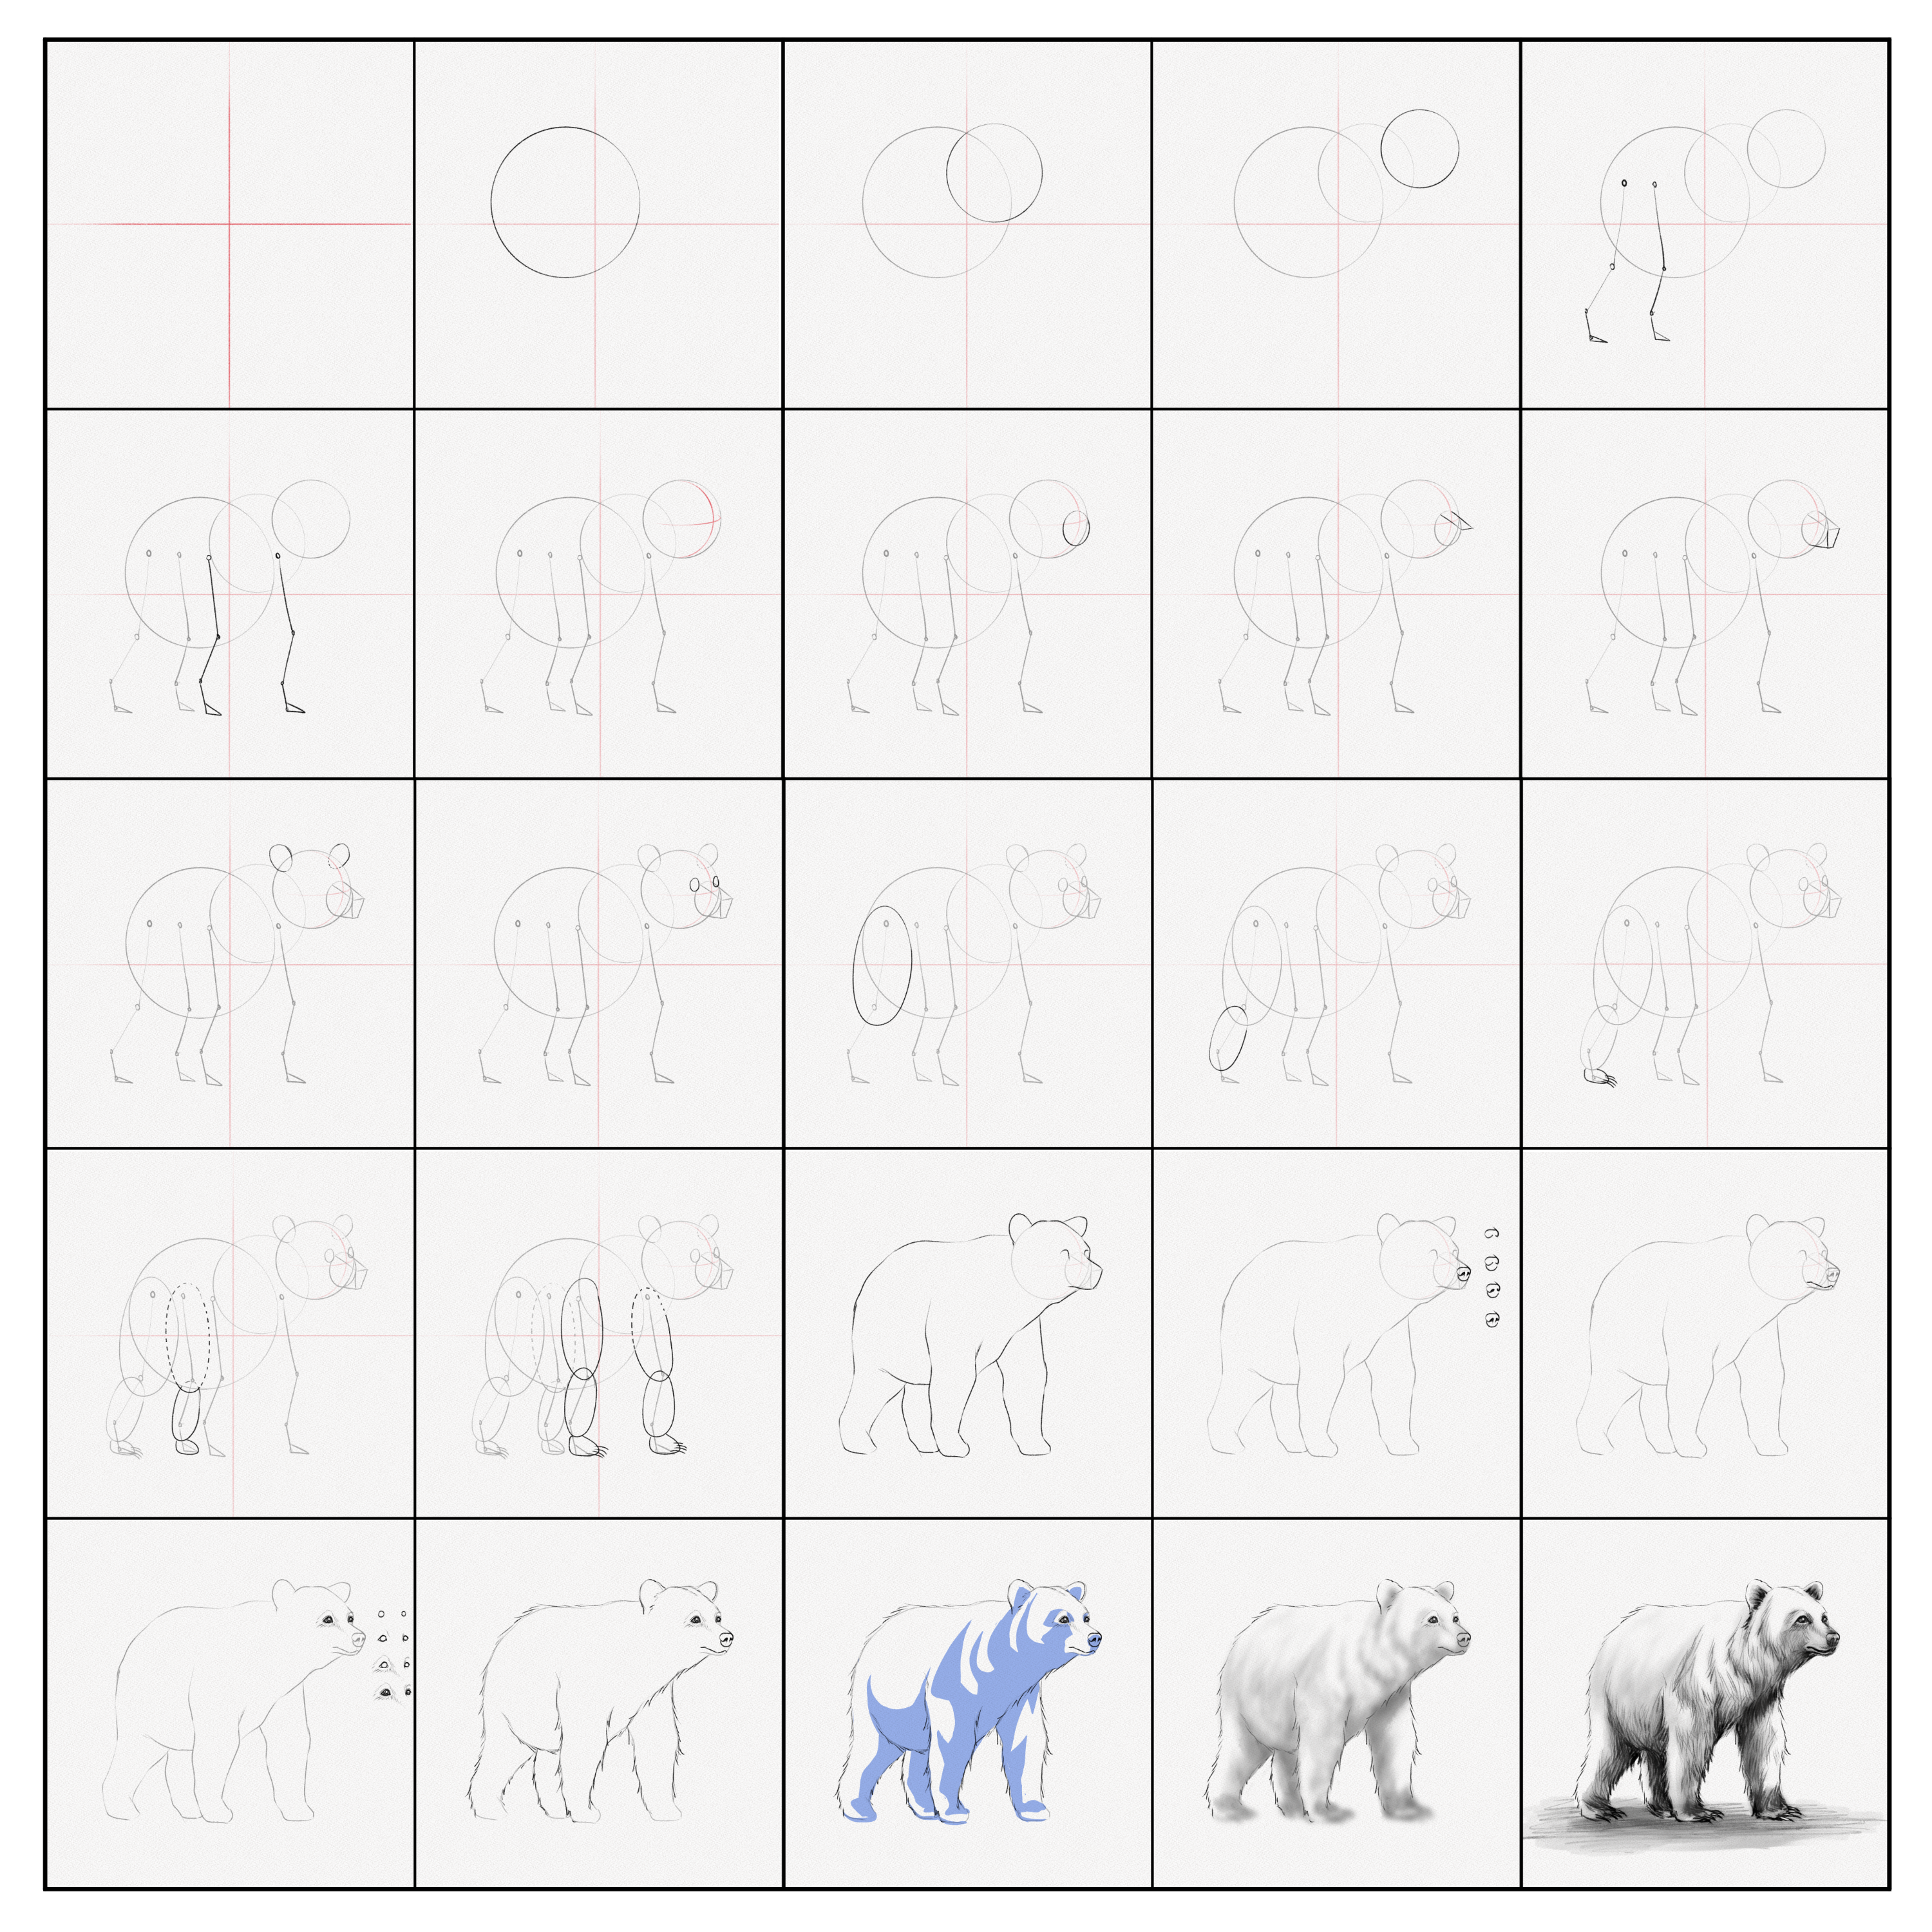
And these are all the steps we’ll guide you through:
Section 1.- The Body Structure of a Bear
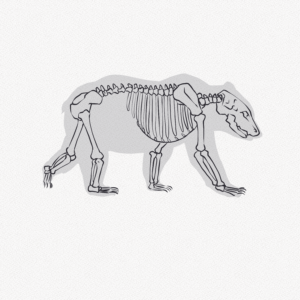
When we see the silhouette of an average bear, we see a solid figure that moves harmoniously and that is hard to break down. In some cases, the fur and fat of the bear make it impossible to identify where a body part ends and where another begins, however, when we see their skeleton, we are able to easily identify the inner structure, the one that defines the proportions and range movement of the bear.
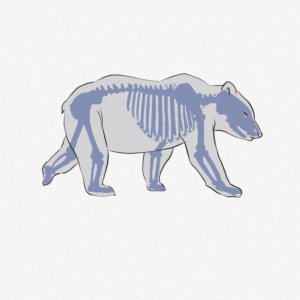
If we translate these into simple shapes, we now will have a figure we can use to draw the bear from any pose and angle, however, this figure doesn’t help with the body’s volume.
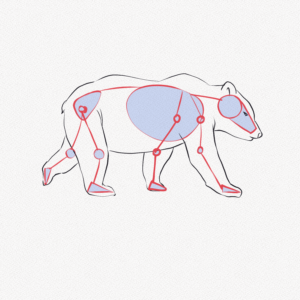
Taking the structure into consideration, we can break the bear’s body into accurate basic shapes, and given the round nature of this animal, we can use thick ovals or blob-like shapes as well as circles to have a more accurate base figure.
Section 2.- How To Draw A Bear
Step 1: Split your canvas into four equal parts
Split your canvas into four equal parts. This will be your guide for the positioning of the structure and will keep your drawing centered. Make very faint lines since we’ll be erasing these guidelines later.
Step 2: Draw a circle
Draw a big circle. this will be the belly of your bear, so make it as big as you want your bear to be, but mind the space around and leave enough space on the side for the thorax and head.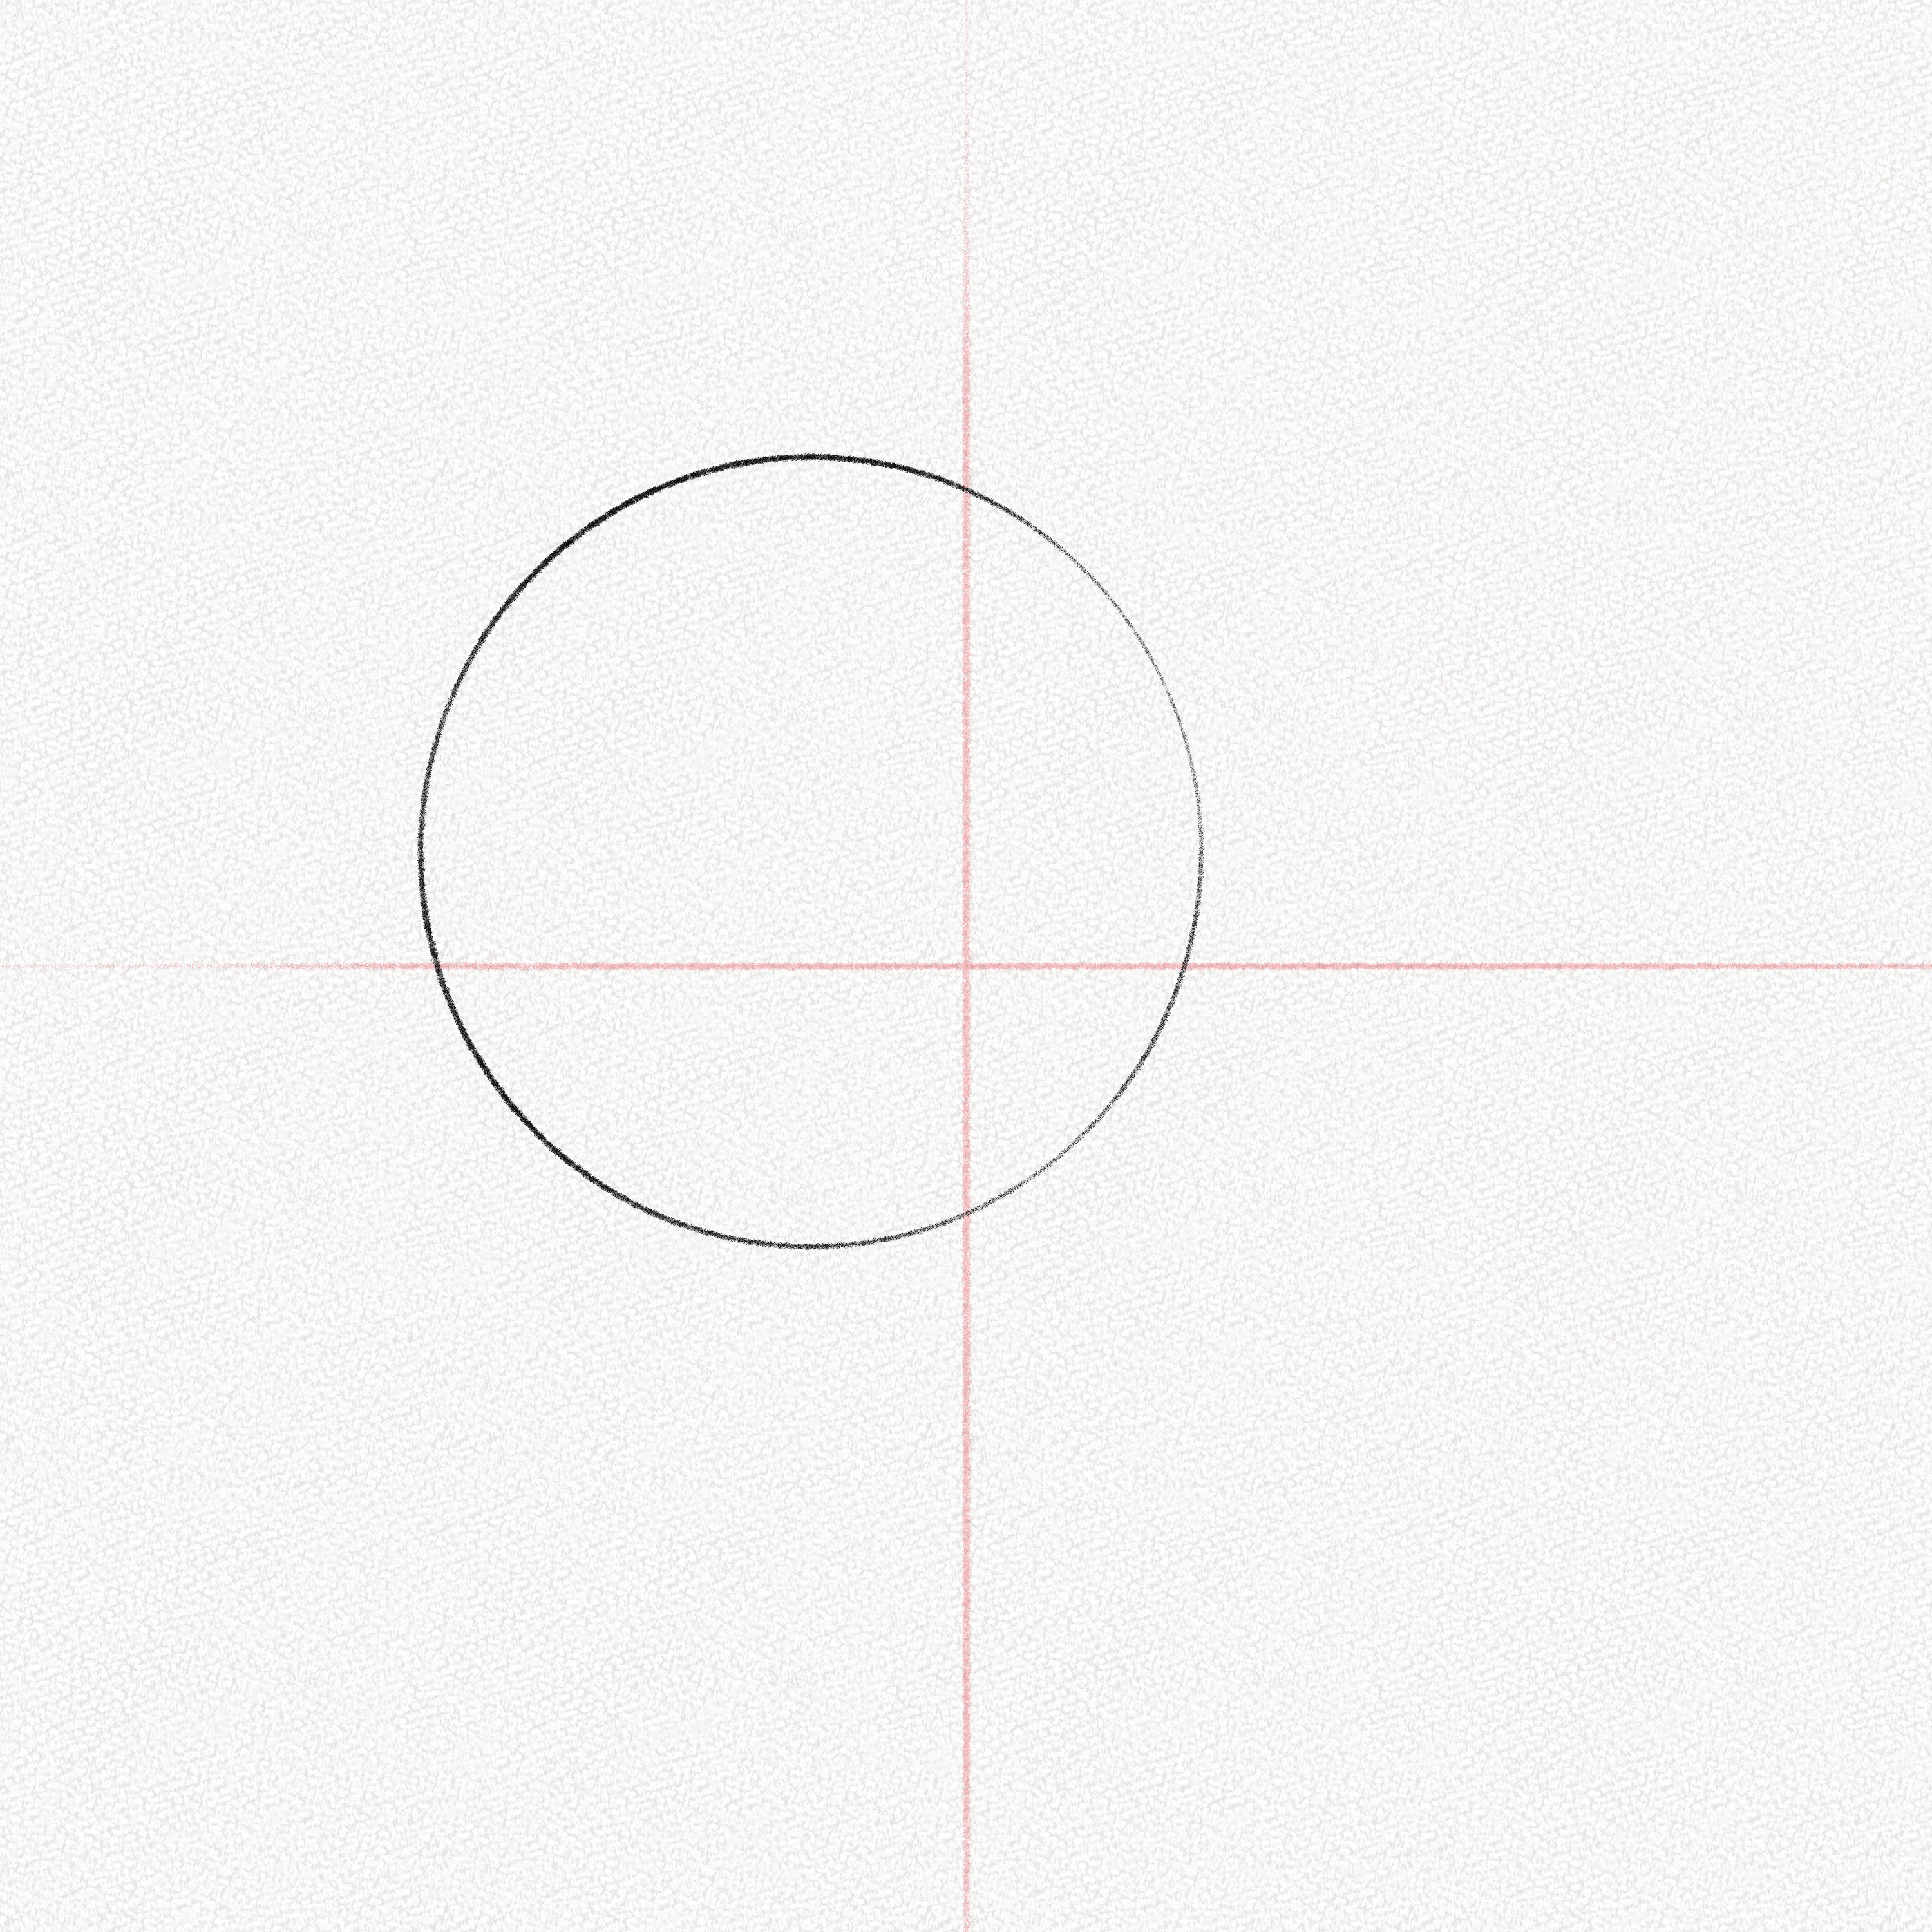
Step 3: Draw another circle
Draw another circle, make it mid-sized since this will be the thorax of your bear. 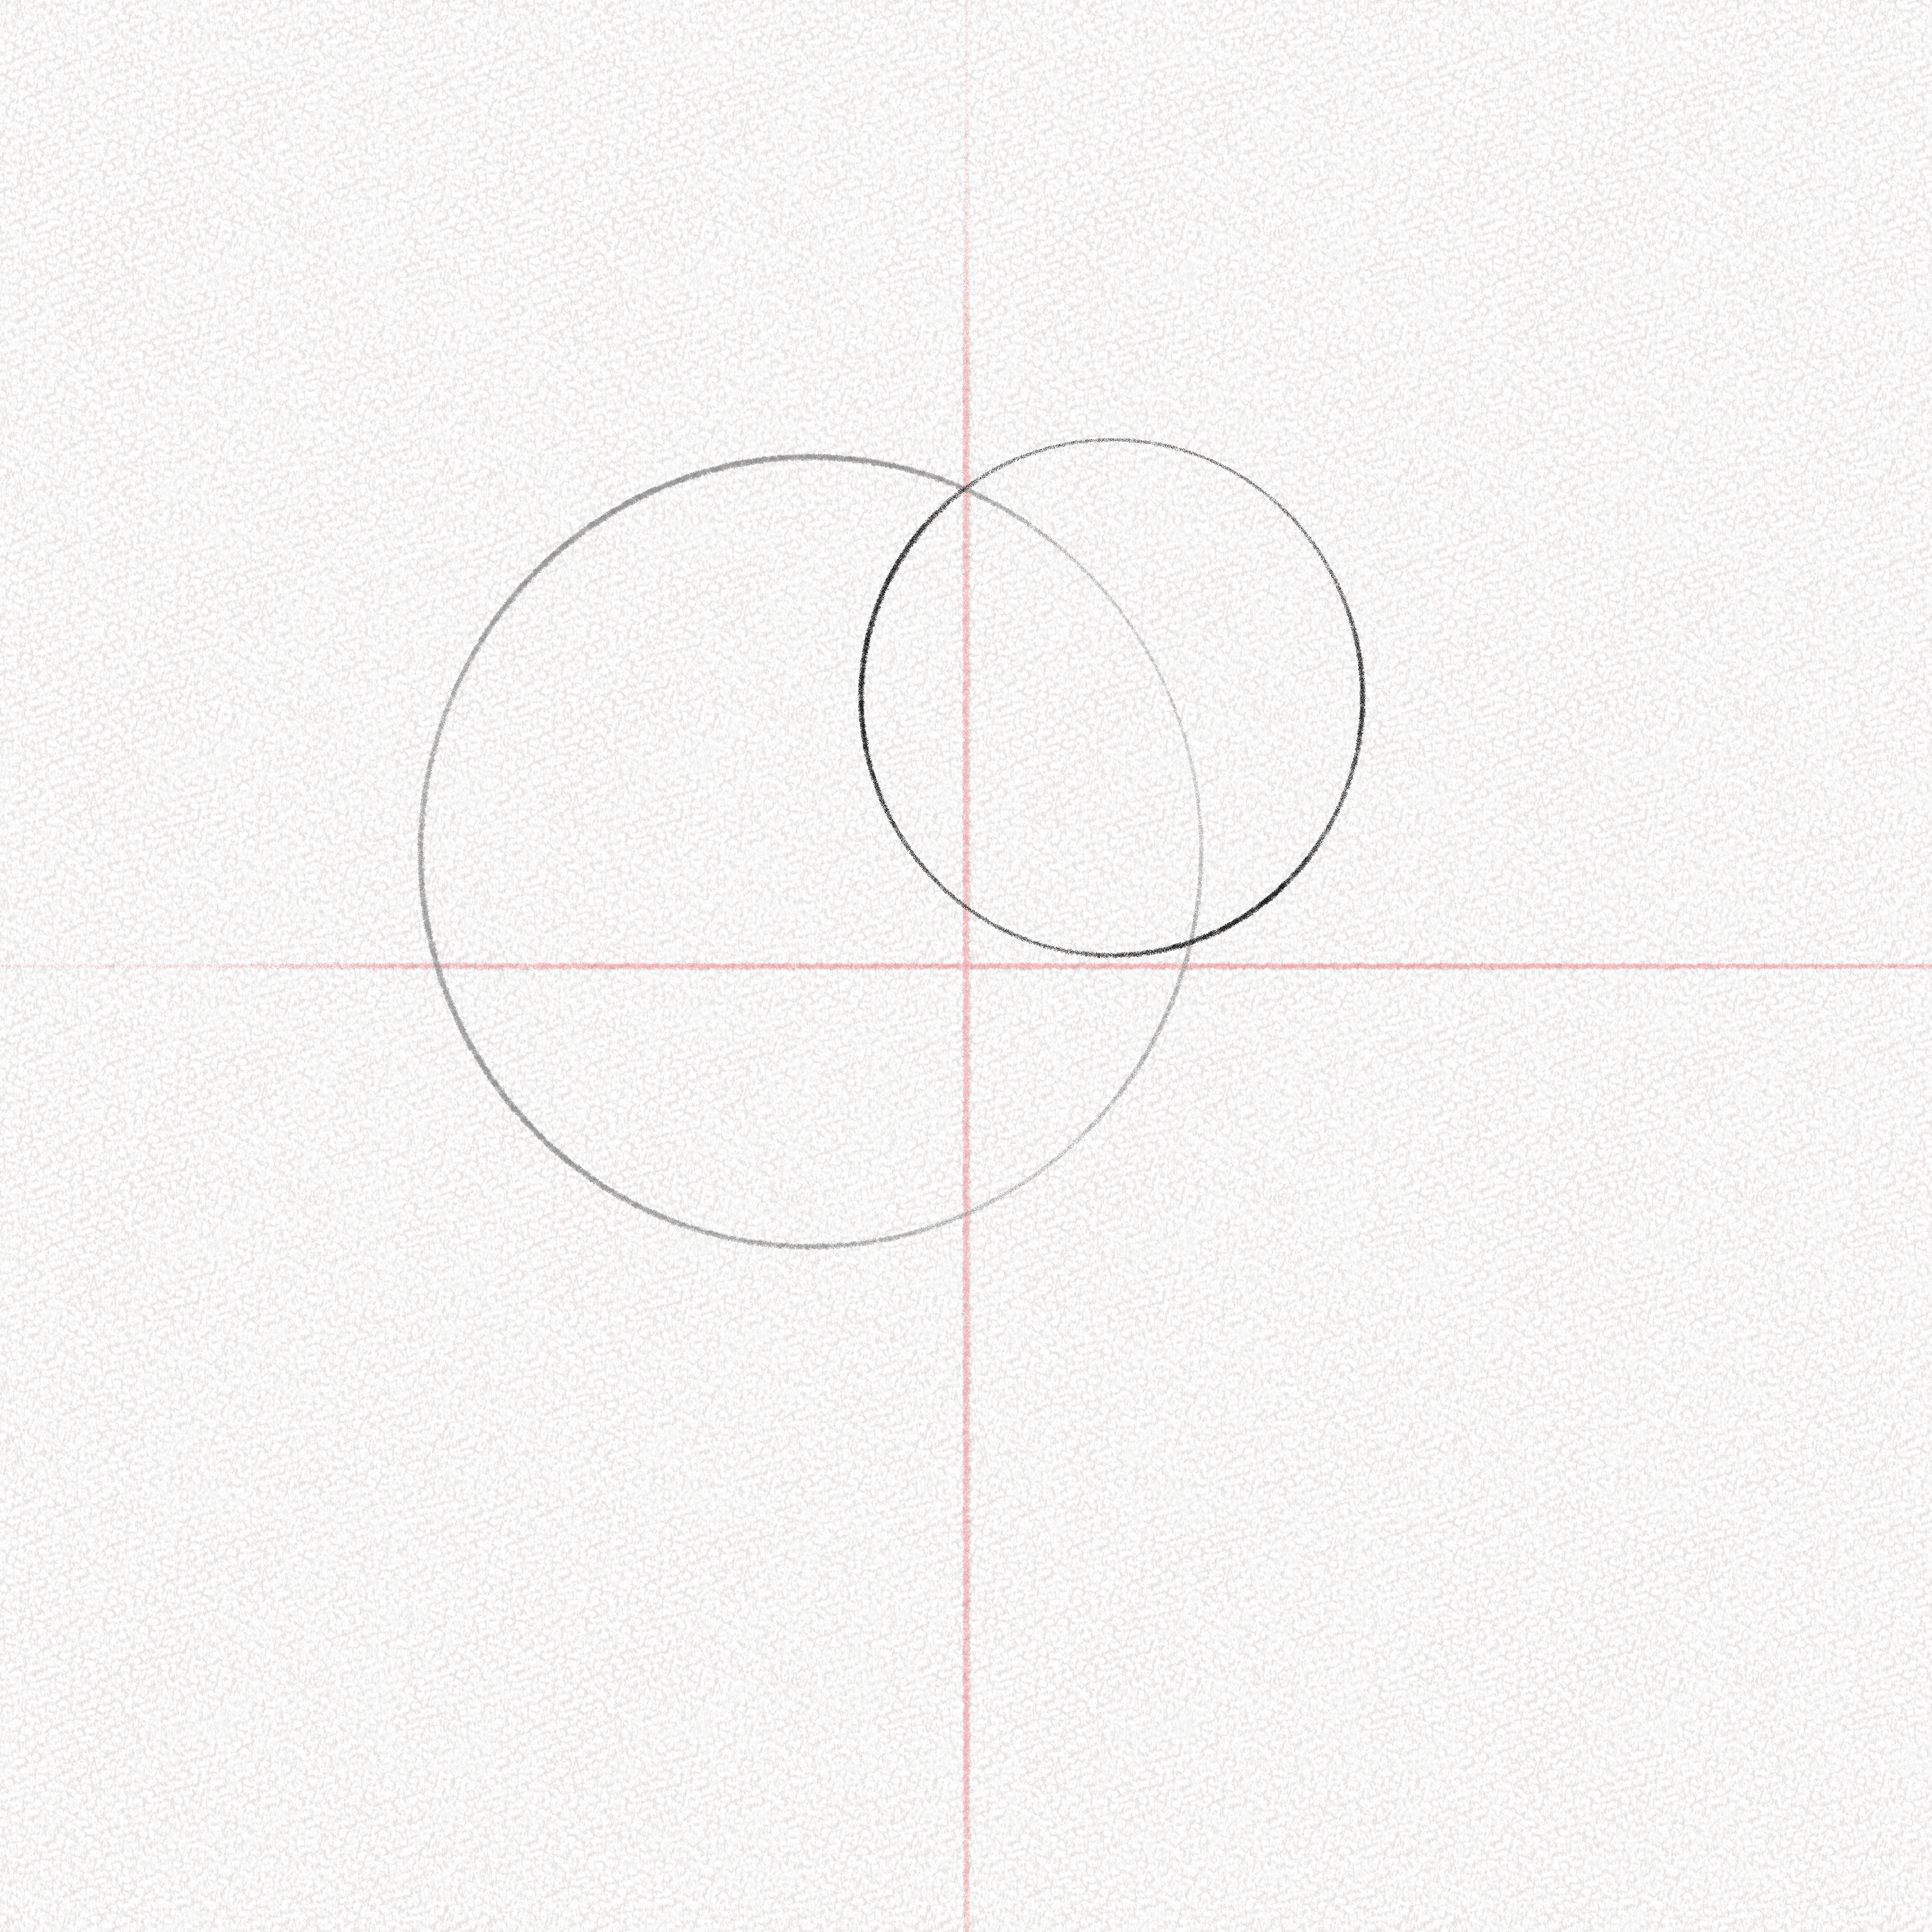
Step 4: Draw a third circle
Draw a third, smaller circle. this will be the head of our bear.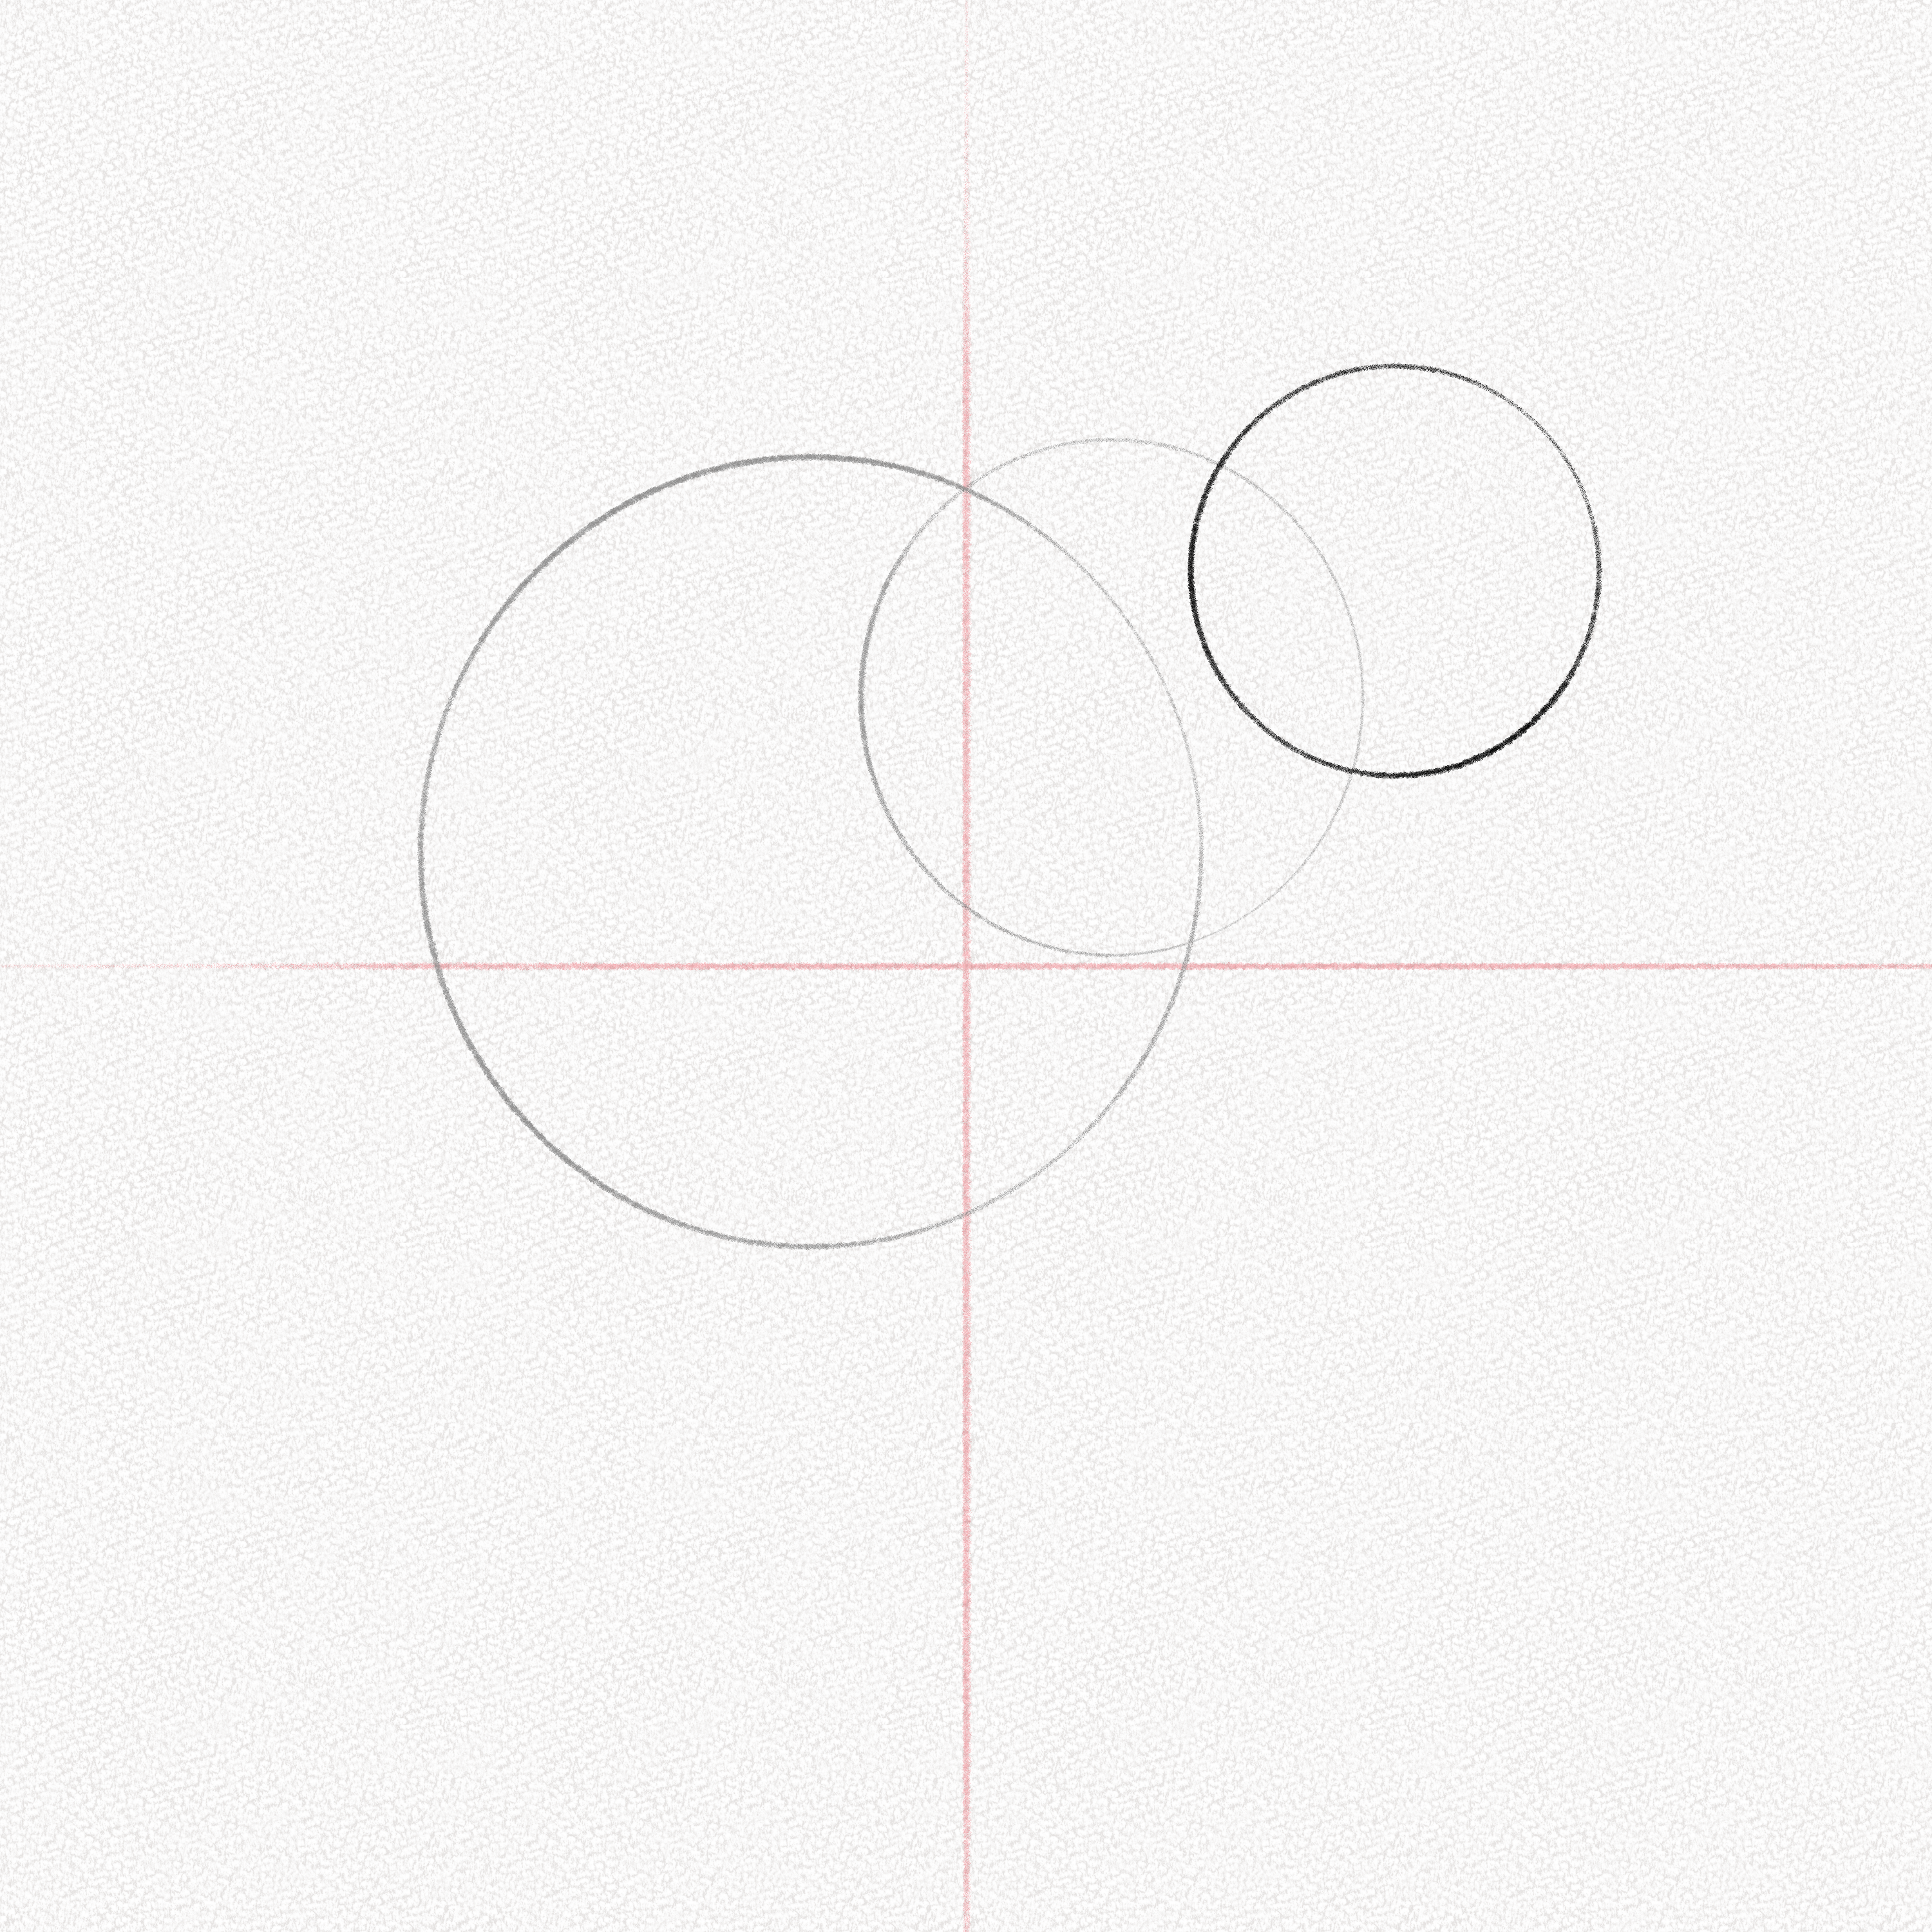
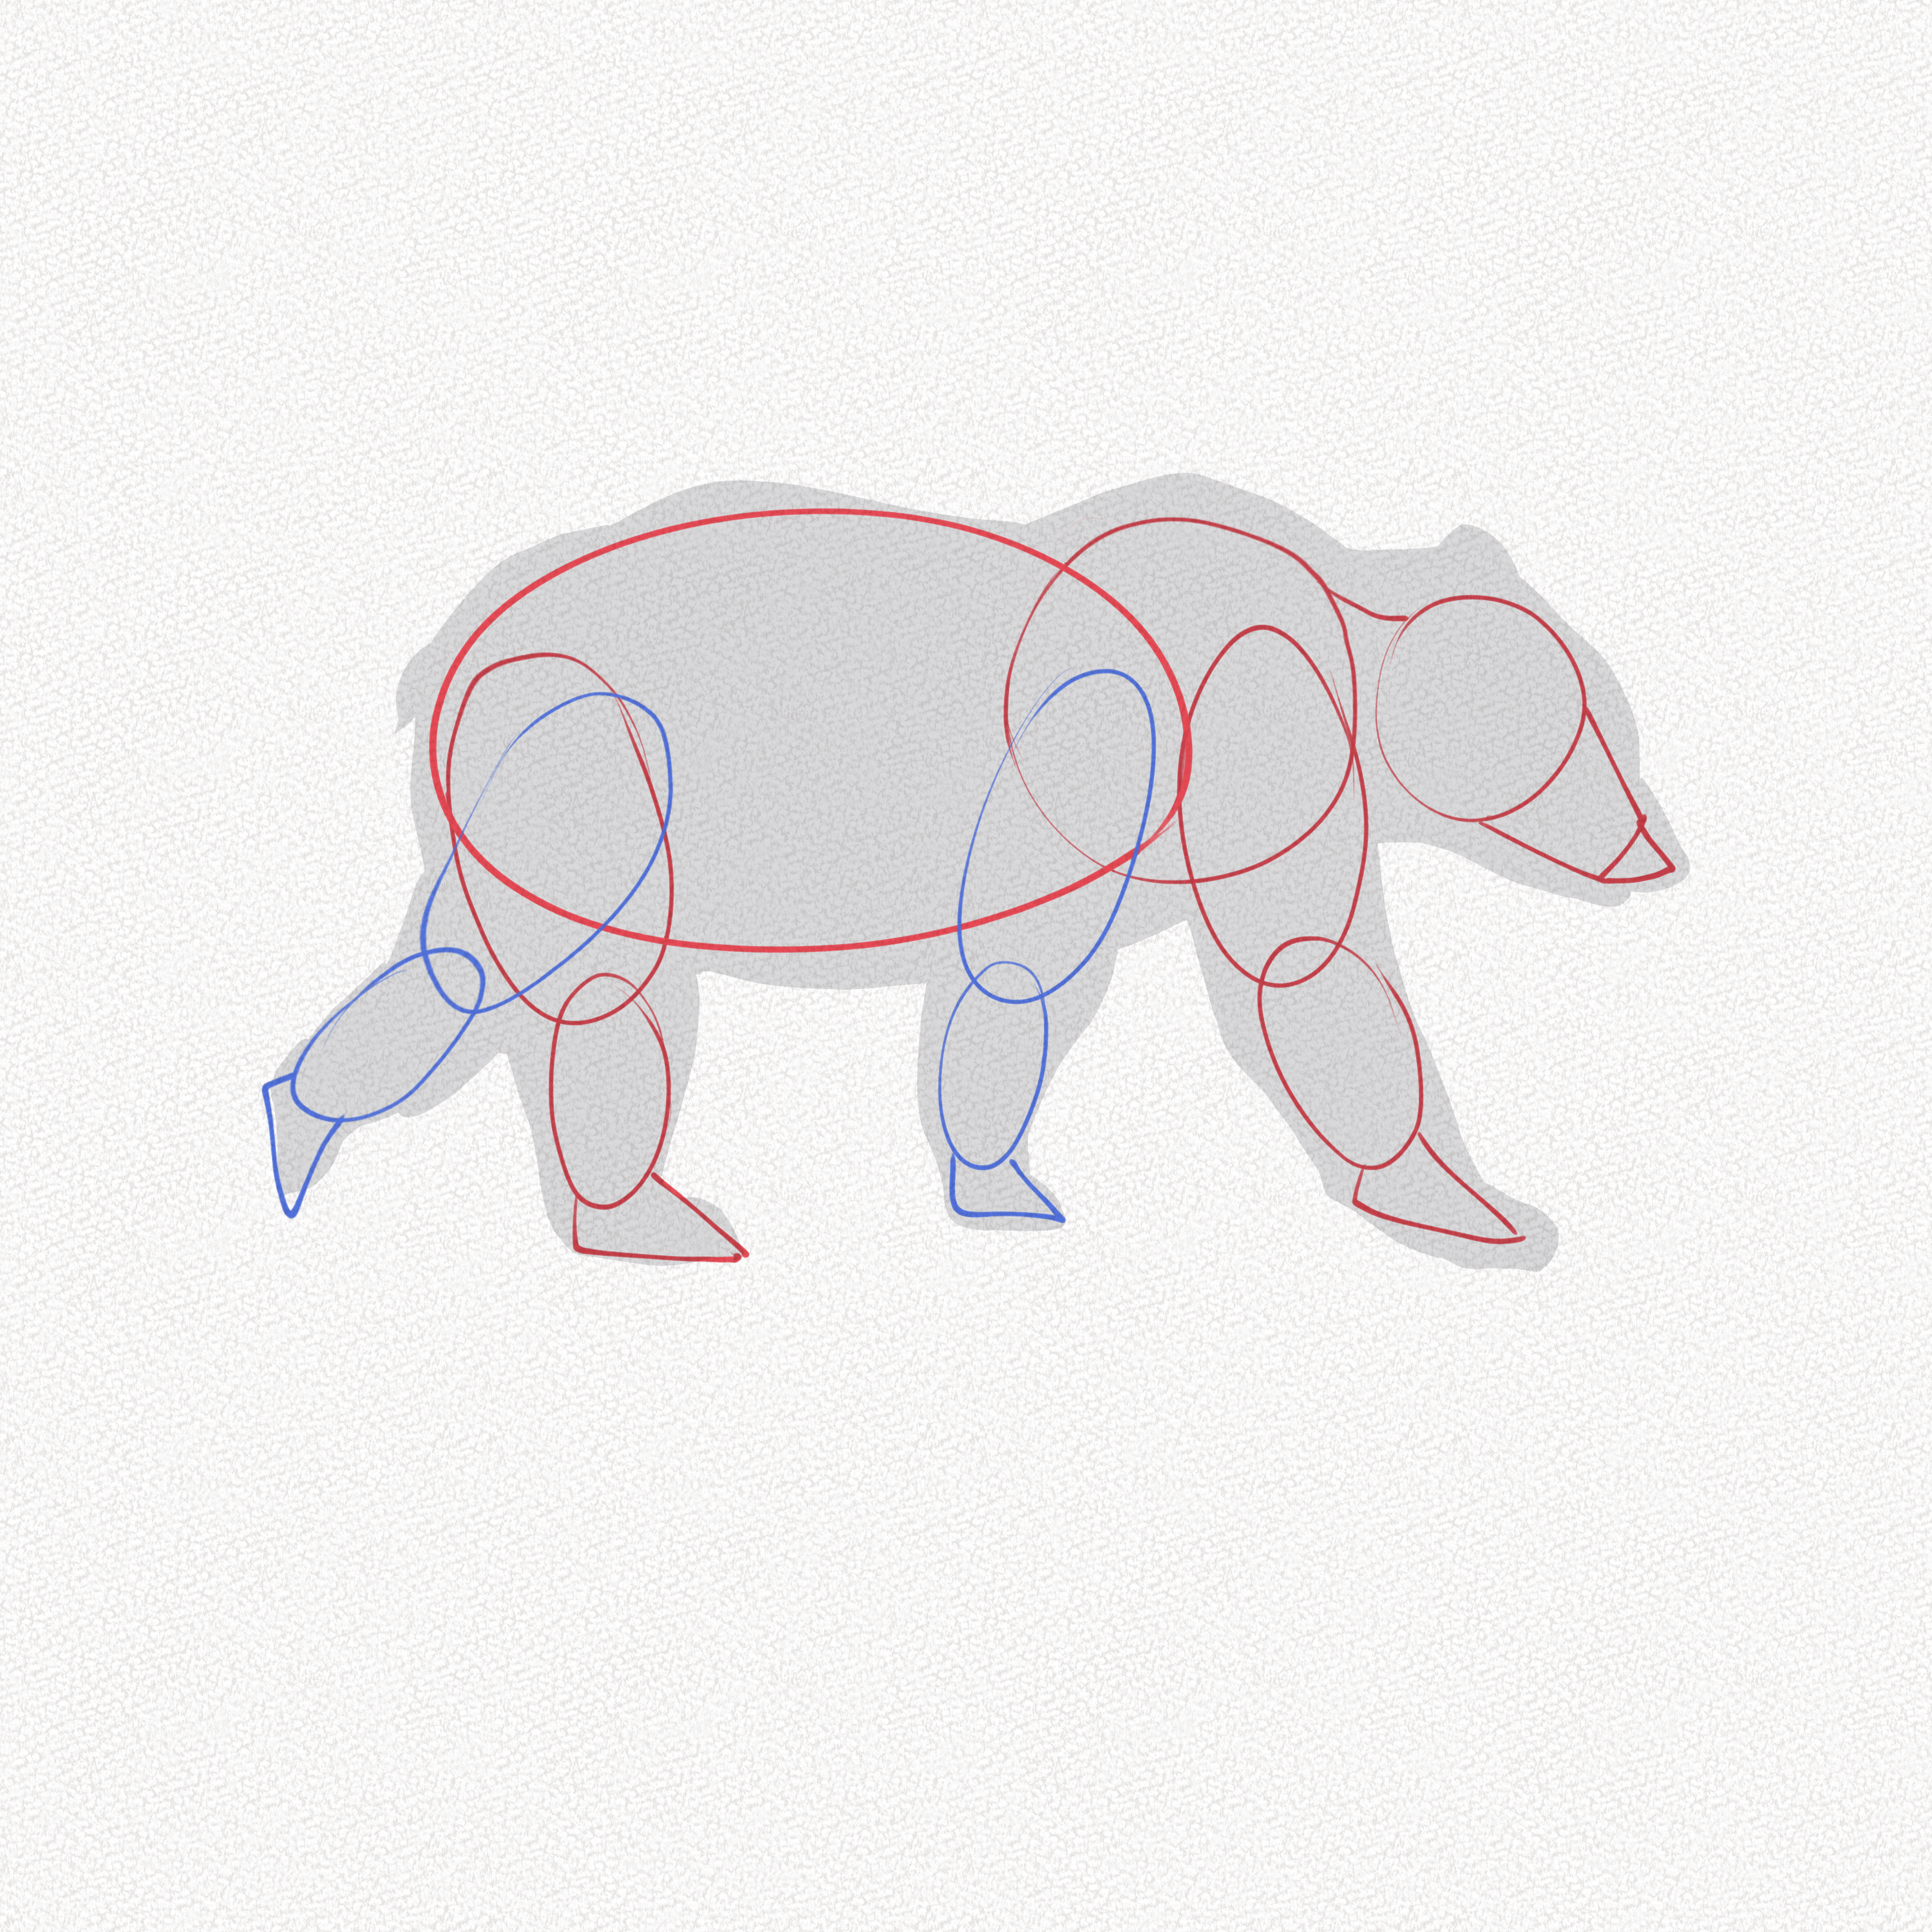
Step 5: Draw the leg’s structure
Draw the hinge legs structure using the diagram in Section 1 as a reference.
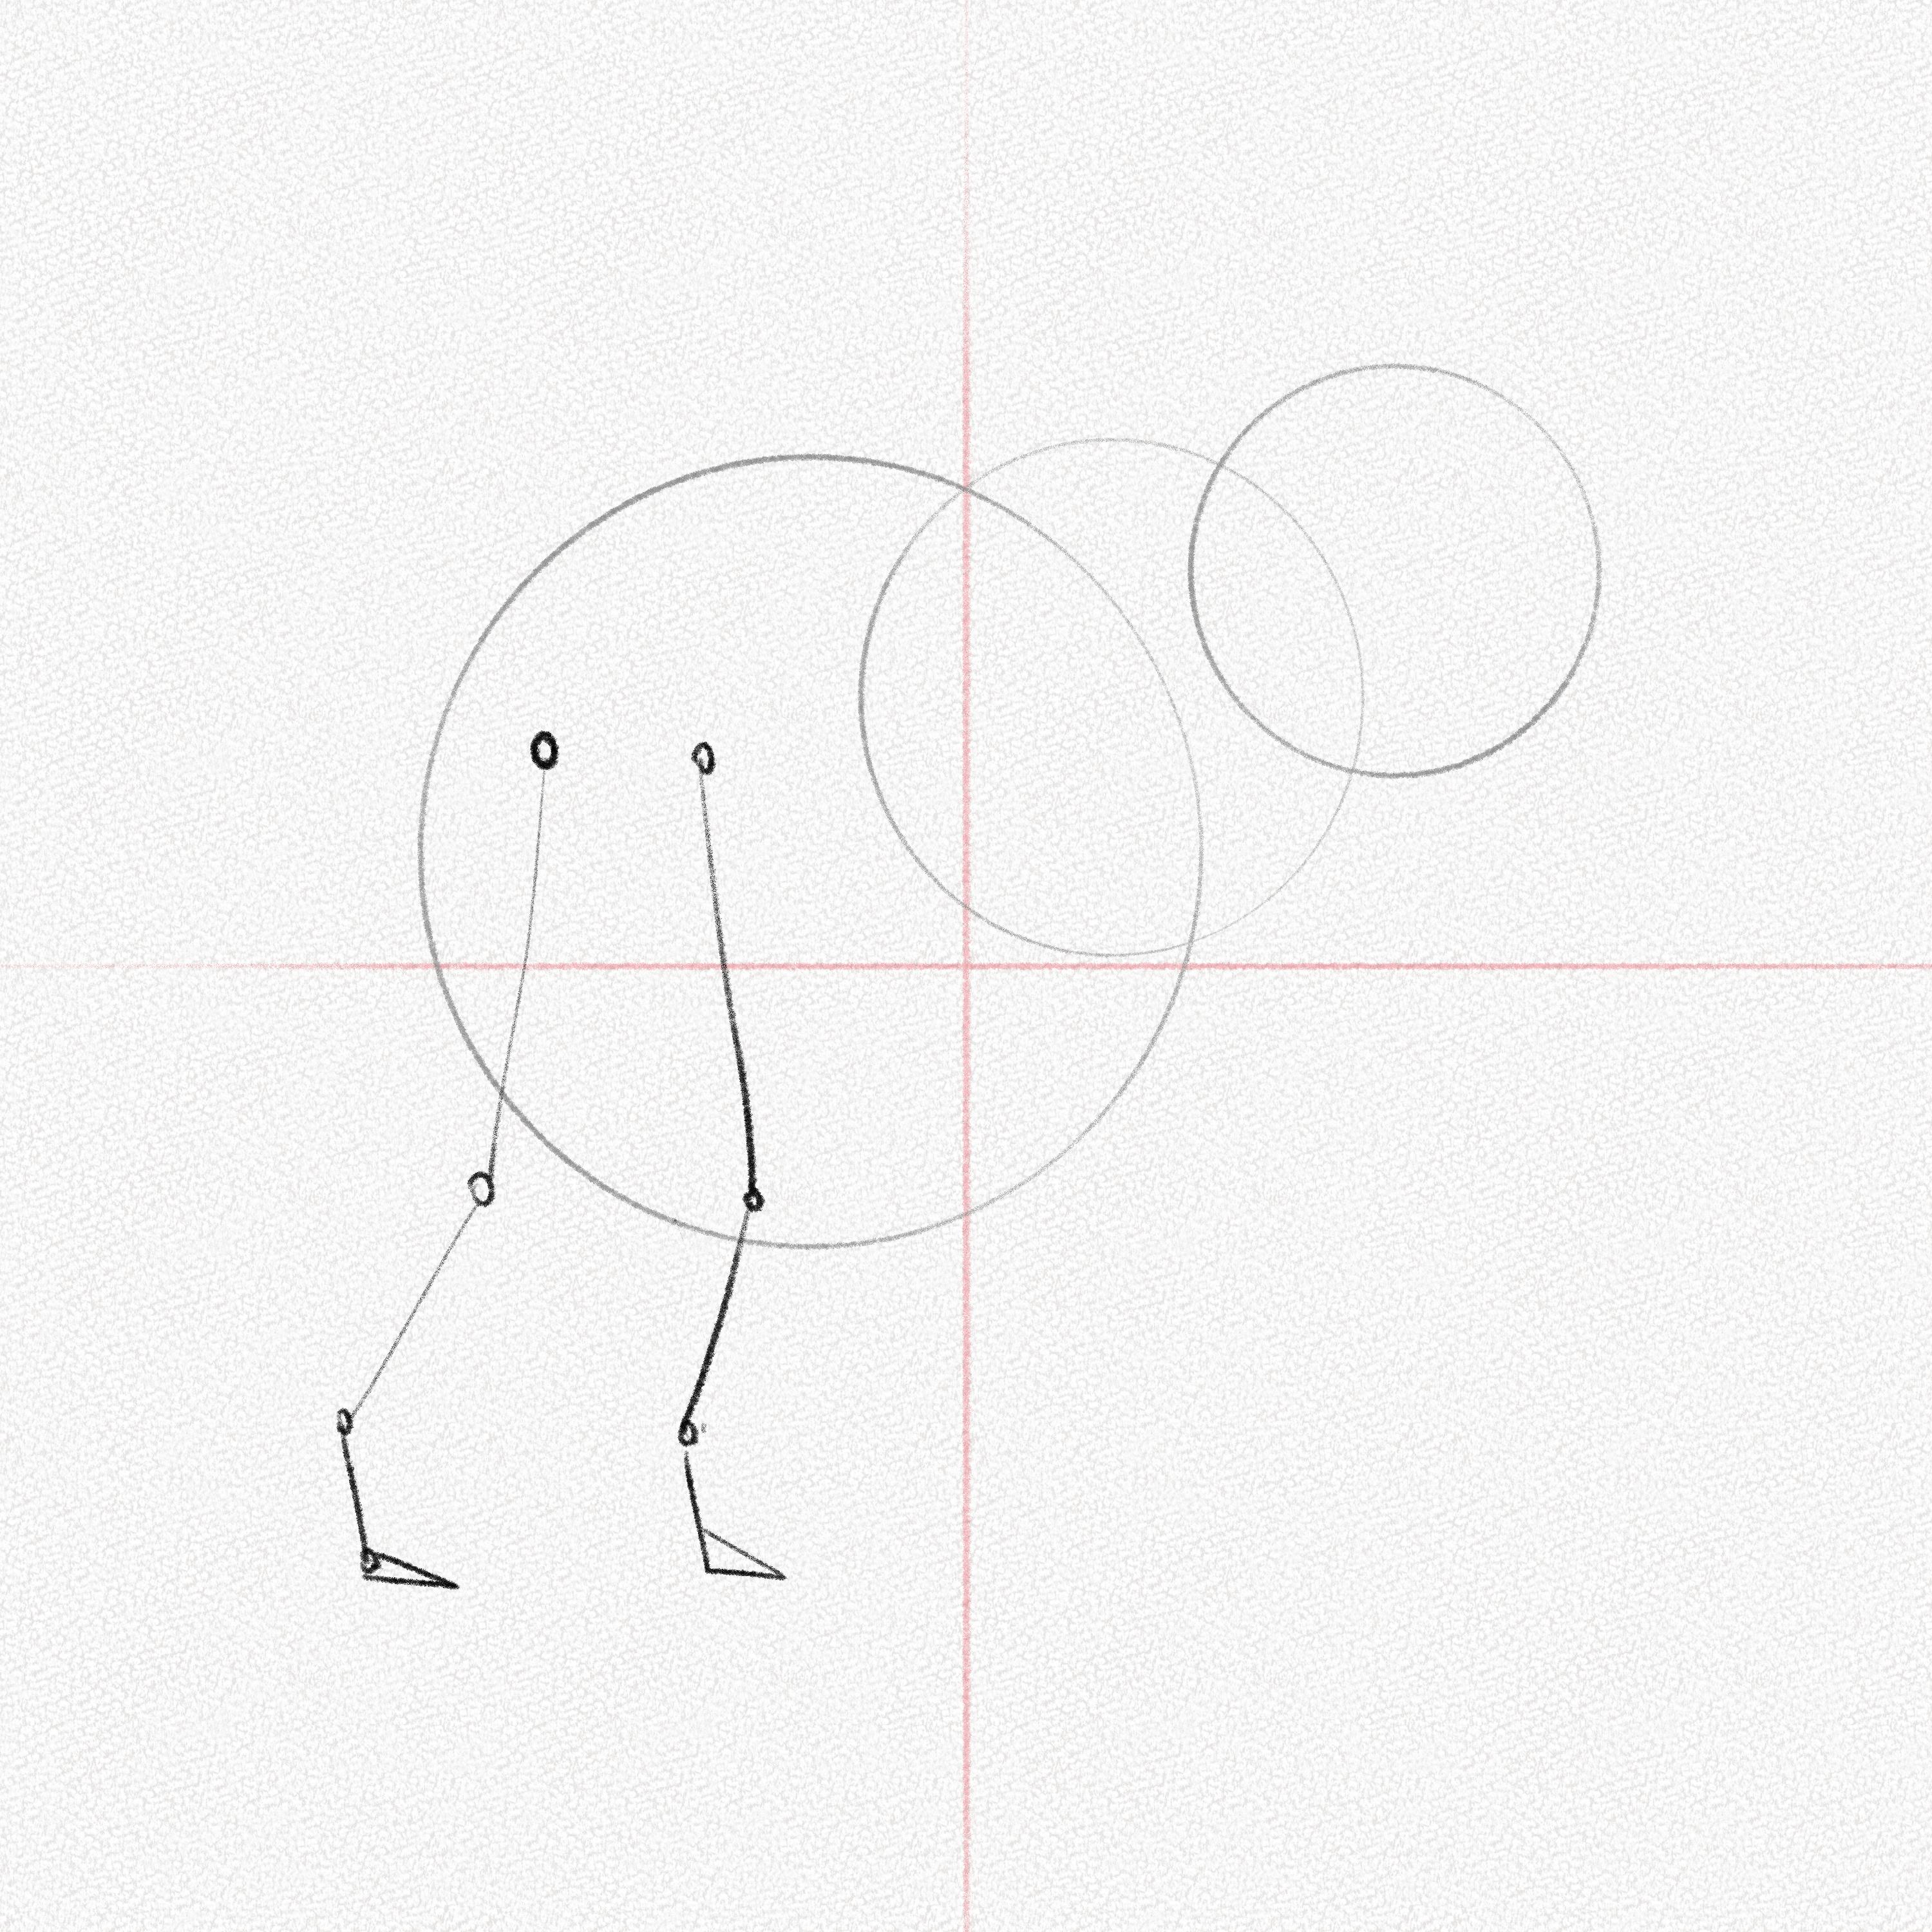
Do the same for the forelegs and use small triangles for the paws.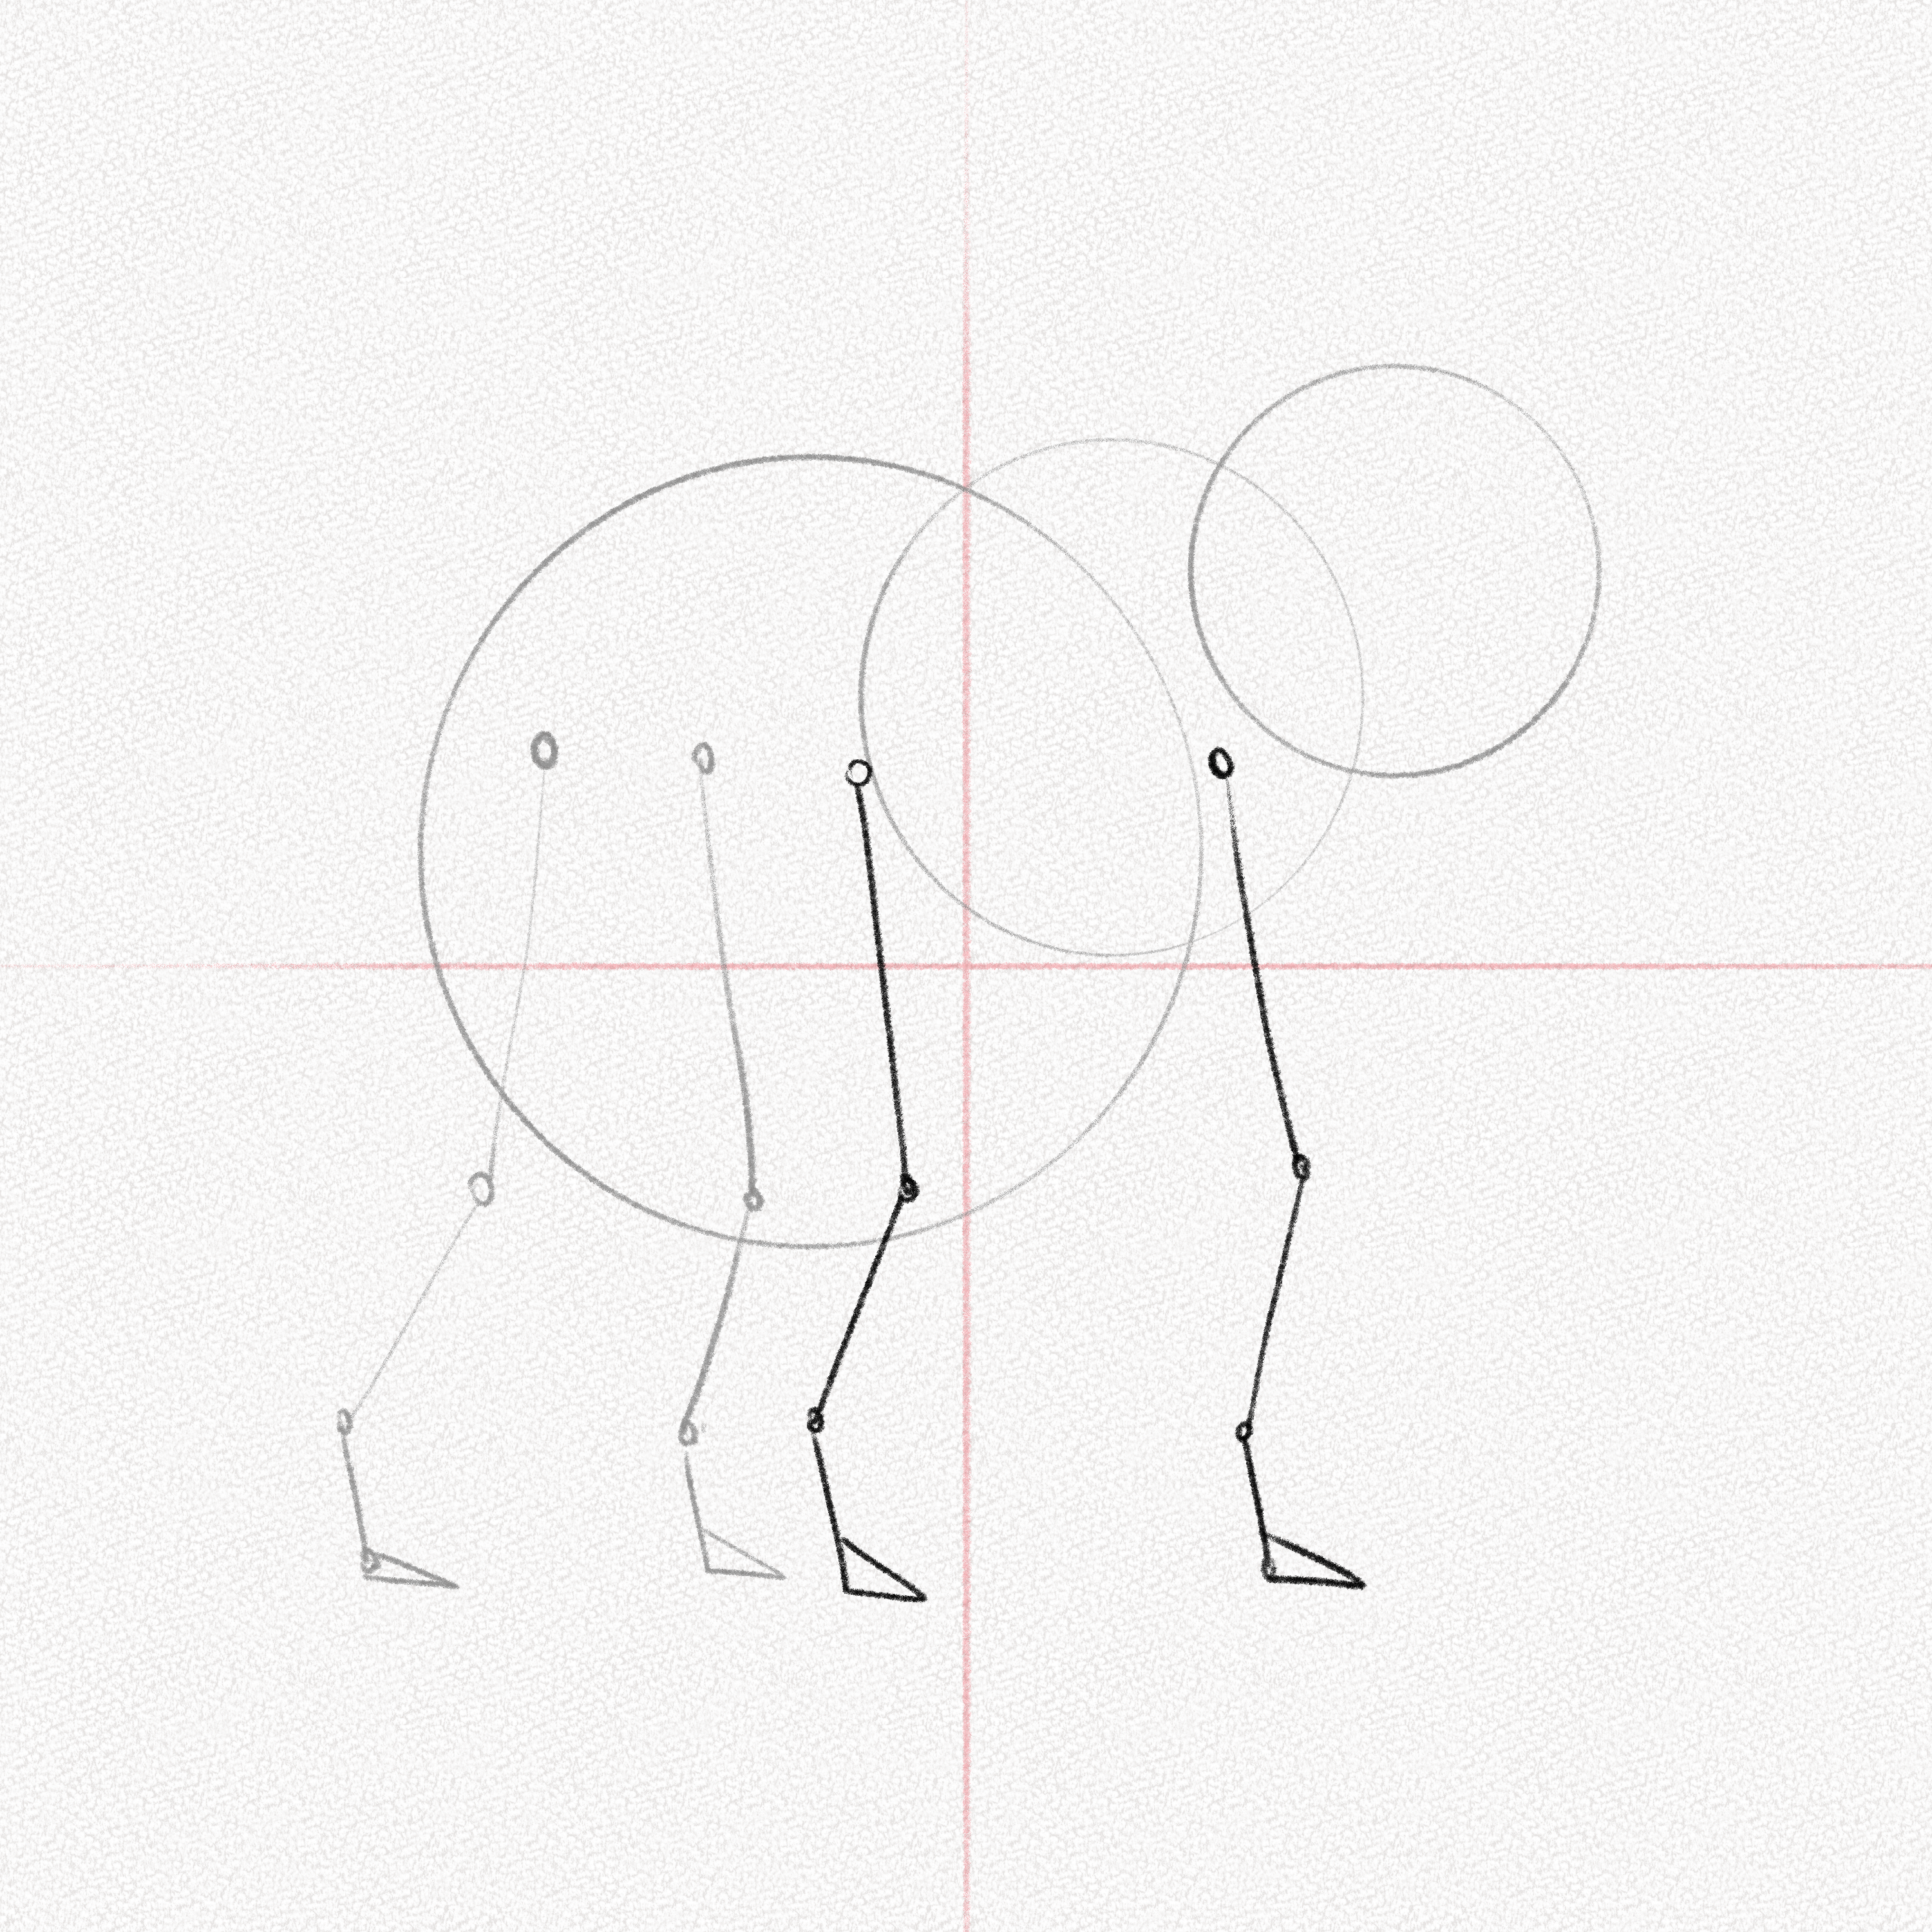
Step 6: Place the muzzle
For this step, we’re going to think of the head circle as and sphere and try to split it into four parts in 3D. 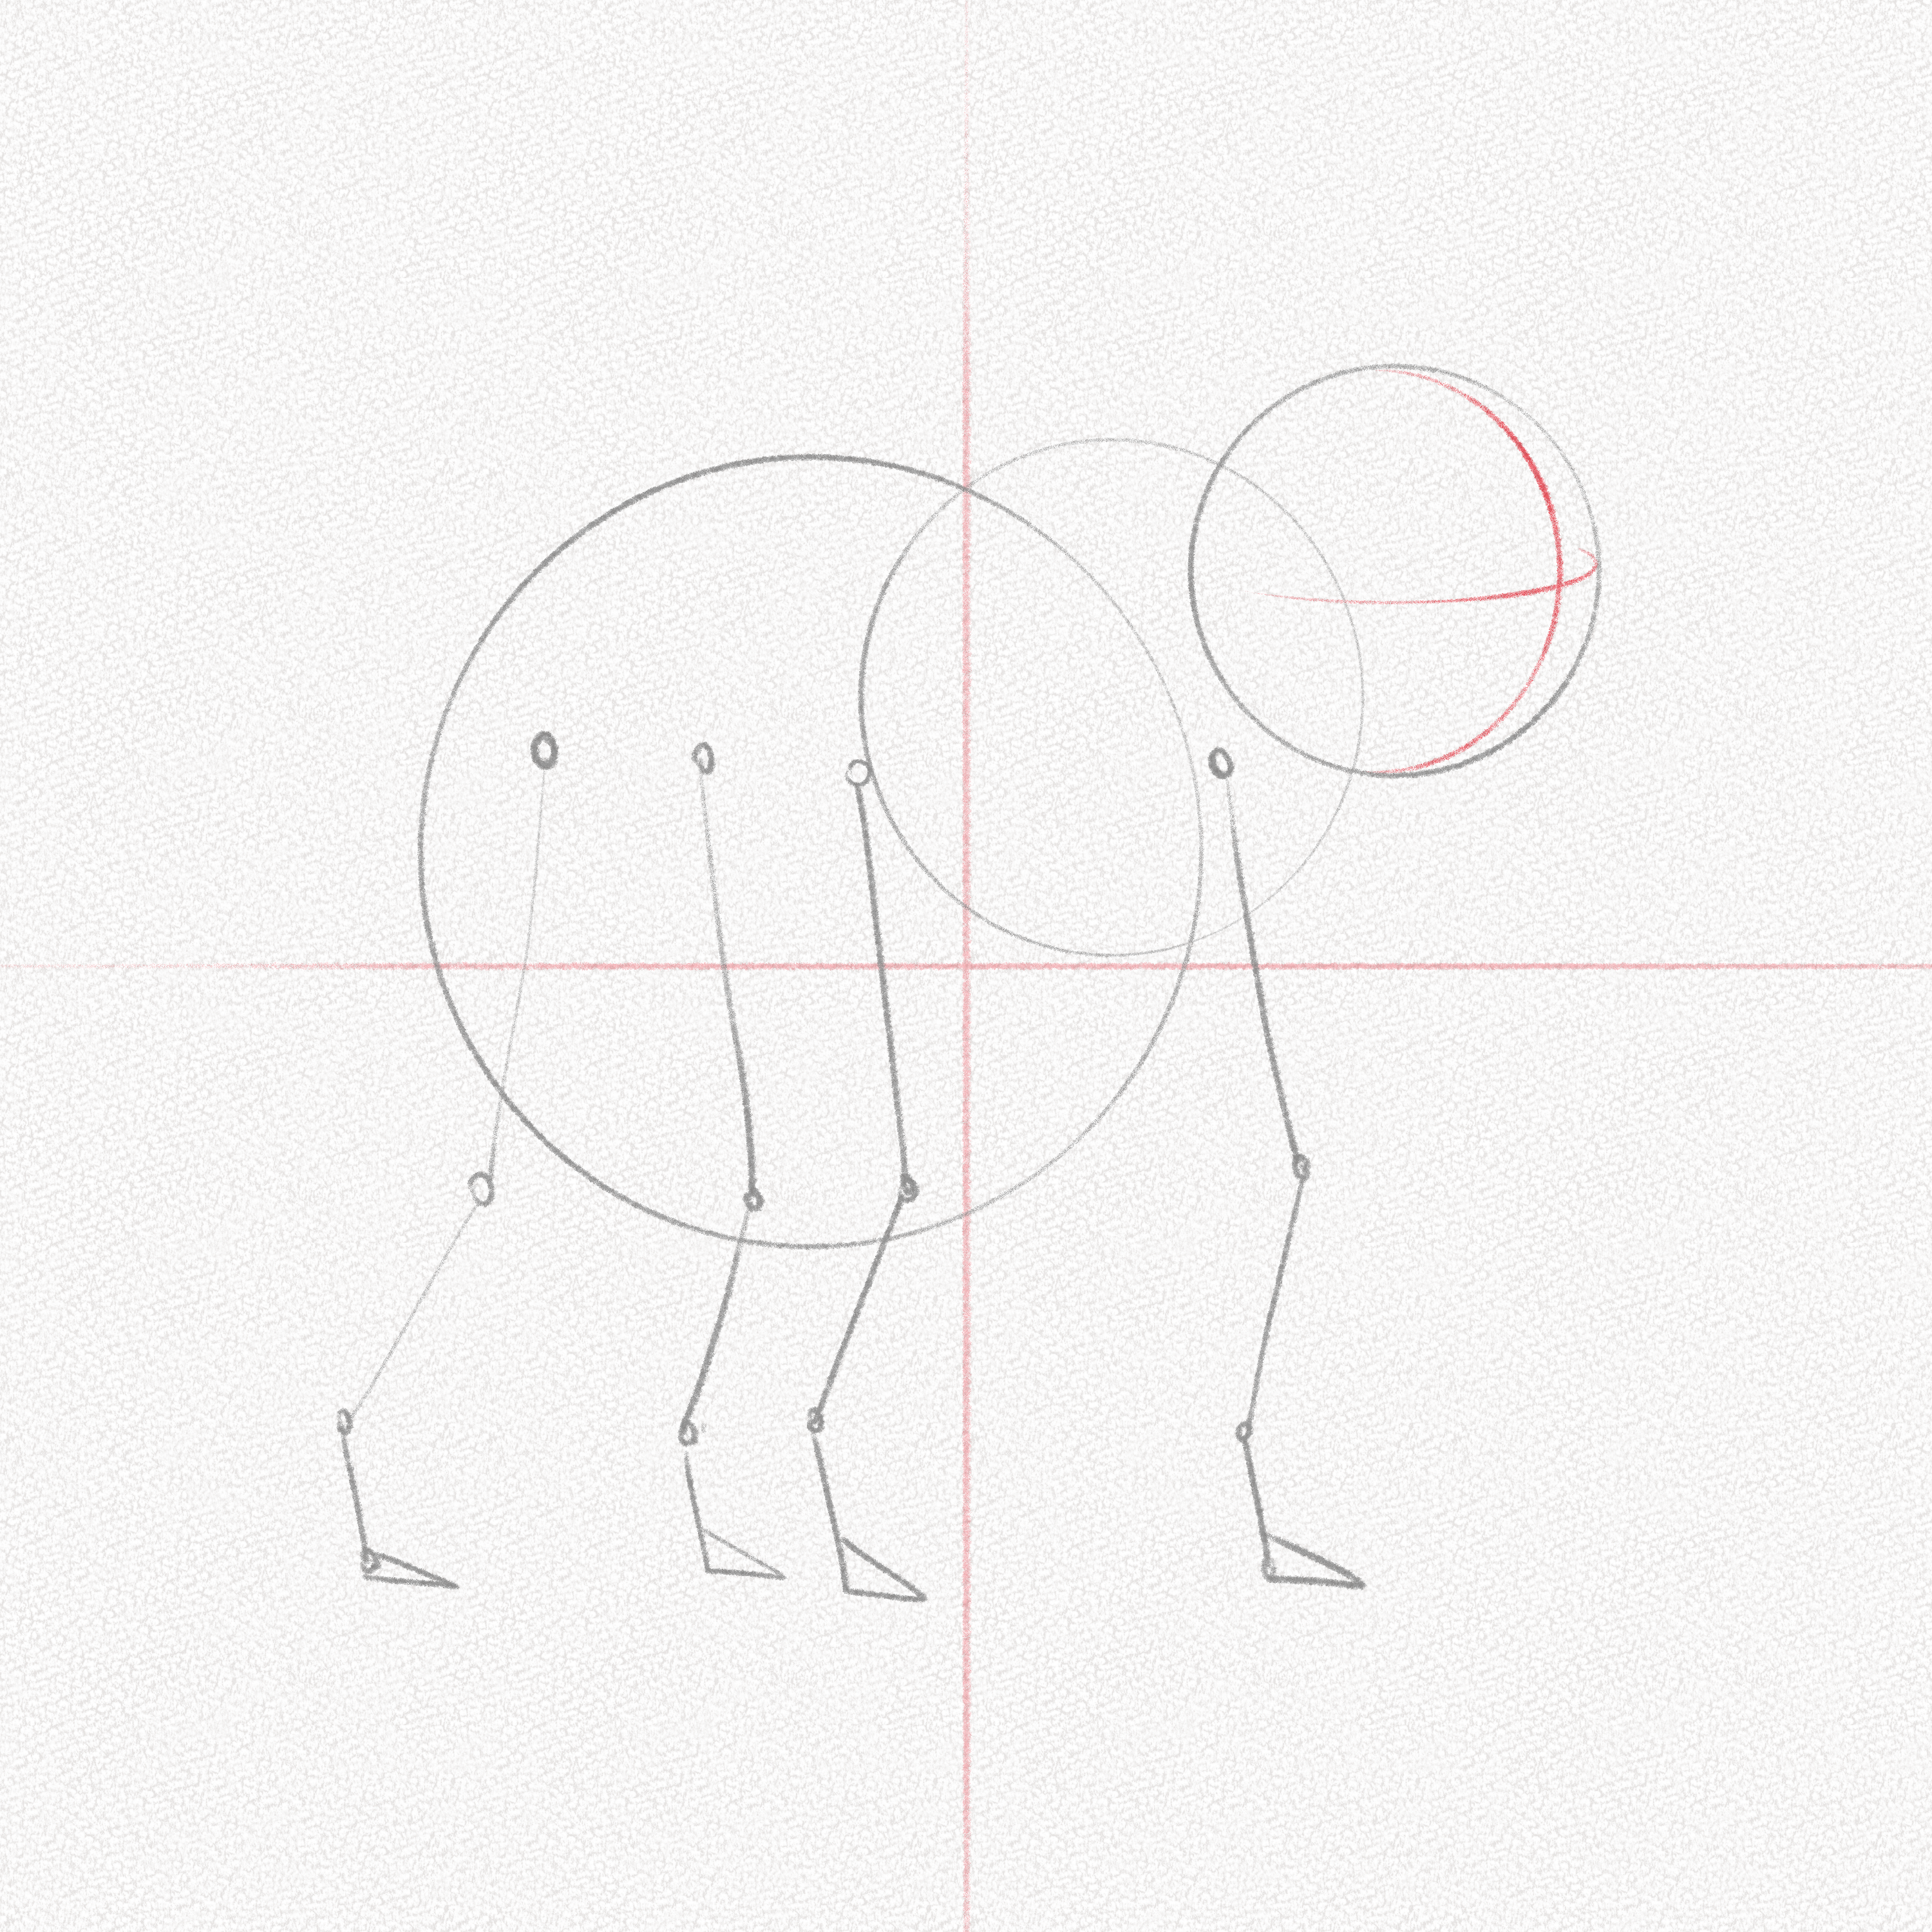
Then we are going to draw an ellipse to place the muzzle. It doesn’t have to be in the middle of the lines we drew, but slightly off-centered.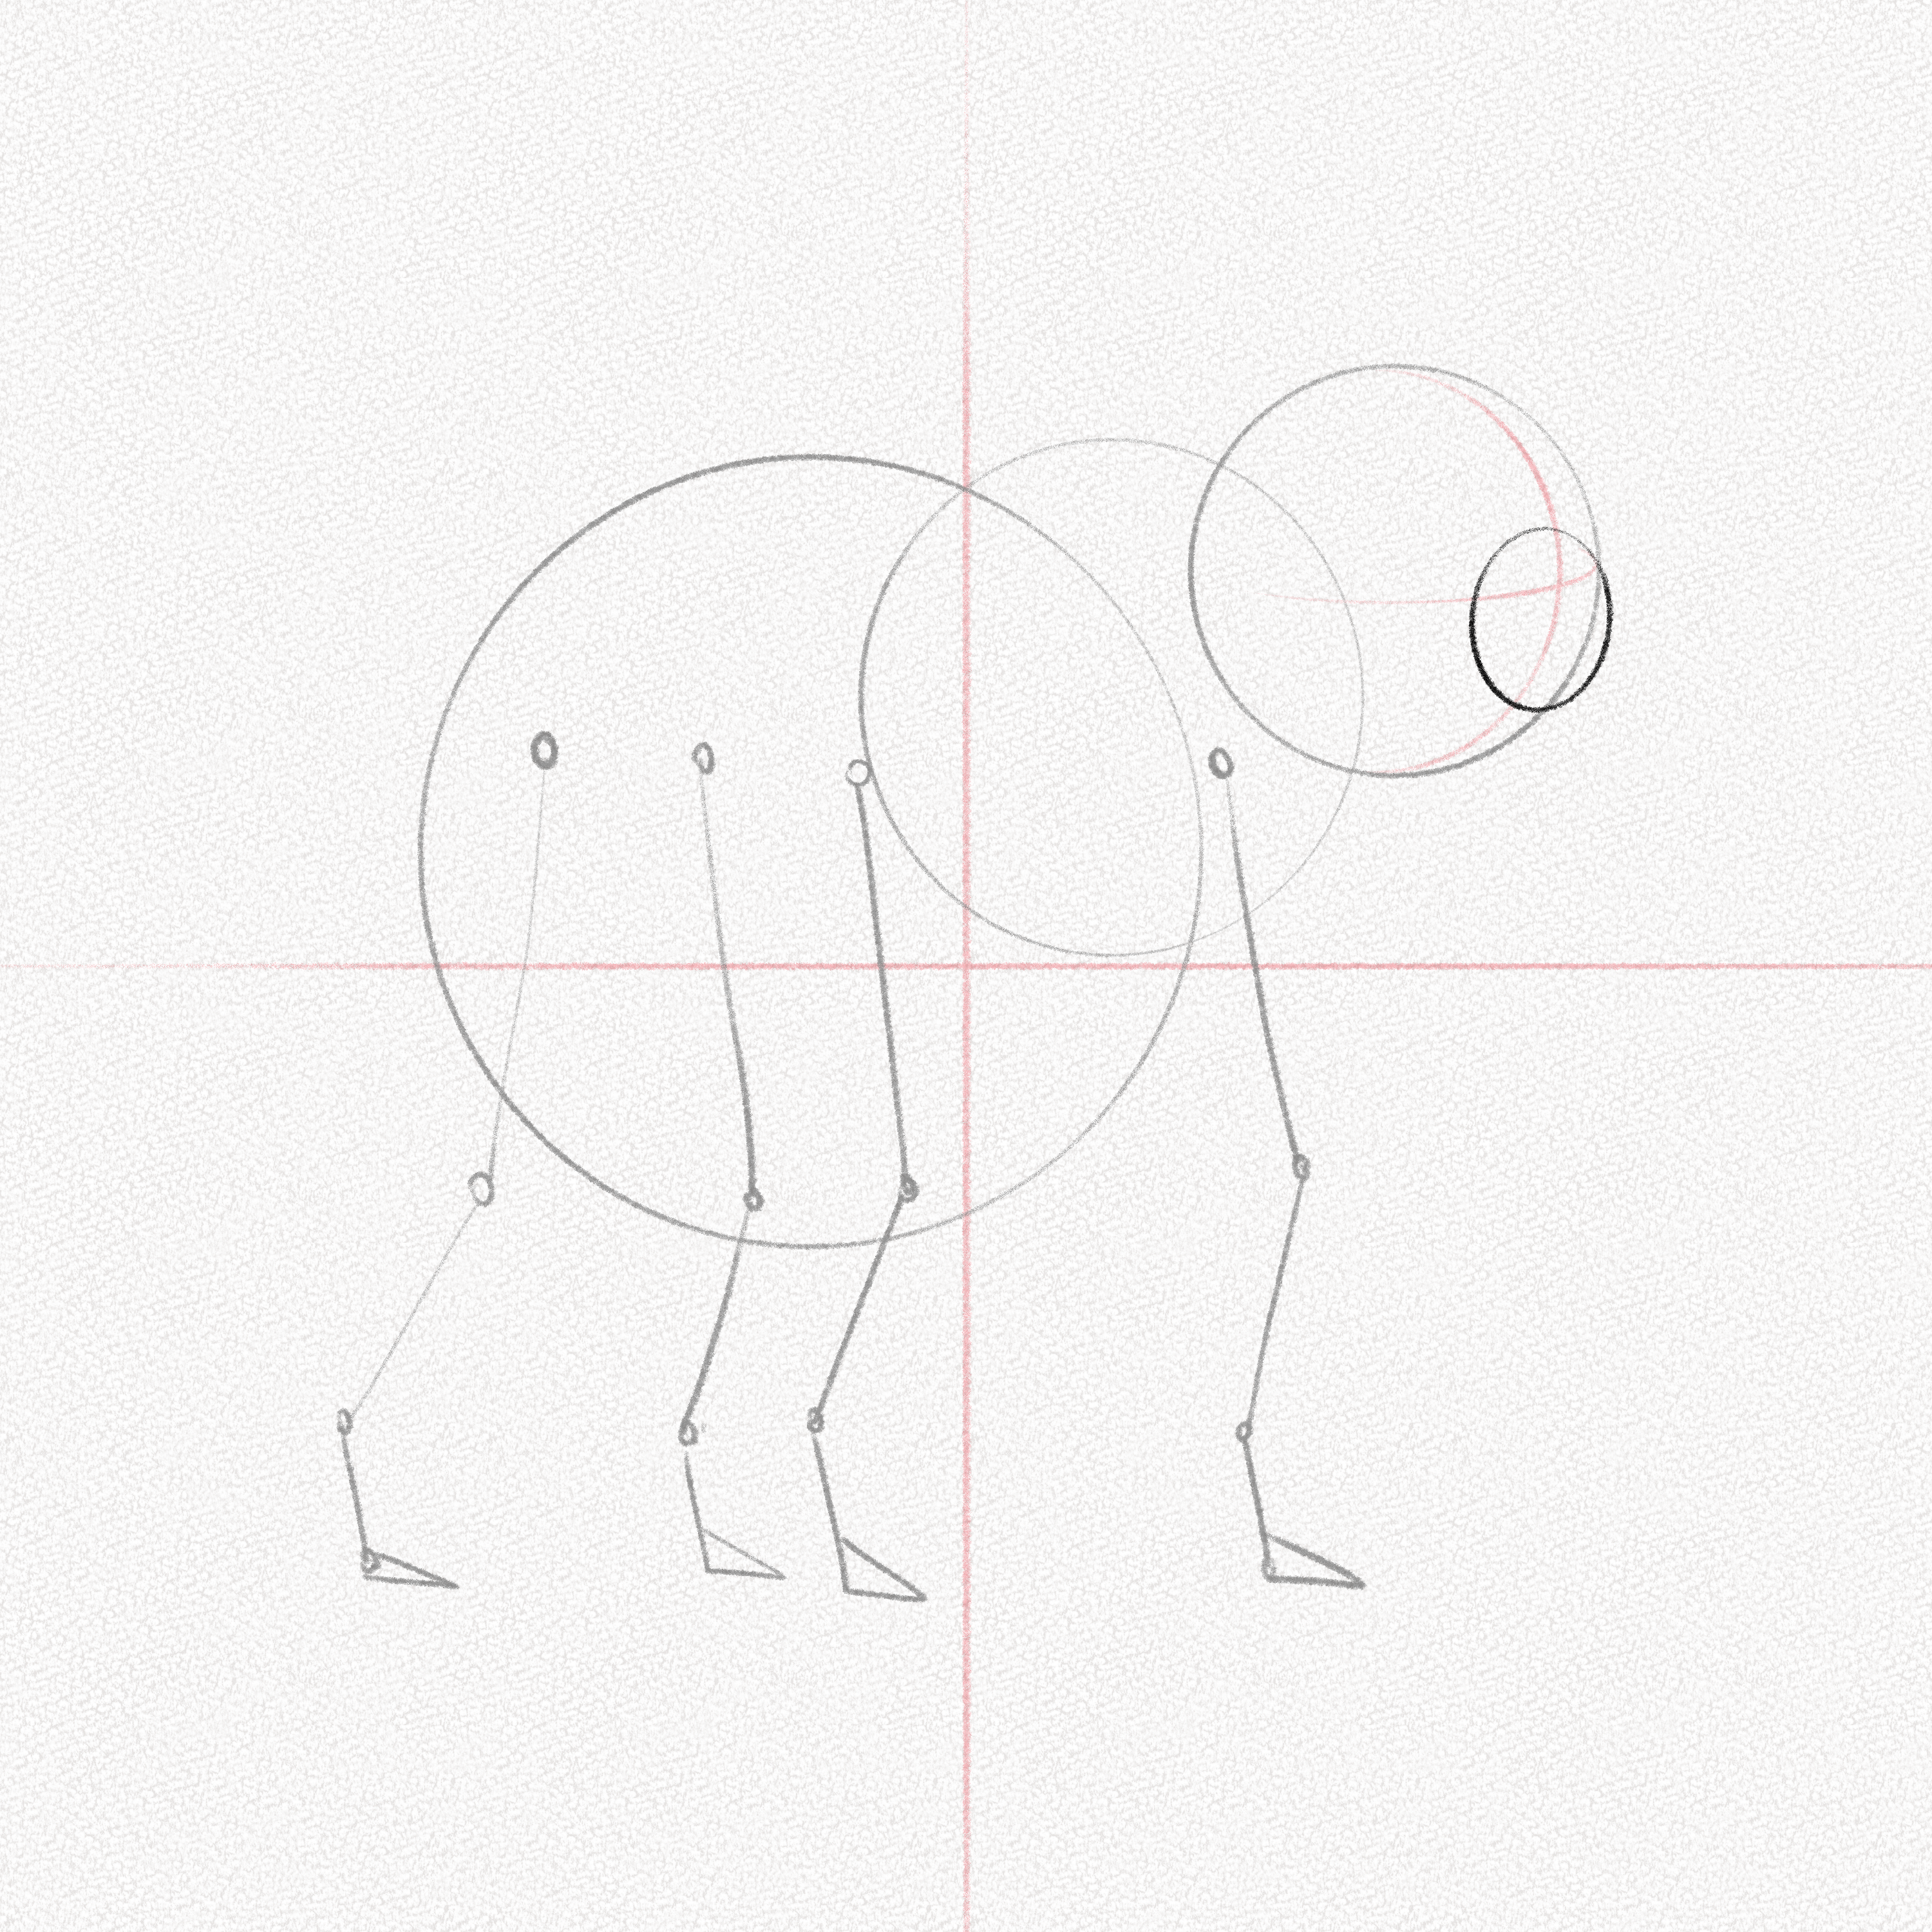
Step 7: Draw the muzzle
Pull two lines from the top of the circle and close them with a straight line creating a rectangle-like shape.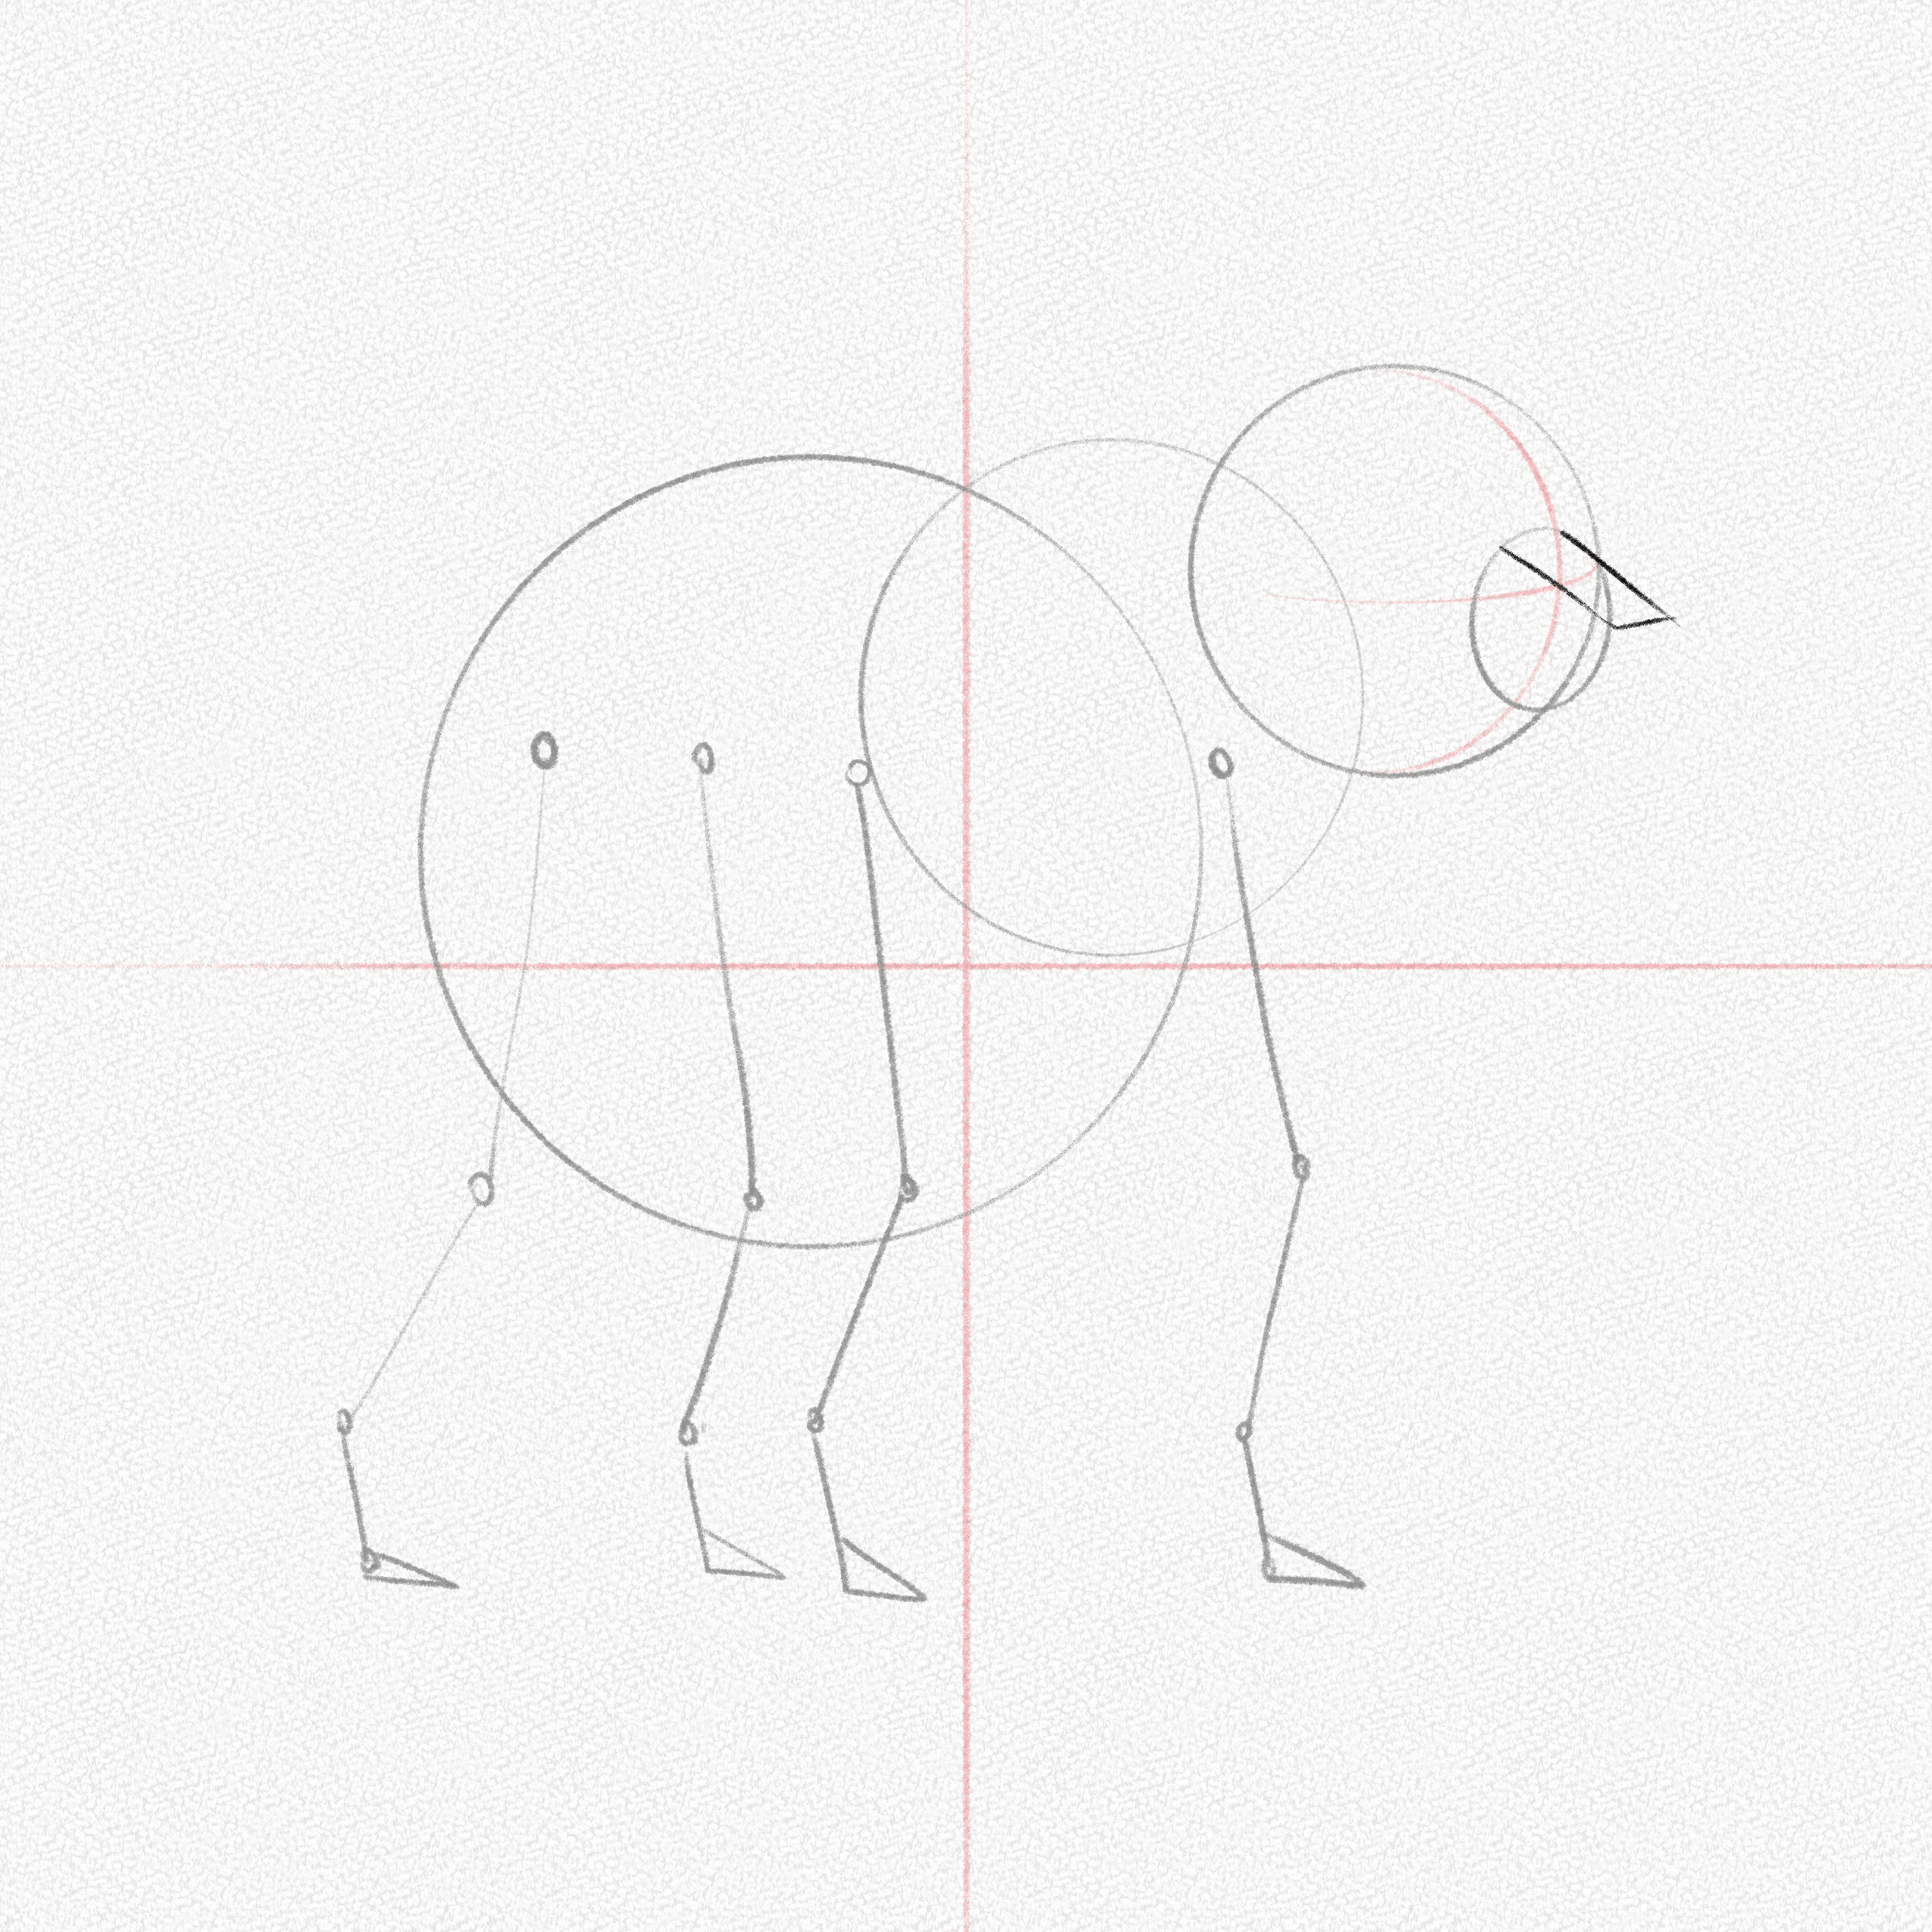
Draw another line from the base of the muzzle ellipse and connect it to the top of the muzzle.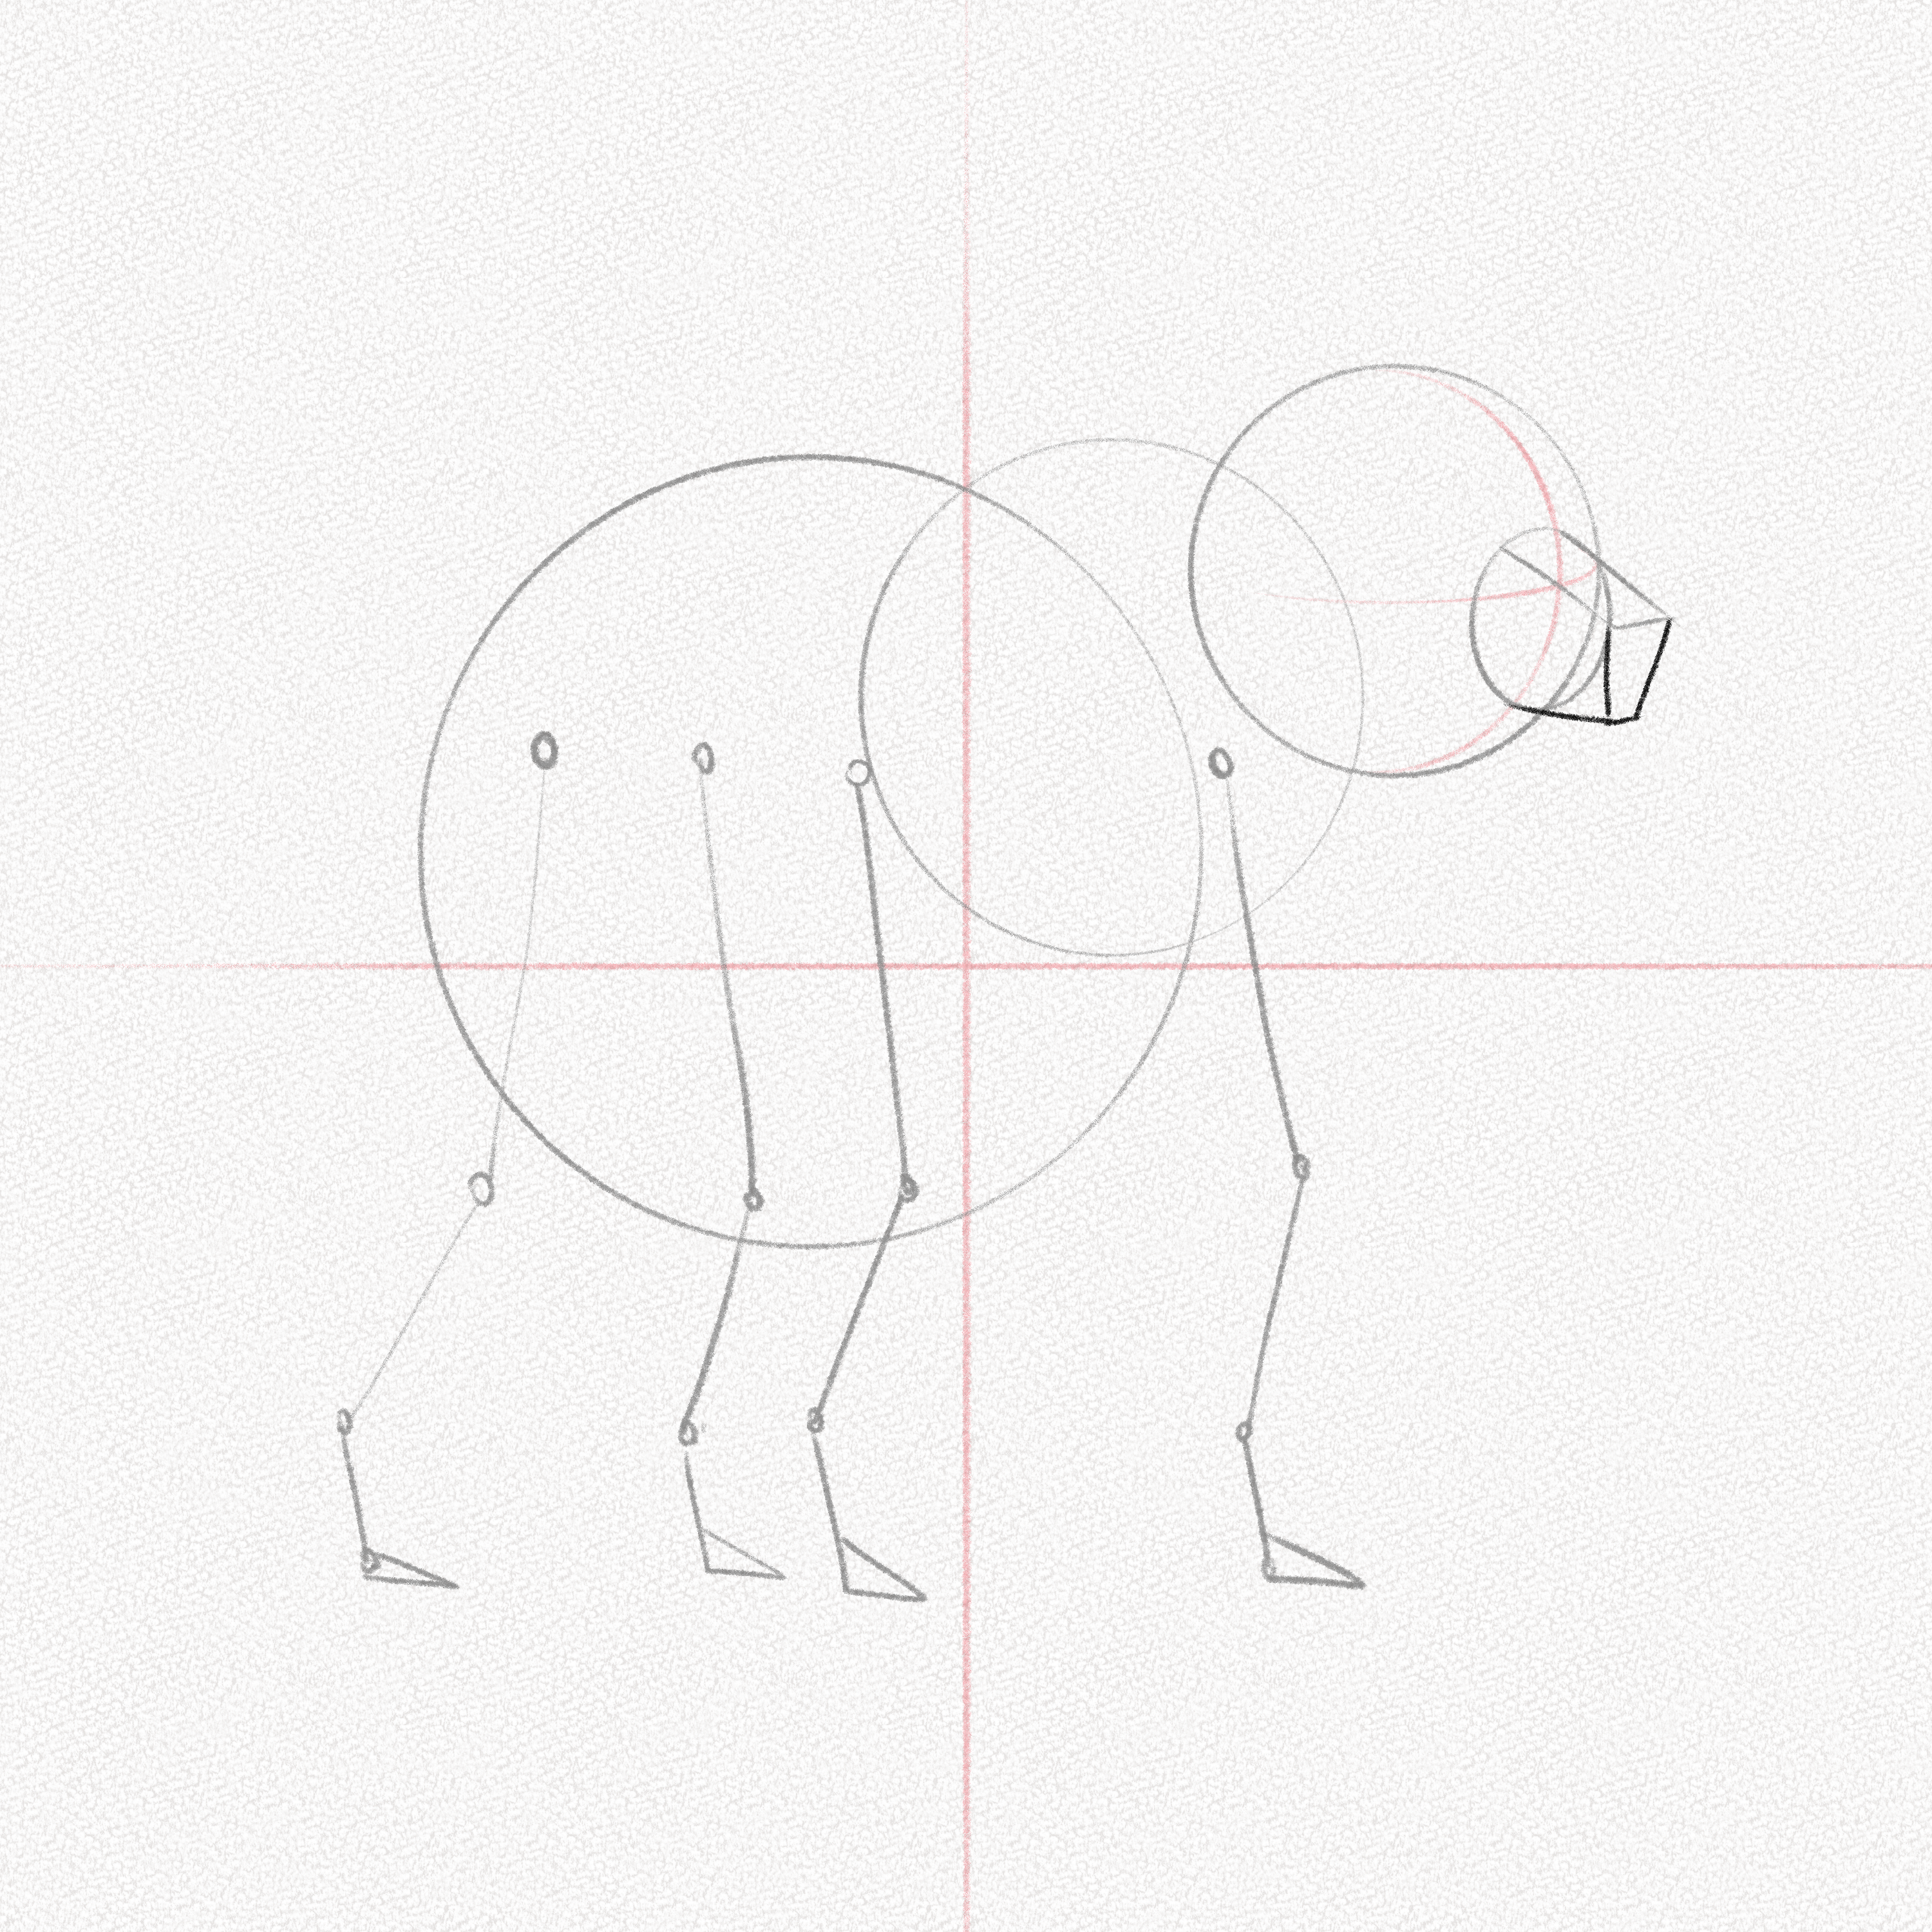
Step 8: Draw the ears
Draw two egg-like shapes on top of the head for the ears of the bear.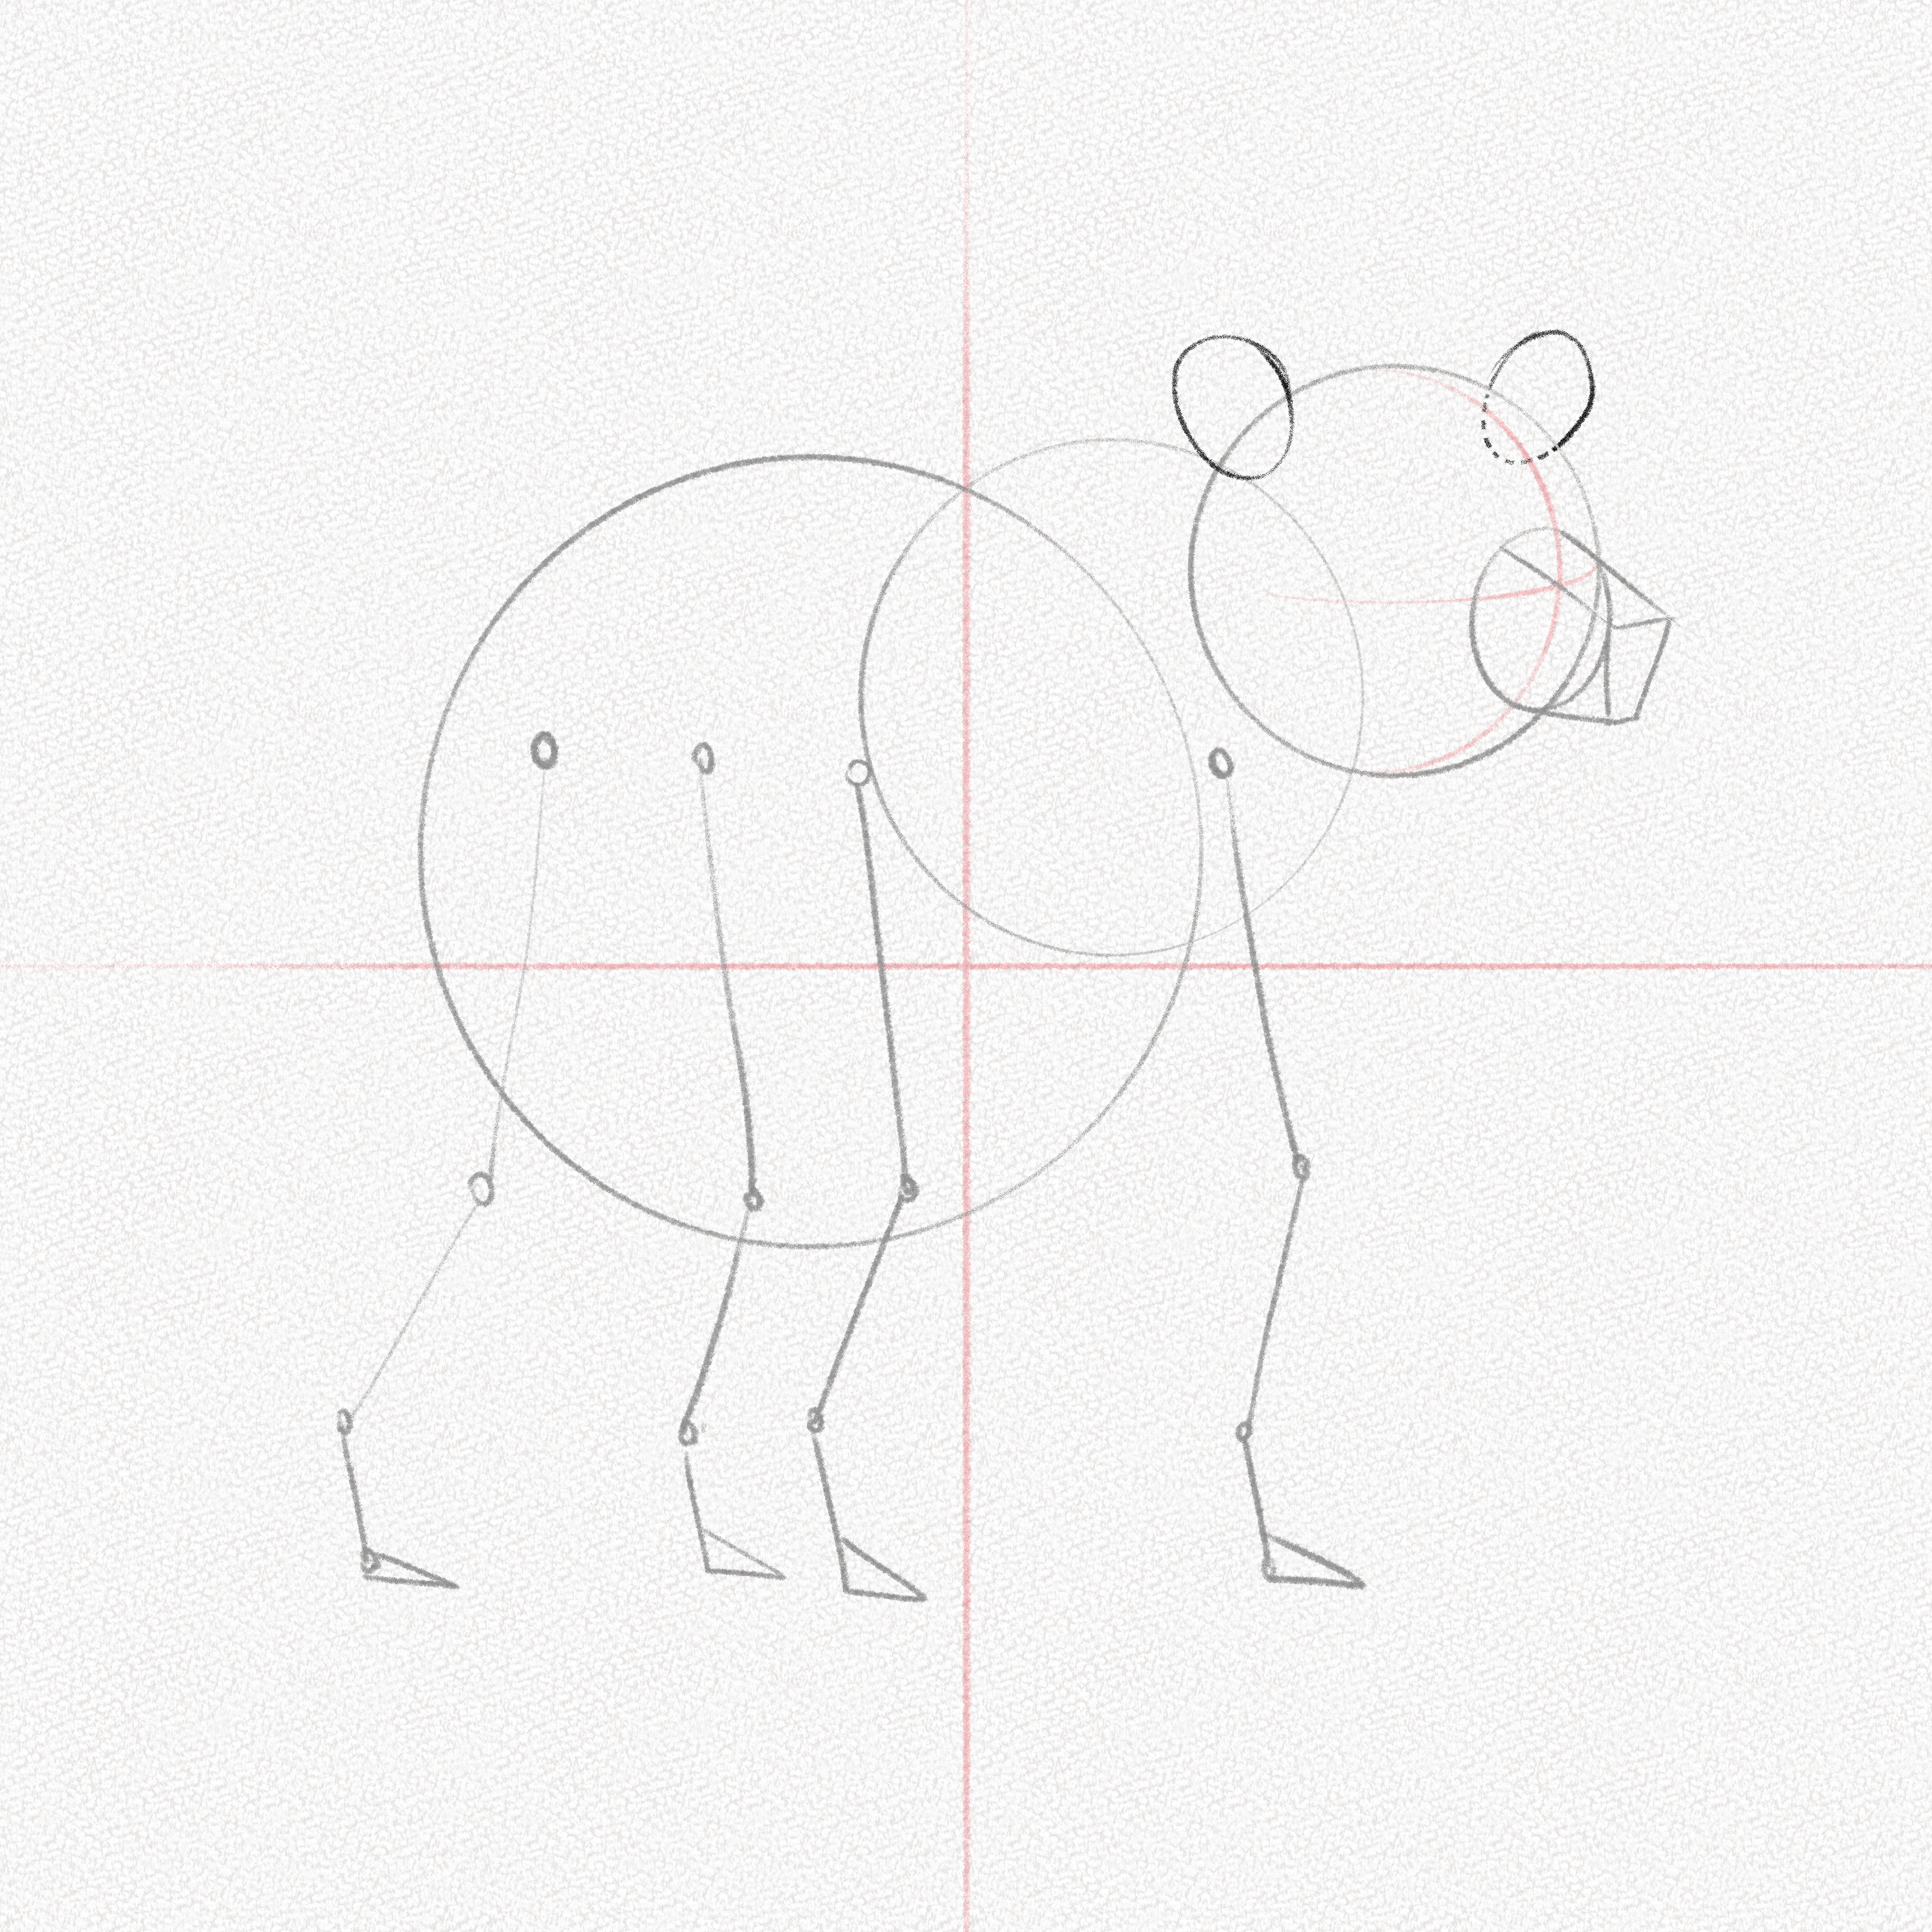
Step 9: Draw the eye sockets
Draw two small elongated circles on the limits of the muzzle and slightly above the head’s middle line. These will be the eye sockets of our bear.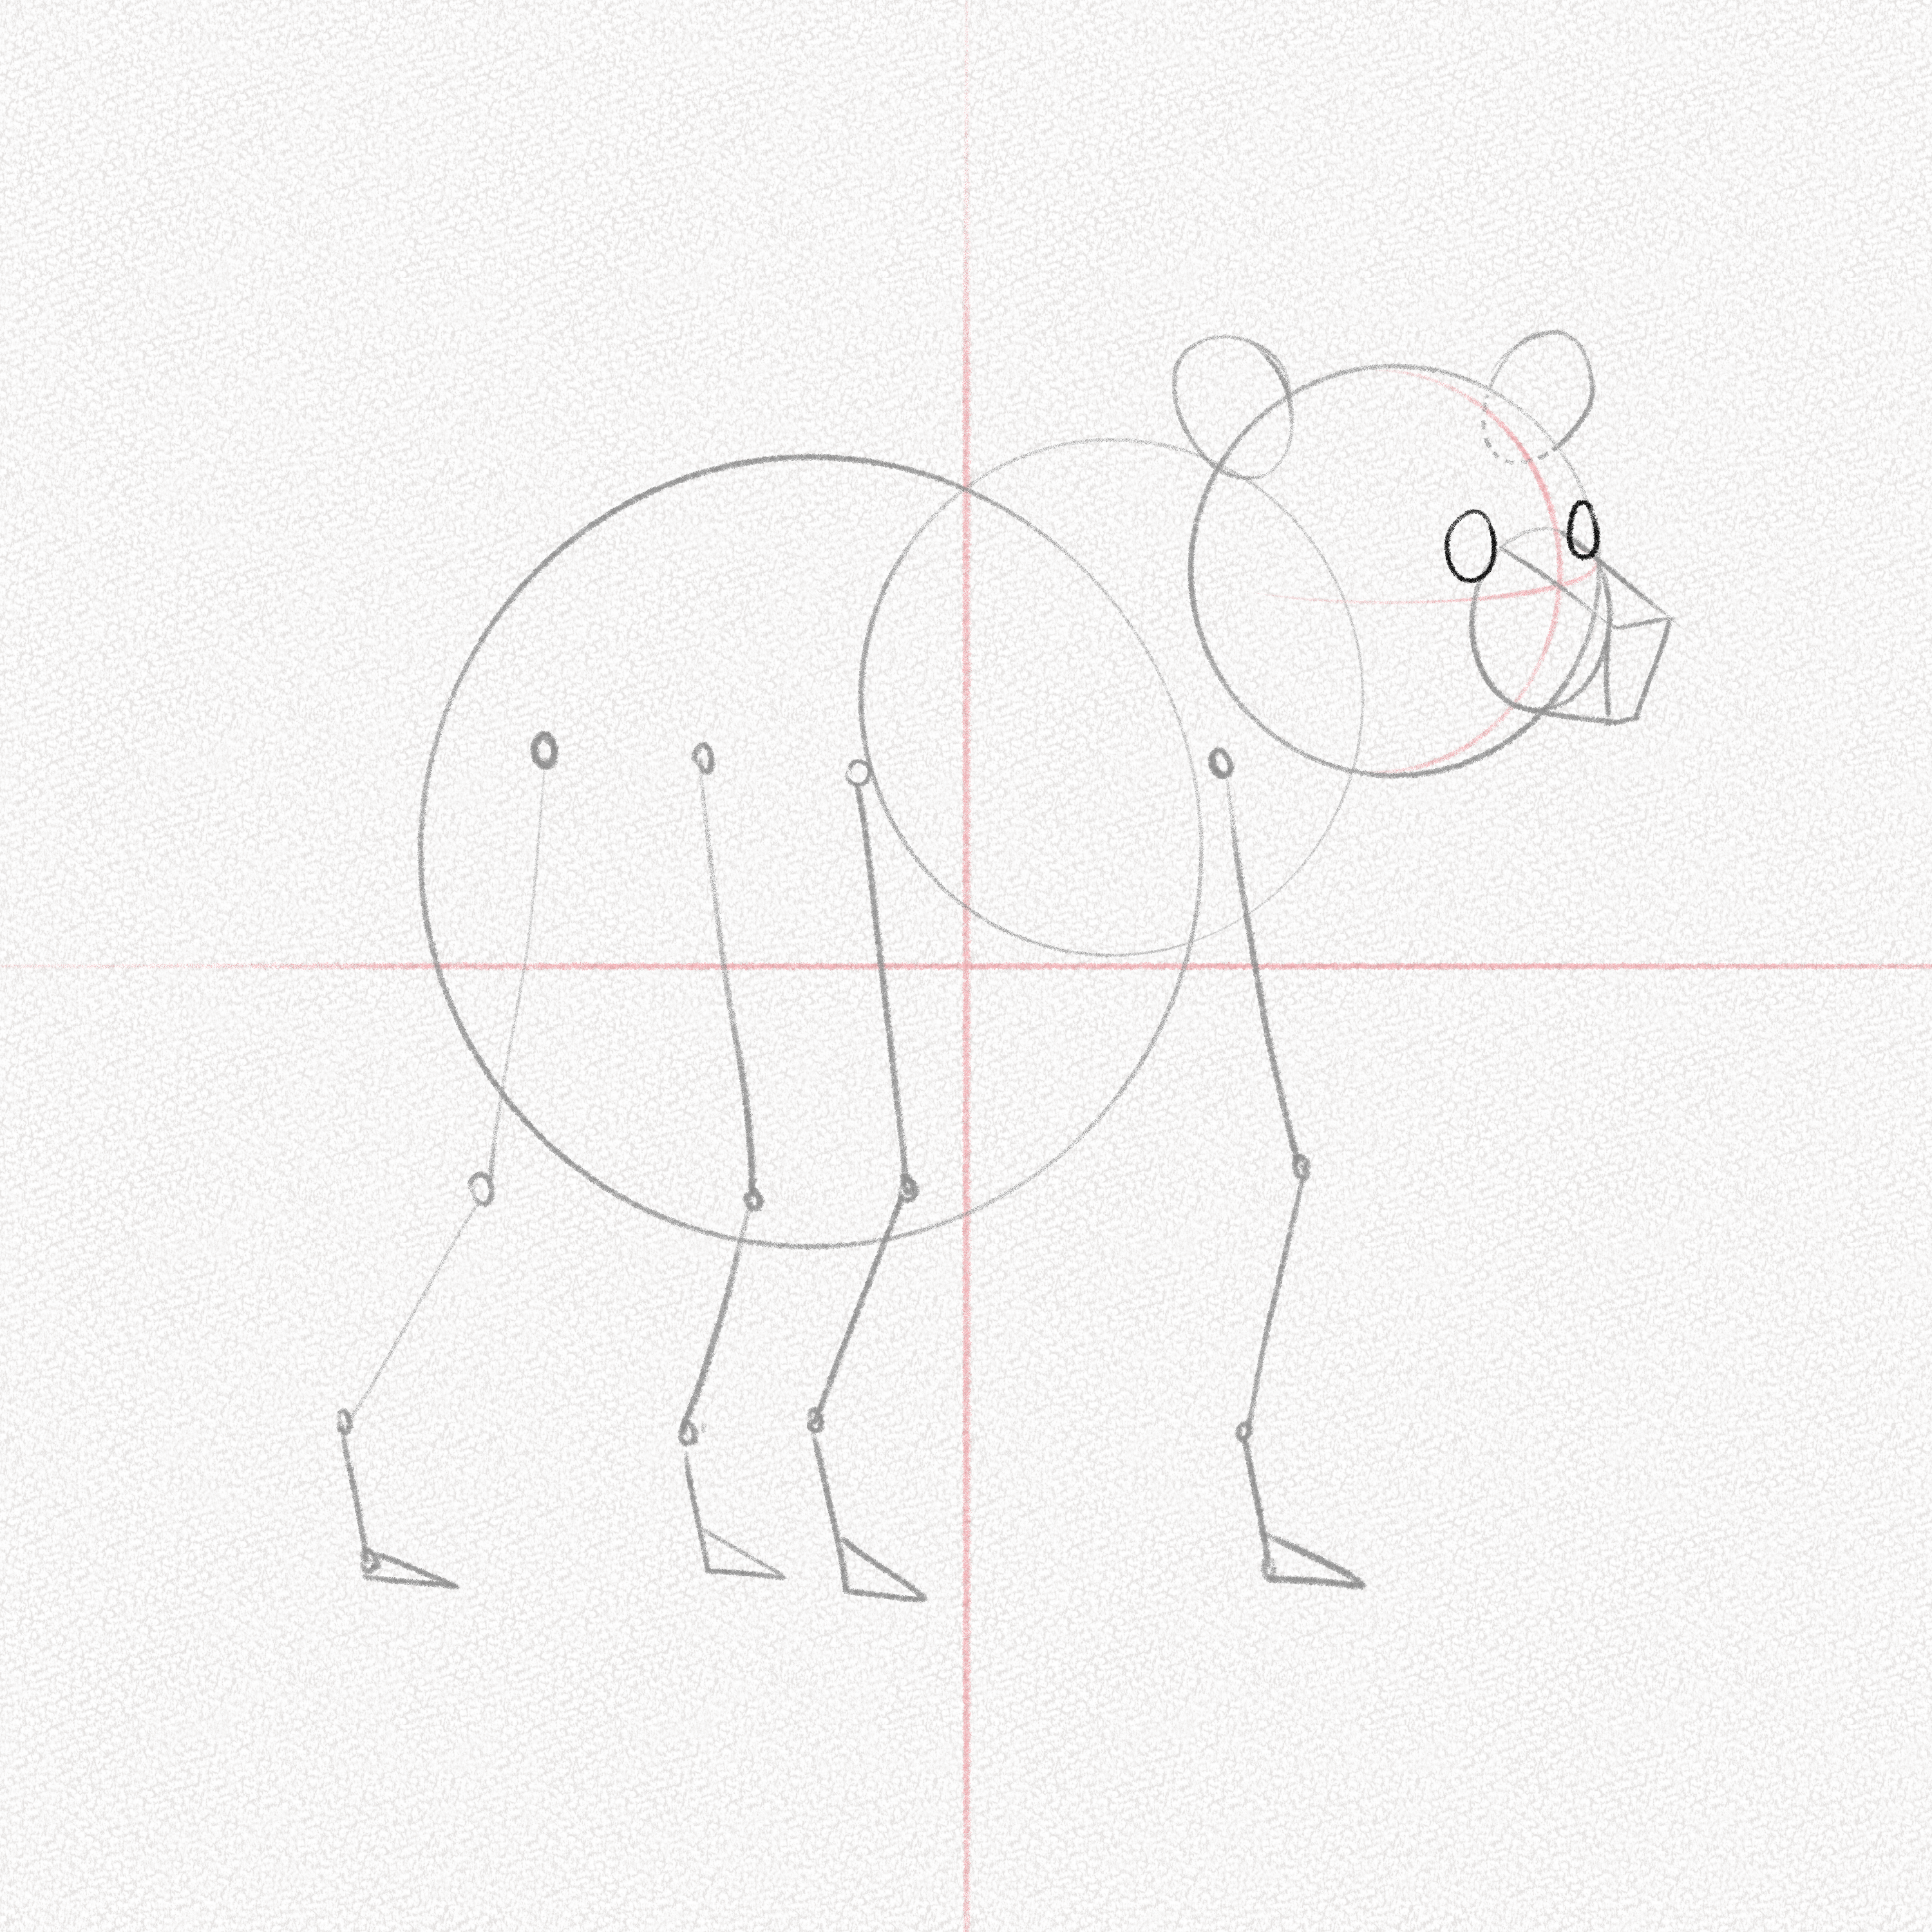
Step 10: Draw the legs
Draw a big and thick oval for the upper part of the right hinge leg.
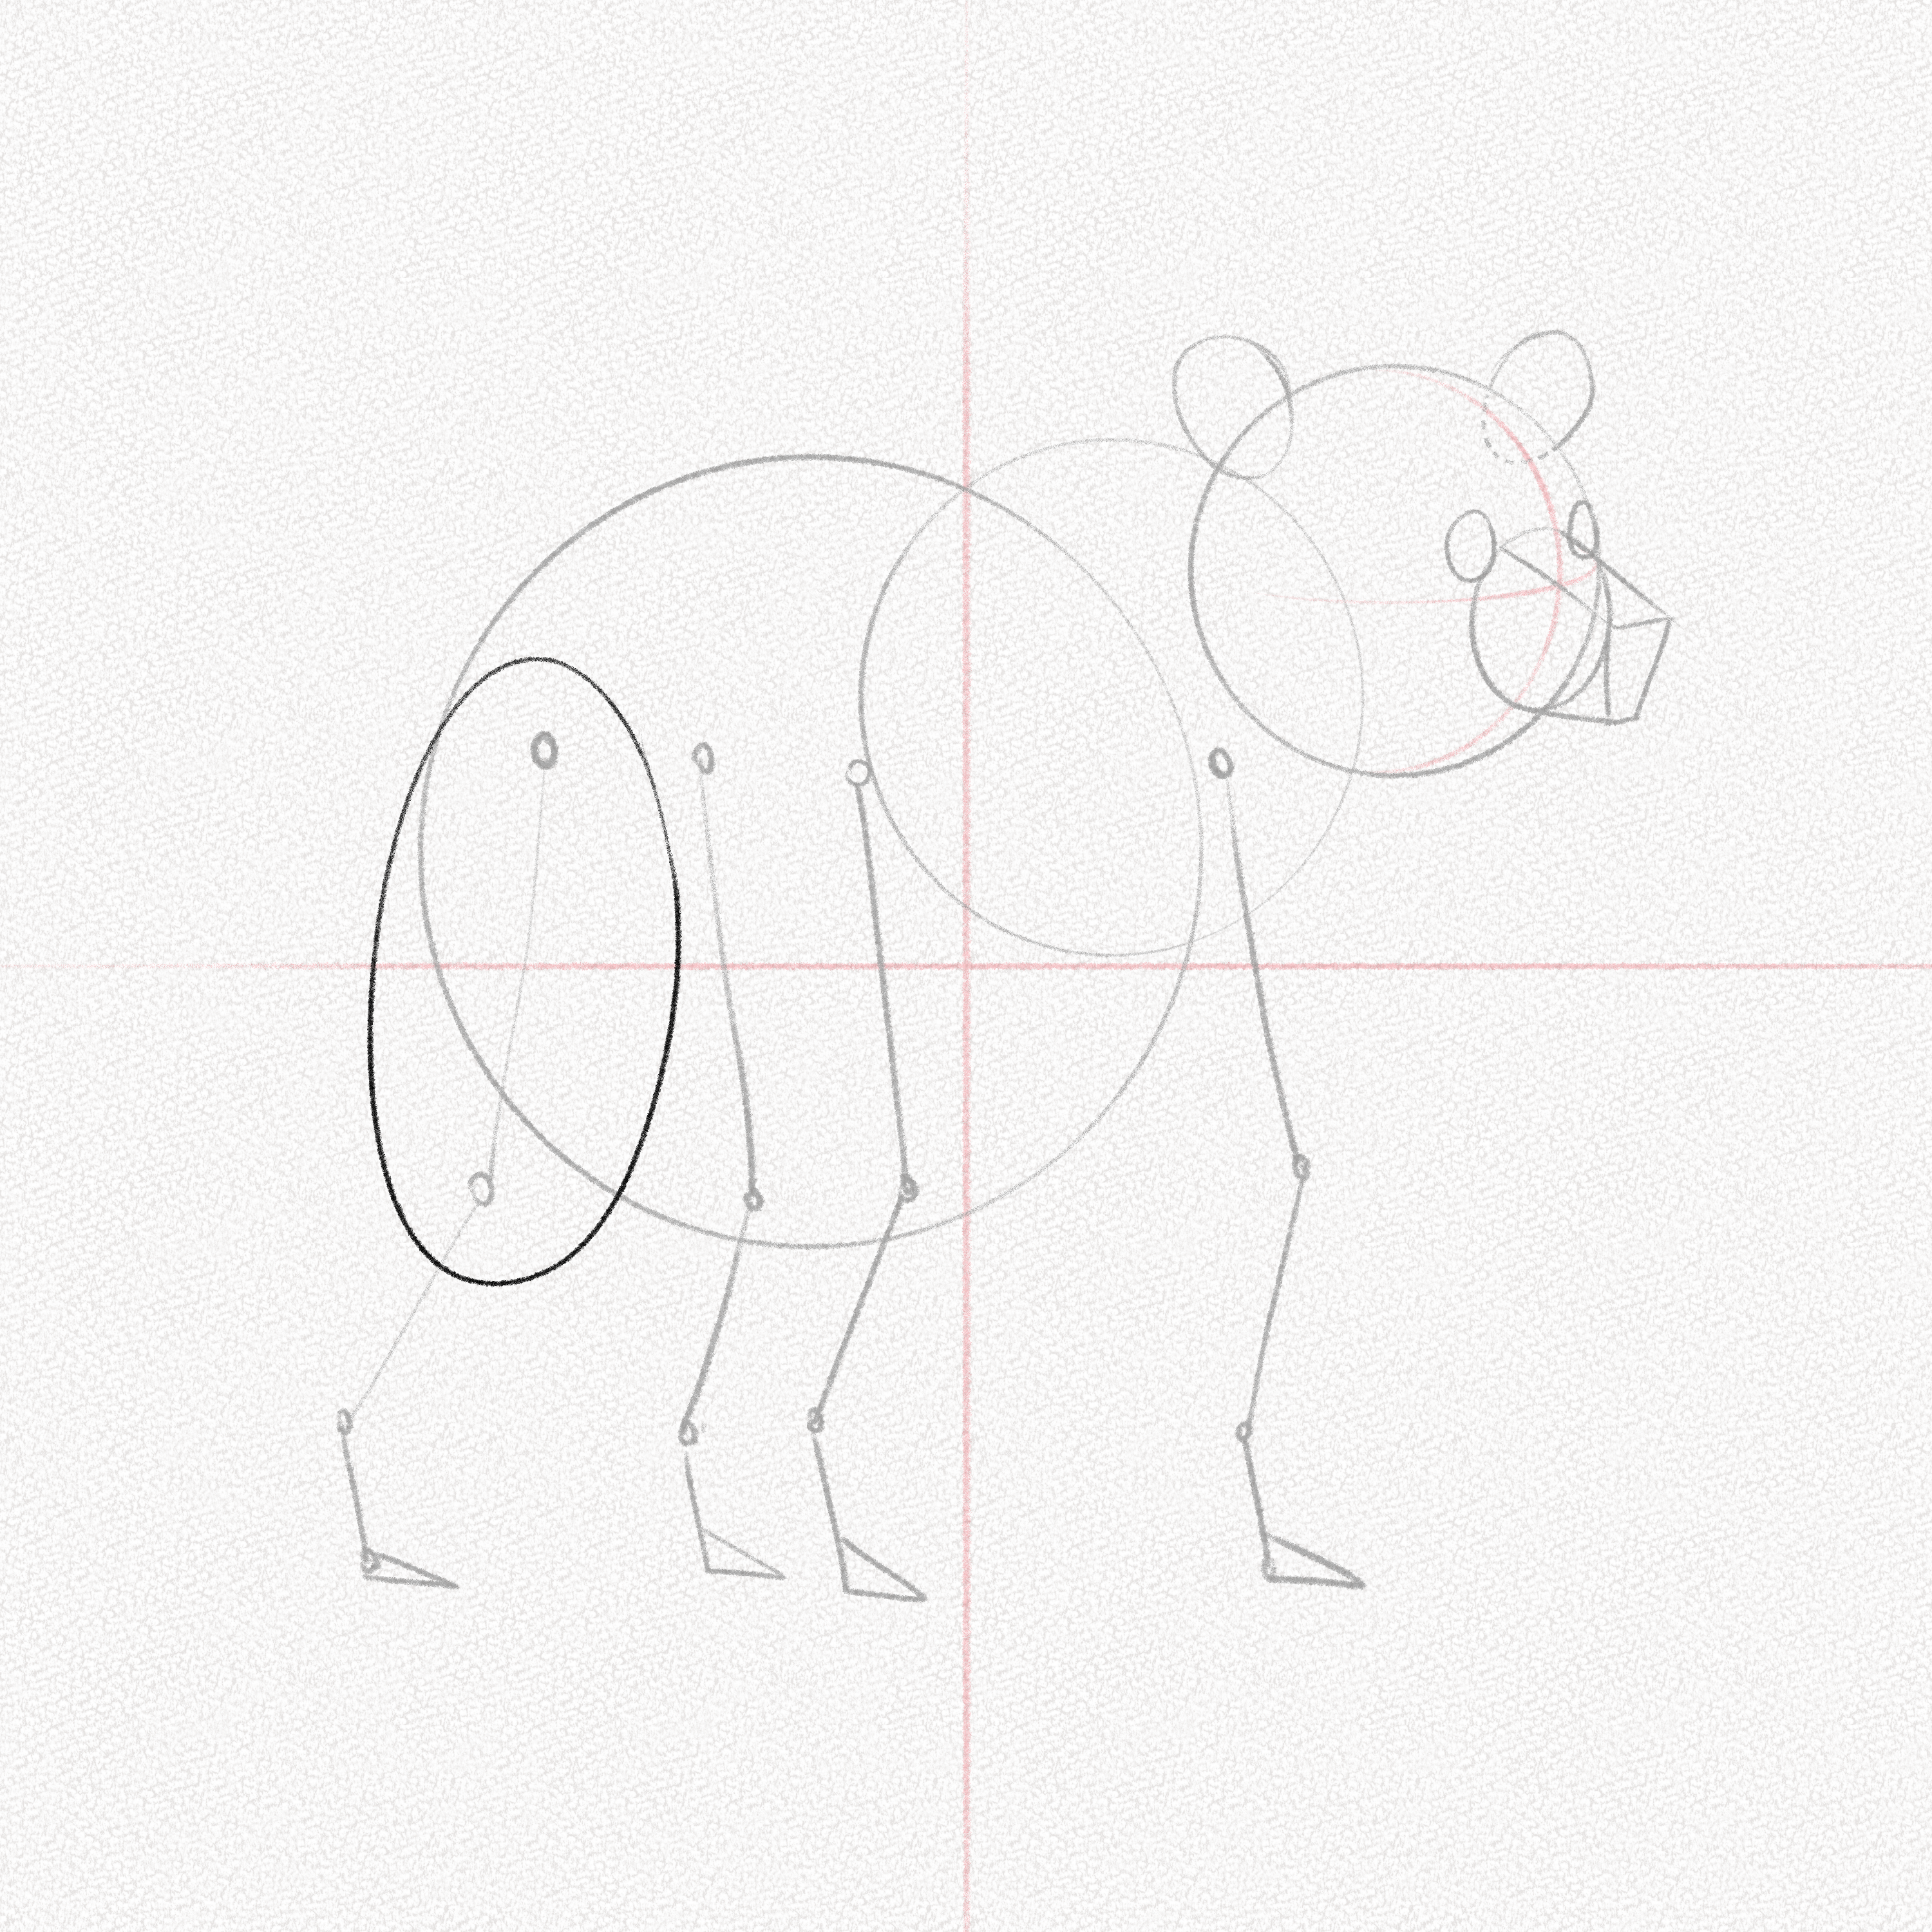
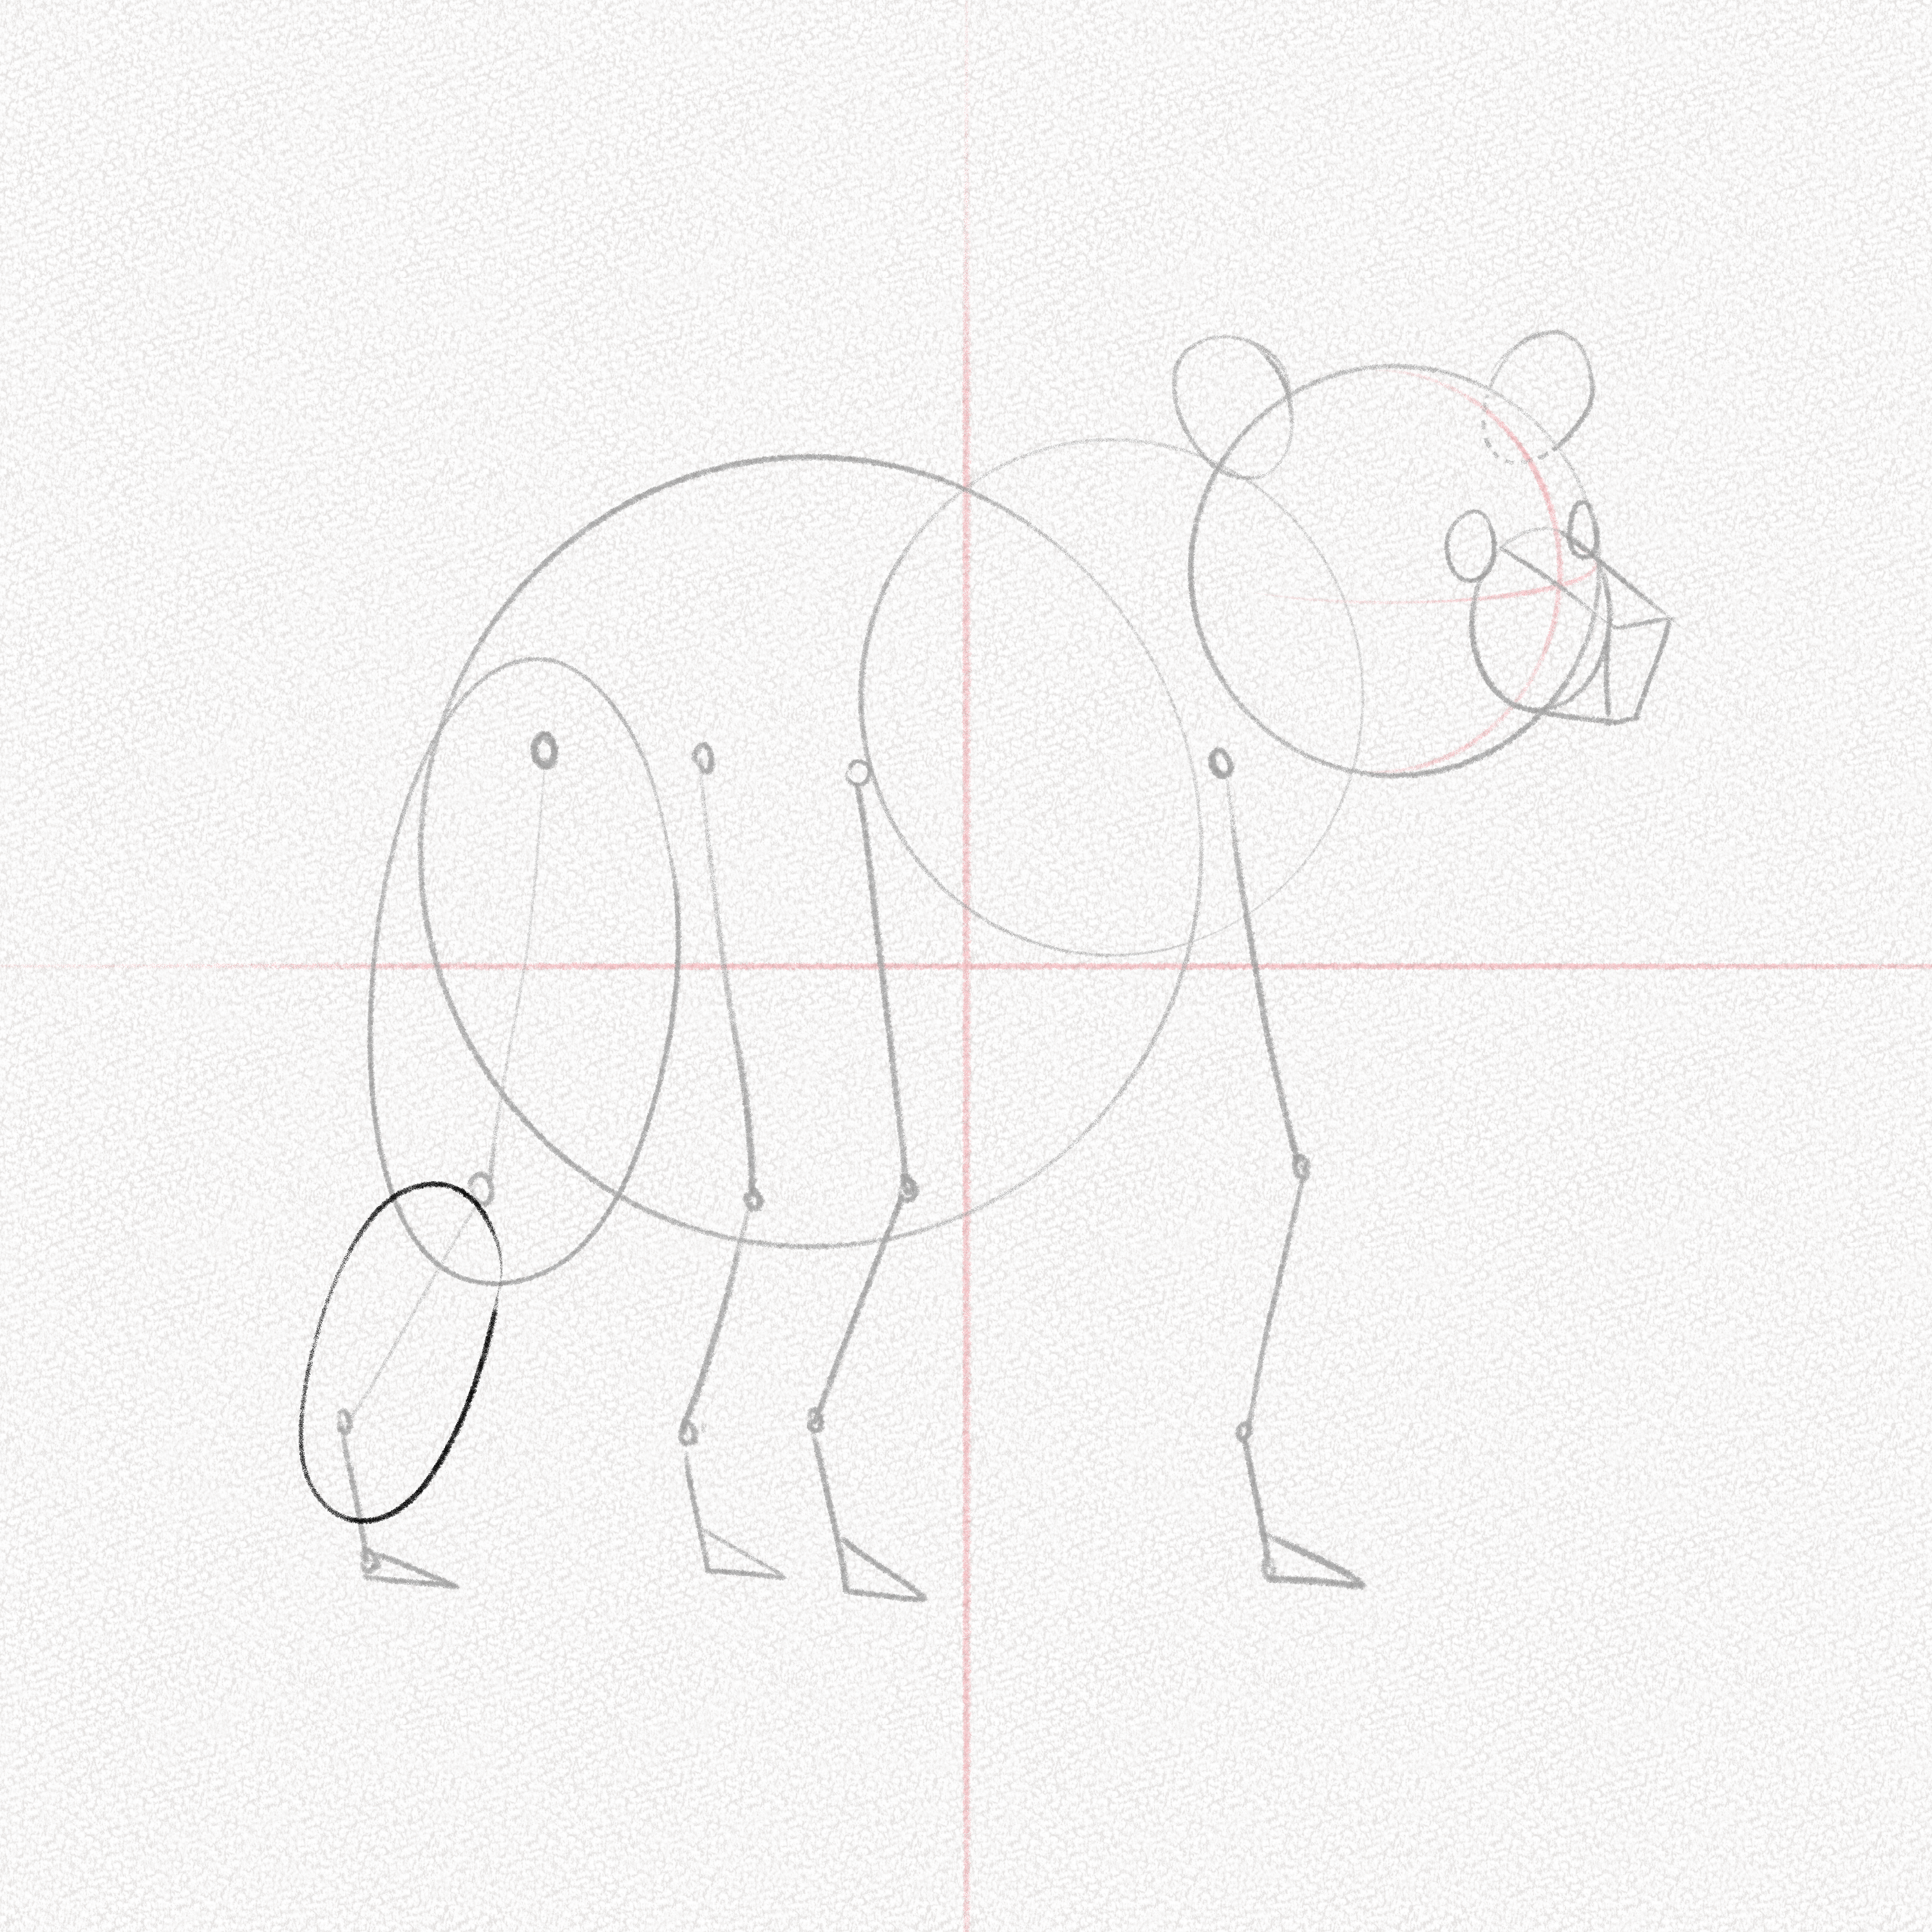
Draw a smaller oval for the lower part and a blob with four claws.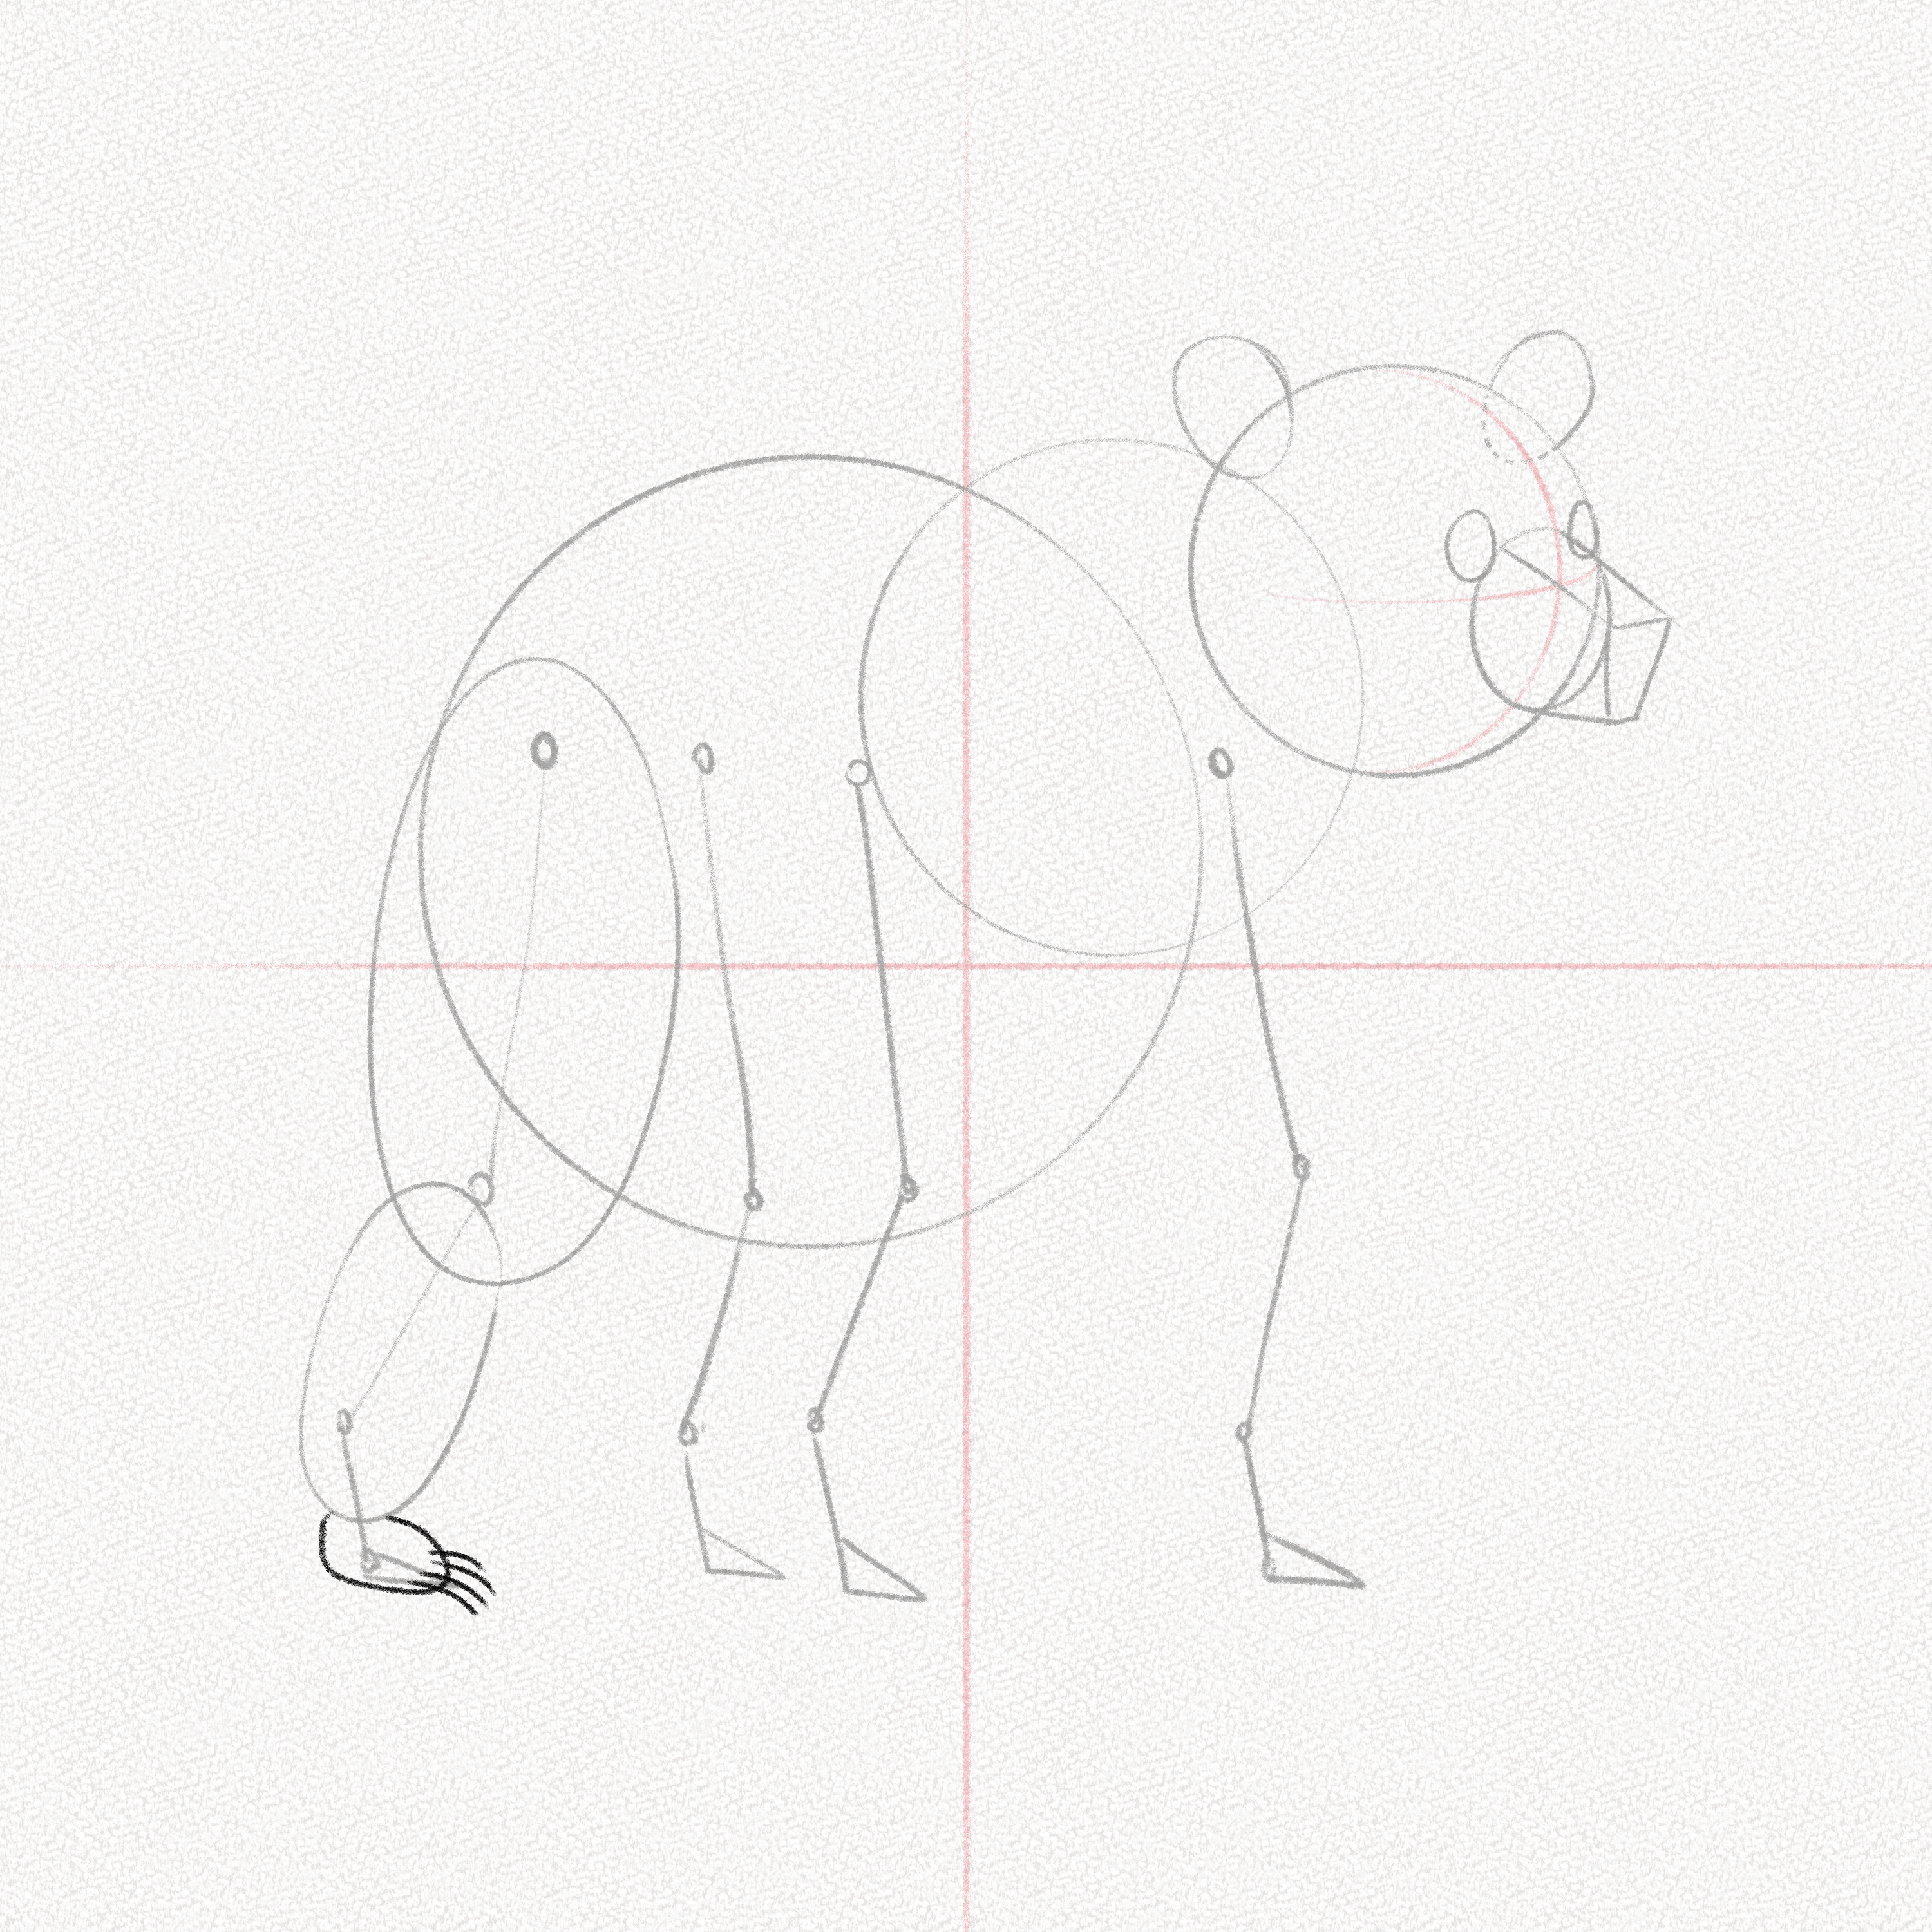
Repeat the same step for the other leg, keeping in mind some of it won’t be visible due to it being hidden by the bear’s body.
Step 11: Repeat
Repeat the steps above for the front legs.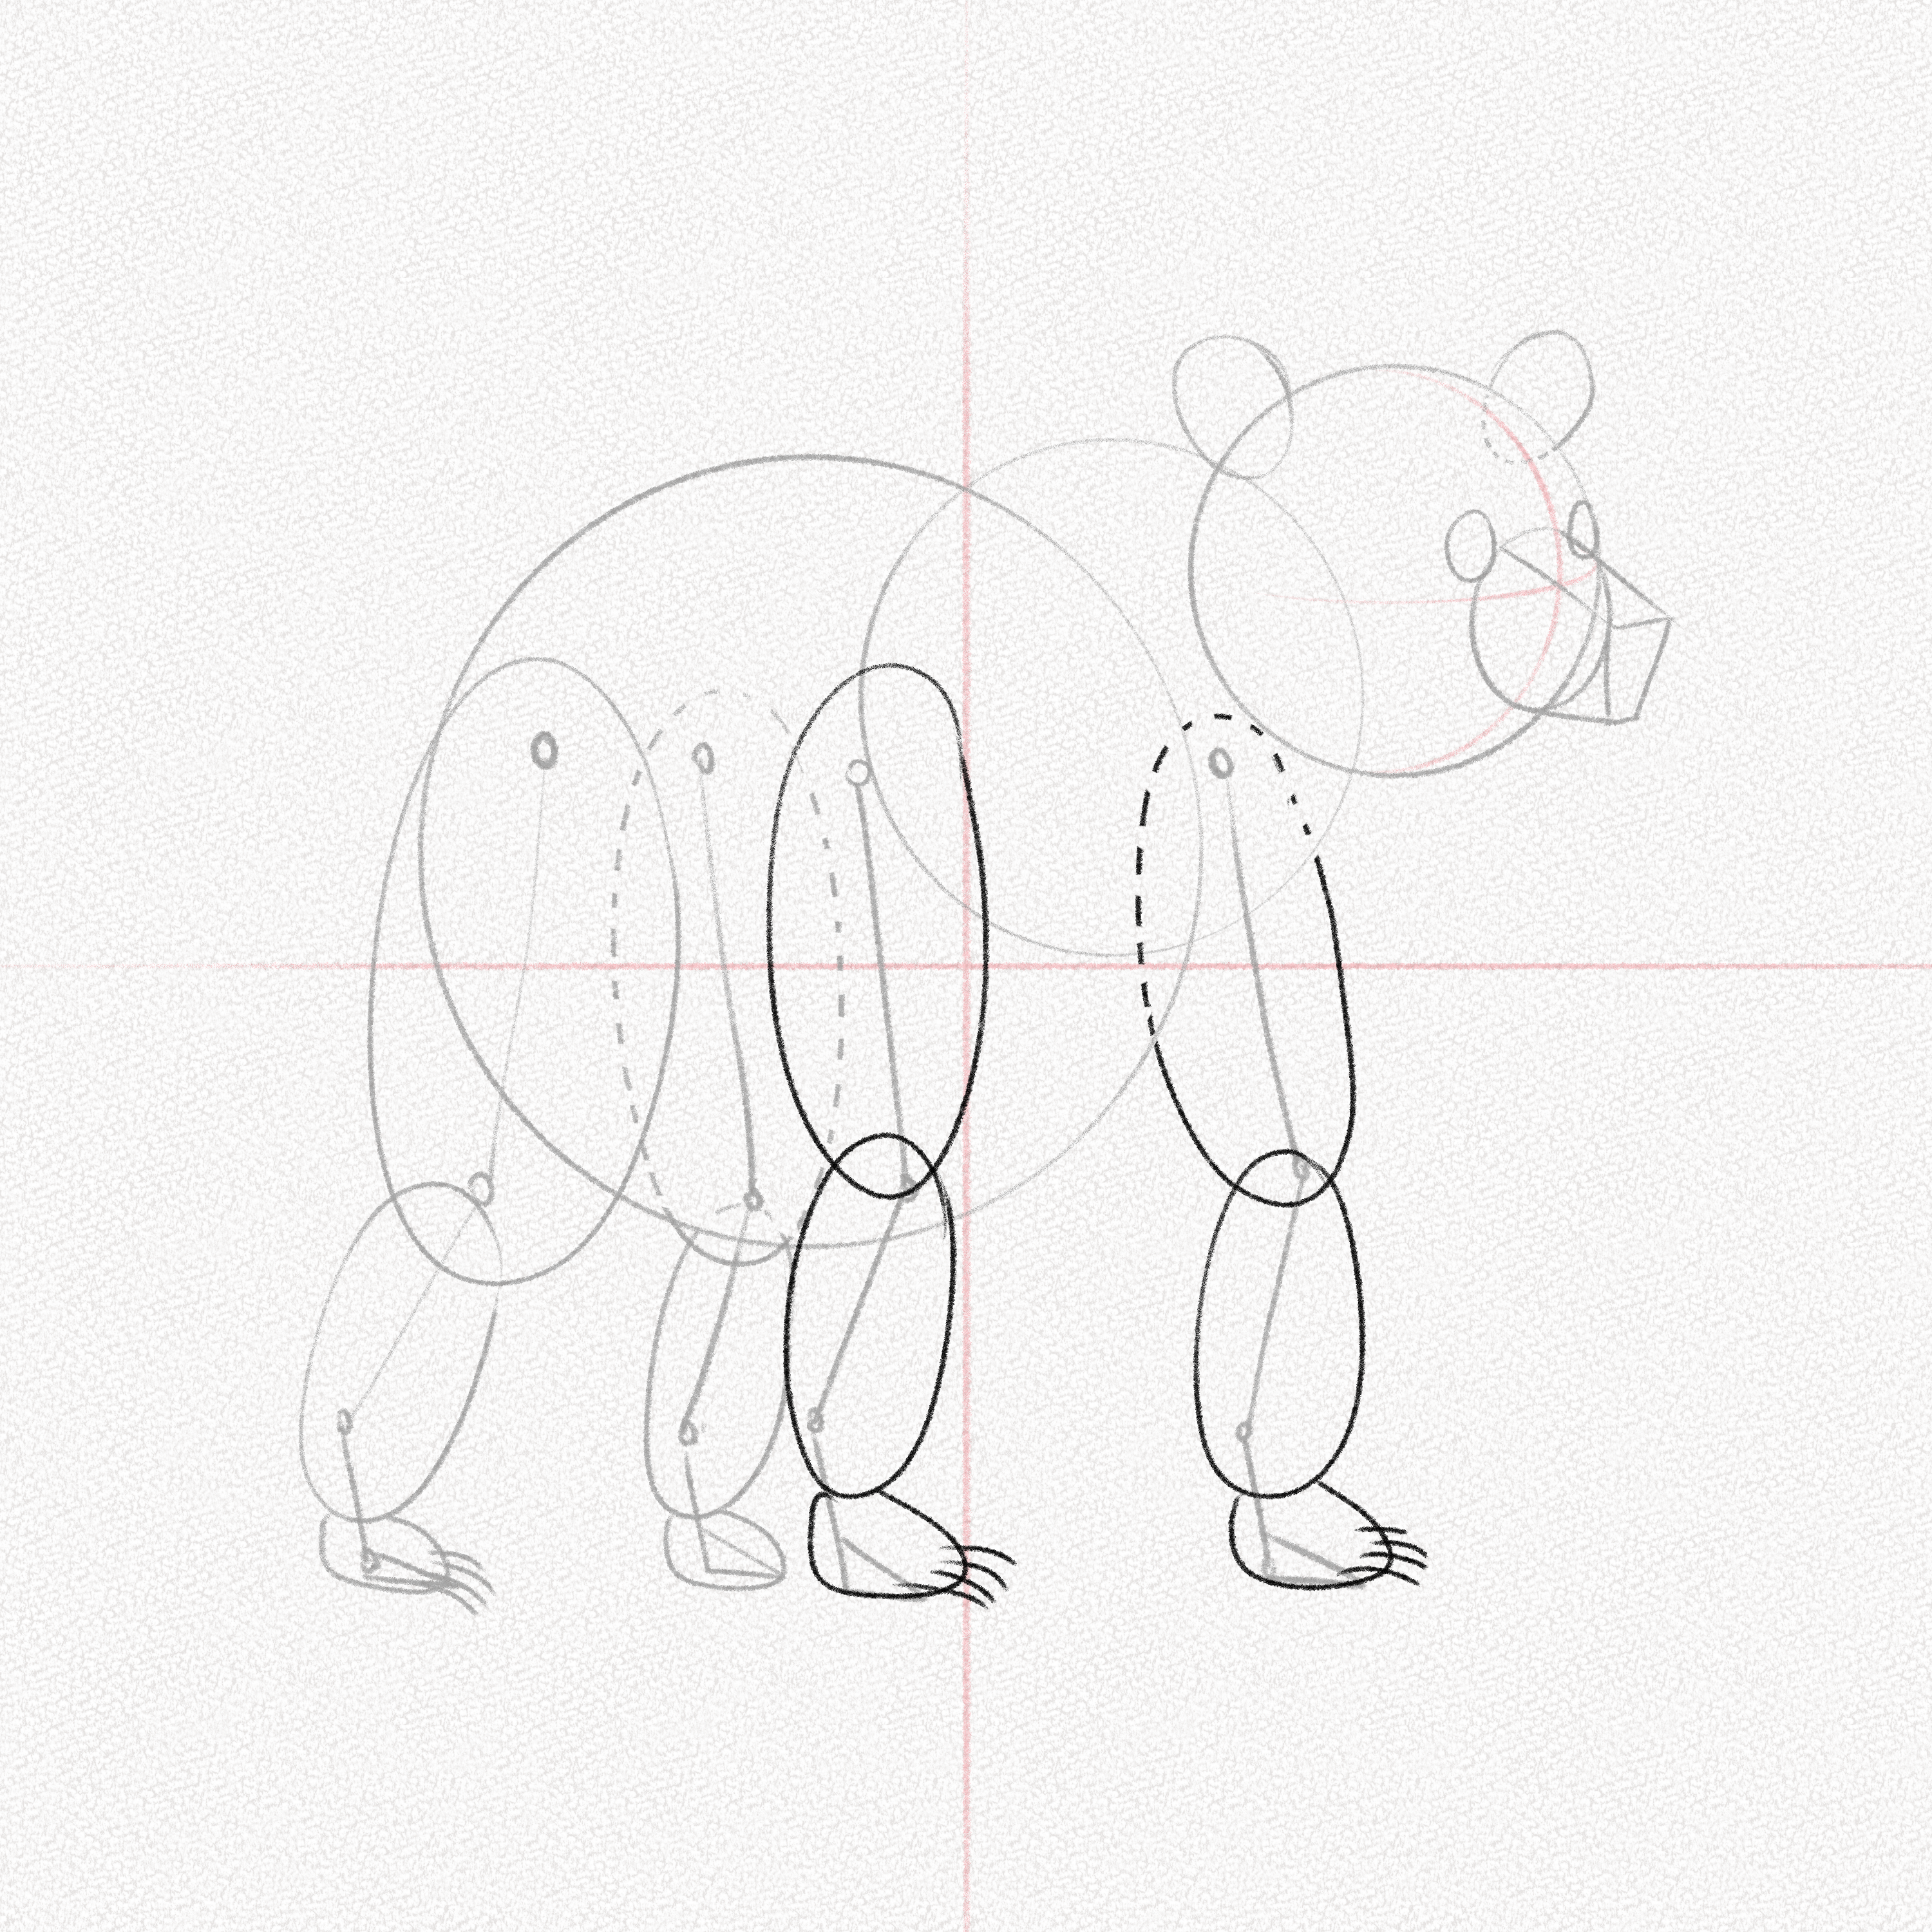
Step 12: Outline the bear
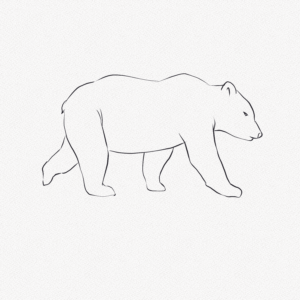
Erase your guidelines and using the structure we’ve built, softly outline your bear. 
Step 13: Draw the nose
Follow the diagram below to draw the bear’s nose. Start with a bean-like shape and build into it.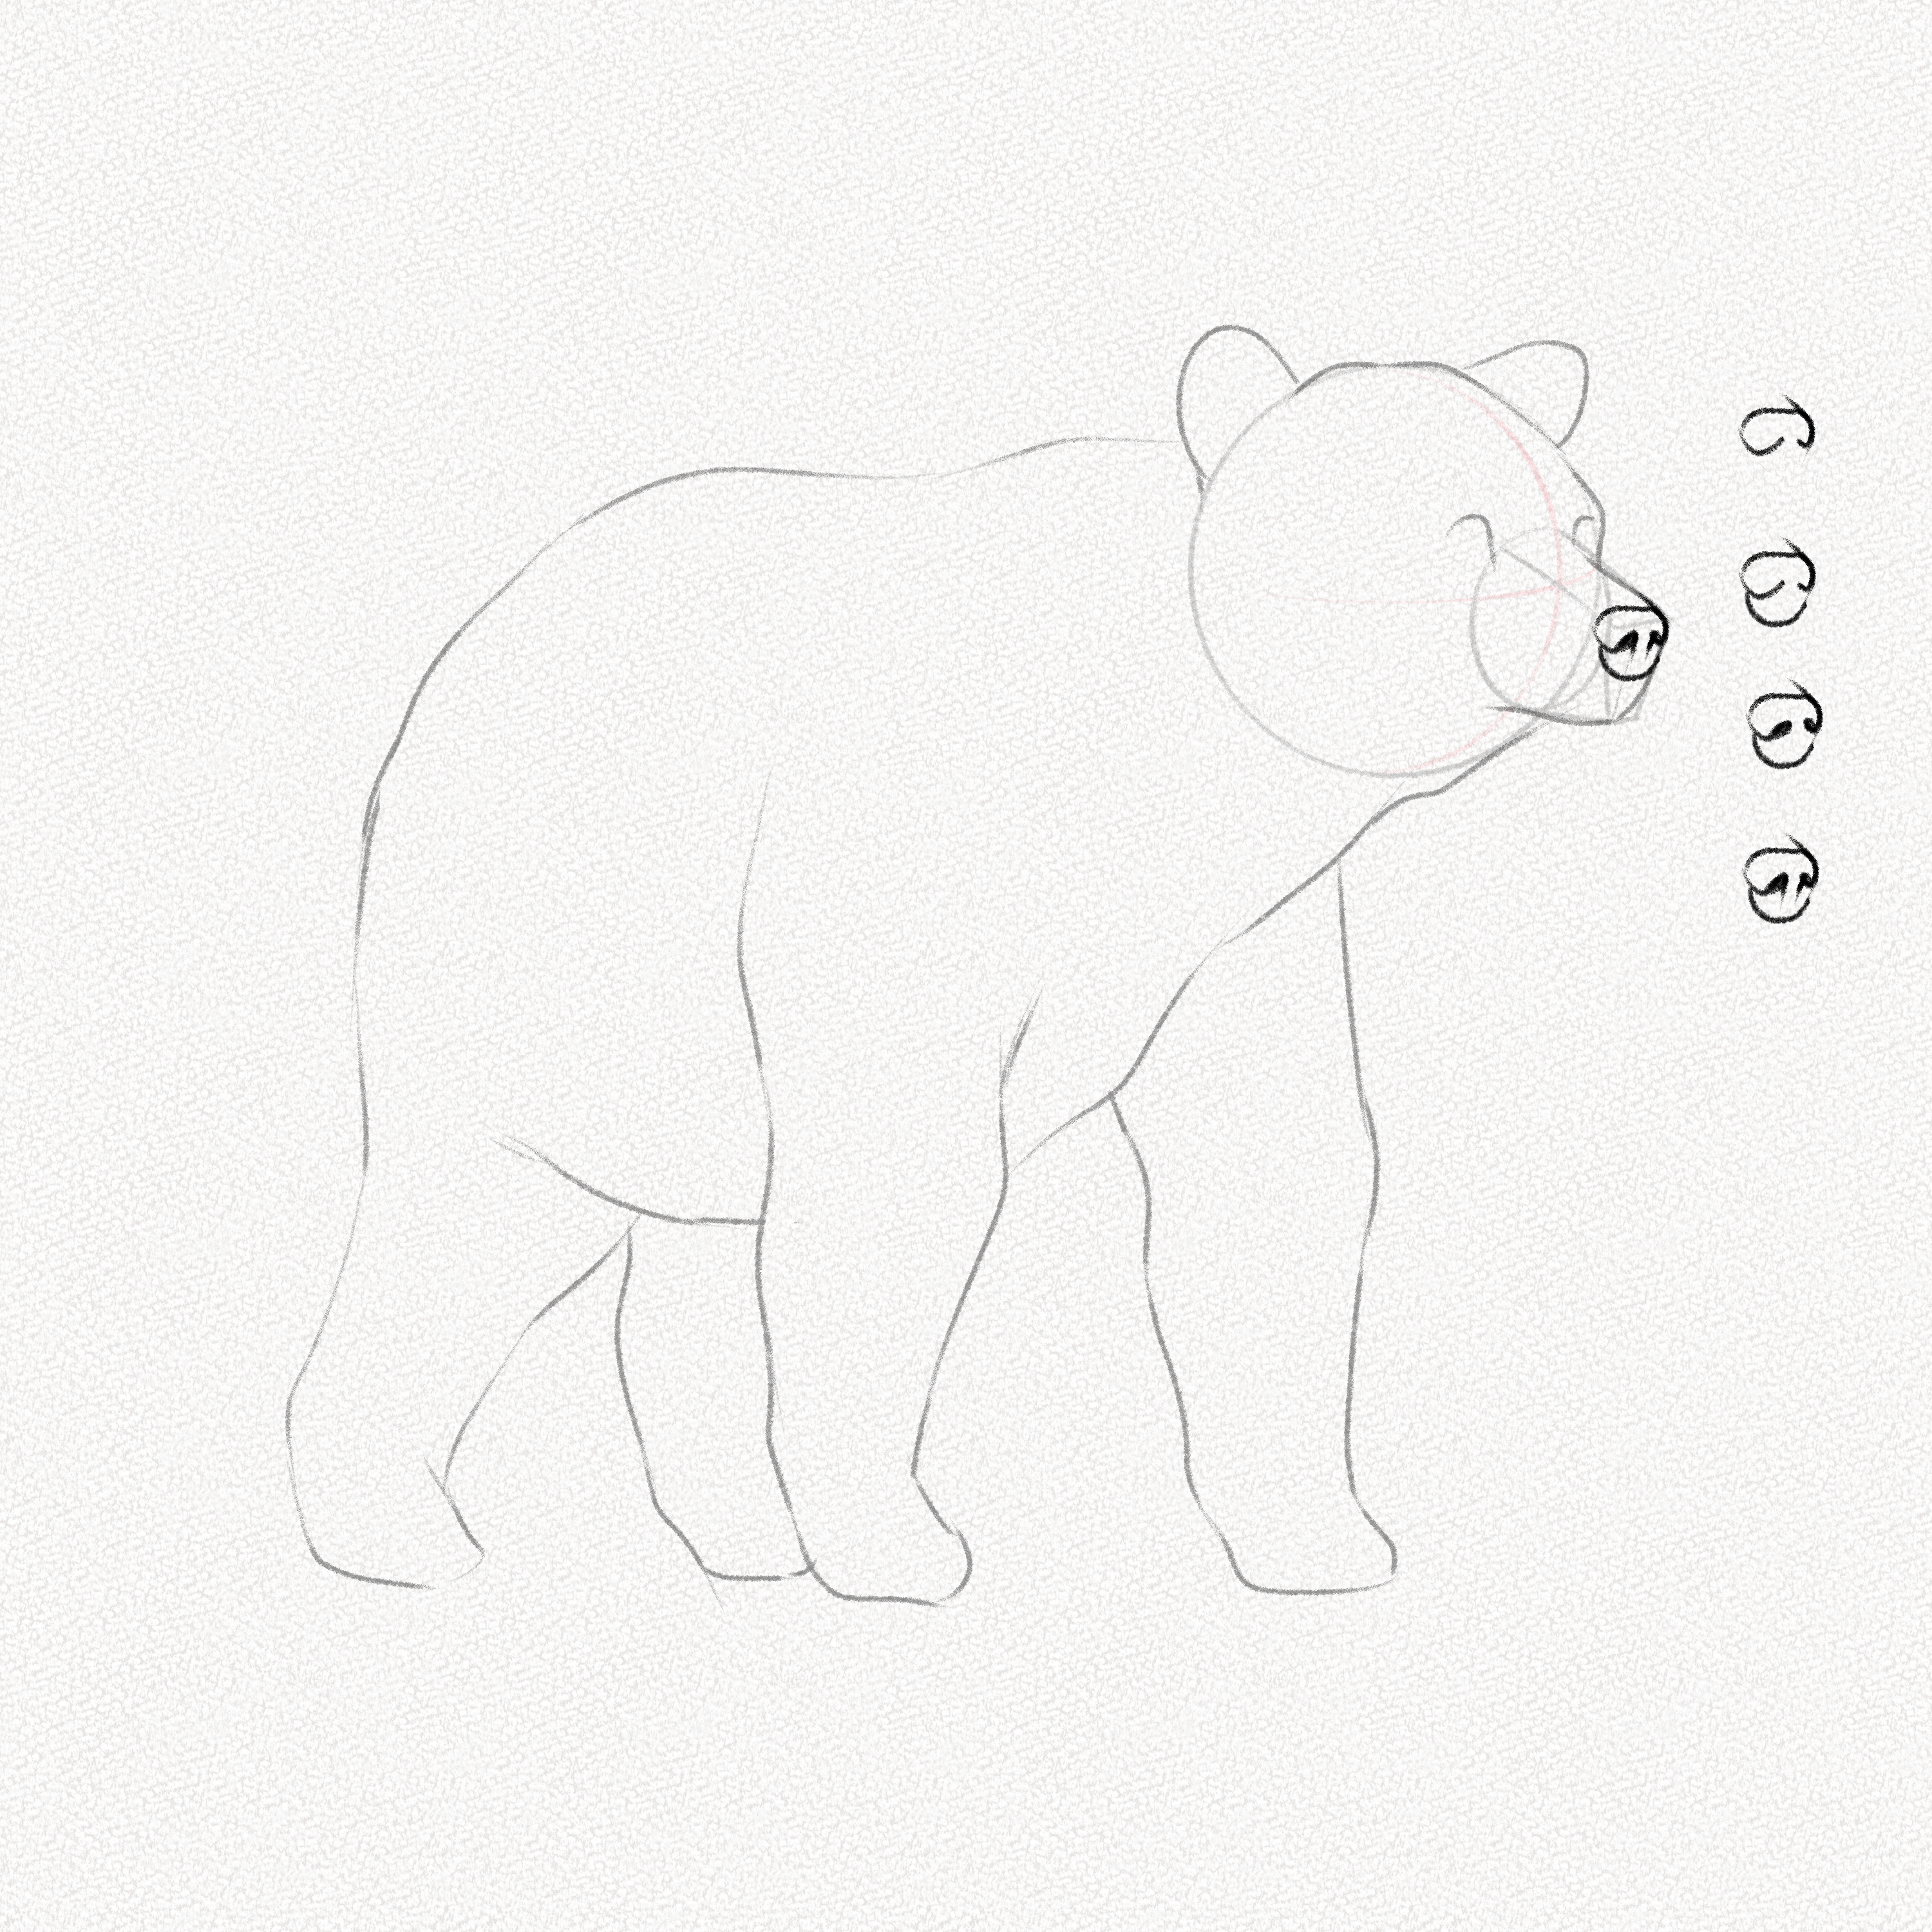
Step 14: Draw the mouth
Draw the bear’s mouth slightly above the muzzle base.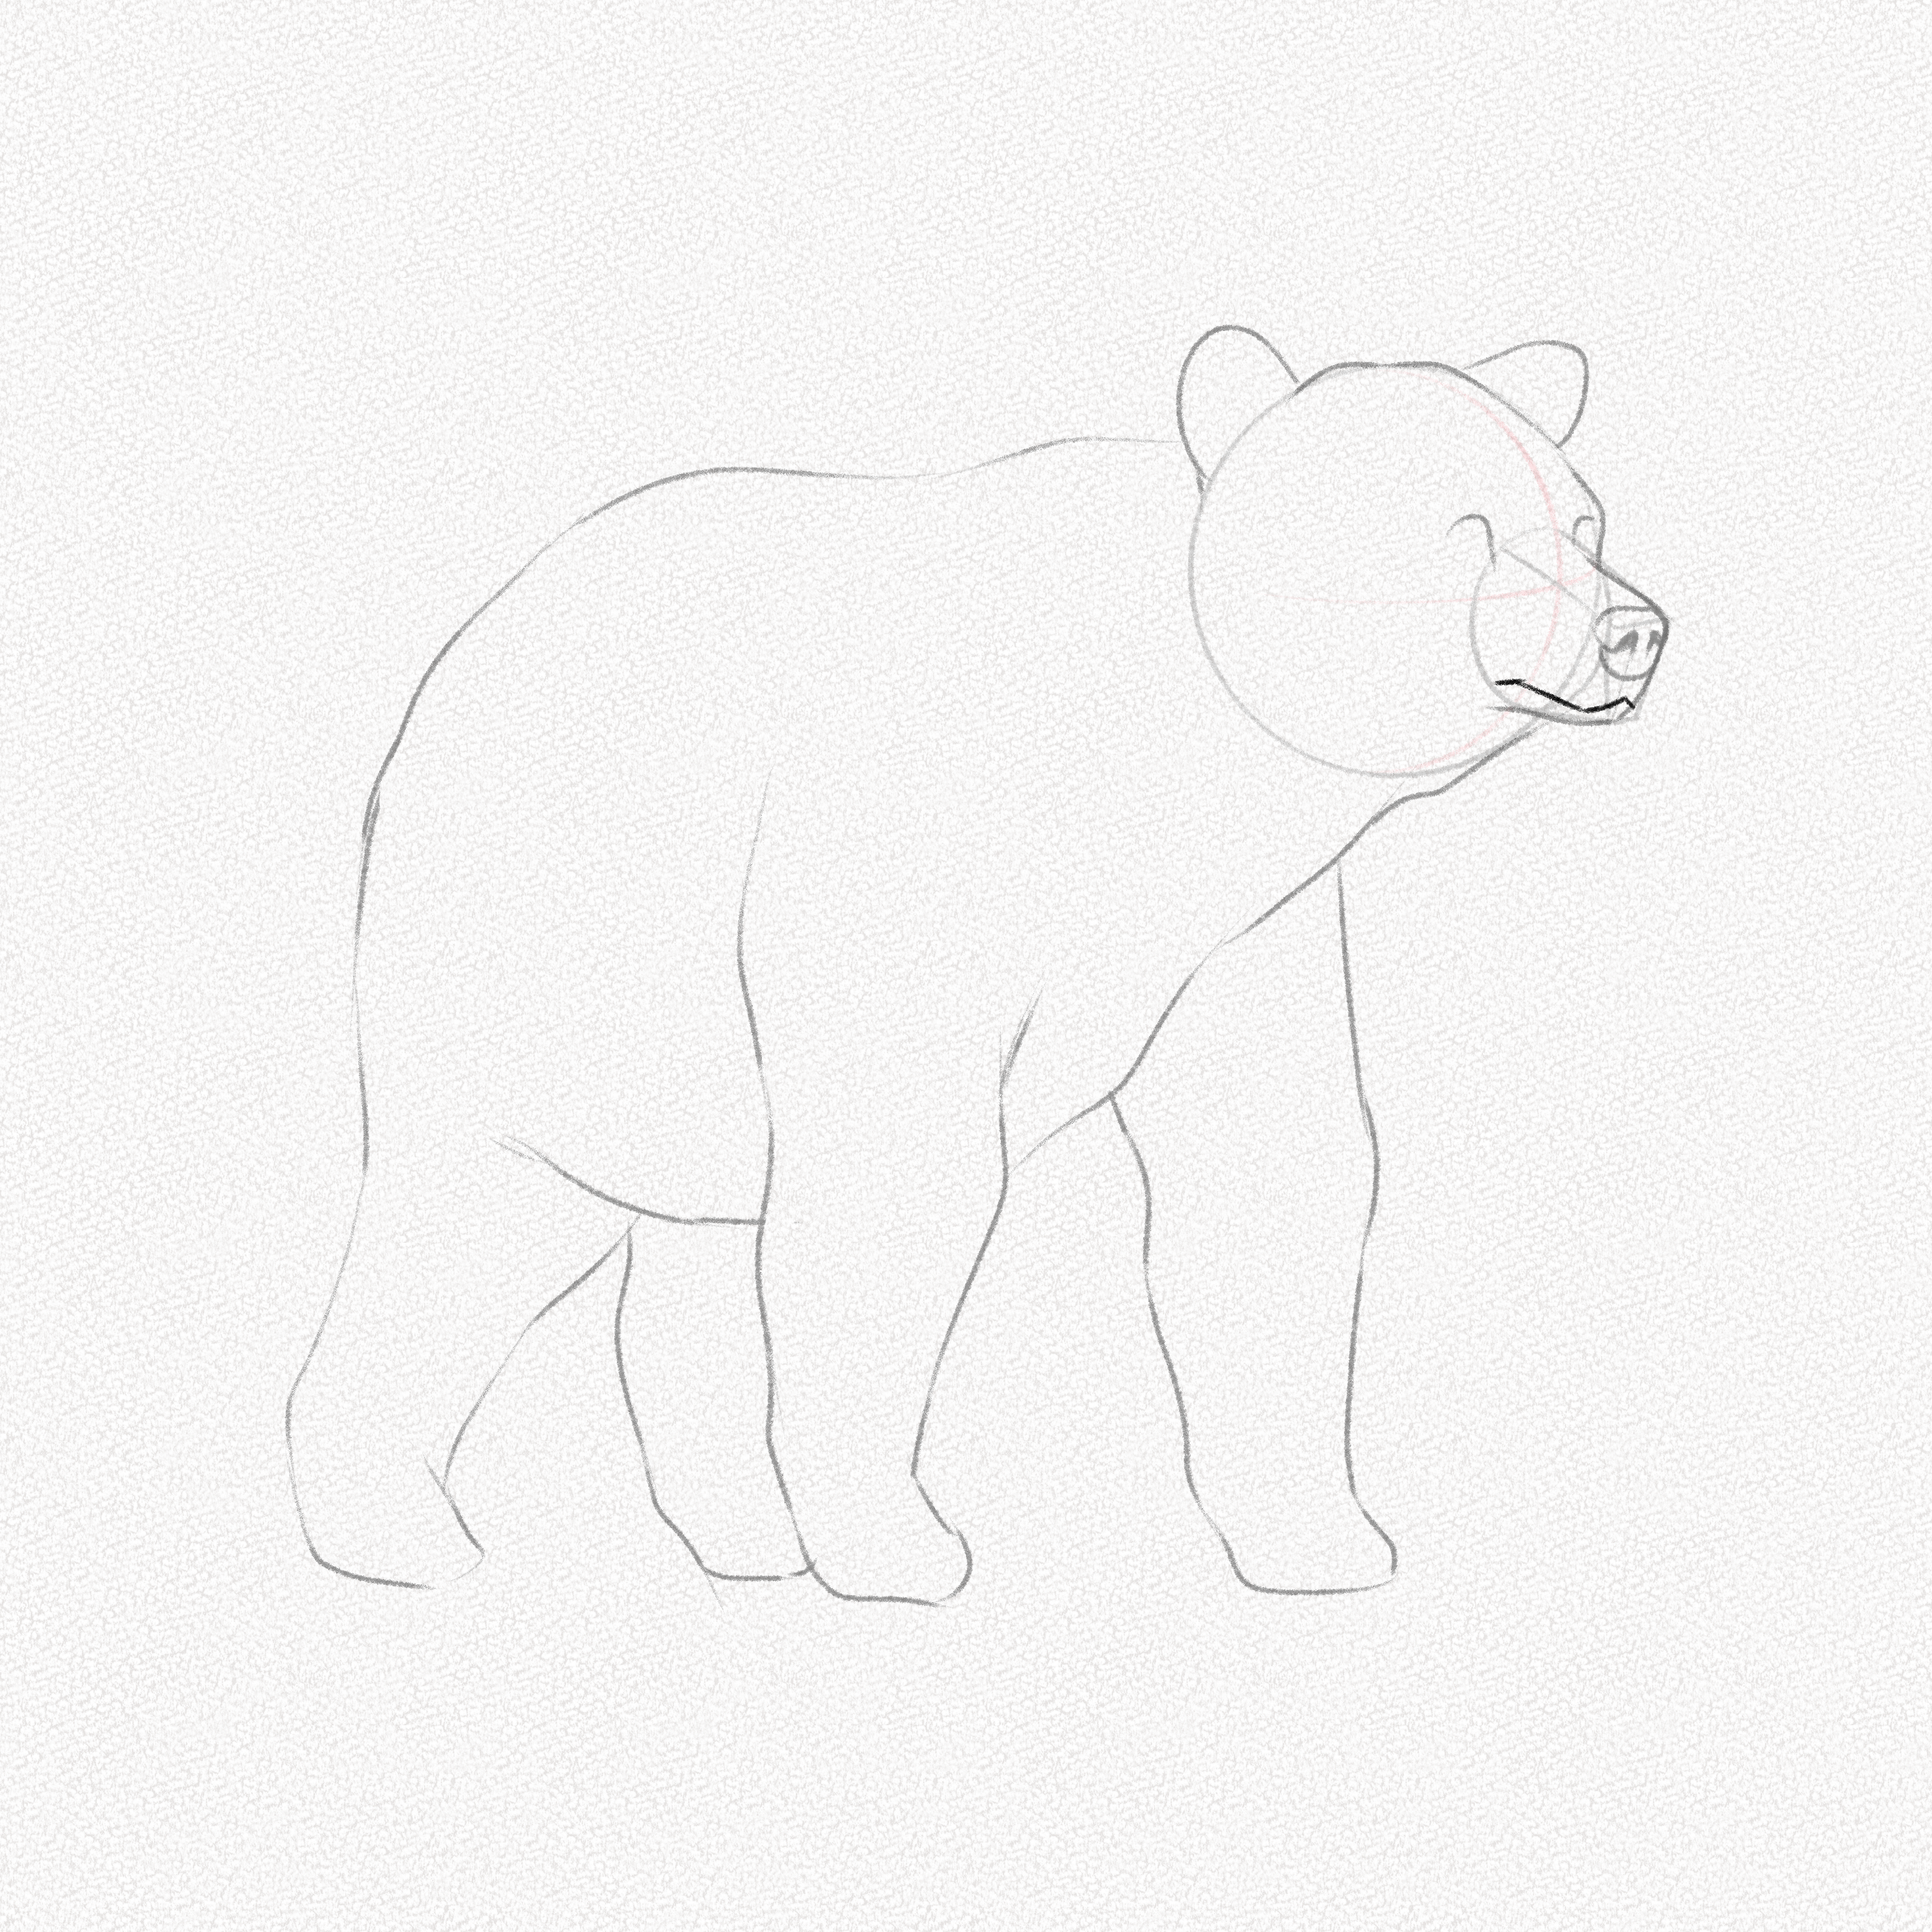
Step 15: Draw the eyes
Erase the remaining guidelines and draw the eyes of your bear. Start with two small circles, add the eyelids, and then some fur around. Fill the eyes with graphite leaving a blank area for the highlights.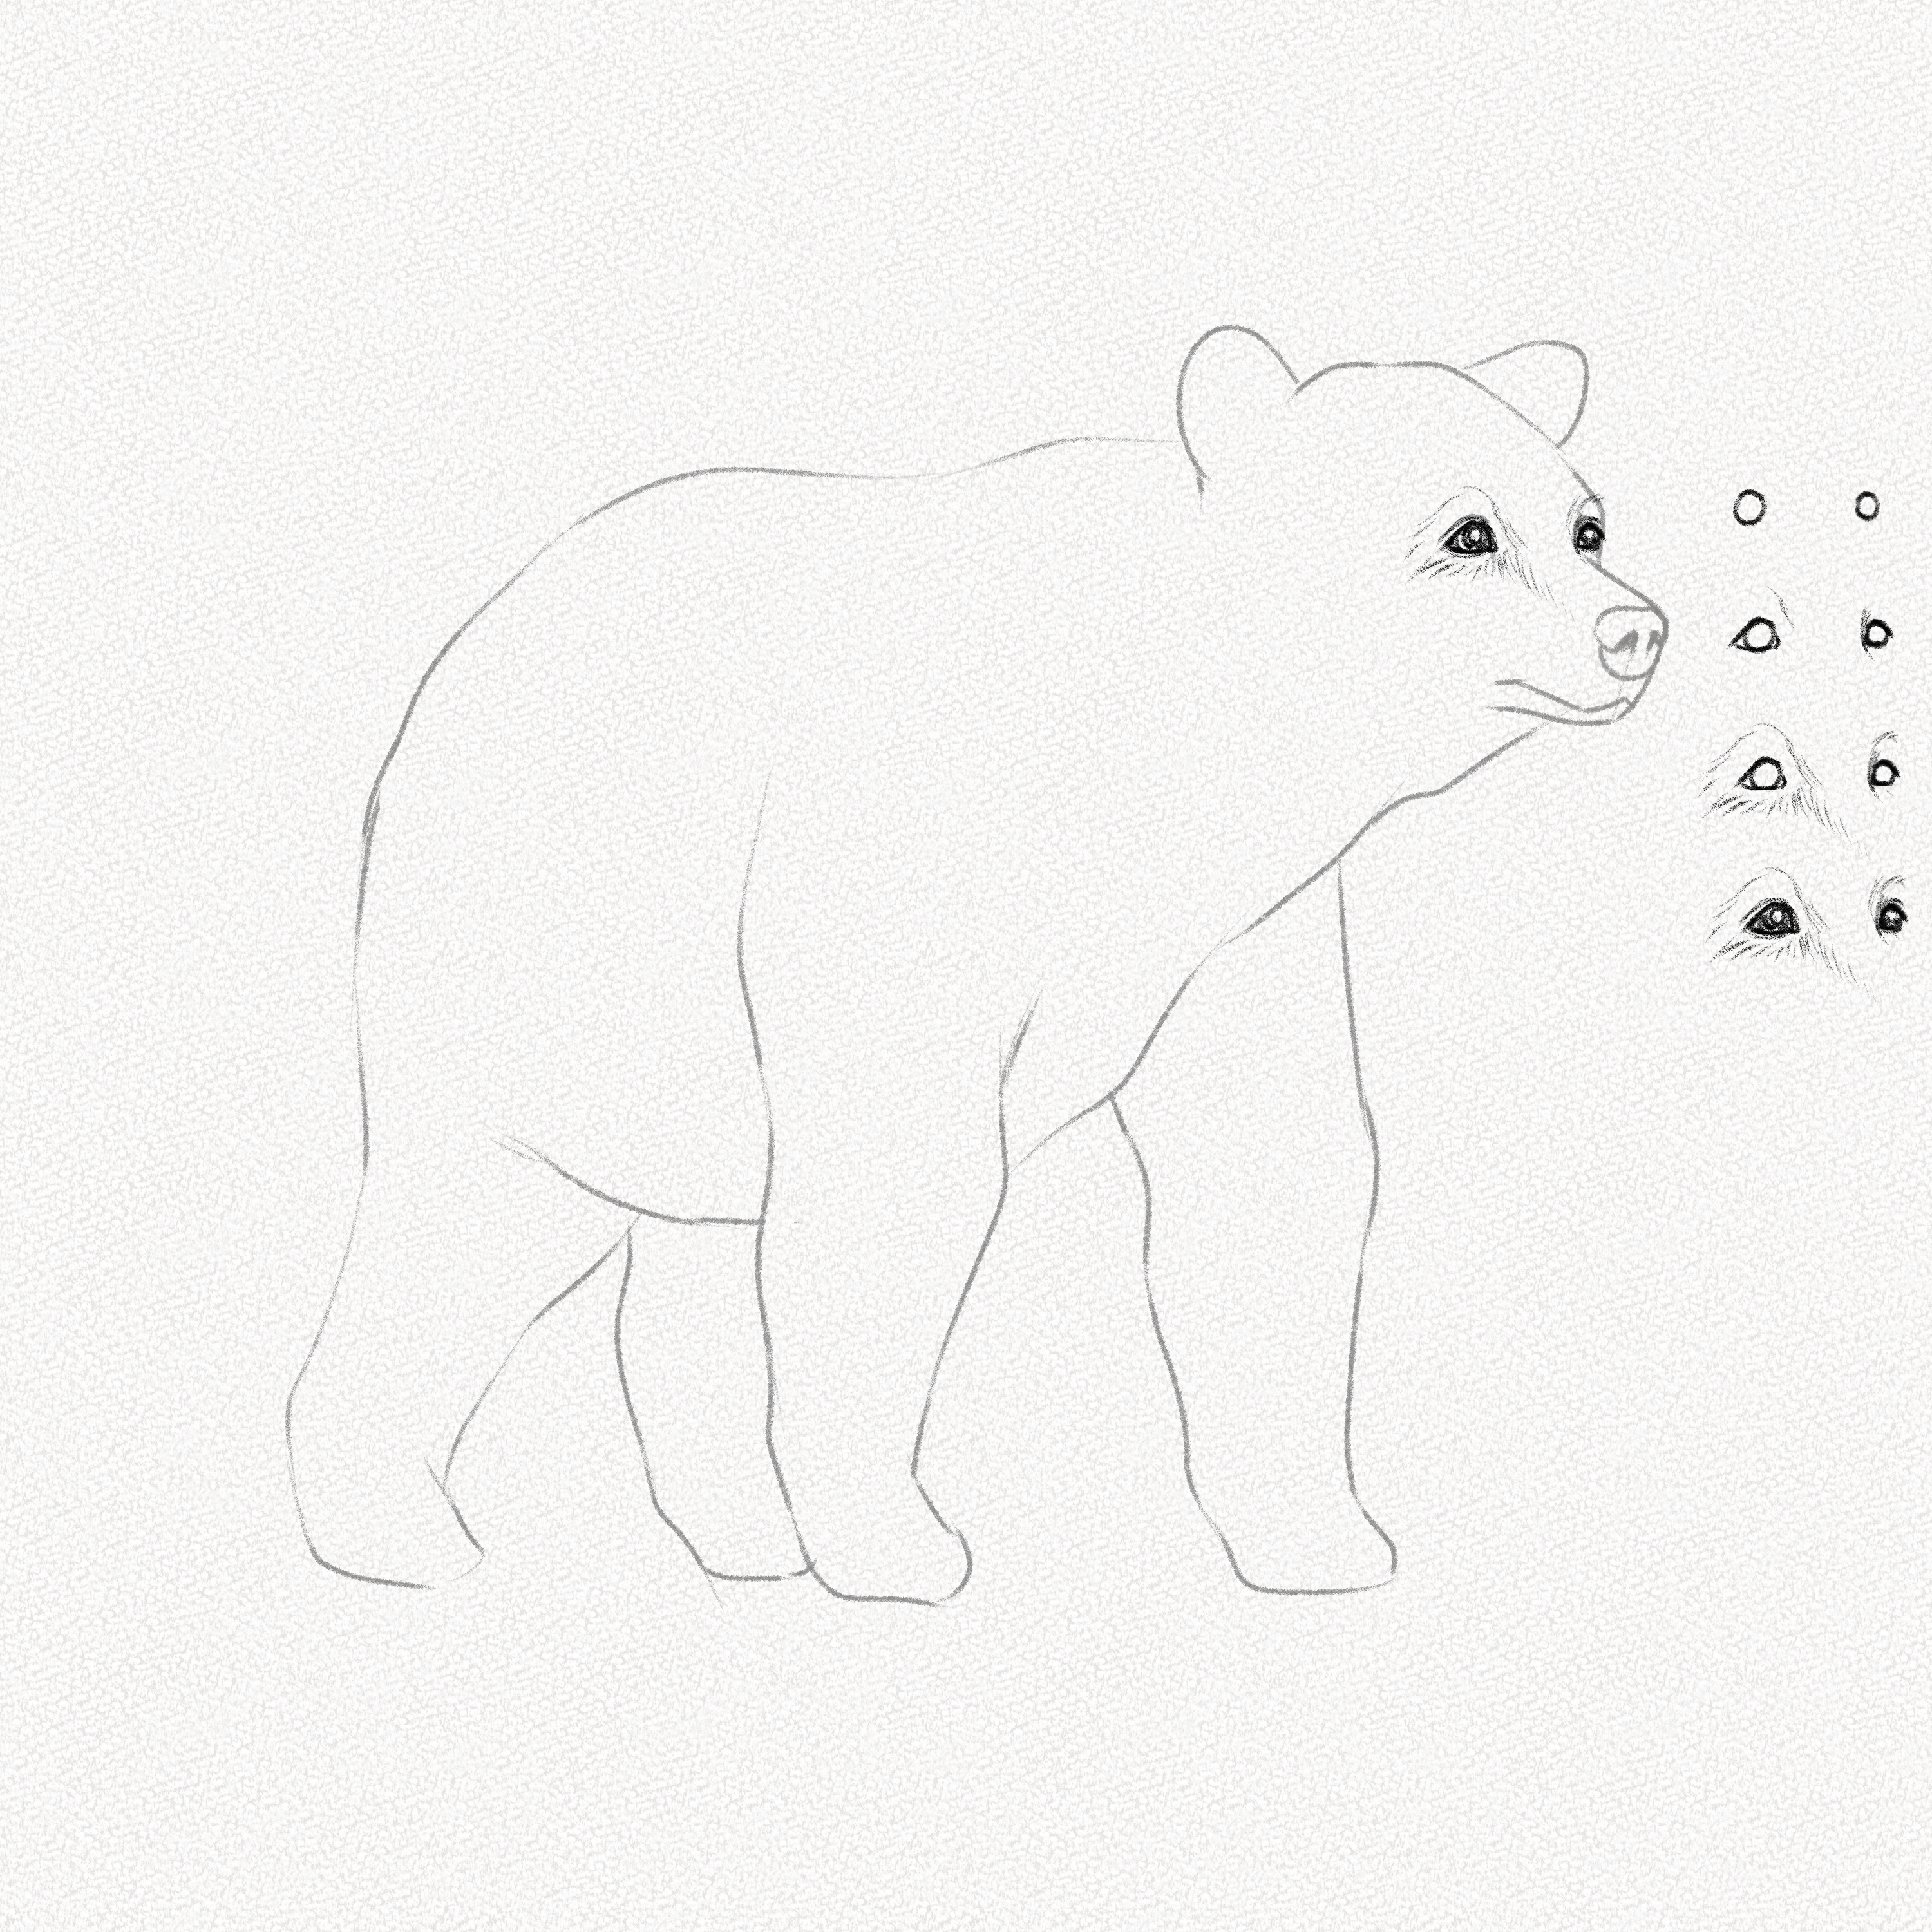
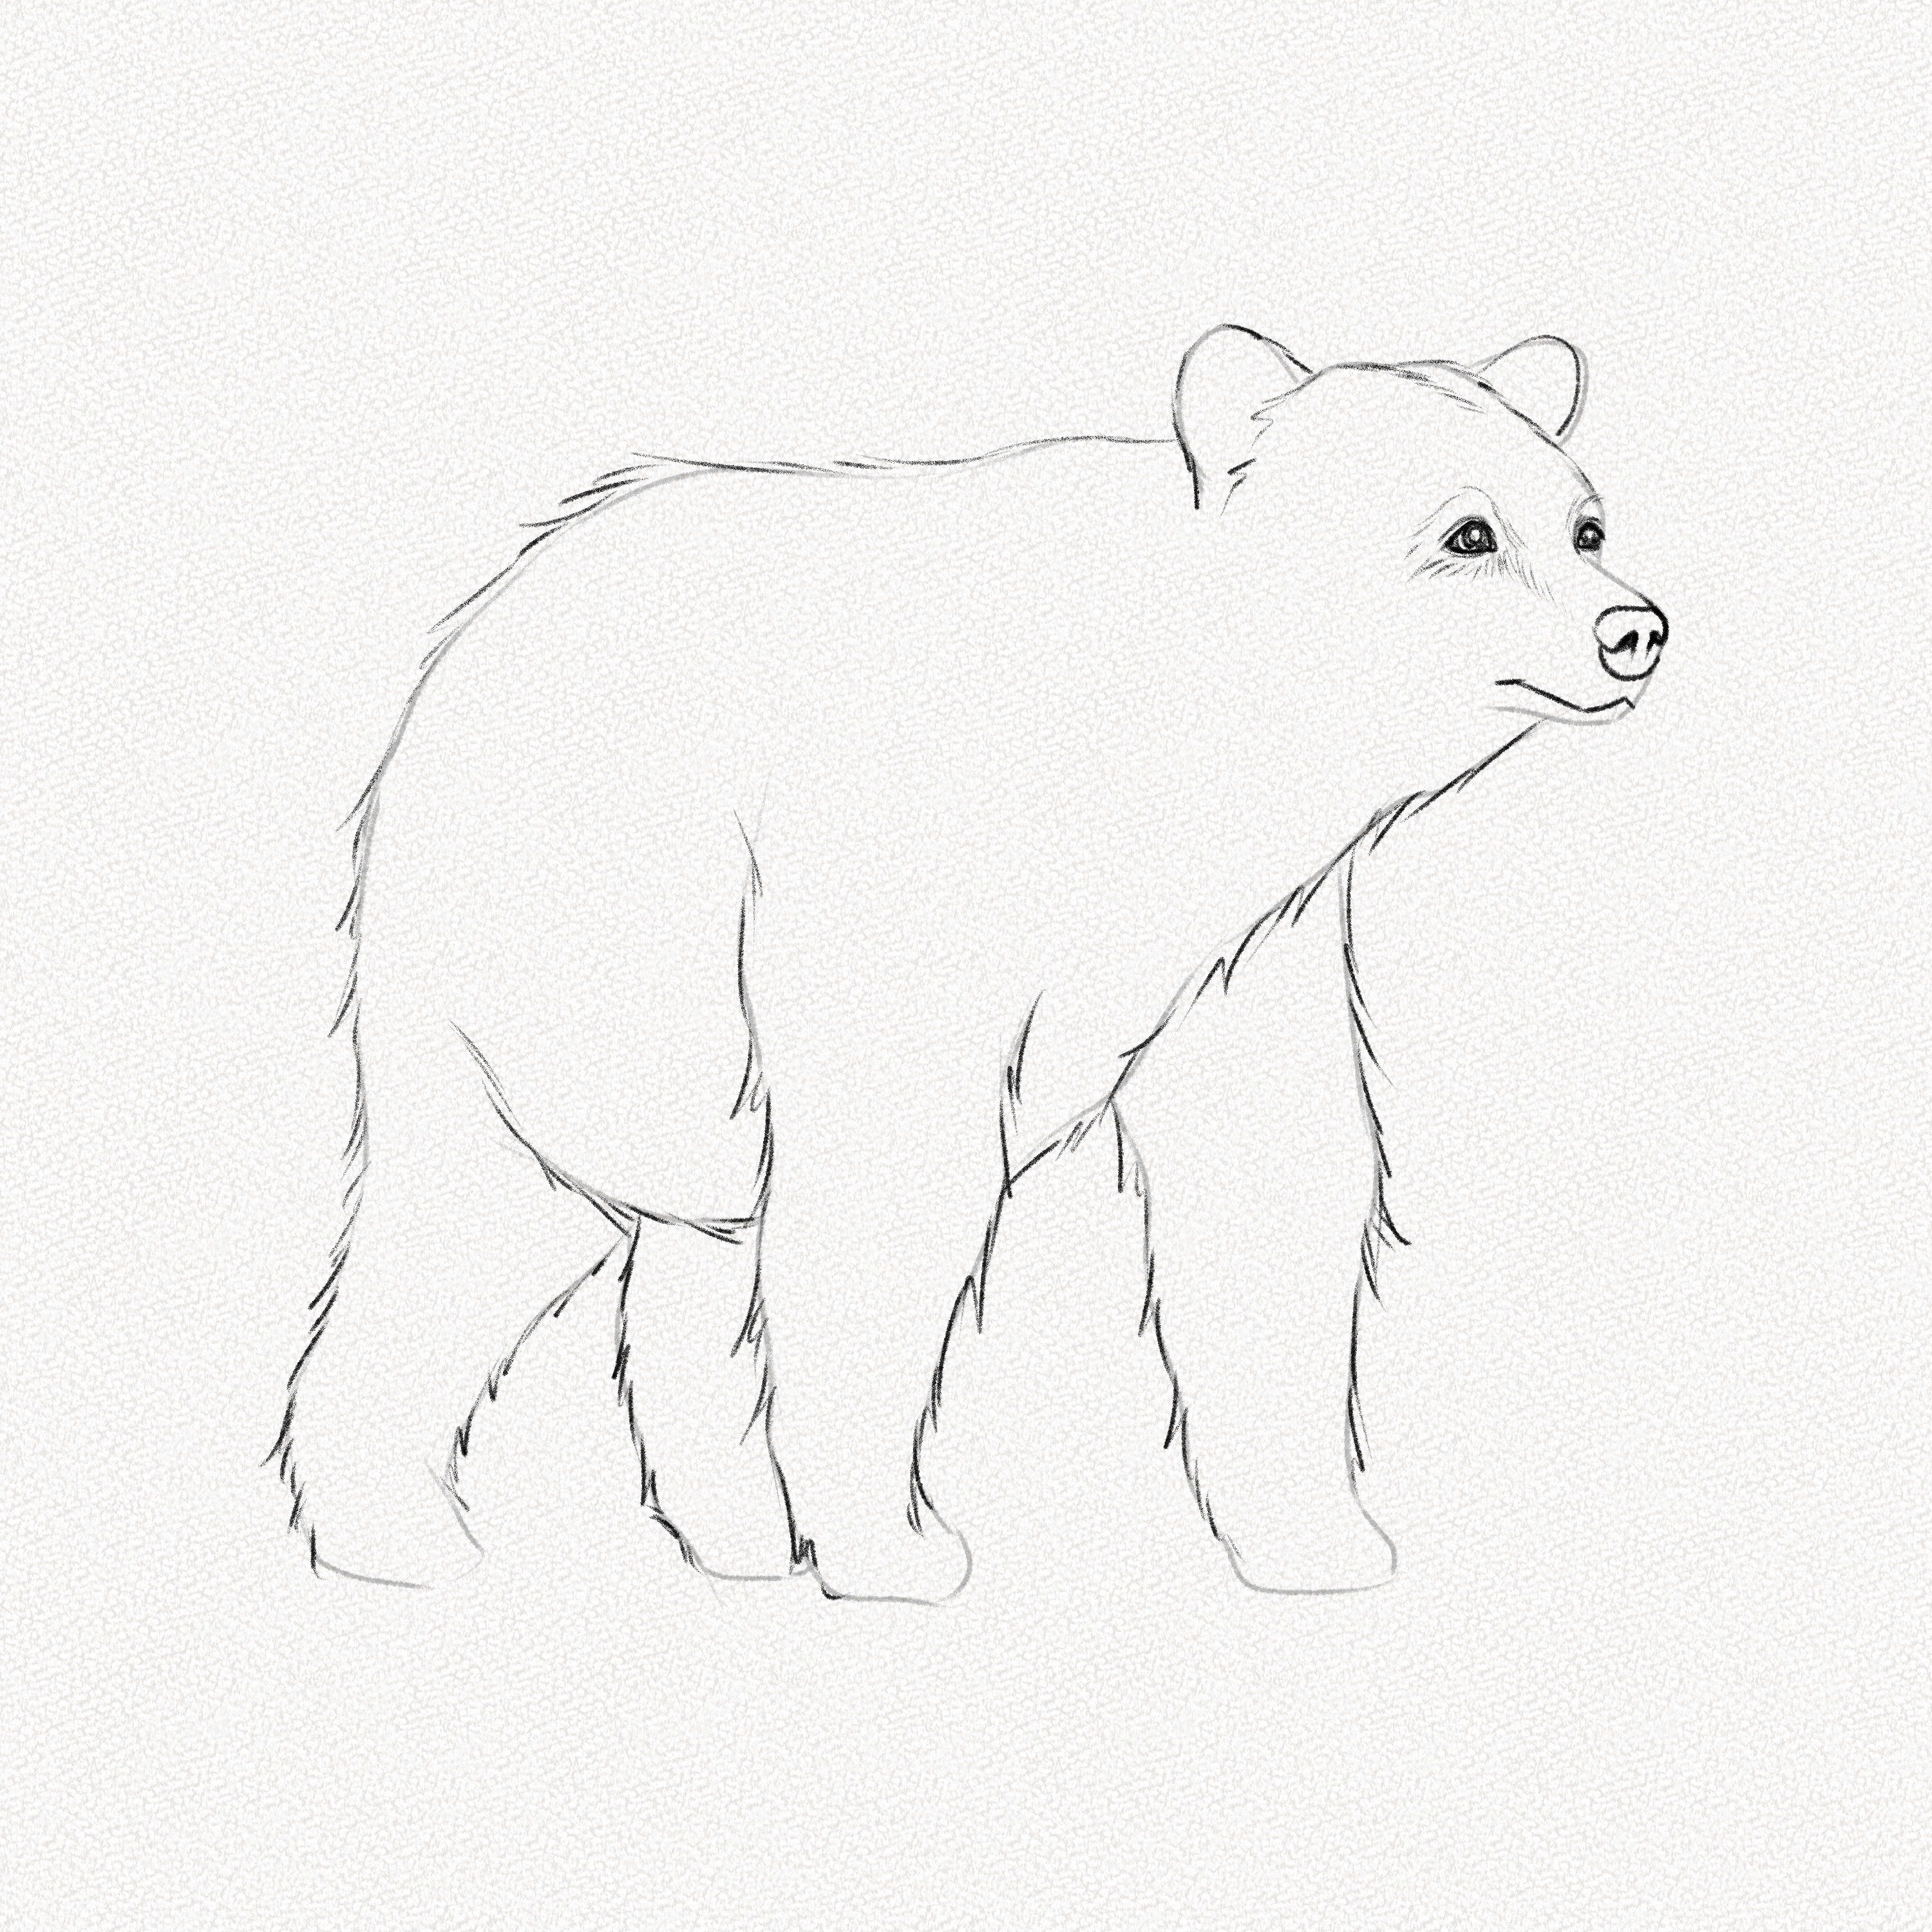
Step 16: Draw the fur
Using the outline we drew in Step 12, add fur to the bear’s body.
Section 3.- How to Shade a Bear
Bears are full of fur, and though drawing fur is an excellent drawing exercise, it can be quite complex and exhausting. Given we’ve already presented you with multiple tutorials where we show how to draw fur, this time we’ll teach you a new technique for quick shading that looks great and doesn’t take that long.
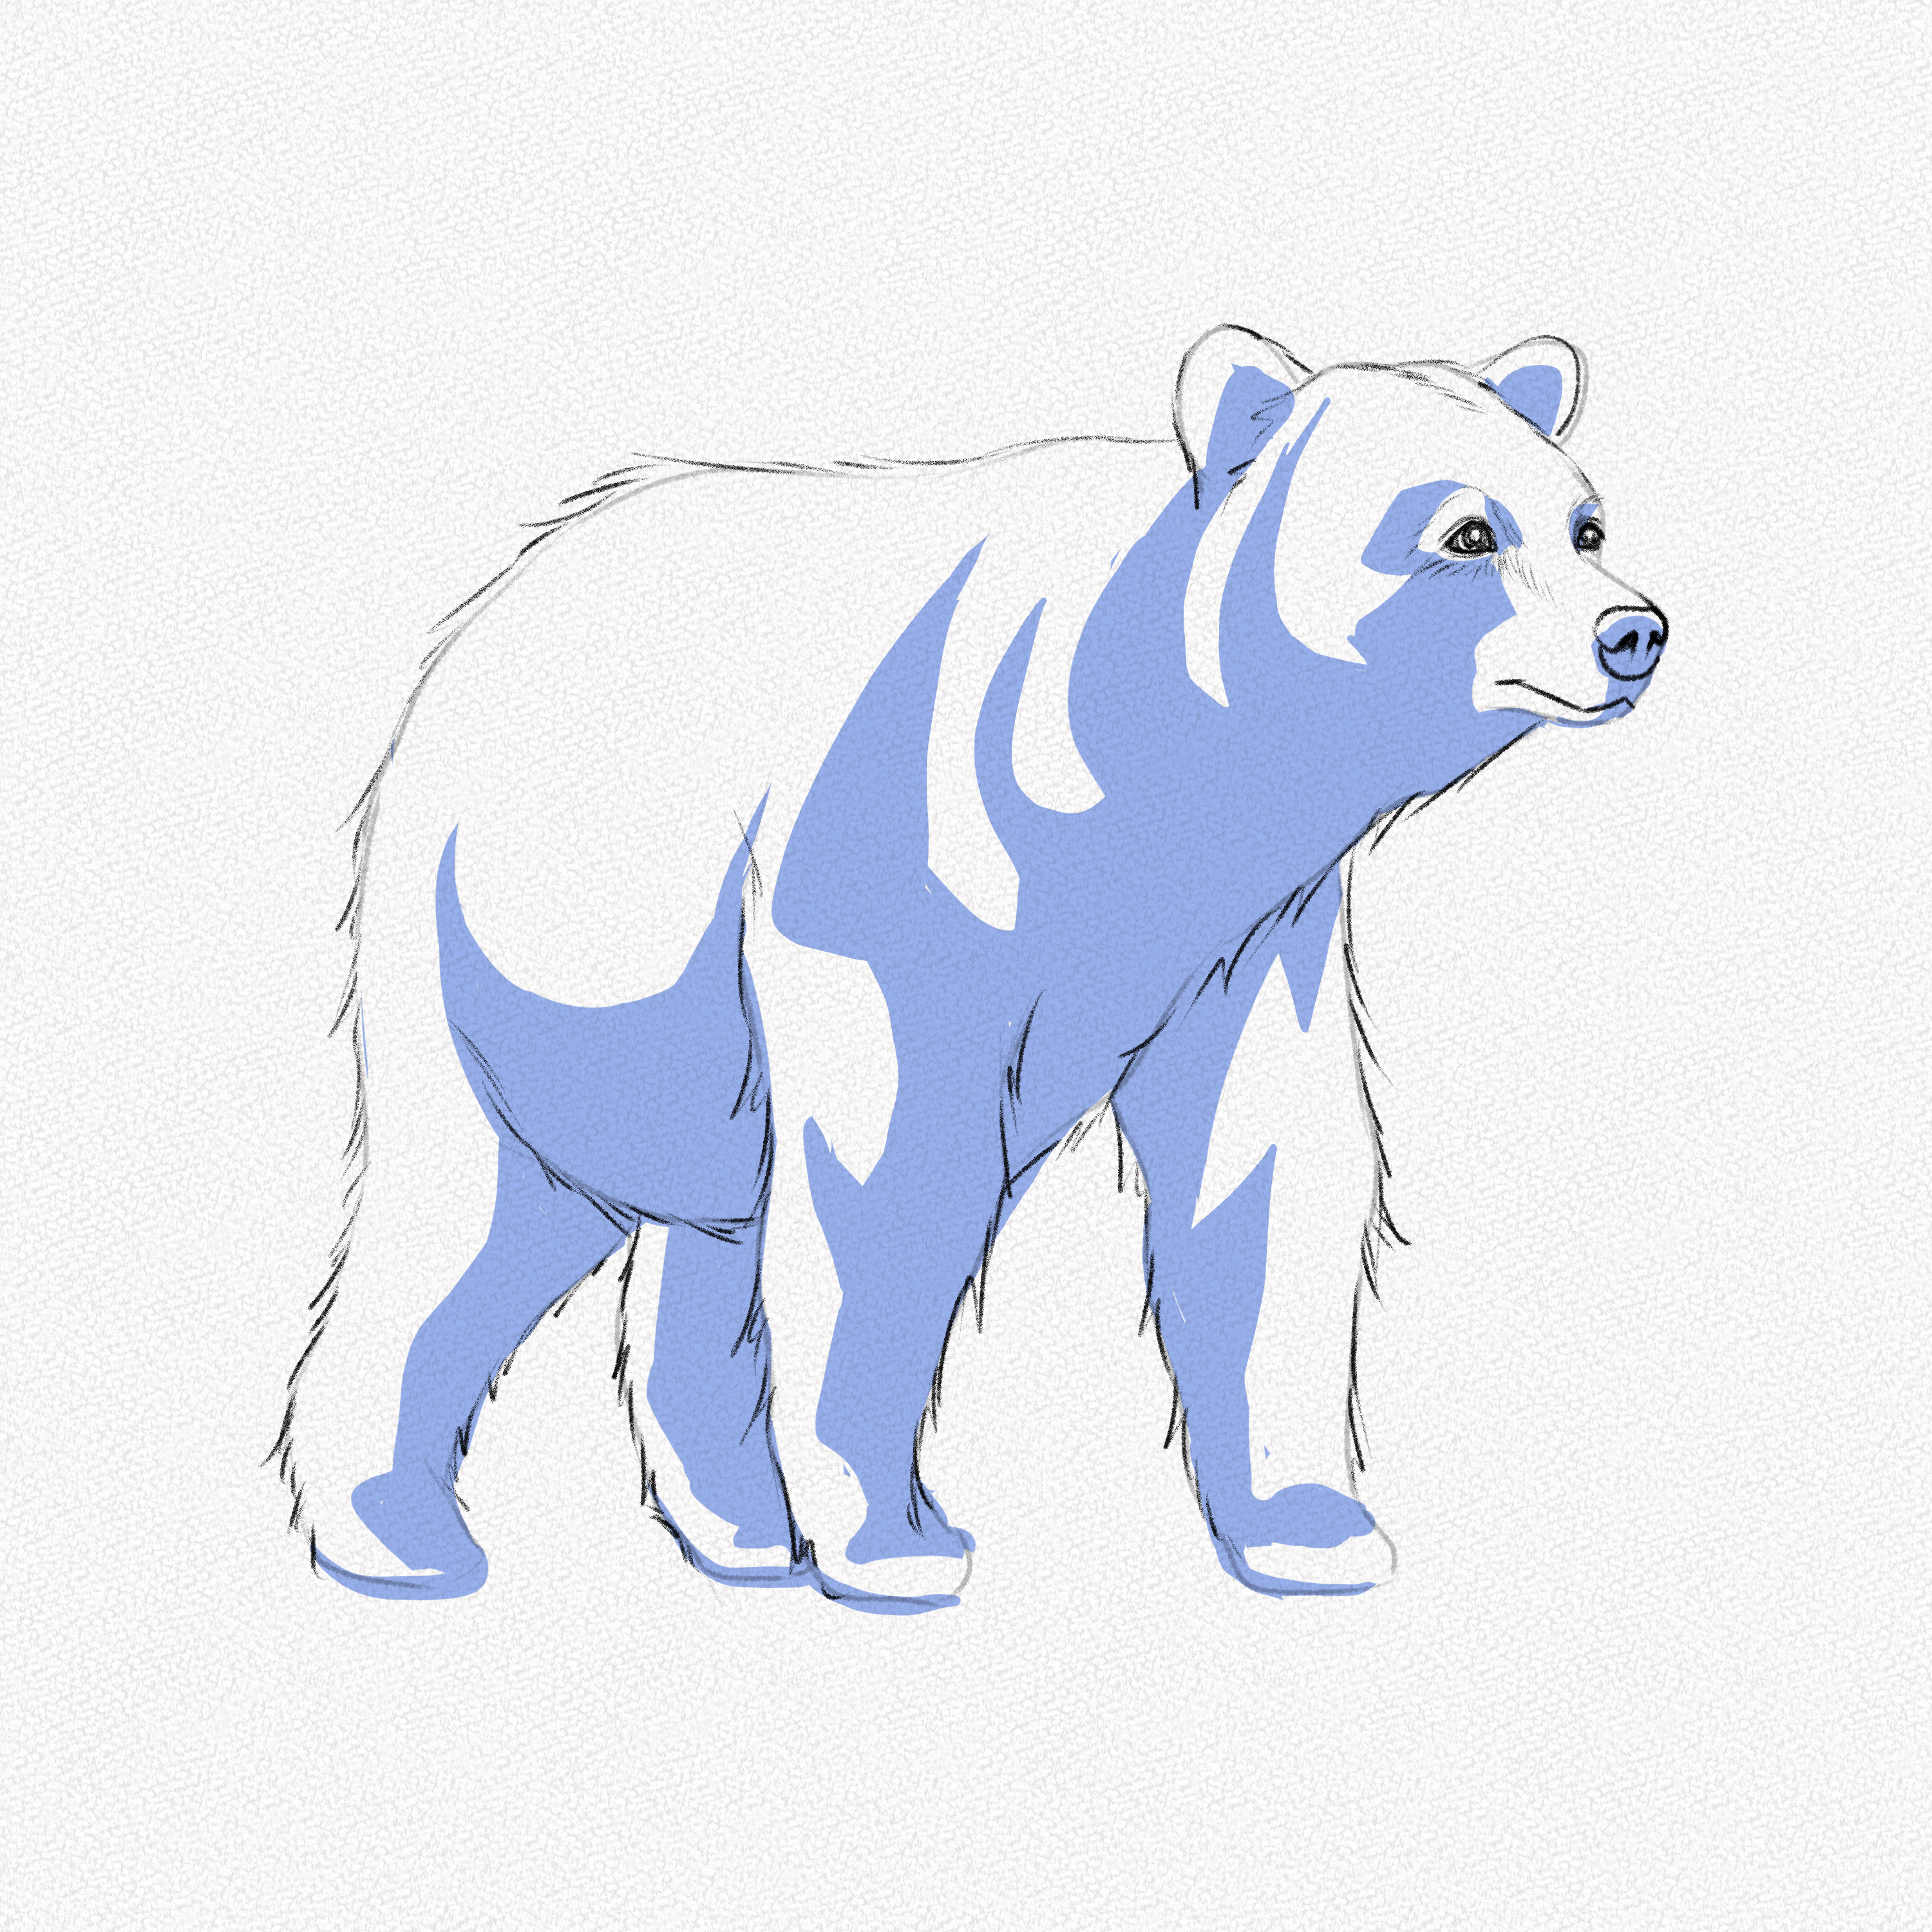
Step 17: Fur patterns
Identifying the fur patterns is the first thing we need to do before thinking of starting shading our bear. Every animal has different fur patterns, however, it mostly depends on their body shape and type of fur. As bears have thick and middle-length fur, it creates patterns around the skin and fat areas, especially the neck and the parts where the legs and arms connect to the body.
Taking into consideration the light direction is also an important matter since light will make the shadow’s direction and shape change.
Step 18: Shade your bear
Using a soft brush and powdered graphite we are going to fill the area with powdered graphite and then with our Tombow Mono Zero we are going to make some fur-like traces, only in the shaded area. 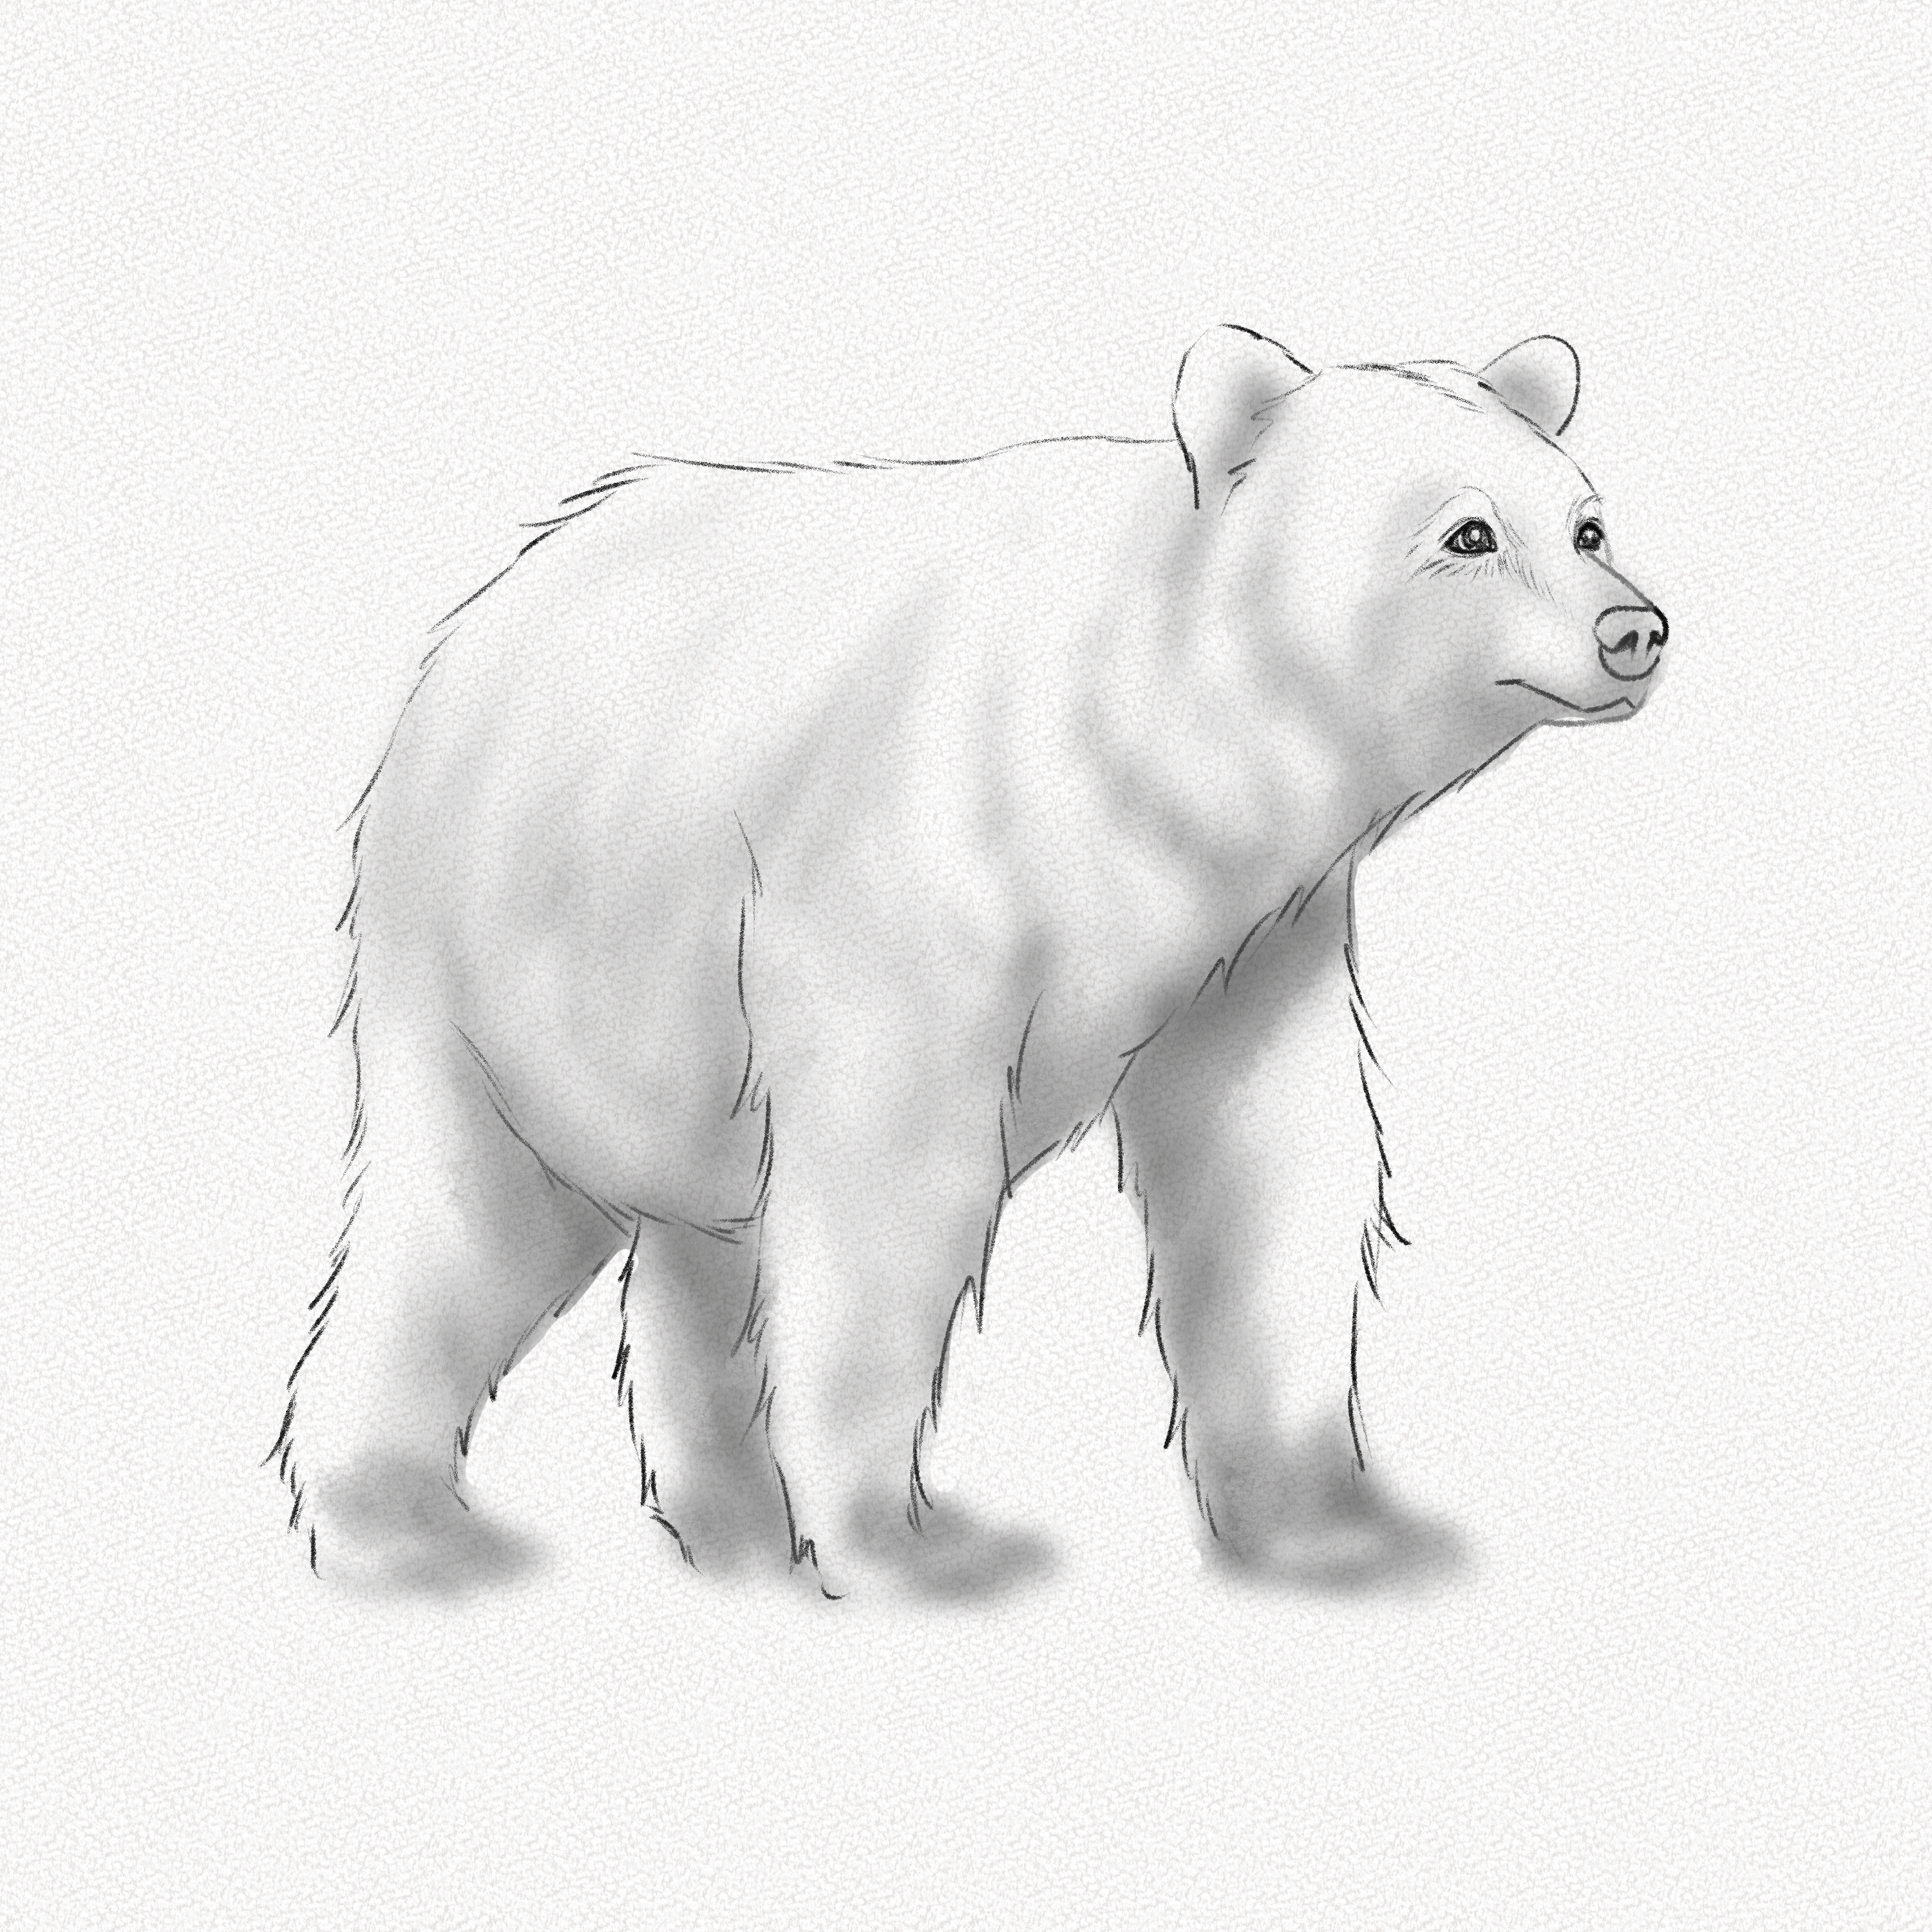
Step 19: Add the fur
Using the Step above as a base, we are going to add fur with our 6B pencil. Just some traces here and there. You can add the amount of detail you prefer to the fur, however, don’t overdo it or else there won’t be any differentiation between light and shadow.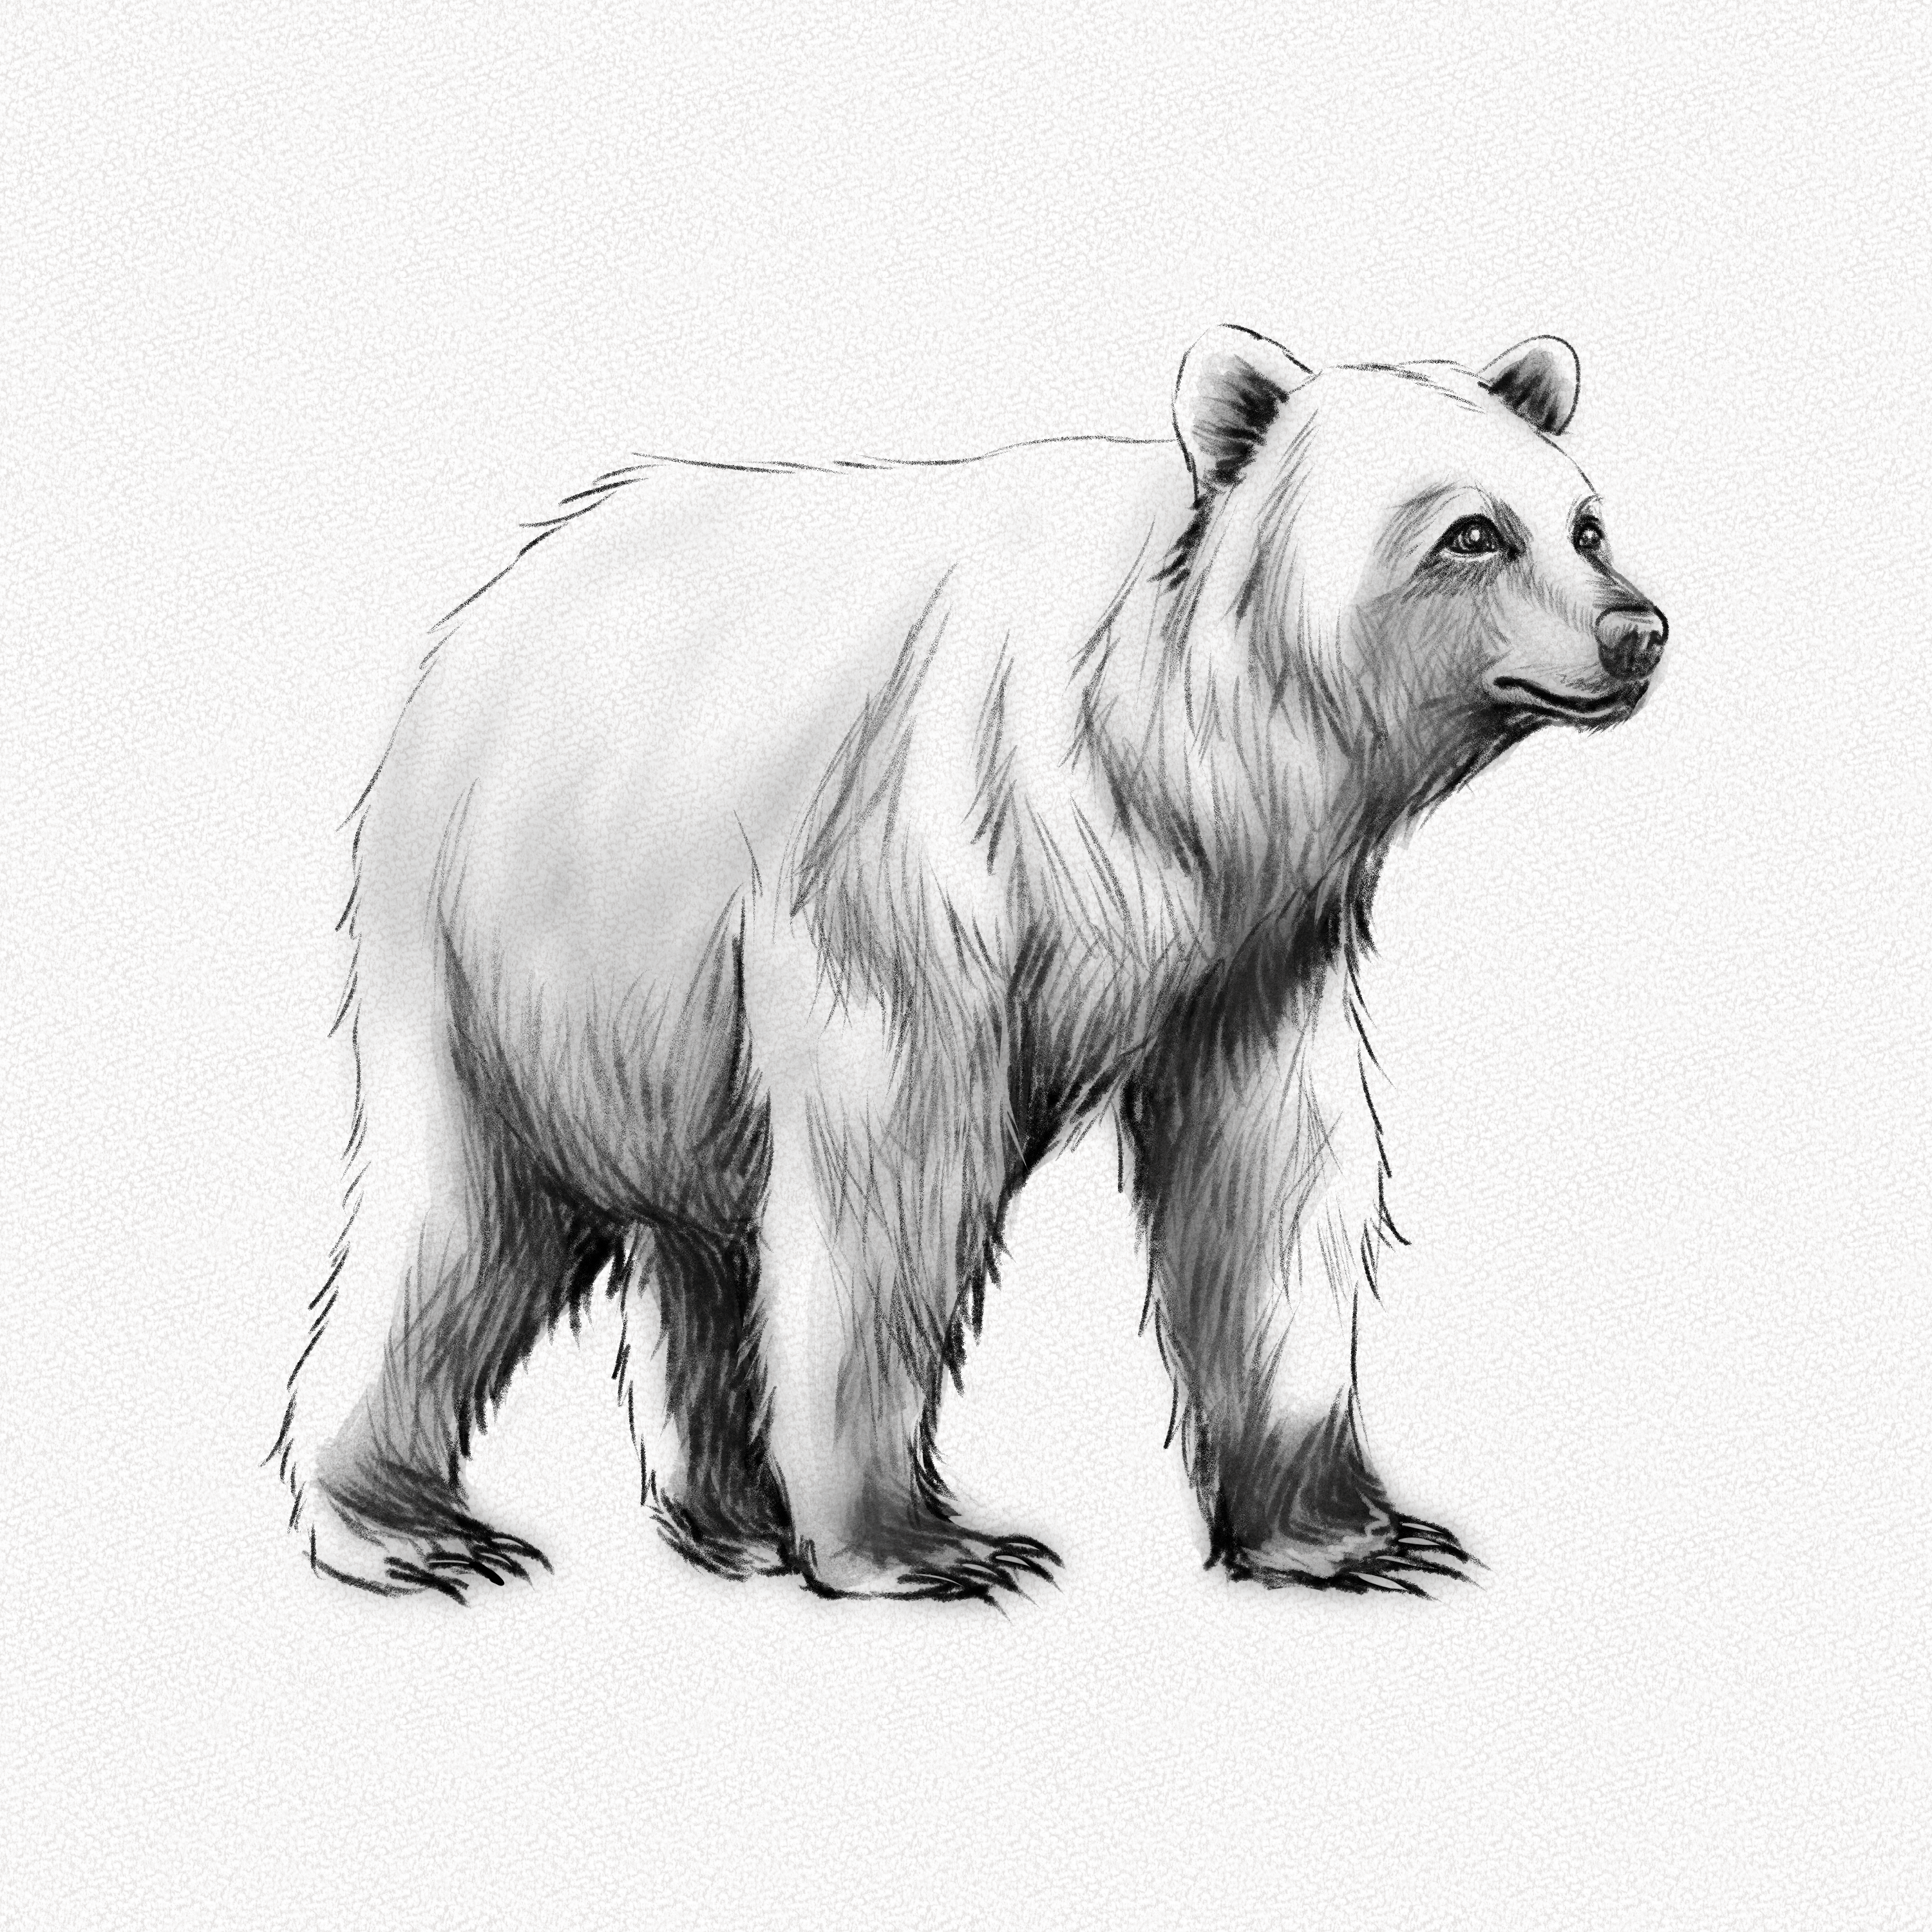
Step 20: Add the ground
Add the ground under our bear by tilting your pencil and making soft strokes under the bear. Use your blending stump to blend them and then go over it again, darkening the area that is right under our bear to give the illusion of a casted shadow.
That’s it. You’re done!
Thank you for following this tutorial, we hope you had fun and learned a bit more about bears, their anatomy, and how to draw and shade them. Although shading fur can be quite the challenge, with the easy steps we presented to you above we hope now you are able to confidently draw fur and fur patterns on other animals.
Remember that art is a journey and that it doesn’t matter if your drawing doesn’t look perfect the first time around all you need to do is keep practicing and experimenting with different techniques, and you will improve over time.
Happy drawing!