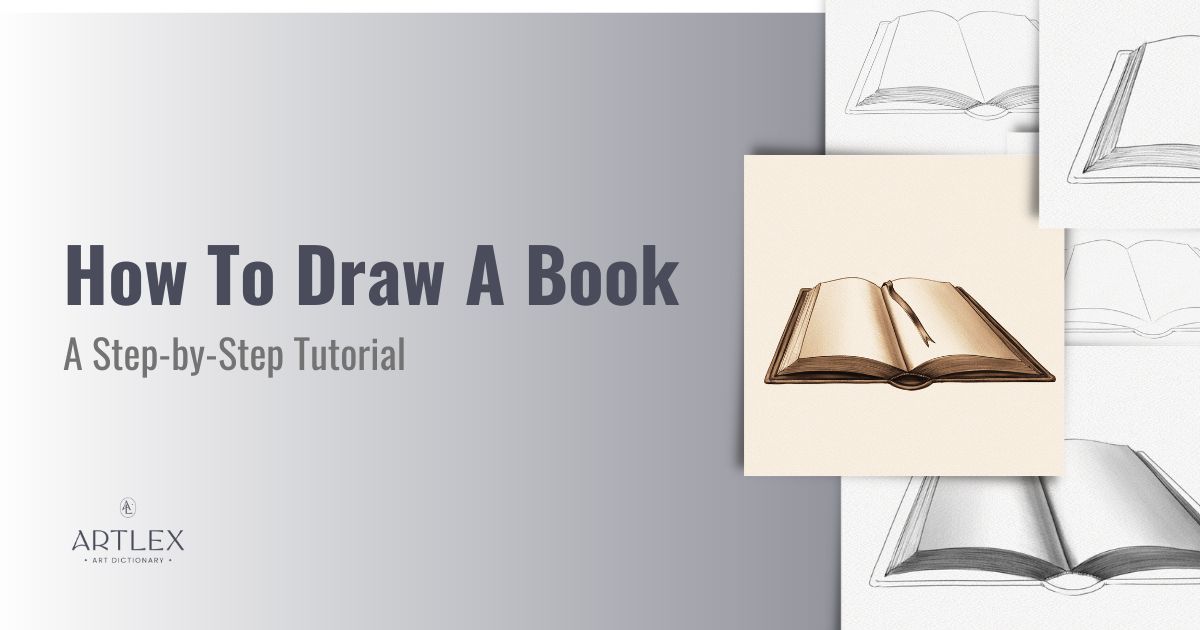
Books have been present in our history for centuries, from ancient scrolls to modern-day e-books, books have helped us learn, grow, and dream. They have allowed us to escape into other worlds, experience different perspectives, and connect with people across time and space. Books have given us heroes to admire, stories to cherish, and lessons to learn, and they continue to be an integral part of our lives.
In this tutorial, we are going to learn how to draw a book, however, we’ll also be learning a small lesson on perspective drawing that we hope helps you on your learning journey as well.
So grab your supplies and get ready to draw!
What you will learn:
- A quick lesson on perspective
- Structure of a Book
- How to Draw and Shade a Book
Materials needed:
- A piece of paper
- A 0.5mm mechanical pencil
- A 4B and 8B graphite pencil
- A blending stump
- A Tombow Mono Zero 2.3mm eraser
- A kneaded eraser
- A ruler
This is the book you will be drawing: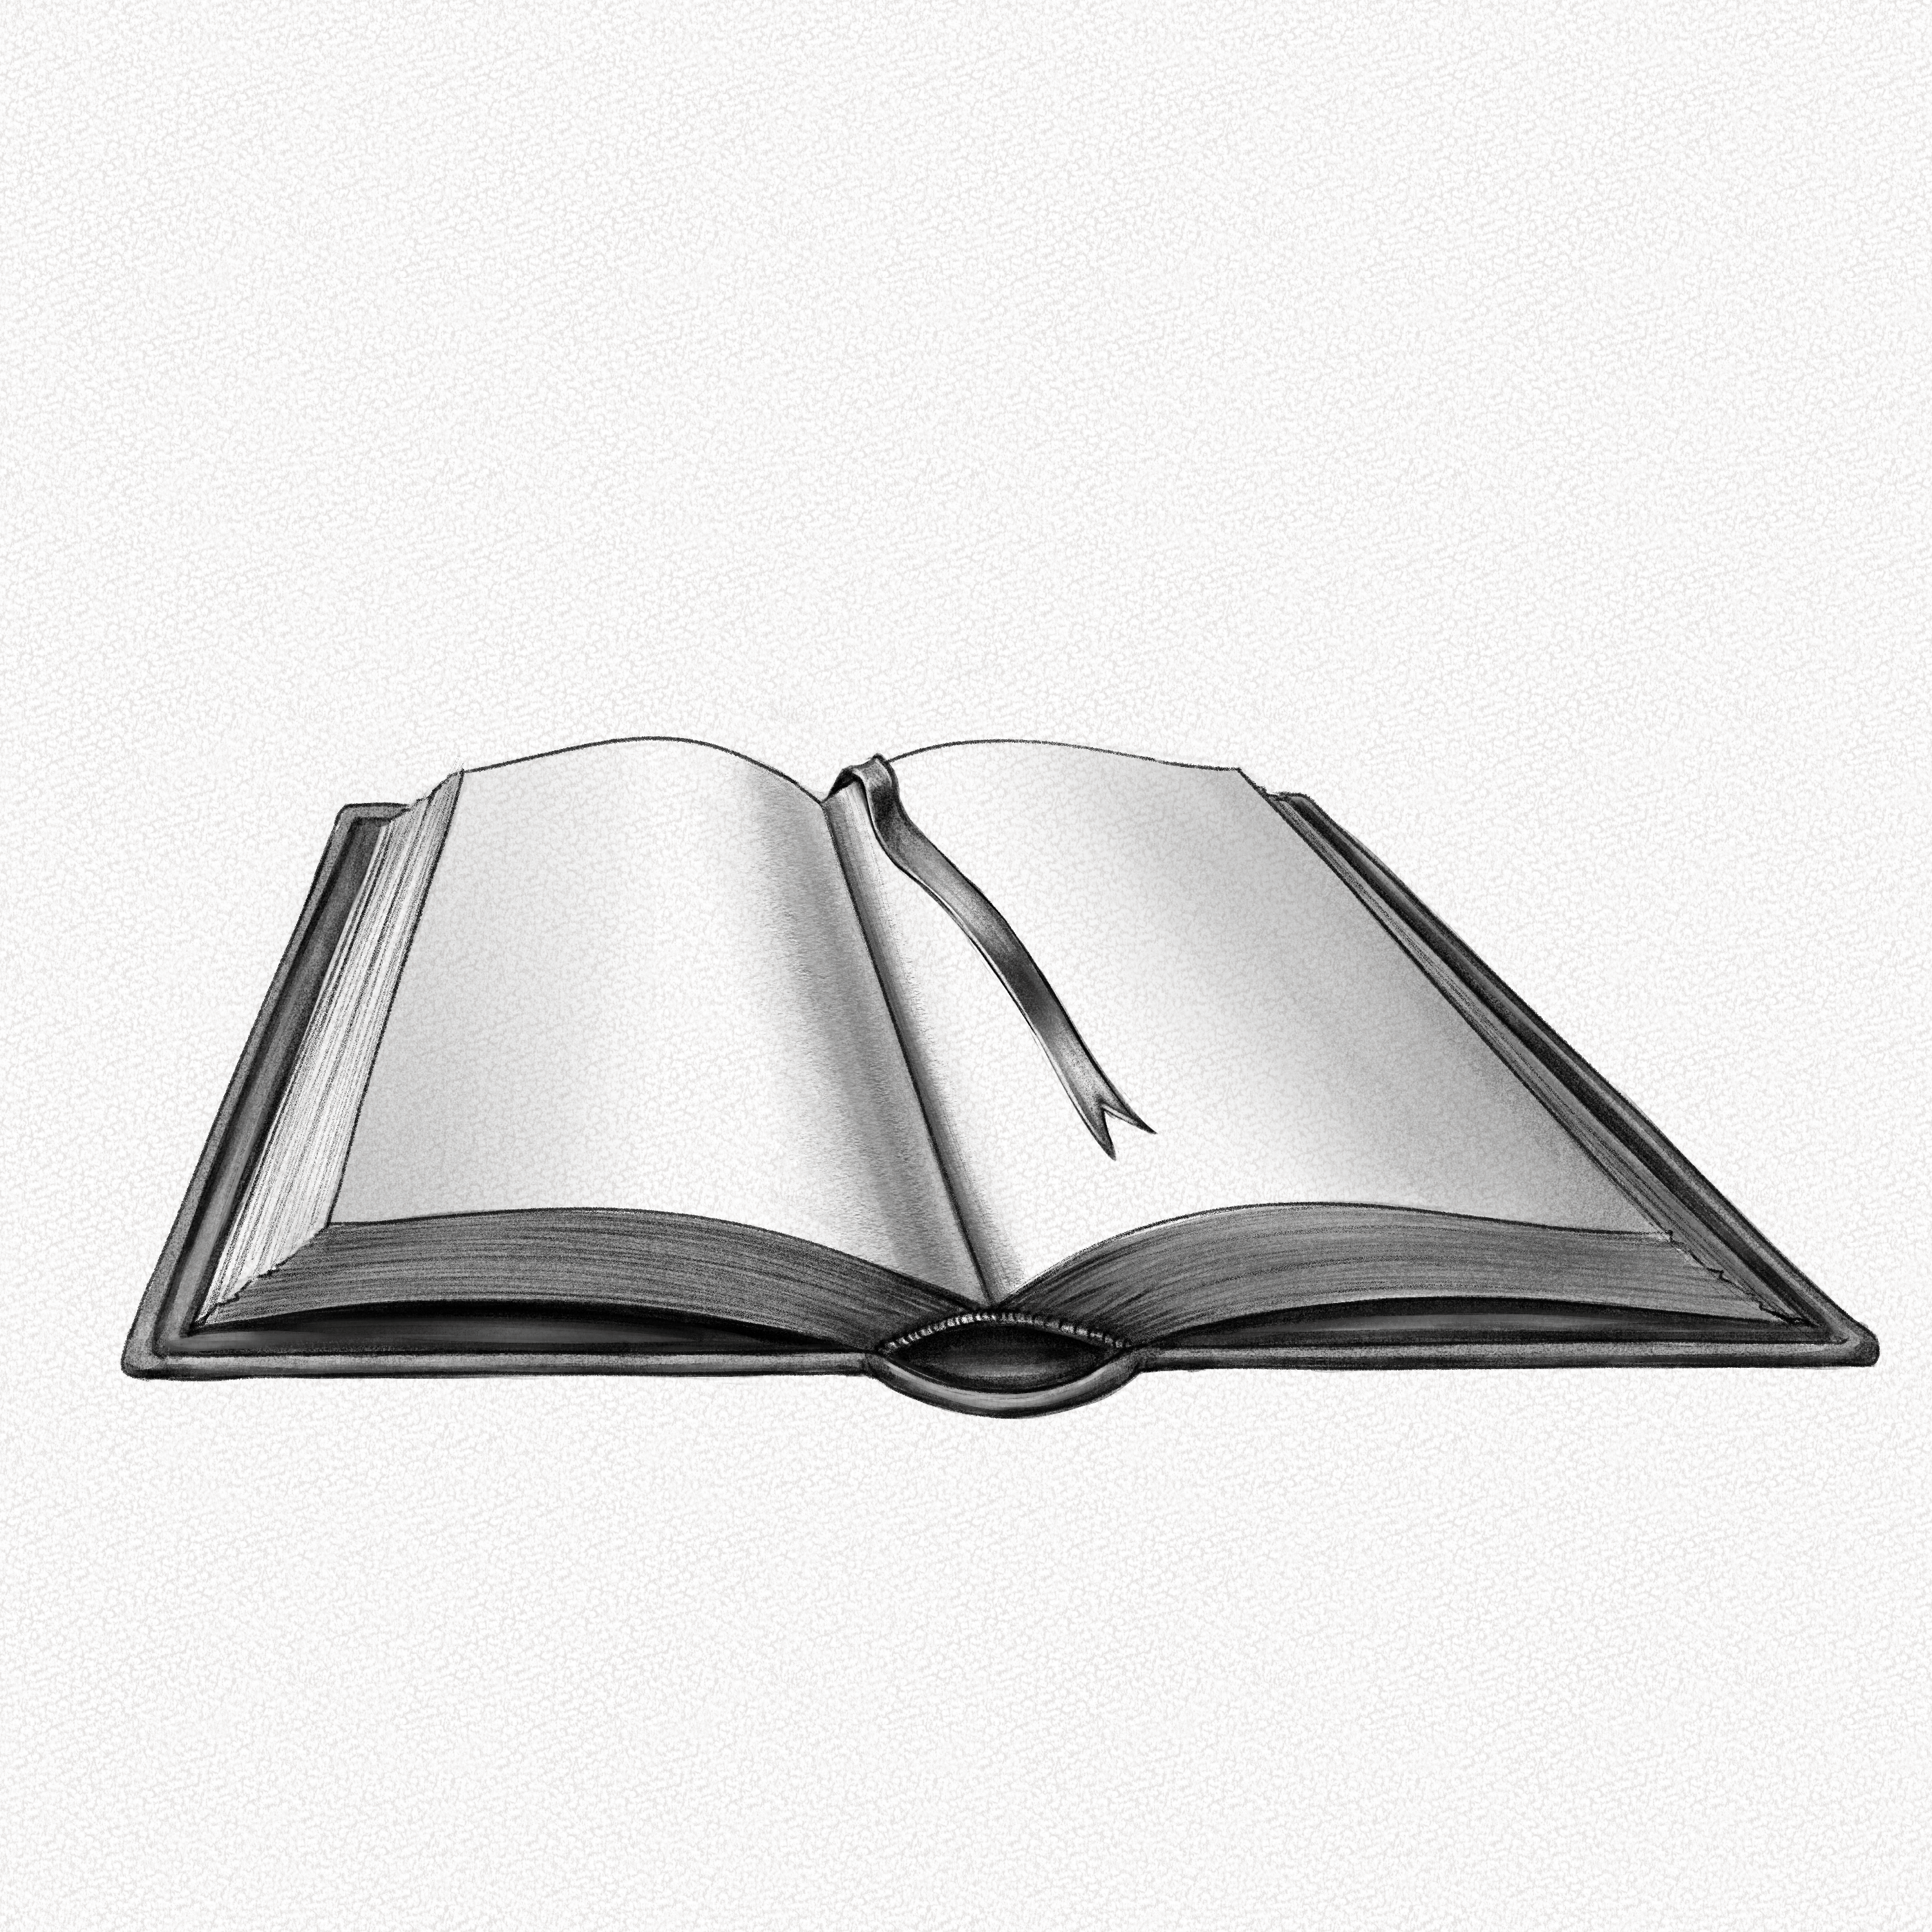
And these are all the steps we’ll guide you through:
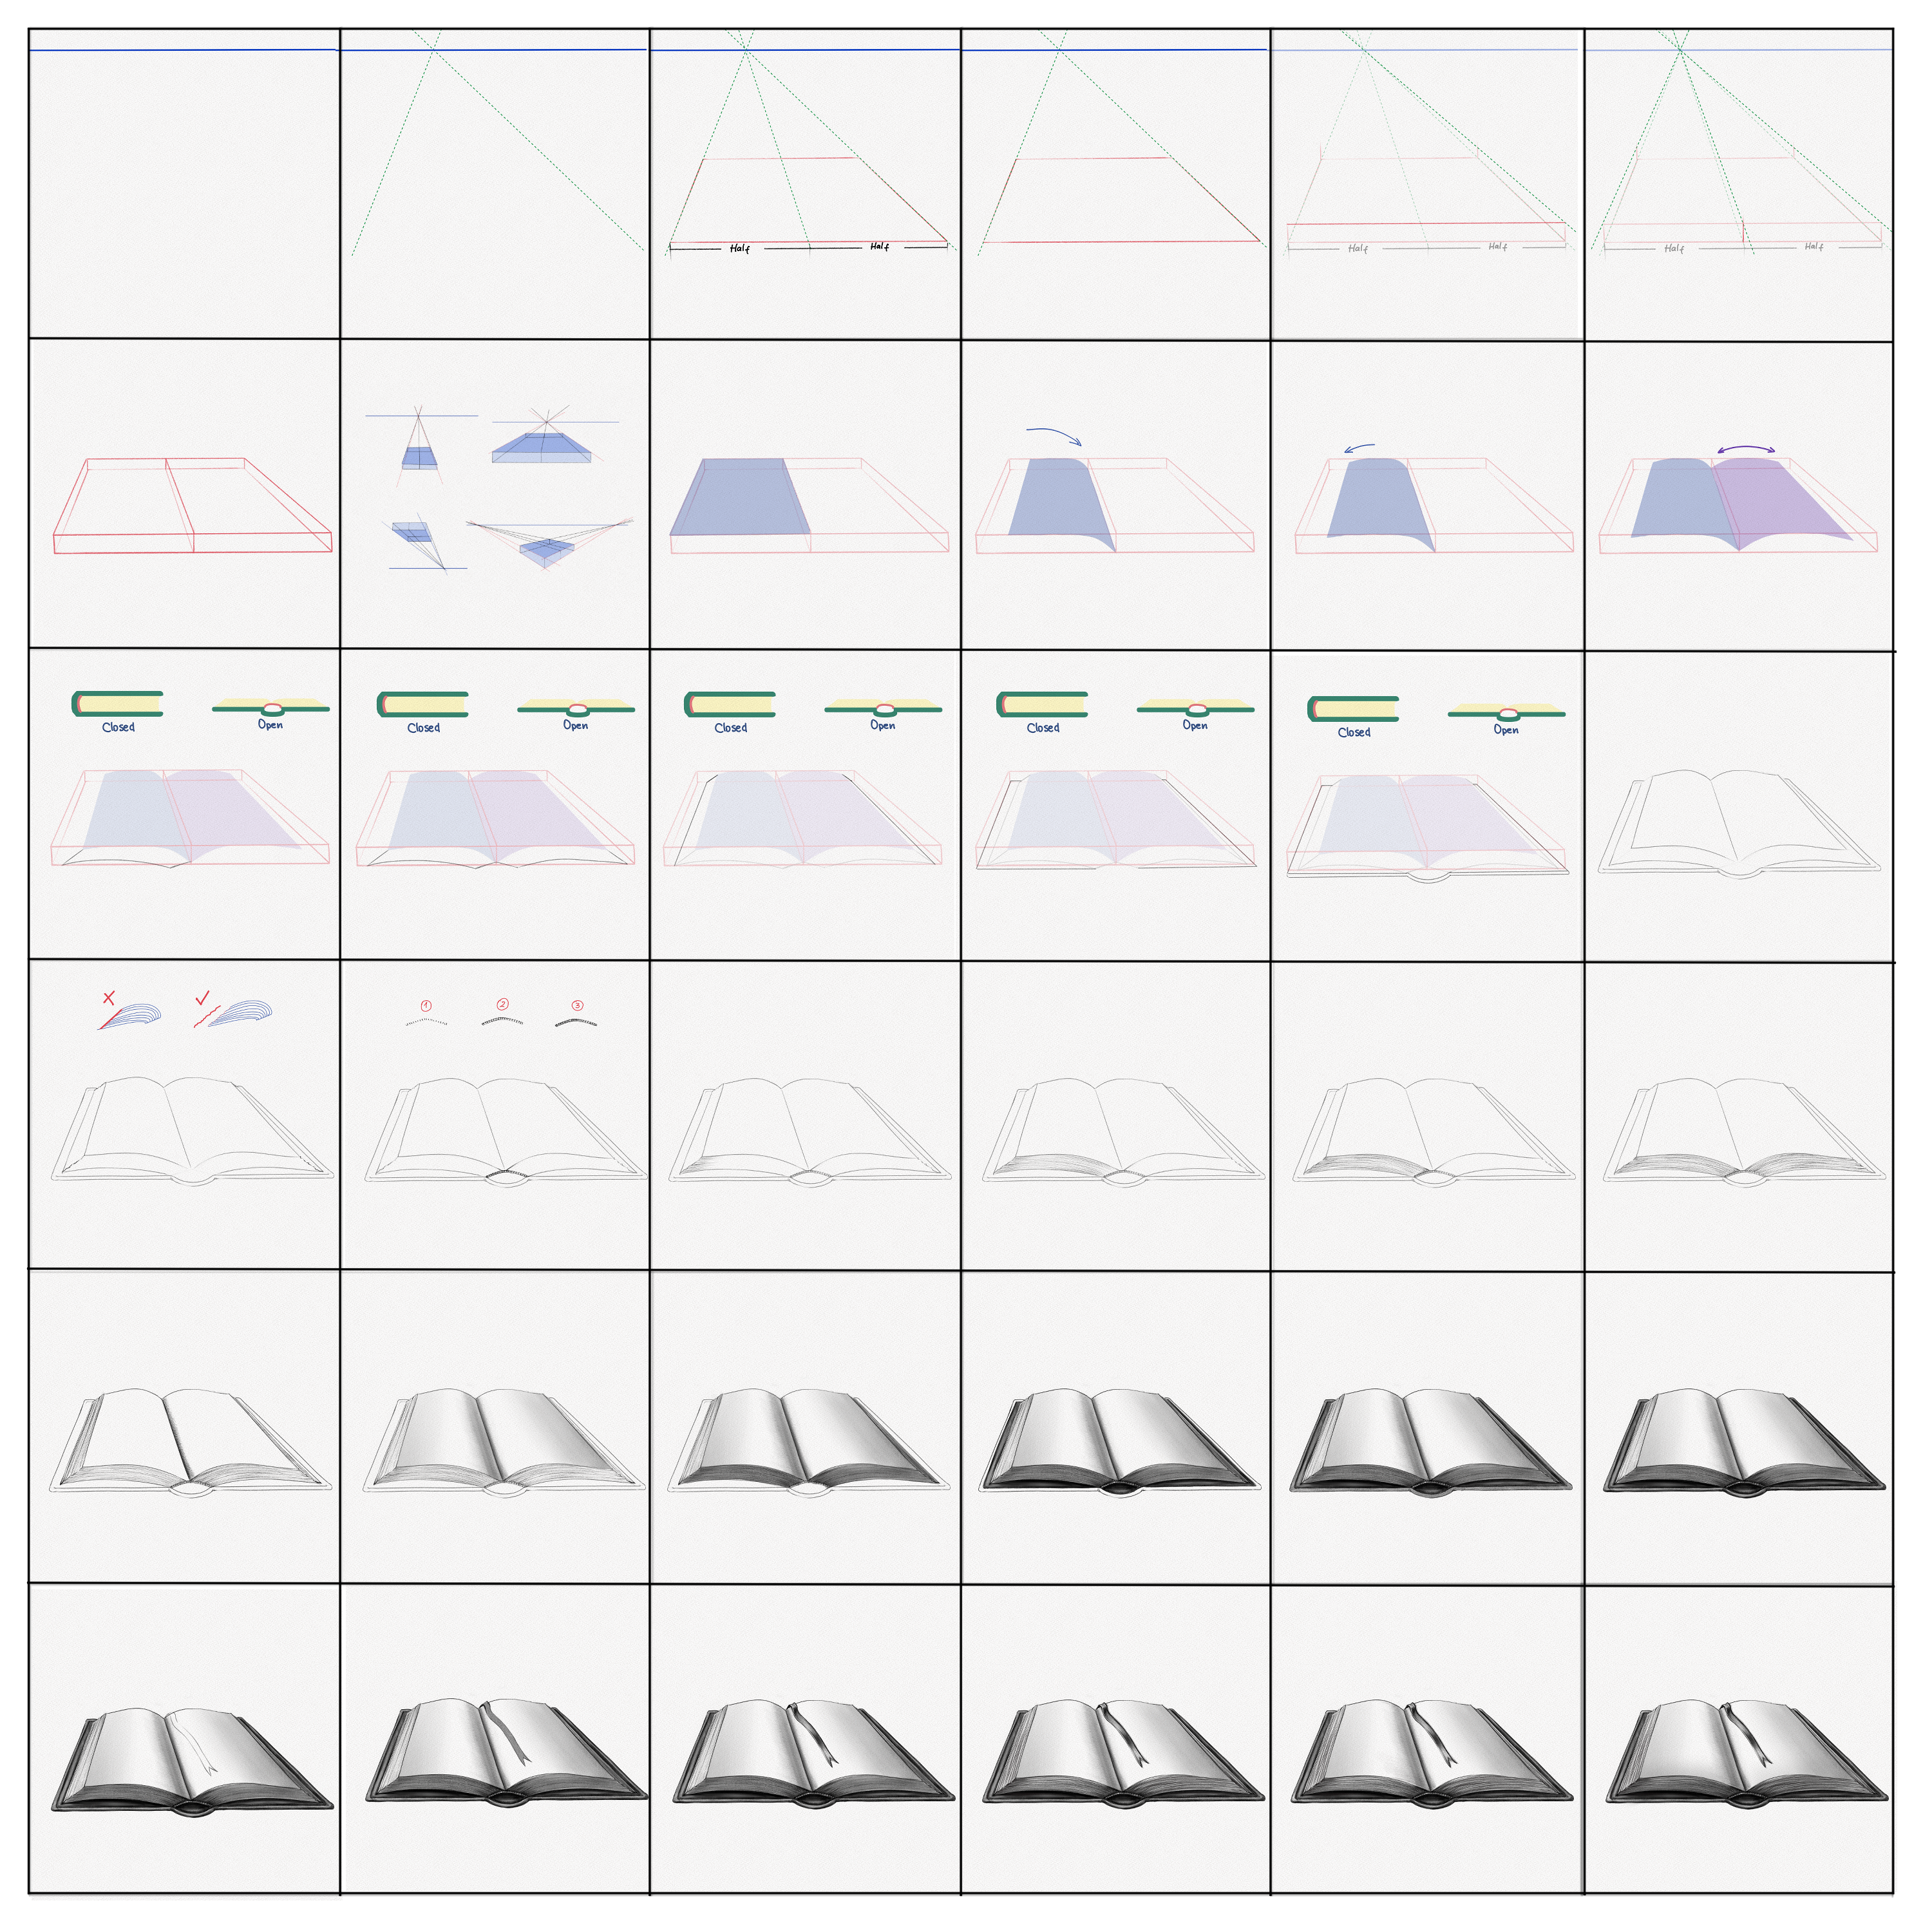
Section 1.- A Quick Perspective Lesson
Drawing a book is a fairly easy task, their simple shape and consistent structure make the process much easier compared to objects, animals, or people with more complex shapes and forms. That’s why instead of guiding you through the generic few-step tutorial you’ve probably seen everywhere we’ve chosen this tutorial to give you a small but valuable lesson on perspective drawing.
For this section, we’re going to need an additional piece of paper, besides your required materials.
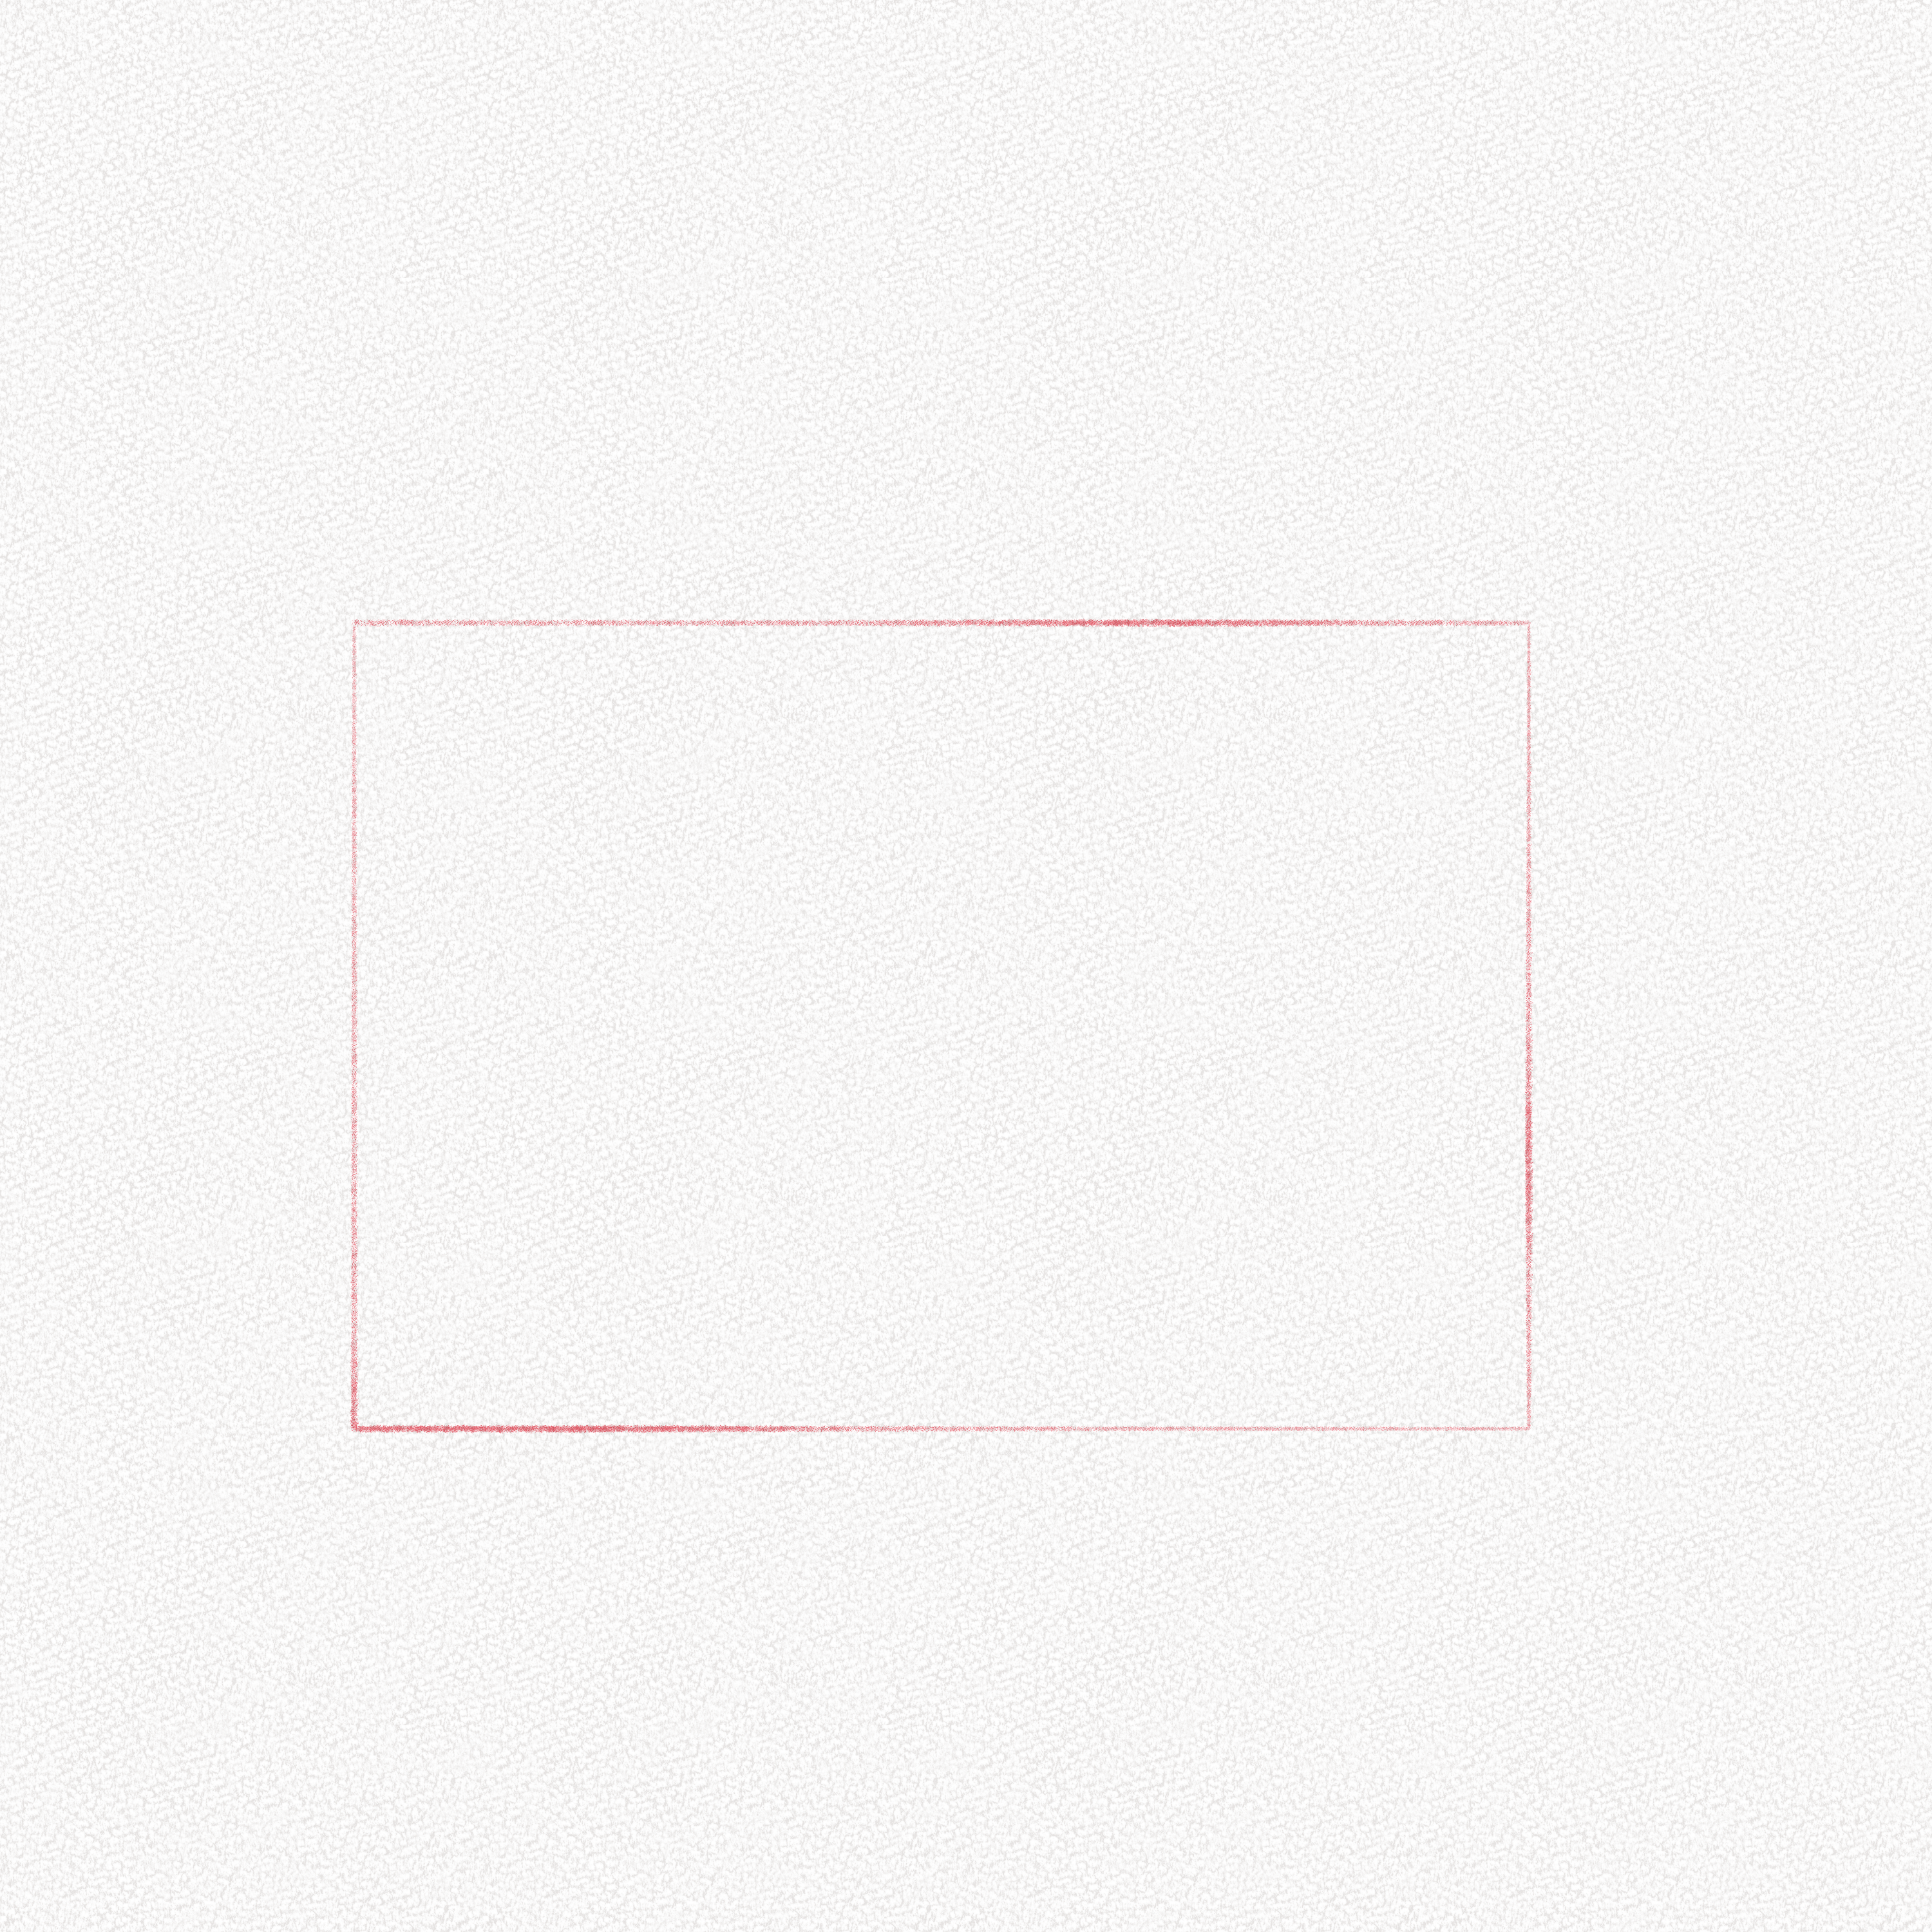
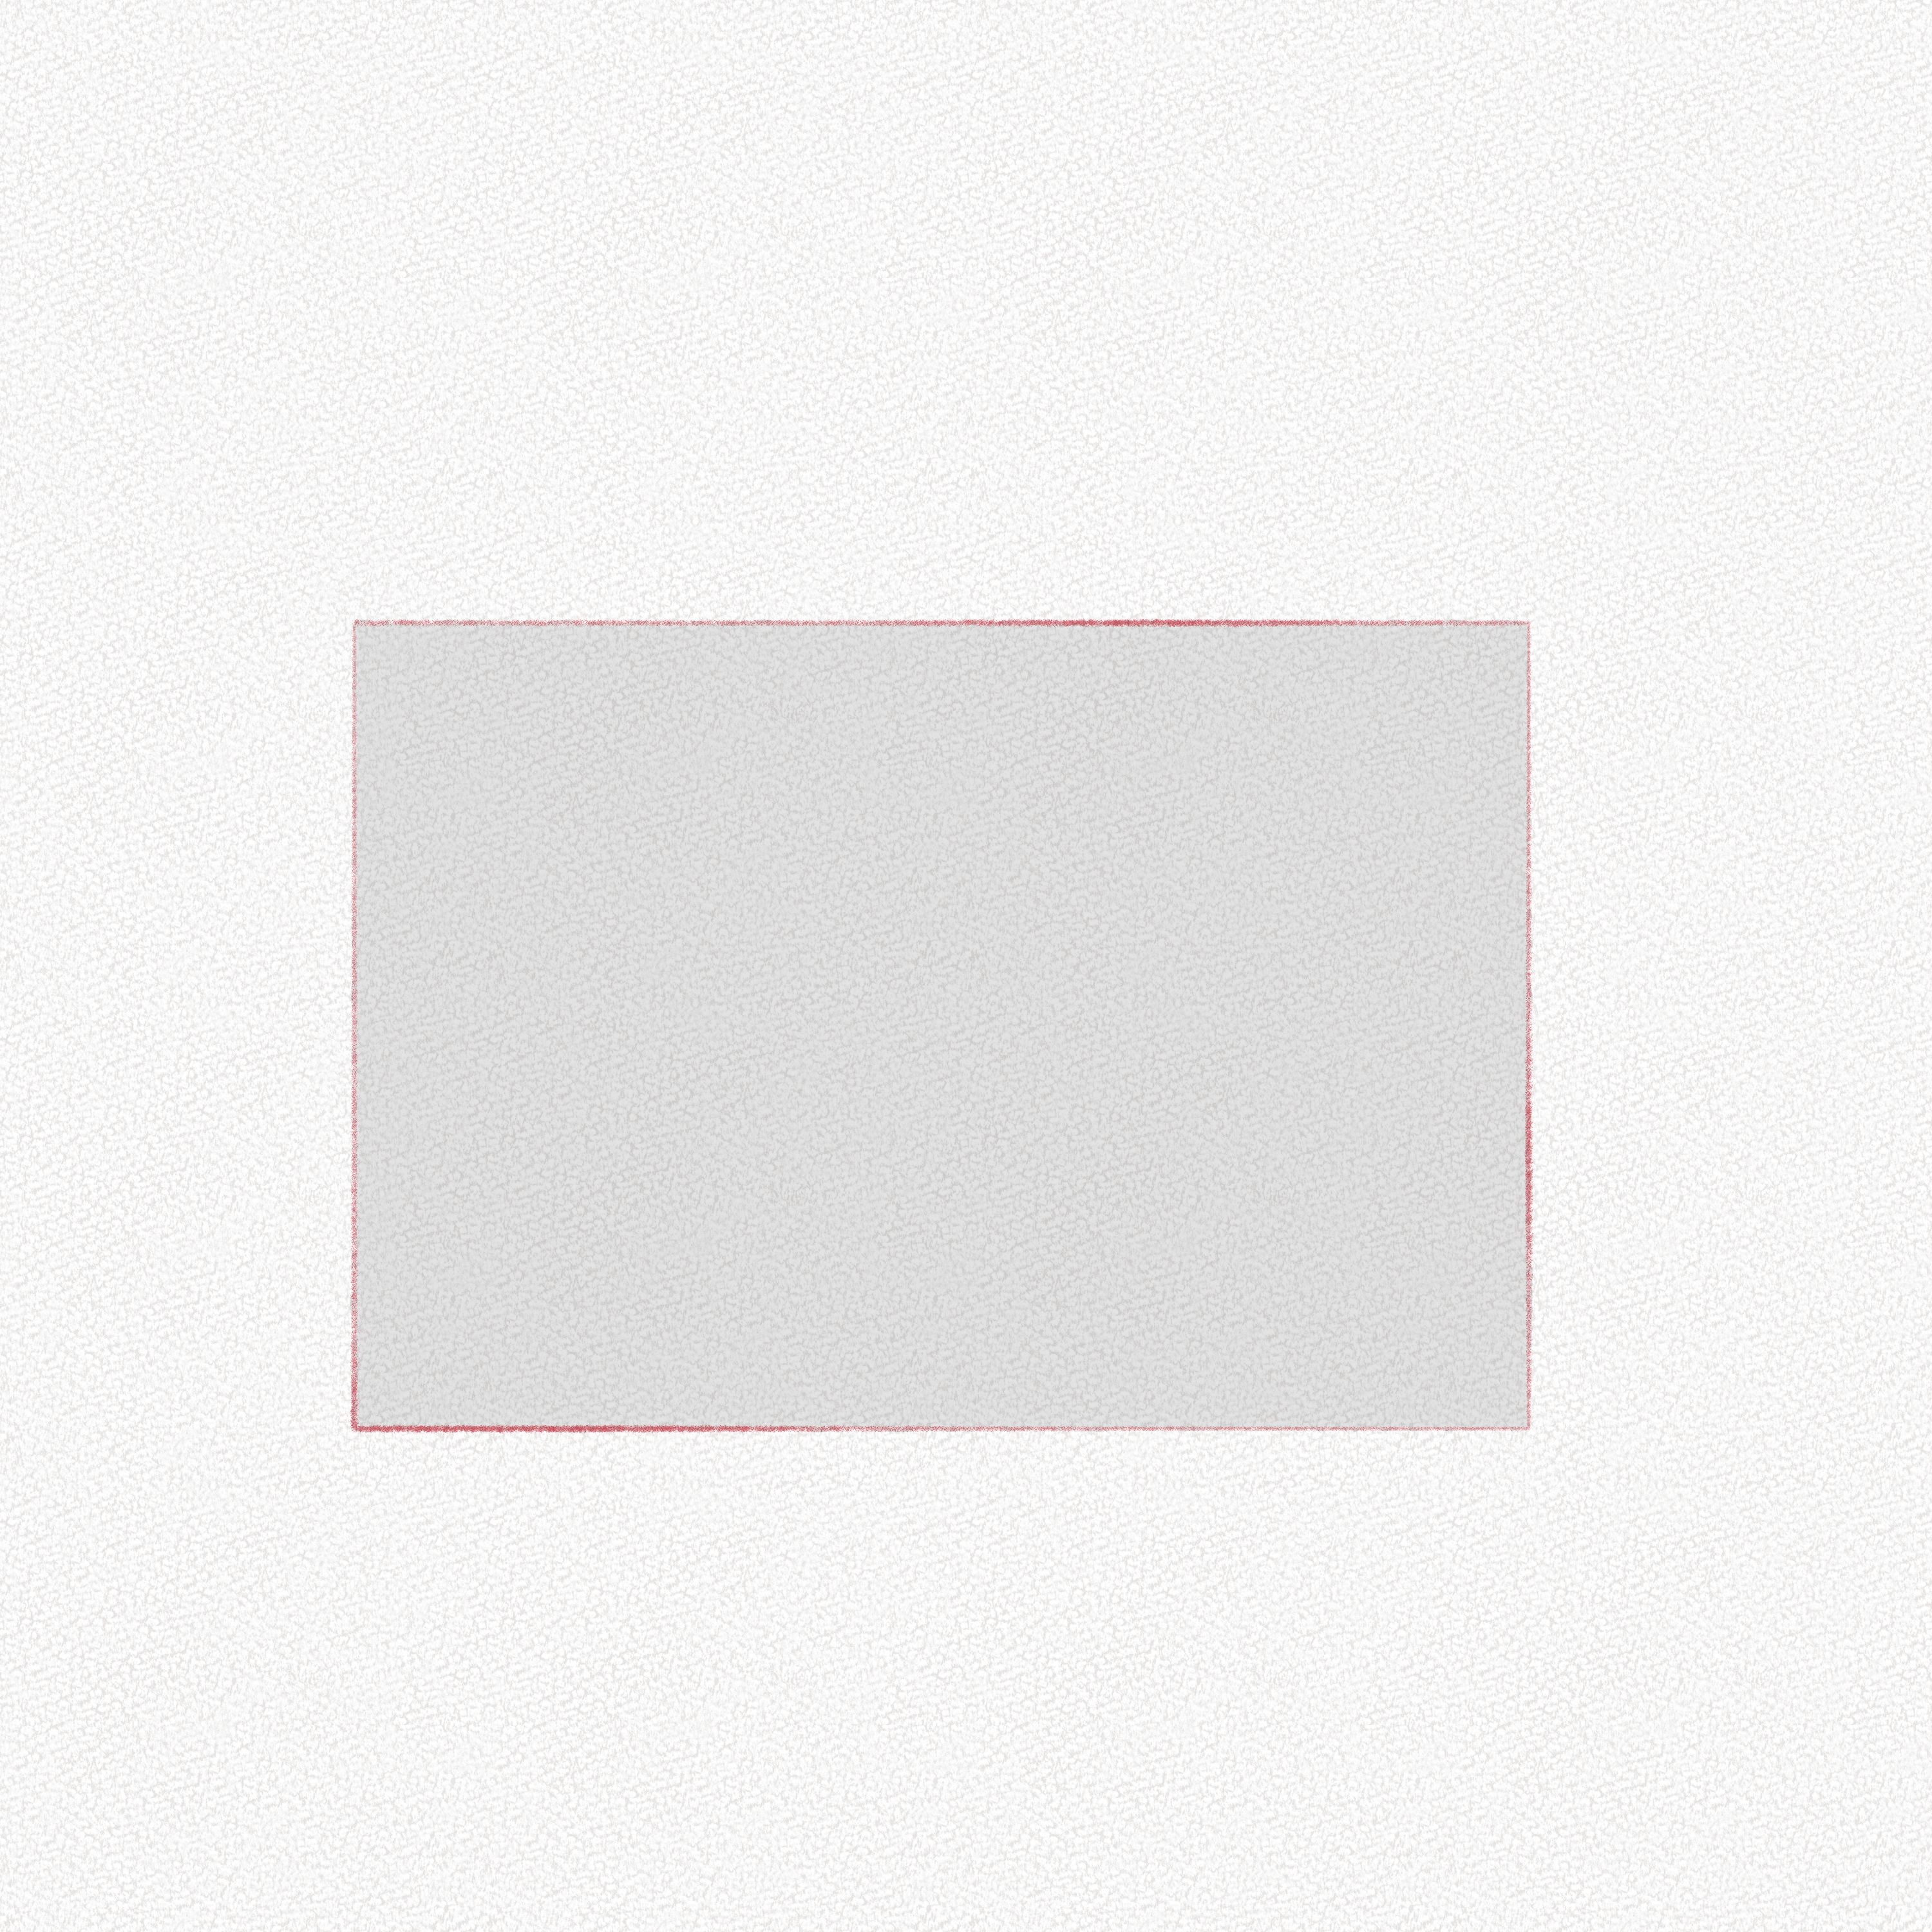
Step 1: Draw a rectangle.
On your additional piece of paper, draw a rectangle. Imagine this rectangle as a flat shape.
Take your paper to your eye level and tilt it backward a little. You’ll be able to see how the rectangular shape changes as you move it closer to your eyes.
If you don’t have a trained eye or previous perspective knowledge, this won’t make sense the first couple of times, however as you keep practicing this exercise you’ll be able to see the differences in the shape as you change your point of view and angle.
You can also take a photo of your rectangle from a frontal view and then again from the same view but changing the angle, when looking at the images you’ll be able to see the difference more clearly.

Step 2: Draw a line
Now onto our perspective lesson: draw a line in the upper part of your canvas. This line will represent our eye level (also called the horizon line). The place where we draw this line will define the level of distortion our object (in this case our book) has. The further it is from the object, the more accurate it will look like, however as we only have our paper, that gives us a limit.
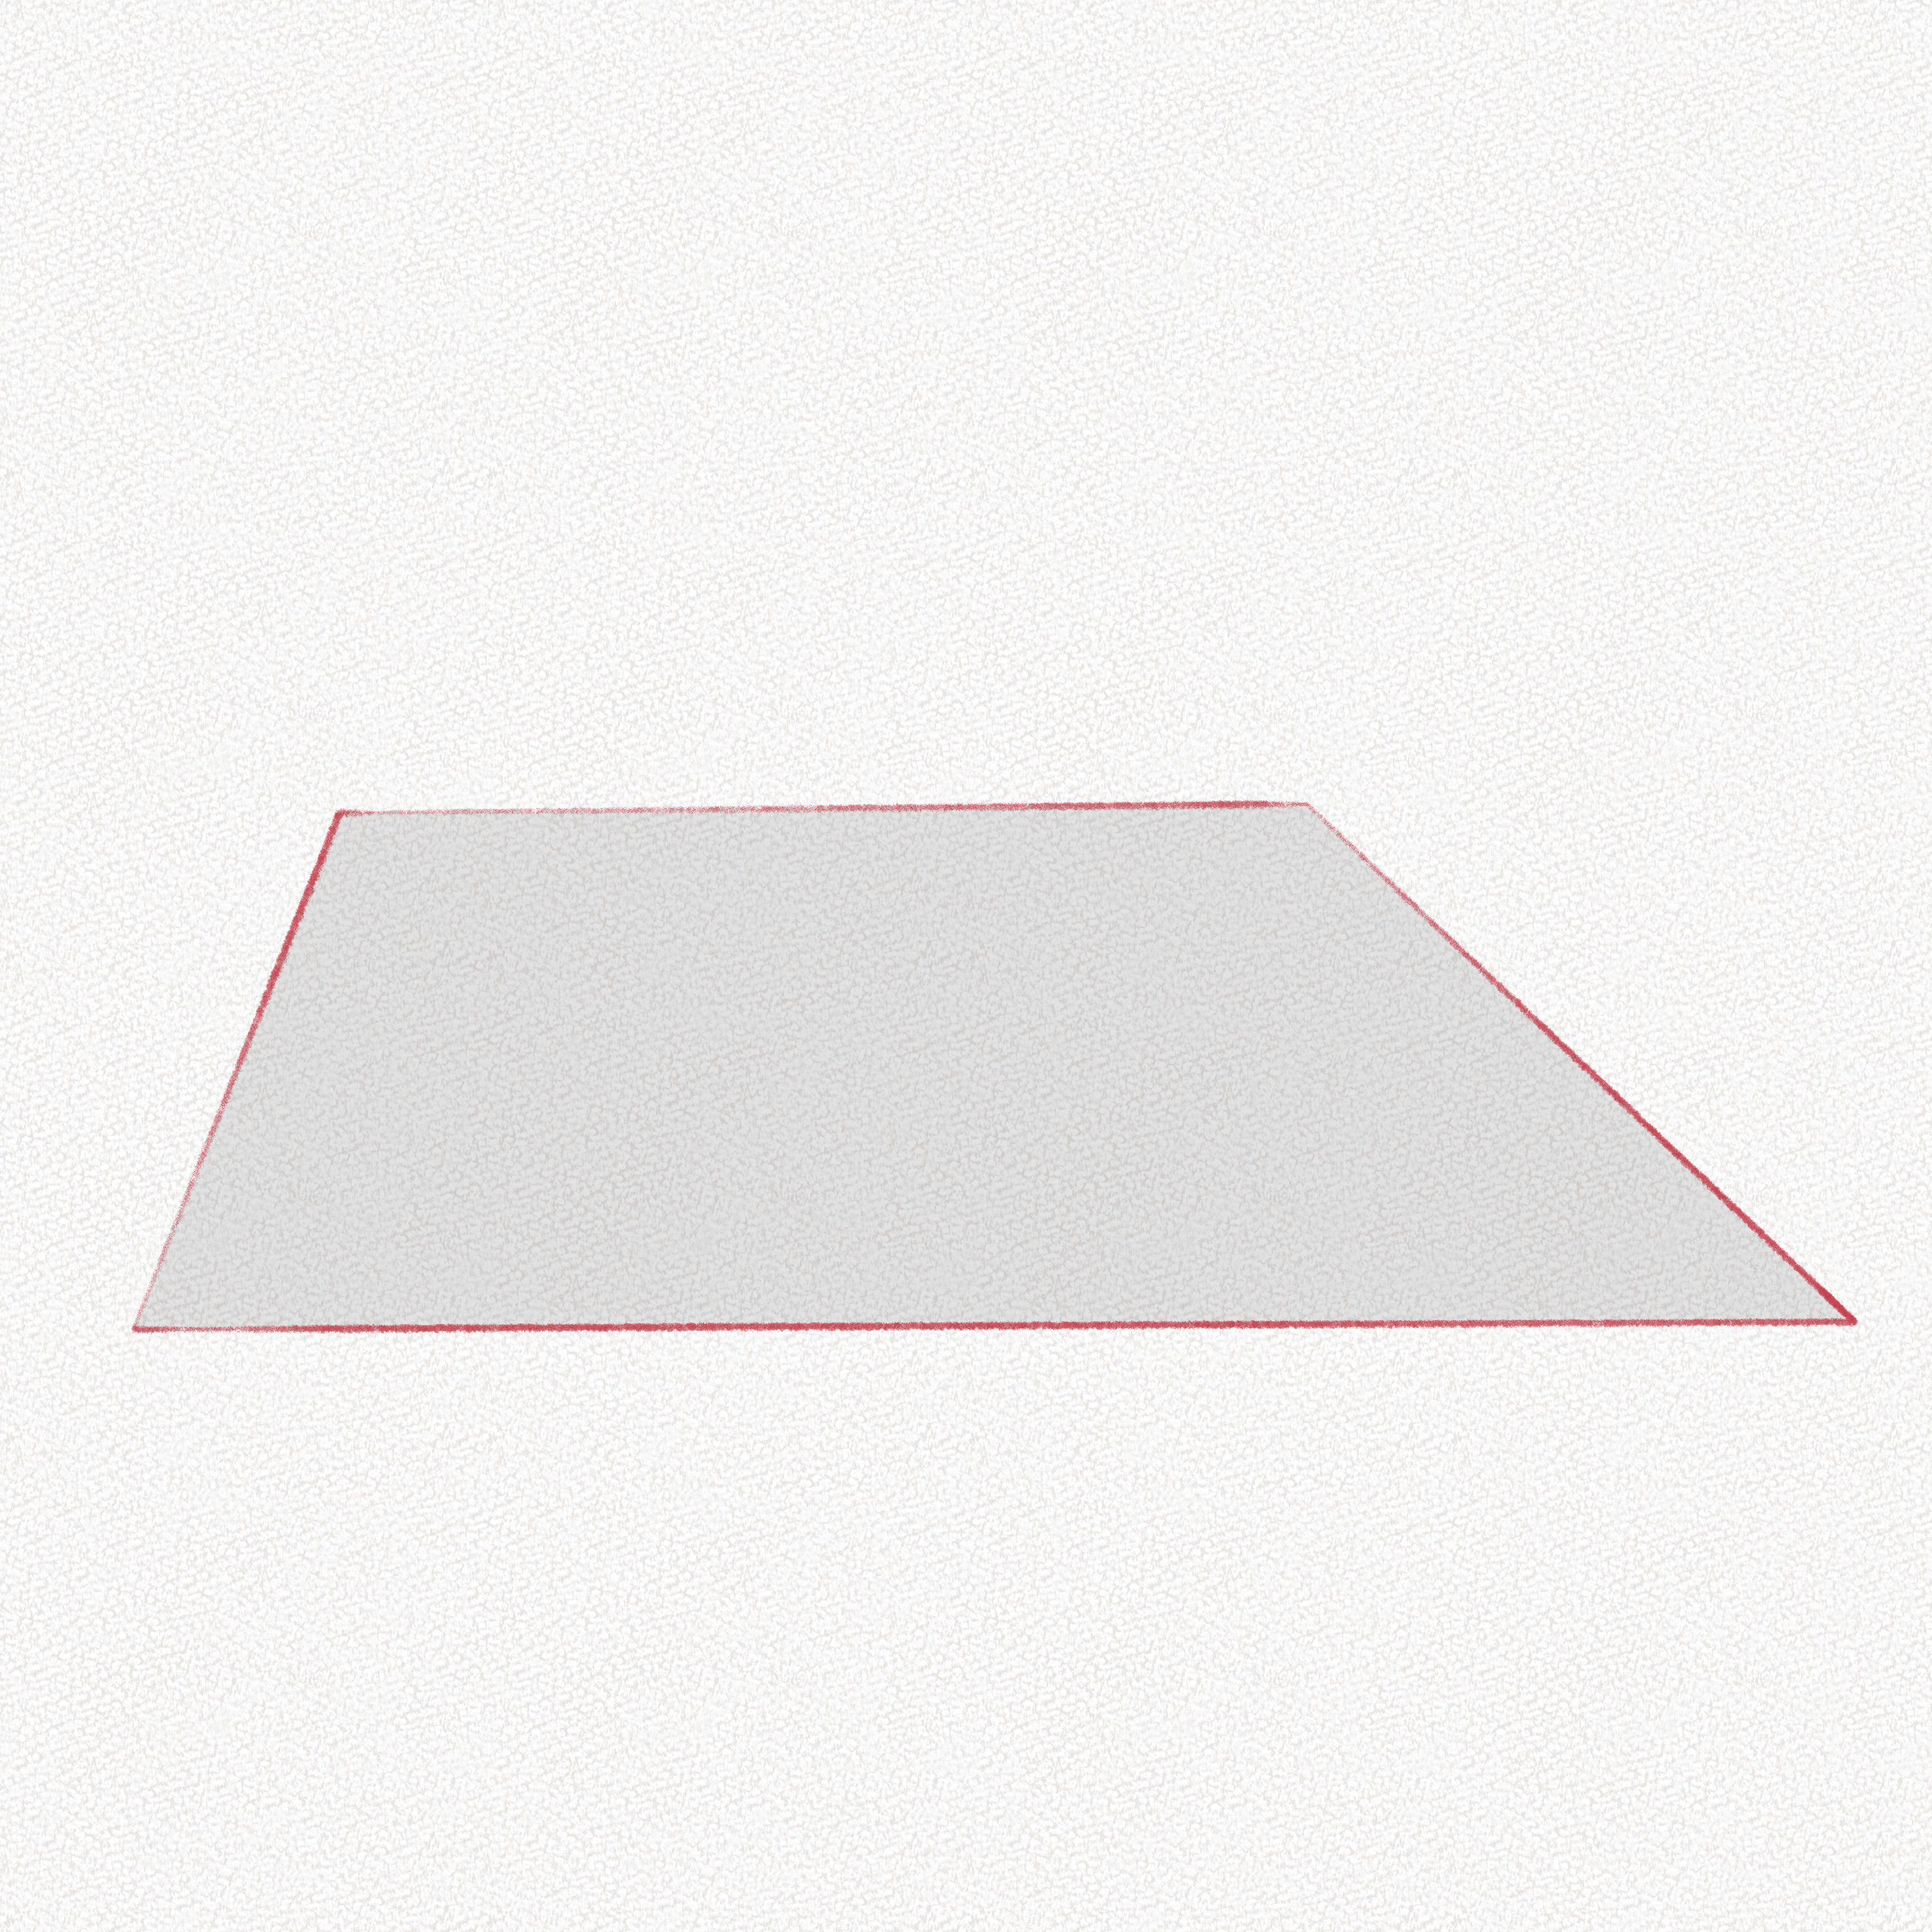
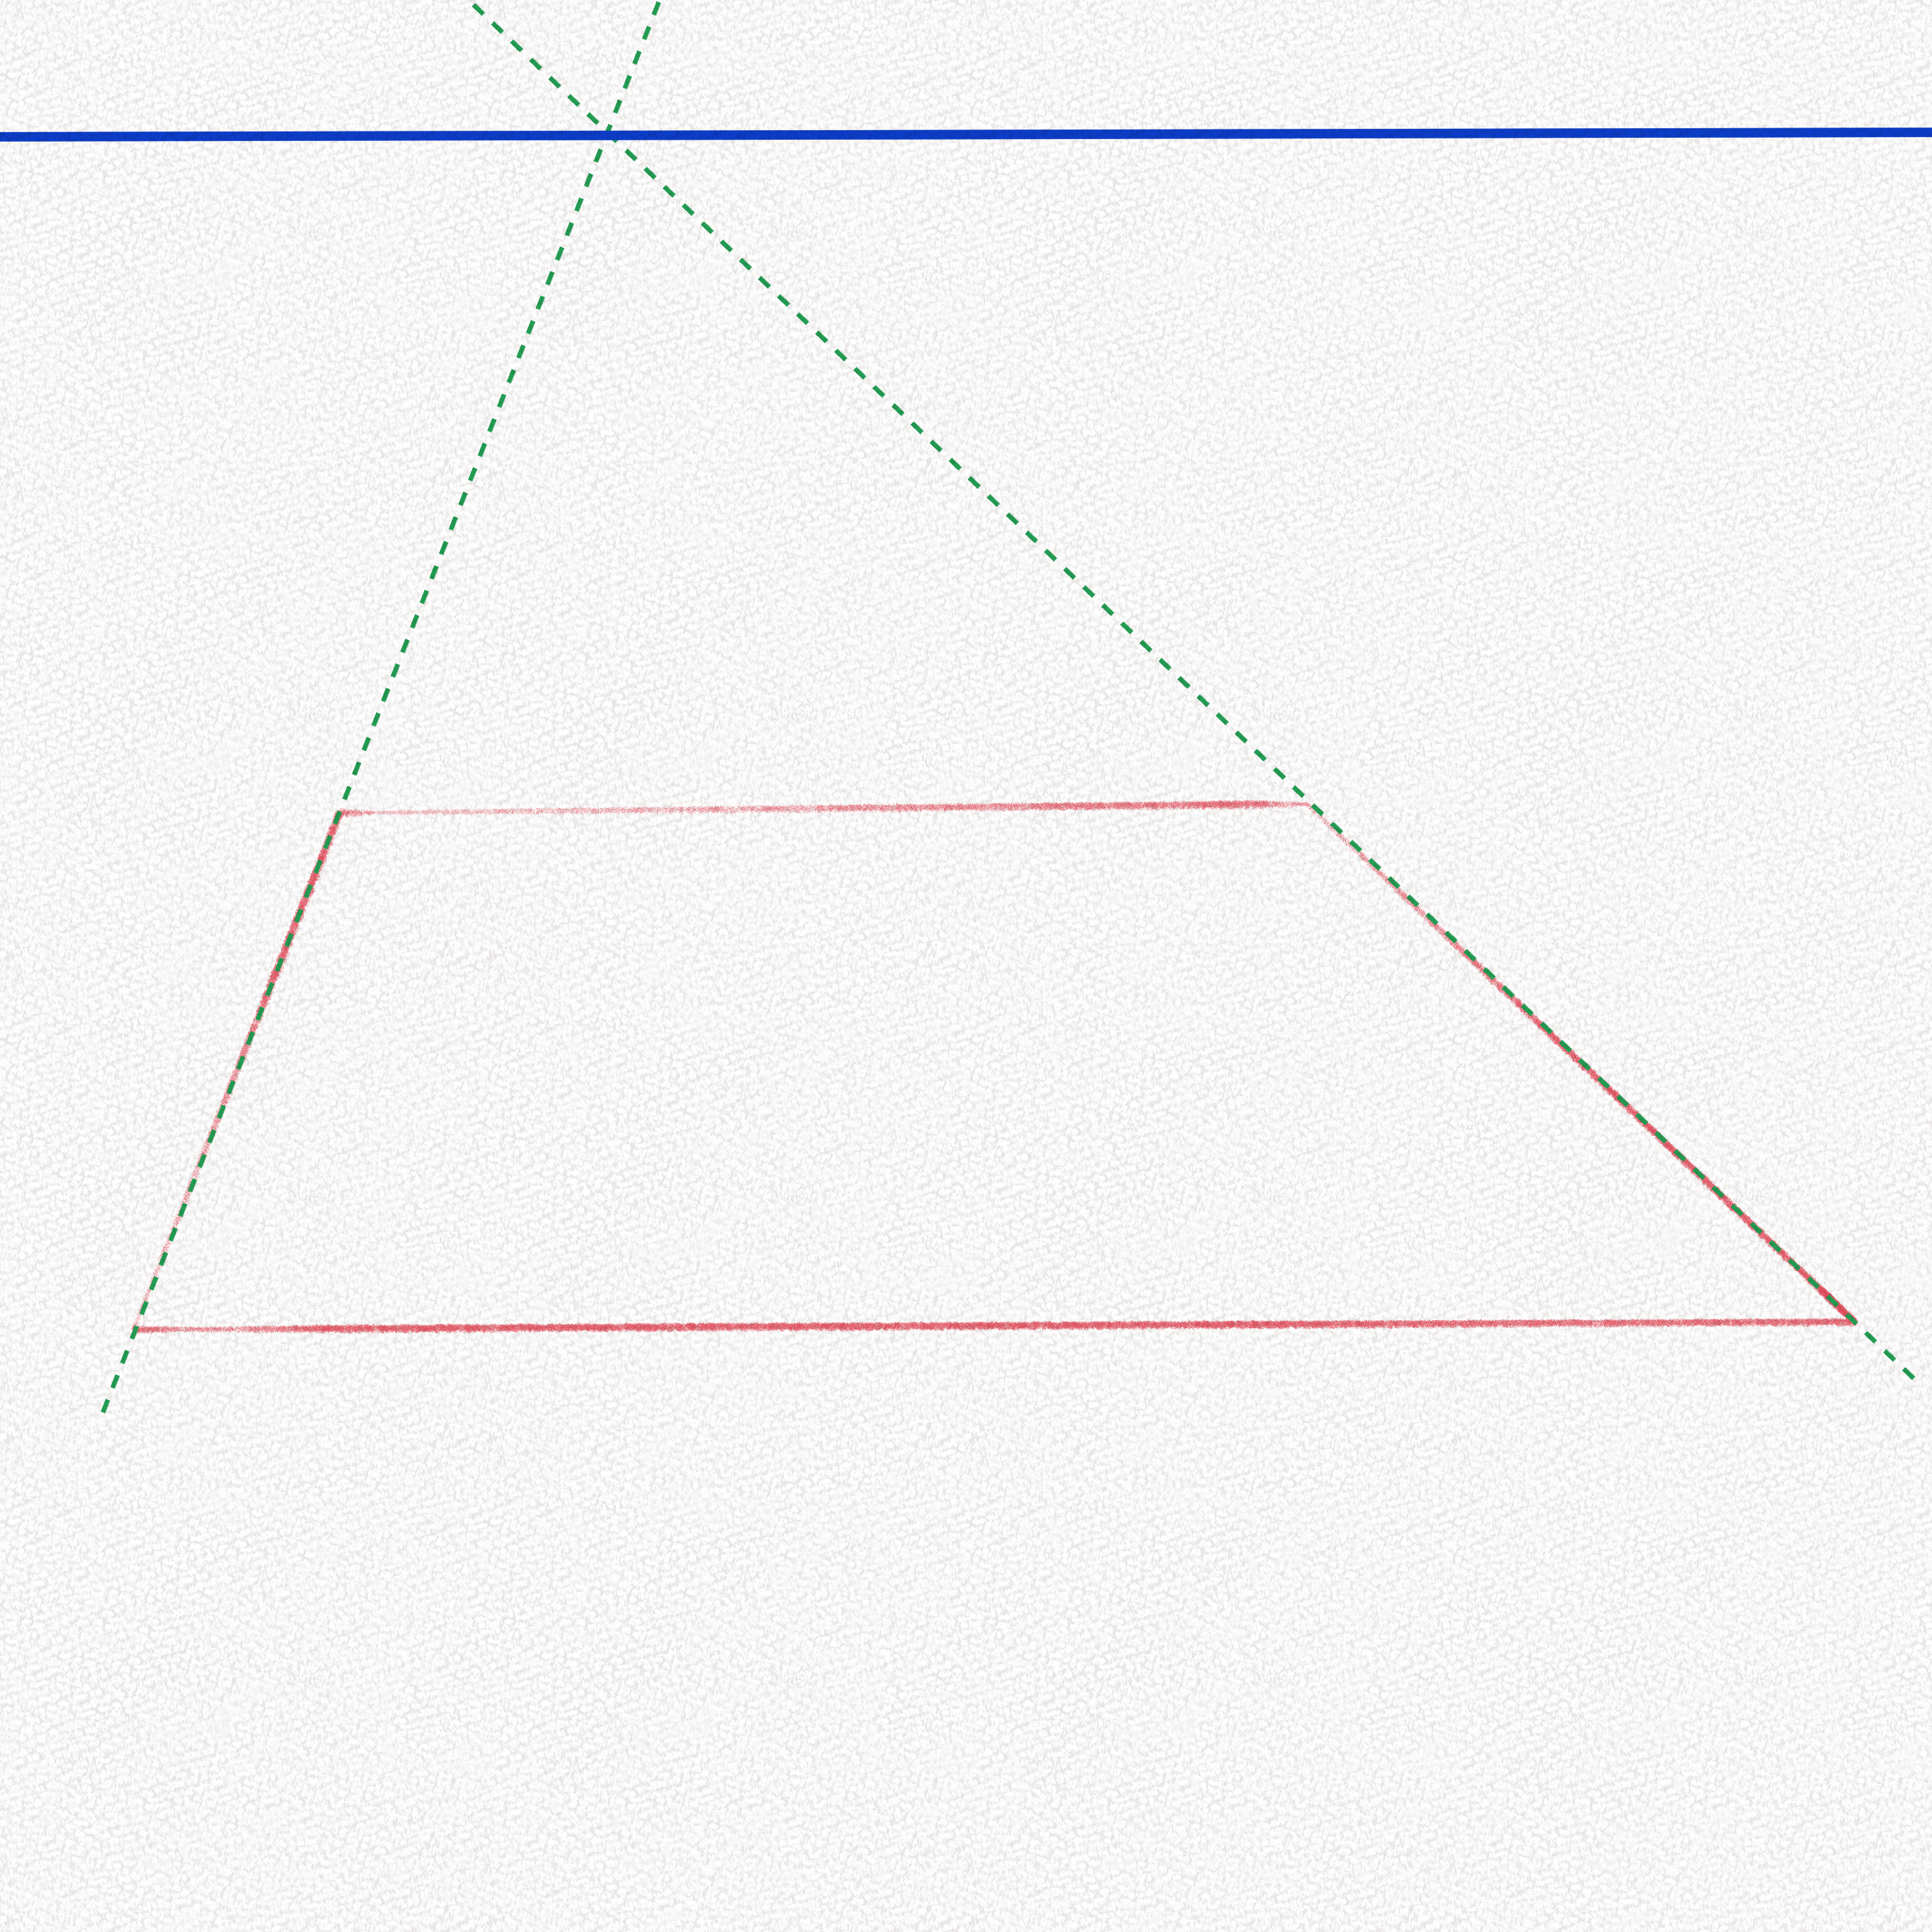
Step 3: Draw two lines
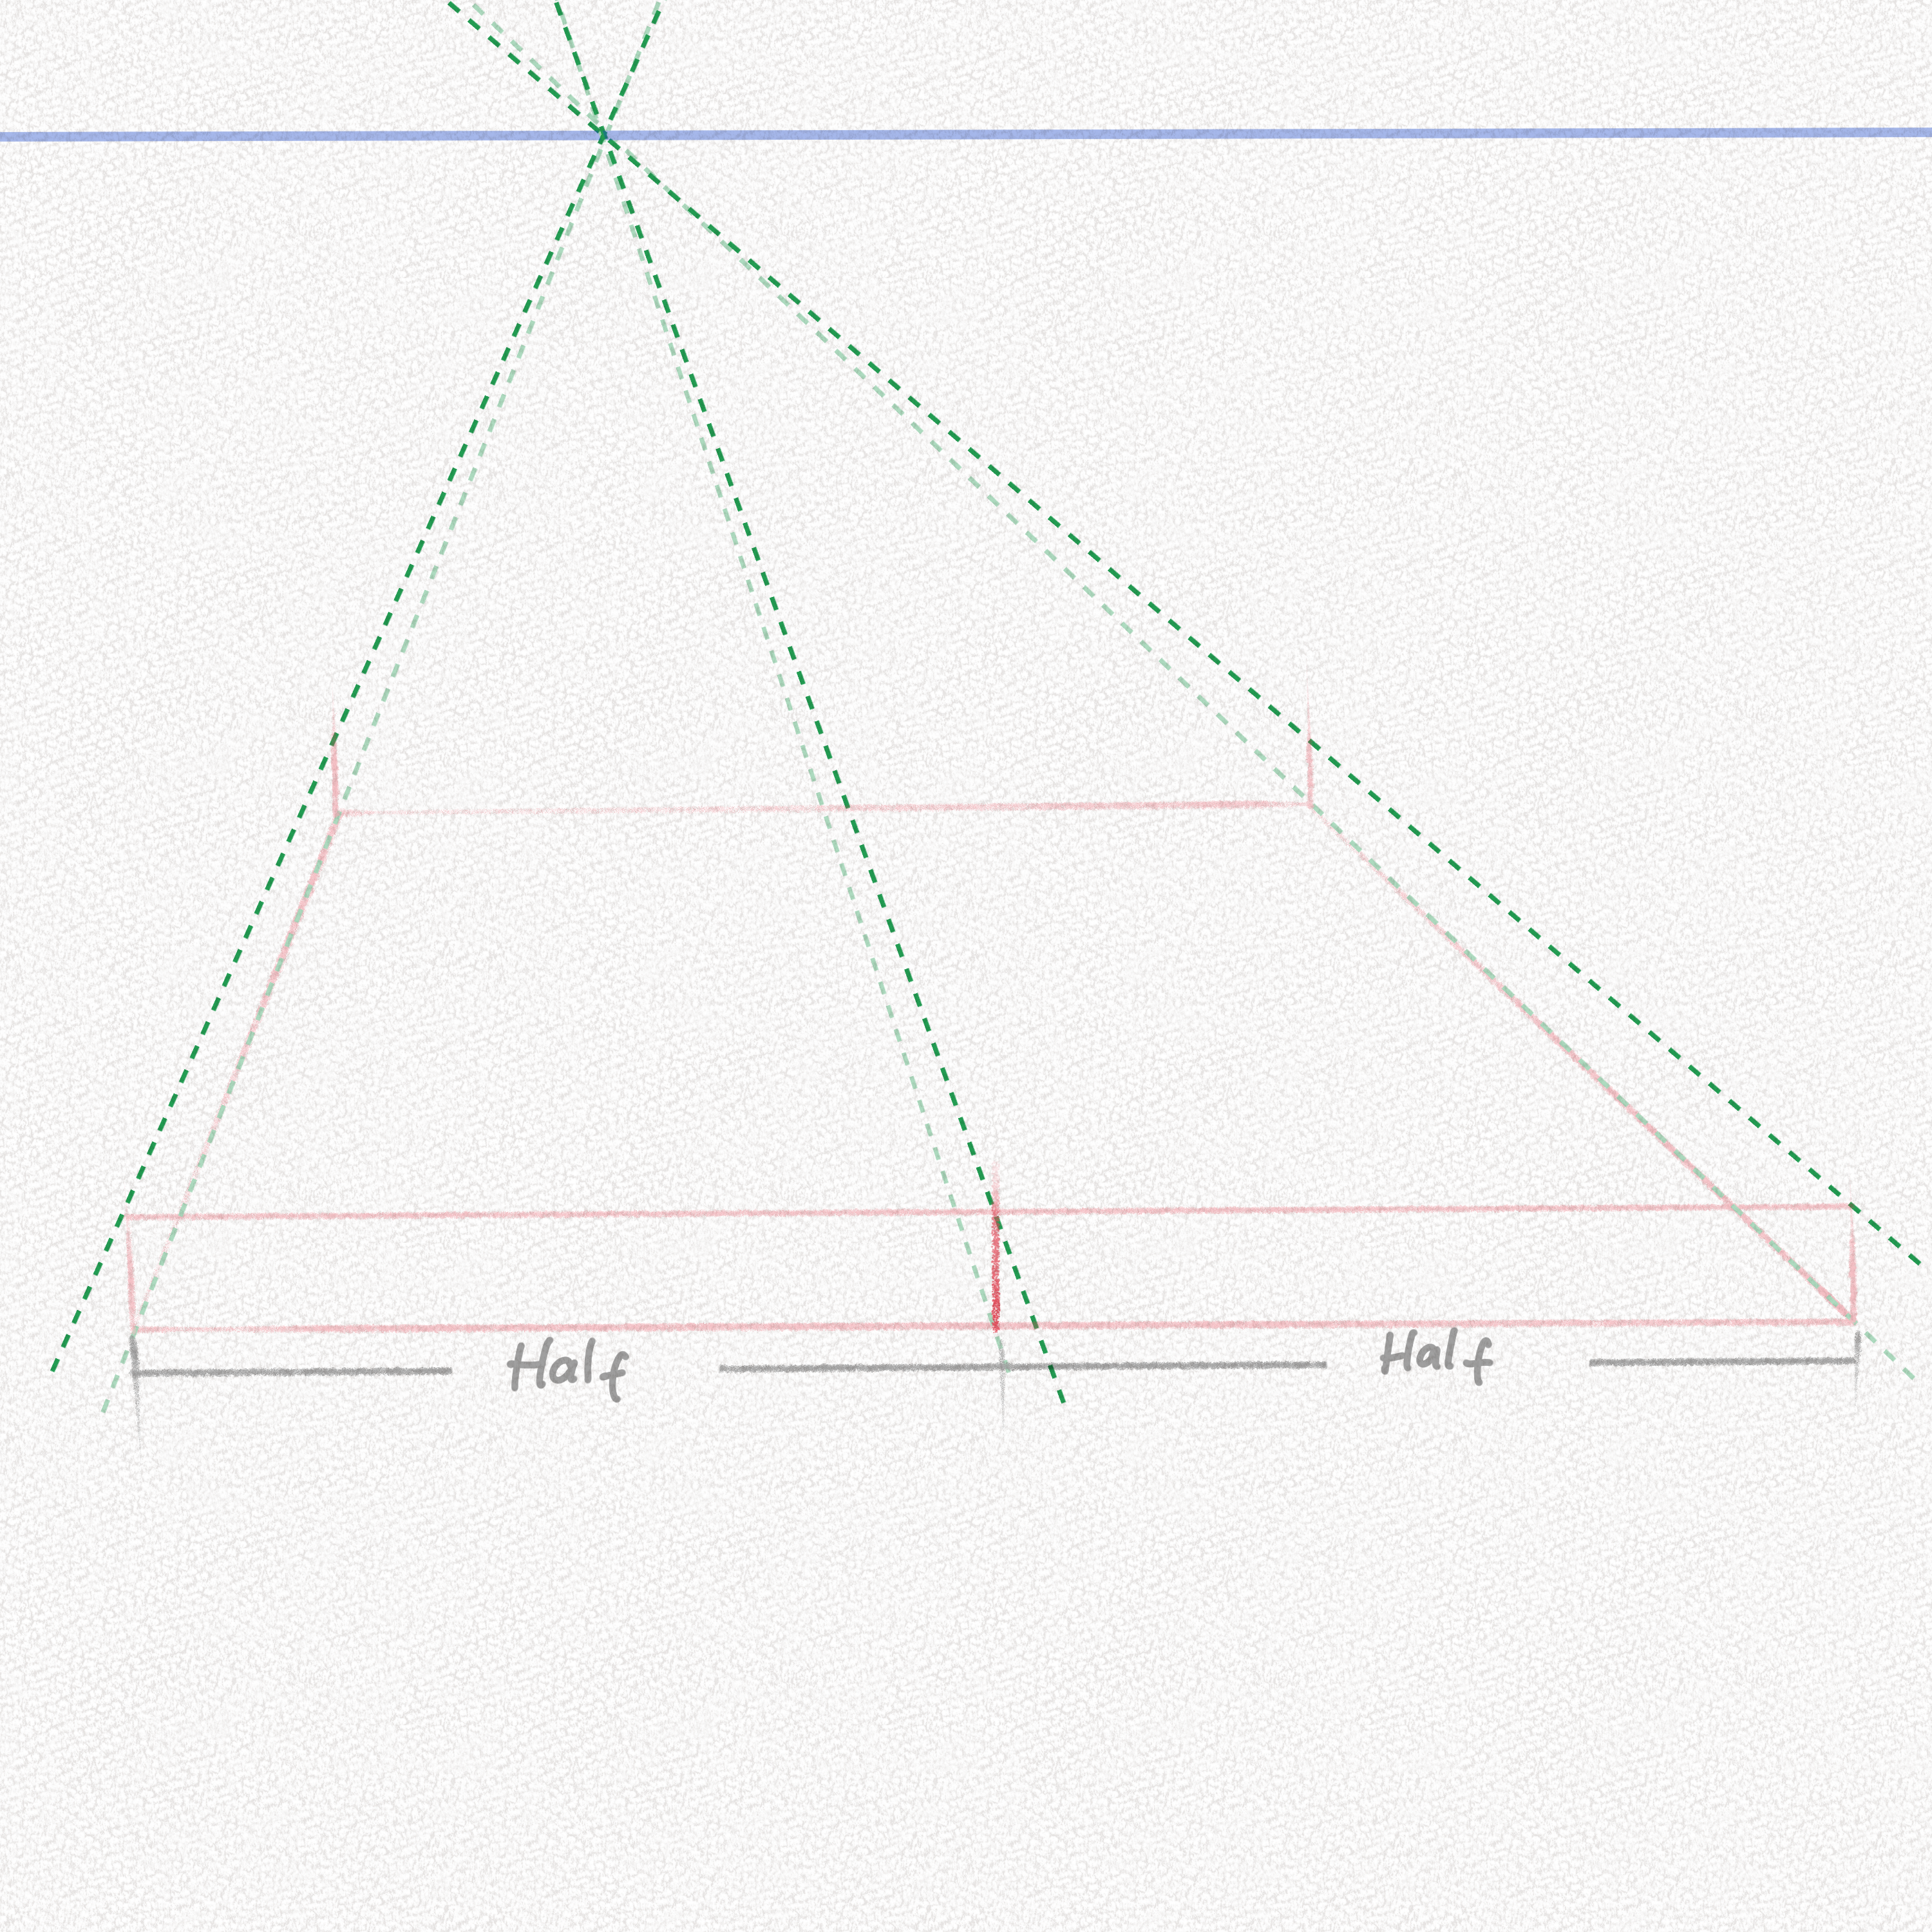
Pick a random point in your horizon line. This point will be the vanishing point of our drawing. Then draw two lines as shown in the diagram. These lines will be our guides for drawing our book.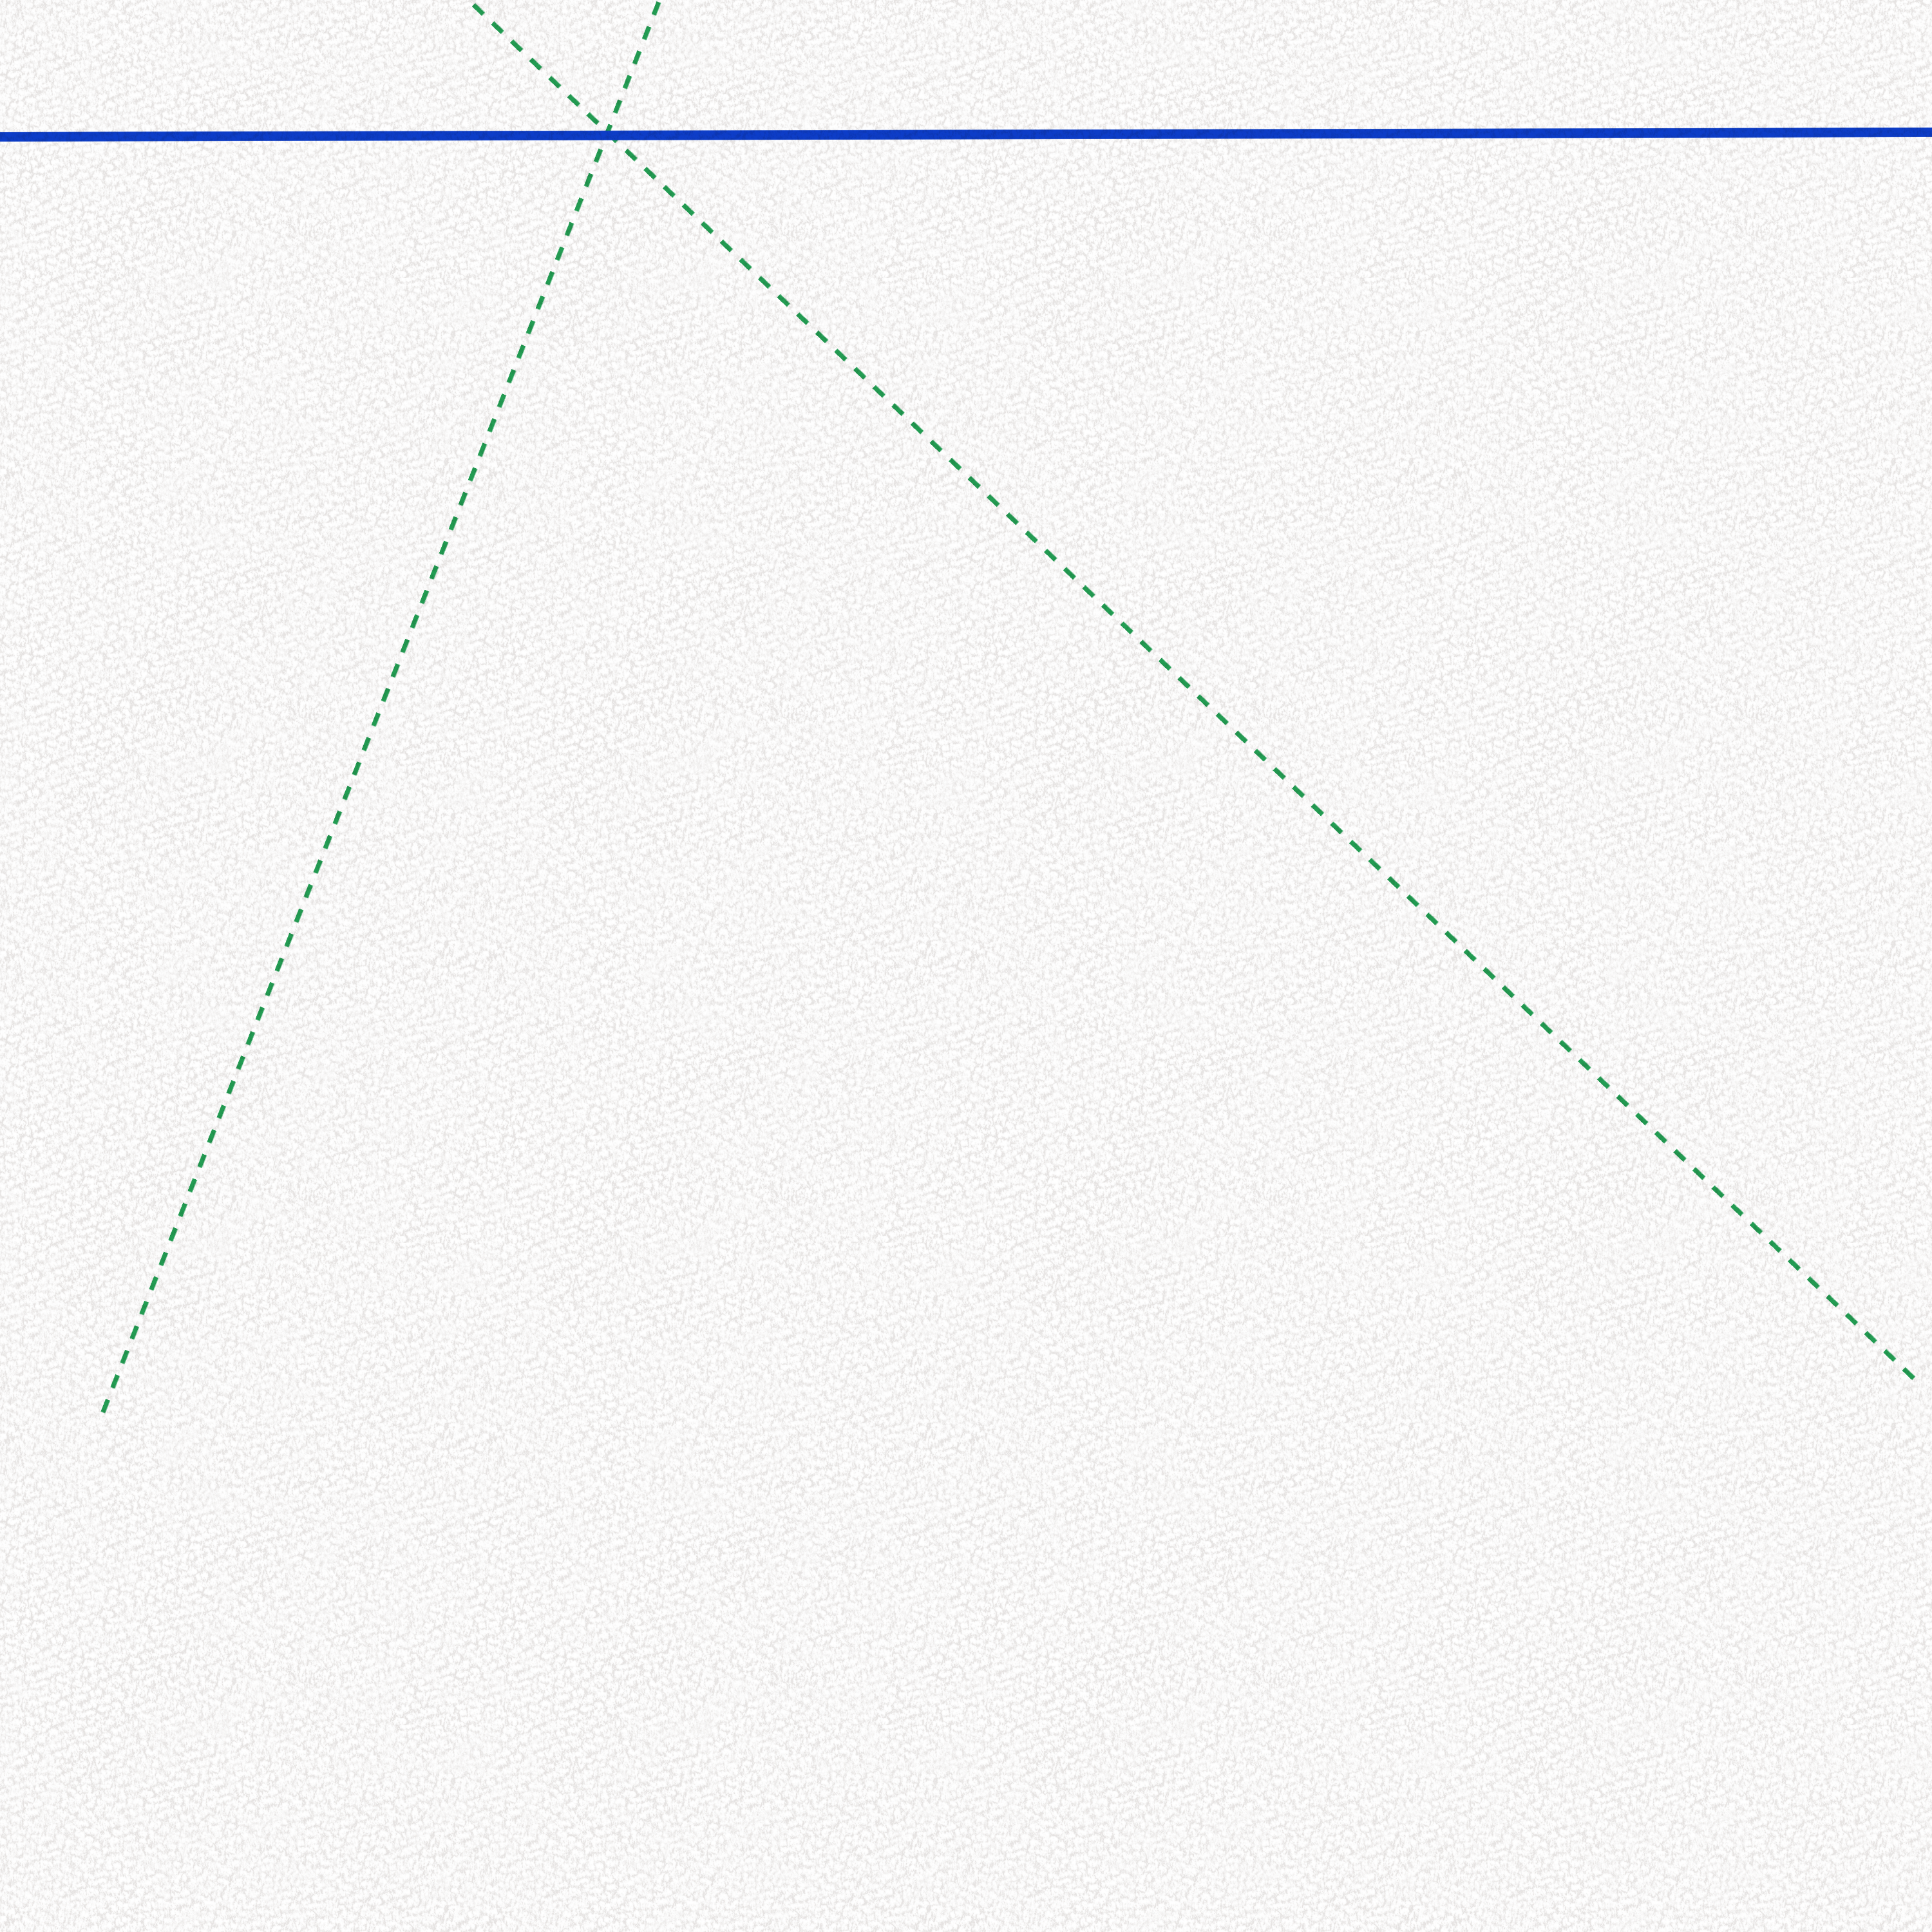
Step 4: Close the shape
Close the figure with two horizontal lines making a trapezium-like shape. This will be the outline of our book.
 Find the middle point of the longest horizontal border and pull a line toward the vanishing point we’ve chosen. All lines that are “horizontally parallel” in our book will always head towards the vanishing point while all the vertical lines will remain vertical. Since in this case, we only have one, then all parallel horizontal lines will head there.
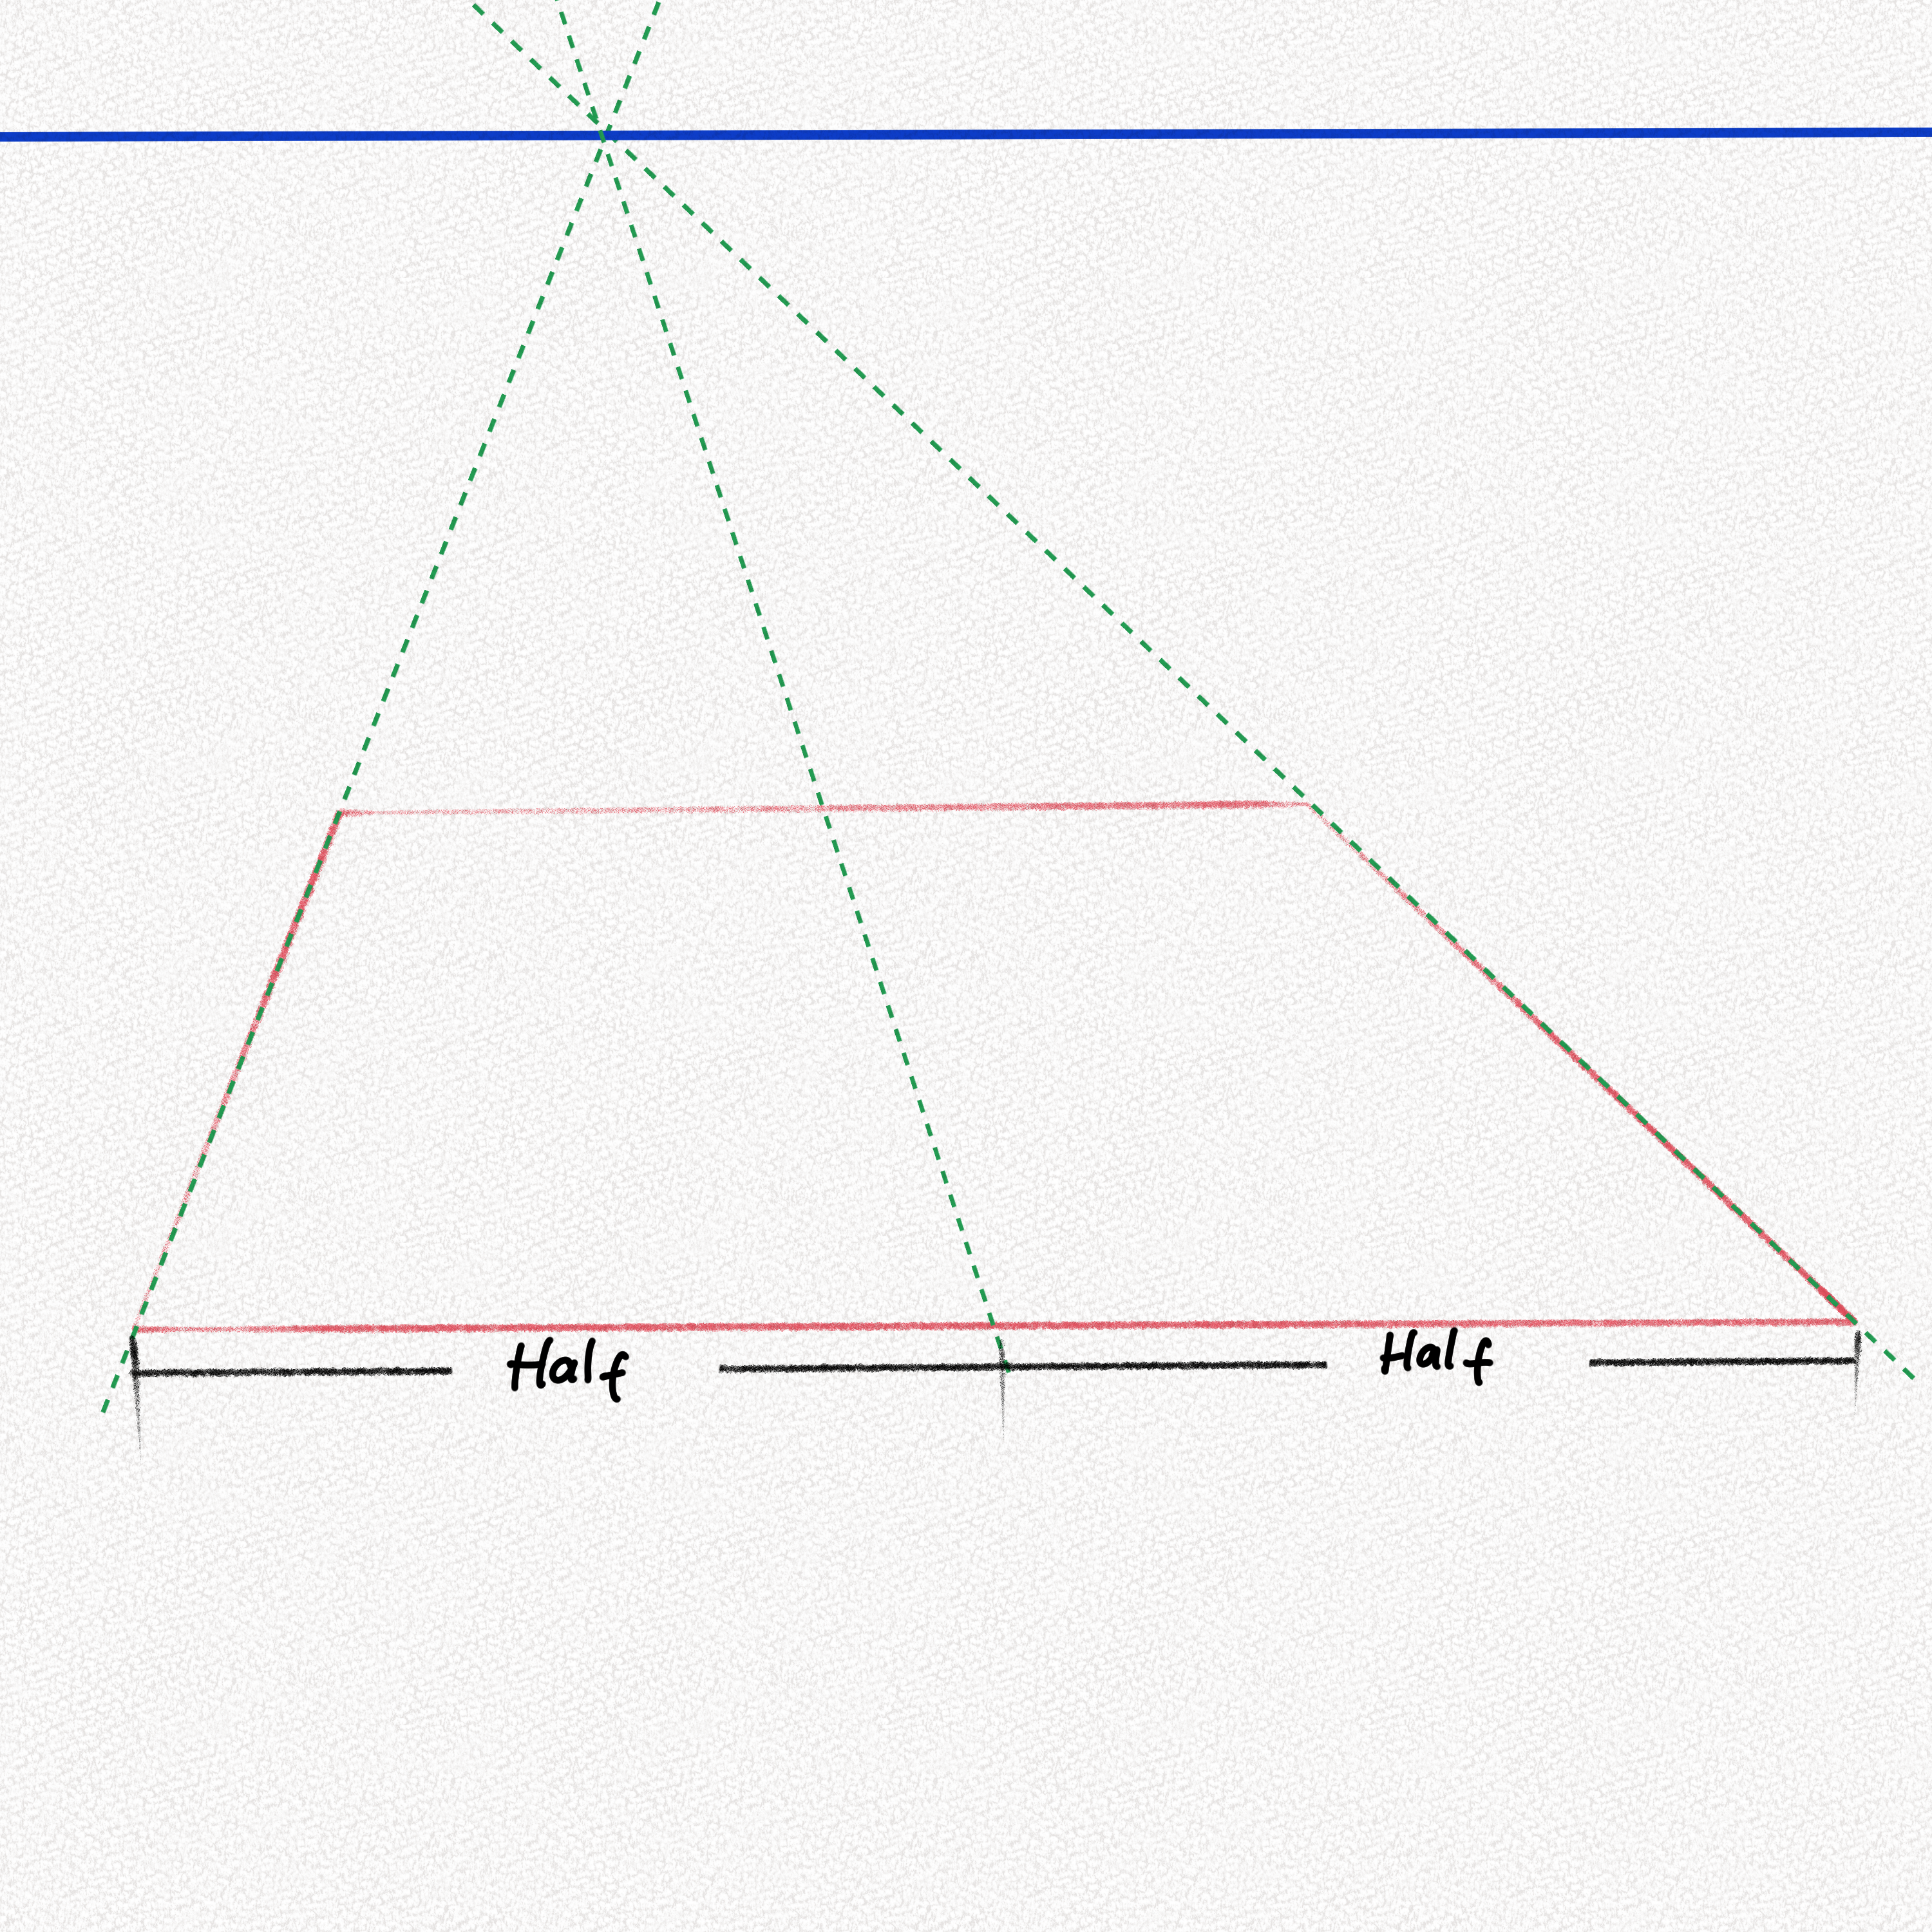
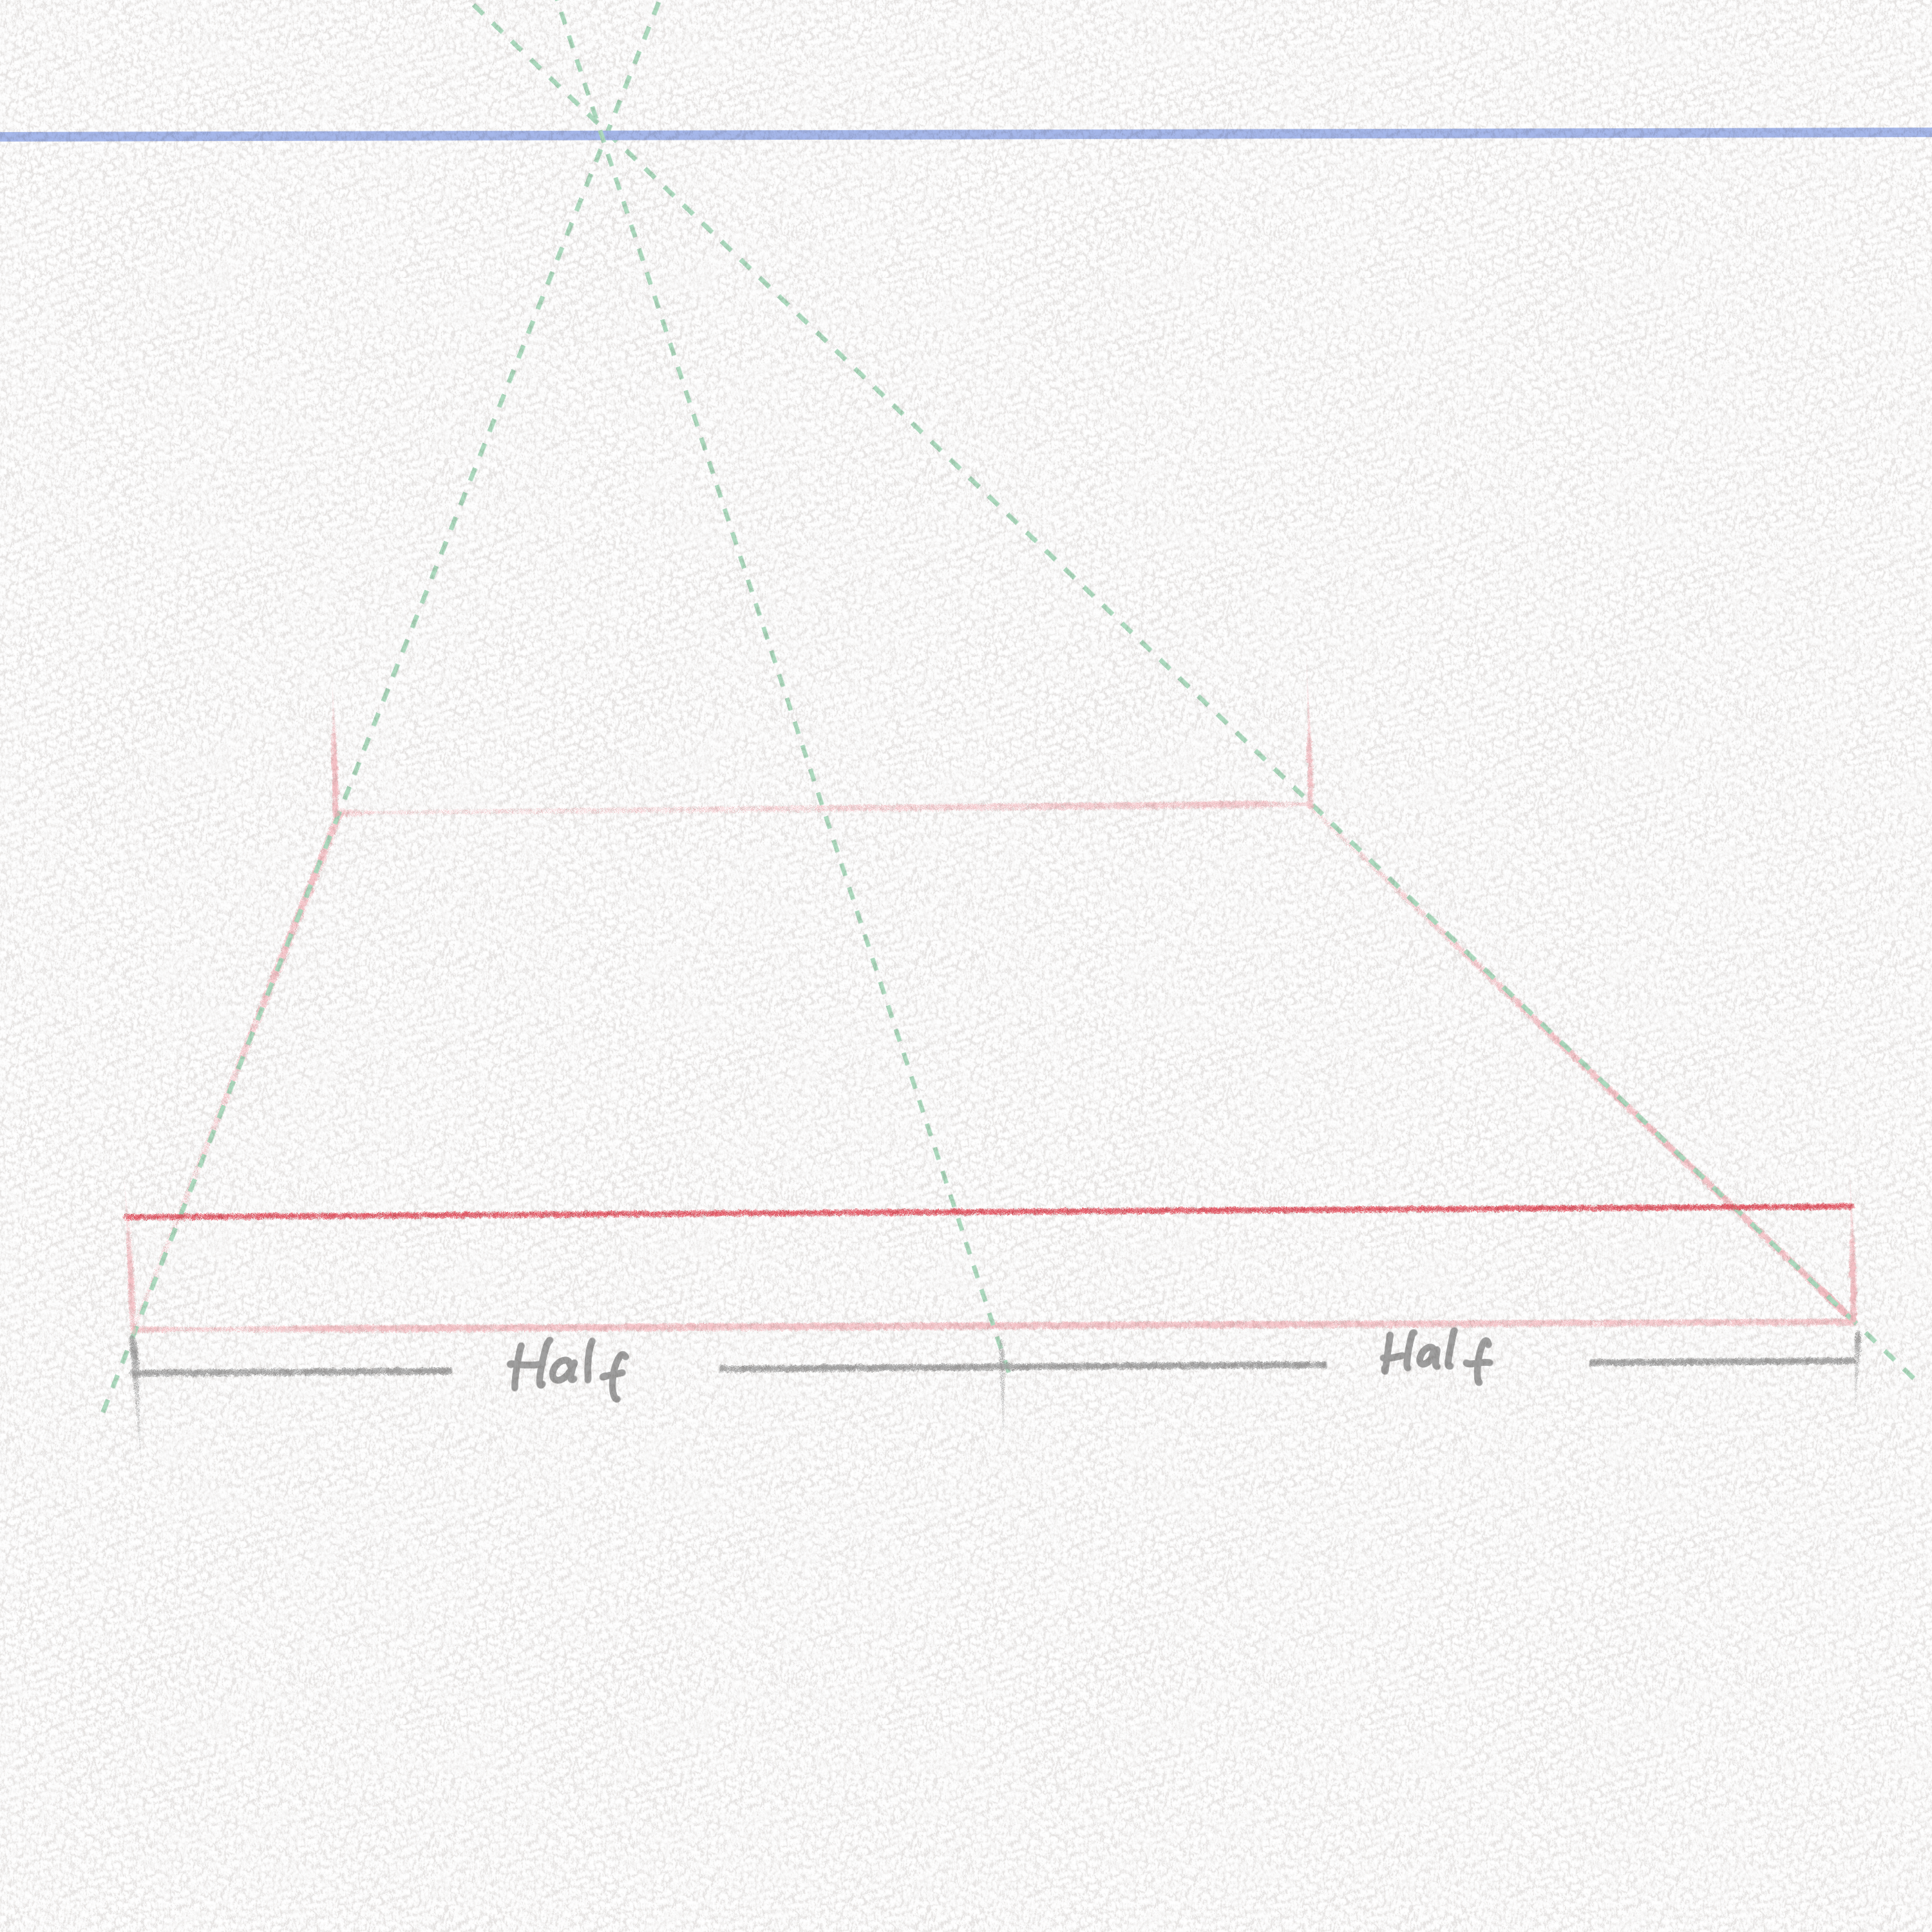
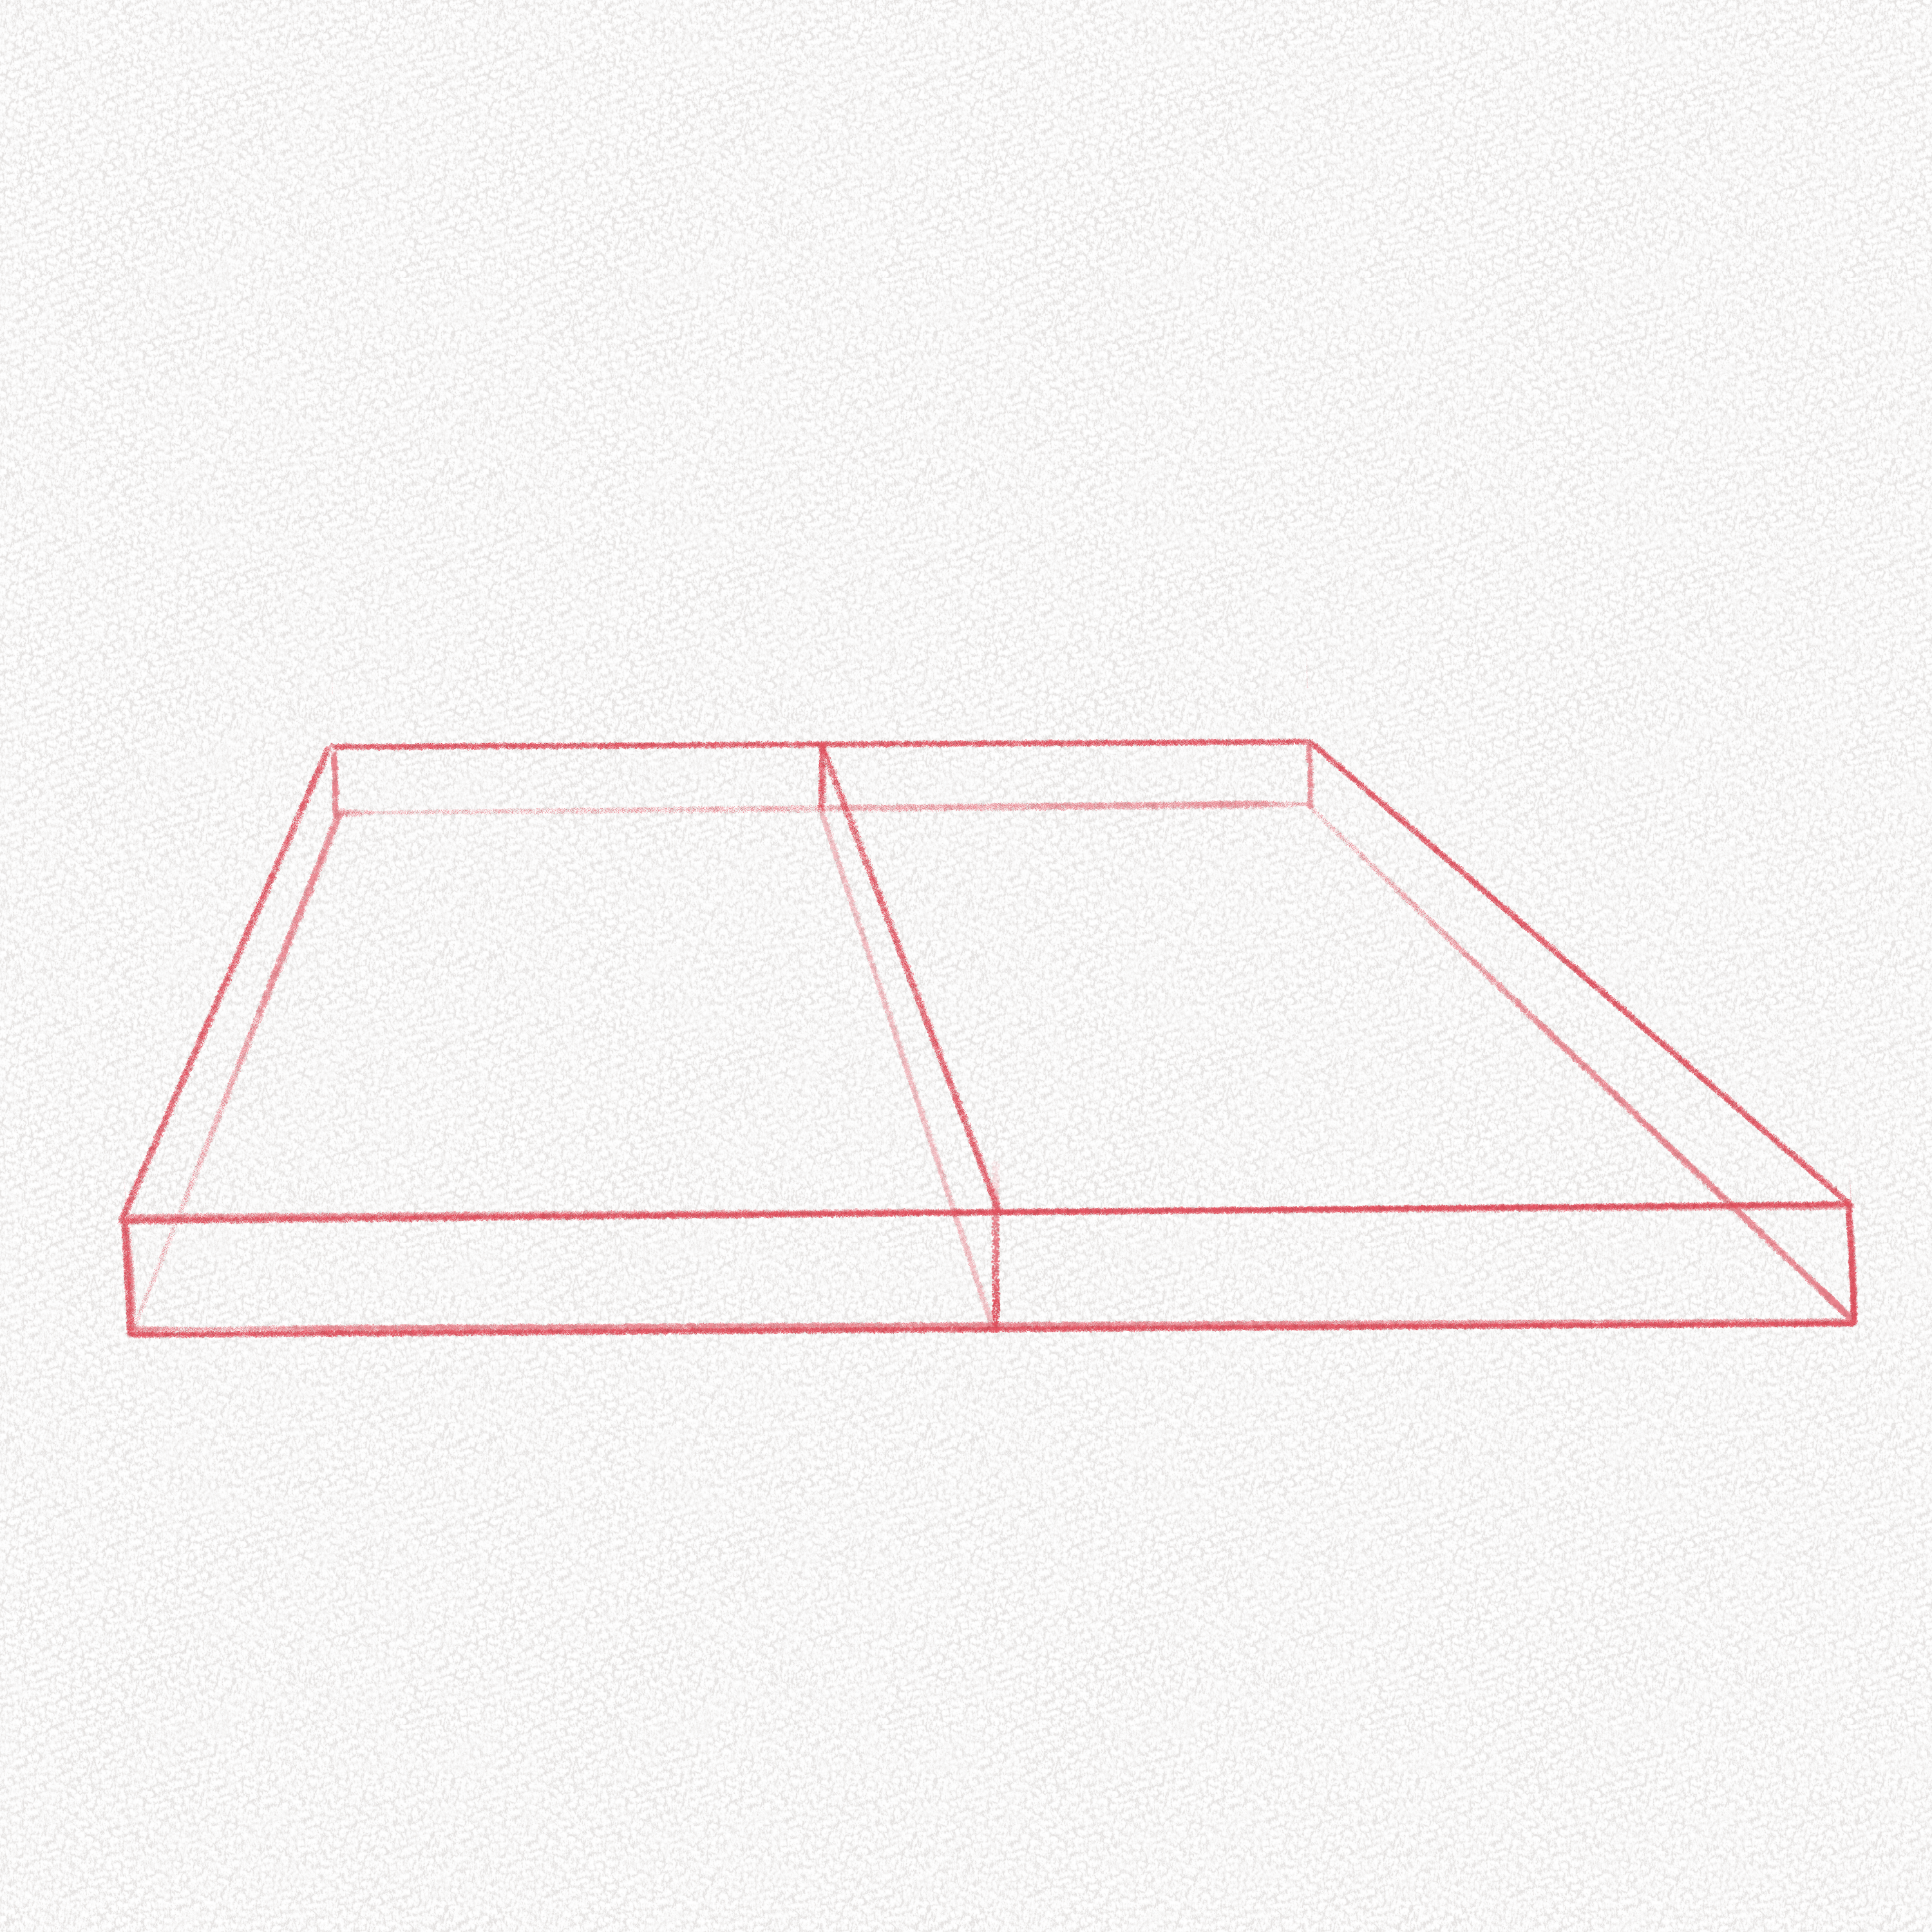
Step 5: Draw four small lines
With your ruler, draw 4 small vertical lines. As of now, we’re building a box that will become the base for our book drawing, and these lines will define the thickness of our book.
Step 6: Define the thickness
Define the thickness of our book by drawing a horizontal line that connects the two frontal vertical lines creating a rectangular shape.
 Then from there, pull two lines toward the vanishing point in order to build the box.
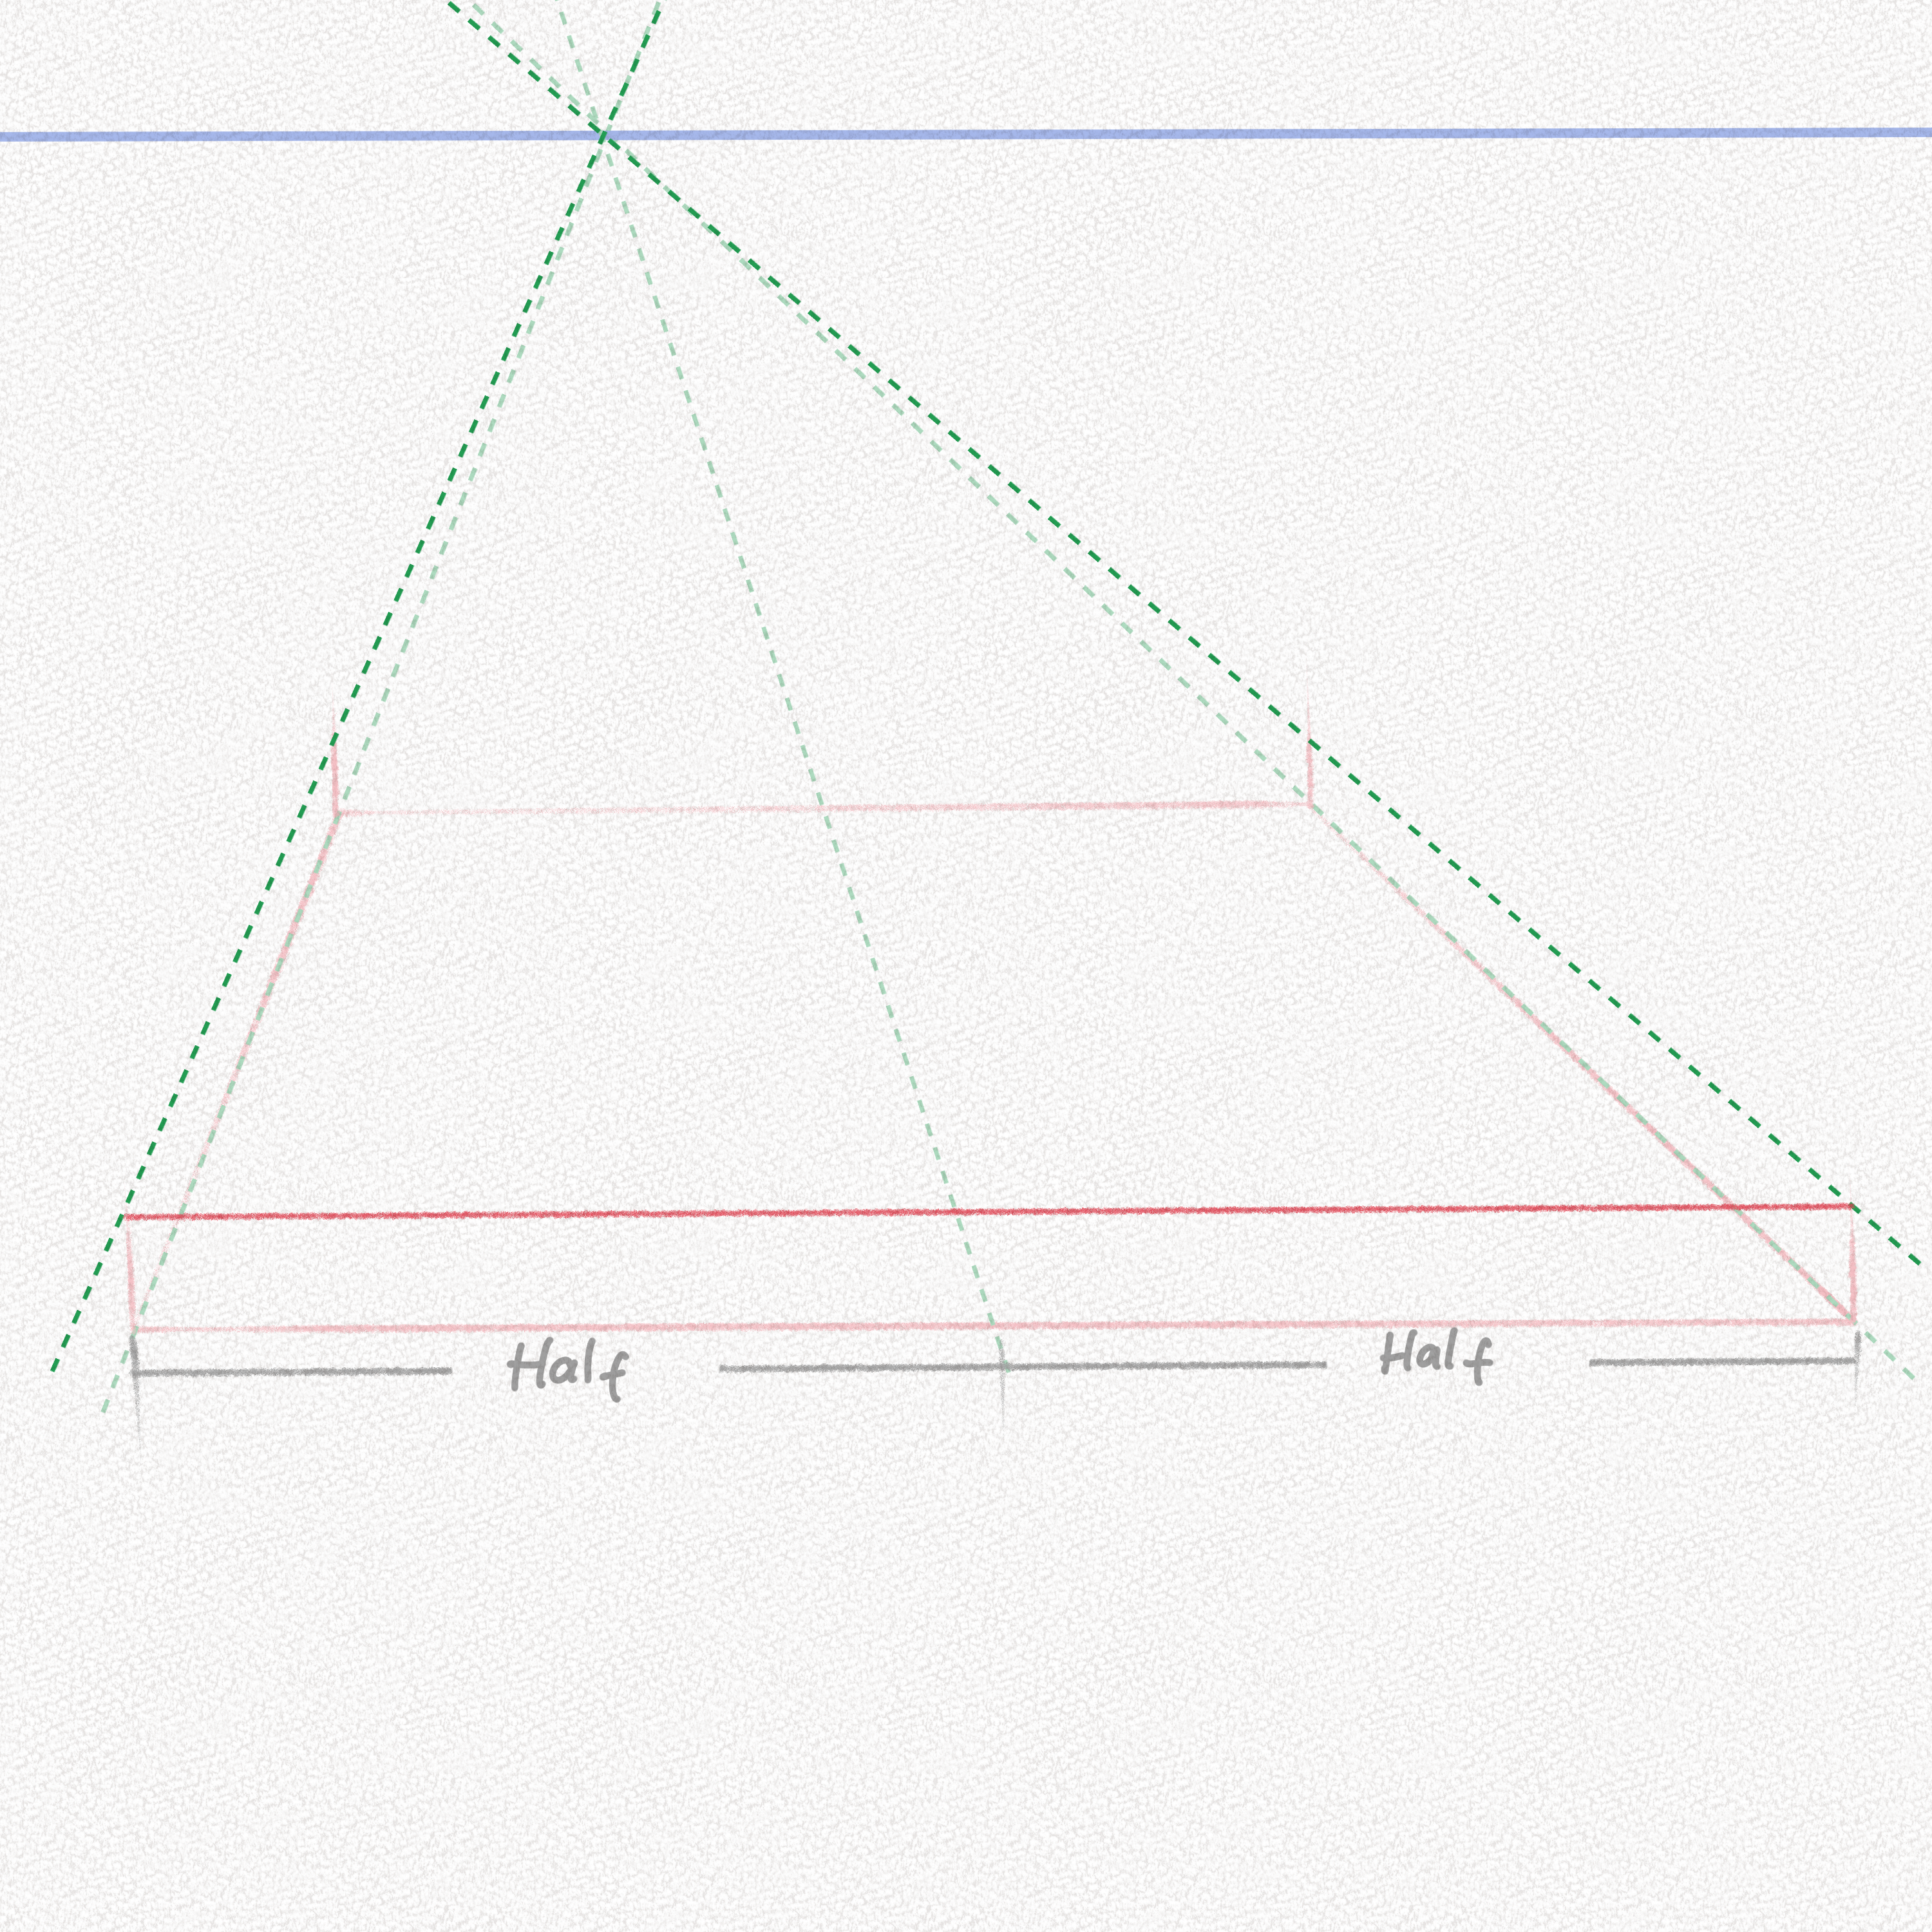
Do the same for the middle line and erase your guidelines.

Congrats! Now you have a perfectly accurate box made with perspective.
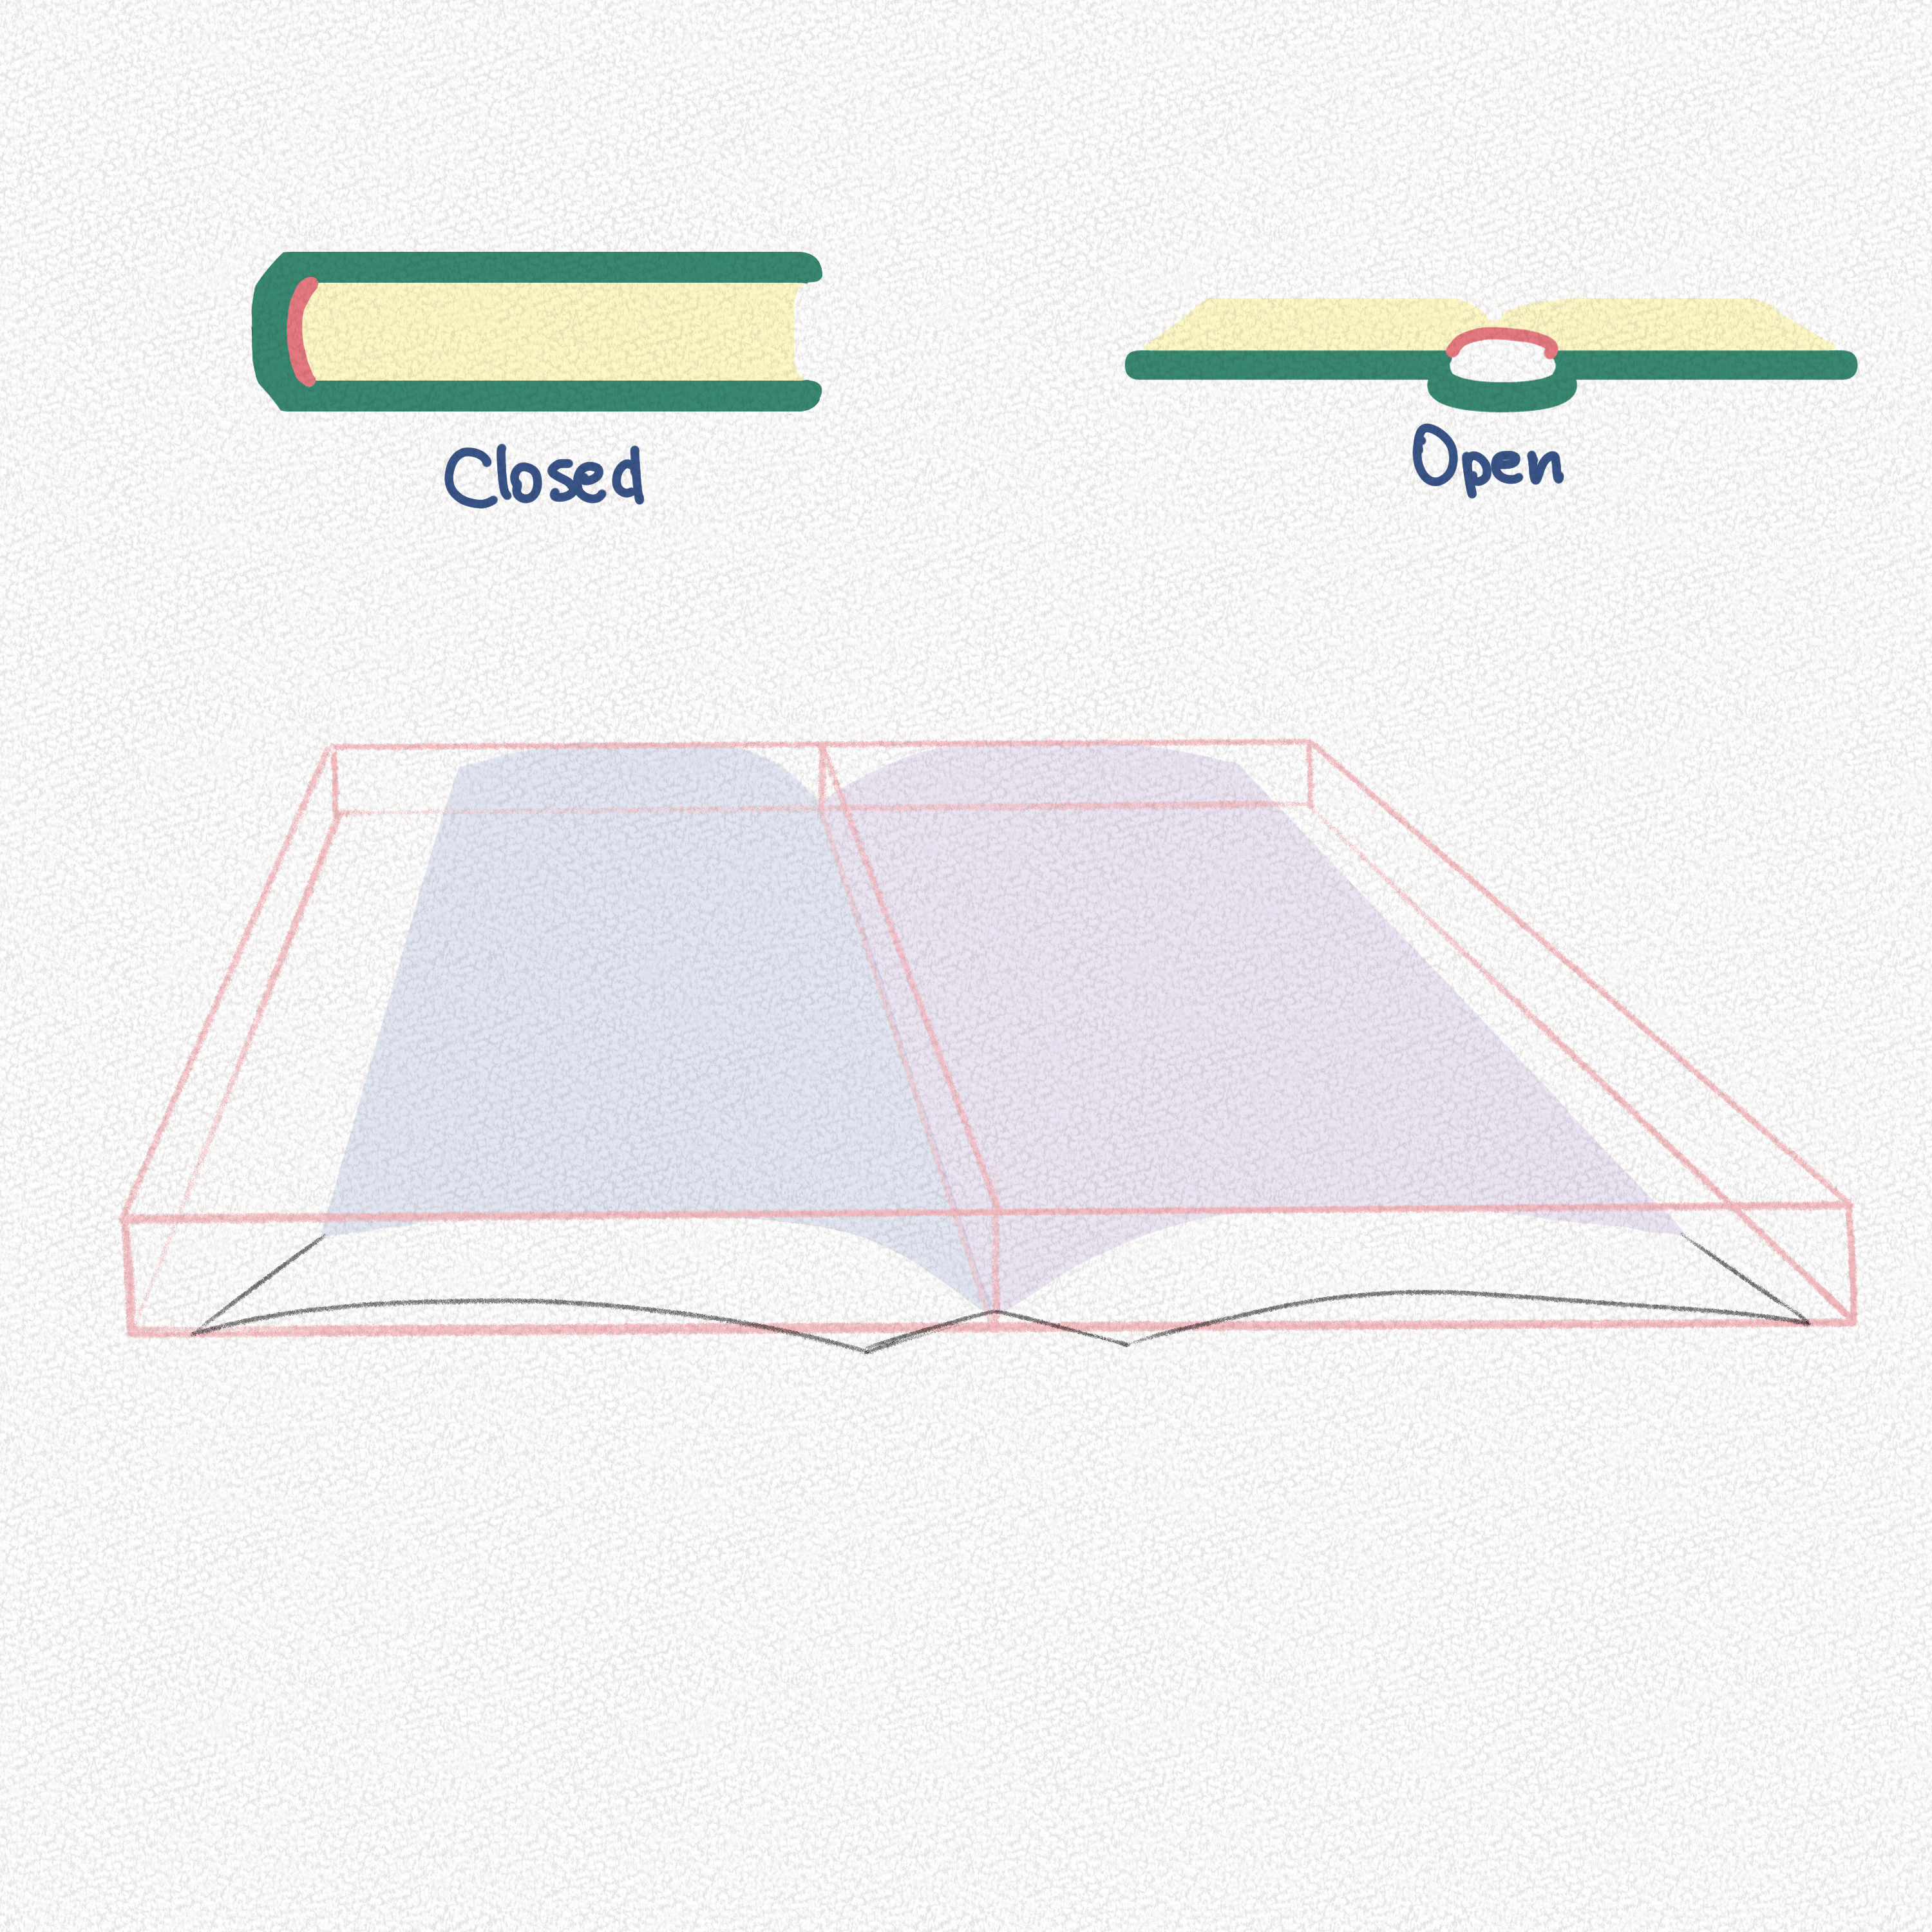
Section 2.- Structure of a Book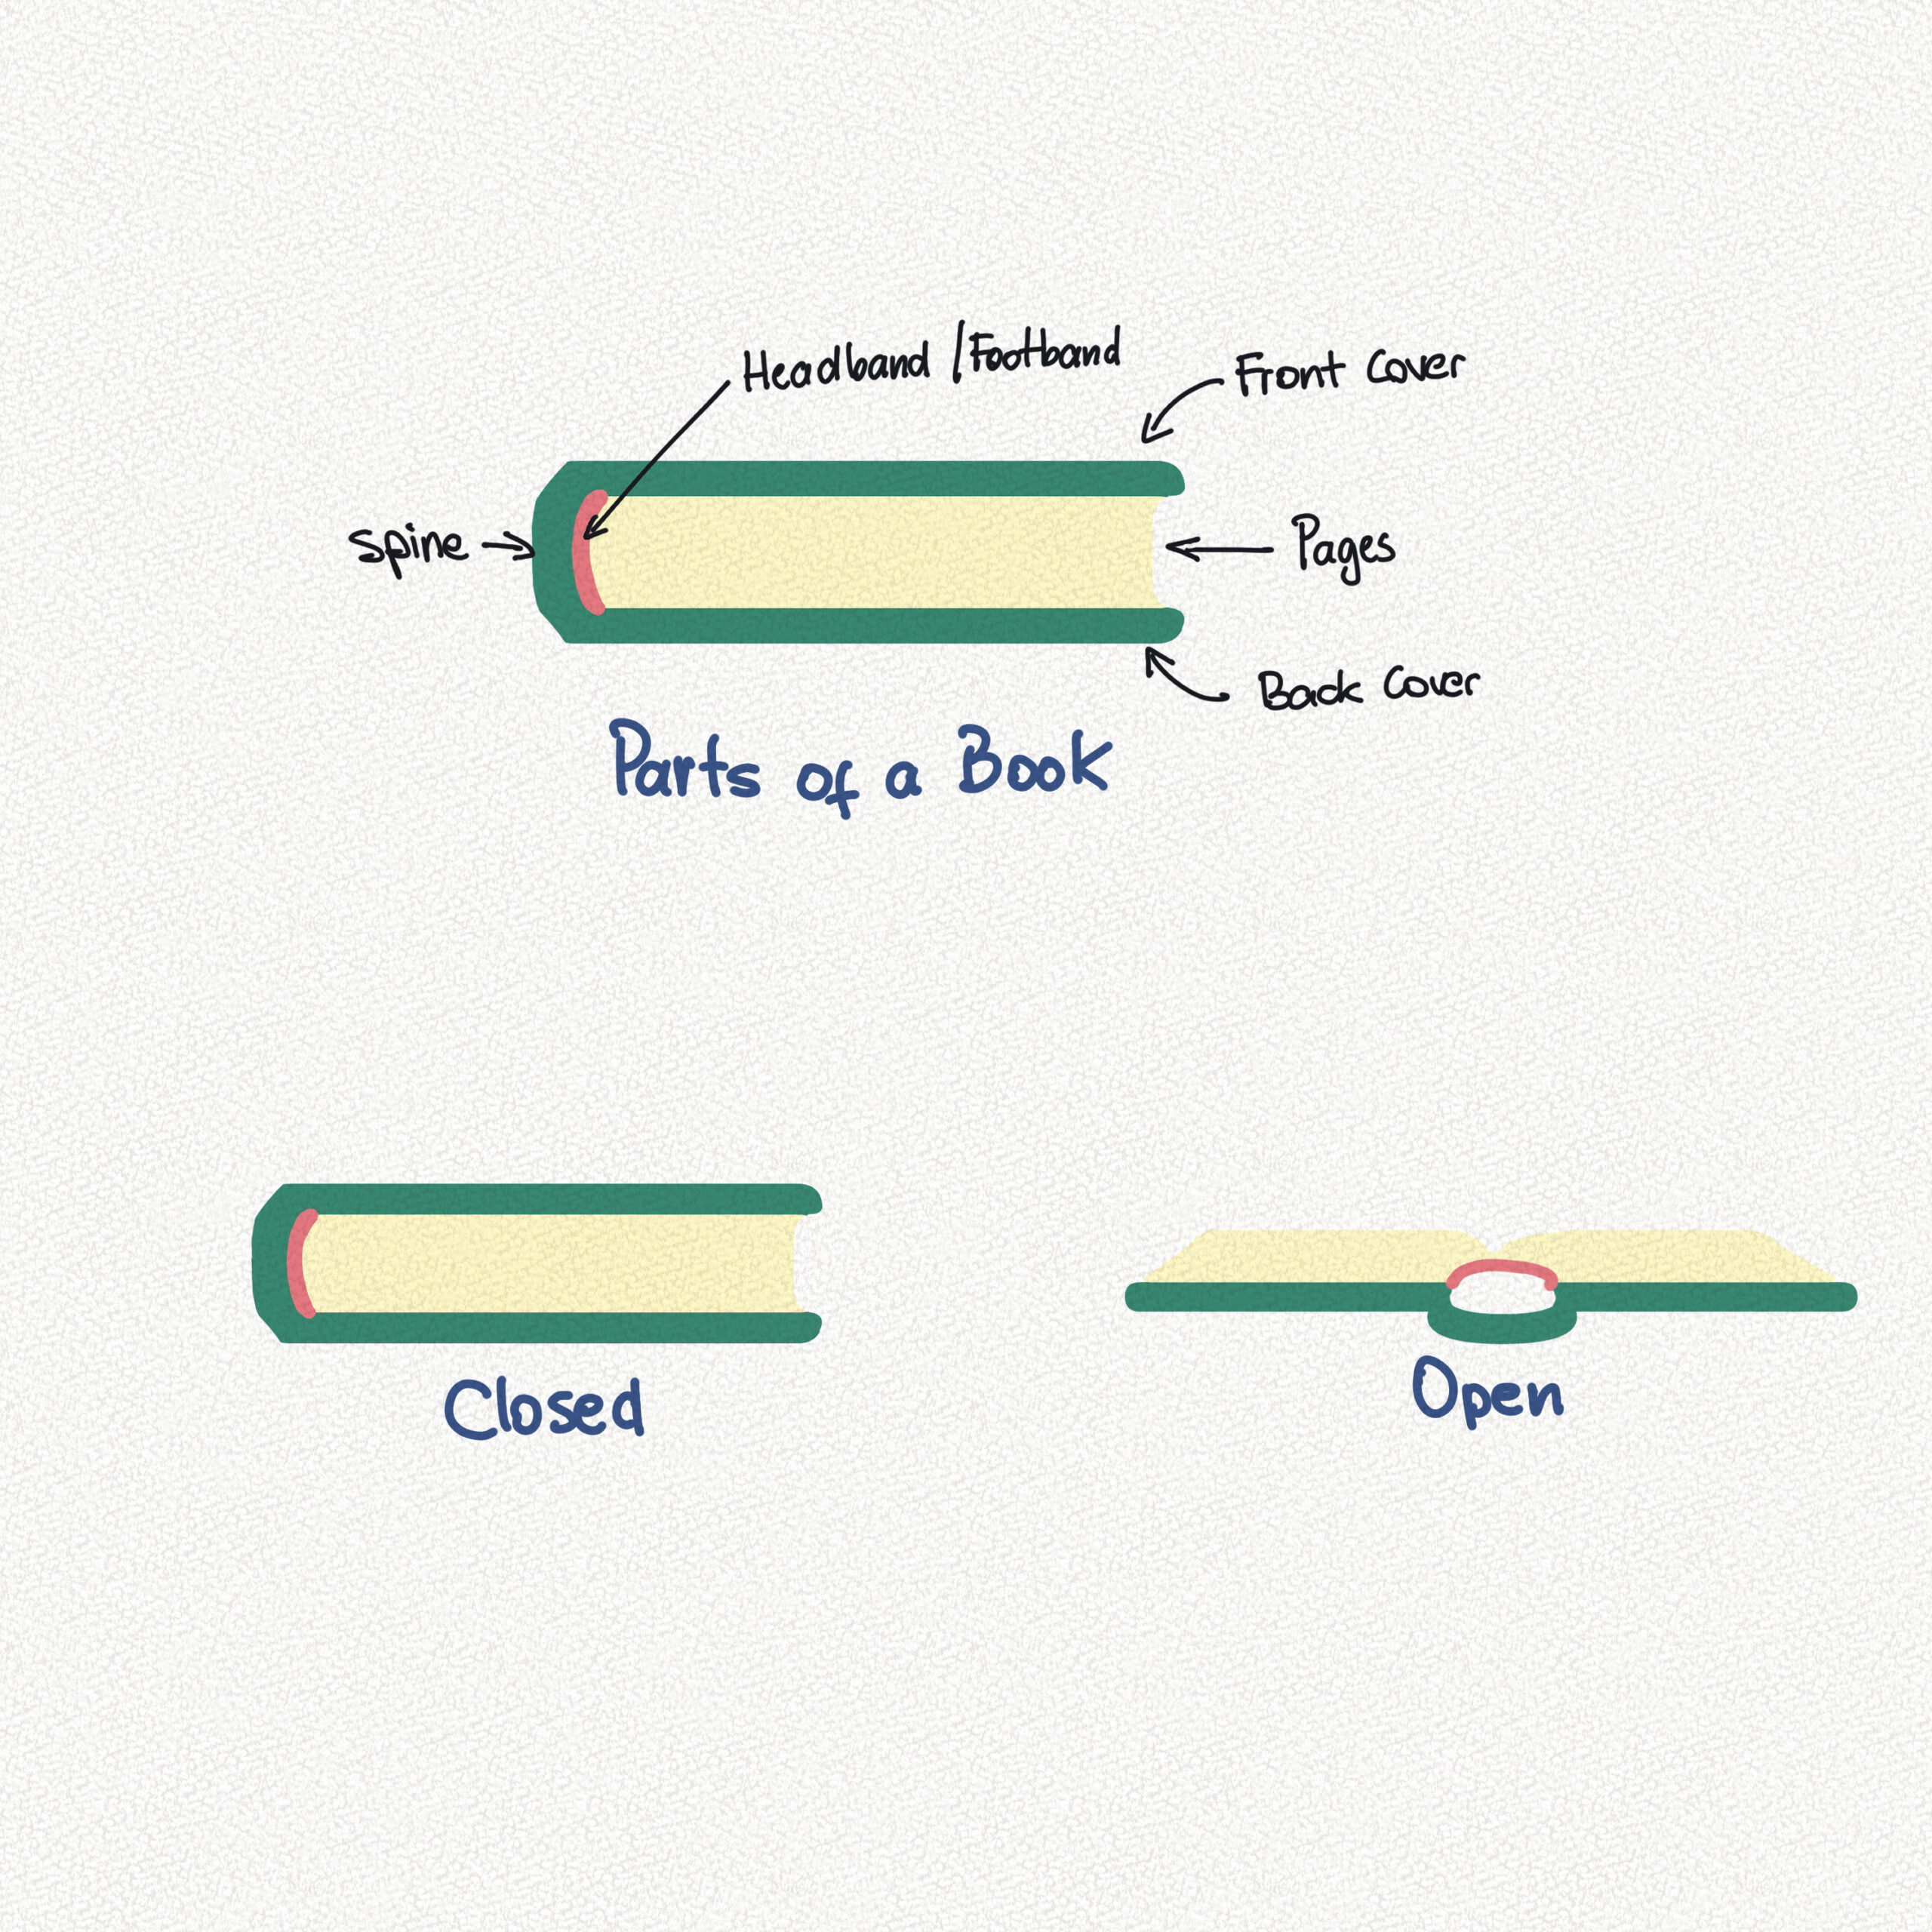
Step 7: The book pages
In order to draw the pages accurately, we’re going to imagine there is a piece of paper on top of our box. Since books are always joined in the middle or “spine”, when open, the middle pages tend to pull towards the middle while the ones at the extremes stay flat.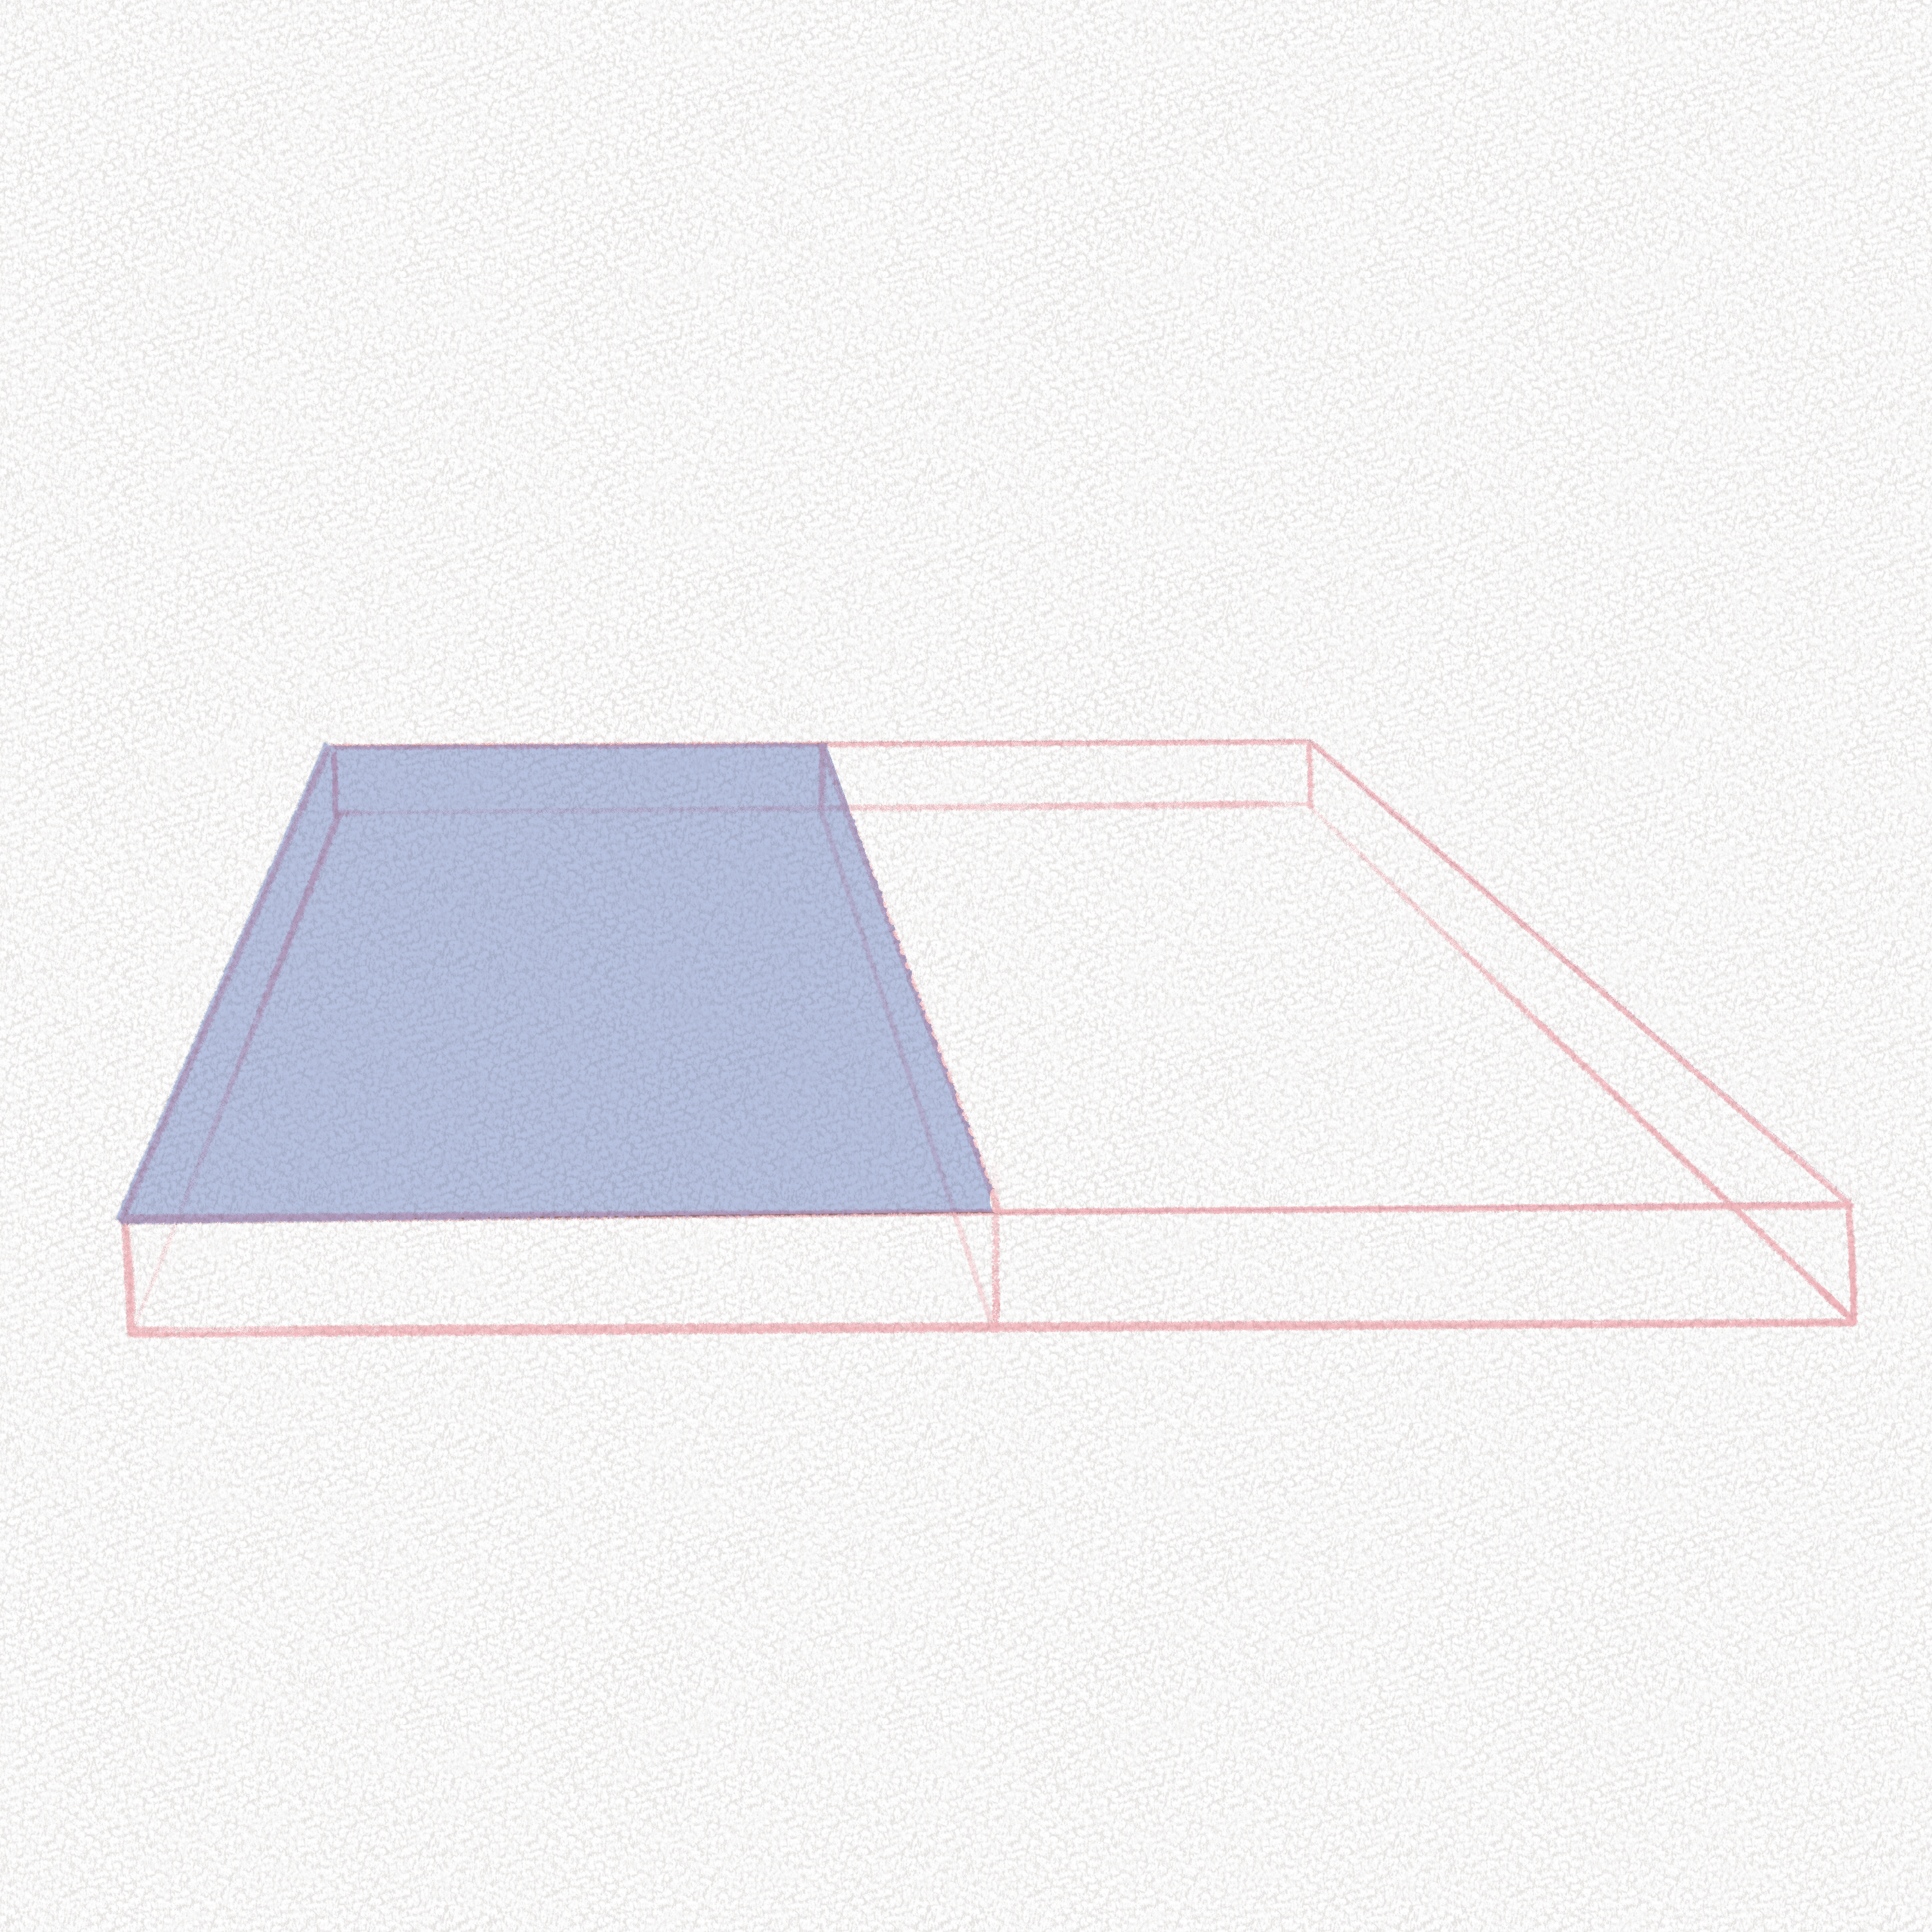
Now imagine that piece of paper at the top of your box being pulled towards the middle. The way to make sure our lines are right is to make sure the curve is the same in the front of the box and in the back.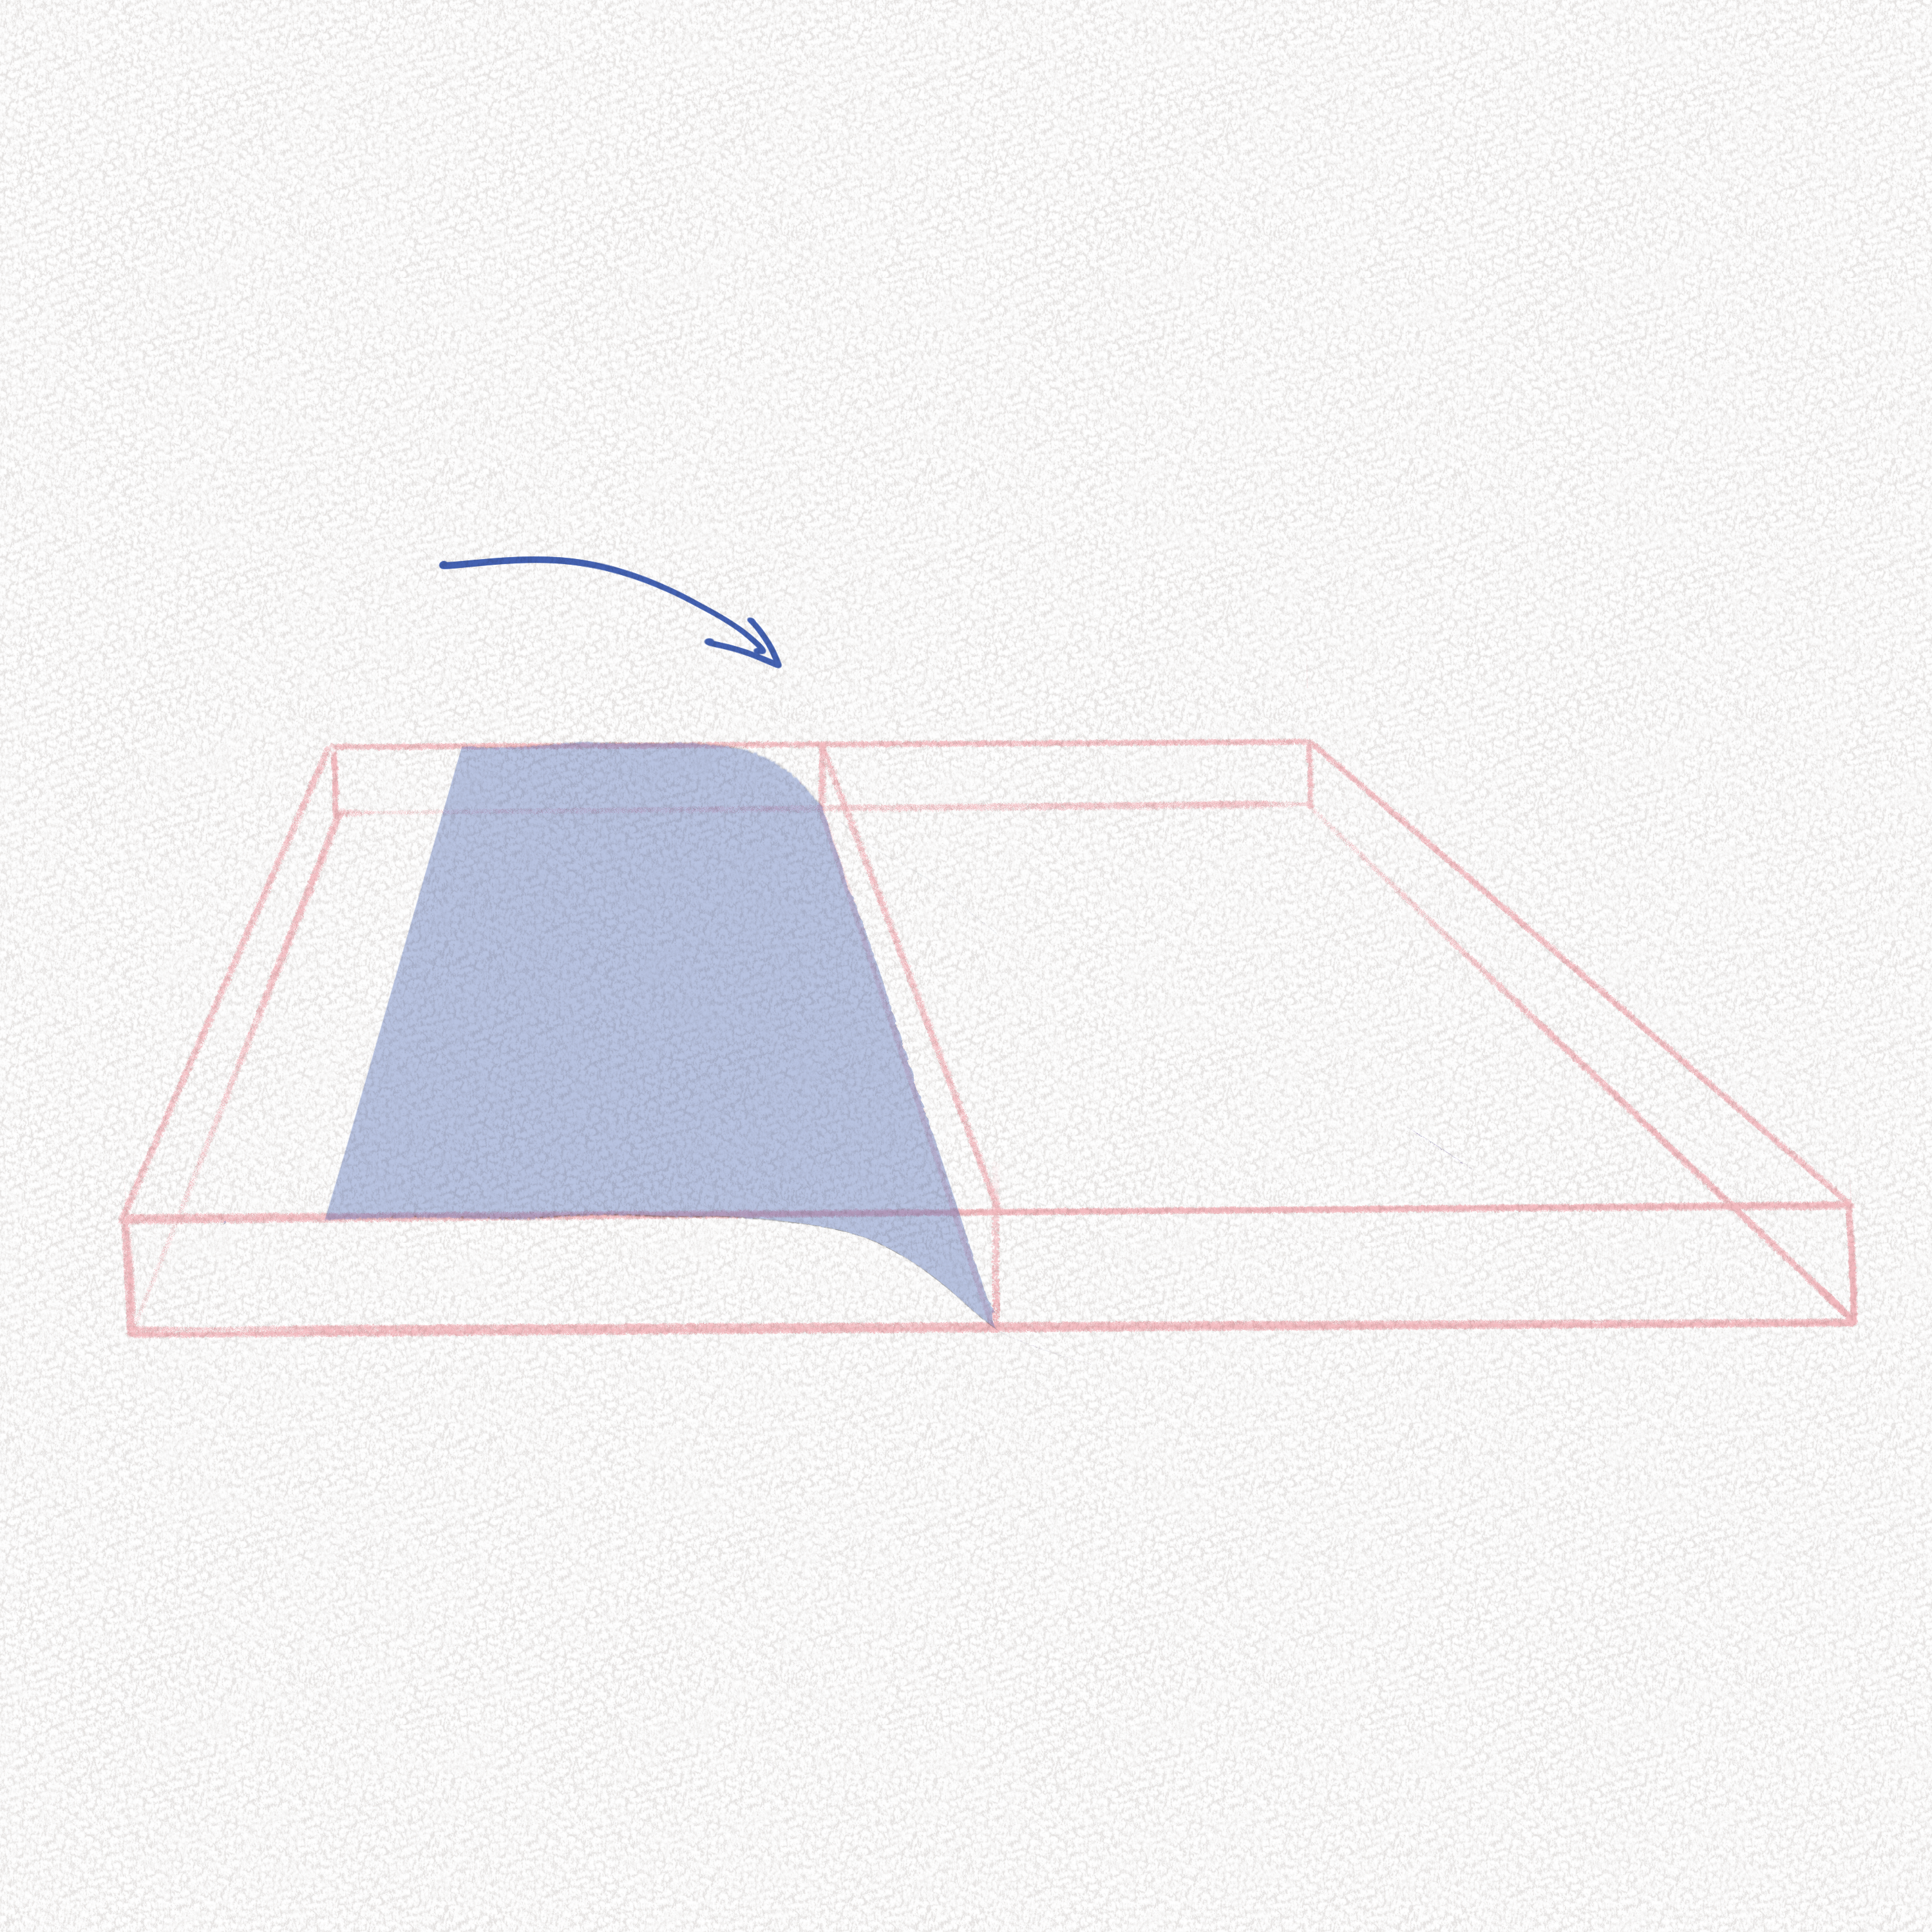
Do the same for the small curve it forms due to the separation of the pages on the other side.
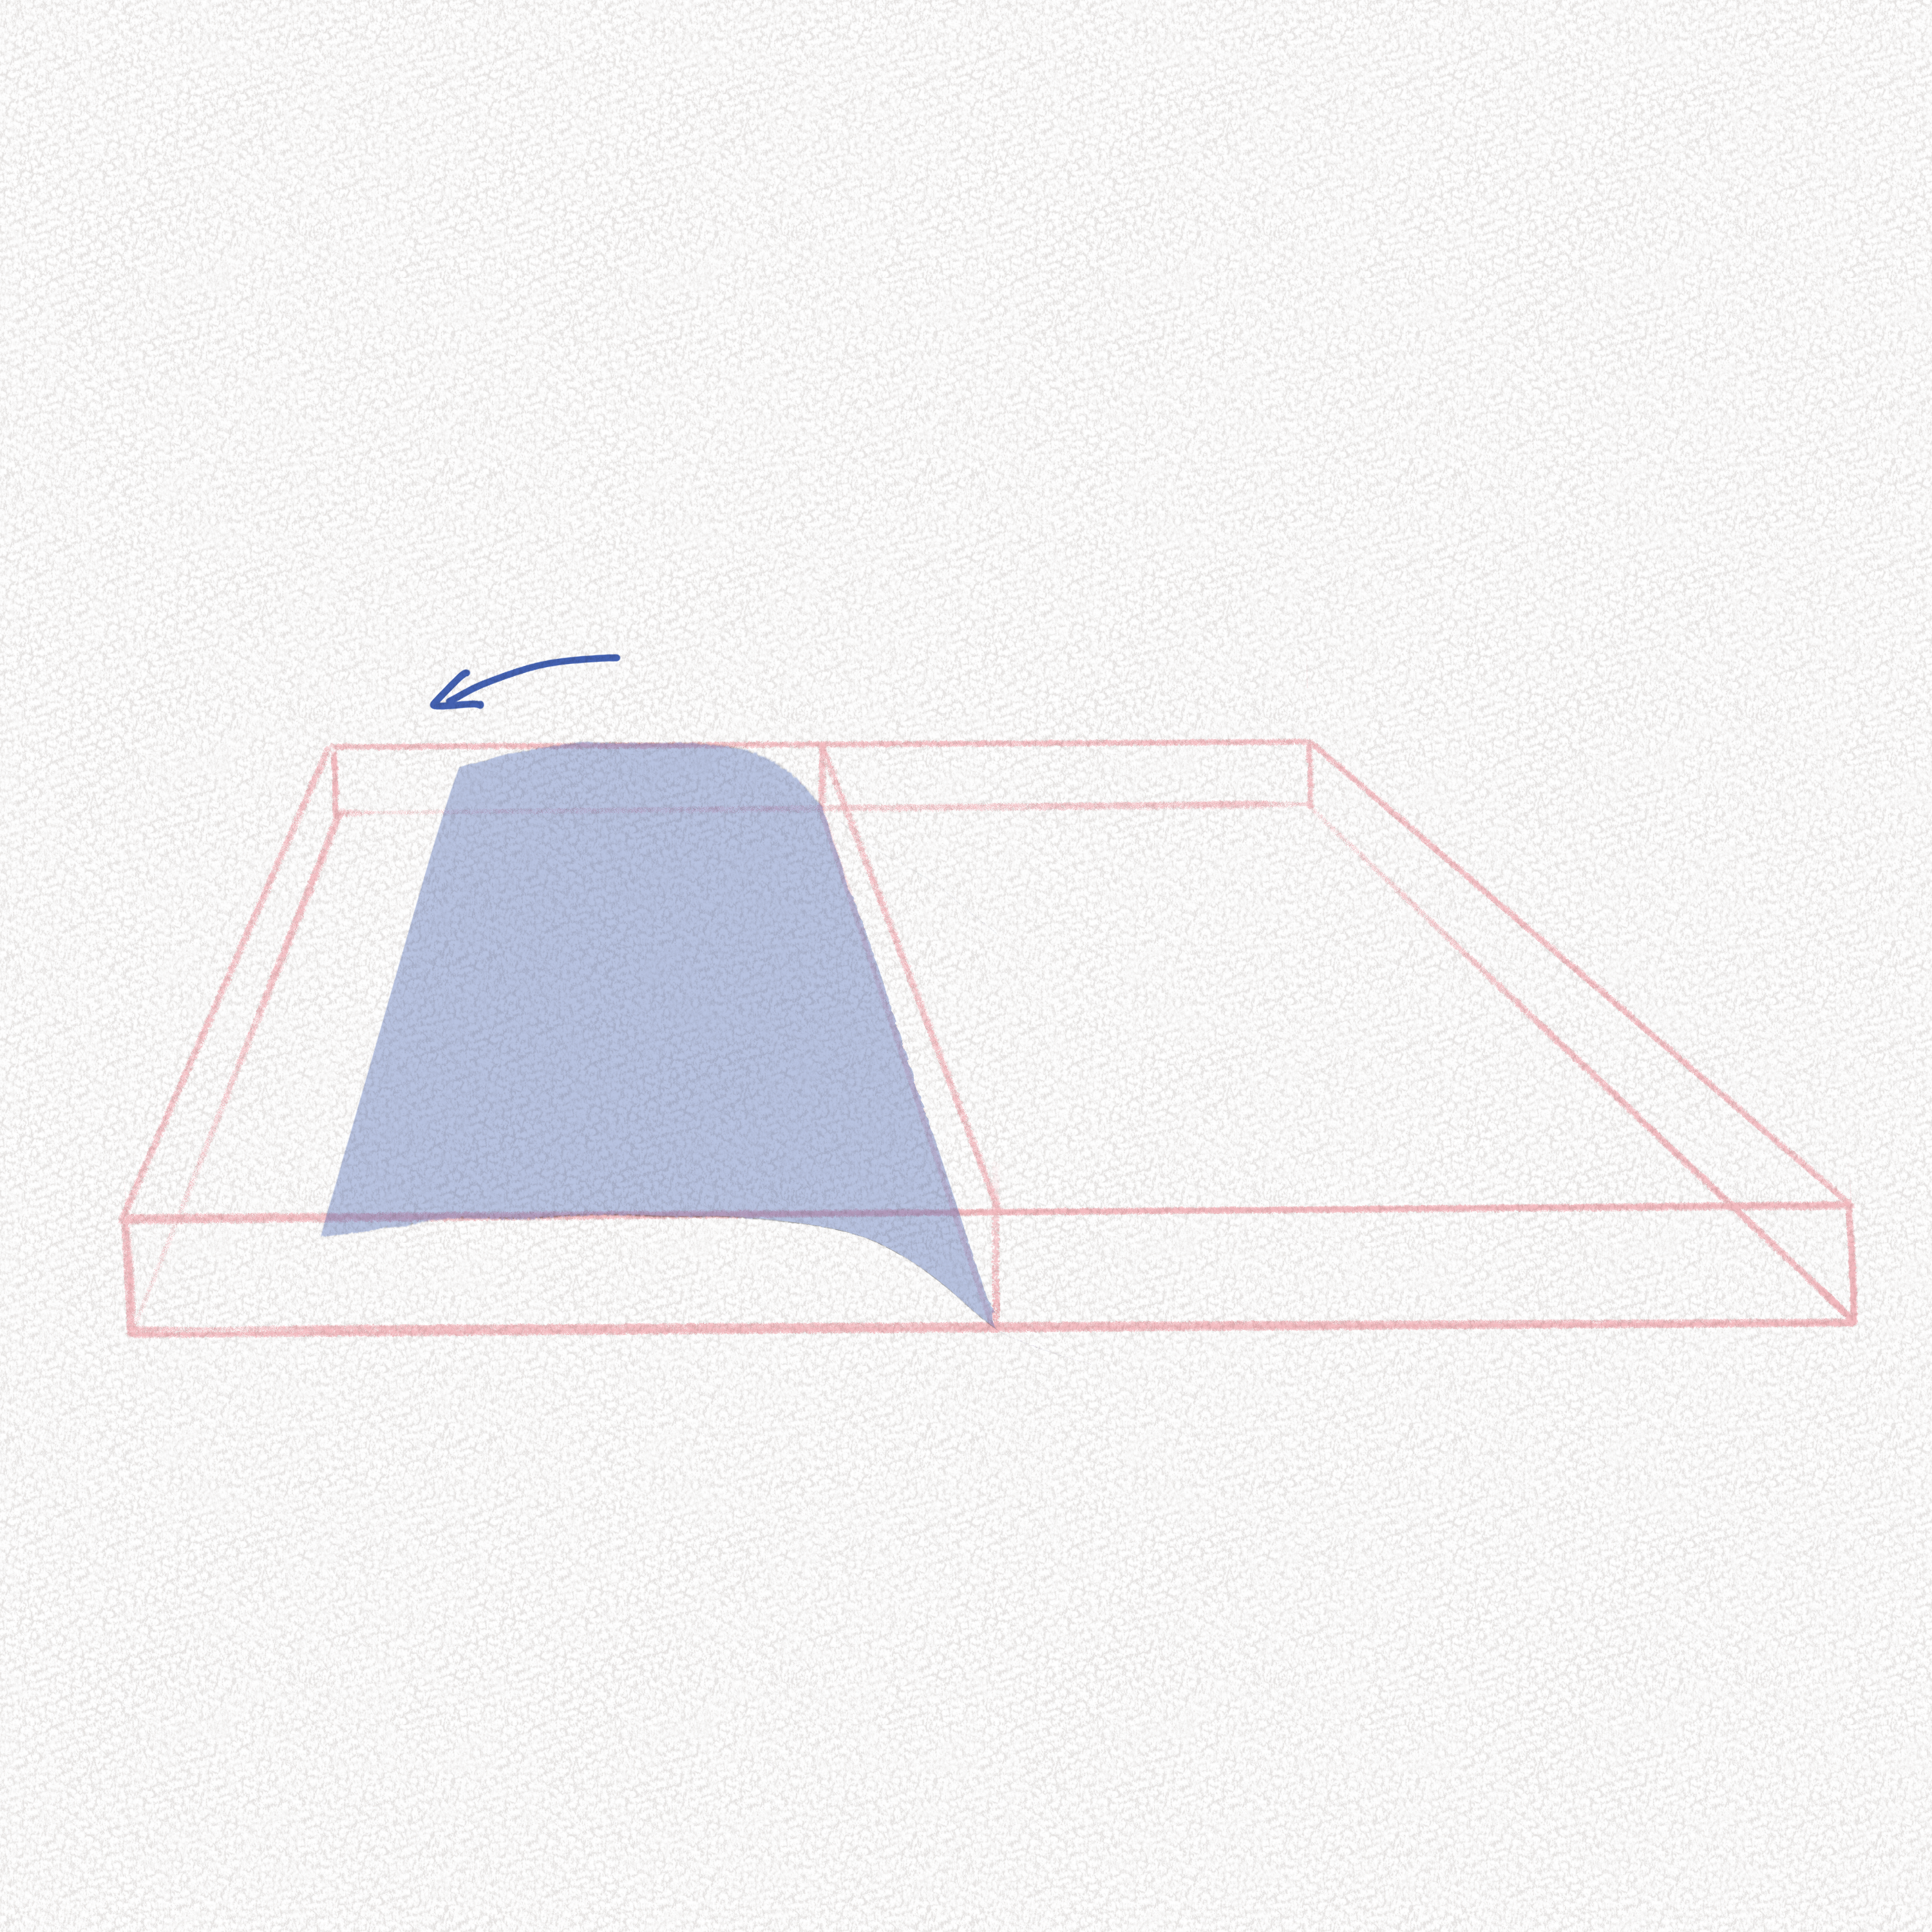
Repeat the steps above for the other half of the book and we’ll have our book structure almost ready.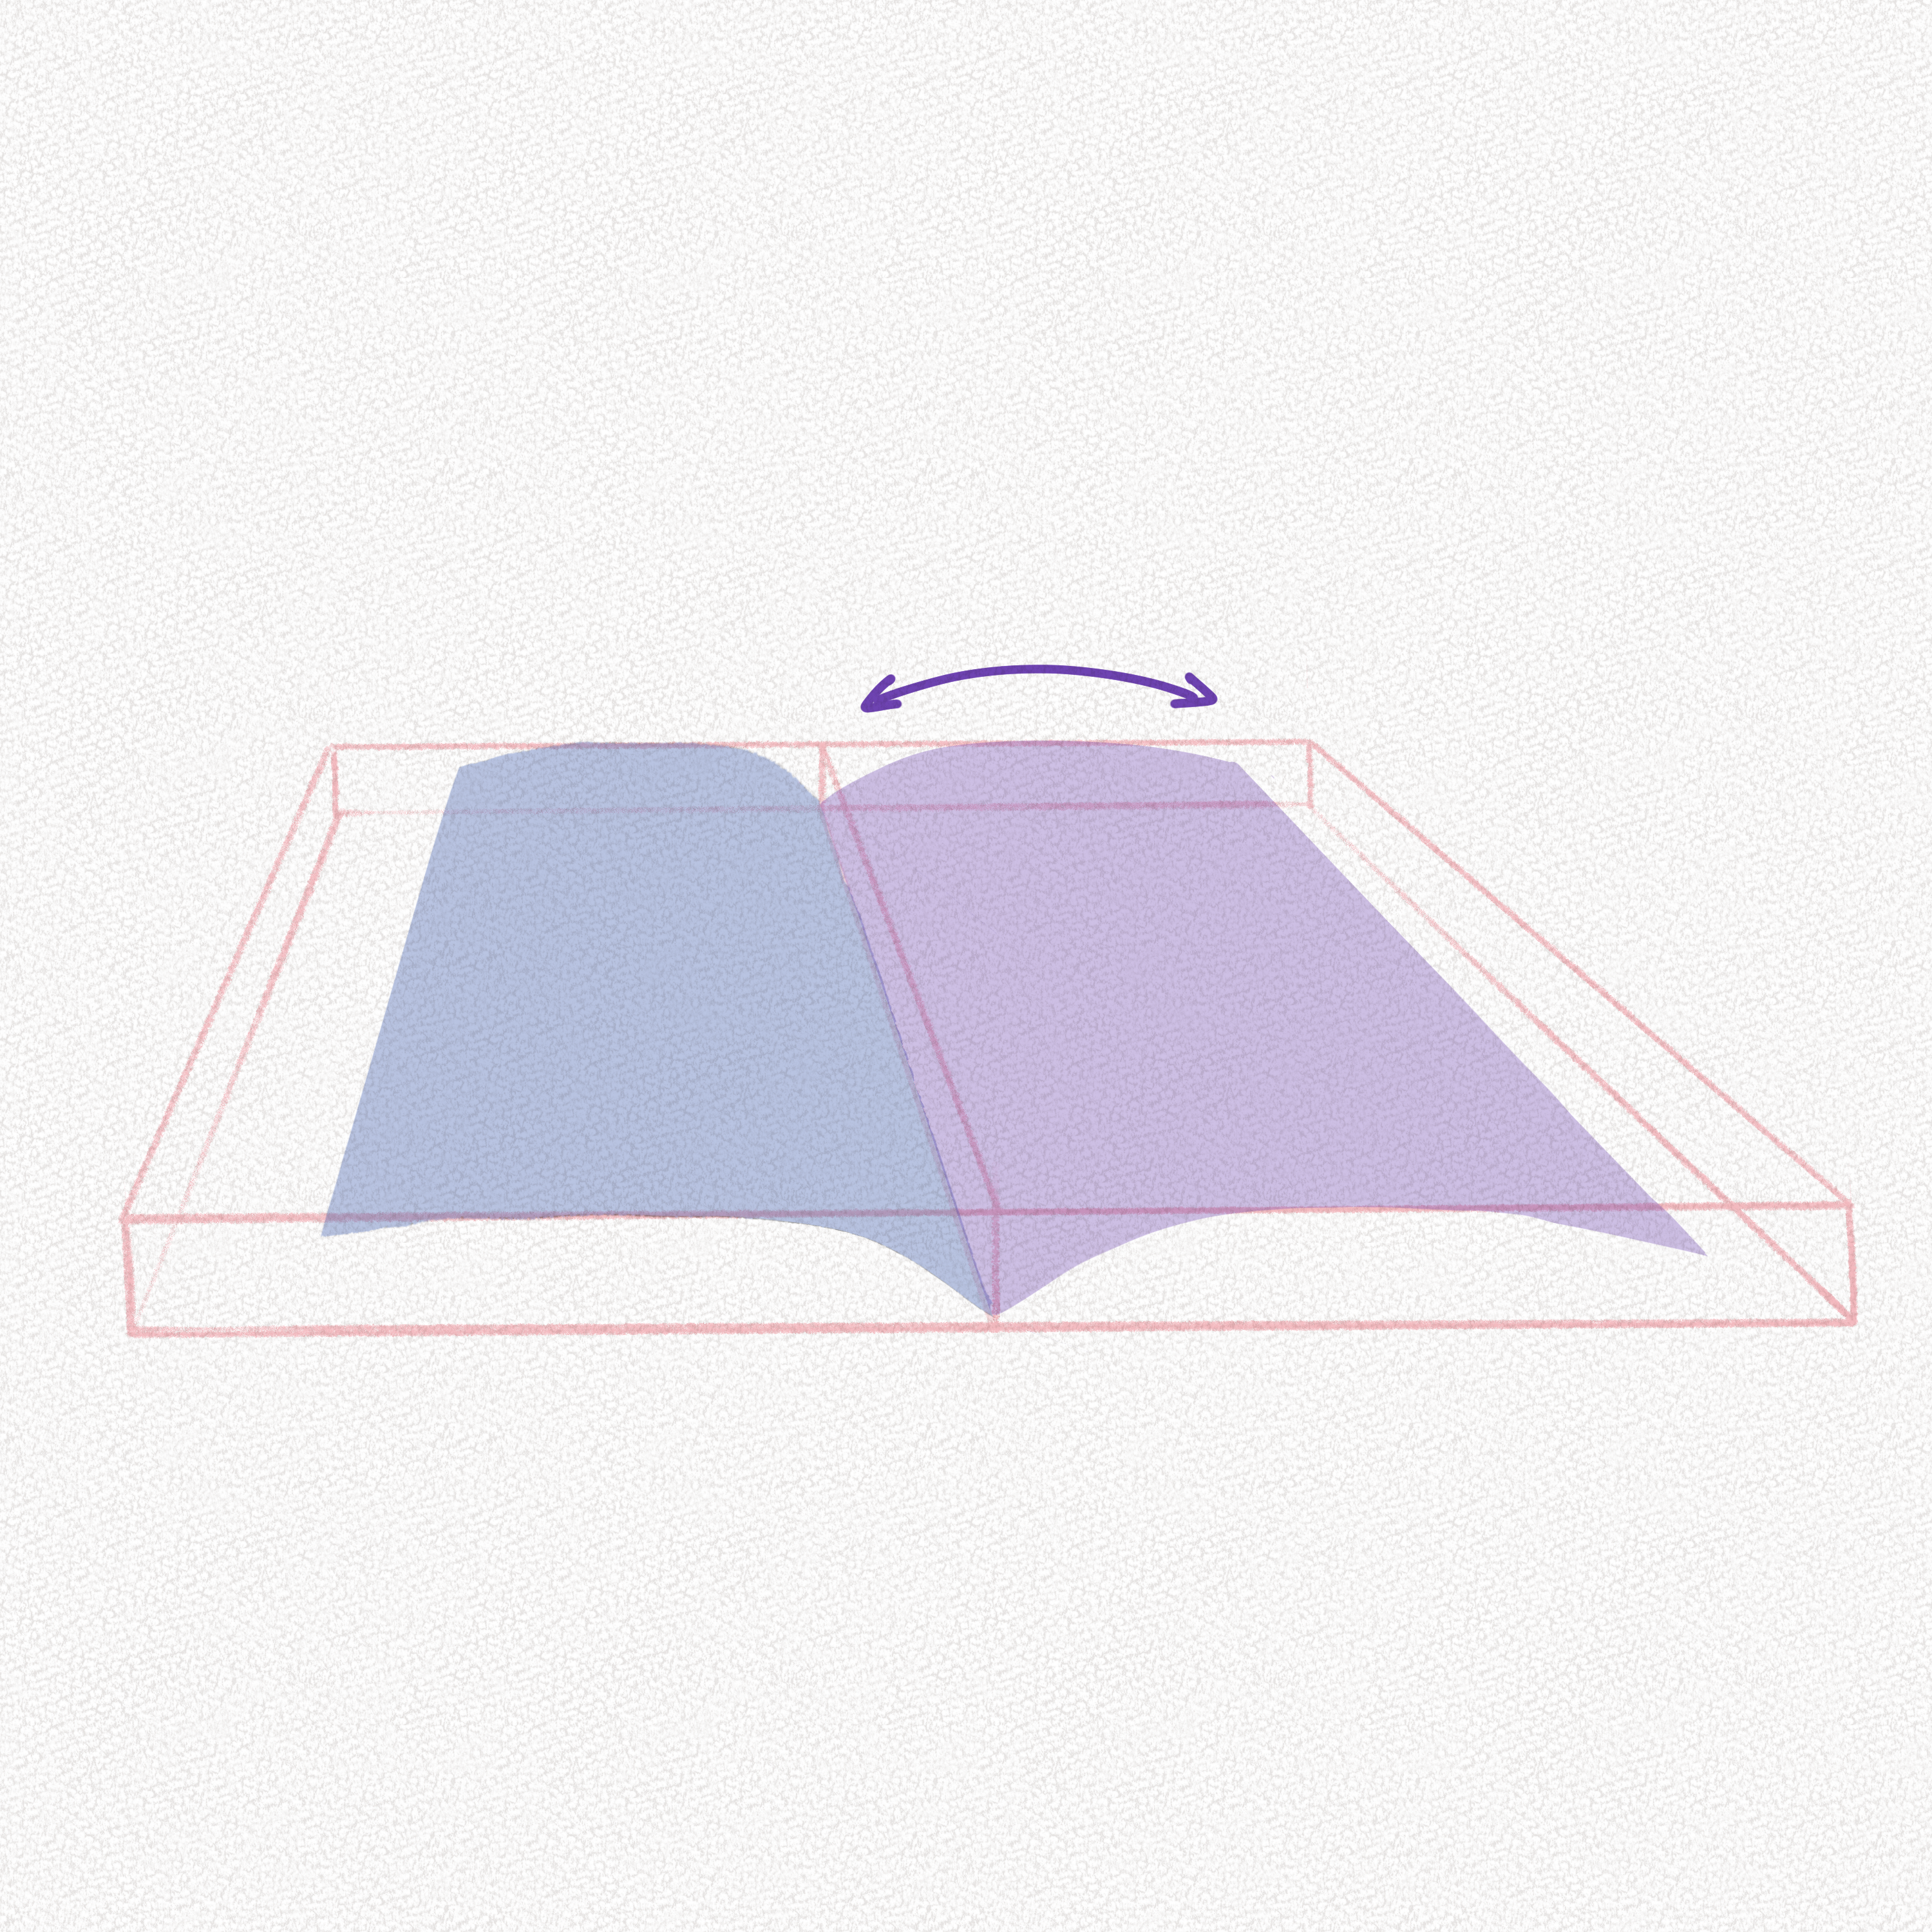
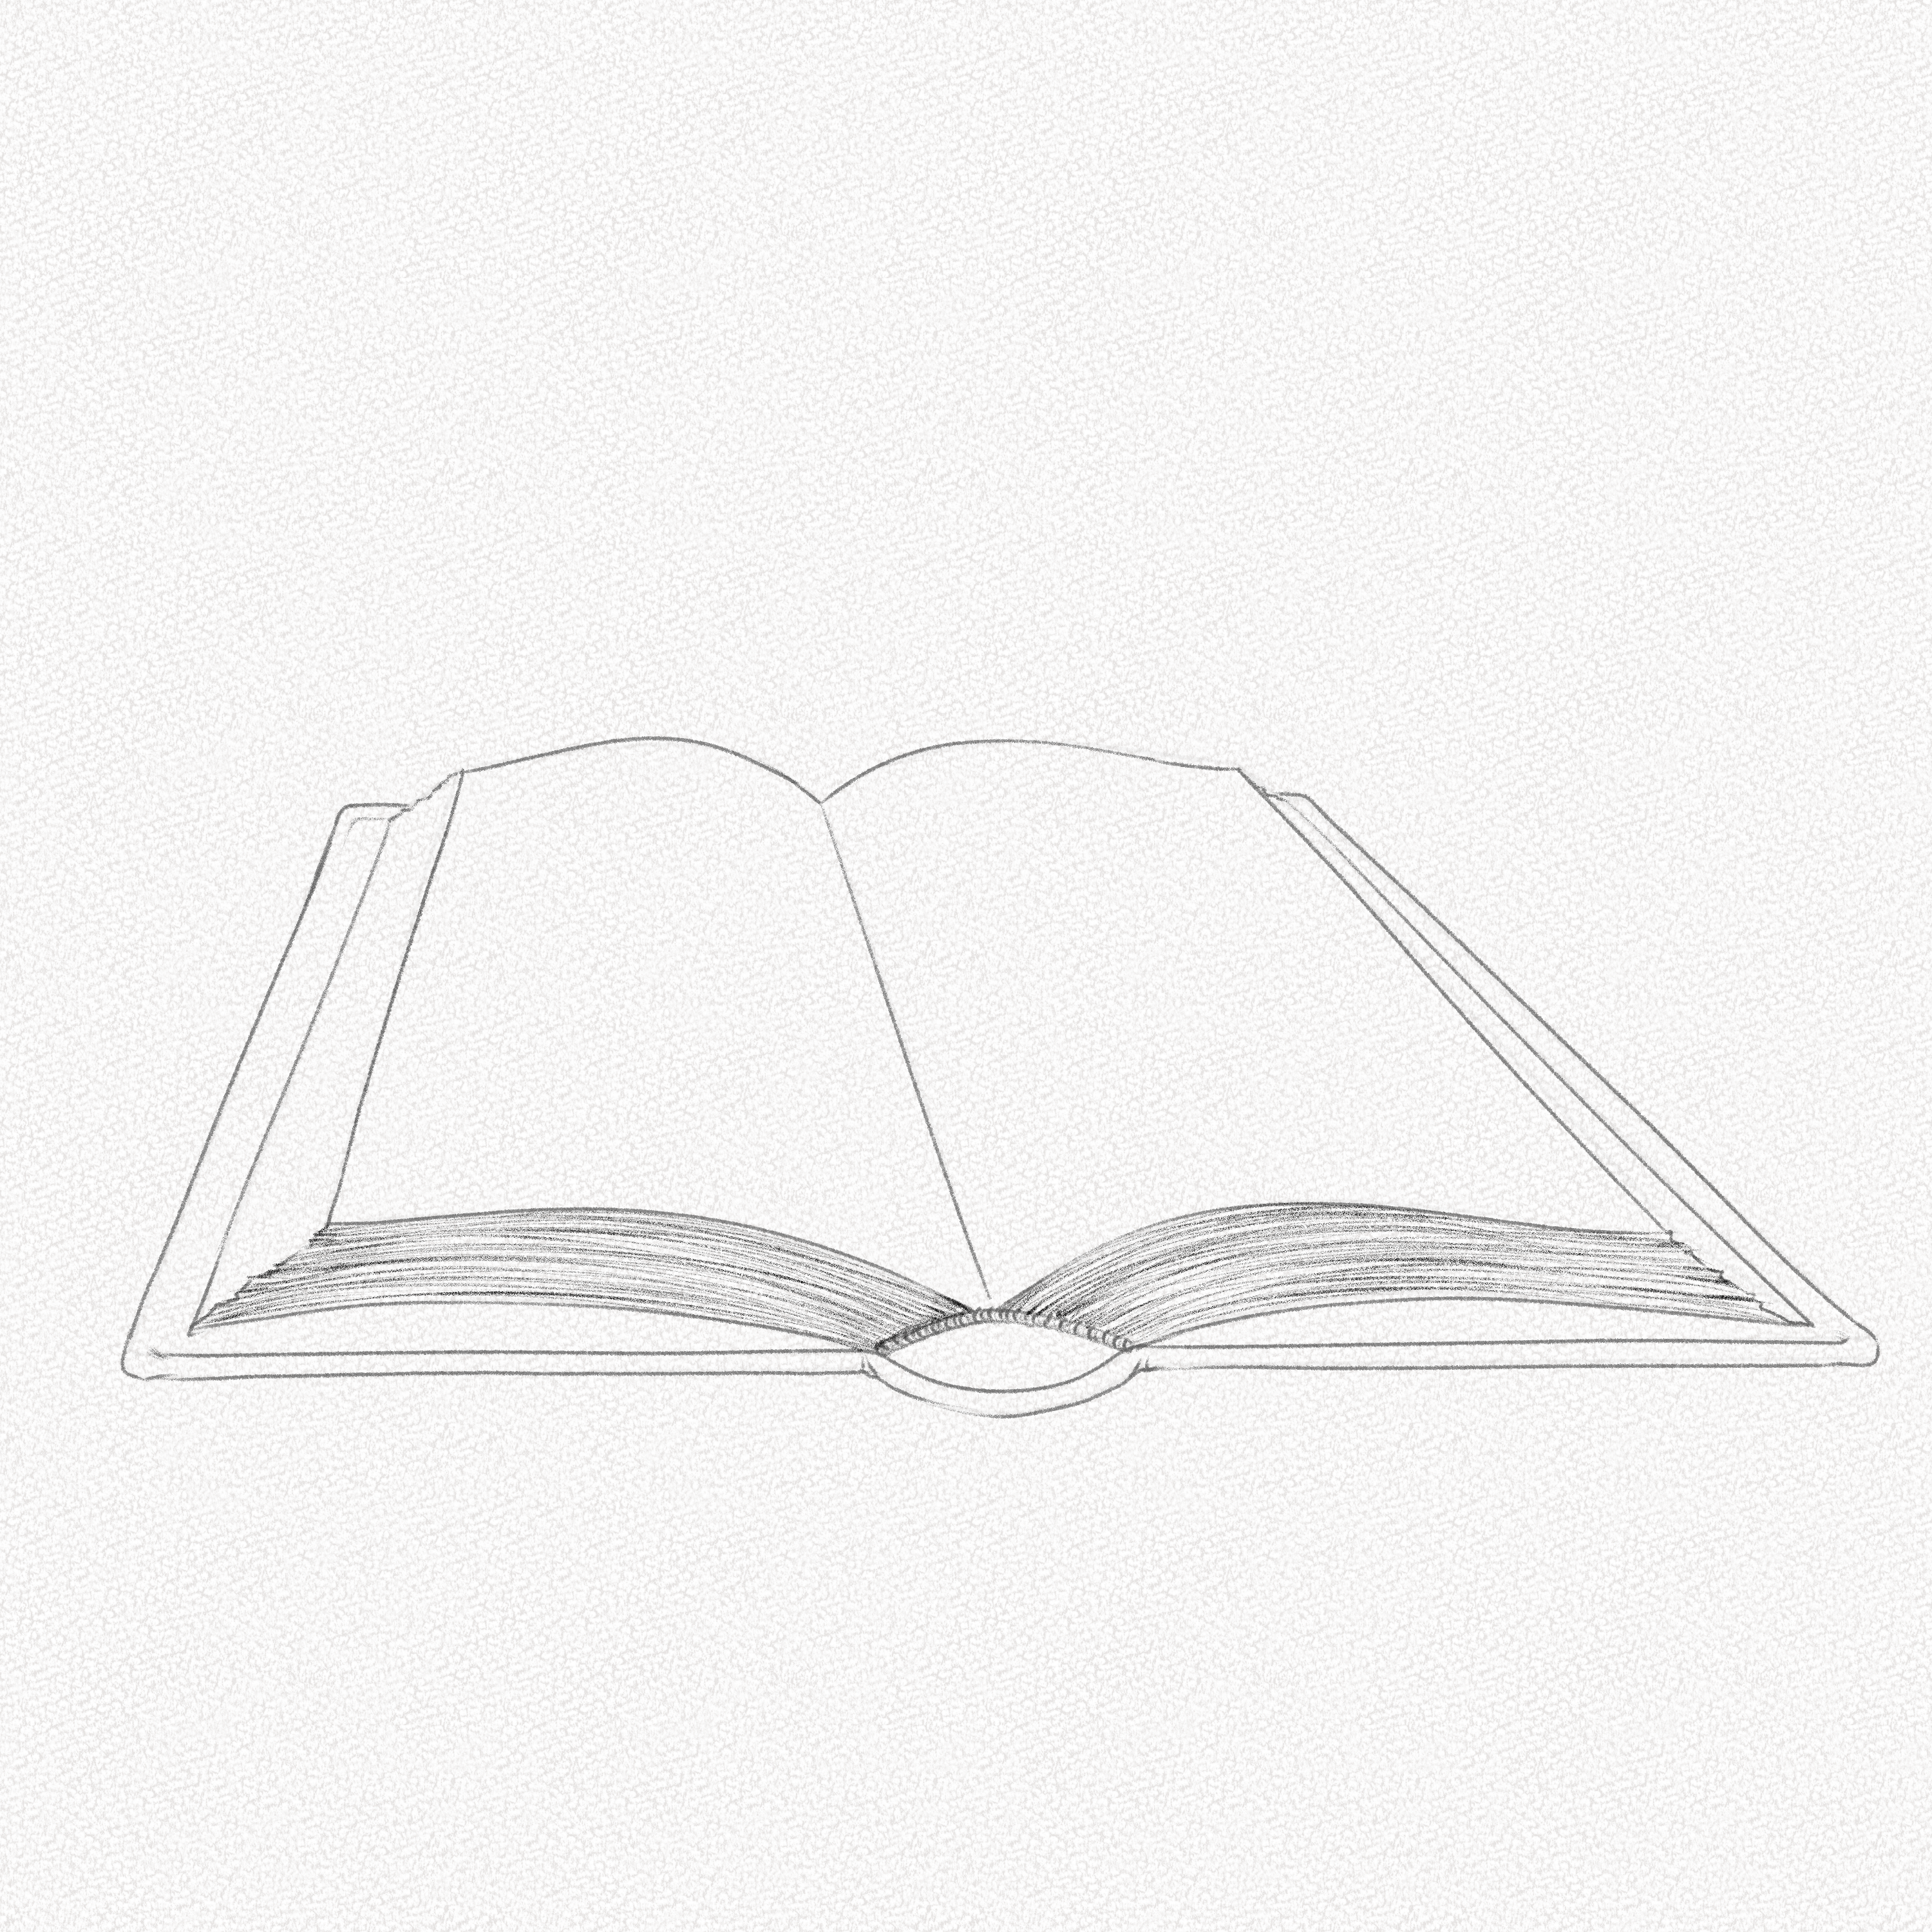
Step 8: Outline the pages
Draw the first block of pages by pulling two diagonal lines from the pages’ corners and connecting them with a curved line.
Complete the shape by doing the same for the upper corners and then connecting the two extremes forming the pages’ shape.
Step 9: Draw the book cover
Using our box as a reference, we’re going to draw a base for our book. This will be the cover, so we’re going to mind the overlapping parts on the top and the spine.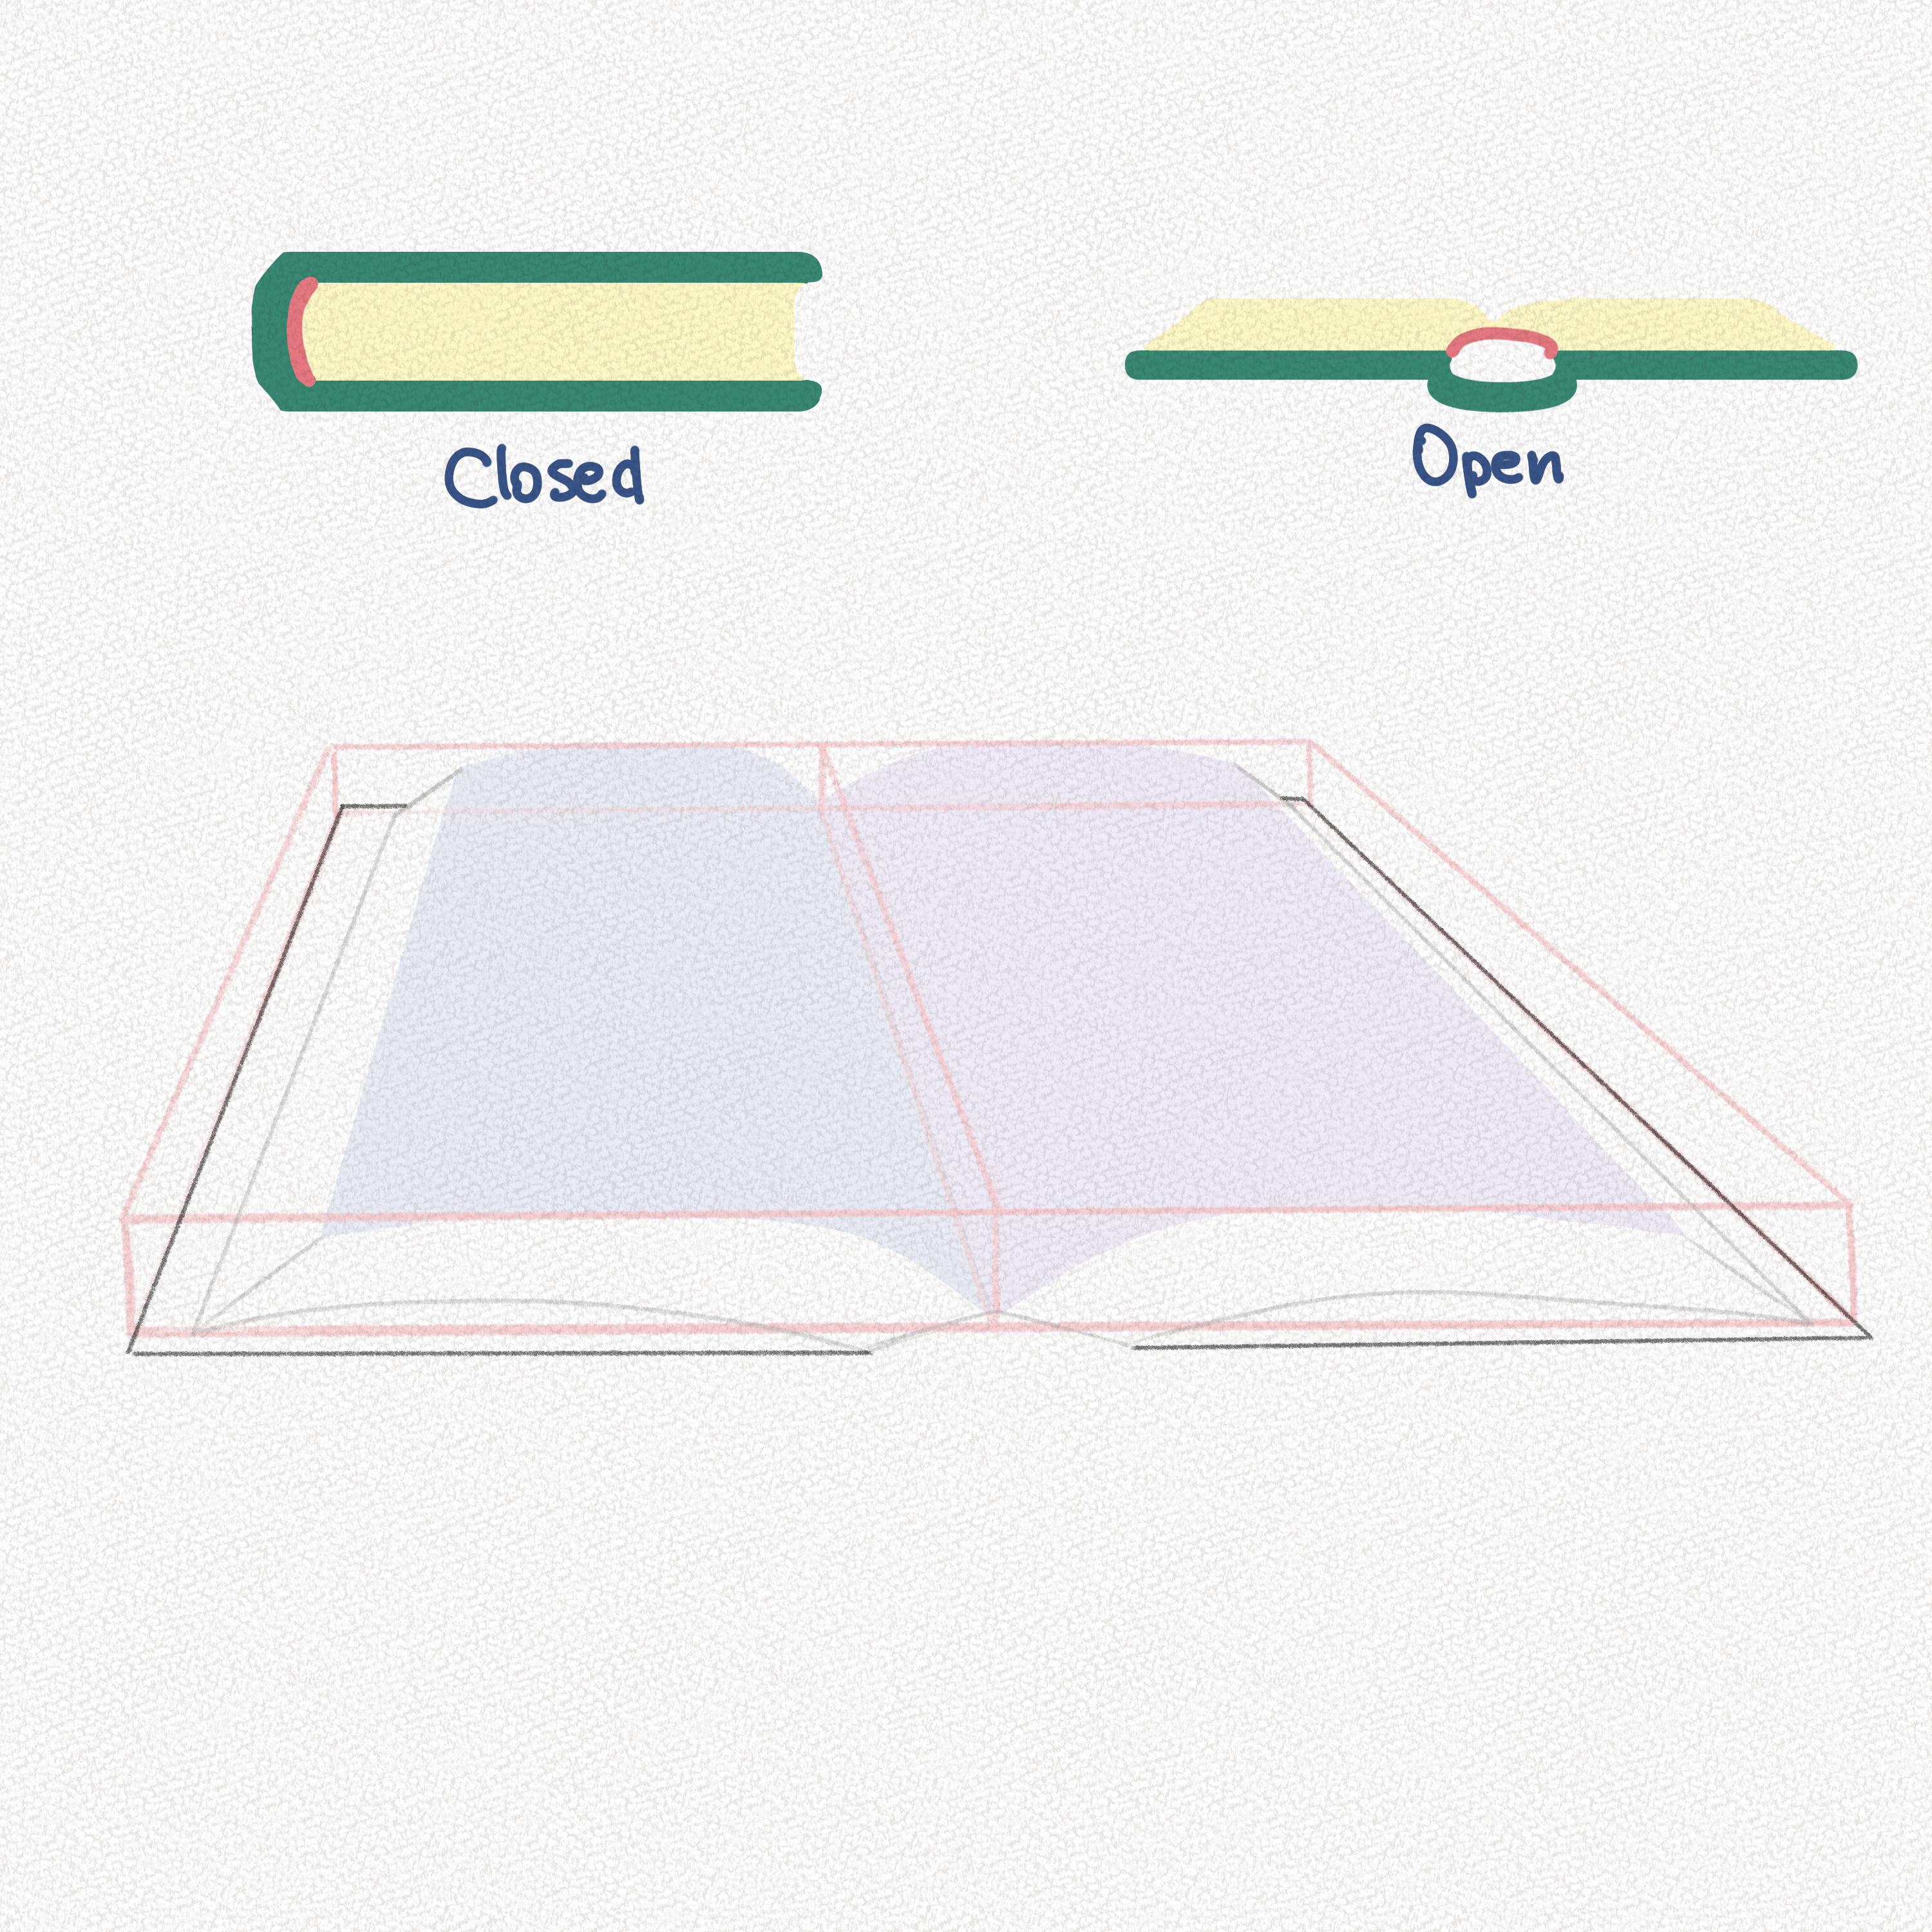
Step 10: Complete the cover and add the spine
Complete the book cover by adding a “border” to the rectangle we drew, but in the spine, draw a curve instead.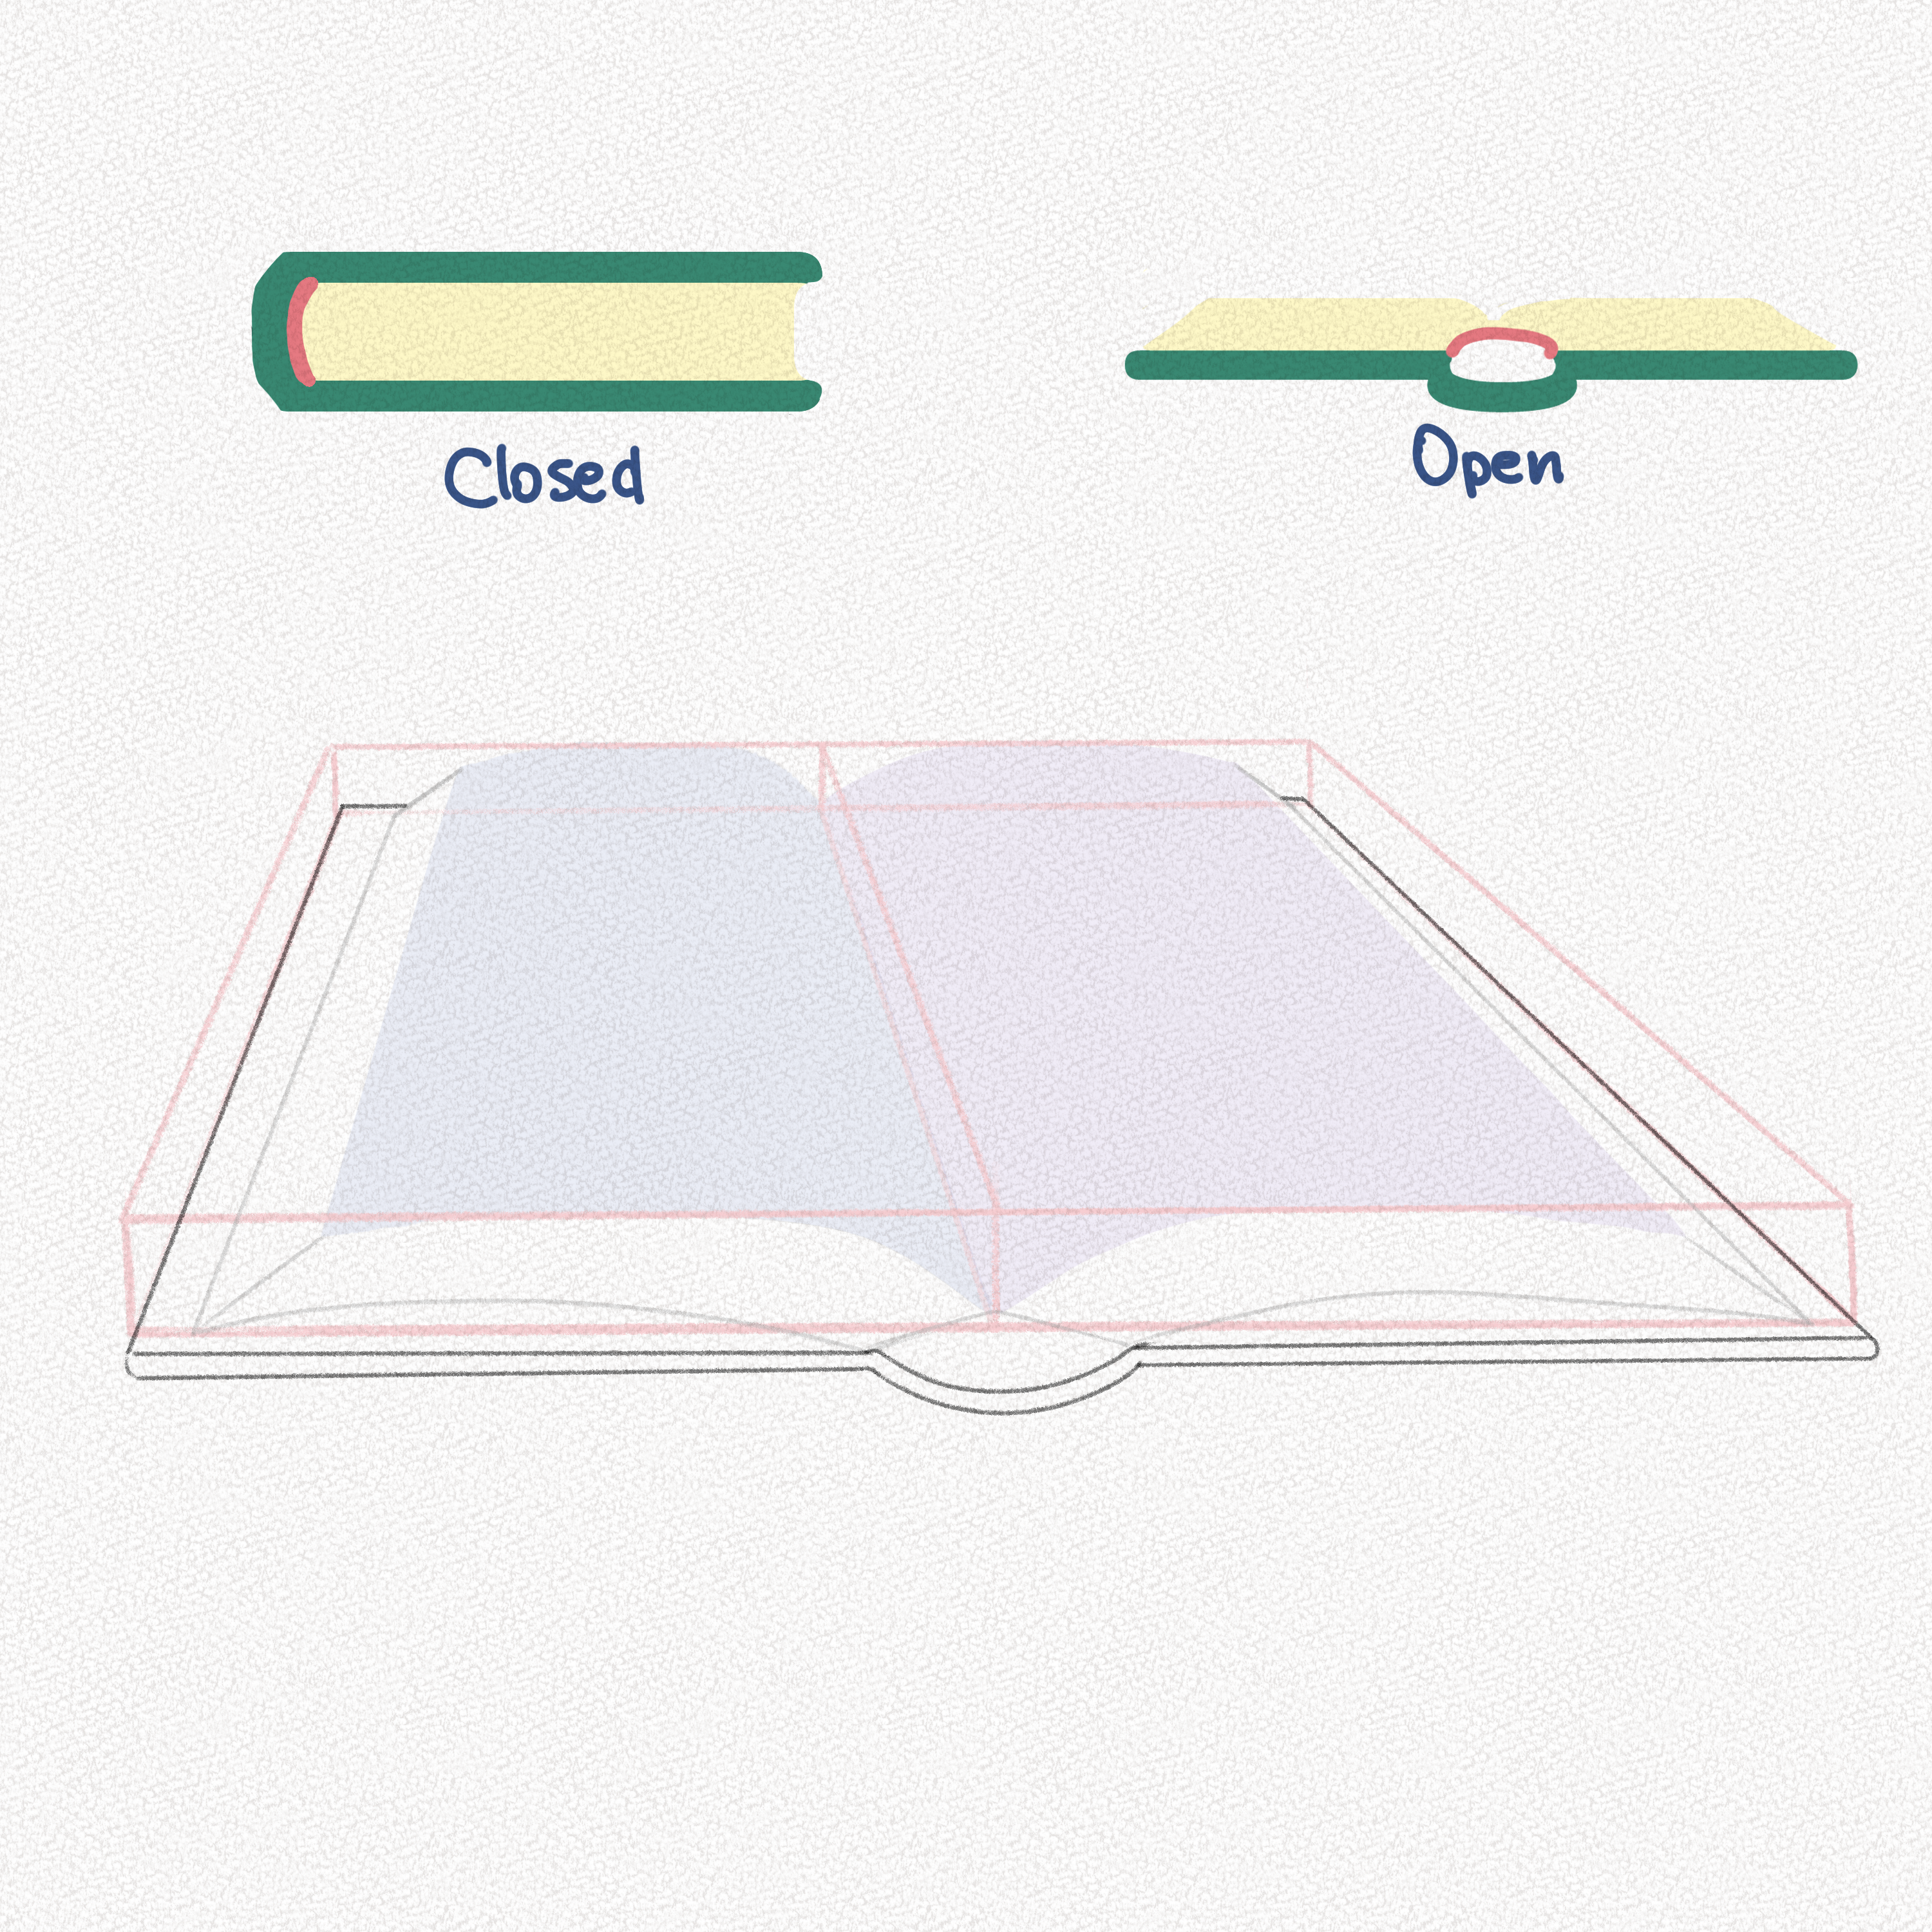
Section 3.- How to Draw and Shade a Book
Step 11: Outline the book
Now you can erase your guidelines and use the remaining lines to draw the complete outline of the book.
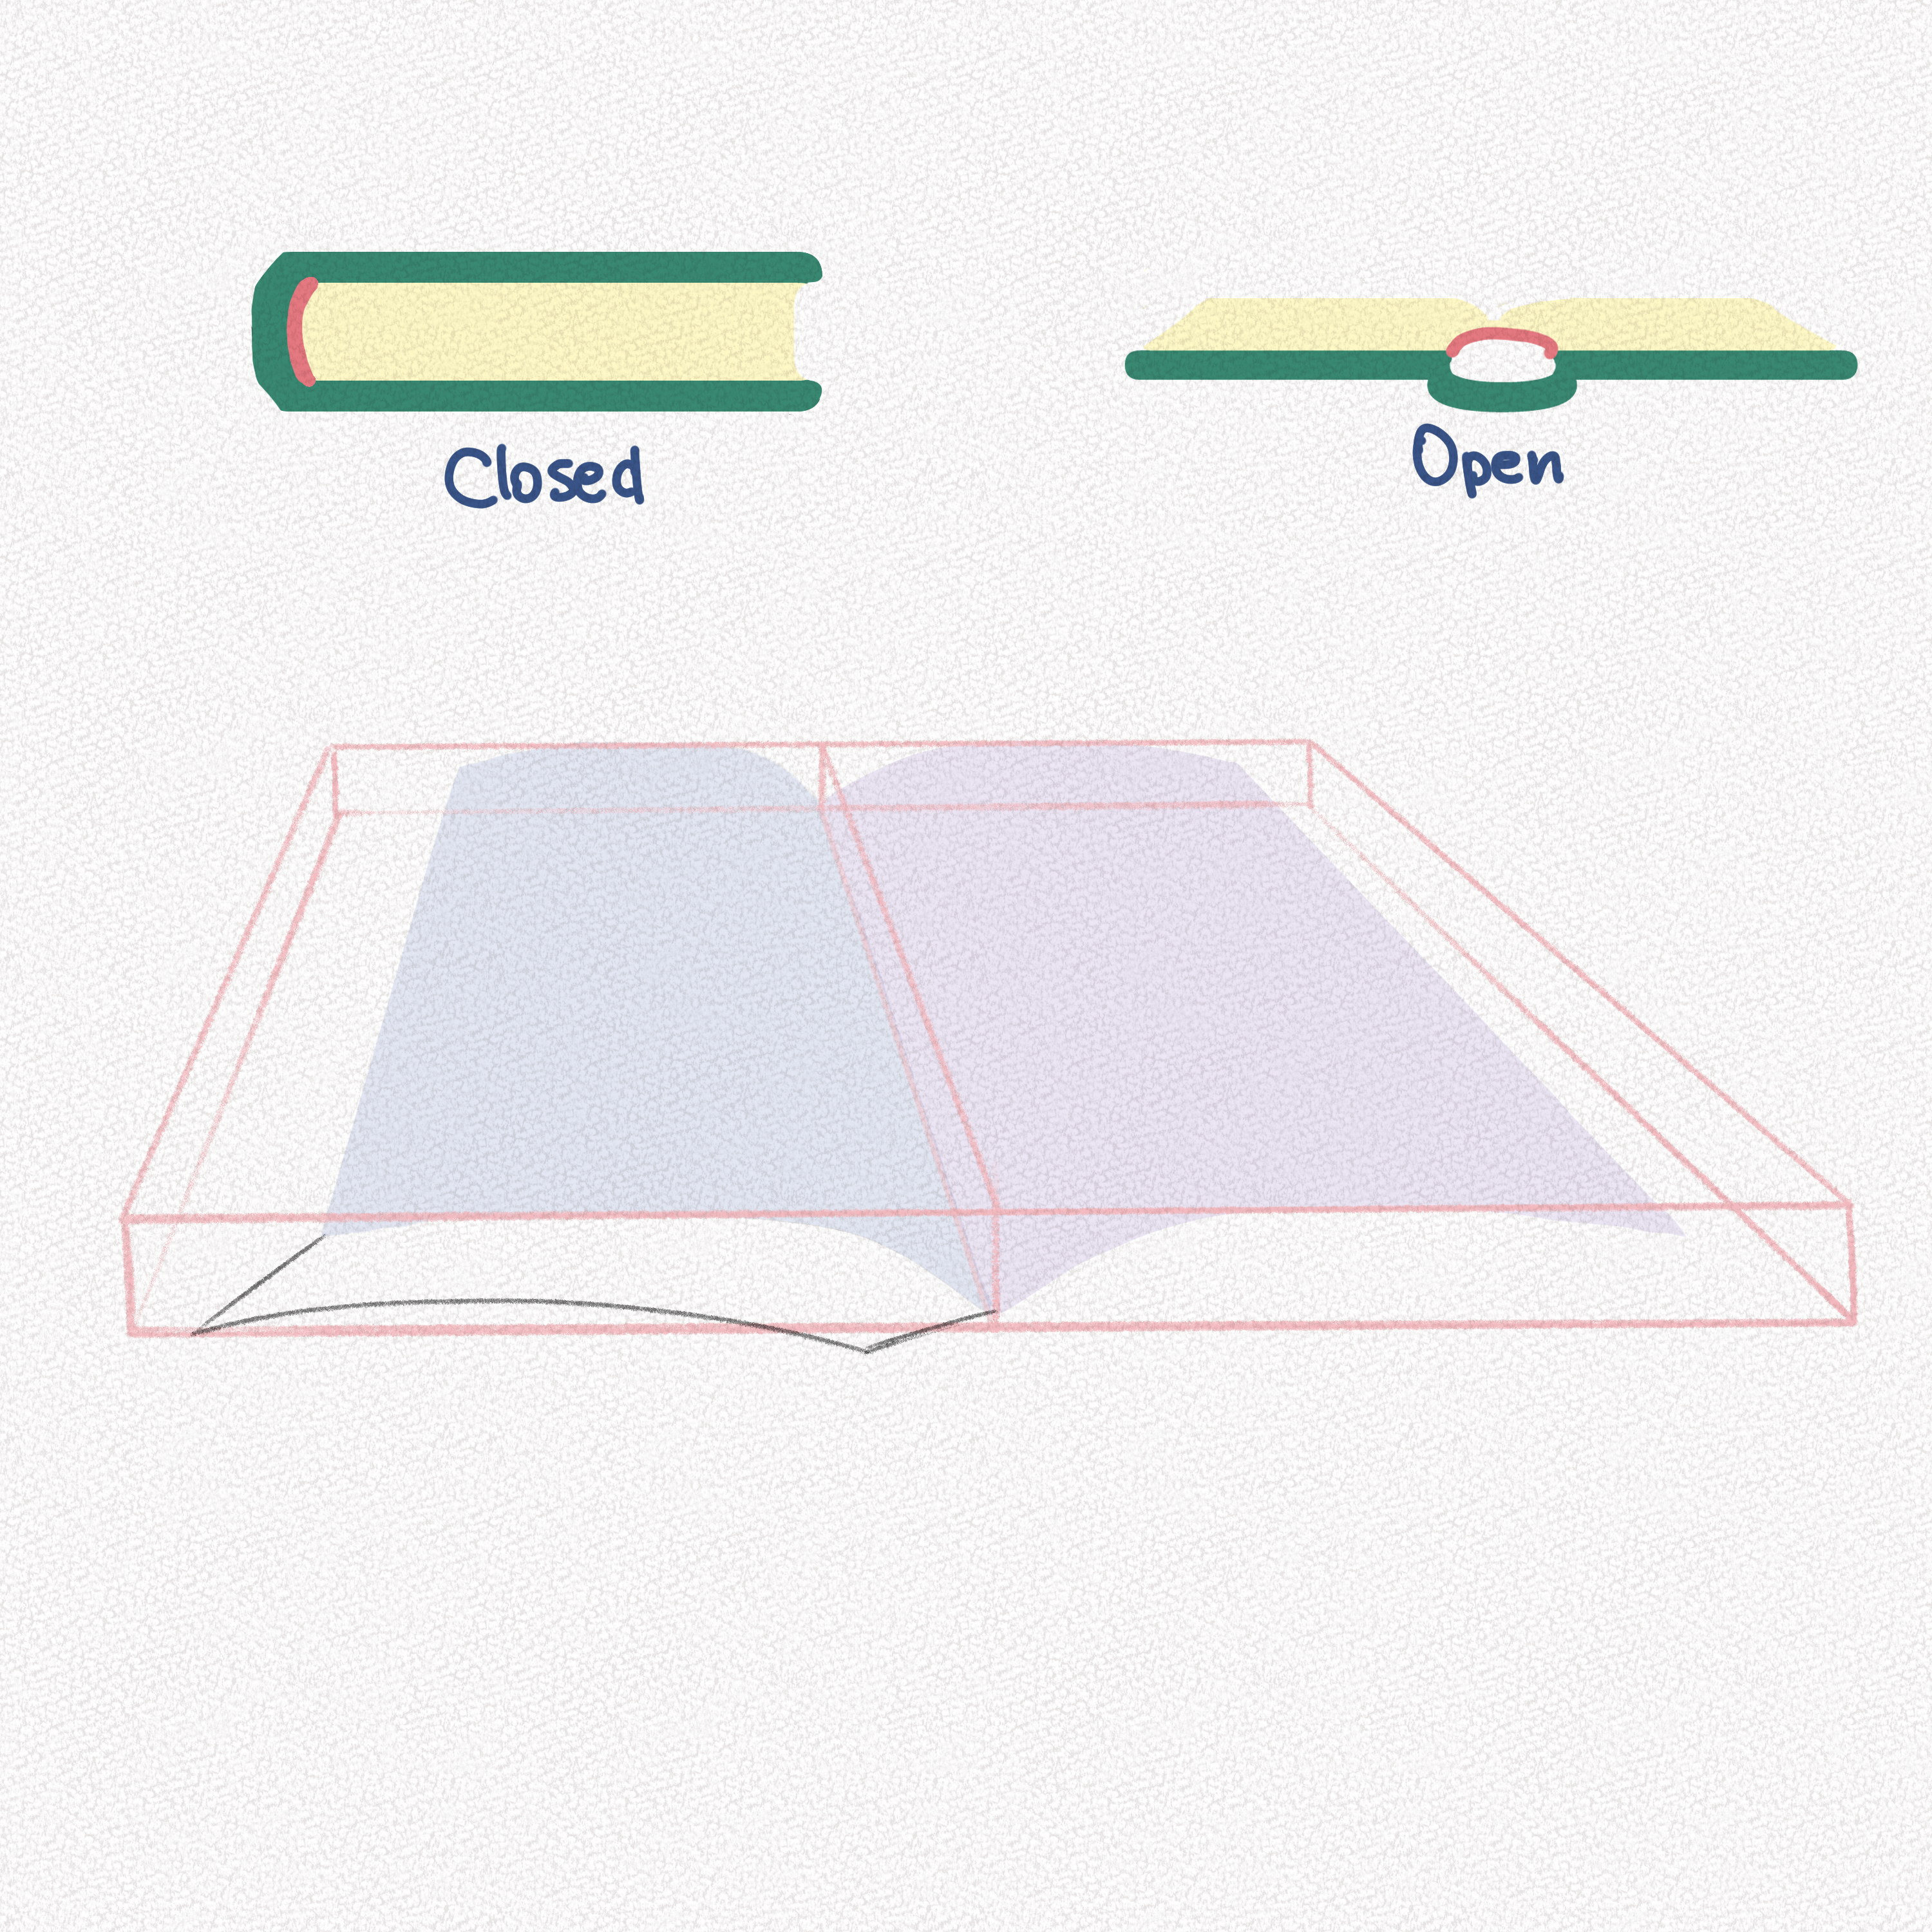
Step 12: The pages
For the pages, take into consideration that when books are open, the pages usually don’t form a flat line, but some kind of broken line that looks more like small steps.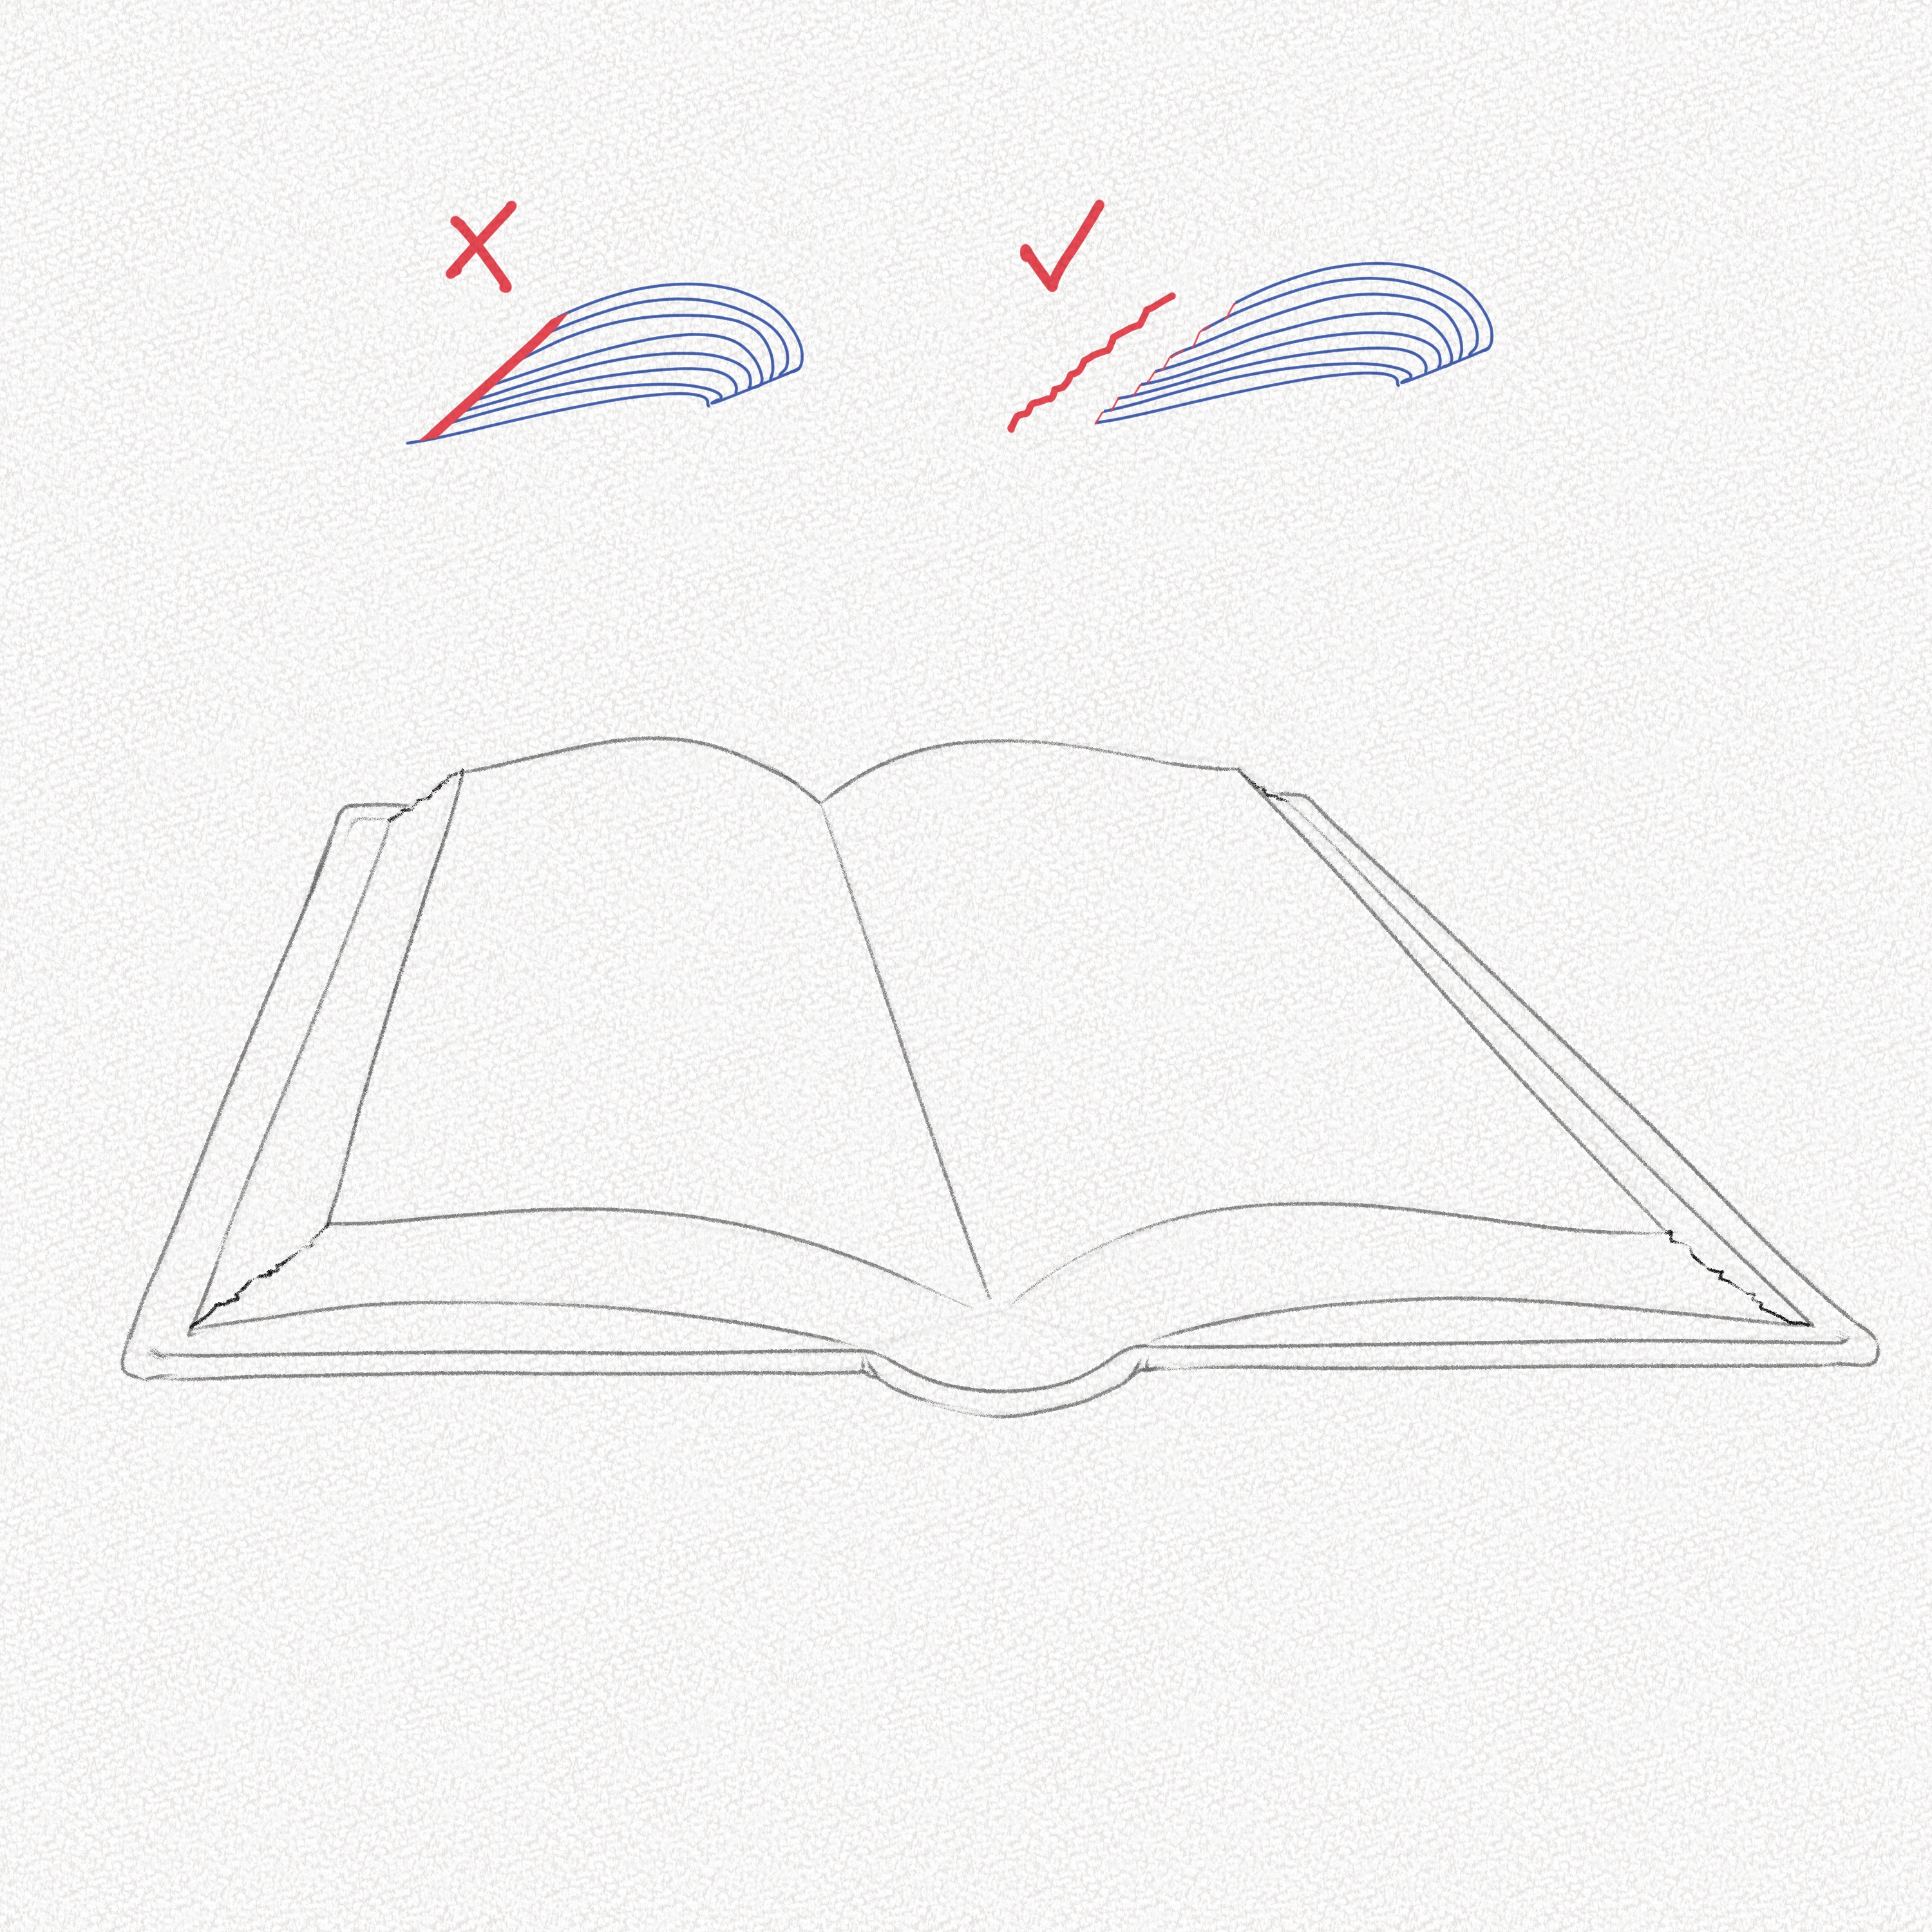
Step 13: Draw the spine
Follow the diagram to draw the book’s spine visible part. Start with small “c” like shapes then connect them and shade them.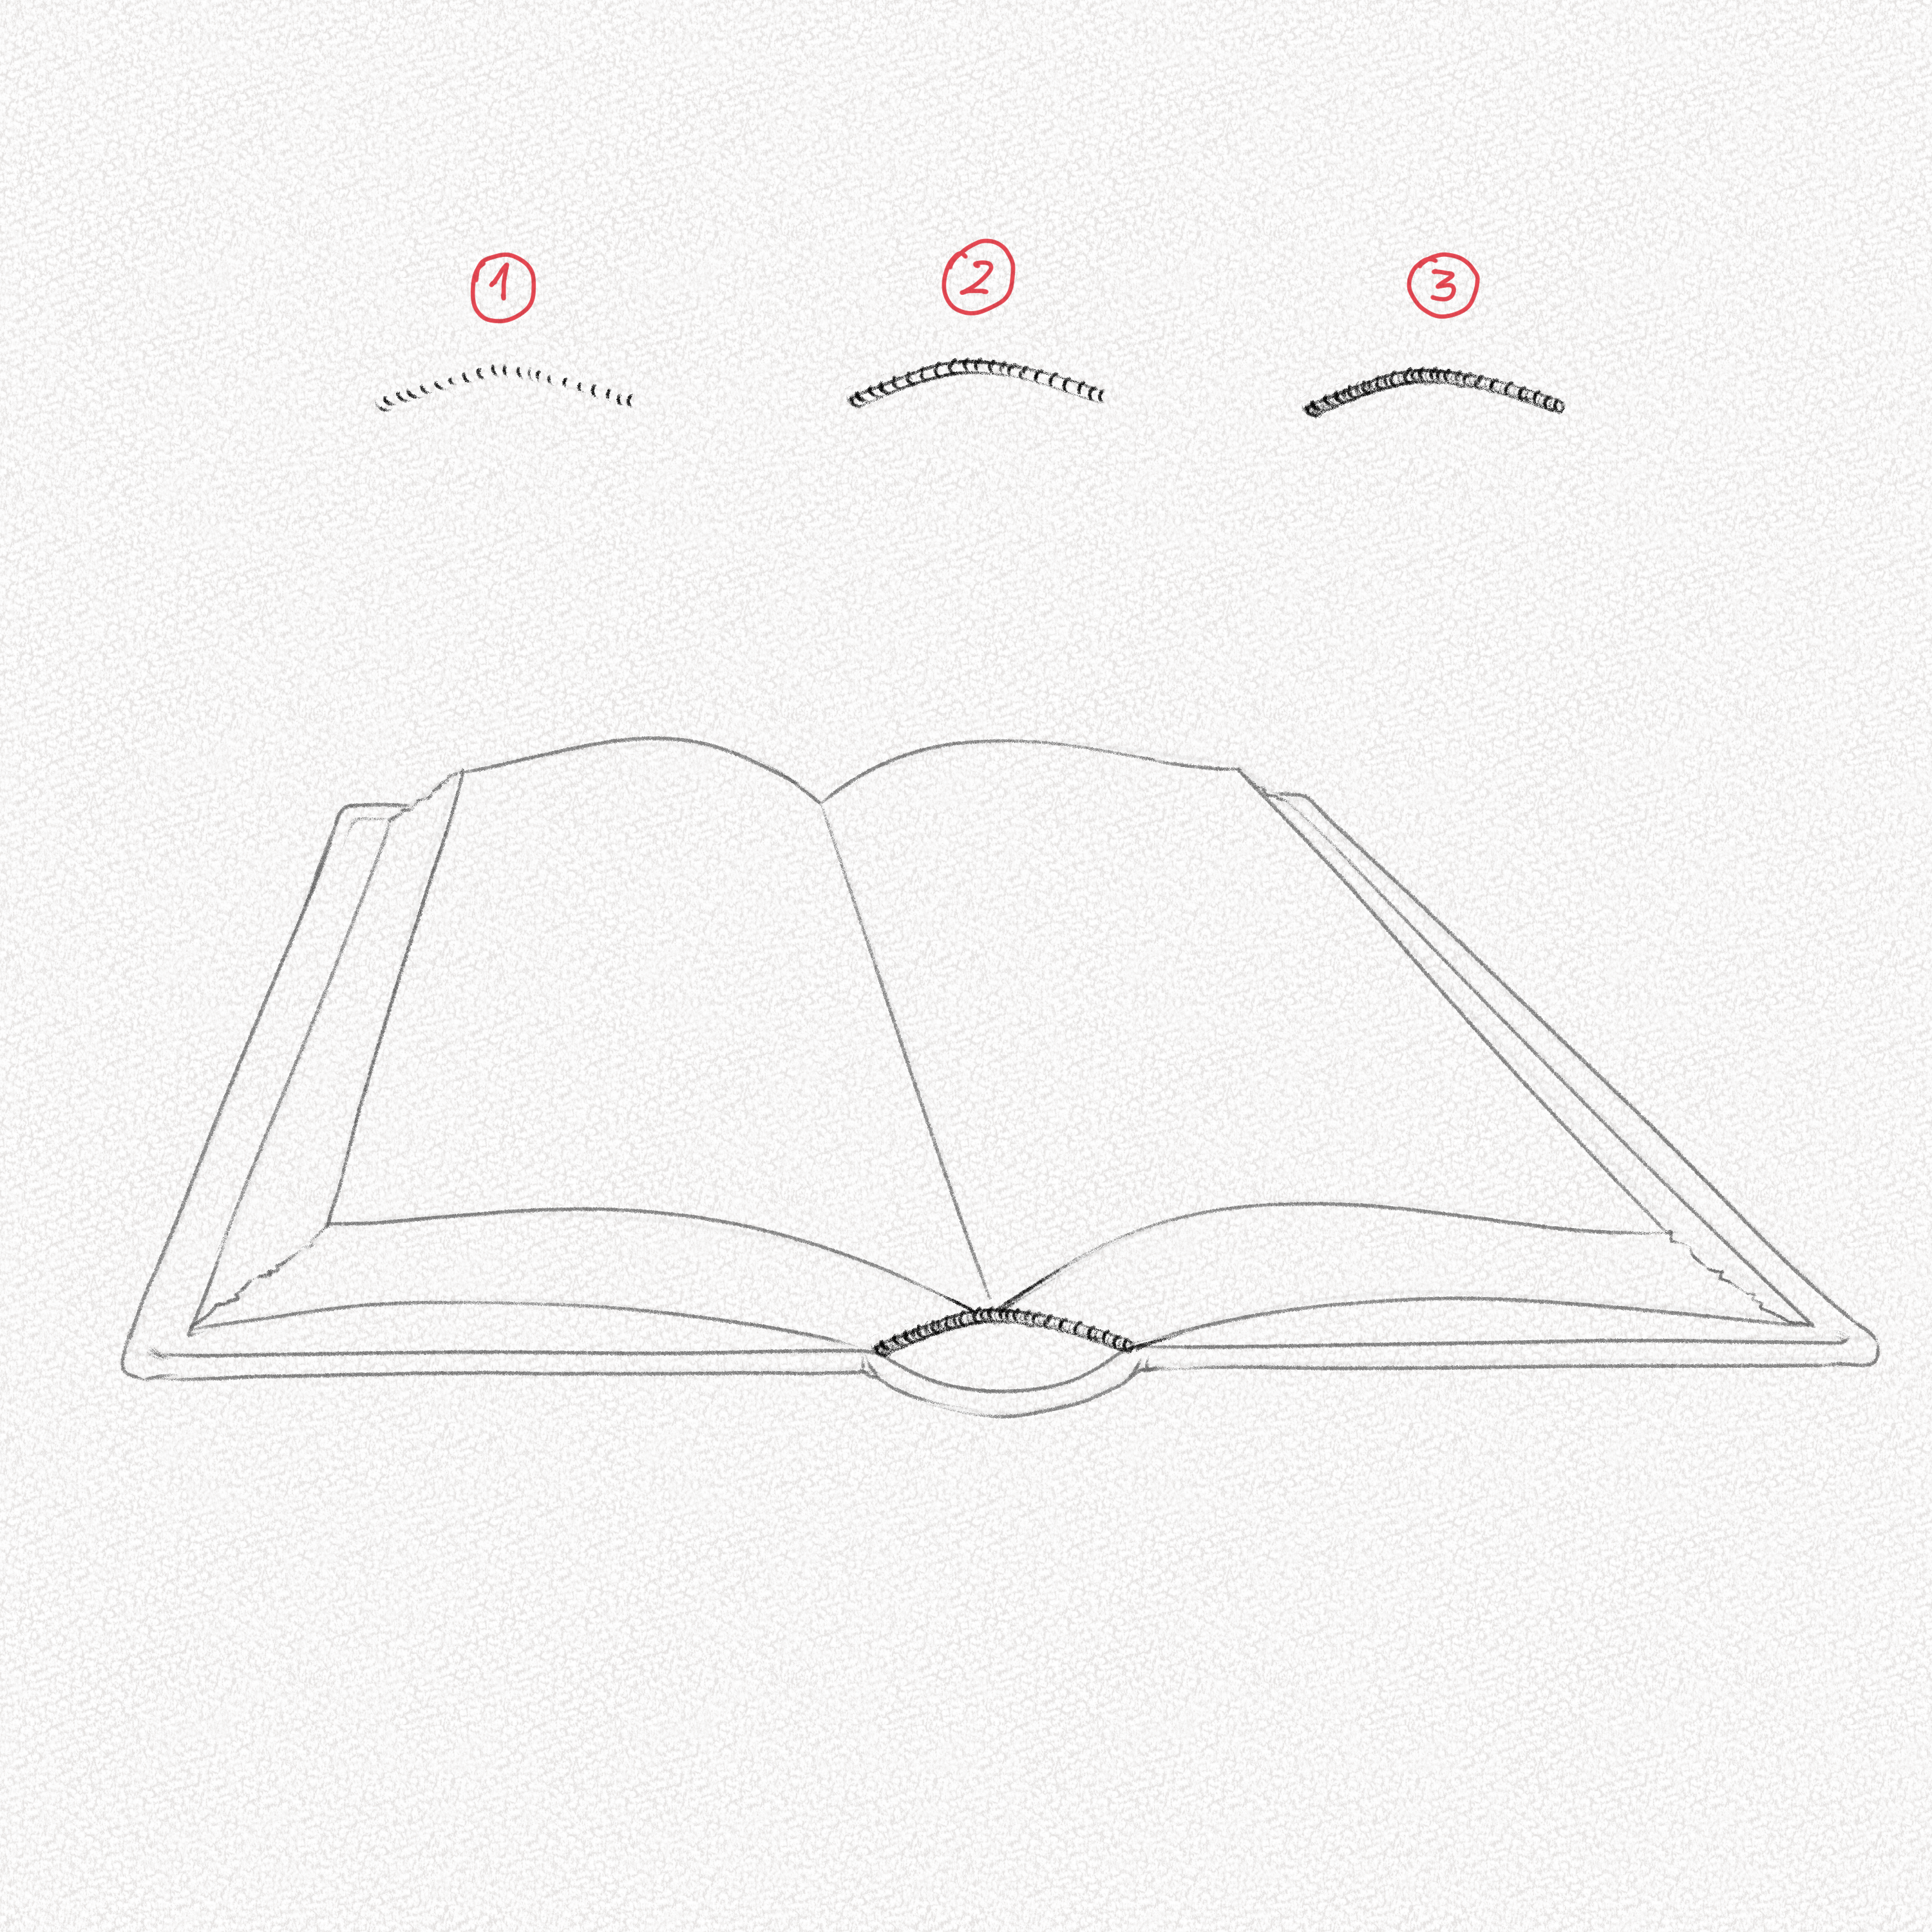
Step 14: Draw the pages
To draw the pages we could make them one by one, however, that would take forever and probably won’t look good so what we’re going to do is make some quick lines with our mechanical pencil from the borders of the pages.
Fill in the middle with more quick lines and then pull some more from the spine.


Repeat these steps for the other half of the book.
Step 15: Draw the borders
Add some lines to the borders of the pages on both sides and shade right in the middle with your 4B pencil.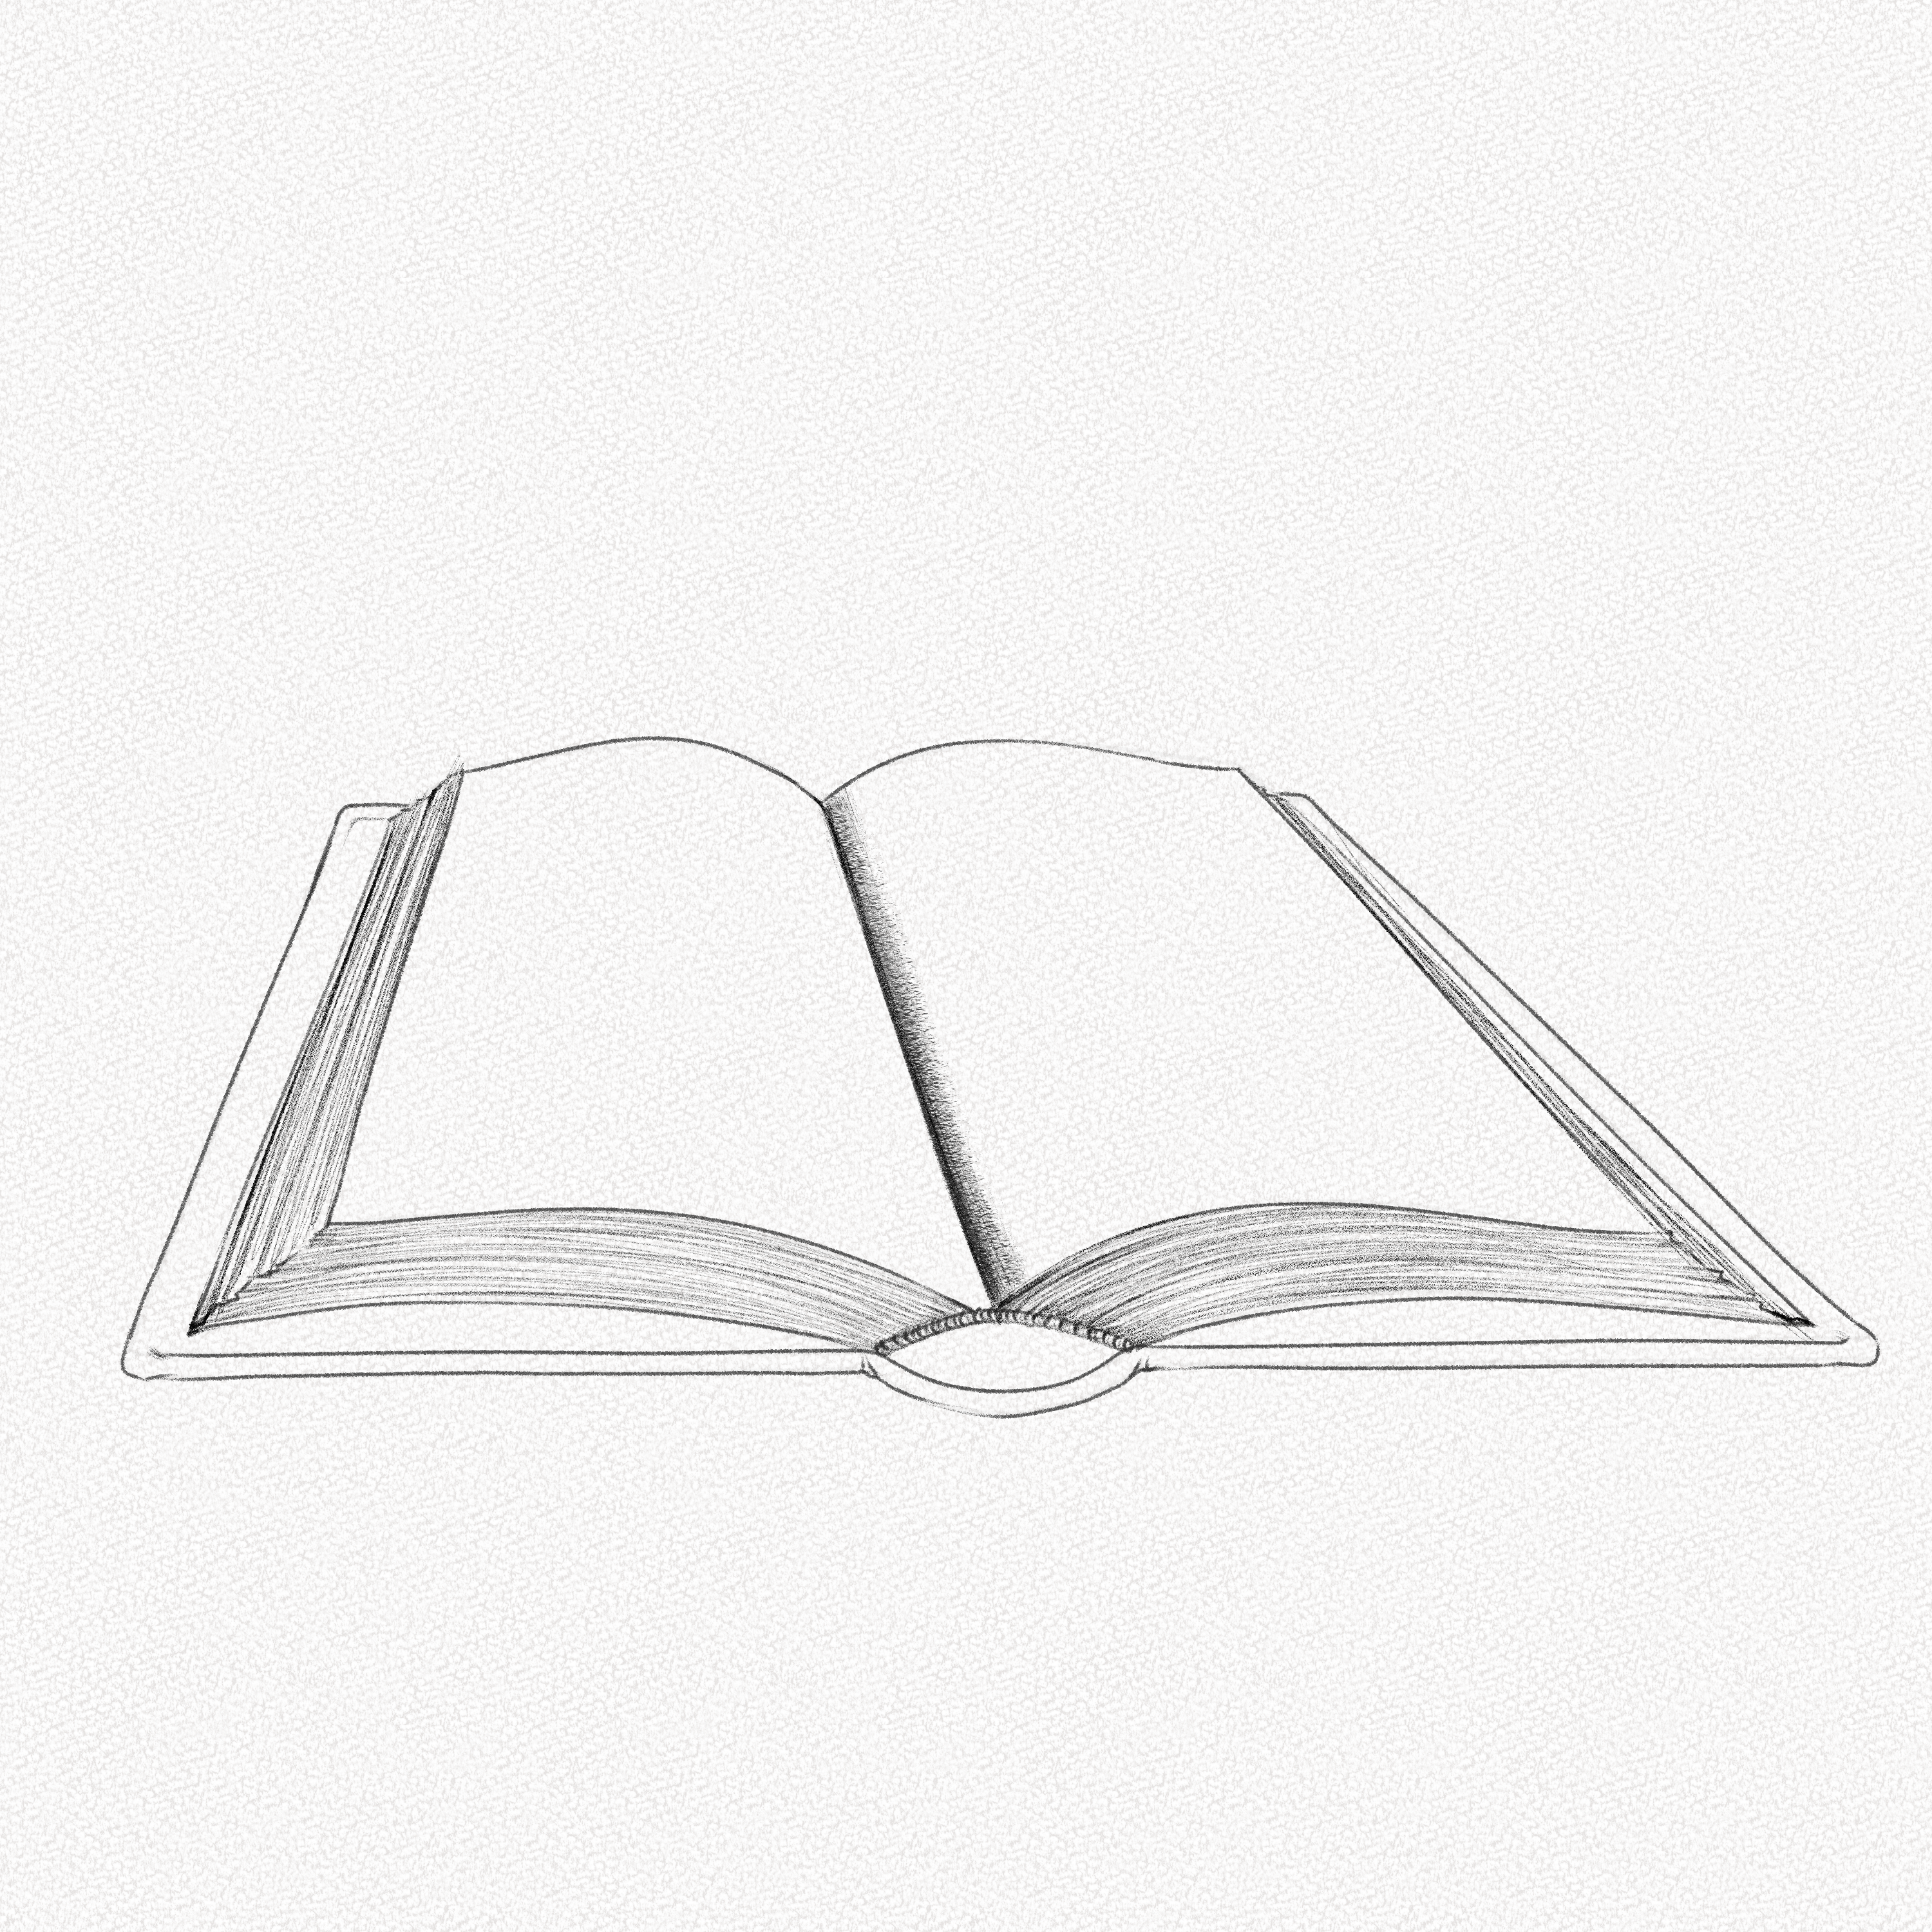
Step 16: Shade the pages
Shade the pages carefully, leaving the elevated parts blank or with the lightest value. Use a soft brush or a piece of paper towel to cover the full area.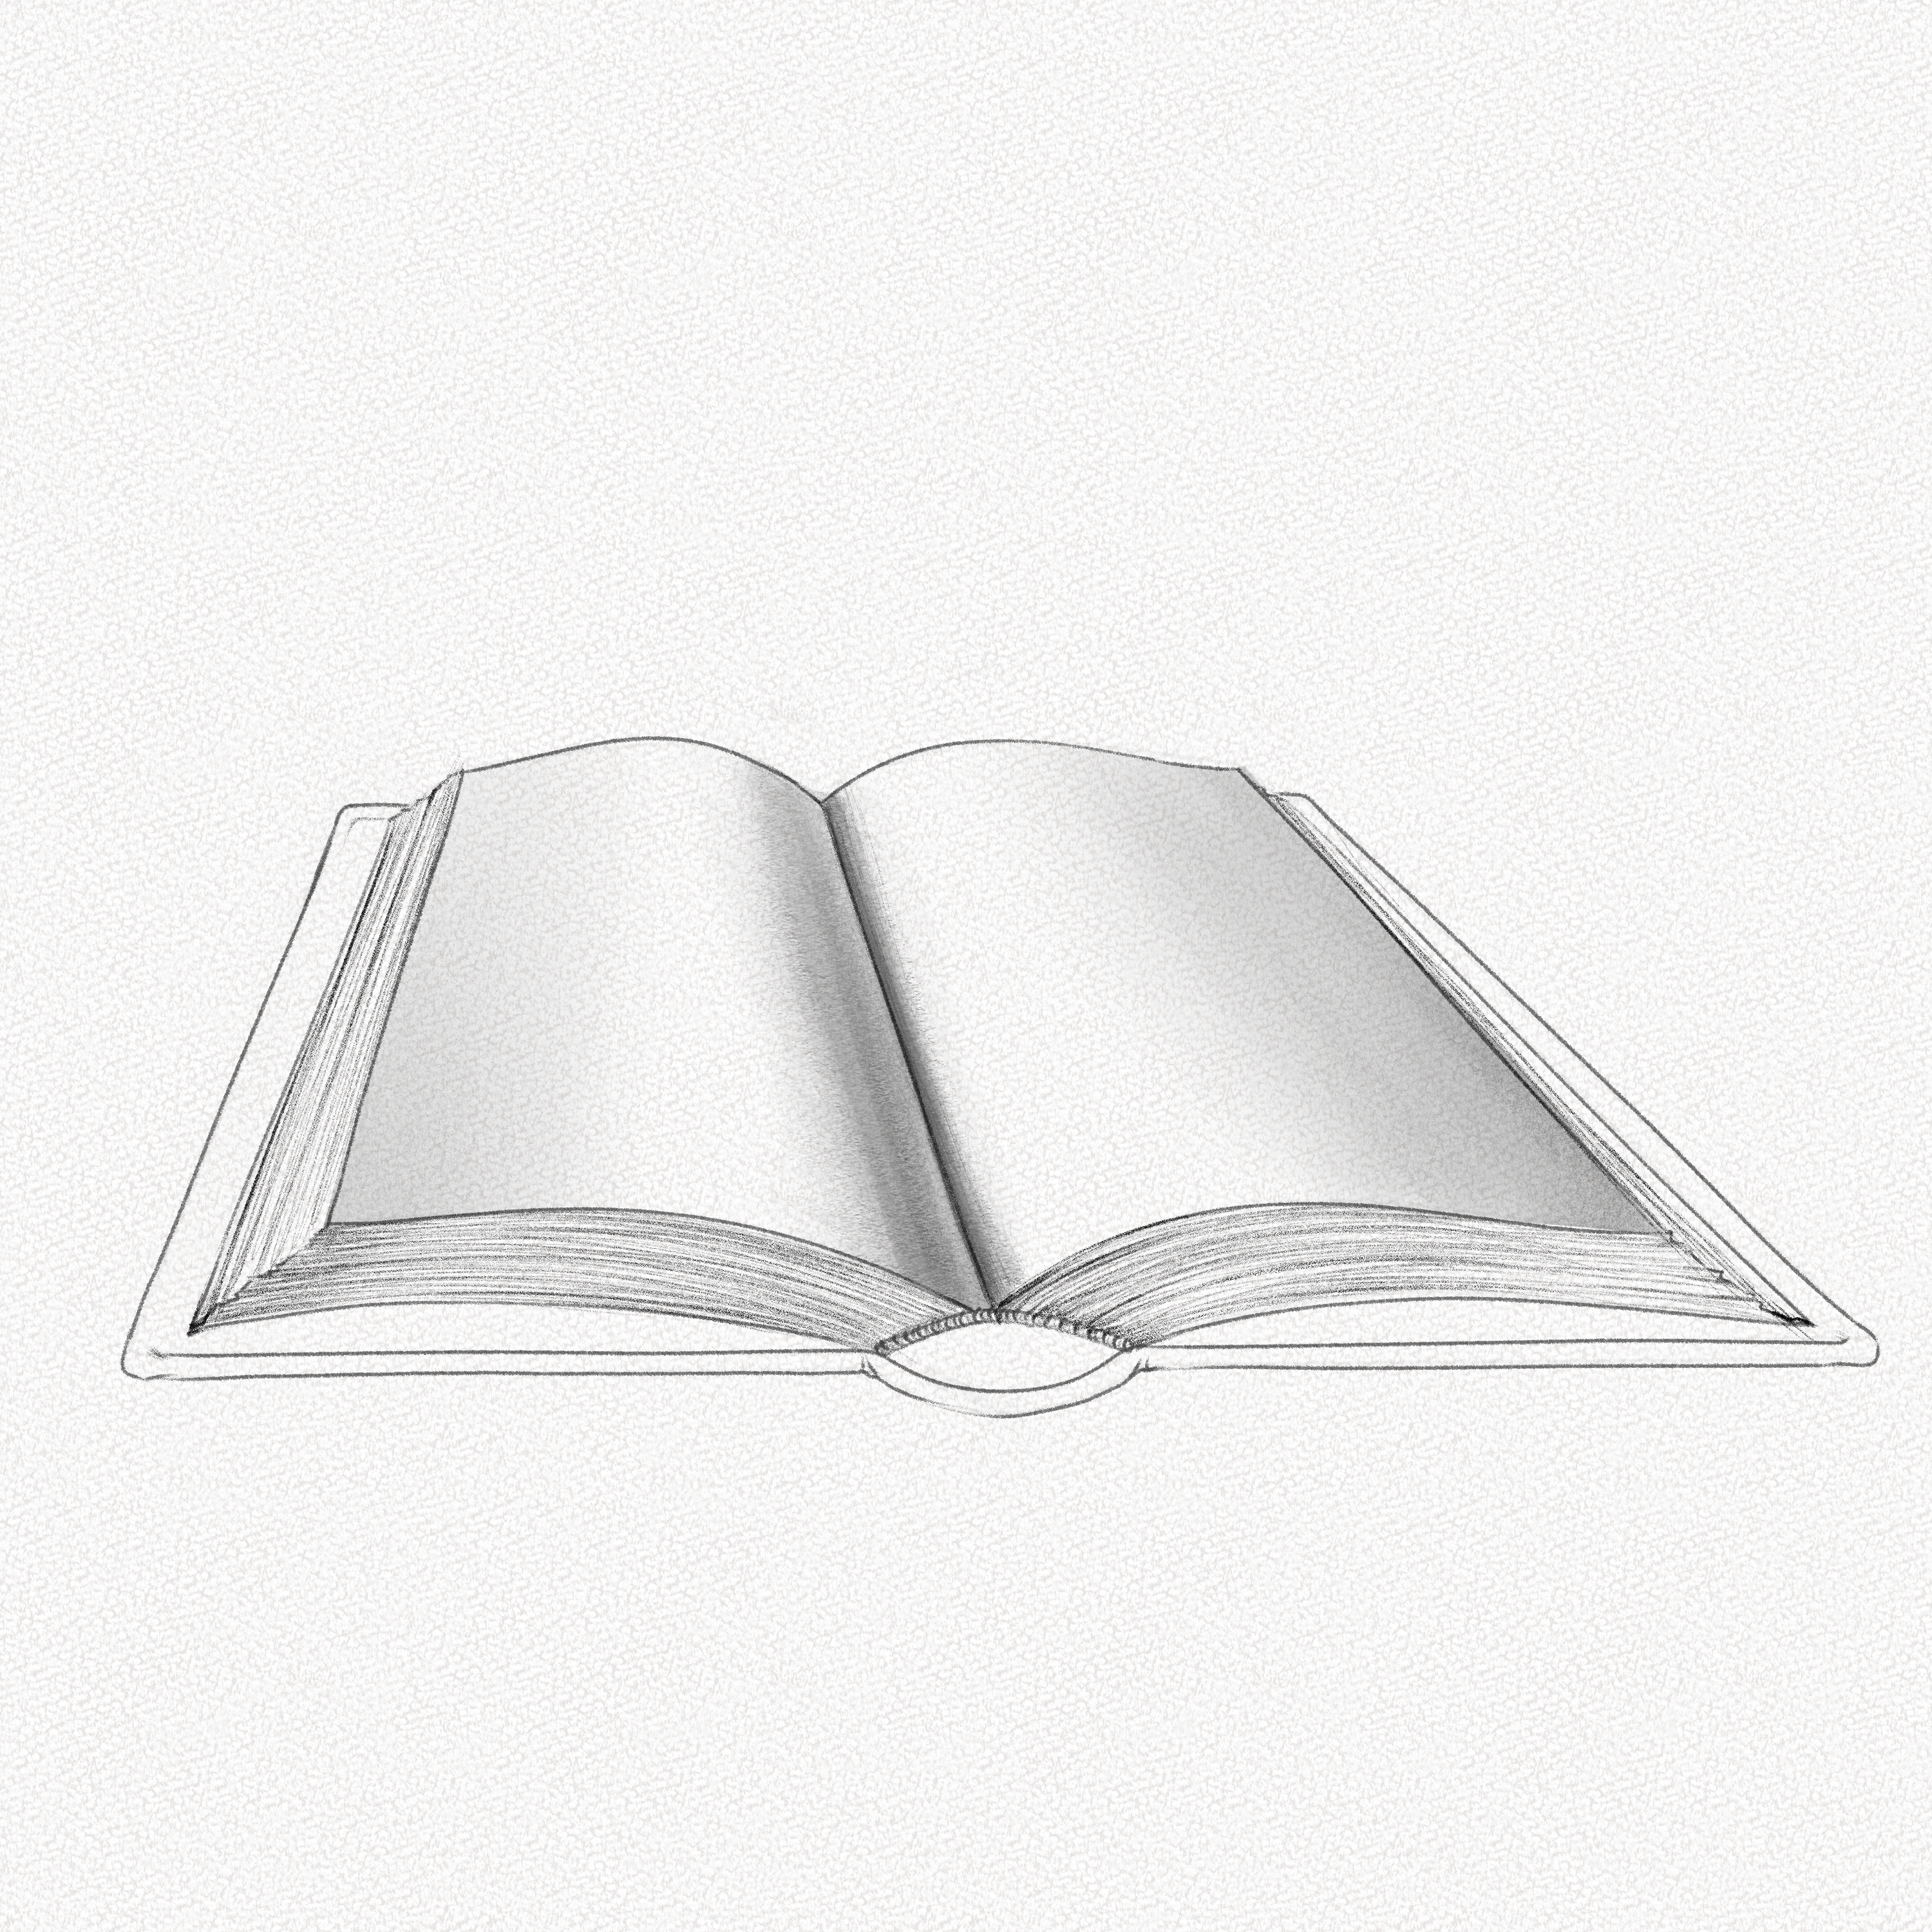
Step 17: Shade the base
Blend the lines in the pages with your blending stump in order to darken the area but only the bottom and right side. 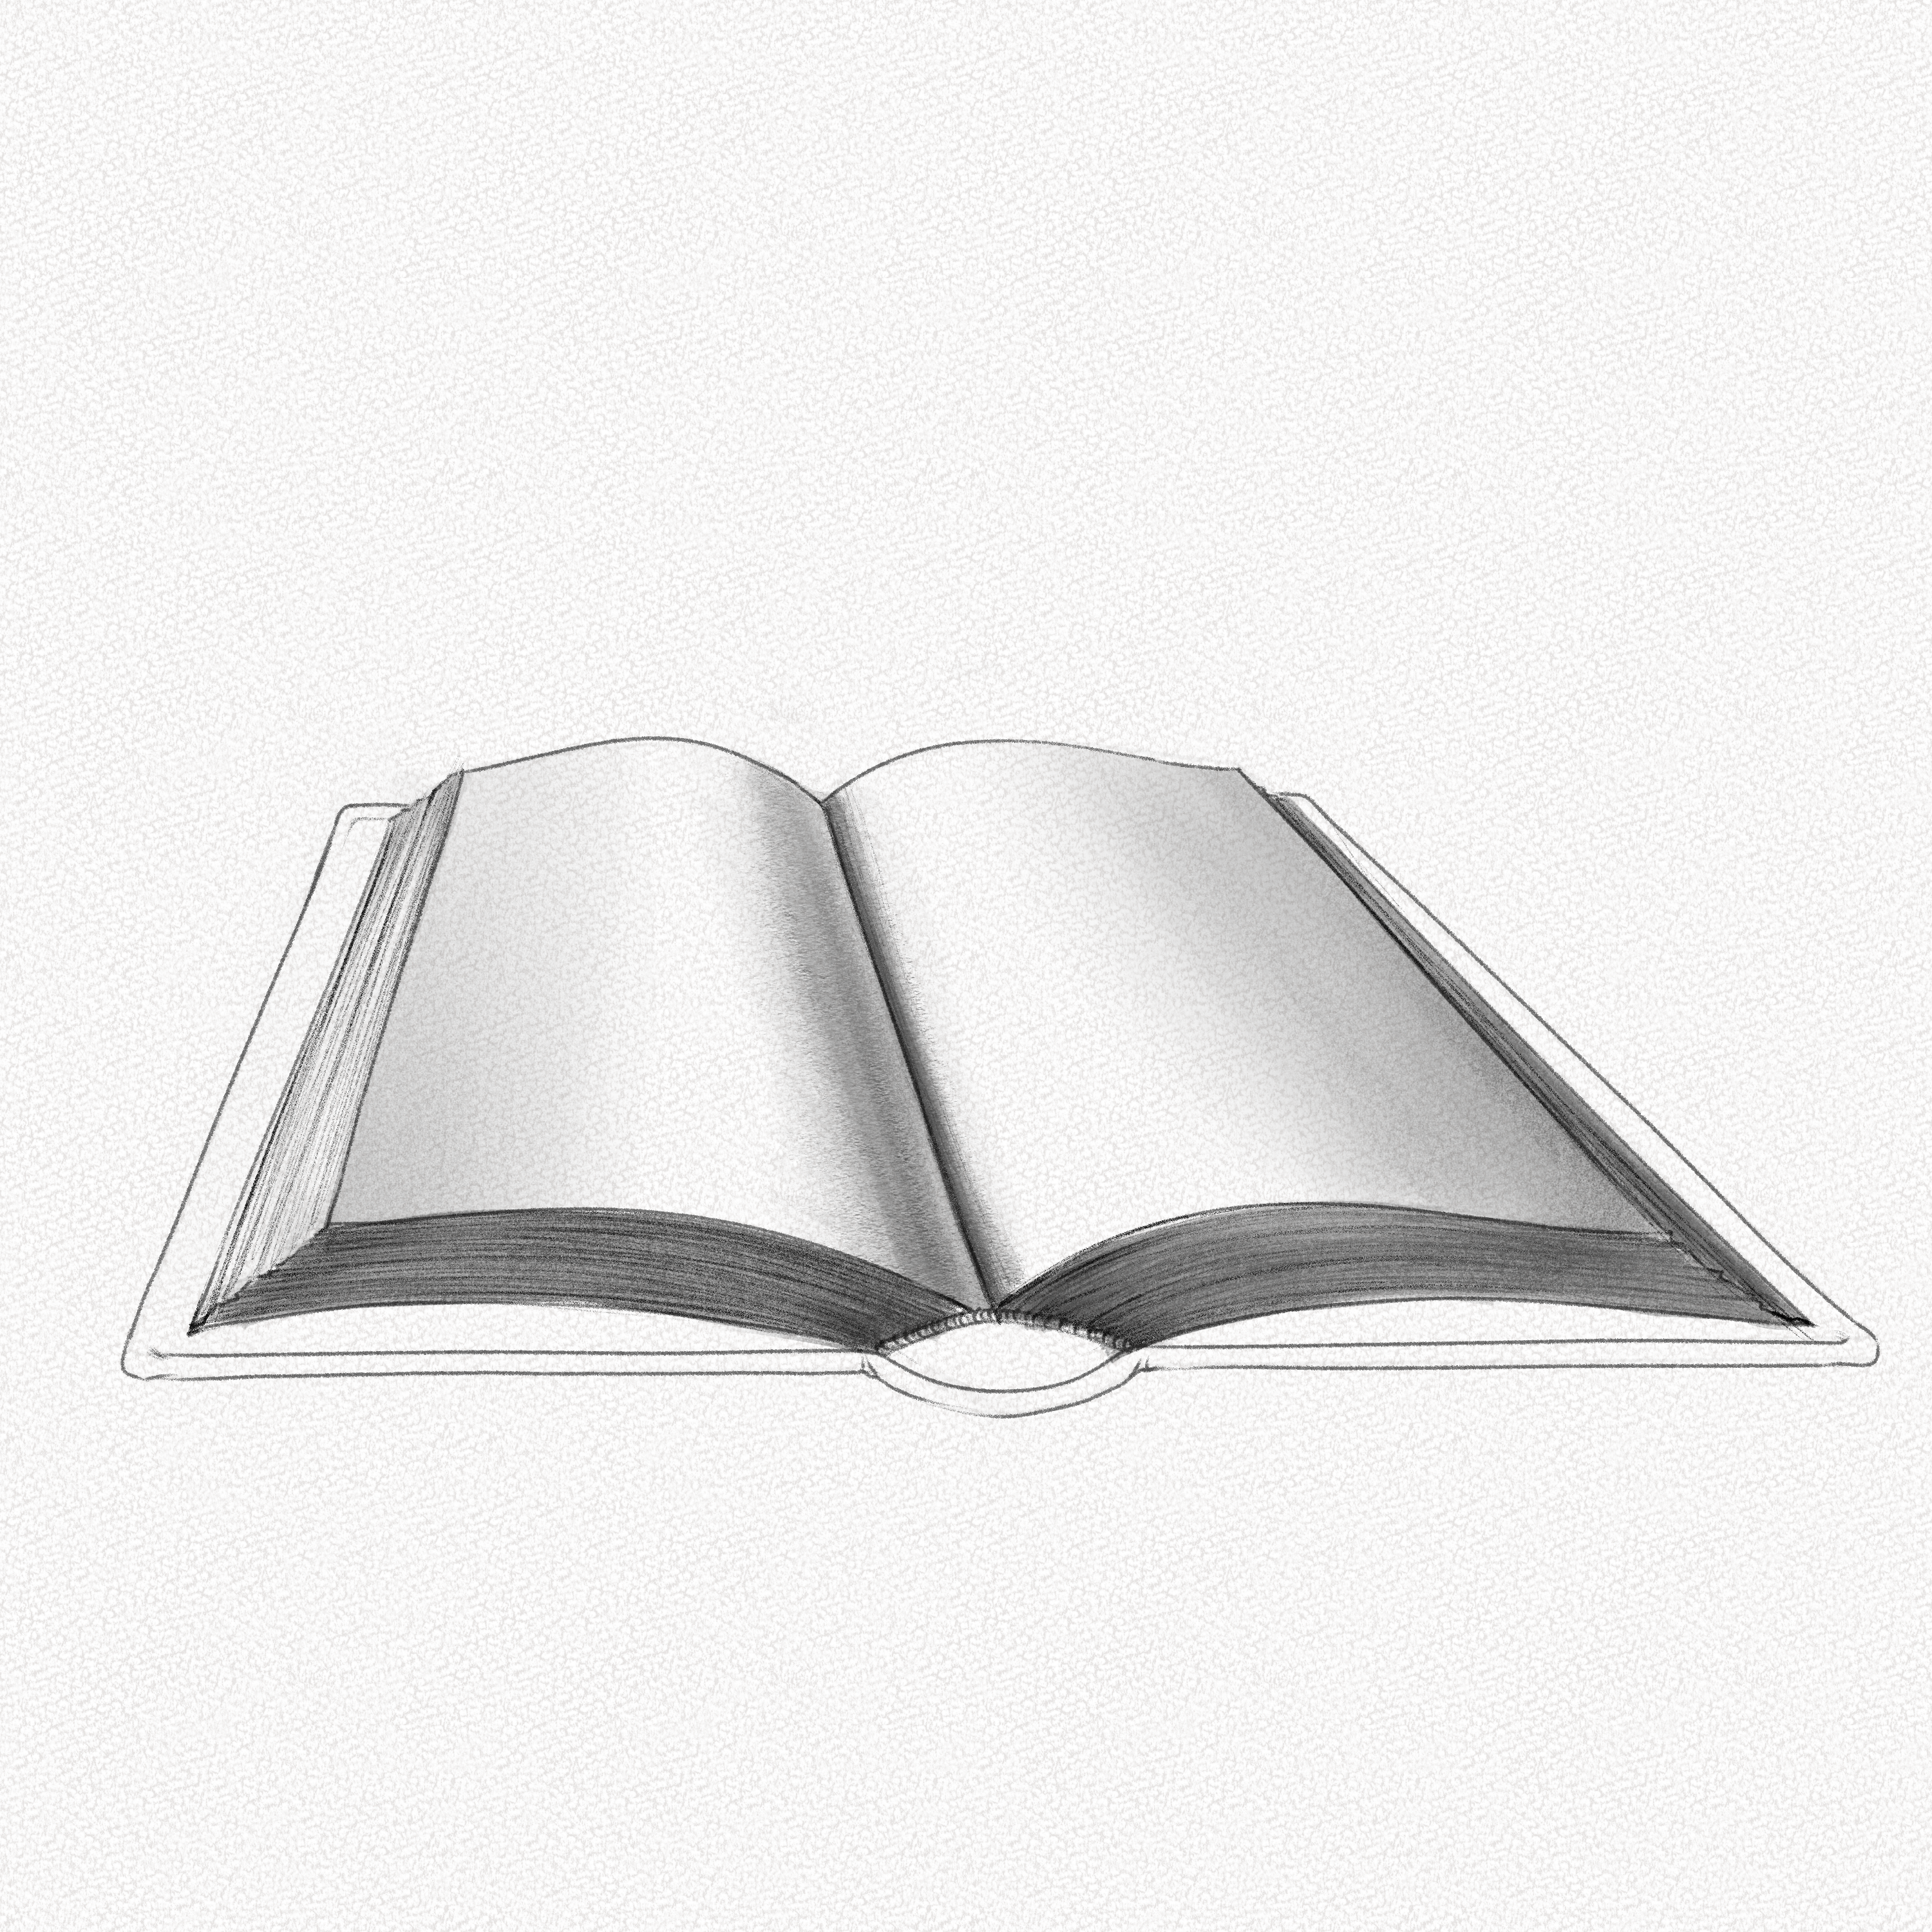
Step 18: Shade the book cover
With your 8B pencil, shade the book cover area by filling it all with graphite and then adding another layer of graphite for contrast in the borders and areas near the pages and spine.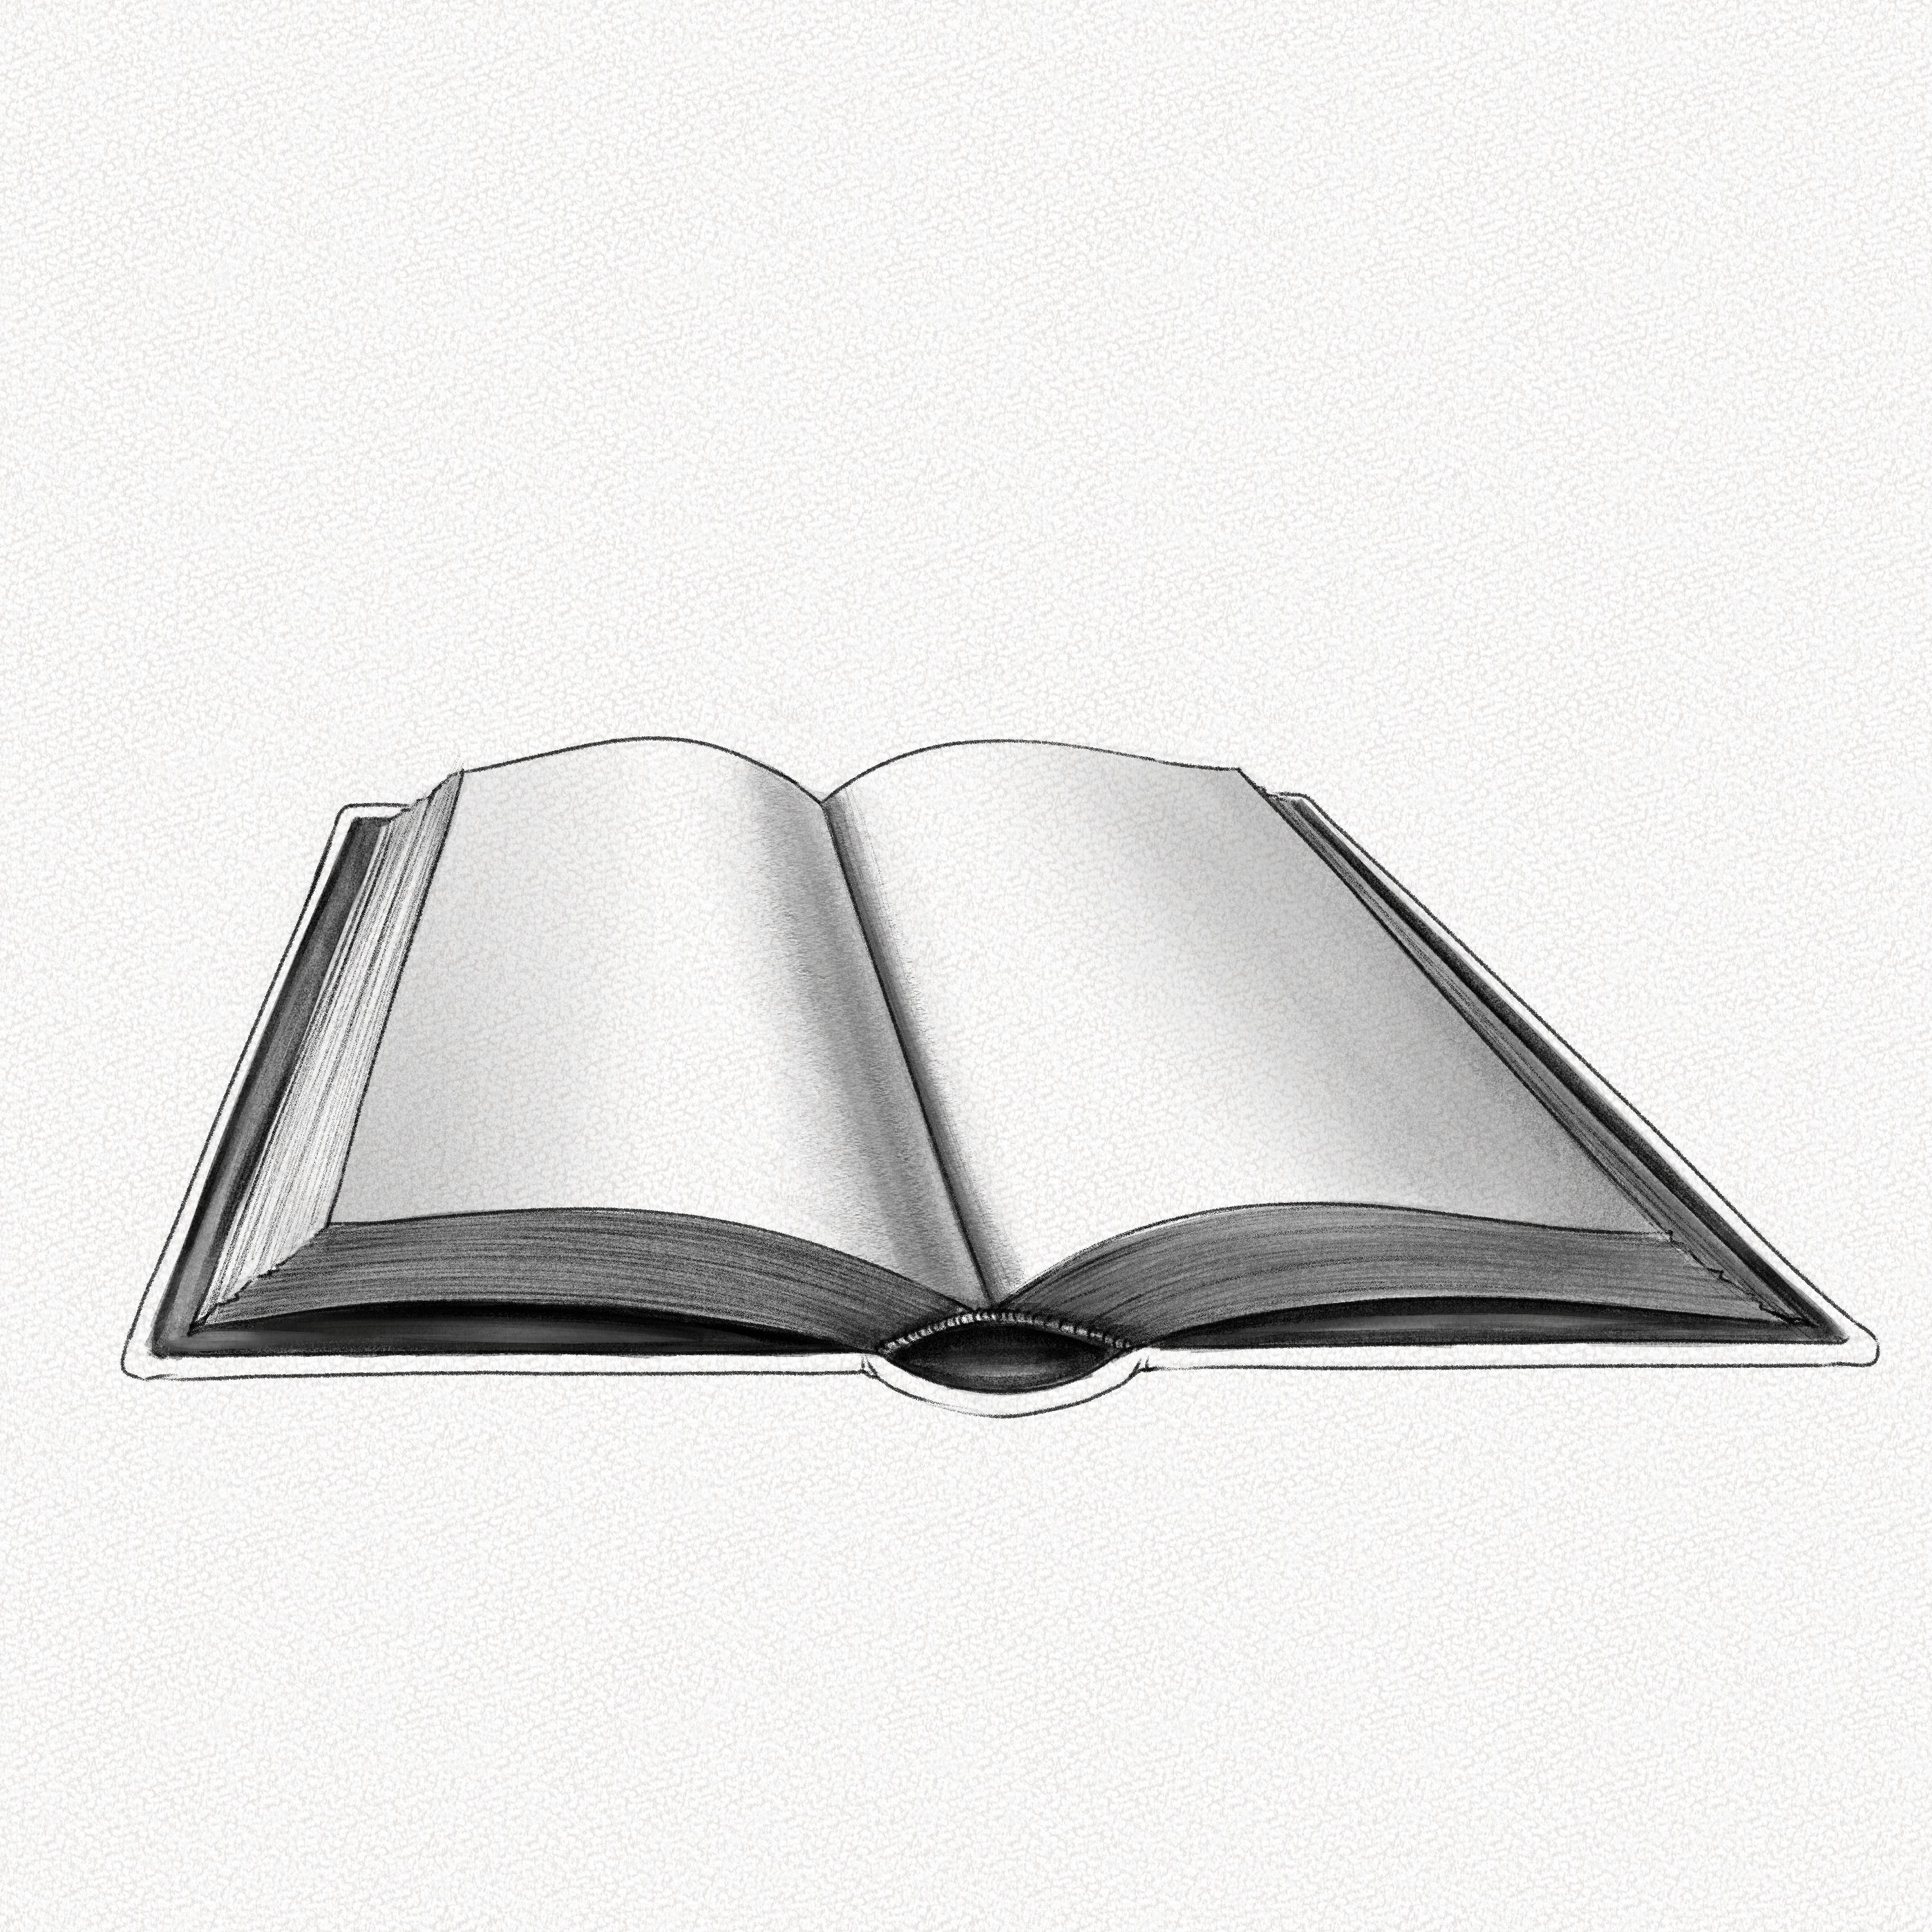
Step 19: Shade the border
Repeat the step above for the borders leaving the middle without shading since that’s the part that catches and reflects light the most. 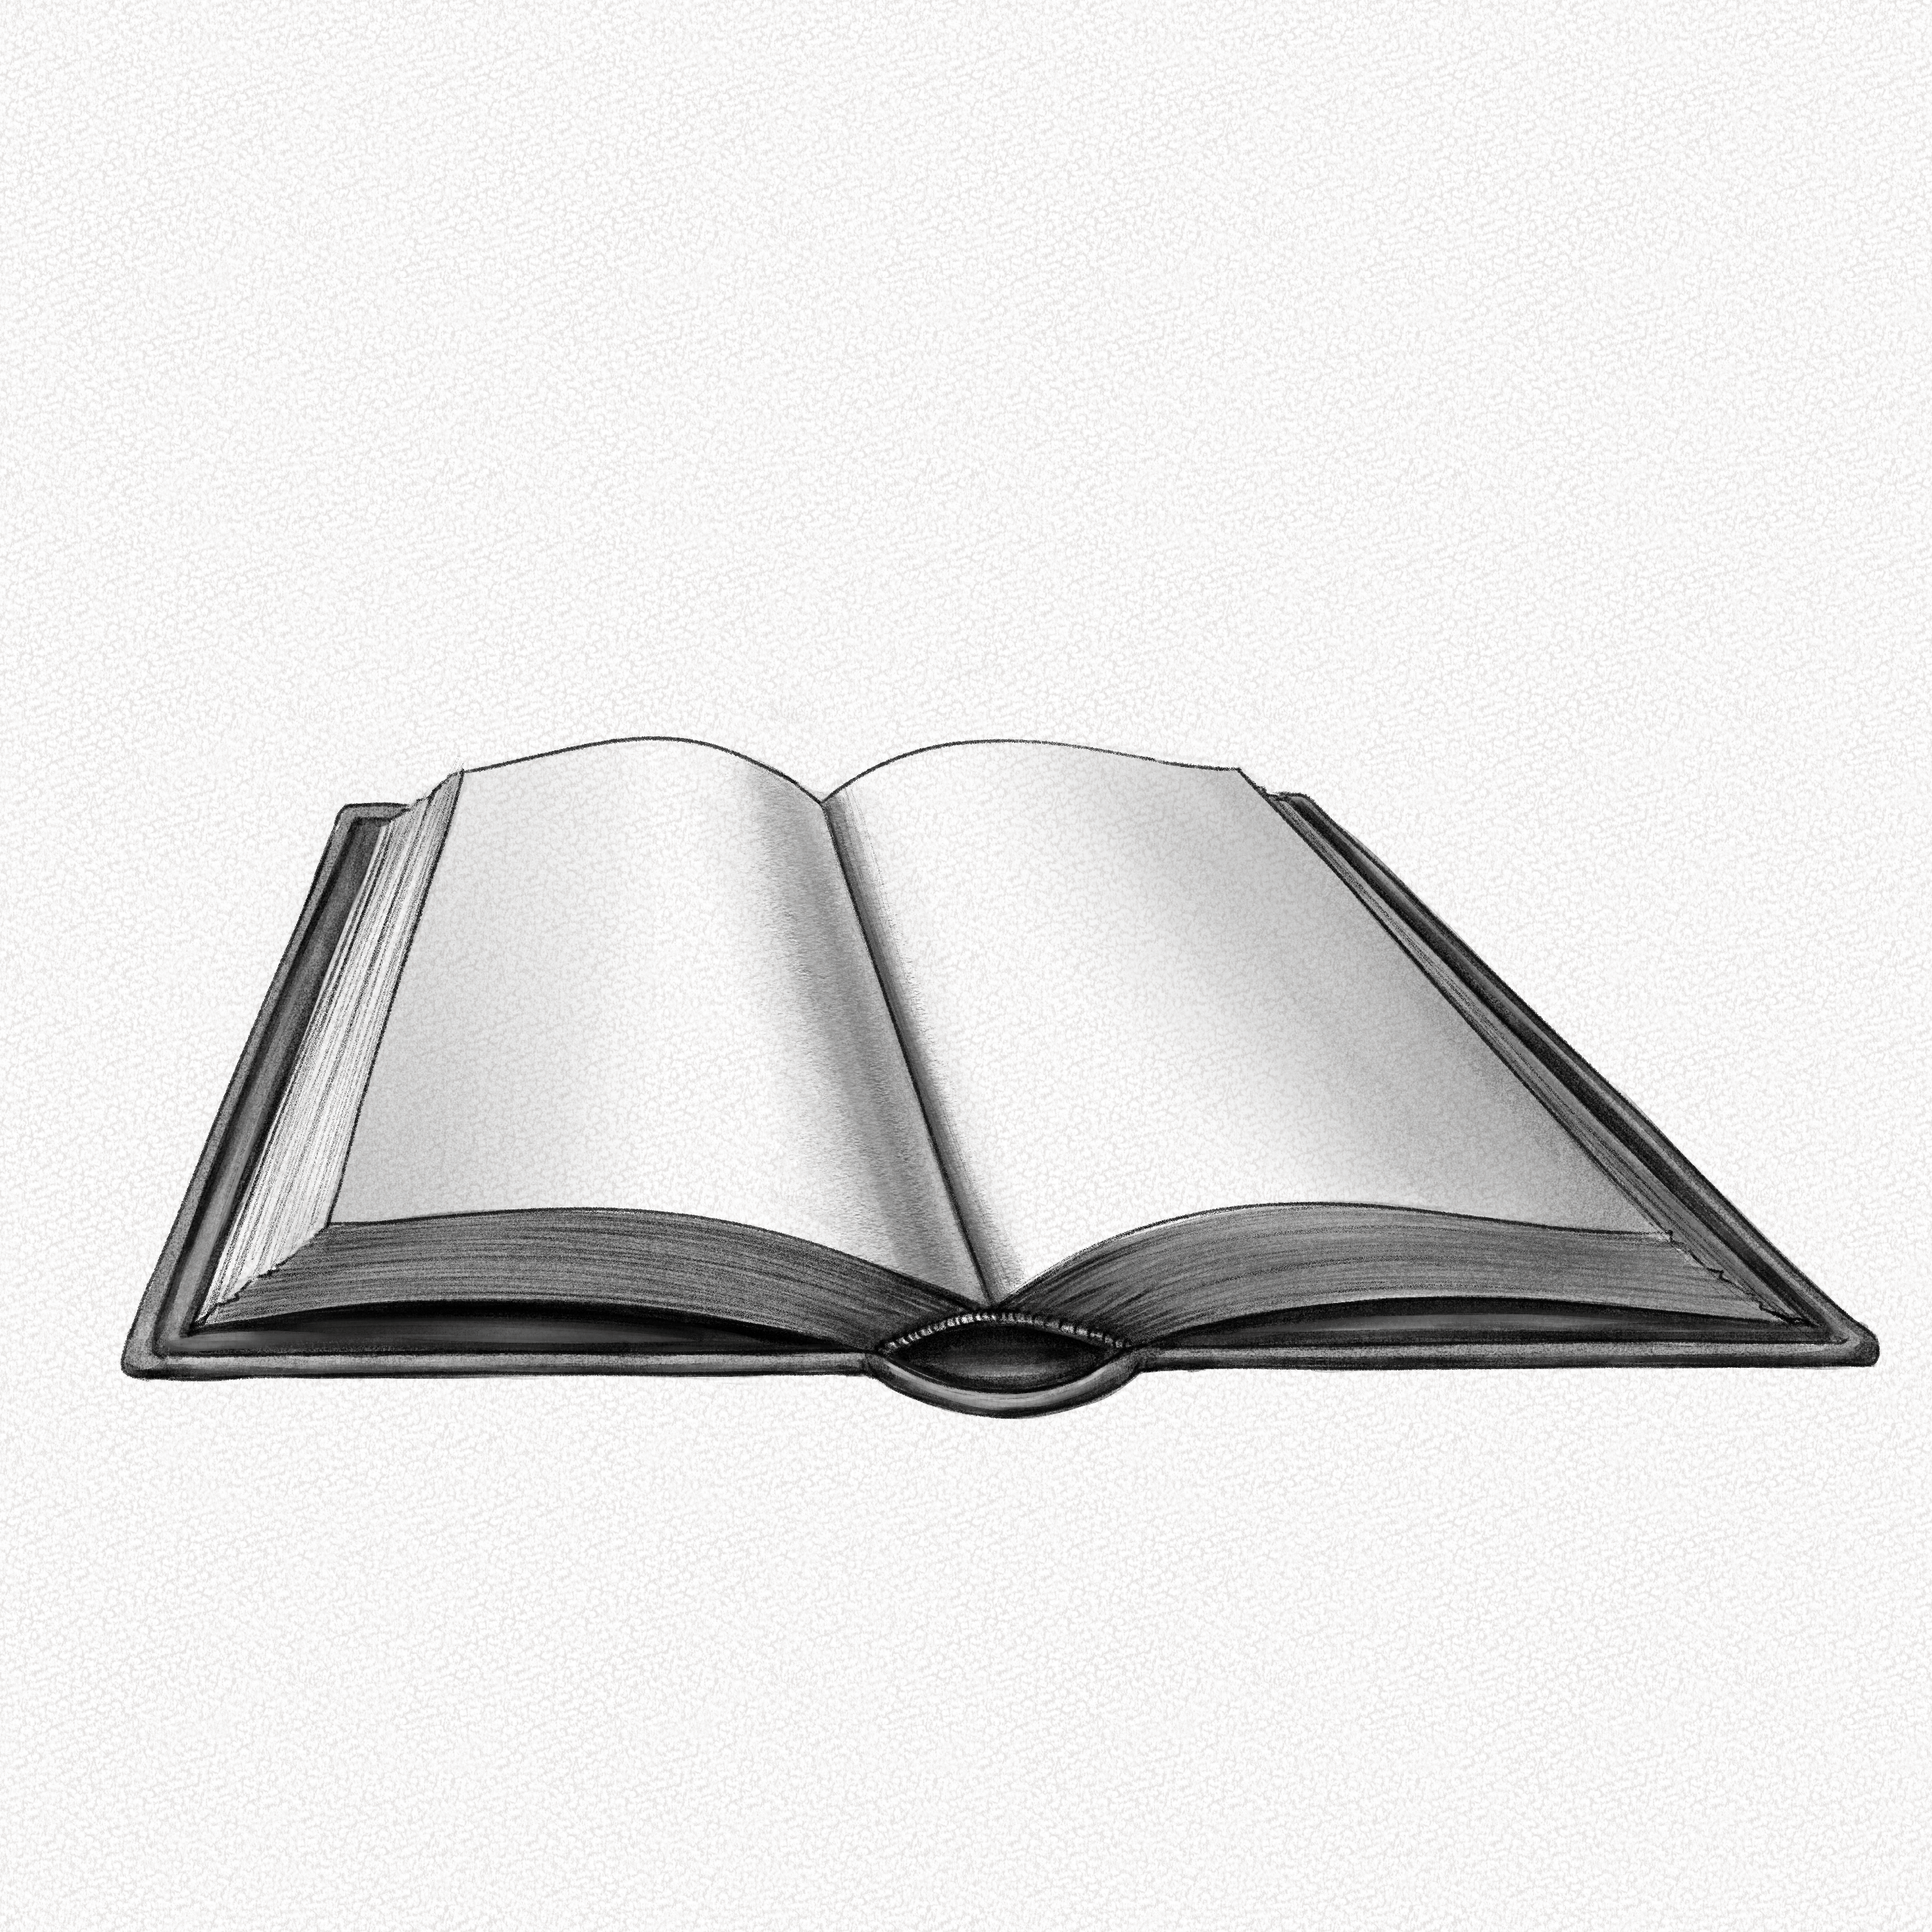
Step 20: Draw the bookmark
Now we’re almost done, and although this is totally optional, it will add a nice realism touch to your book. Draw the bookmark outline taking into consideration it comes from the spine of the book.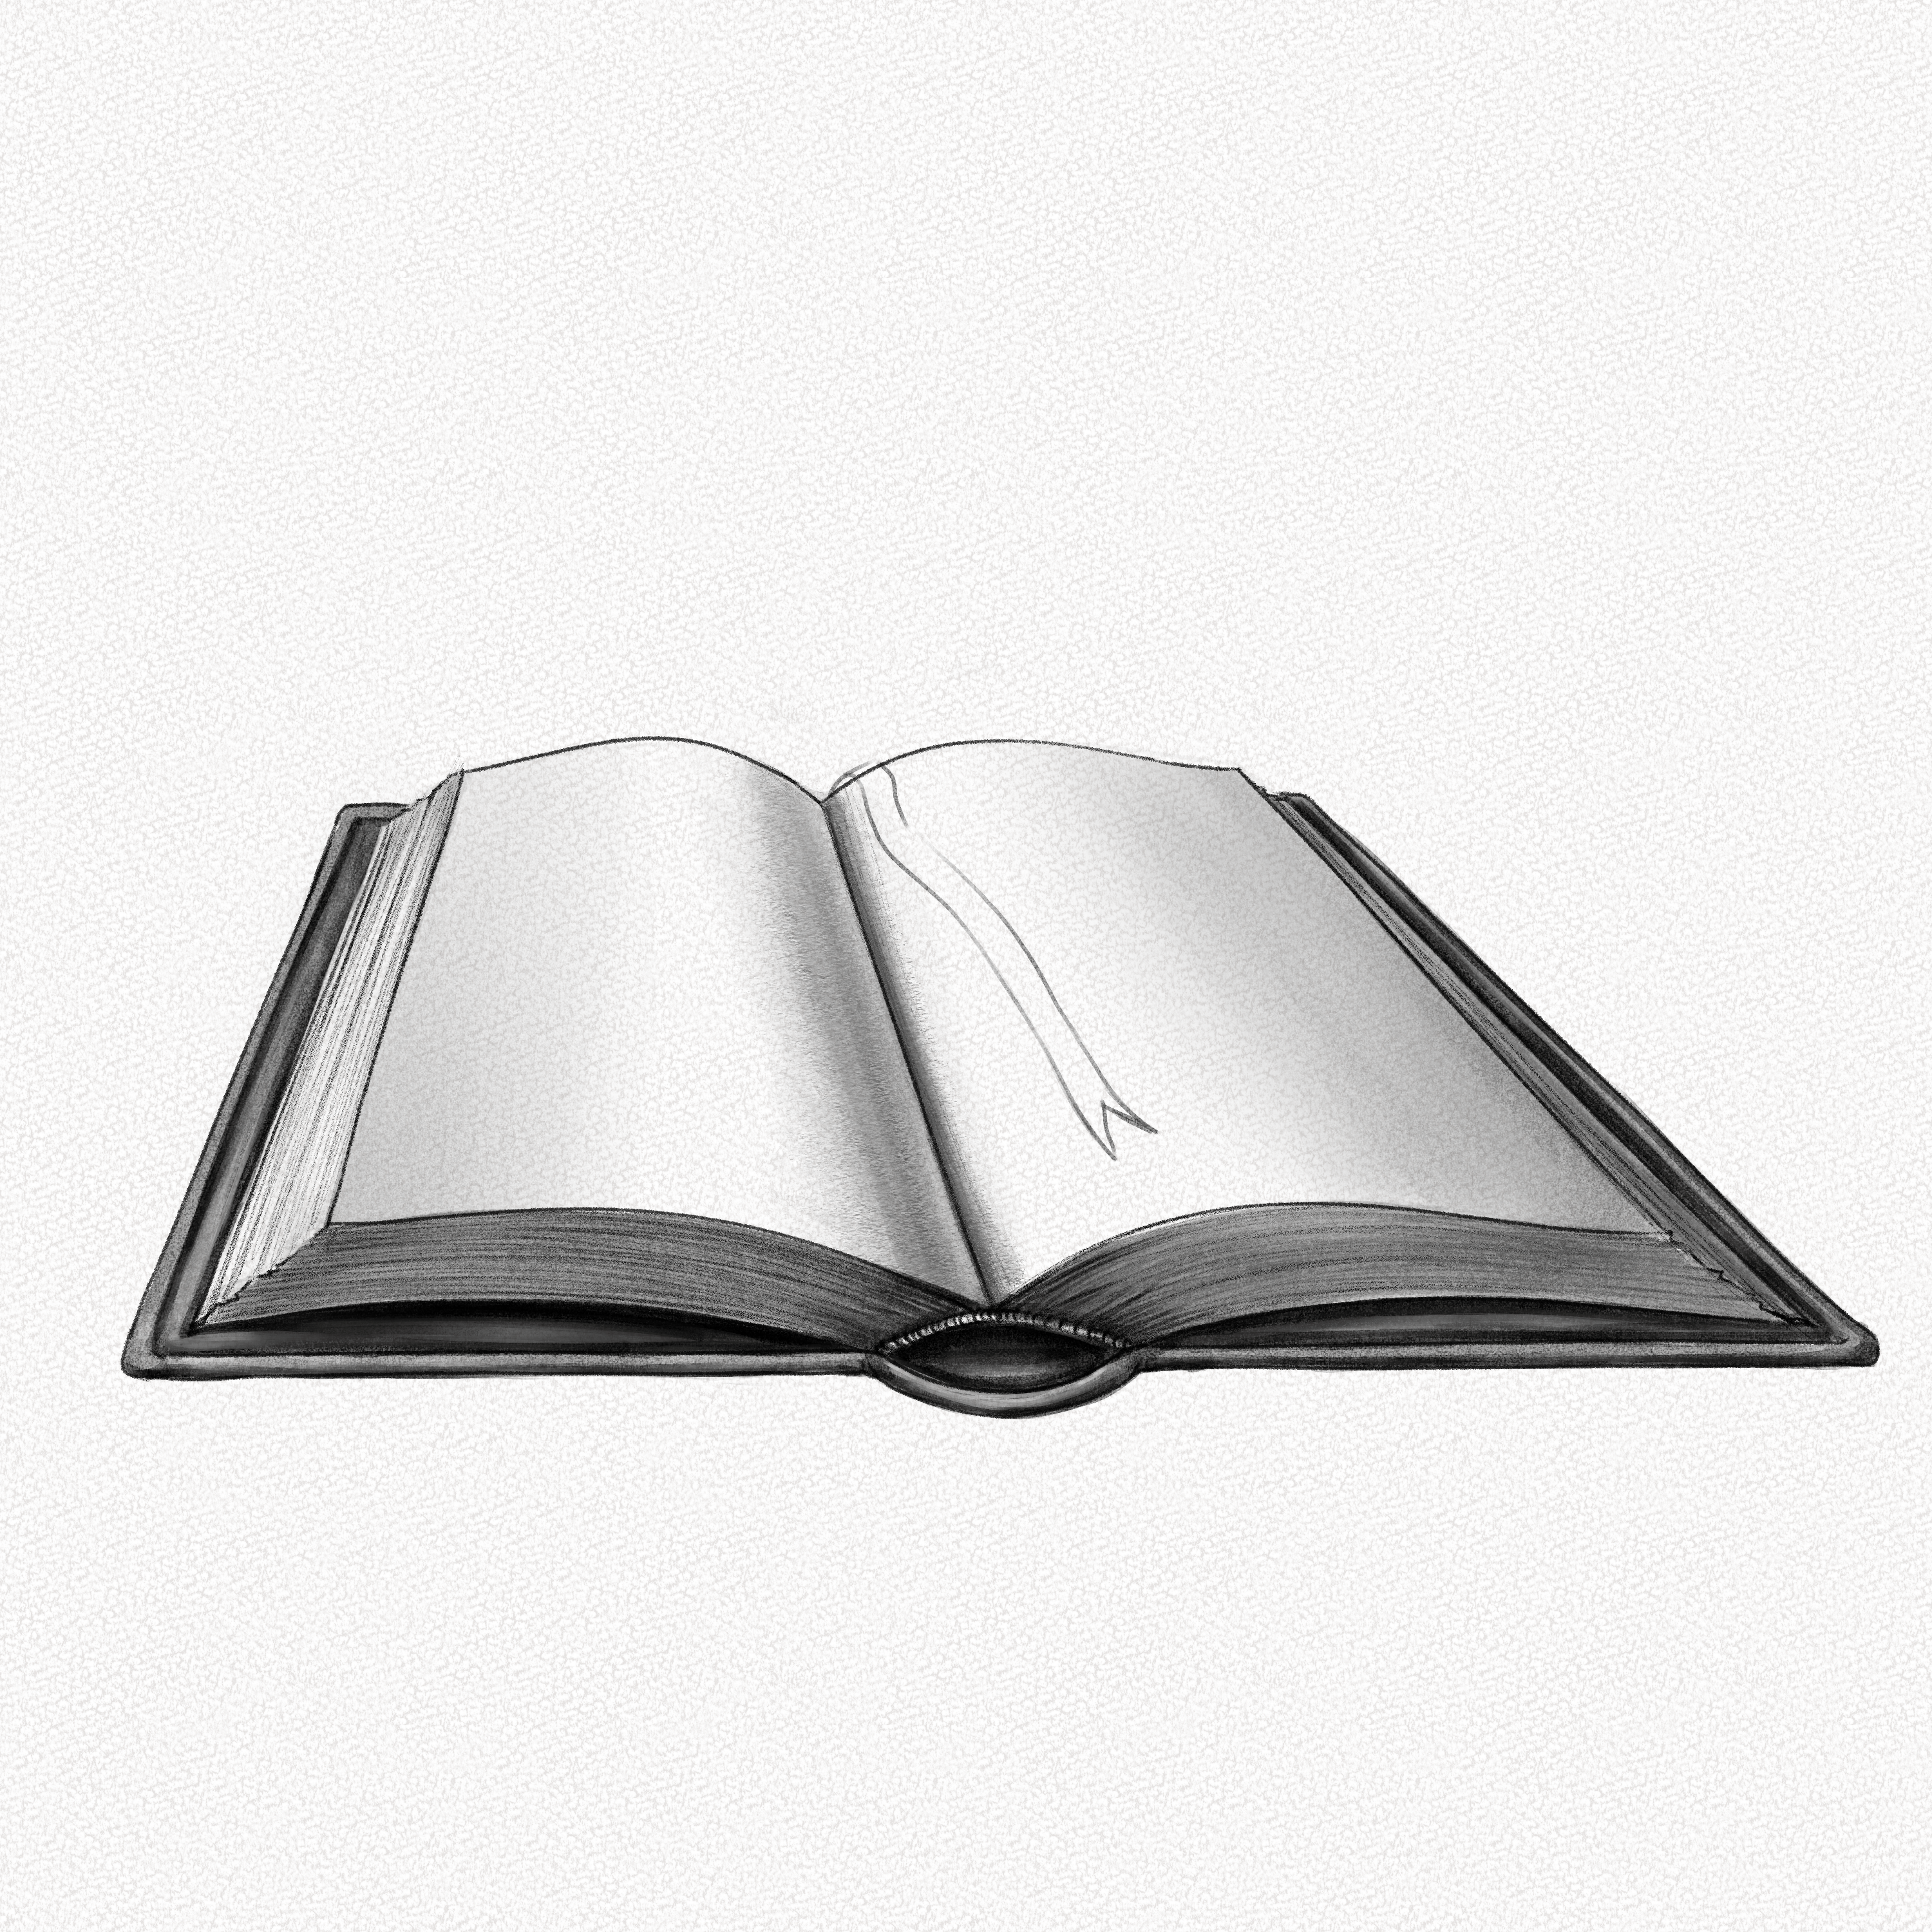
Step 21: Shade the bookmark
Shade the bookmark by filling it with graphite, and the work the dark and light tones from there. Use your Tombow Mono Zero eraser for the details on the borders of the bookmark.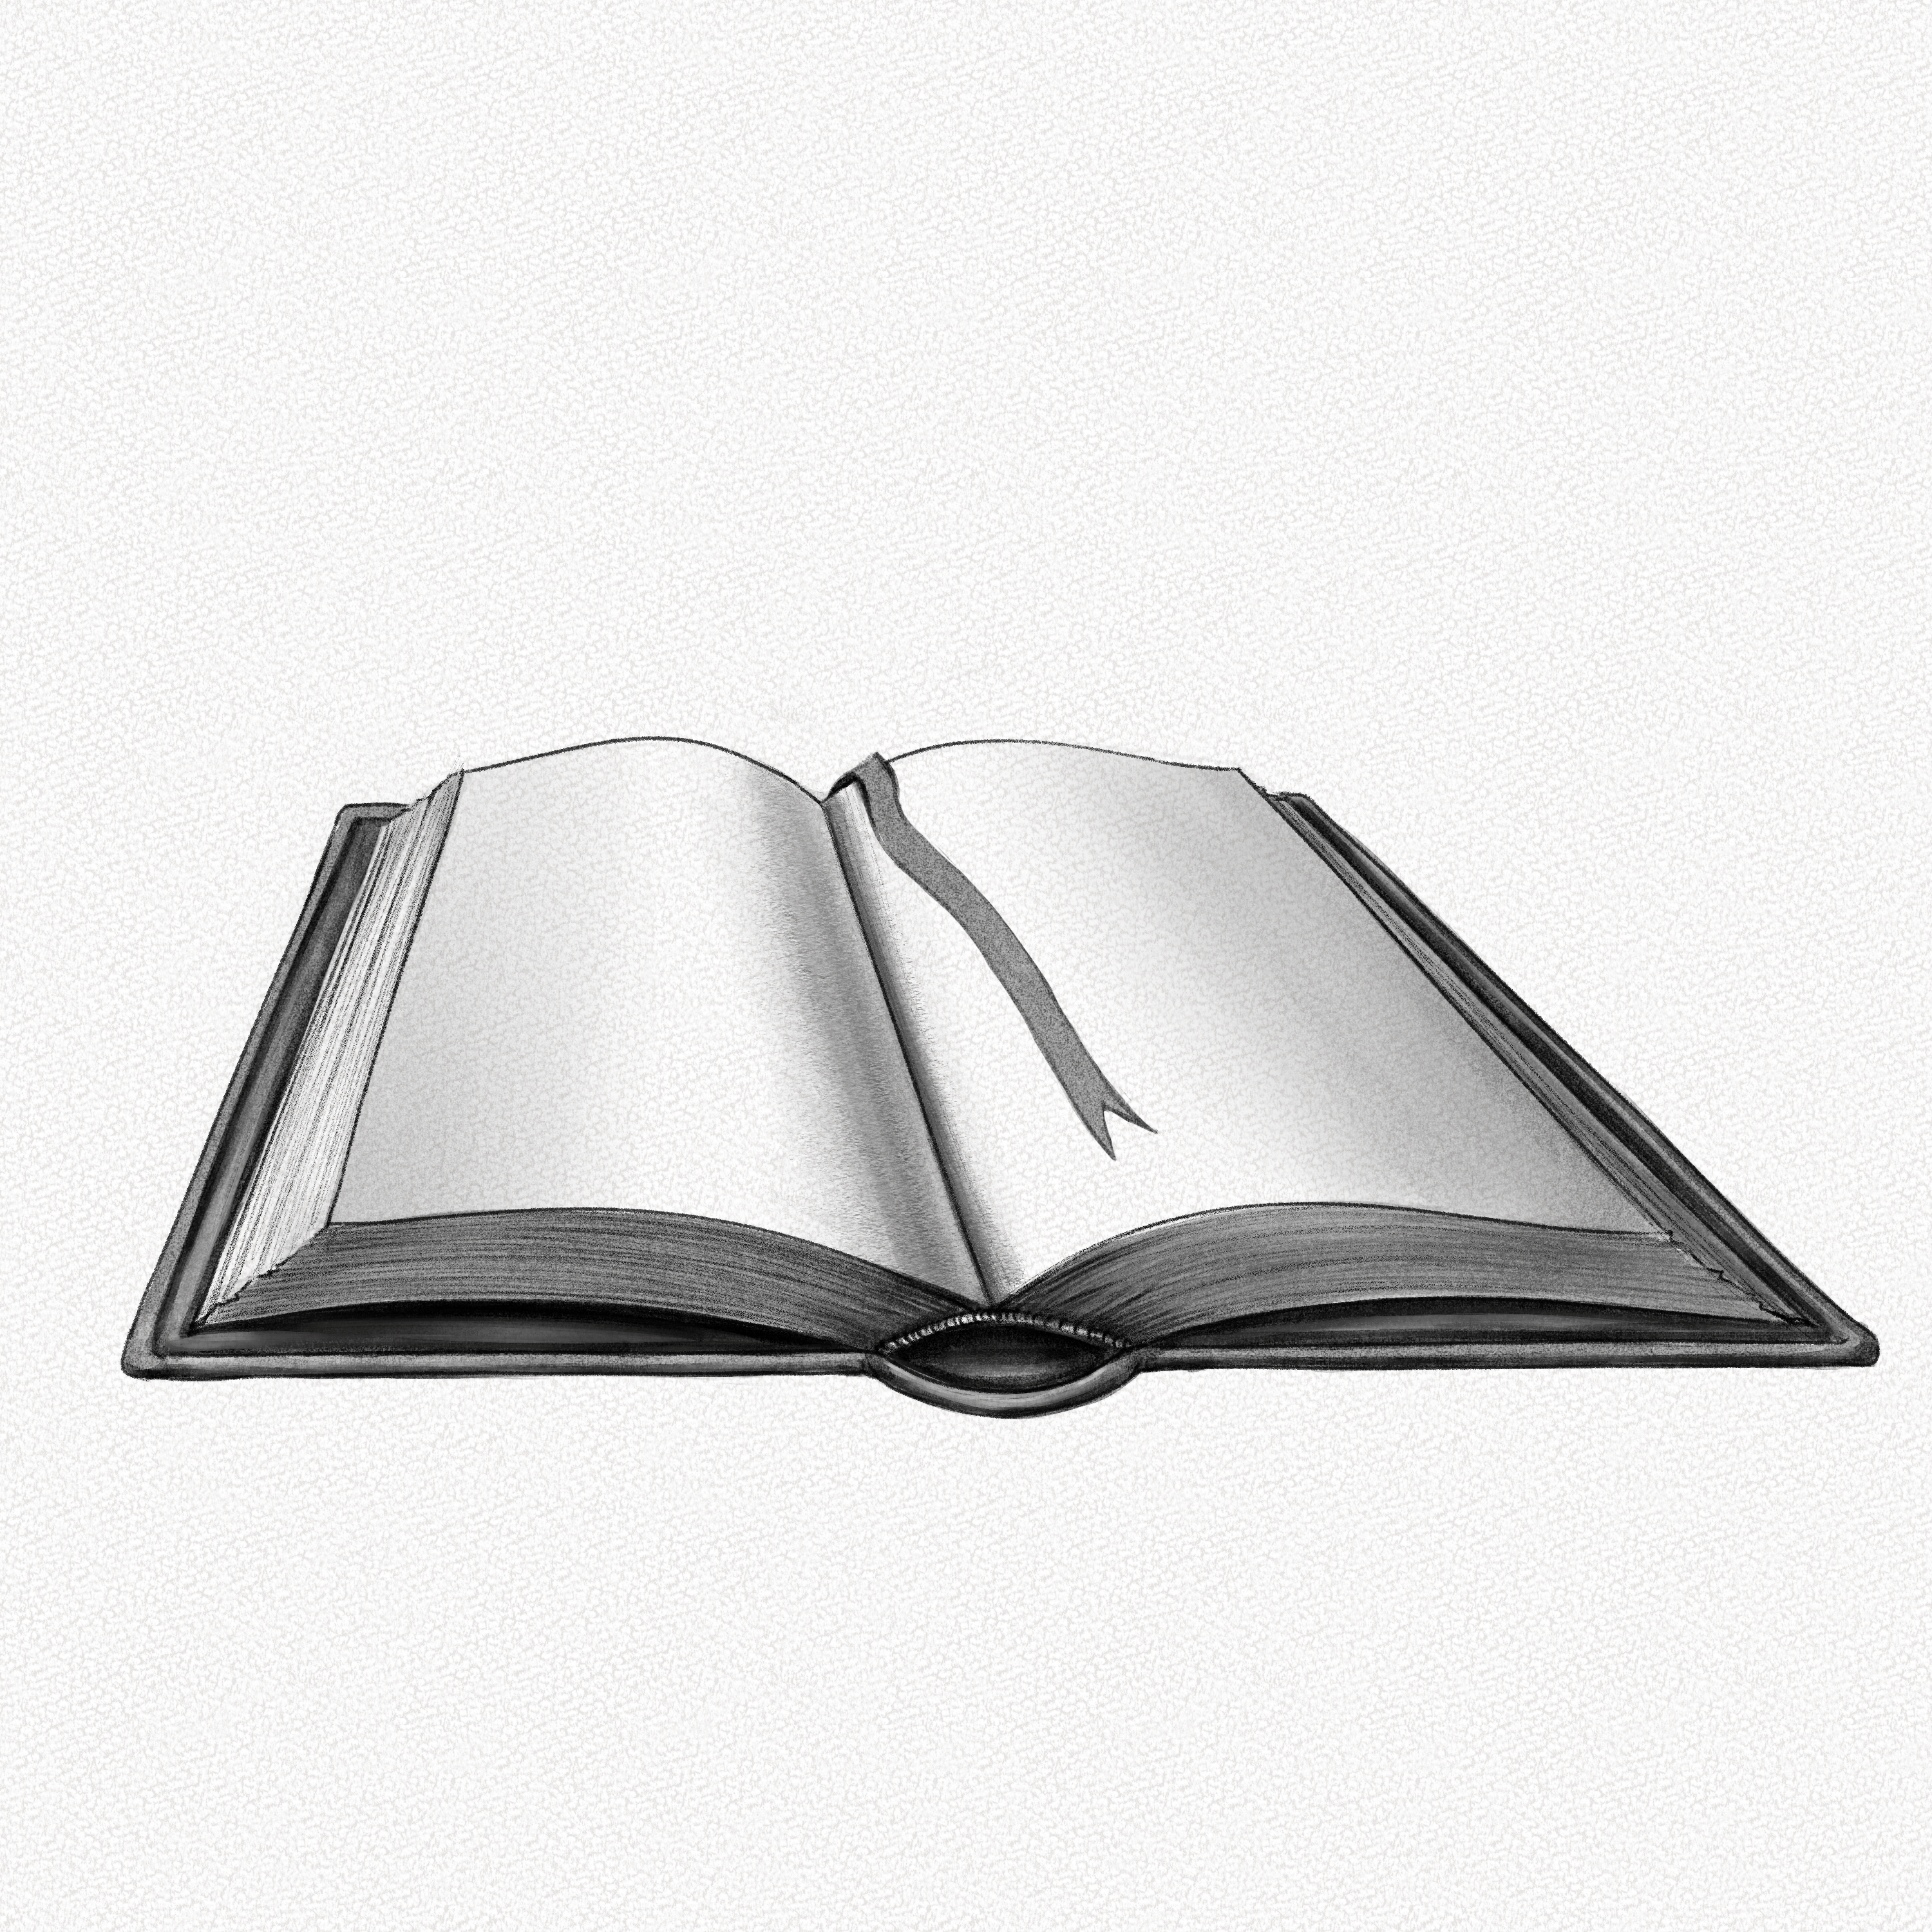
Step 22: Add Details
Add a subtle and small shadow to the book (cast by the bookmark) and take some graphite away from the borders of the book to make it look more realistic with your Mono Zero eraser, add some details to the book pages
That’s it. You’re done!
Thank you for following this tutorial, we hope you had fun and learned a bit more about perspective and how to use it to draw simple objects accurately. Remember to practice this exercise and apply it to your other drawings.
We also hope you liked this book drawing tutorial and that now have a better grasp on how to draw a well-structured book.
Happy drawing!