Wolves are often portrayed in art as beautiful, majestic creatures.
Wolves were first drawn in cave paintings that date back to 6000 BC. These drawings show how wolves were seen as a threat to humans in ancient times, and hunters used to kill them for their fur, meat, and skin for clothes or shelter. As time passed by, wolves started being seen as an essential part of nature because they helped balance wildlife populations by hunting animals that had grown too large in numbers like elk or deer, which could result
The first question that arises is why do people portray wolves in their artwork? What is the significance of these depictions? Wolves have been a part of human culture for centuries. They have been depicted as symbols of power, bravery, and intelligence.
And even in modern ages, we still see many people drawing and painting wolves as a way to express themselves and their creativity. Drawing a wolf can be a great way to practice your drawing skills and have fun at the same time.
Keep reading to learn how to draw a wolf using simple shapes.
What you’ll learn:
- Structure of a wolf’s body
- How to draw a wolf
- How to shade a wolf
Materials needed:
- A piece of paper
- A 0.5mm 2B mechanical pencil
- A 0.5mm HB mechanical pencil
- A 4B graphite pencil
- A 2.3mm Tombow Mono Zero eraser
- A blending stump
- A ruler
- An eraser or a kneaded eraser
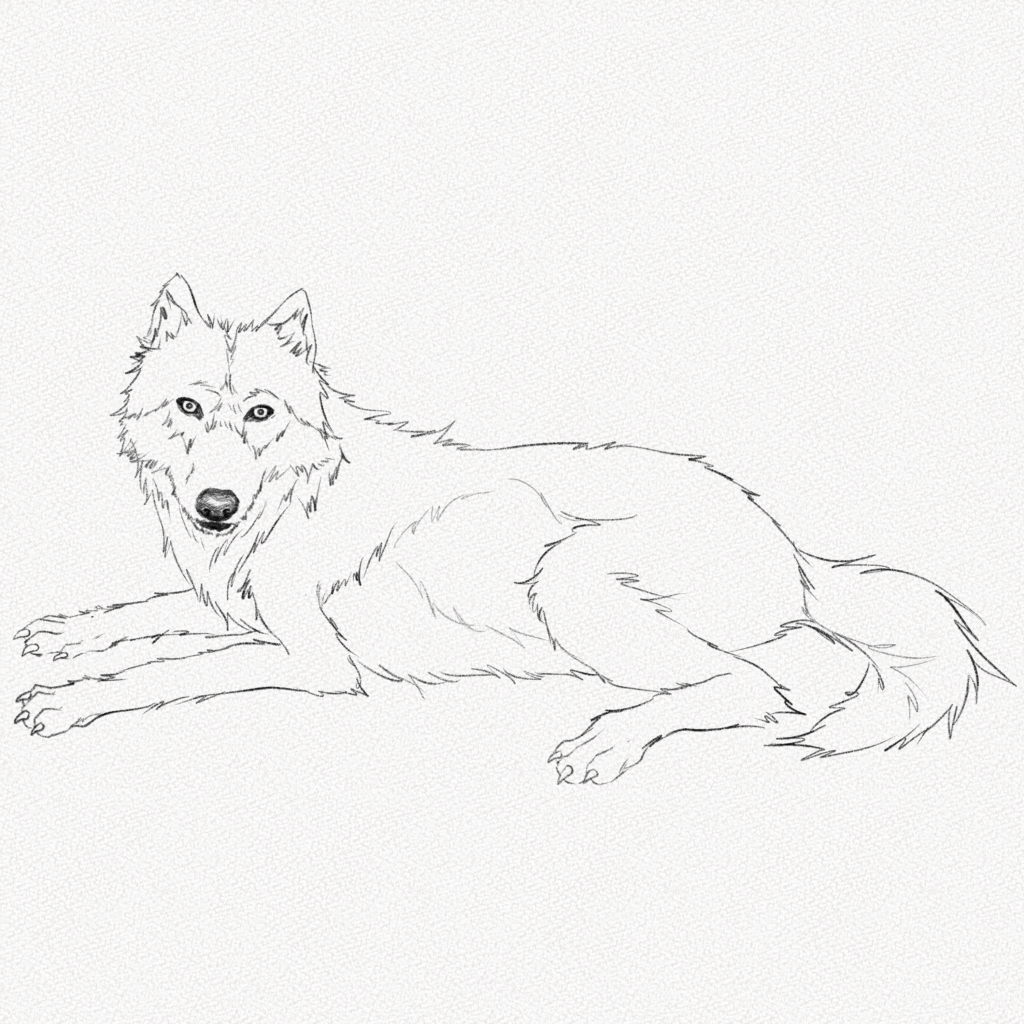
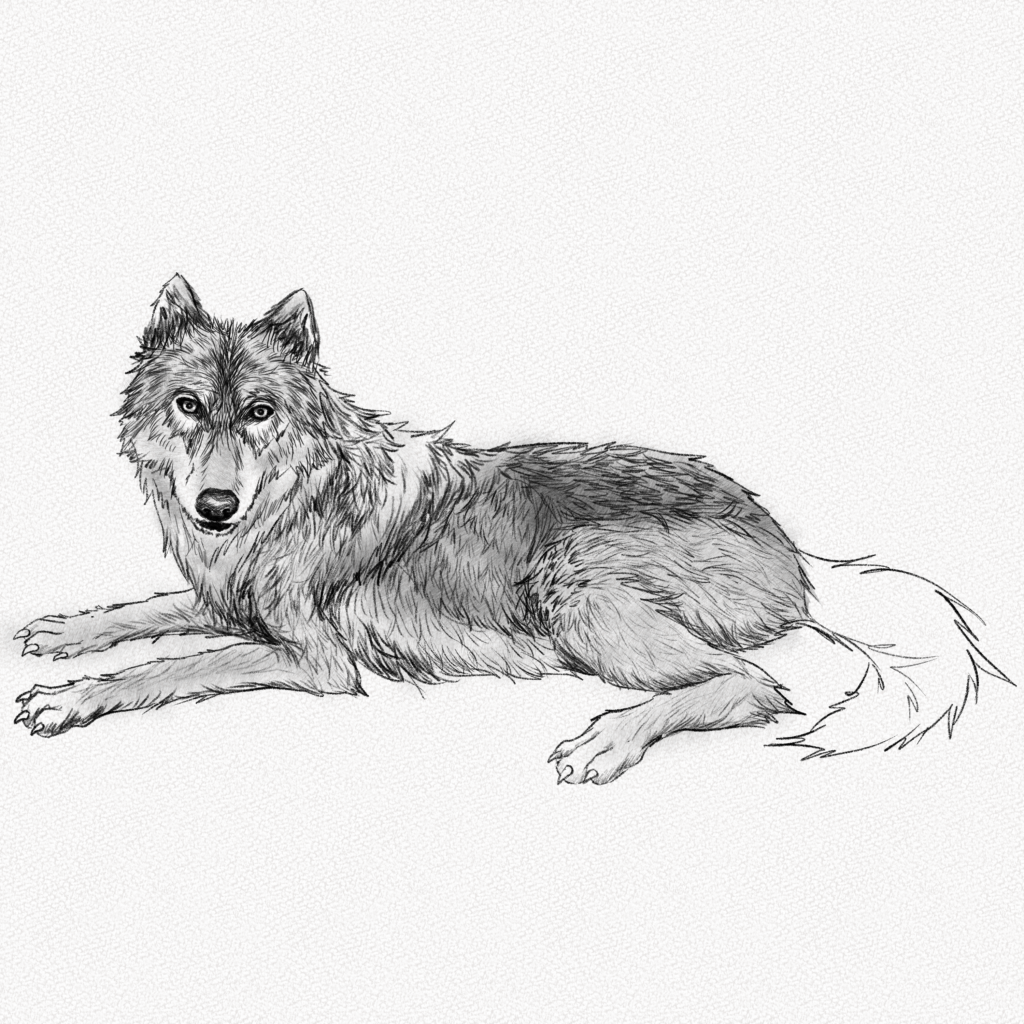
This is the wolf you’re going to draw: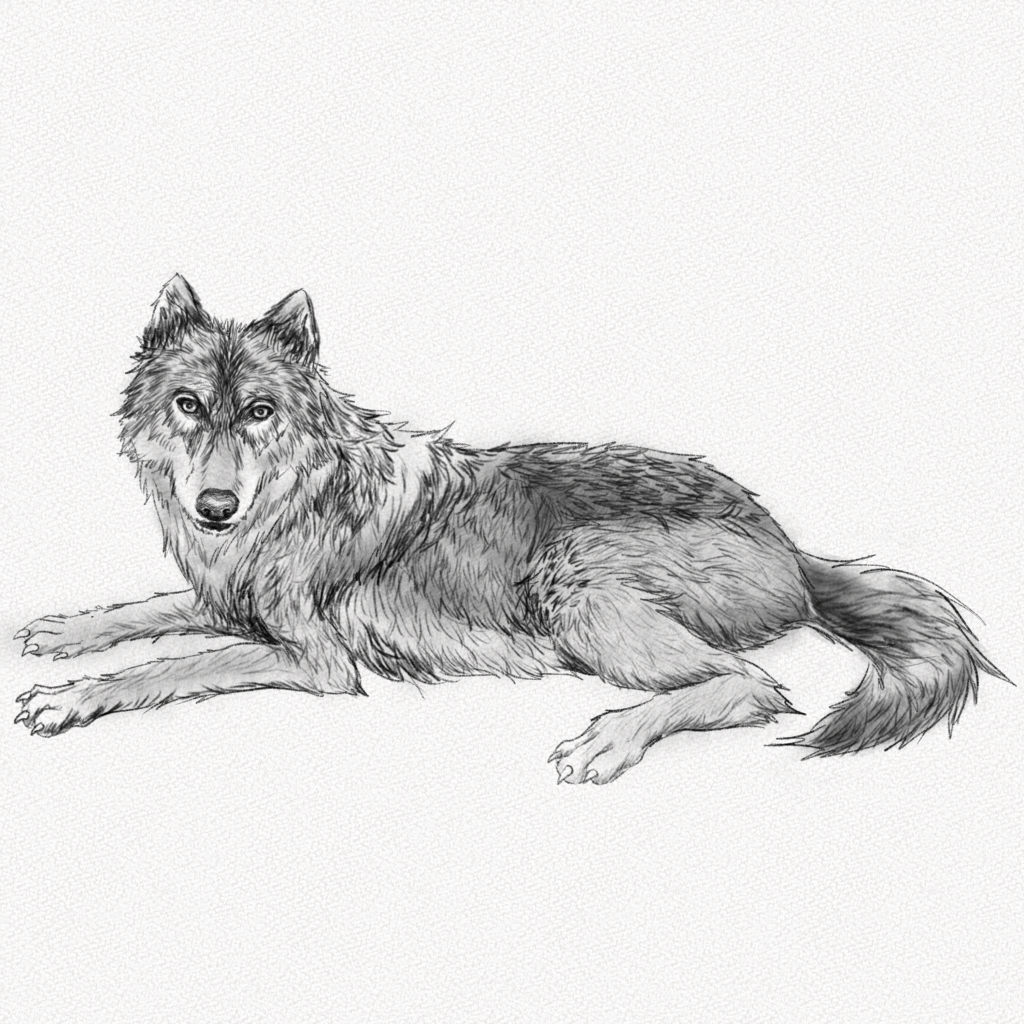
And these are all the steps we’ll walk you through:
Section 1. Structure of a wolf
In this section, we’ll learn how to draw a wolf from scratch, it might look complicated, but if you follow the steps, you’ll find out how simple it is in reality!
Step 1: Split your canvas vertically
Using your measuring ruler, split your canvas into three equal parts vertically. Use your mechanical pencil for this step, and be careful not to apply too much pressure.
Step 2: Split your canvas again
Repeat the step above and split your canvas horizontally. The result is a 3 x 3 grid to help us center our drawing and keep the wolf’s proportions right.
Step 3: Draw a circle
Draw a circle that rests on top of your lower horizontal guideline. Make sure your vertical guideline goes right through the middle of it too. This will represent the rib cage of our wolf.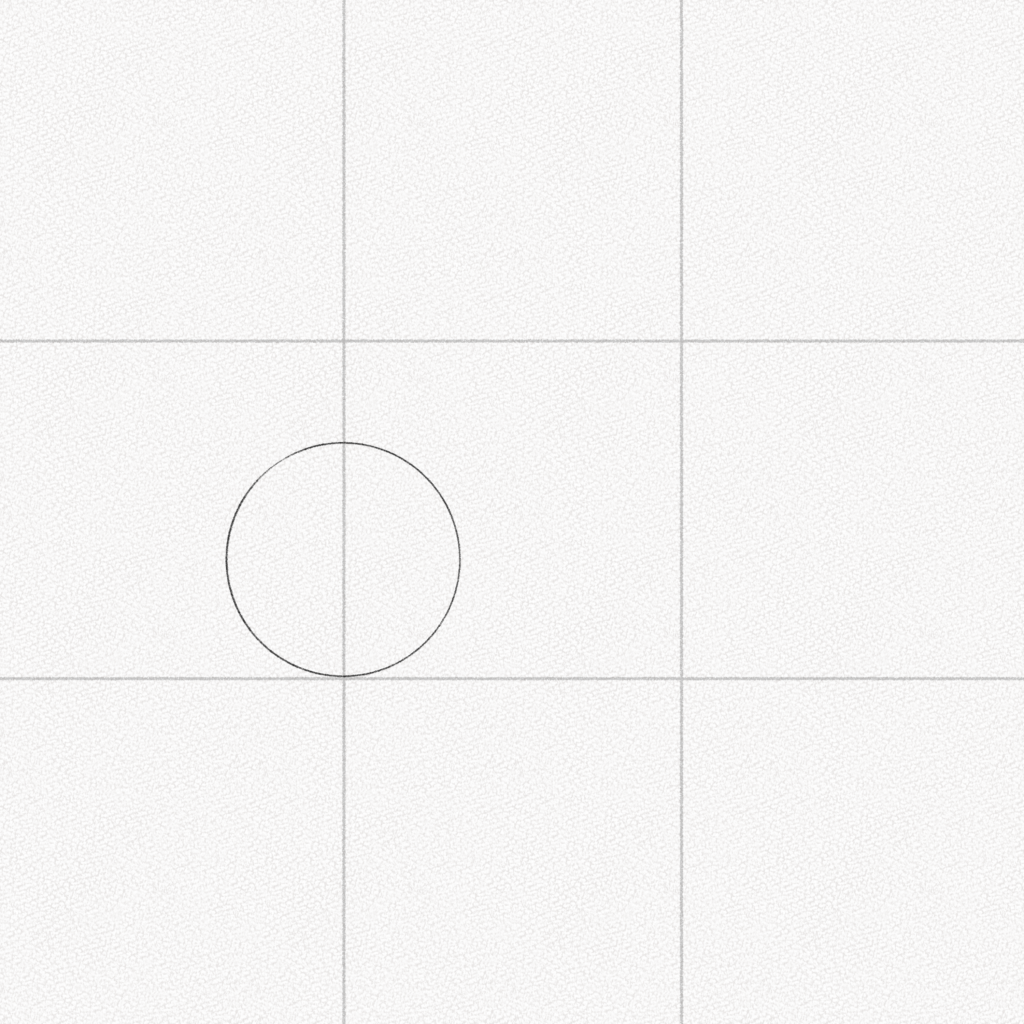
Step 4: Draw another circle
Draw a smaller circle on the left vertical guideline. This one shouldn’t rest on top of the lower horizontal guideline but a little bit lower. This will be the hip and lower part of our wolf.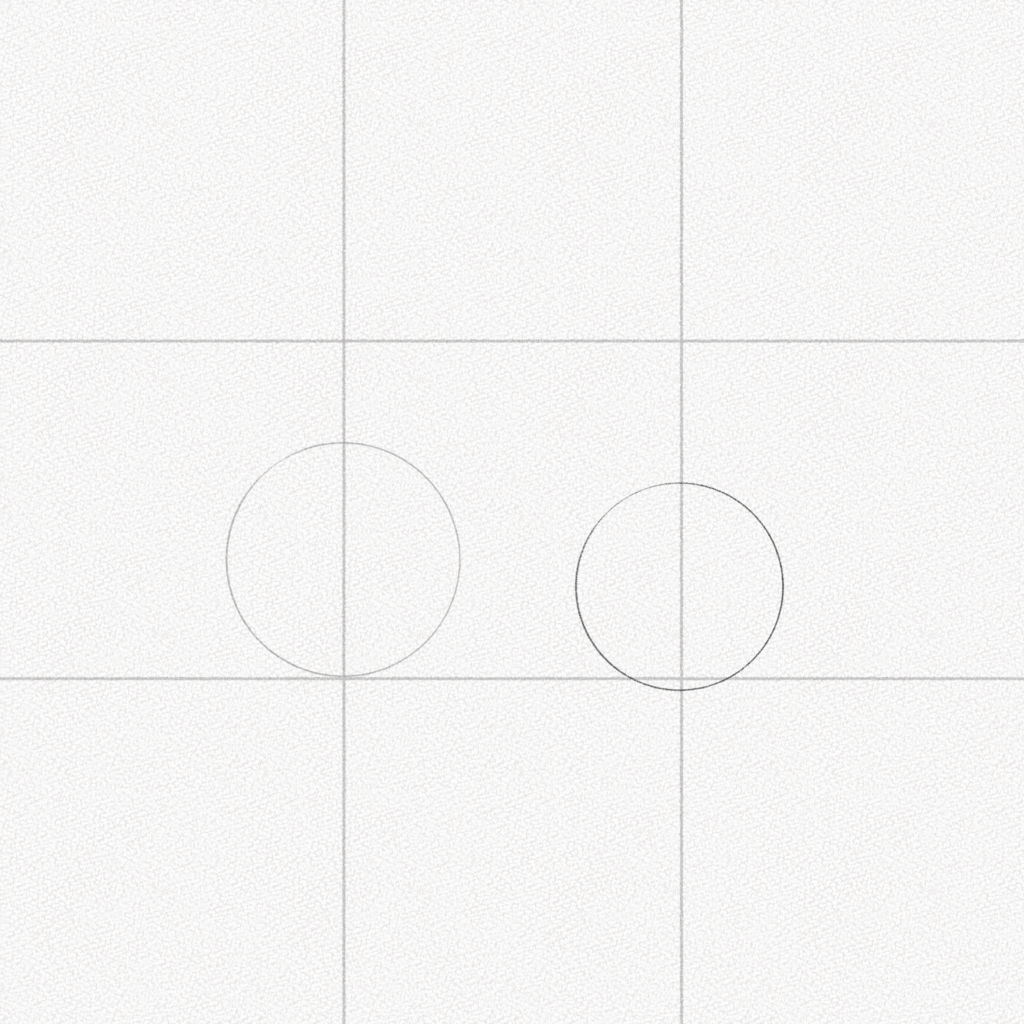
Step 5: Draw a third circle
This will be the head. Make it smaller and align it with the first circle. If you’re having trouble with the right position, check the diagram and use your guidelines to find it.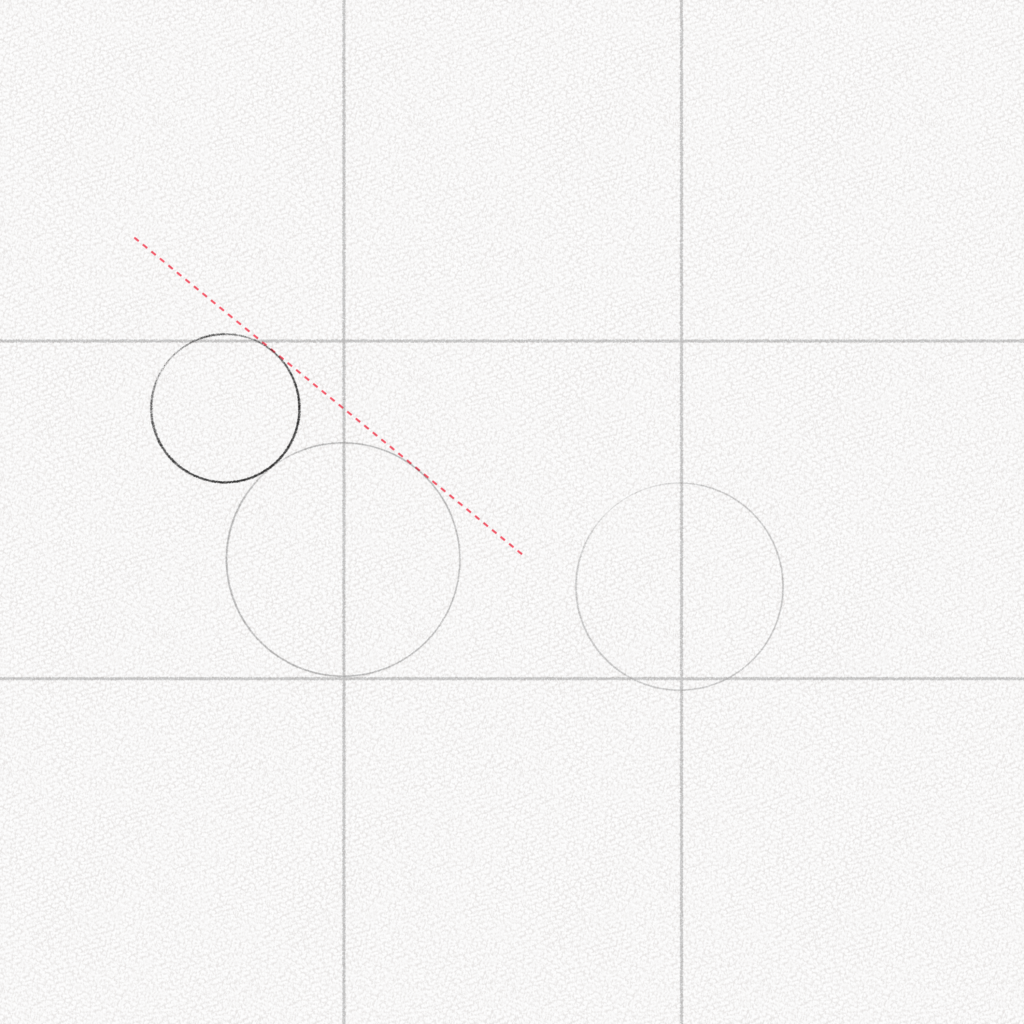
Step 6: Connect the upper and lower body
Connect the circles you drew with a curved line. This line will represent the spine of our wolf.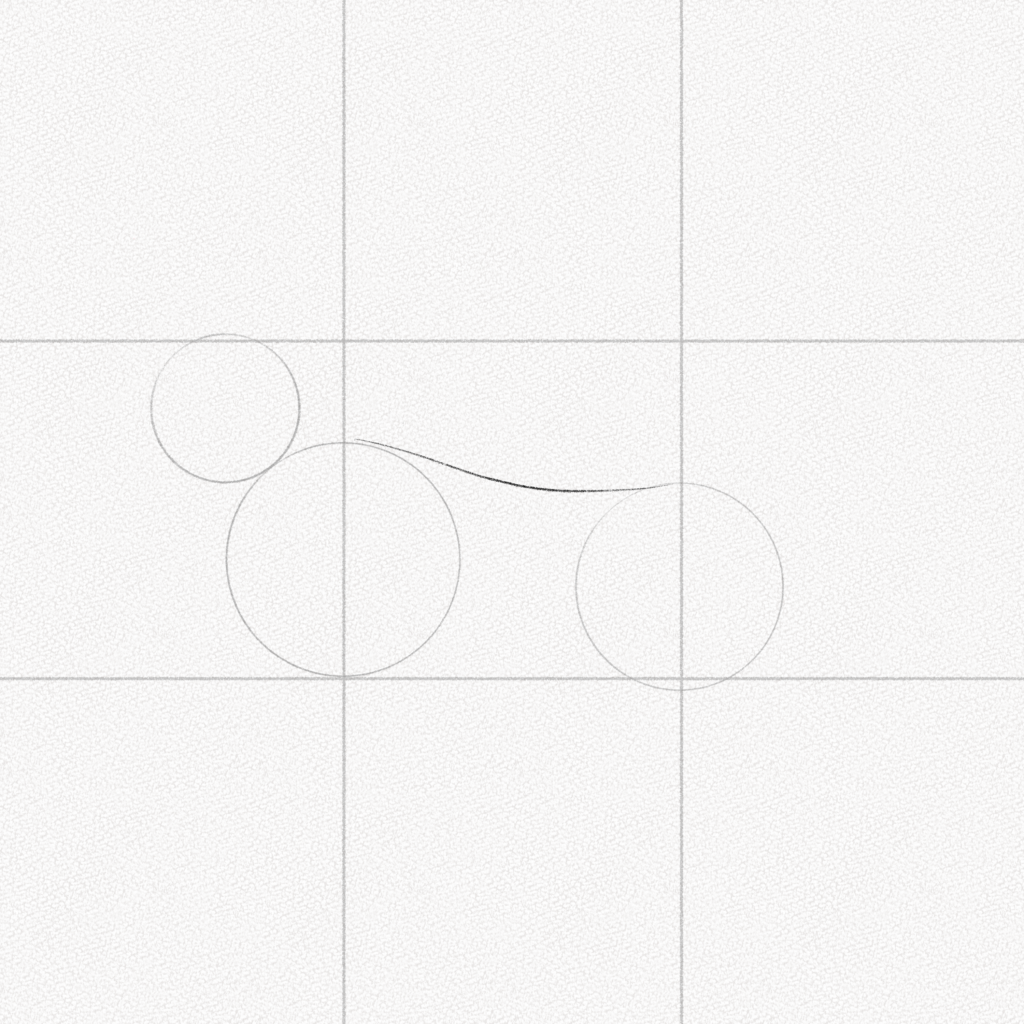
Step 7: Draw two lines
Part the head circle vertically and draw two lines from the top. Please don’t make them too far apart since those will be the guidelines for the nose and mouth.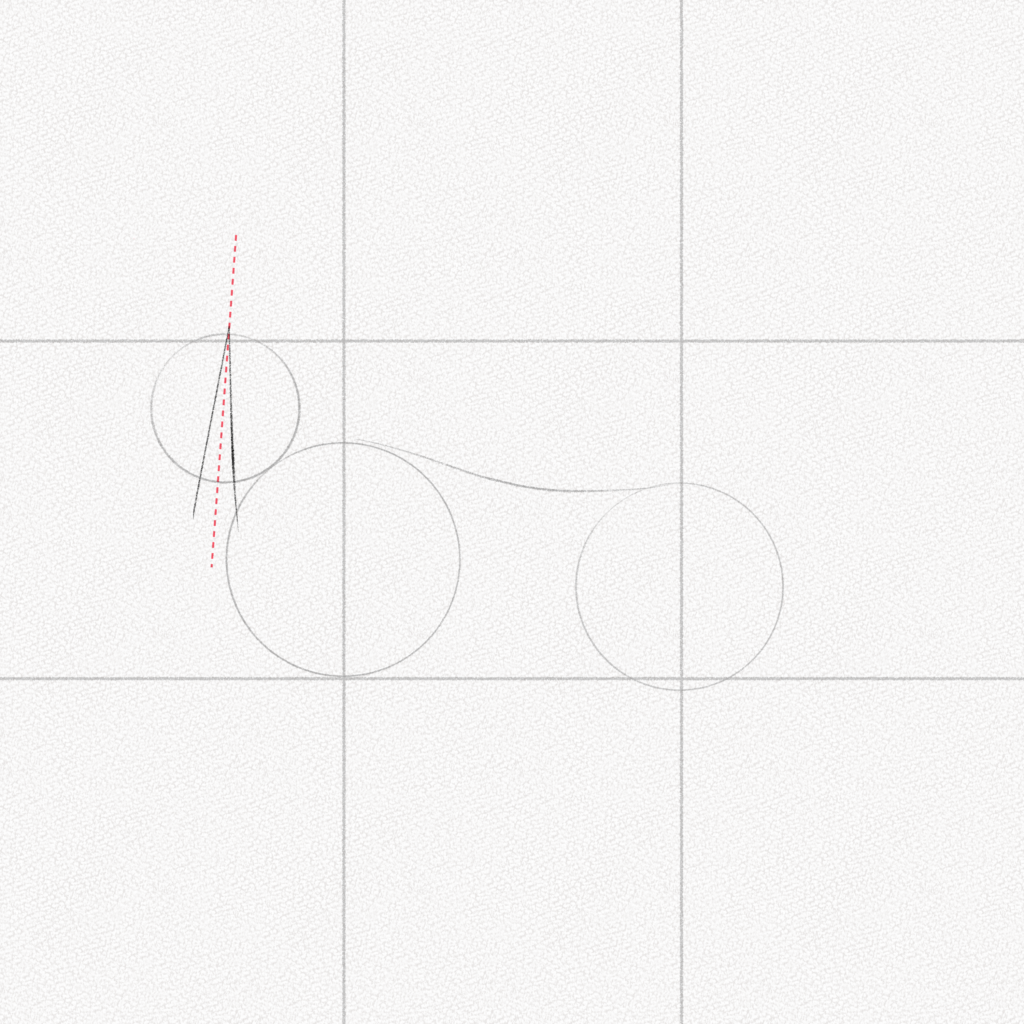
Step 8: Draw an irregular hexagon
Using the diagram below as a reference, draw an irregular hexagon. This will be the mouth area.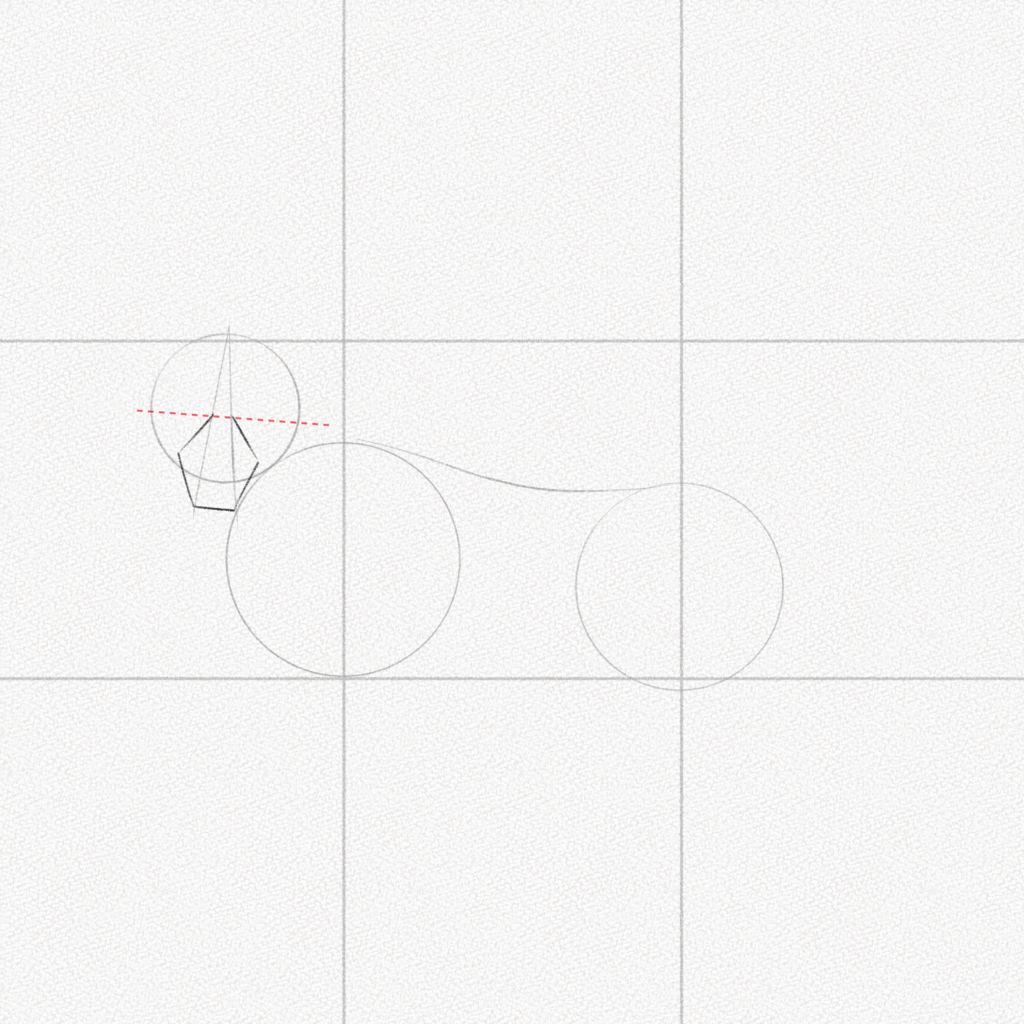
Step 9: Add the eyes and lower jaw
Split your circle in half horizontally. Then, with a parallelogram-like shape on each side of the face for the eyes. Make sure they rest on top of the middle of your circle. Add half of a hexagon e for the lower jaw since most of it will be hidden due to the angle.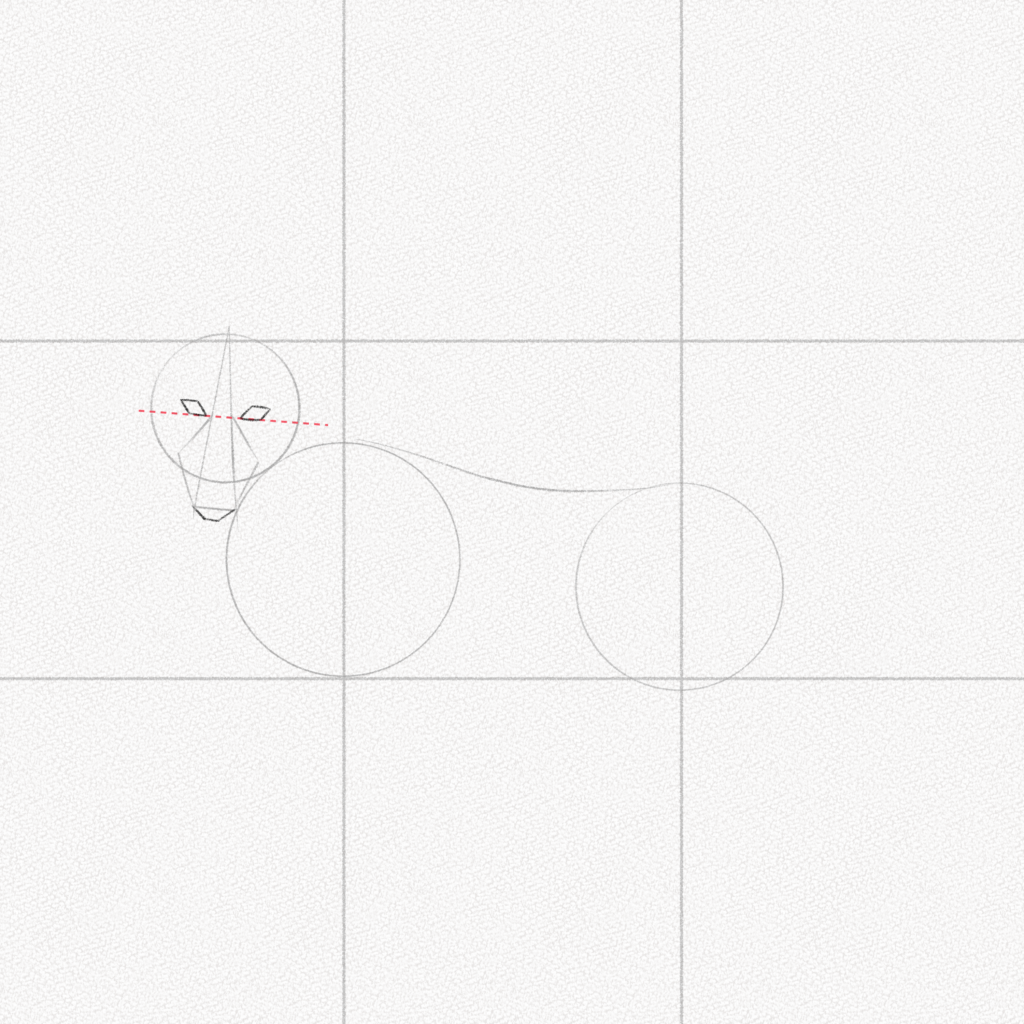
Step 10: Add the ears and nose
Follow the diagram and add the ears and nose. For a more detailed tutorial on snouts, you can check our article on” How to Draw a Dog’s Face.”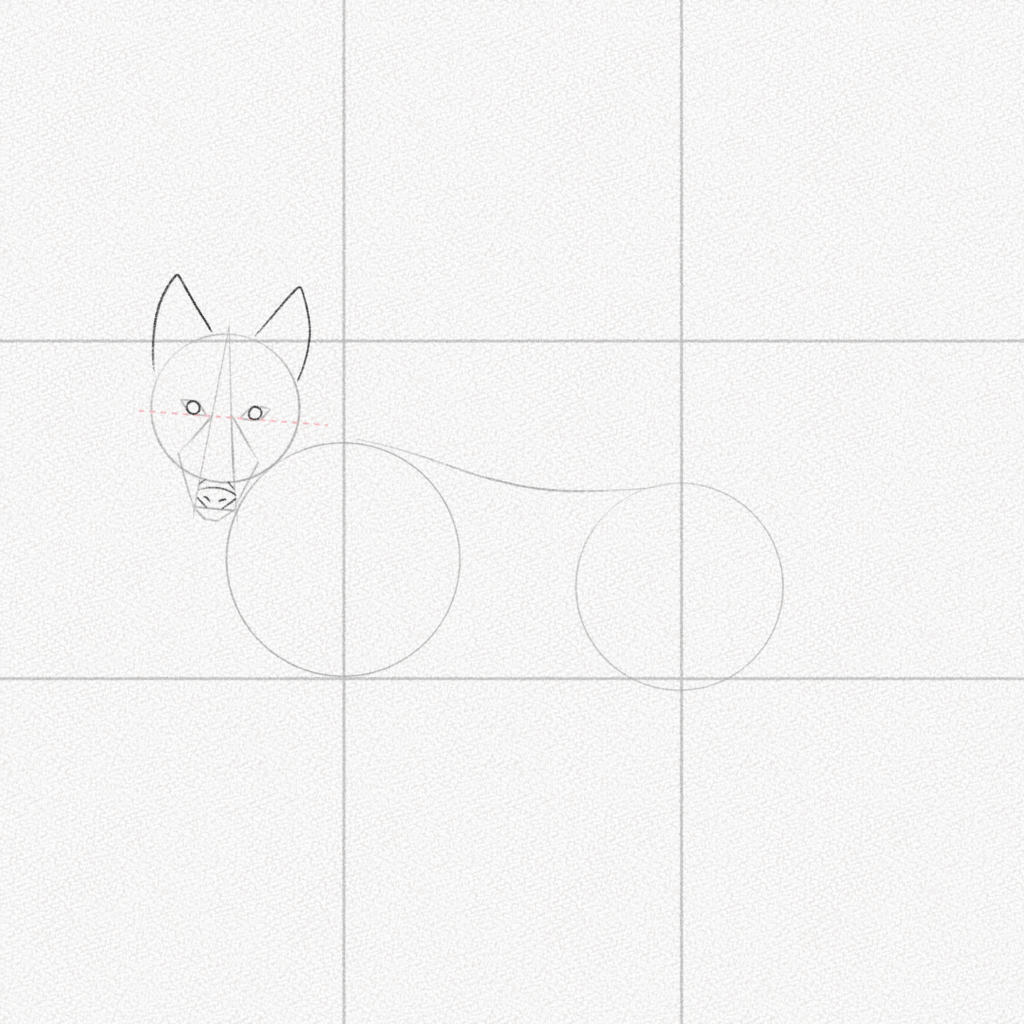
Step 11: Add two lines
Add two lines on each side that come from the top sides of the head to the nose.
 Step 12: Add an M-like line
Draw an M-like shape from the corners of the face to the top of the eyes and nose.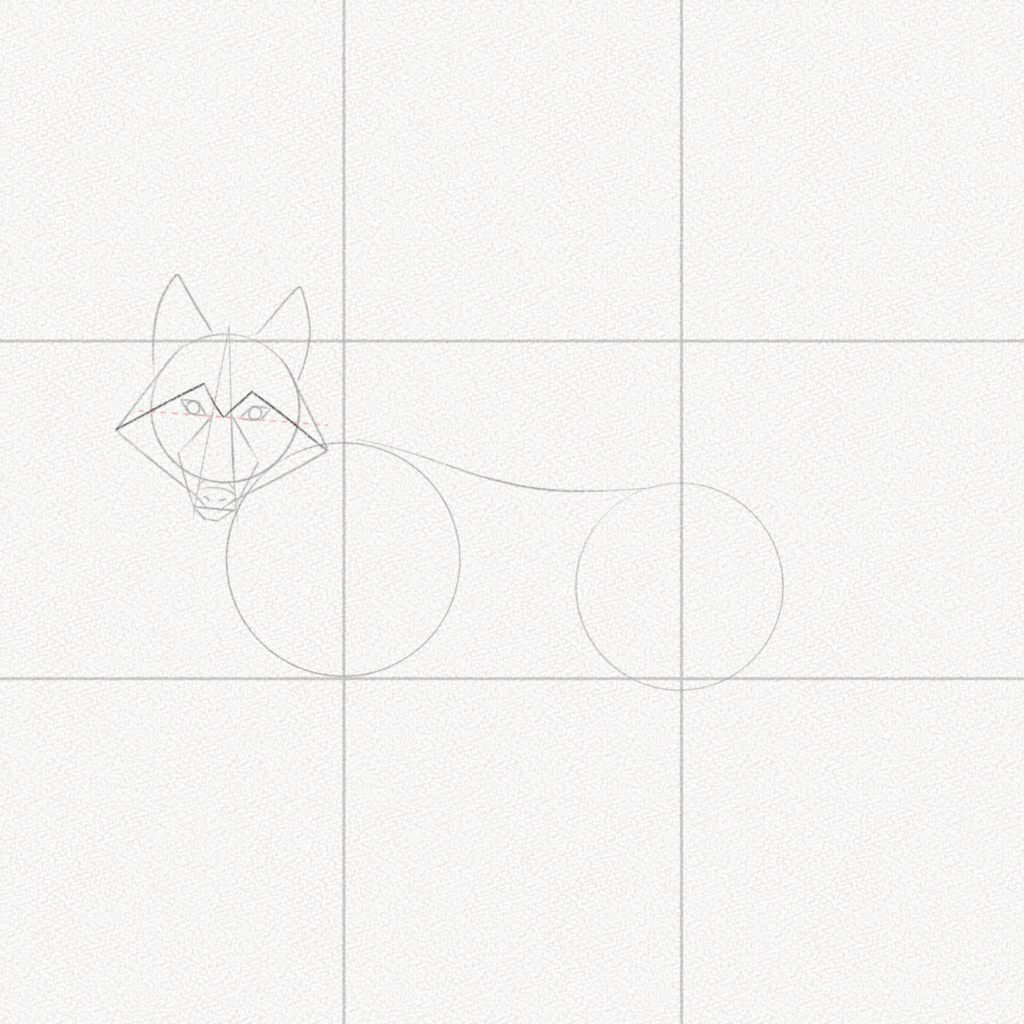
Step 13: Draw a V shape
Draw a V shape from the face’s sides to the torso’s lower part. This will complete the wolf face and neck structure.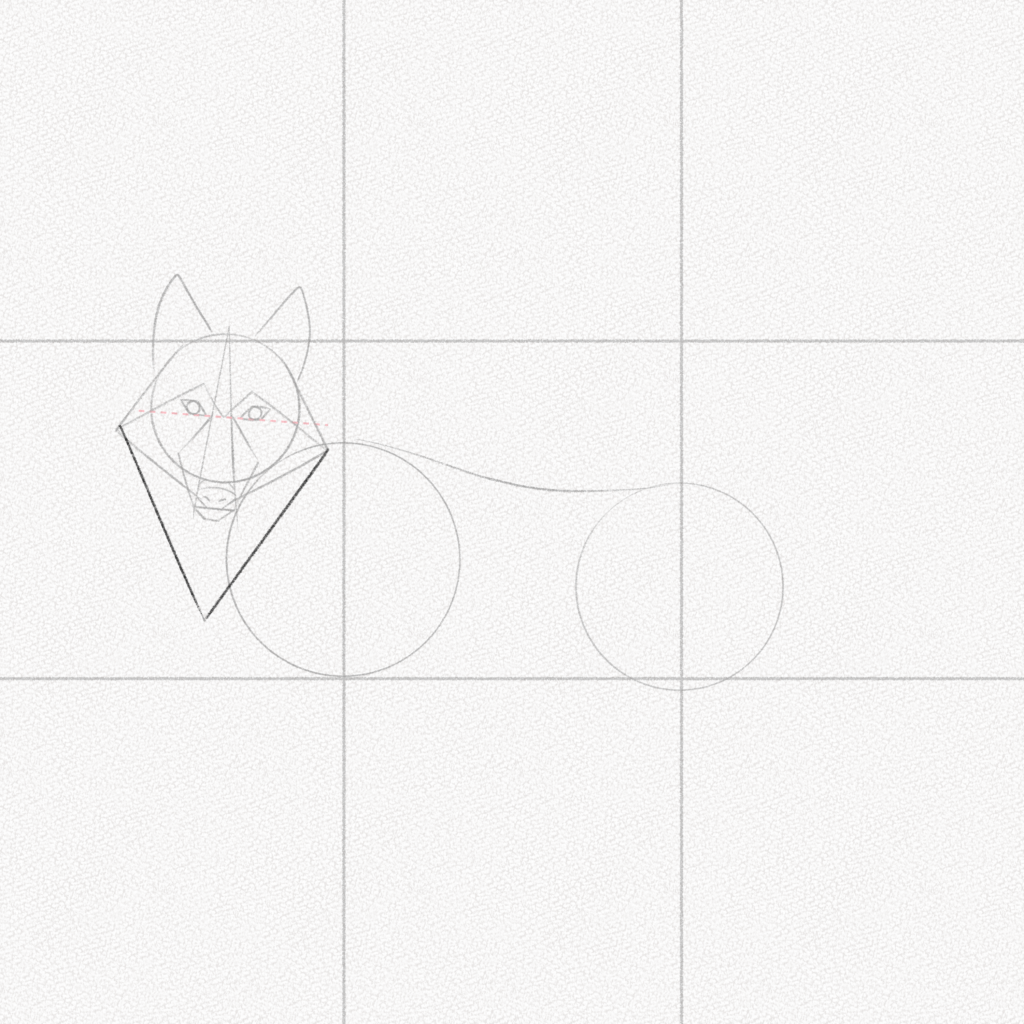
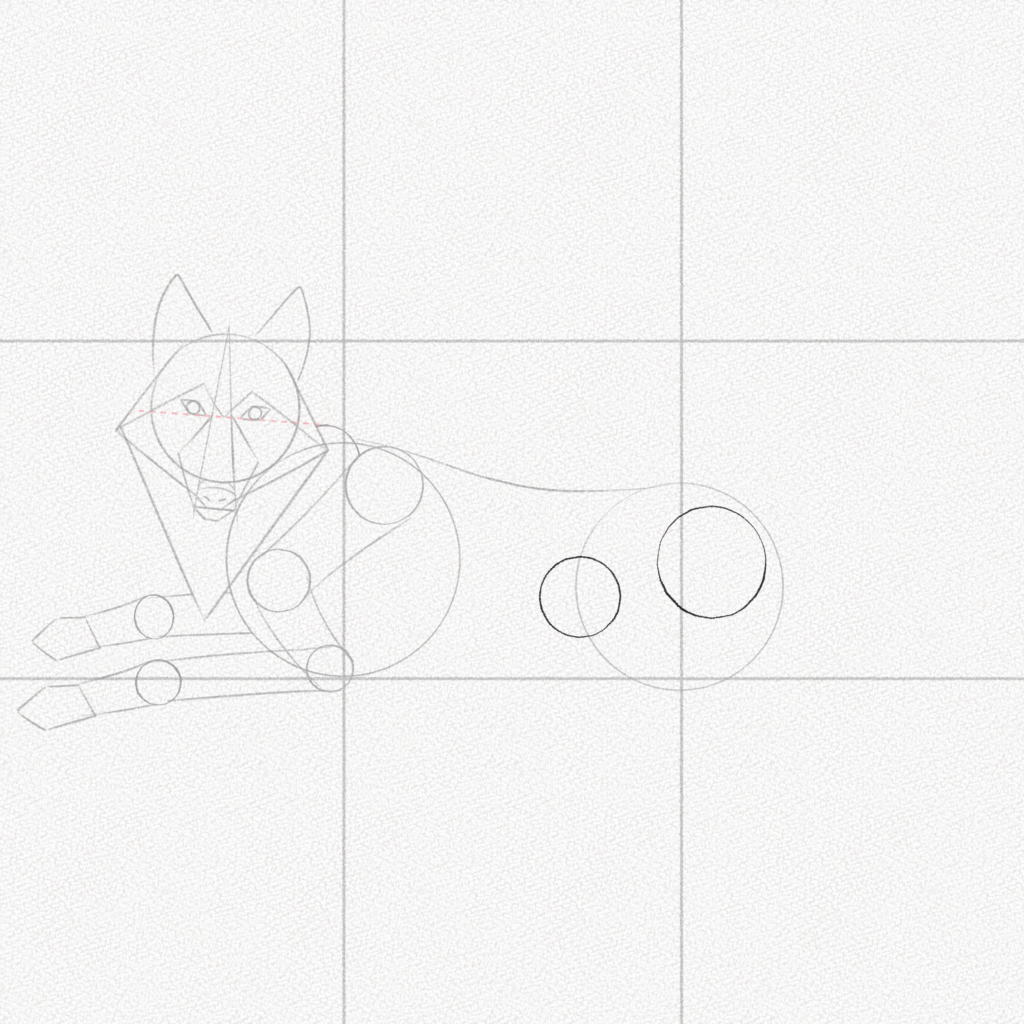
Step 14: Draw two circles
Wolves, like most animals, have digitigrade legs, which means they have extra articulations on their limbs. Since we’re not going to study wolf anatomy right now, let’s simplify it with circles and go step by step.
Draw two circles, one bigger than the other. Follow the diagram for the positions and sizes.
Step 15: Draw another two circles
Add another two circles and an irregular pentagon for the paw, this time closer to our lower horizontal guideline.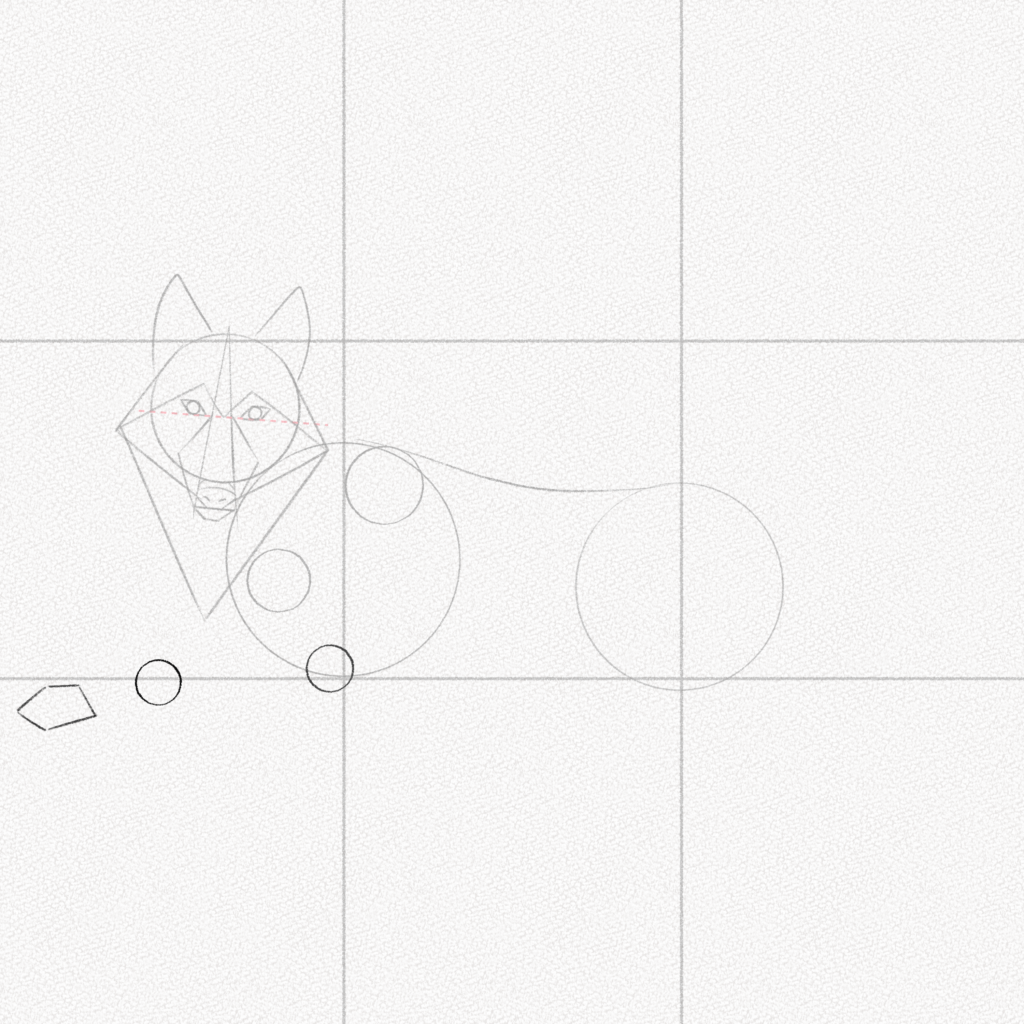
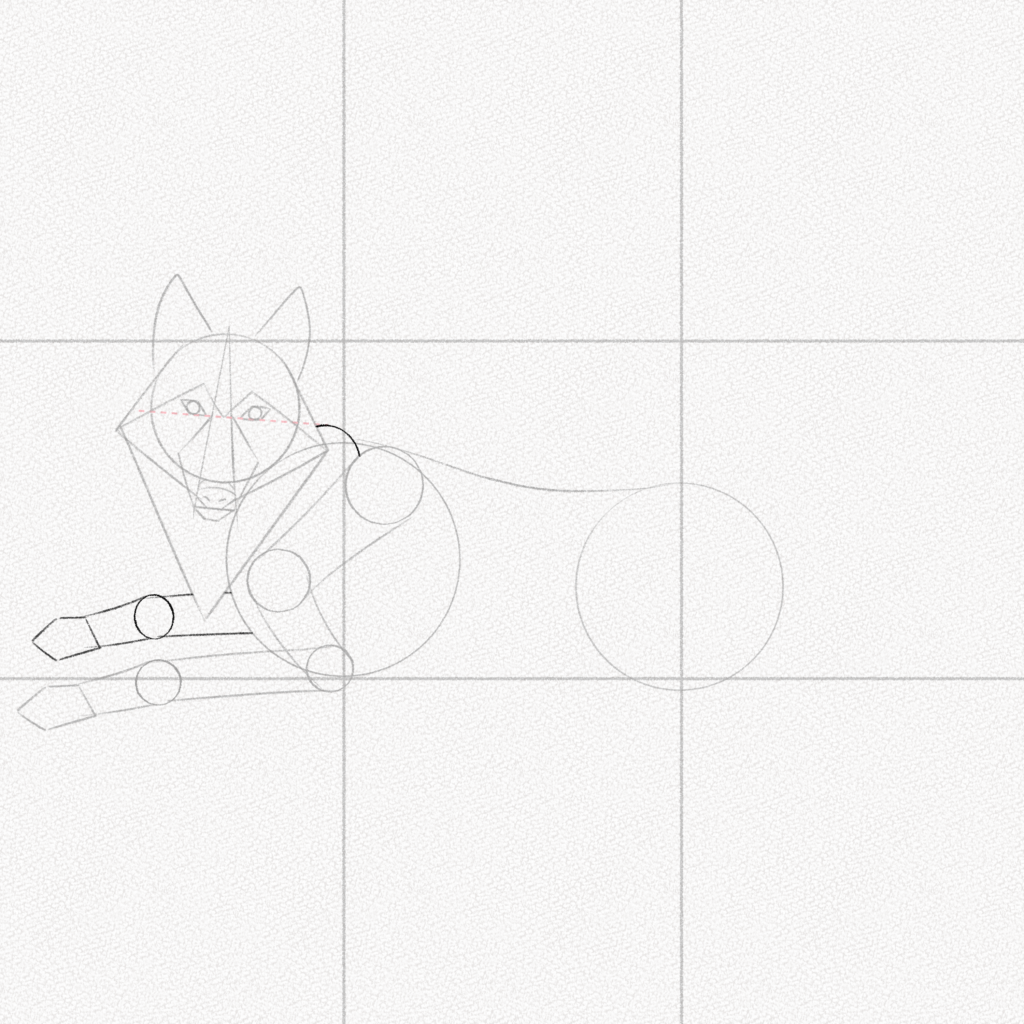
Step 16: Connect the circles
Connect the circles with lines as shown below, and you will have your front leg ready!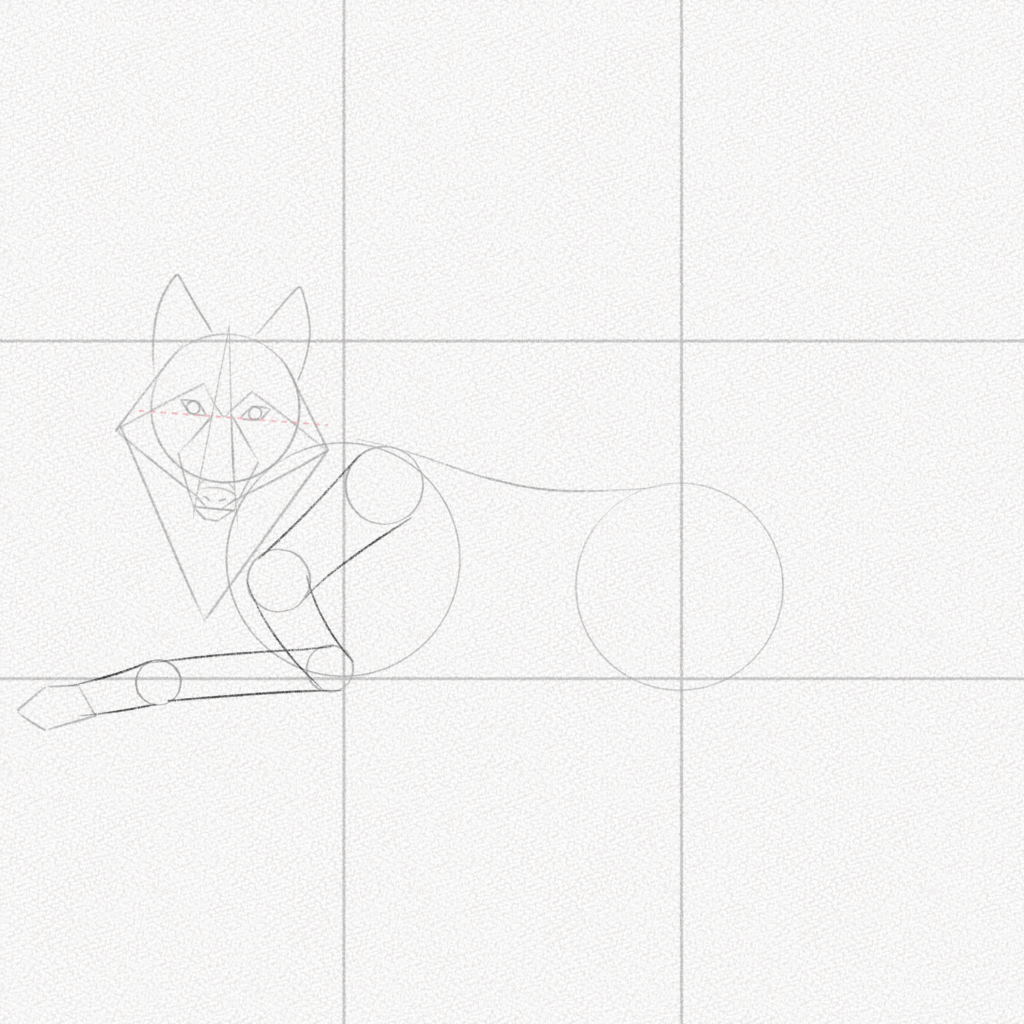
Step 17: Repeat
Repeat the t steps above for the other leg. Erase the overlapping parts. Use softer or dashed lines to find the right position of the other leg.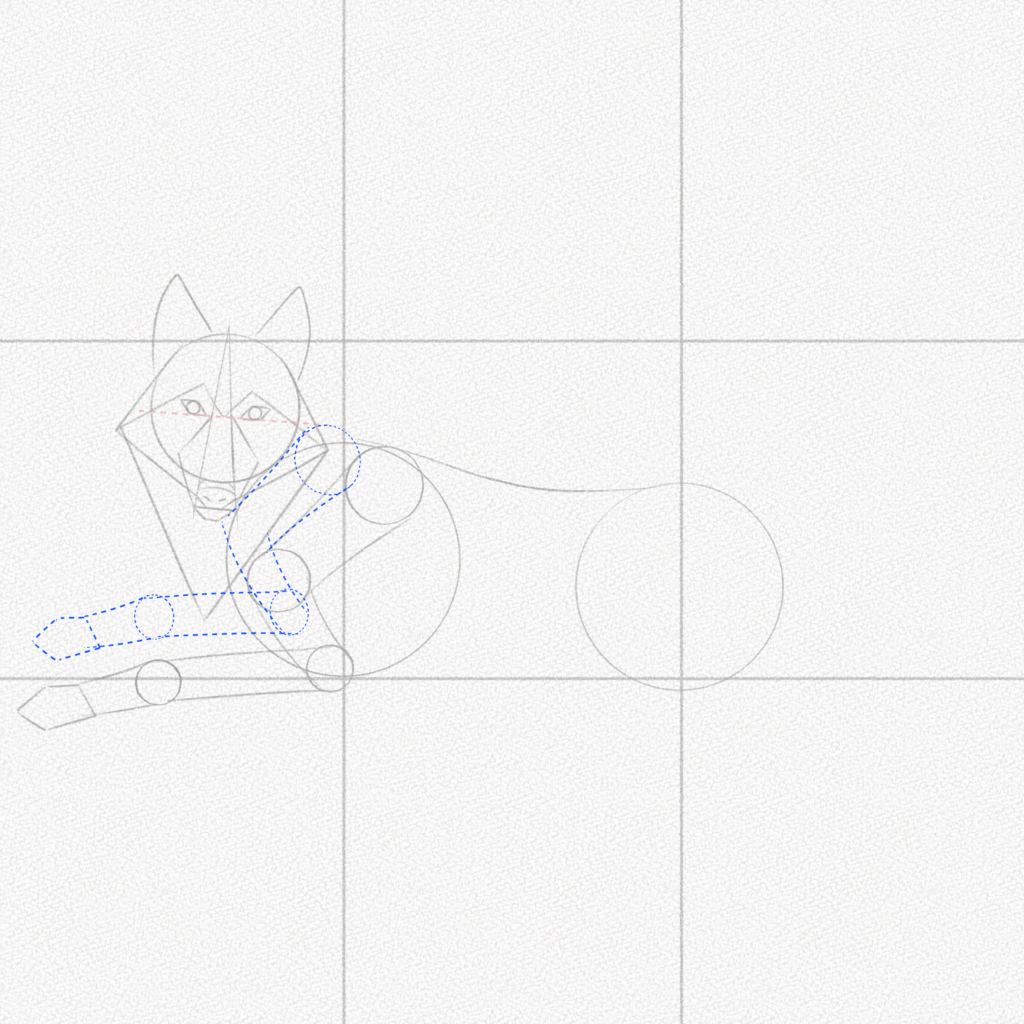
Step 18: Draw two circles again
Draw another two circles for the lower leg of the wolf. Make them bigger this time since lower limbs are thicker in most animals.
 Step 19: Draw a circle and a pentagon
Draw a smaller circle and a pentagon for the paw.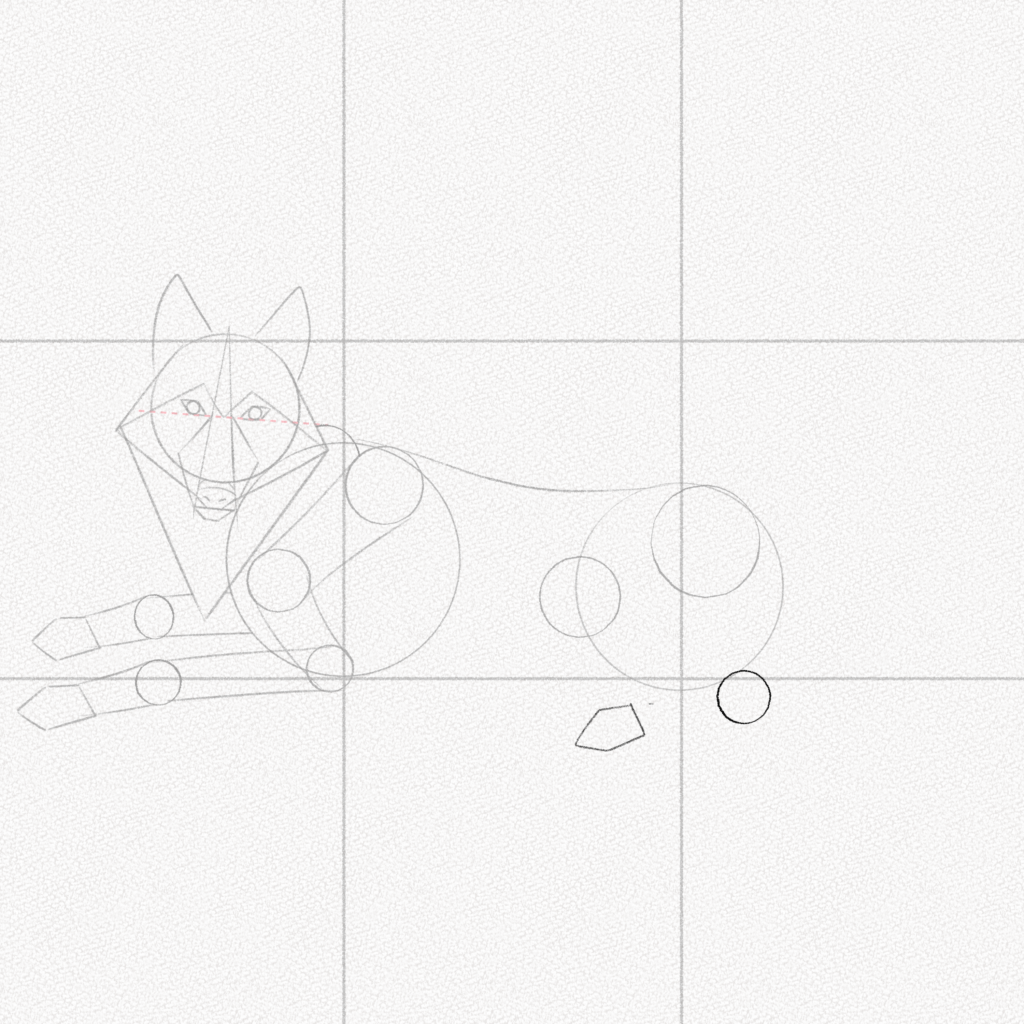
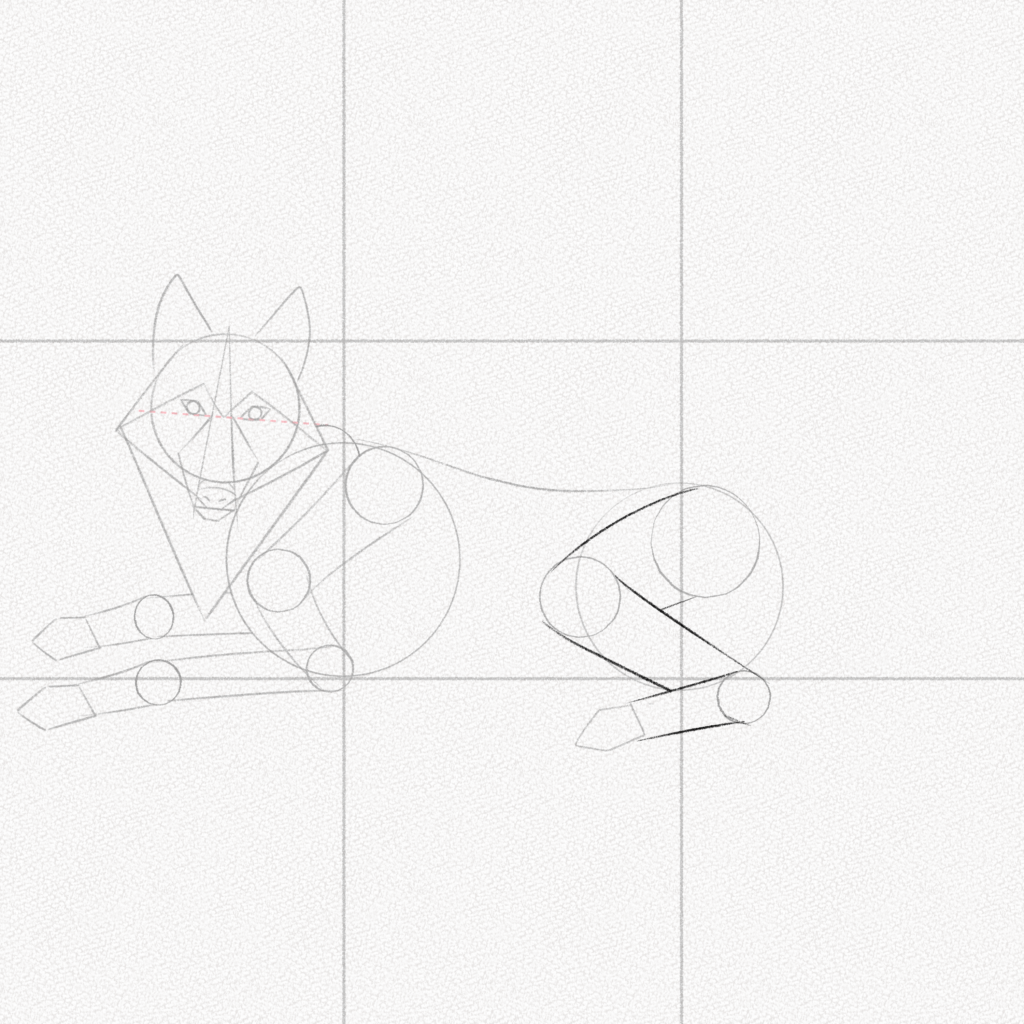
Step 20: Connect the circles
Connect the circles to form the lower leg.
 Step 21: Draw the tail
Draw the rough shape for a fluffy tail, and you will complete the basic structure of your wolf.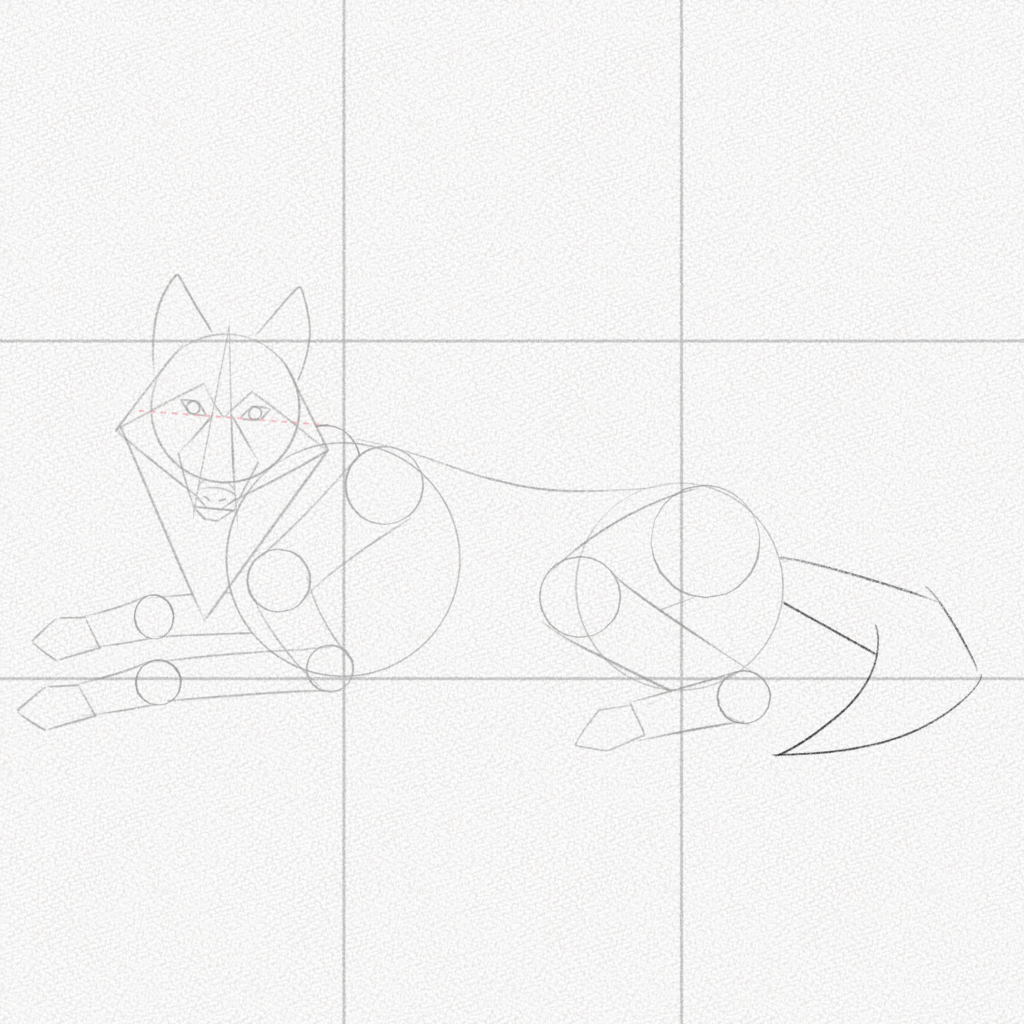
Section 2: How to Draw a Wolf
Before starting this section, softly erase your guidelines leaving only a faint image of your wolf’s structure. Grab your 2B 0.5 mechanical pencil and get ready to begin!
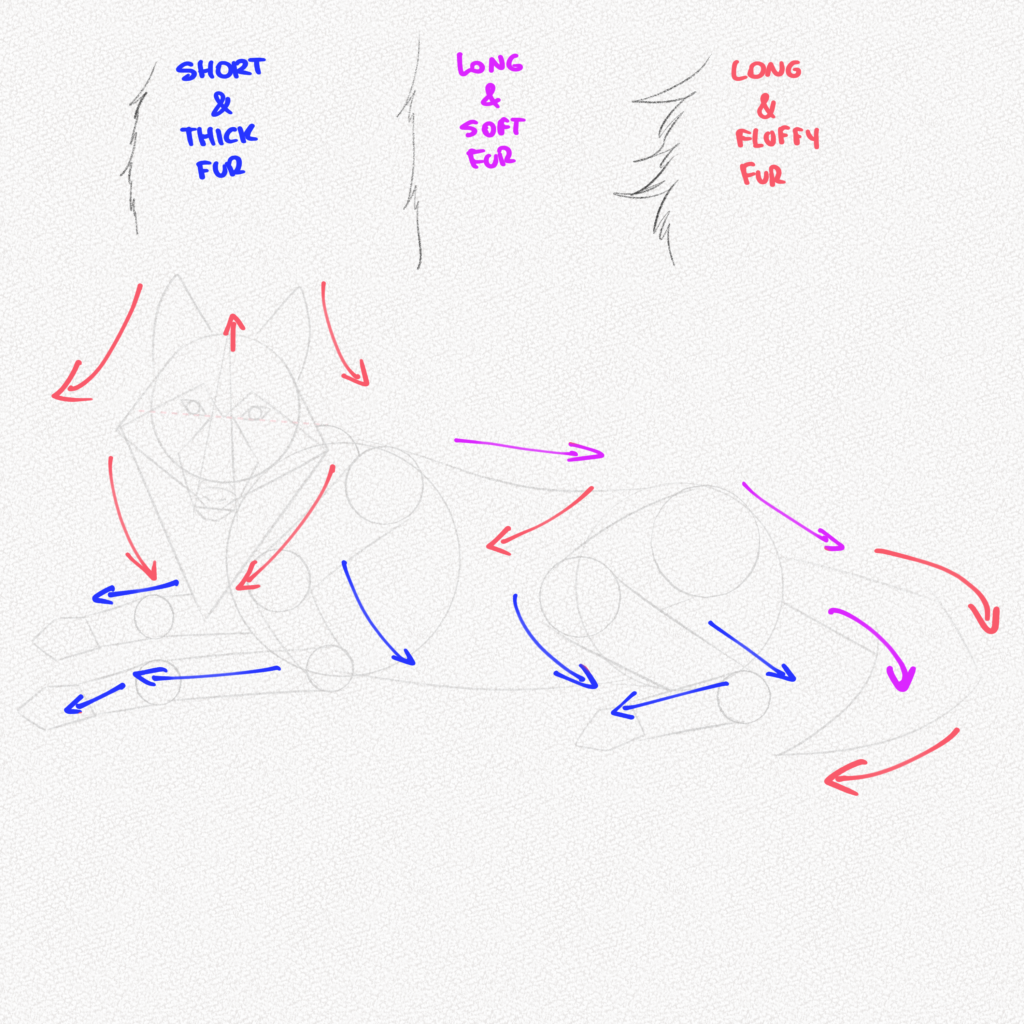
Step 22: Wolf fur
Take a good look at the diagram below. The arrows indicate the direction of the fur and the colors, the kind of fur you’ll have to draw.
Step 23: Paws and claws
Follow the steps below for the paws and claws of the wolf’s left side limbs.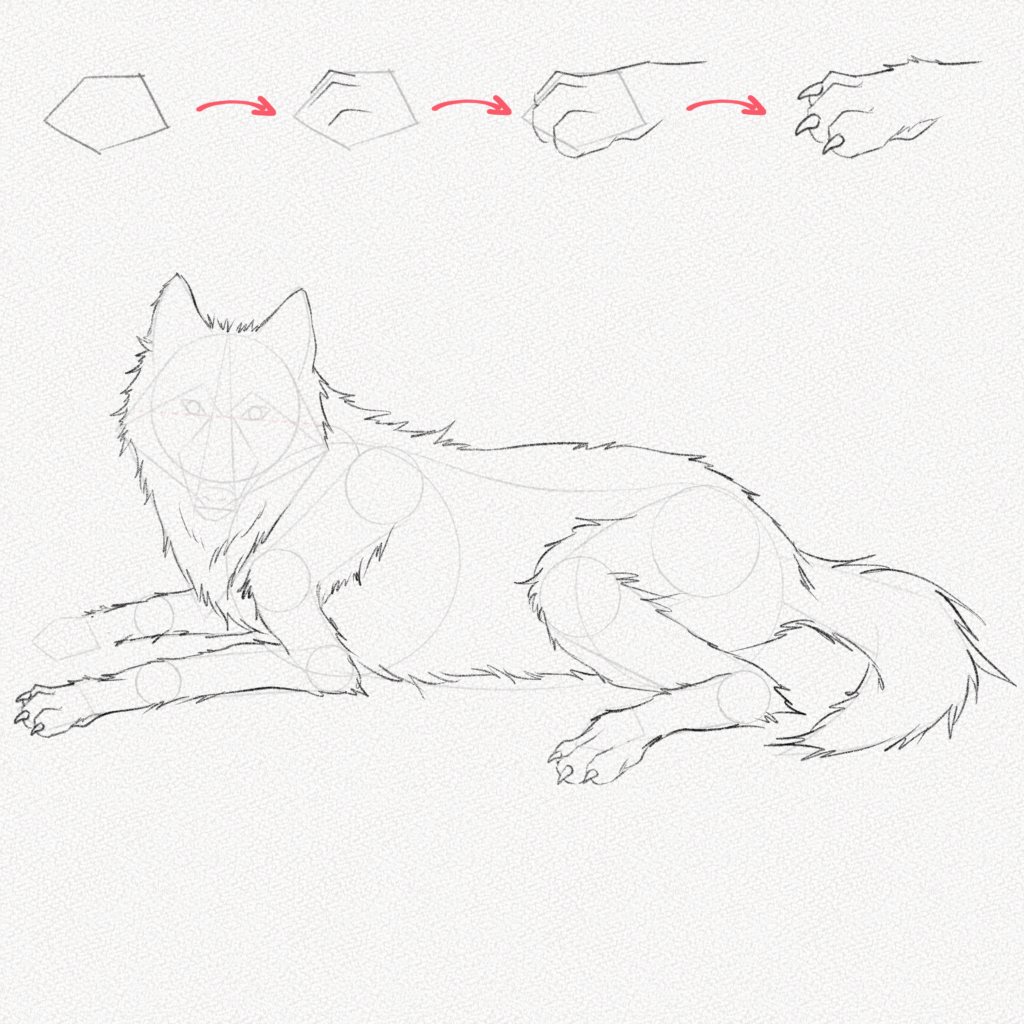
Since we can see only one of the right side’s legs, follow these other steps for the visible part of the right leg.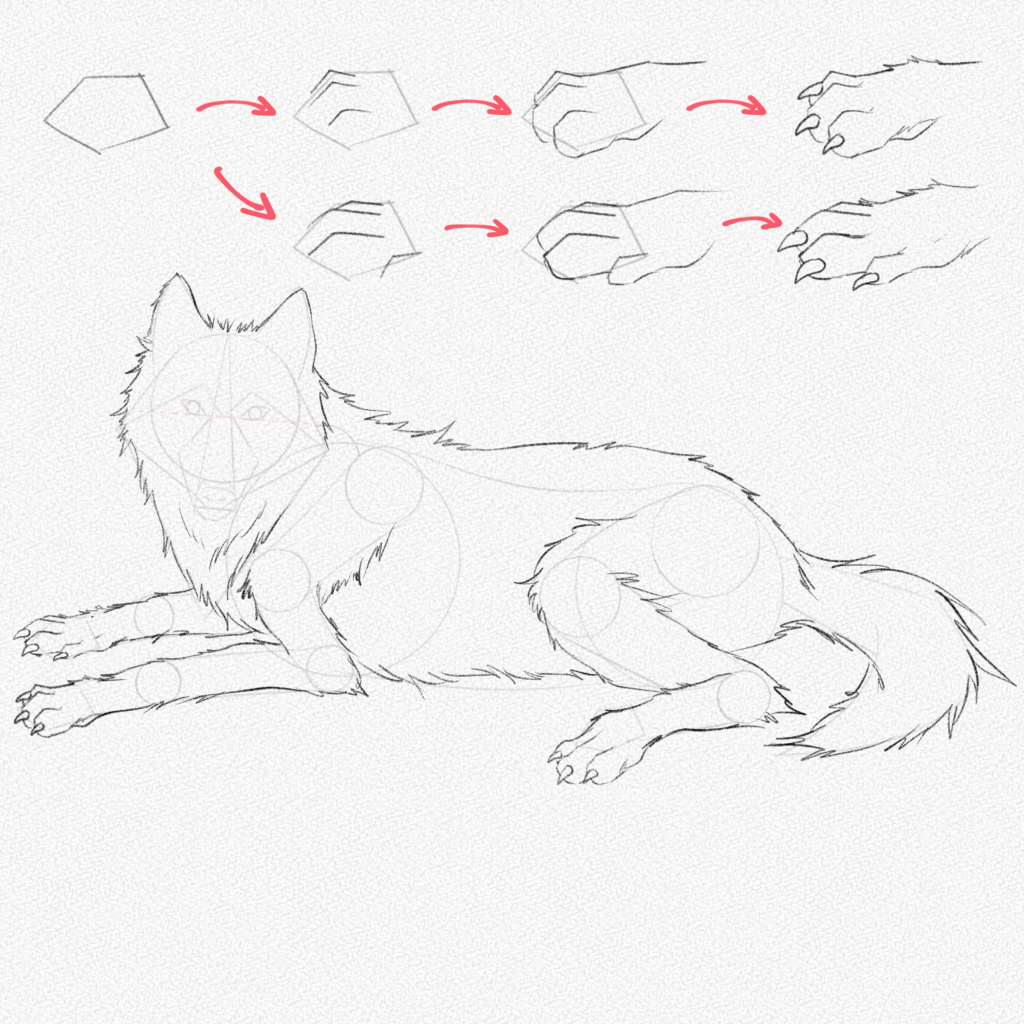
Step 24: Eyes and nose
Shade the nose and eyes since those are the darkest part of the wolf (without considering the fur)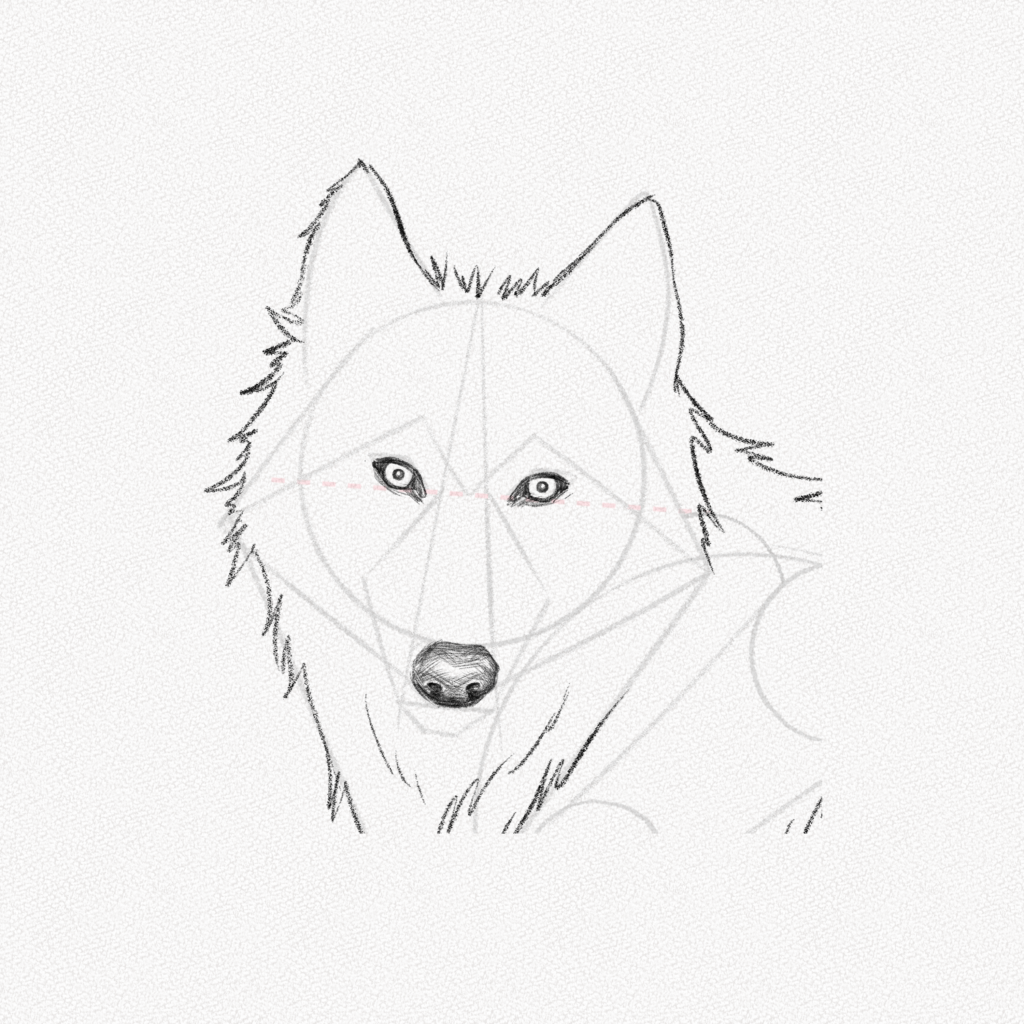
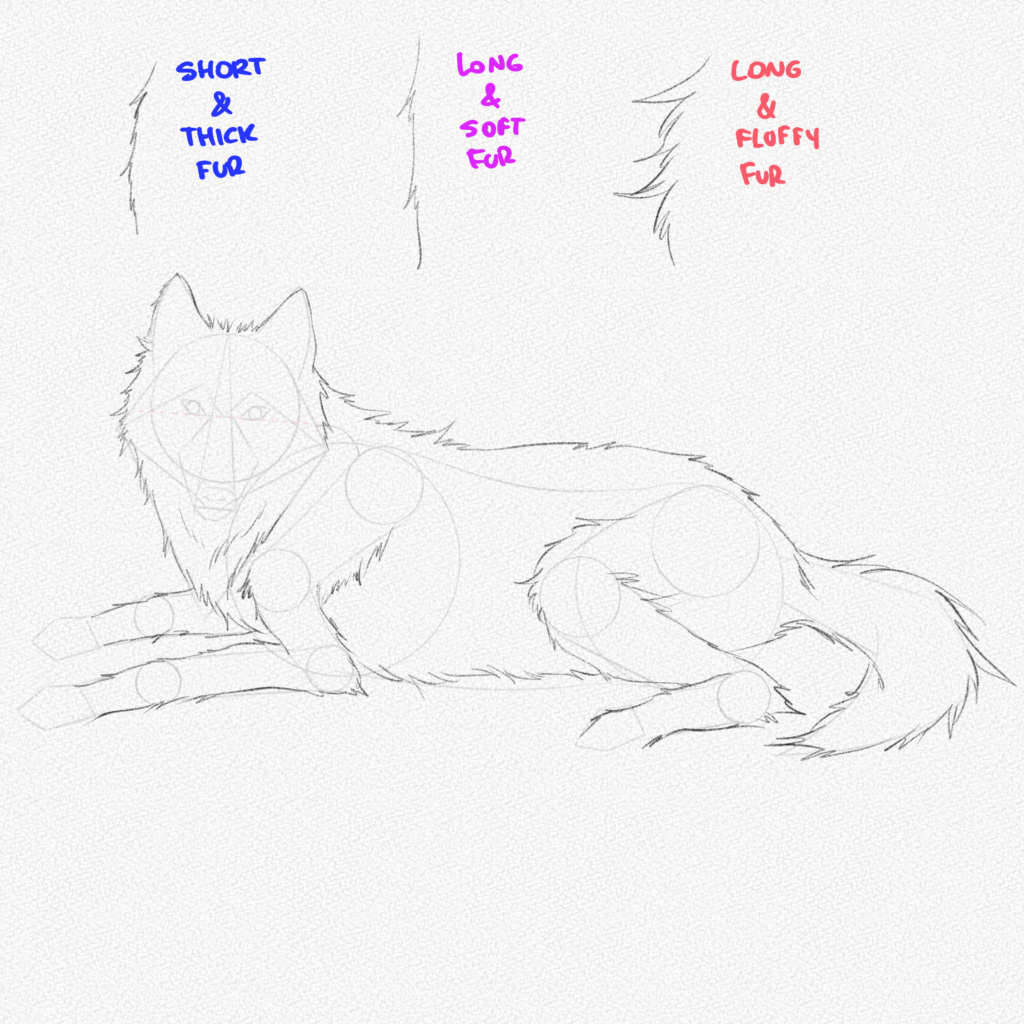
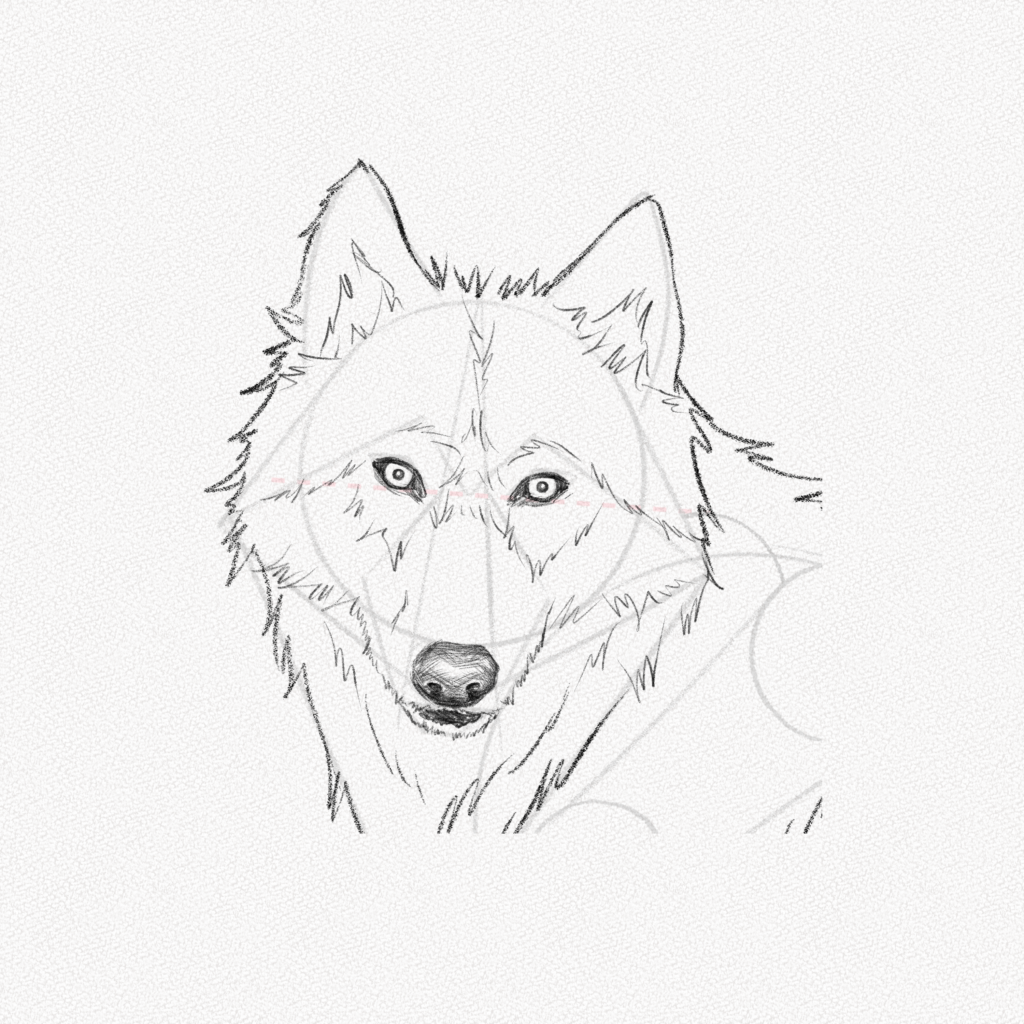
Step 25: Face fur
For the face’s fur, we will follow the lines below and use the “short and thick” fur shape we learned above.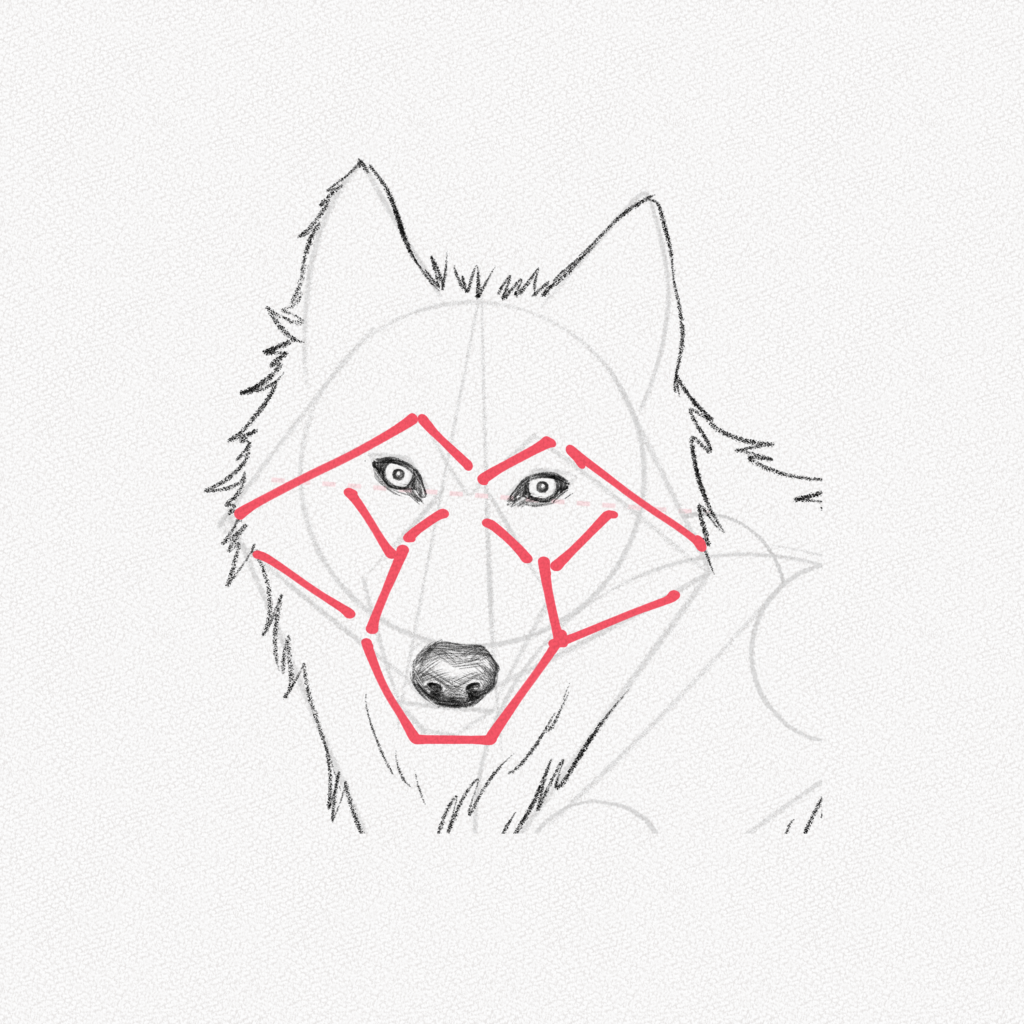
Step 26: Body fur
Follow the lines adding some fur lines to the body. Now you have a perfect drawing of a wolf. Keep reading if you want to take it a step further and shade it.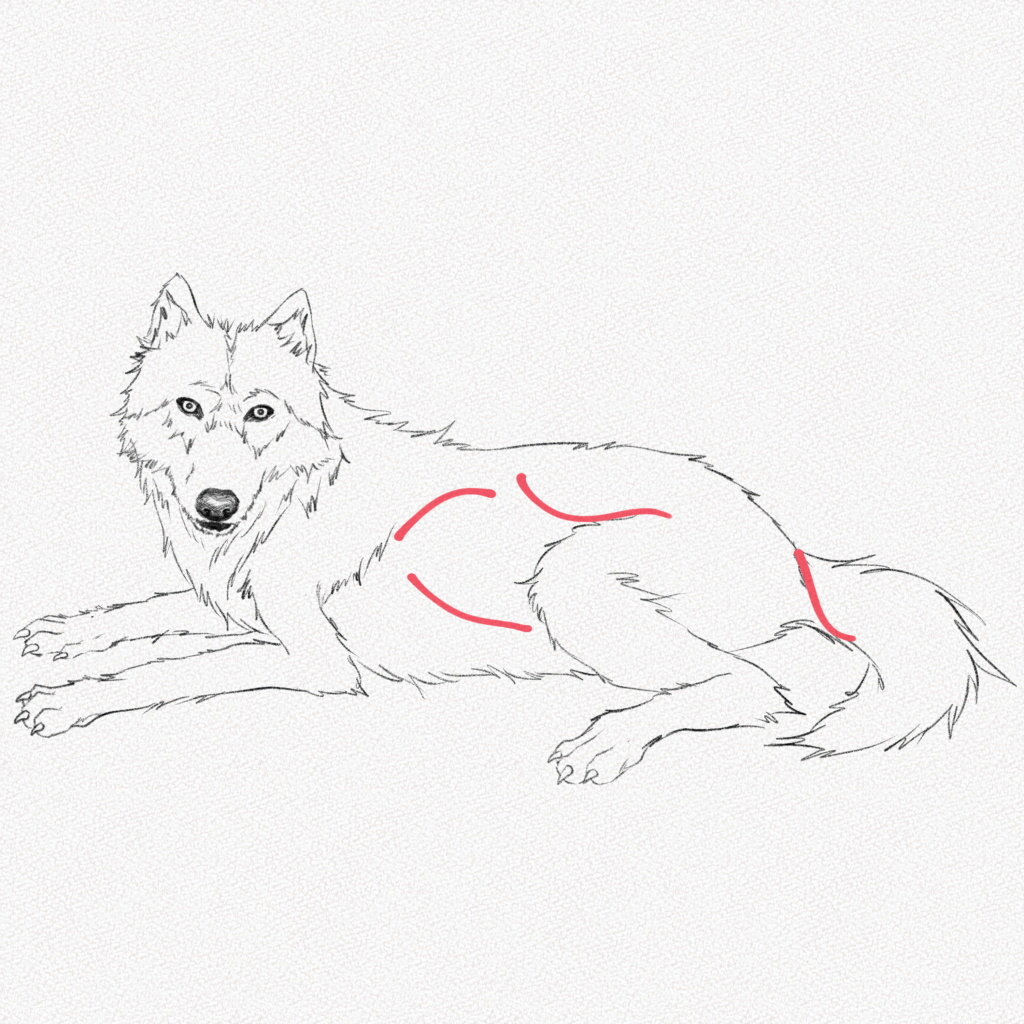
Section 3: How to shade a Wolf
For this section, we are going to use almost all of our materials.
We are going to follow three simple steps for each part of the body. Follow the instructions and have fun!
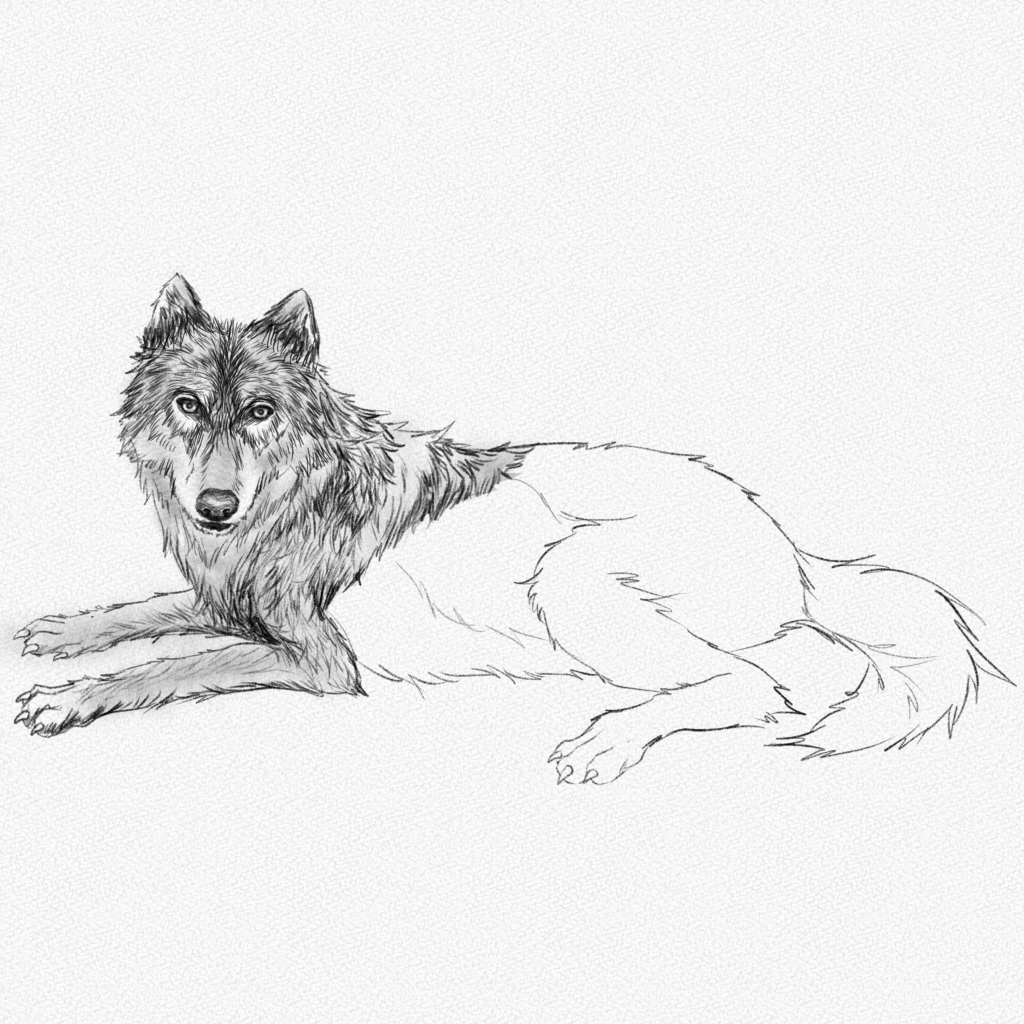
Step 27: The head
With your 0.5mm HB mechanical pencil, create a soft graphite layer with small fur-like traces. Fill the entire head and be patient. Don’t rush it, or it’ll look wonky and messy.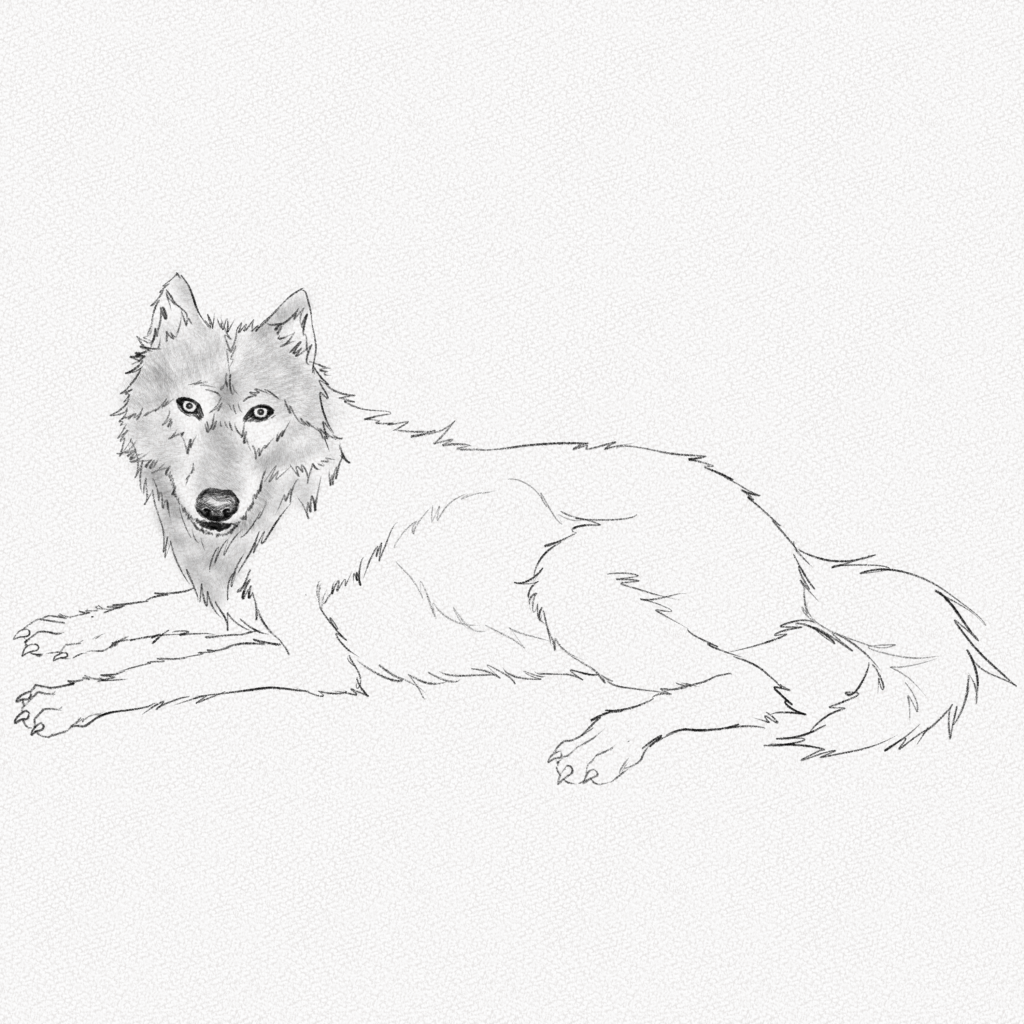
Check the image below. These will be the areas where we will detail and darken the fur.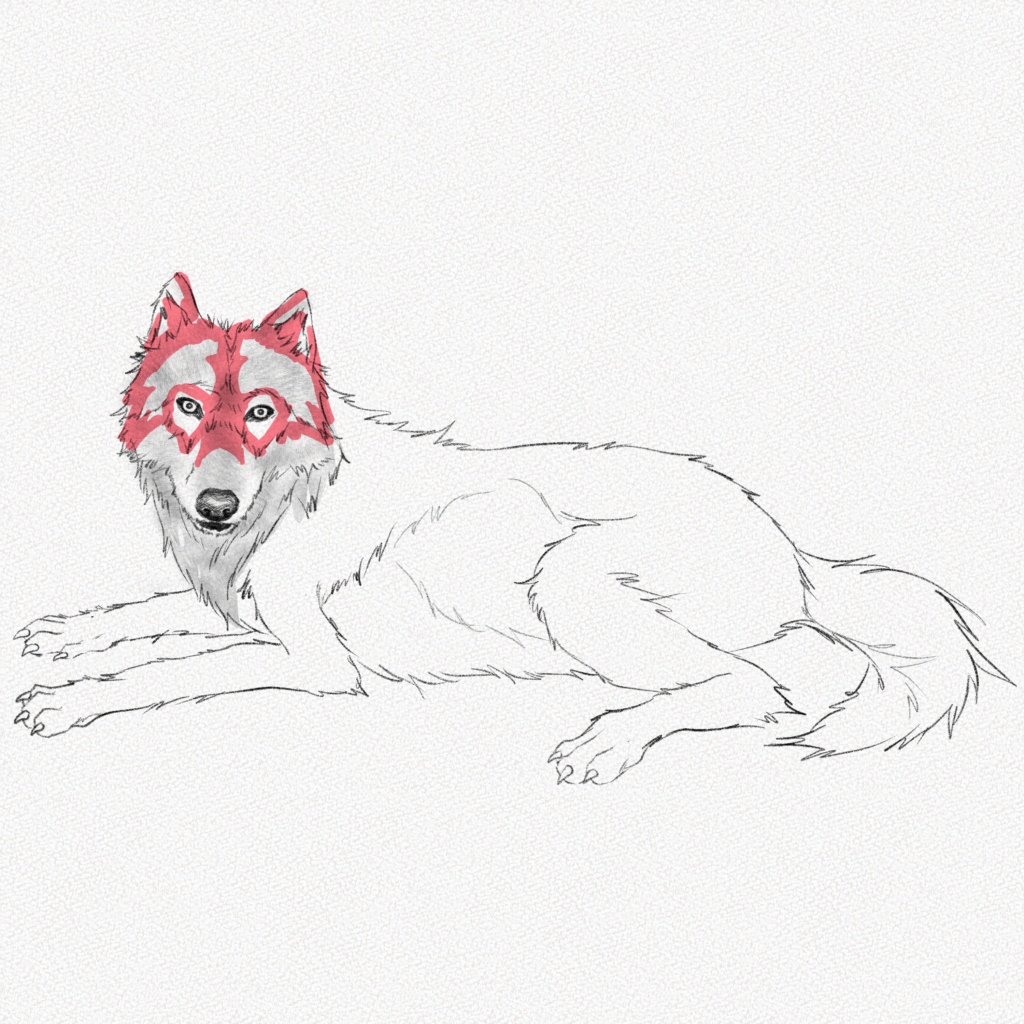
Use your 0.5 2B mechanical pencil and your 4B pencil for the darkest areas. Notice how the darkest fur areas follow the pattern we drew before.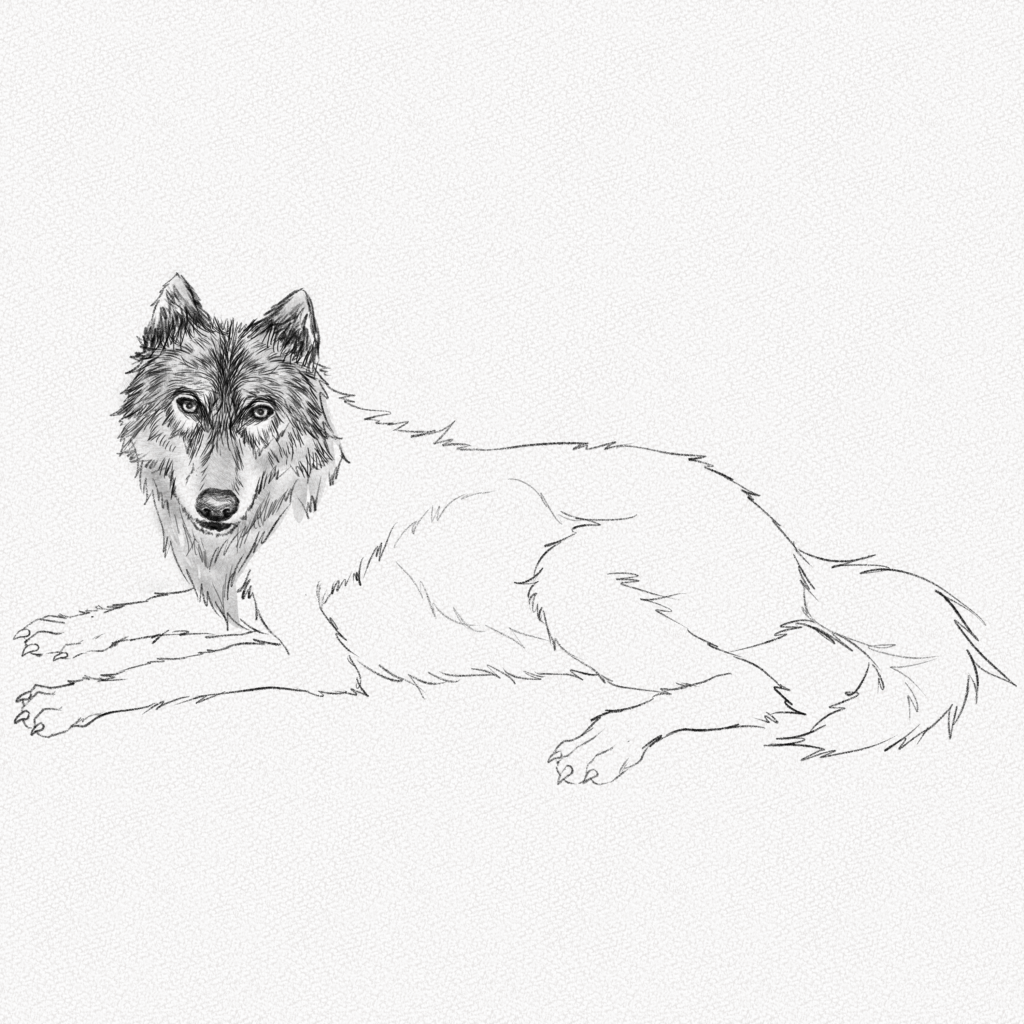
Step 28: Upper body
Repeat the steps above for the upper body. Fill the upper body with graphite and then add details with the 2B and 4B graphite pencils.
For the regions with the lowest value, you can use your Tombow Mono Zero to simulate white fur or your kneaded eraser too. 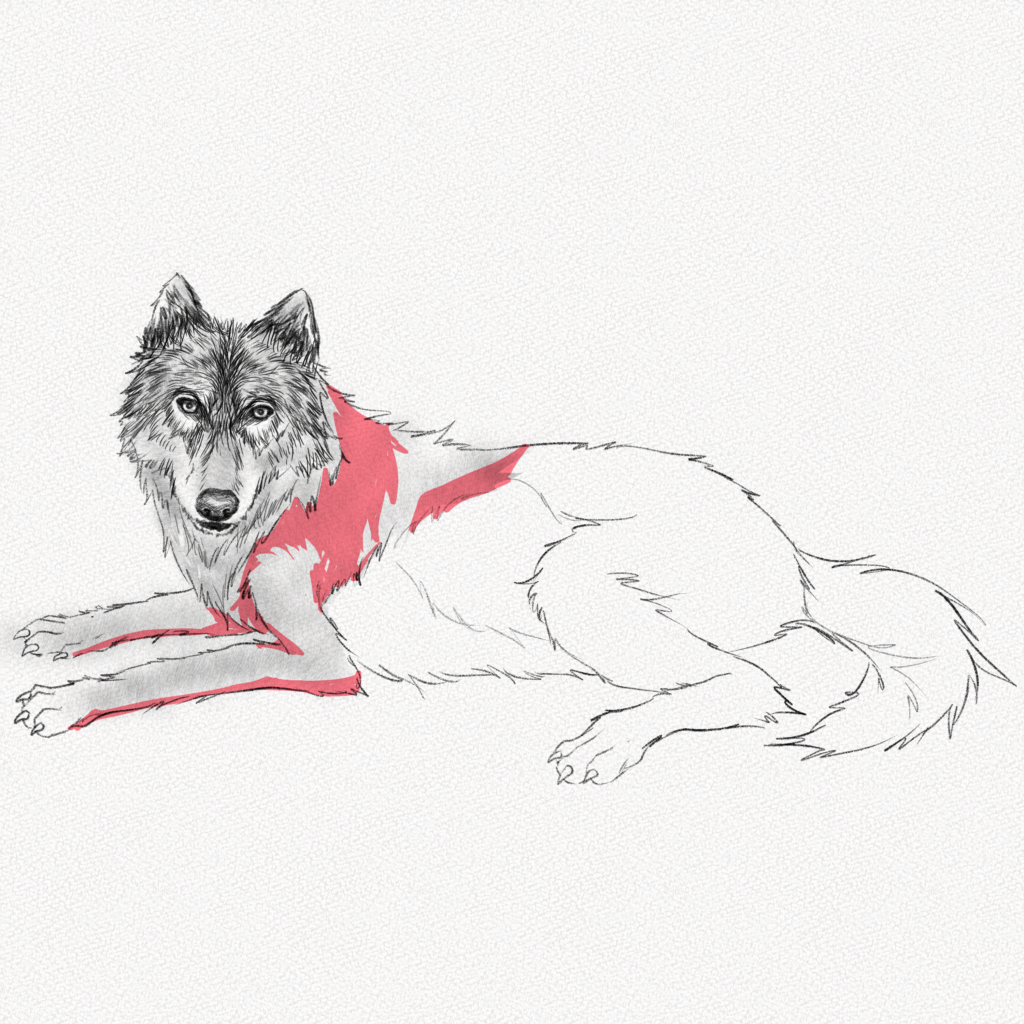
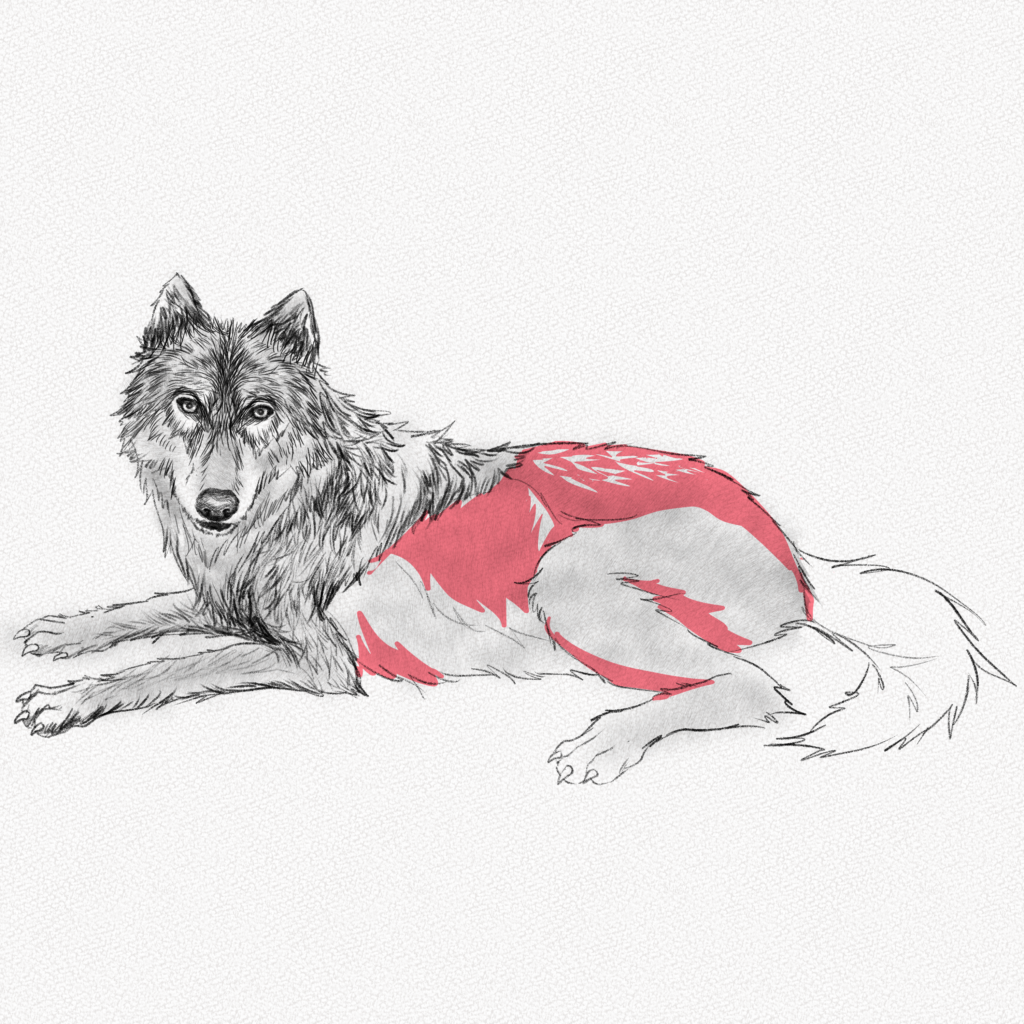
Step 29: Lower body
Do the same for the lower body. Wolves have darker fur on their backs, so this part will have even more graphite. Use your 4B pencil and your eraser for this step. Notice how there are some clear spots on the highlighted areas. These sports are white fur details that need to be blank or have a low value.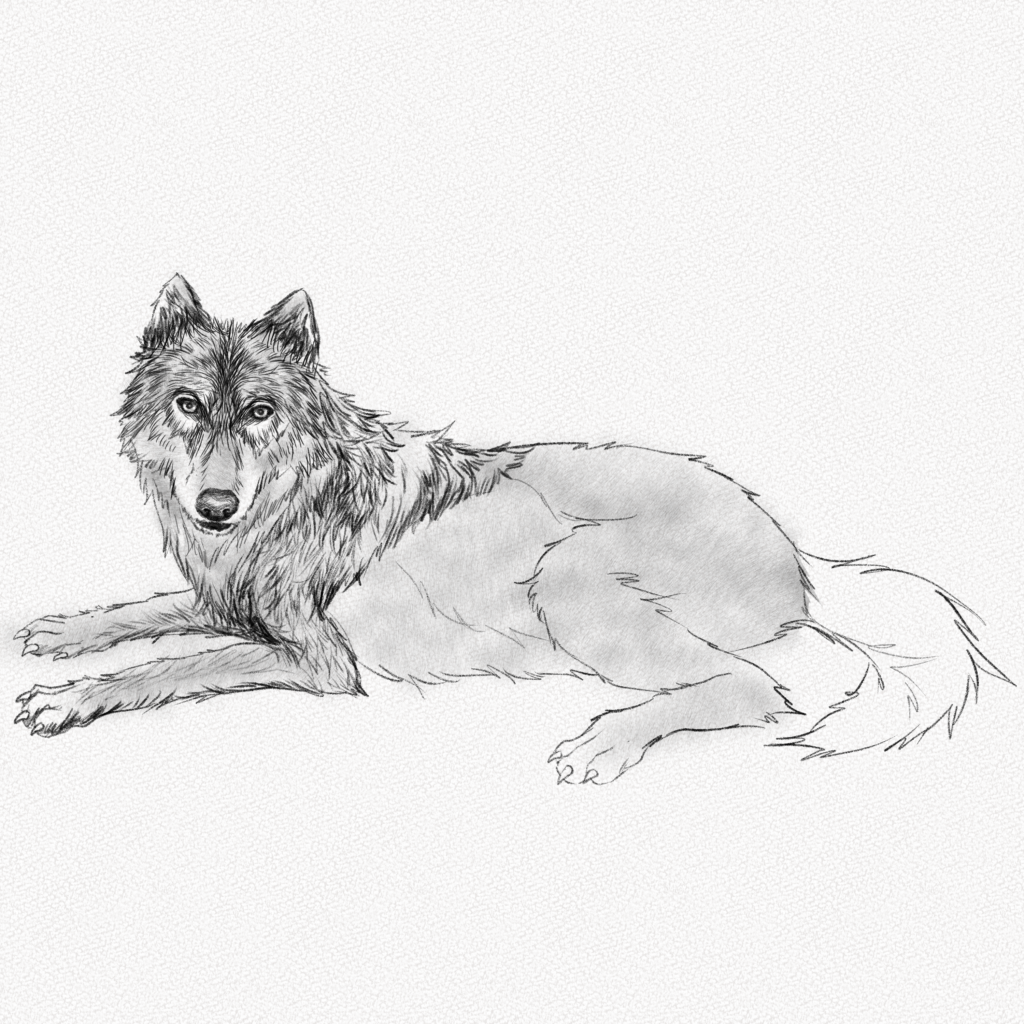
Step 30: Tail
Now for the tail base layer, make sure to use large and loose traces to imitate the fluffy fur. Add details with your 2B mechanical pencil and 4B pencil, and blend some of the fur on the wolf’s body with your blending stump.4 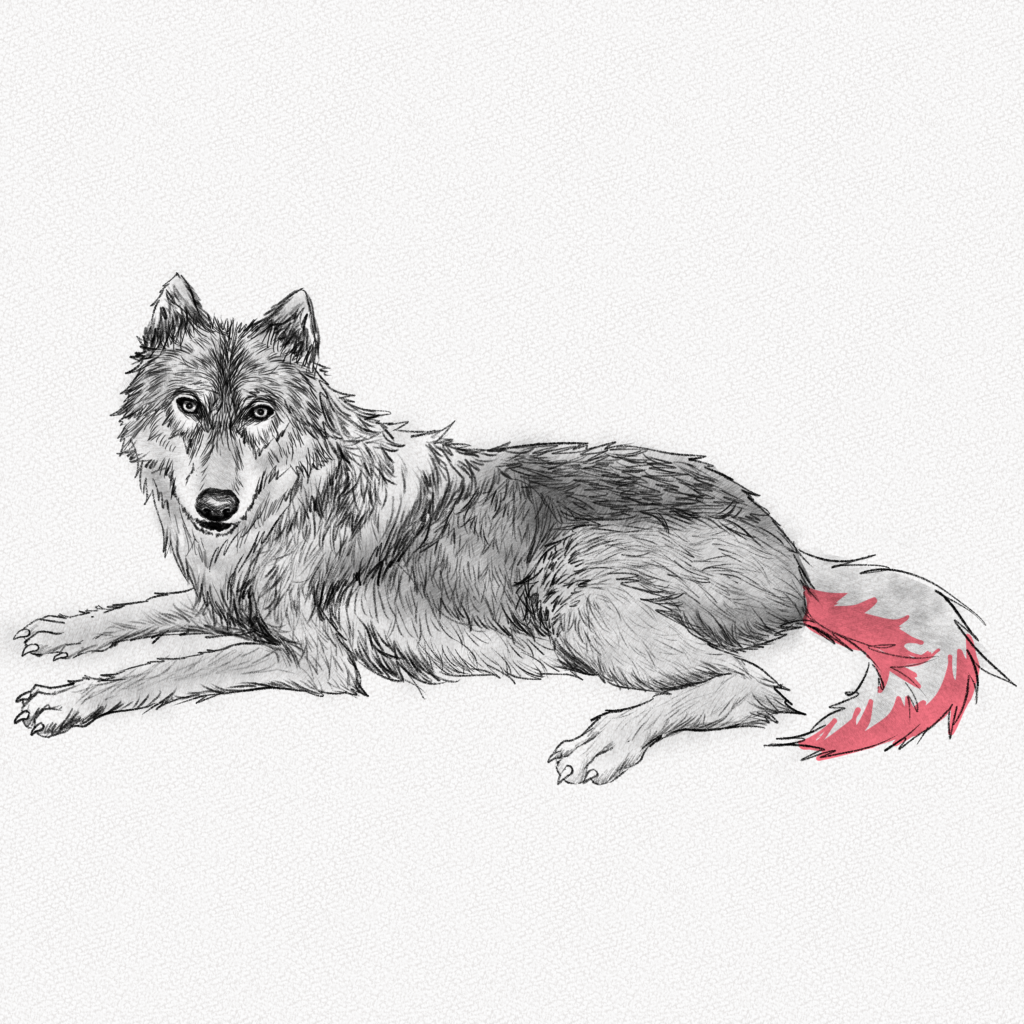
And that’s it. You’re done.
Thank you for following this tutorial. You did great!
I hope you learned something new today and now have a better grasp of how to draw and shade a Wolf.
Until next time!