Hey there! If you’re a fan of anime, then you probably already know how difficult drawing anime girls can be. The stylization of their eyes, nose, and lips and the change in art style from one series to another makes it very hard to accurately draw an “anime girl” from scratch.
Although it doesn’t seem like it, there is a lot of theory and knowledge behind your average anime girl. If you’re thinking about trying your hand at drawing anime girls, then you’re in for a treat!
In this tutorial, we’re going to teach you how to draw an anime girl! We’ll show you how to build the structure behind them, how to draw their facial features, how to shade them, and make them look totally awesome. So grab a pencil and let’s get ready to draw!
What you will learn:
- The structure behind an anime girl
- Drawing the hair
- The facial features
- How to shade an anime girl
Materials needed:
- A piece of paper
- A 2H graphite pencil
- A 4B and 8B graphite pencil
- Powdered Graphite
- A soft brush
- A Tombow Mono Zero 2.3mm eraser
- A kneaded eraser
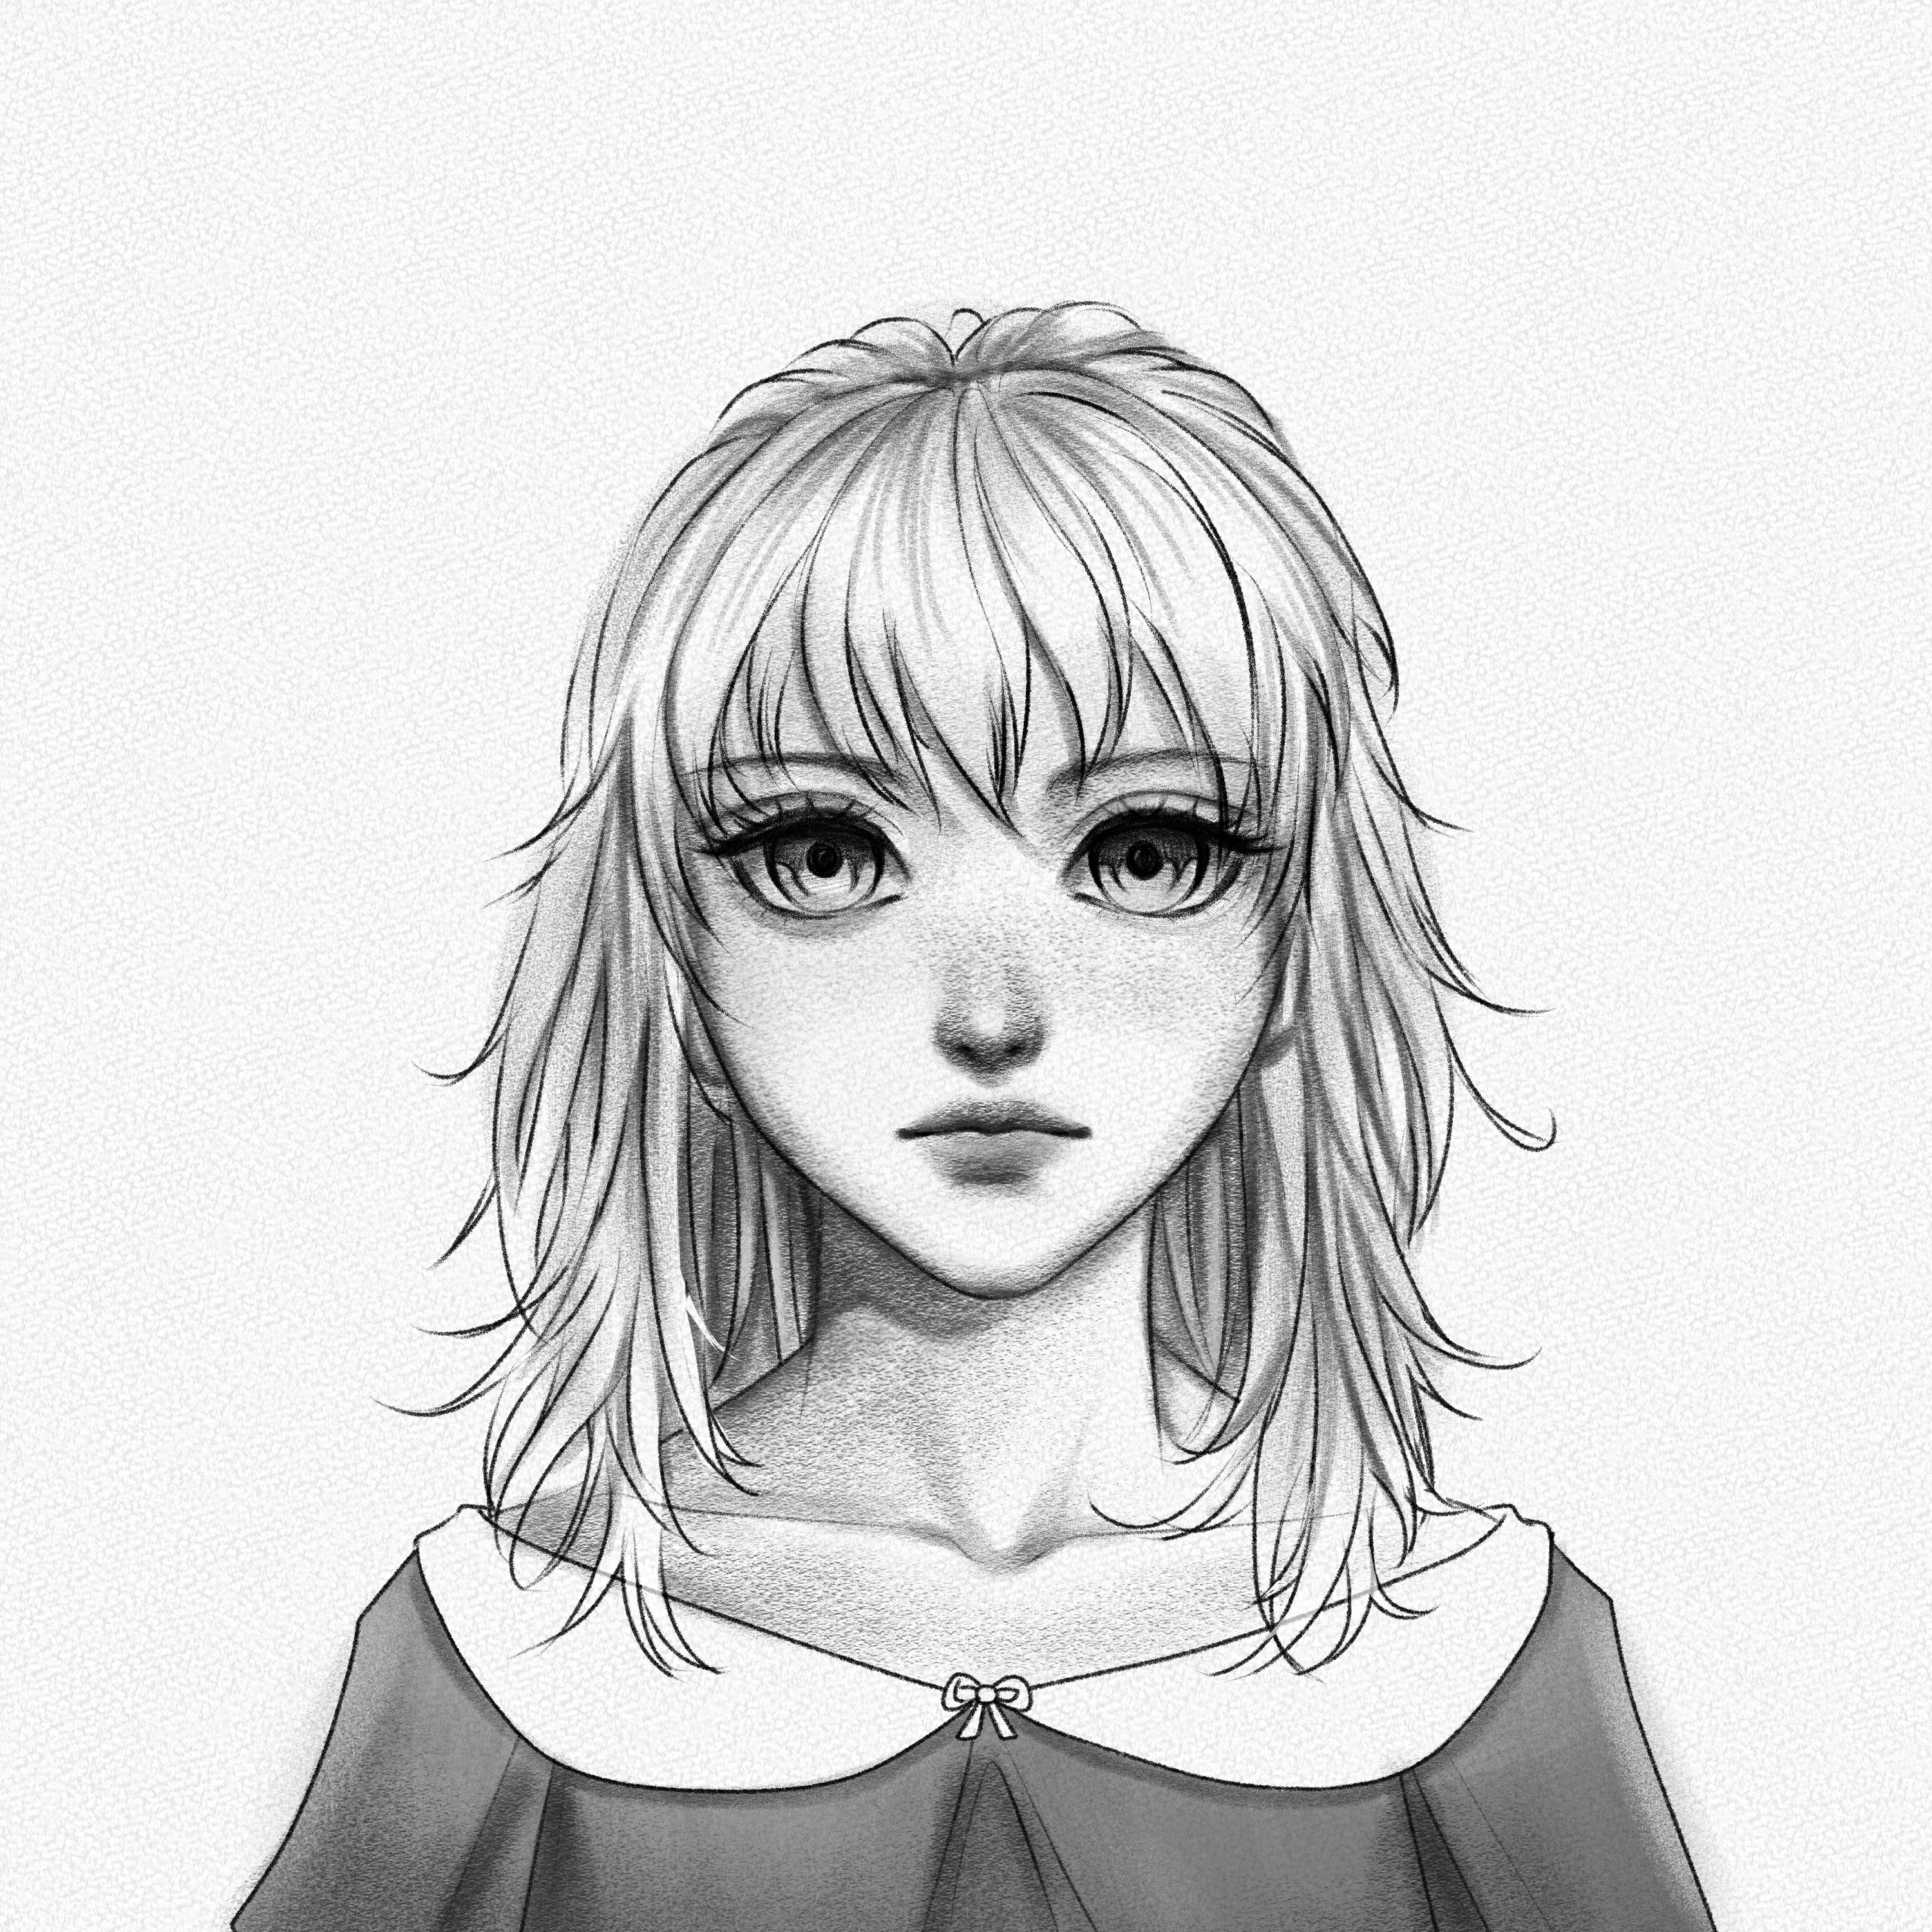
This is the anime girl you will be drawing
And these are all the steps we’ll walk you through: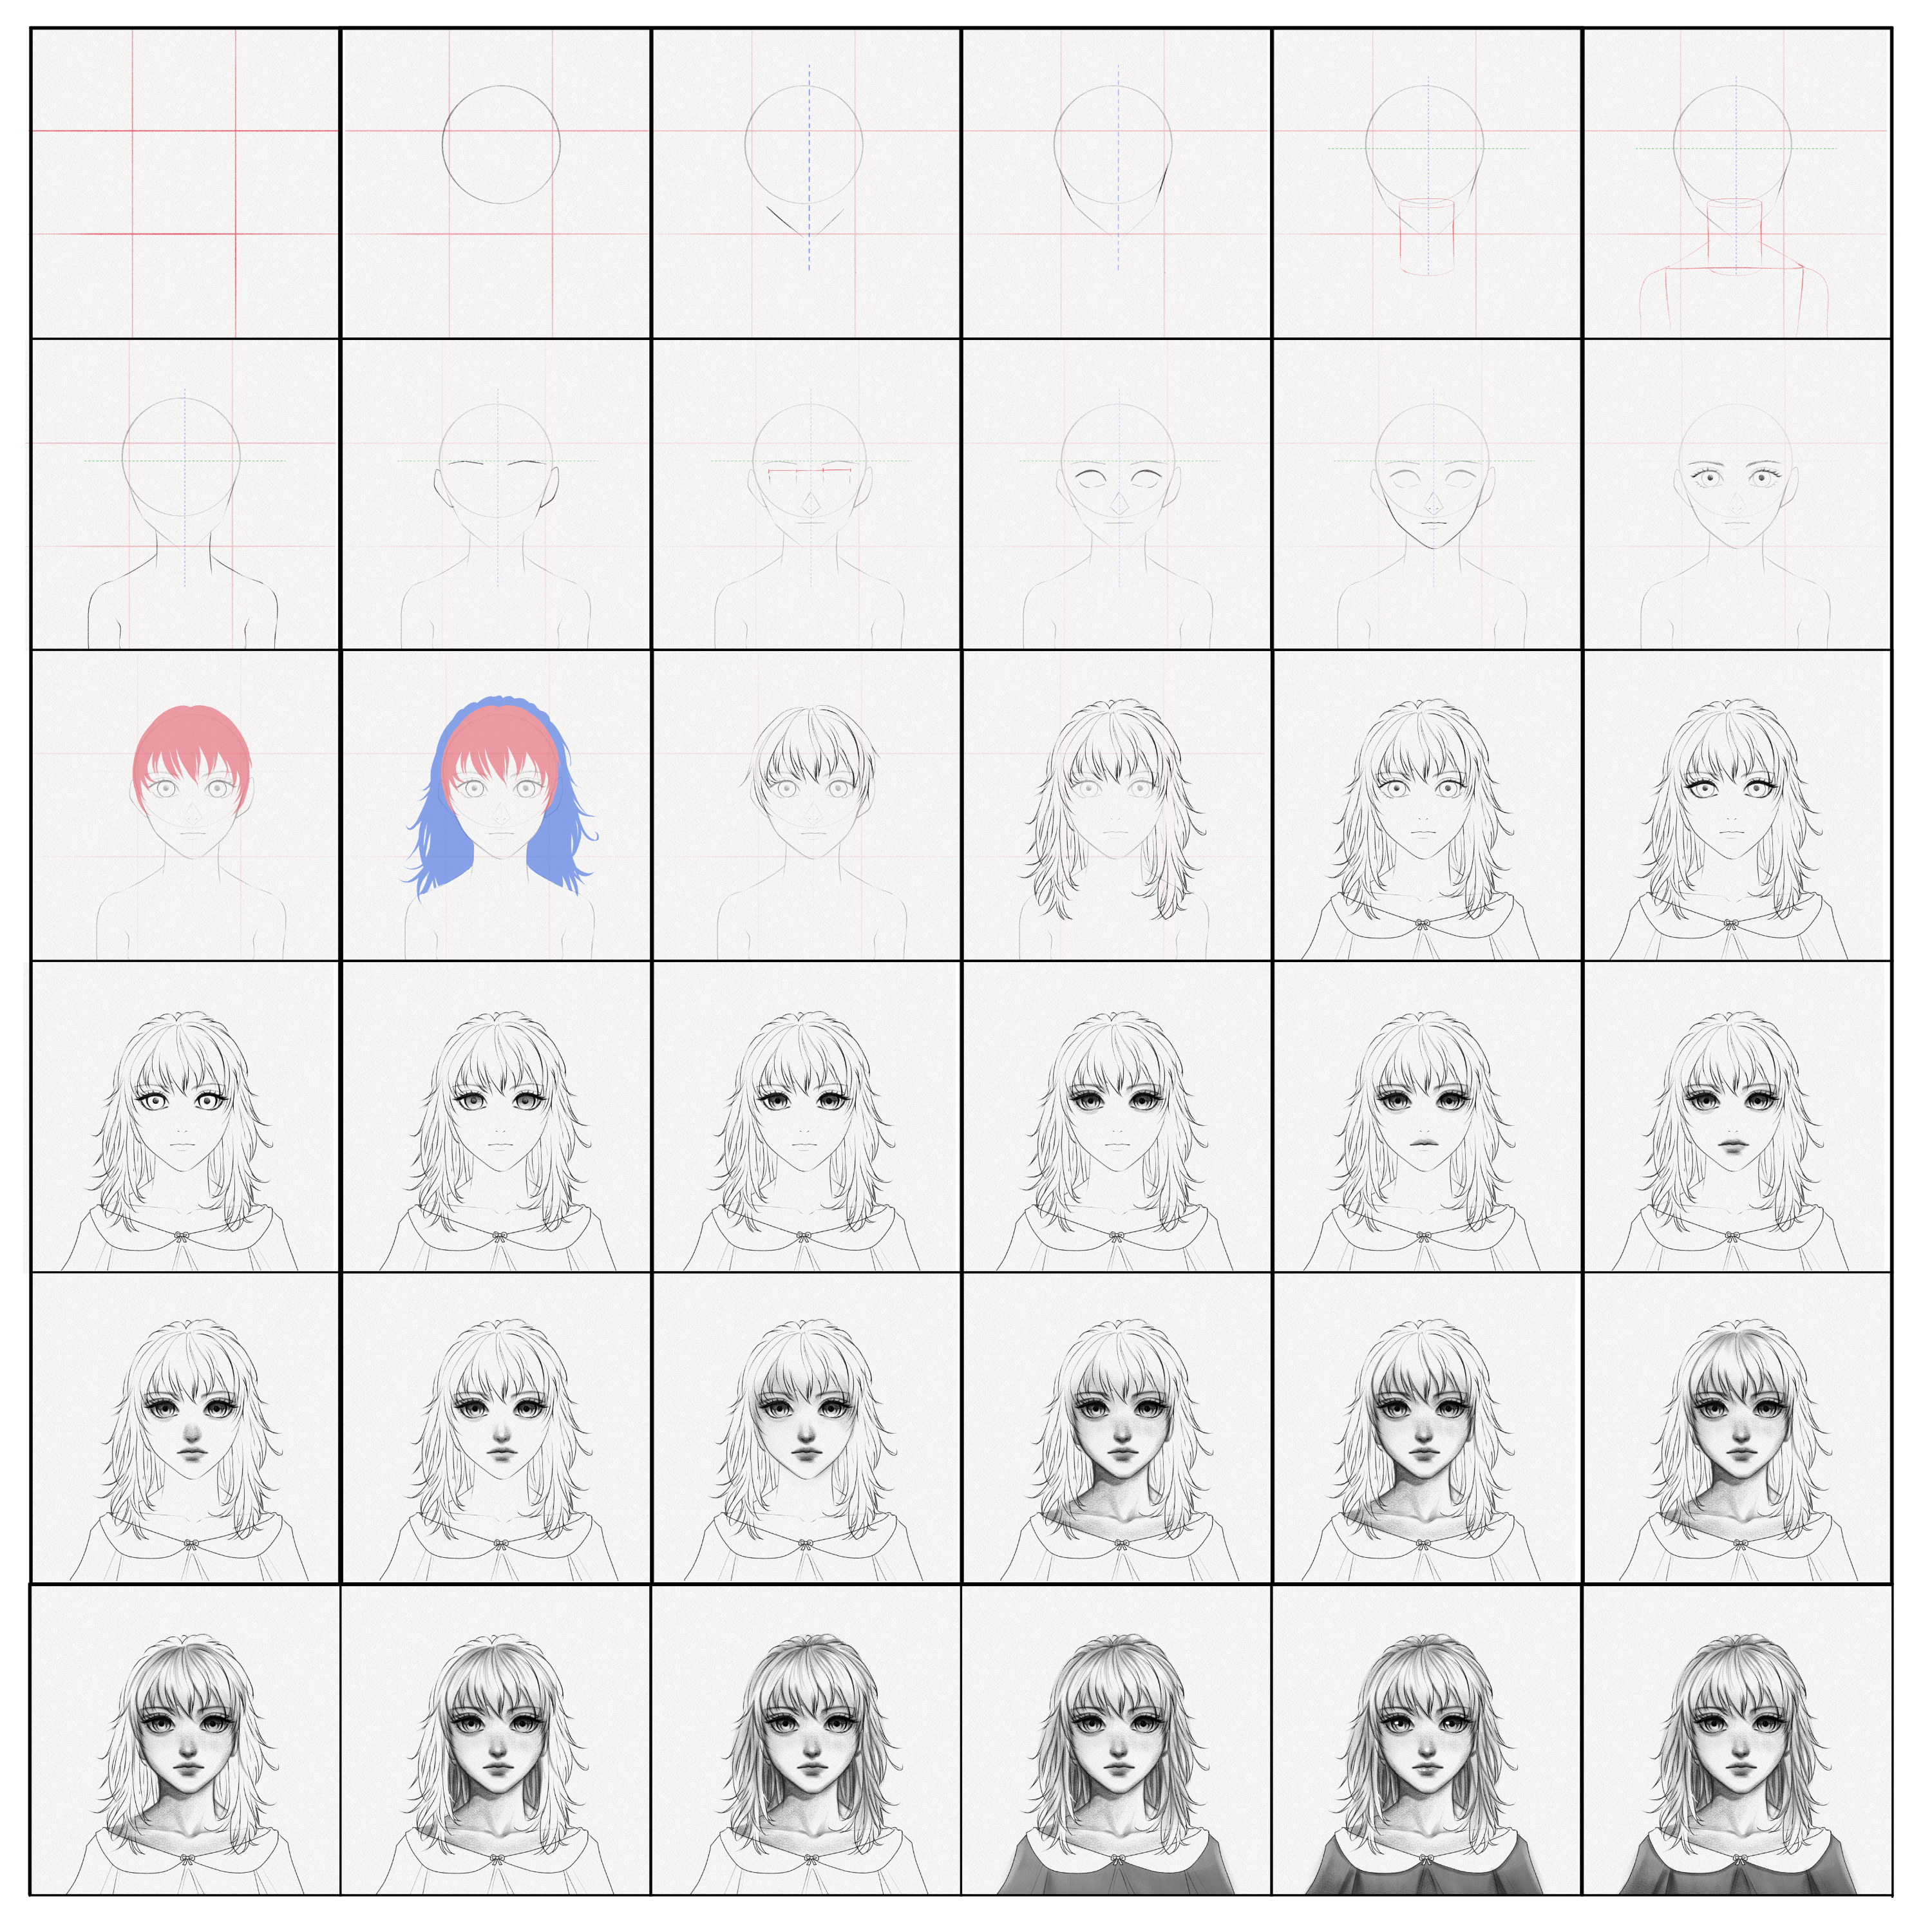
Section 1.- Drawing the structure
When it comes to drawing, understanding the basics is crucial. One of the most important skills to master is drawing the underlying structure of the subject, but it can be especially challenging when it comes to the human body.
No worries though, because in this tutorial, we’ll show you how to start drawing the body structure from the chest. This is a super helpful foundation for all sorts of characters, whether you’re going for a realistic look or something more anime-inspired, and will help you practice for future occasions.
Step 1: Divide your canvas
Divide your canvas into three equal parts, horizontally and vertically so you have a uniform grid that can be used as a reference for positioning your drawing.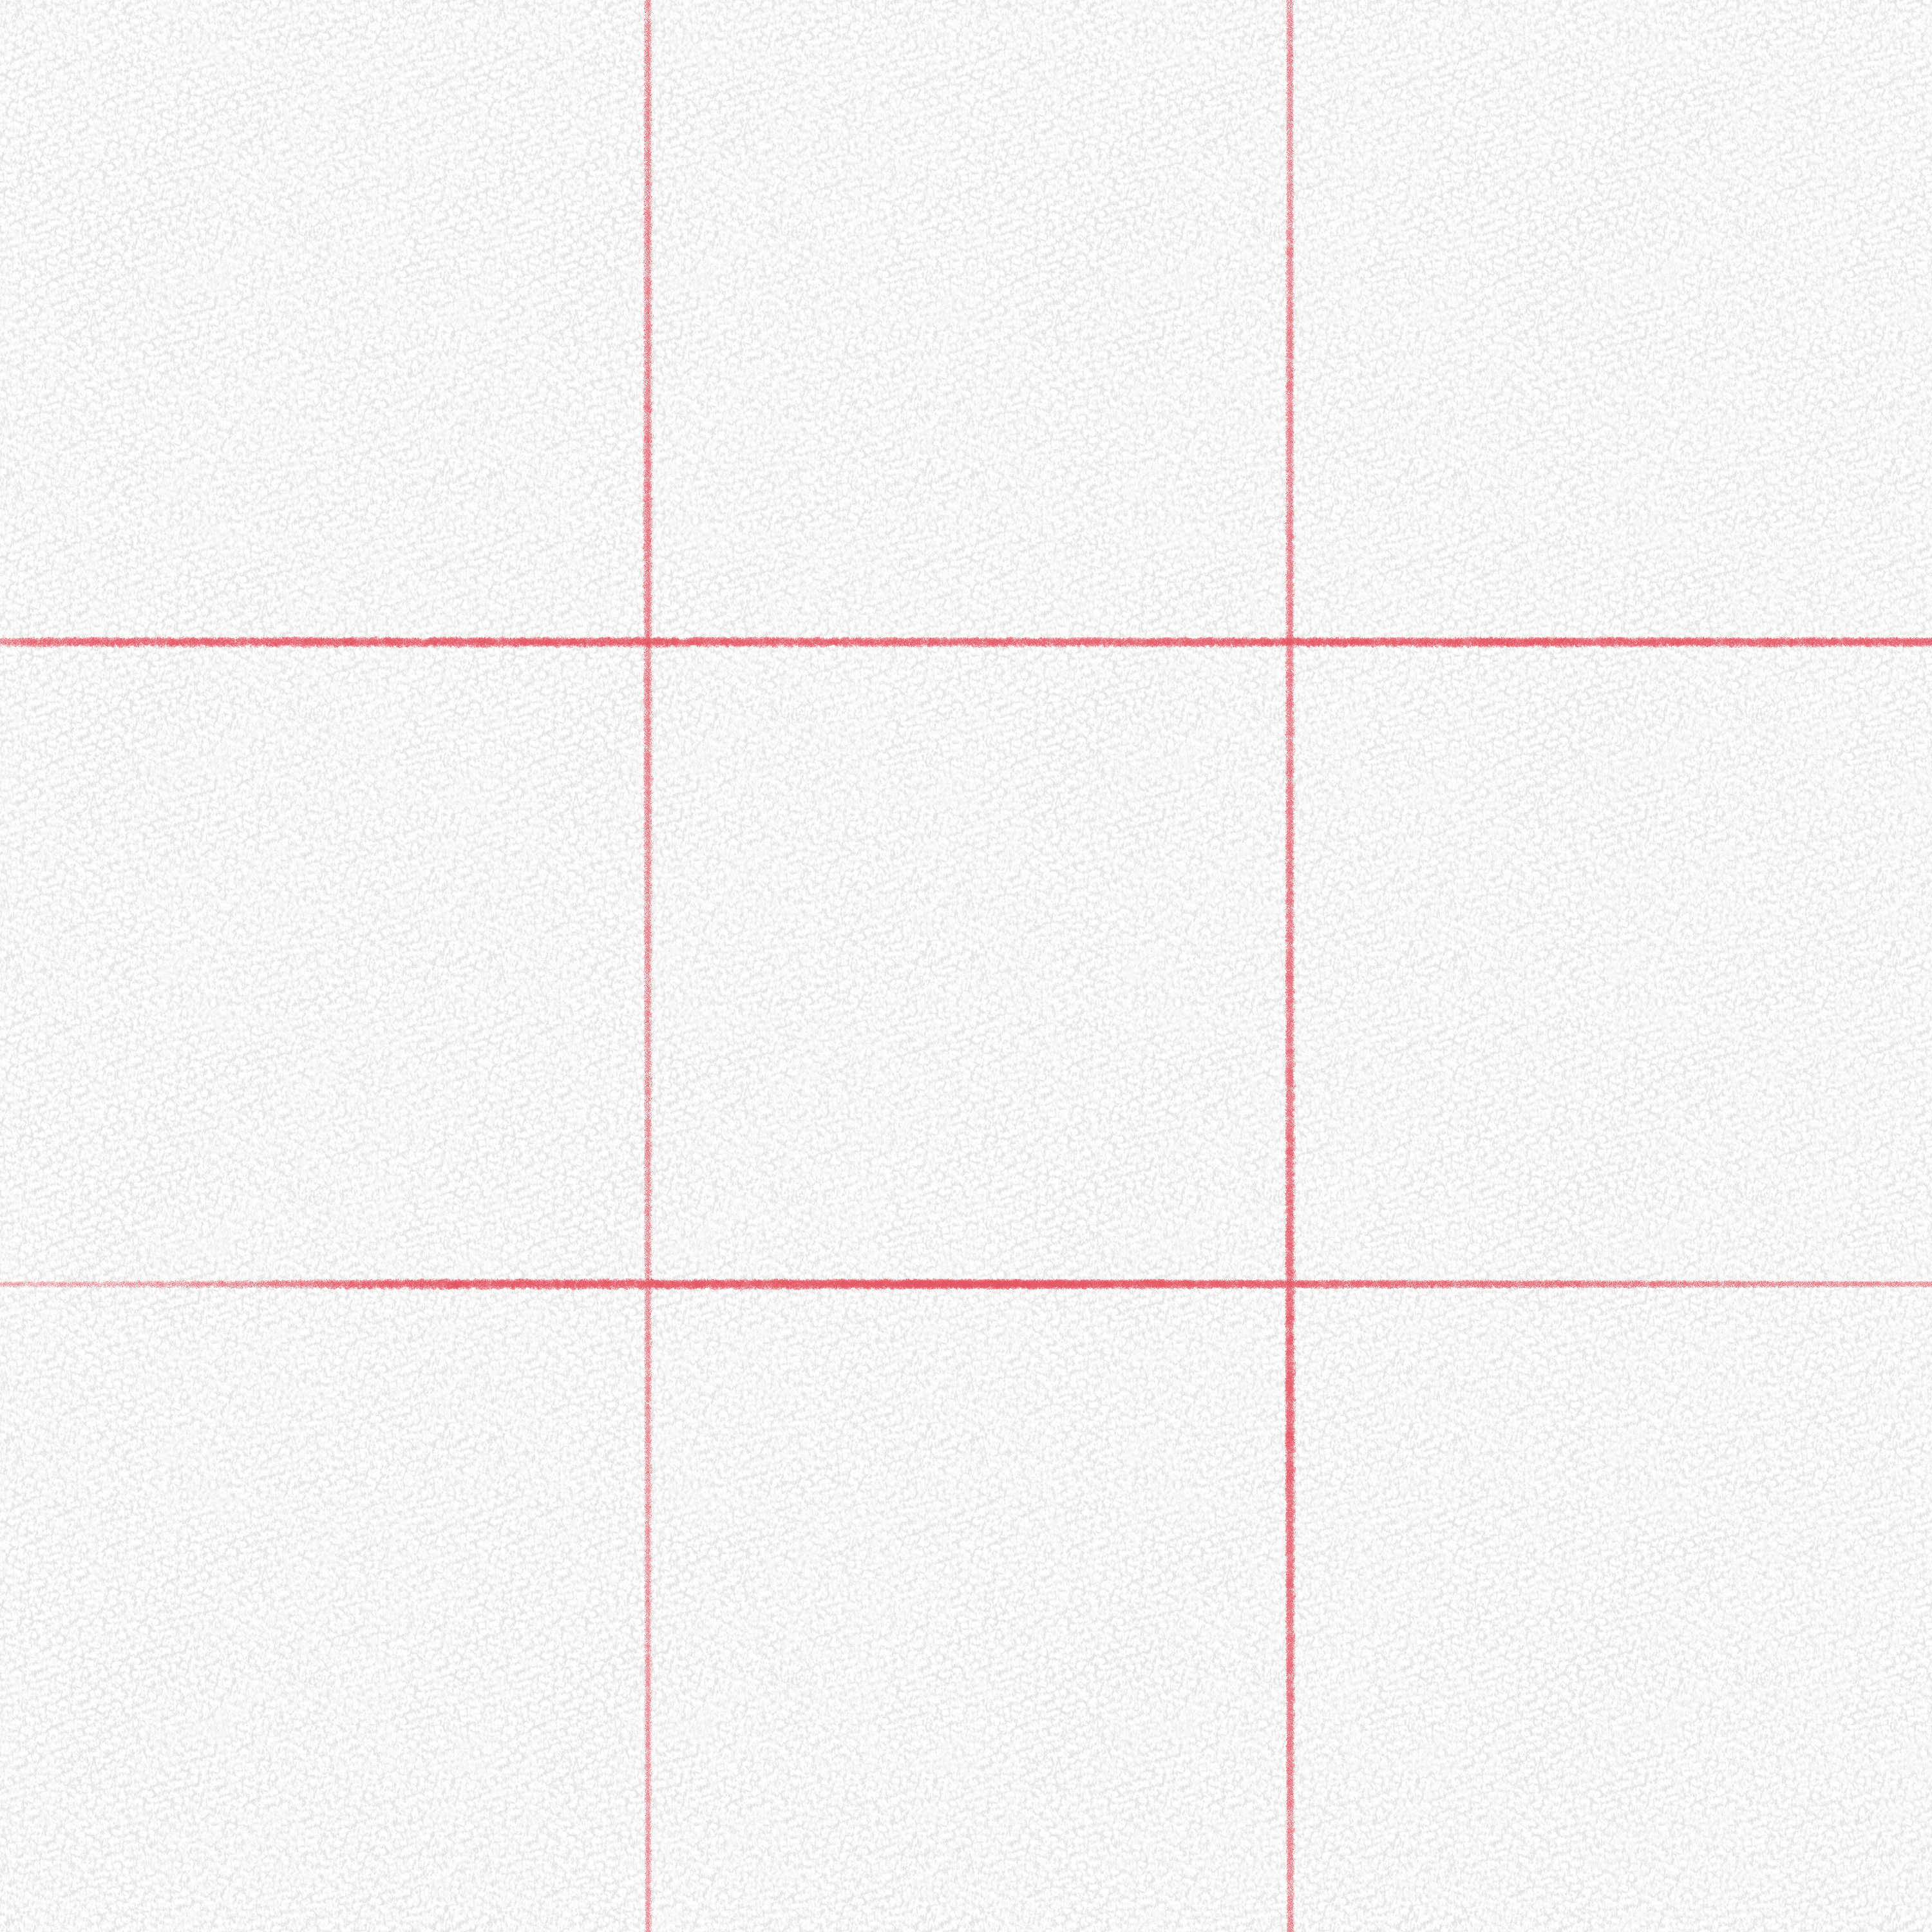
Step 2: Draw a circle
Draw a circle in the upper part of your canvas. You can use the diagram below as a reference for positioning.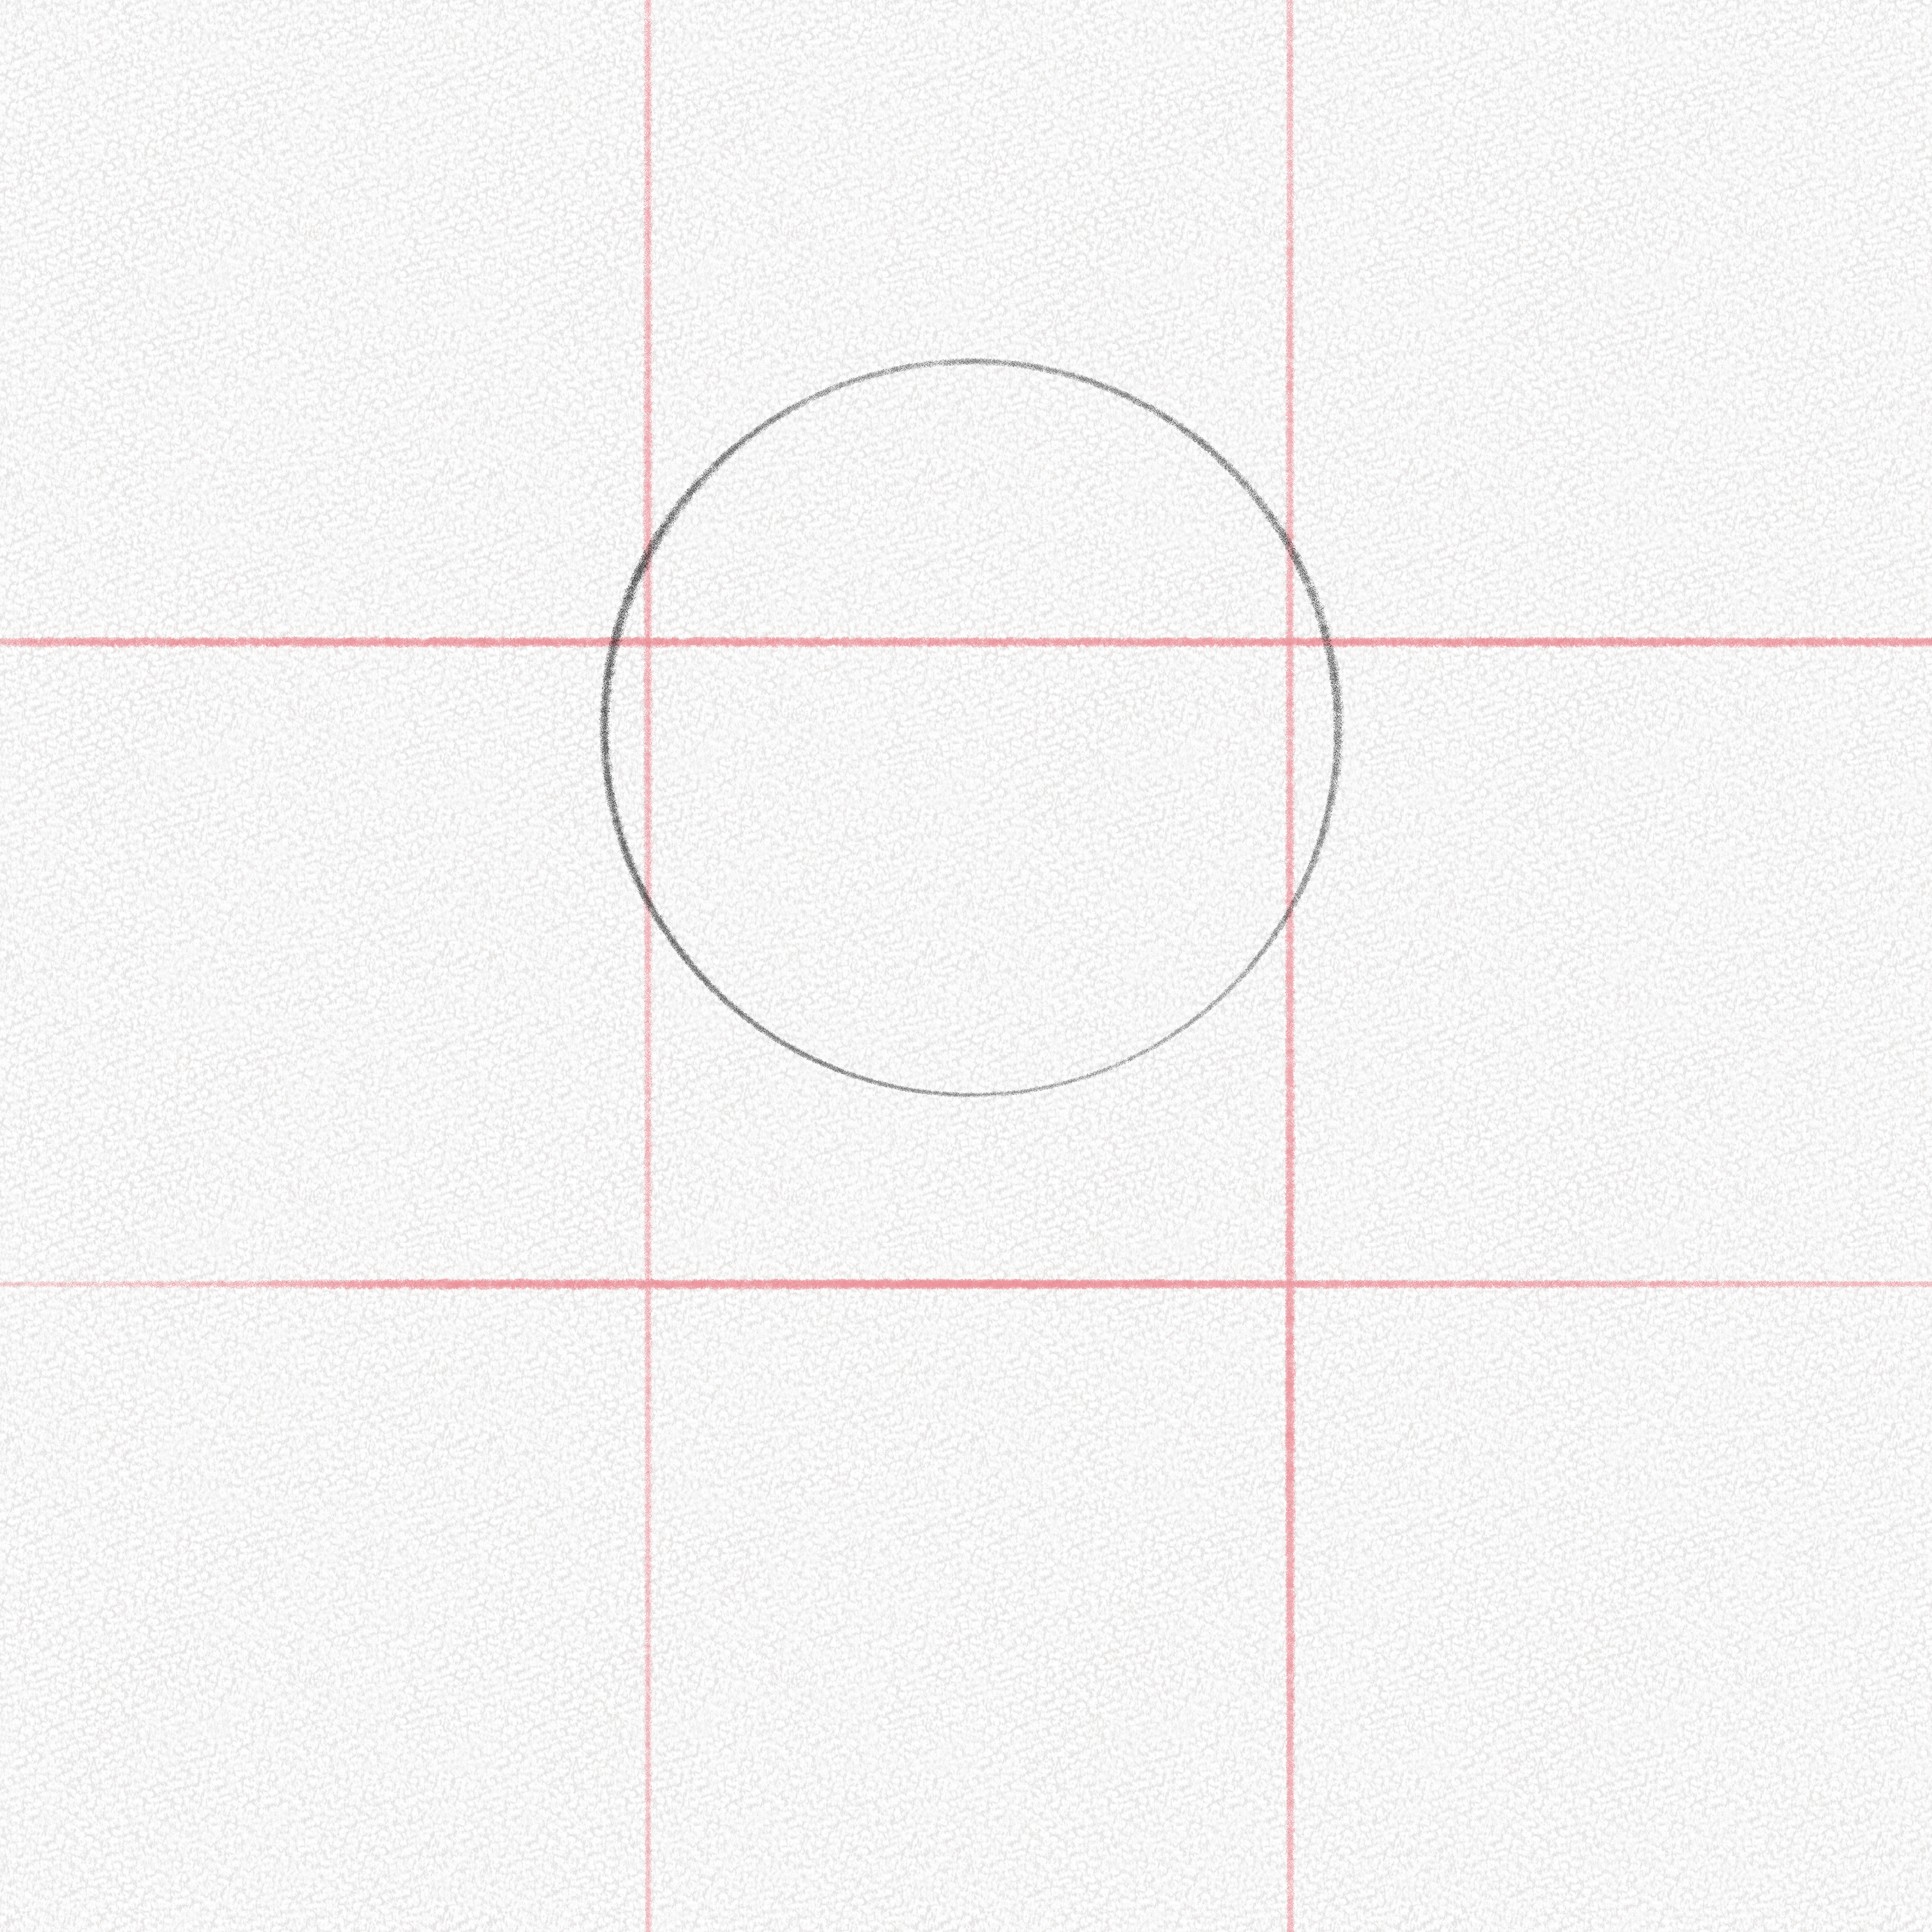
Step 3: Draw a subtle line
Draw a line in the middle of the circle, this line will help you position the eyes, nose, mouth, and eyebrows.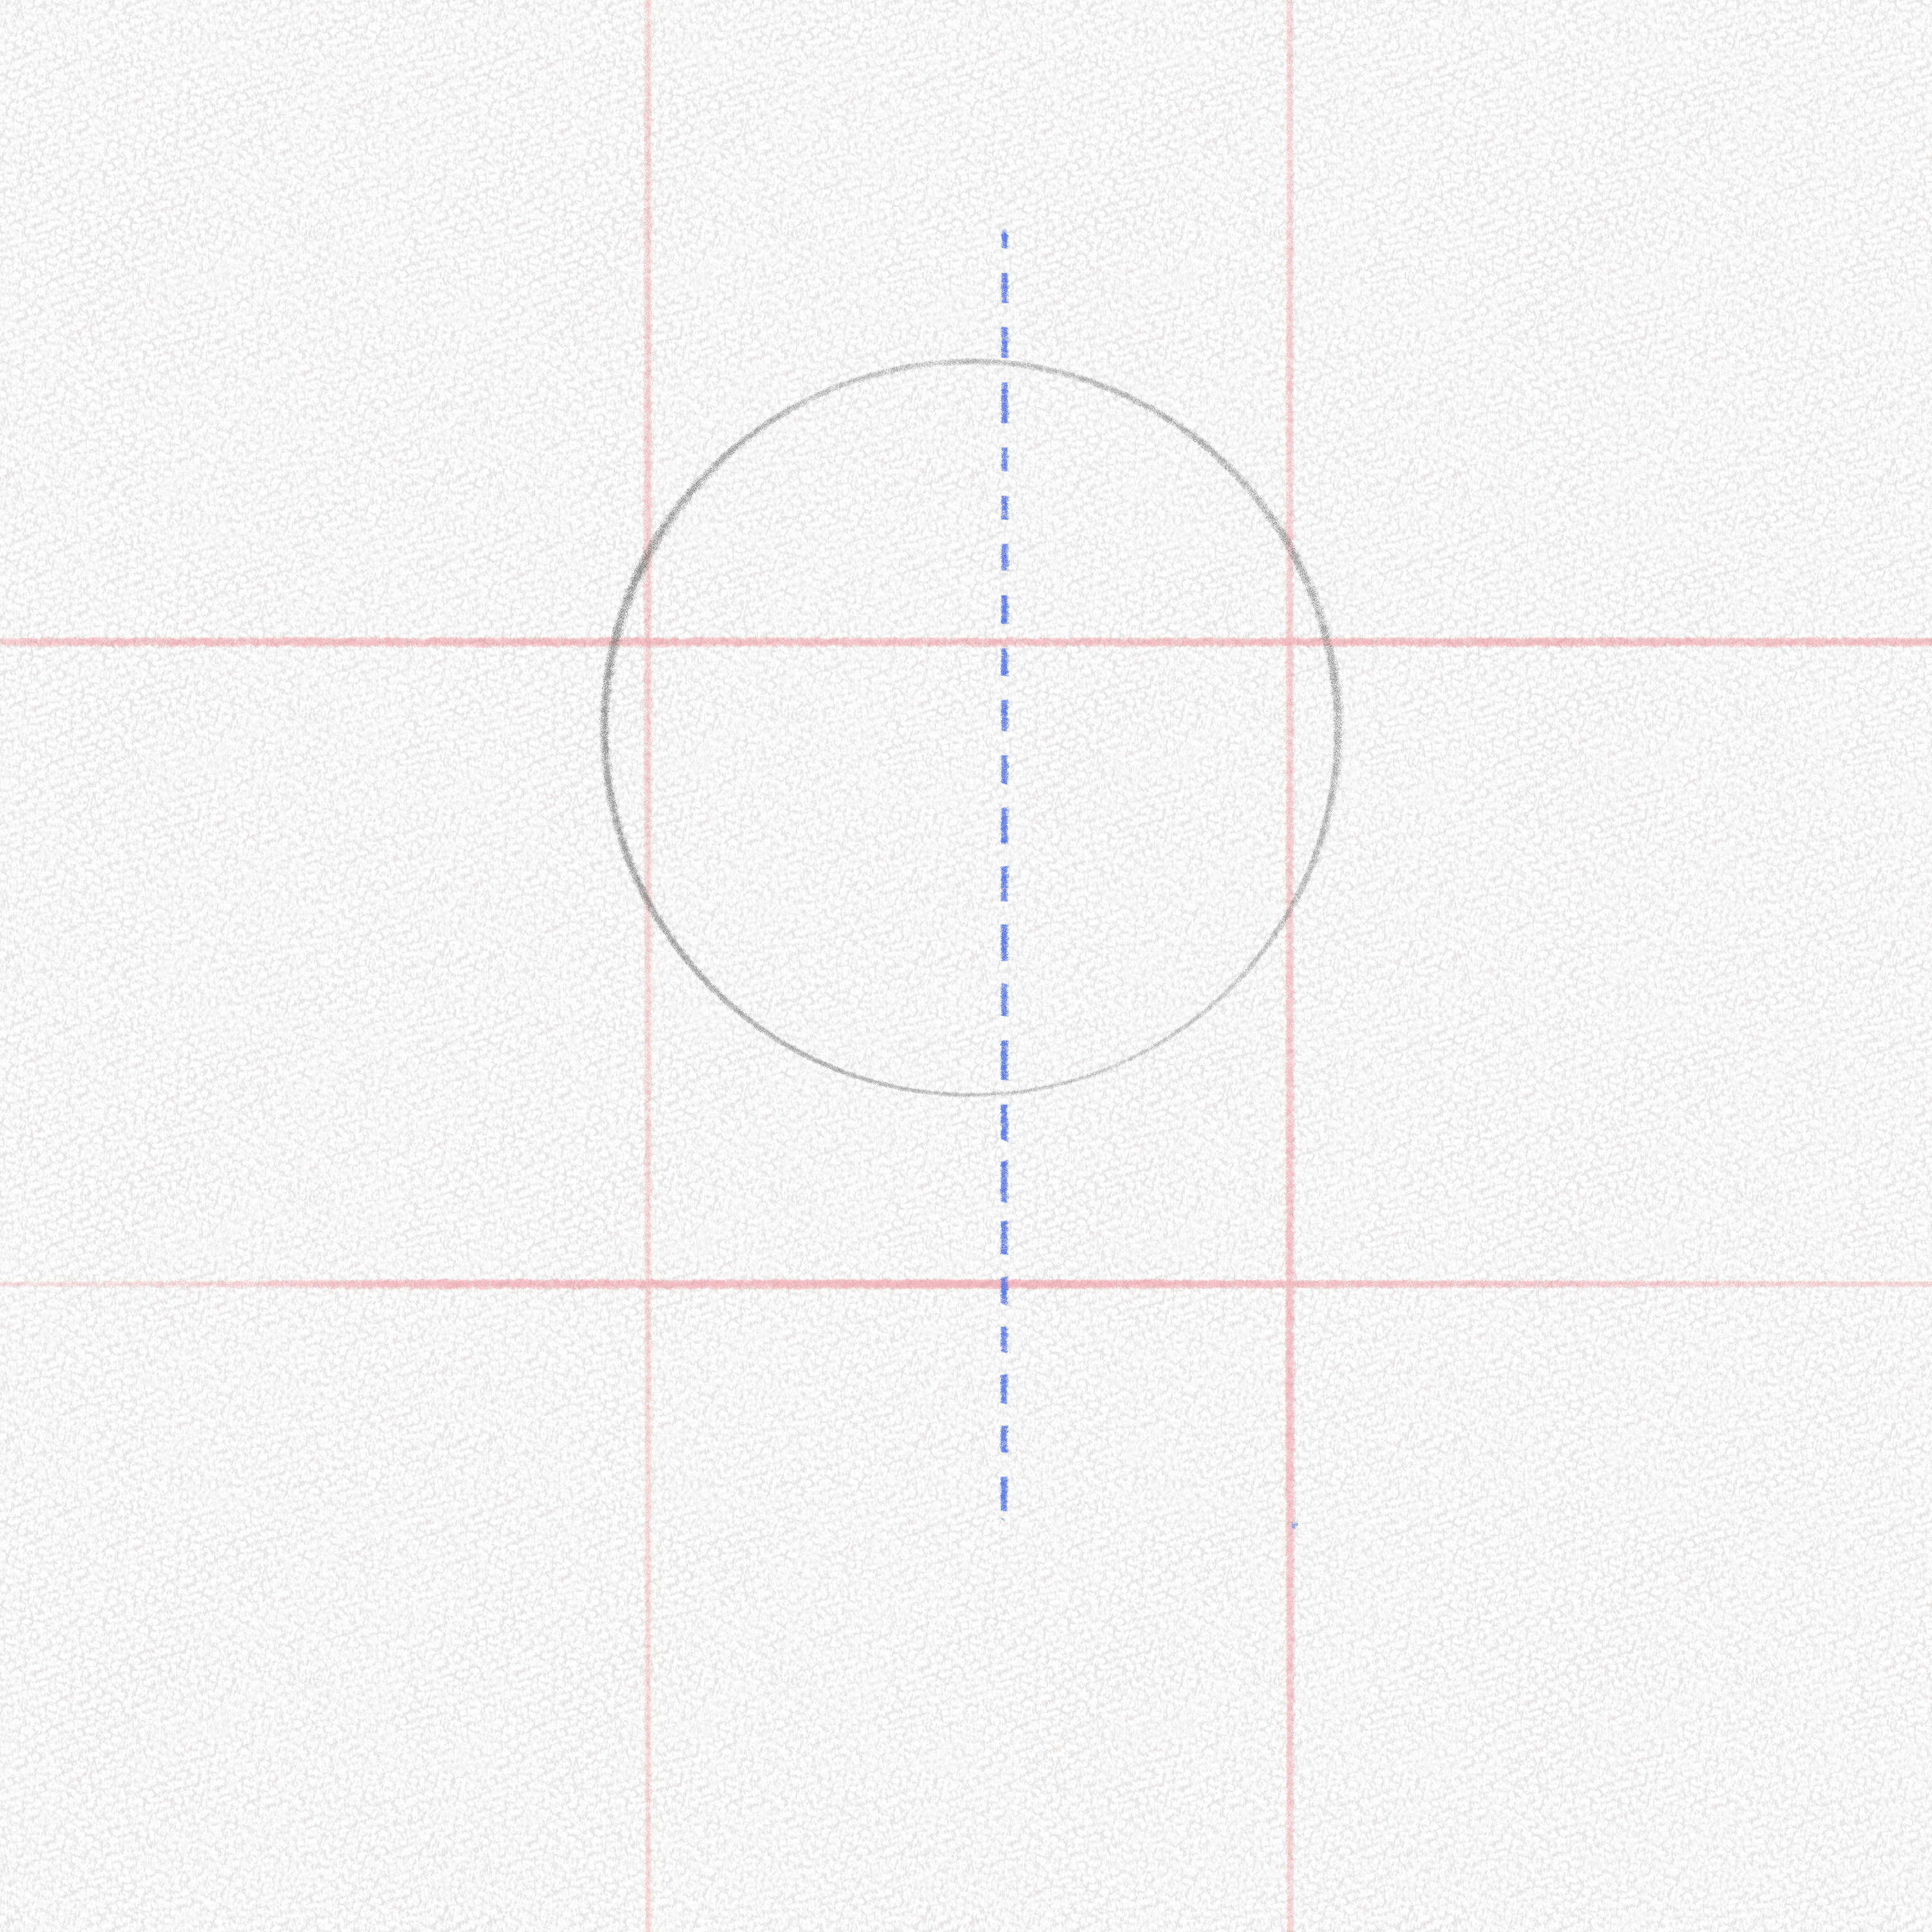
Step 4: Draw two lines
Draw two lines forming a wide “V” shape, don’t make them converge since the face is not pointy.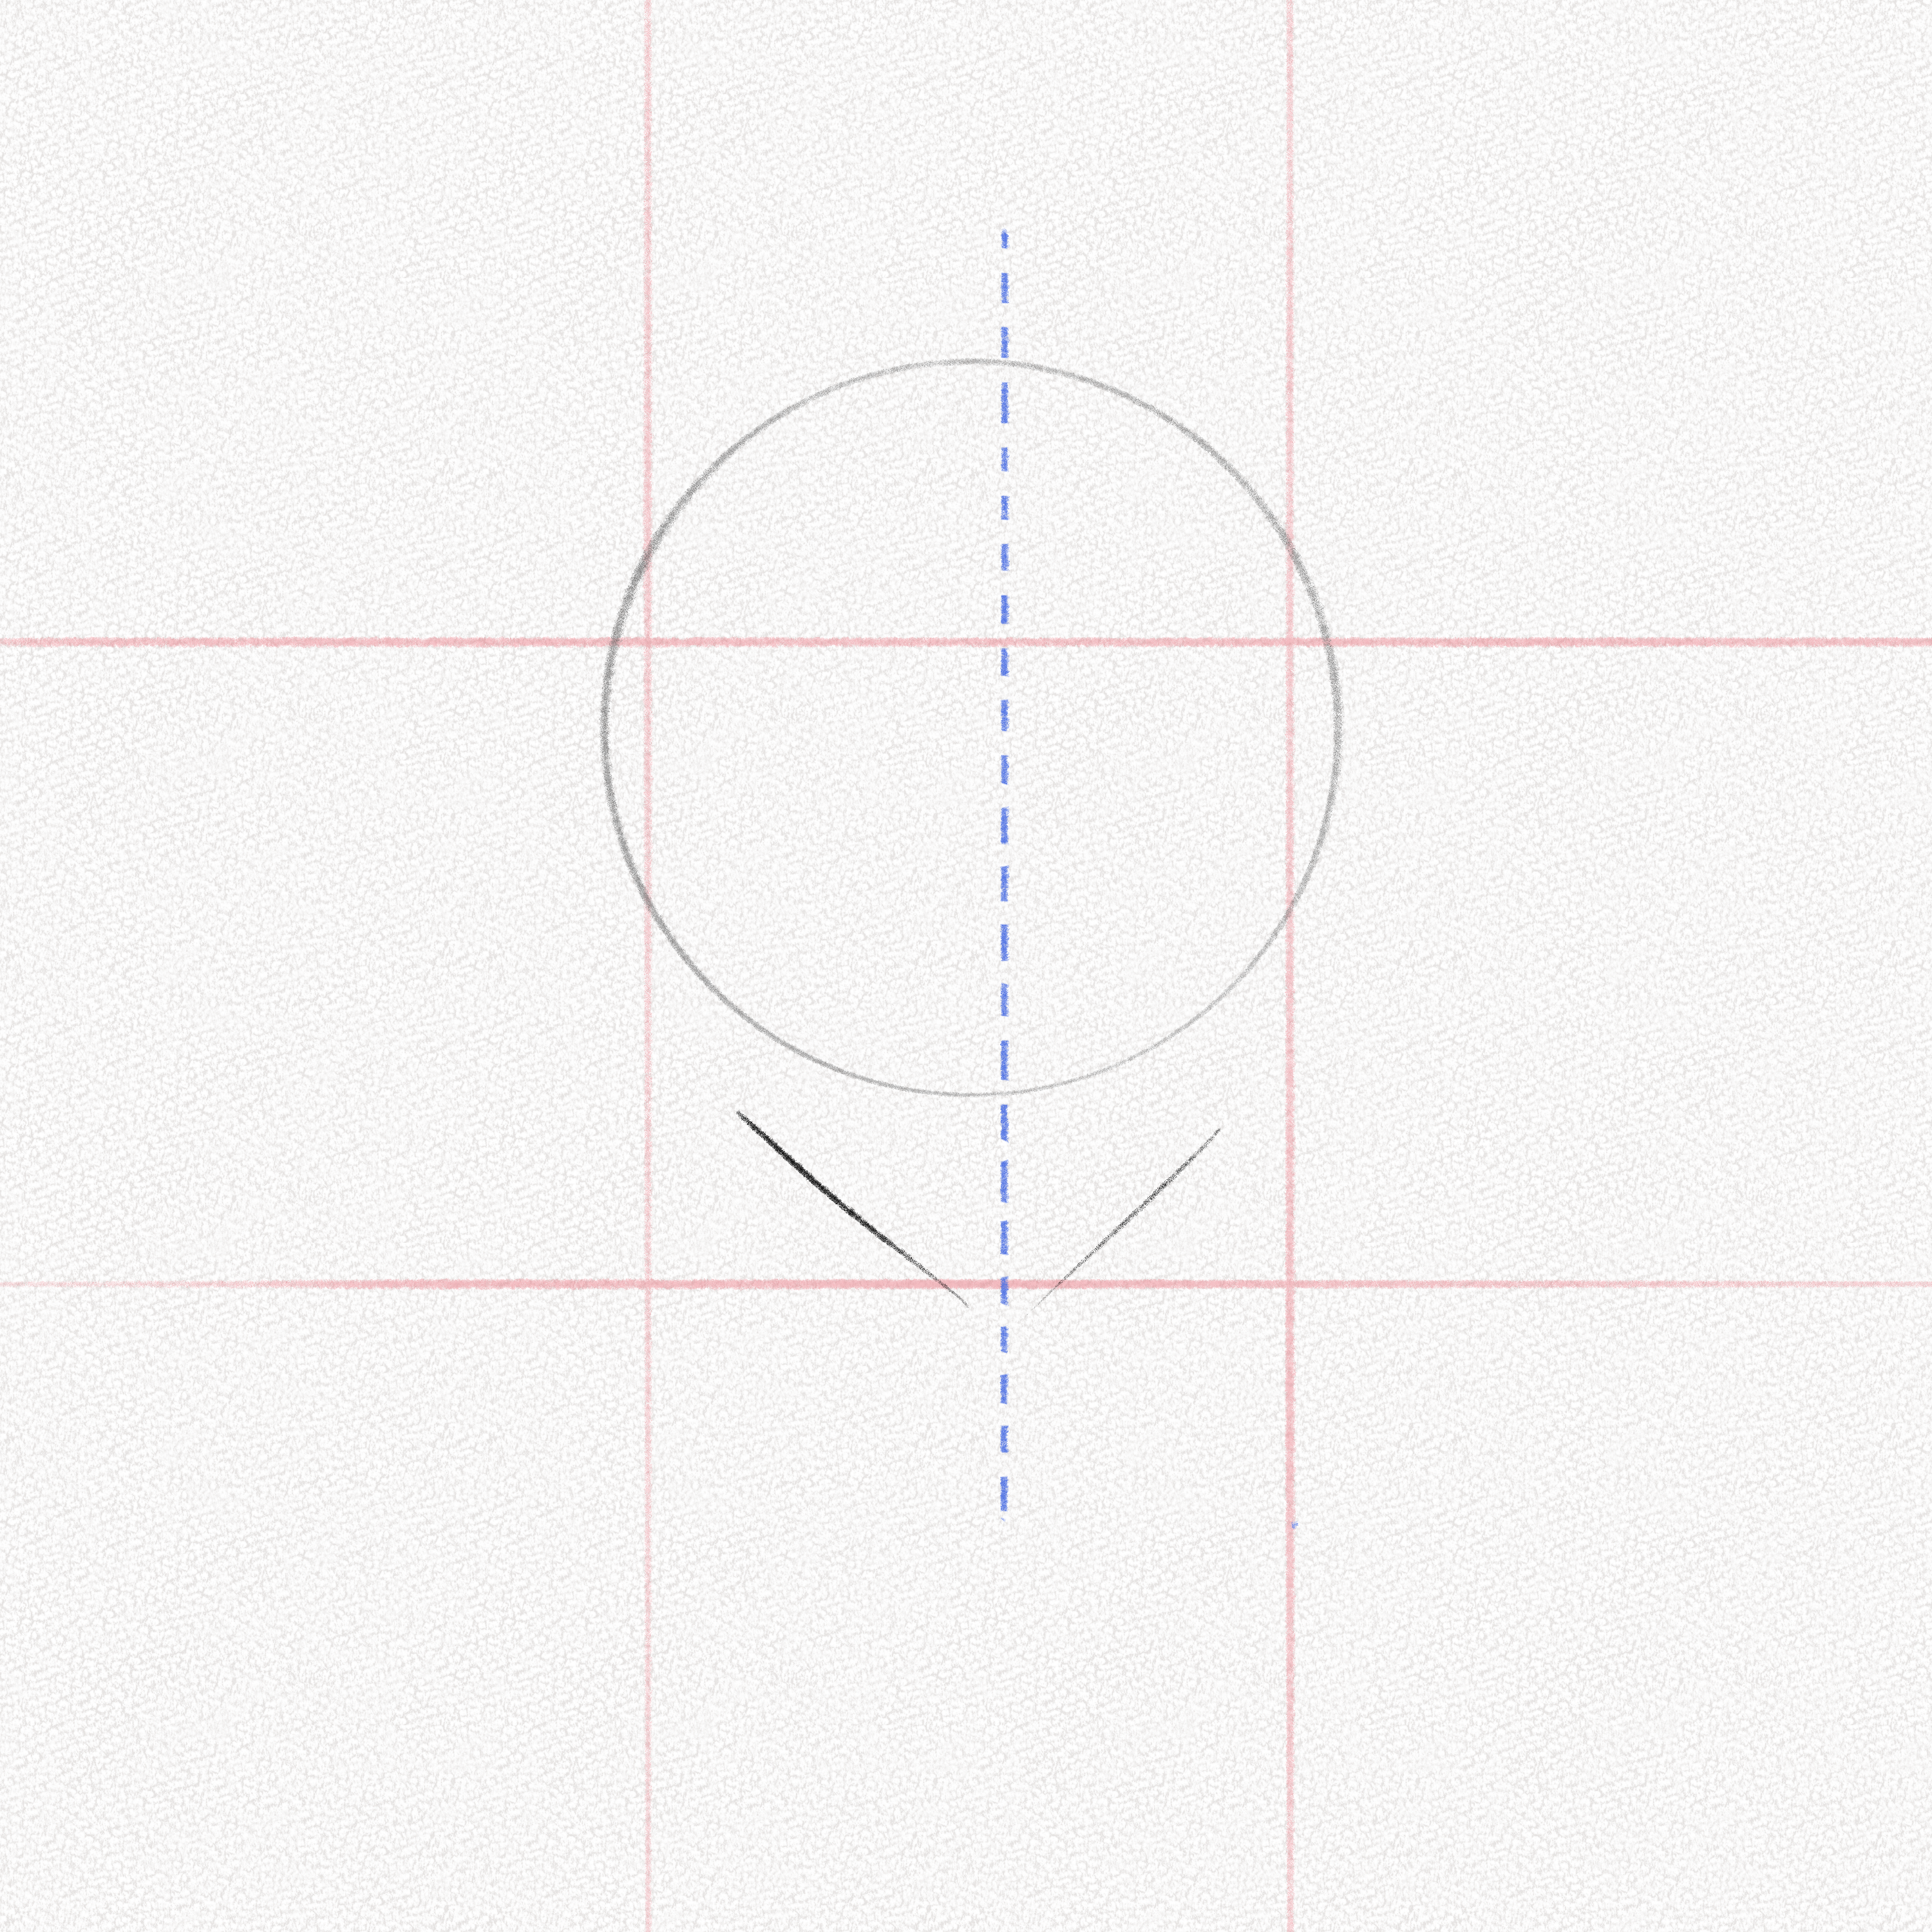
Step 5: Connect them to the circle
Connect the lines to the circle forming the shape of a head. Make the corrections you think necessary according to the type of face you want to draw.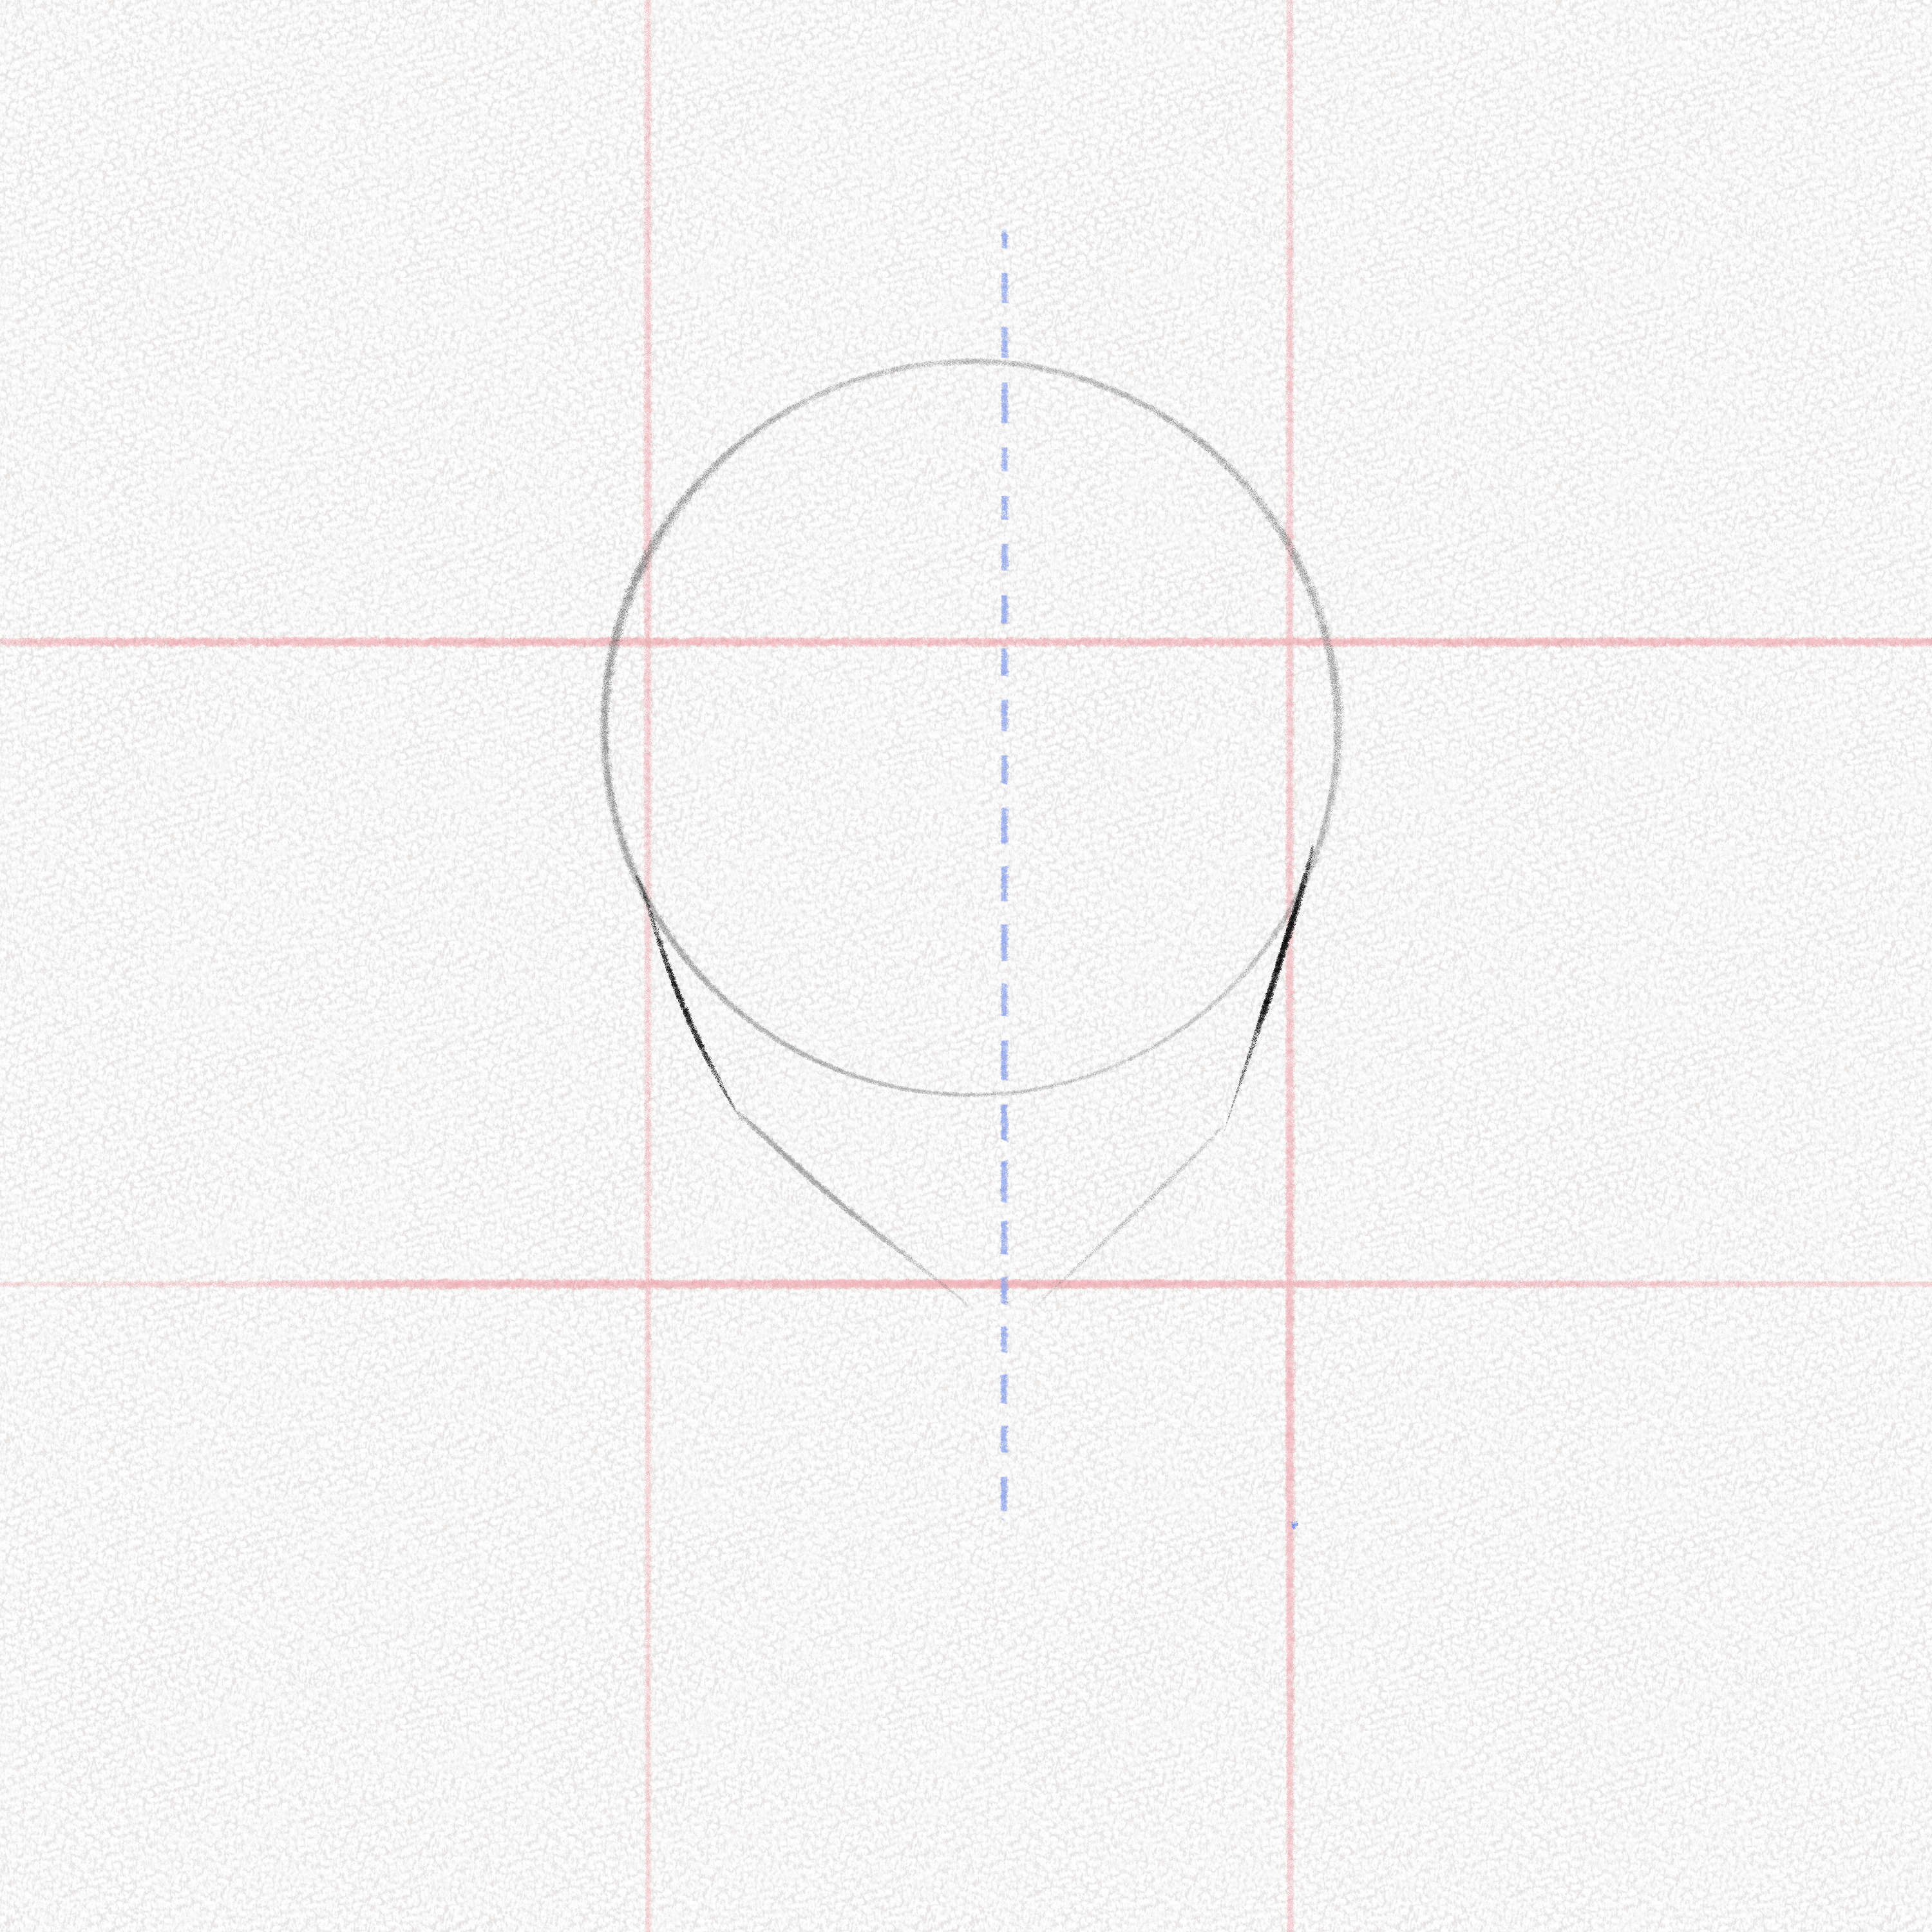
Step 6: Draw another subtle line
Draw a horizontal line dividing the head’s circle in half.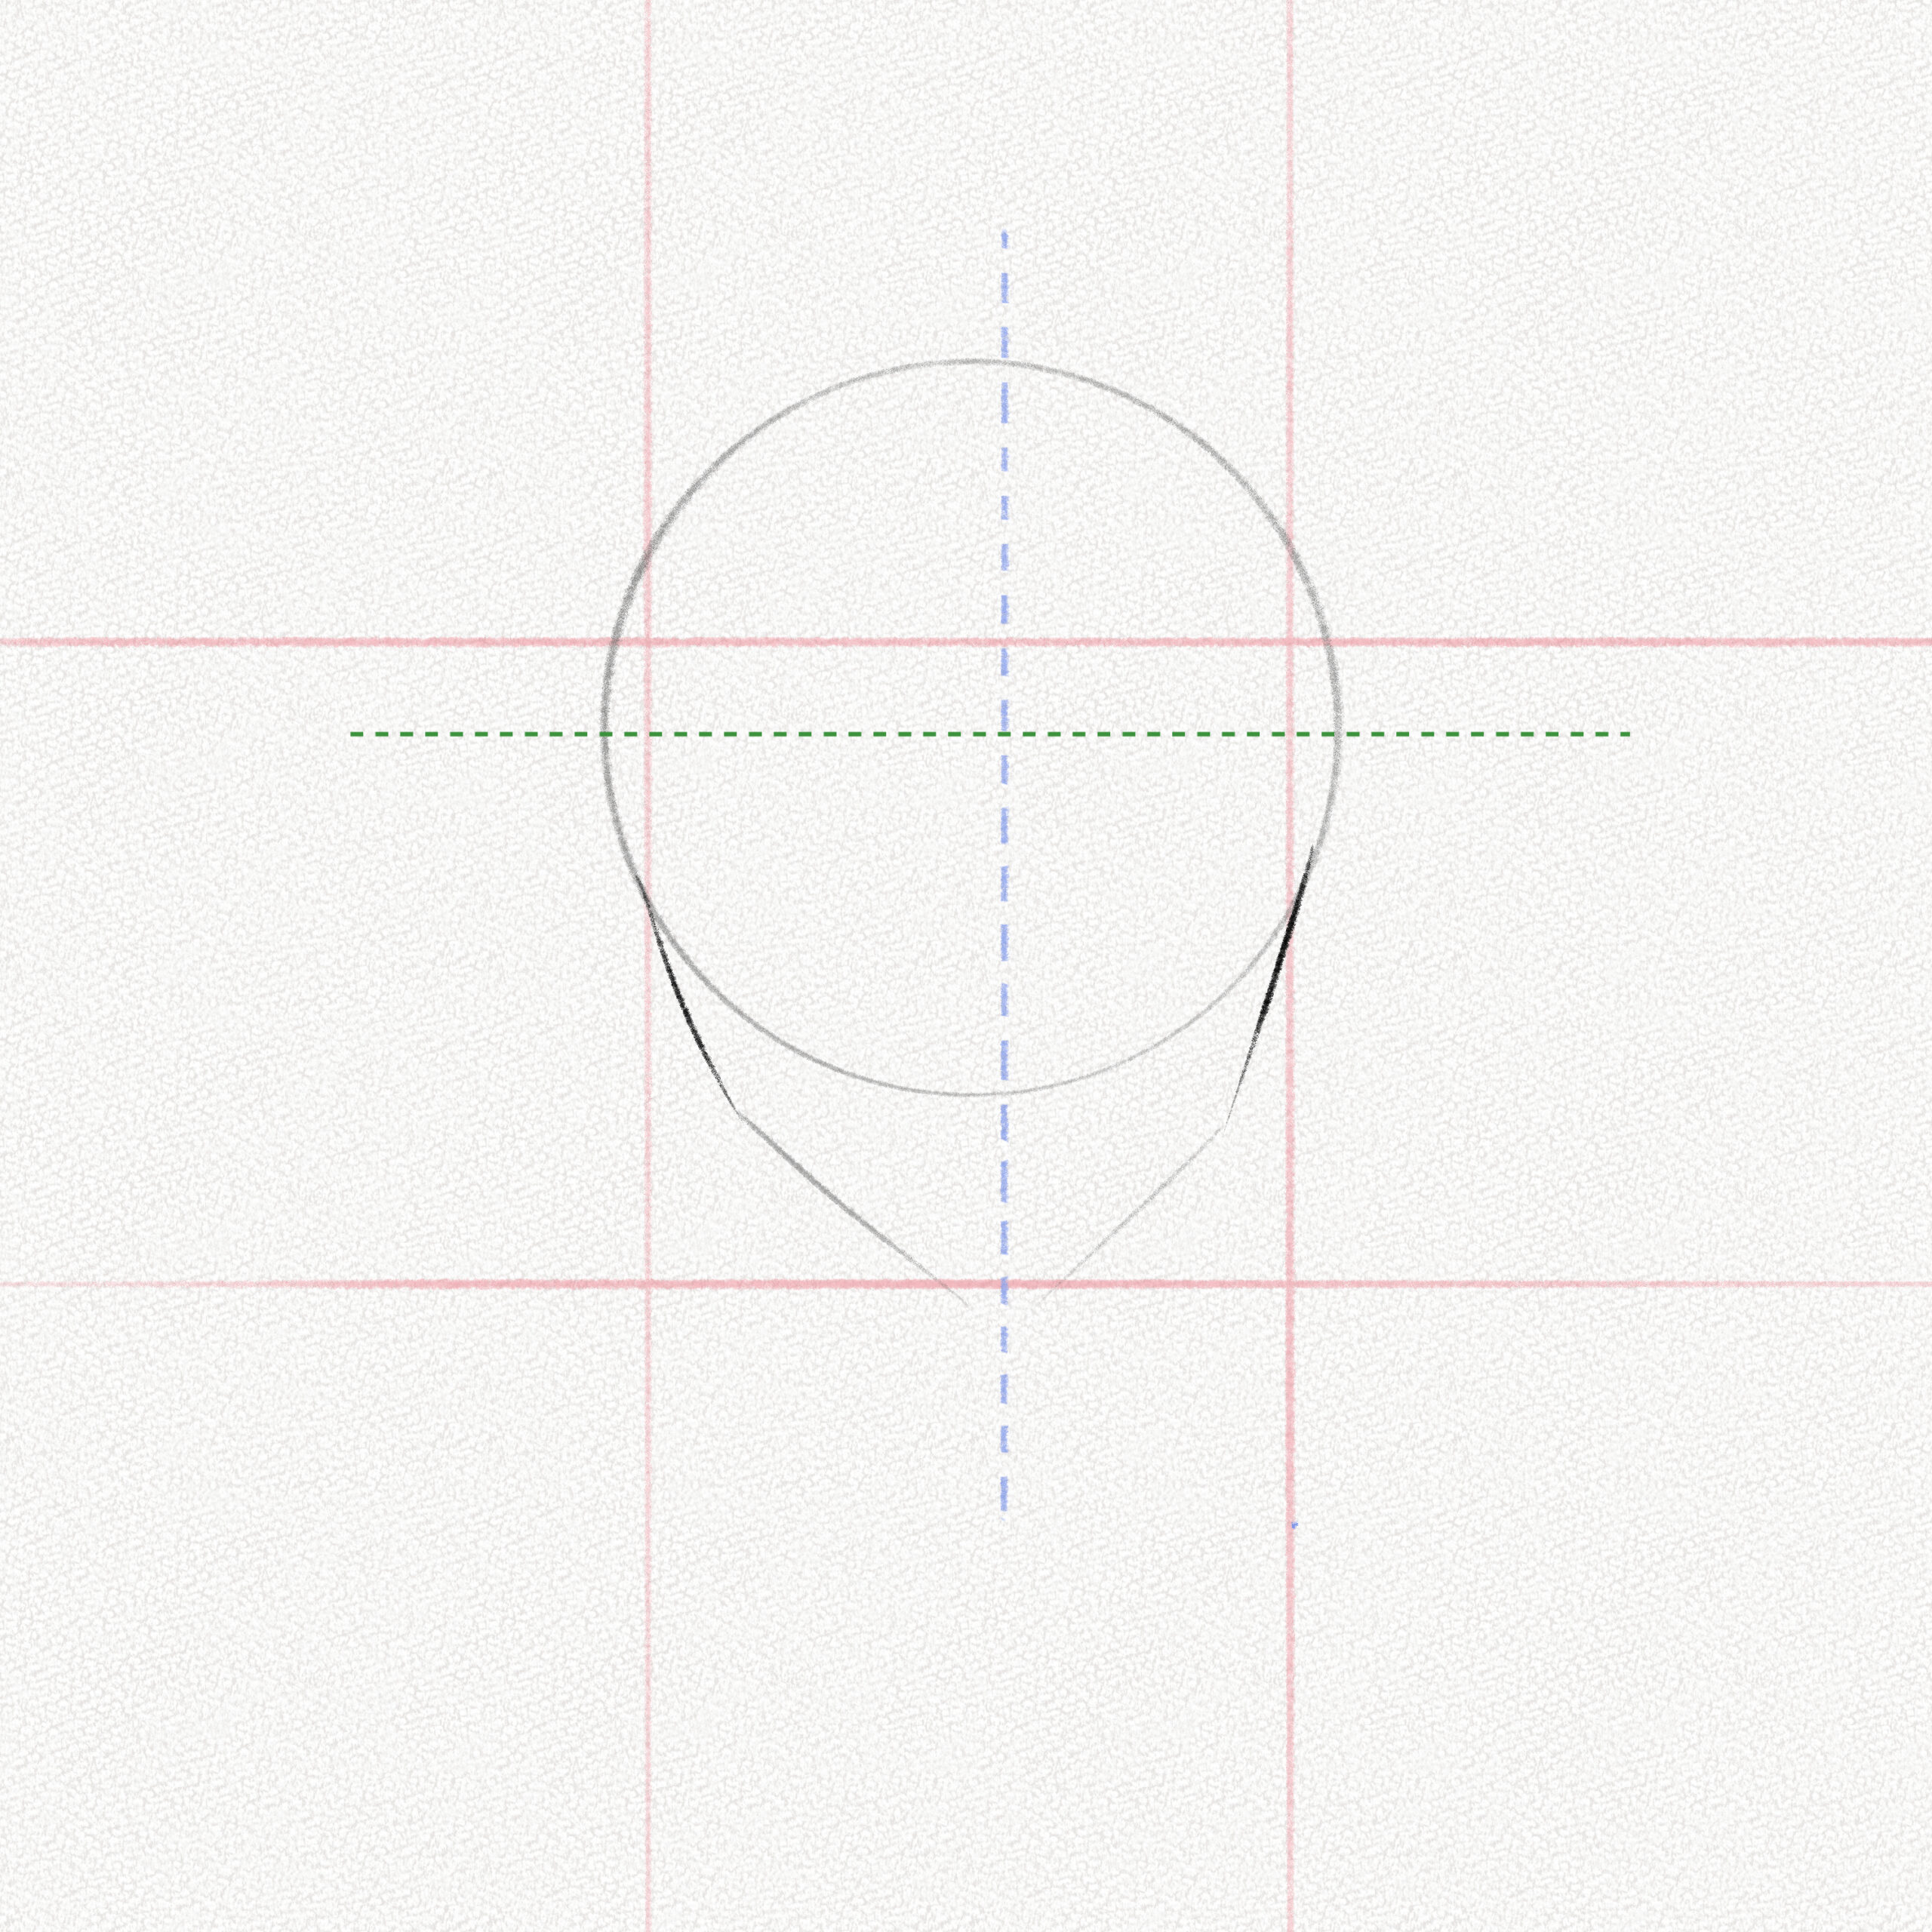
Step 7: The body structure
Visualize a cylinder that comes from the base of the head’s circle. Make it thin but not too much.

Draw a rectangle and then connect the upper corners to the neck forming two triangles.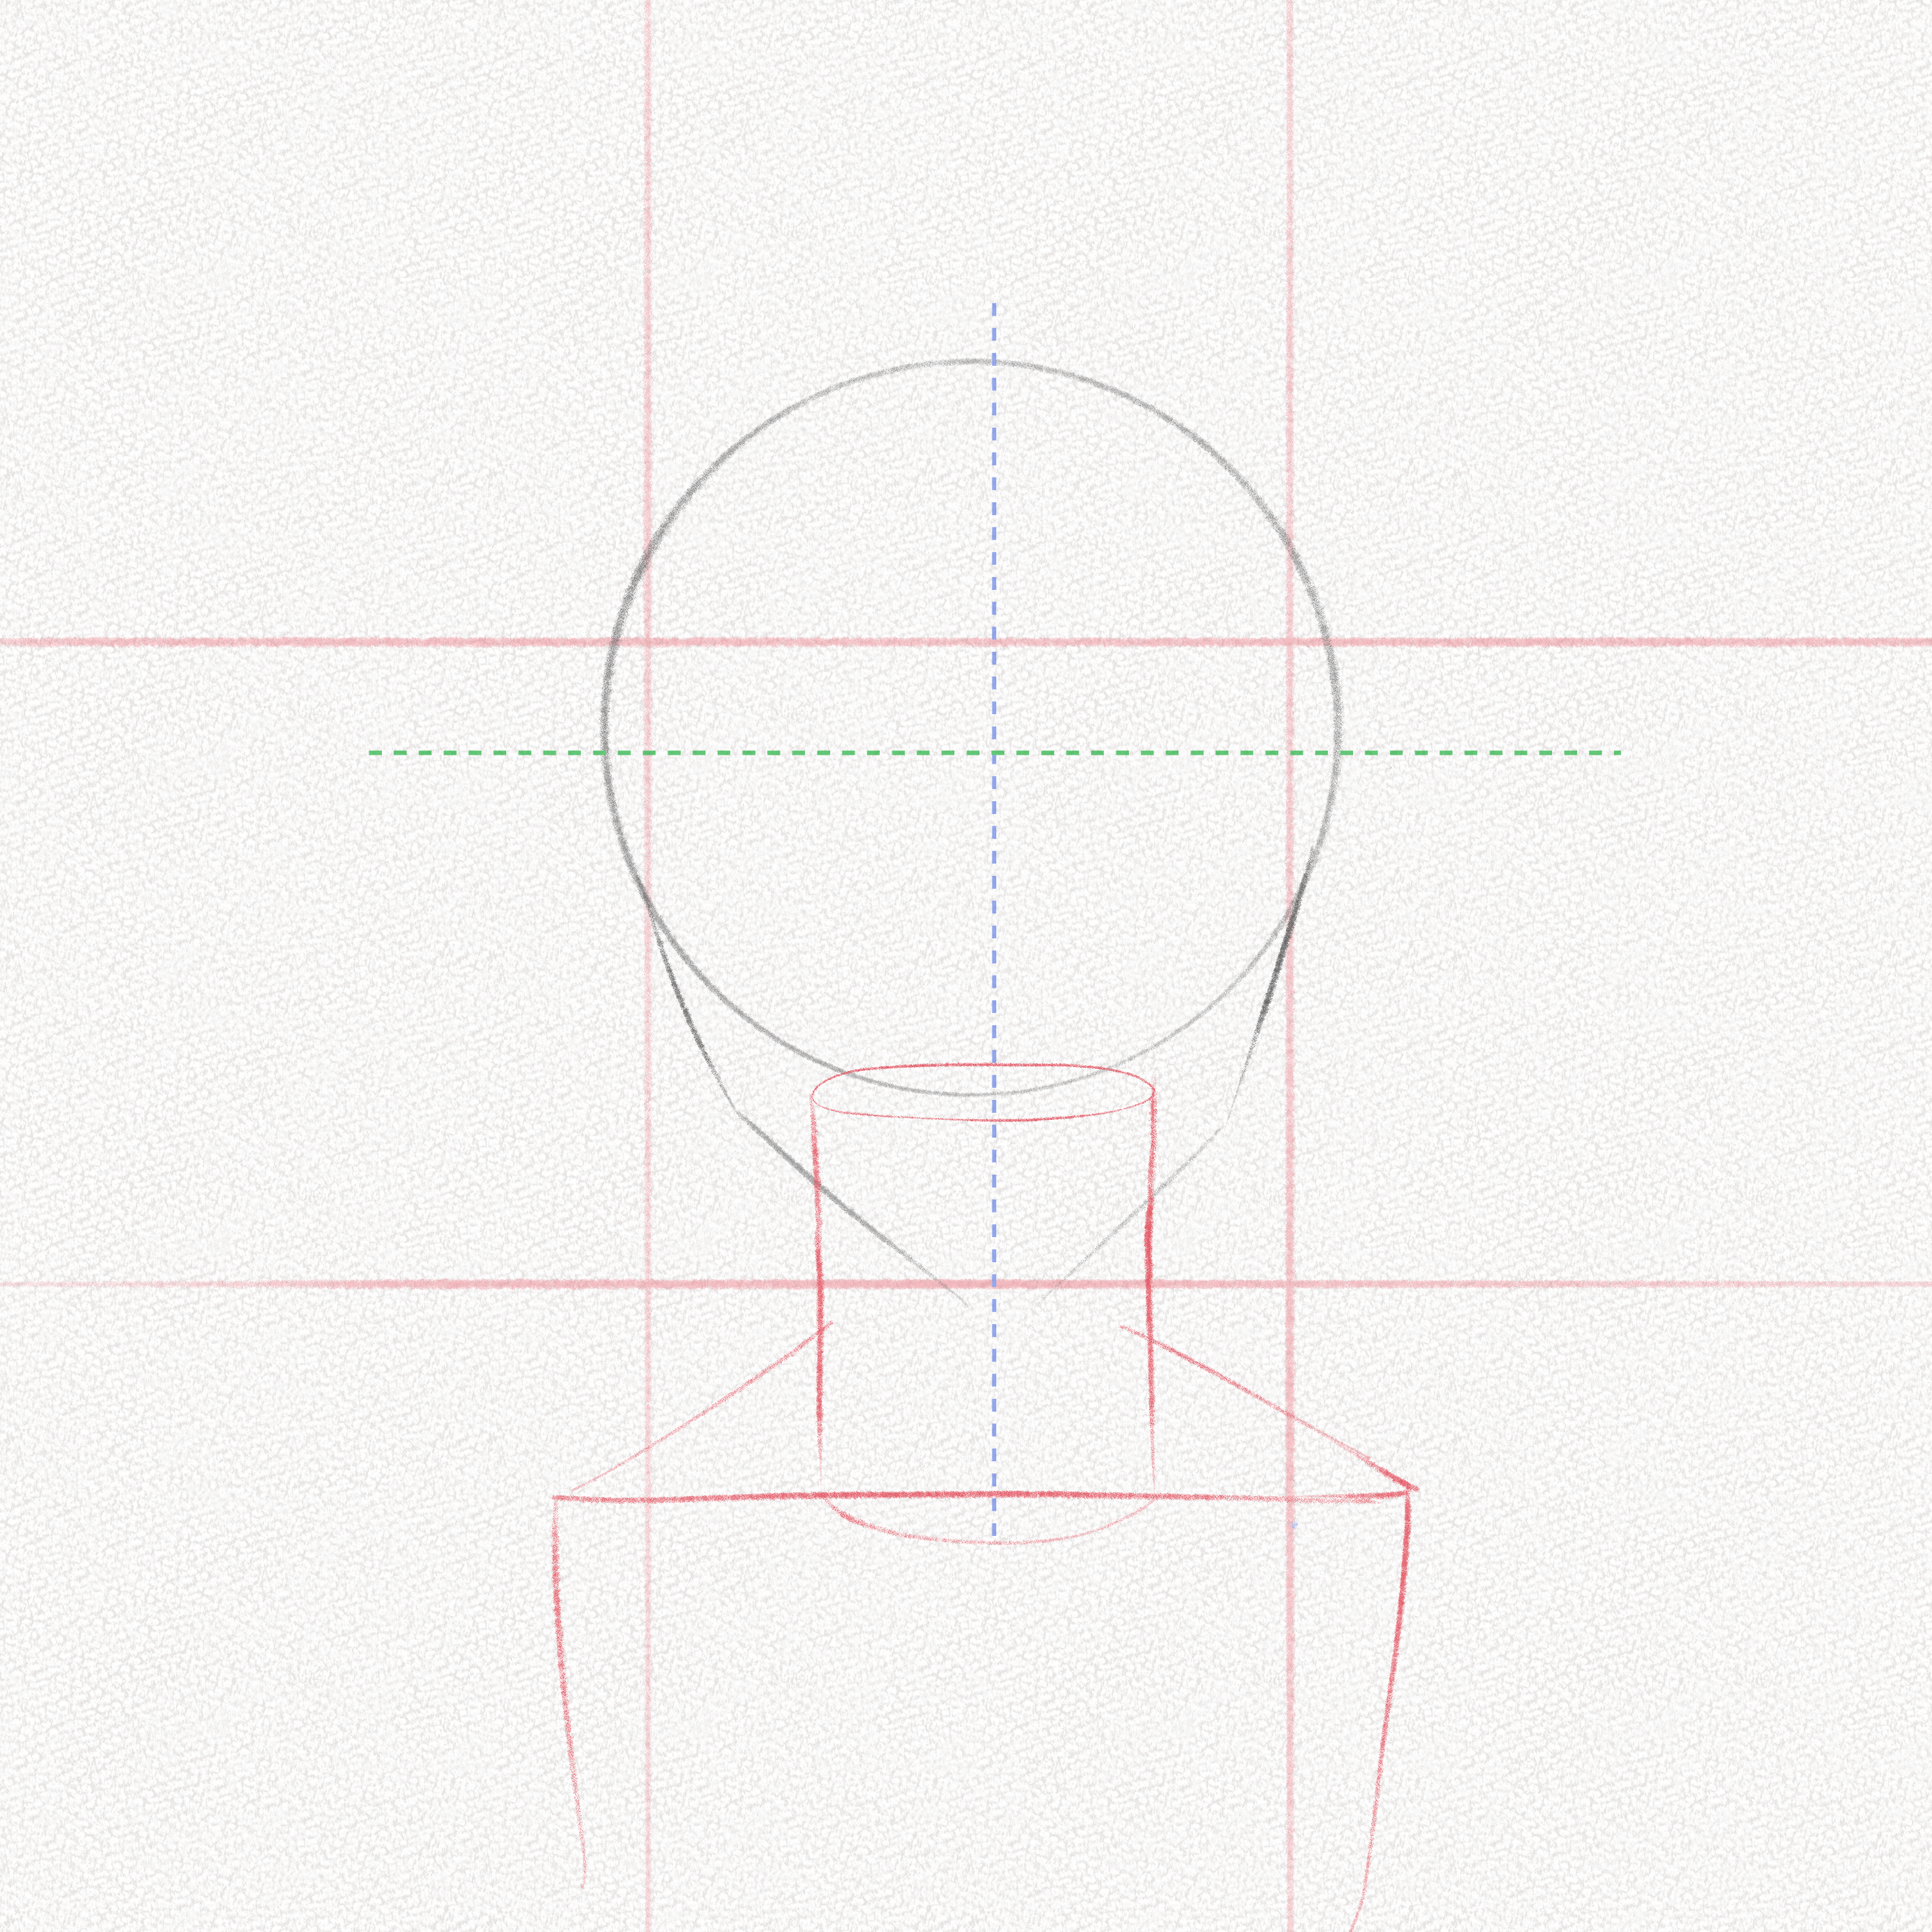
Pull two curved lines for the arms.
Step 8: Outline
Use your kneaded eraser to erase the previous marks making them barely visible and outline the body using organic lines.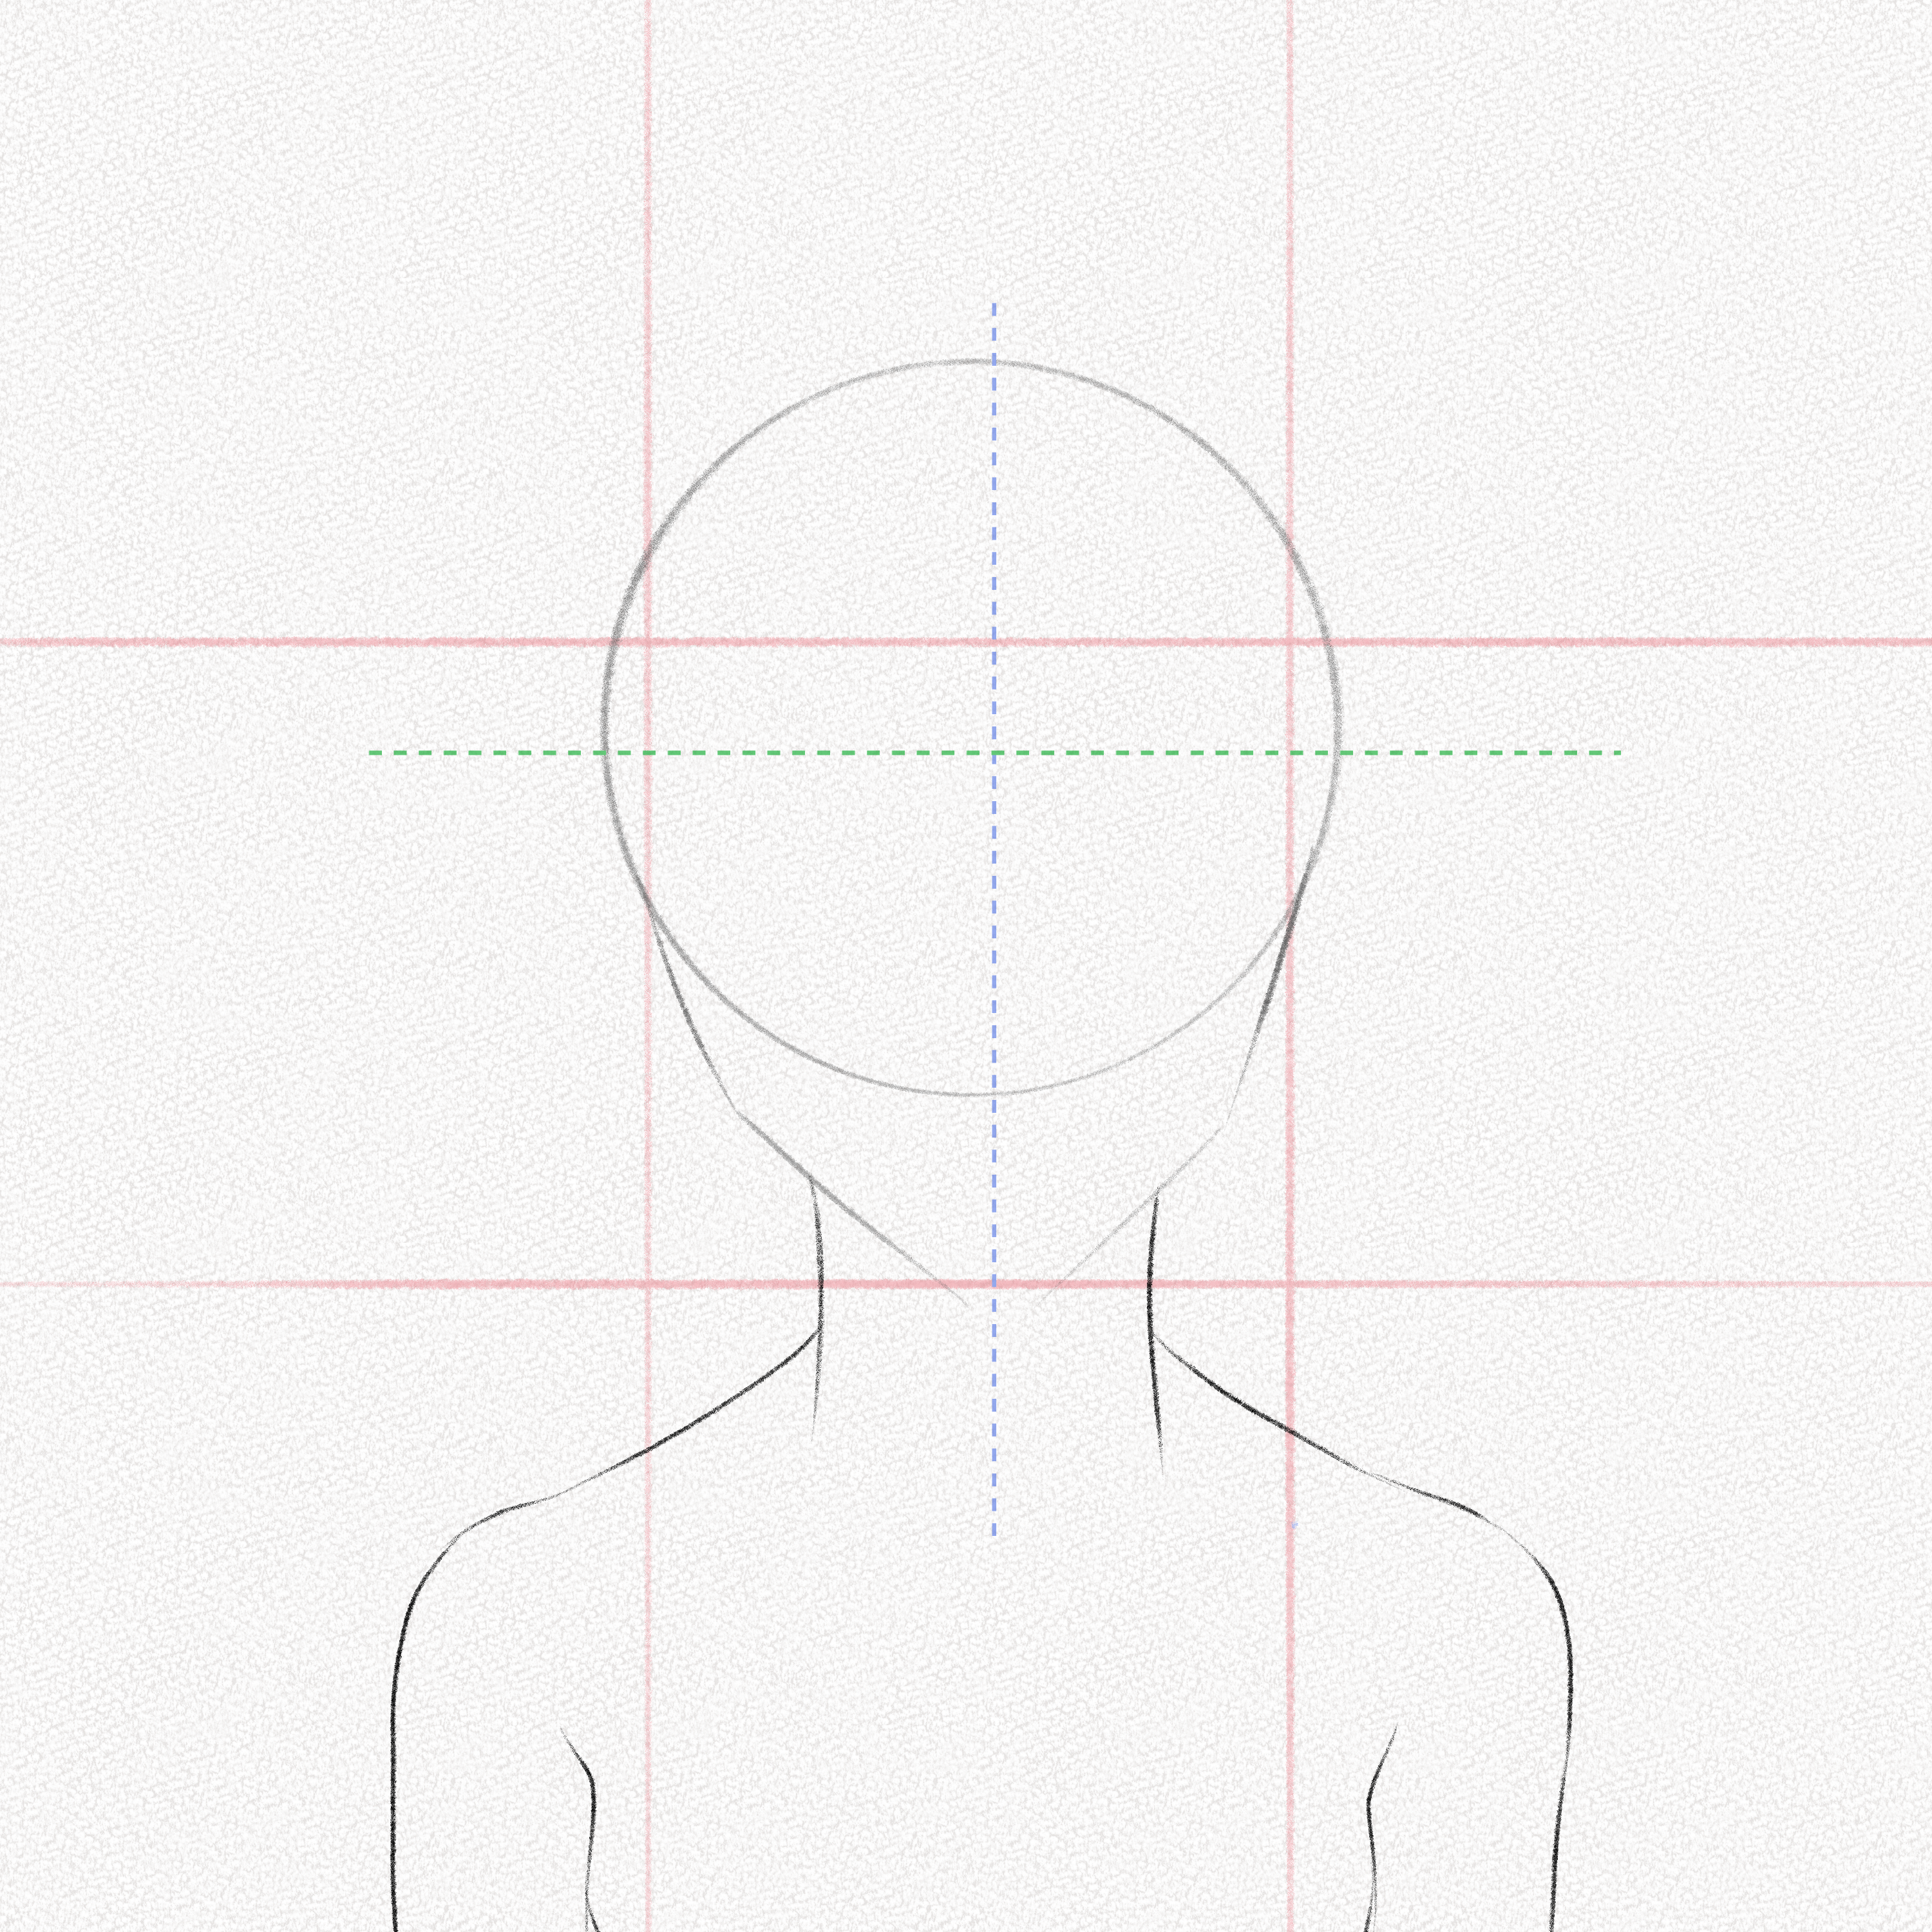
Step 9: Draw the eyebrows and ears
Draw the eyebrows with two curved lines right below the line that splits the head’s circle in half horizontally. Use them as a reference to draw the ears. 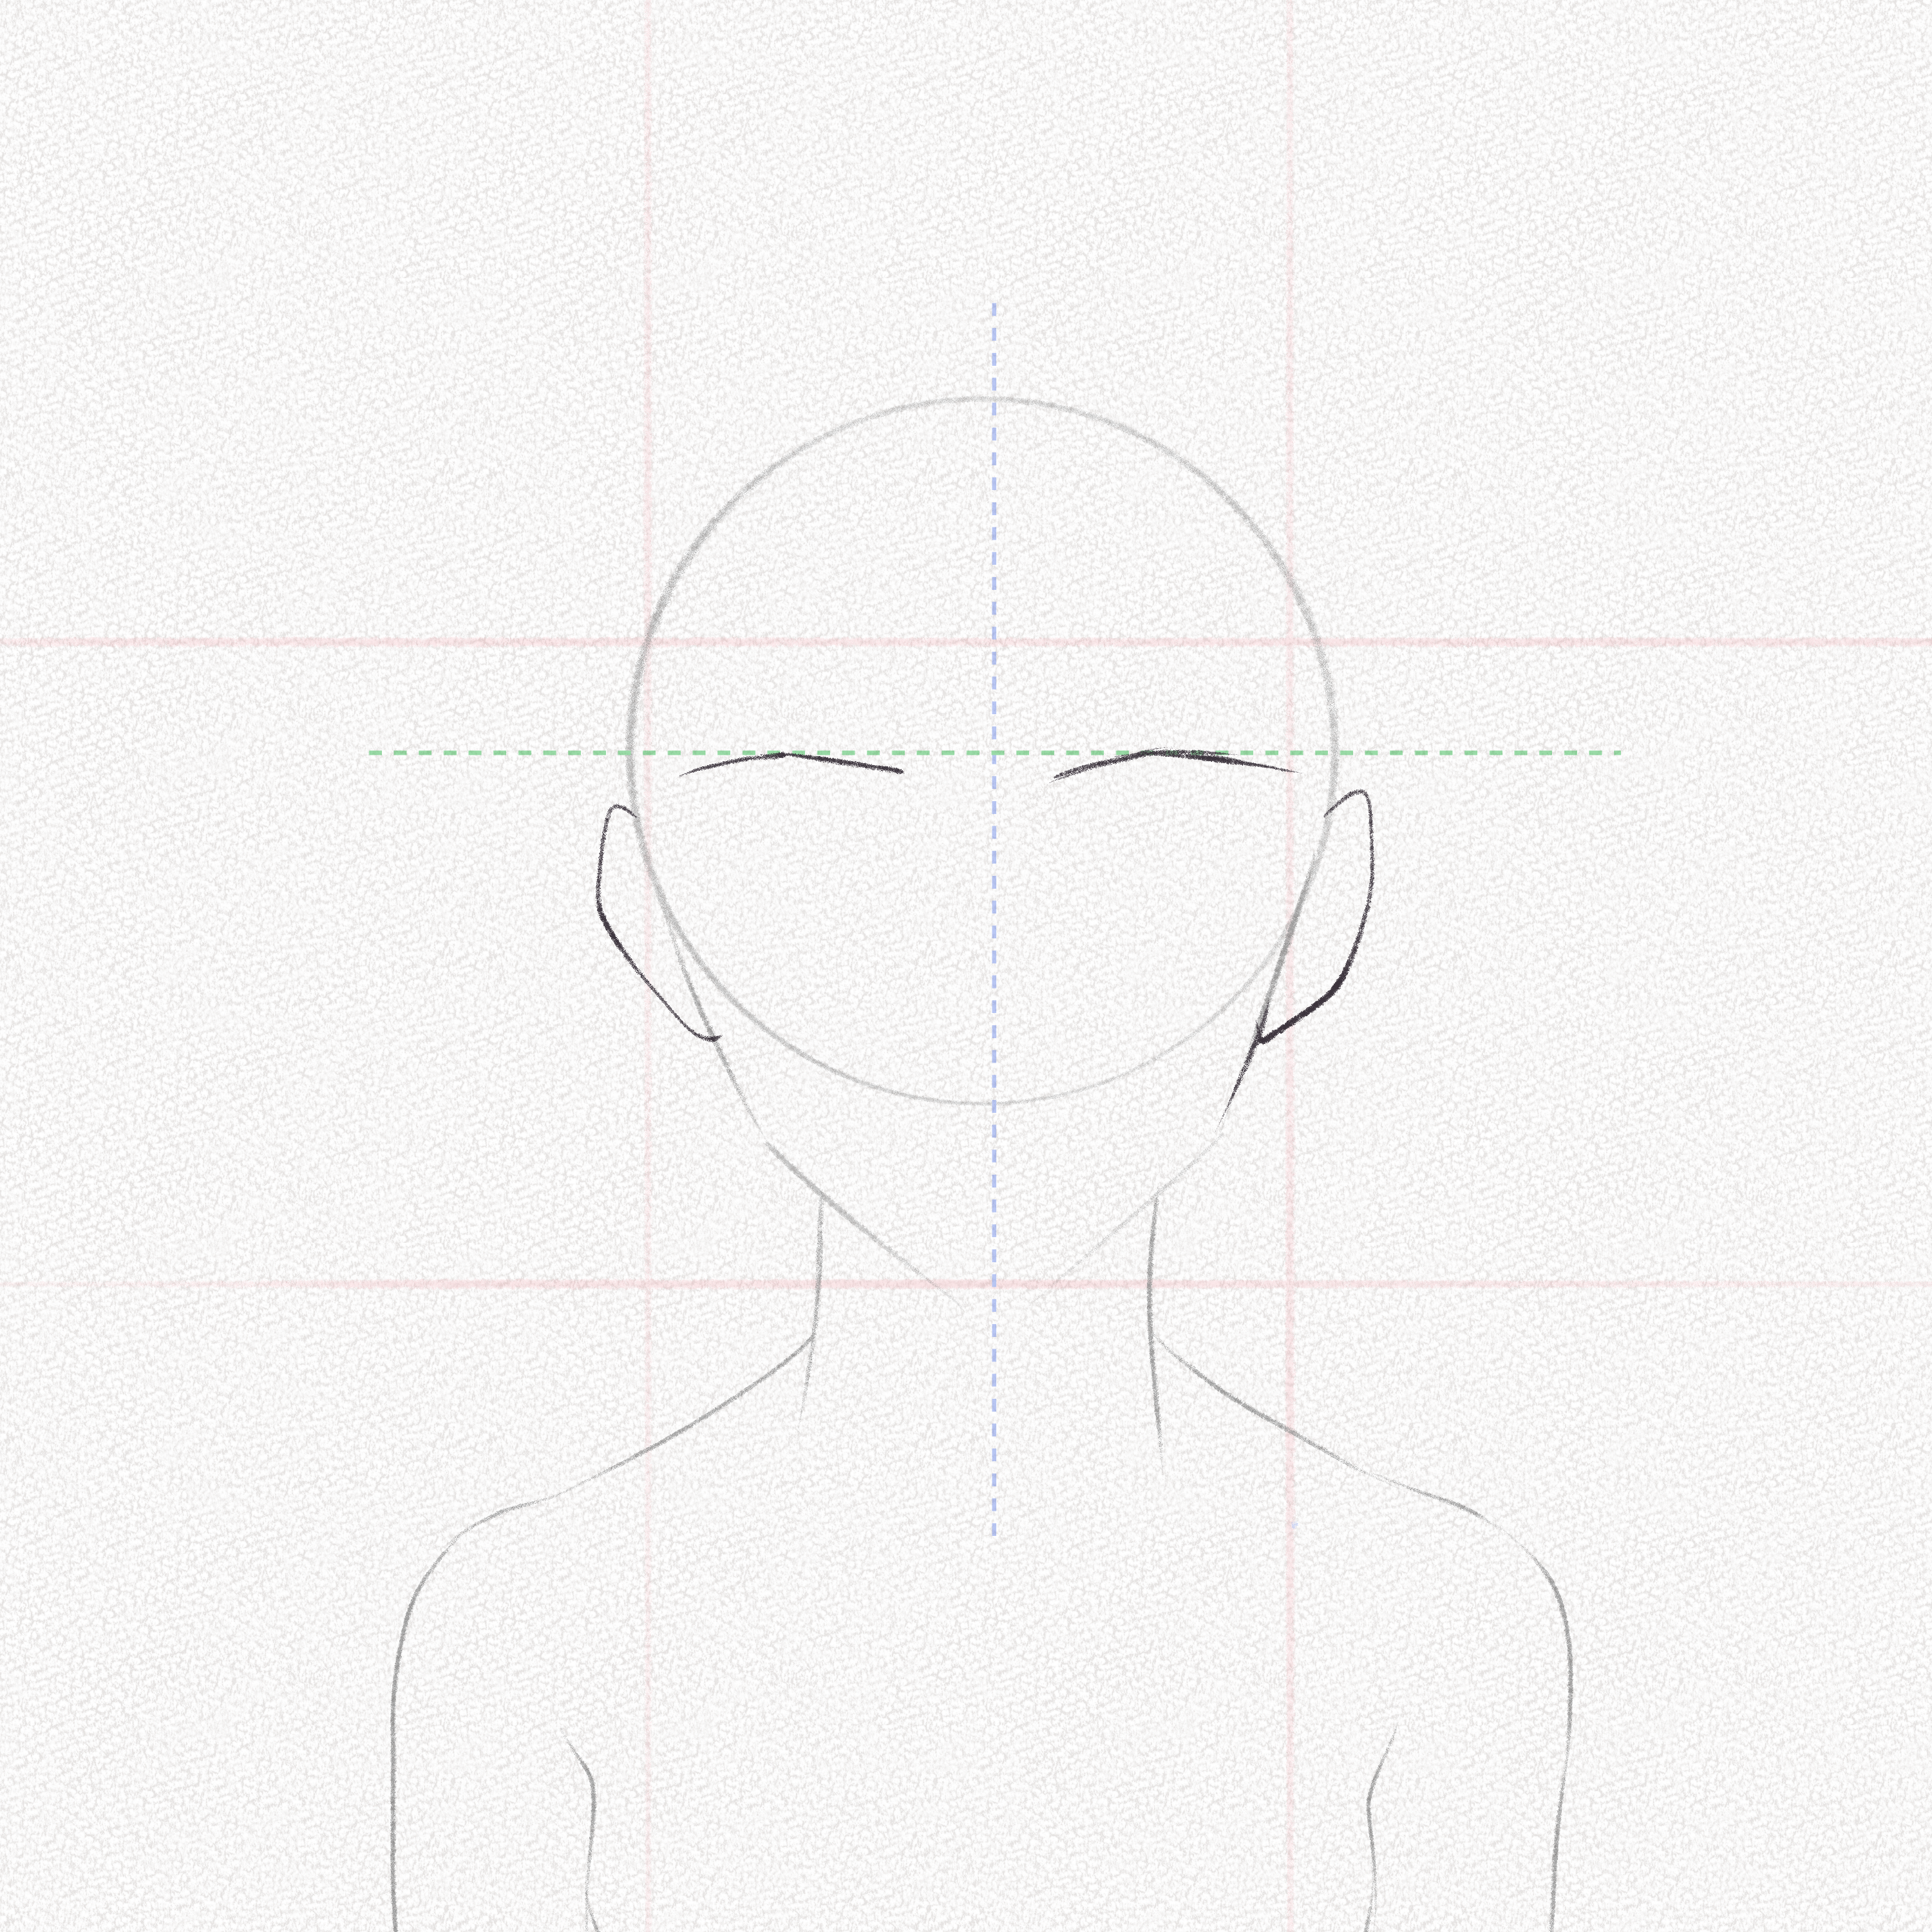
Step 10: Mark the position of the eyes nose and mouth
Begin at the center point and use a measuring tool to mark three evenly spaced spots for the eyes. Draw a diamond shape on the nose and a line slightly under the base of the head’s circle to mark the position of the mouth.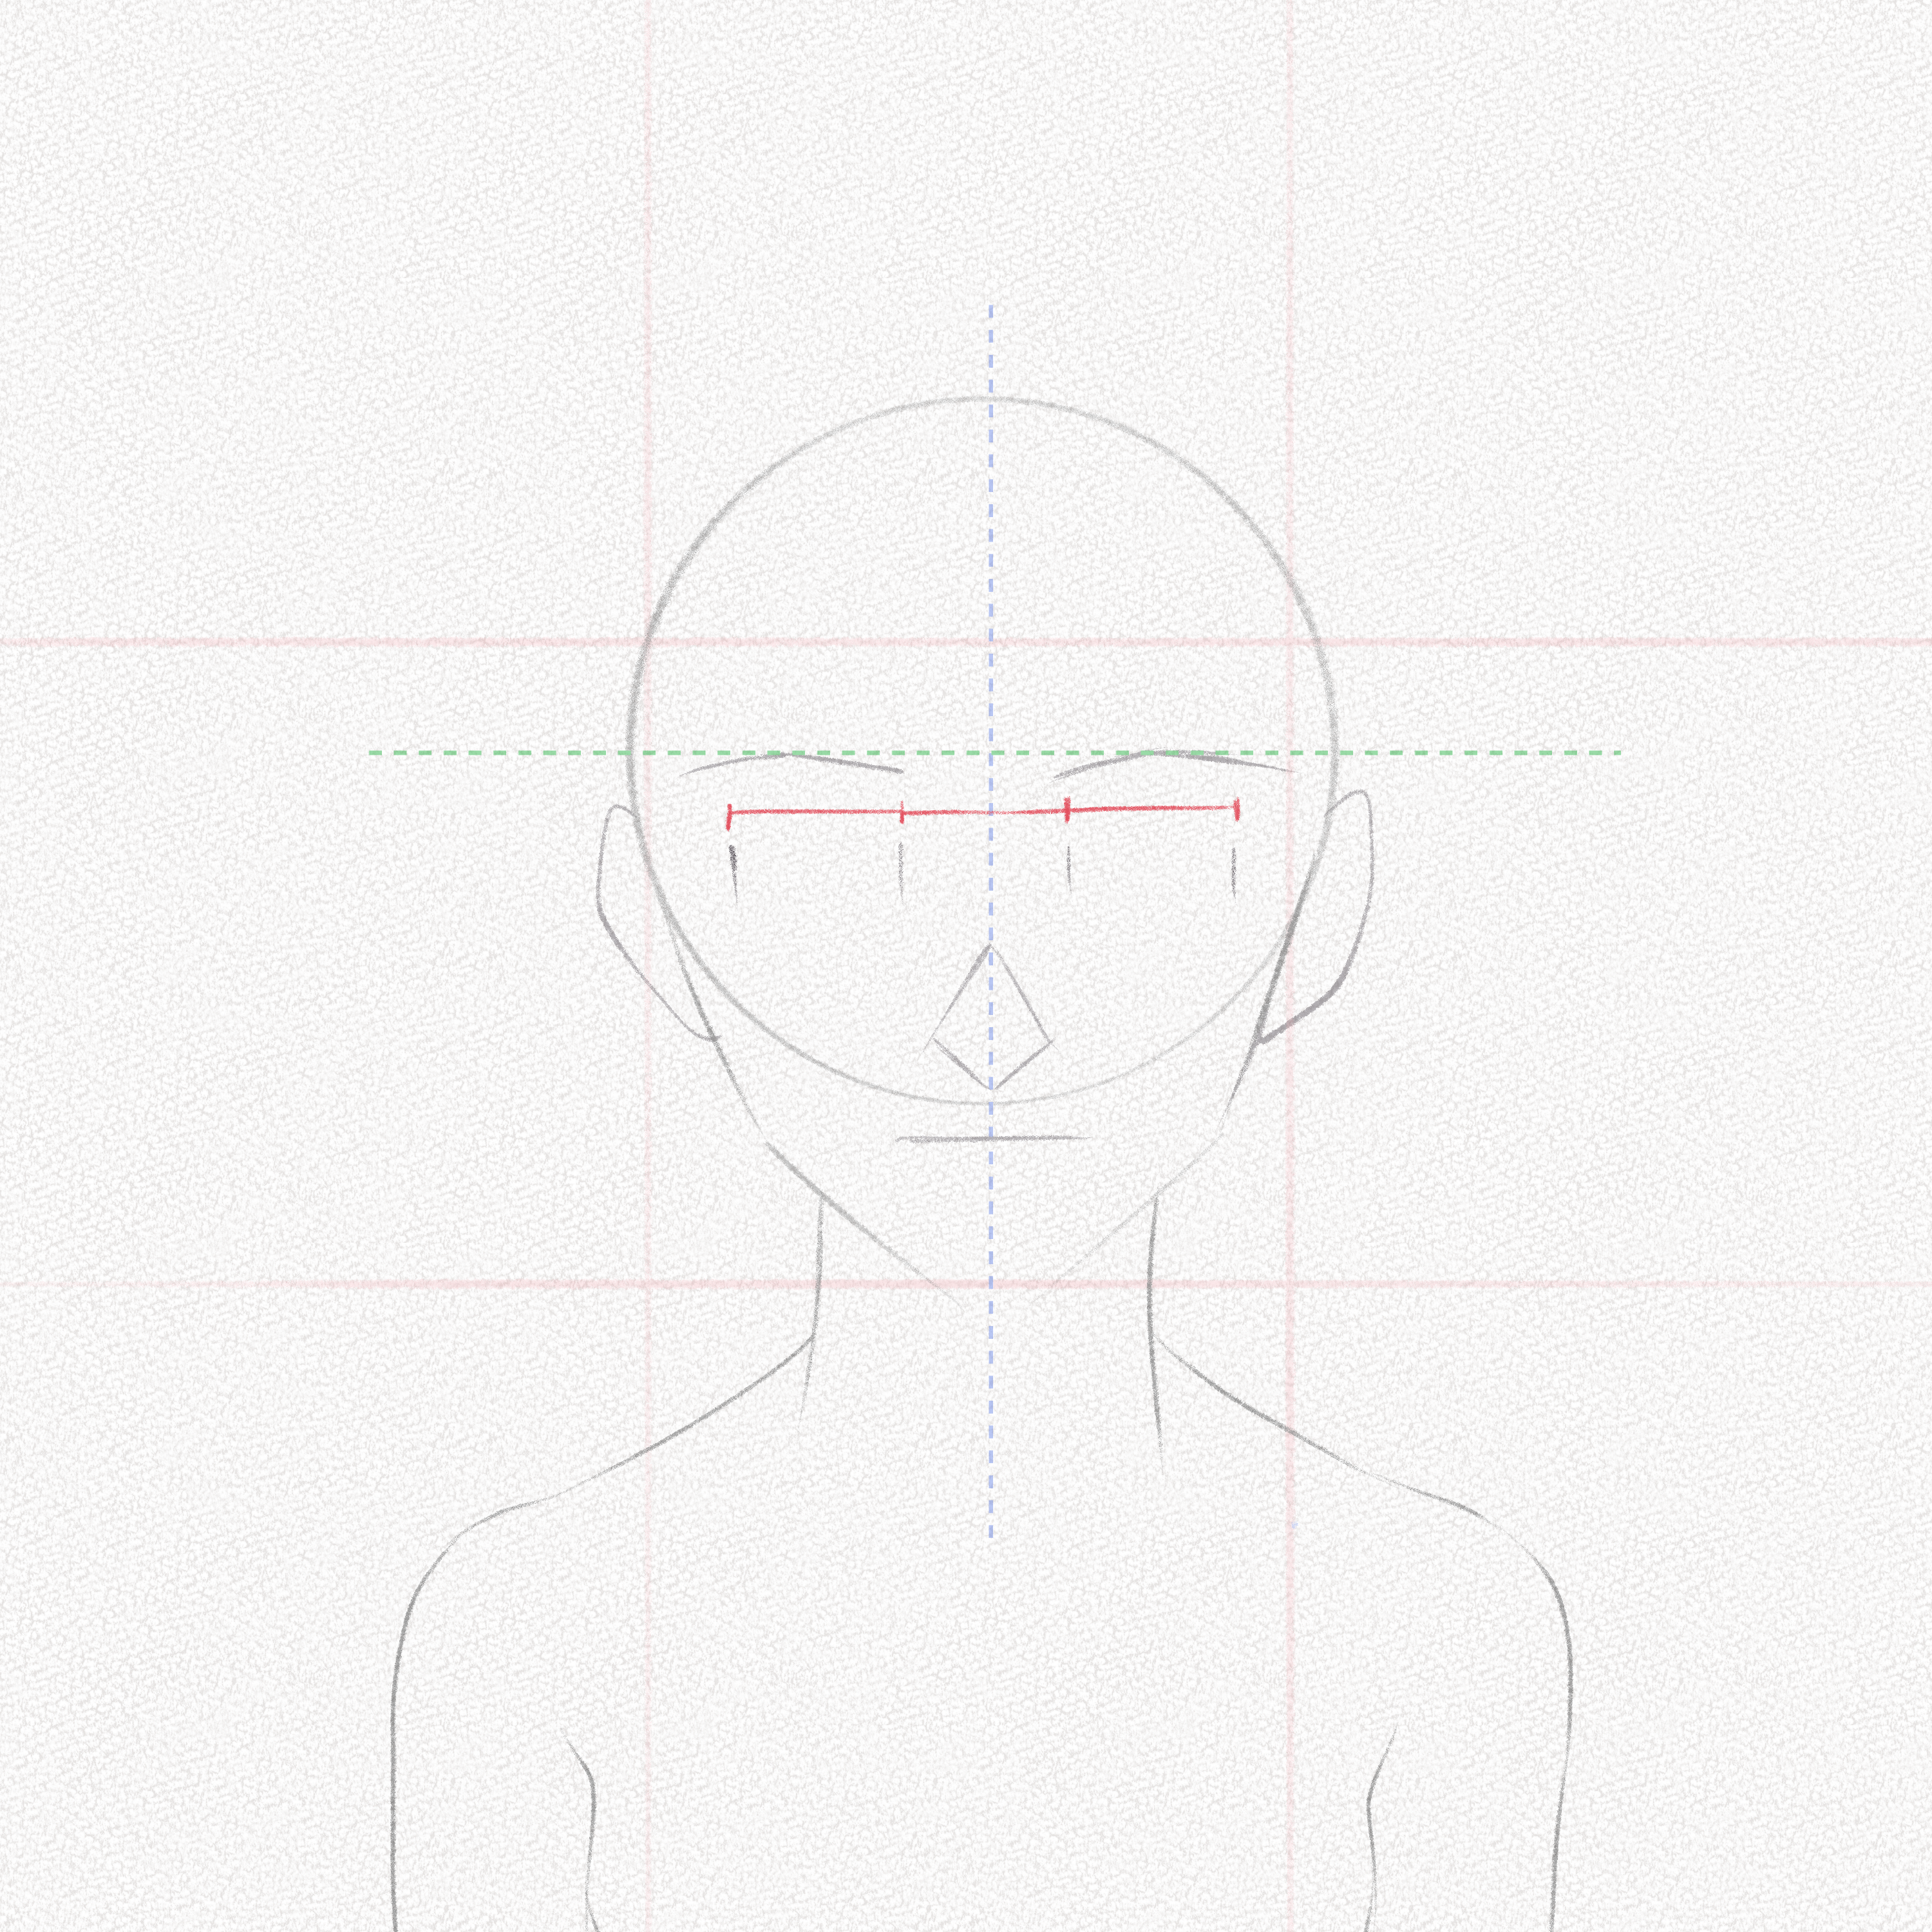
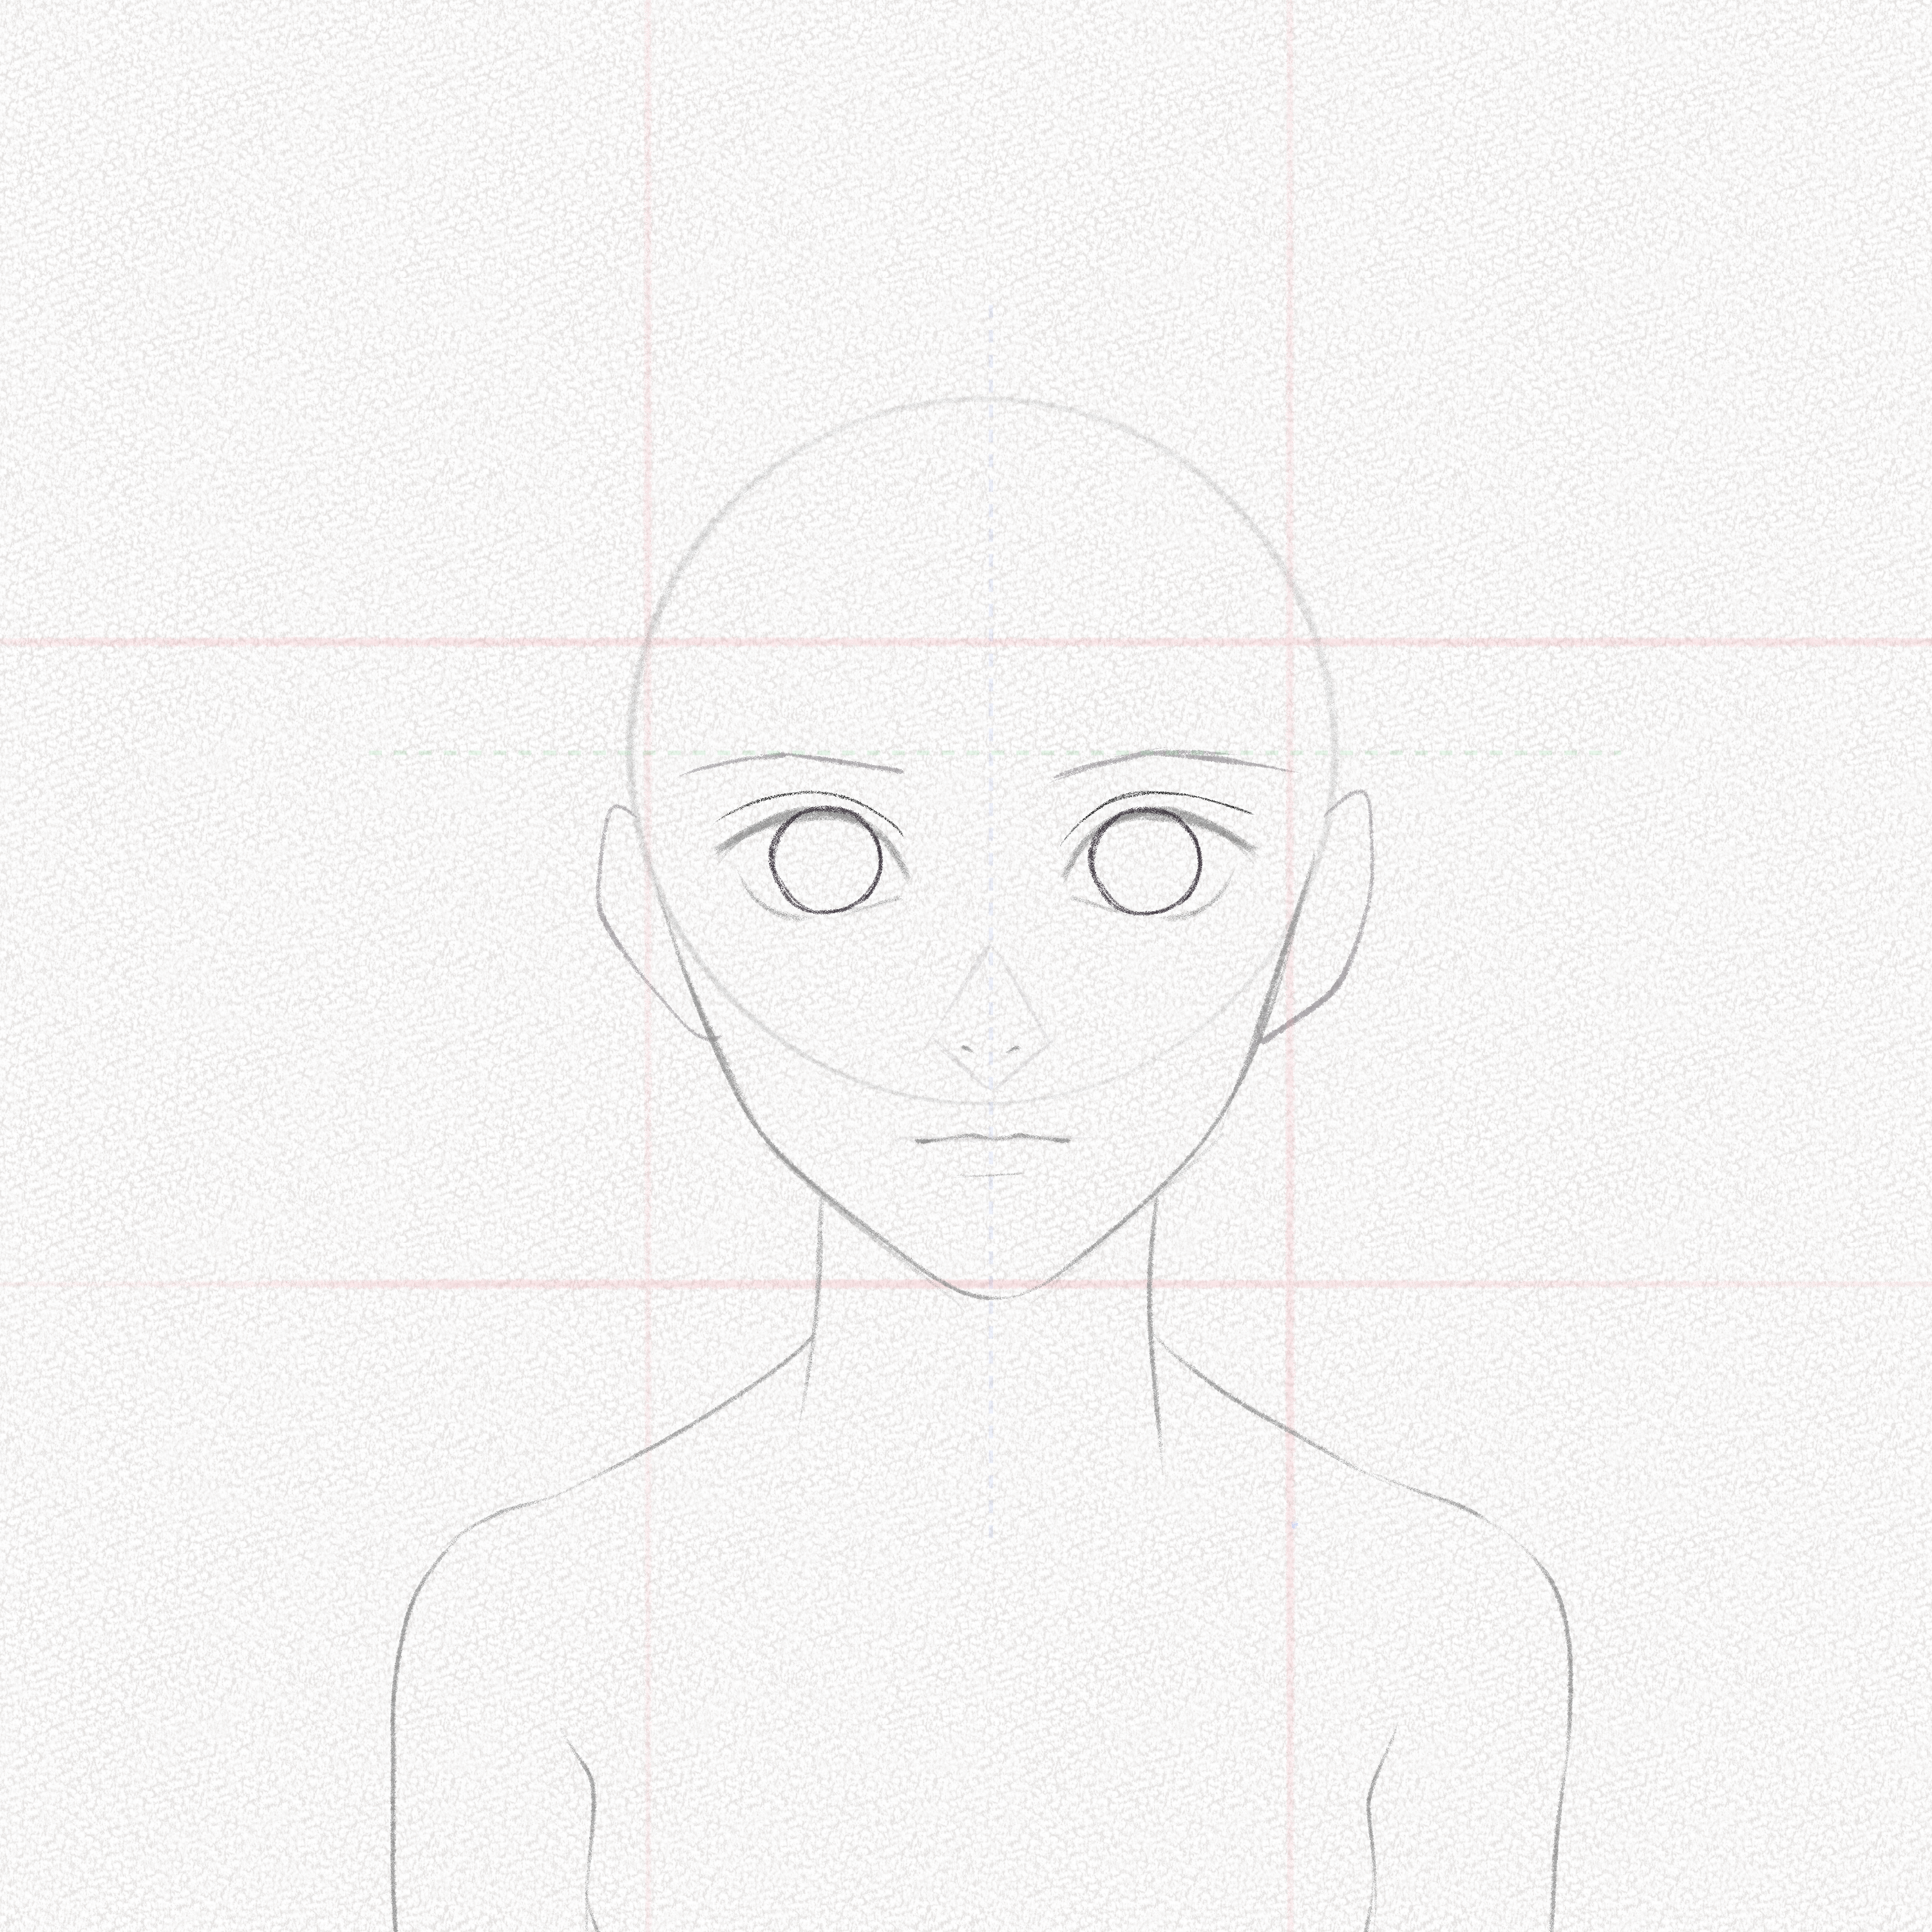
Step 11: Draw the eyes
Erase your guidelines and start drawing the eyes, you can follow this tutorial where we talk about how to draw anime eyes in detail.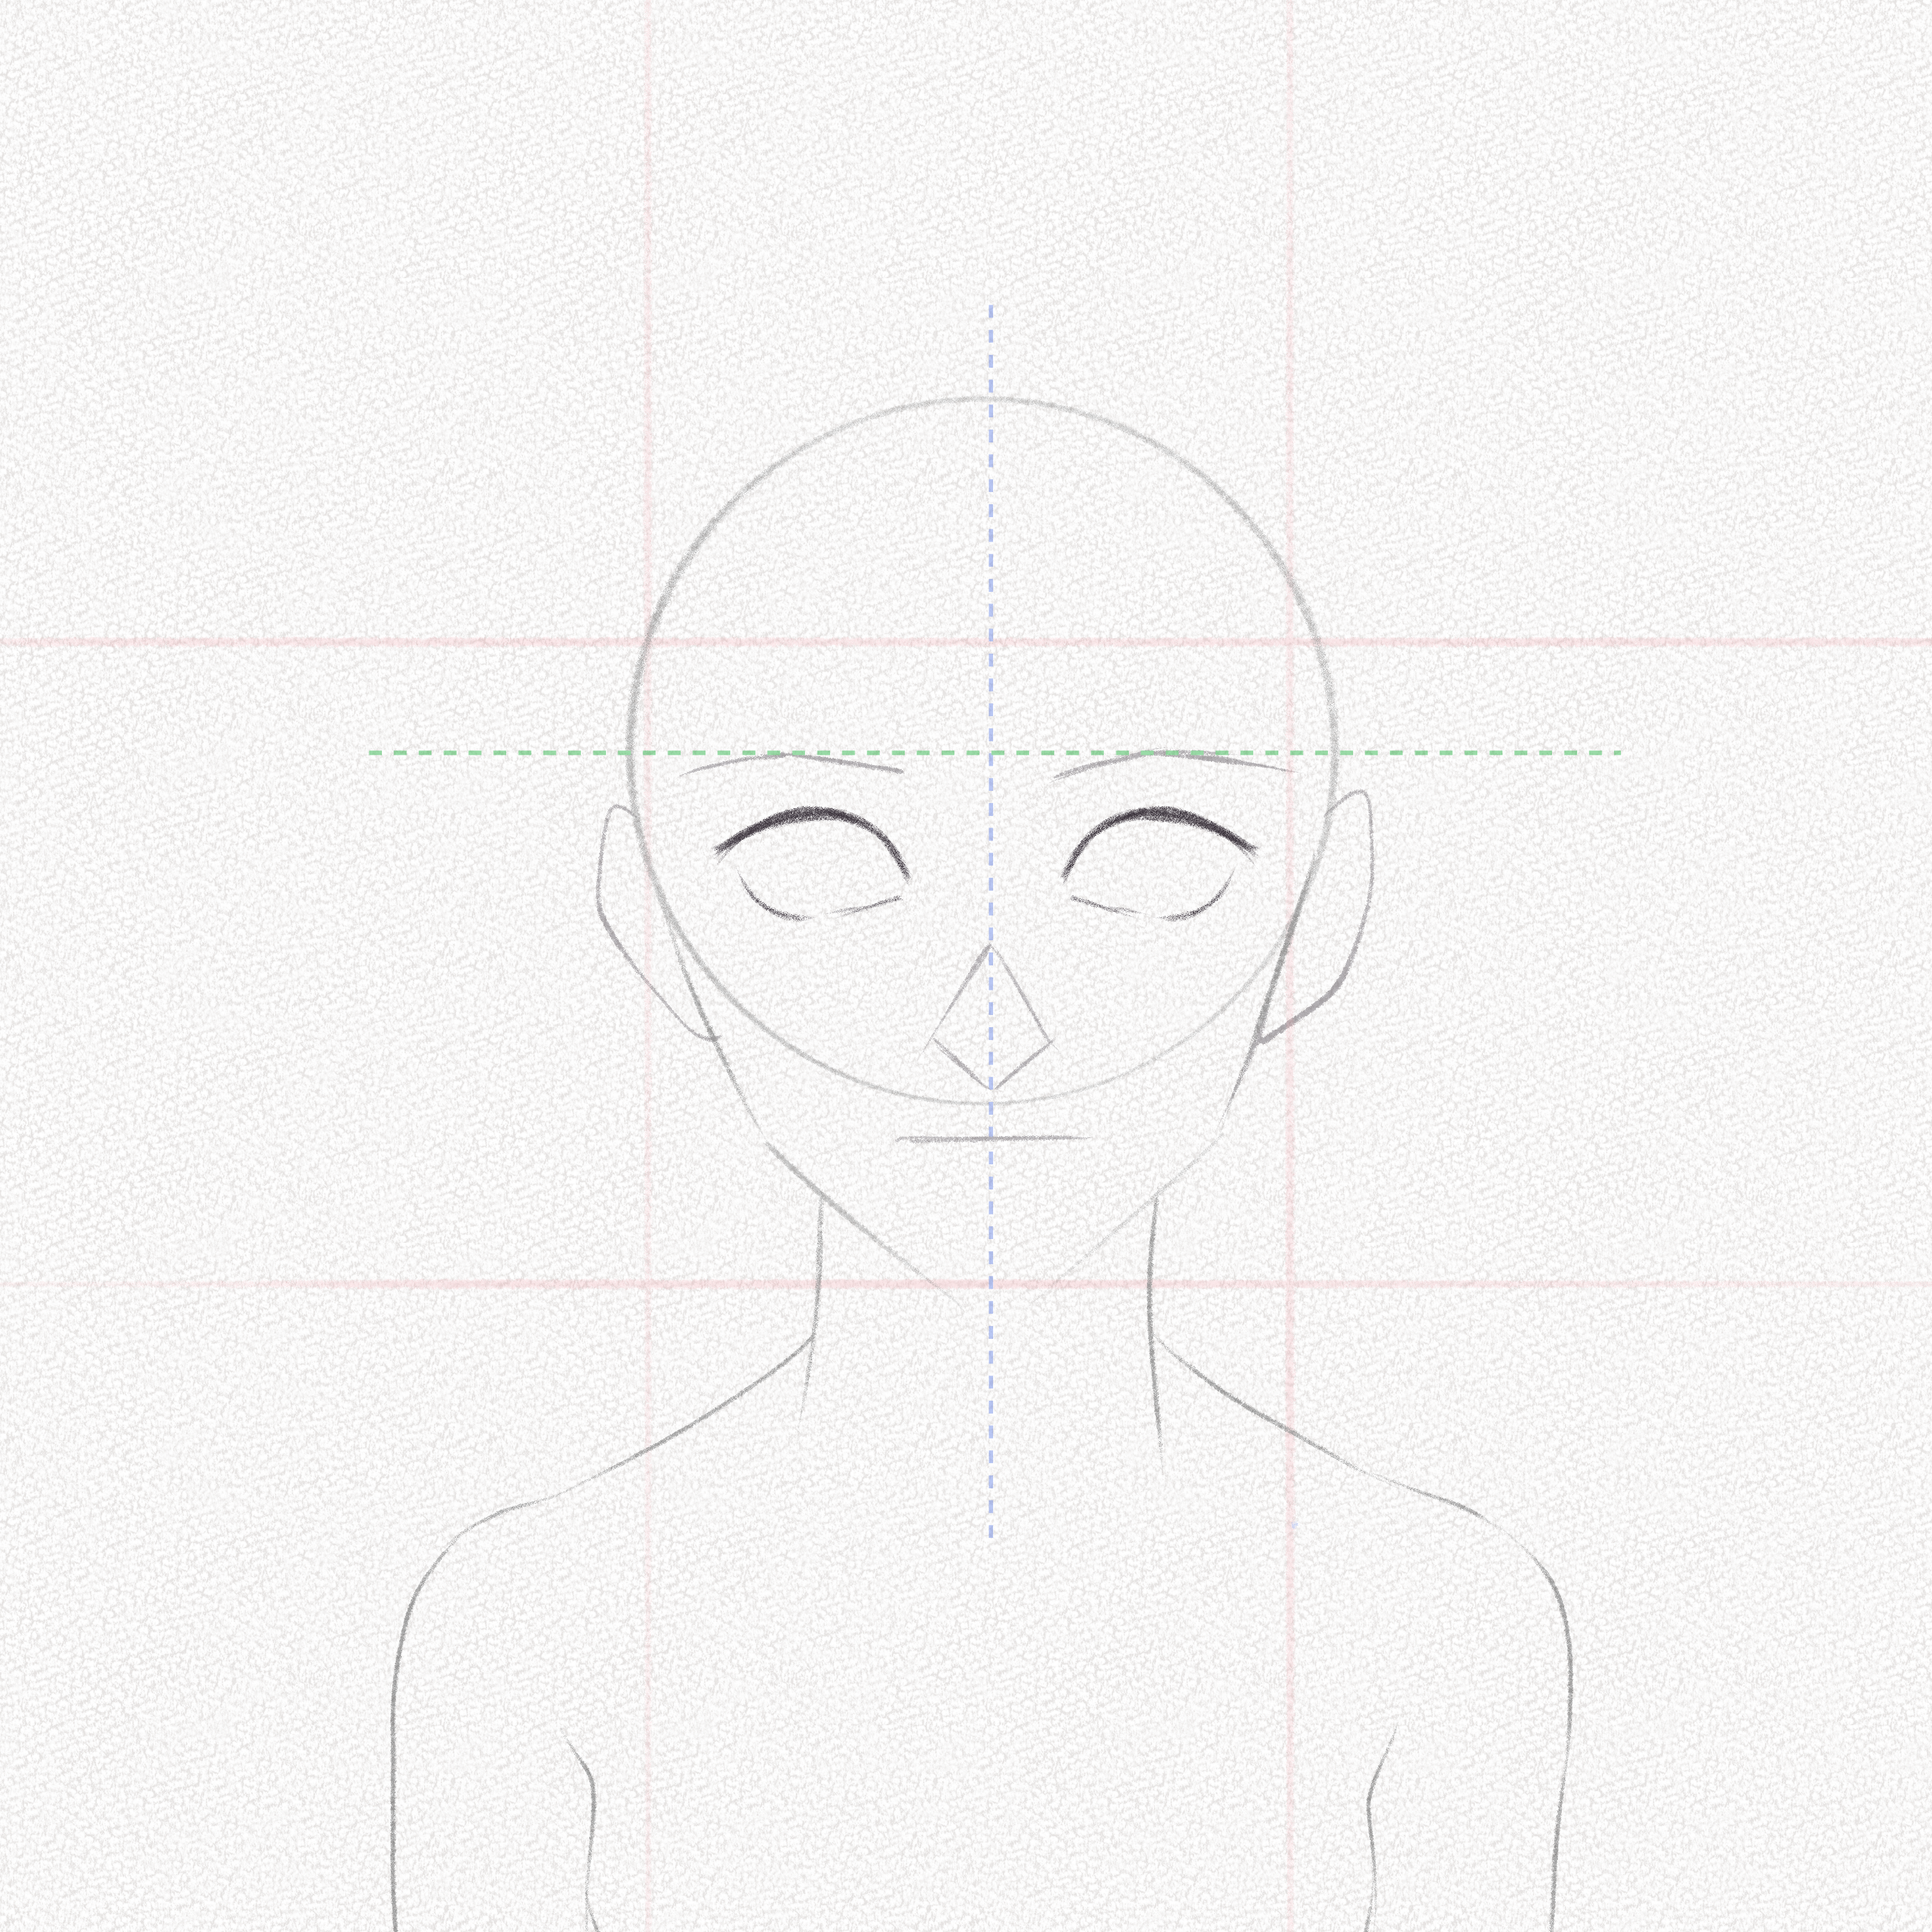
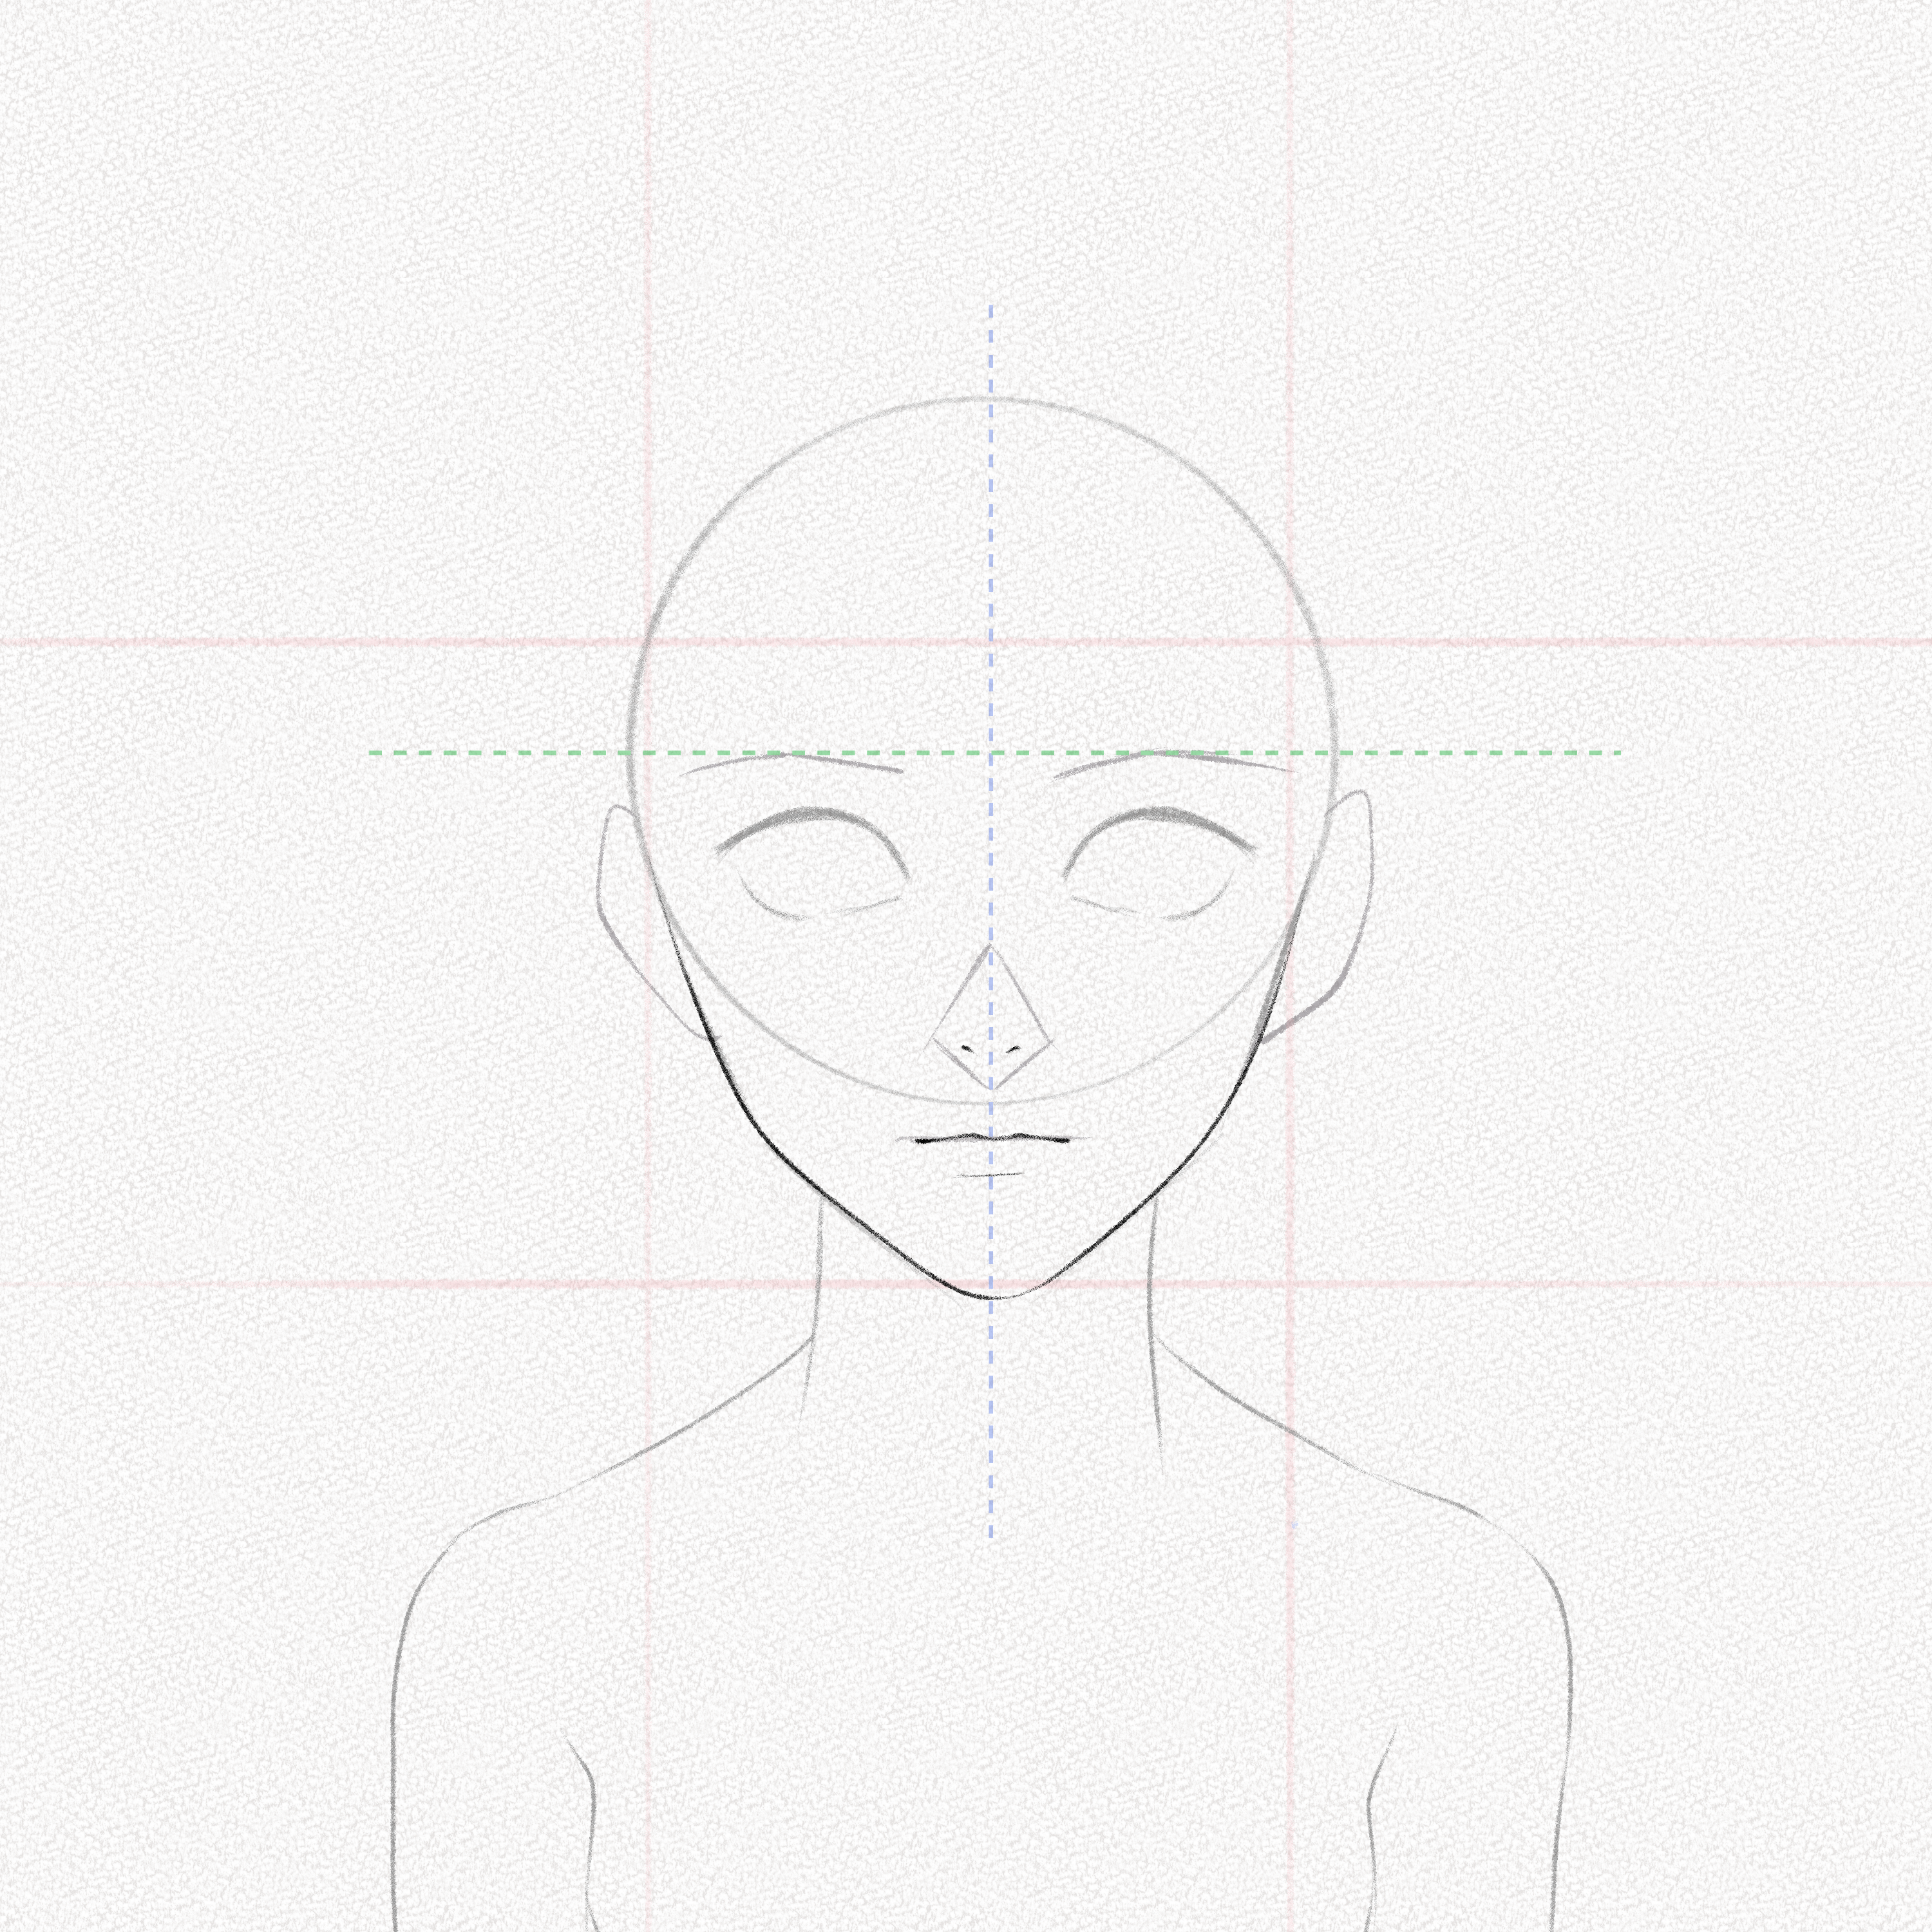
Step 12: Outline the face
Erase your guidelines for the face, nose and mouth and outline them with your 4B pencil. Draw two small lines for the nostrils and the shape of the mouth indicating the volume of the lips with a line below the bottom lip.
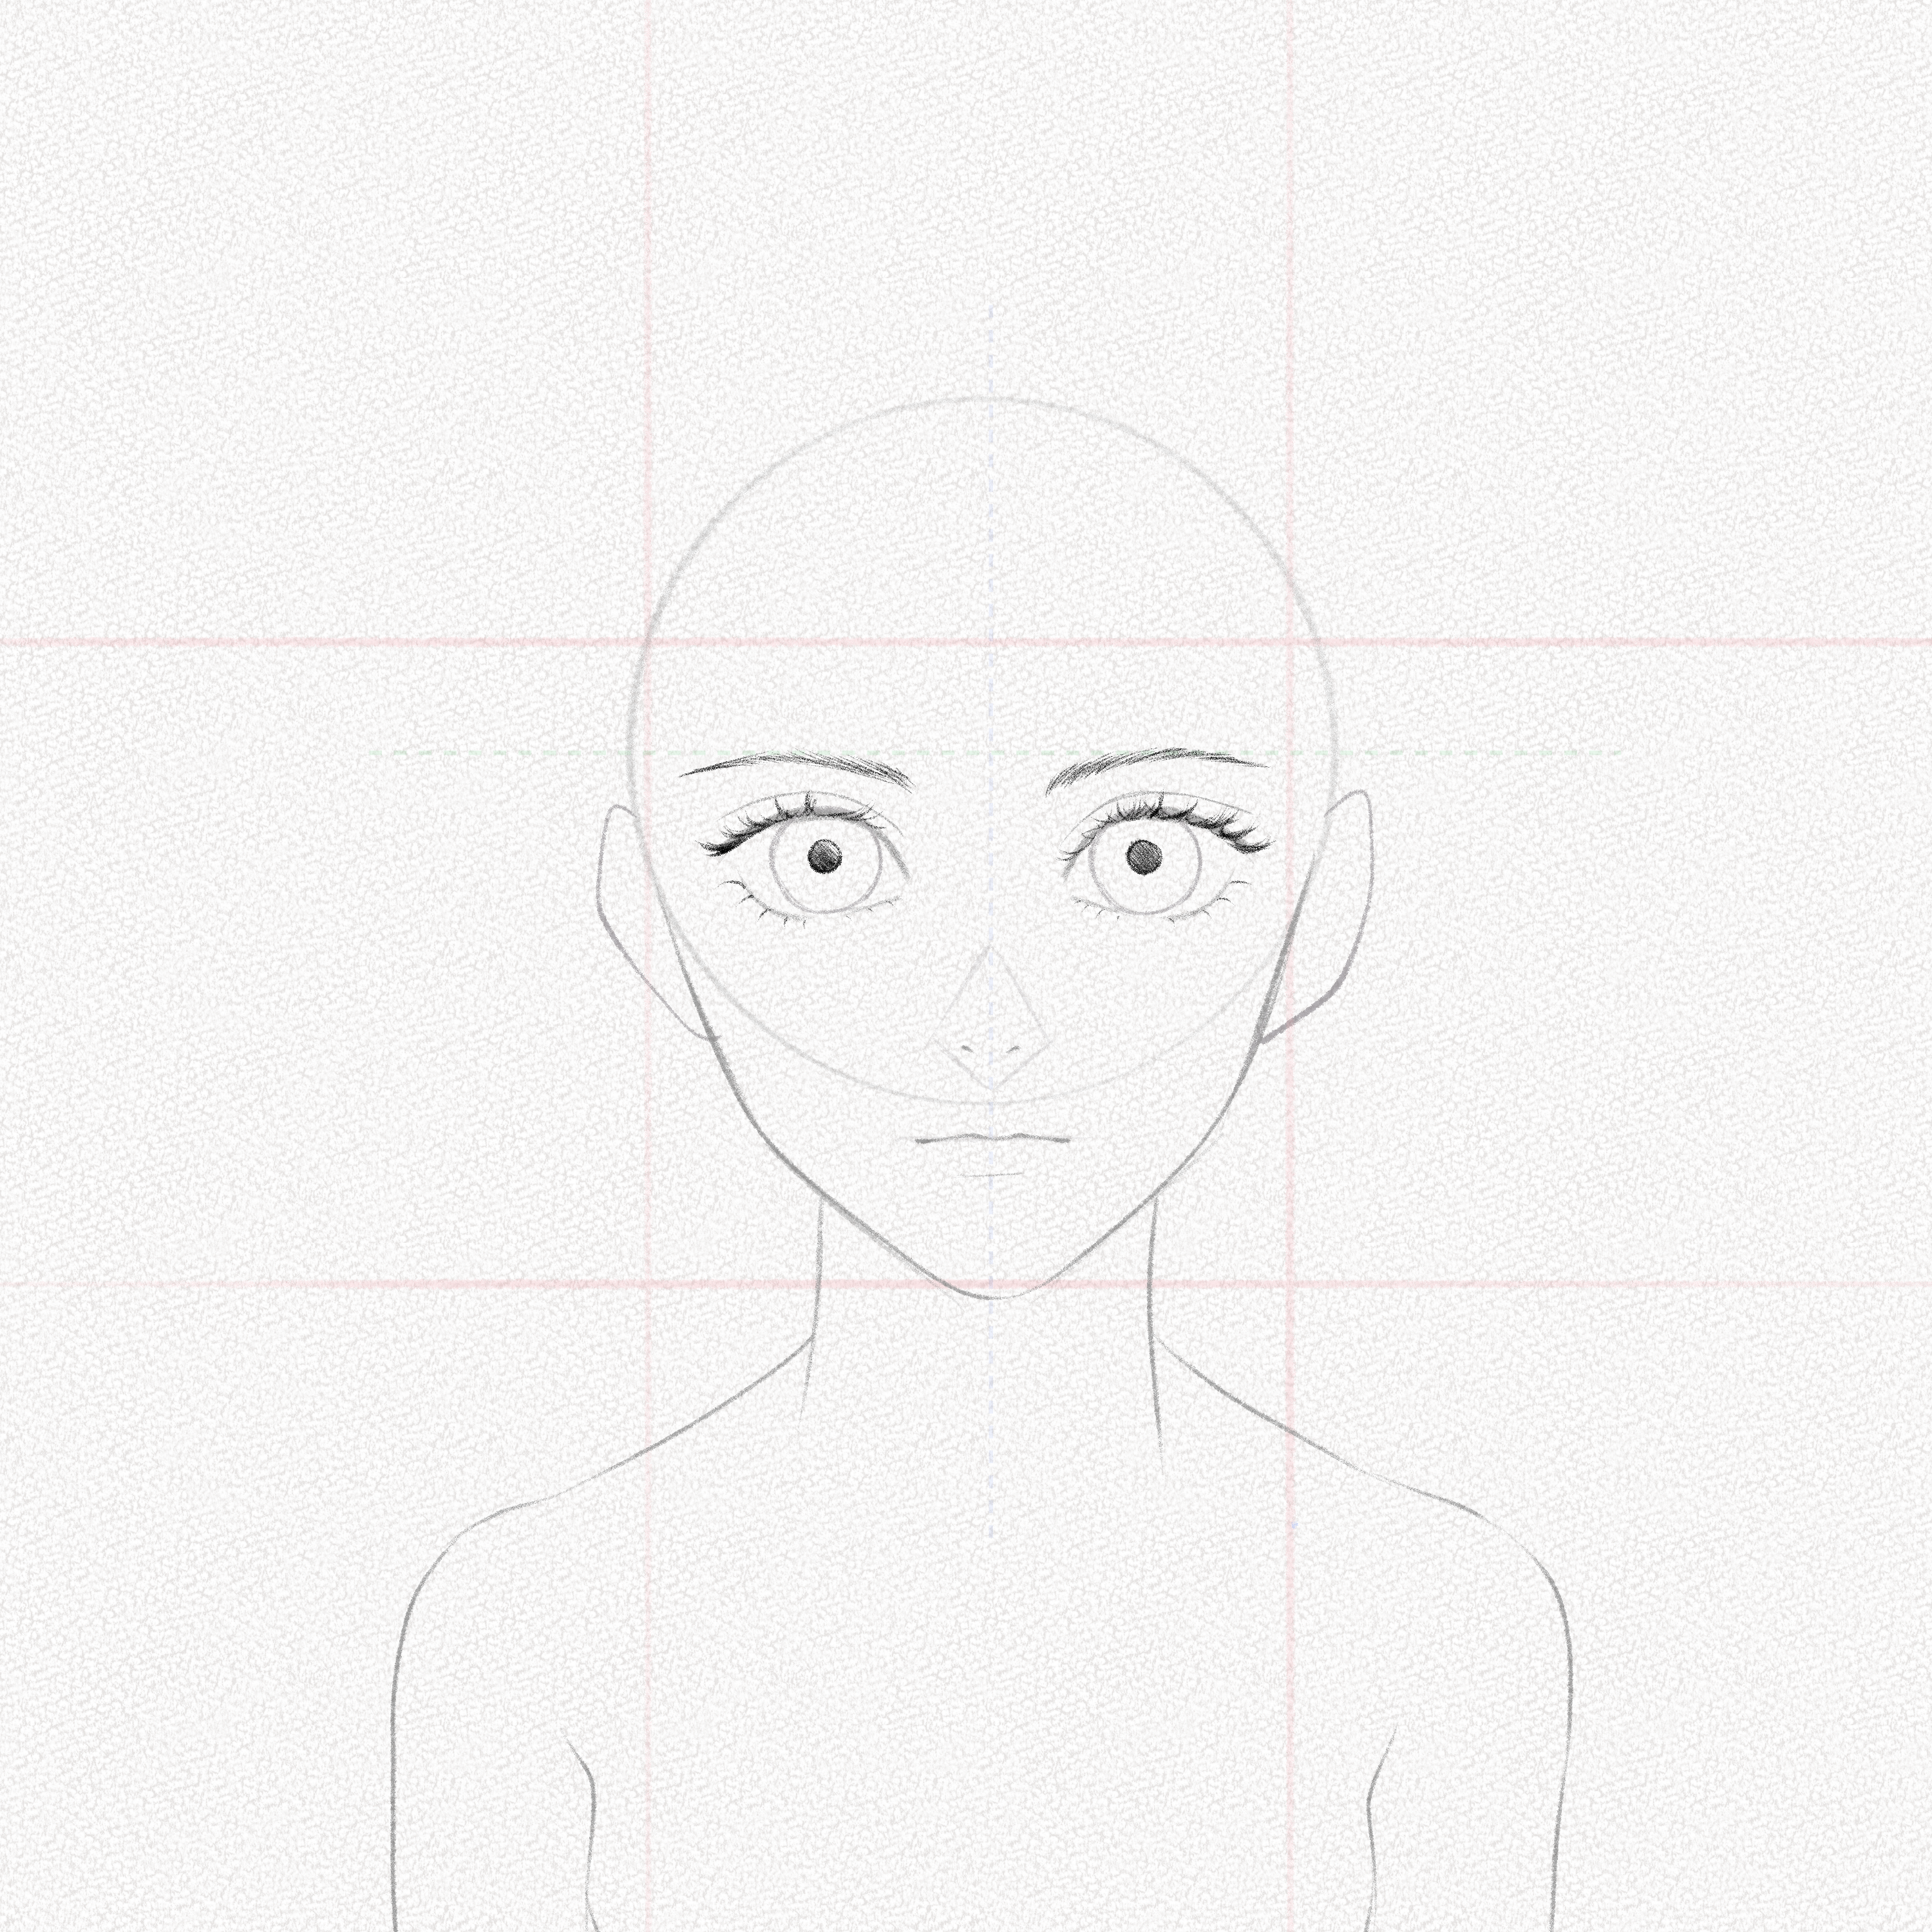
Step 13: Draw the iris
Draw the iris, pupils, and eyelashes of your anime girl. Try to darken the upper lash and to define the shape of the eyebrows.
You can replicate this structure from different angles and with different proportions, don’t be afraid to try and practice, even if you fail, you’ll learn a lot!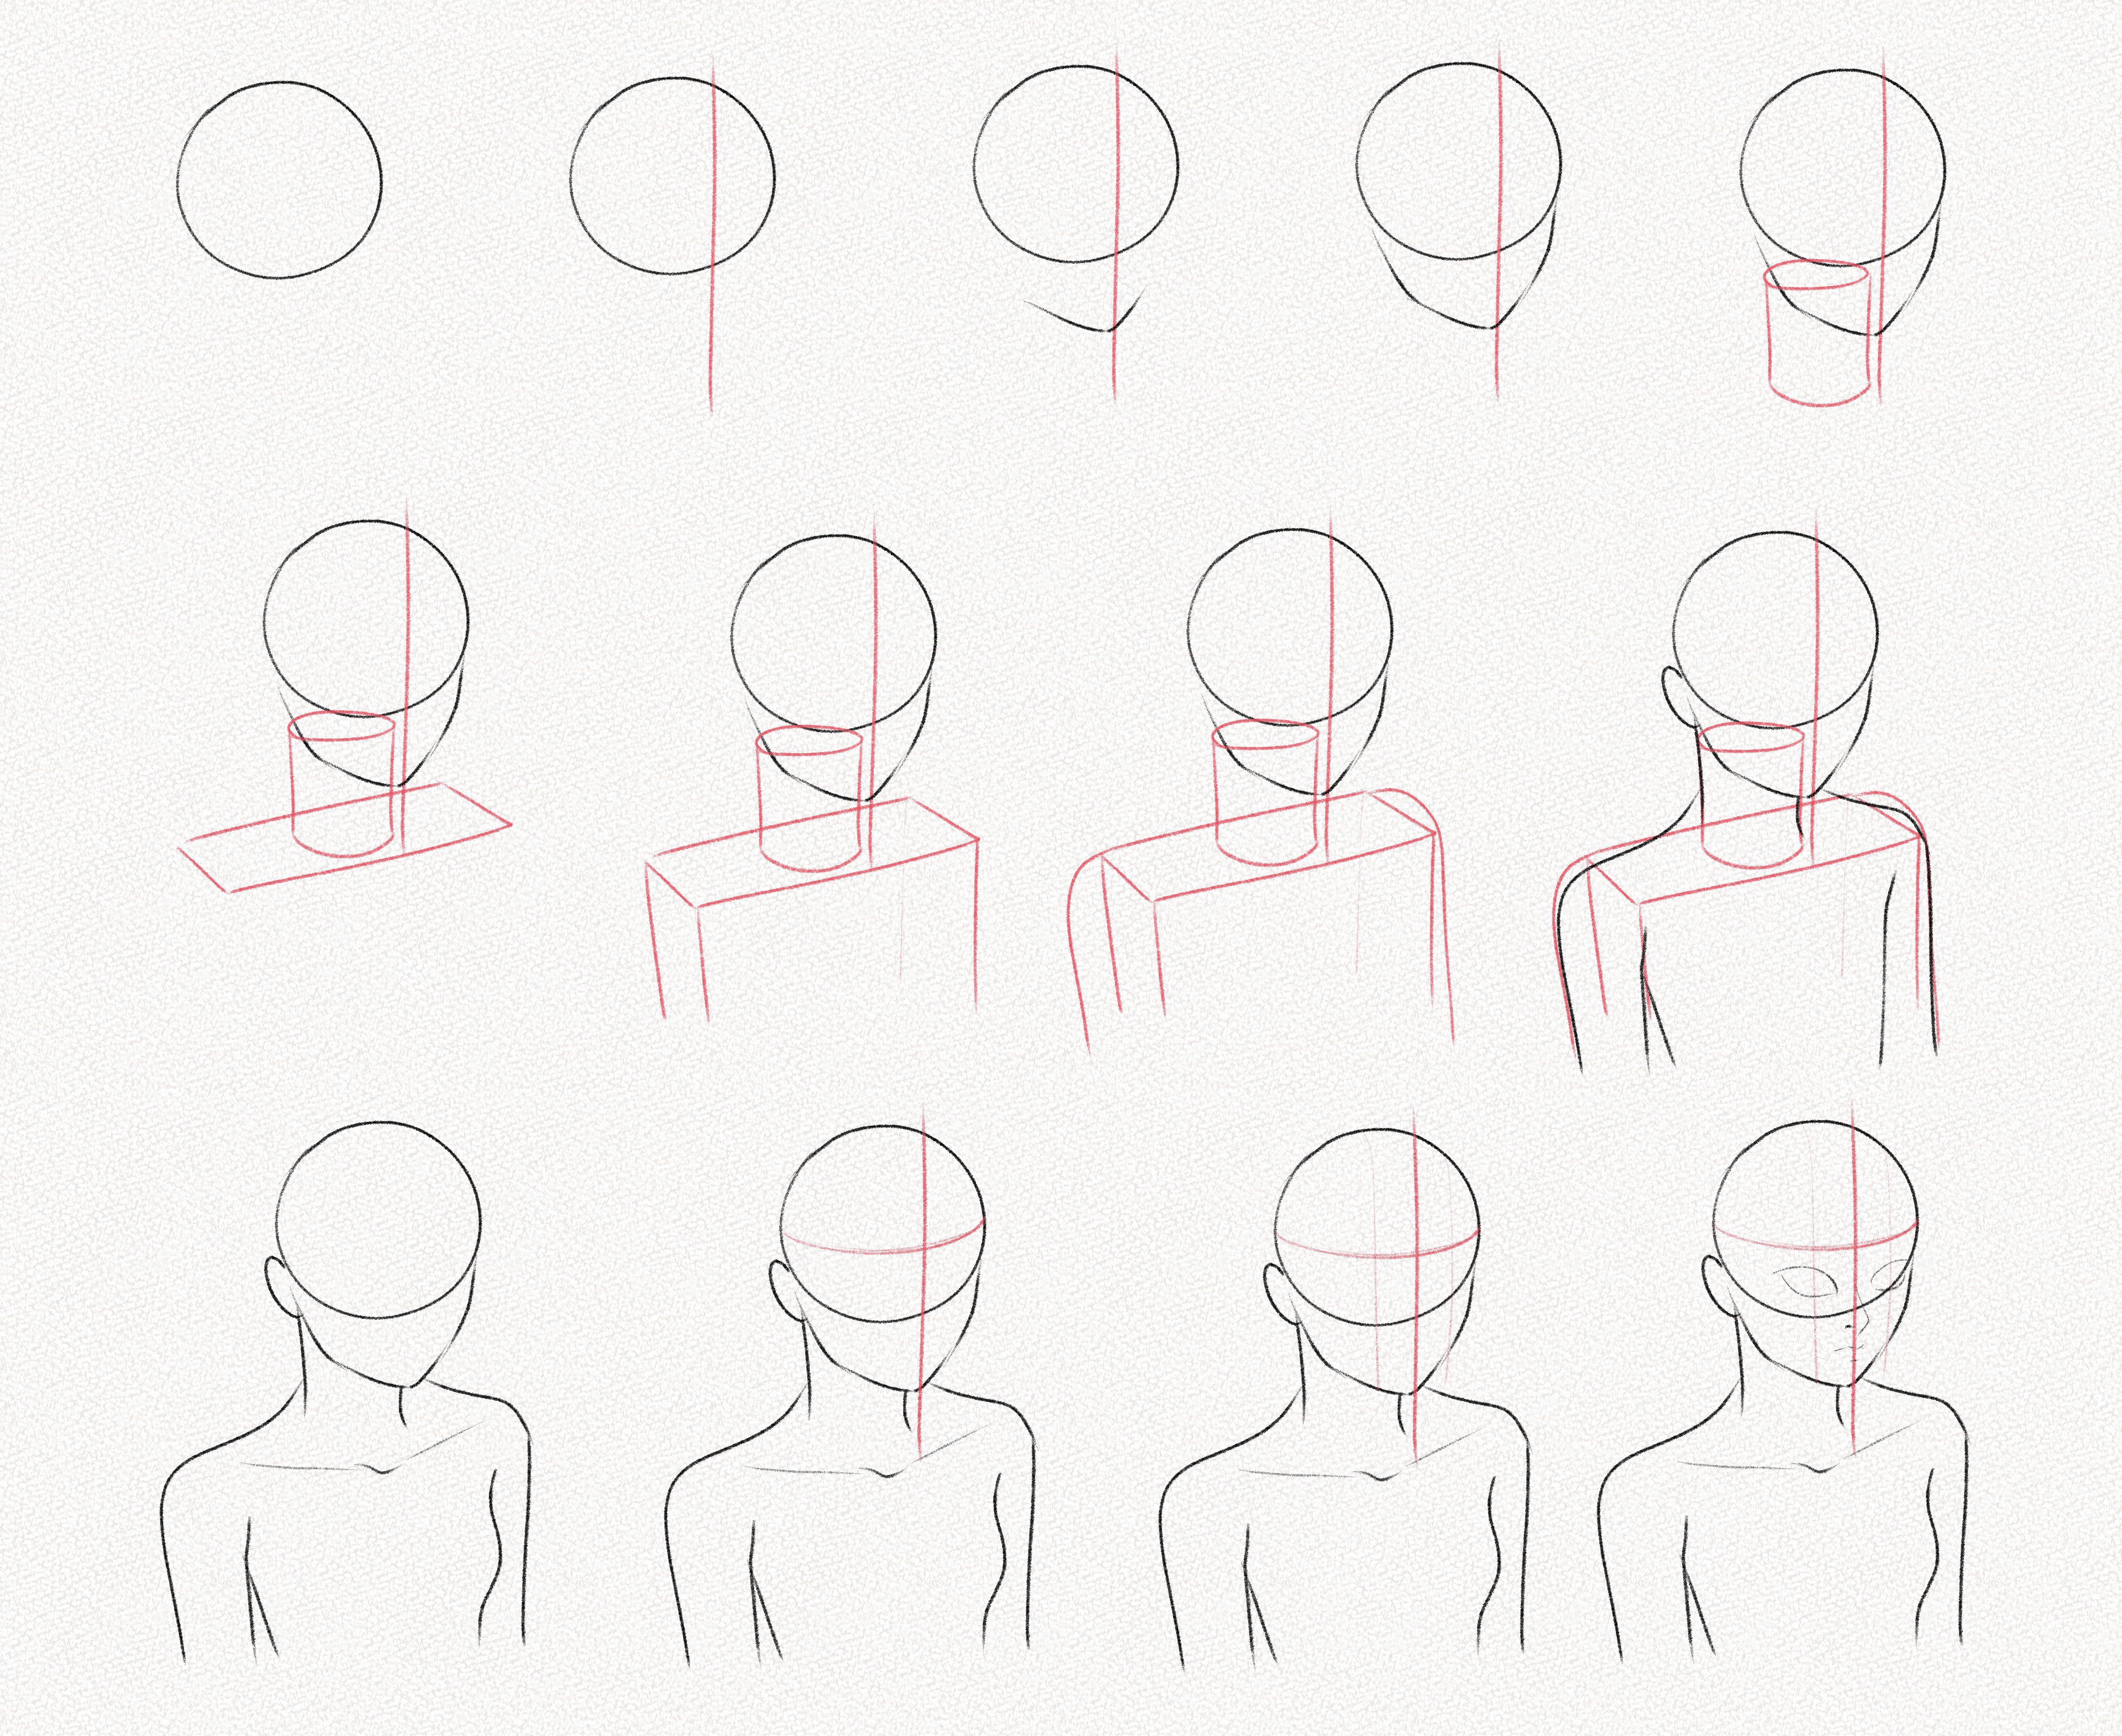
Section 2.- The Hair
When drawing the hair, we must think in layers. in this case, we will begin with two layers, the back layer, and the front layer. Since our anime girl has a bit of a fringe or bangs, we’re going to draw the top layer first and then the second layer after that. 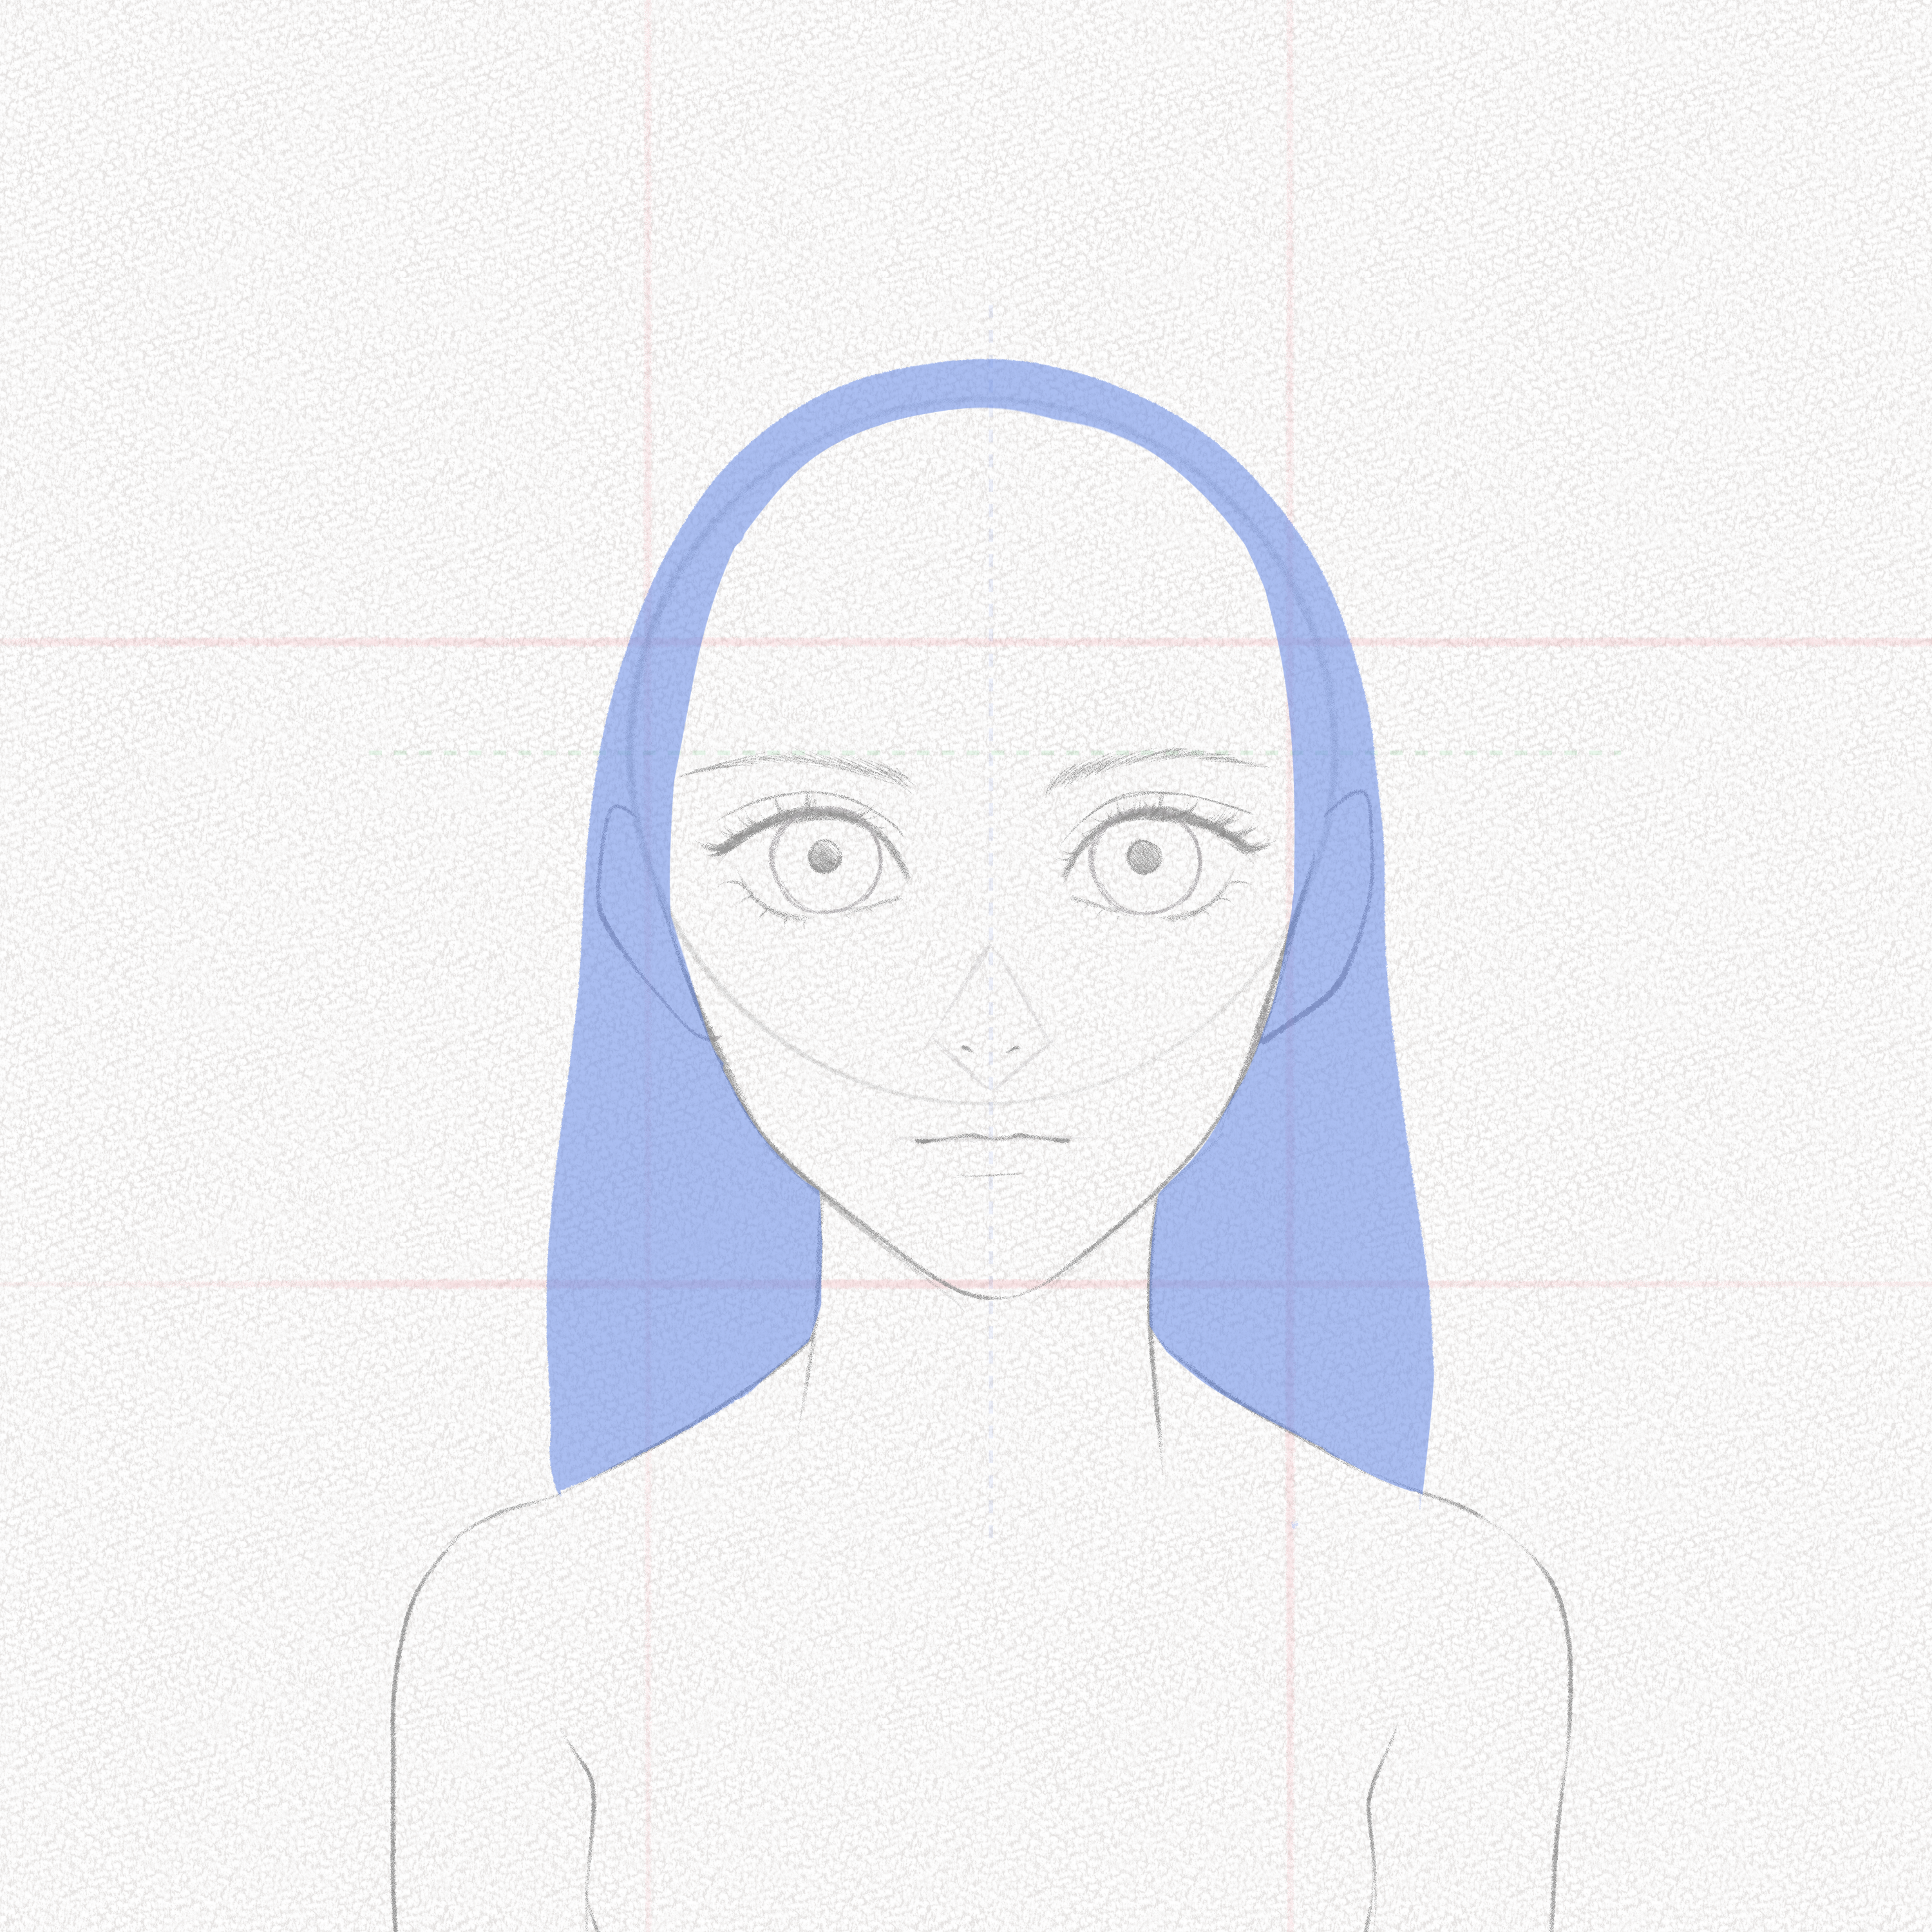

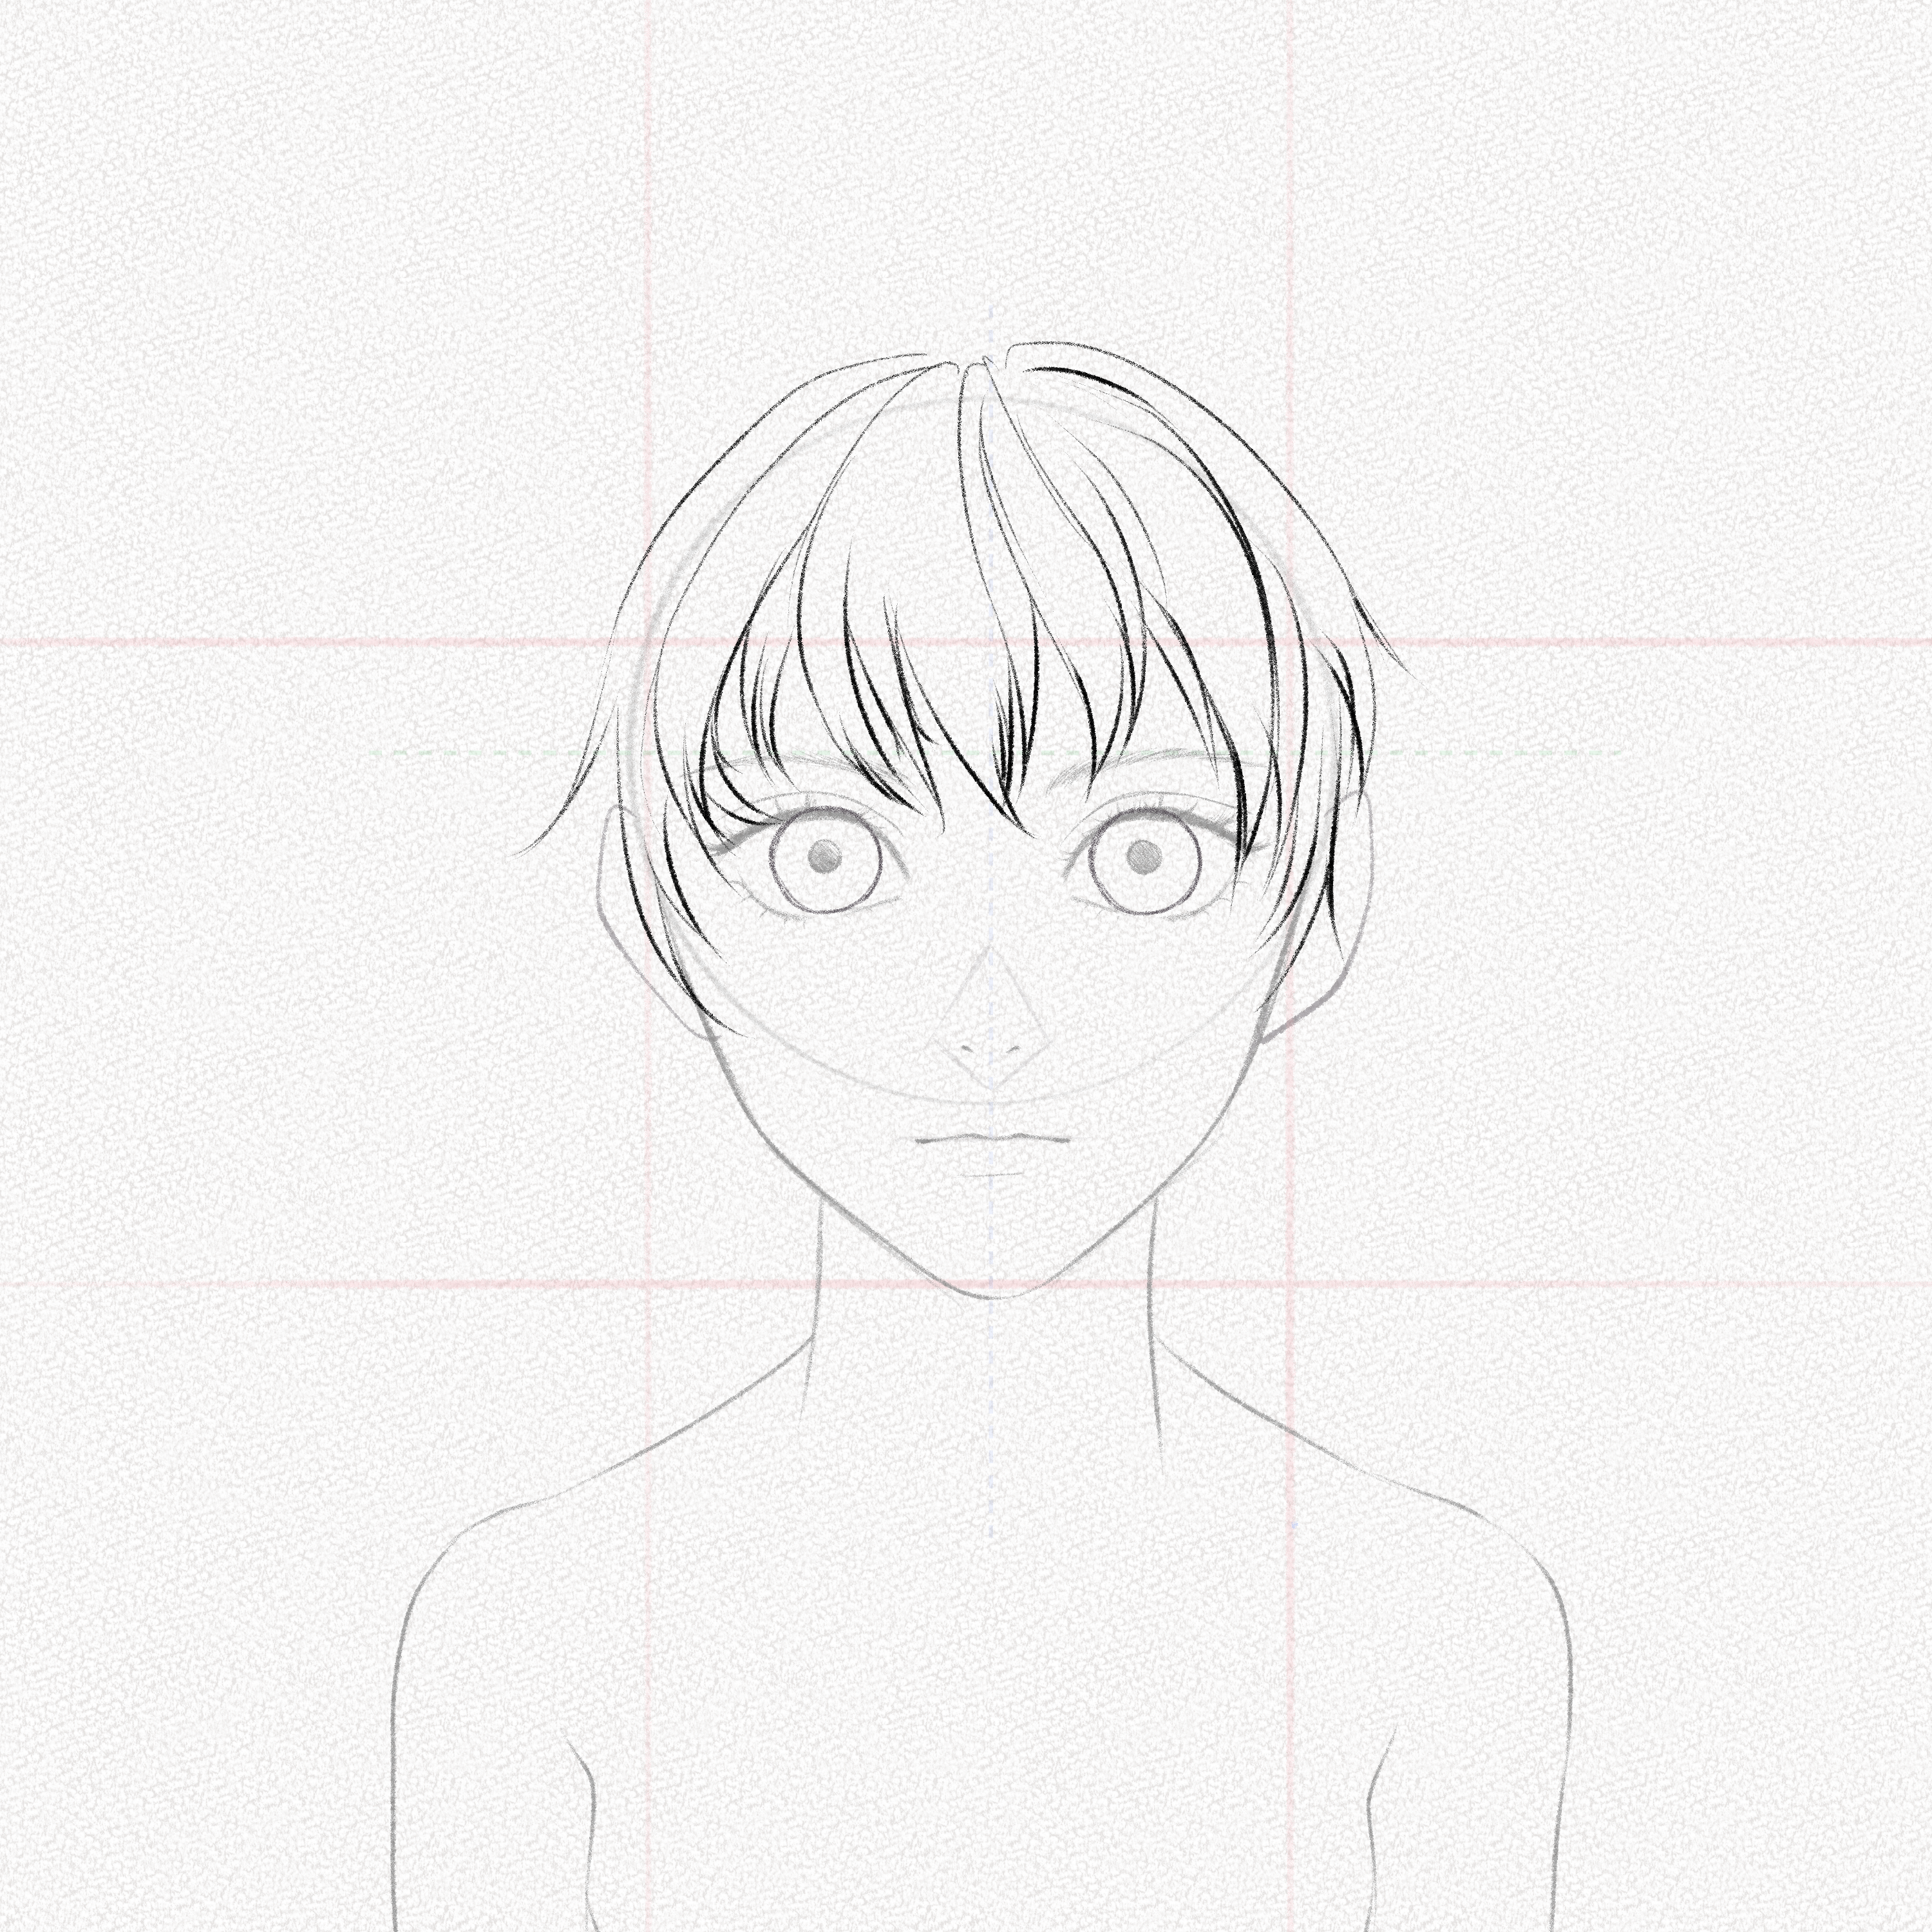
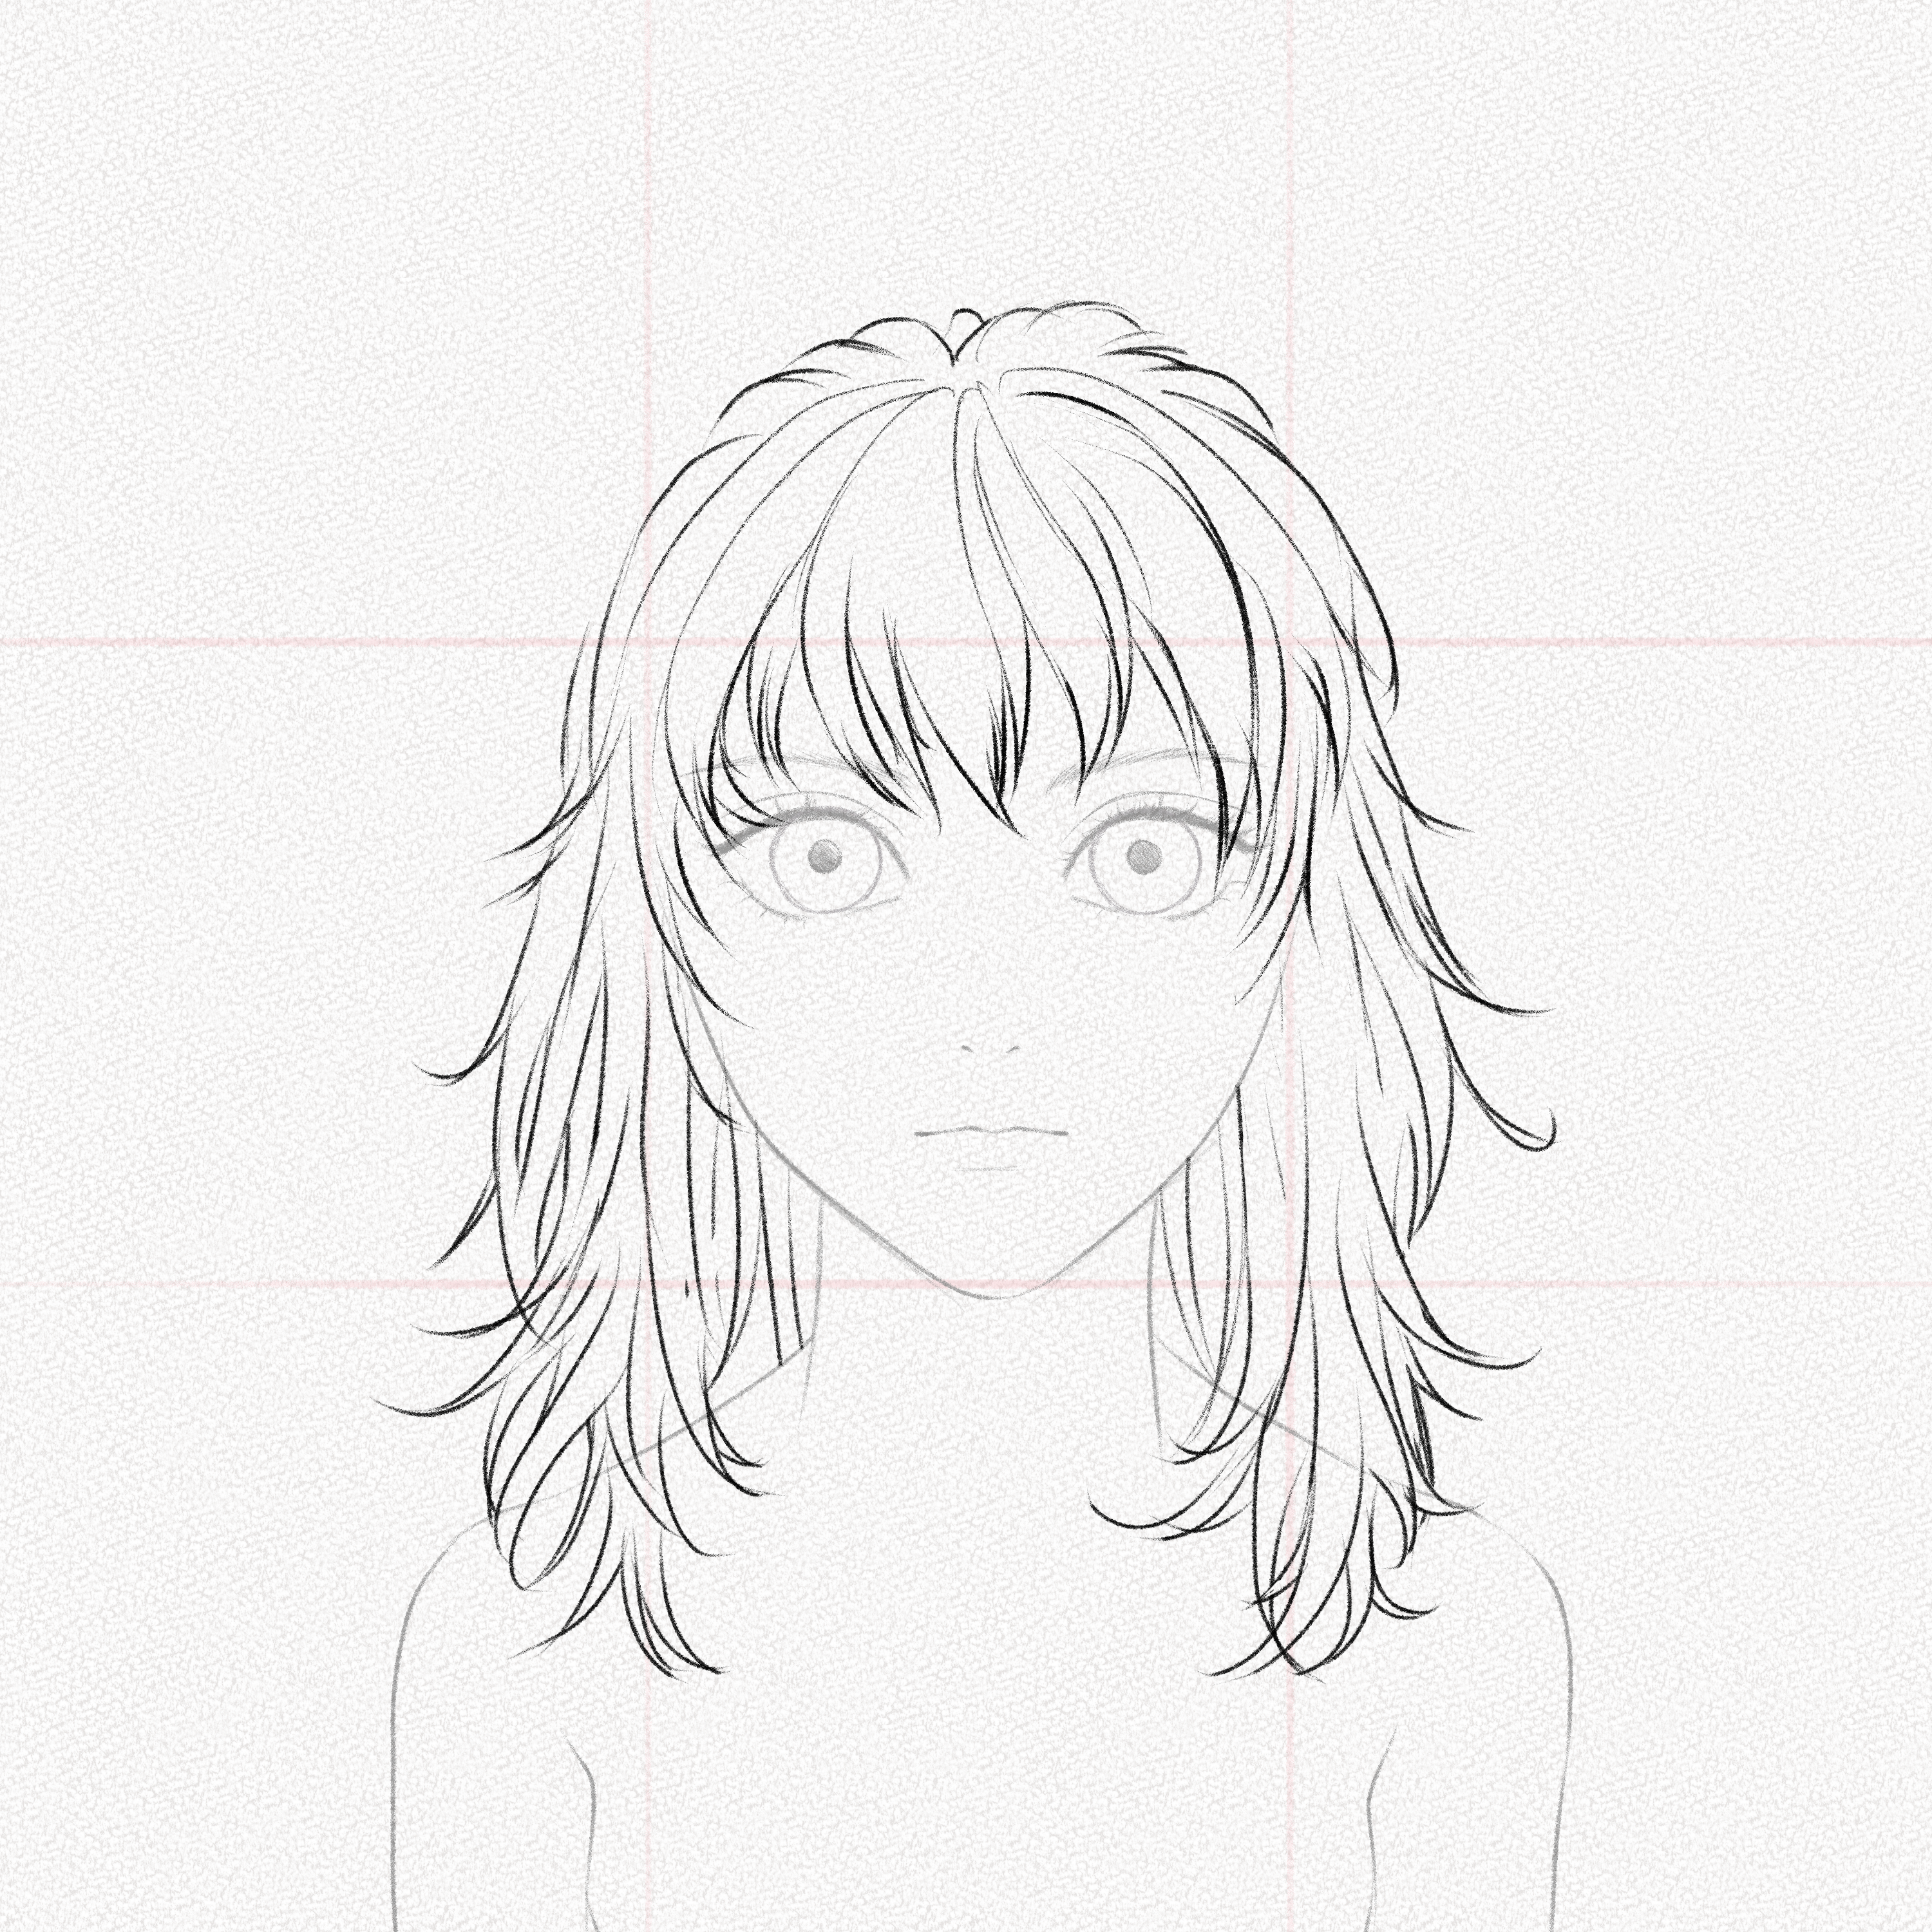
Step 14: Draw the front layer
Our anime girl is going to have slightly textured hair, and in order to add dynamism, we’re going to separate it into sections.
Step 15: Draw the back layer
Now, carefully draw the back layer trying not to overlap any line with the front layer.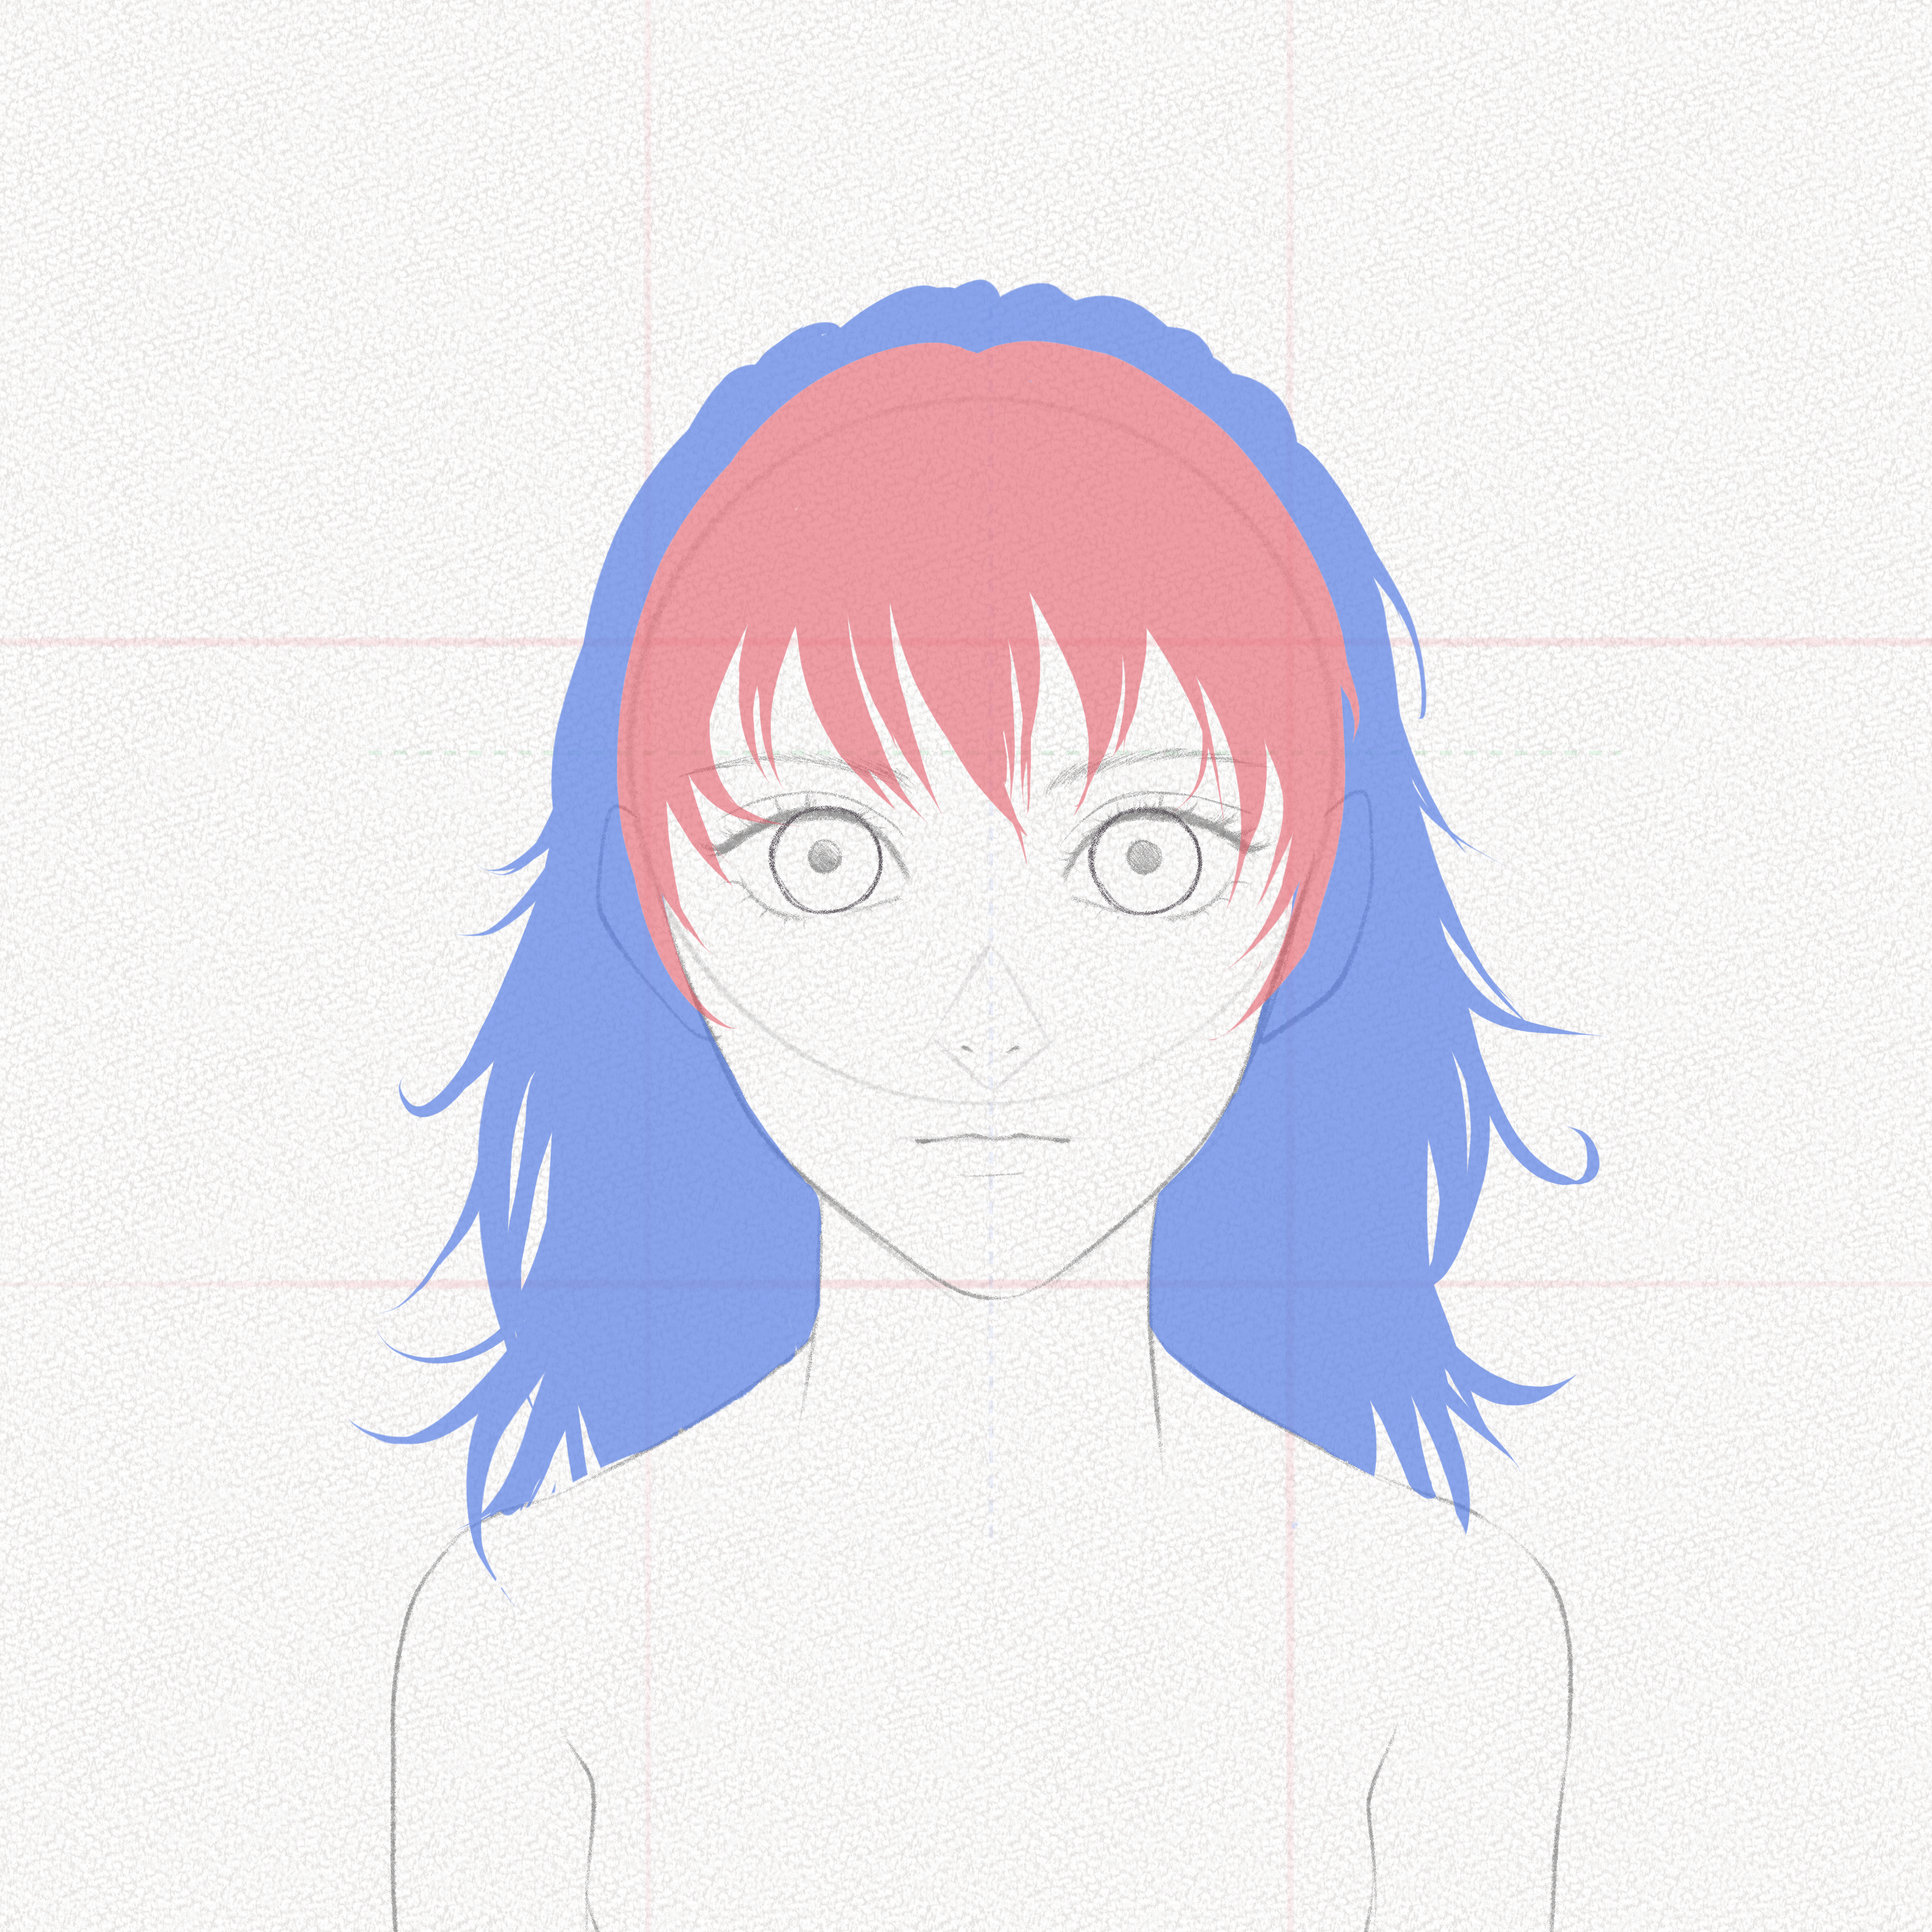
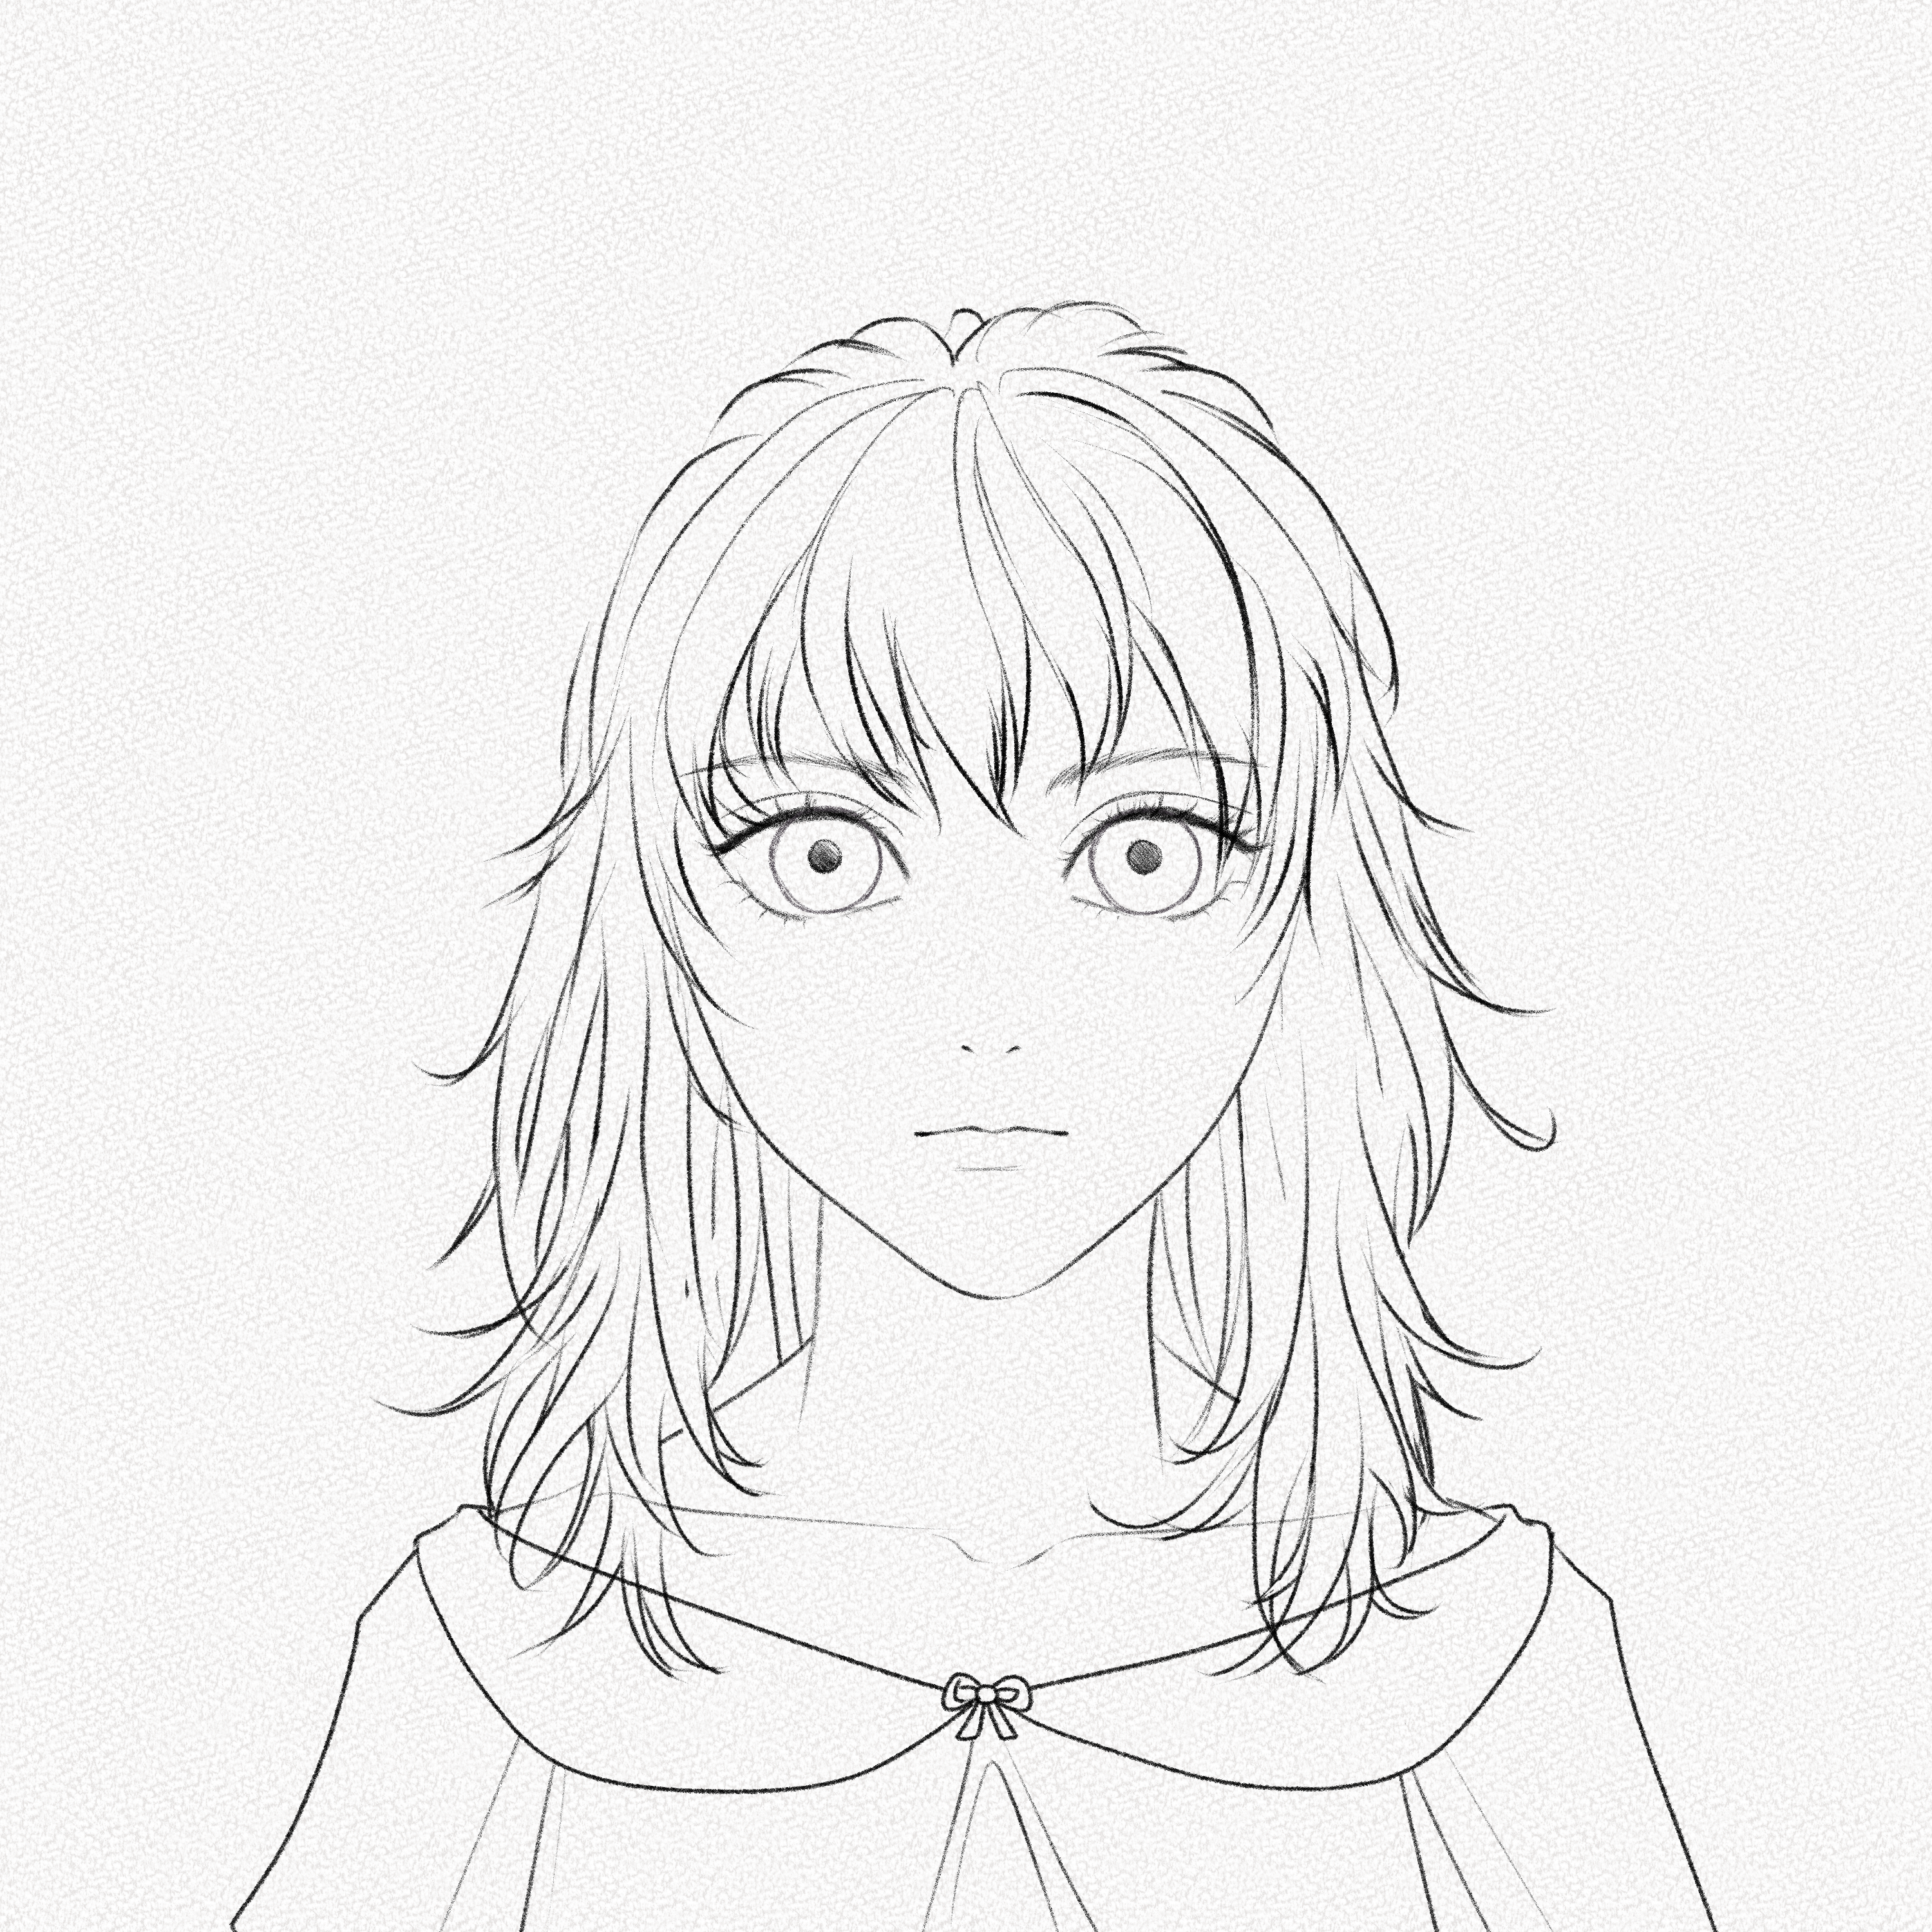
Step 16: Add details
Add another layer(the one that falls in front of the shoulders). Define the locks and add details to the hair. You can find a complete tutorial on how to draw anime hair here.
Step 17: Draw the clothes
Before jumping to the last section, we are going to dress our anime girl, for this occasion, we’re going for clothes that are rather simple, however, you can choose whatever you like the best for your drawing.
Section 3.- The facial features
For this section, we’re going to use our 4B and 8B pencils.
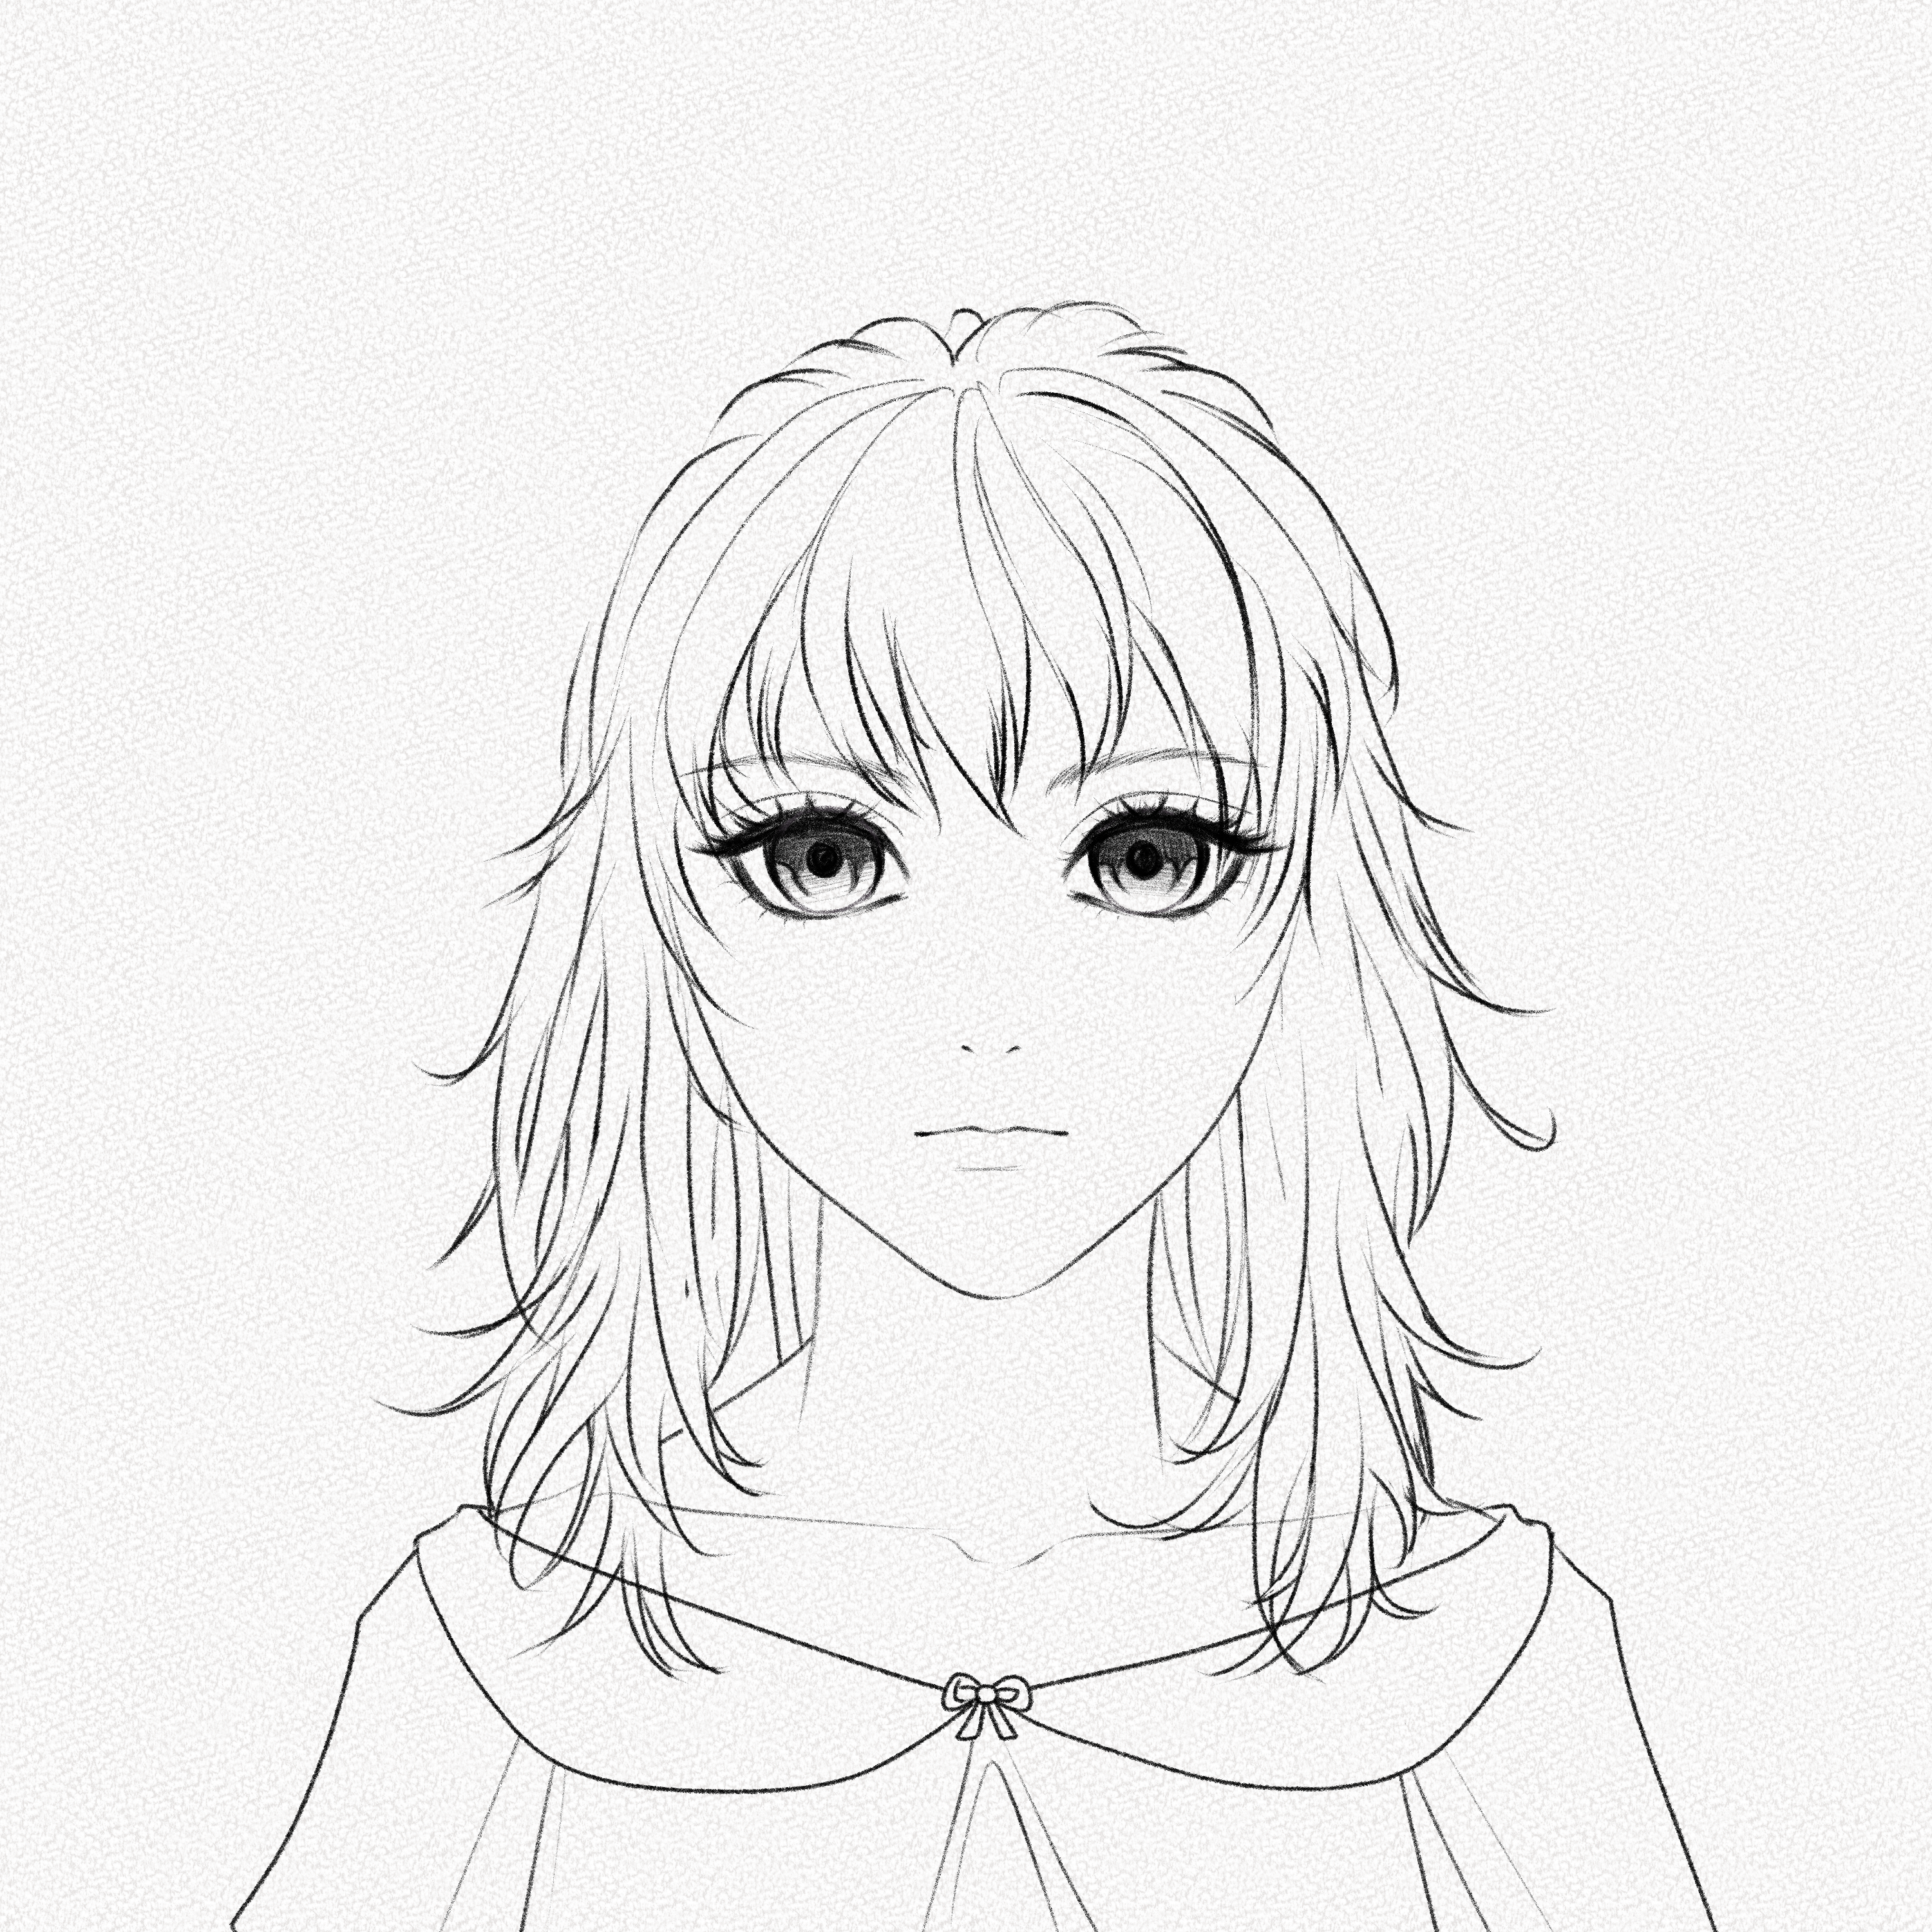
Step 18: Define the eyes
Define the shape of the eyelids and darken the value with your 4B and 8B pencils. Don’t forget to also darken the eyelashes. 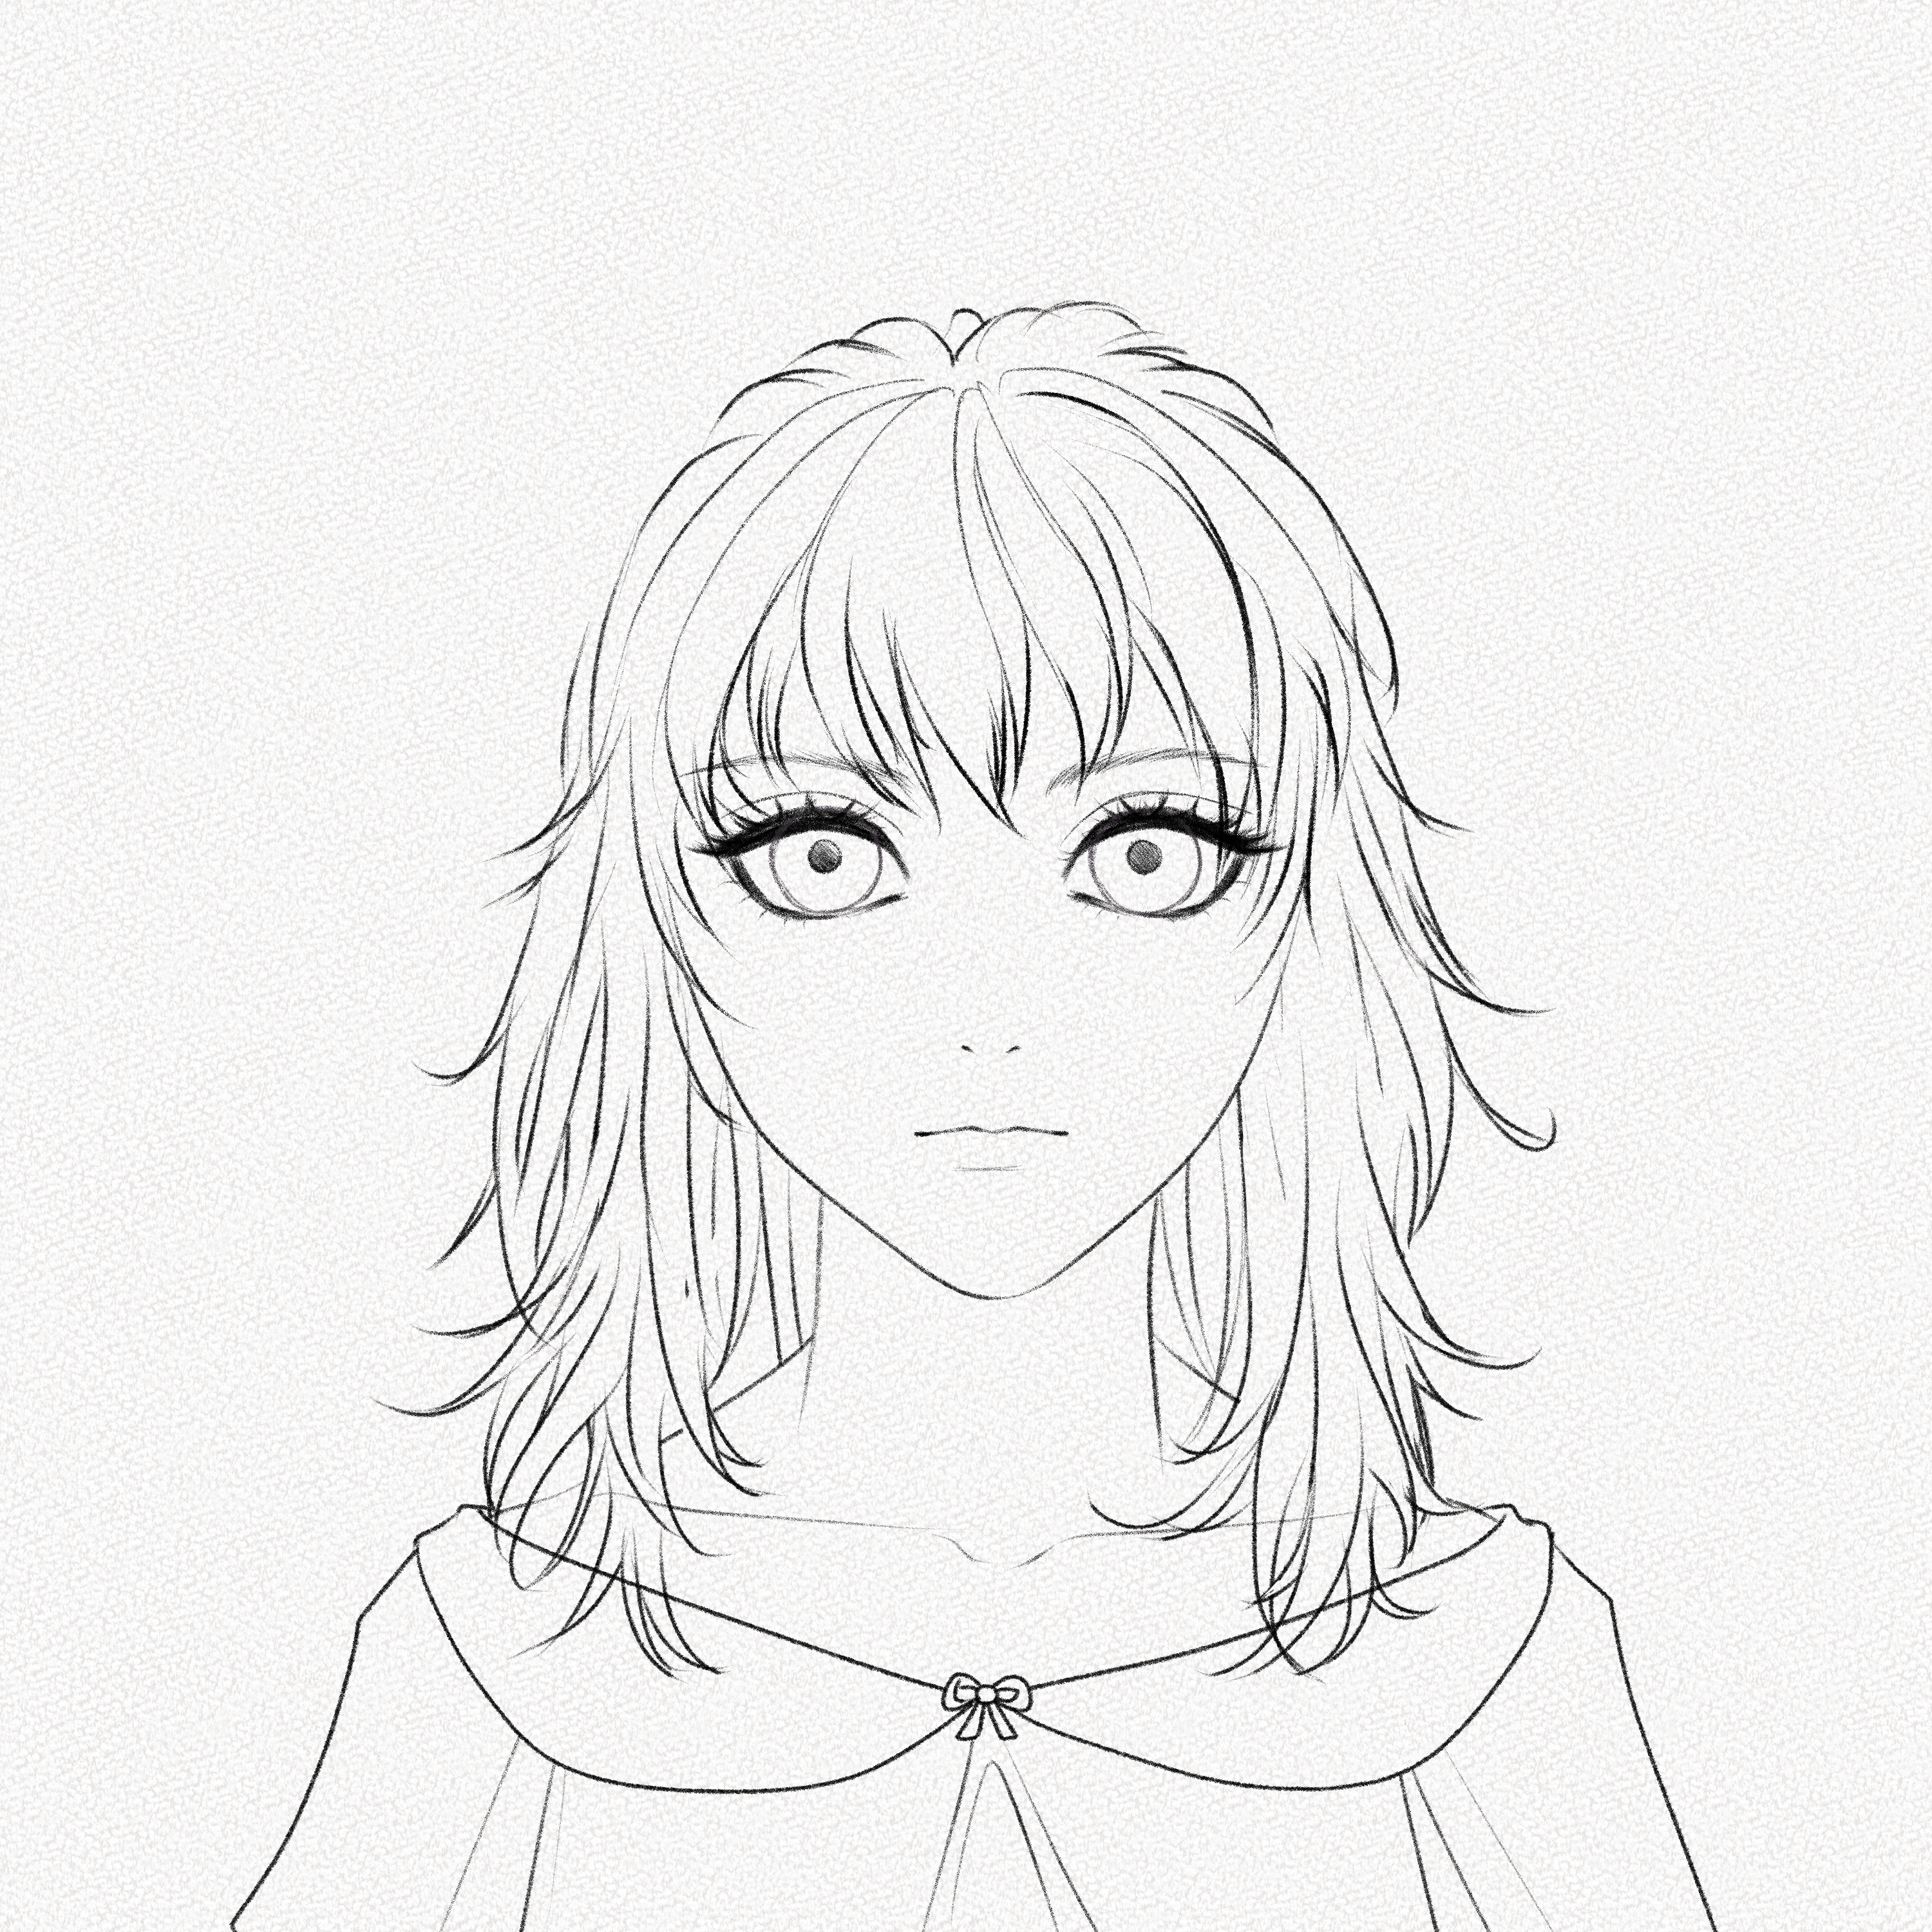
Step 19: Darken the iris
Do the same for the iris, make the iris’ lines thicker on the part that connects to the lashes and darken the pupil as well
Step 20: Shade the iris
Fill the iris with graphite with your 4B pencil, creating a gradient. Then add another layer of shading to the upper part only. 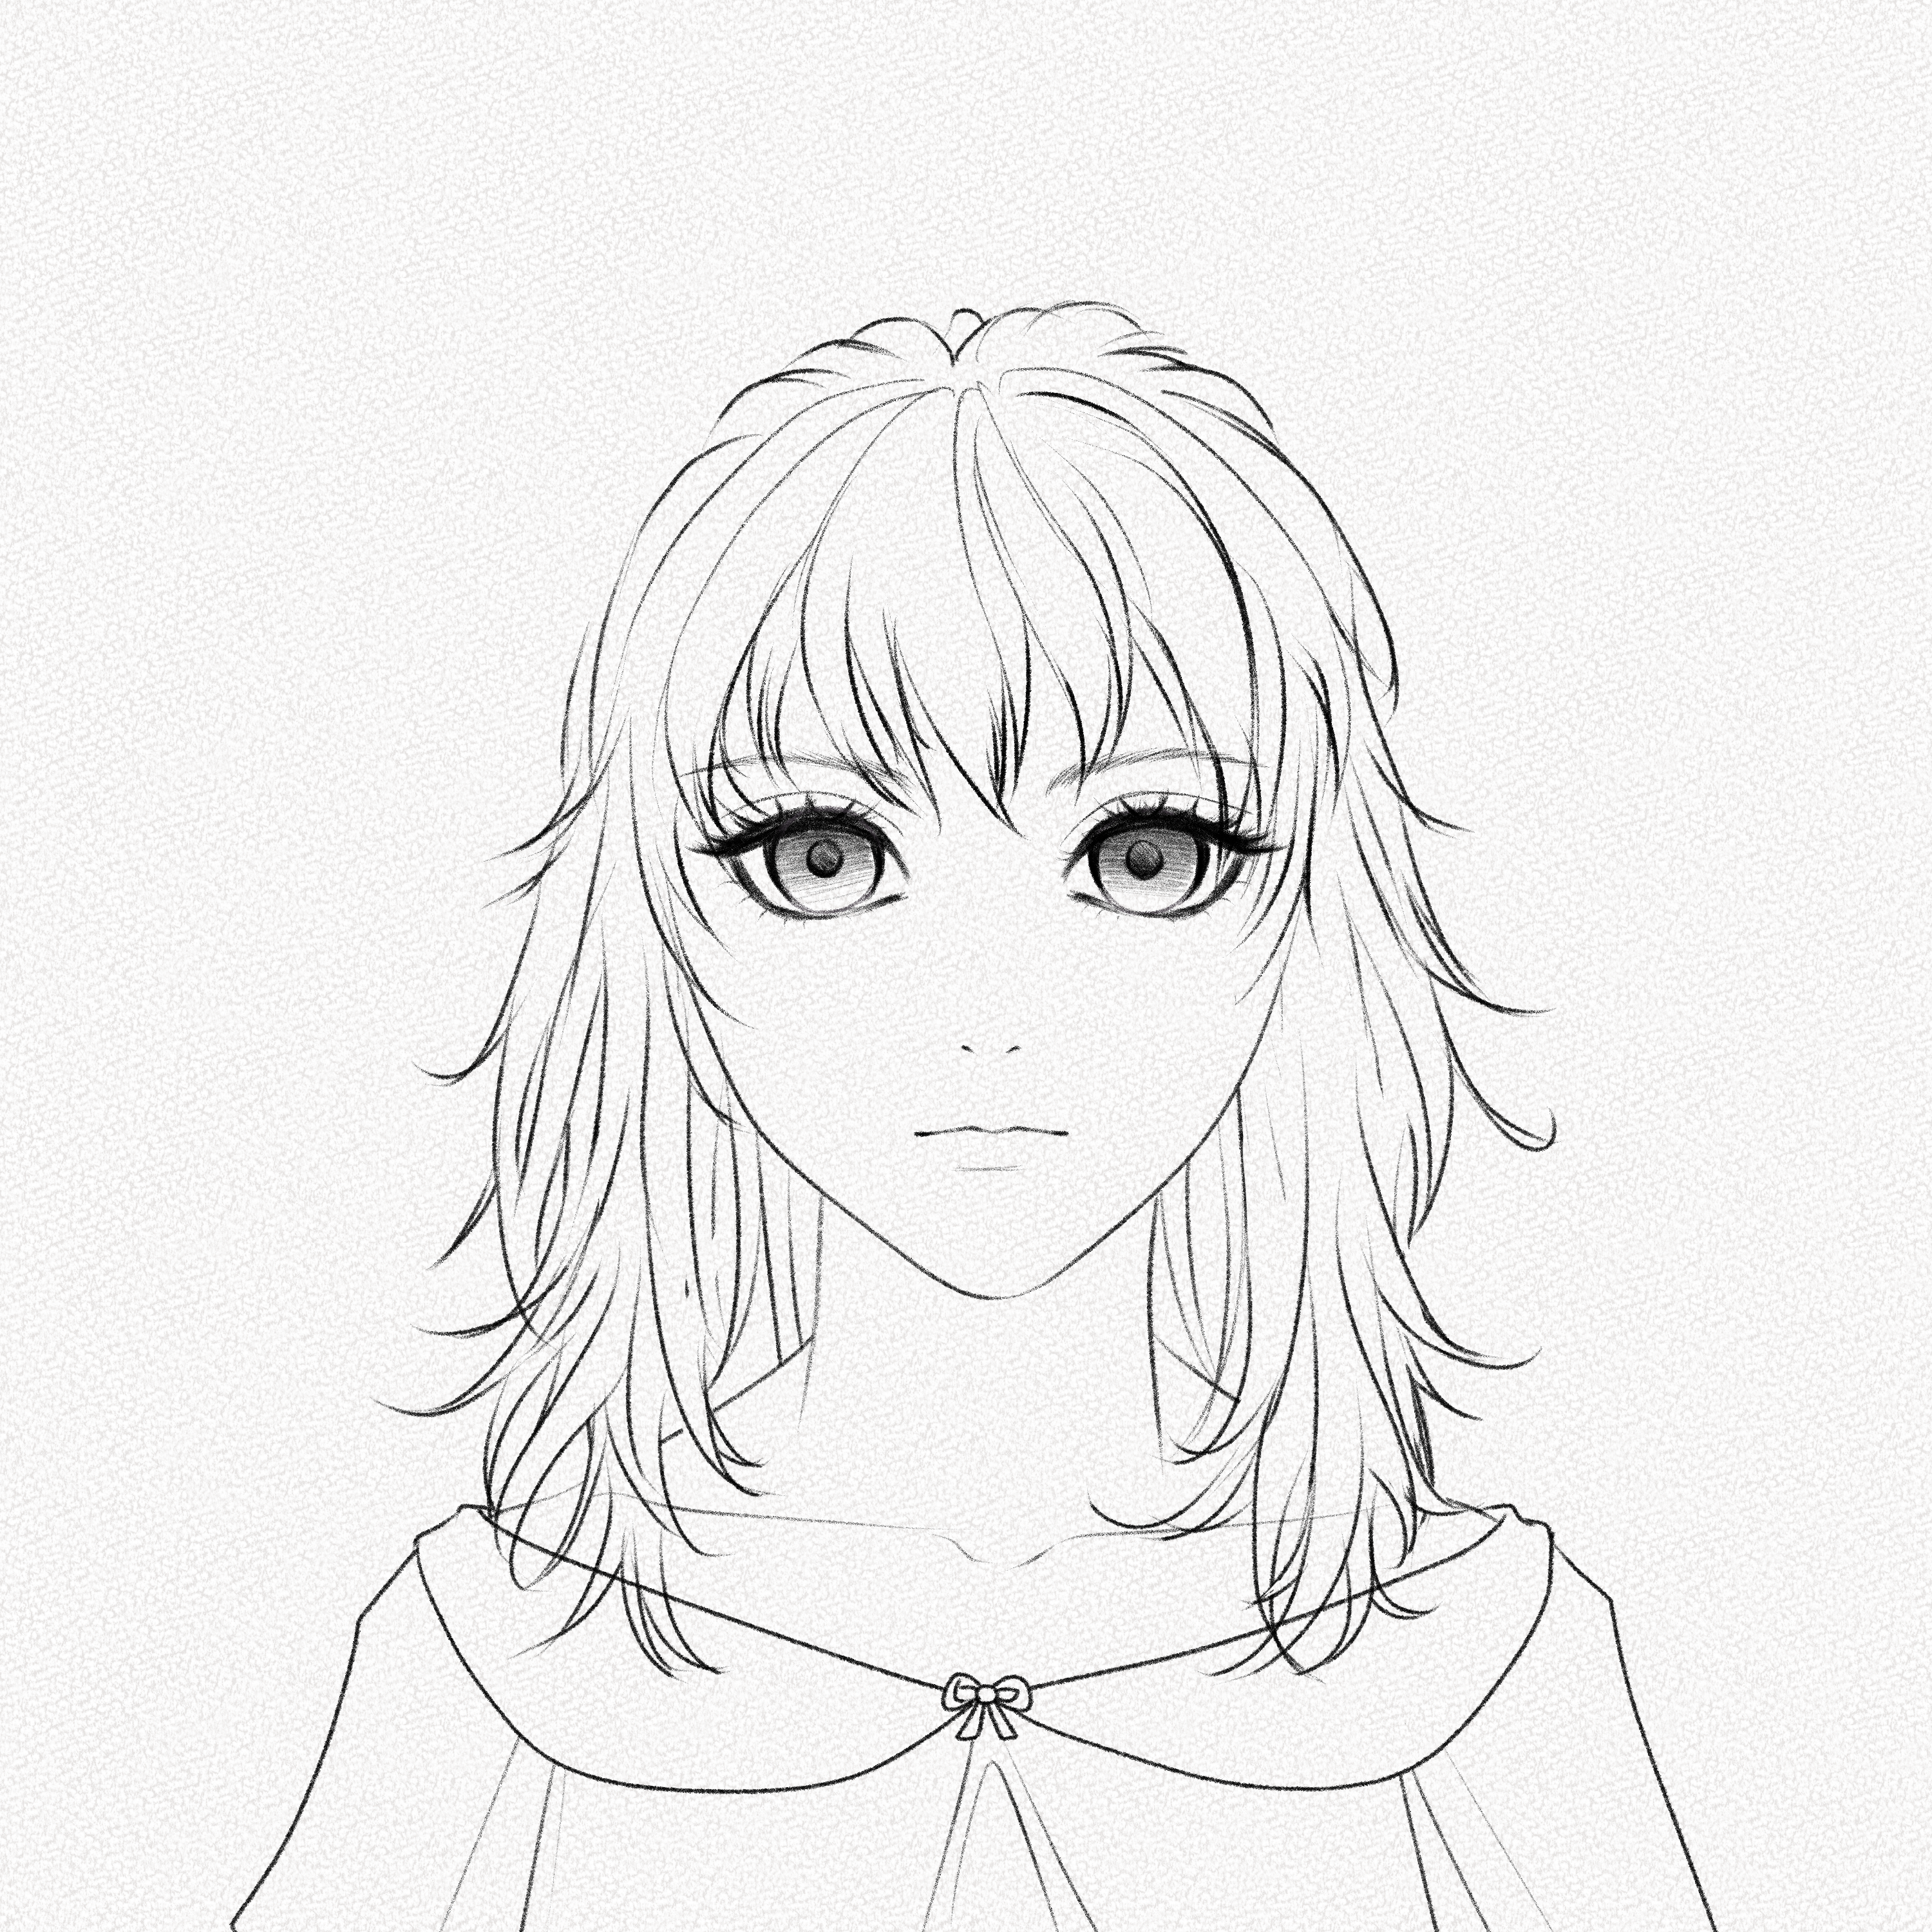
Step 22: Shade the eyes
Now, with your soft brush, shade the white parts of the eyes along with the upper and lower eyelid. Shade under the eyebrows as well.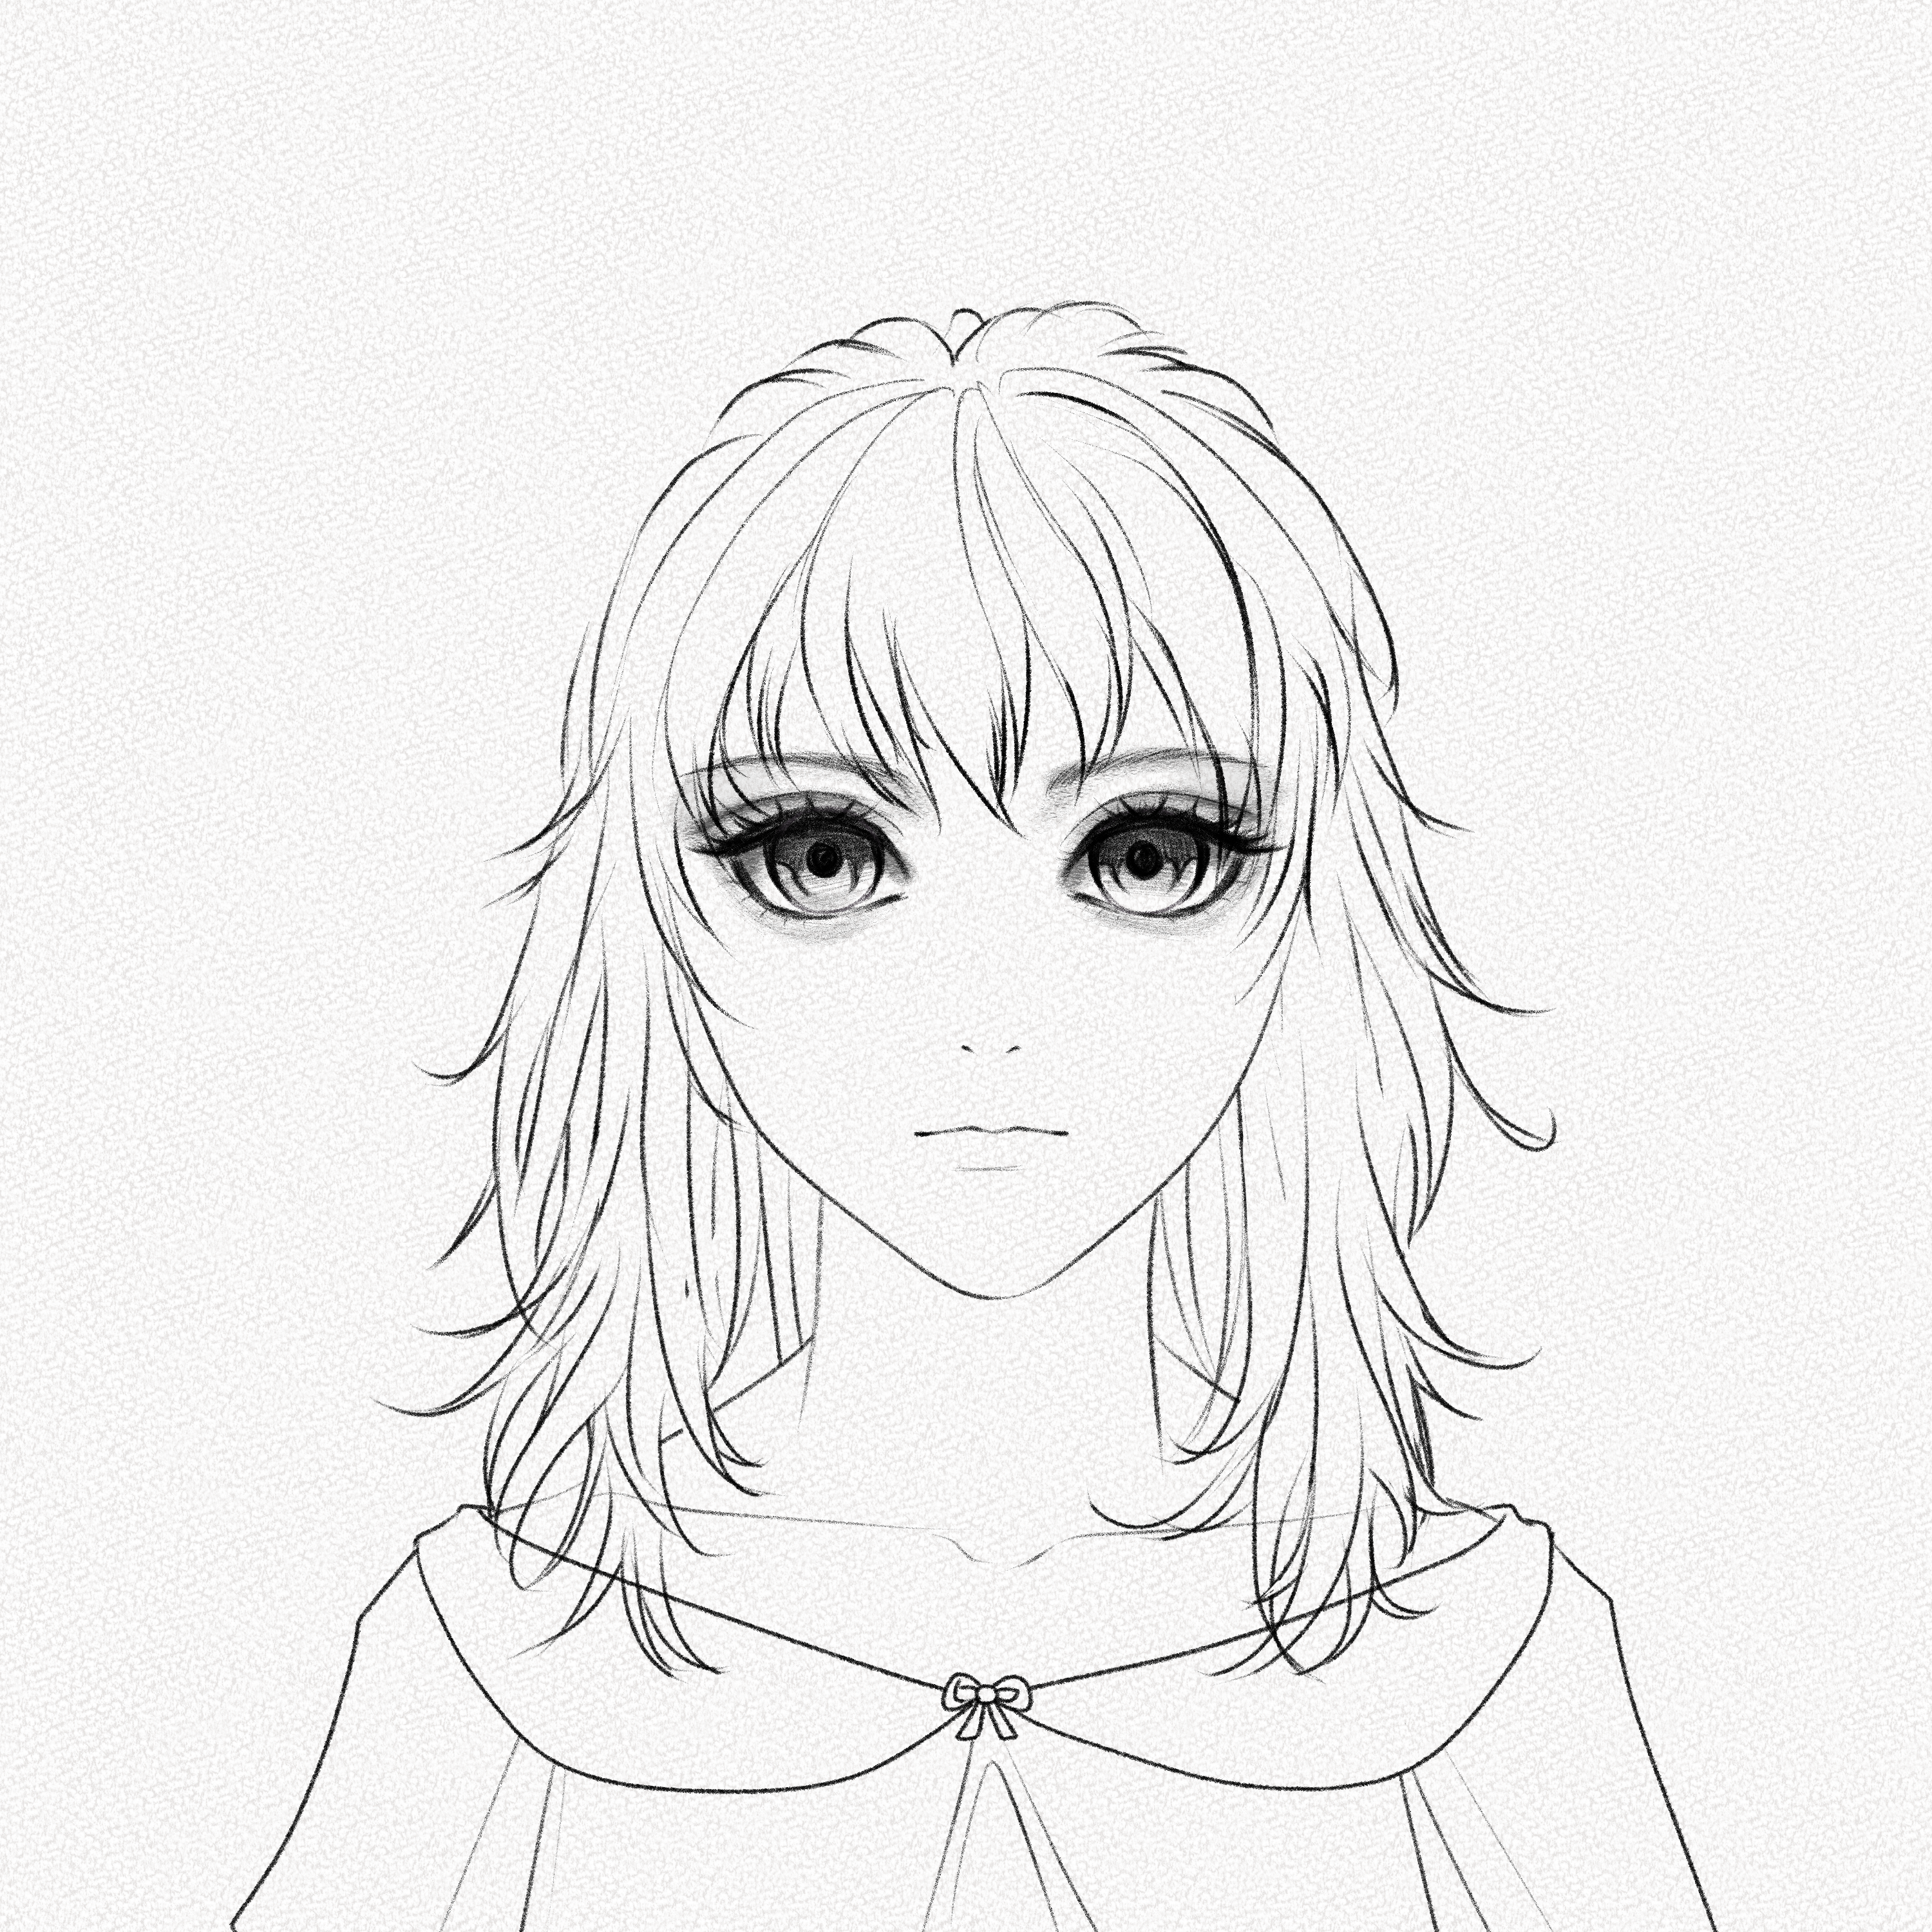
Step 23: Shade the upper lip
Shade the upper lip creating a wide “M” lipe shape and filling the inside. 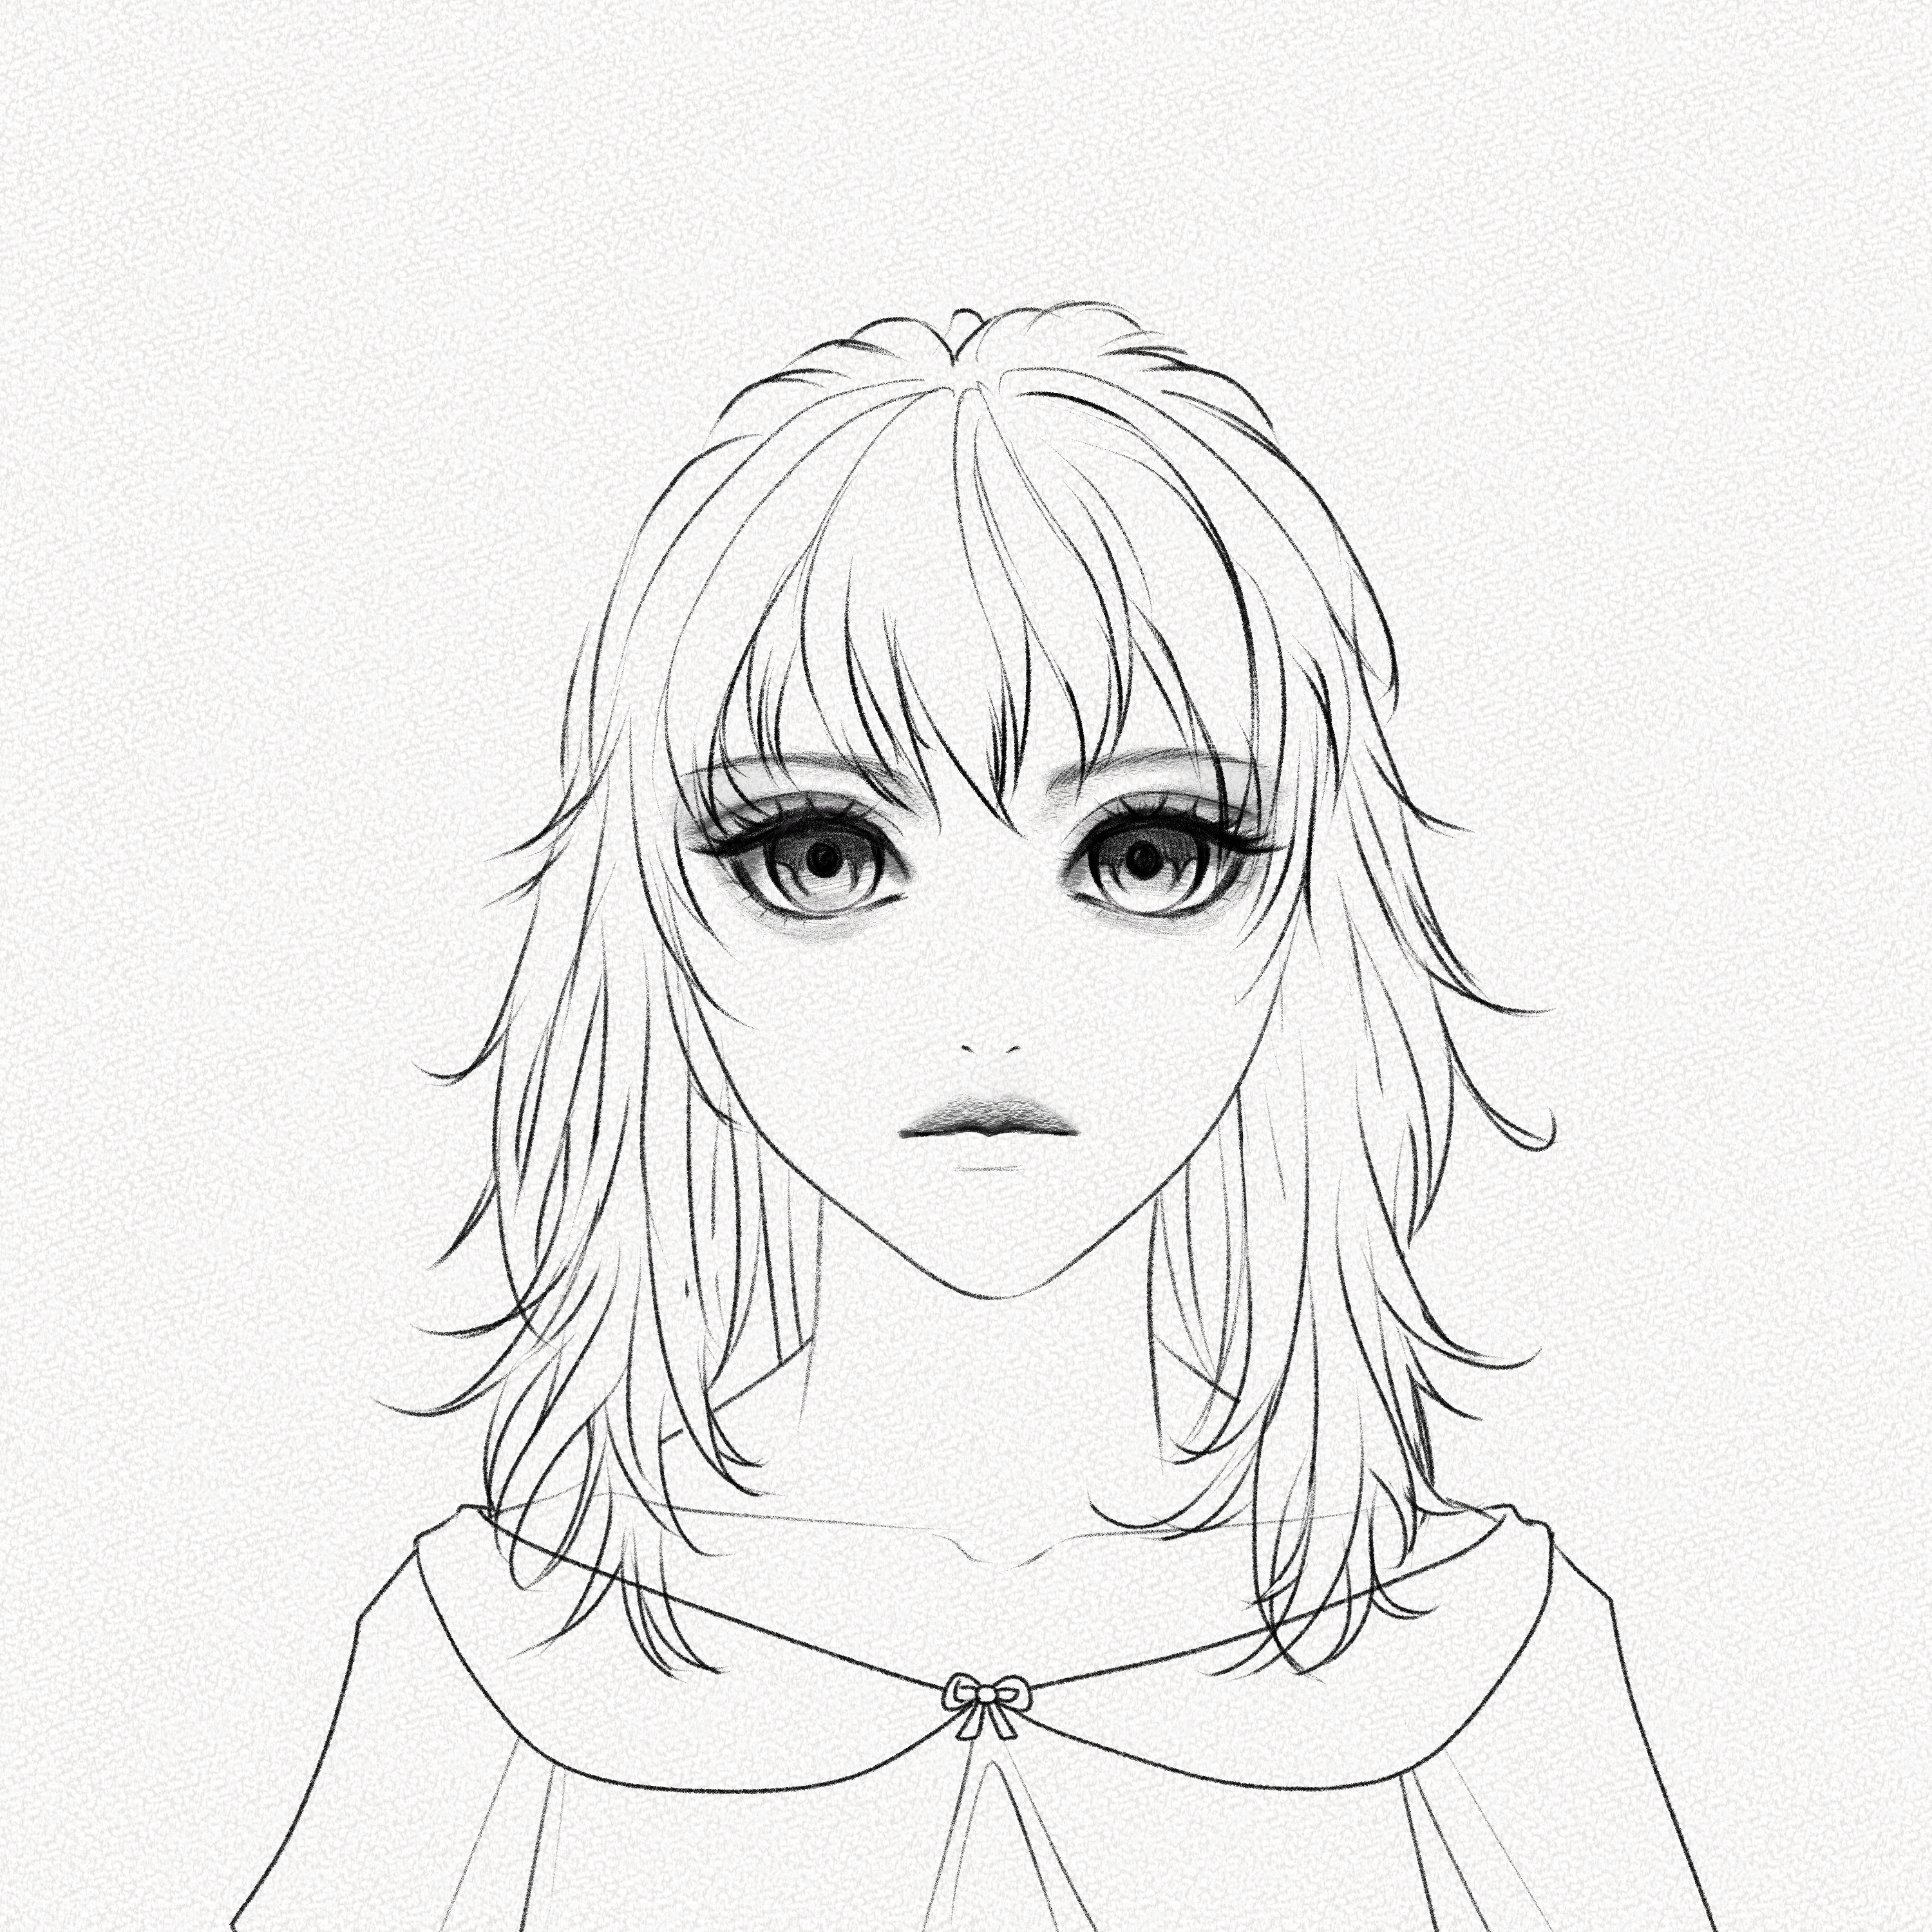
Step 24: Shade the bottom lip
Shade the bottom lip by filling it with graphite softly, make sure it’s lighter than the upper lip, and shade the base of the bottom lip and the shadow it casts on the chin.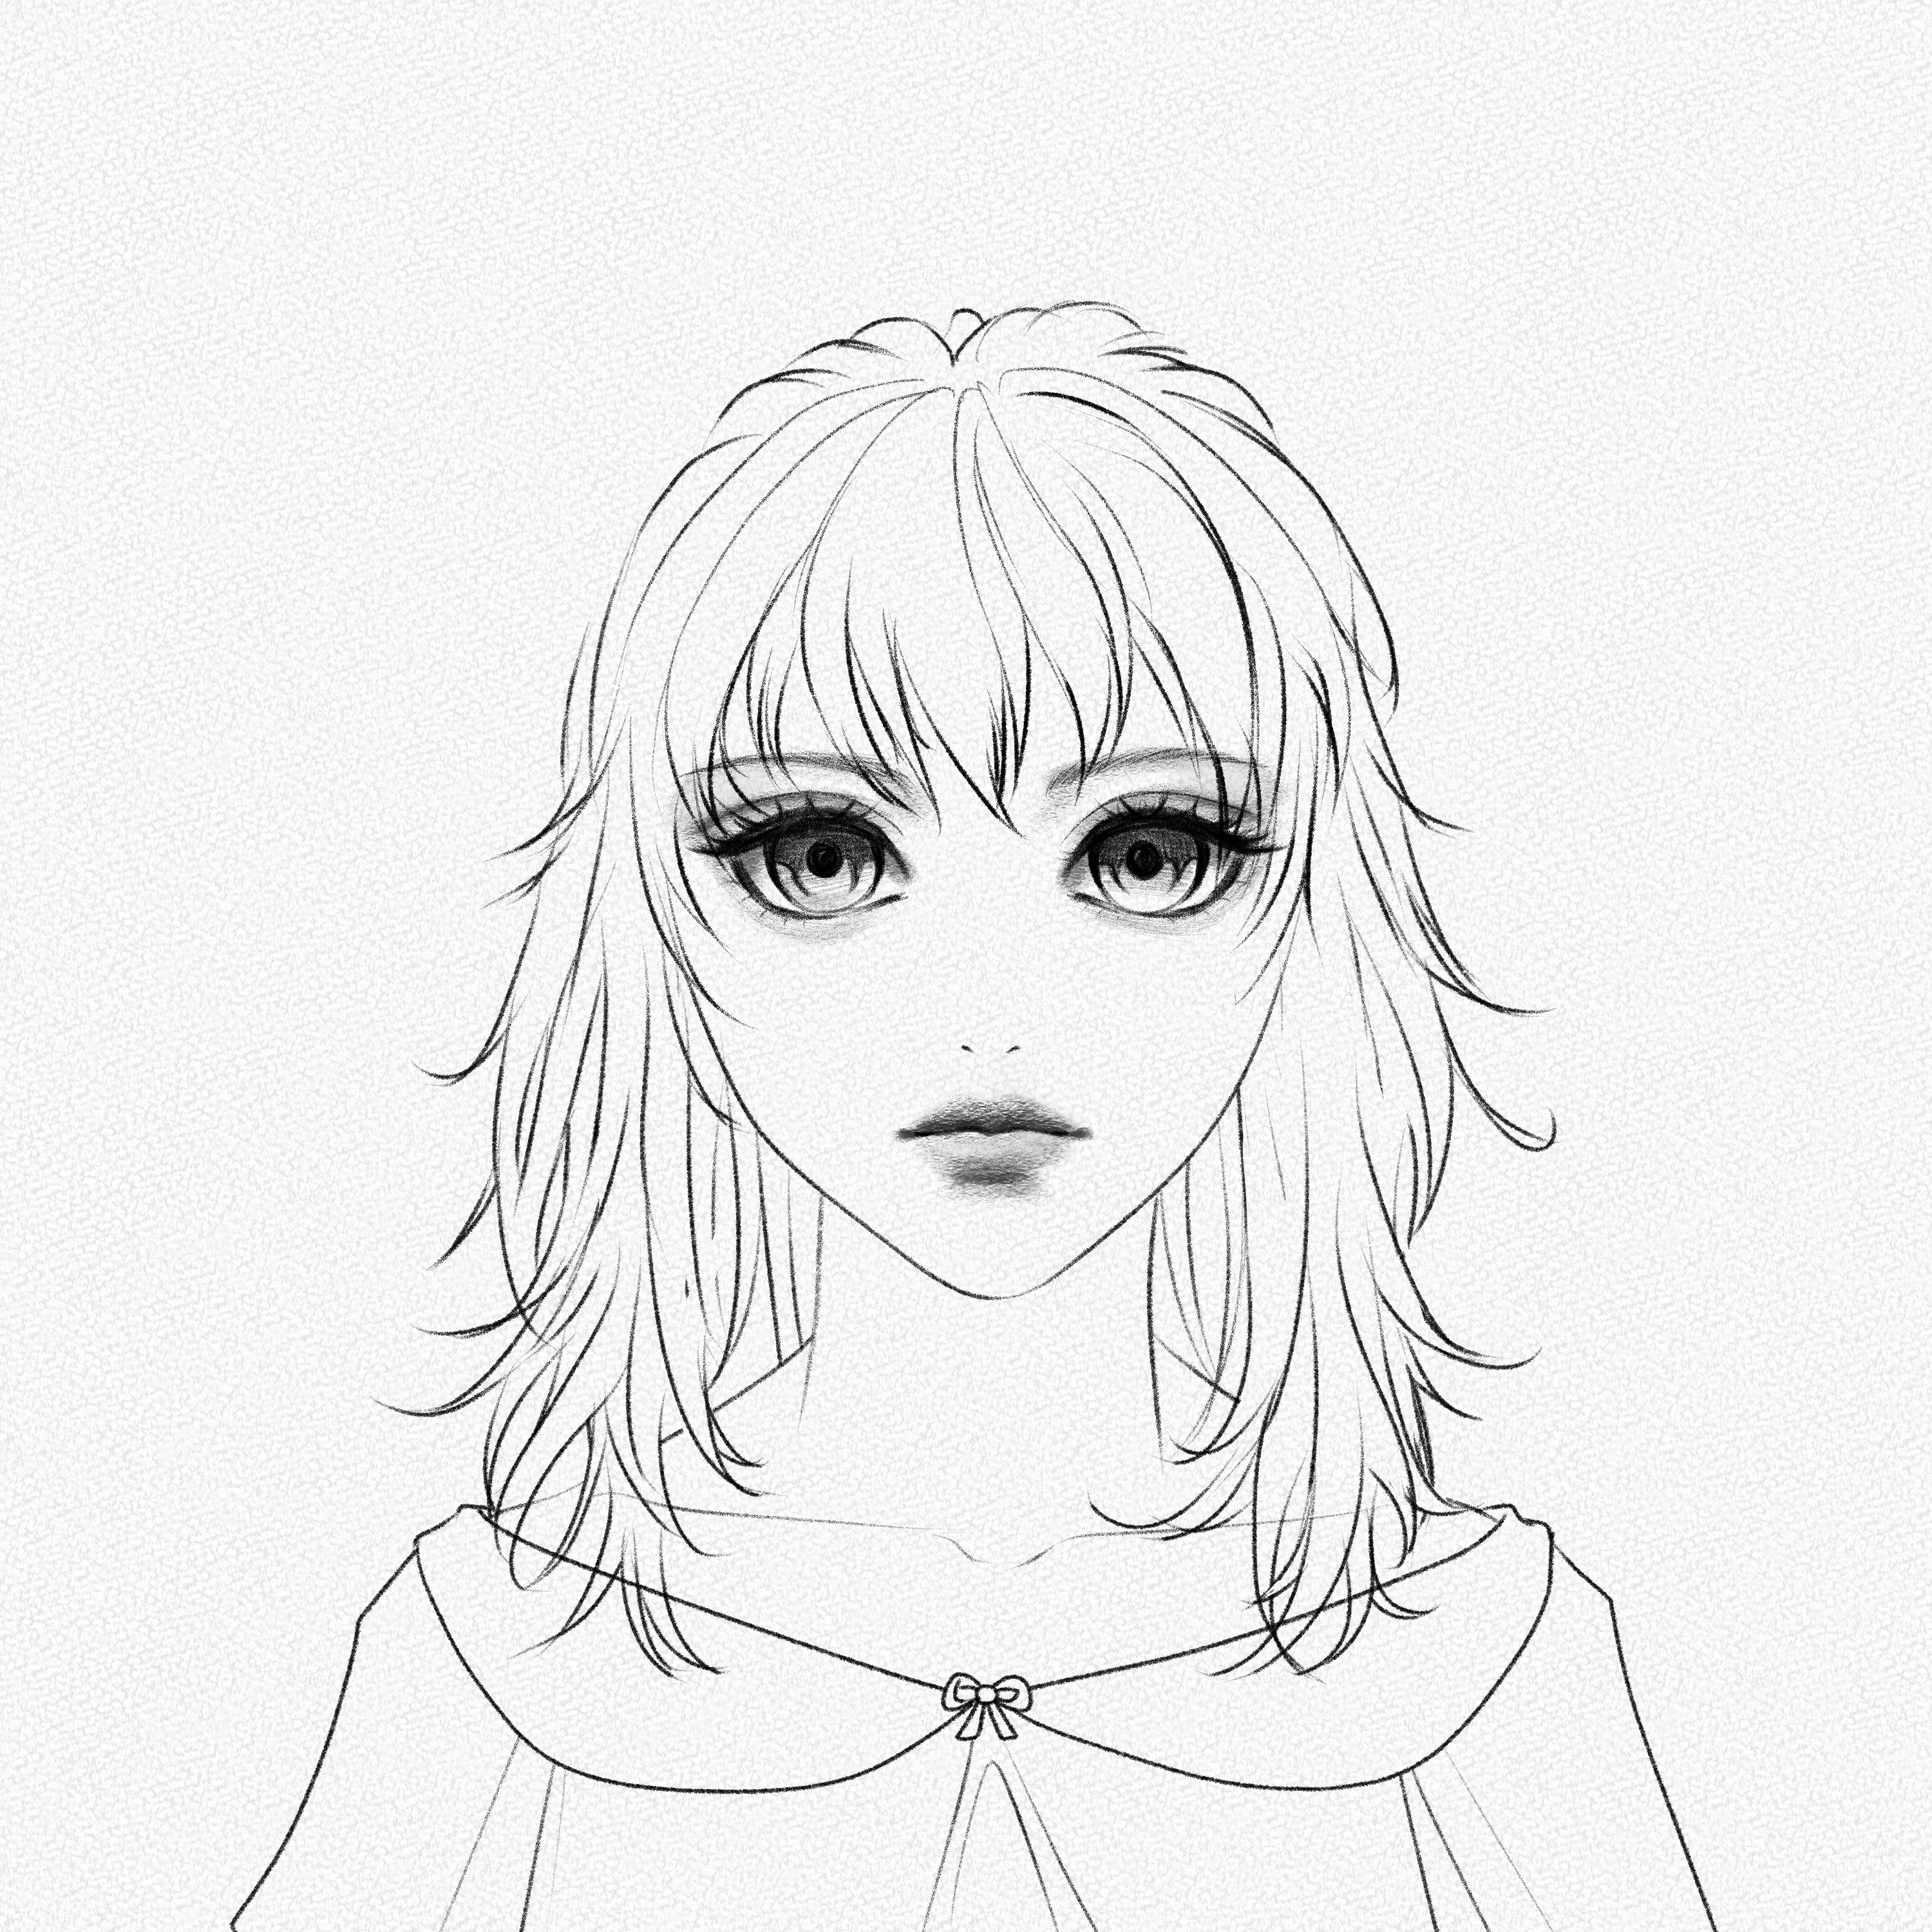
Step 25: Shade the nose
Add some graphite to the nose, creating a closed “U” shape.  Then with your kneaded eraser, erase the middle part to create the illusion of a nose. Shade the nostrils and define the shadow it casts onto the face.
Step 26: Shade the Face
With your brush, shade the face around the cheeks and the visible part of the forehead. Try to create a blush-like effect.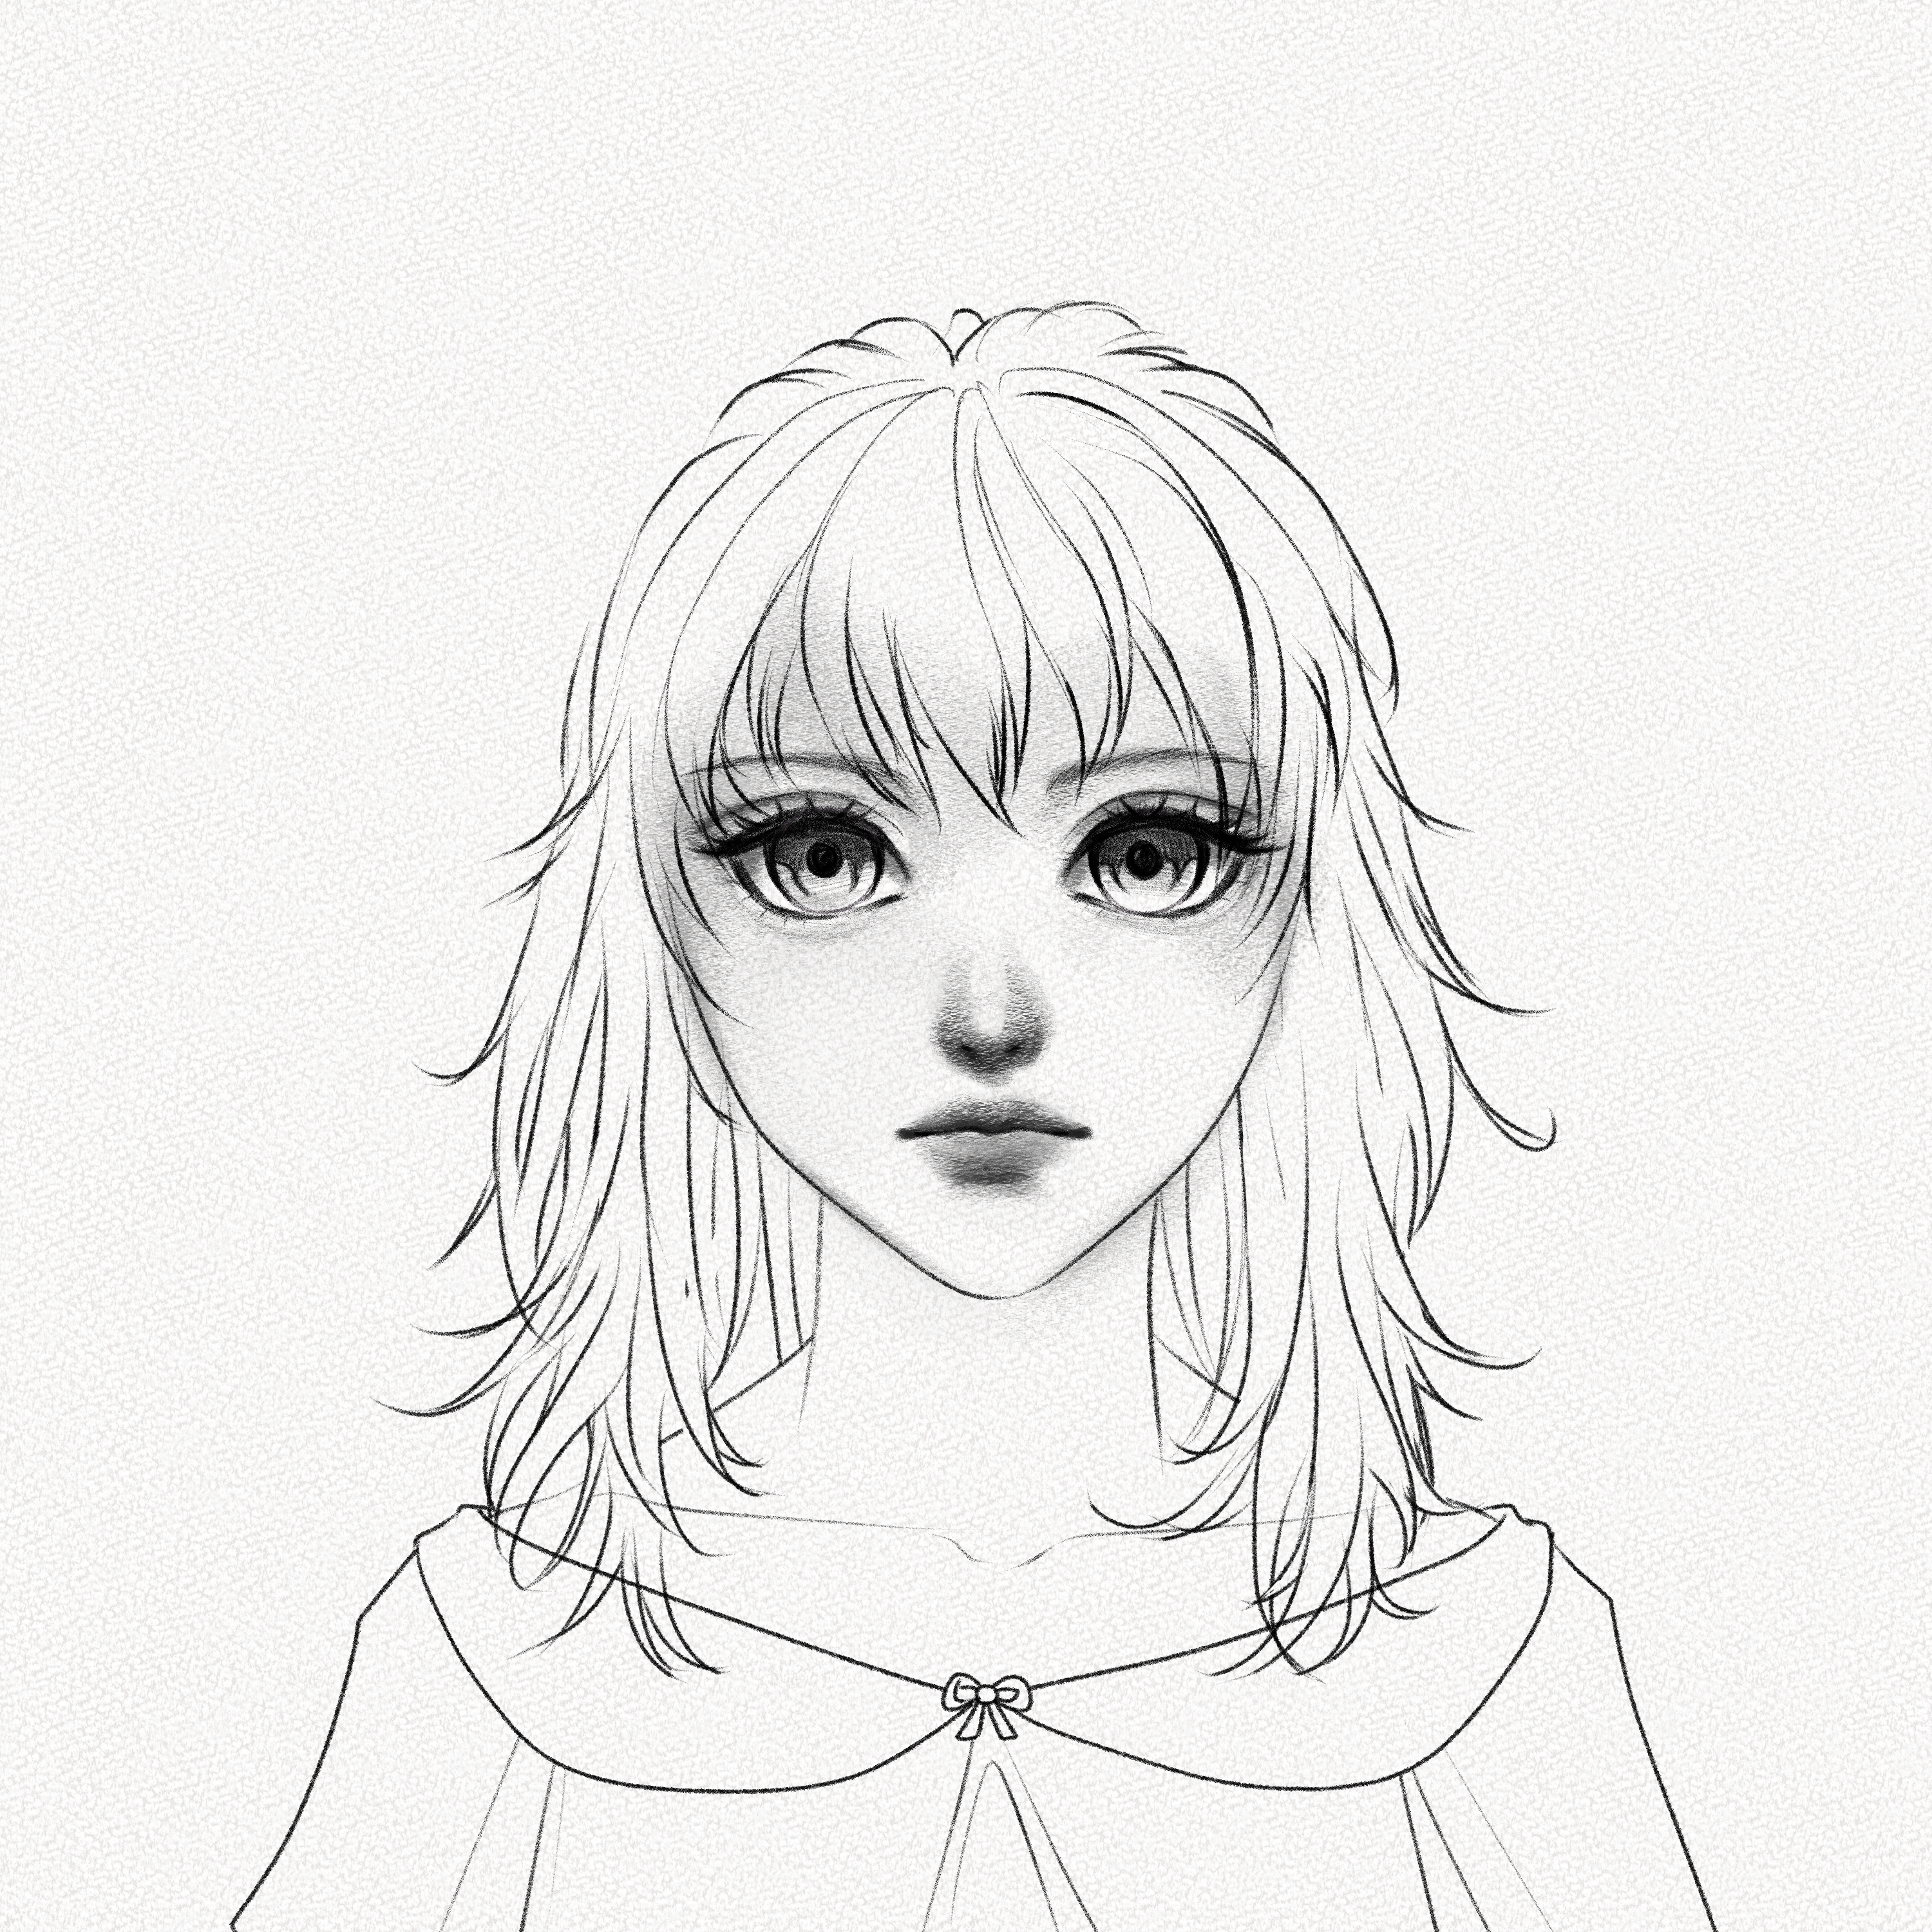
Step 27: Shade the neck
Shade around the border of the face to add dimension to your anime girl. Shade the neck and collarbone area with your powdered graphite, and add a second layer of graphite with your 4B pencil to the neck to indicate the area where the head casts a shadow.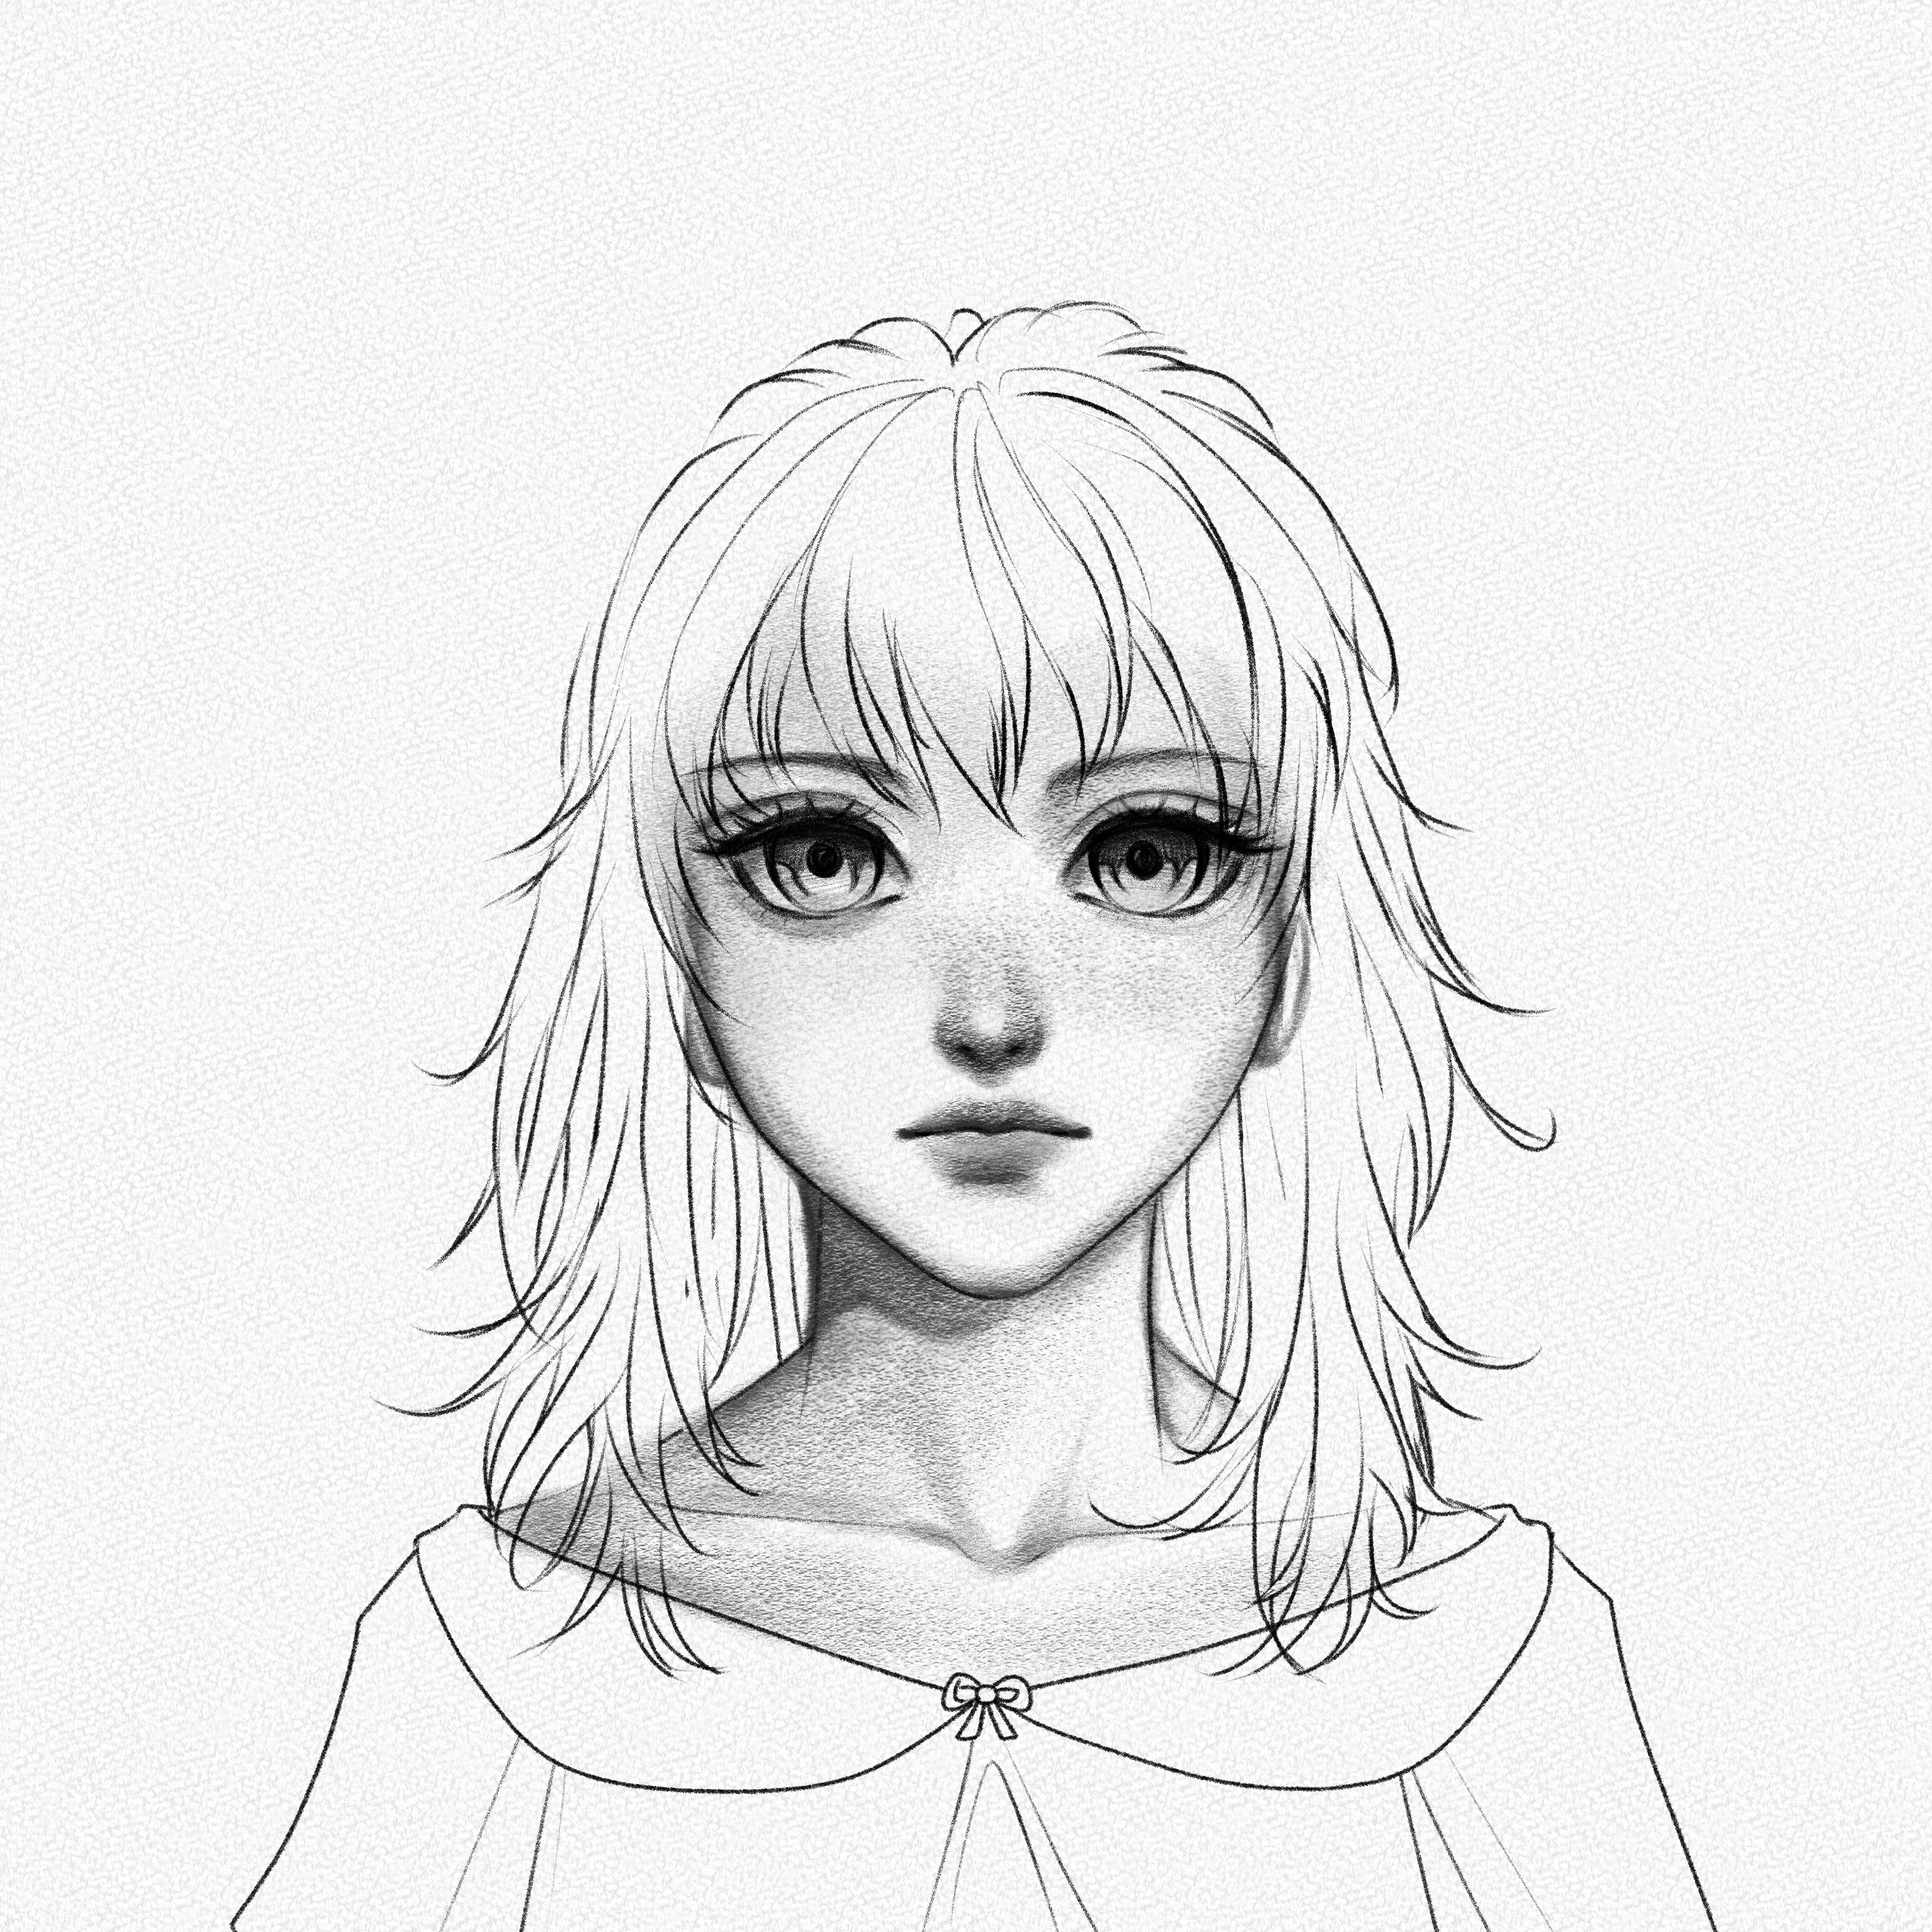
Step 28: Shade the bangs
As for now, you probably have some sections of the hair already stained with graphite, don’t worry, that was intentional. Using your 4B and 8B pencil, darken the lines of the hair, and with your blending stump, “draw” lines from the top of the head leaving the middle untouched.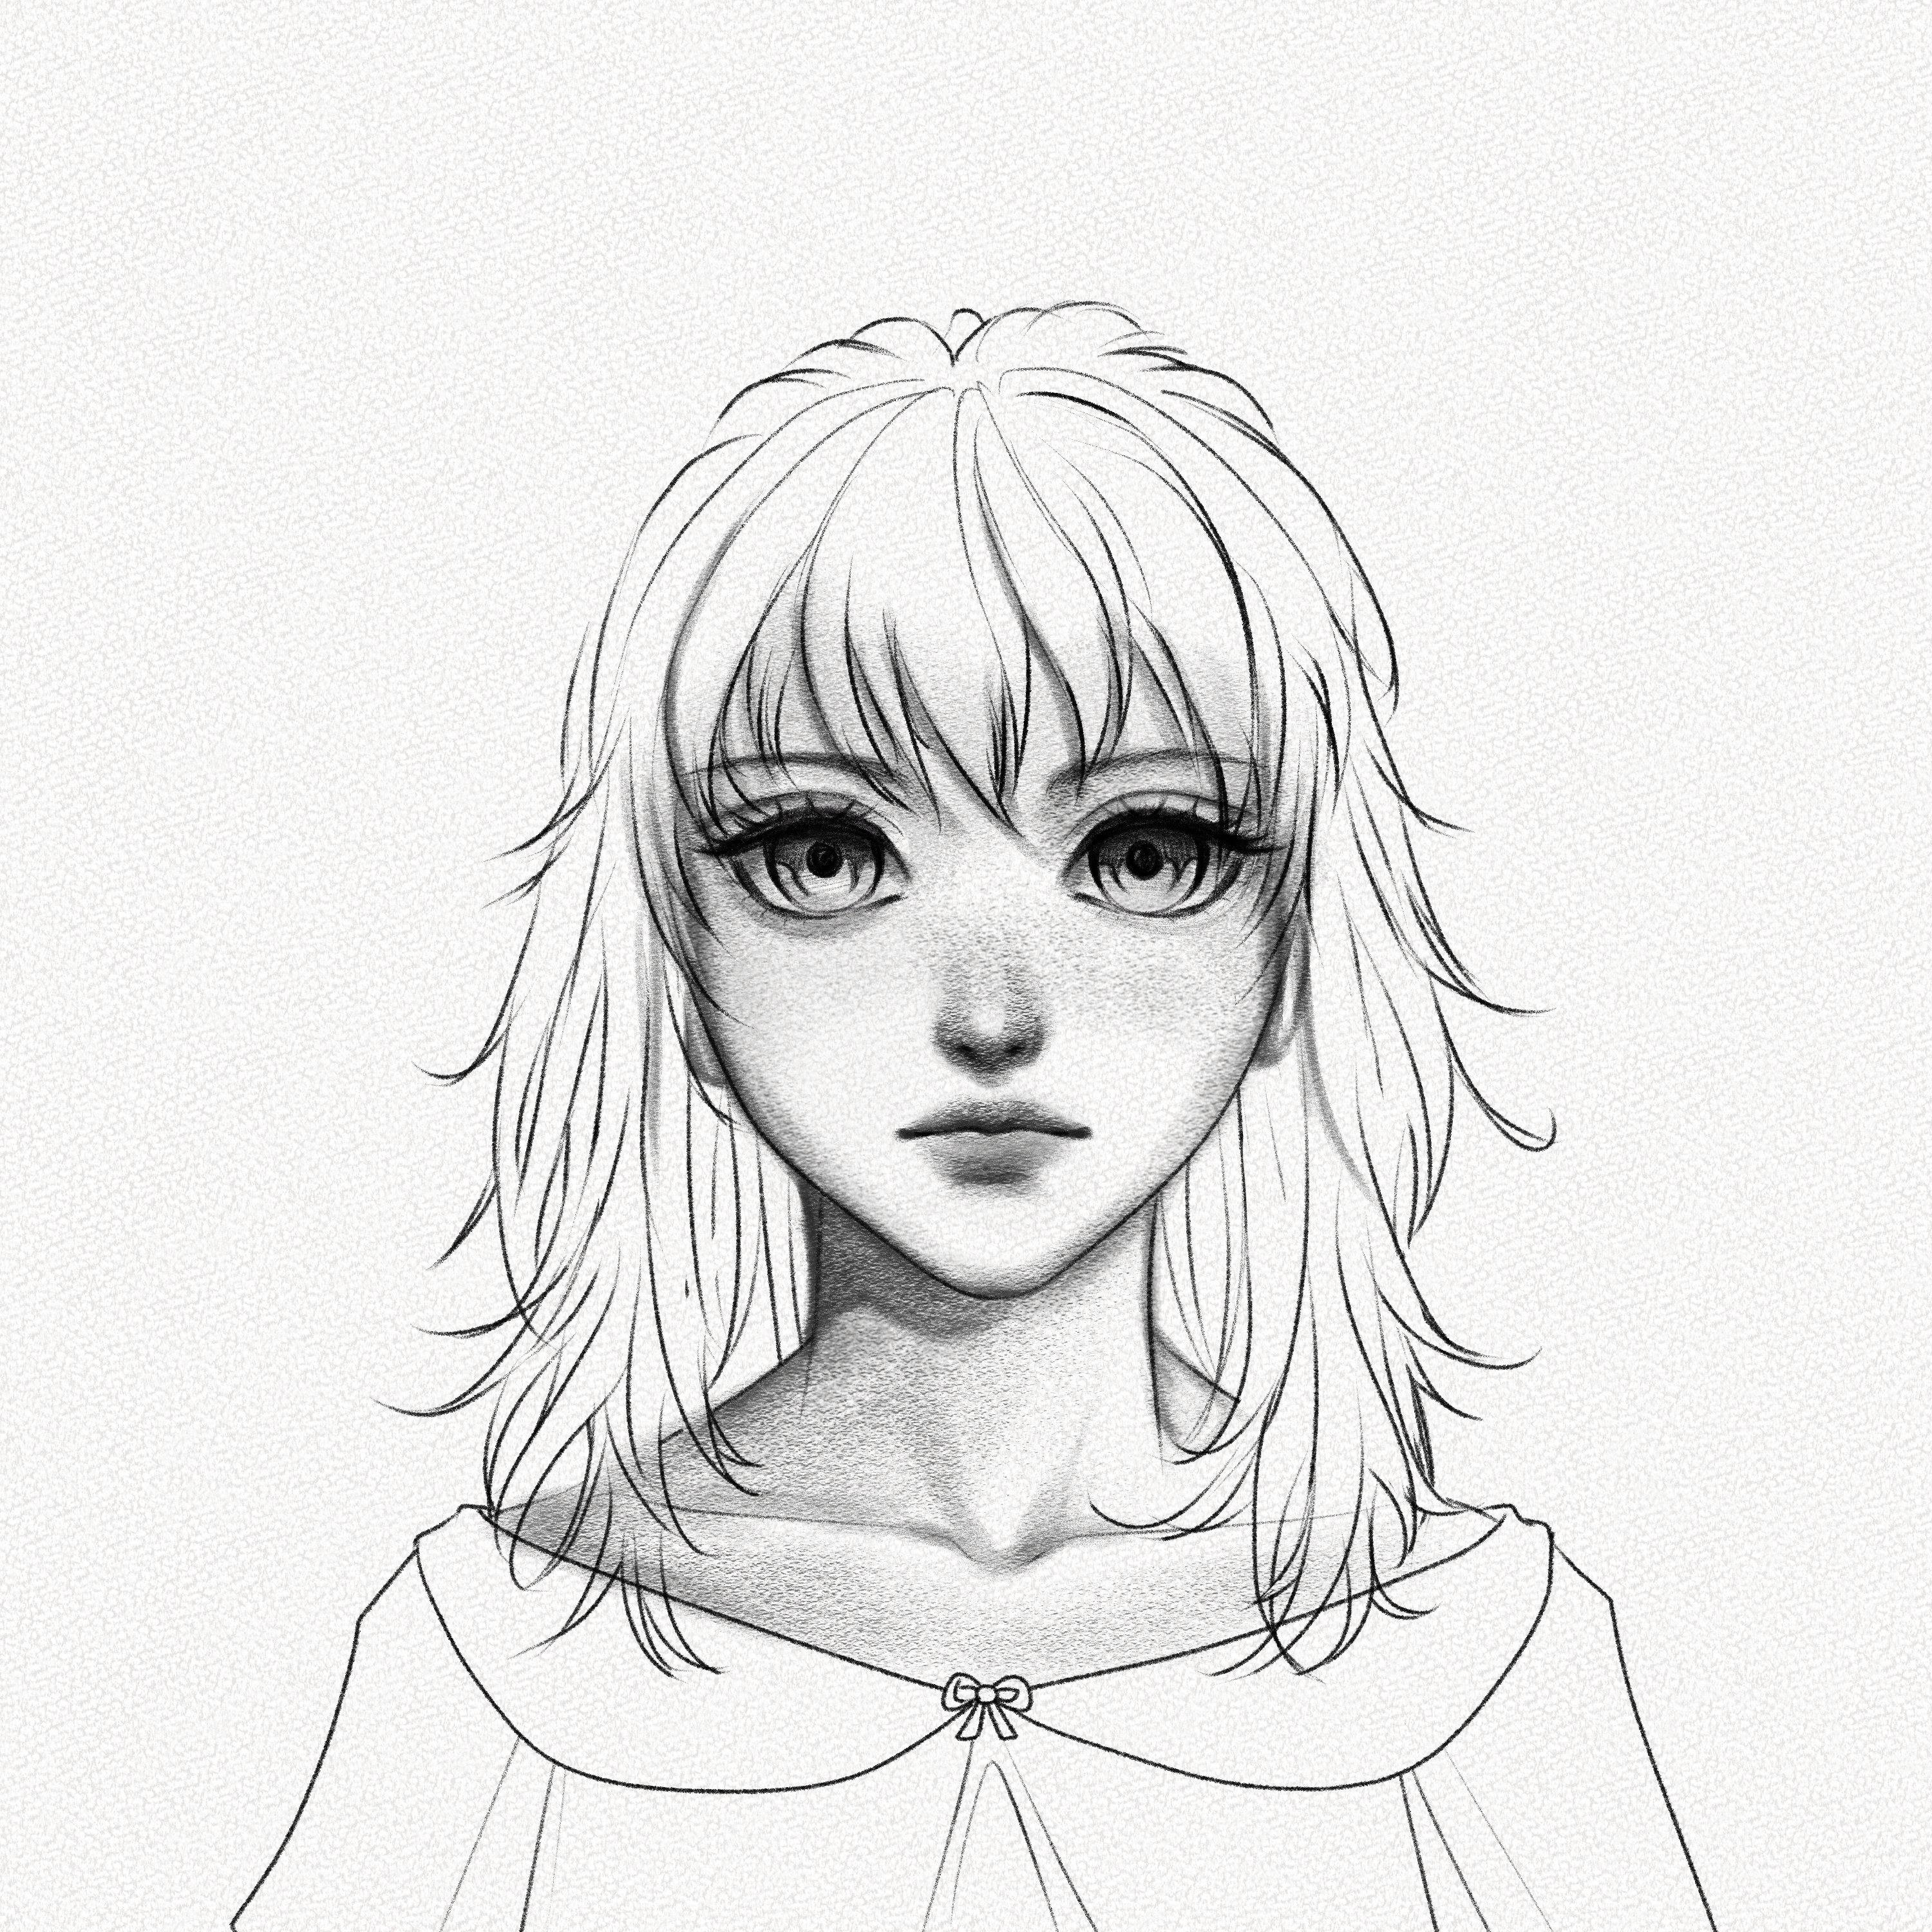
Now, clean your blending stump and “draw” some thin lines to add details to the hair. use your Tombow Mono 2.3 to add “highlights” if necessary.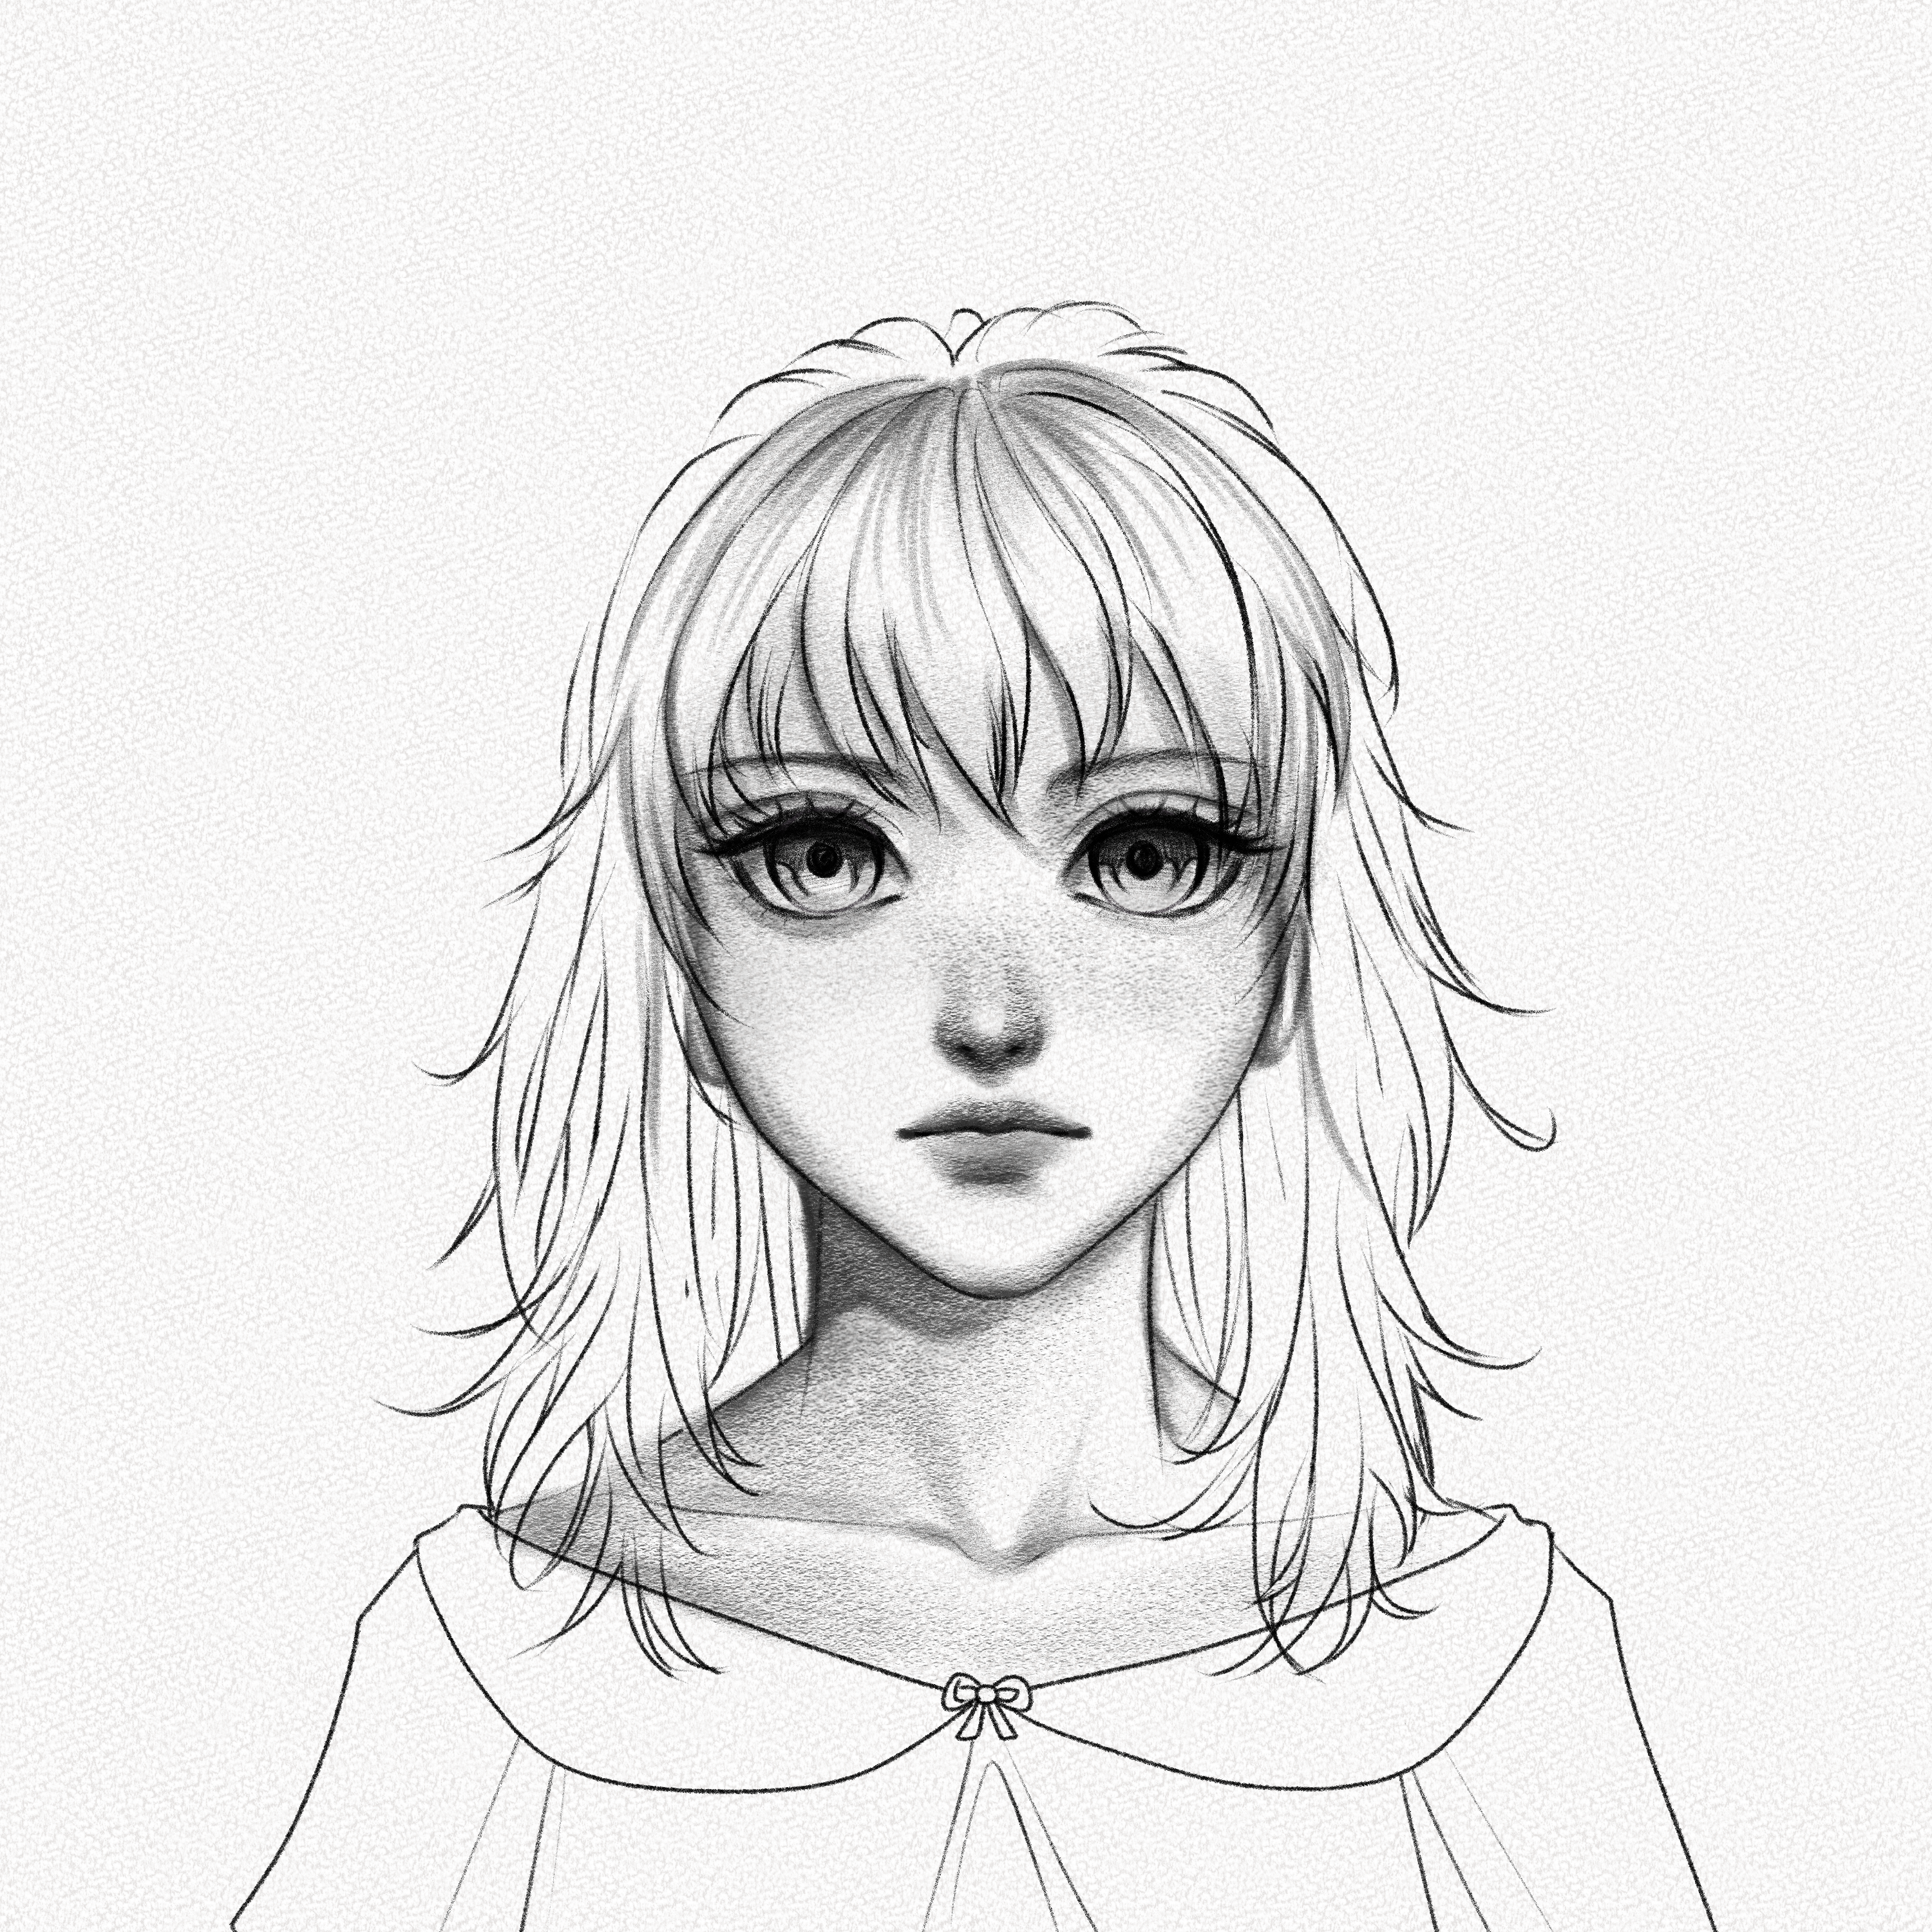
Step 29: Shade the back of the hair
With your 4B and 8B pencil, shade the part of the hair that falls behind the shoulders, Use your Tombow eraser again to add details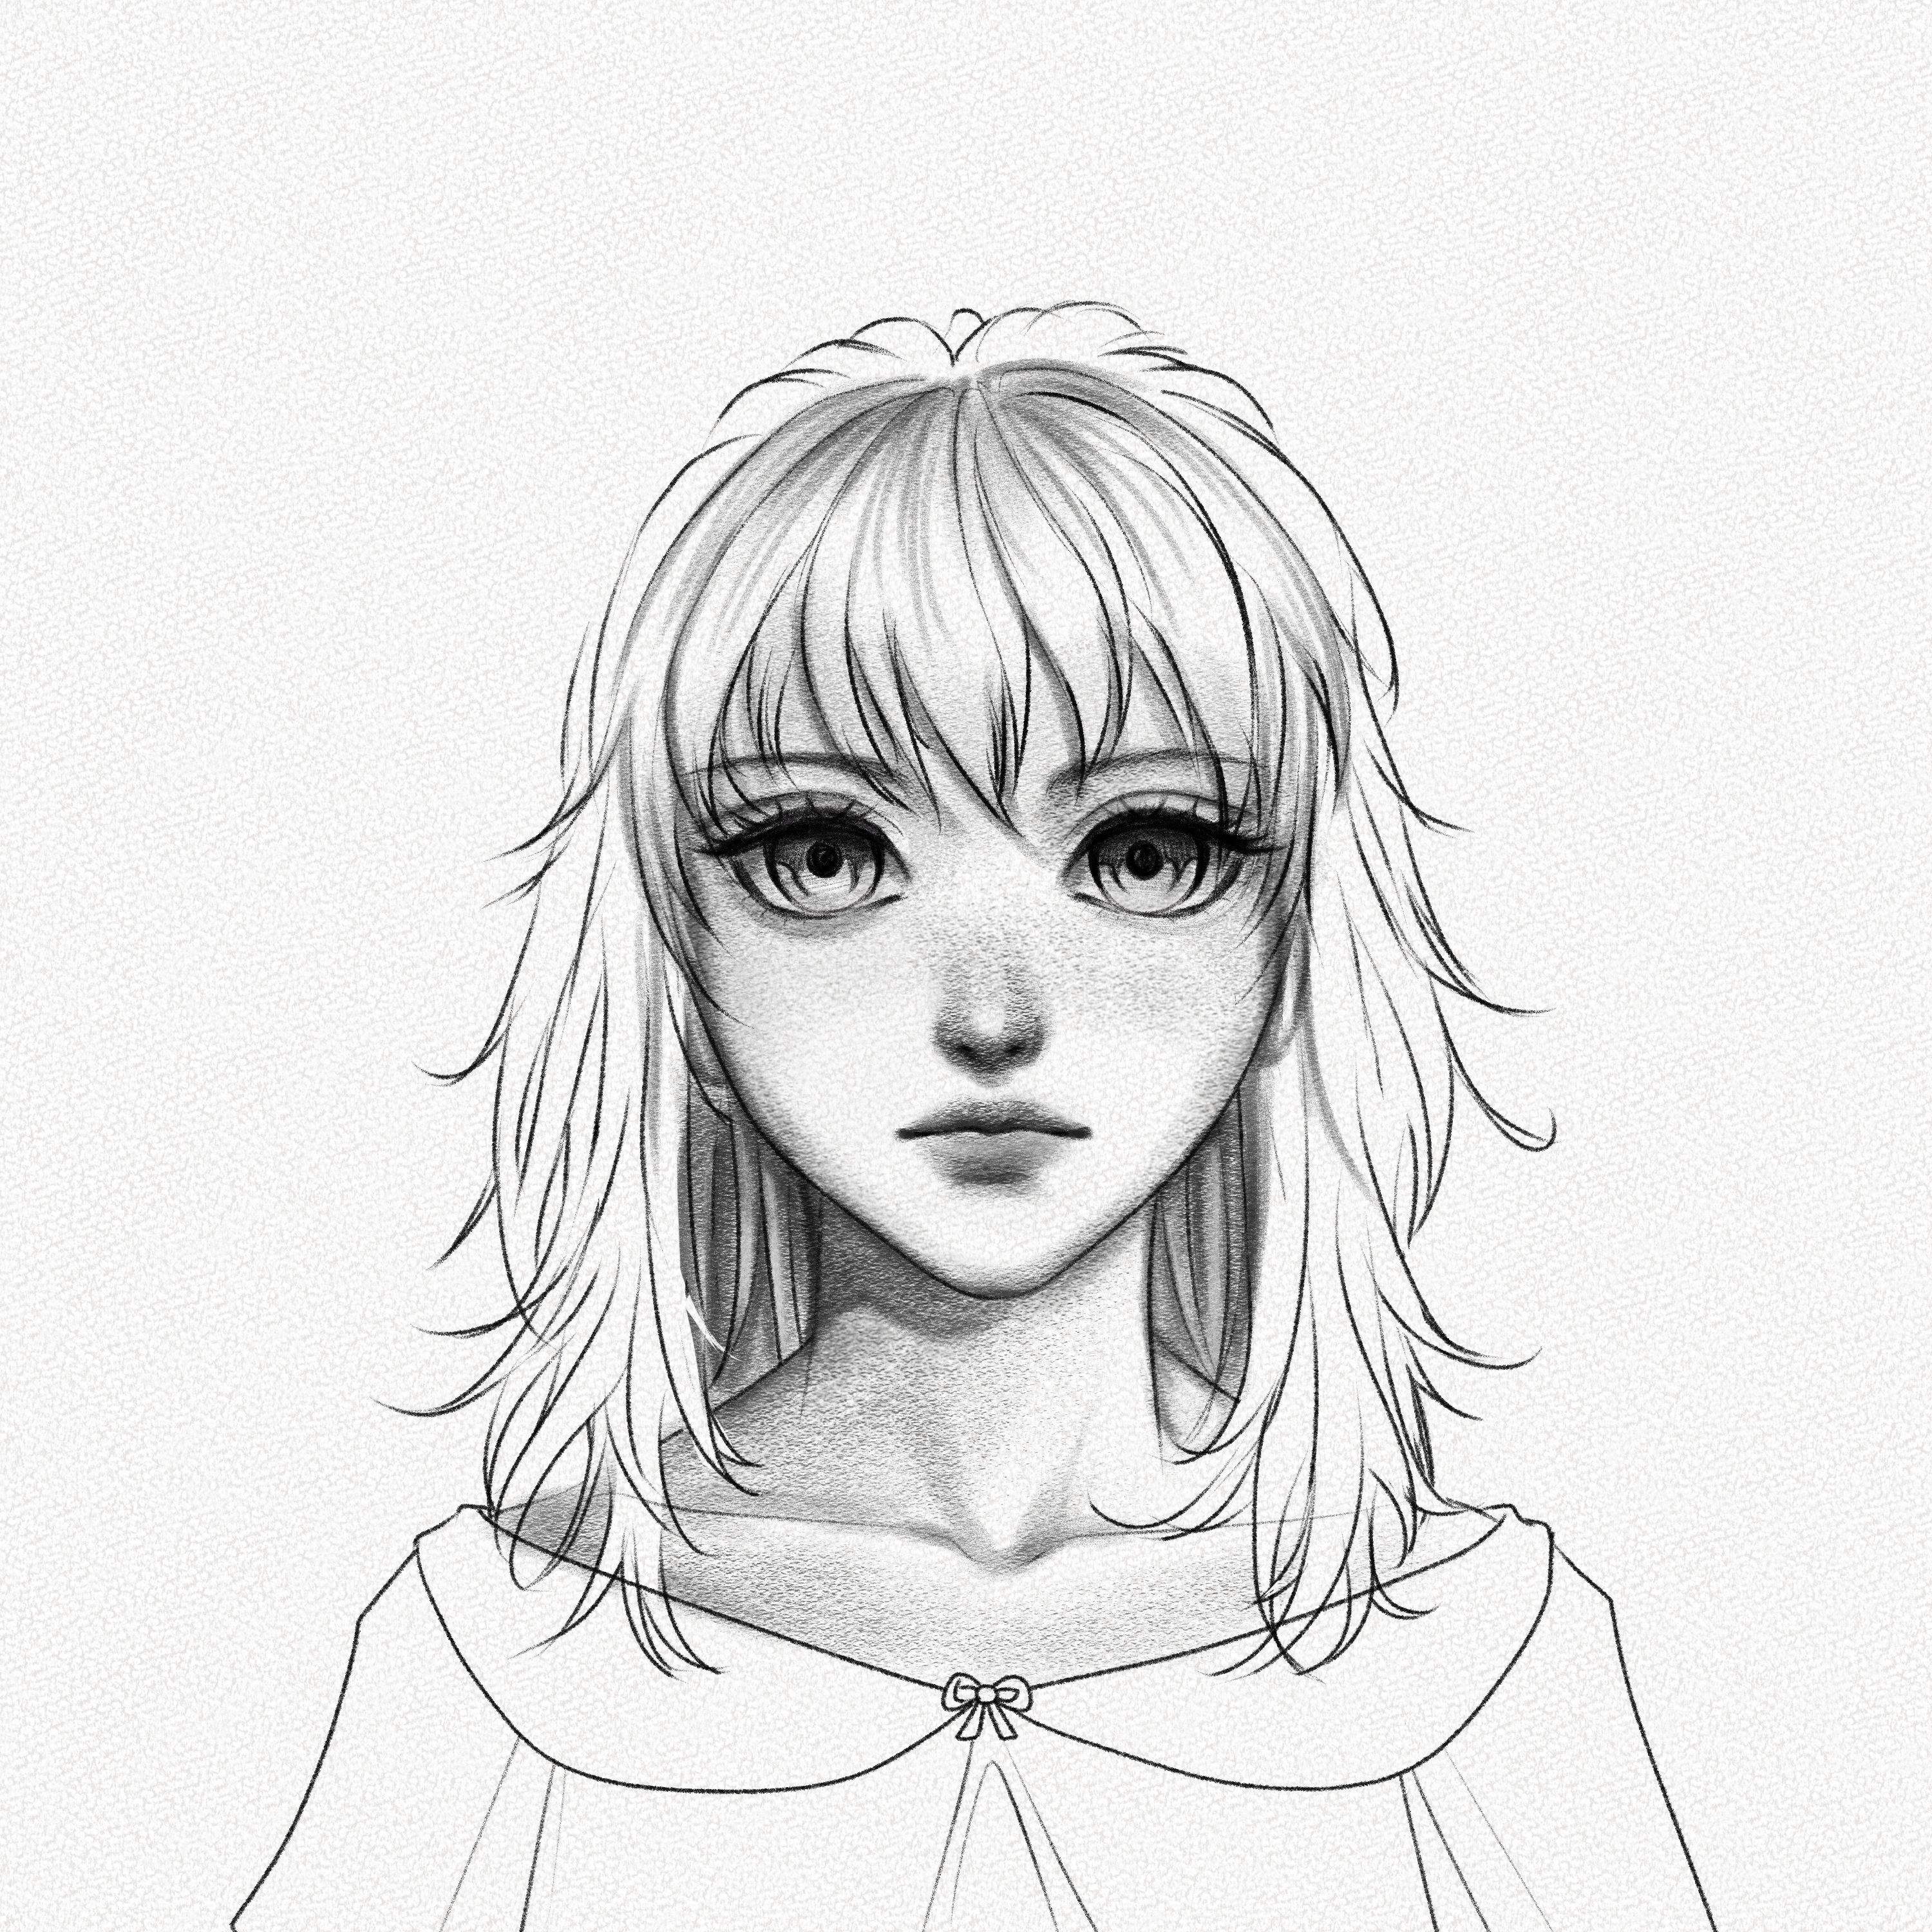
Step 30: Shade the rest of the hair
Shade the rest of the hair with your blending stump and 4B pencil, darkening the parts where two locks join.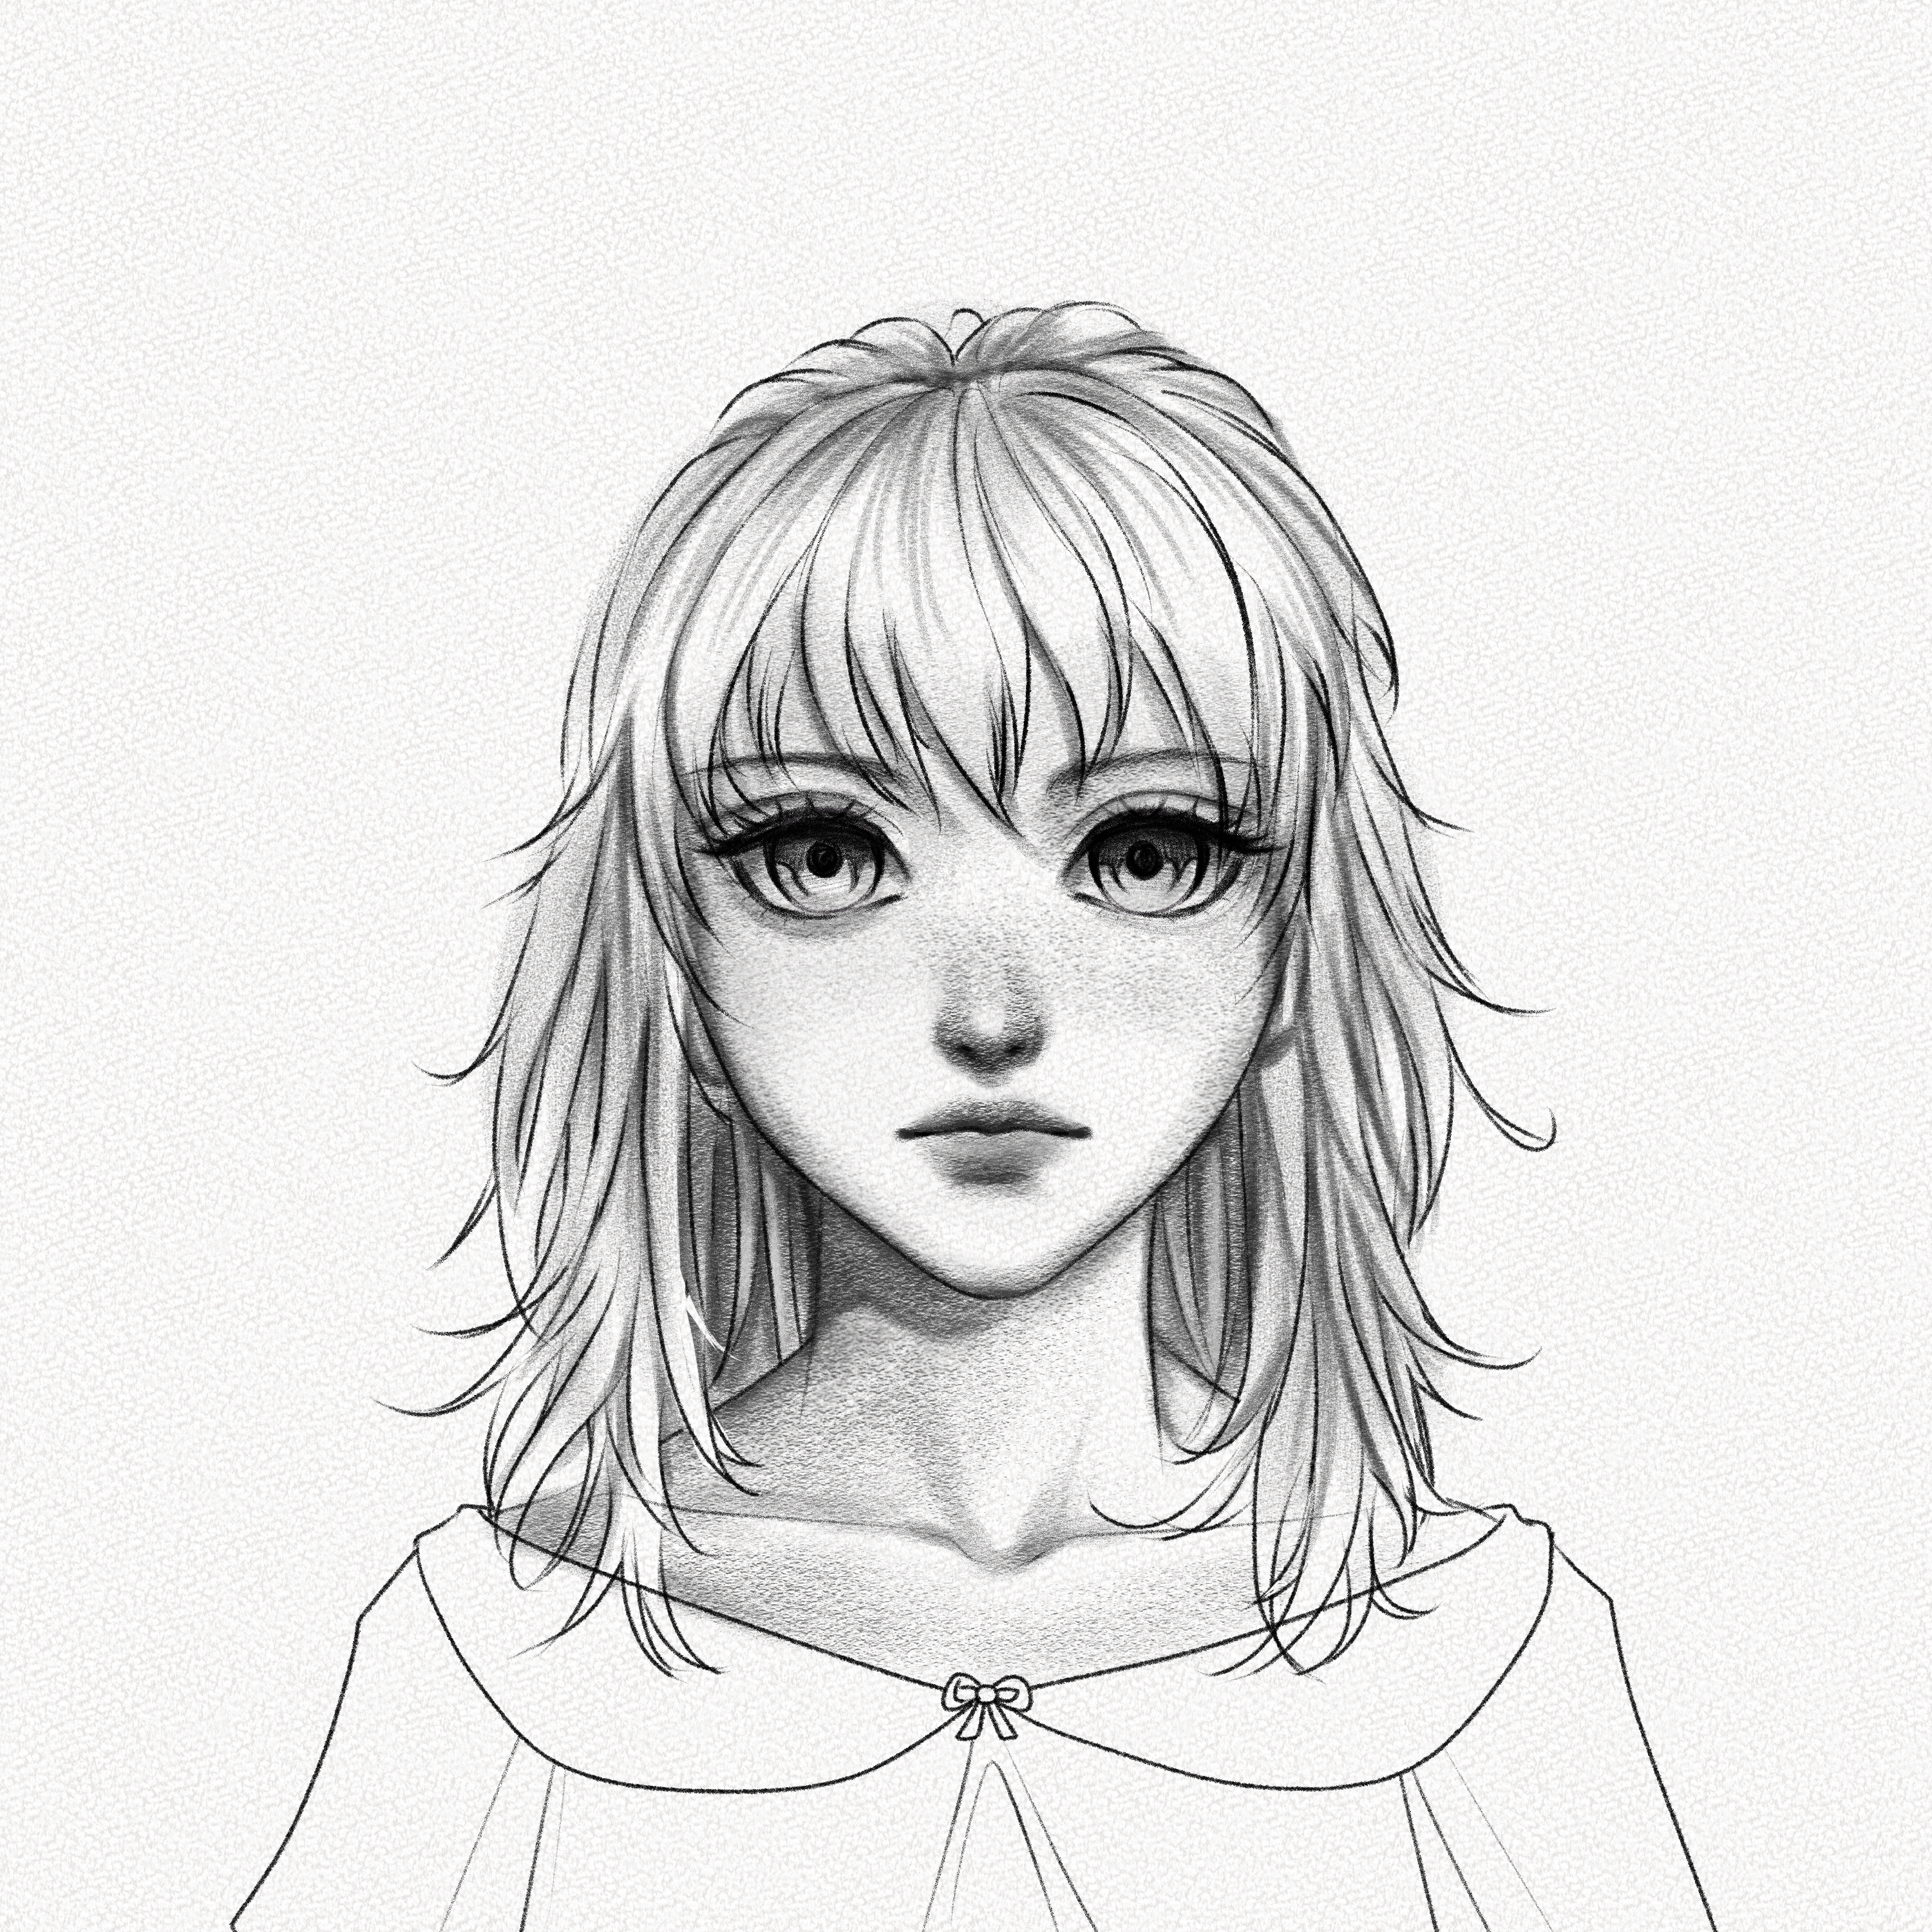
Step 31: Shade the clothes
Fill the dress with powdered graphite using a cotton ball, making sure not to stain the white lapels, but if you do, then erase it the best you can.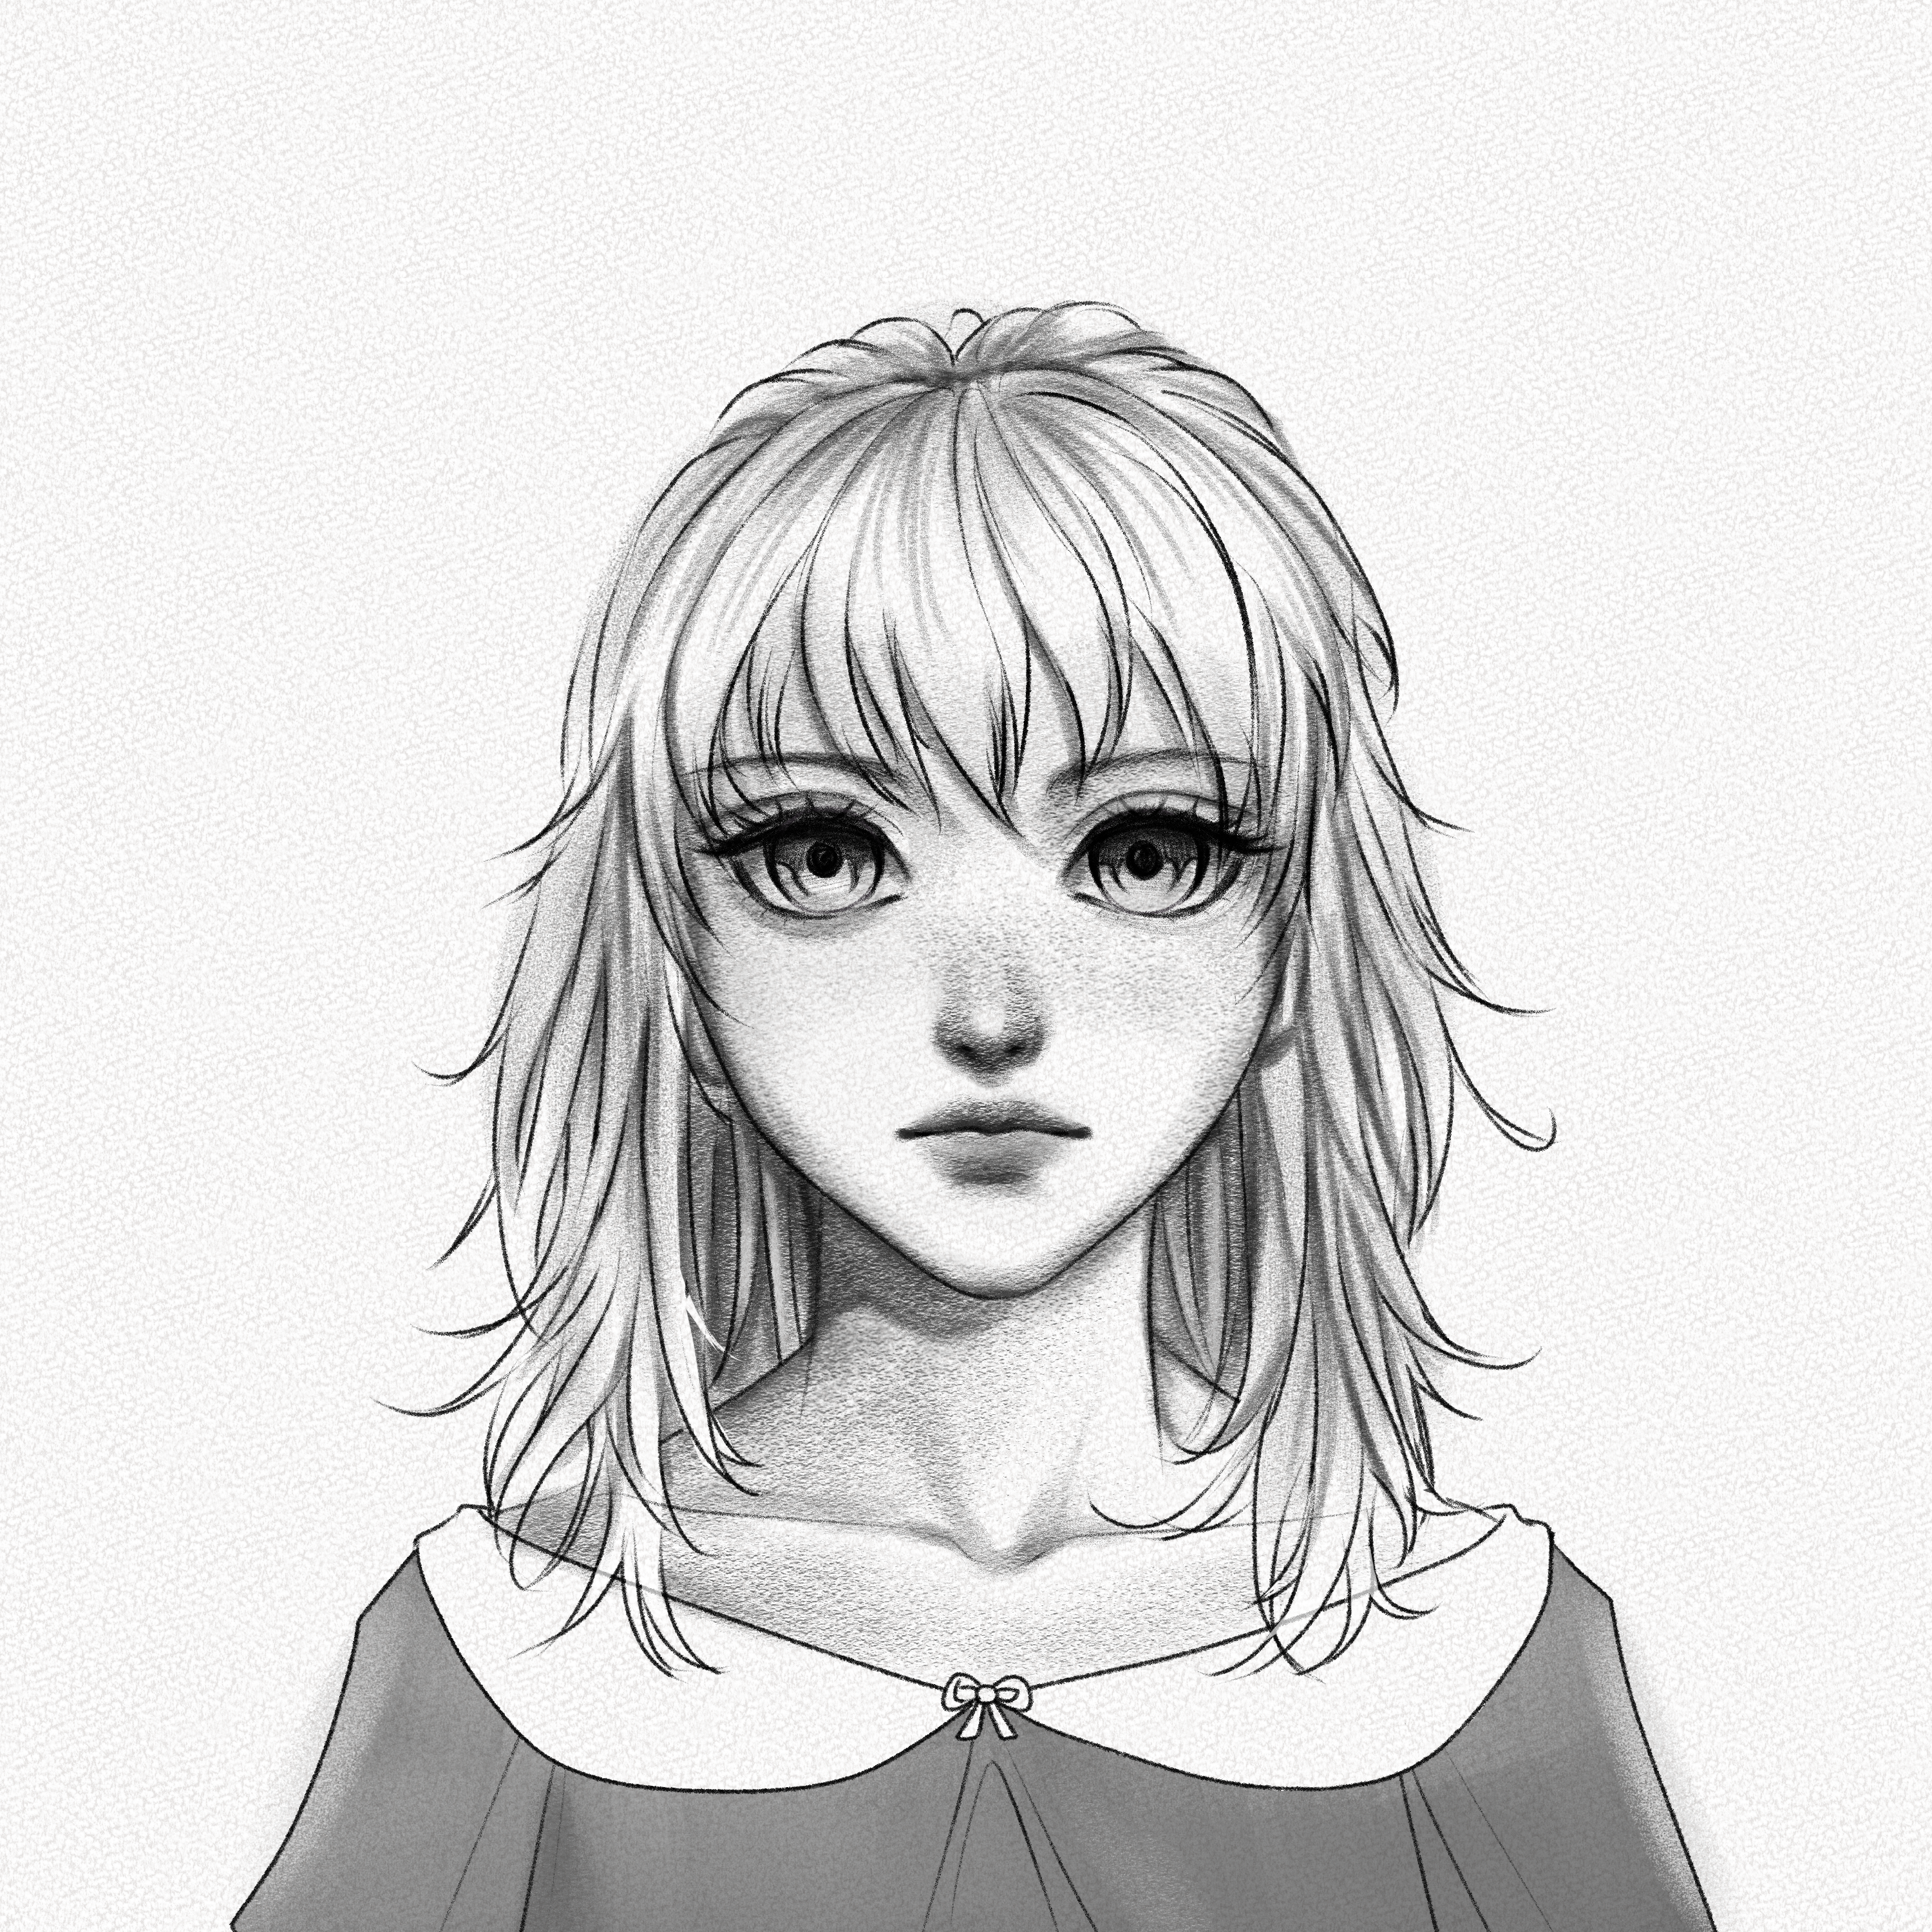
Shade the folds with your 8B pencil and shade under the lapels.
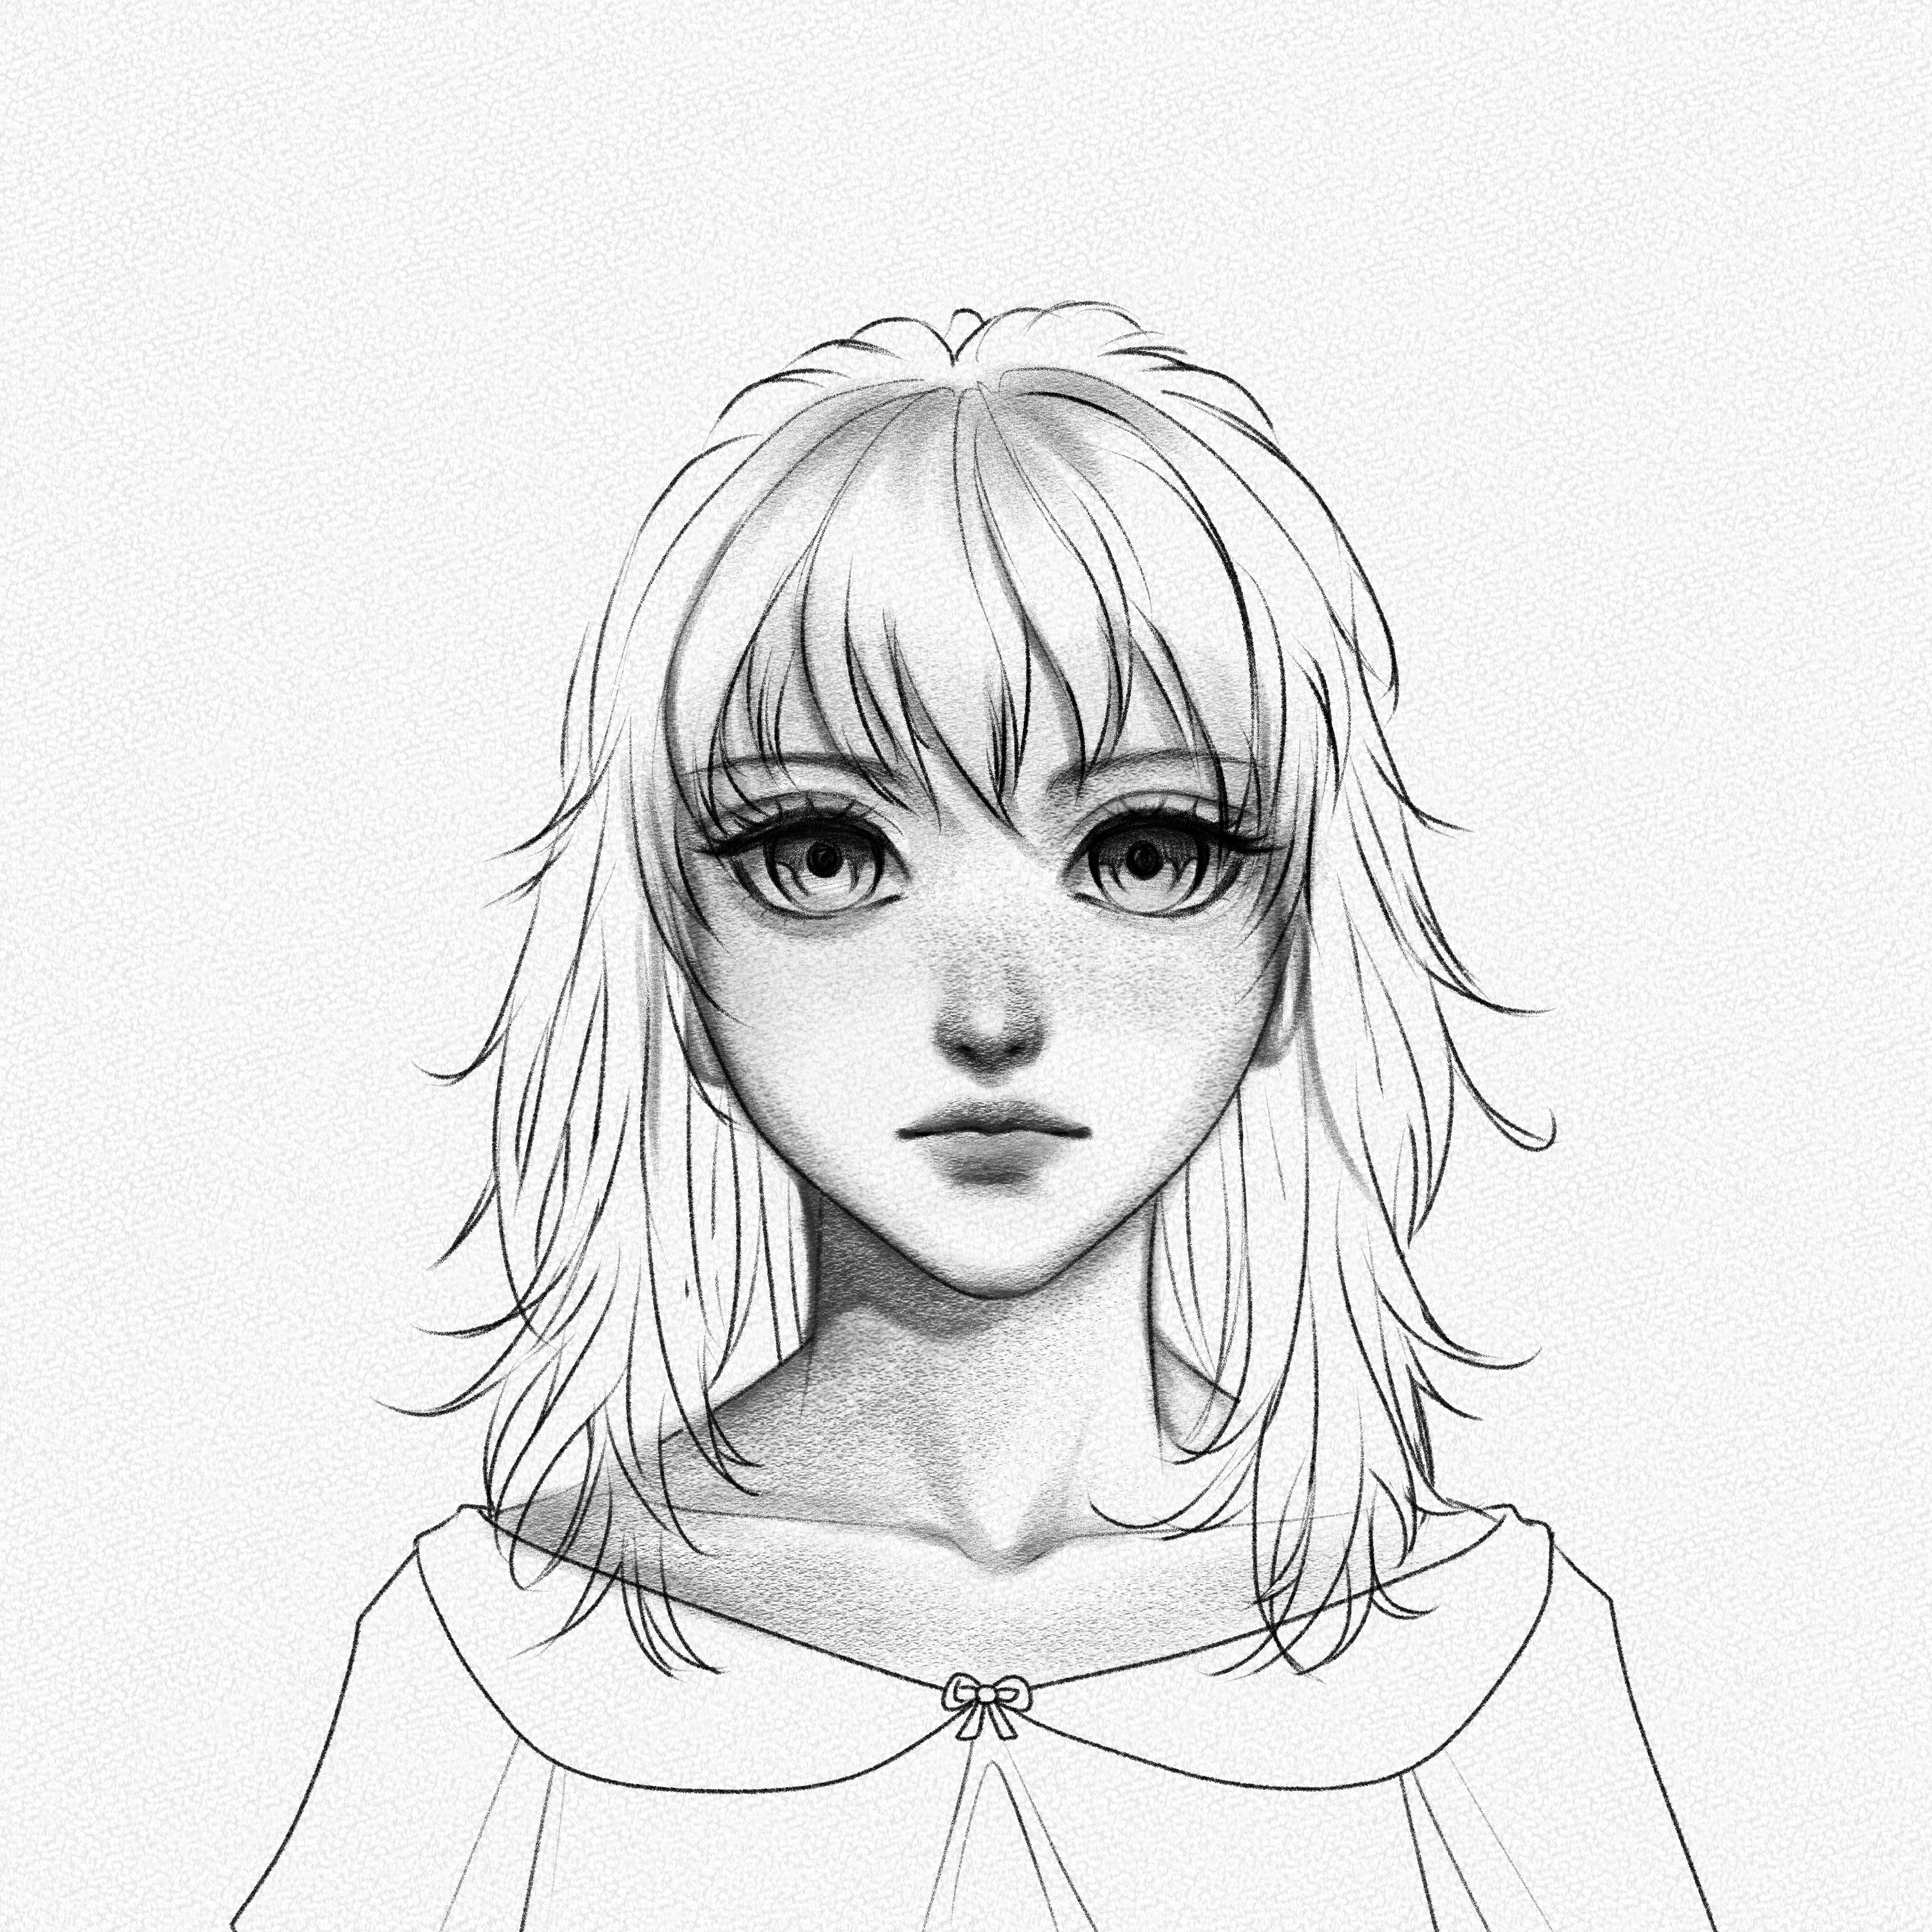
Step 32: Add Highlights
Now, using a white gel pen or white acrylic paint, add highlights to your drawing in the eyes nose, and lips.
That’s it. You’re done!
Congrats! That was a long tutorial!
We hope you had fun and enjoyed learning how to draw anime, this was a very specific tutorial, however, you can use the techniques you learned here to make your own drawings Just play with the angles, perspectives, and facial features and you’ll be able to draw your own characters in no-time!
Thank you for joining us on this adventure, and happy drawing!