Turkey is a bird that has long been associated with the holiday season. It is a symbol of the fall harvest, and in some cultures, it represents abundance.
In art, turkeys are often used as symbols of abundance and prosperity. In paintings, they are often depicted as symbols of Thanksgiving. They can also be seen in other arts, such as pottery and needlework.
Turkeys are magnificent birds with beautiful plumage, which might appear as an obstacle when drawing. However, this tutorial will show you how to draw a turkey step-by-step without failing!
What you’ll learn:
- Structure of a turkey
- How to draw a turkey’s plumage
- How to shade a turkey
Materials needed:
- A piece of paper
- A 2B graphite pencil
- A 6B graphite pencil
- Powdered Graphite
- A soft blending tool
- A kneaded eraser
- A Precise Eraser (Tombow Mono Zero)
- A ruler
This is the turkey you’re going to draw: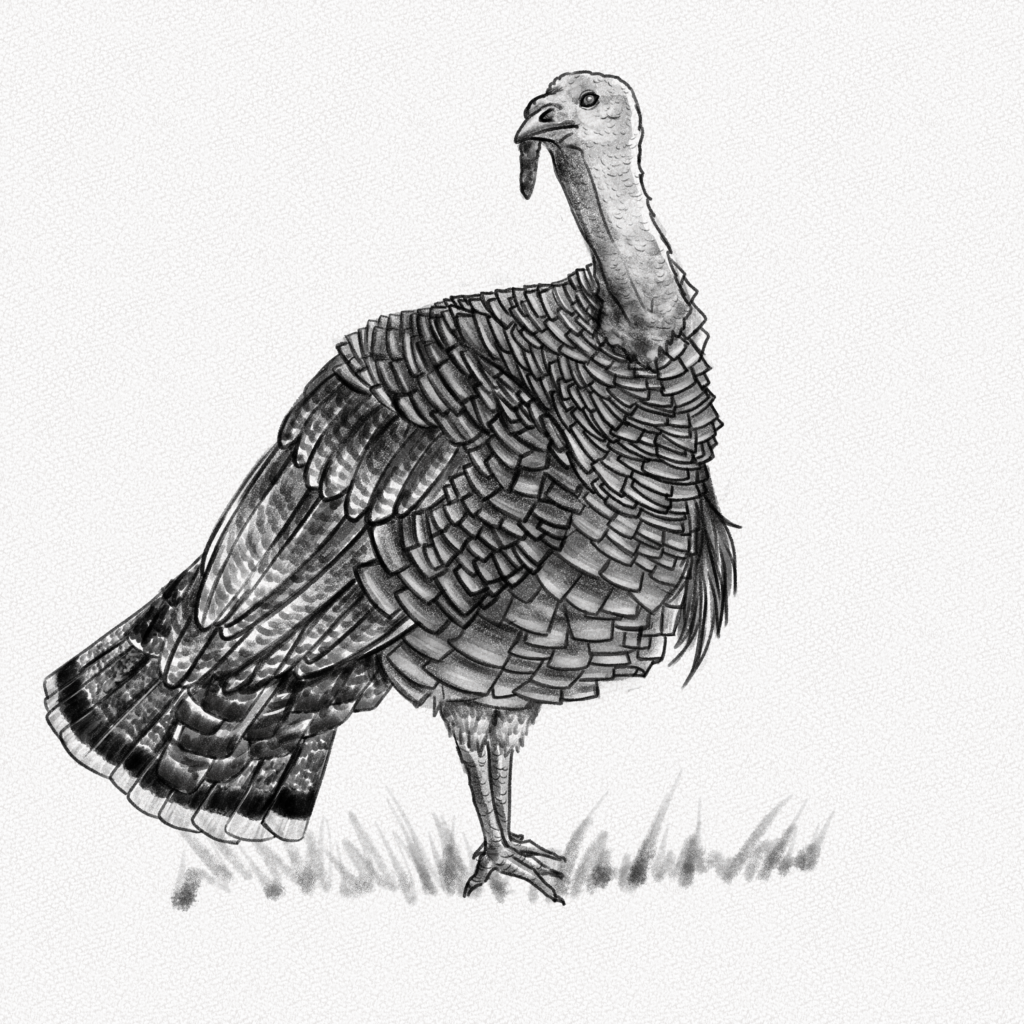
And these are all the steps we’ll walk you through: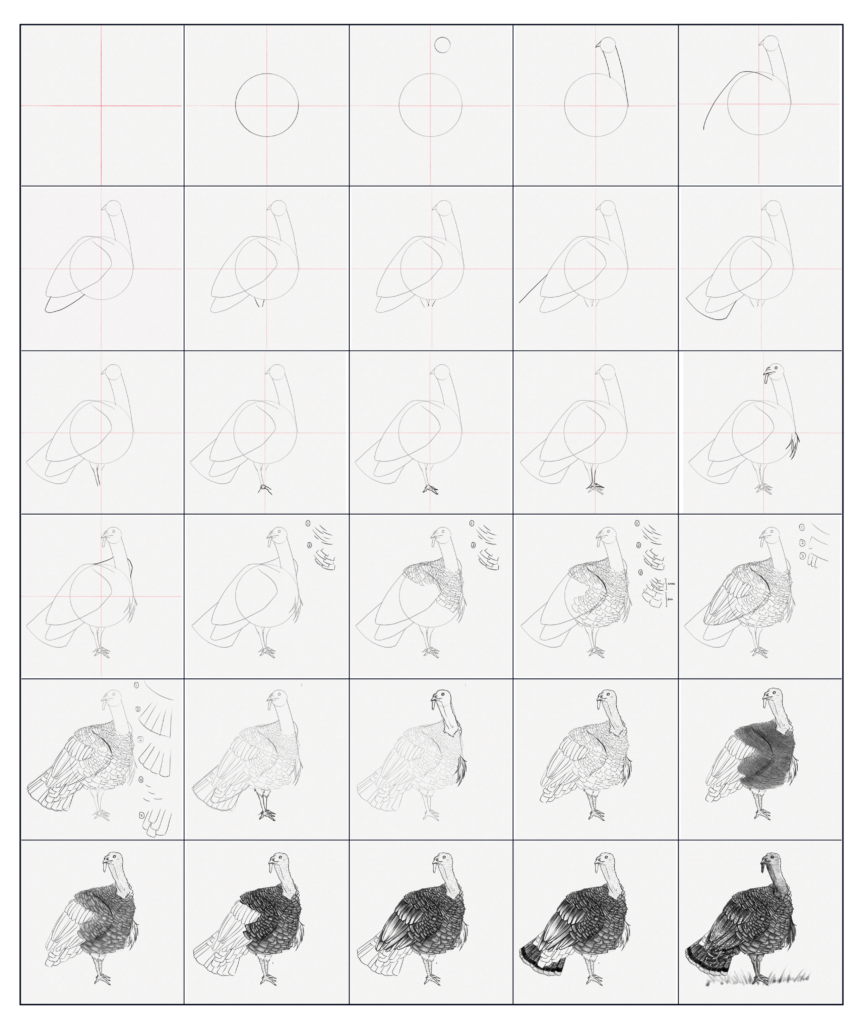
Section 1.- Body Structure
For this section, we’re going to break the turkey’s body into simple shapes that will make the drawing process easier.
Step 1: Split your canvas
Using your ruler, measure and split your canvas into four equal parts with two lines. These lines will help you place each part of the turkey’s body.

Step 2: Draw a circle
Draw a circle in the middle of your canvas, and use the lines we drew in the previous step as a reference to place them. This will be our turkey’s body.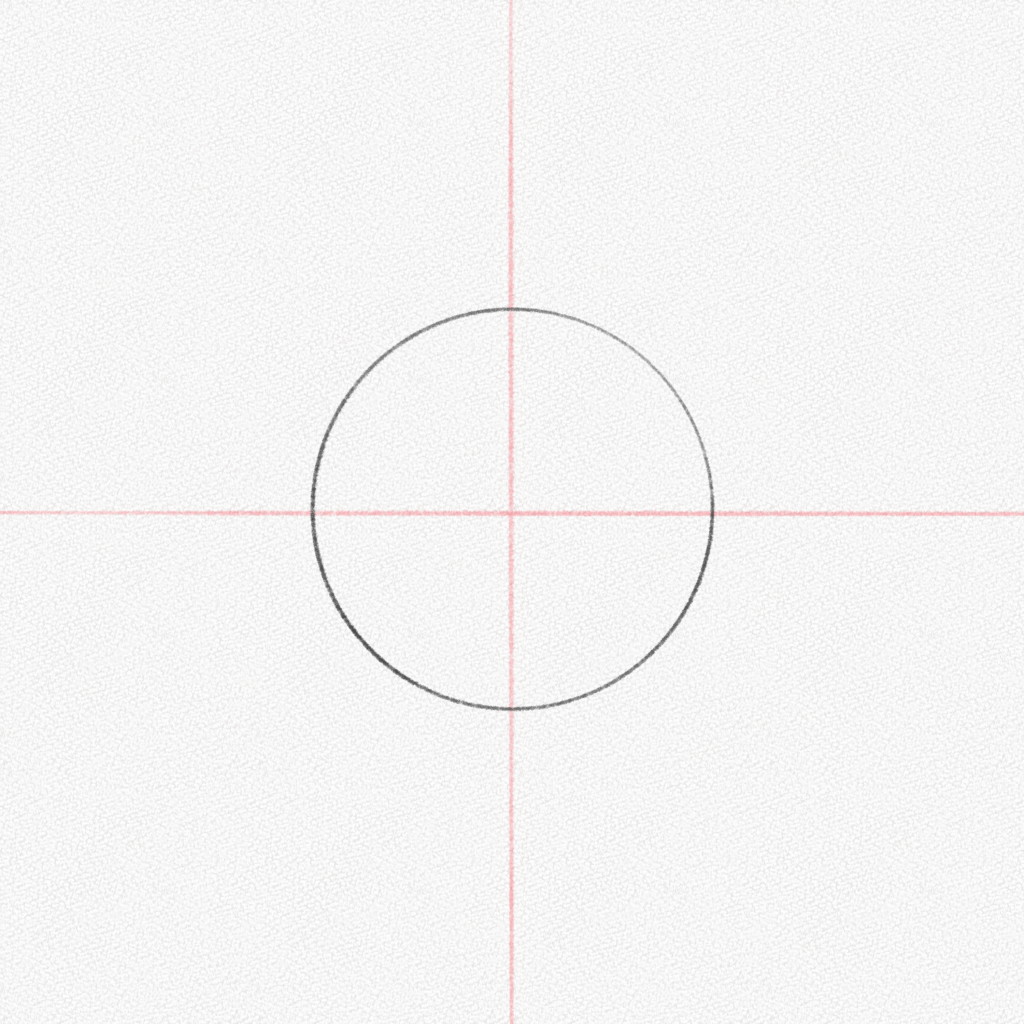
Step 3: Draw a smaller circle
Draw another circle on the top part of your canvas. This will be the turkey’s head. 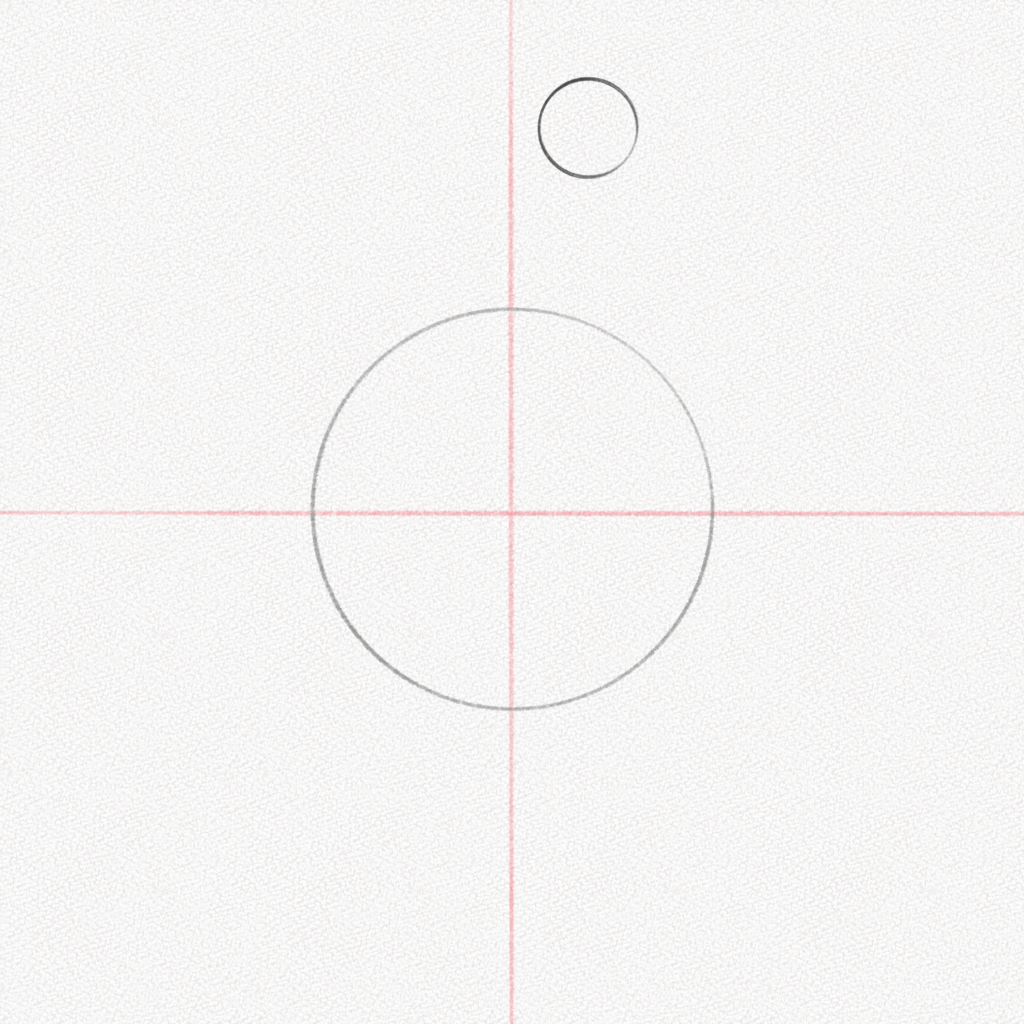
Step 4: Draw two lines
Draw two lines from the sides of the smaller circle to the body. This will be the neck of our turkey. Add the shape of the beak too.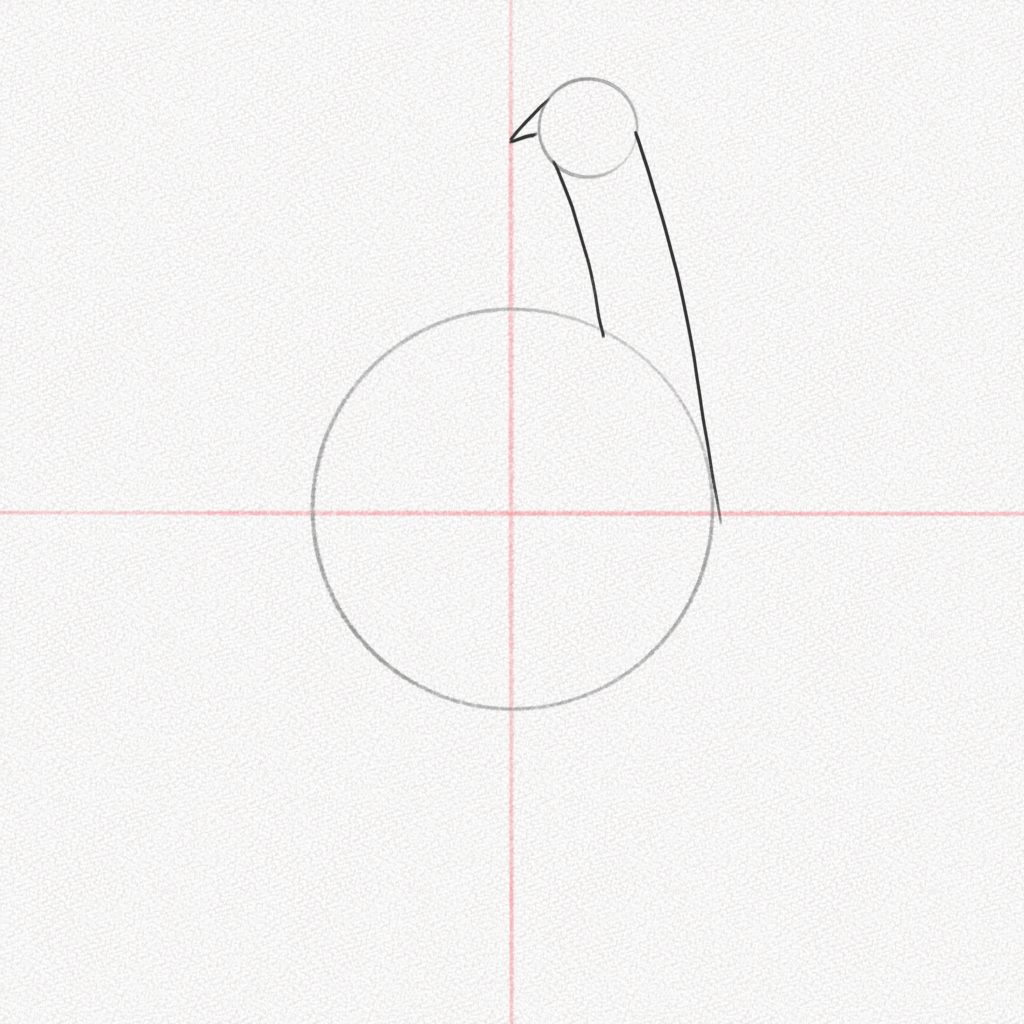
Step 5: Draw a curved line
Trace a curved line from around the base of the neck to the base of the circle at an angle. This will be the wing of our turkey.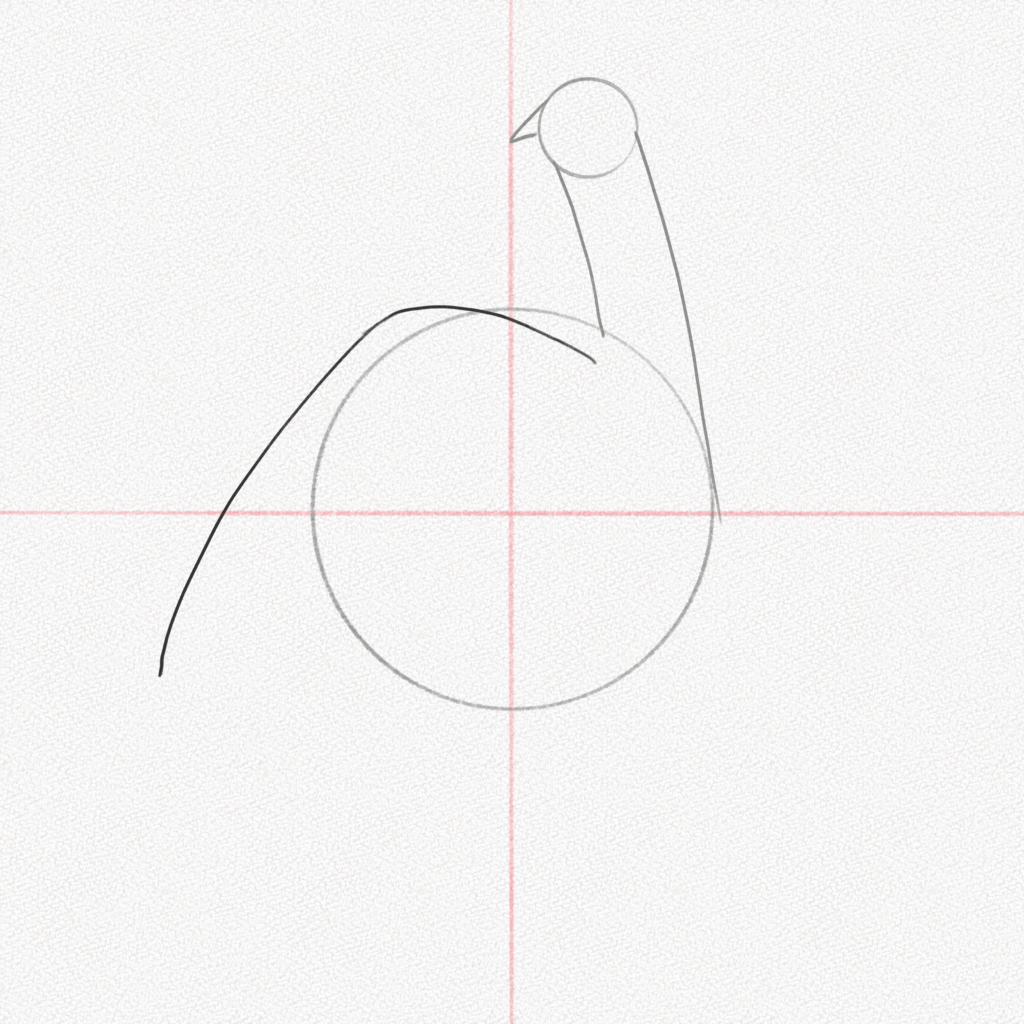
Step 6: Complete the wing
Draw another curved line following the shape below and complete the wing’s form.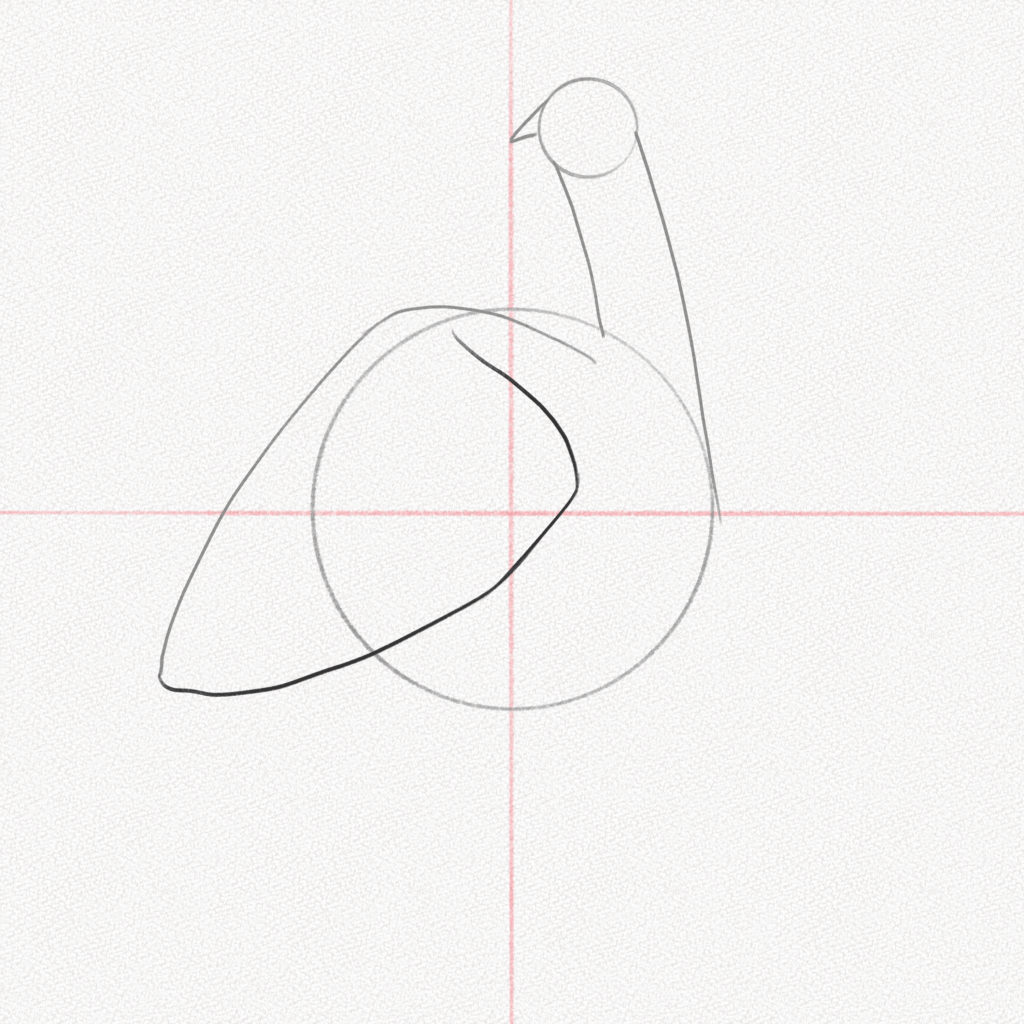
Step 7: Draw another curved line
Draw another curved line under the wing. This will be the first layer of the tail.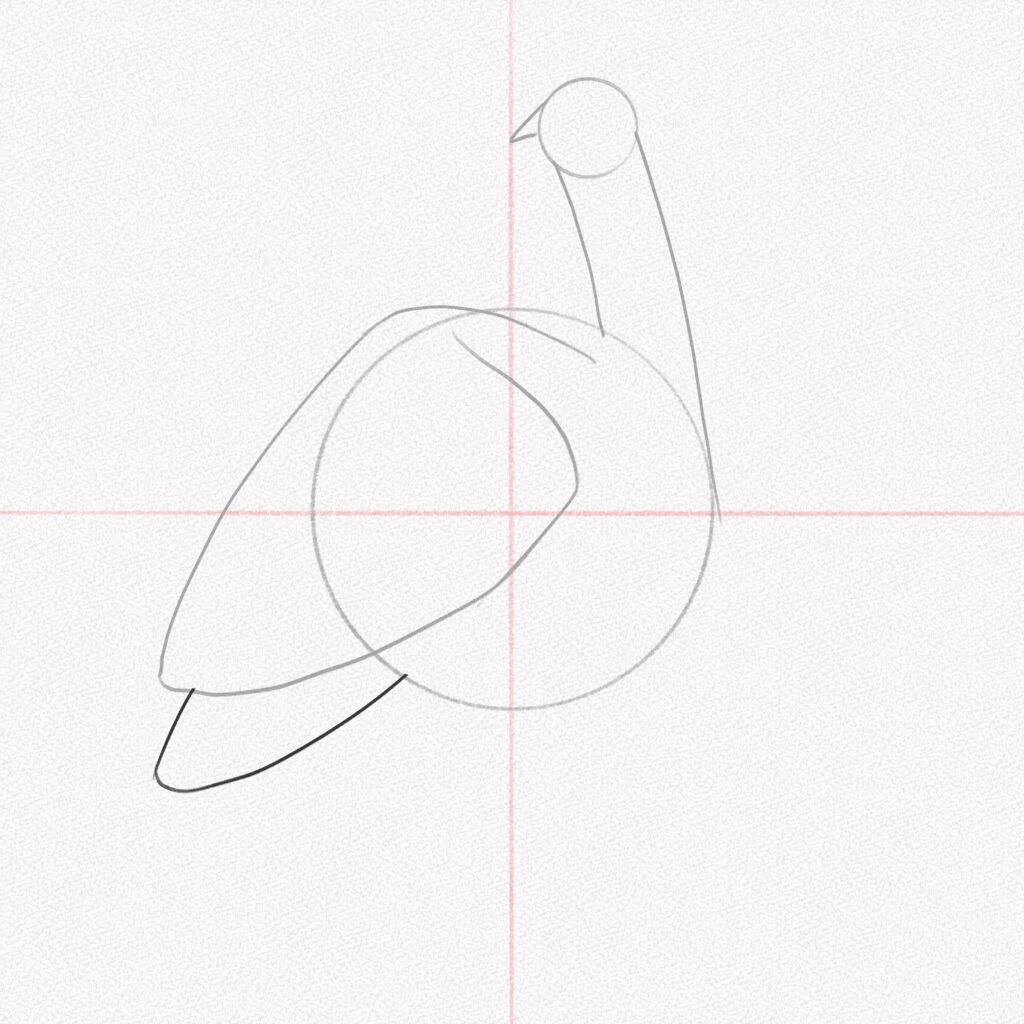
Step 8: Draw two lines
Parting from the base of the circle, draw two small lines in an incomplete V shape. These will form the upper part of your turkey’s leg.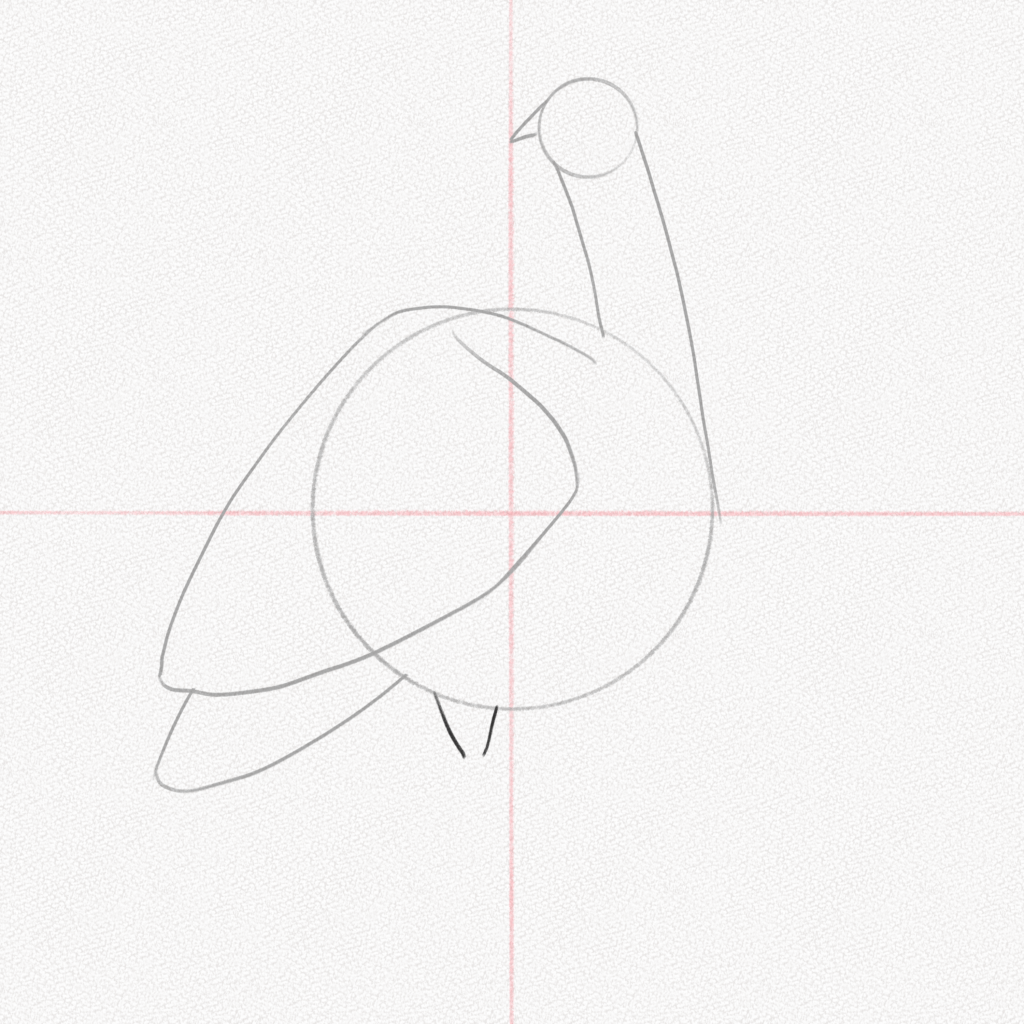
Step 9: Repeat
Repeat the steps above for the second leg, and take overlapping into consideration for the second leg. 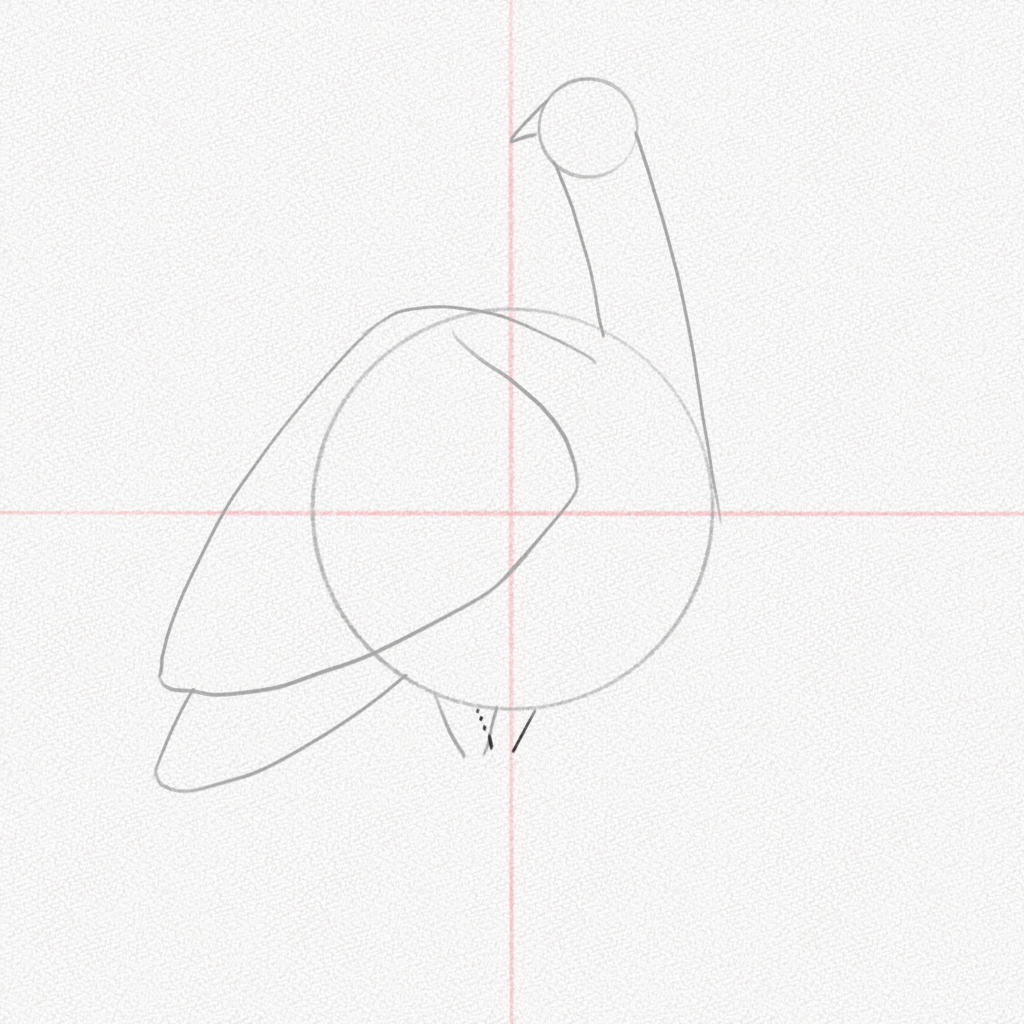
Step 10: Draw a straight line
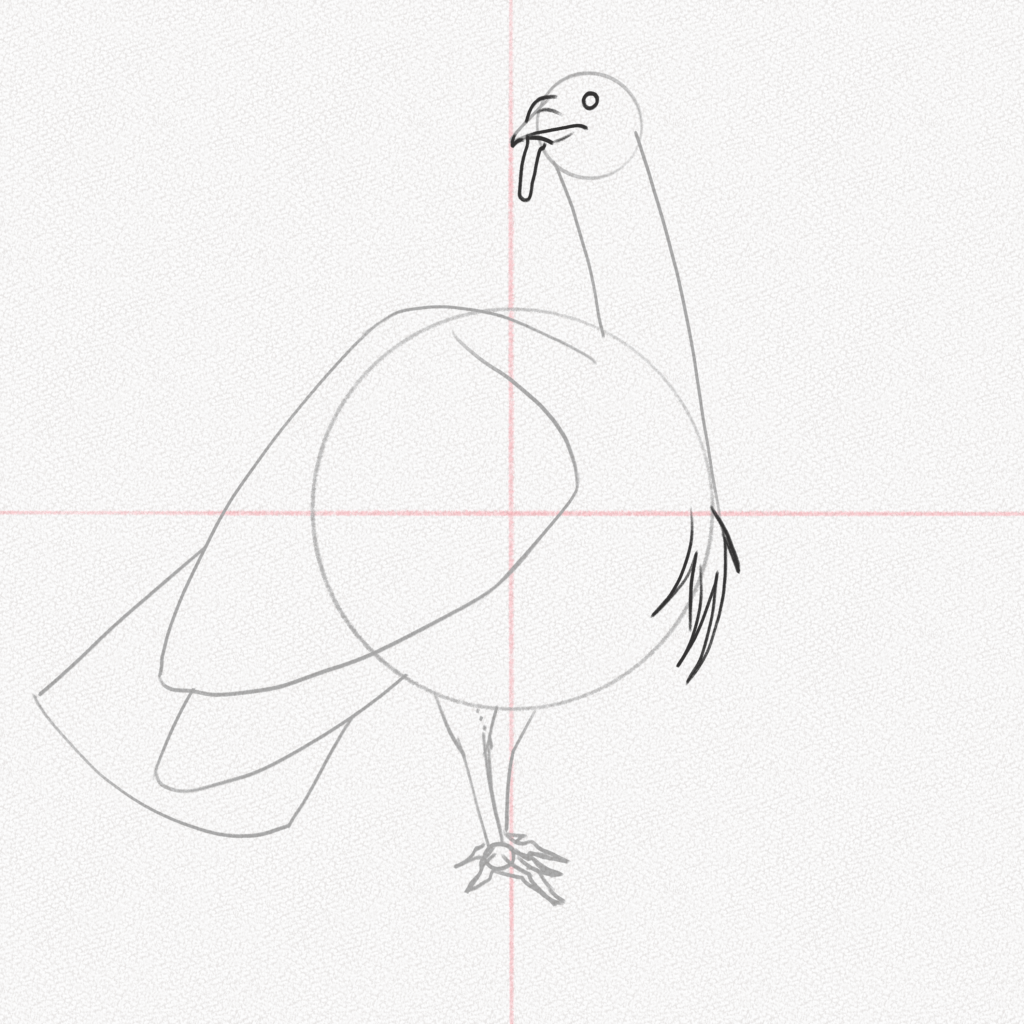
Pull a straight line from the wing of our turkey. This will be the tail.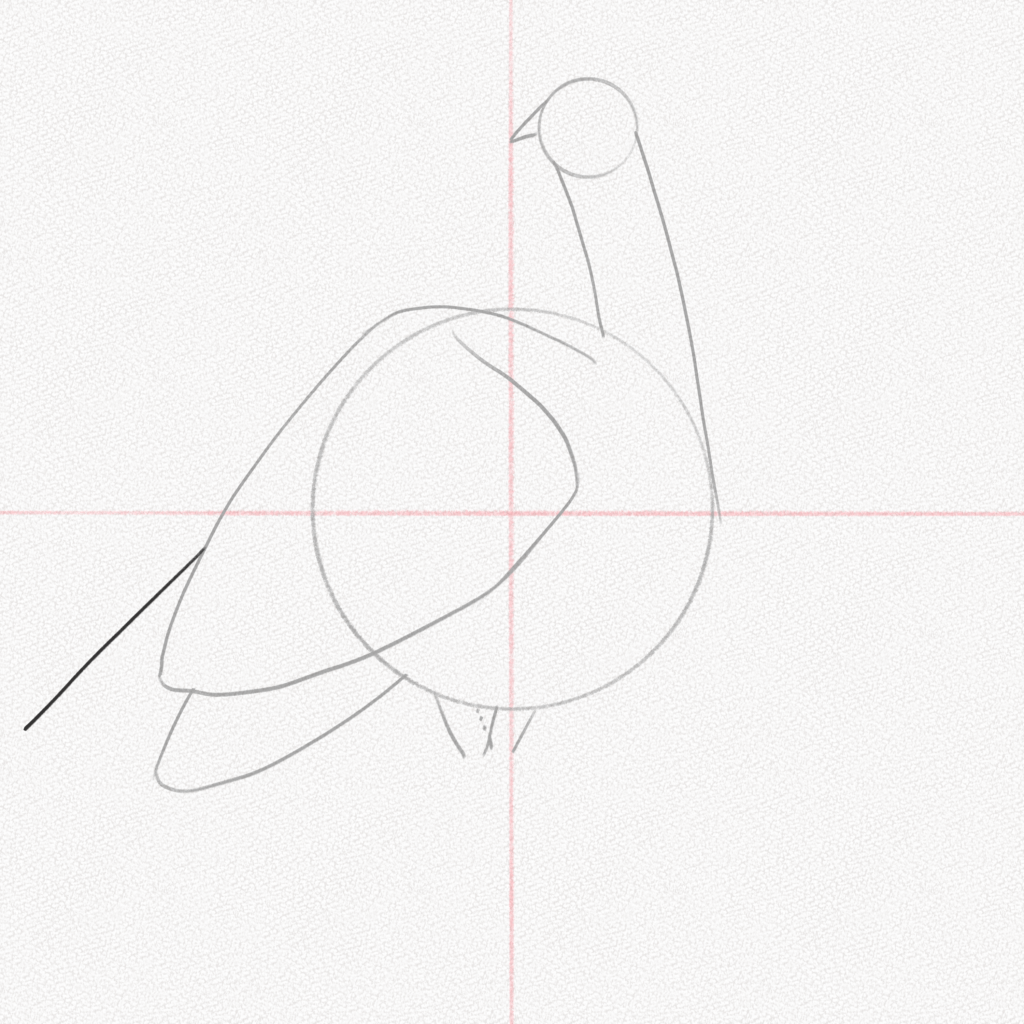
Step 11: Complete the tail
Complete the tail following the diagram shown below.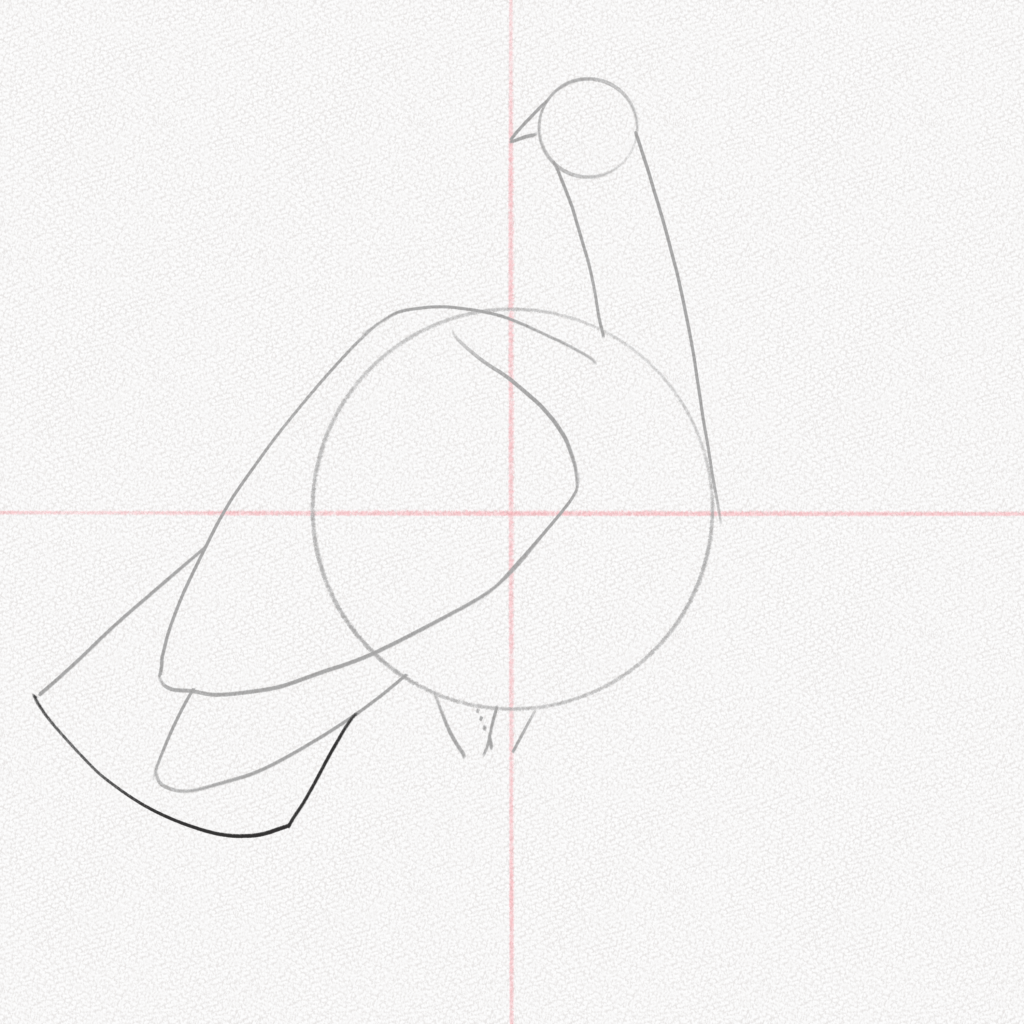
Step 12: Draw two lines
Starting from the unfinished V in step 8, draw two parallel lines. These will be the lower part of the turkey’s leg.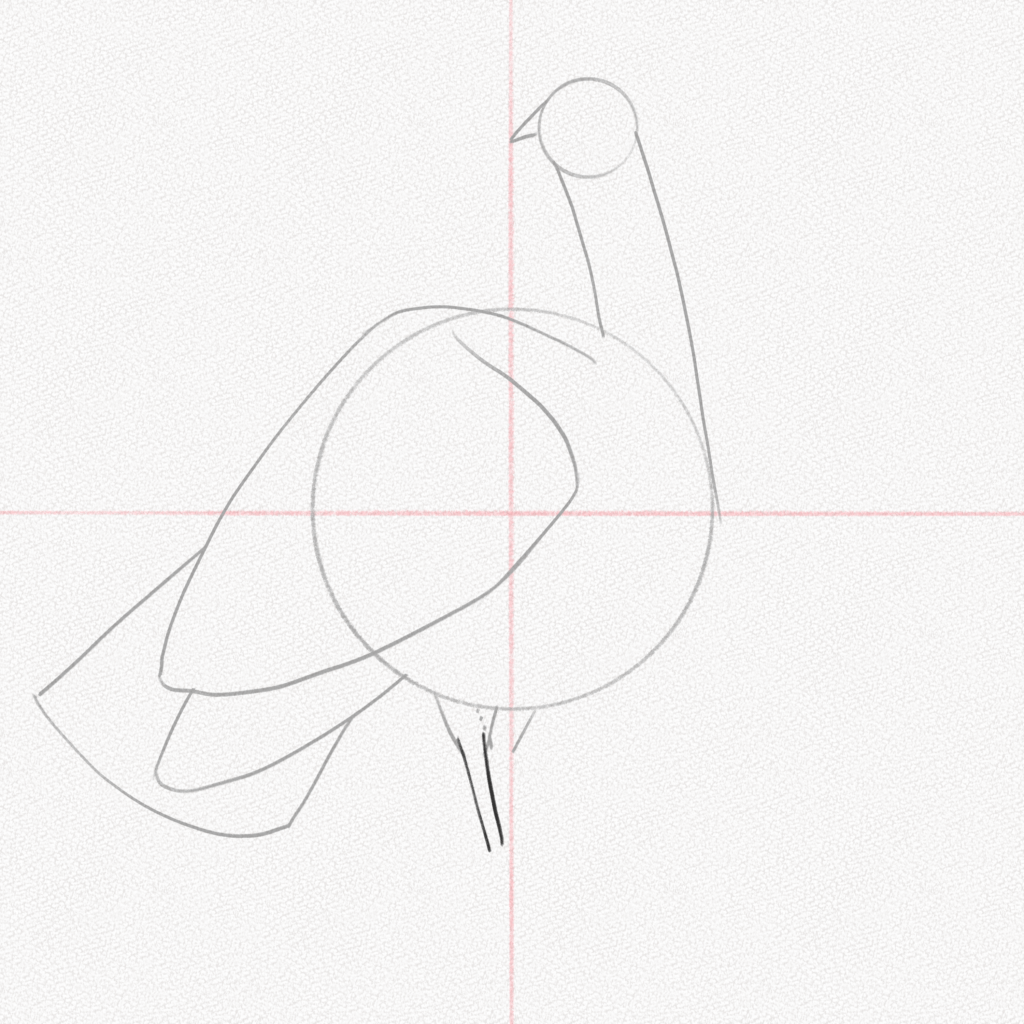
Step 13: Draw the feet structure
Follow the diagram below and draw the turkey feet’s structure.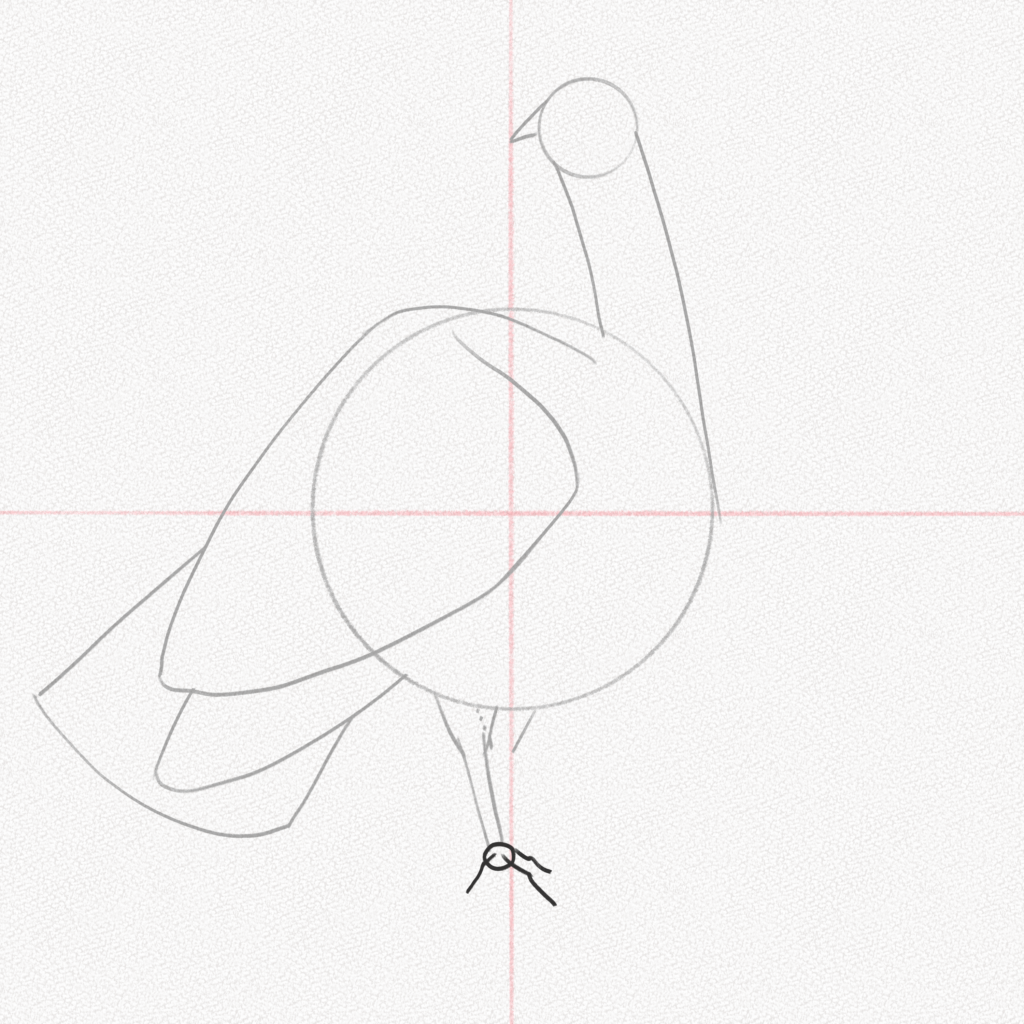
Step 14: Outline it
Erase your guidelines and outline the structure of the feet.

Step 15: Repeat
Repeat steps 12, 13, and 14. Have overlapping in mind for this step as well, and you’ll have the legs done!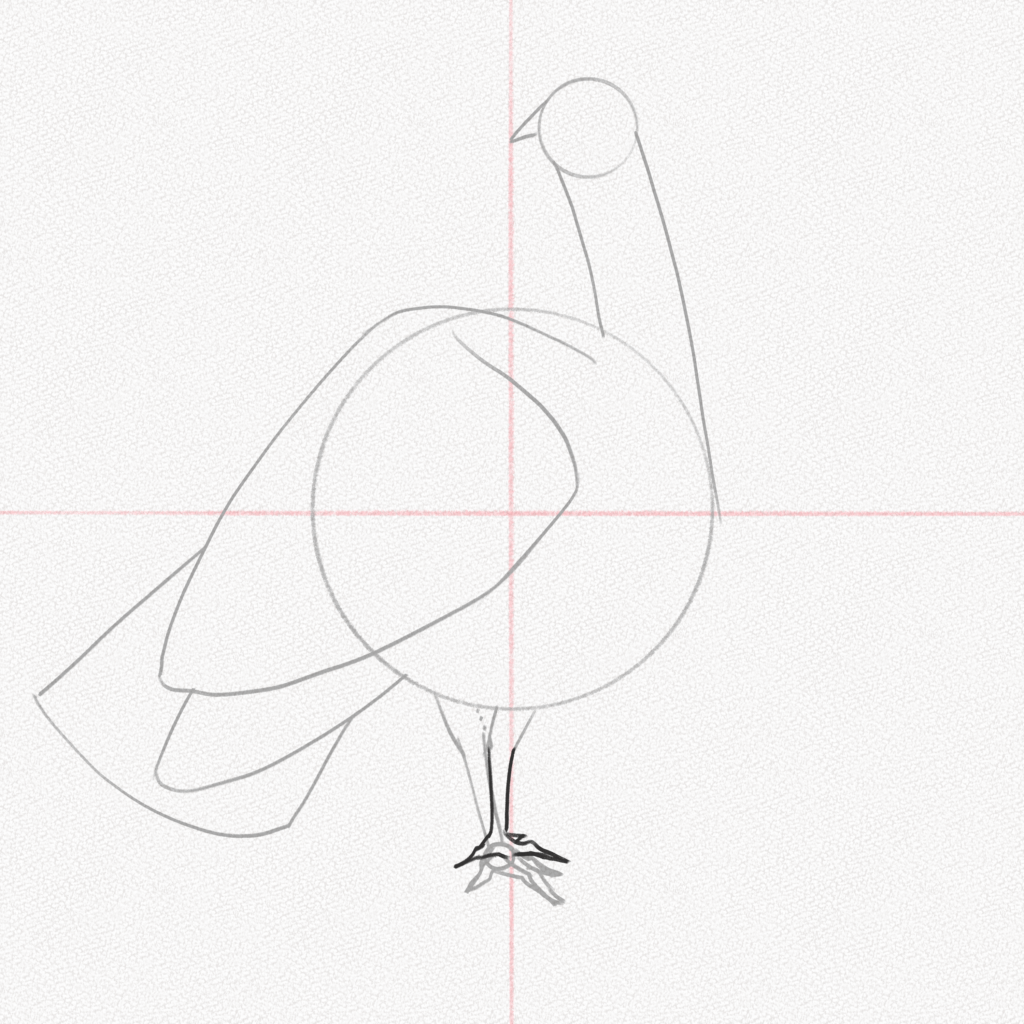
Step 16: Draw the face and gobblers
Draw the turkey’s face and the “beard” the beard is hair-like filaments on the turkey’s chest.
Step 17: Add two lines
Add two lines to connect the head and the body, and you’re done!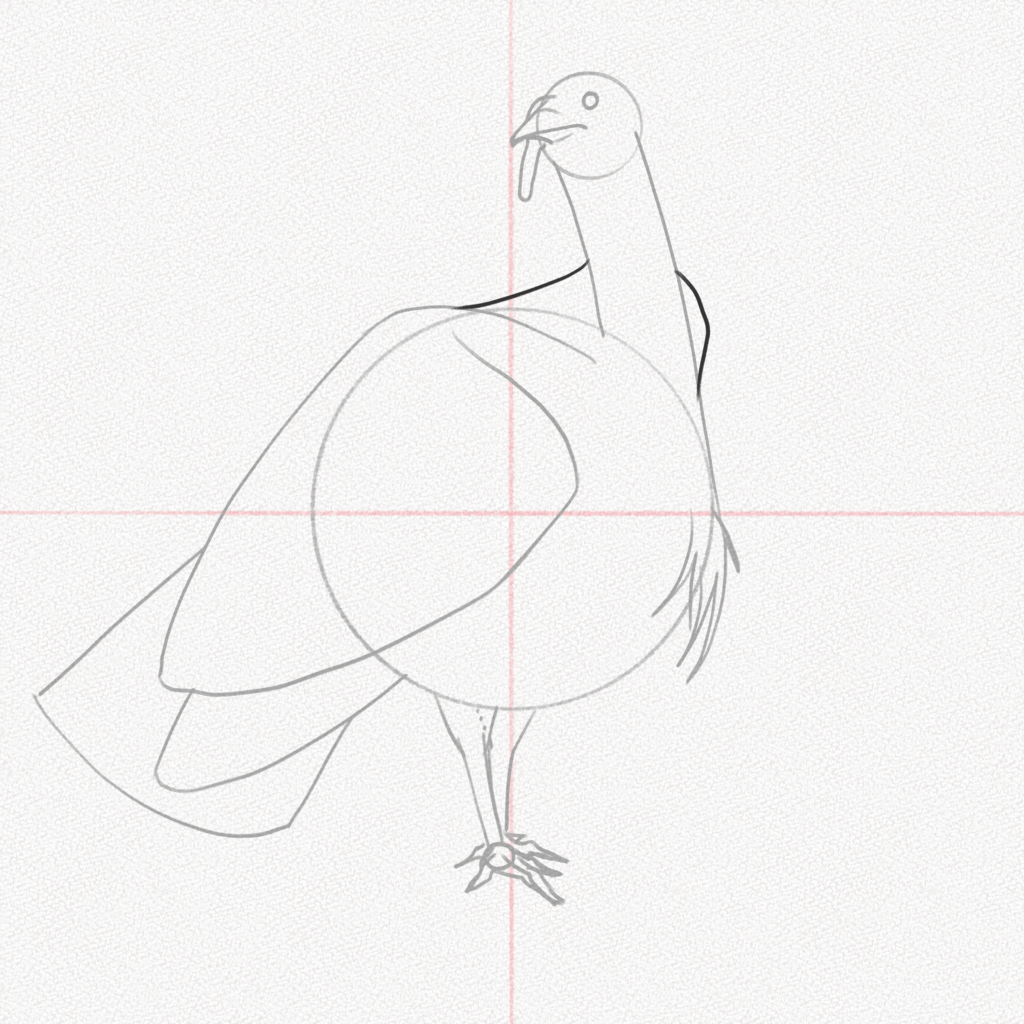
Section 2.- How the turkey’s plumage
Turkeys, like most birds, have different types of plumage in their bodies. These are not the only types of feathers we’ll find in a turkey’s body, but they are the ones that are the most visible.
The plumage will be distributed through the turkey’s body and wings. Using this diagram, we’ll be able to identify where each kind of feather goes.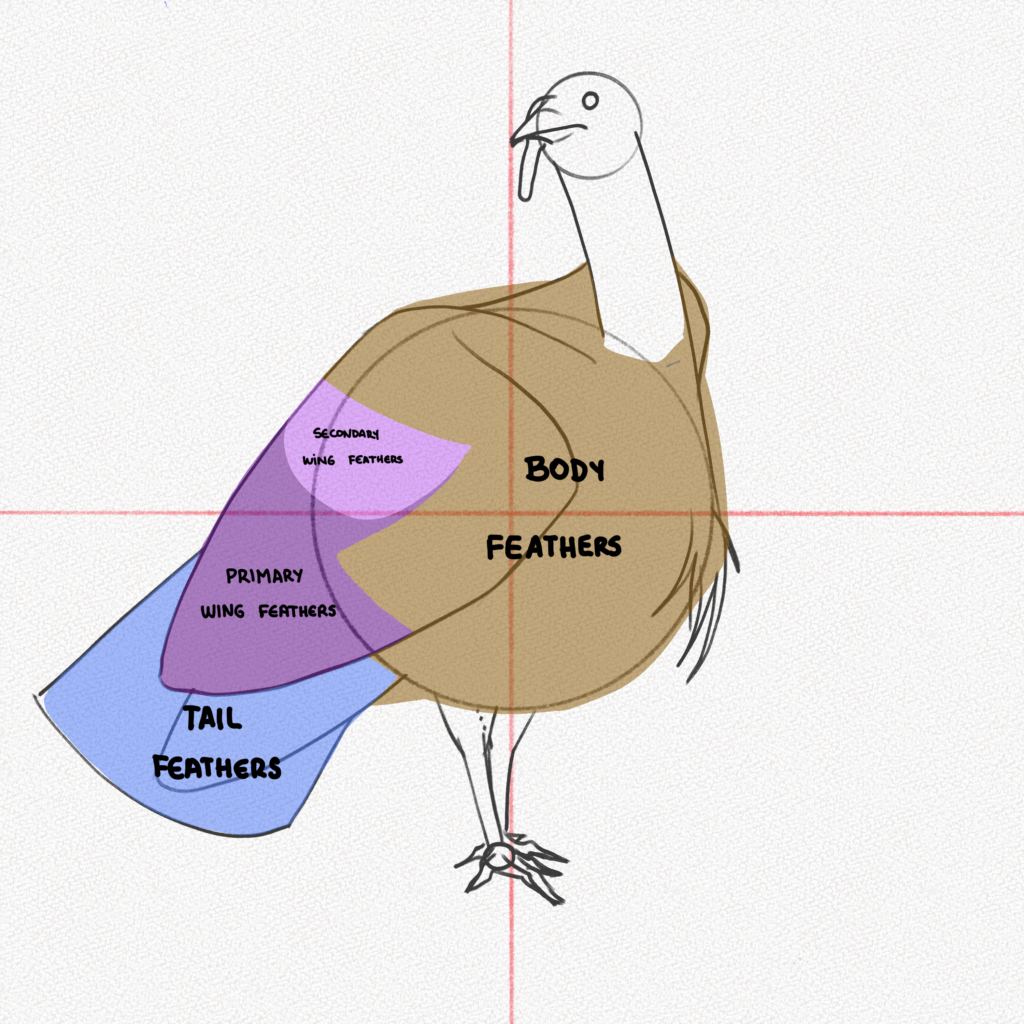
Step 1: Body feathers Part 1
Turkey’s body feathers are short and numerous. Getting the texture and amount right is not an easy task and will take some time to draw. However, an easy way to draw them is by drawing short curved lines and then connecting them with even shorter vertical lines. If you’re having trouble, just follow the diagram below and check the next step.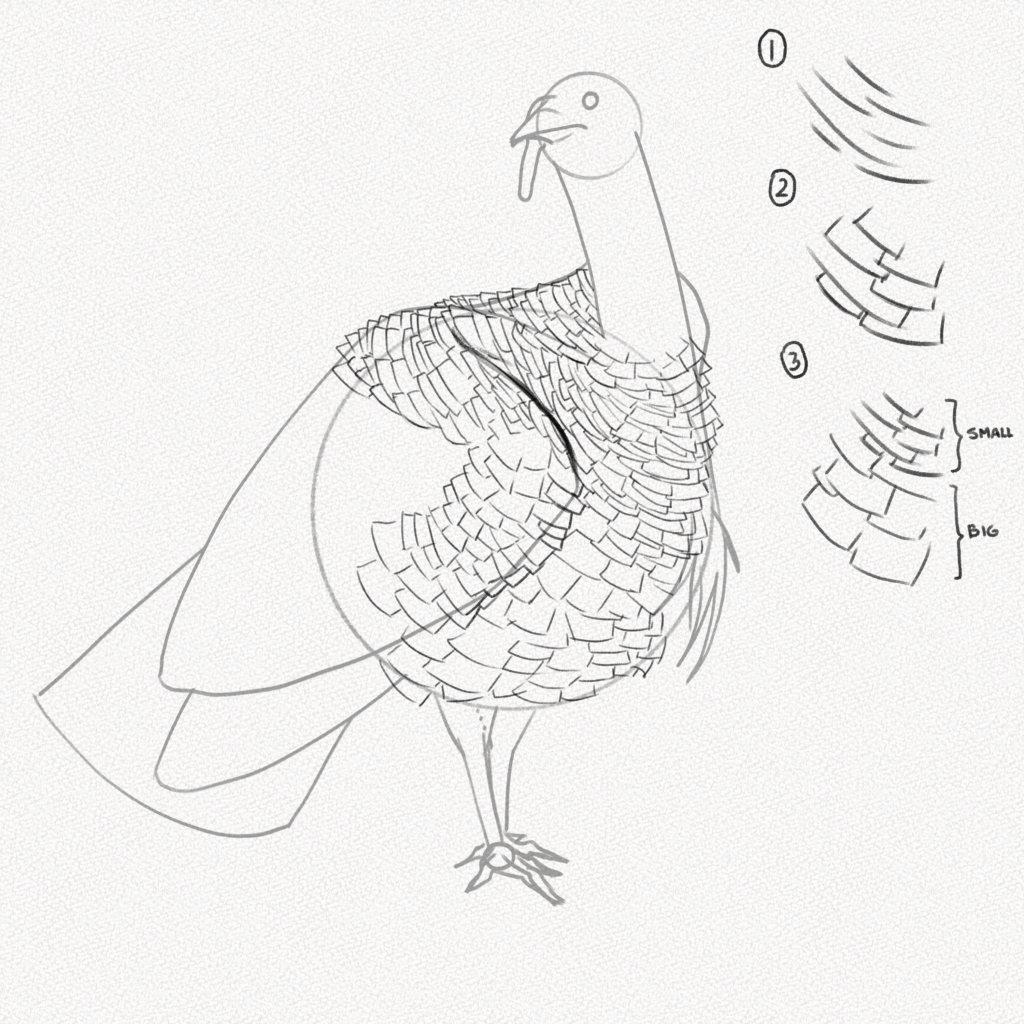
Step 2: Body feathers Part 2
For the lower body, leave a more significant gap between each curved line since the feathers are longer and thicker.
Step 3: Wing feathers
Follow the diagram below for the wing feathers. Make them short for the secondary wing feathers section and large for the primary wing feathers section.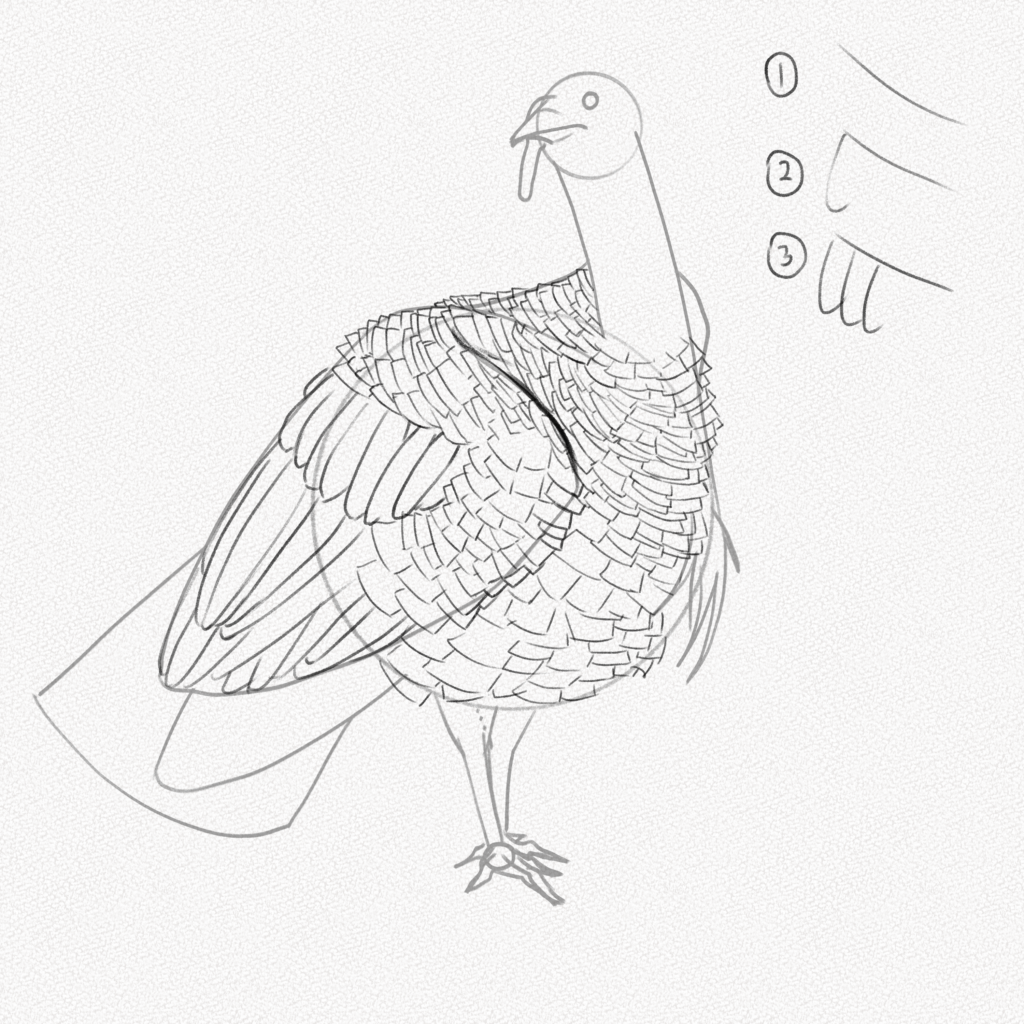
Step 8: Tail feathers
Follow the steps below for the tail feathers. As you can tell, there are two types of feathers in the tail, ones that are like elongated body feathers and others that look more organized and uniform. 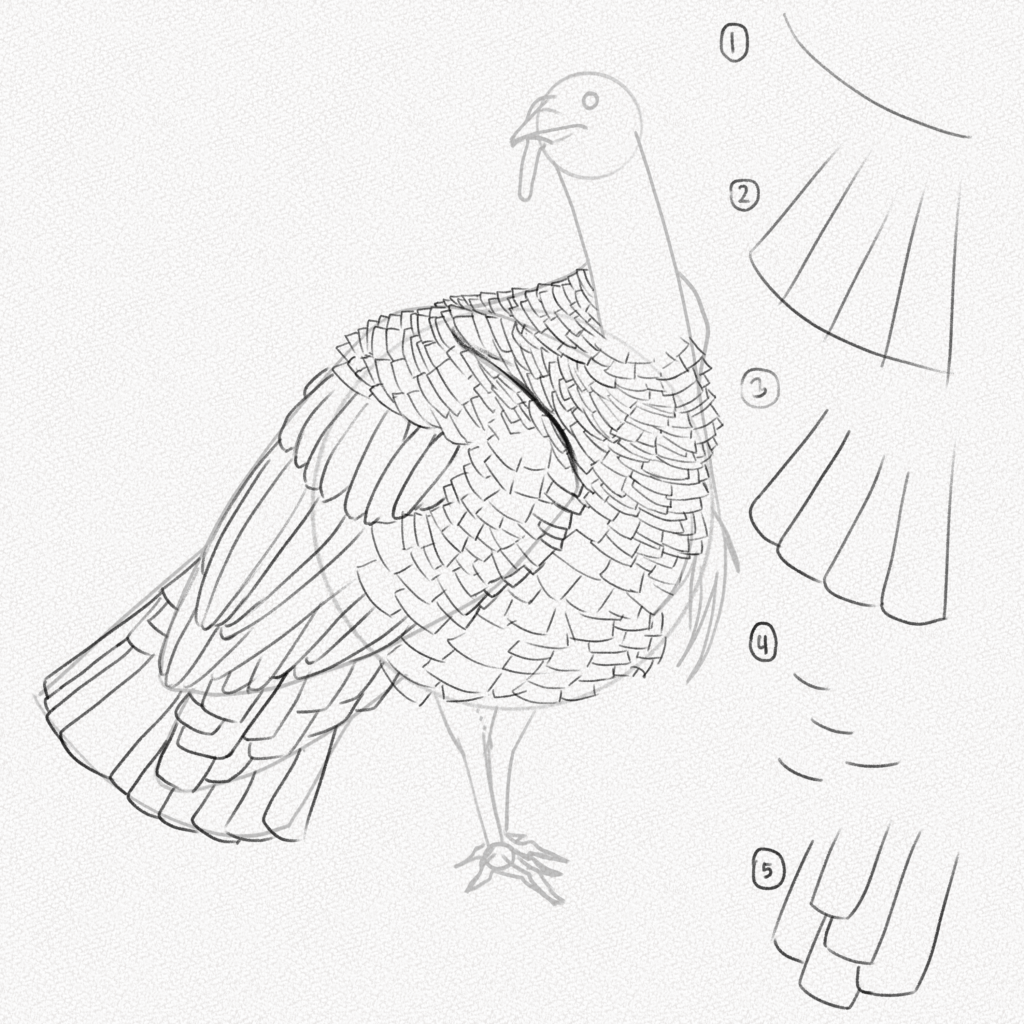
Step 9: Outline the legs and feet
The feathers in the legs are short and thick, hinting at the plumage with soft up and down traces. Outline the lower legs and feet too.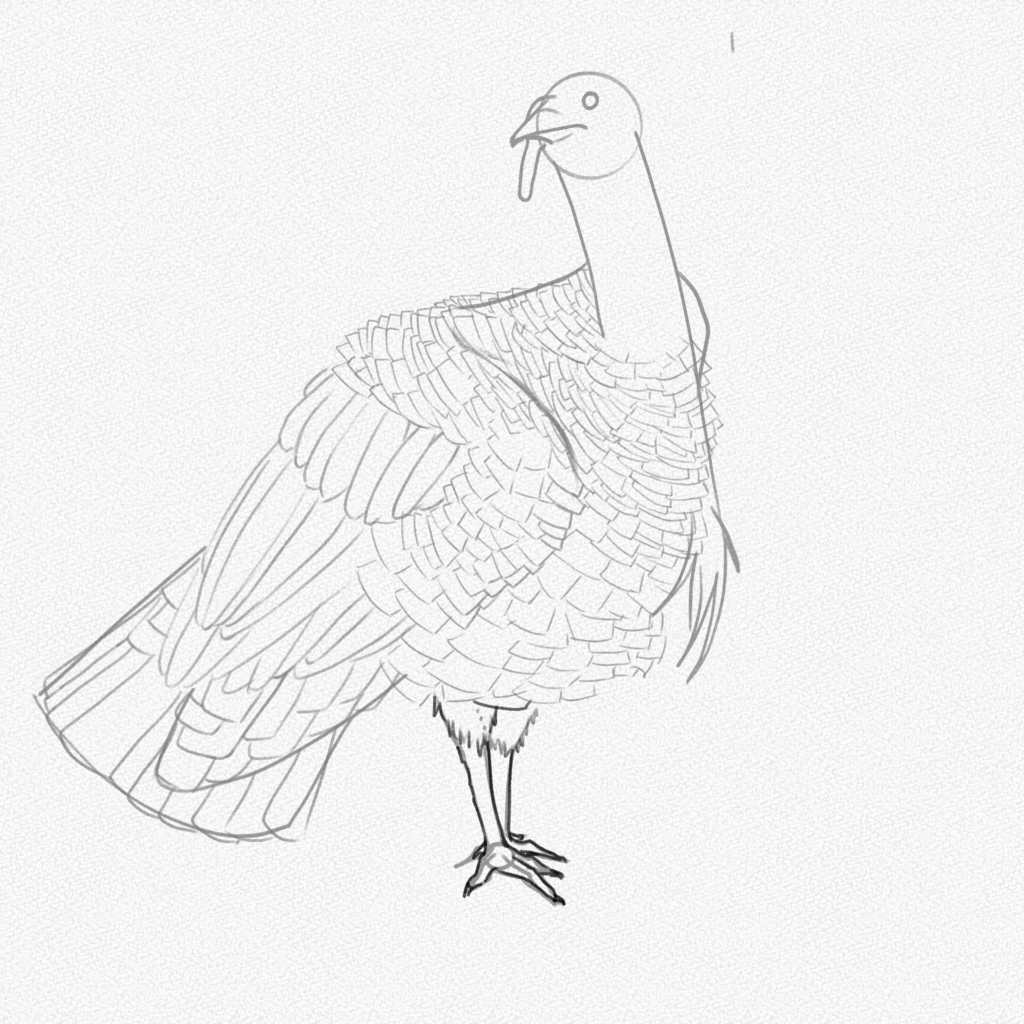
Step 10: Outline the neck and the beard
Outline the neck, draw the head and also outline the beard. You can check out this article for a more detailed tutorial on drawing a bird’s head.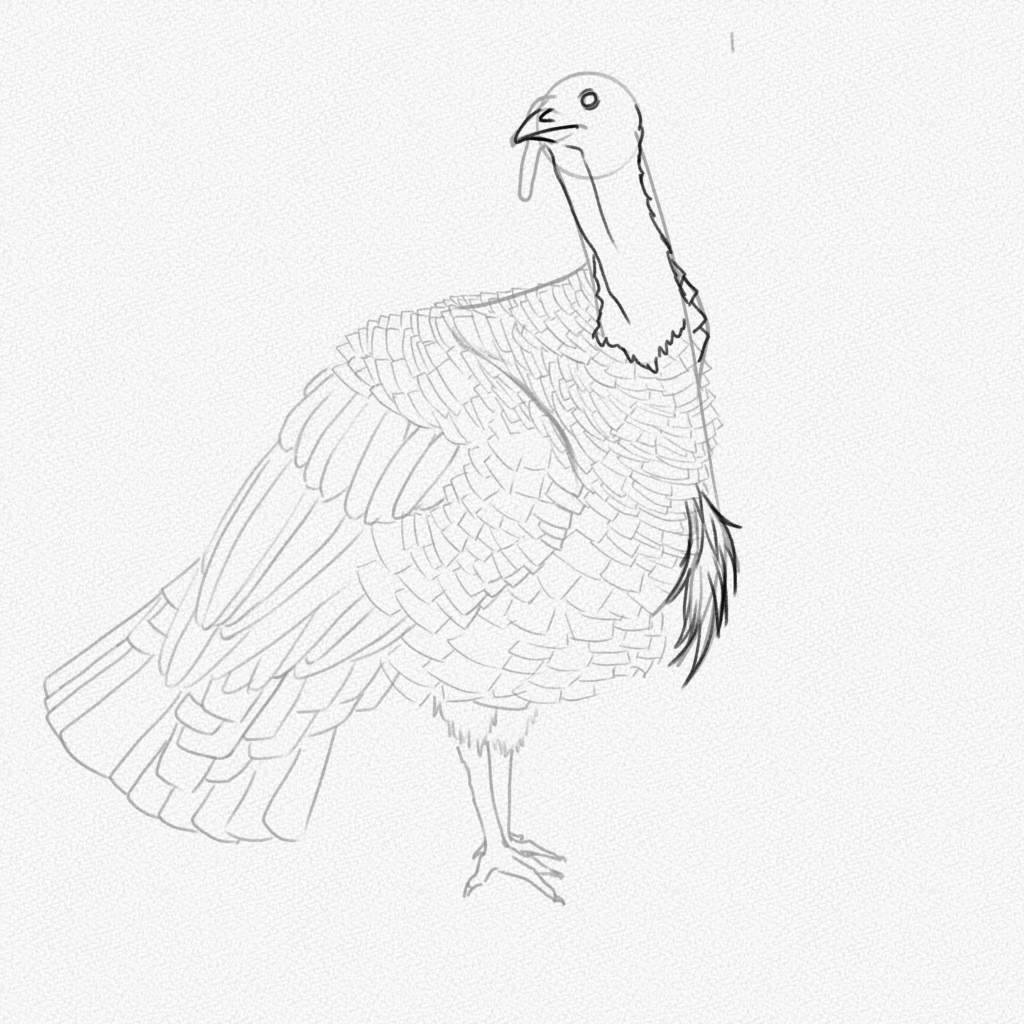
Step 11: Add details
Erase your guidelines and add details to the neck and feet. 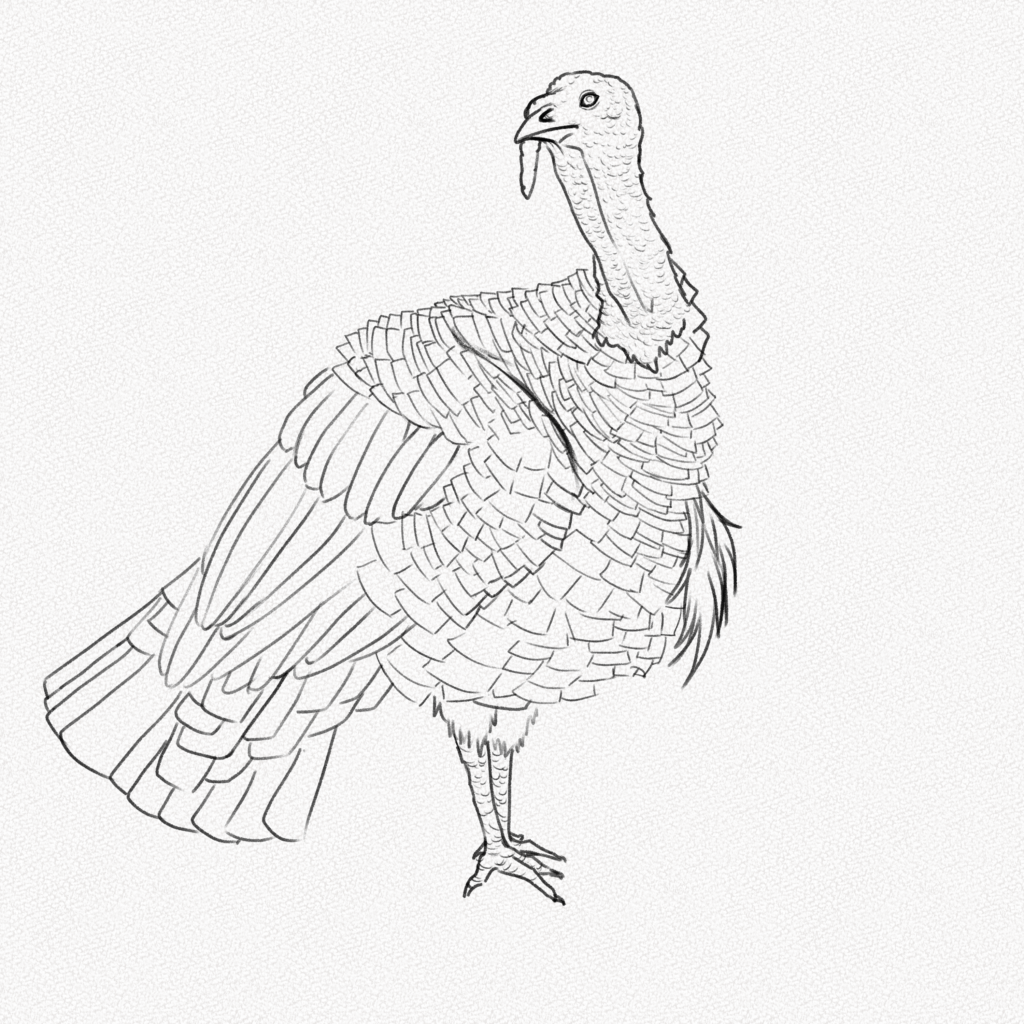
Section 3.- How to shade a turkey
For this section, we are going to use the Powdered graphite, the 6B pencil, the precision eraser, and your blending tools!
Step 1: Fill the body feathers section
With the Powdered graphite and a soft brush, fill the body of our turkey. Check Section 2 for the feather distribution diagram.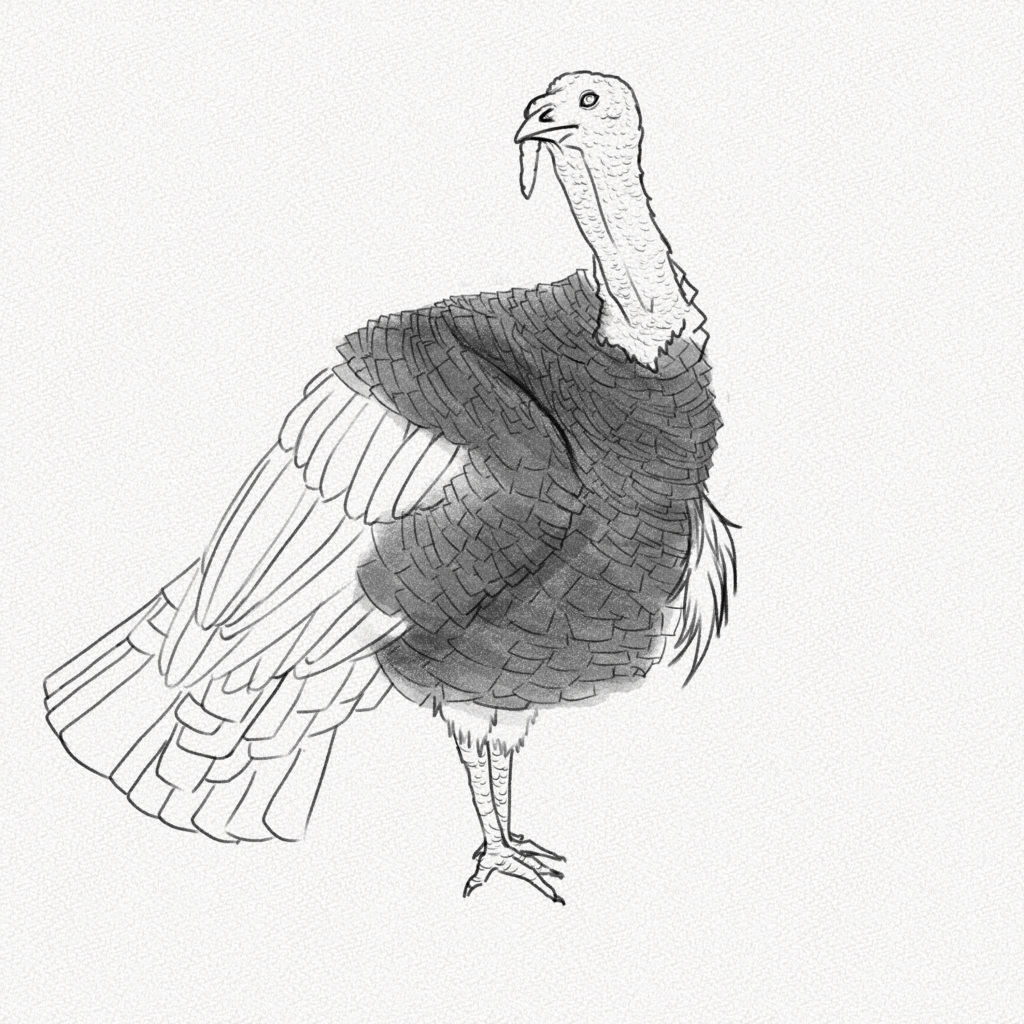
Step 2: Take some graphite away
With your precision eraser, take some graphite away from the base of each feather
This might take a while since there are many feathers on the turkey’s body, but it will make a big difference in the final result.
Step 3: Outline each feather
With your 6B pencil, outline the feathers and shade a bit in the intersection of each feather.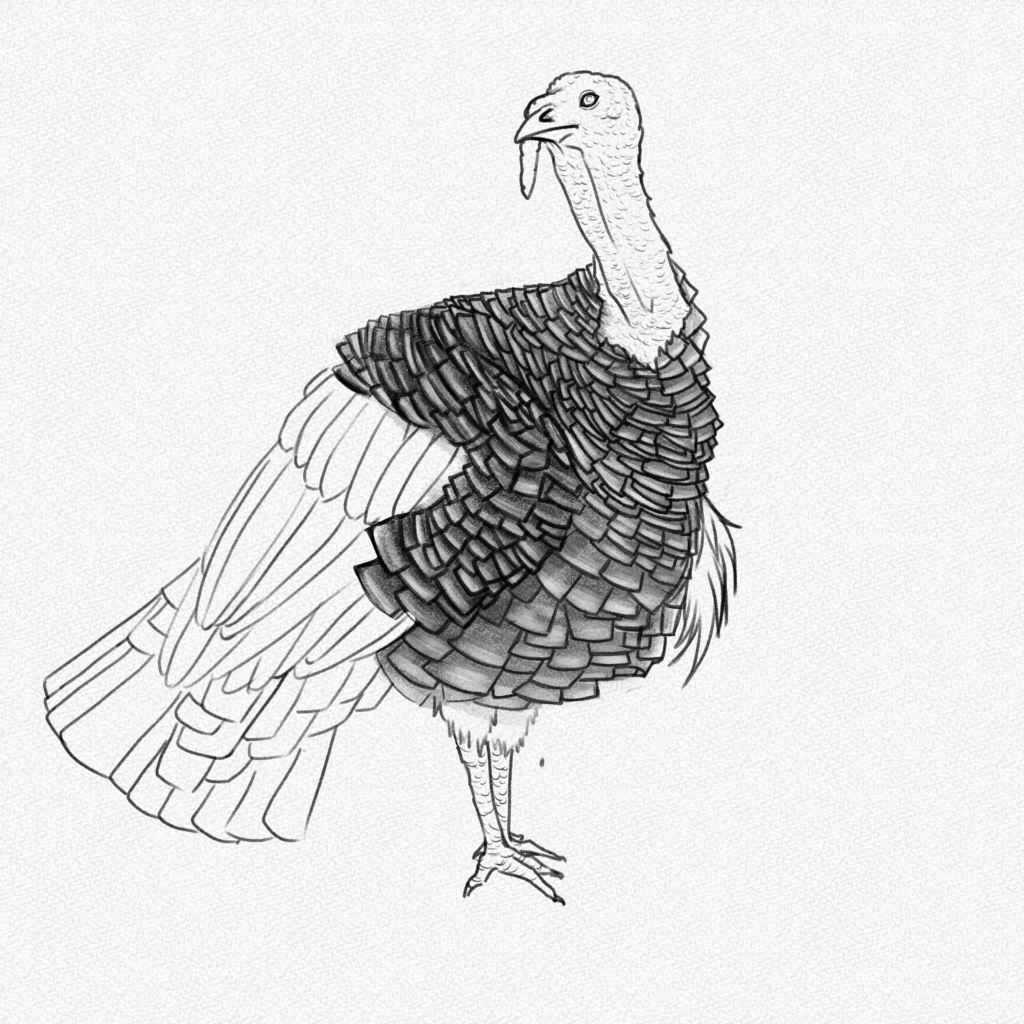
Step 4: Shade the wing feathers
Using your 6B pencil, create a soft gradient and shade the wings, shade one at a time for a better effect.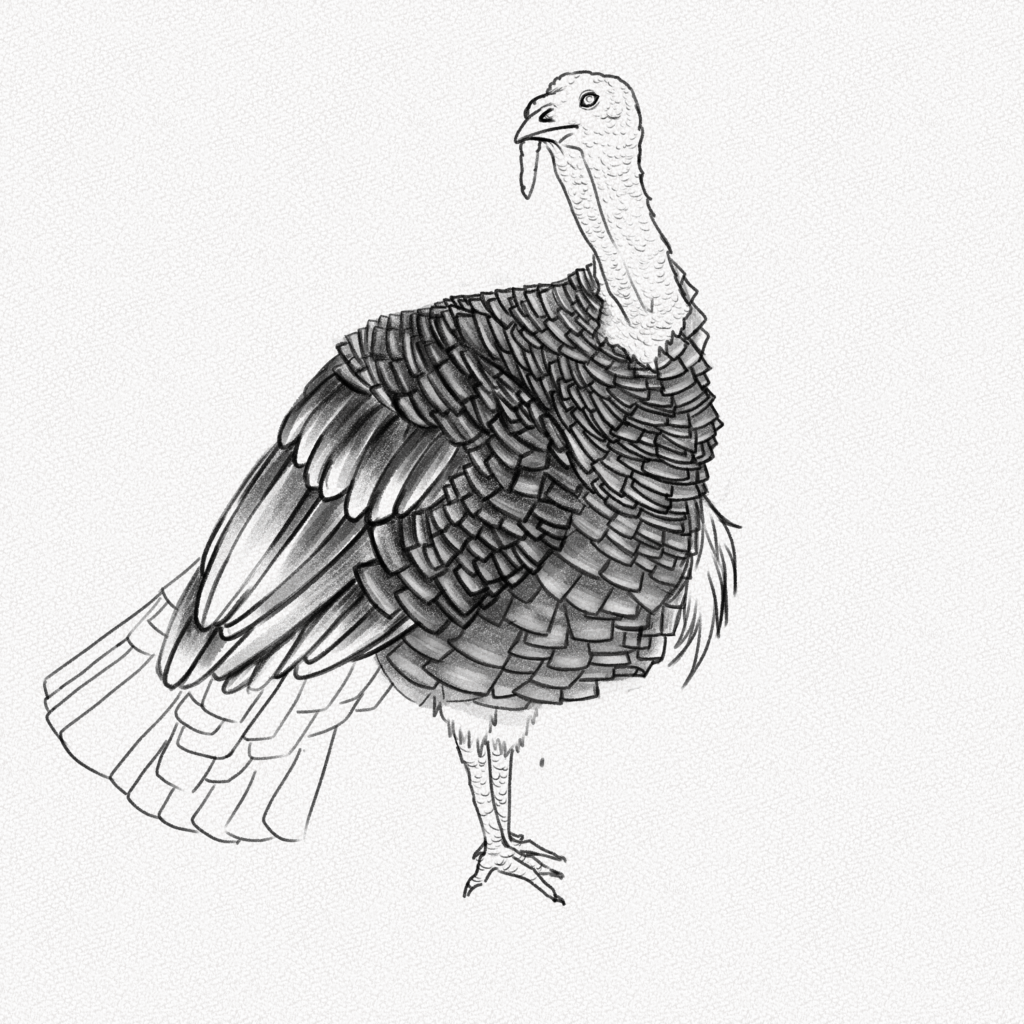
Step 5: Shade the lower tail feathers
Taking the image at the beginning of section 3 as a reference, shade the turkey’s lower tail feathers.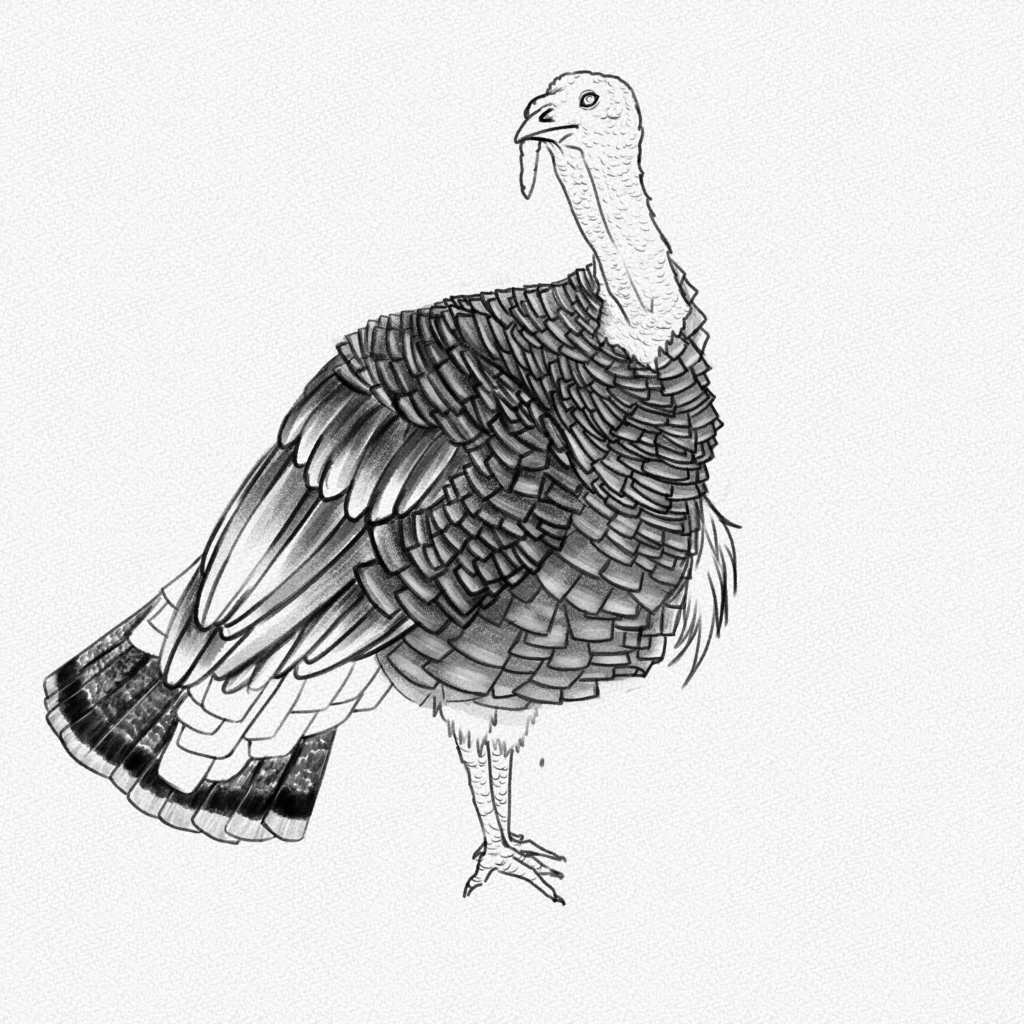
Step 5: Shade the upper tail feathers and the head
Repeat the step above for the upper tail feathers, but make them smaller and thinner.
Shade the head with powdered graphite, adding details with your 6B pencil on the beak, beard, and eye.
And that’s it. You’re done.
Thank you for following this tutorial. You did great!
I hope you learned something new today and that now that we’re close to the holidays, you can say that you know how to draw a turkey.
Until next time!