When it comes to capturing the beauty of nature through art, few subjects are as iconic and challenging as the Strawberry. These small, sweet fruits have been a beloved subject in art for centuries, appearing in paintings, illustrations, and even sculptures. From the still lifes of the Renaissance to modern works of art, strawberries have consistently captivated the attention of artists and viewers alike.
Have you ever wanted to learn how to draw a realistic strawberry? These small, sweet fruits sometimes seem too complicated to draw, but with the proper techniques, you can create your own stunning depiction of a strawberry. In this tutorial, we will guide you through the step-by-step process of drawing a strawberry. Whether you are a beginner or an experienced artist, you will find helpful tips and techniques to help you capture this popular fruit’s essence. By the end of this tutorial, you will have the skills and knowledge you need to draw a beautiful, lifelike strawberry.
So grab your pencils, and let’s get started!
What you’ll learn:
- How to Draw A Strawberry
- How to Shade a Strawberry
Materials needed:
- A piece of paper
- A 2H graphite pencil
- A 6B graphite pencil
- A Blending stump
- An eraser or a kneaded eraser
- A Tombow Mono Zero 2.3mm
This is the Strawberry you’re going to draw: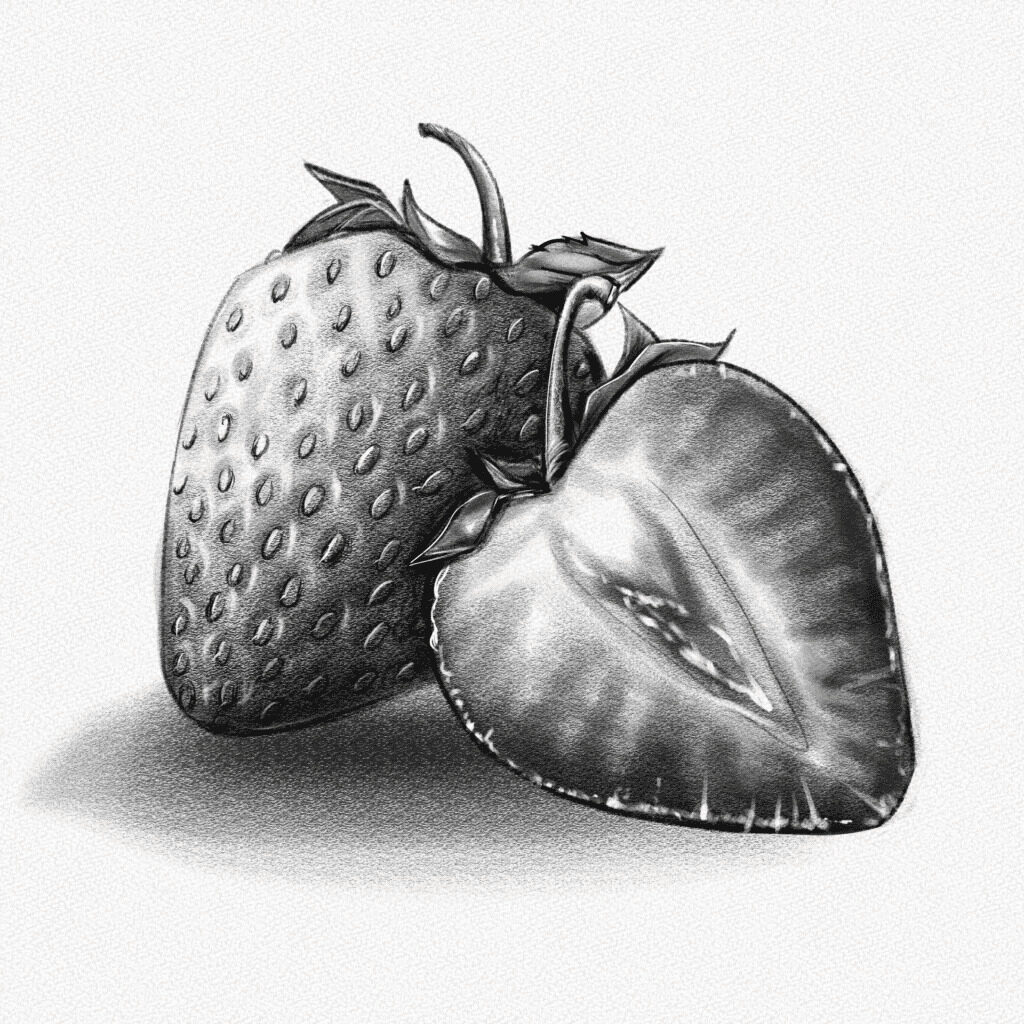
And these are all the steps we’ll walk you through: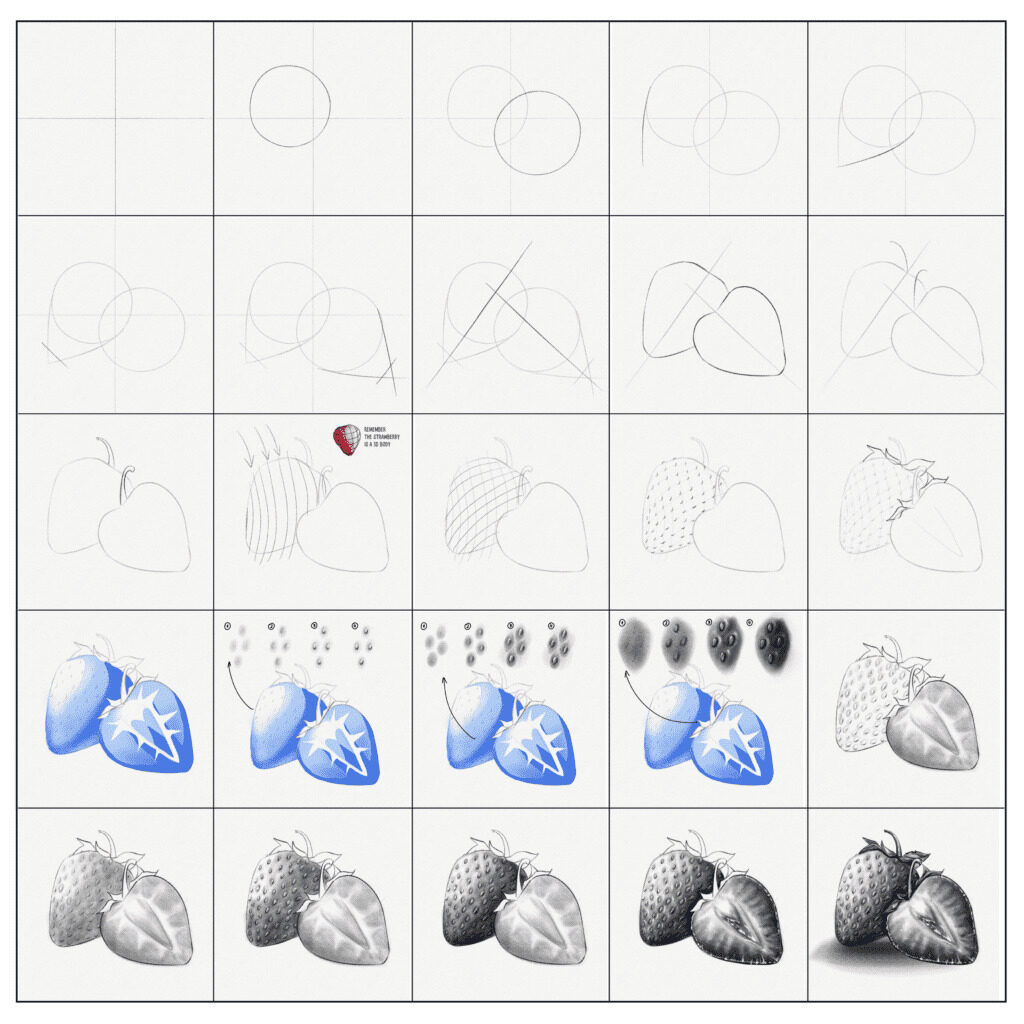
Section 1.- How to draw a strawberry
In this section, we’ll deconstruct the Strawberry into basic shapes and build it from there. We are going to use our 2H pencil and kneaded eraser.
Step 1: Split your canvas into four parts
Using your 2H pencil, split your canvas into four equal parts so that you will have a reference for the position of the Strawberry.
Step 2: Draw a circle
Sketch a circle in the upper left part of your canvas, and use the lines in the diagram as a reference for the exact position.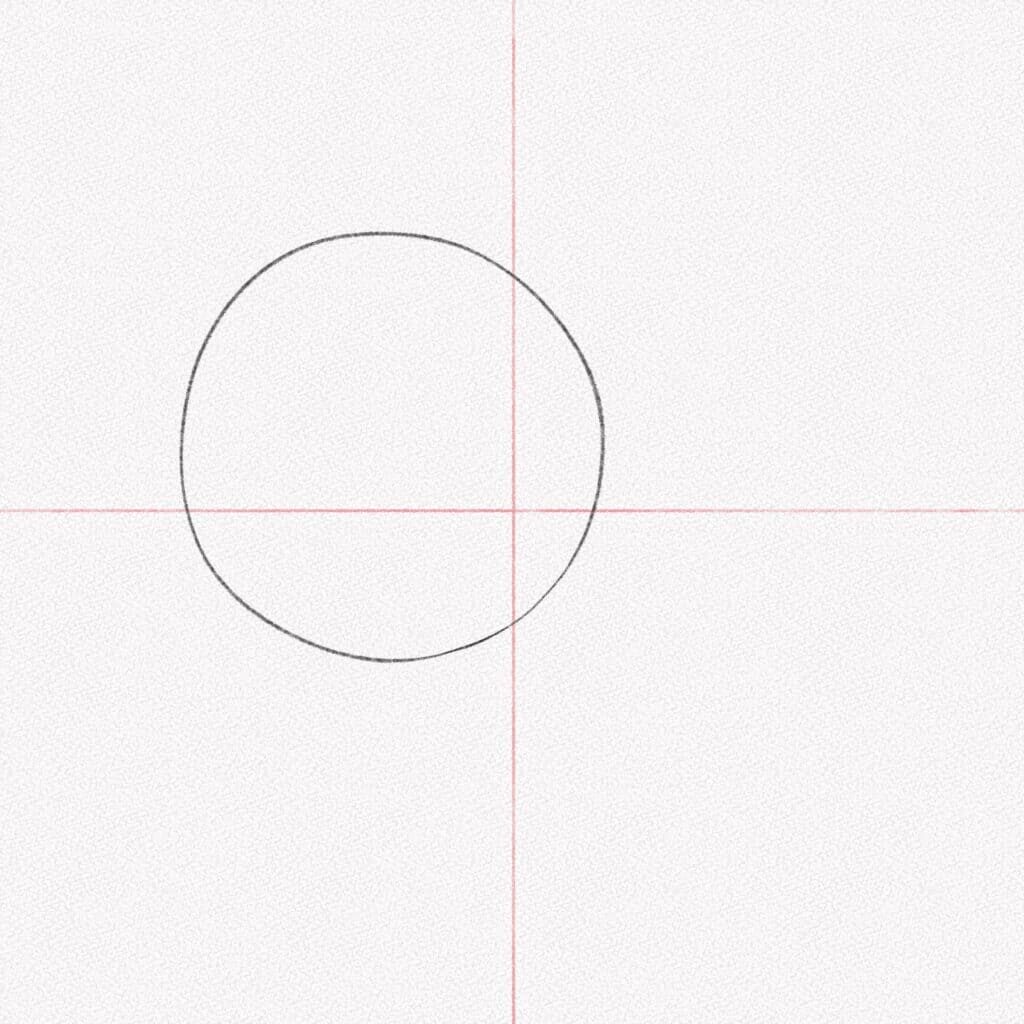
Step 3: Draw another circle
Near the bottom right side of your canvas, sketch another circle for the half-strawberry we are going to draw. 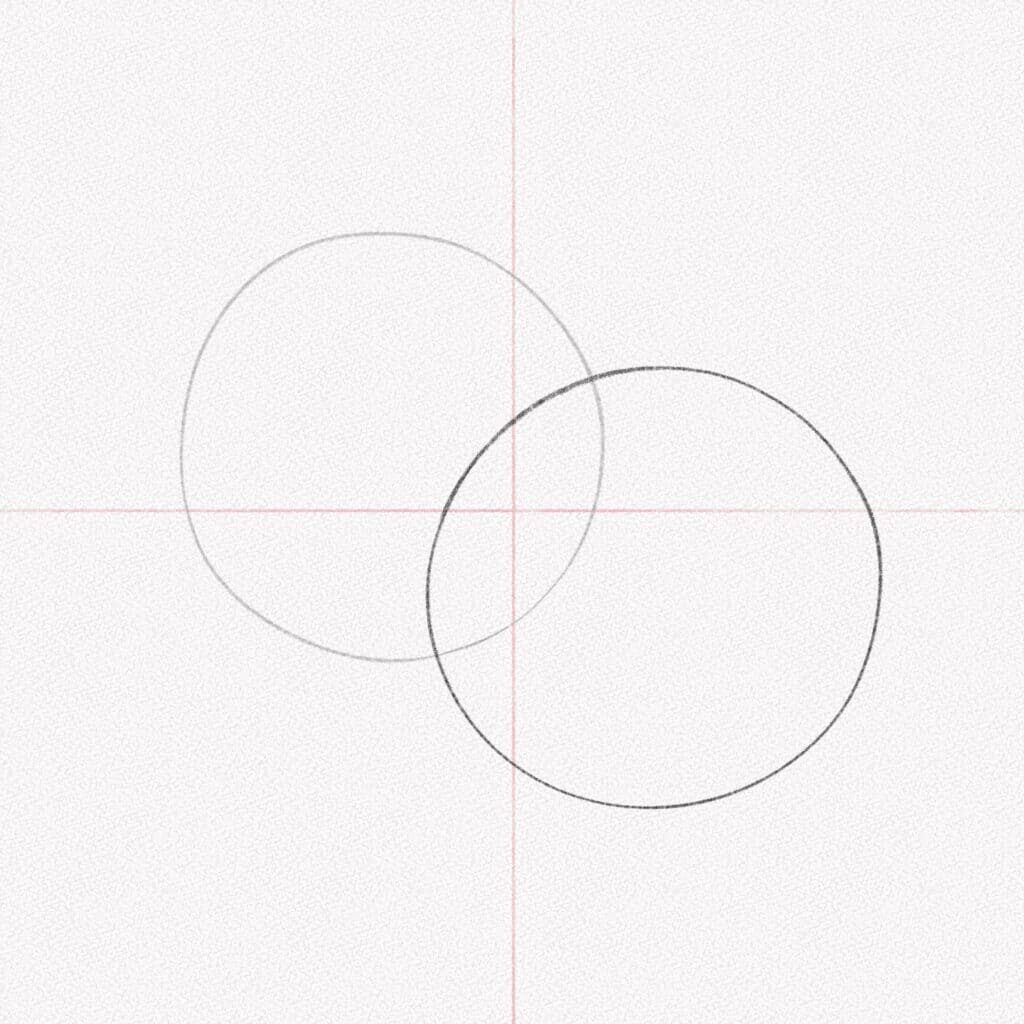
Step 4: Draw a line
Pull a line from the circle border pointing down slightly.
Step 5: Draw another line
Draw another line as shown in the diagram, pulling from the other side of the circle towards the first line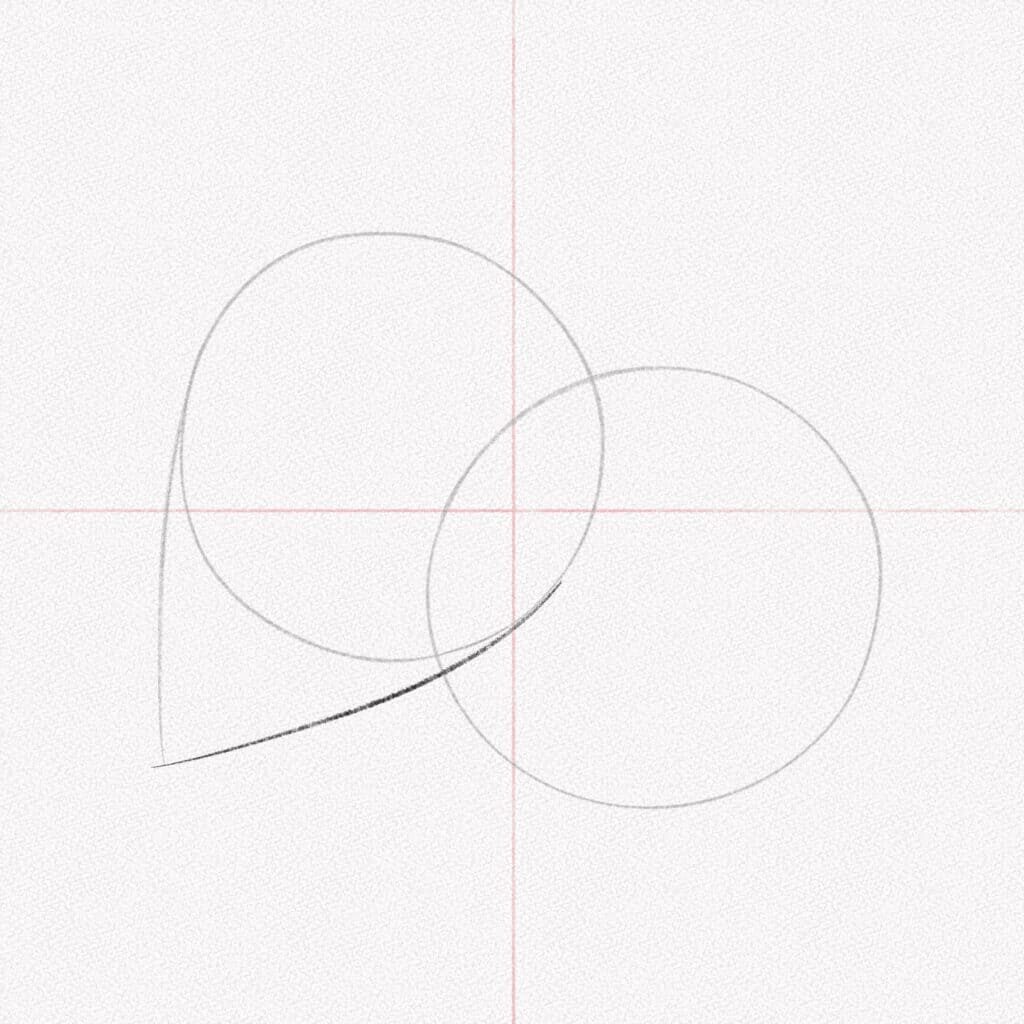
Step 6: Draw a third line
Draw a third line cutting the first two near the end, defining the Strawberry’s shape.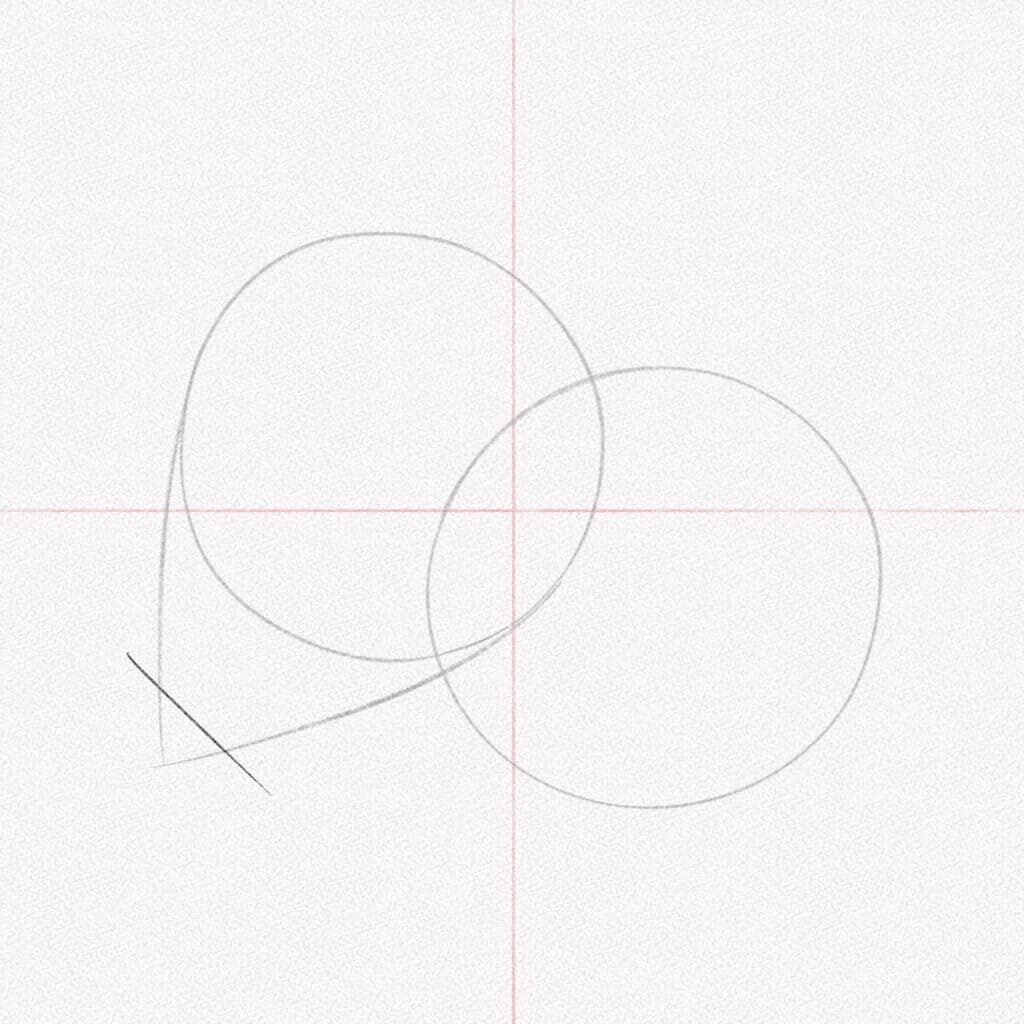
Step 7: Repeat
Repeat the last three steps for the second Strawberry 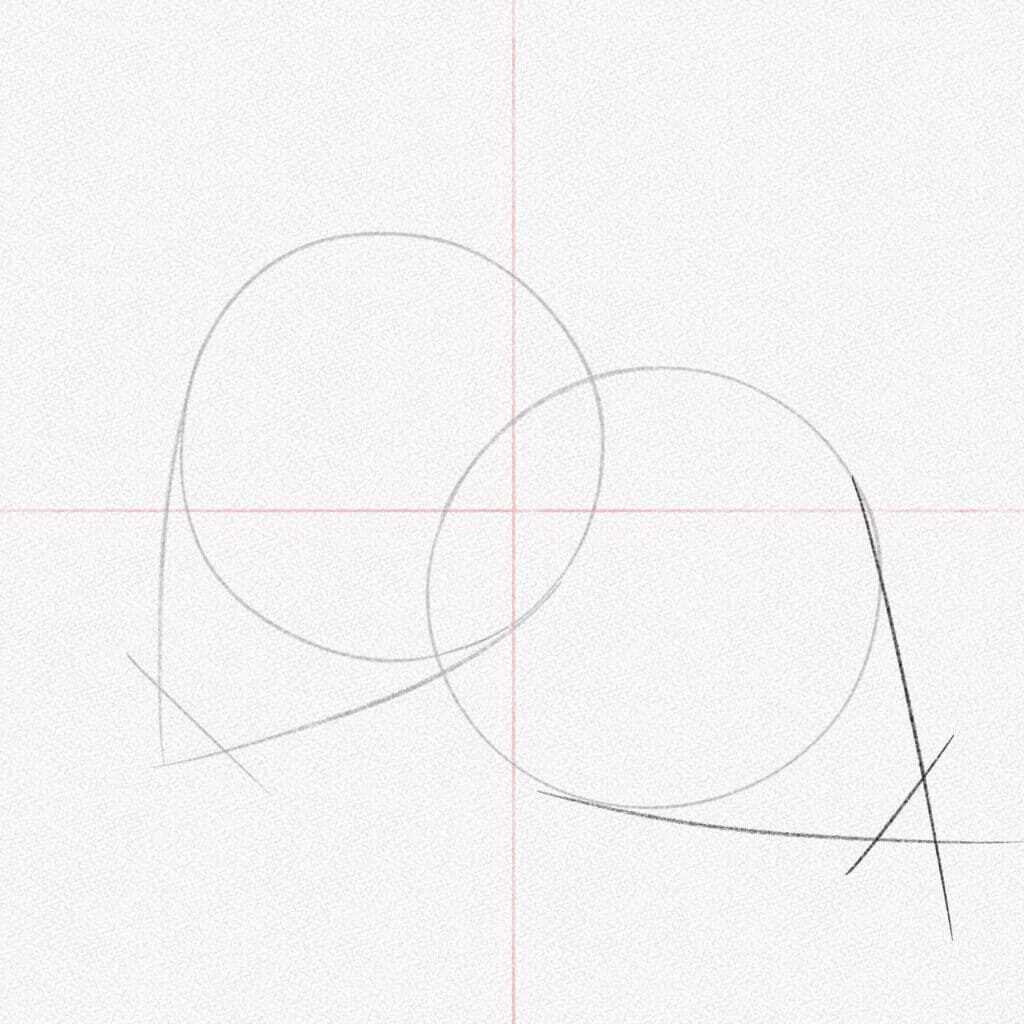
Step 8: Mark the middle line
Using your 2H pencil, mark the middle division of each Strawberry’s base circle.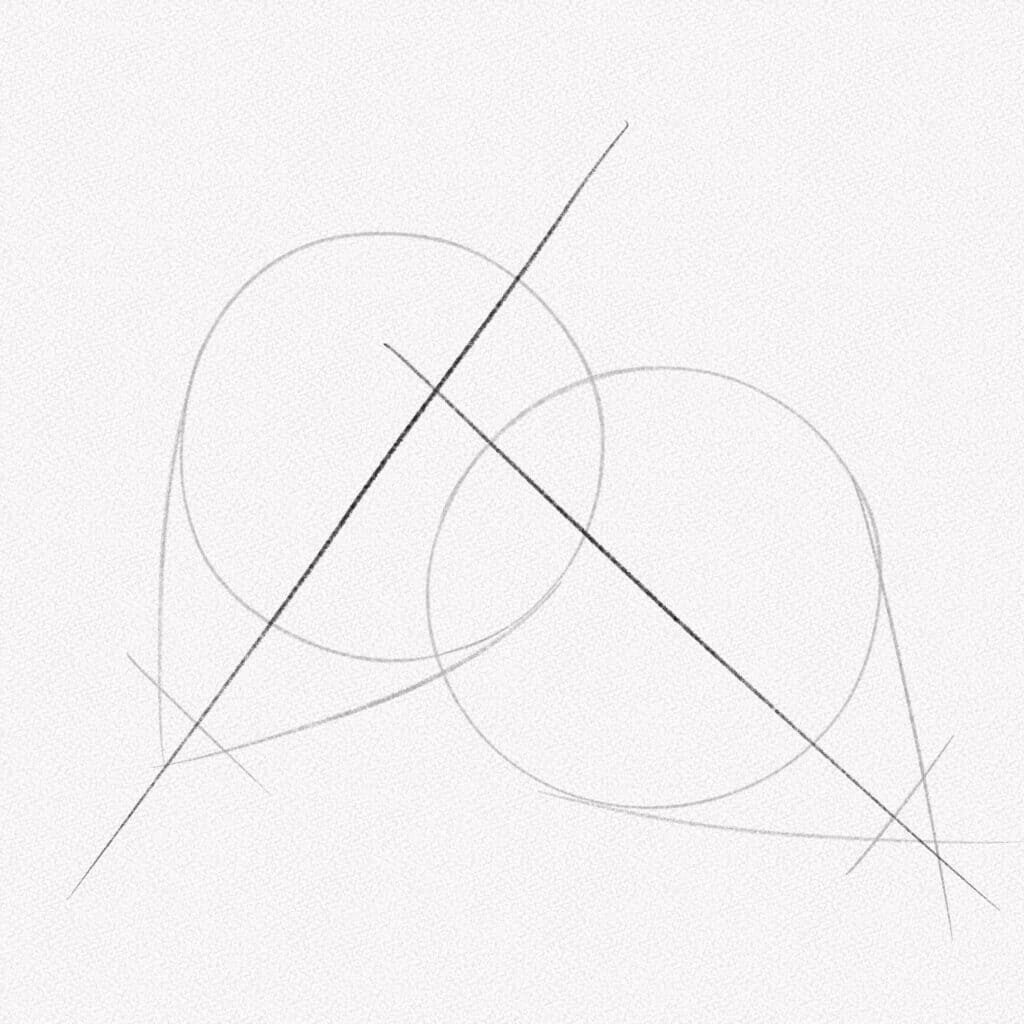
Step 9: Outline the Strawberry
For this step, use your kneaded eraser to softly erase your structure guidelines and outline both strawberries.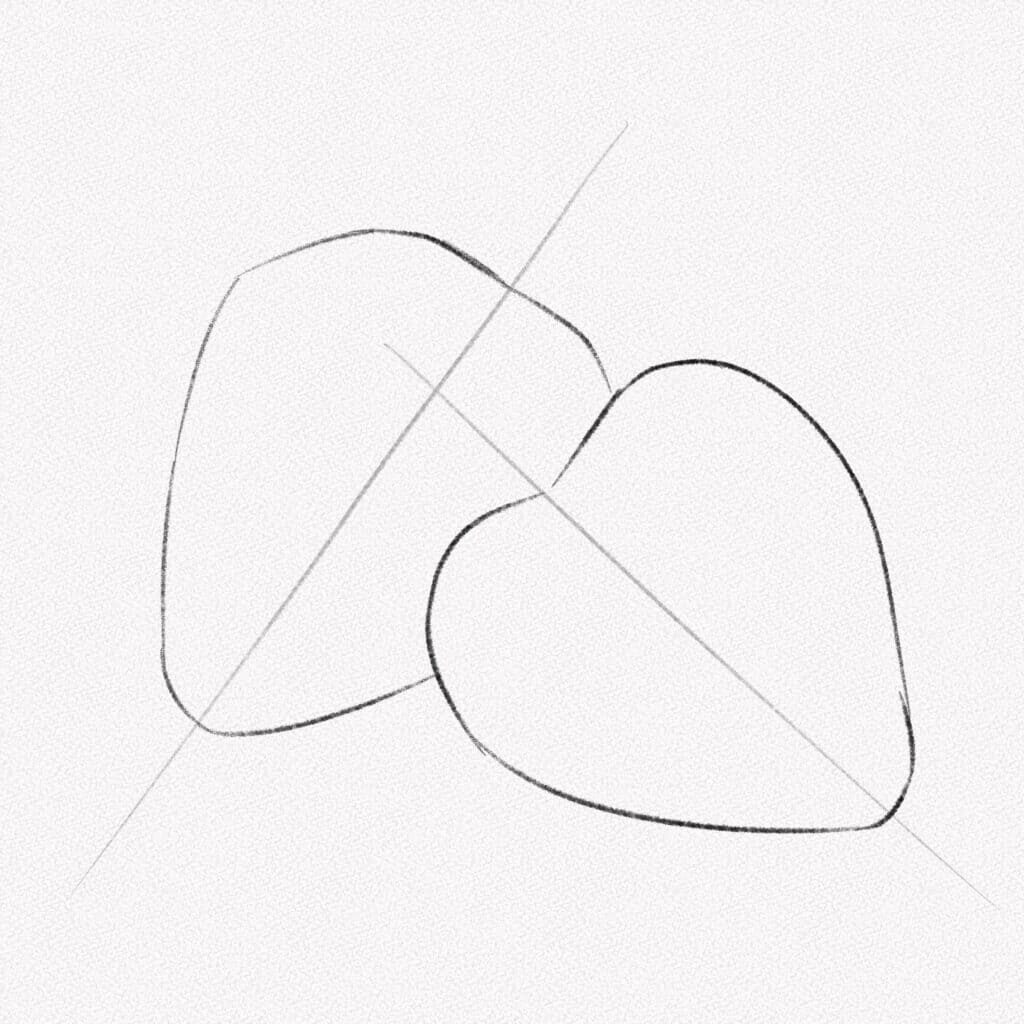
Step 10: Draw the stems
Pull two curved lines from the middle of each Strawberry’s top for the stems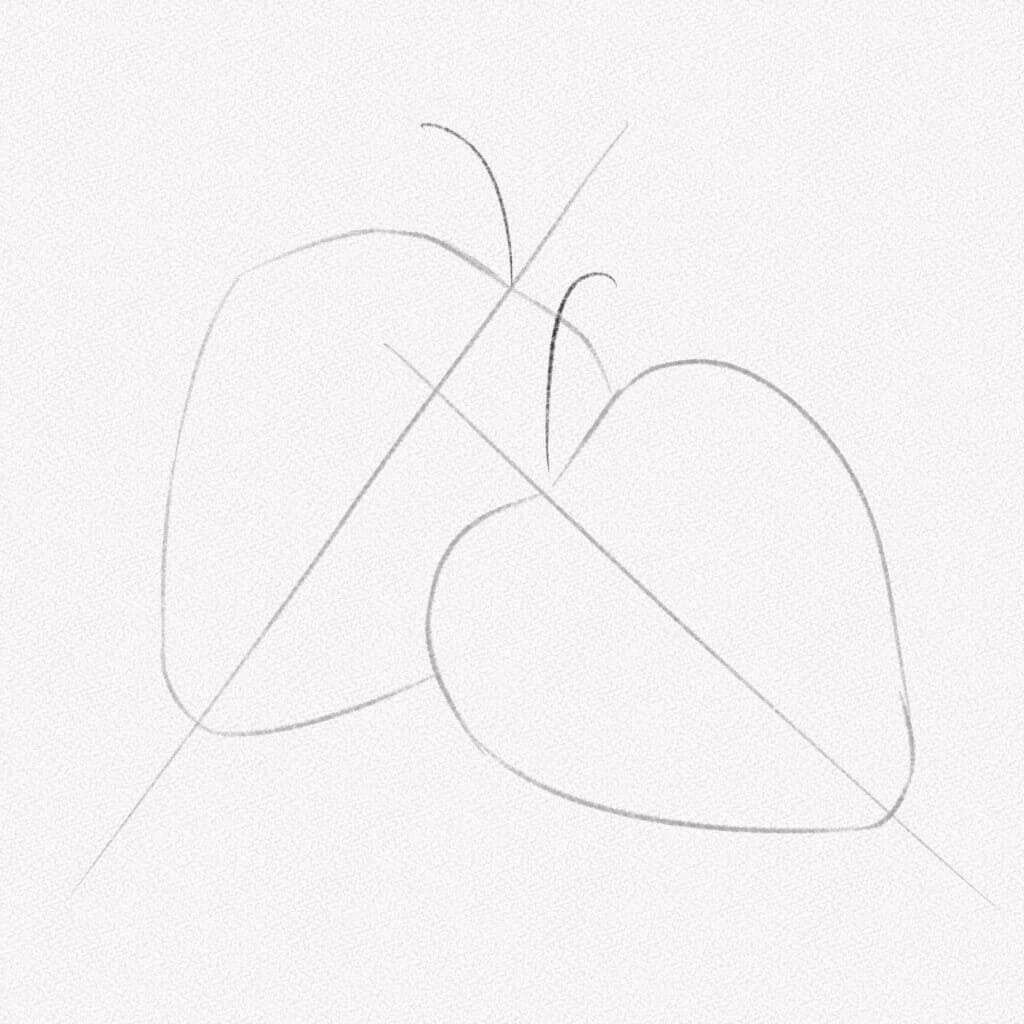
Step 11: Mark the seed’s positions
Strawberries have multiple seeds placed on top of their skin, and although the patterns they are placed on aren’t exact or perfect, we can use parallel lines as a reference to draw them.
For this step, draw diagonal parallel lines through the Strawberry’s body. Remember, strawberries are three-dimensional bodies, so the lines shouldn’t be straight but go around the Strawberry’s body.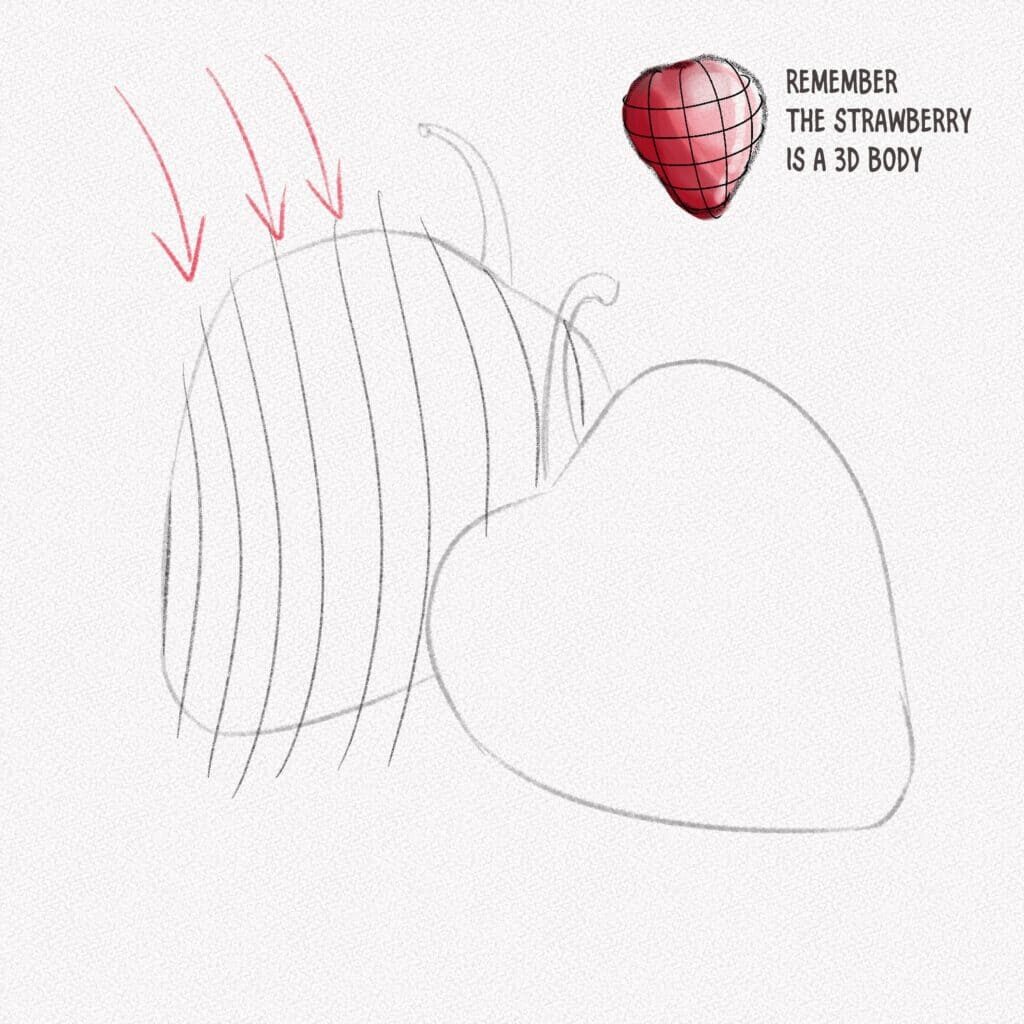
Step 12: Repeat
Repeat the step above but in the opposite direction. Remember not to apply too much pressure since we will erase these lines later on.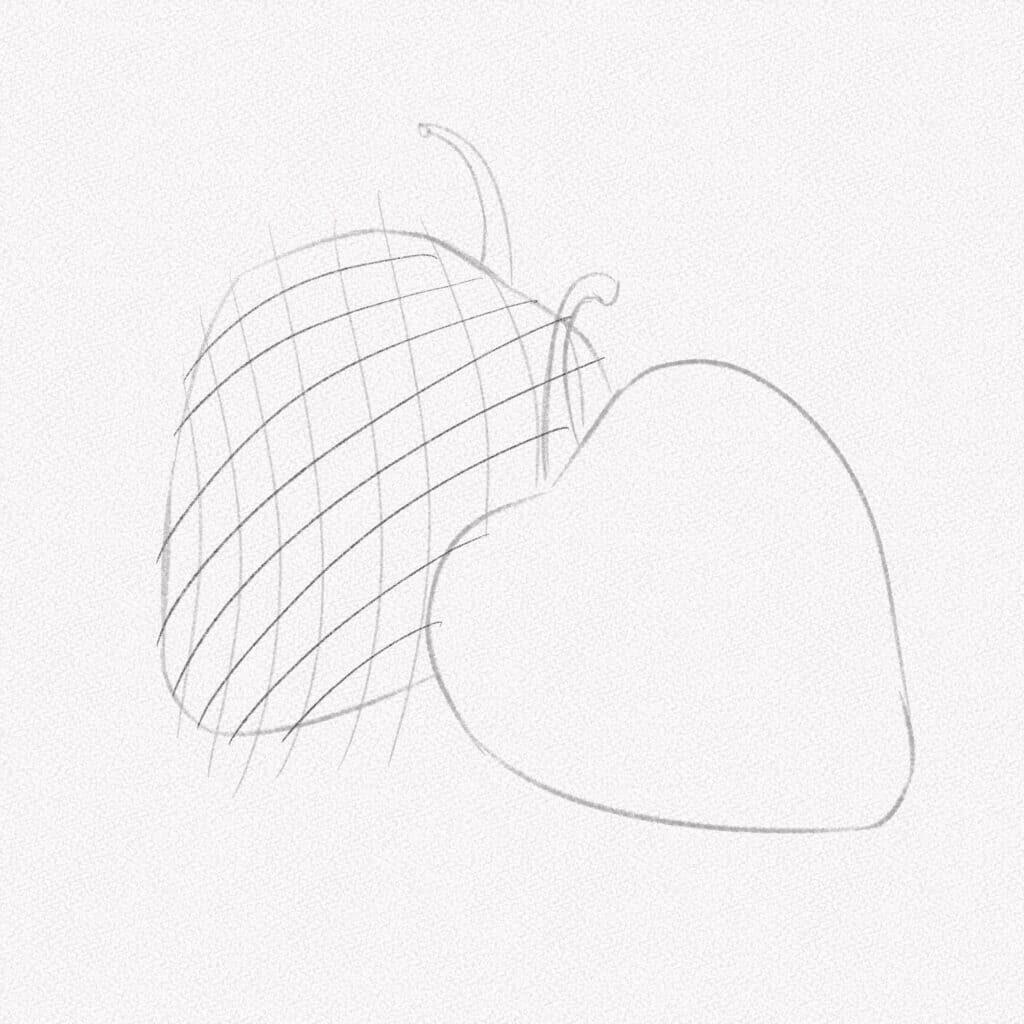
Step 13: Draw the seeds
Erase your guidelines softly and mark the seed positions with small curved lines.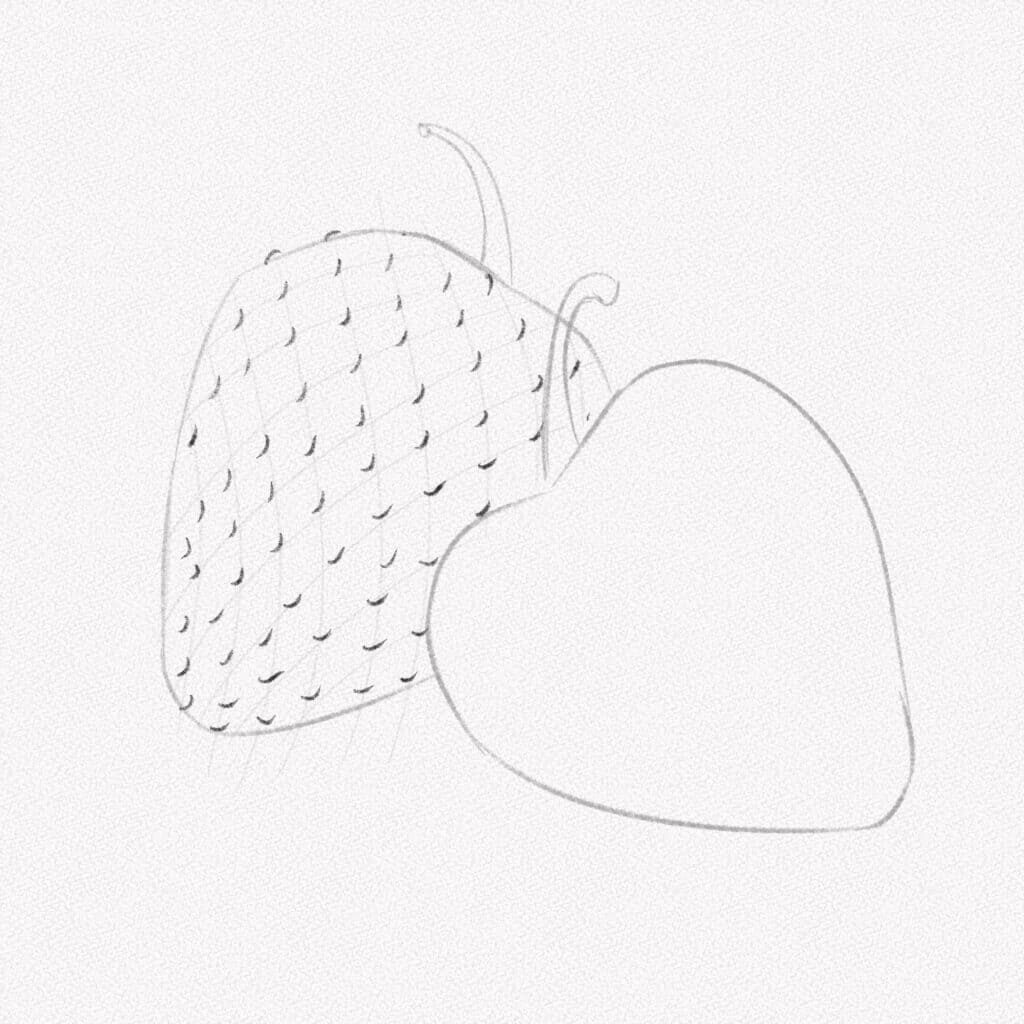
Step 14: Draw the leaves
Finally, draw the leaves on top of the Strawberry. Remember, these leaves tend to bend a little bit, either up or down, so add variety by drawing them differently.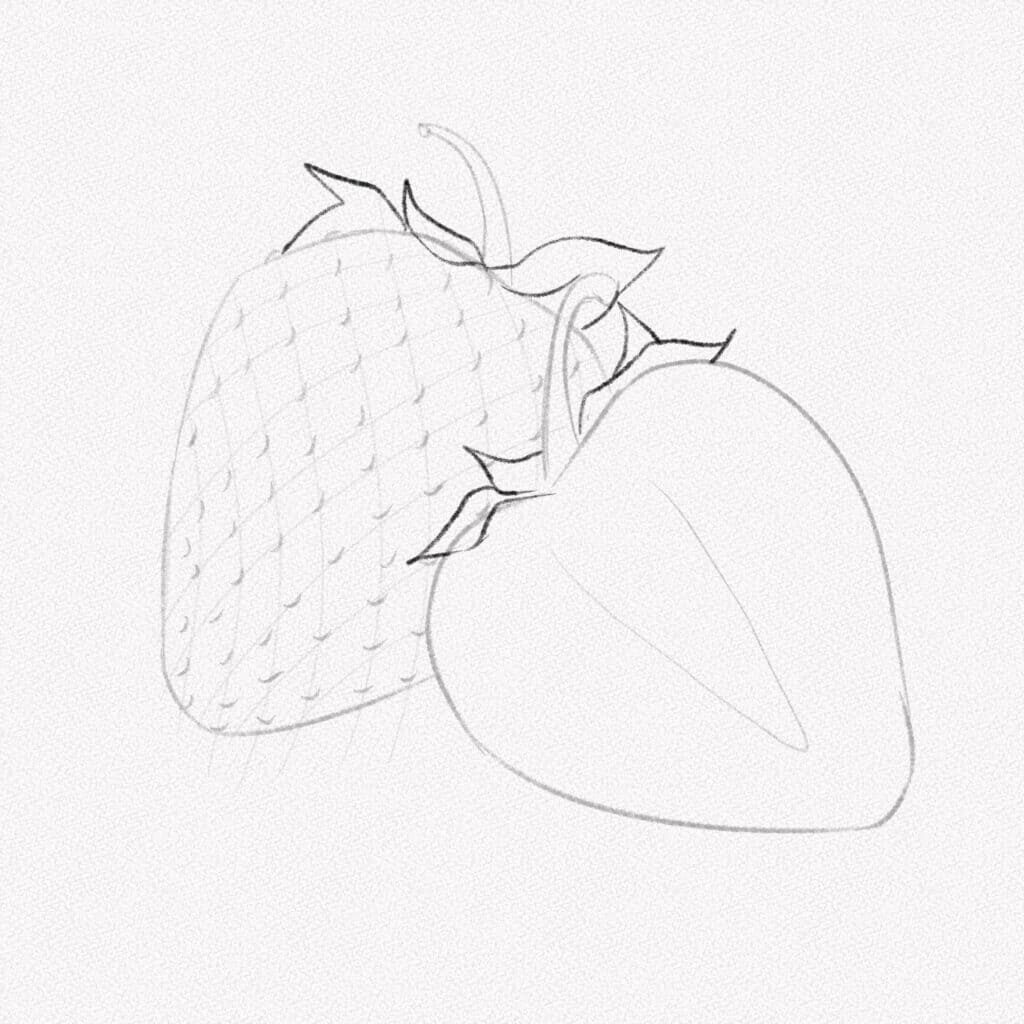
Section 2.- How to Shade a Strawberry
Congrats! Now you know how to draw a strawberry. Now let’s grab our pencils and start shading!
For this section, we are going to use our 6B pencil, our Tombow Mono Zero eraser, and our bending stump.
Step 15: Define the areas of light and shadow
For this tutorial, we are going to follow a particular shading direction, where the light comes from the top-left corner. However, you can change the light settings and use the one you like the most.
The crucial part of this step is determining the areas that will be hit by the light and the areas that will stay in the shadows. 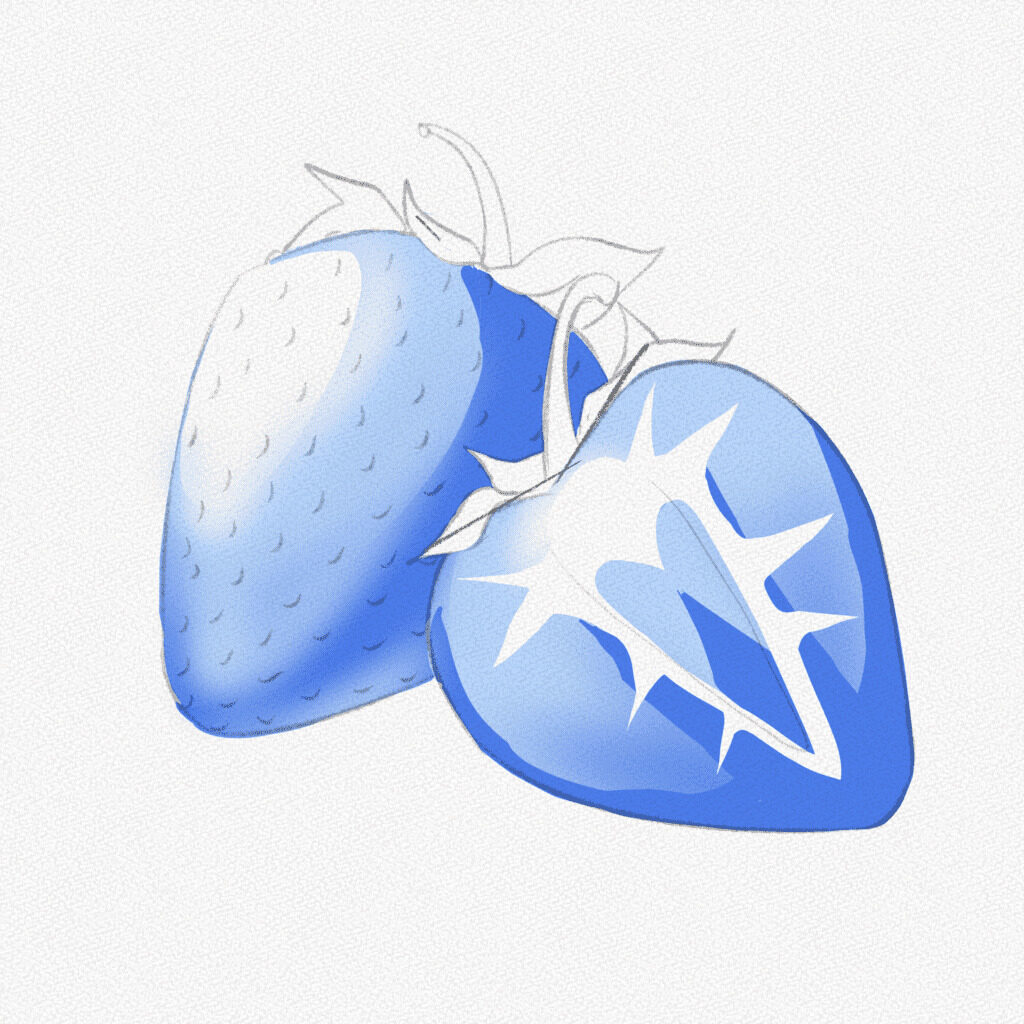
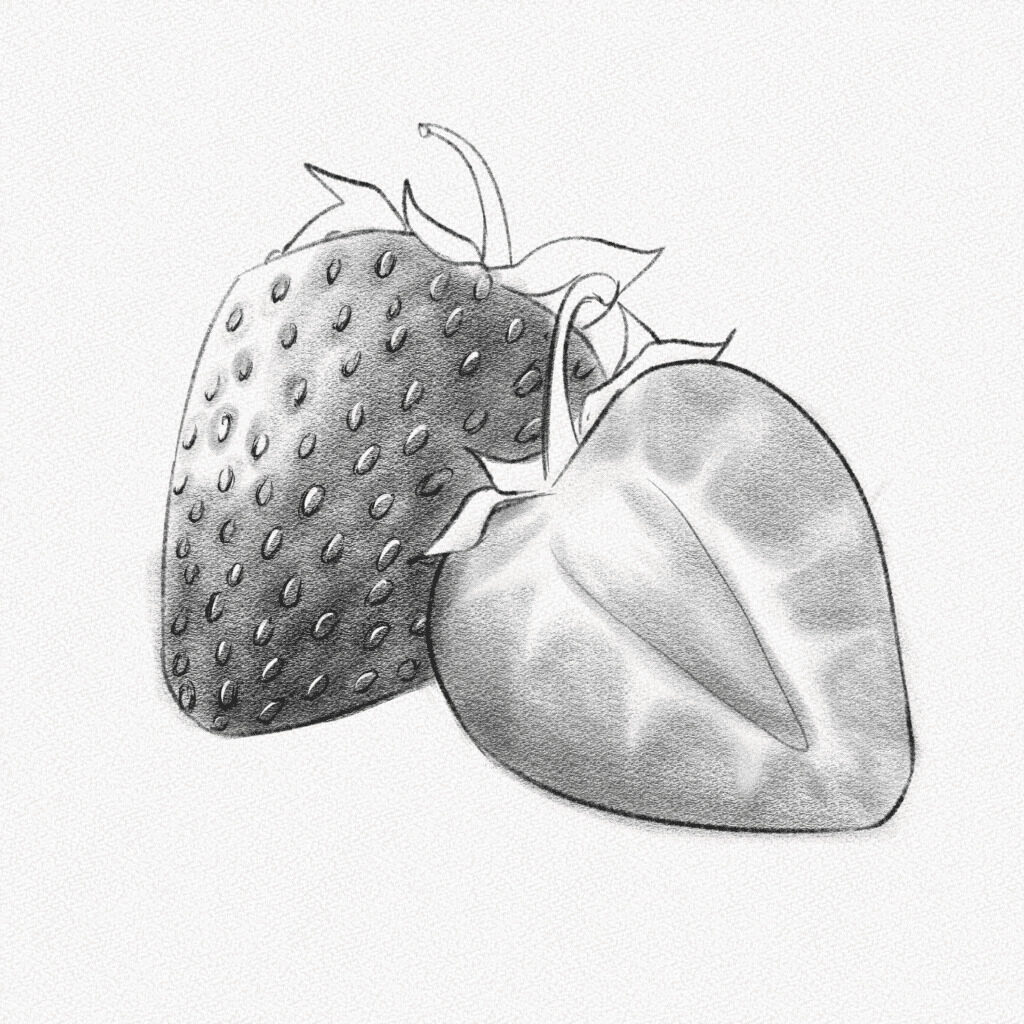
Step 16: Shade the lightest area
Follow the diagram below to shade the lightest part of the Strawberry and the strawberry seeds.
Fill the half-strawberry with a soft layer of graphite, and make sure to blend to create irregular borders around the lightest areas.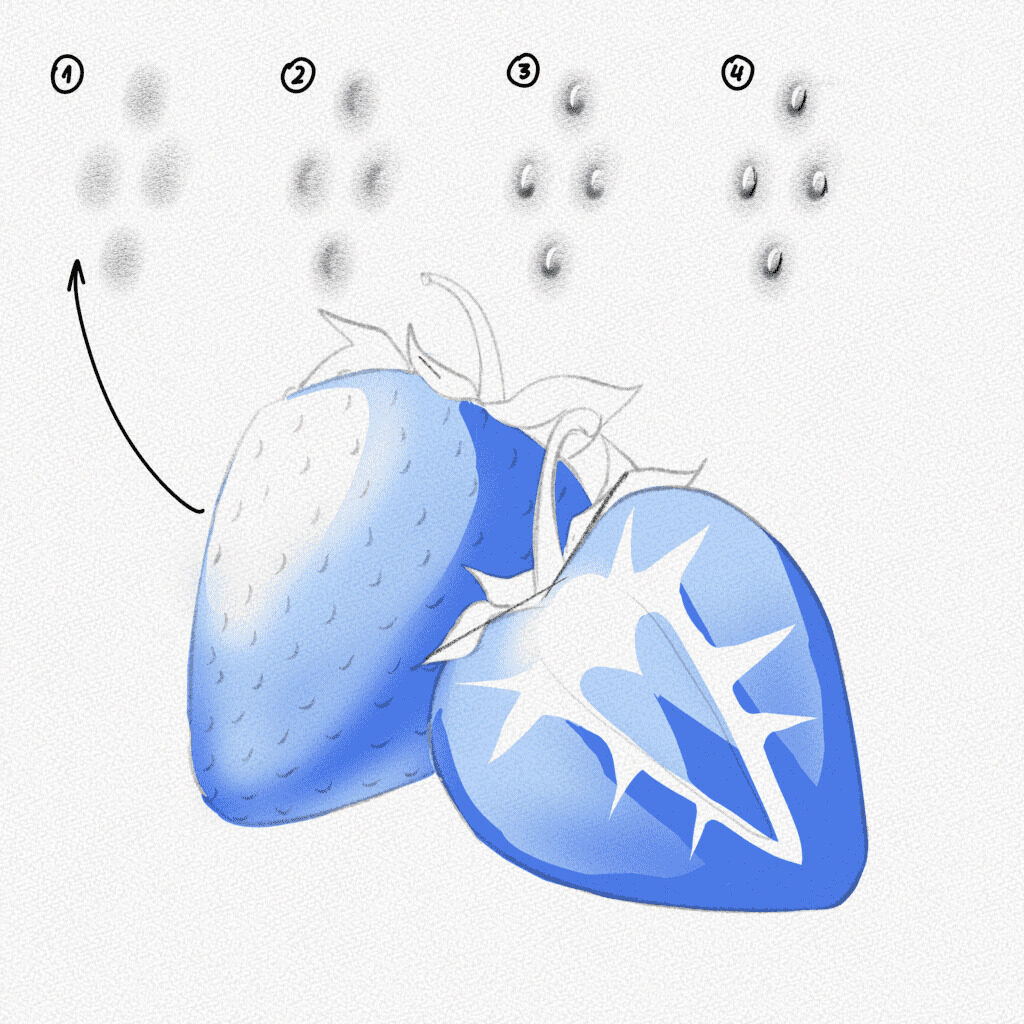
Step 17: Shade the middle area
Use the following diagram as a guide on how to shade the Strawberry and seeds.
Use your kneaded eraser and your Tombow mono zero for the lighter areas and small details in the seeds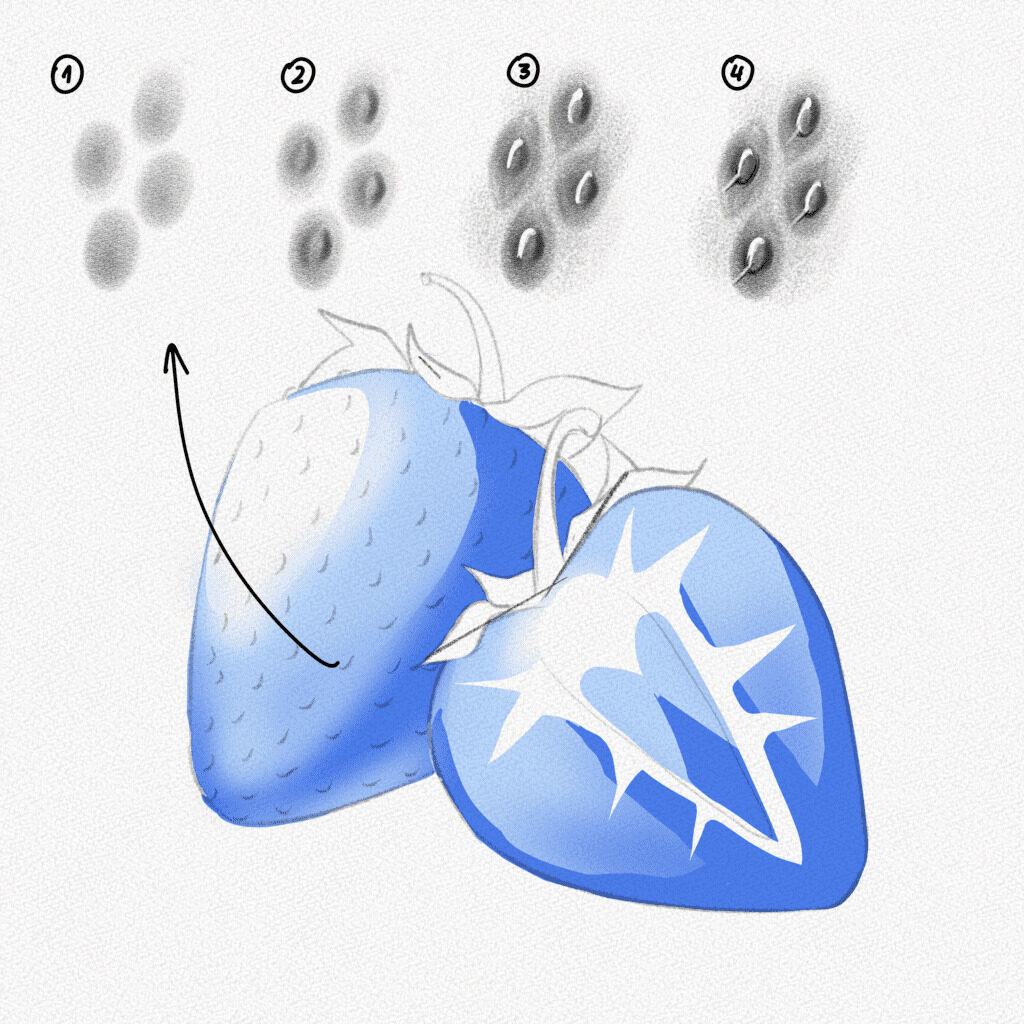
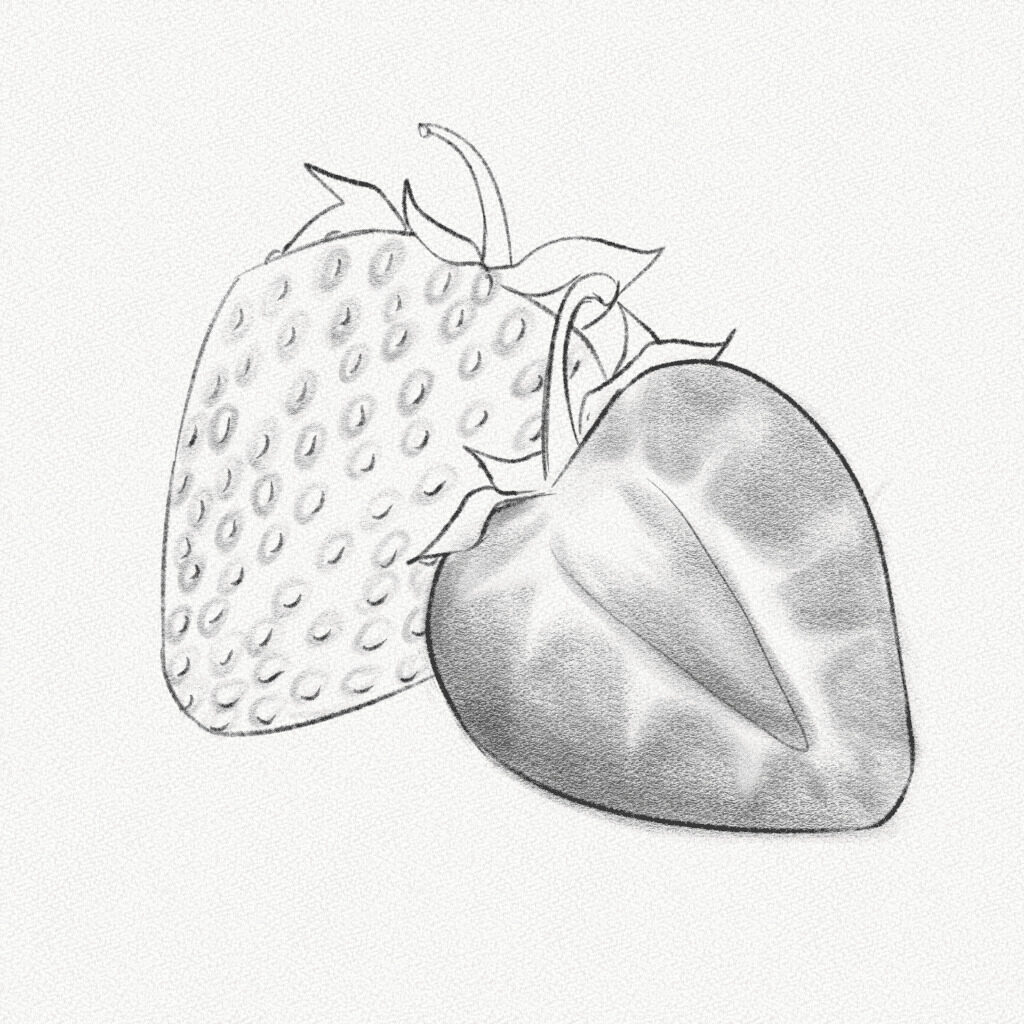
Step 18: Shade the darkest area
For the darkest area, add an additional layer of graphite to the area we are going to shade and proceed to build more graphite layers slowly around the seeds and borders of the Strawberry. Use your kneaded eraser to take away graphite from the areas that still get some light and the tip of your Tombow mono zero for the seeds.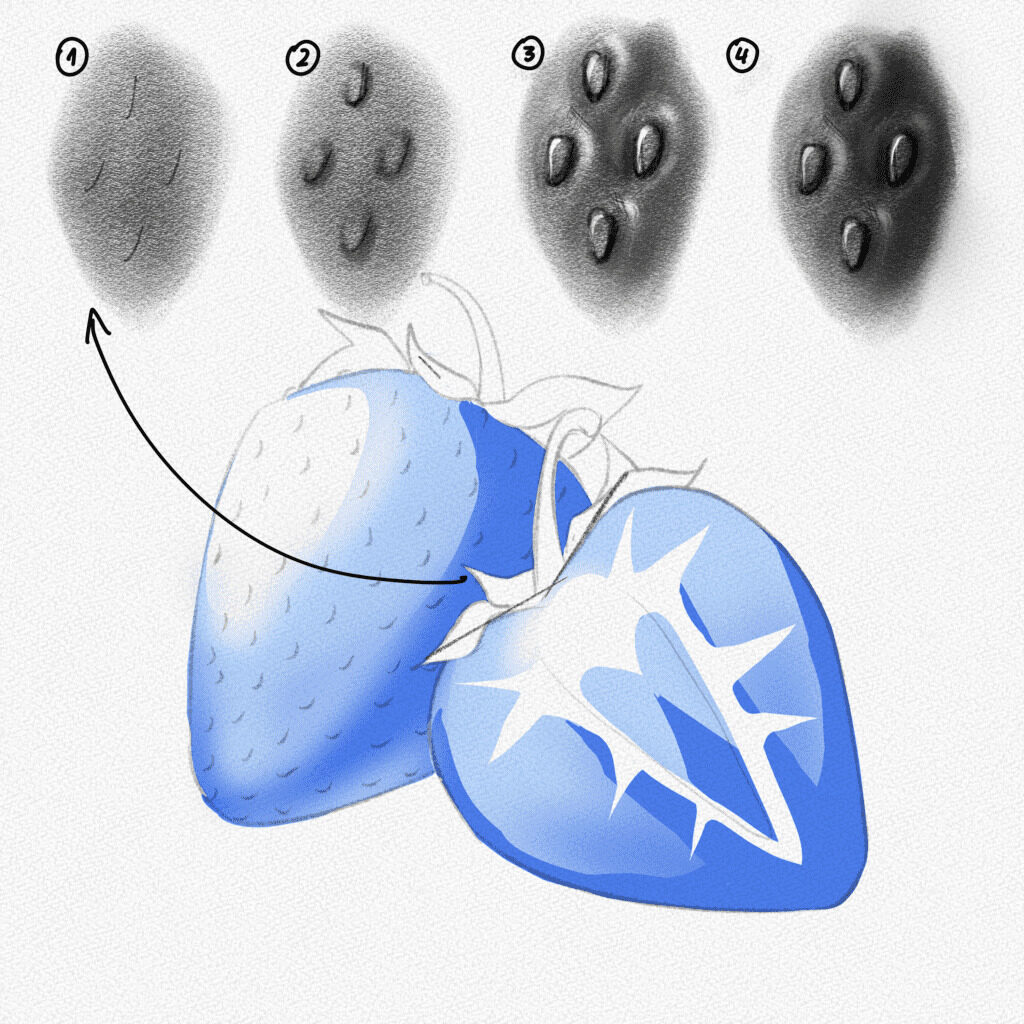
Step 19: Add contrast
With your 6B pencil, add contrast and sharpness to the borders of the Strawberry and uniformize the darkest areas, especially around the seeds.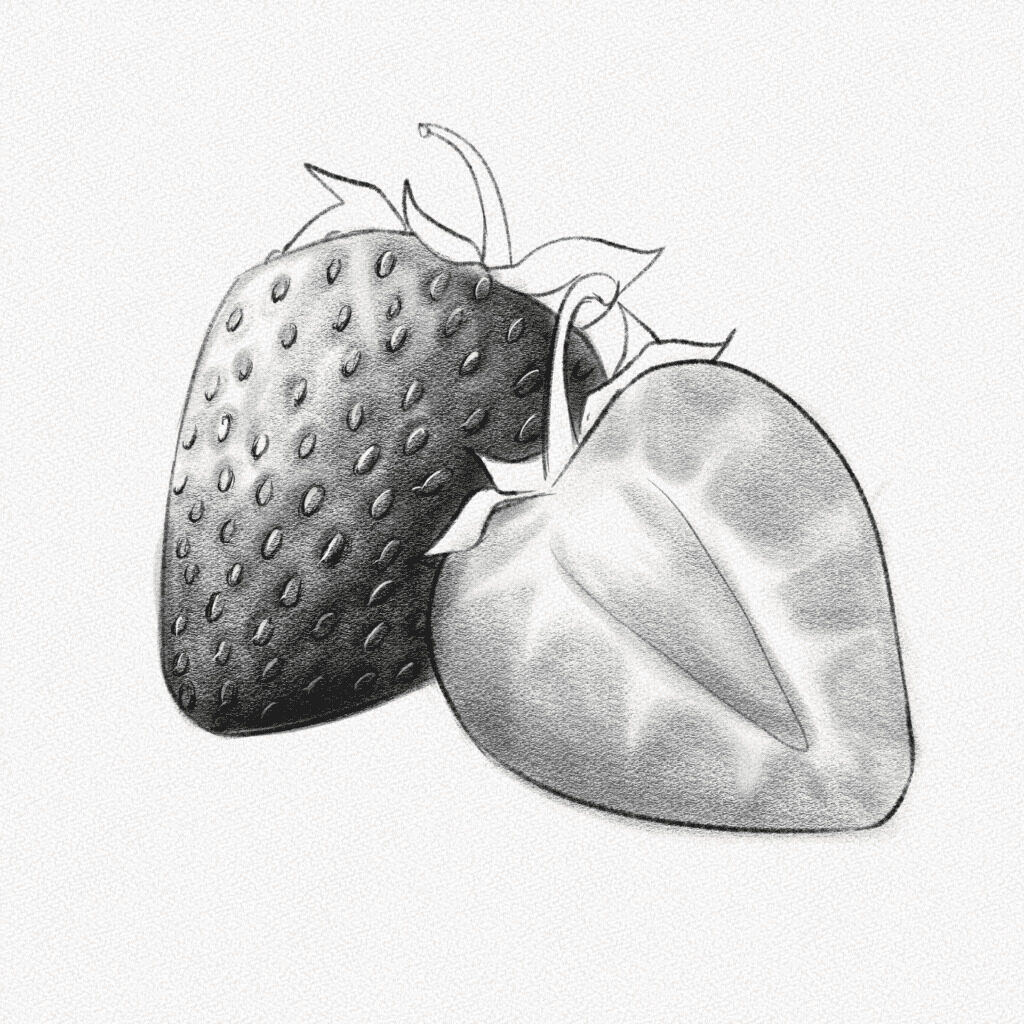
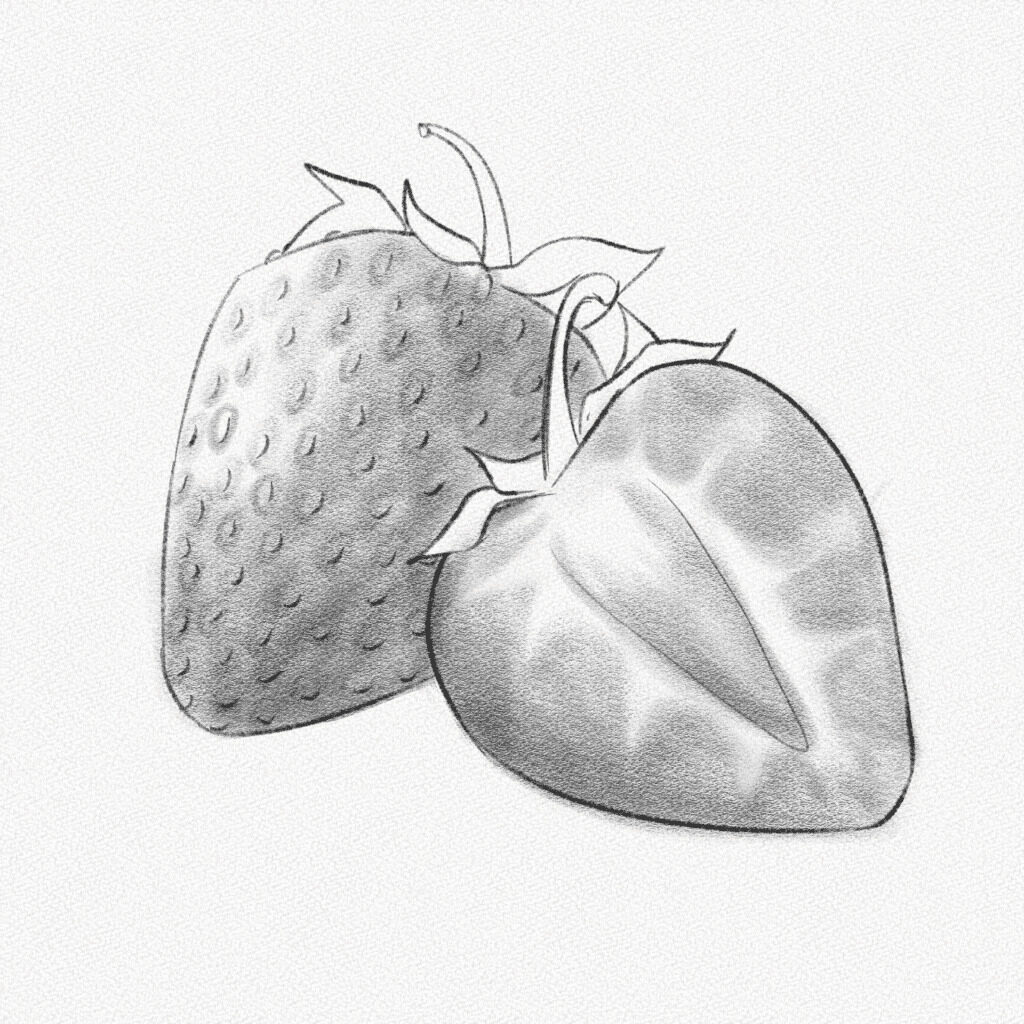
Step 20: Shade the half-strawberry
For this step, make sure to dull the tip of your 6B pencil and fill the Strawberry using zig-zag lines. Then use your blending stump and with the same movements, blend the graphite towards the center of the Strawberry. 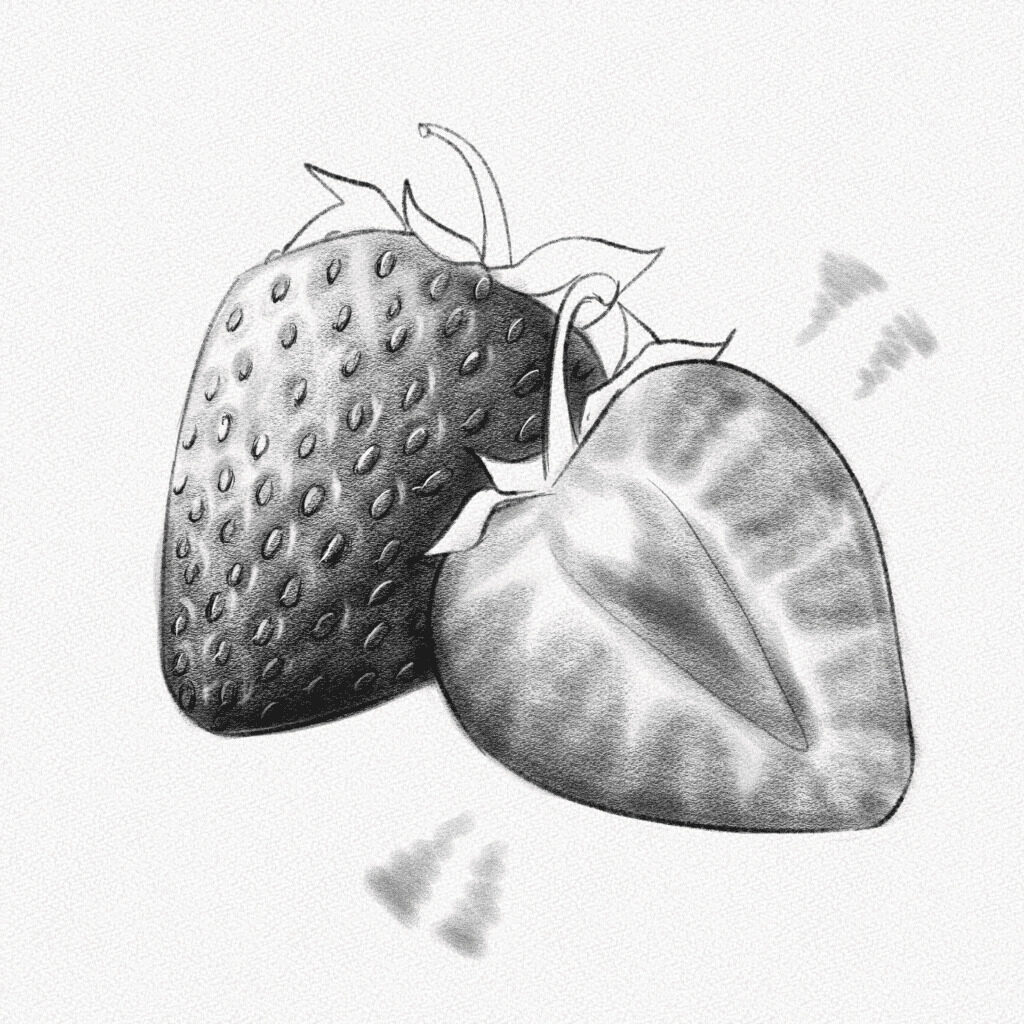
Step 21: Add contrast and highlights
Repeat the step above and keep darkening the Strawberry. Take small portions of graphite away from the borders with your Tombow mono zero. That will give your drawing an additional level of realism and detail.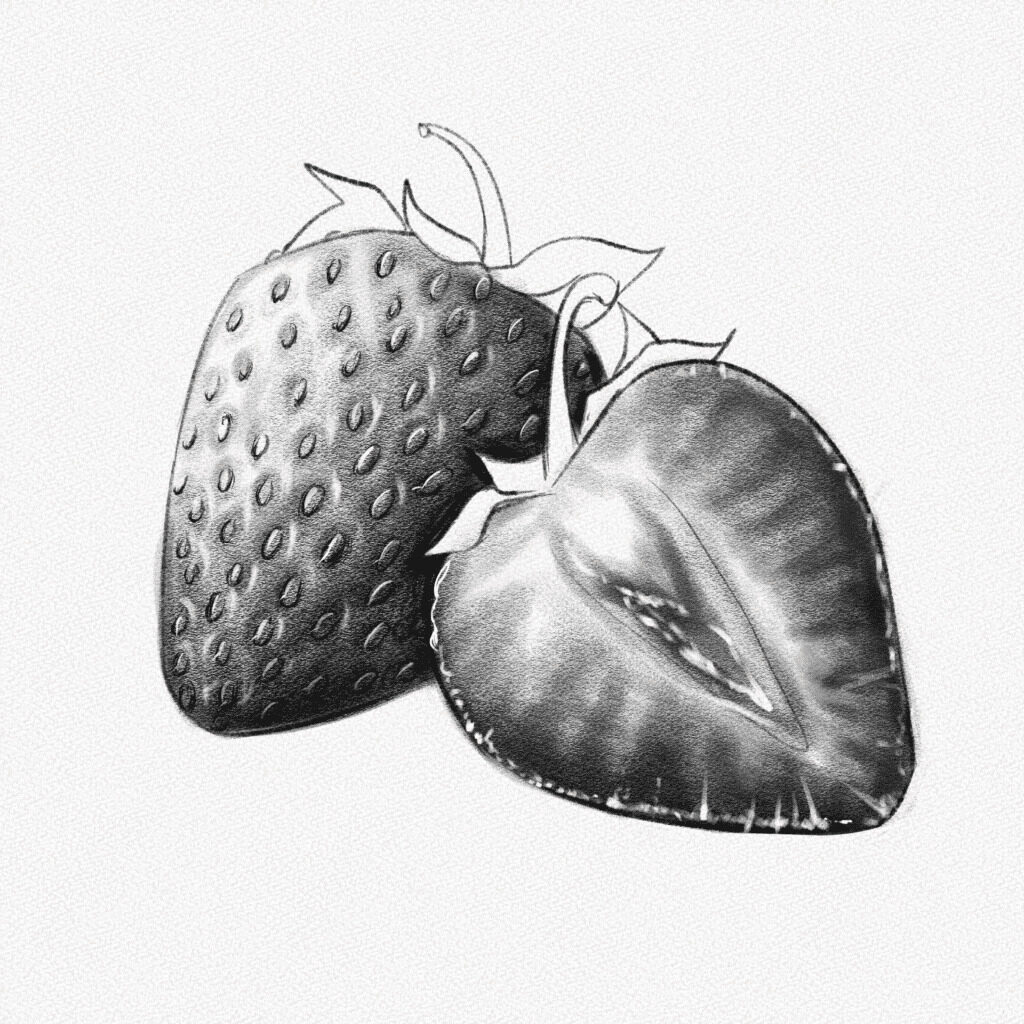
Step 22: Shade the leaves
Now, shade the Strawberry’s leaves and stem, and add a casted shadow under the strawberries to give it an additional level of dimension as well.
Congratulations on completing this tutorial on how to draw a realistic strawberry! You did great!
I hope you found it helpful and that you are now armed with the skills and knowledge you need to create your own stunning depictions of this popular fruit.
Remember, drawing a realistic strawberry takes time and practice, so don’t get discouraged if your first attempts don’t turn out exactly as you had hoped.
So keep on drawing and have fun!
Thank you for following this tutorial.
Happy drawing, until next time!