Roses are some of the most beautiful flowers on earth. They are always worth admiring and have captured our attention more than once in our life.
Drawing them is a bit of a challenge, though. Roses seem to have intricate and complicated patterns, especially the open ones.
But don’t worry. In this tutorial, you will learn how to draw a rose from scratch by following simple steps.
What you’ll learn in this tutorial:
- Basic shapes behind a rose
- How to draw and shade rose petals
- How to draw a rose
These are the materials we are going to use:
- A 2H pencil
- A 2B pencil
- A 4B pencil
- A blending stump
- A kneadable eraser
- A precision eraser
- A ruler
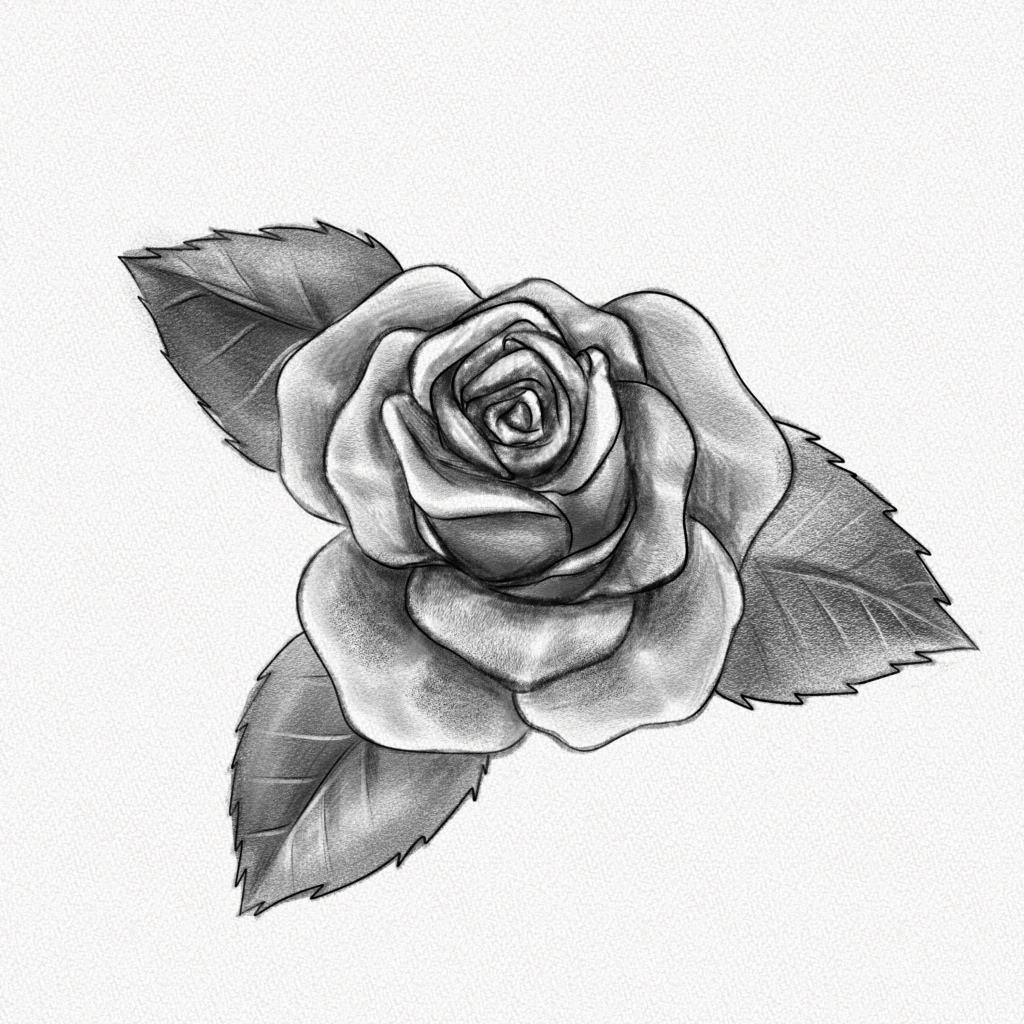
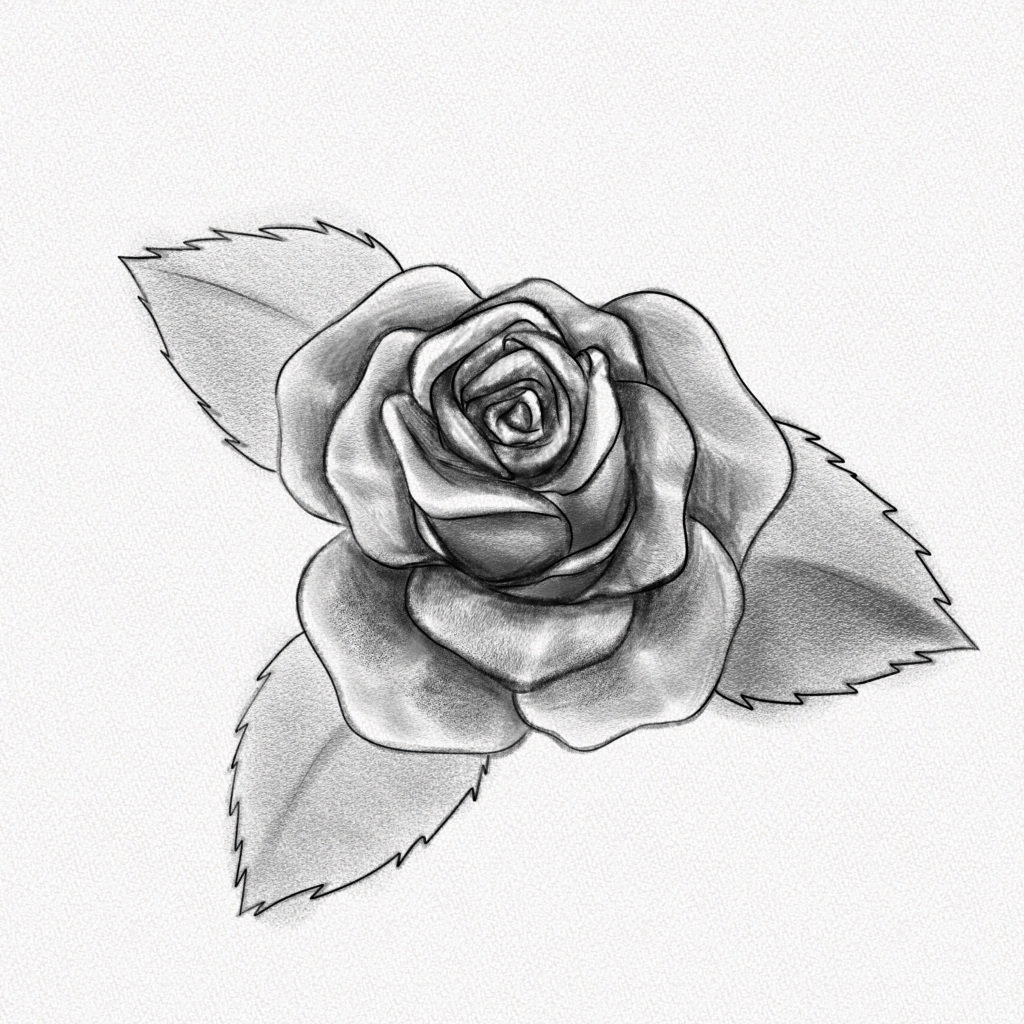
This is the rose you’re going to draw:
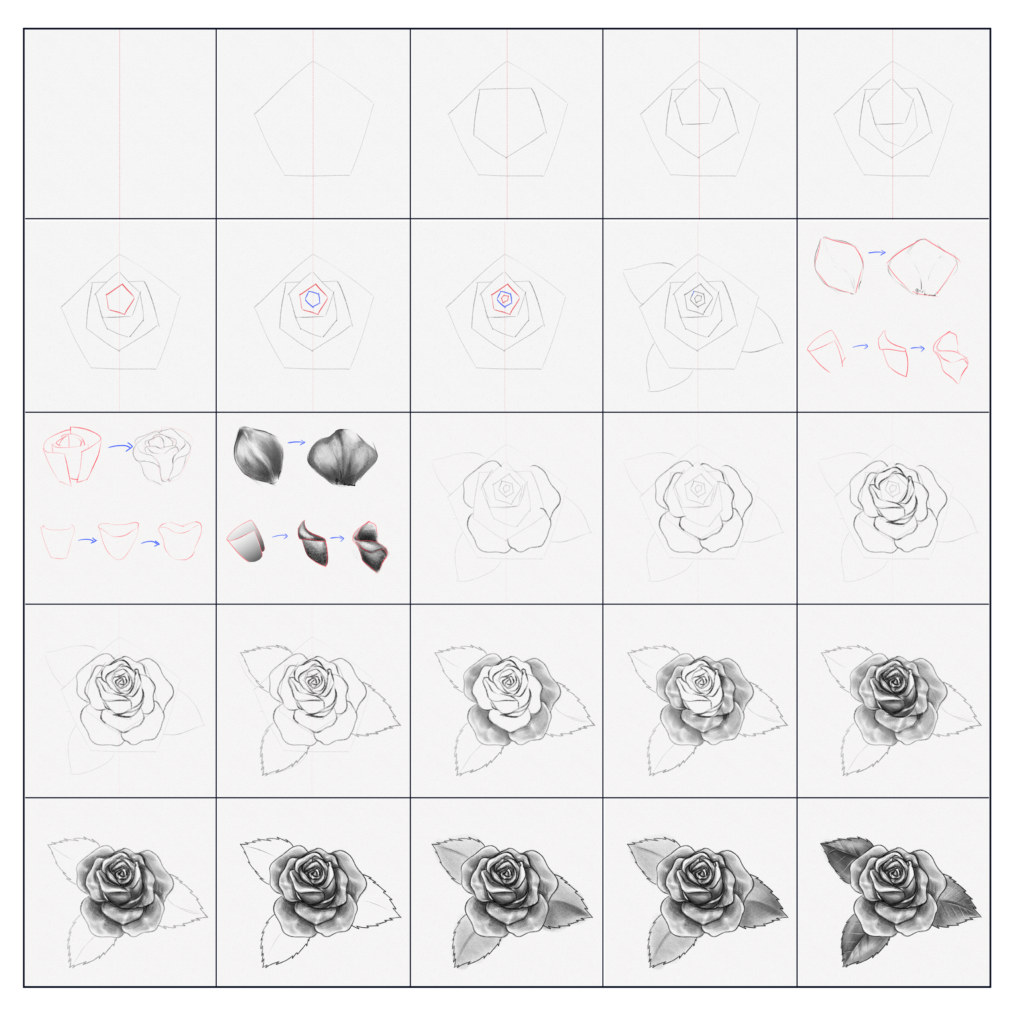
And these are all the steps we’ll walk you through:
Section 1.- Basic Shapes Behind a Rose
A rose goes through different blooming stages. It goes from a simple bud to a complete open rose.
The last is the one we’re going to draw today. Although it’s also the most complicated one, it’s also a rose’s most beautiful blooming stage.
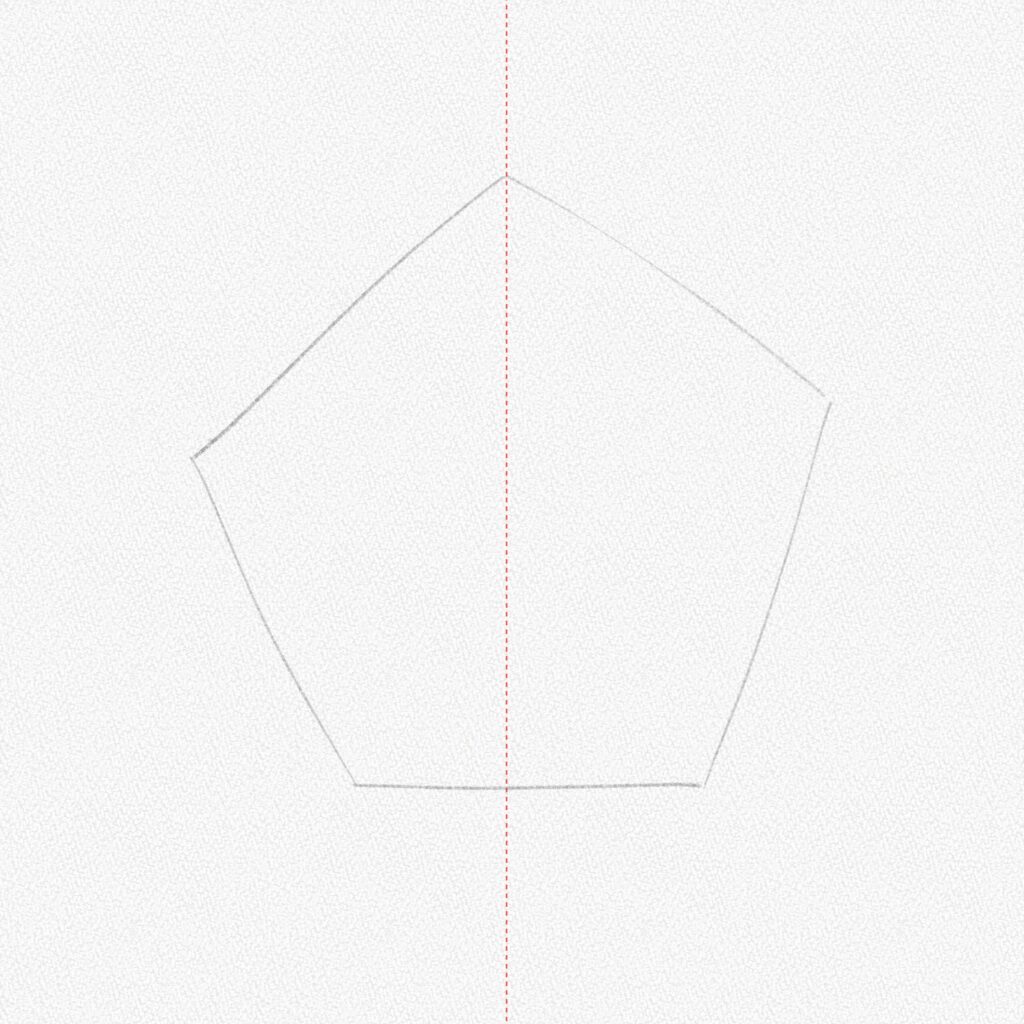
Step 1: Draw a line
With your ruler, draw a line through the middle of your canvas.

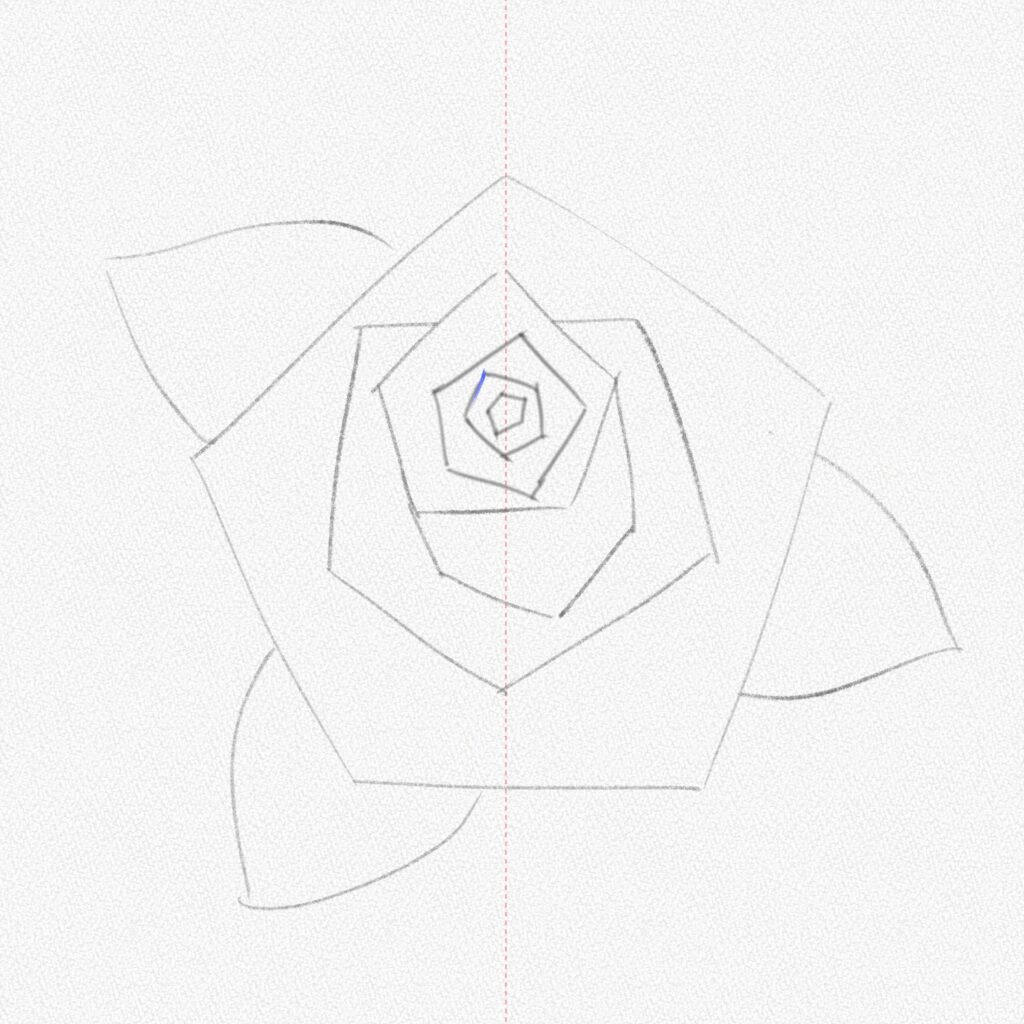
Step 2: Sketch a pentagon
With your 2H pencil, sketch a pentagon. It doesn’t have to be perfect, but try to keep it symmetrical. This pentagon will be the size of your rose, so make it as big as you want your rose to be. Leave some space for the leaves on the sides as well.
Step 3: Repeat
Repeat the previous step by sketching a pentagon backward. Make it smaller, as shown in the diagram.
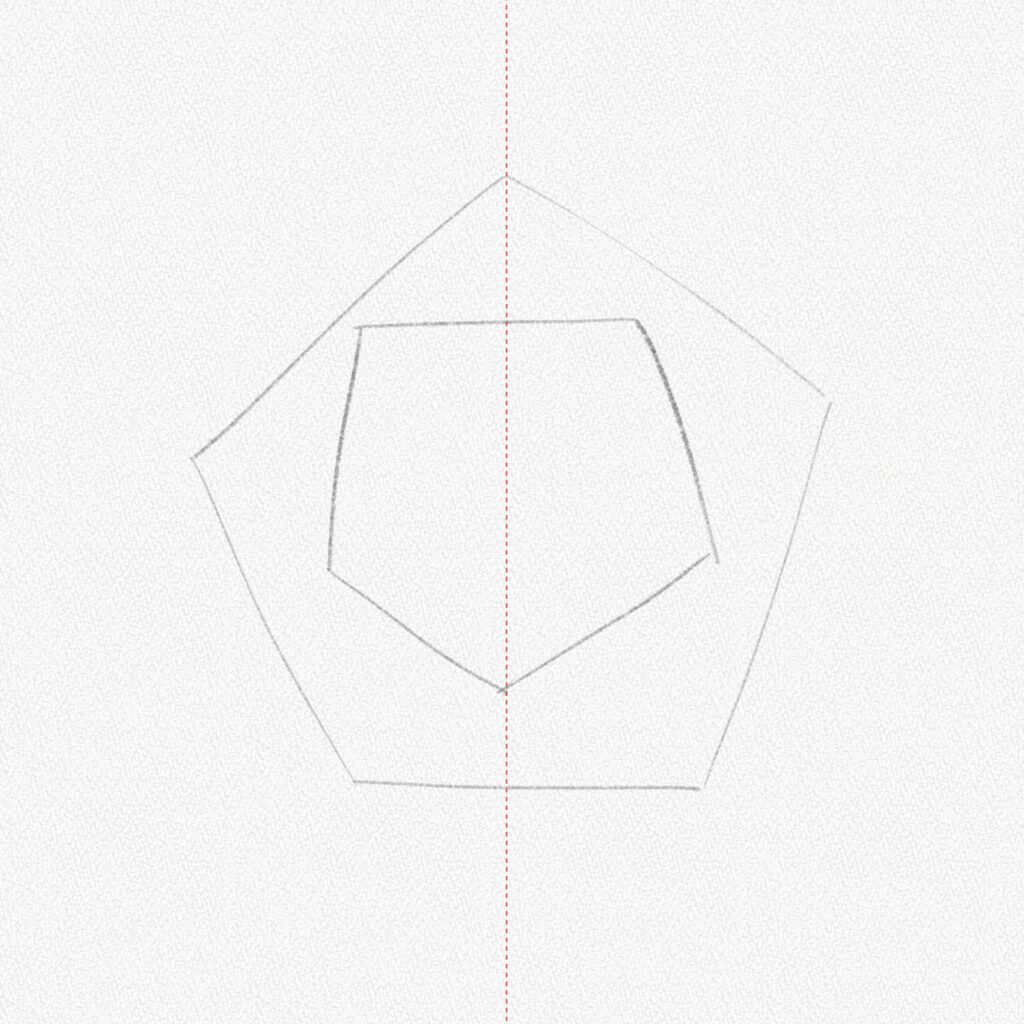
Step 4: Repeat, but smaller
Please pay special attention to this step. We’re going to draw this smaller pentagon above the other ones. Think about it like this, the outer petals are more open and thus closer to the ground, while the center is still closed in a cup-like shape. This pentagon we’re drawing will be the top of that cup.
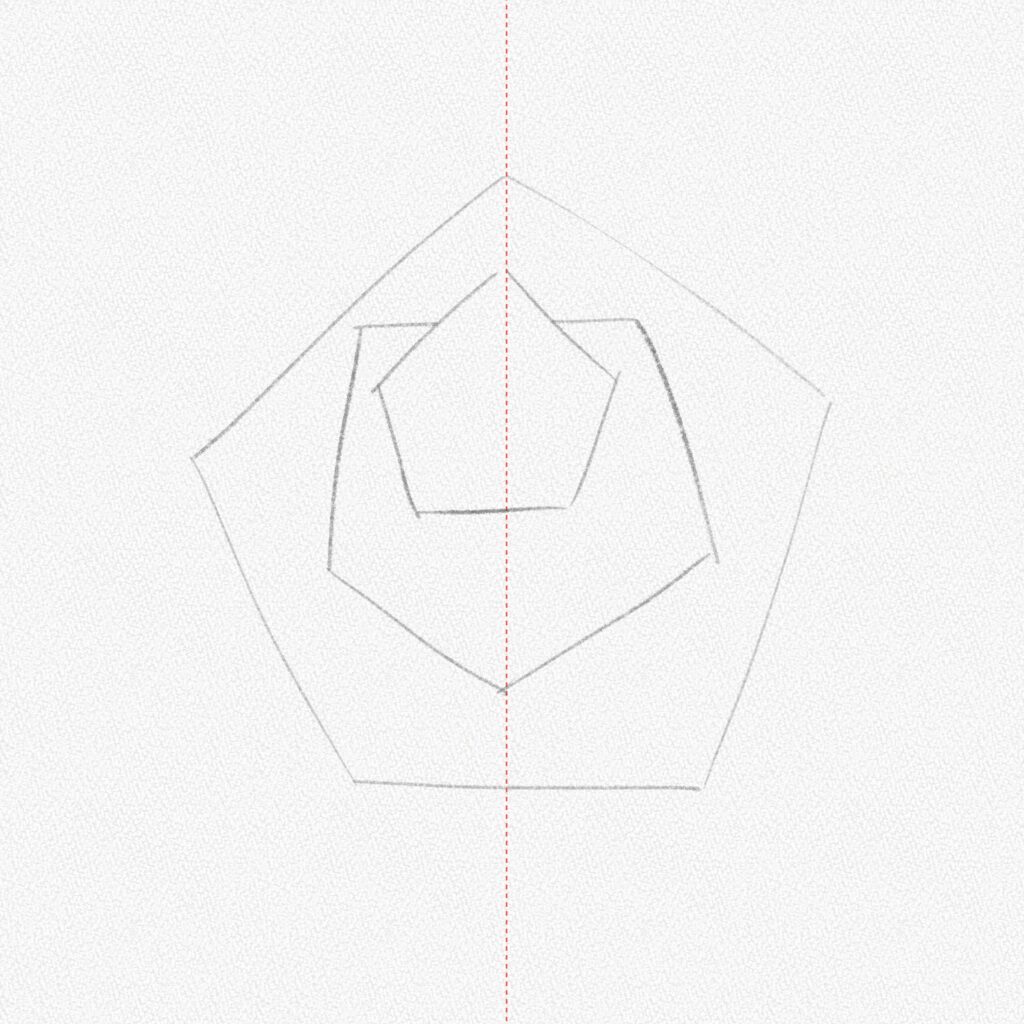
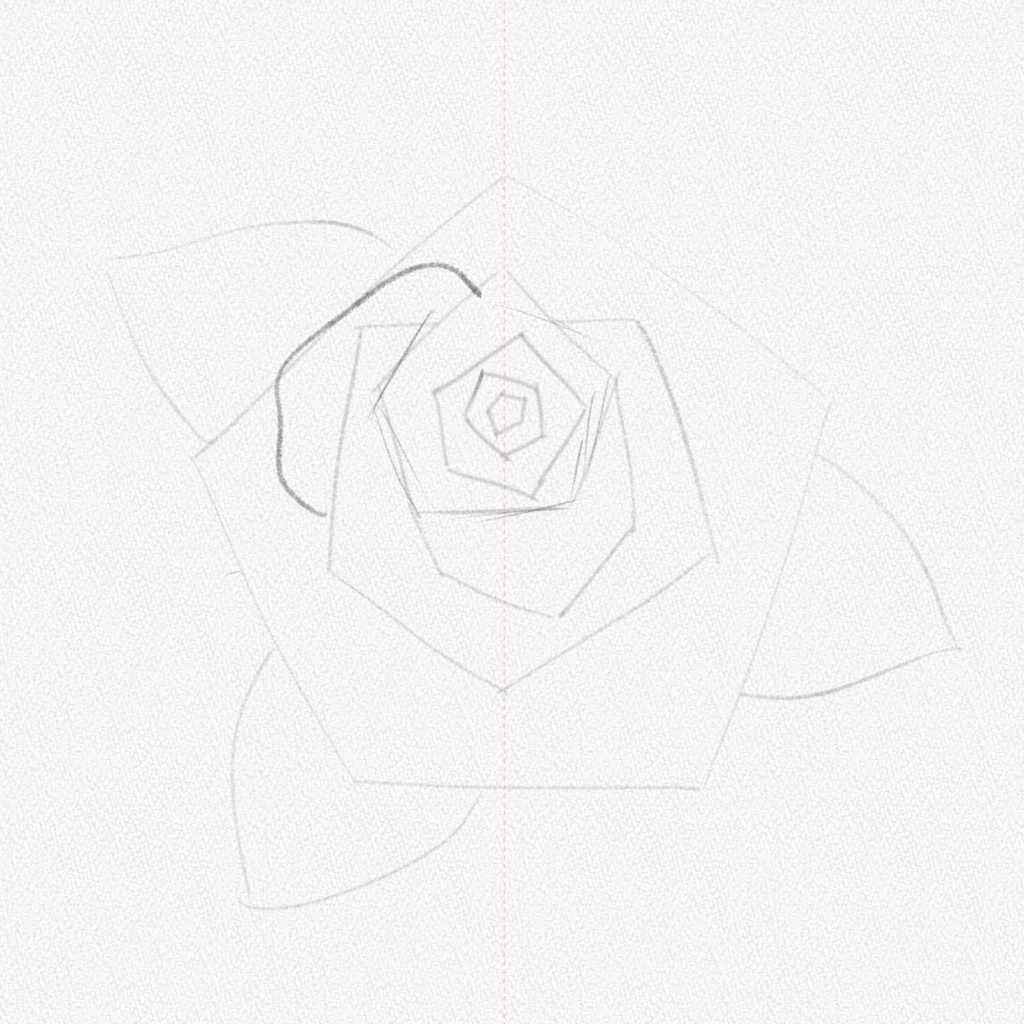
Step 5: Mark the center of the rose
Following the step above, now we’re going to draw the rest of the “cup” with an irregular “U” shape.

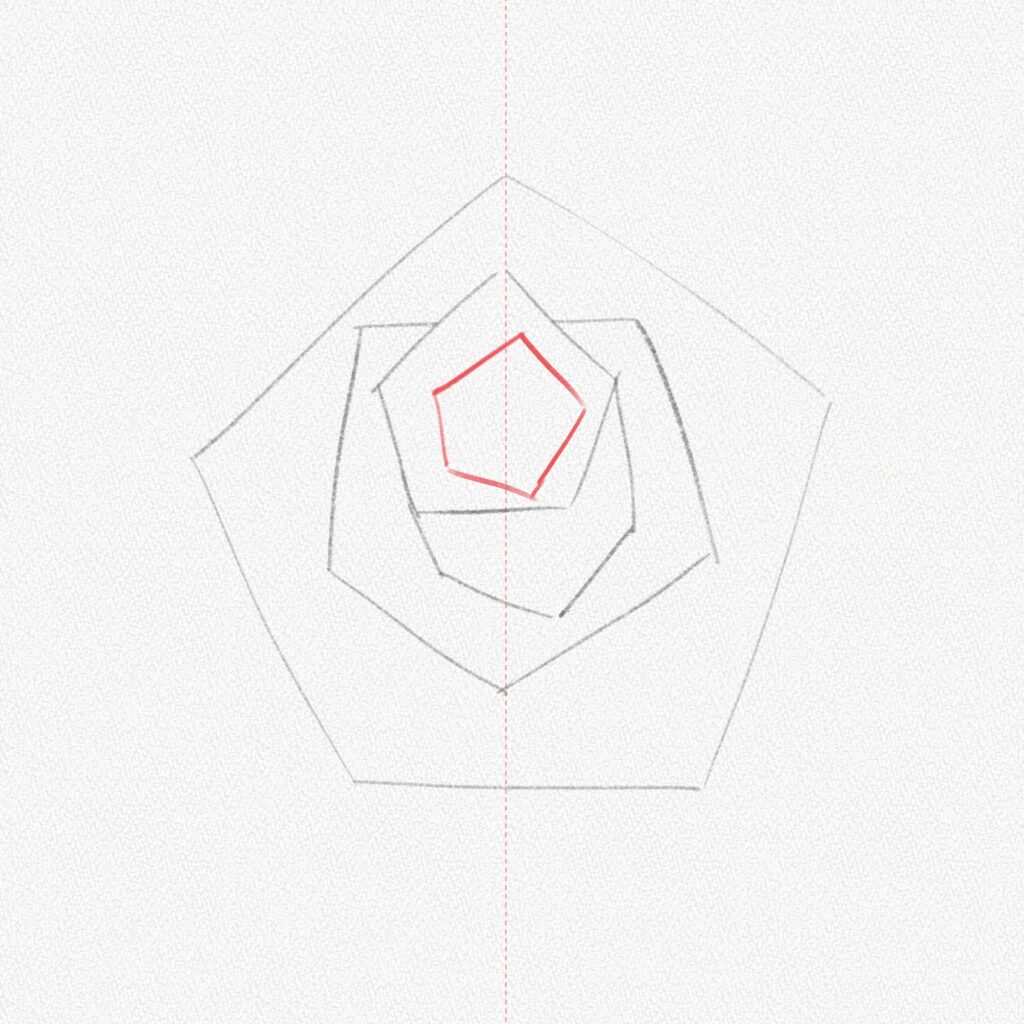
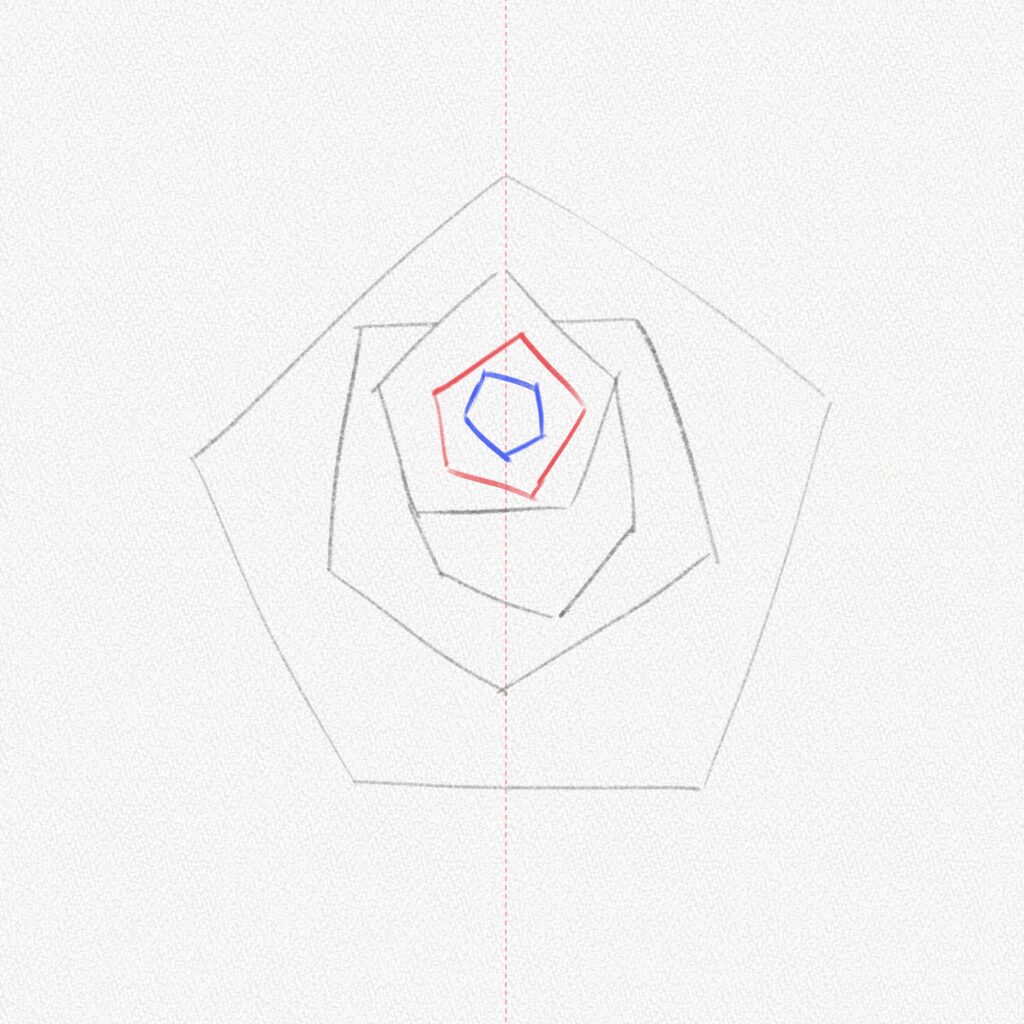
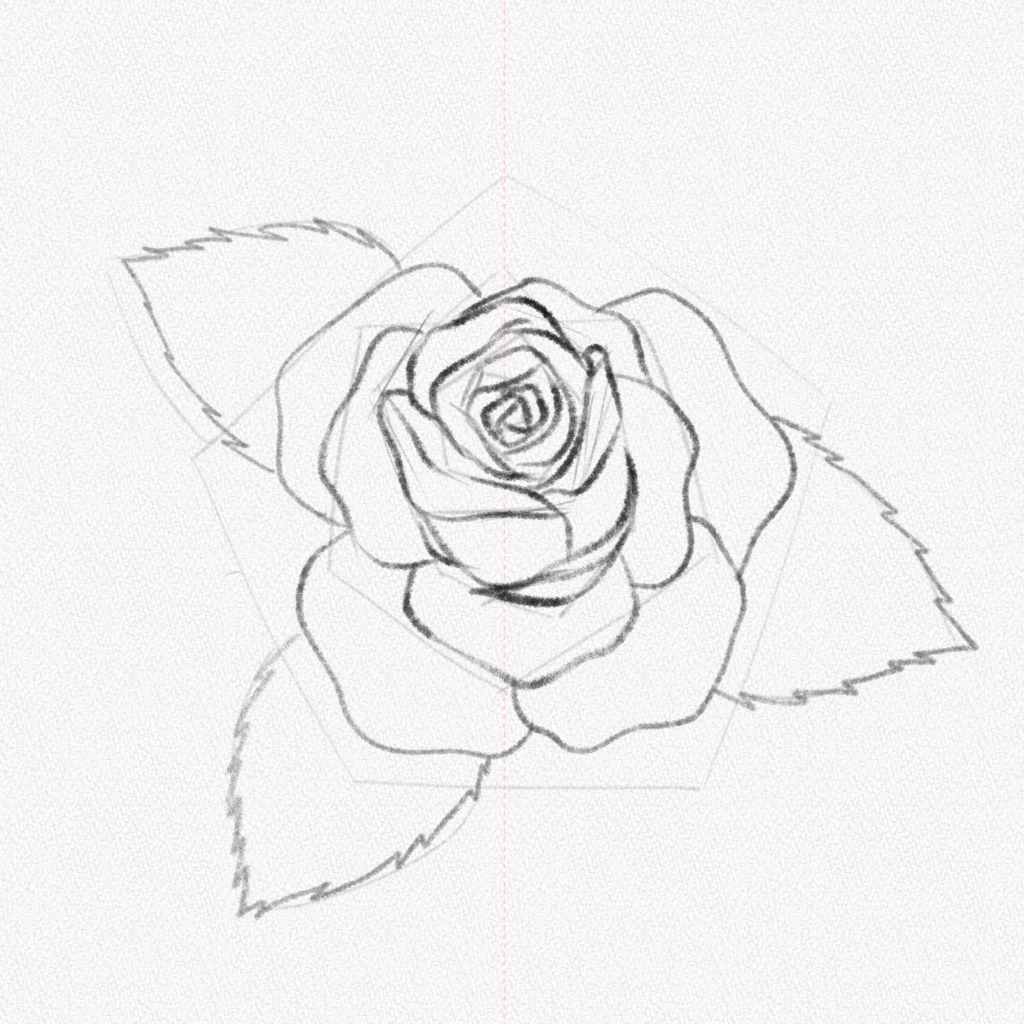
Step 6: Add the guidelines for the center of the rose
As this step would be a little confusing to explain, I made sure to highlight the shapes in the order you need to draw them. It’s all about pentagons from different angles. The angle difference decreases as the pentagons get smaller, but making sure they don’t point in the same direction will be enough.

Step 7: Add the leaves
Sketch three leaves as shown below, and make sure at least two of them are opposite to each other.
Section 2.- How to Draw and Shade Rose Petals
And that’s it. We have the guidelines for our rose. Now what? How do we go from lines and shapes to rose petals and leaves?
Before we jump to drawing the petals of our rose, it is important that we learn how rose petals work and how to shade them properly in any position and angle.
Step 8: Rose Petals
Rose petals change as they grow. They go from small and round hexagon-like shapes to bigger and rounder pentagon-like shapes. Rose petals grow in layers from the center of the rose, and even when the rose has bloomed, it still remains a cup-like shape full of unopened petals.
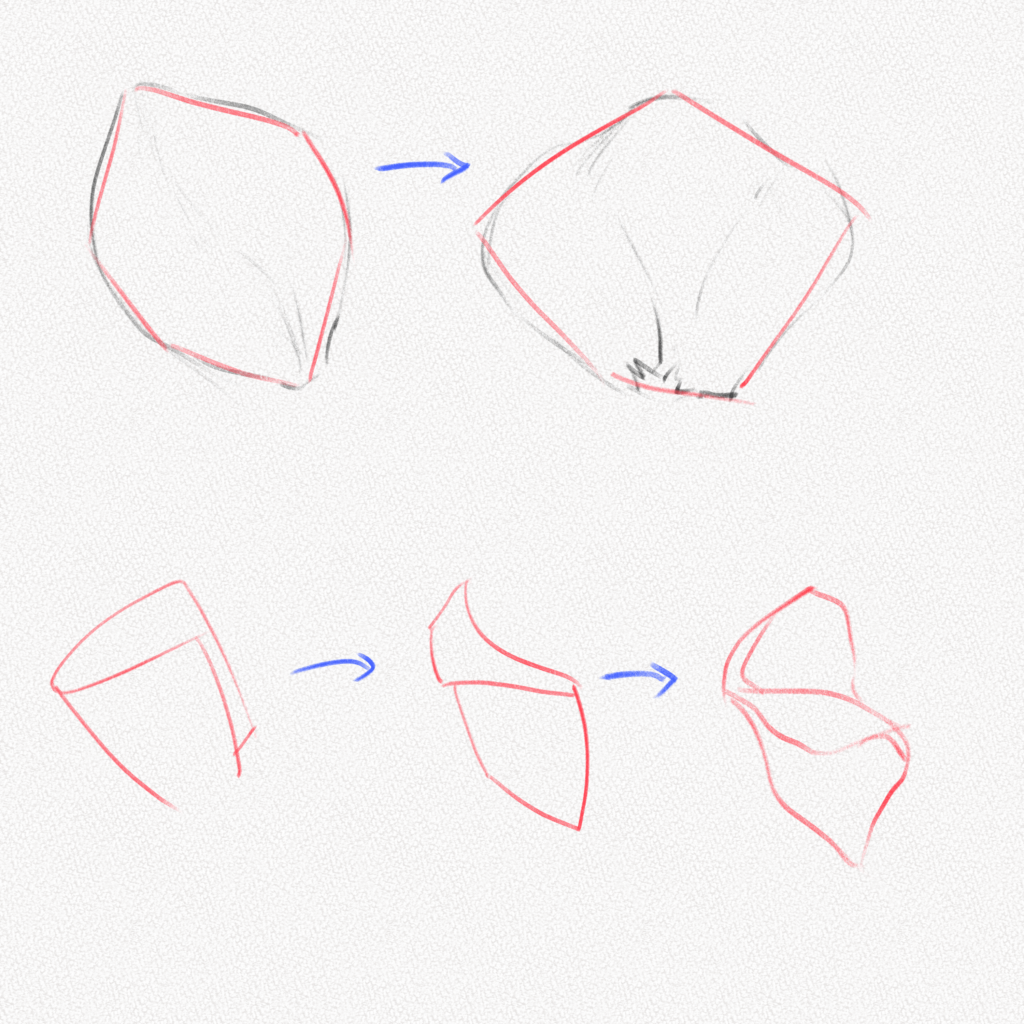
As the petals start opening, the top usually curves towards the outside, giving the rose its characteristic and charming look. It is a simple fold for the younger petals, while for the older ones, it’s usually a double fold that narrows in the middle. (Check the diagram for more details)
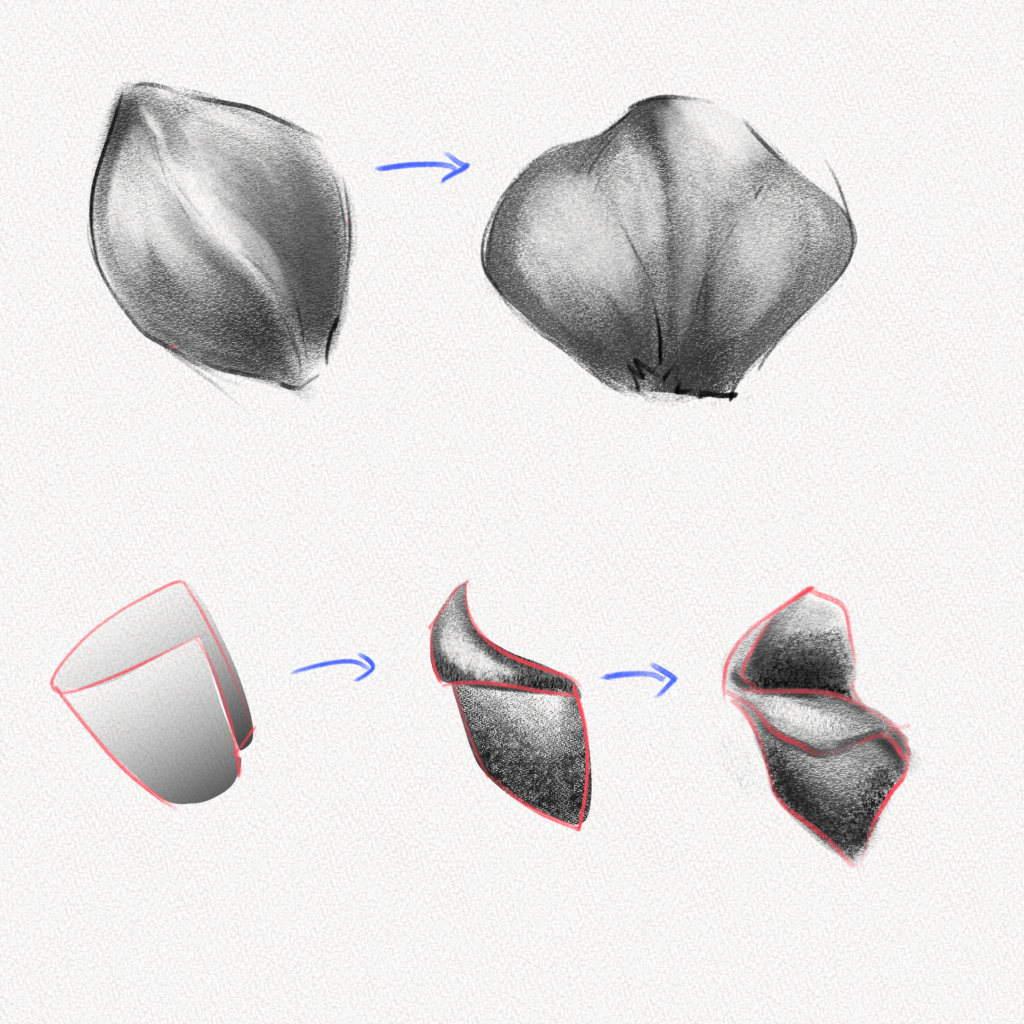
Step 9: Shading rose petals
Roses are not always red. The colors and volumes make the values change; however, something that remains unchanged is the way light works with a rose. Since we can’t have a light source inside the rose, the darkest part will always be the center.
In this case, the light is hitting from above, so the darkest part of the rose portals will be the base getting darker as we get closer to the middle.
Section 3.- How to Draw a Rose Step-by-Step
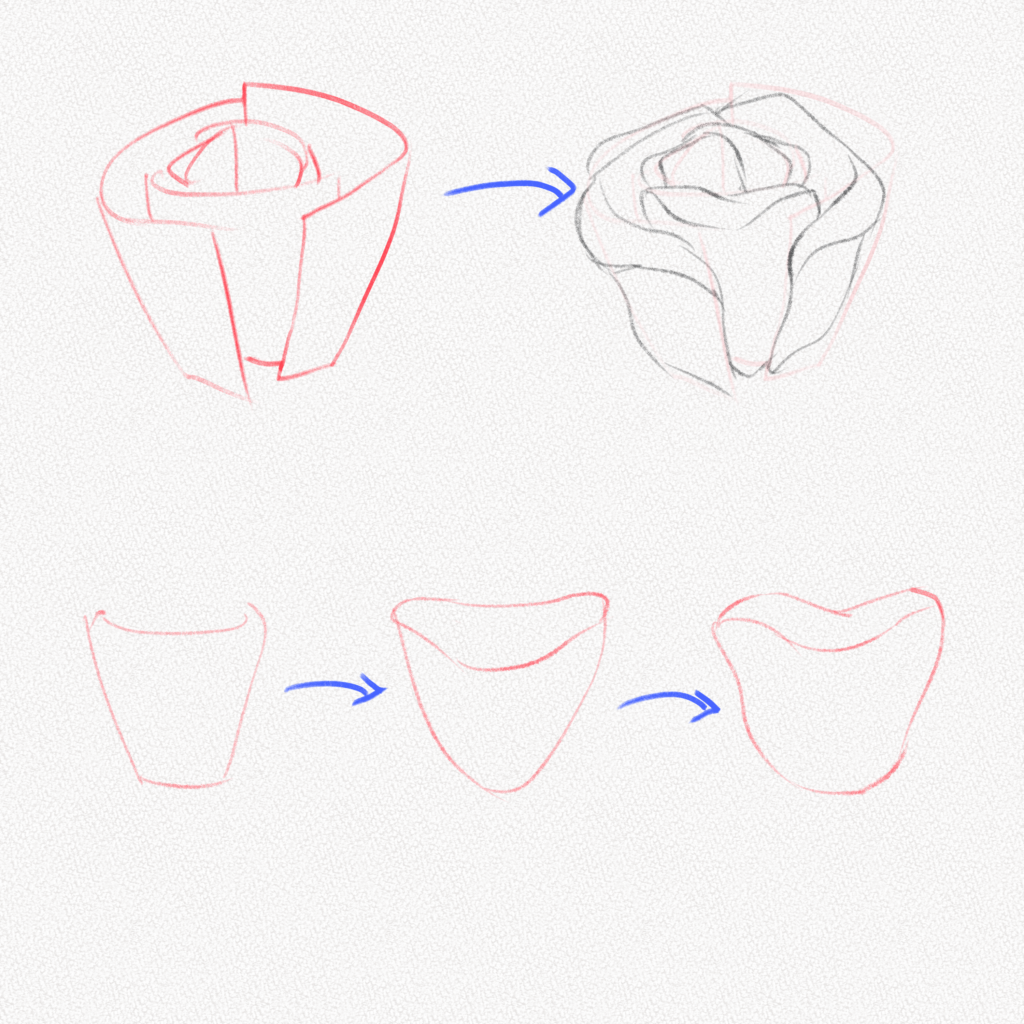
Step 10: Start drawing the petals
Now that we know how to draw rose petals, we are going to start drawing our roses. Remember that the petals on the base are broader and flatter than the ones in the center. Please start with the first petal and draw the rest overlapping them.
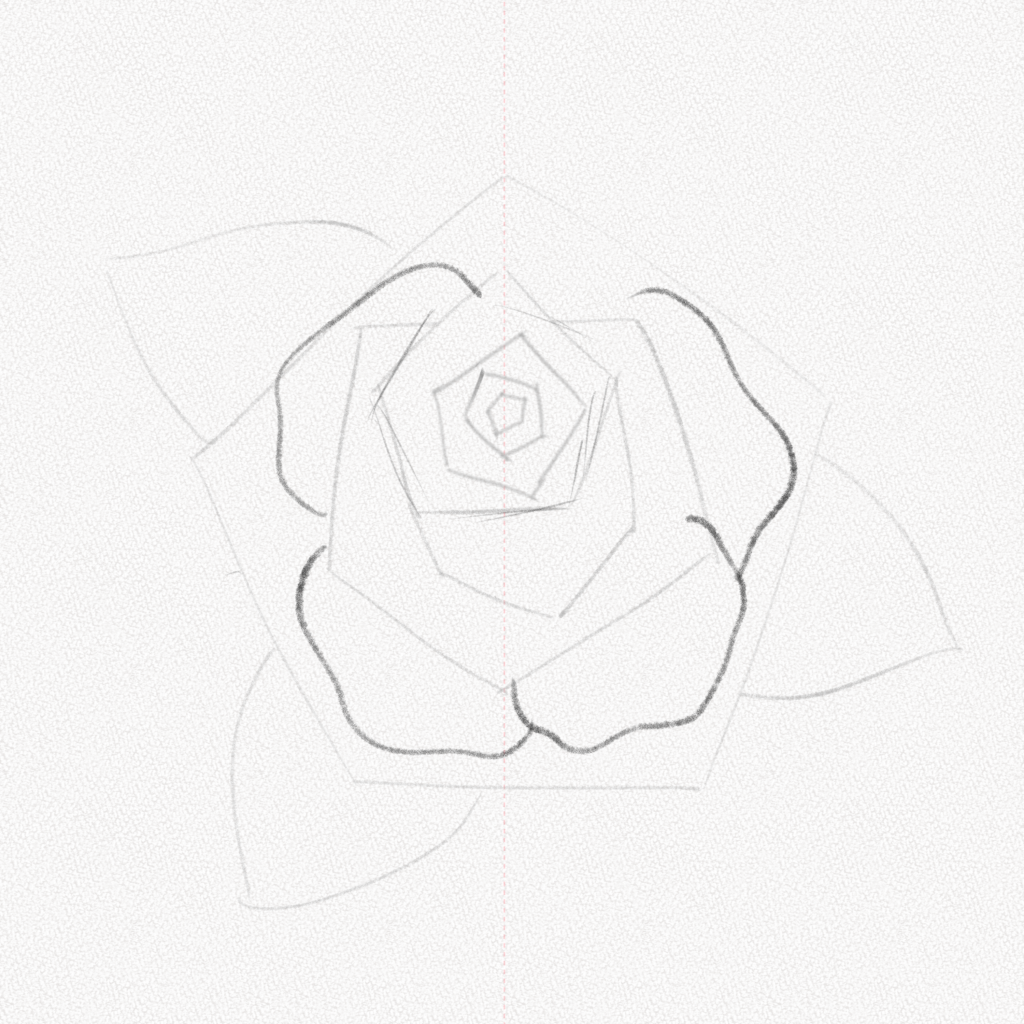
Step 11: Draw the second layer of petals
Do the same for the second layer, but smaller. Remember to use curved shapes and organic lines.
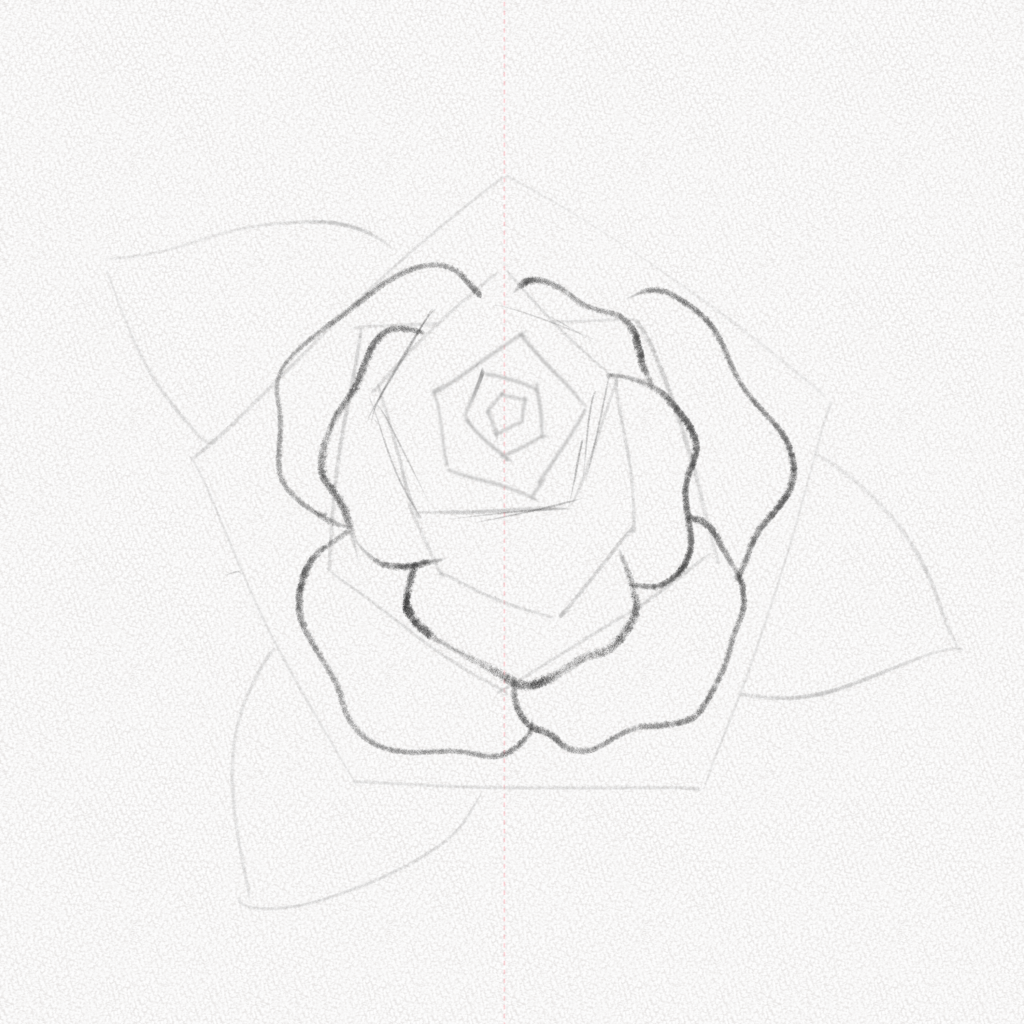
Step 12: Draw the center
Using the instructions in Section 2, draw the rest of the petals. Remember, these petals are in a cup-like shape, and they only bend at the top.

For the very middle of the rose, overlapping lines will be enough.
Step 13: Add the leaves
Rose leaves are pointy and have sharp, dented edges, so using your guidelines as a base, add the leaves to the rose.
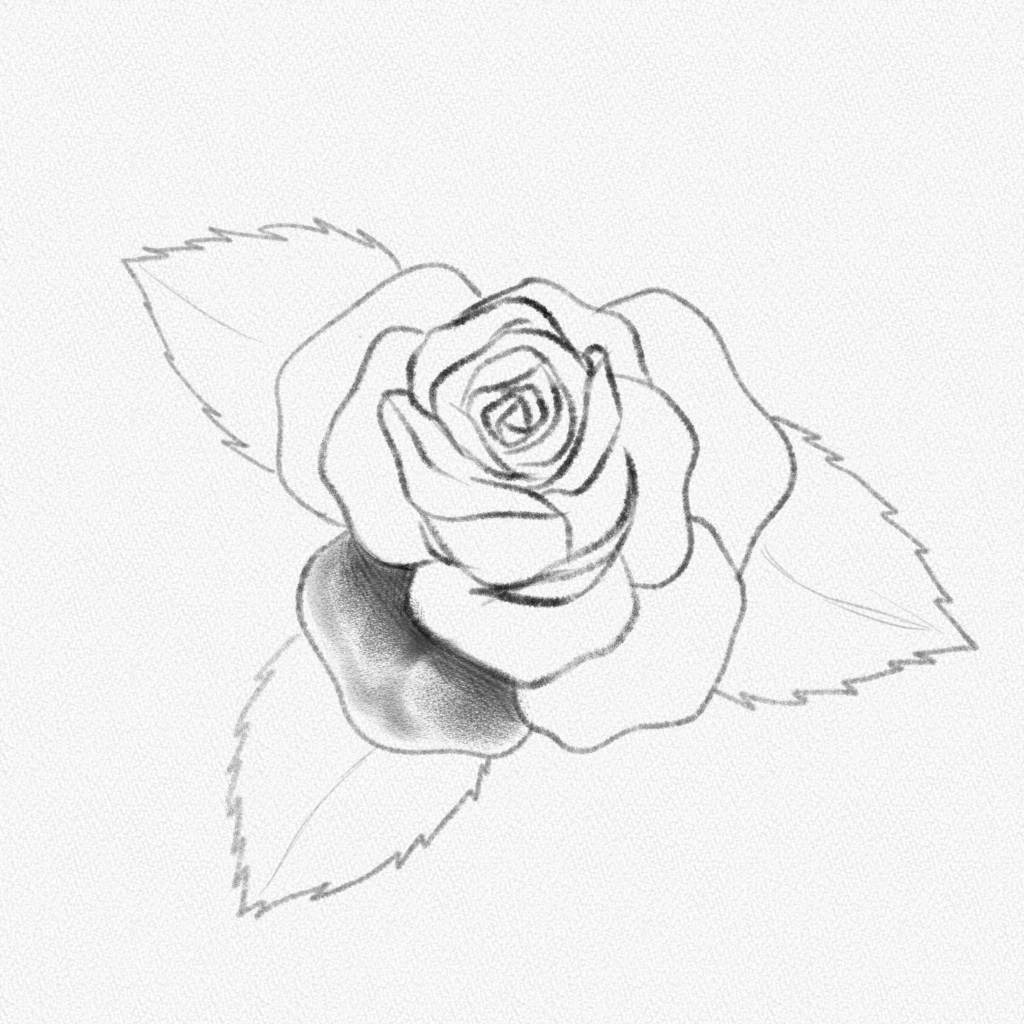
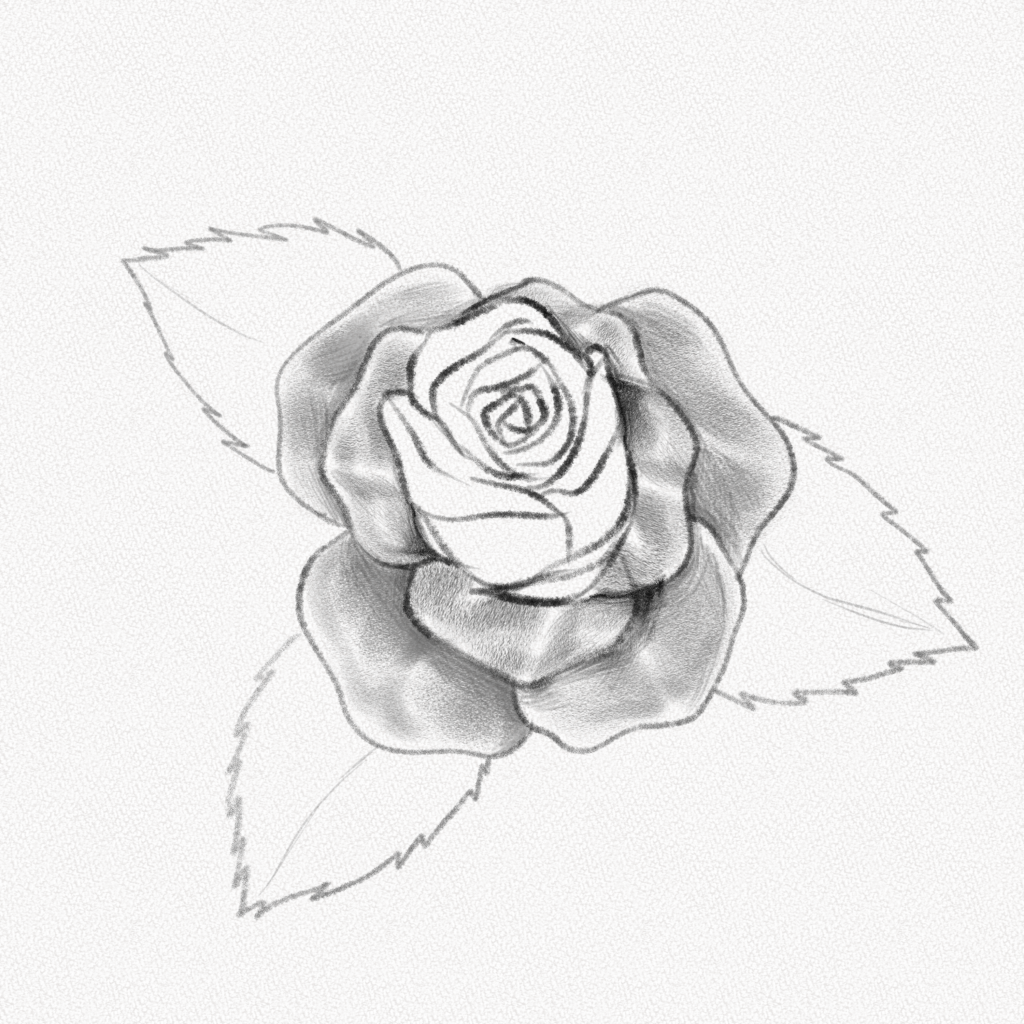
Step 14: Shade the first layer of petals
Erase what is visible in your guidelines, and keep in mind the tutorial for shading petals in Section 2. With our 2B Pencil, we will shade each of the petals and keep the shading lighter on the outer part of the petals.
Step 15: Shade the second layer of petals
Do the same for the second layer. Build a couple more layers of graphite in the crevices where the petals overlap.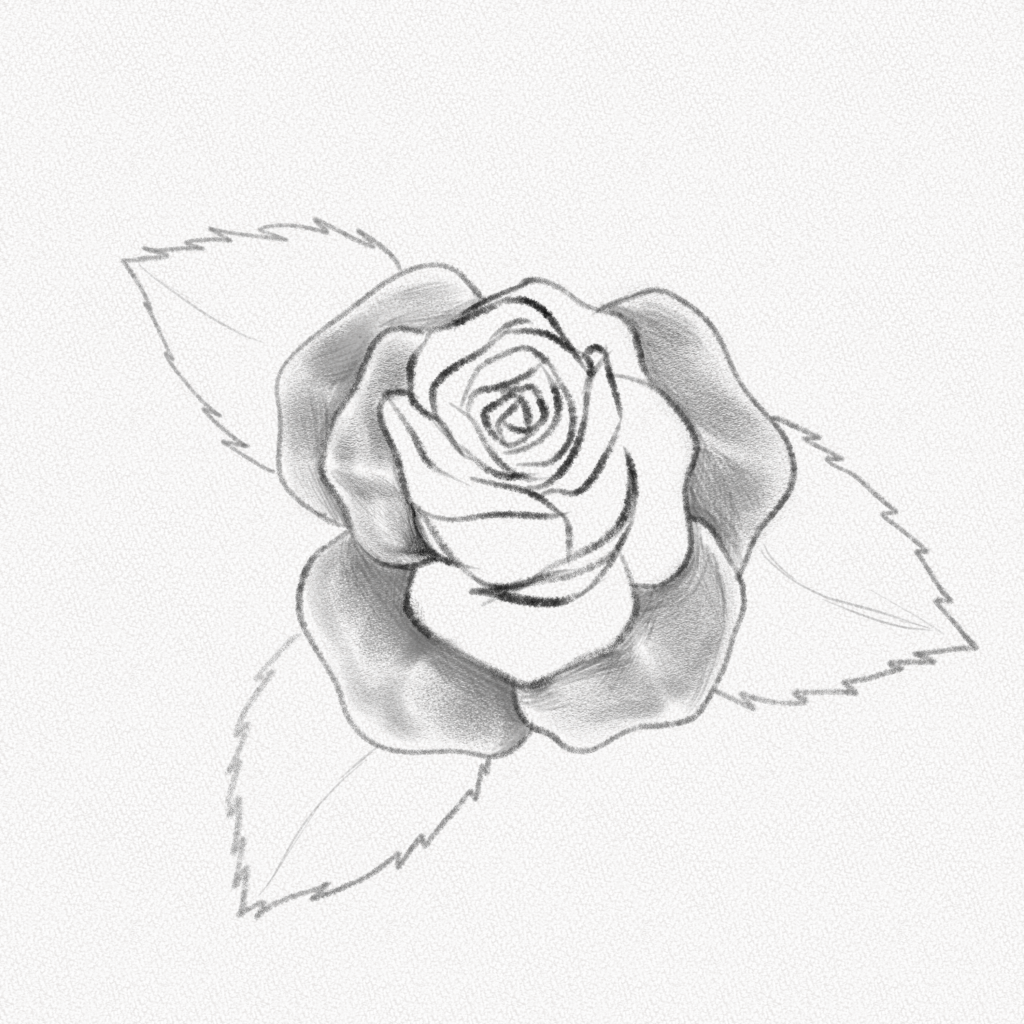
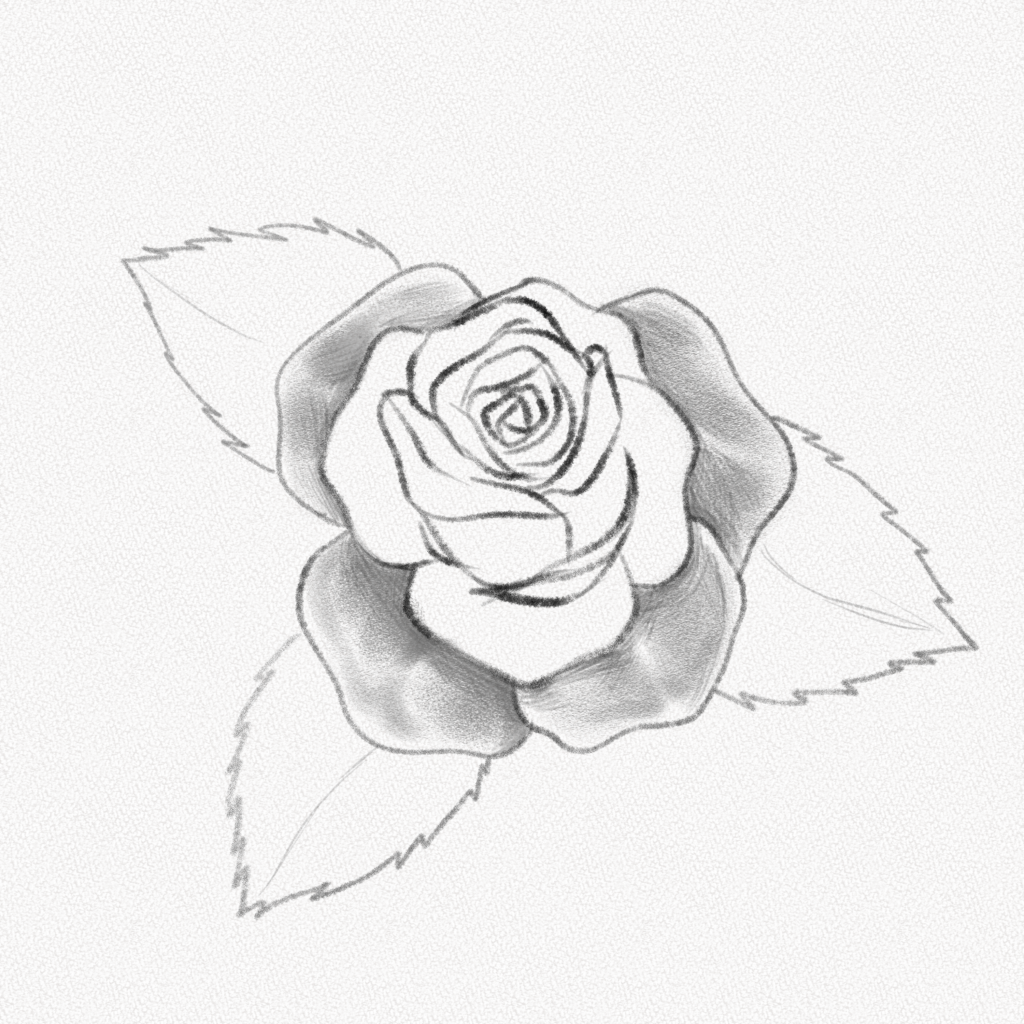
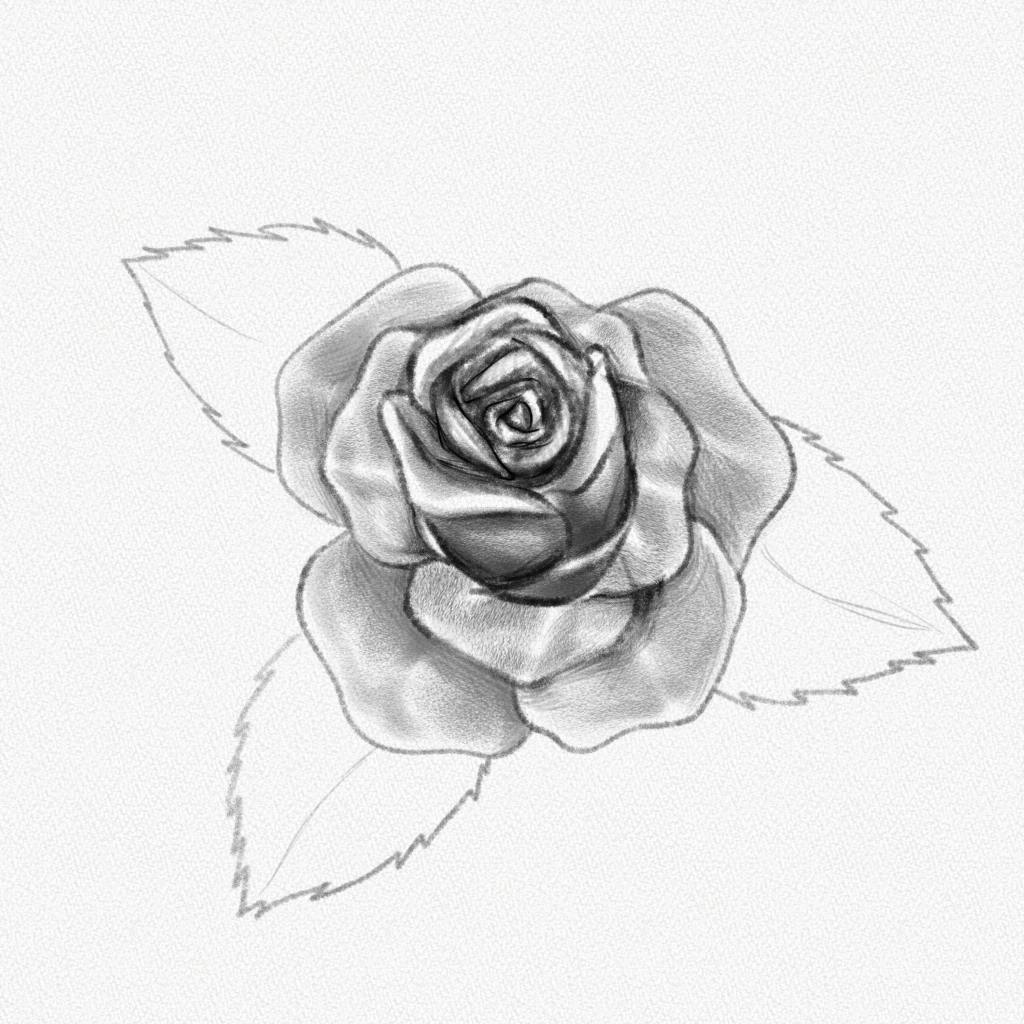
Step 16: Shade the middle of the rose
With our 4B pencil, we will shade the middle of our rose. Remember that this part is the darkest of all, especially the base of the petals. Shade and blend the middle leaving the top of the petals free of graphite.
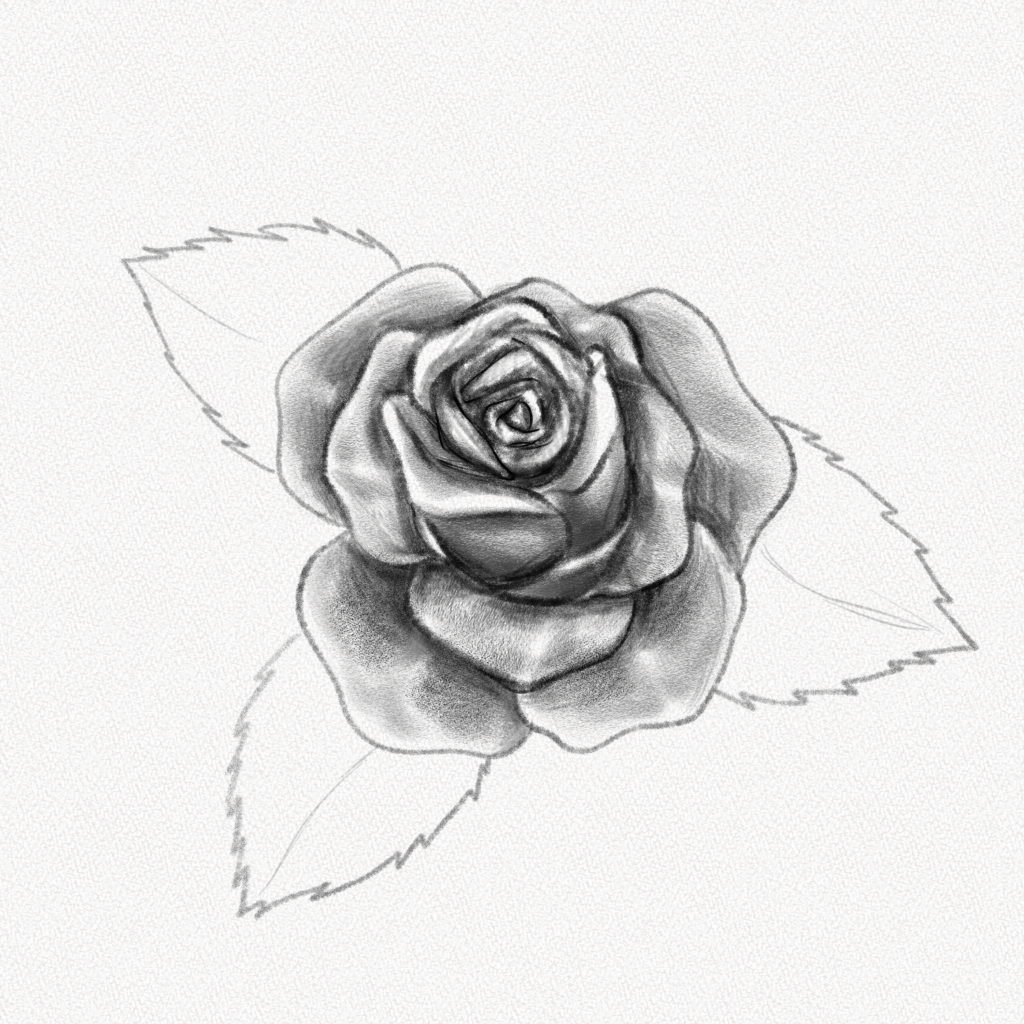
Step 17: Add contrast
Since the middle of our rose is the part that determines the value of the flower, we are now going to add more contrast to the base layers with our 4B pencil, especially to the parts that are closer to the center.
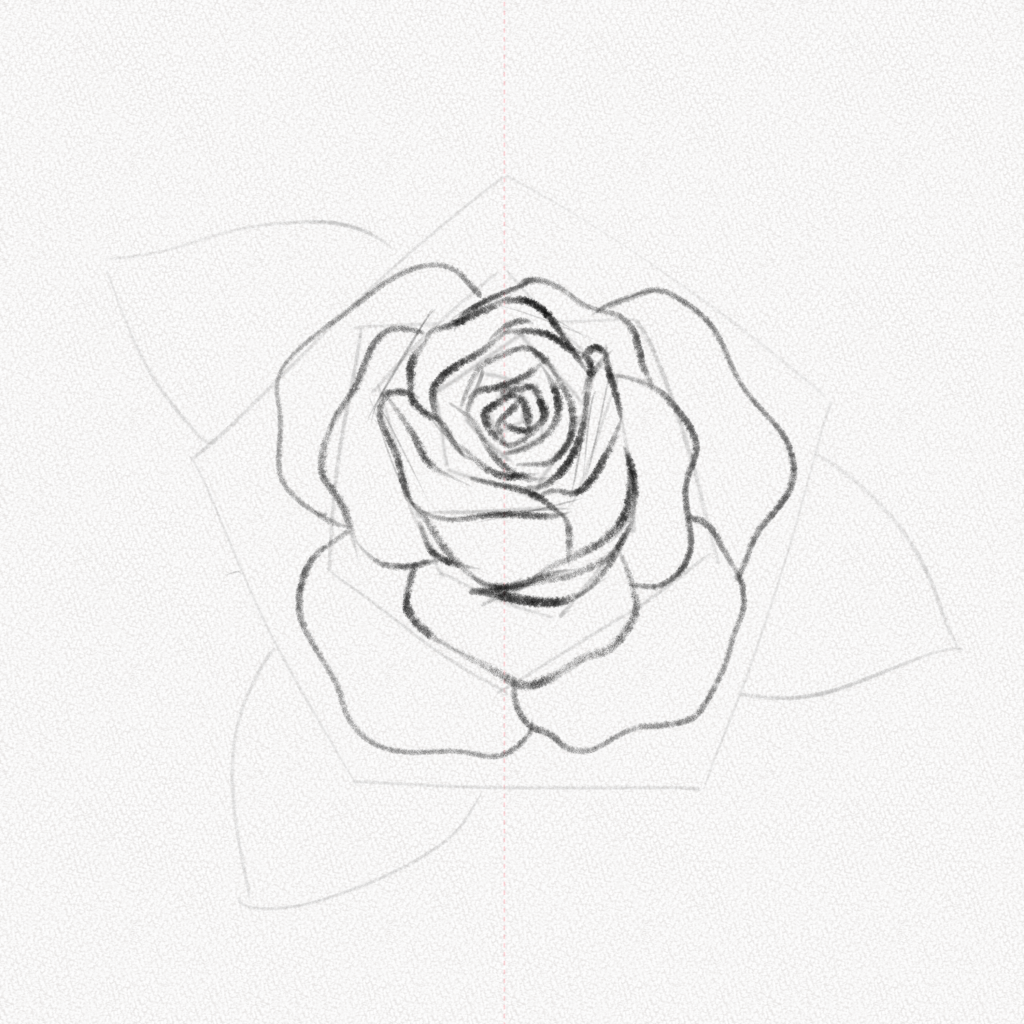
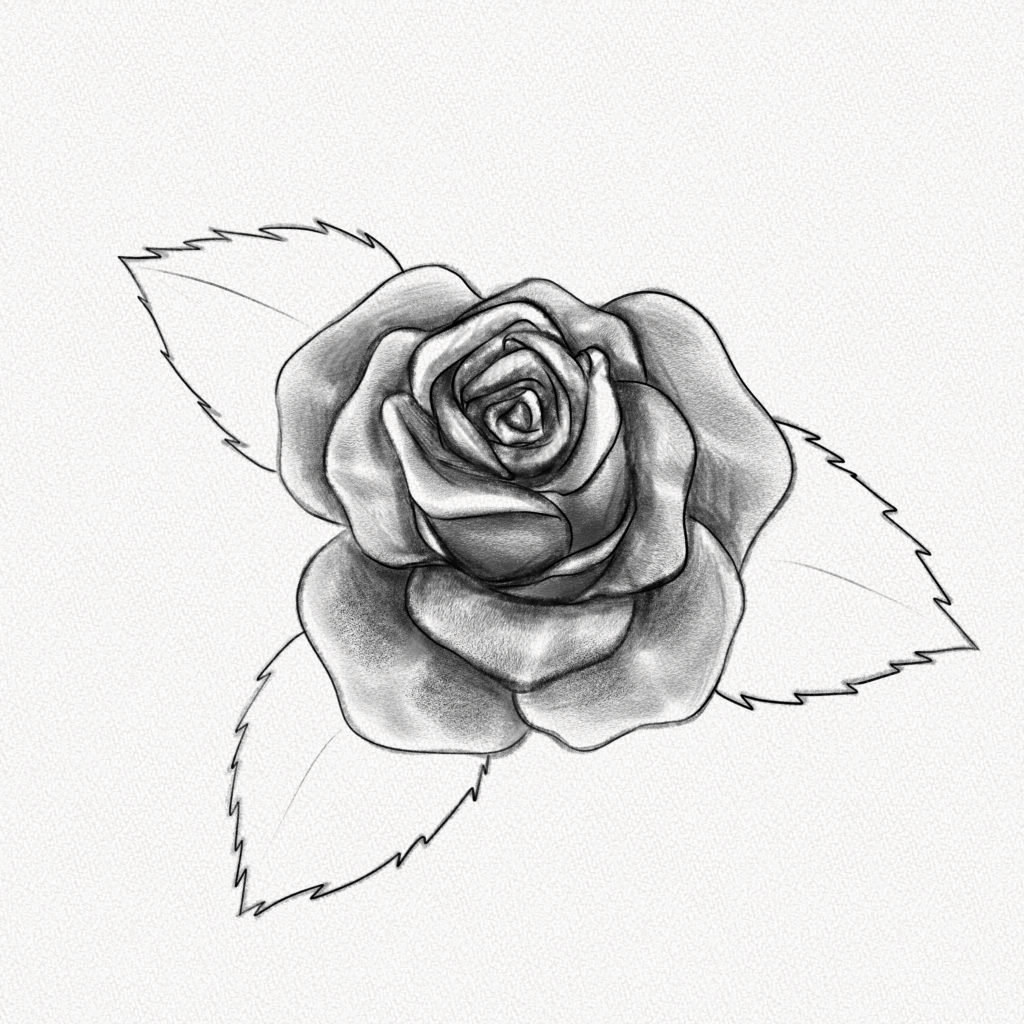
Step 18: Define the lines
With our 4B pencil, we are going to give more definitions to the petals of our rose. Make sure to sharpen your pencil to a very fine tip for this step and carefully outline the petals and leaves of the rose.
Step 19: Shade the leaves
For the leaves, first, we are going to fill them uniformly with graphite. The green of the rose’s leaves has a darker value than the rose petals, so there won’t be any white highlights here.
Shade the first half, starting by the middle and the right part of the base. Remember to add more layers of graphite towards the region that overlaps with our rose.
Step 20: Repeat
Shade the other side of the leaf, doing the exact opposite to the other half, leaving the middle and base empty and the border shaded. Do the same for the other two leaves.
Step 21: Add details
Now that you have the basic shading add more contrast by building more graphite layers on top of the already shaded areas. Add the veins and make them noticeable by taking away some graphite right next to the lines with your precision eraser.
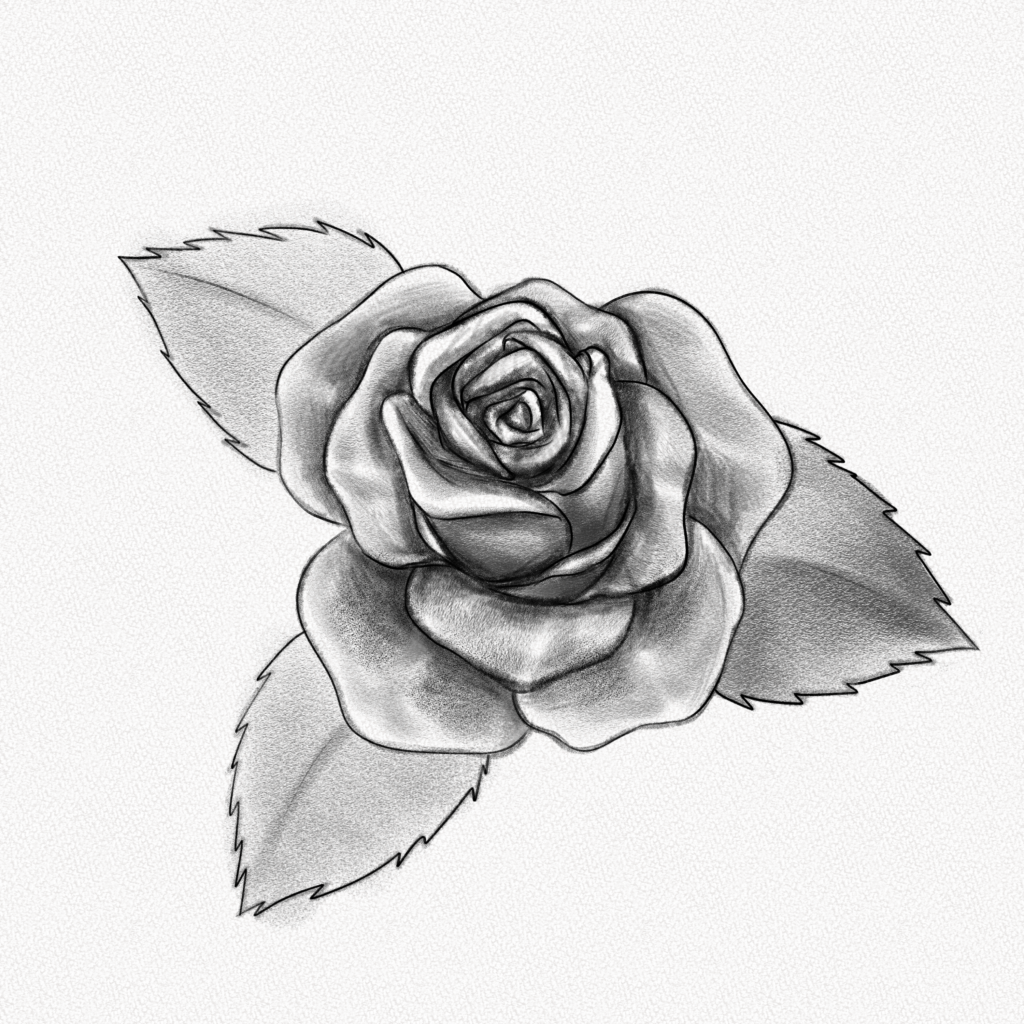
And that’s it. You’re done!
Thank you for following this tutorial. I hope you learned how to draw a rose and that you had fun in the process.
Until next time!