Birds are a part of our natural environment. Their beauty provides a sense of peace and serenity to those who watch them. They can be found in all parts of the world and can be found in many different colors, shapes, and sizes.
Drawing a bird is all about capturing the essence of the bird’s nature. The feathers, the eyes, the legs, and the beak are the most noticeable features of any bird and finding which one defines the bird’s nature is what will make your drawing come to life. It doesn’t matter if you are drawing a hummingbird or an ostrich. It’s all about capturing the essence of what makes that particular bird beautiful.
From basic shapes to lines to realistic shading, in this tutorial, we are going to learn how to draw and shade a bird step by step.
In this tutorial, you’ll learn:
- Basic shapes of a bird
- How to draw a bird step by step
- How to shade a bird
The materials you’ll need:
- Graphite powder (or a file and an HB pencil)
- A soft brush
- A 4B graphite pencil
- A 0.5mm mechanical pencil
- A ruler
- A blending stump
- A Tombow Mono Zero 2.3mm eraser
- A kneadable eraser
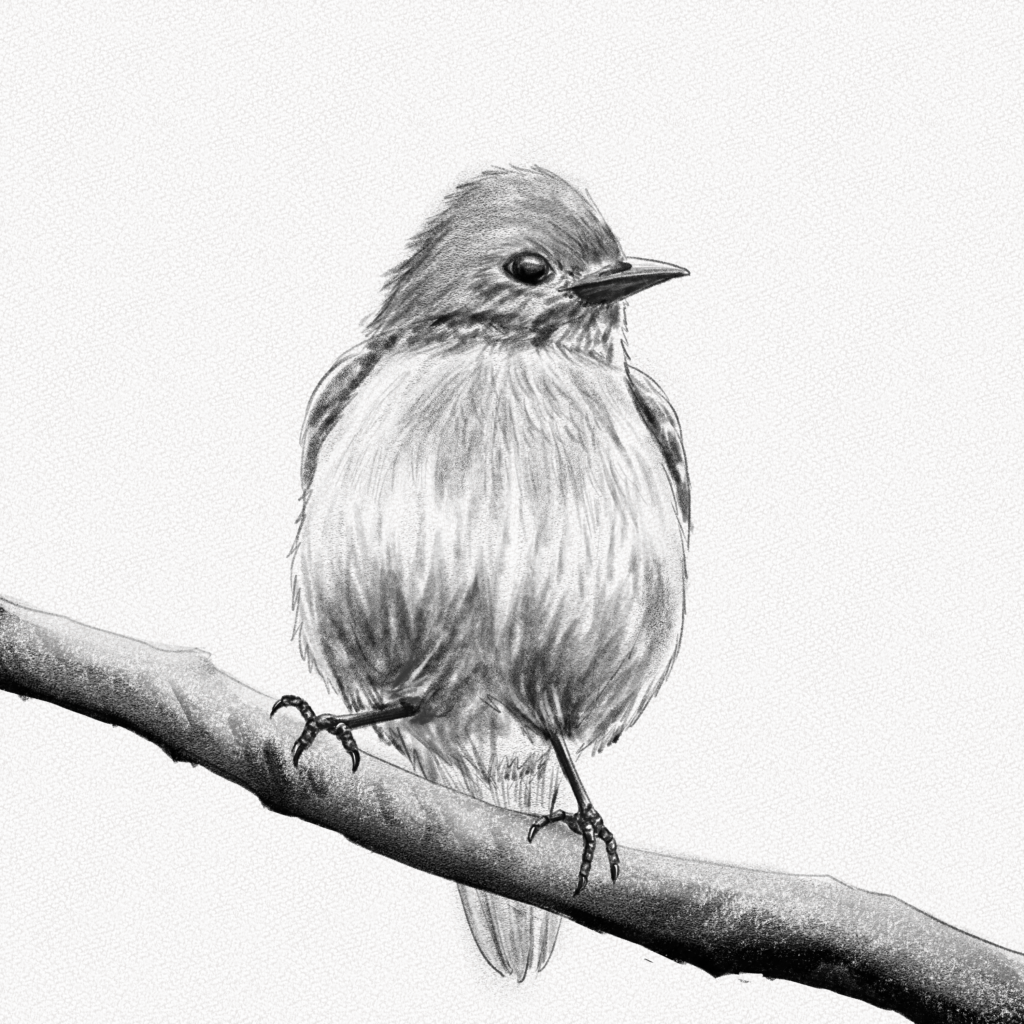
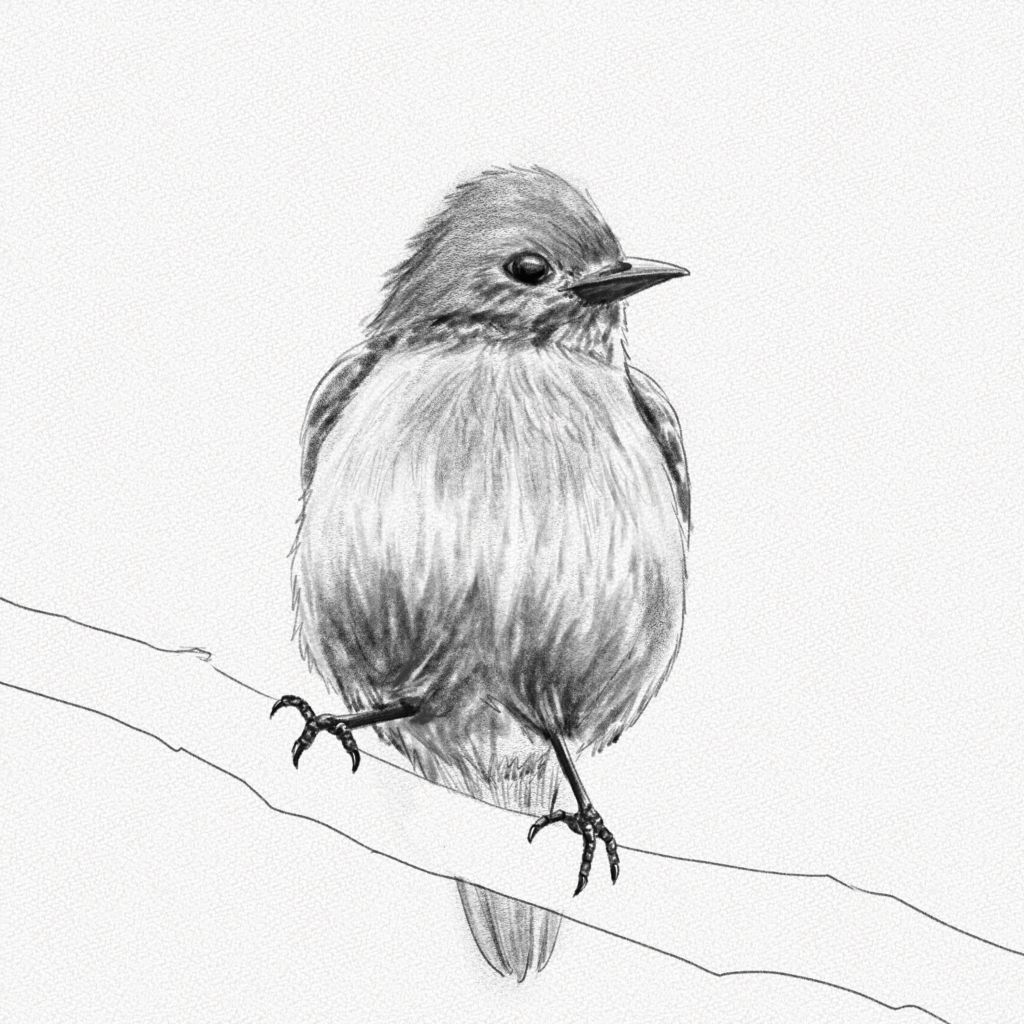
The bird you’re going to draw:
And these are all the steps we’ll walk you through:
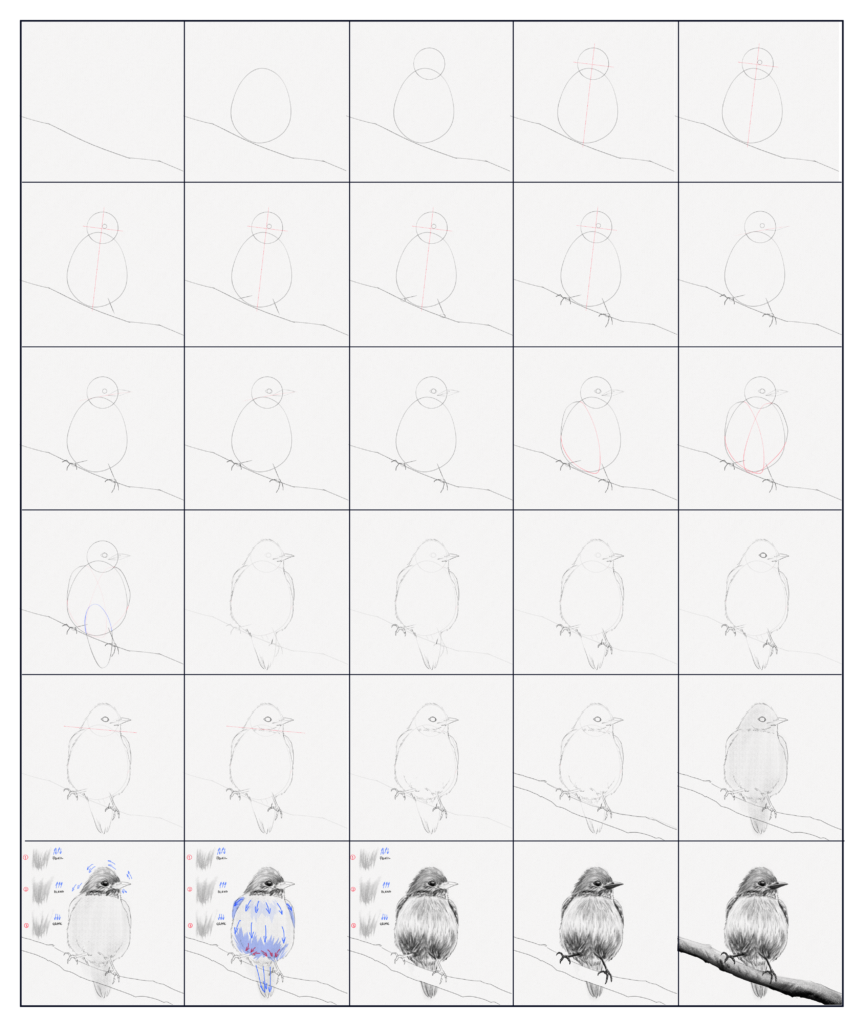
Section 1.- Basic Shapes of a Bird
Birds come in different shapes and colors. However, most of them can be simplified to circles, lines, and triangles. And that’s what we will do here with the eastern bluebird. For this section, we are going to use our mechanical pencil.
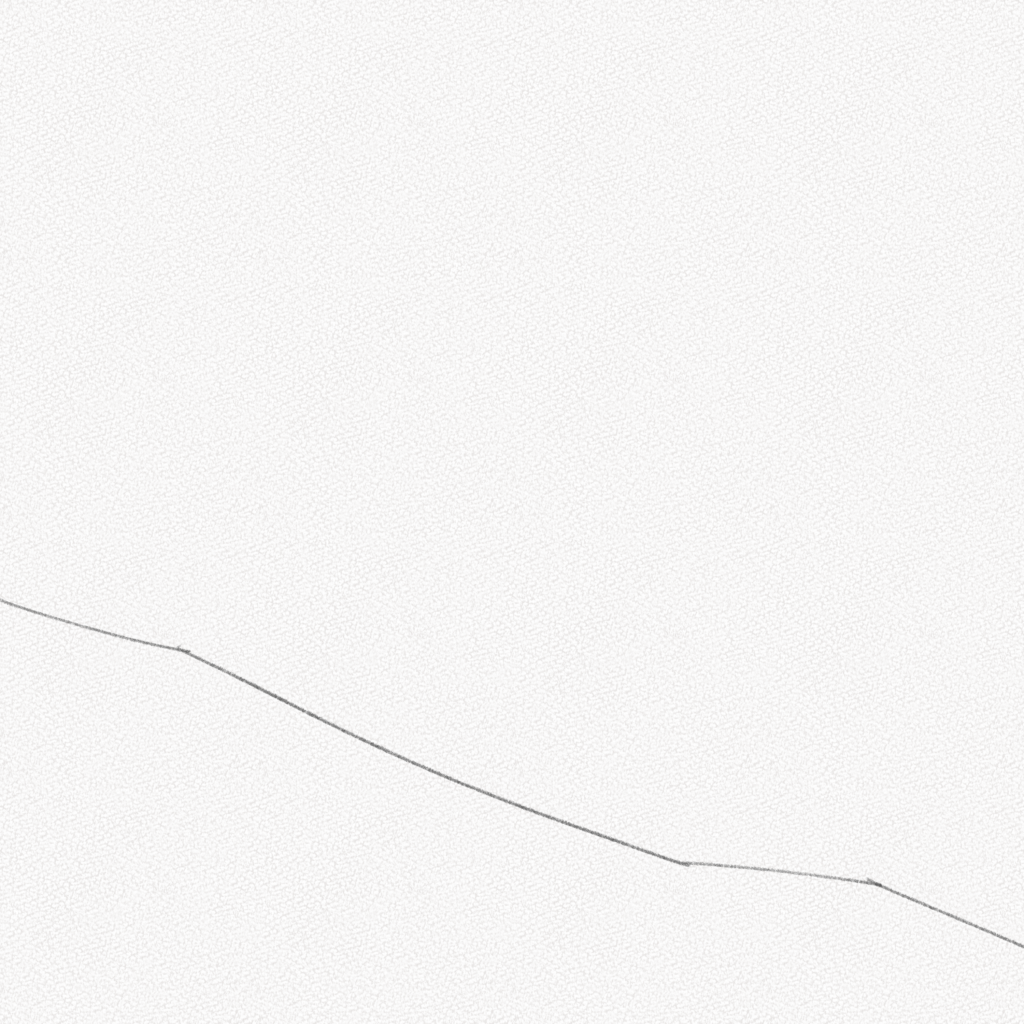
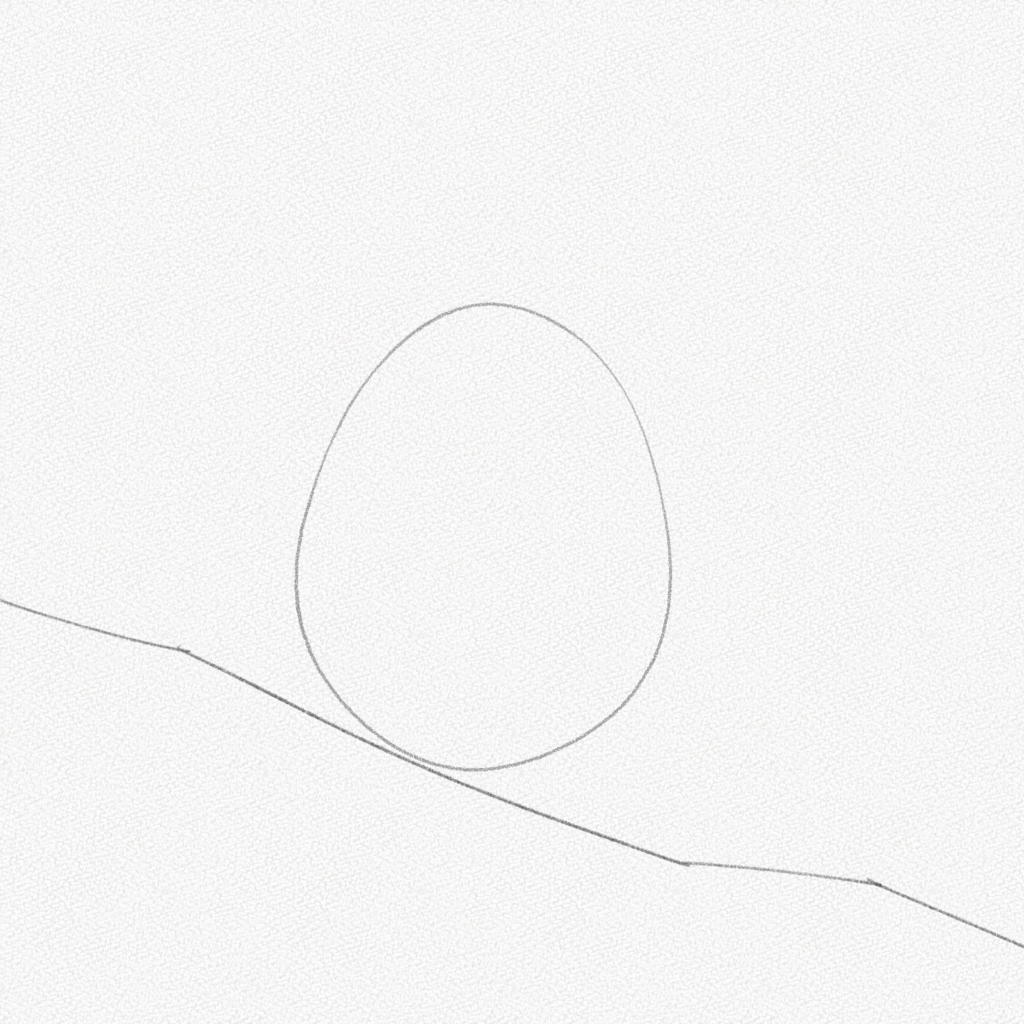
Step 1: Sketch a branch
Birds always perch on branches, so we are going to use straight lines with minor angle differences to sketch a branch for our bird.
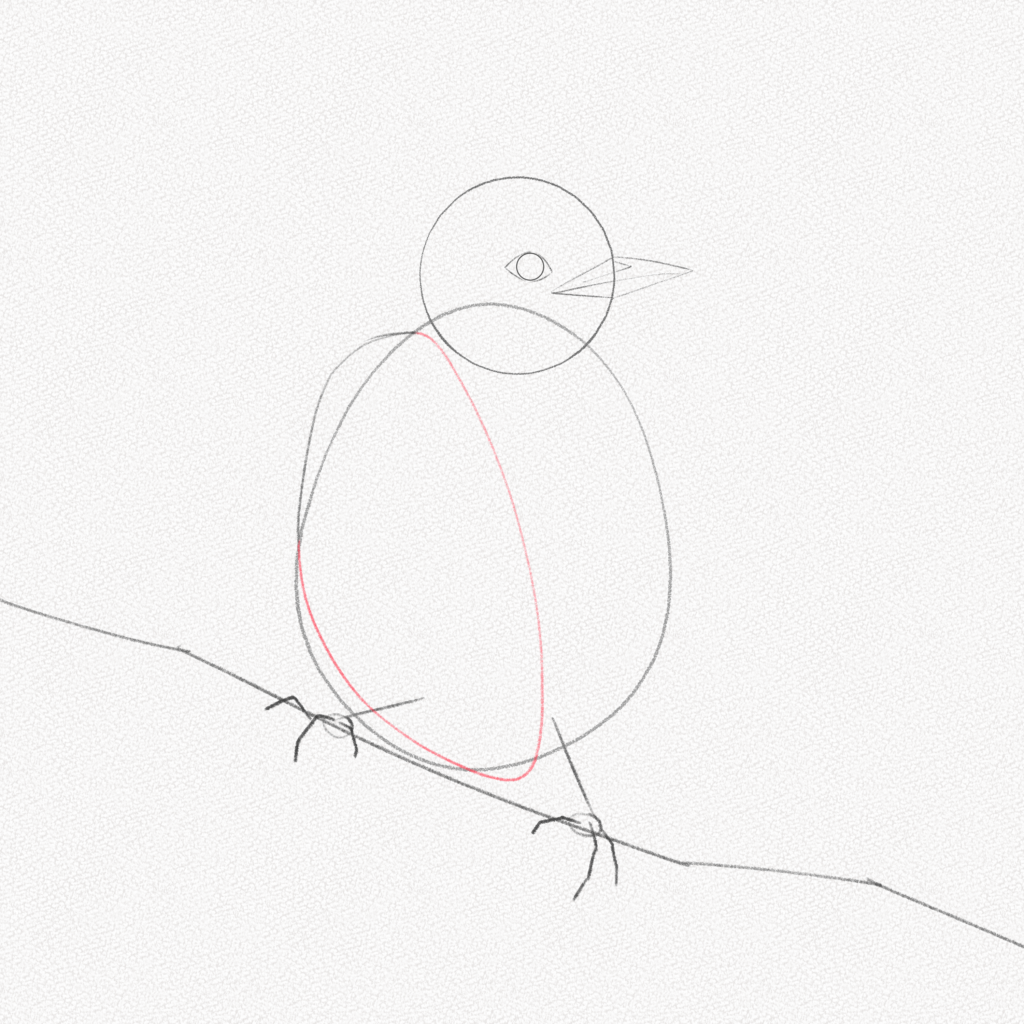
Step 2: Draw an egg
Yes, an egg. This will be our bird’s body, so make it as big as you want your bird to be, but please leave some space above the head and below for the tail.
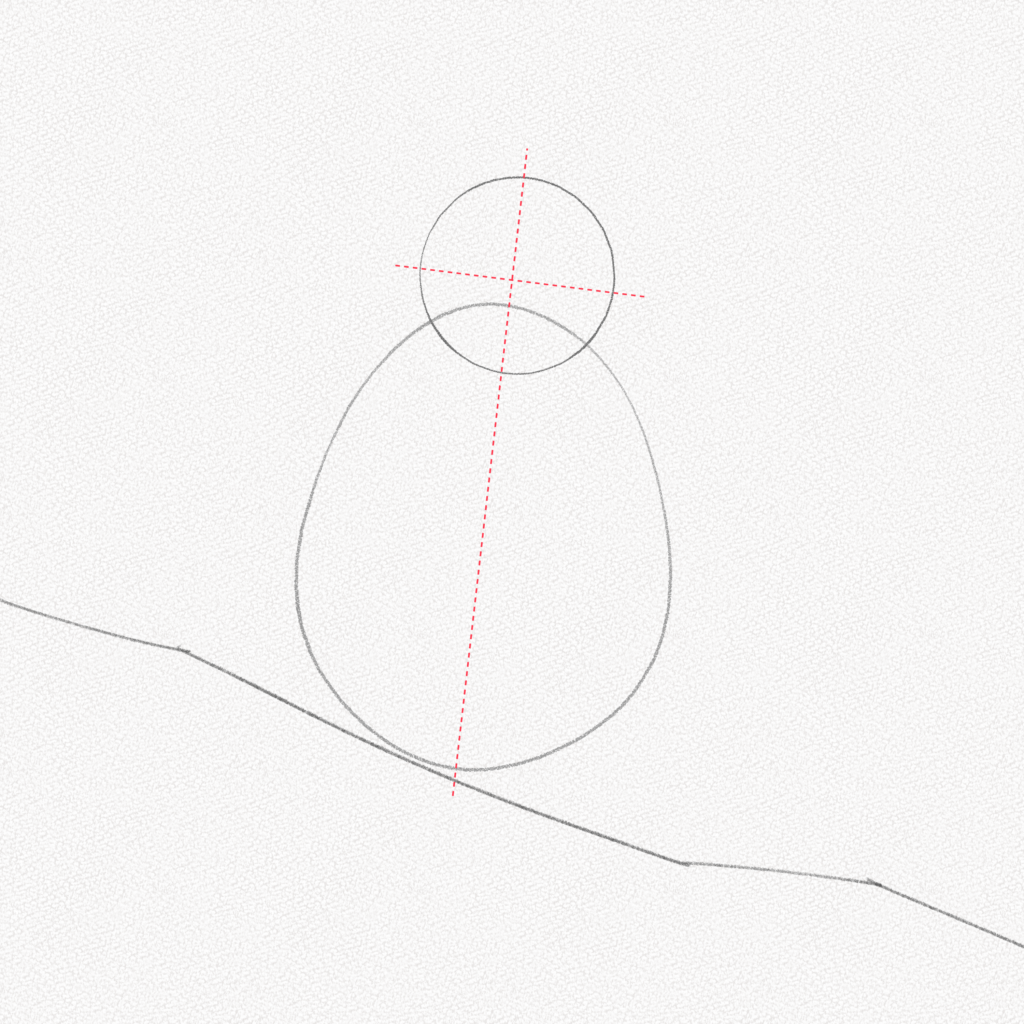
Step 3: Draw a circle
Draw a circle overlapping a third of it with the egg we drew in the previous step. This will be the head of our bird; since our bird will be resting on the branch, the neck won’t be stretched.

Step 4: Draw two lines
Draw a horizontal line through the middle of the head and a vertical line through the center of the body and the head. Those will be our guidelines for the eye, the beak, and the legs.
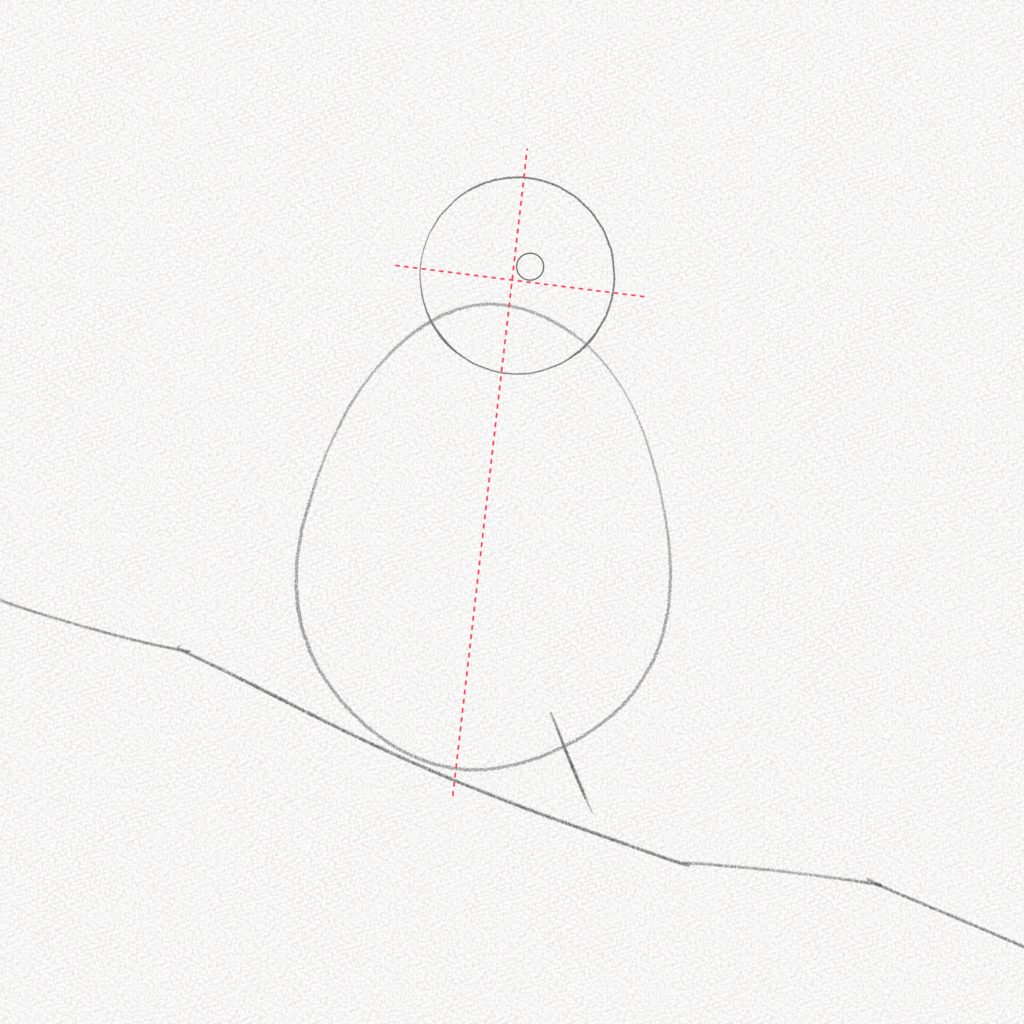
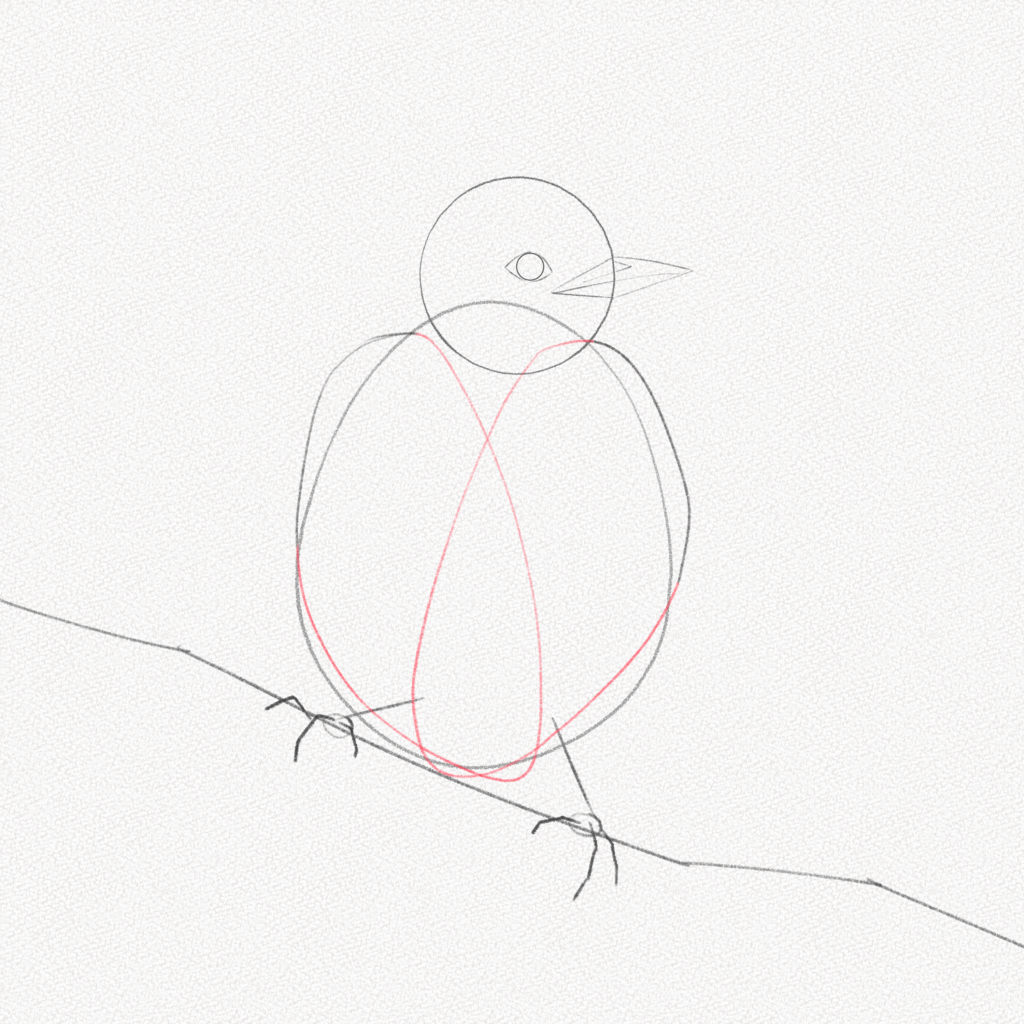
Step 5: Draw a circle
Now, sitting between the two head’s guidelines, we are going to draw a tiny circle for the eye of the bird.

Step 6: Draw a leg
Draw a small line as shown below, for the leg, and make sure it ends close to the branch.
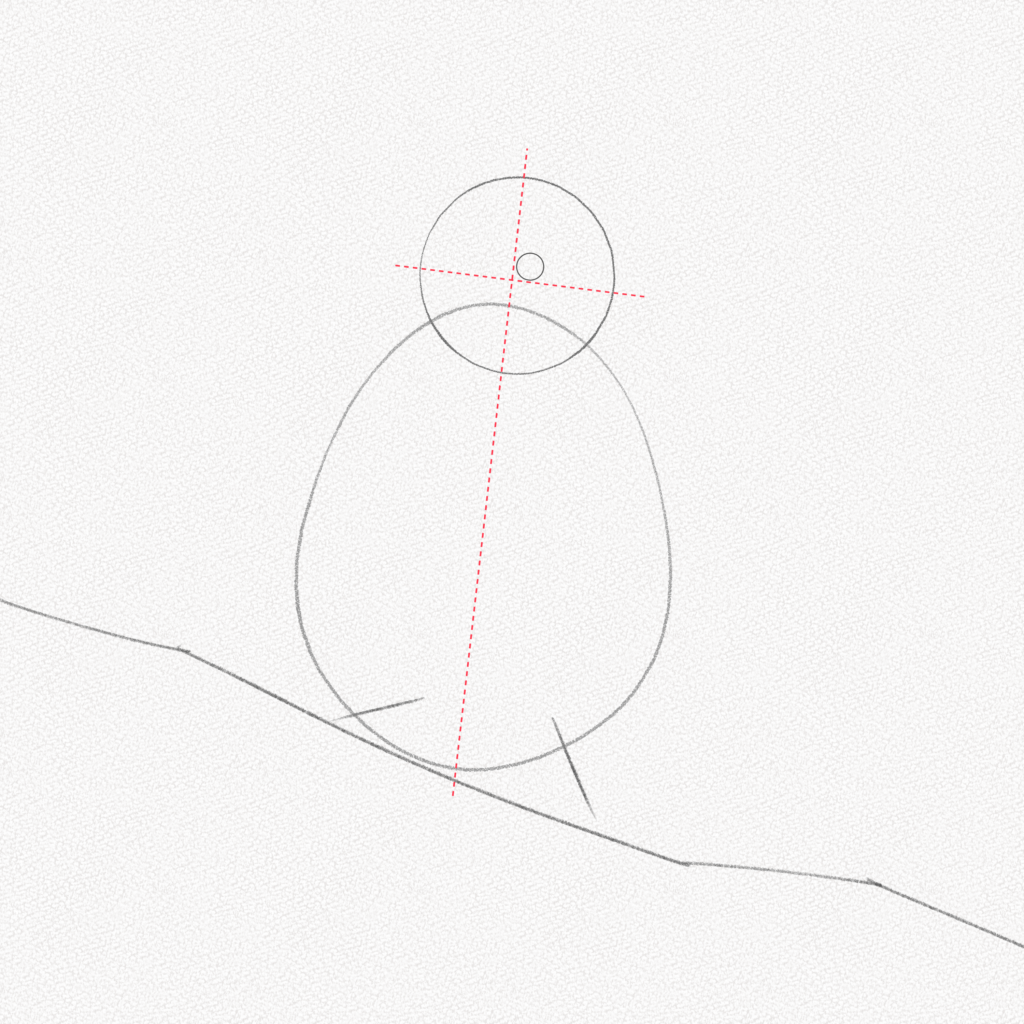
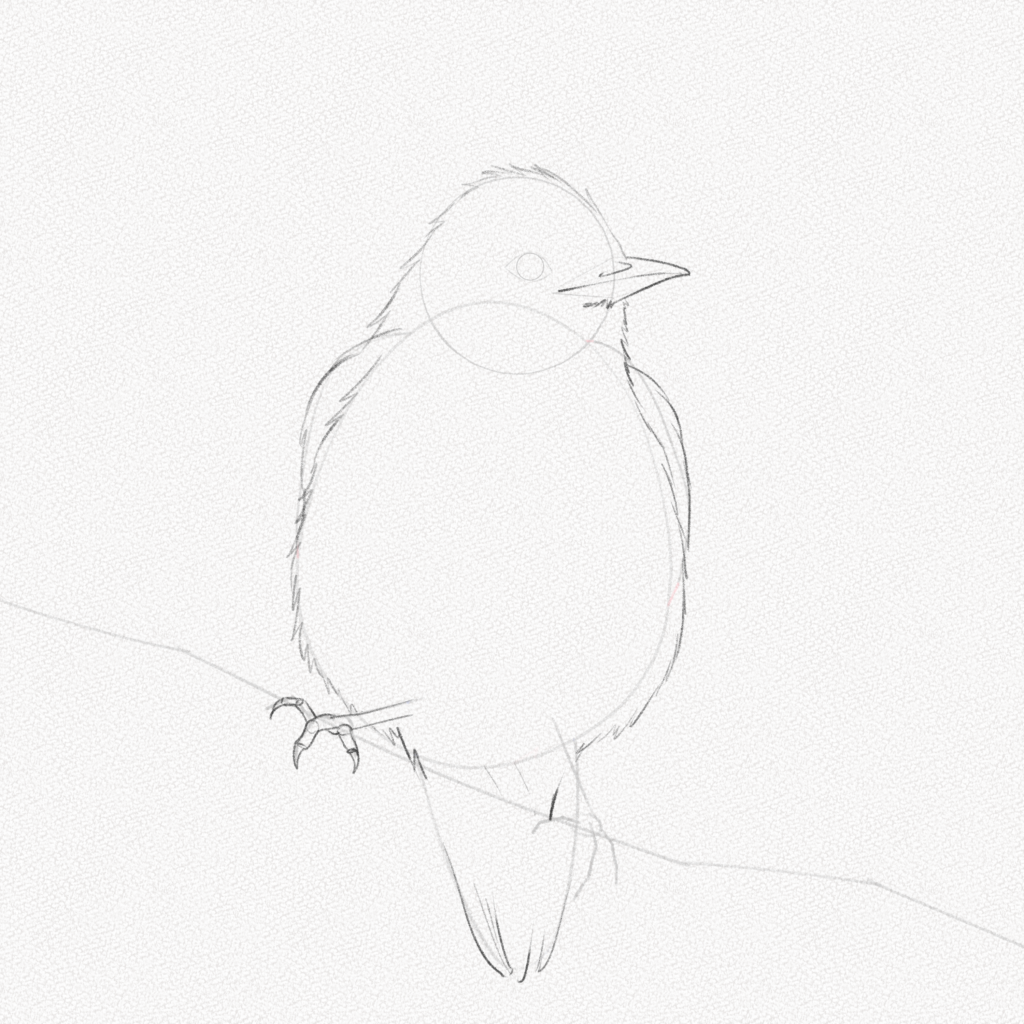
Step 7: Draw the other leg
Draw a small line for the other leg. It doesn’t have to be perfectly symmetrical to the other since the branch is angled.
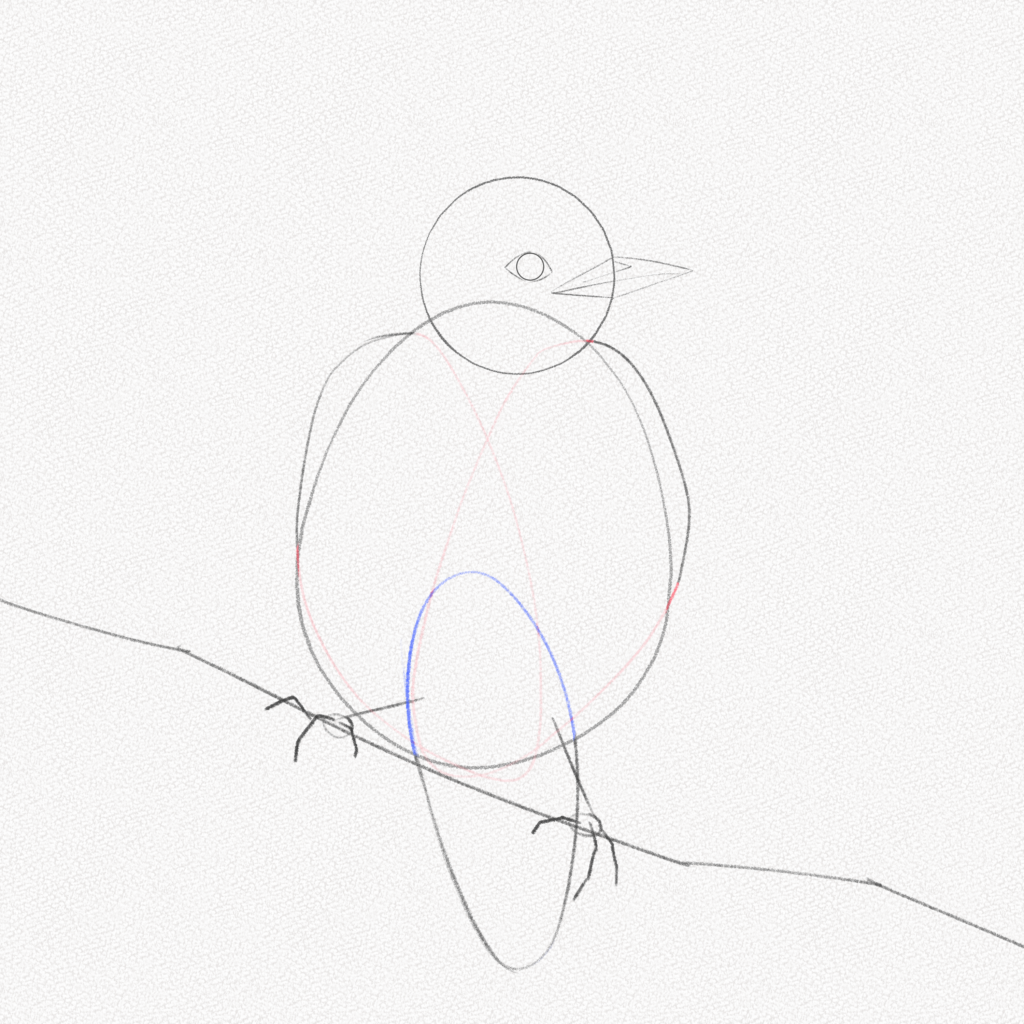
Step 8: Draw two ellipses
Draw ellipses on the base of each leg, those will be the base for the claws.
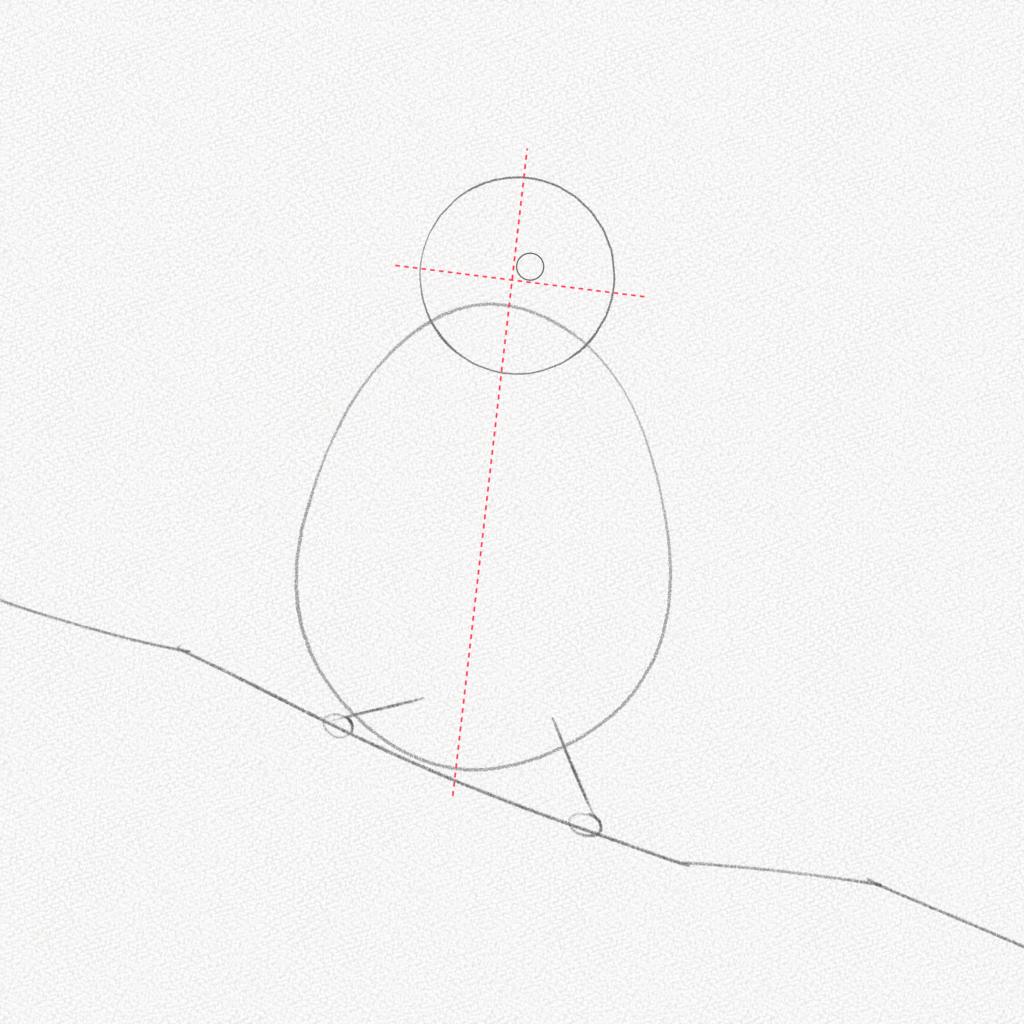
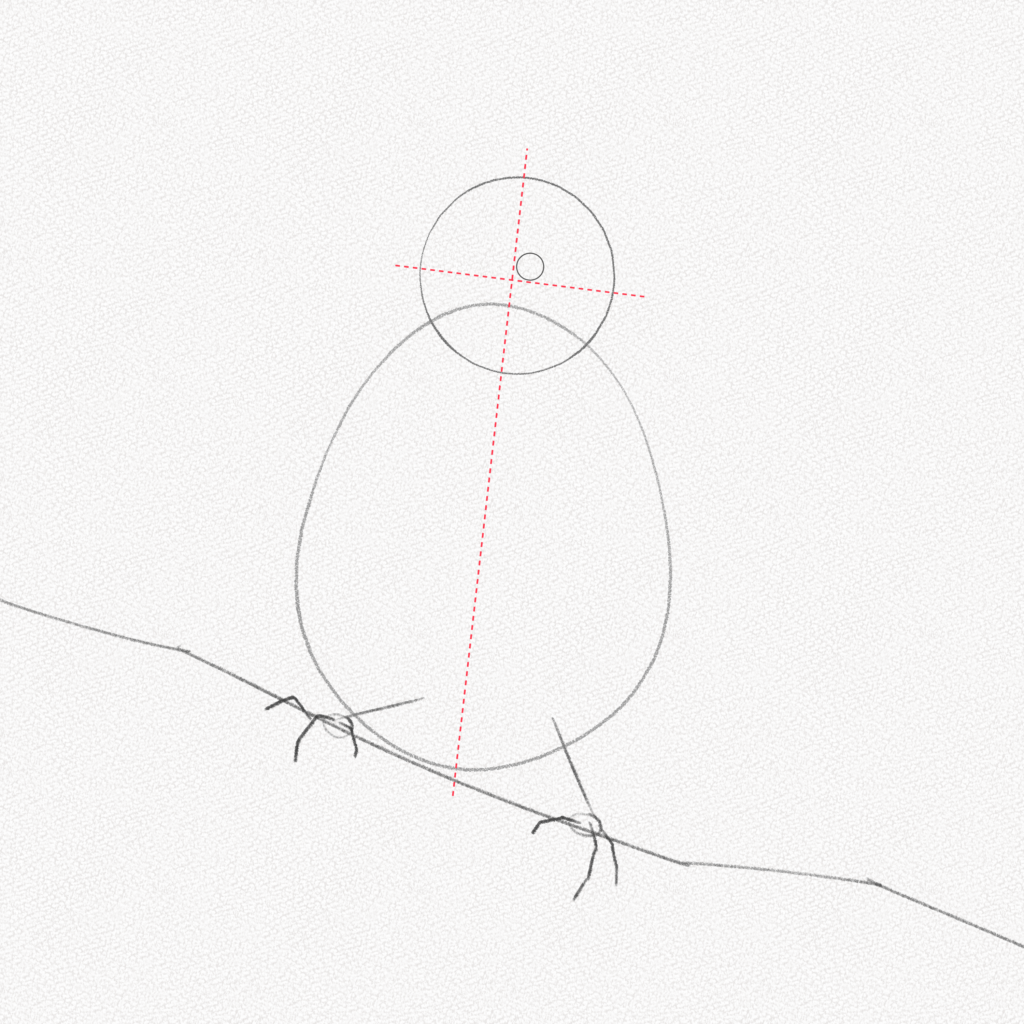
Step 9: Add the claws
Add three claws on each leg, as shown below. These claws will be grabbing the branch so make them slightly curved.
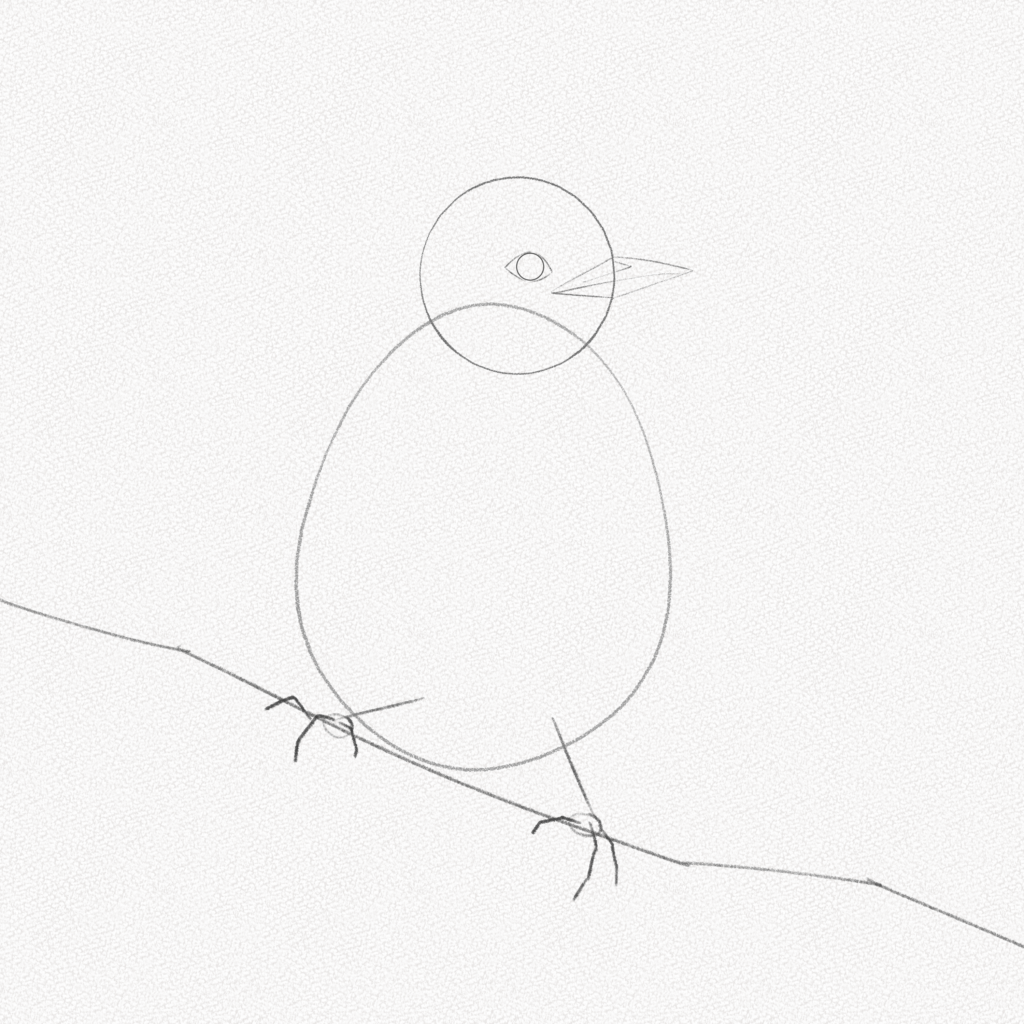
Step 10: Draw the base of the beak
Erase your guidelines and draw a line going from the top of the egg to the point where it crosses your guidelines. Add two lines forming small triangles, as shown below.

Step 11: Draw the top of the beak
Do the same for the top of the beak, but make the triangles slightly bigger.

Step 12: Add two triangles
Add two small triangles next to the eyes and erase your guidelines.
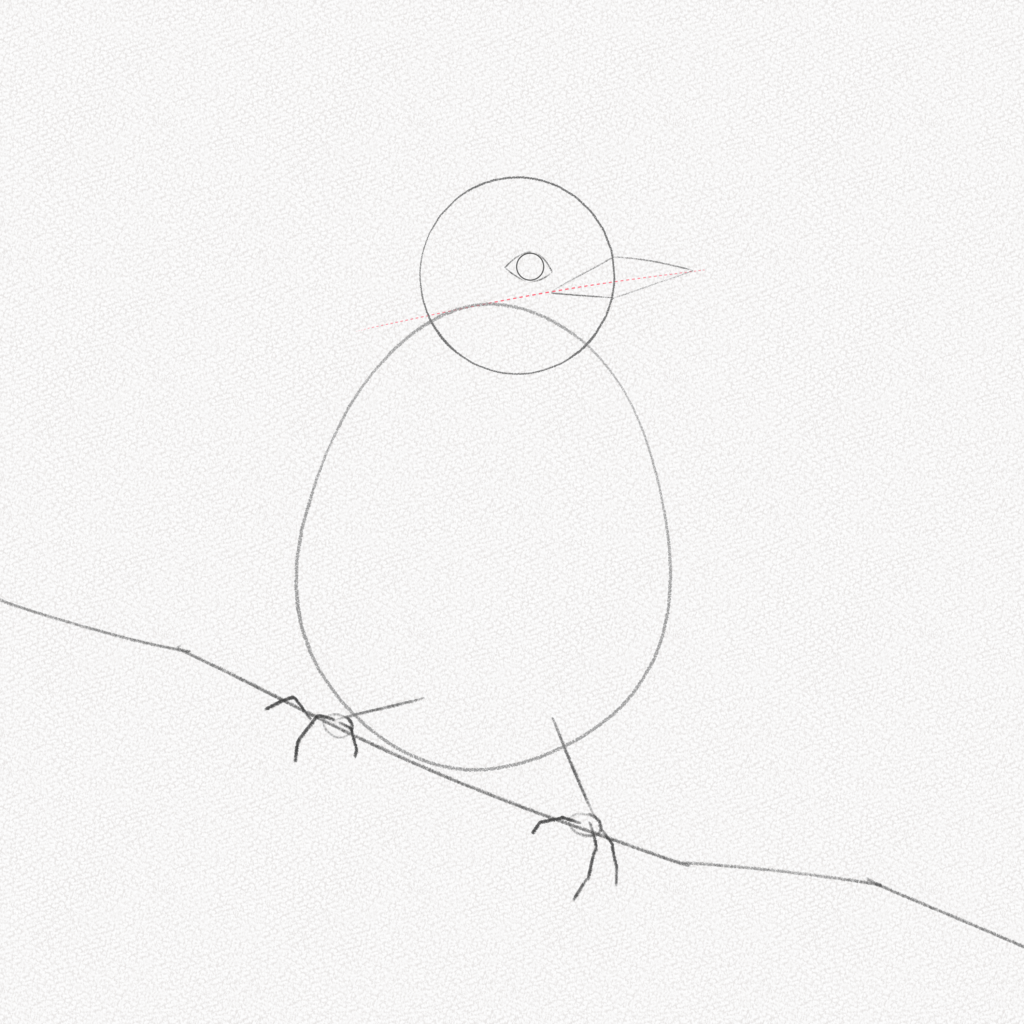
Step 13: Add the nares (nostrils)
Add a horizontal “V” shape as shown in the diagram below for the nare. The other one won’t show because of the head’s angle.
Step 14: Add the right wing
The wings are hidden behind the body since we’re drawing the bird from the front. Use a curved shape to represent the wings.
Step 15: Add the left wing
Do the same for the left wing. Make sure the shapes overlap in the middle of the body’s base.
Step 16: Add the tail
Using a long ellipse, sketch the shape of the bird’s tail. Now erase your guidelines and the overlapping lines and prepare for the next step.
Step 17: Outline the bird’s figure
With our mechanical pencils, we are going to outline our bird’s figure. Since the bird’s body is covered in feathers, we are going to use soft traces as if we were drawing fur. Trace the outer part of the beak and mark the nose.
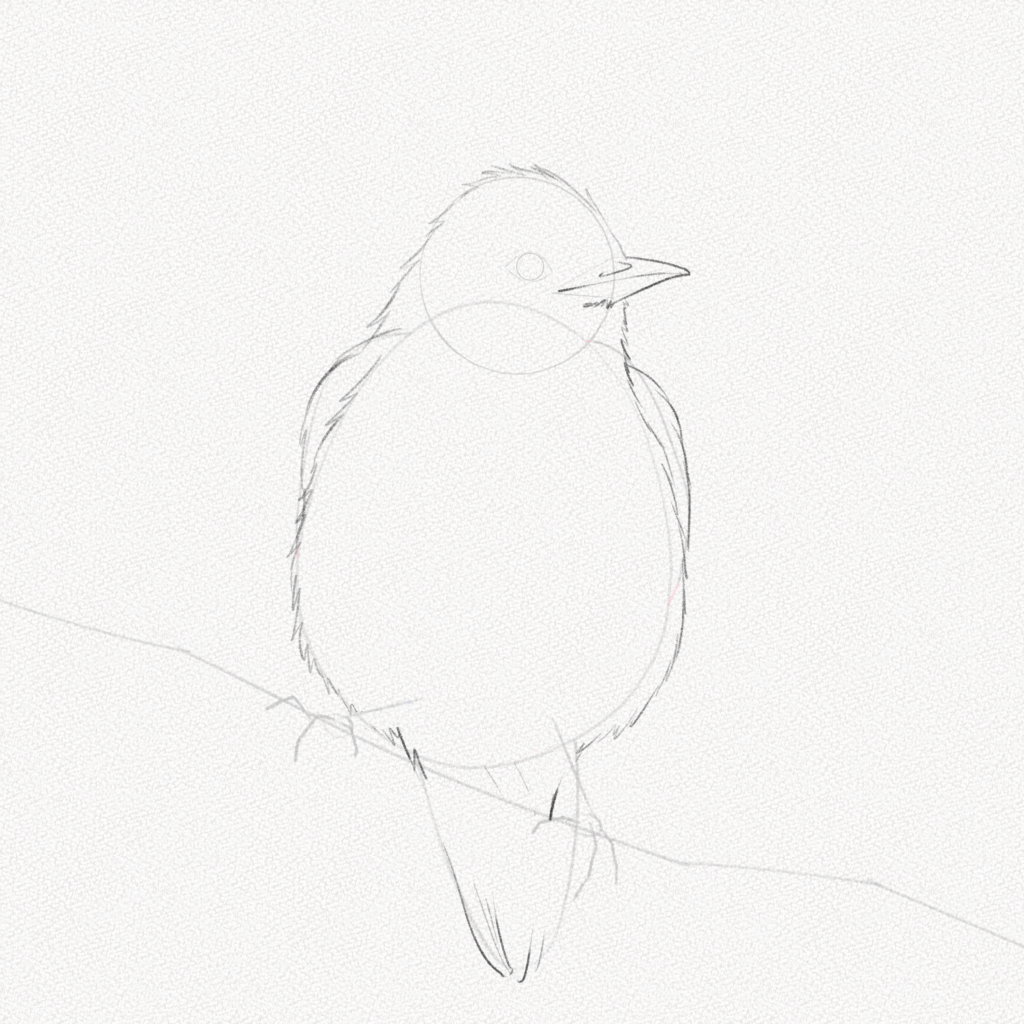
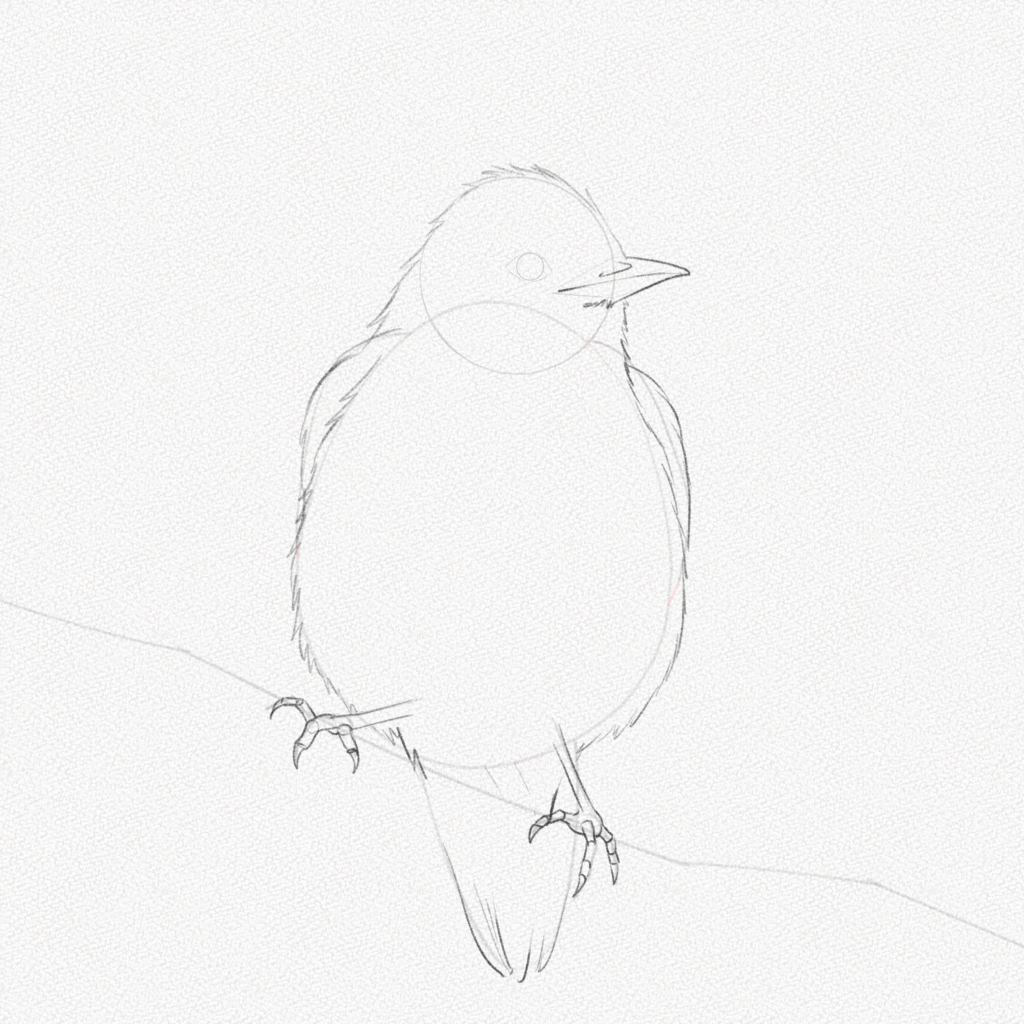
Step 18: Outline one leg
Using cylindrical shapes, we are going to give volume to the bird’s legs and digits and use pointy shapes for the talons. If you have doubts about how to do it, look at the diagram below.
Step 19: Outline the other leg
Repeat the steps above for the other leg.
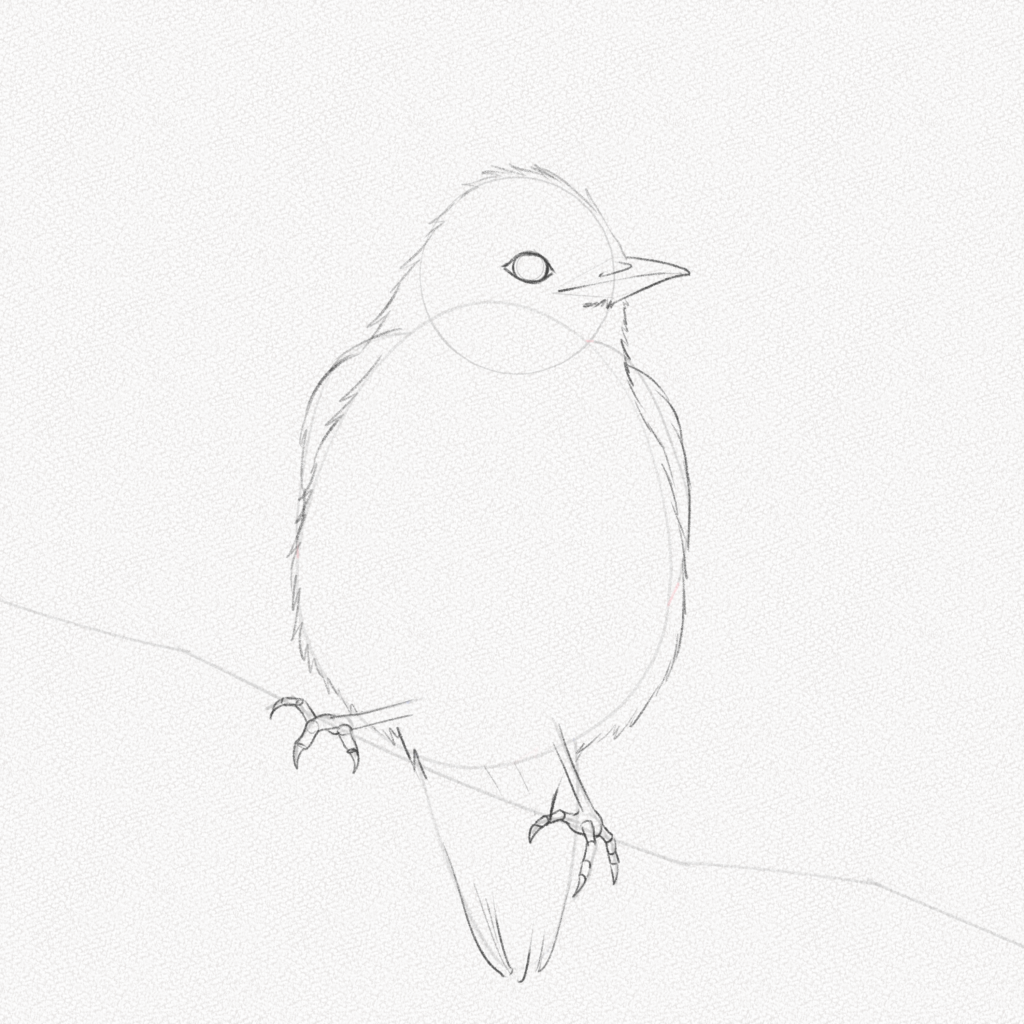
Step 20: Outline the eye
Using organic lines, draw the bird’s eye. Just follow your guidelines and you’ll be done!
Step 21: Add the neck
The bird’s head and body have different groups of feathers that are different colors as well. In order to find the separation, trace a line that passes through the points where the head and body intersect and sketch the feathers as shown below.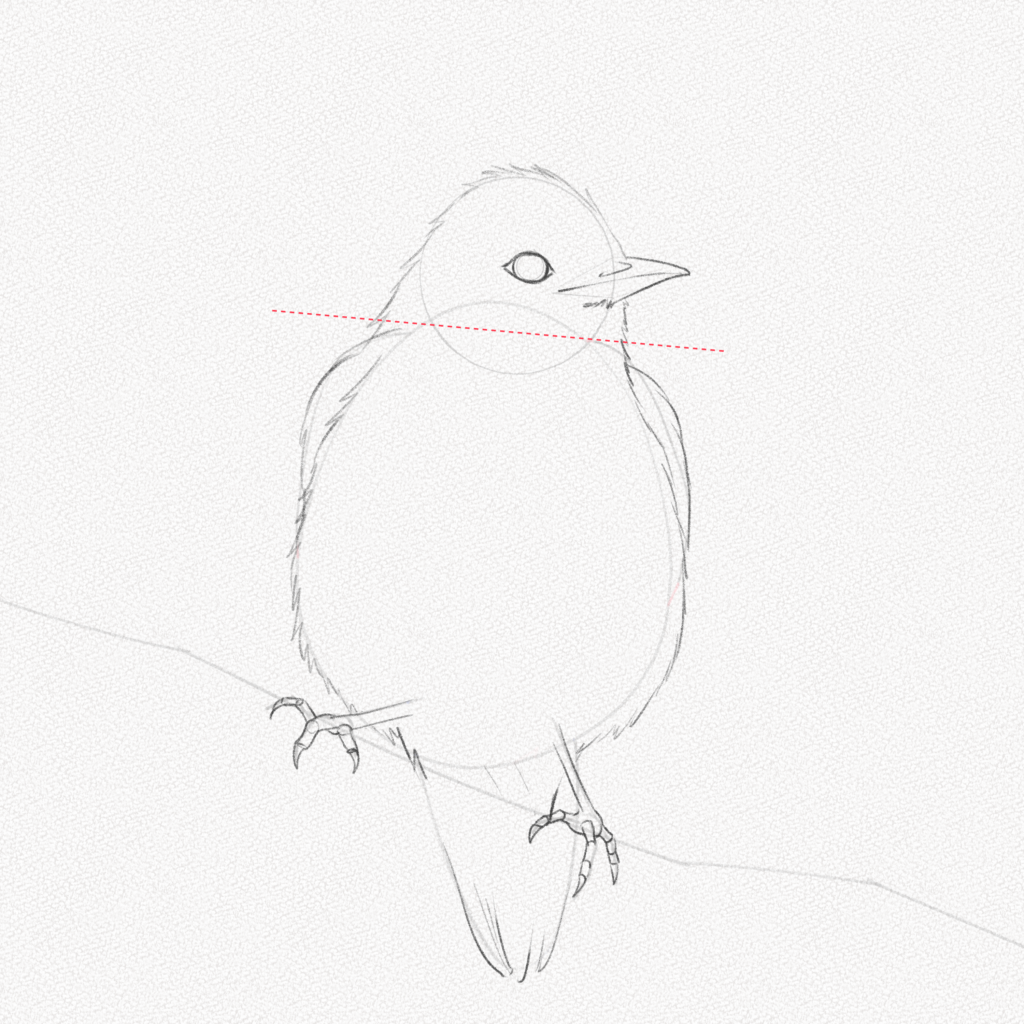
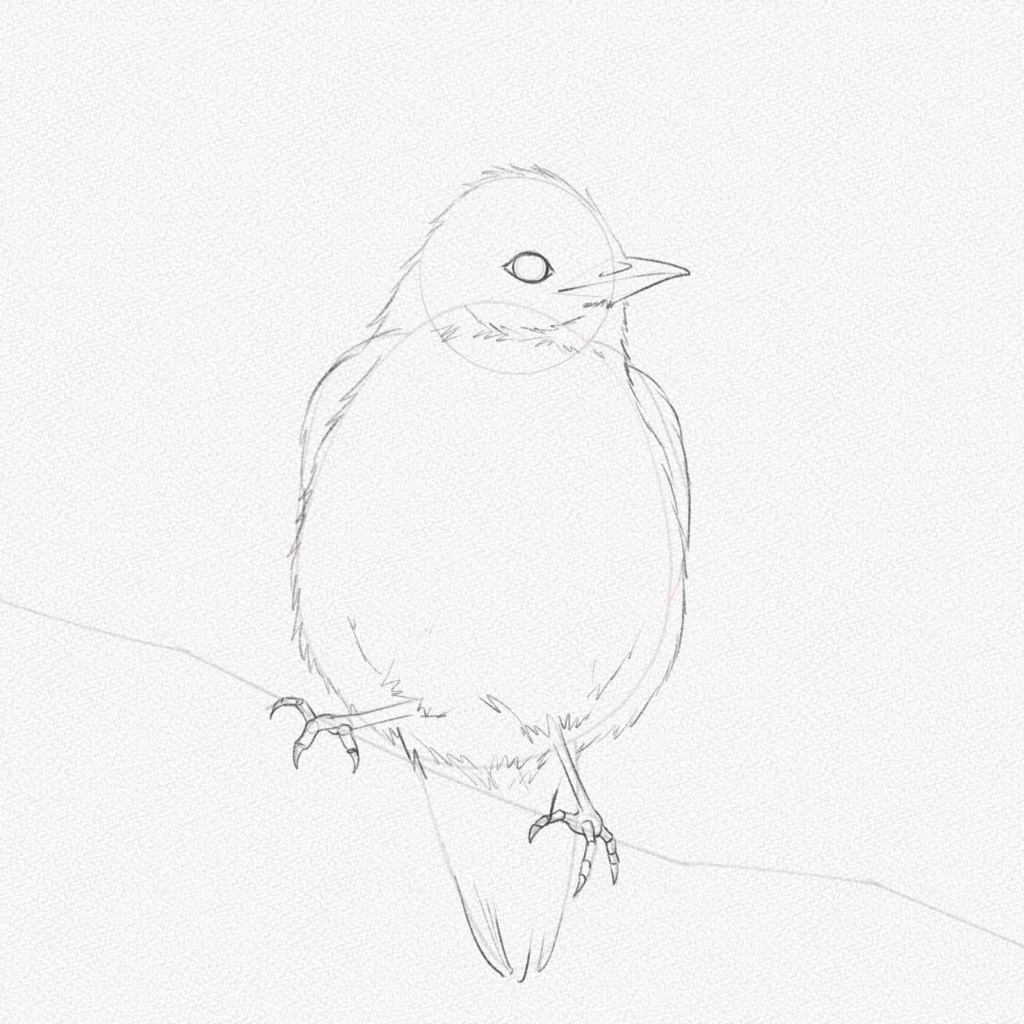
Step 22: Add feathers to the legs
Feathers also cover the legs; you can hint that by adding small soft scribbles around them.
Step 23: Outline the branch
Now, outline the branch adding bumps here and there to give it a more realistic shape.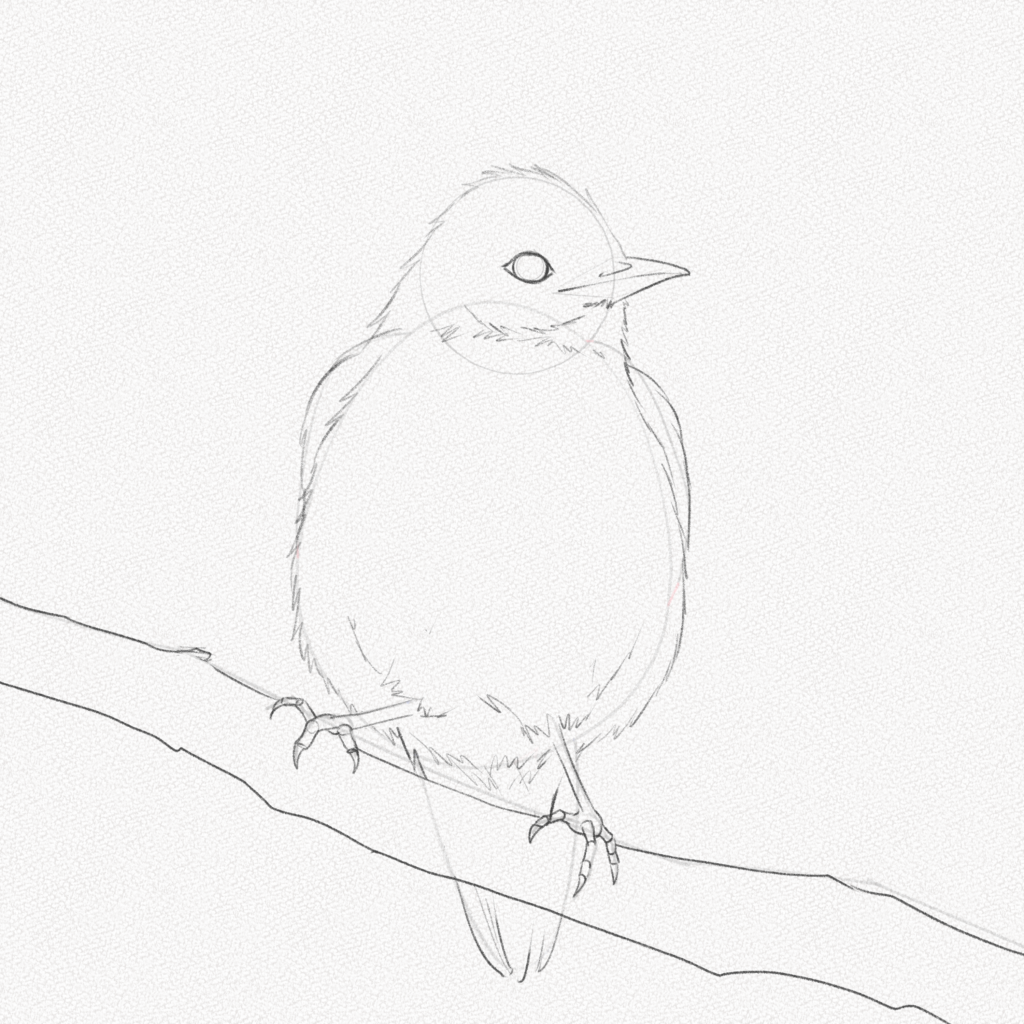
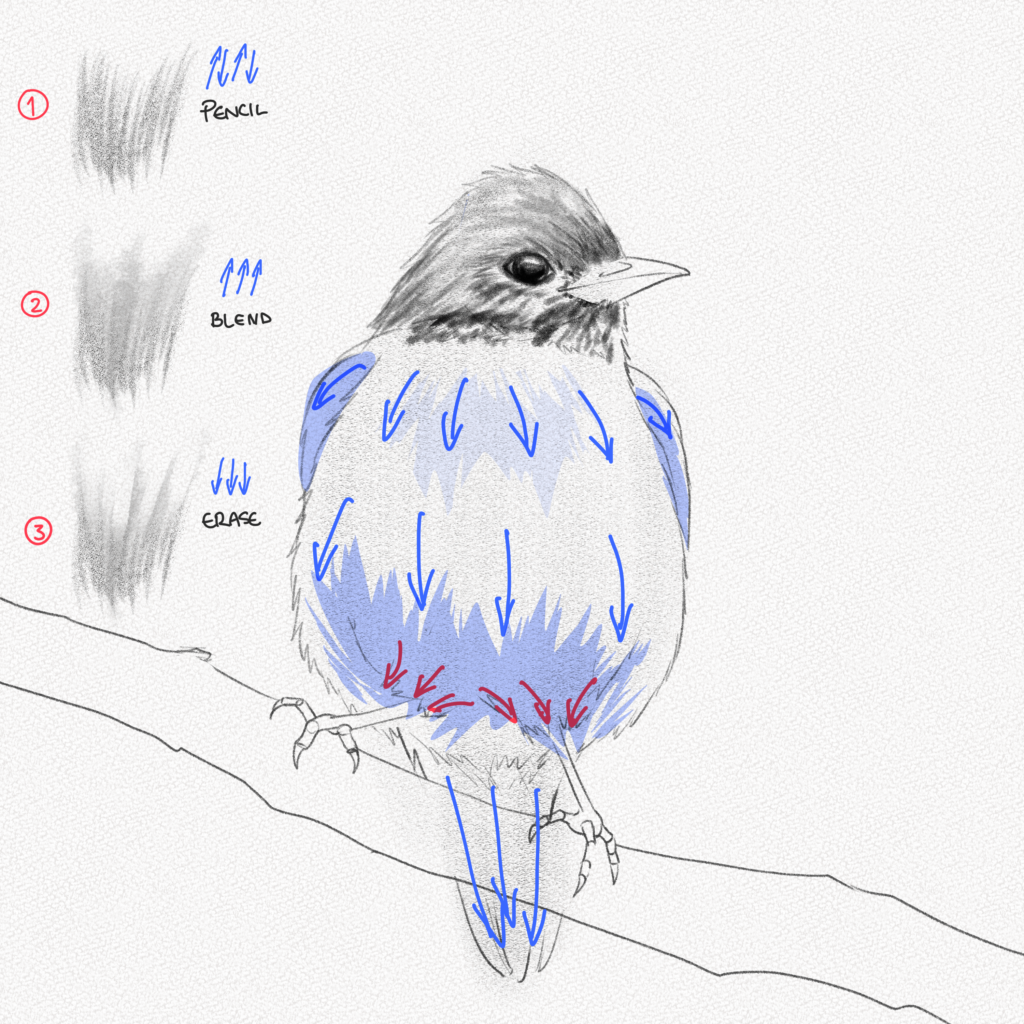
Section 3.- How To Shade A Bird
Step 24: Fill the bird with graphite powder
Use your graphite powder and a soft brush to fill the bird. Keep the values light on the body and dark on the head.
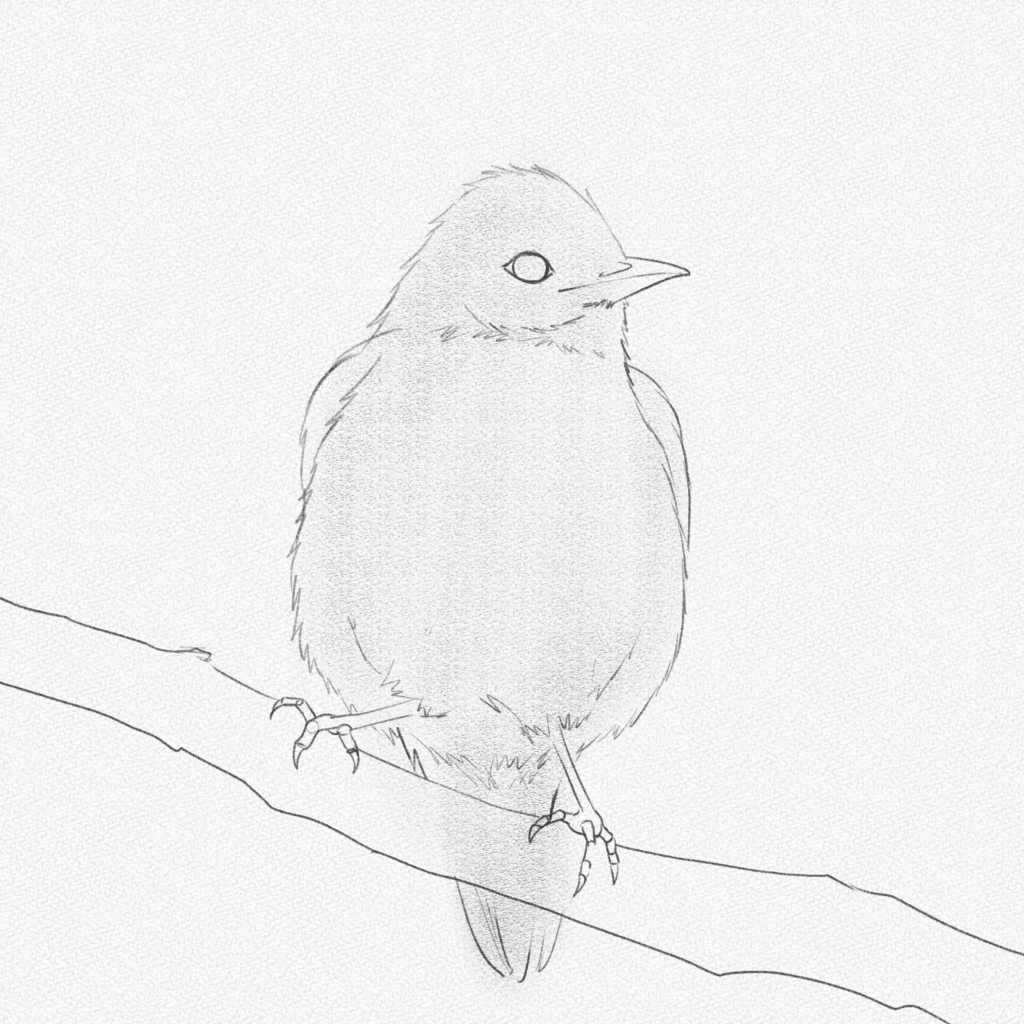
Step 25: Shade the head and the eye
Using the technique shown below, add small feathers to the head of the bird. Make sure to use your 4B pencil for the base and your mechanical pencil for the details.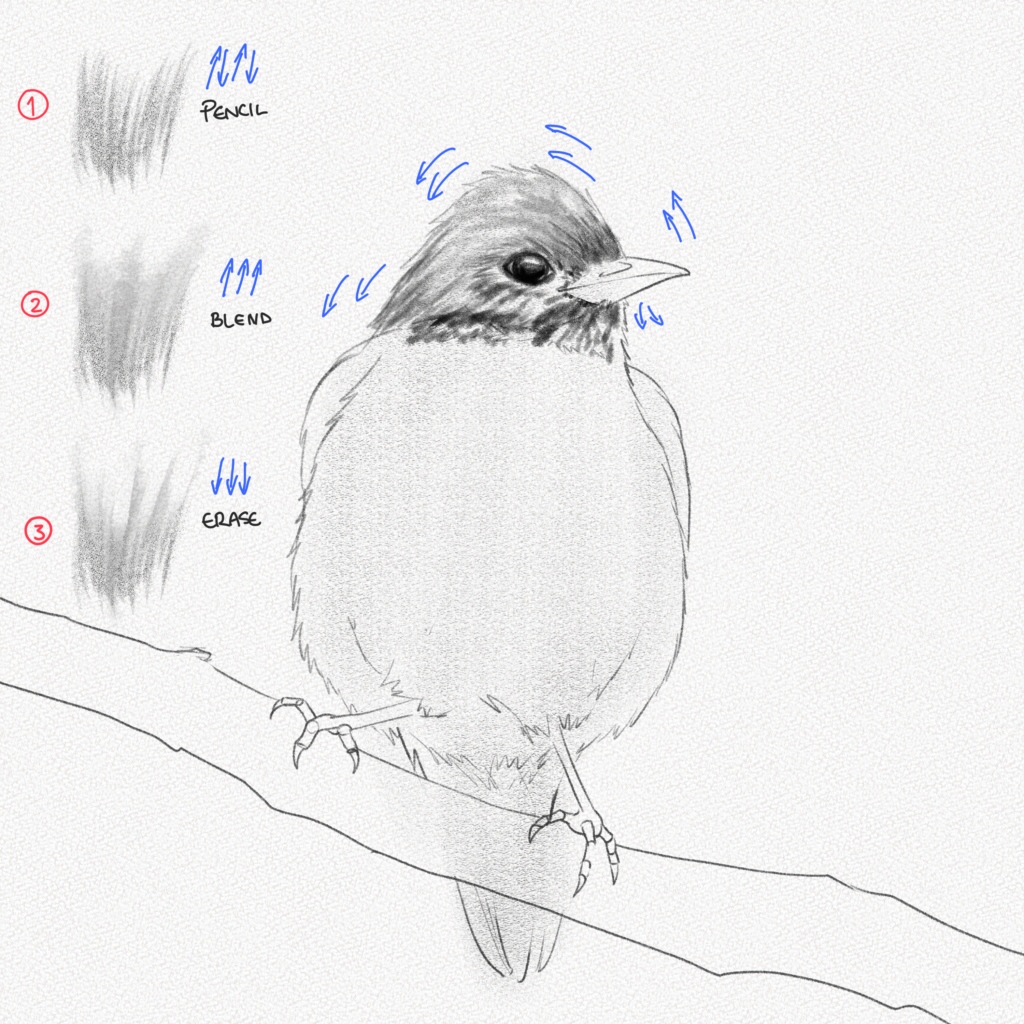
Step 26: Shade the body
Follow the diagram to shade the birds feathers and use the same technique but on a bigger scale for the body’s feathers, the darkest areas will have the darkest values and the white areas will have the lightest value.
Step 27: Shade beak and legs
The beak and legs have the darkest values of all, fill them with several layers of graphite and apply some pressure to the areas where the light doesn’t hit.
Step 28: Shade the branch and add highlights
Using the mono zero erasers, take some graphite away from the body to give the illusion of small feathers. Shade the branch, adding some texture by tilting your pencil a bit.
And that’s it. You’re done.
Thank you for following this tutorial. You did great!
I hope you learned something new today and now have a clearer notion of how to draw and shade a bird.
Until next time!