 Frogs are one of the most common animals in art. They are often depicted as transformation, rebirth, and fertility symbols.
There are many kinds of frogs in nature, and they also come in many sizes. These small creatures have been around for about 200 million years and have evolved to survive in a wide variety of environments. They have adapted to living in water, on land, and even underground.
And although they can be very scary due to the venomous stature of some species, they are also very cute and peaceful animals.
In this section, we’re going to learn how to draw and shade a frog step by step, so gather your materials and keep reading!
What you’ll learn:
- How to draw a frog
- How to shade a frog
Materials needed:
- A piece of paper
- Graphite powder
- A soft brush
- A 2H graphite pencil
- A 4B graphite pencil
- A Kneaded eraser
- A white gel pen
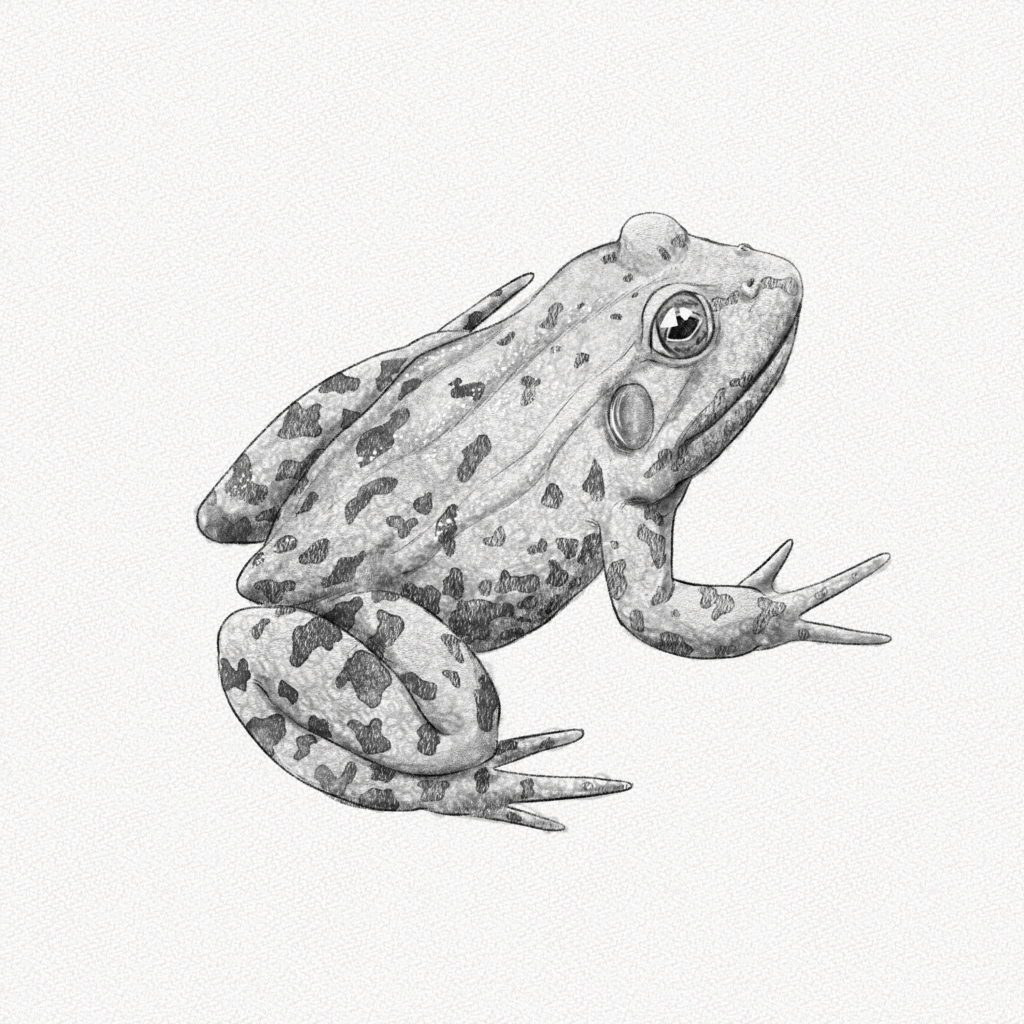
This is the frog you’re going to draw:
And these are all the steps we’ll walk you through:
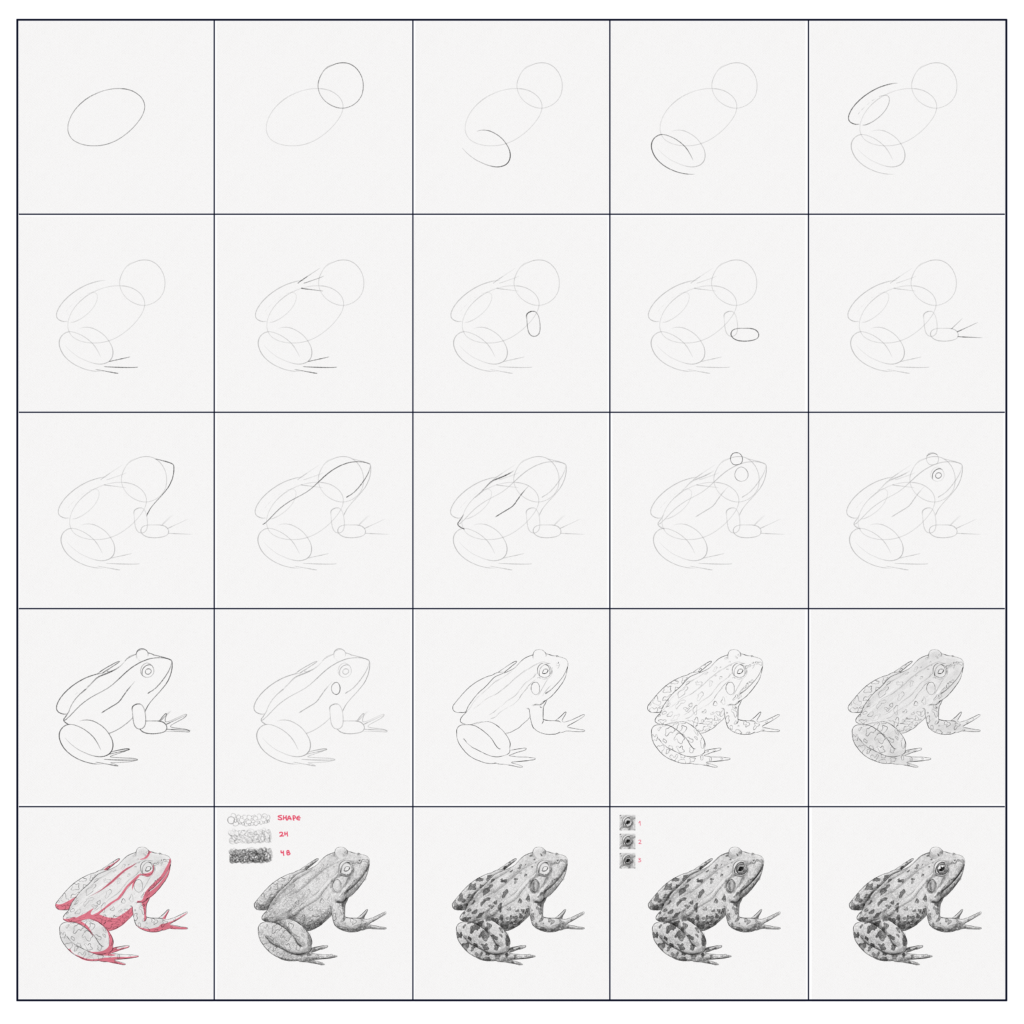
Section 1.- How to draw a frog: Structure and lines
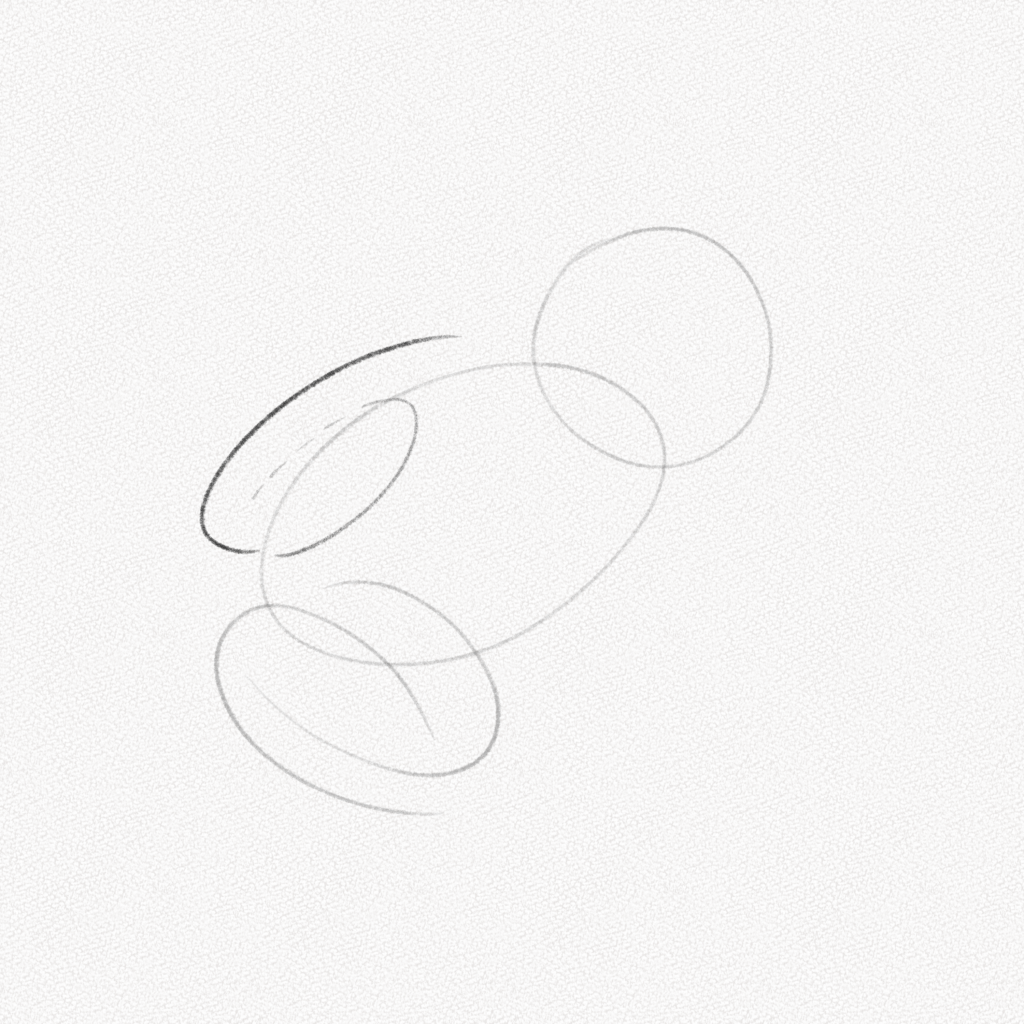
Step 1: Draw an oval
Draw an oval in the middle of your canvas. This will be the body of our frog, so make it as big as you want your frog to be.

Step 2: Draw a circle
Draw a circle on top of your oval. This will be our frog’s head. Make sure this circle is around the same width as the oval you drew in the previous step.

Step 3: Draw the leg
With a tilted “U” shape, draw the right leg. Make sure the bottom of the shape reaches about the middle of the body.

Step 4: Draw the leg
Repeat the step above but in the opposite direction, making this shape slightly thicker in the middle.

Step 5: Repeat
Repeat the steps above on the other side. Use dashed lines for the overlapping parts since you will be erasing them later.
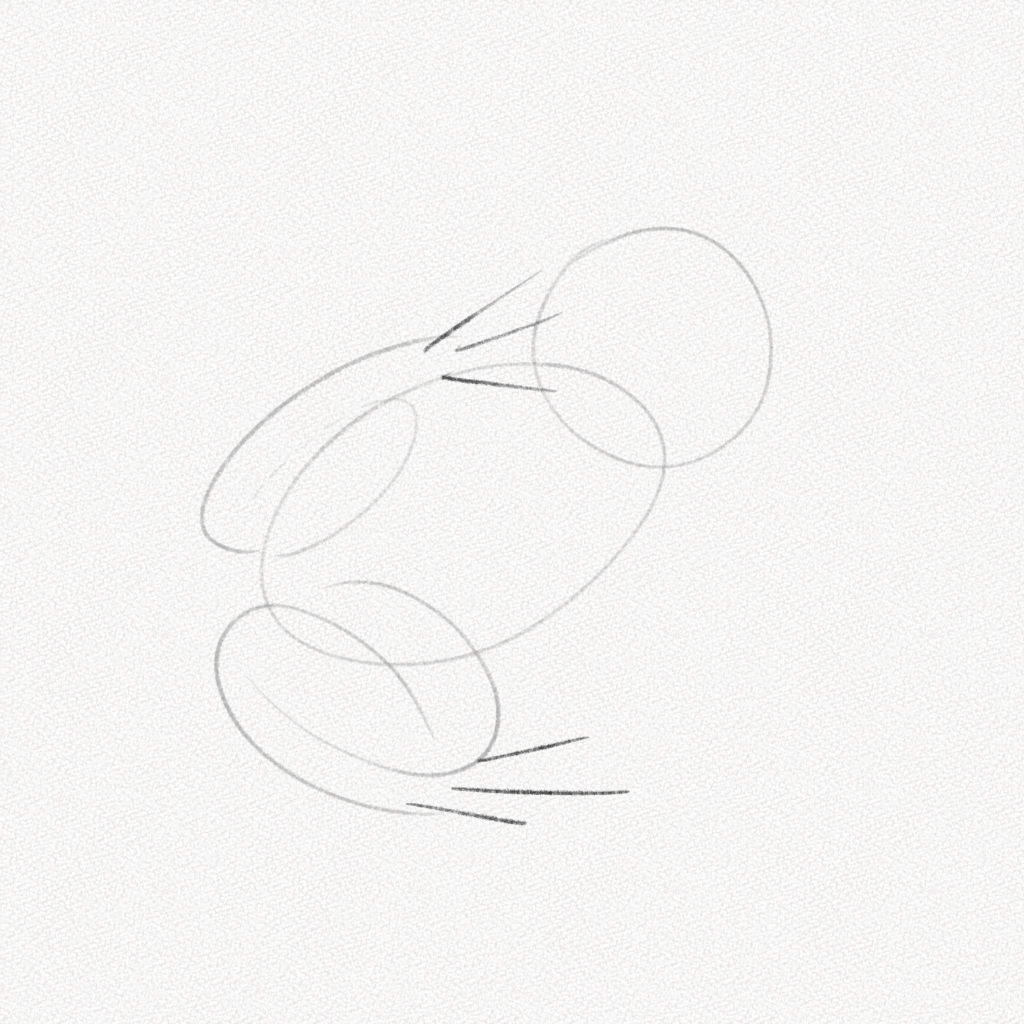
Step 6: Draw the toes
Three lines (two same-size lines and a bigger one in the middle) mark the position of the frog’s toes. The toes of most frogs are long and thin. Though some species have round toes, this is not the case.
Step 7: Draw the front leg
Draw a bean-like shape for the upper part of the front leg.
Step 8: Draw the front leg
Repeat the step above with a 90-degree angle difference for the lower part of the front leg.
Step 9: Draw the front toes
Use three lines to mark the position of the front toes, as shown in the diagram below.
Step 10: Draw the head structure
Draw the frog’s head with a curved line, as shown in the diagram below. Leave the pointy part for the middle of the body’s structure.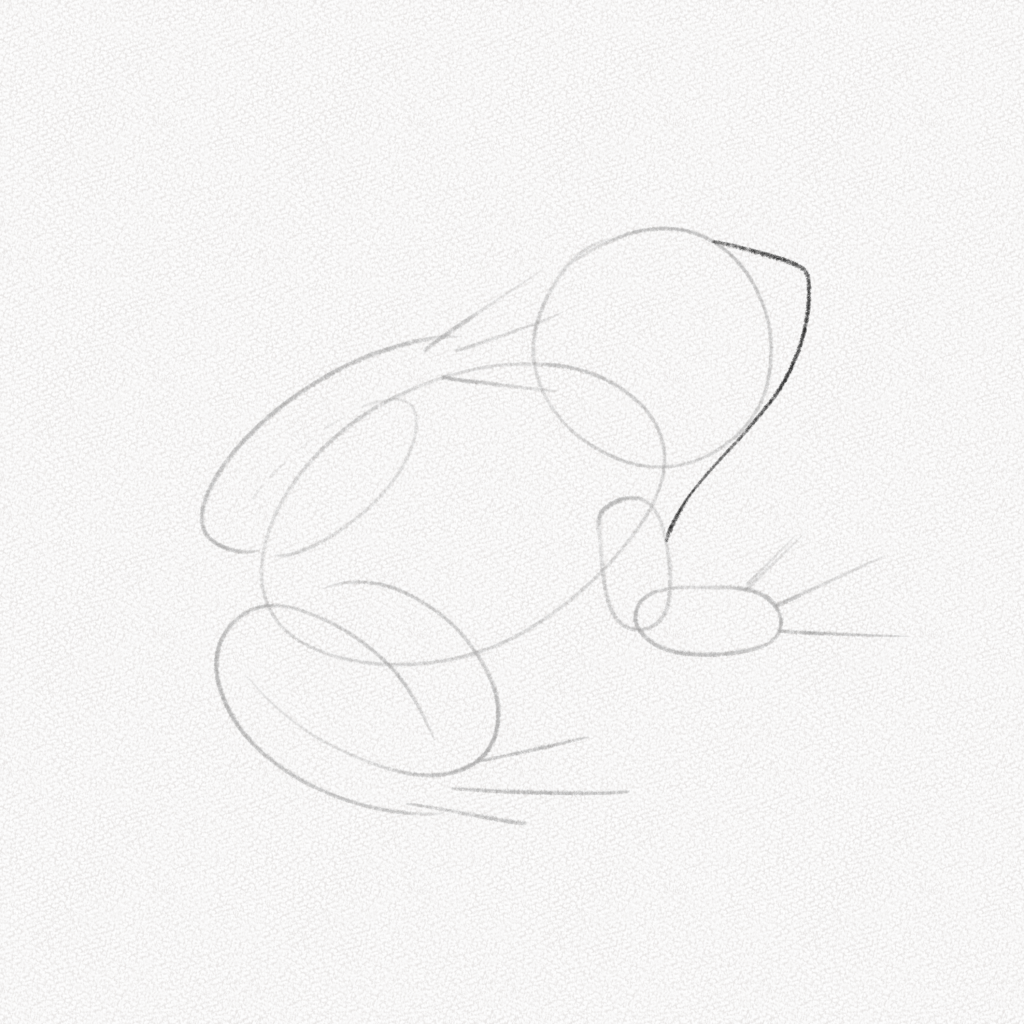
Step 11: Add a line
From the pointy part of the head, draw a line following the 3D shape of the circle and ellipse. This will be the frog’s spine. Pull another line from the top to draw the mouth of the frog.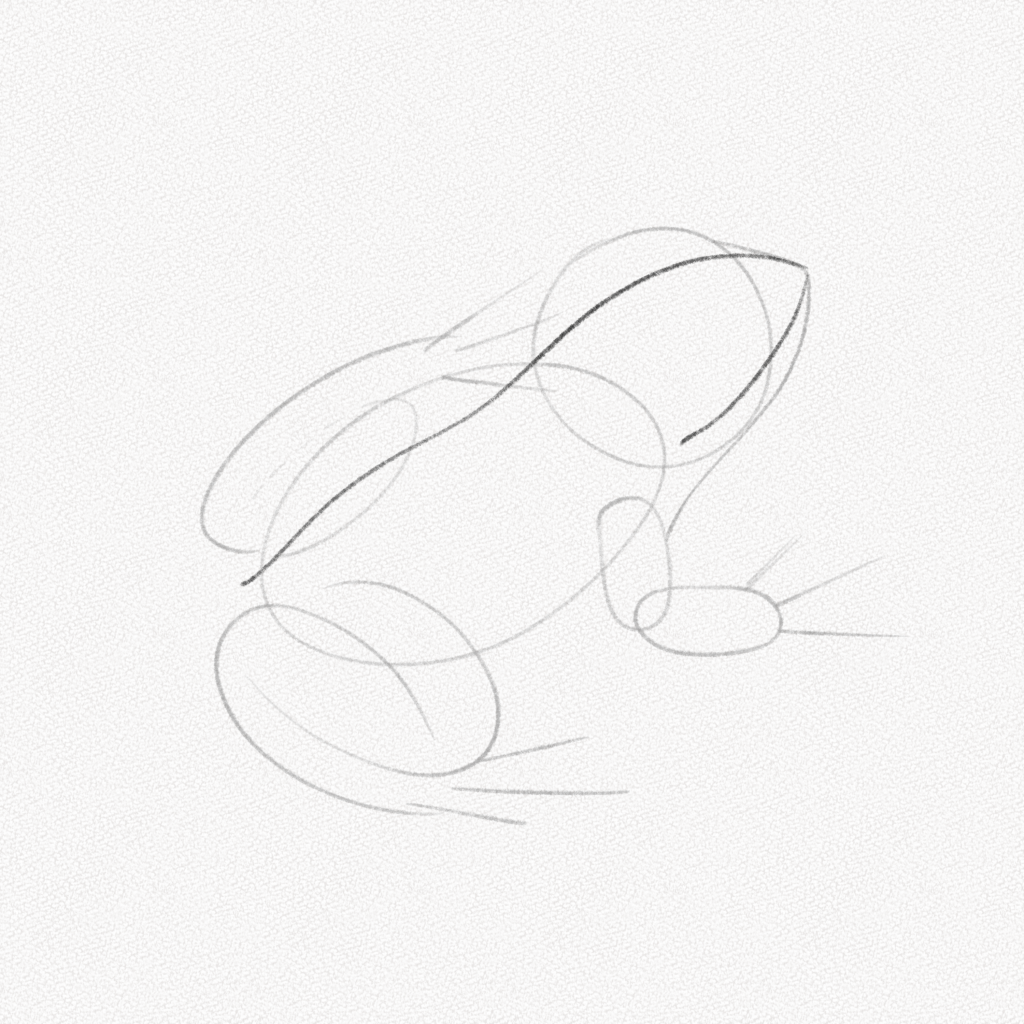
Step 12: Add the tail
Draw two lines as shown below. These will be the bone structure of the frog’s back. Use a small “V” shape placed between the legs for the tail.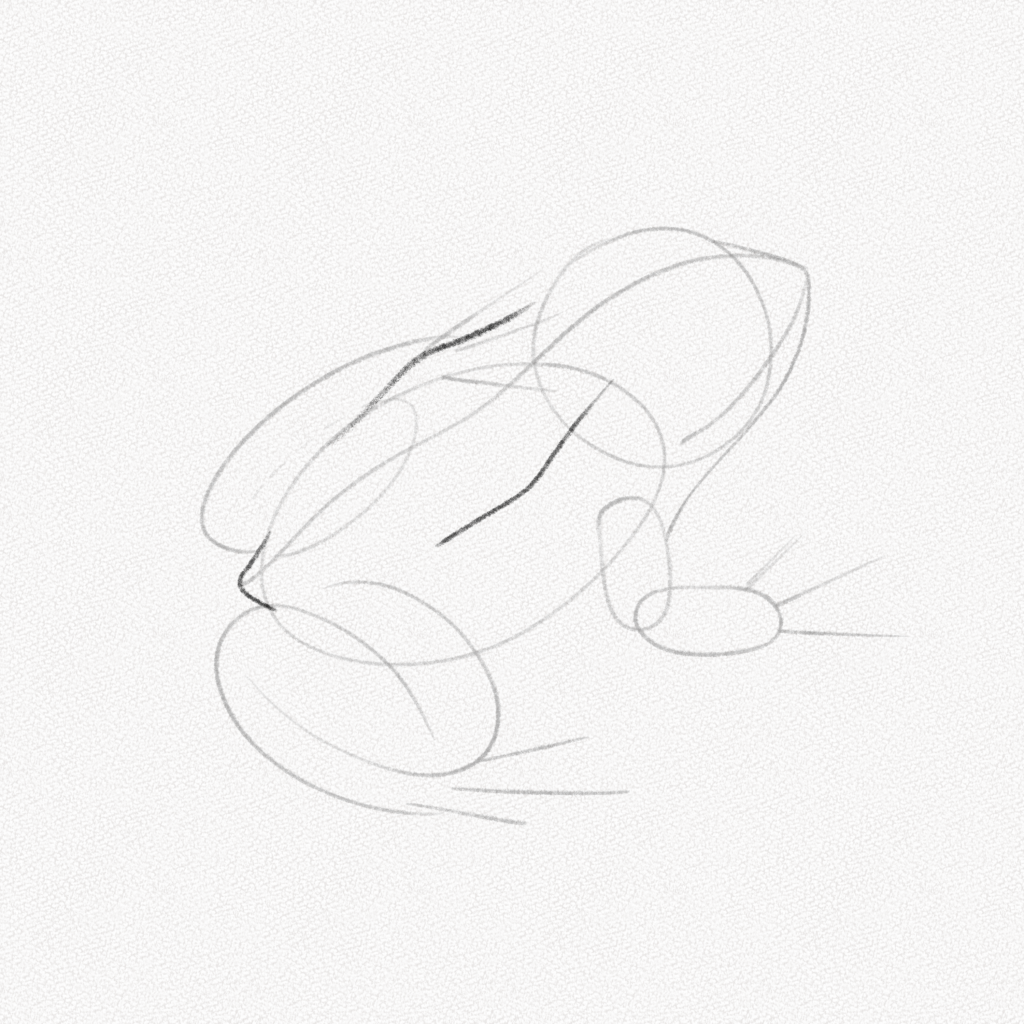
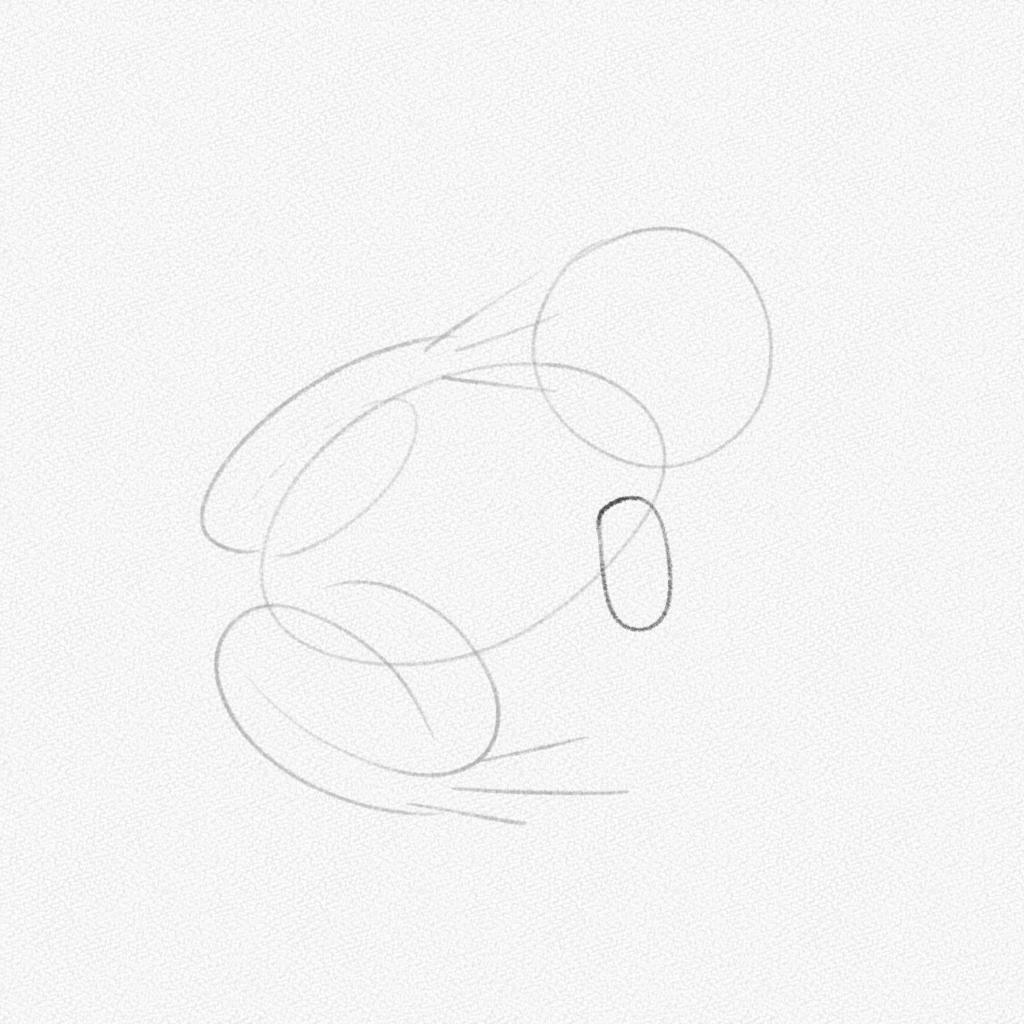
Step 13: Mark the eyes’ position
Remember, the eyes of a frog are protruding. Therefore they should be on top of the head, not inside. Use two small circles on each side of the spine line to place the eyes.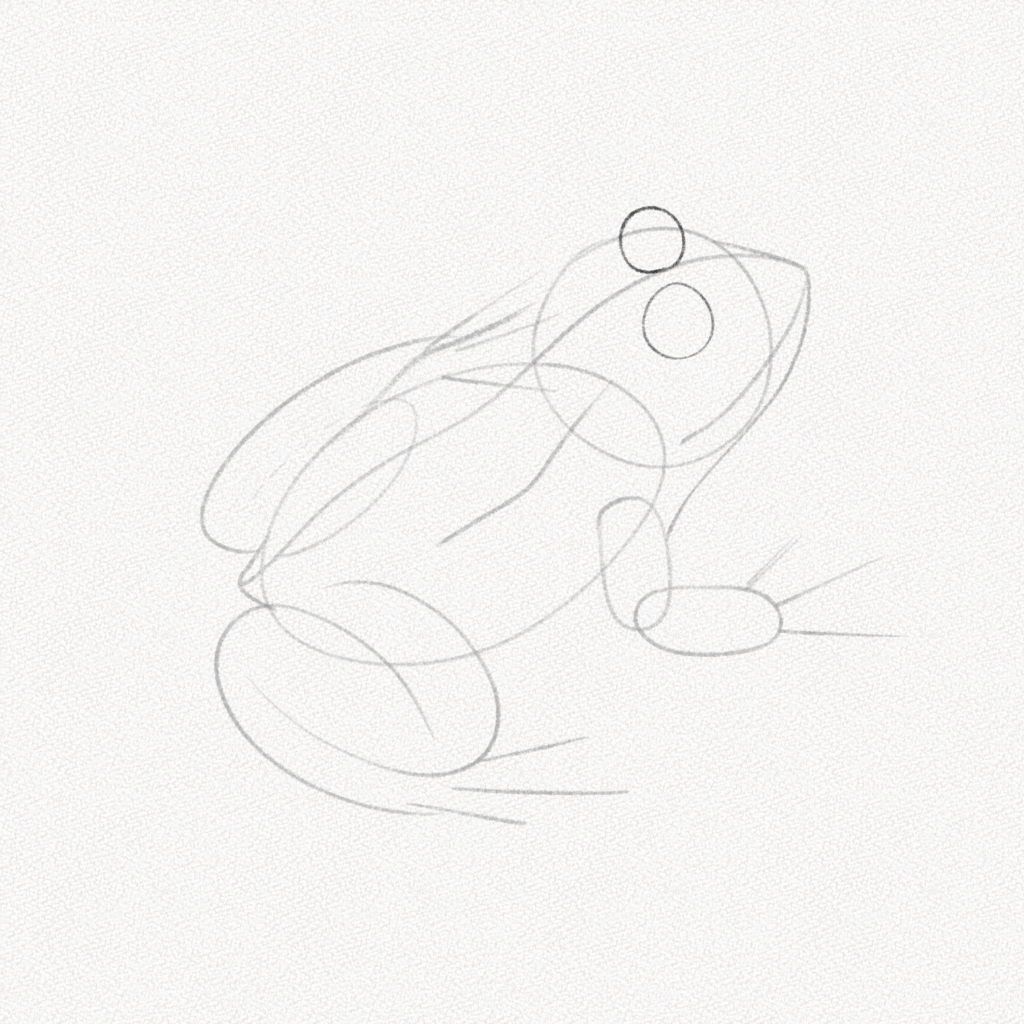
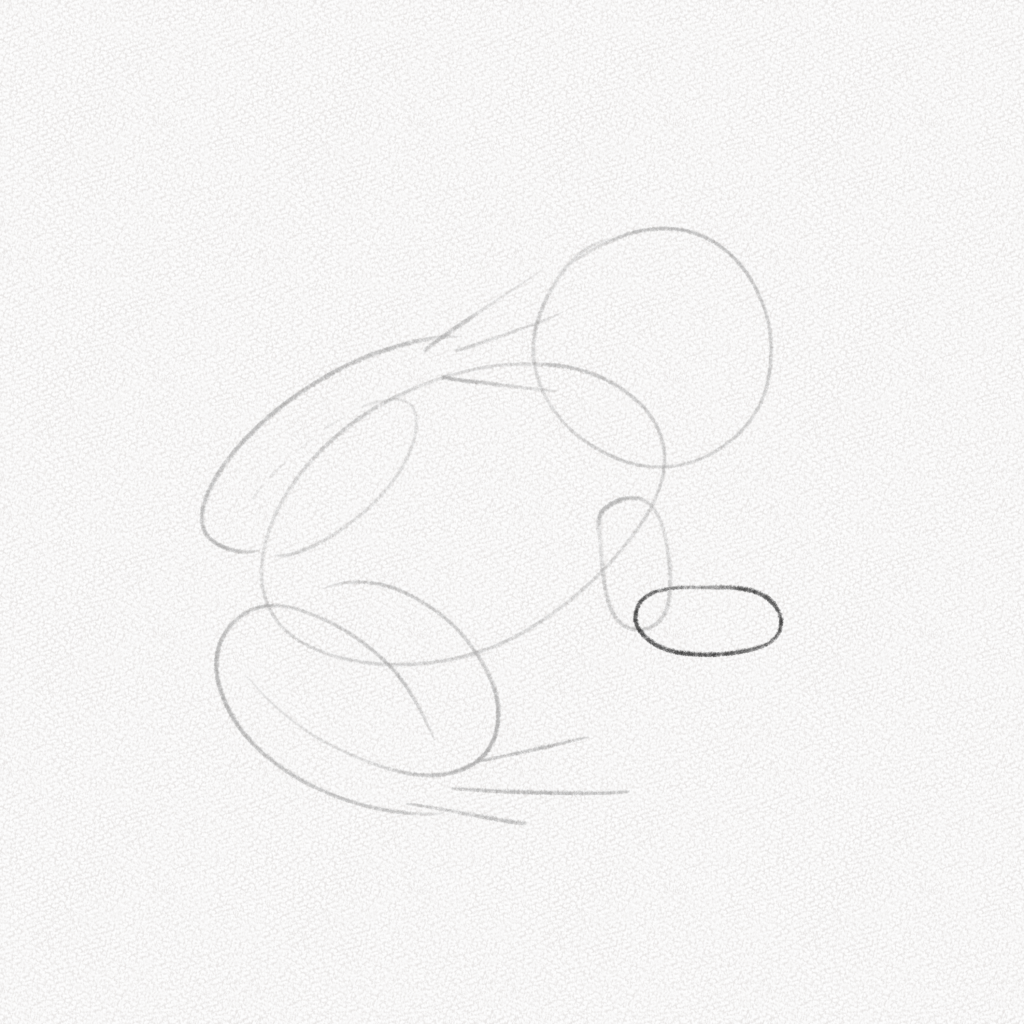
Step 14: Draw the eyelids and pupils
Draw the eyelids and use a circle to mark the position of the frog’s pupils.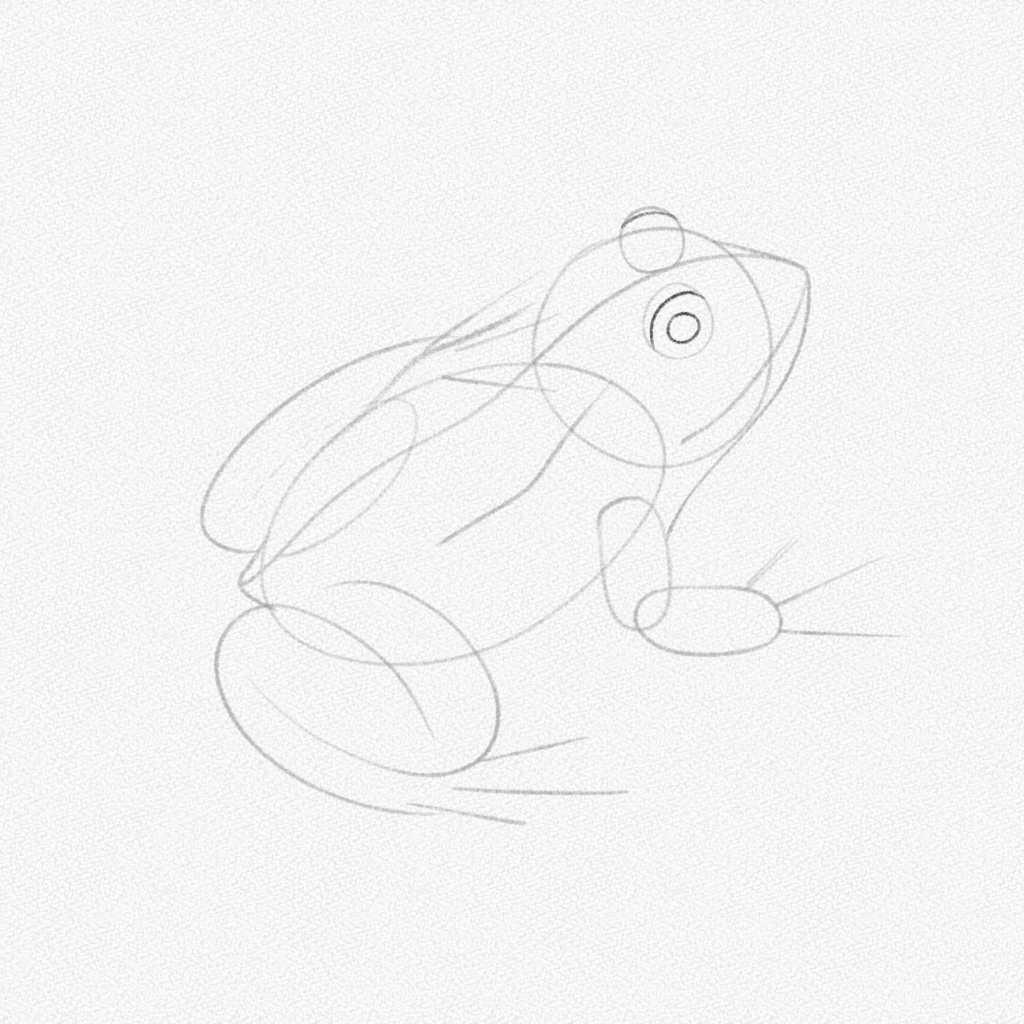
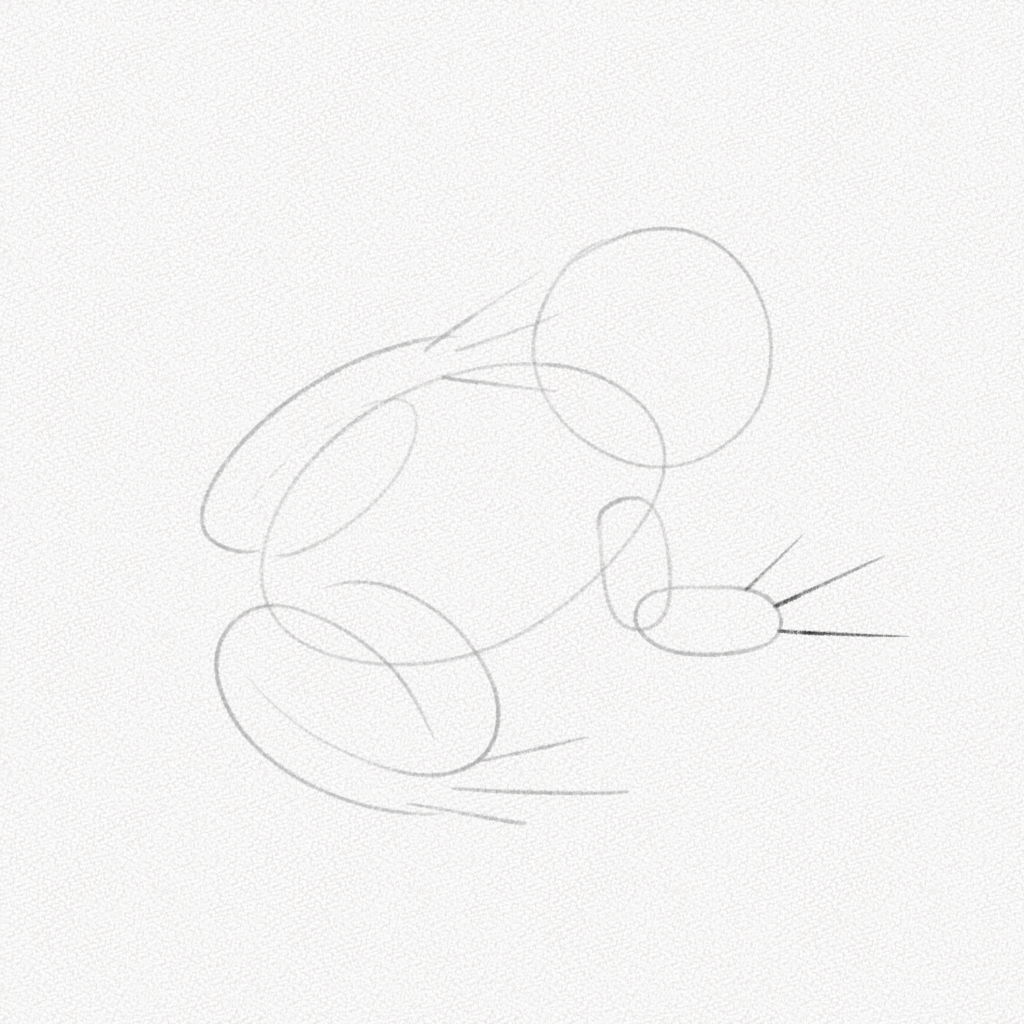
Step 15: Draw the toes and clean your drawing
Erase your guidelines and overlapping lines, and outline the frog’s toes.
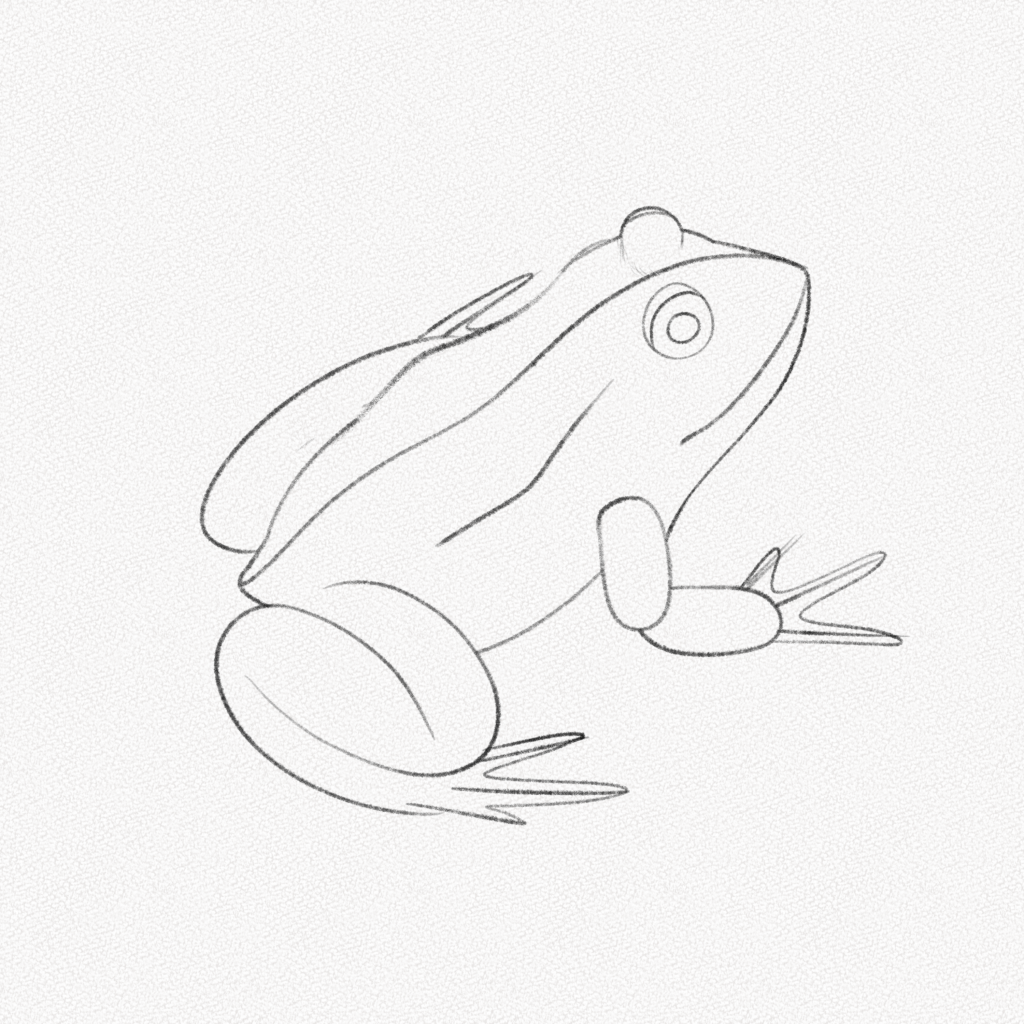
Step 16: Draw the eardrum
Using a circular shape, draw the eardrums of the frog. Yes, the eardrums are placed right below the eyes; you can identify them by their circular shape and dark color.
Section 2.- How to shade a frog
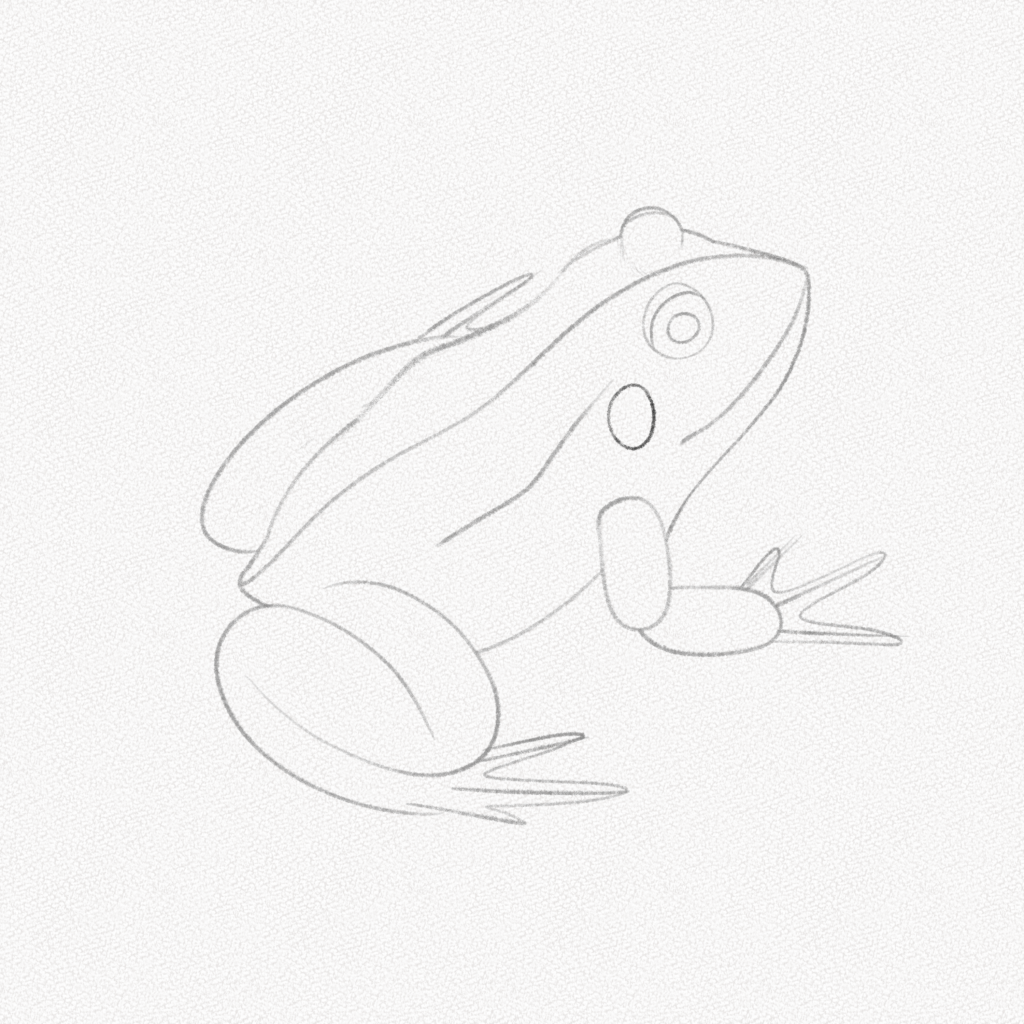
Step 17: Detail your frog
Now, using more organic lines, we are going to add details to our frog. The nostrils, eyelids, and back lines will be critical points that will make our frog look more realistic.
Remember, a frog’s pupils con in many shapes. In this case, we are going to use a curved triangle.

Step 18: Add the spots
Draw irregular shapes all over the frog’s body, draw bigger shapes for his spots in the legs and lower back, and smaller spots on the head and toes.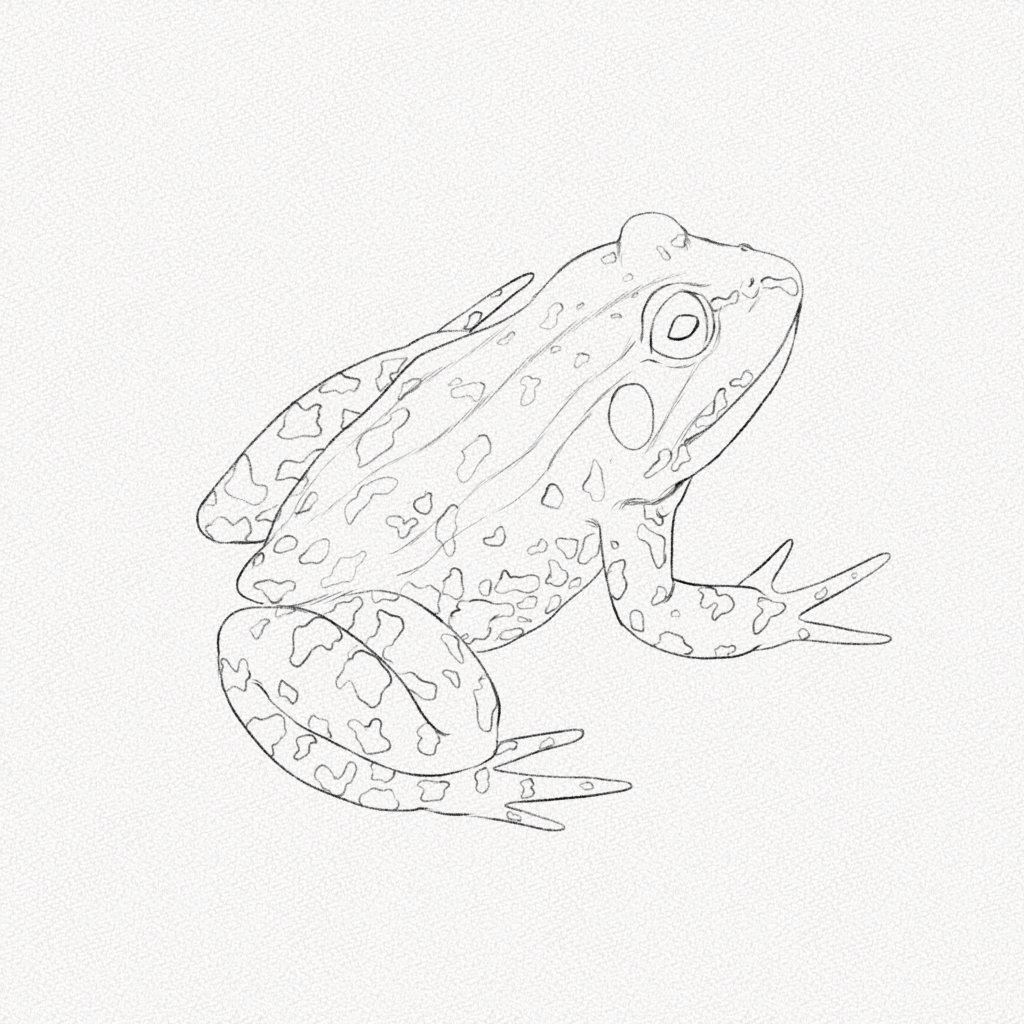
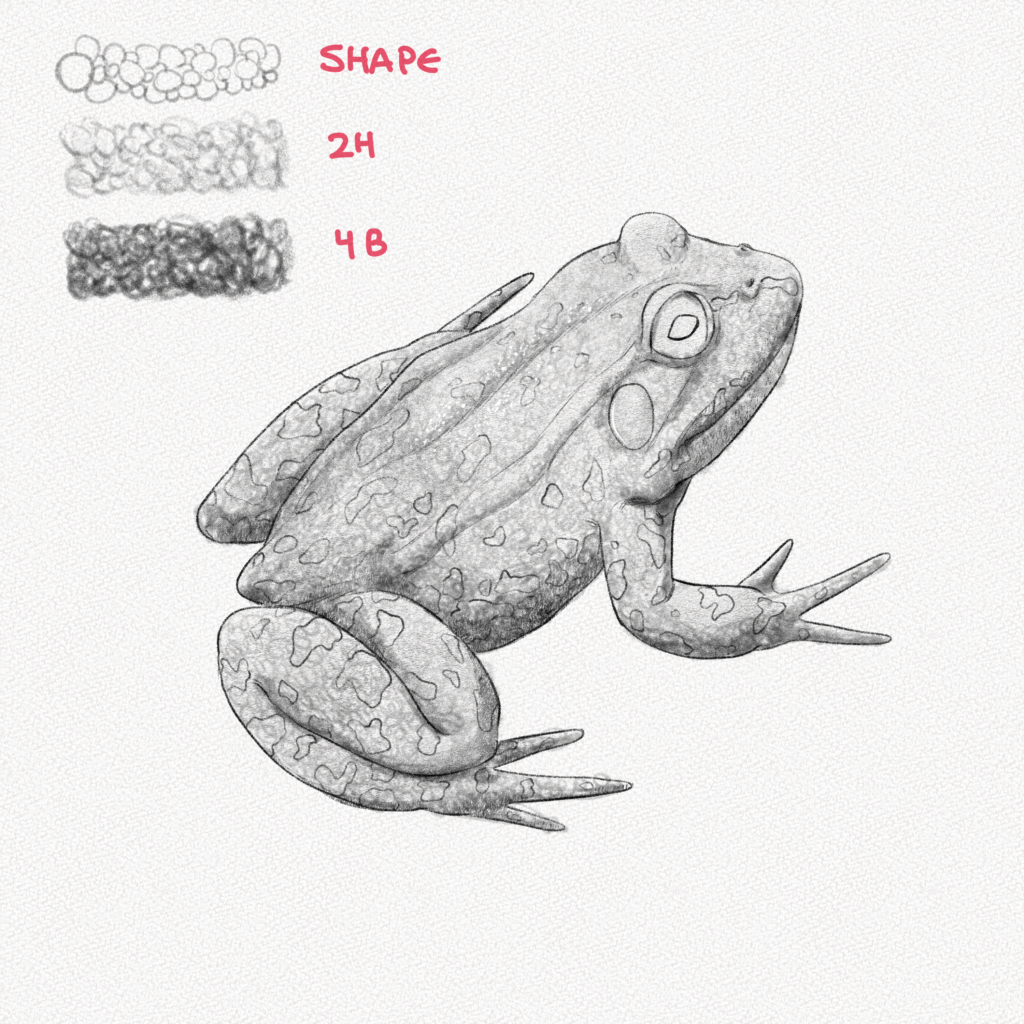
Step 19: Fill your frog
Using powdered graphite and a soft brush, fill the frog with a soft layer of graphite. Clean up the edges and any graphite excess with your kneaded eraser.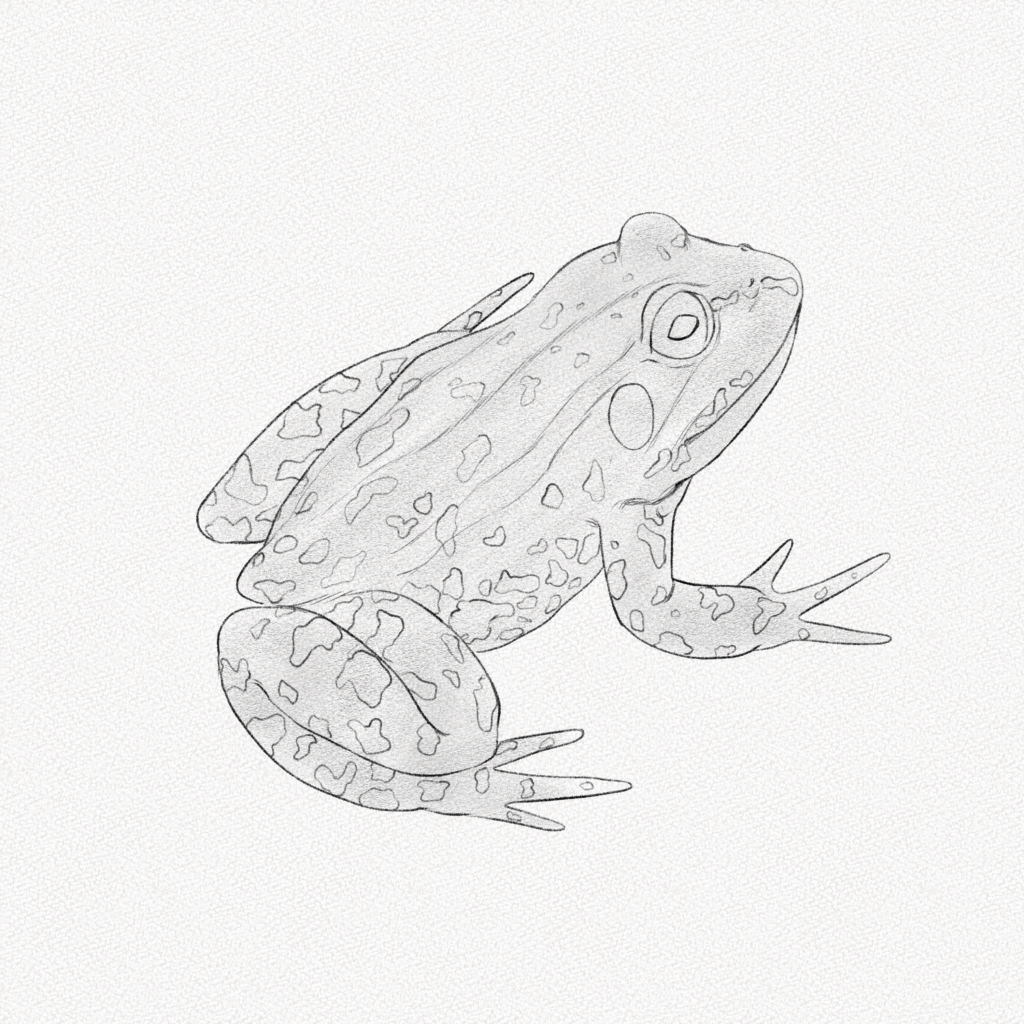
Step 20: Shade your frog
Frogs’ bodies are slimmer than most animals. Using your 2H and 4B graphite pencils, add texture to the frog’s skin, as shown below. In the diagram below, we’ve highlighted the areas that need more intense shading, regions where the light doesn’t directly hit.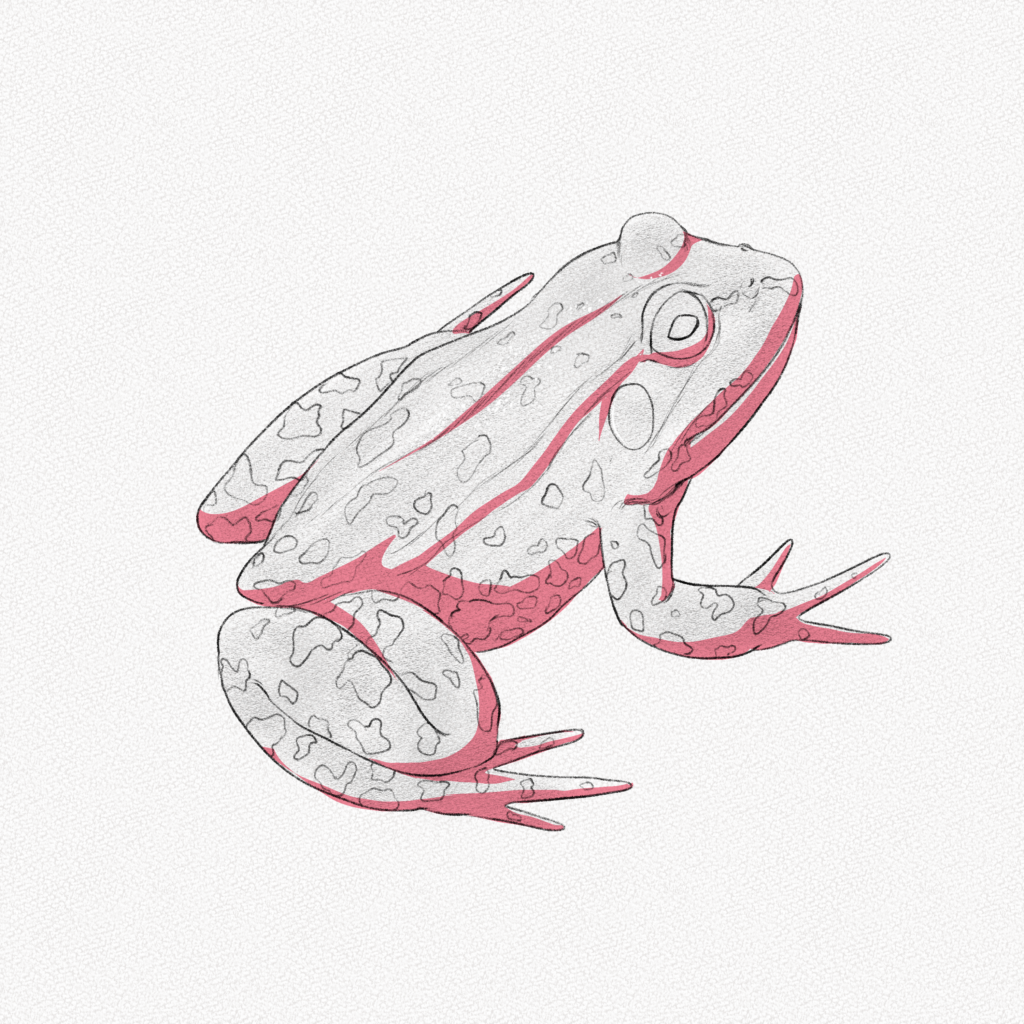
Step 21: Fill the spots
With your 4B pencil, applying a bit more pressure than usual, fill the frog’s spots and eardrum.
Step 22: Shade the eye
Follow the steps shown below to shade the frog’s eye. First, draw an outline around the pupil, then fill the eye with a soft layer of graphite. Finally, add some spots inside the eye.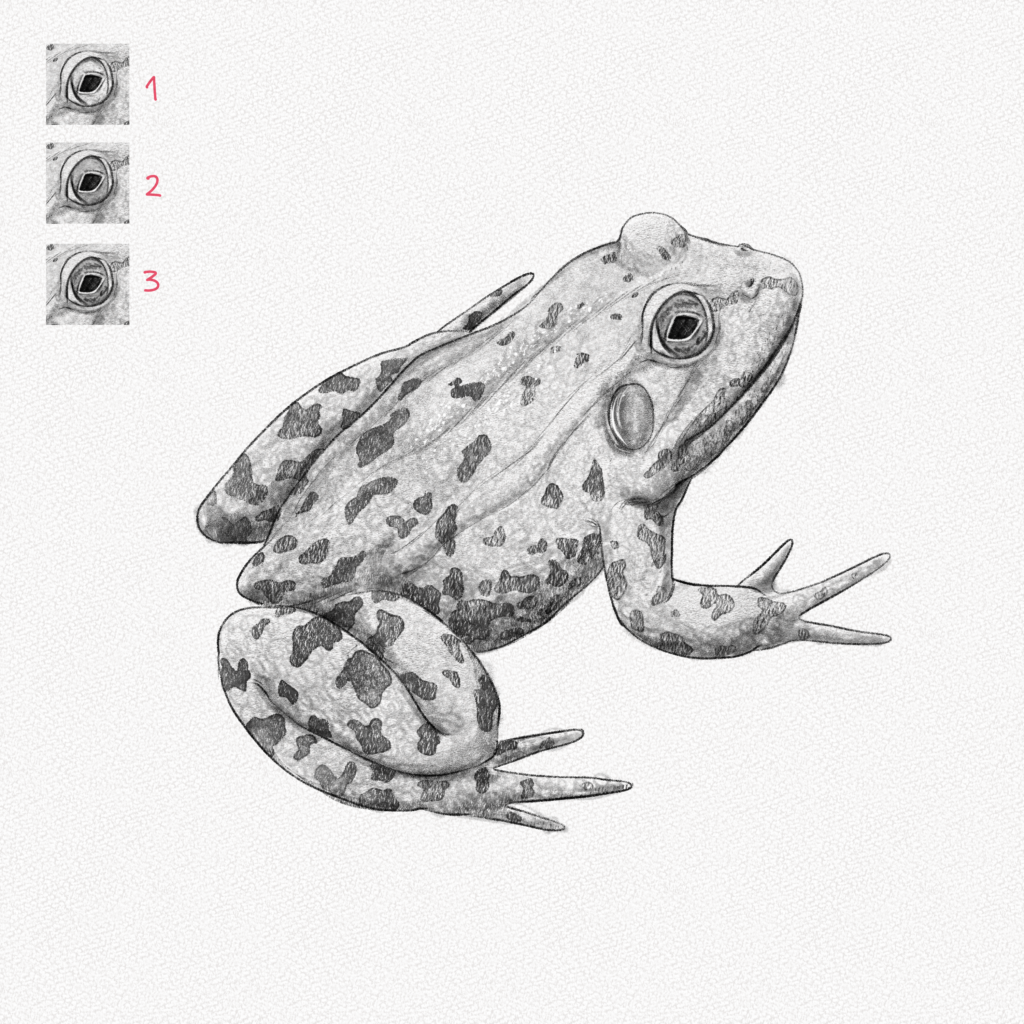
Step 23: Add highlights
Using your white gel pen, add two small triangles to the eye. Also, tap gently on top of your frog’s skin to give that “humid” effect.
And that’s it. You’re done.
Thank you for following this tutorial. You did great!
I hope you learned something new today and that now you have a better grasp on how to draw a realistic frog.
Until next time!