As small as they are, bees are a crucial part of our ecosystem, extraordinary pollinators and a symbol of nature’s delicate balance. As if their ecological role wasn’t enough to pique our interest, their bodies, intricate wings make them really fun to draw.
In this tutorial, we’ll guide you step-by-step on how to draw a bee. We’ll cover everything from creating a basic outline to adding the final details. You’ll learn techniques like shading and texturing, which you can use in other drawings too.
So grab your pencil and paper, it’s time to start drawing! There’s a world of buzzing bees waiting for us to bring them to life!
What you will learn:
- How to Draw a Bee’s Structure
- How to Shade a Bee
Materials needed:
- A piece of paper
- A 2H and 6B graphite pencil
- A blending stump
- A Tombow Mono Zero 2.3mm eraser
- A Ruler
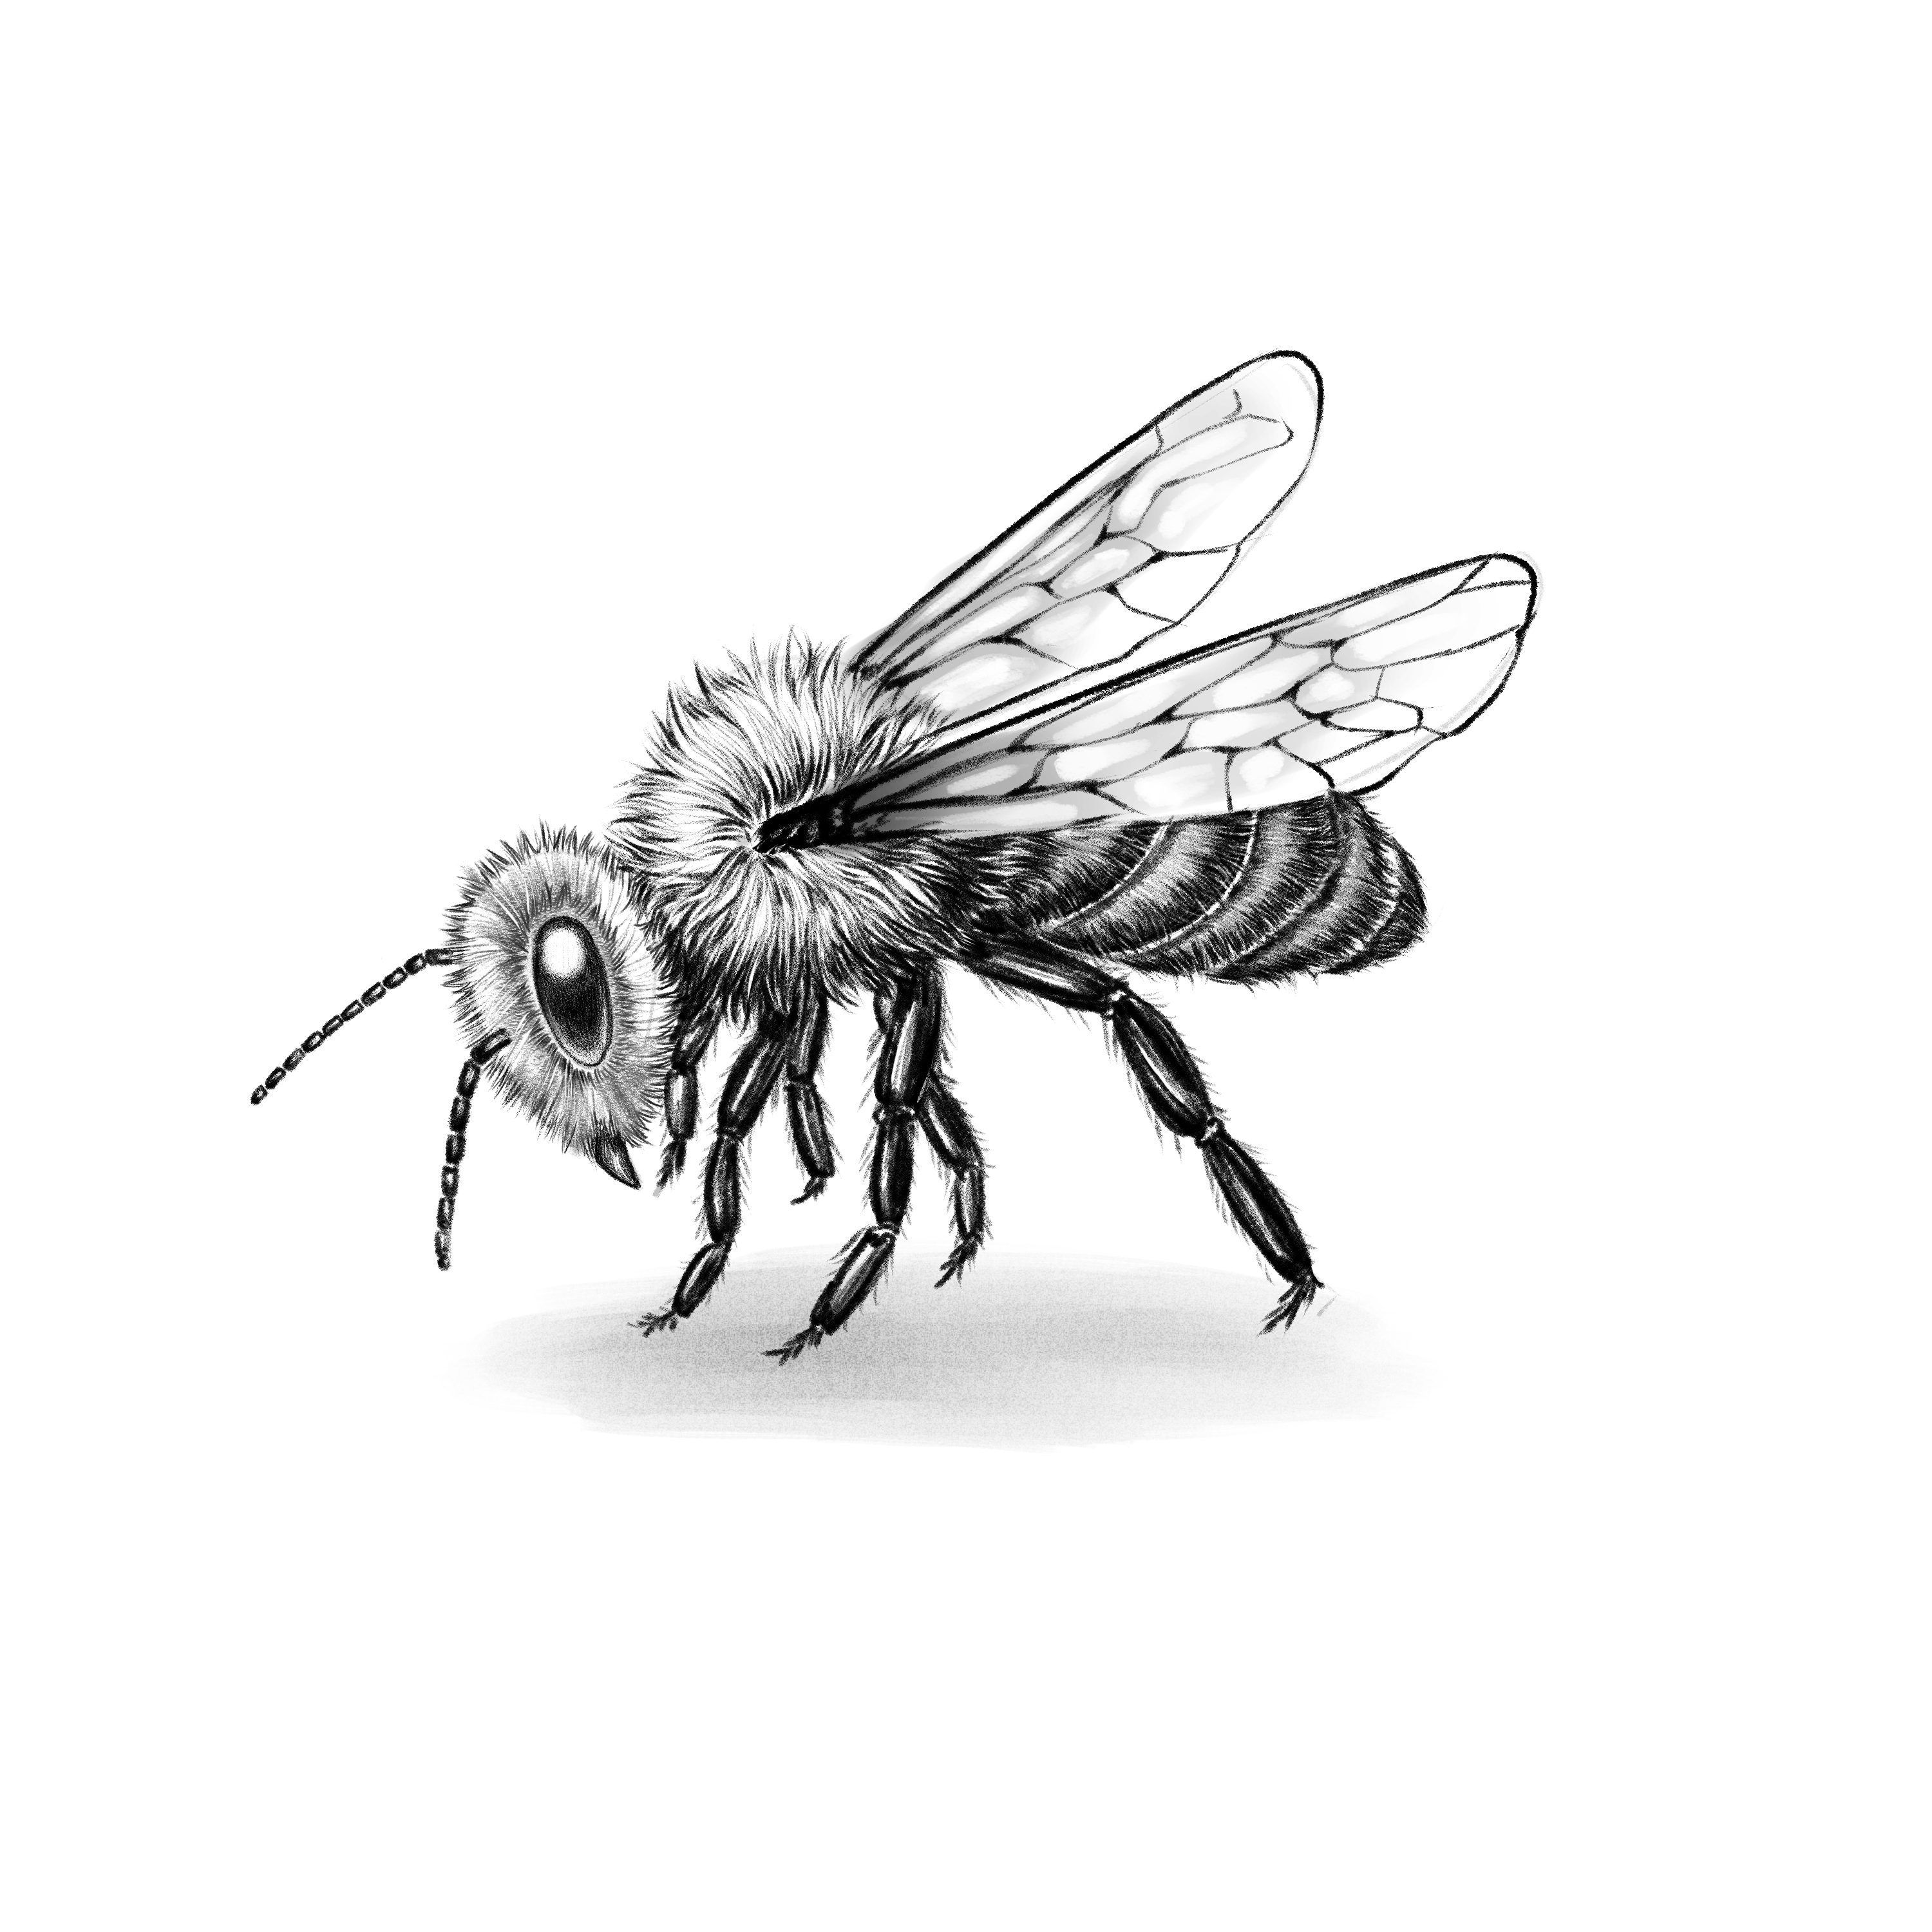
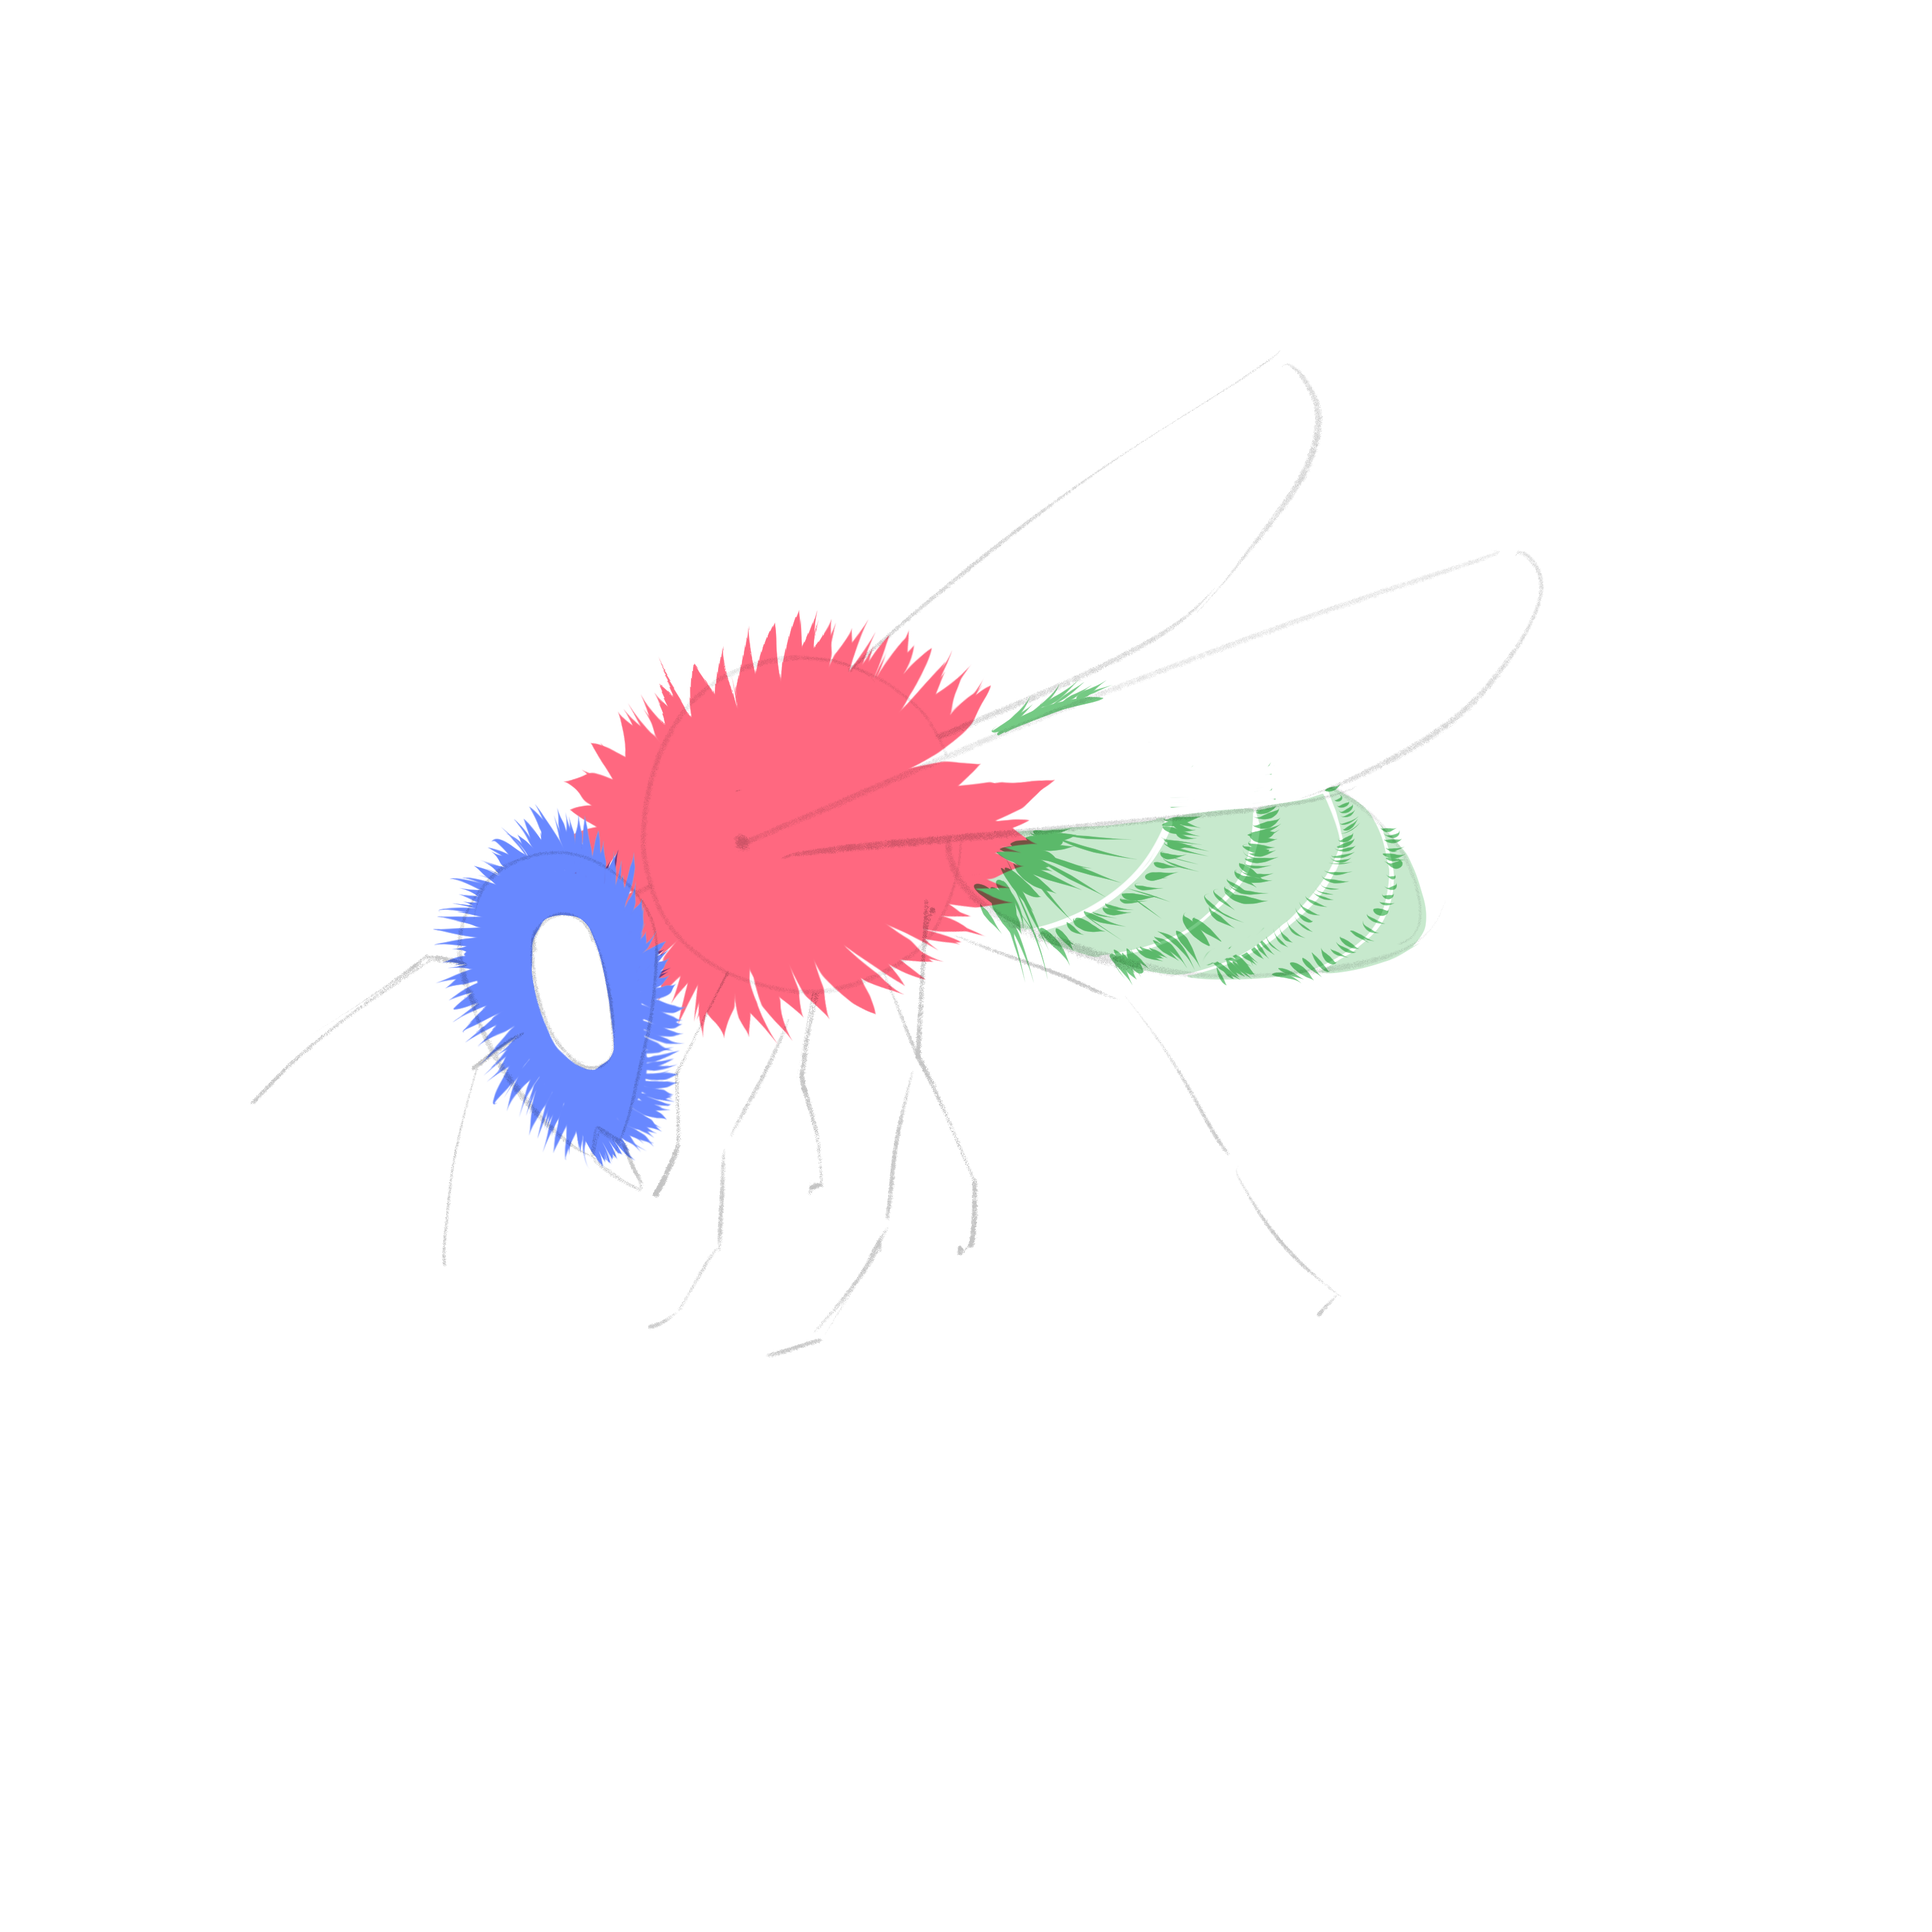
This is the bee you will be drawing:
And these are all the steps we’ll guide you through:
Section 1.- A Bee’s Body Structure
Step 1: Starting Off
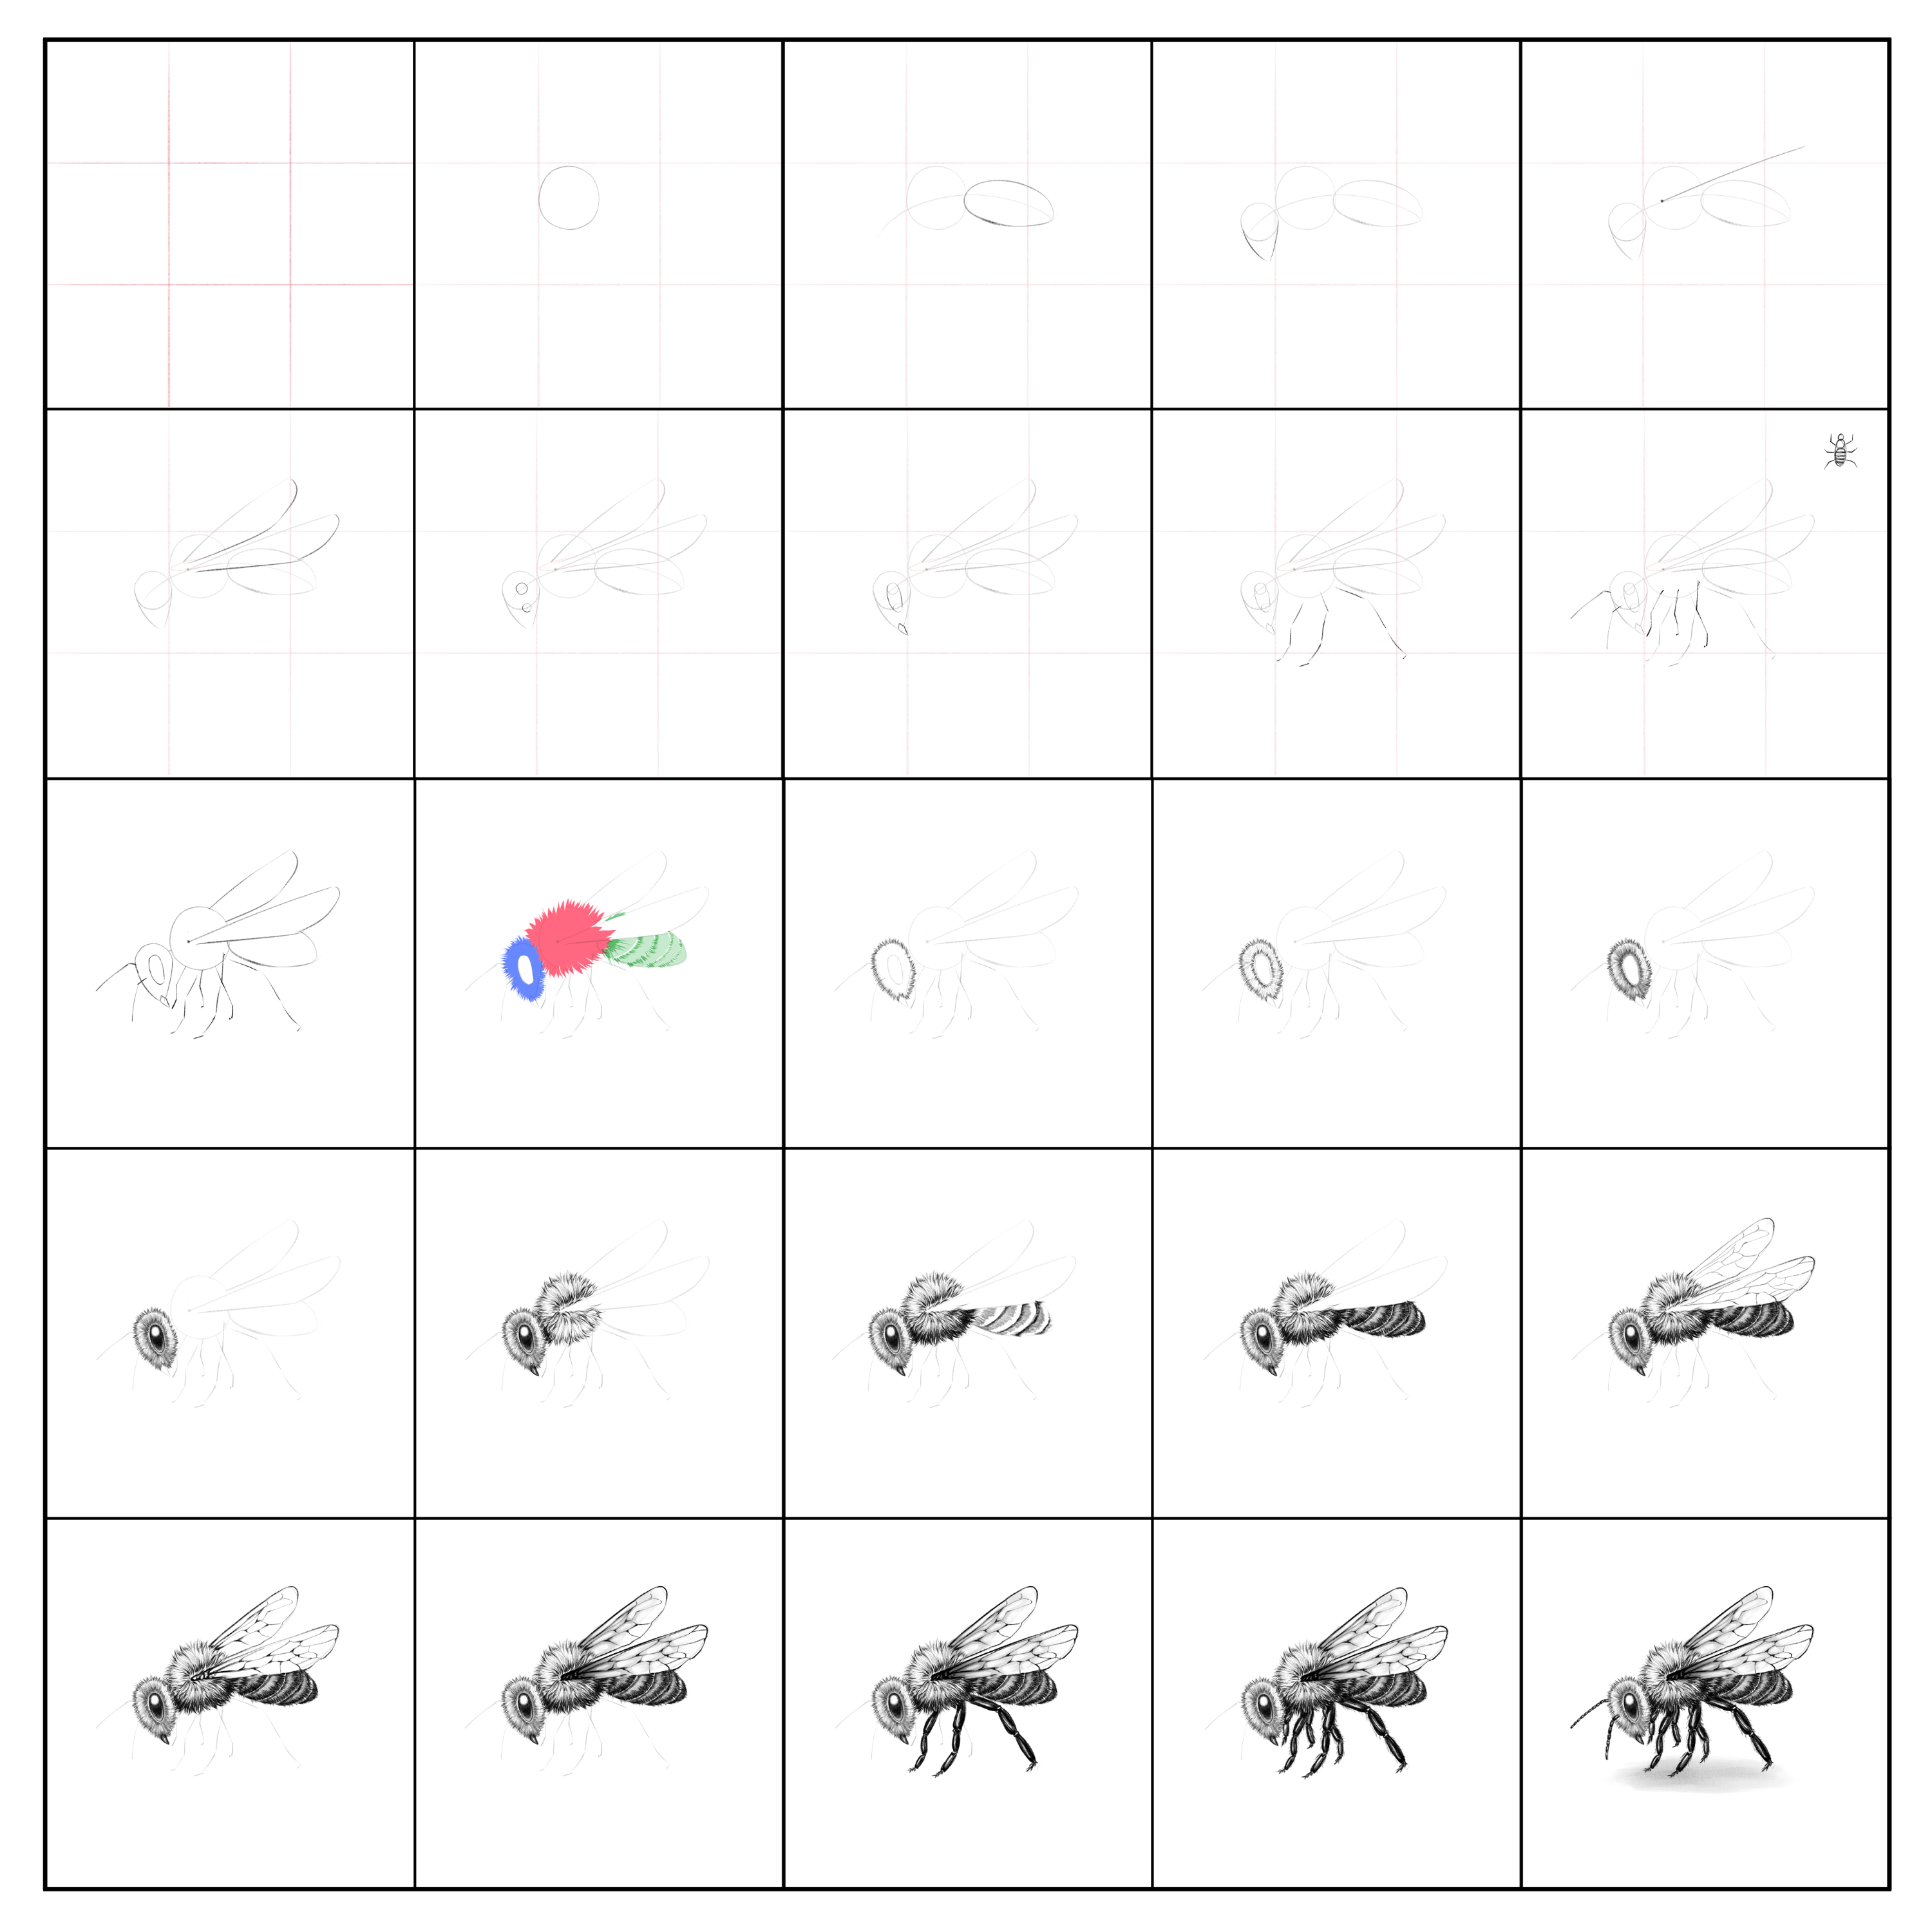
Begin by drawing two vertical lines to split your canvas into three equal parts.
Step 2: Creating the Grid
Add two horizontal lines that have the same distance as the vertical ones to create a grid. Now, your canvas is divided into nine equal sections.
Step 3: Torso Drawing
Look at the upper-left section of the central grid and draw a medium-sized circle. This will be the torso of the bee.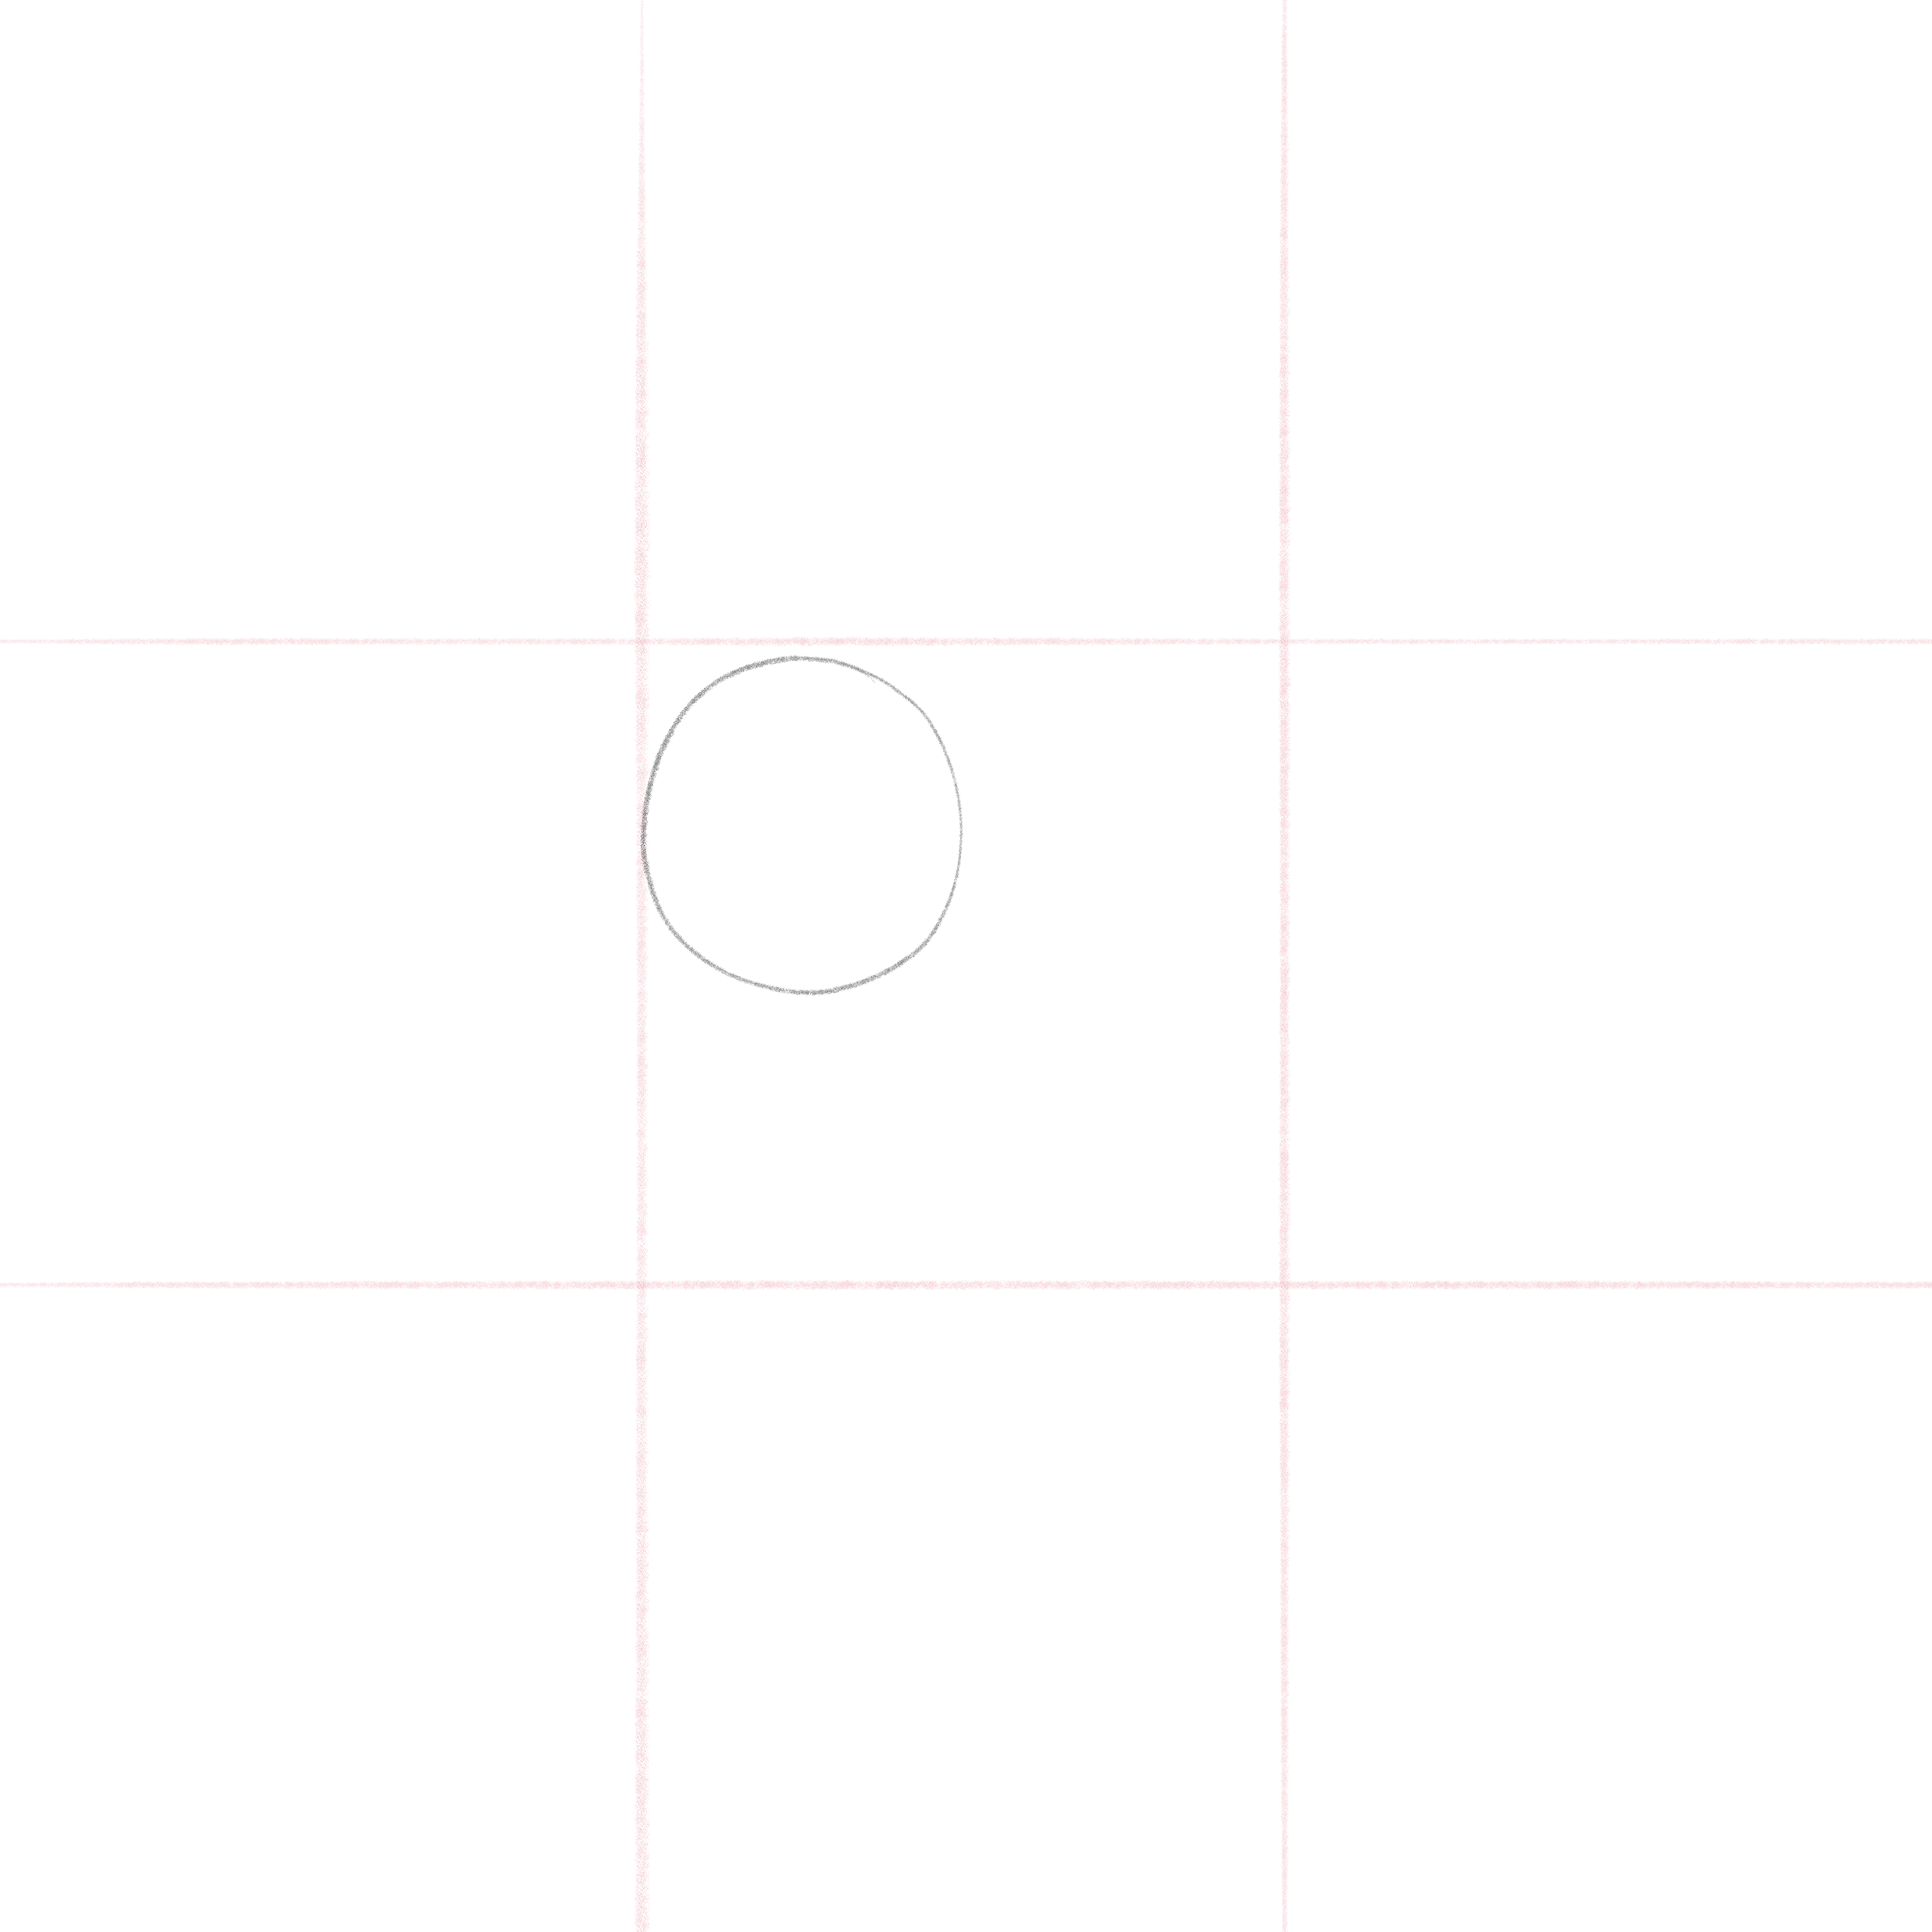
Step 4: Positioning the Body
Draw a curved line that cuts across the torso. This line will help us shape the body of the bee.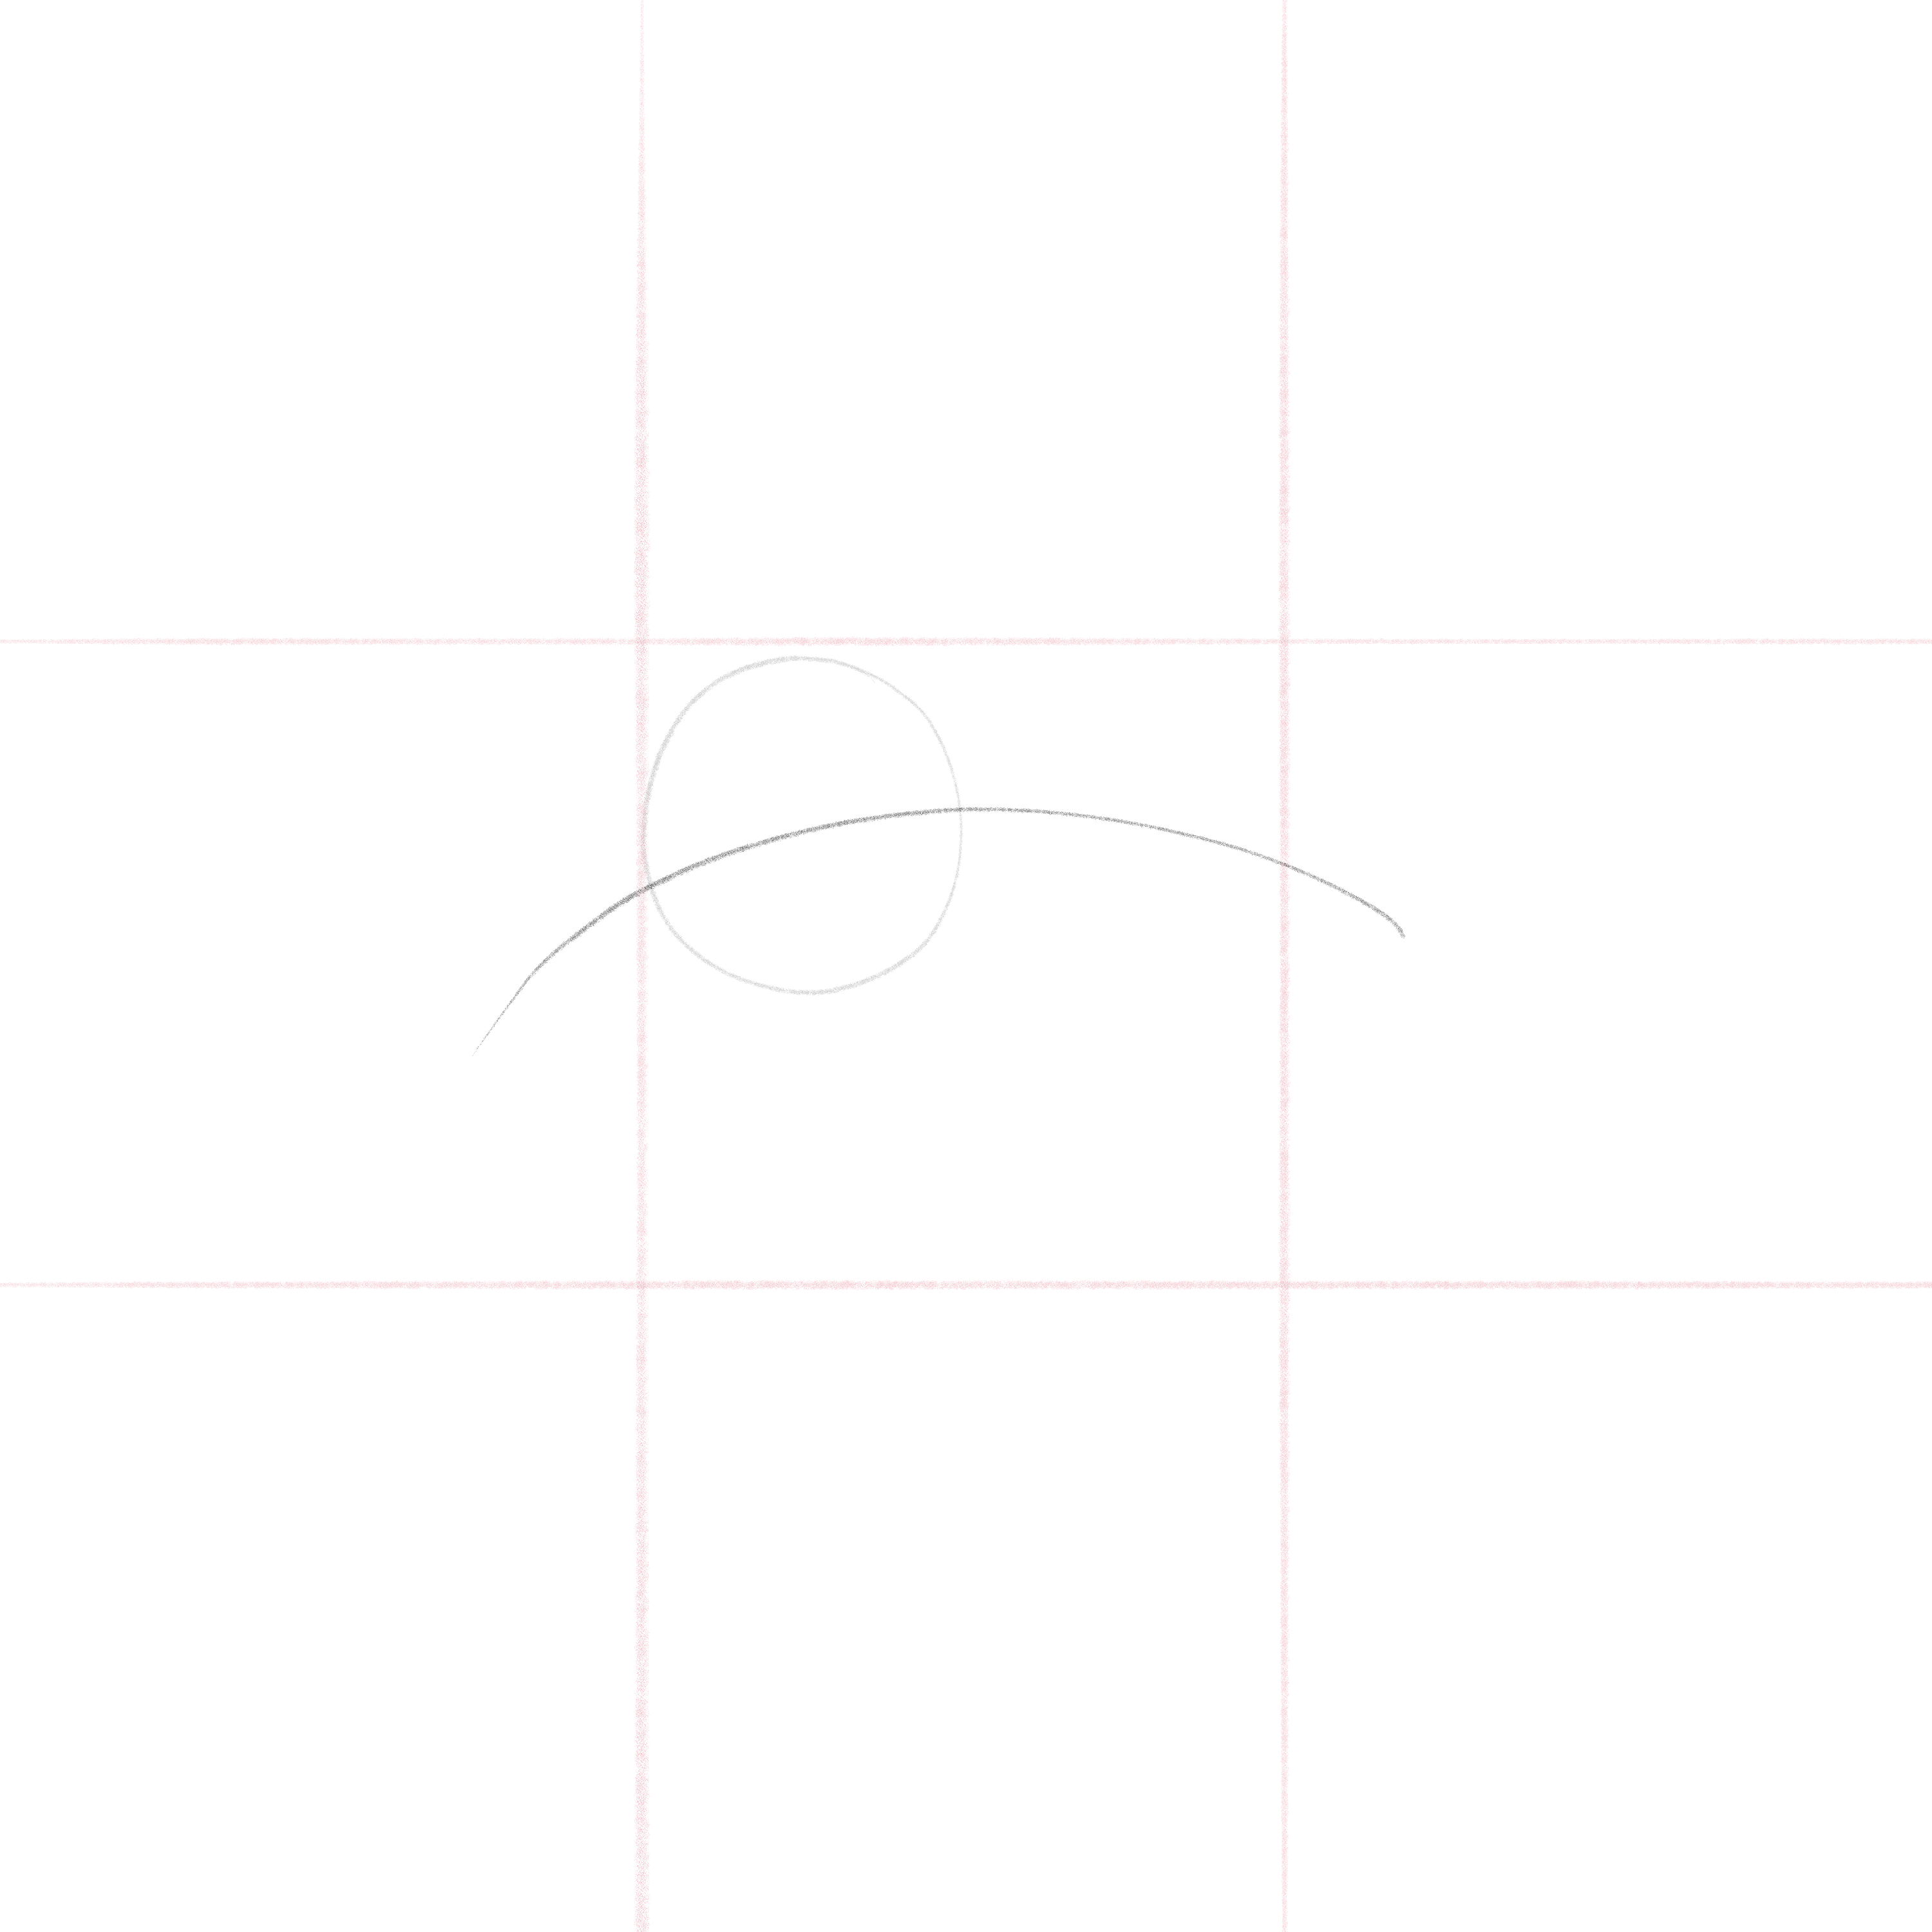
Step 5: The Abdomen
Draw a tilted ellipse next to the torso, which will represent the abdomen of our bee.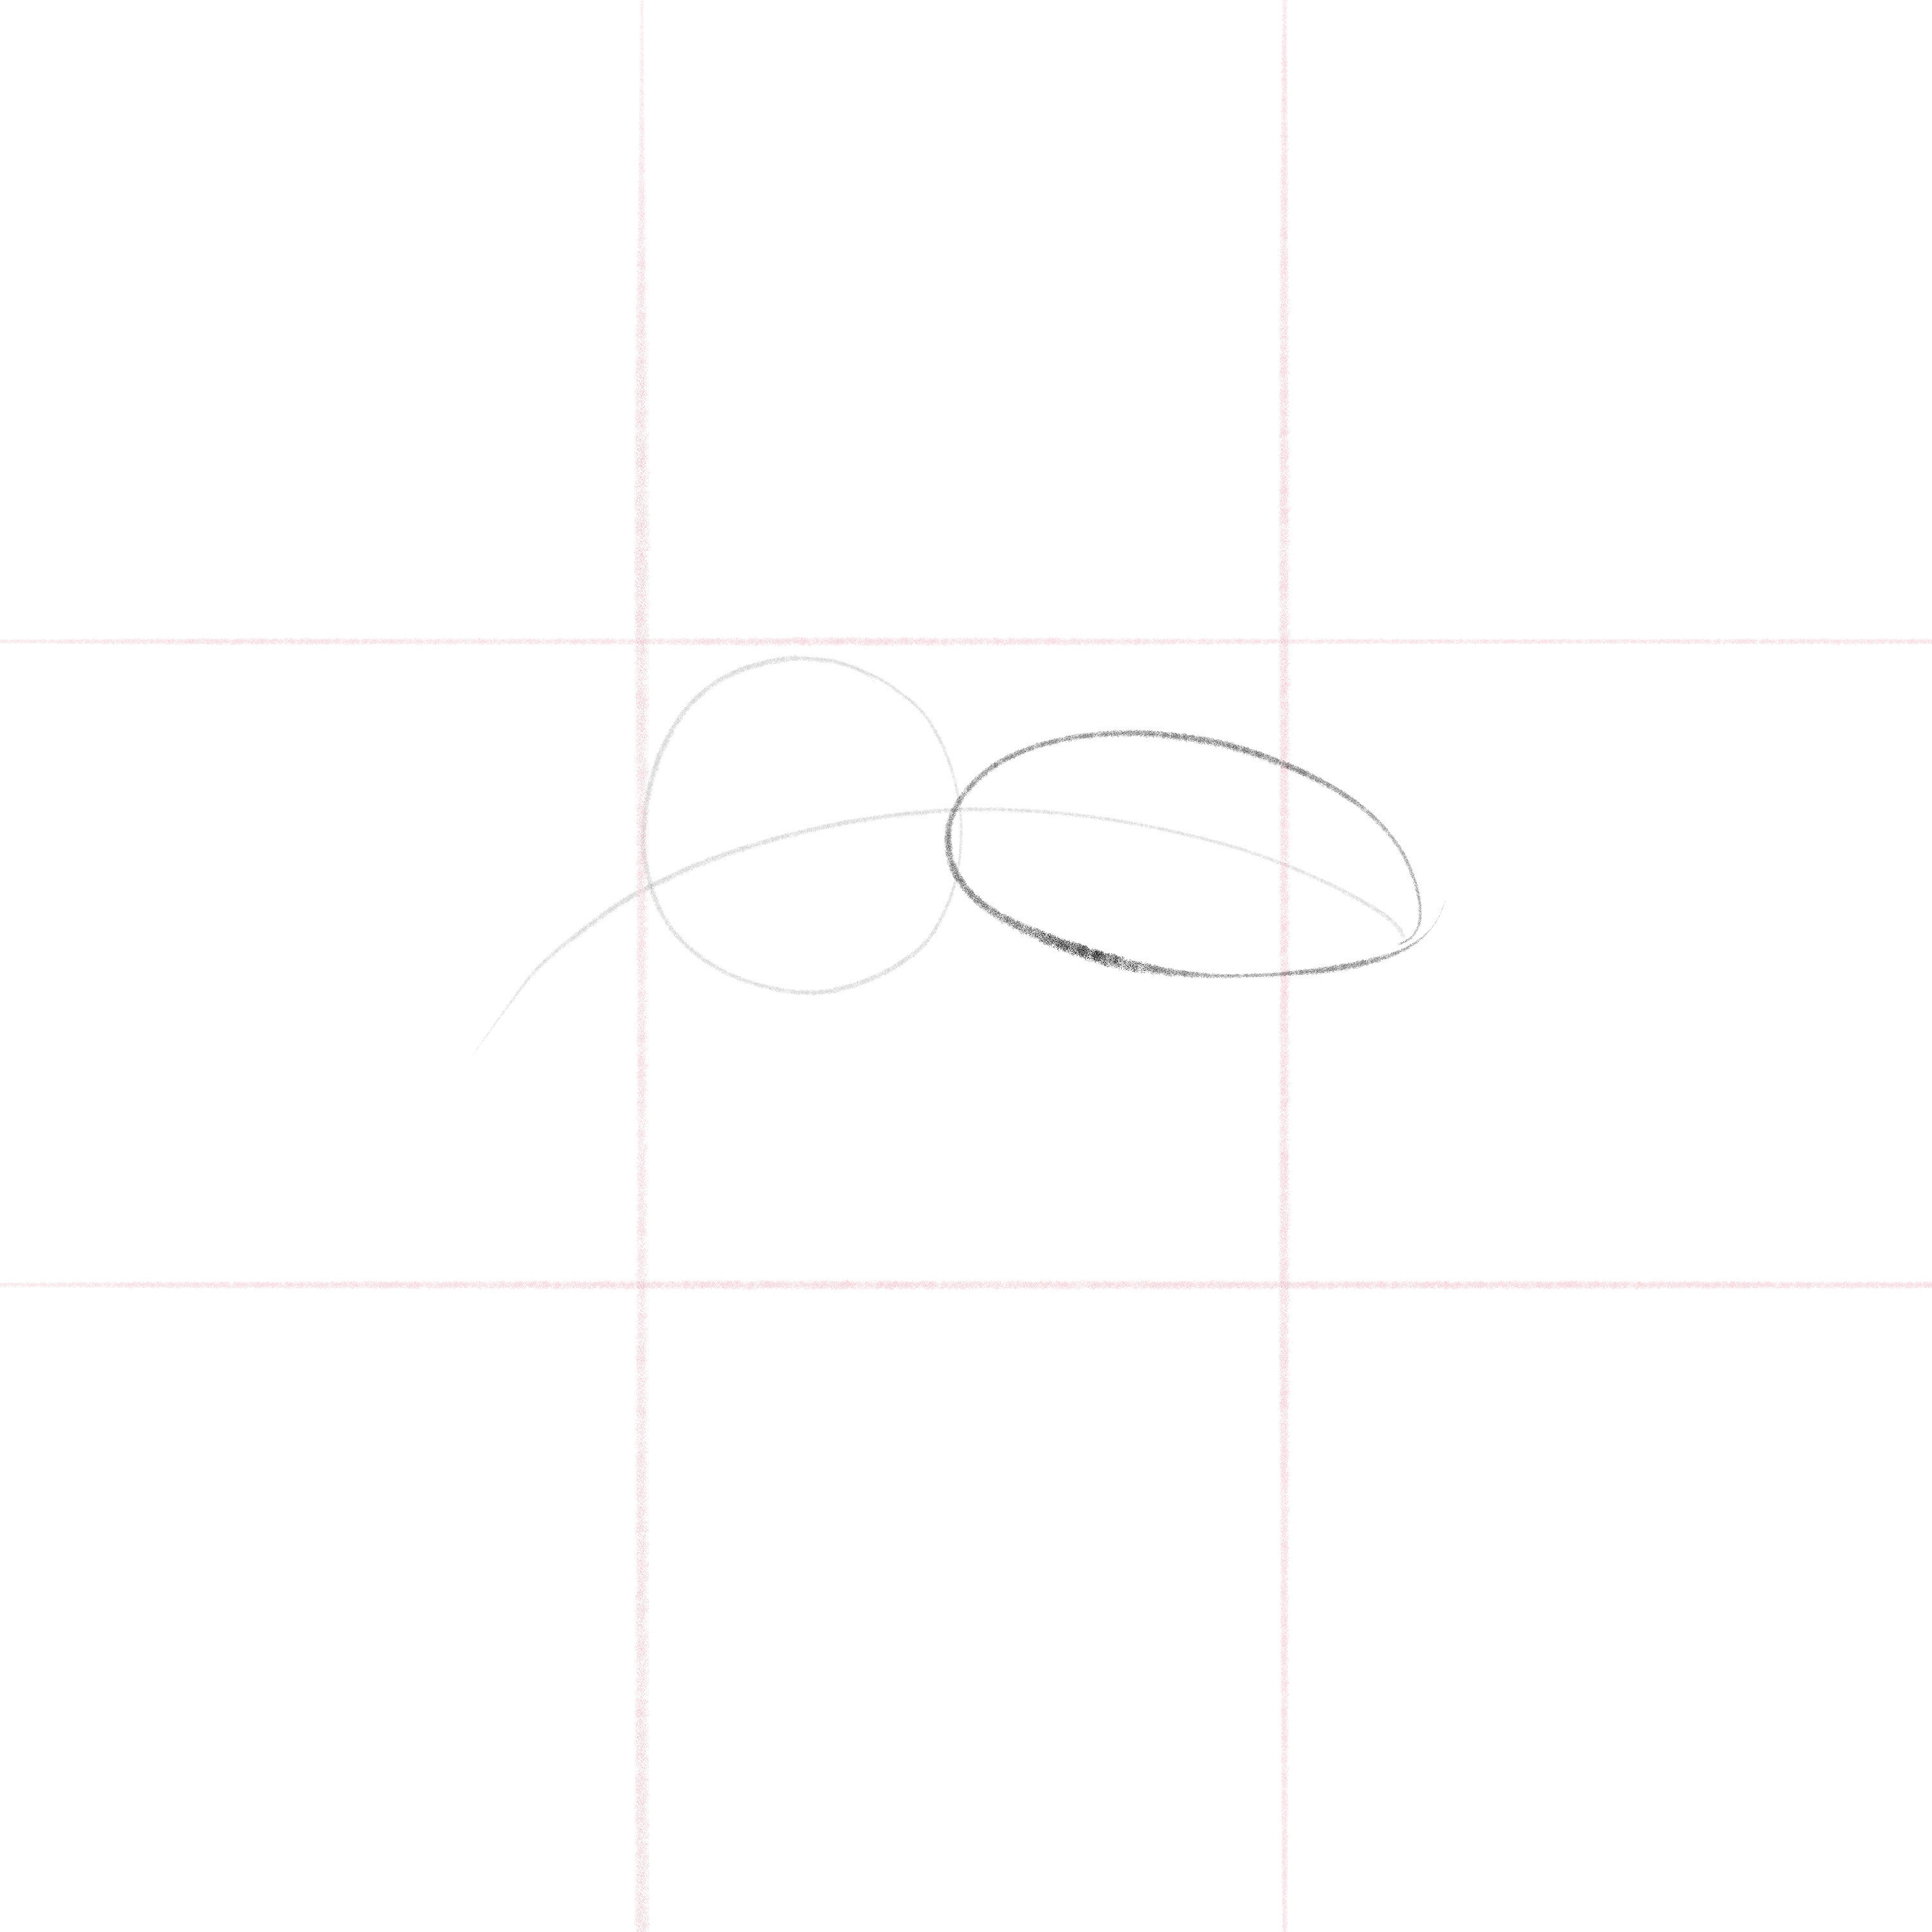
Step 6: Head Sketching
On the left side of the torso, sketch a smaller circle along the curved line. This will be the bee’s head.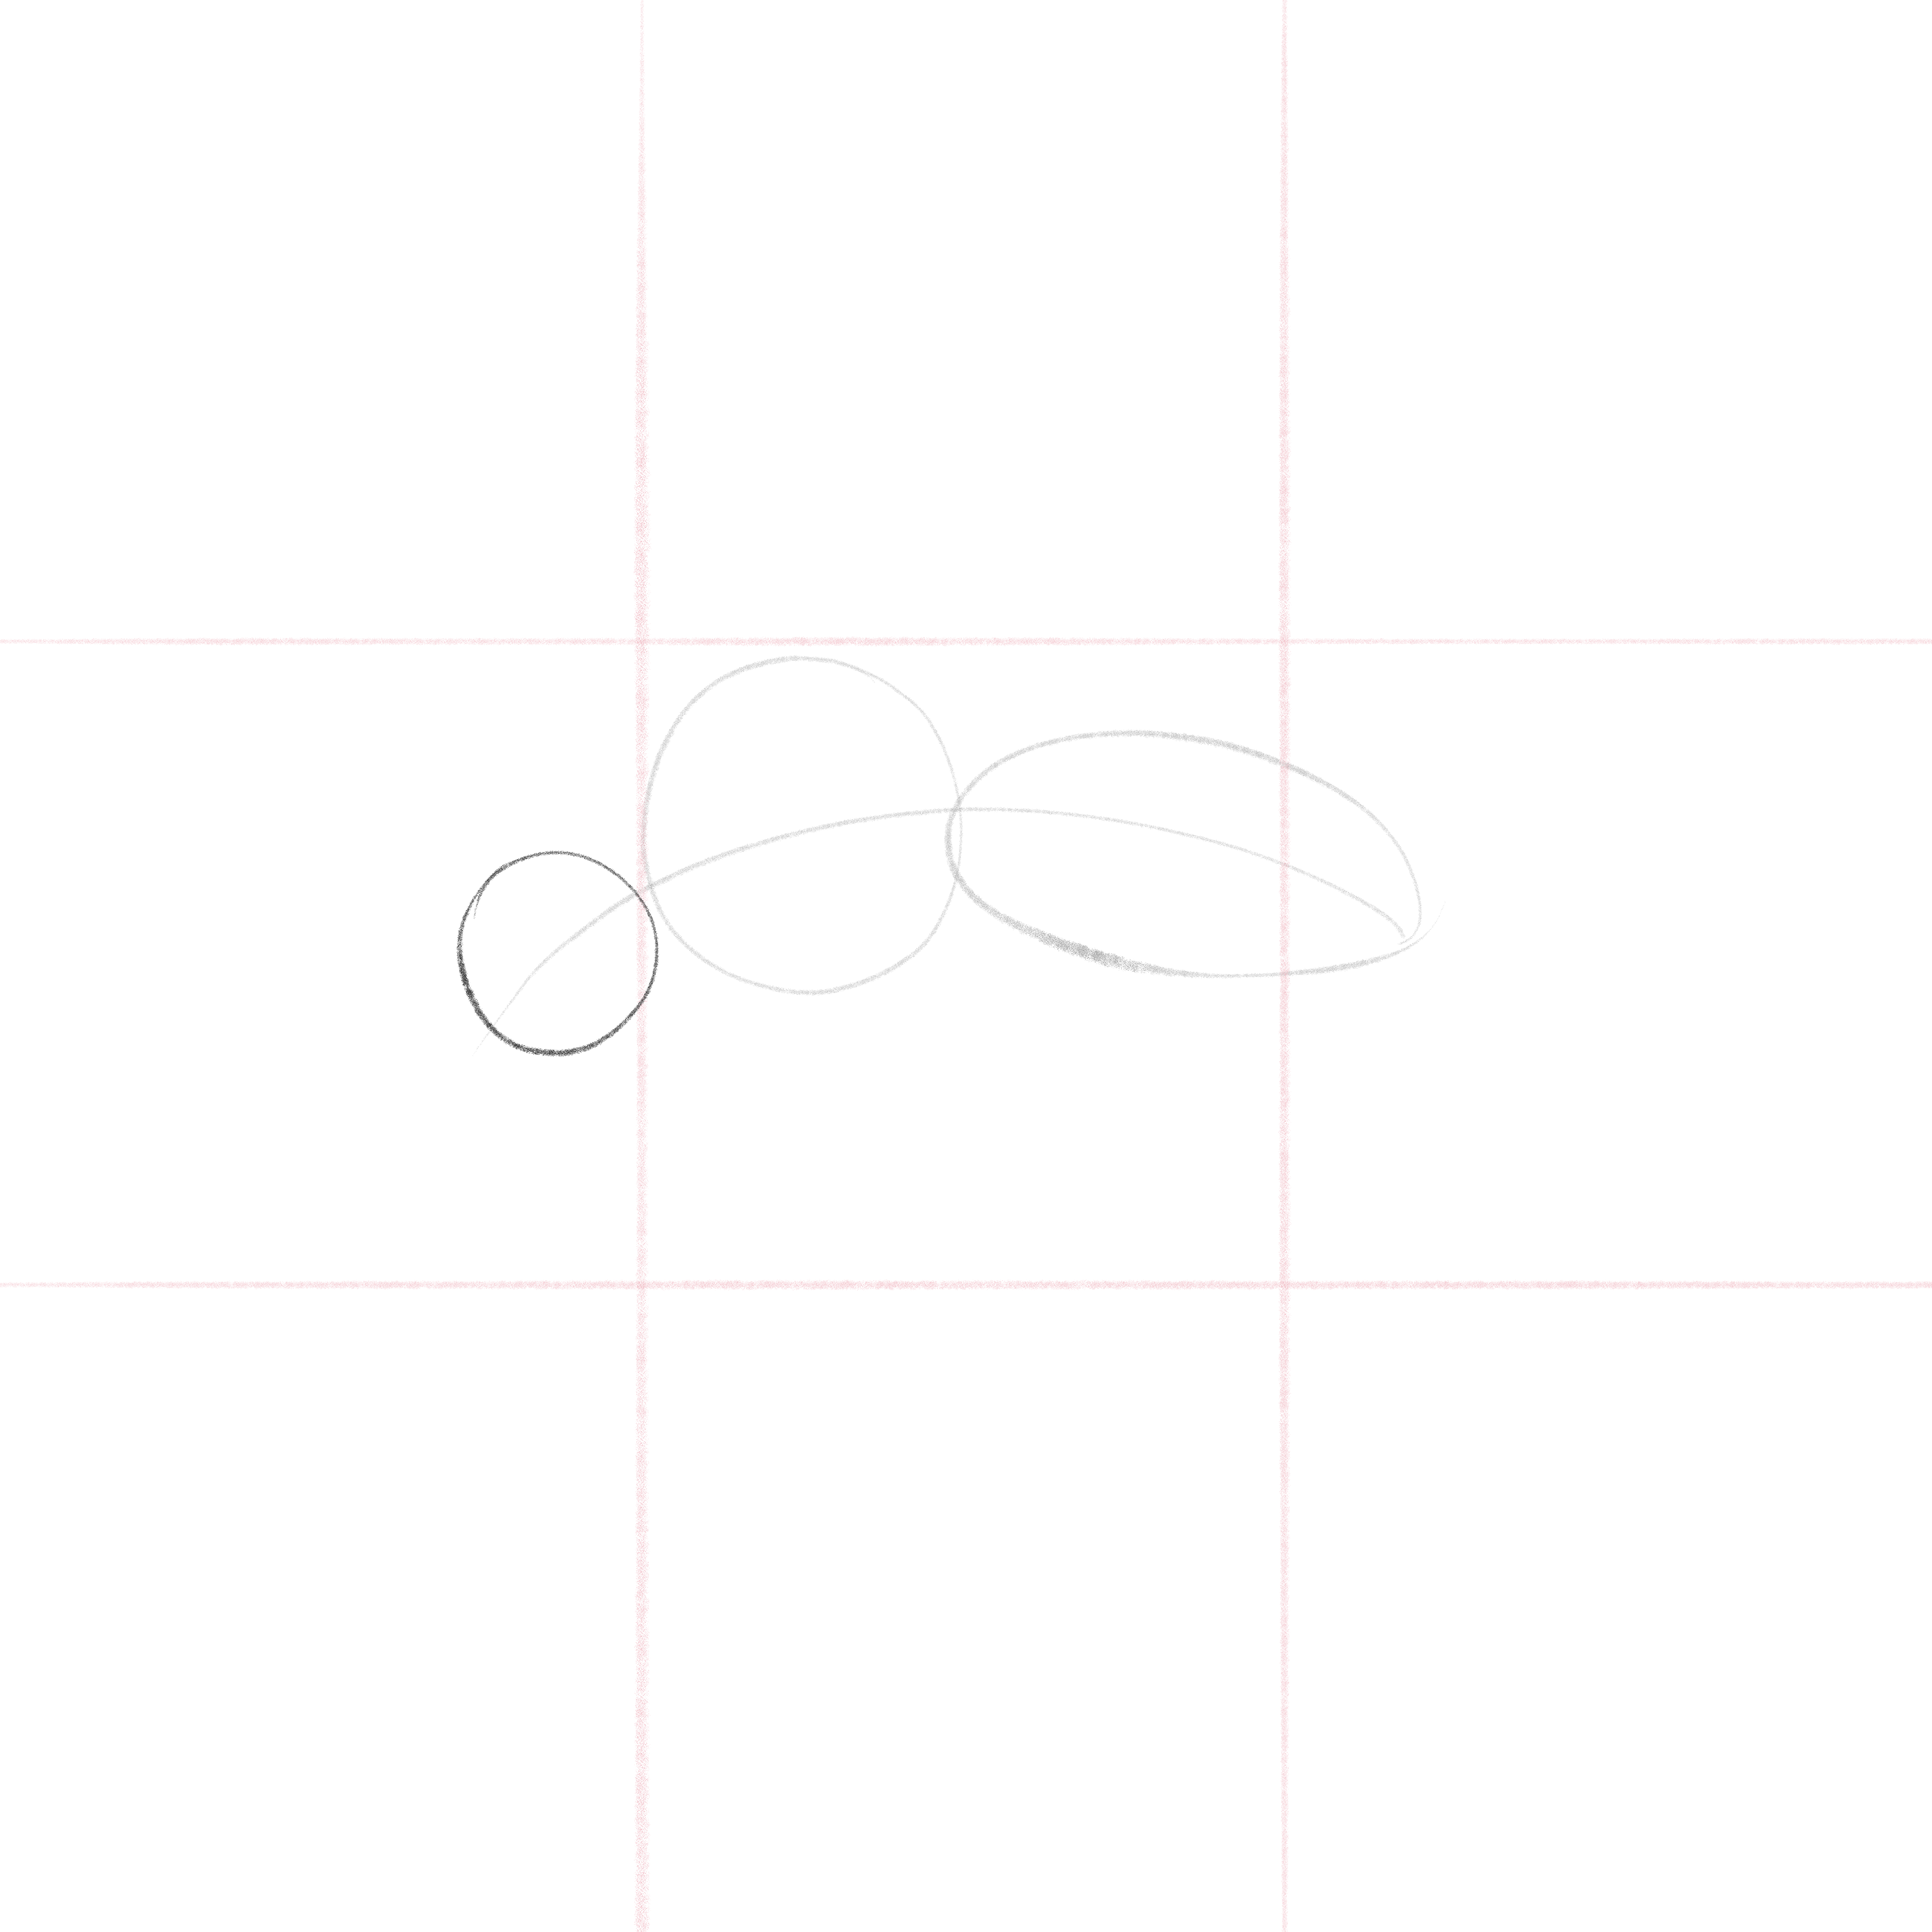
Add two lines from the sides of this circle, not meeting at the bottom, to outline the head’s structure.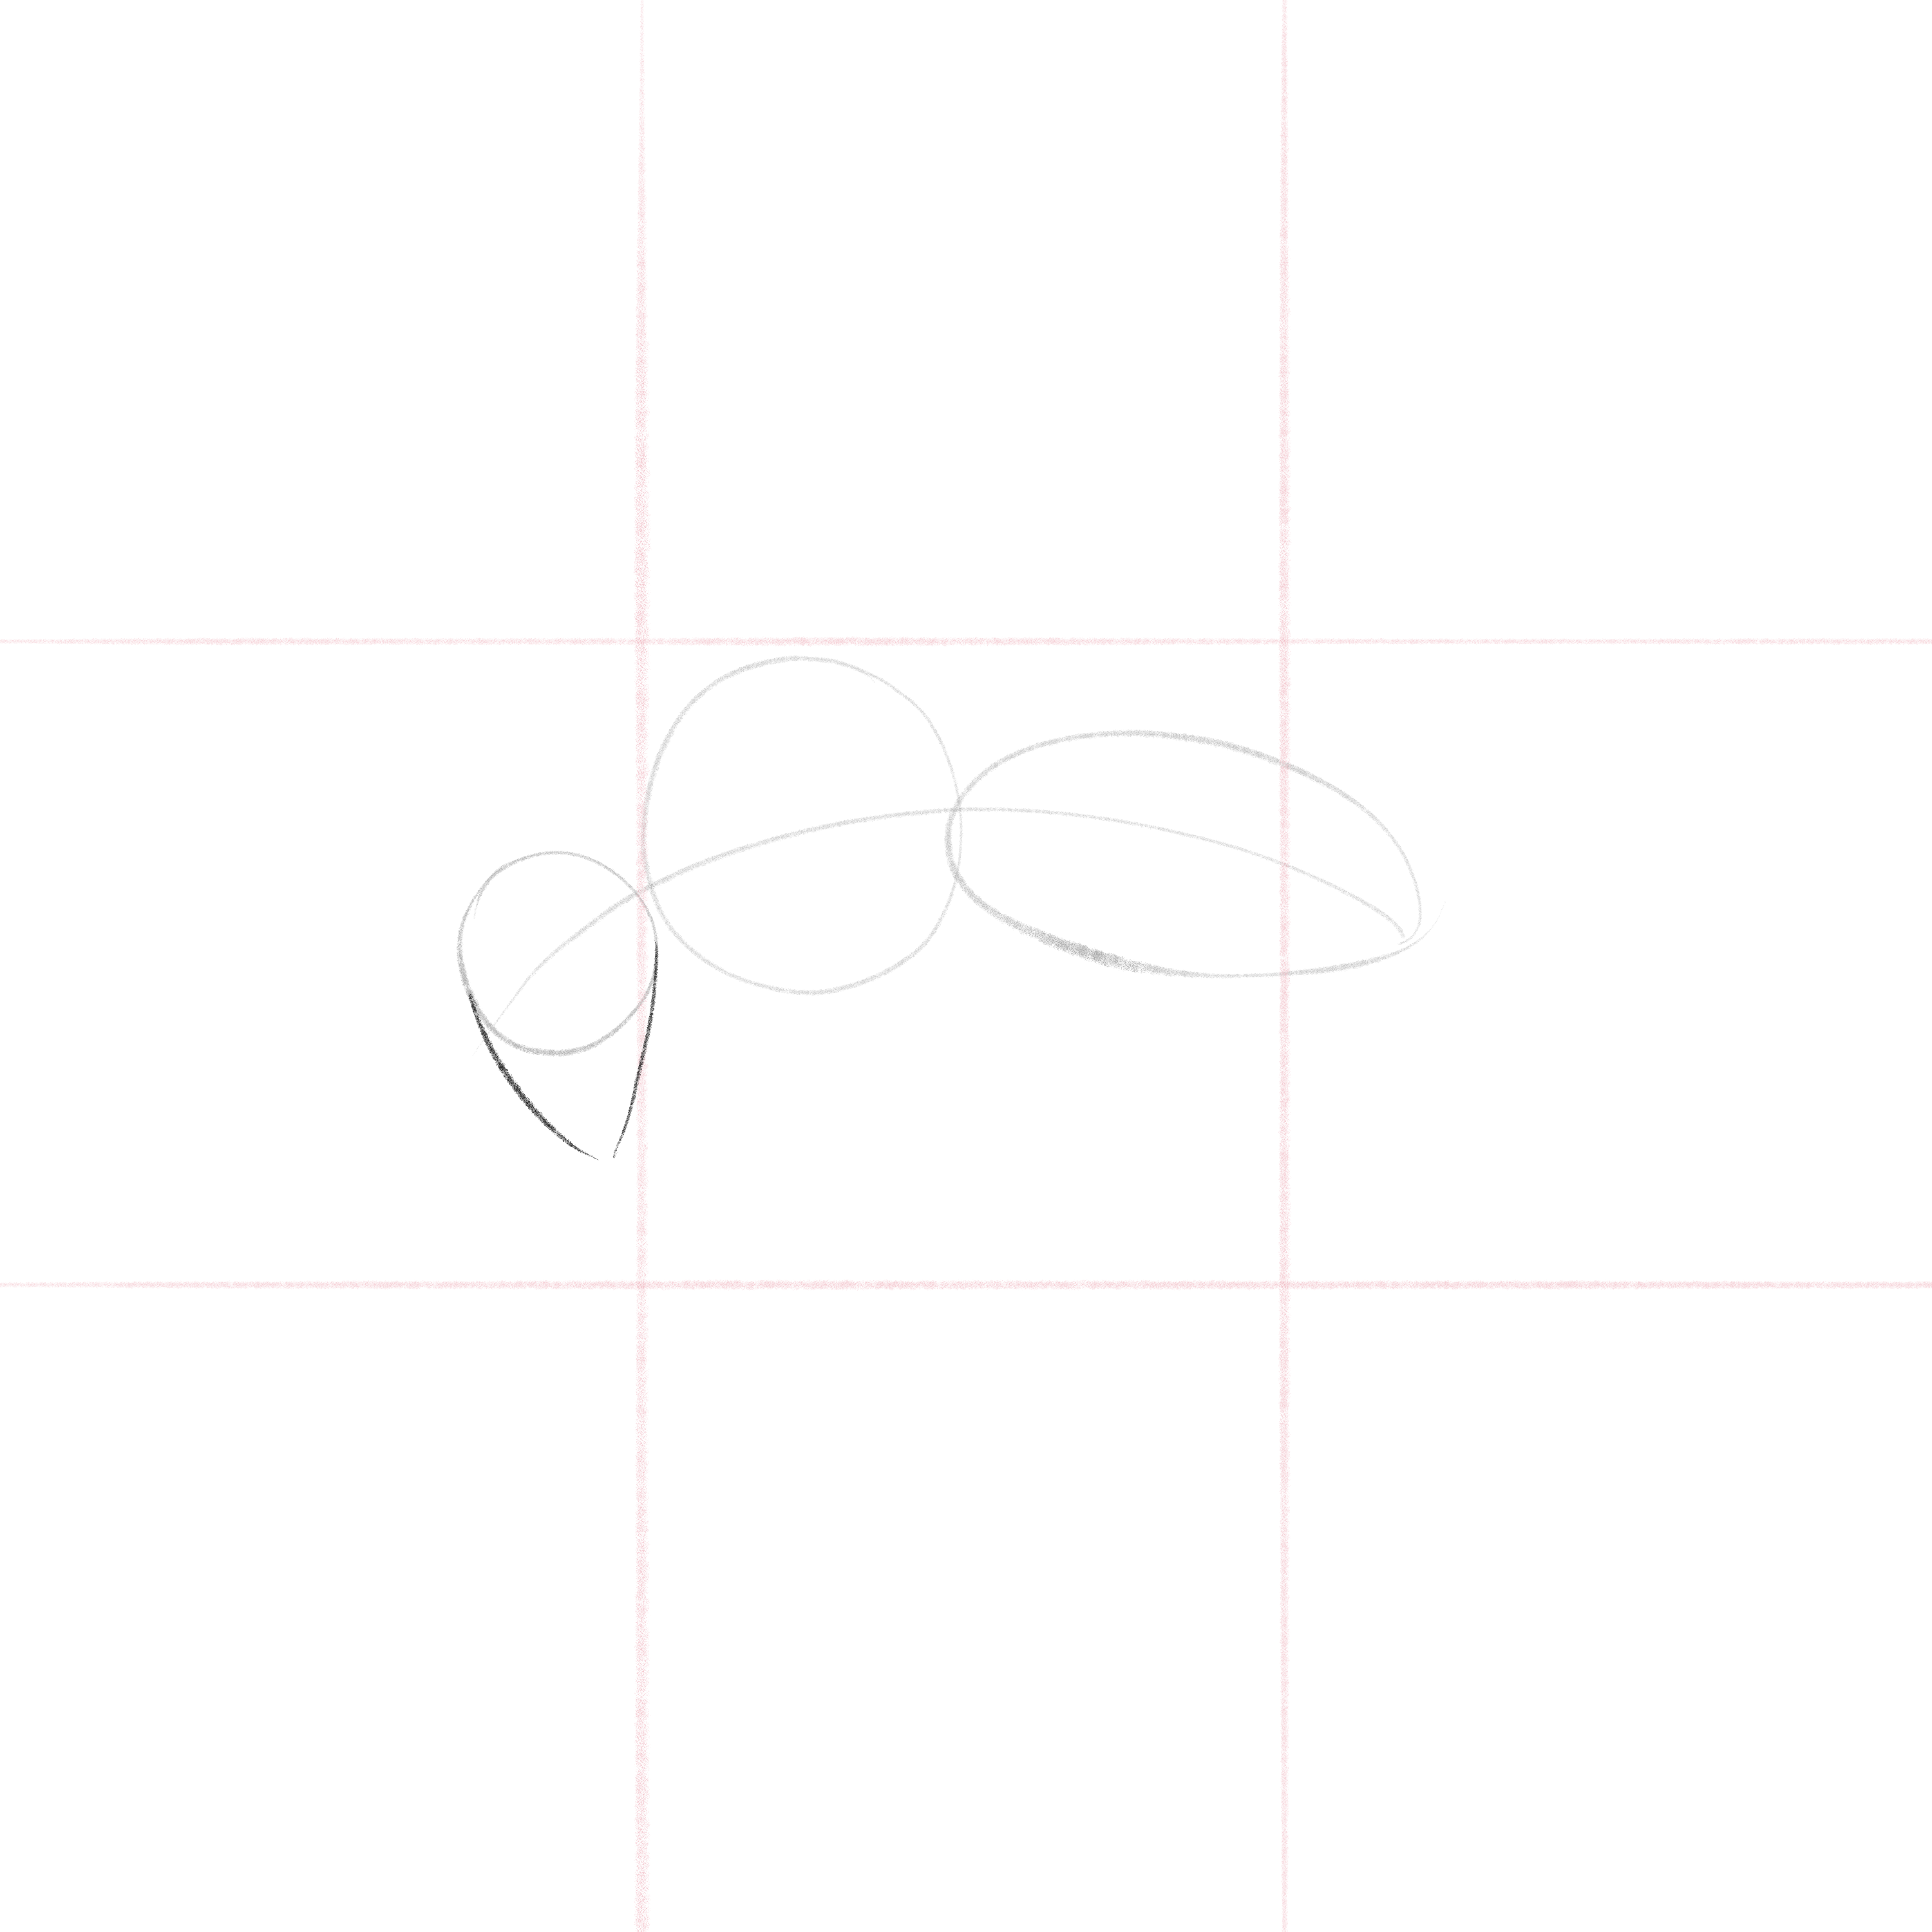
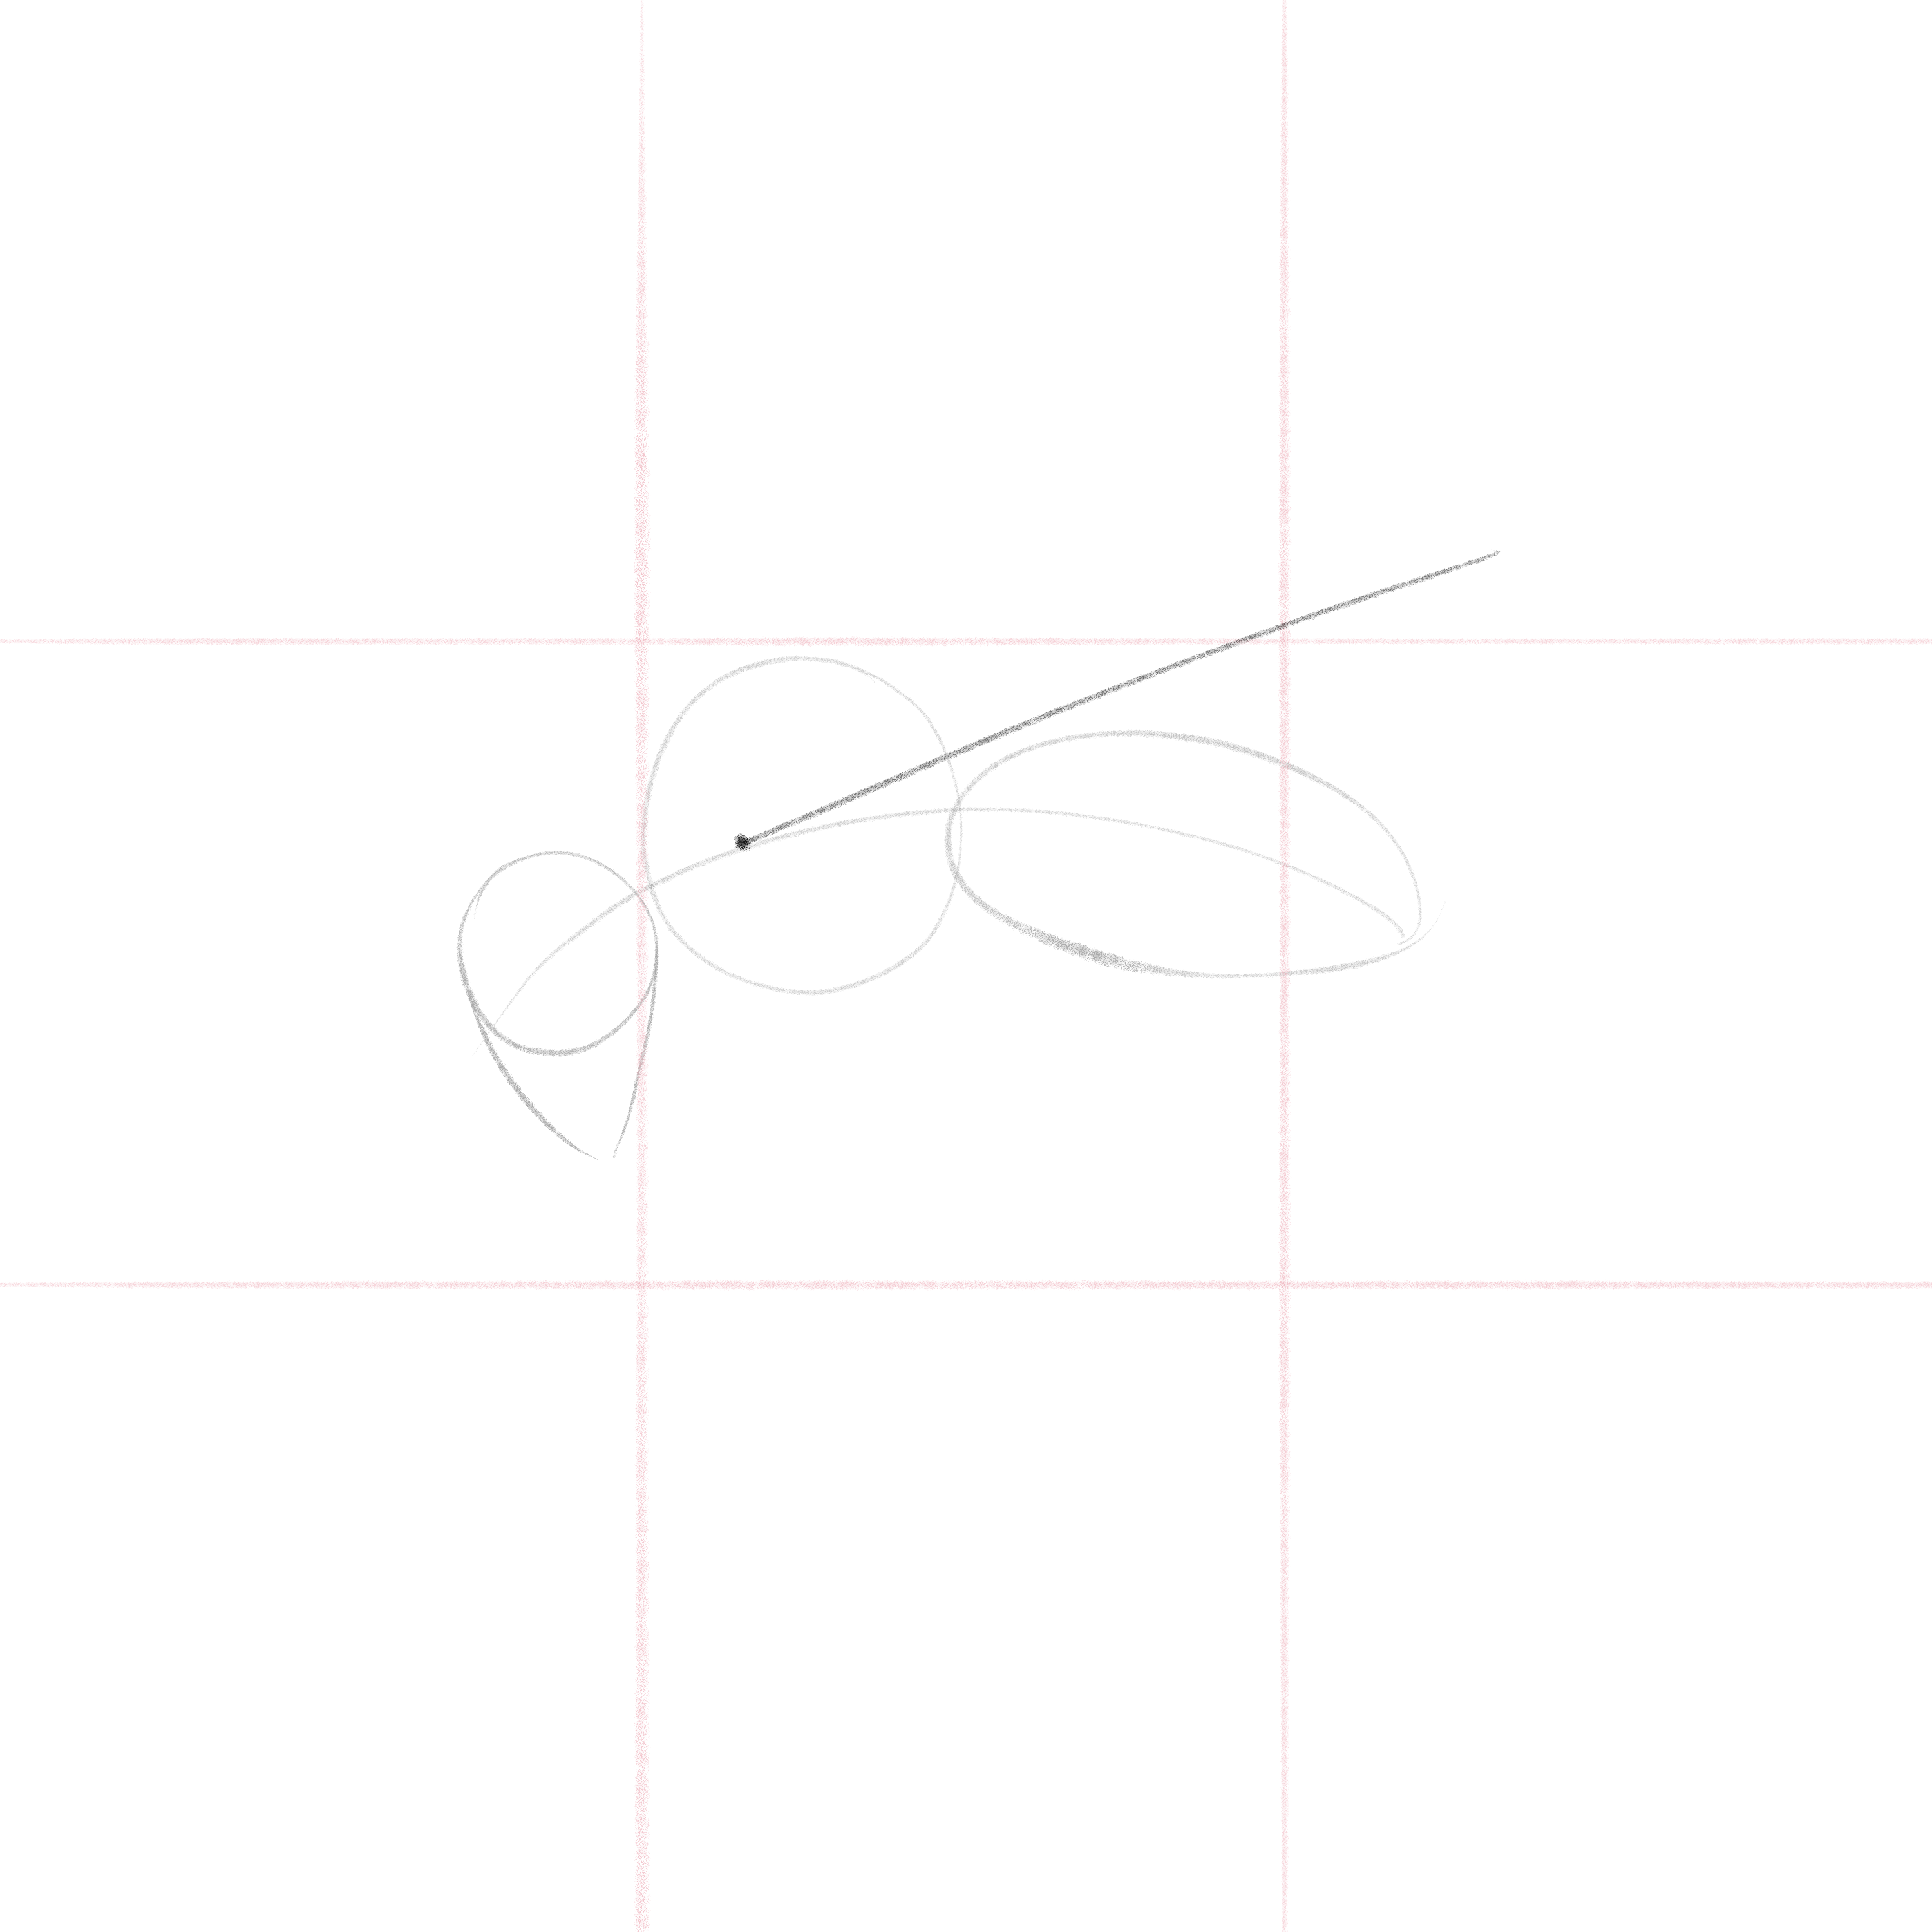
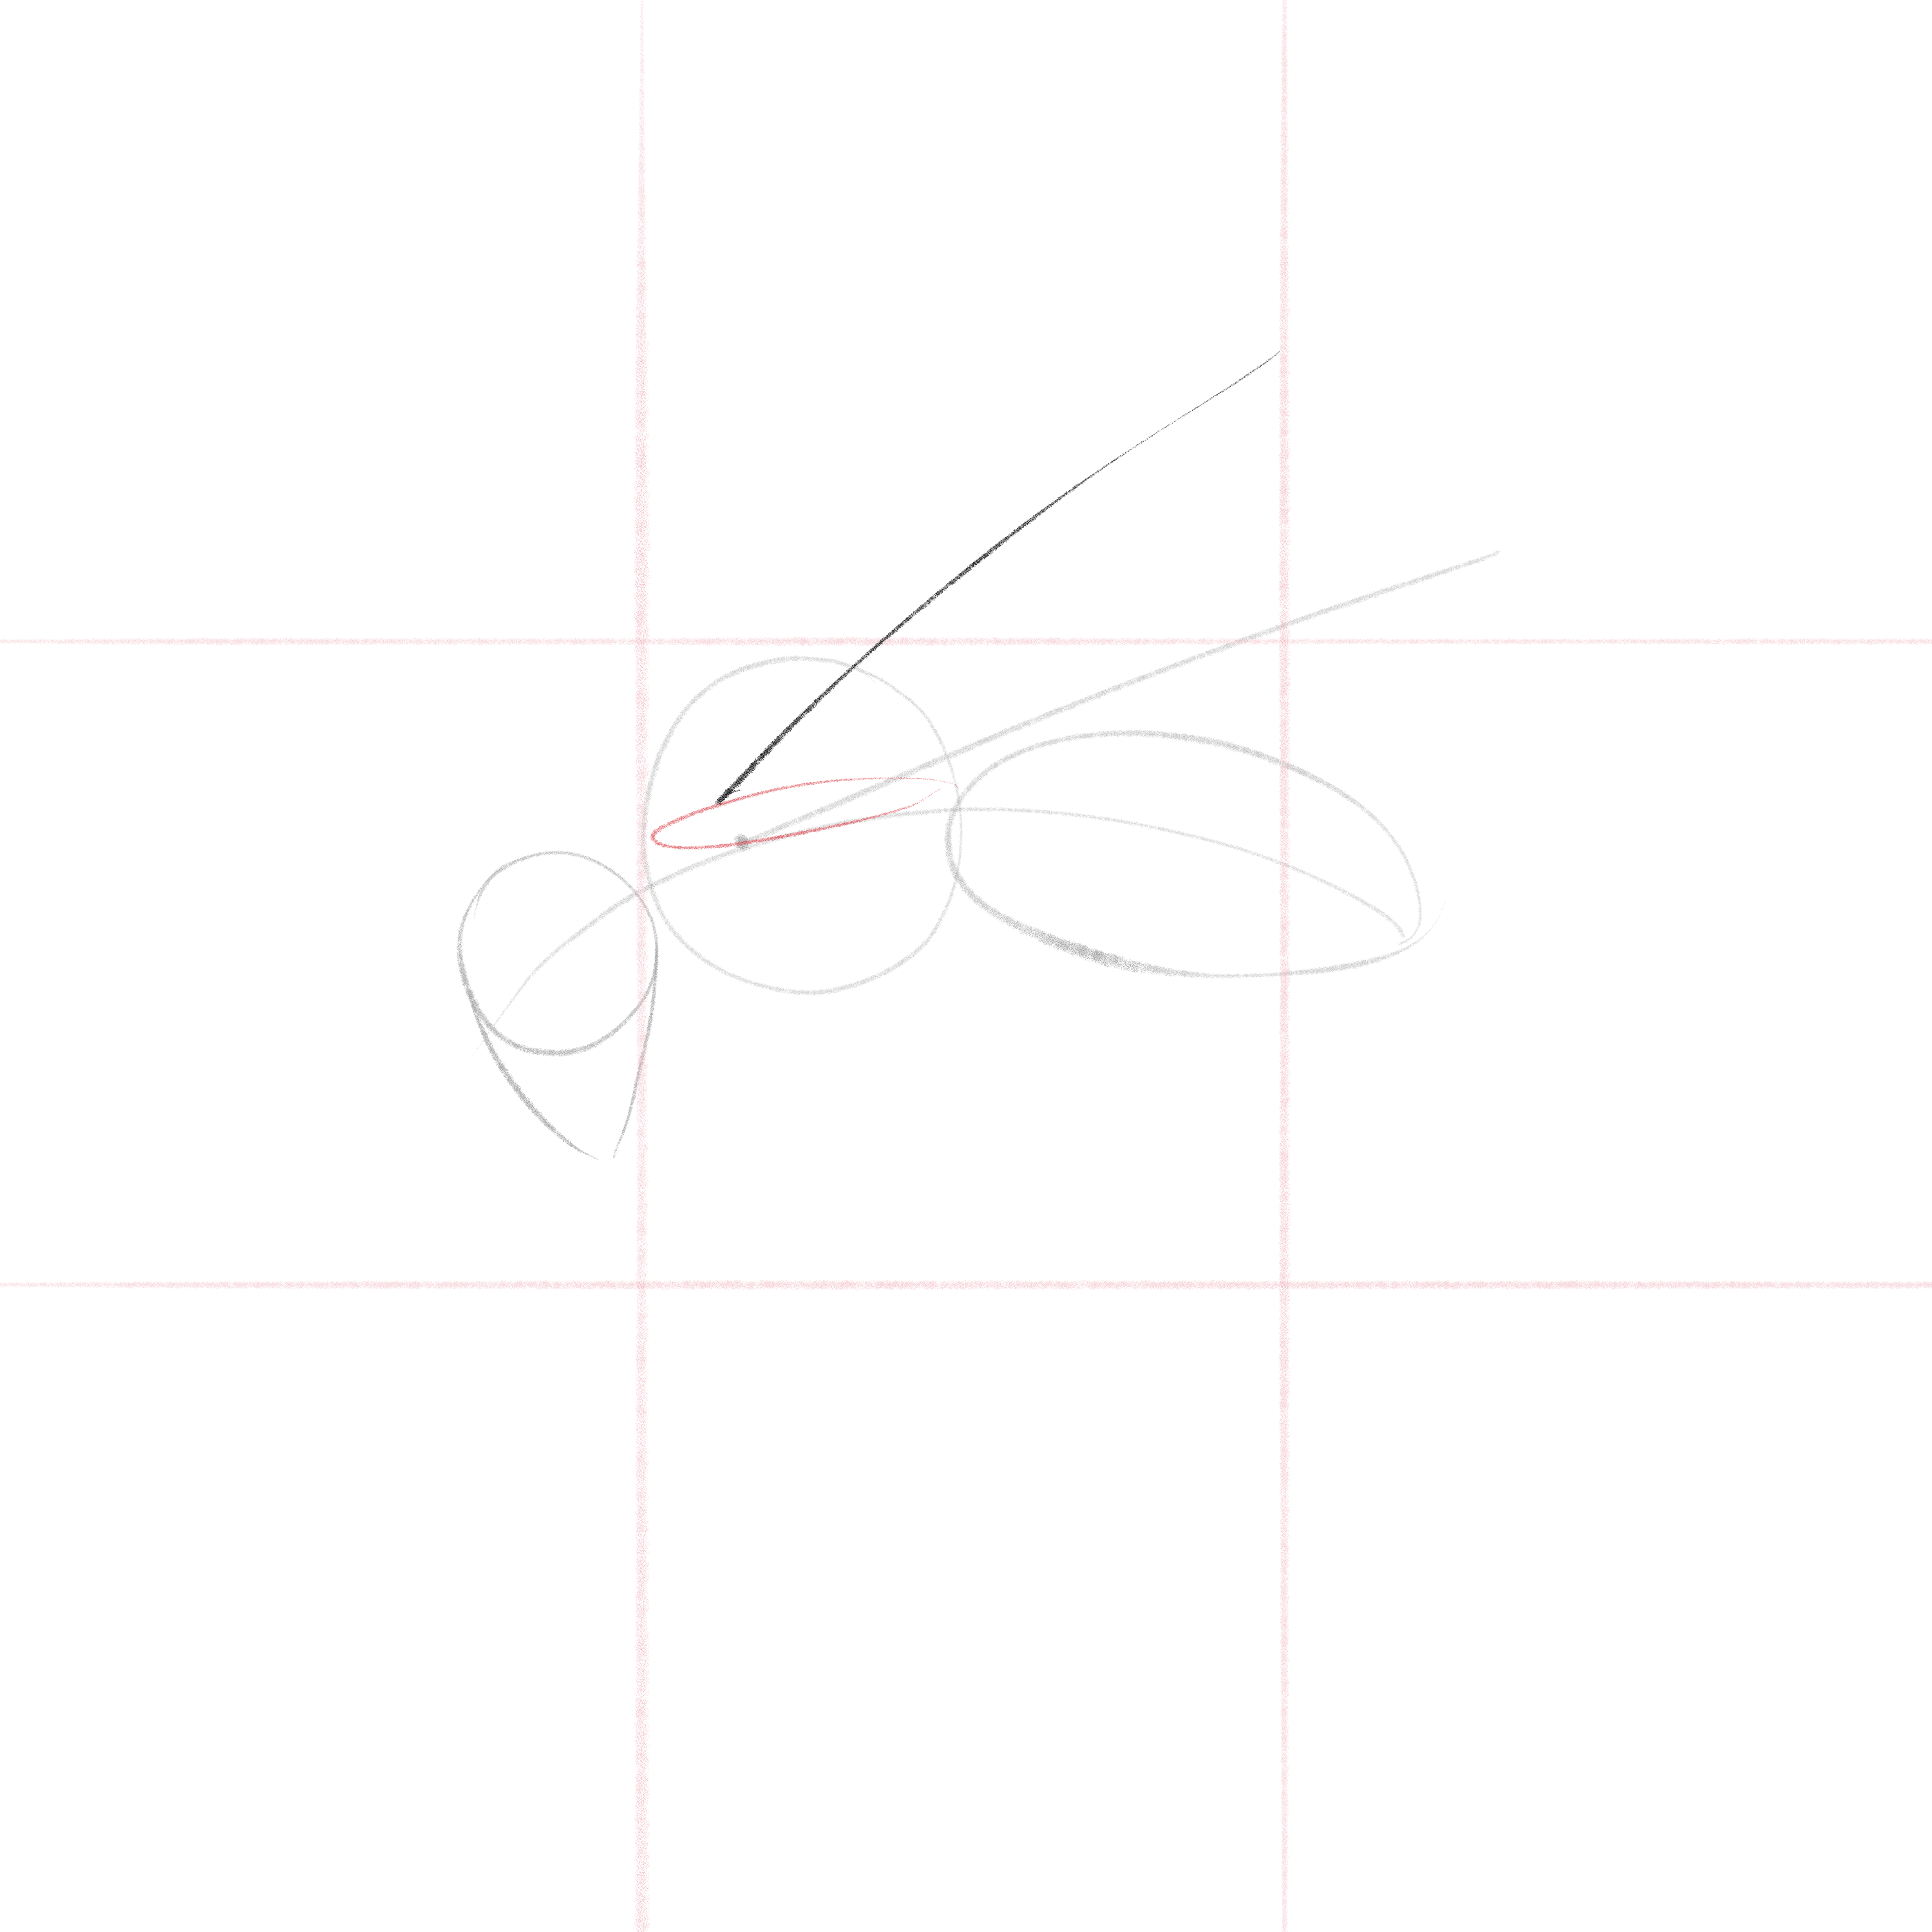
Step 7: Wings Drawing
Identify a point on the guide line we drew and sketch a slanted line, which represents the closest wing.
 Use a perspective technique: draw a small, soft ellipse to find the origin of the second wing, and then draw another line of similar length but at a different angle.
Draw two curved lines from the ends of these lines back to the origin to complete the wings.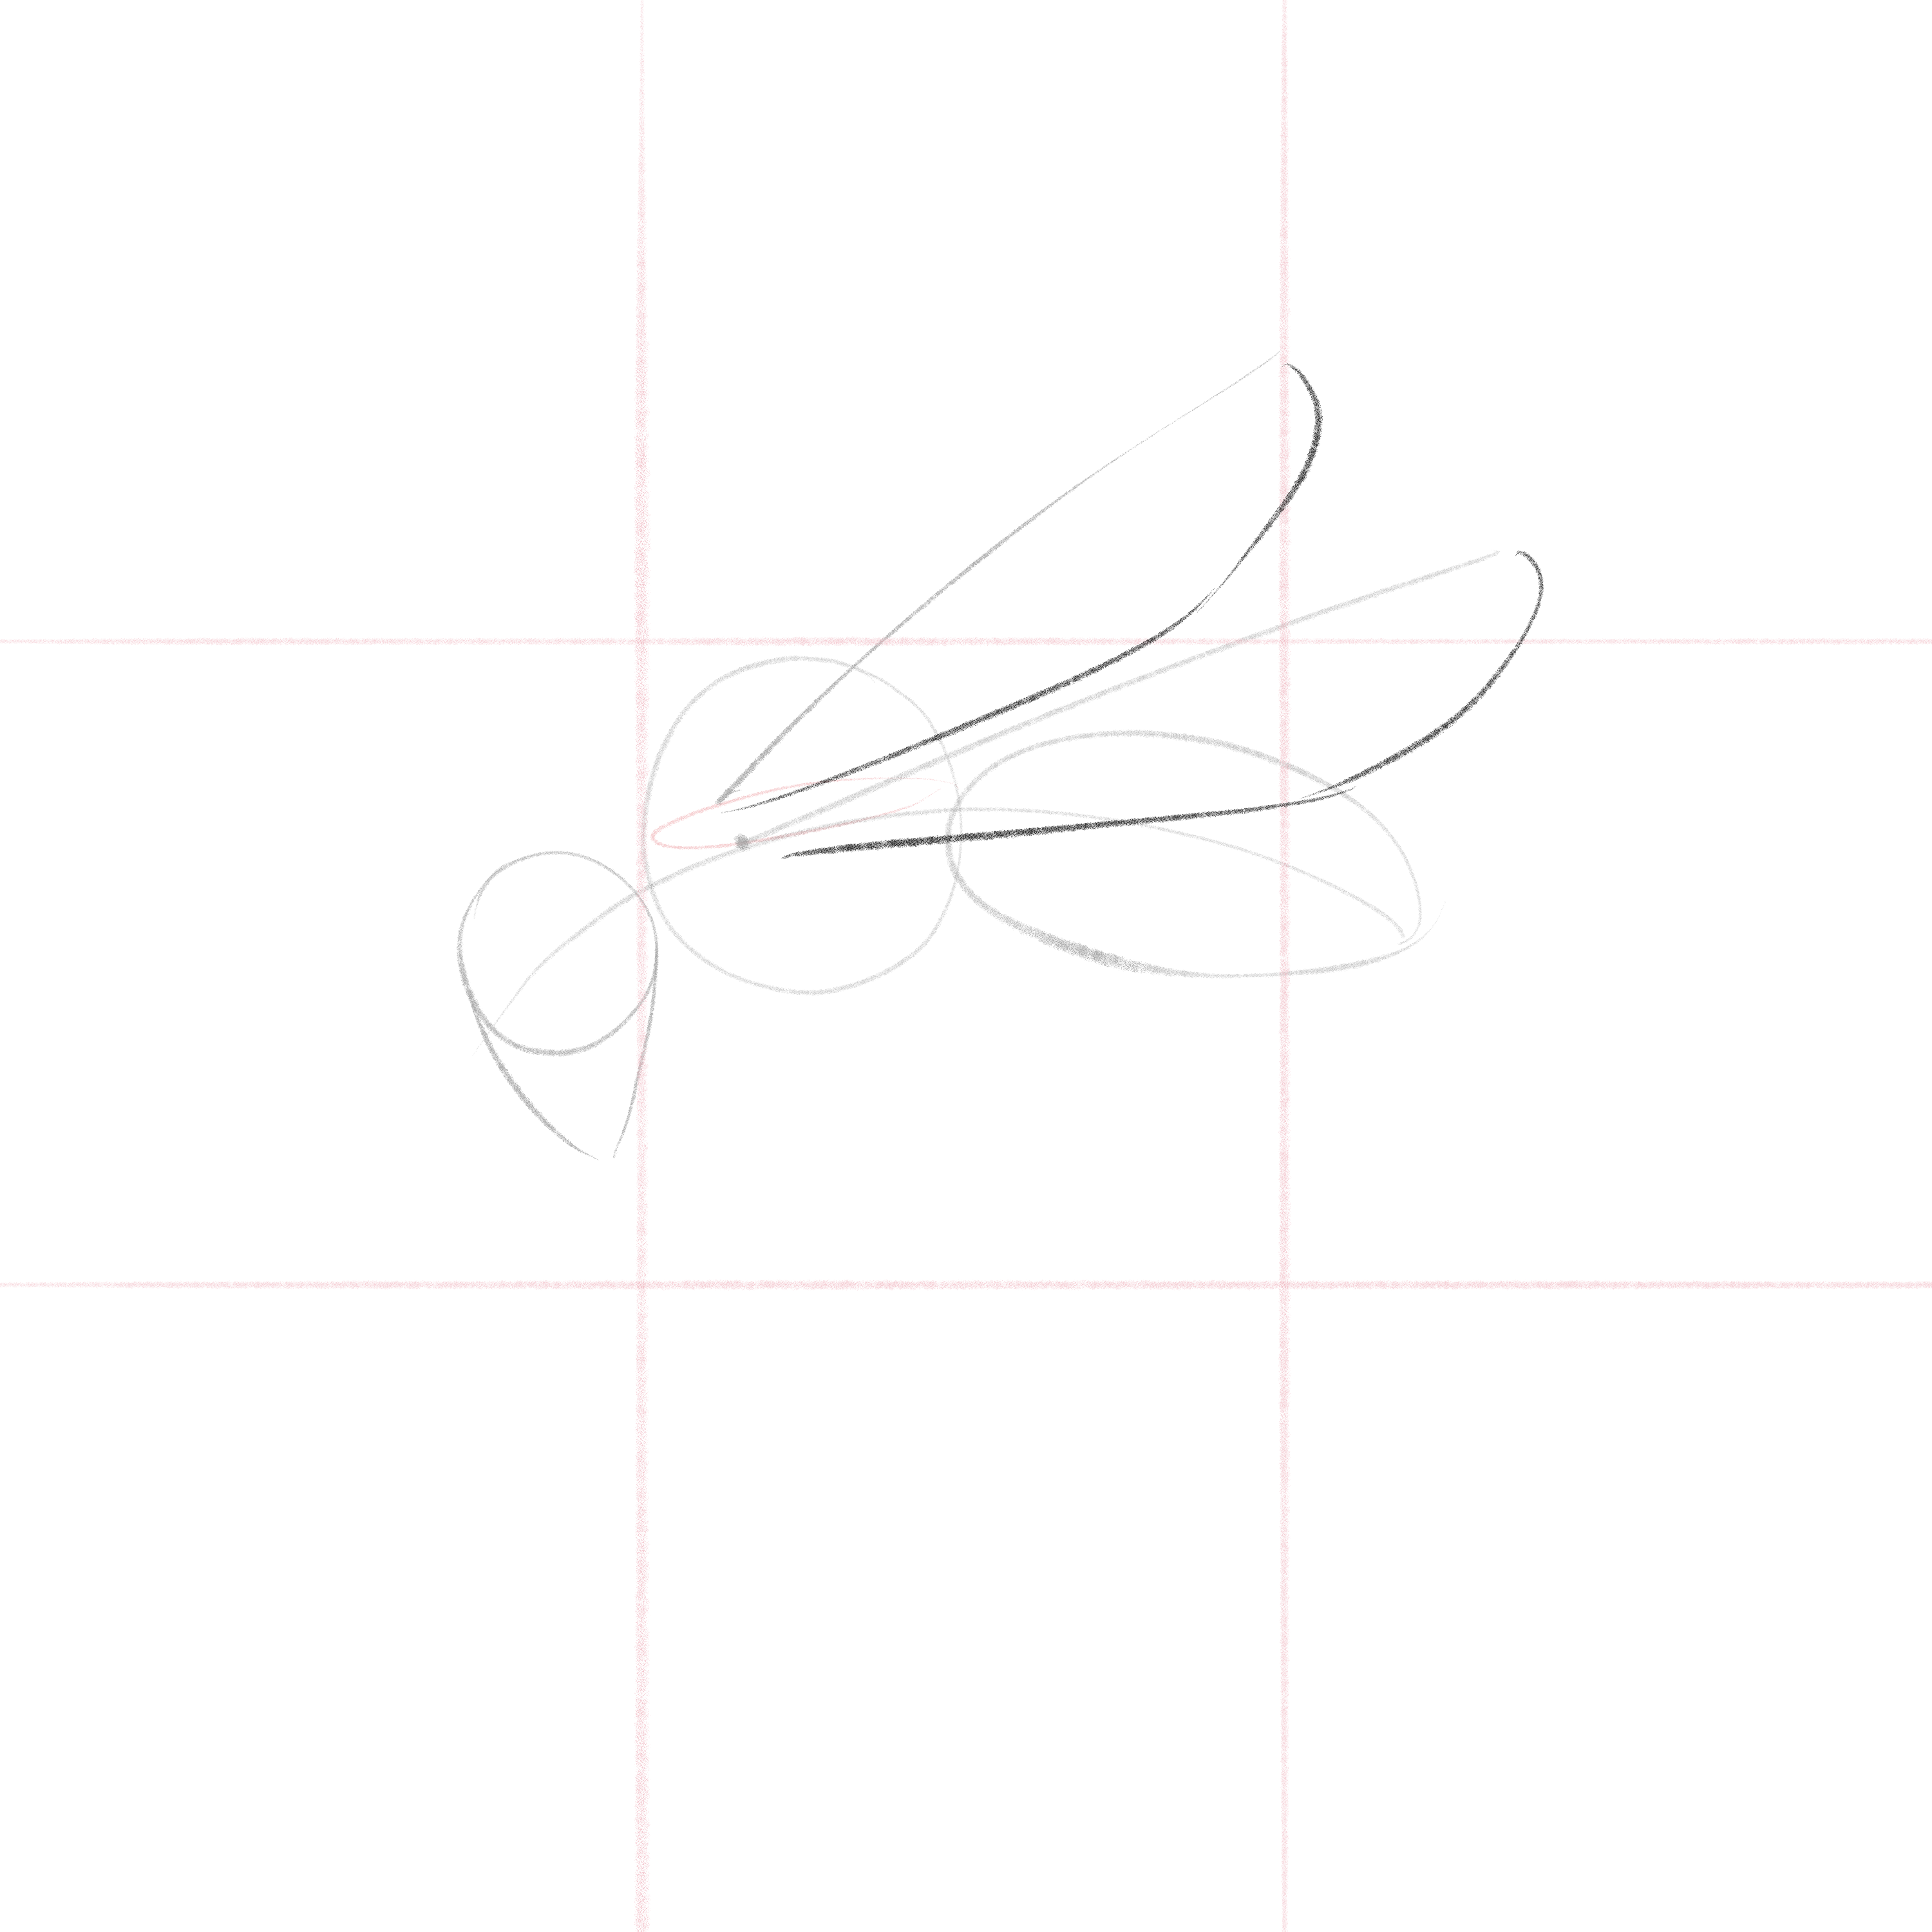
Step 8: Eyes and Mandible
Draw two circles for the eye.
 The first one will be in the middle of the head circle’s guideline, and the second will be in the middle of the lower part of the head circle.
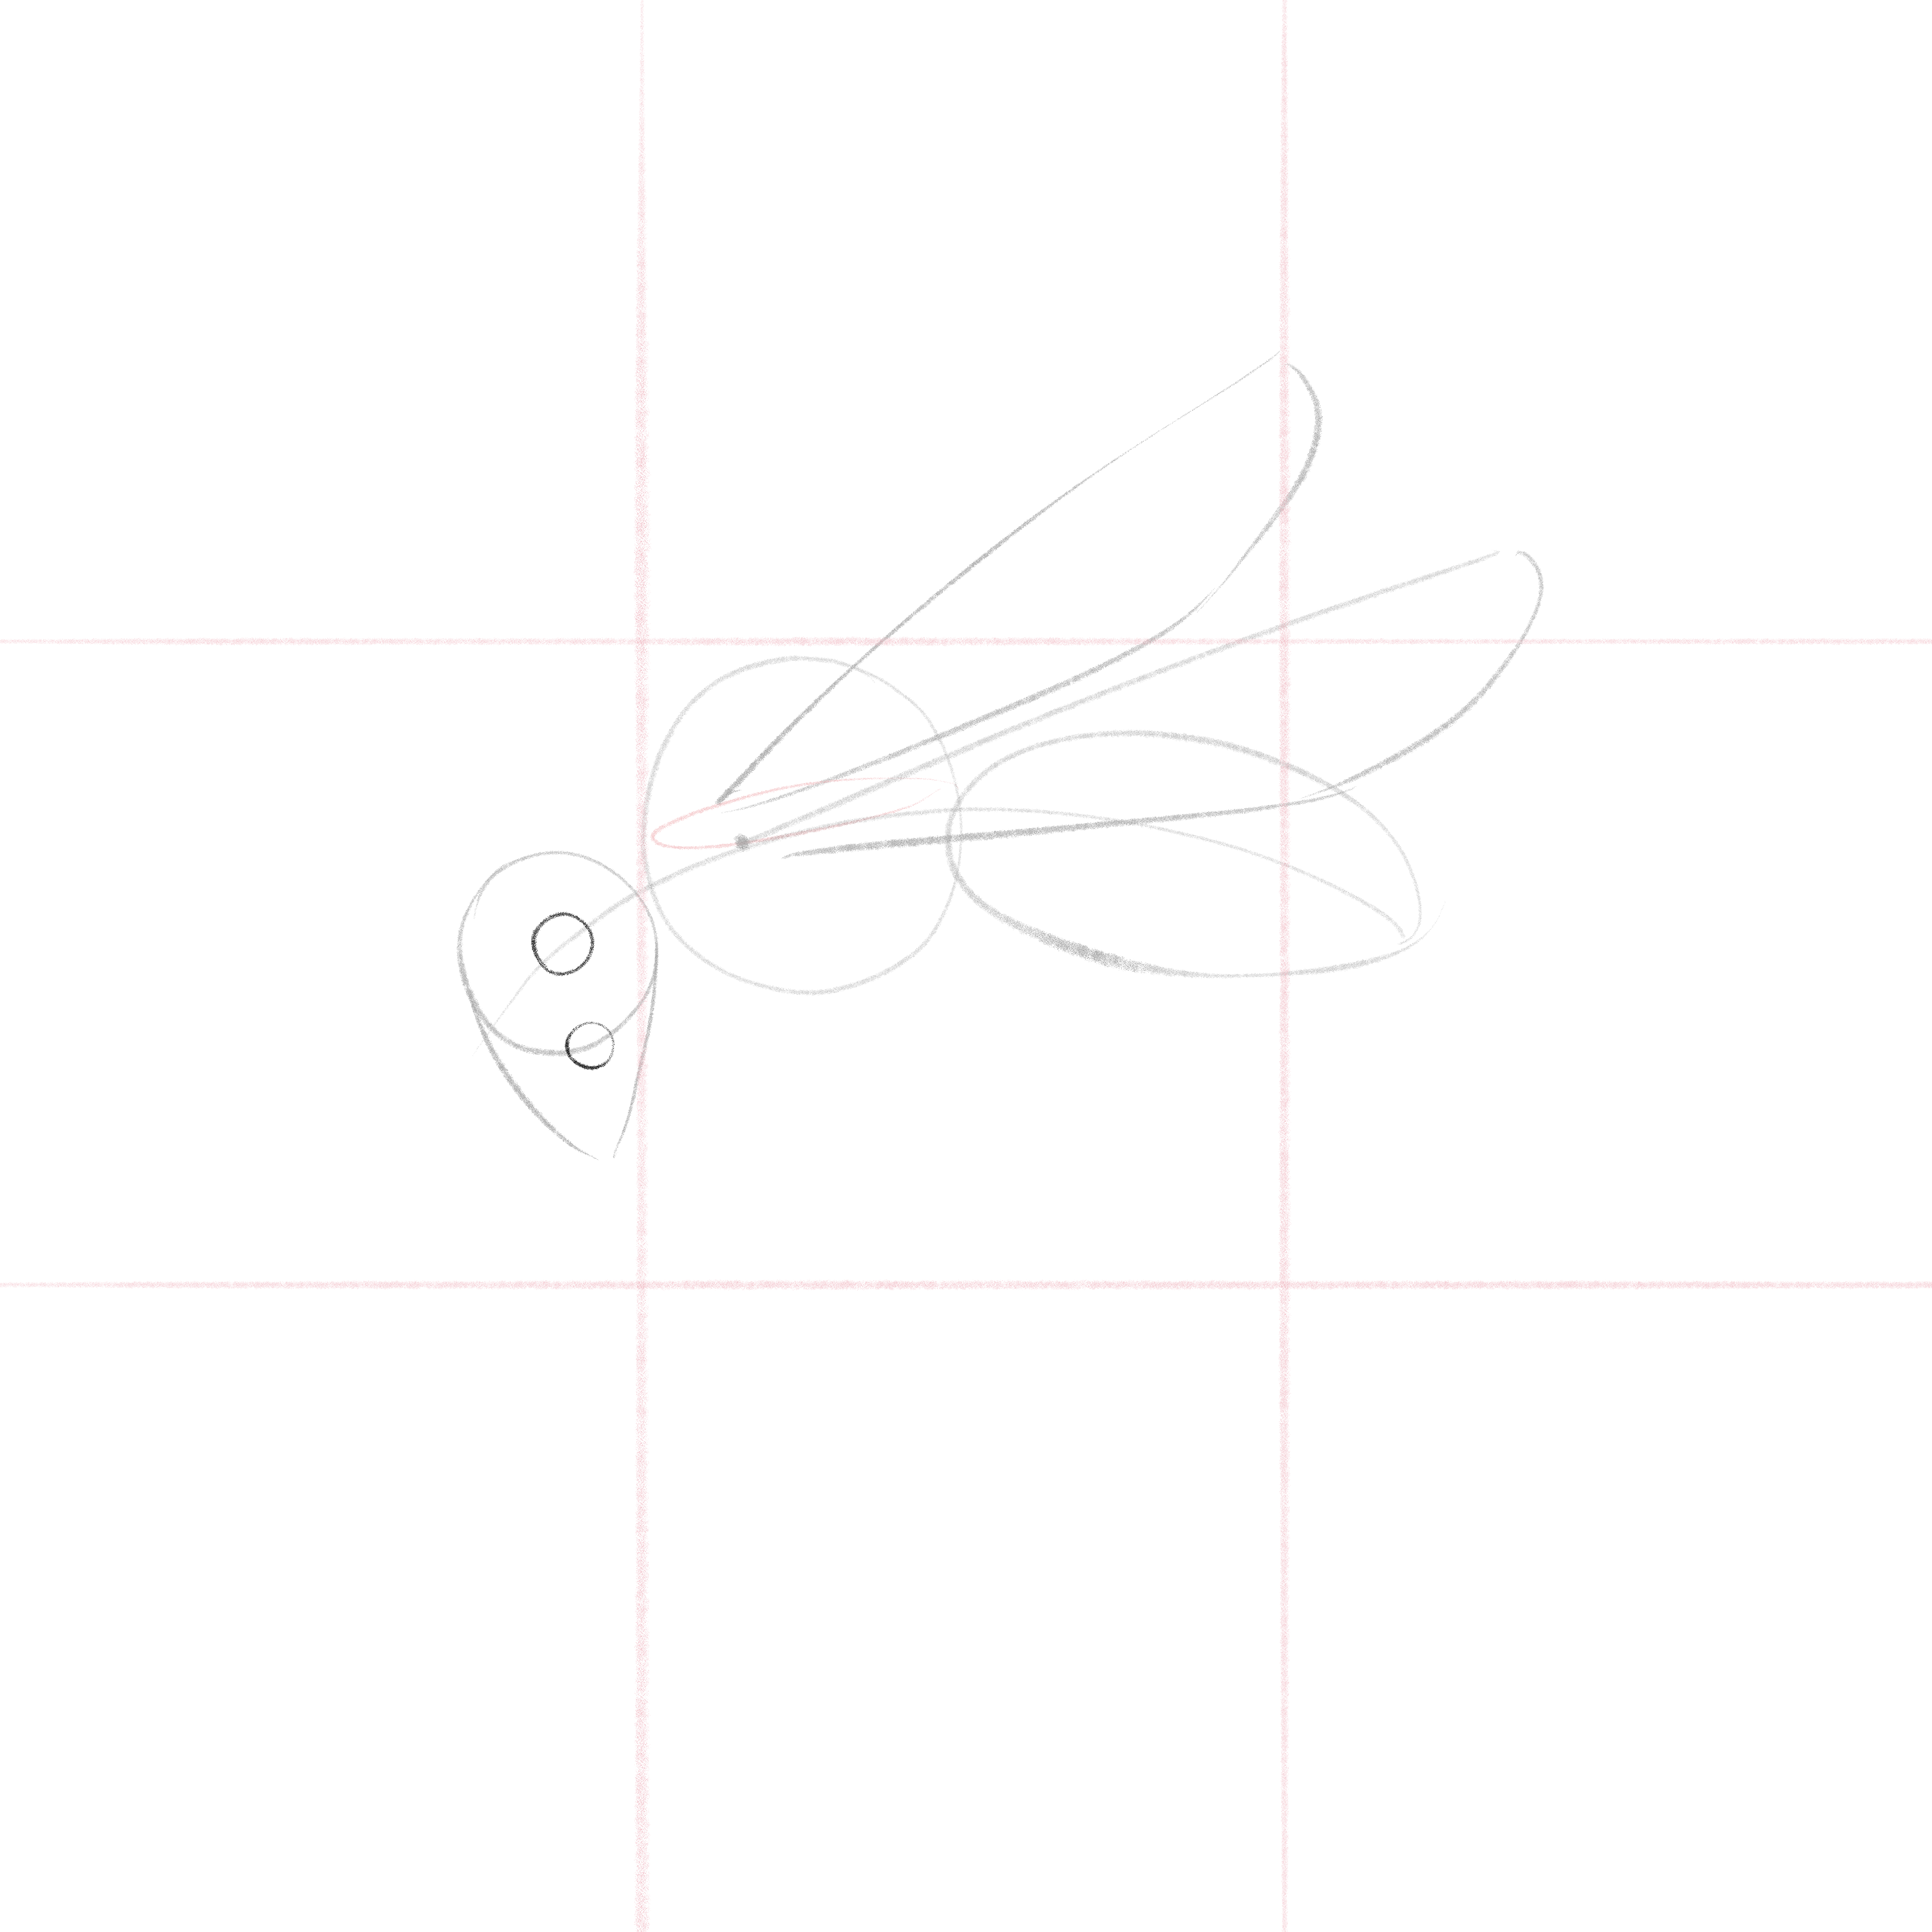
Connect these two circles with two soft curved lines, thereby creating the bee’s eye. Also, sketch the bee’s mandible, which has the shape of an irregular, curved diamond. 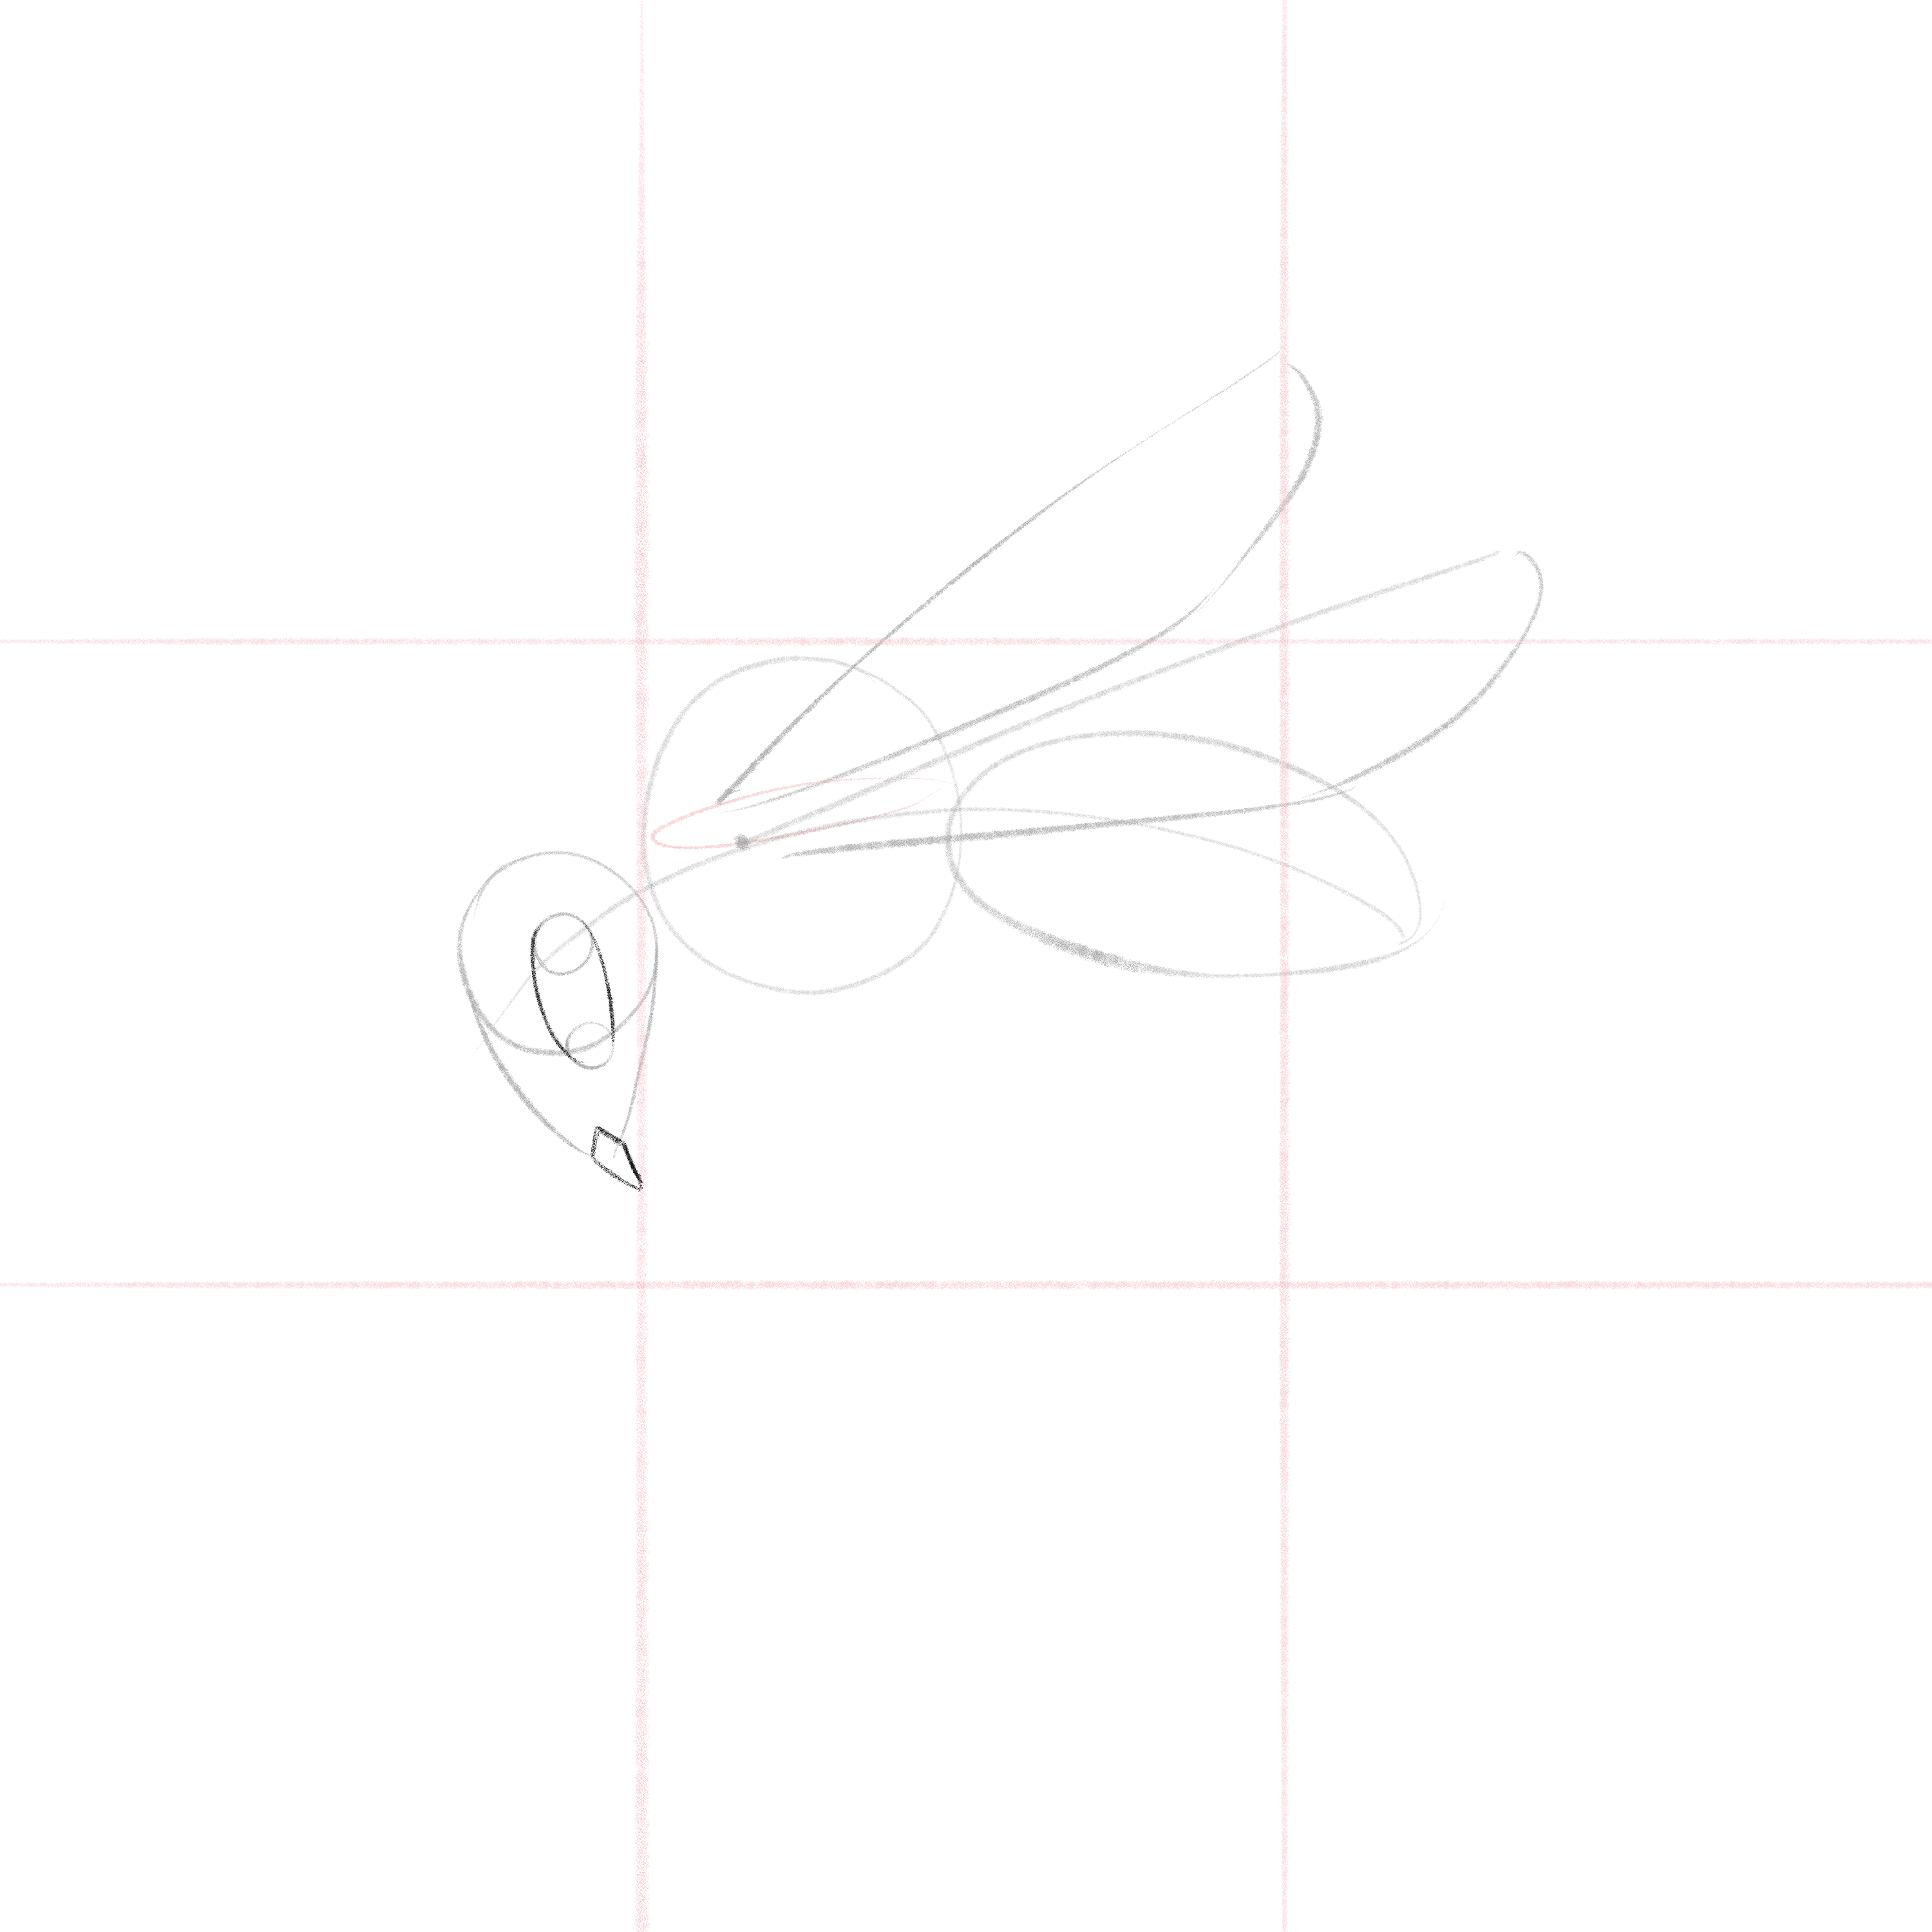
Step 9: Legs Drawing
Next, draw the bee’s legs on the left side, closest to us. Keep in mind that bees have six legs, divided into three main sections and a smaller base called “claws”. 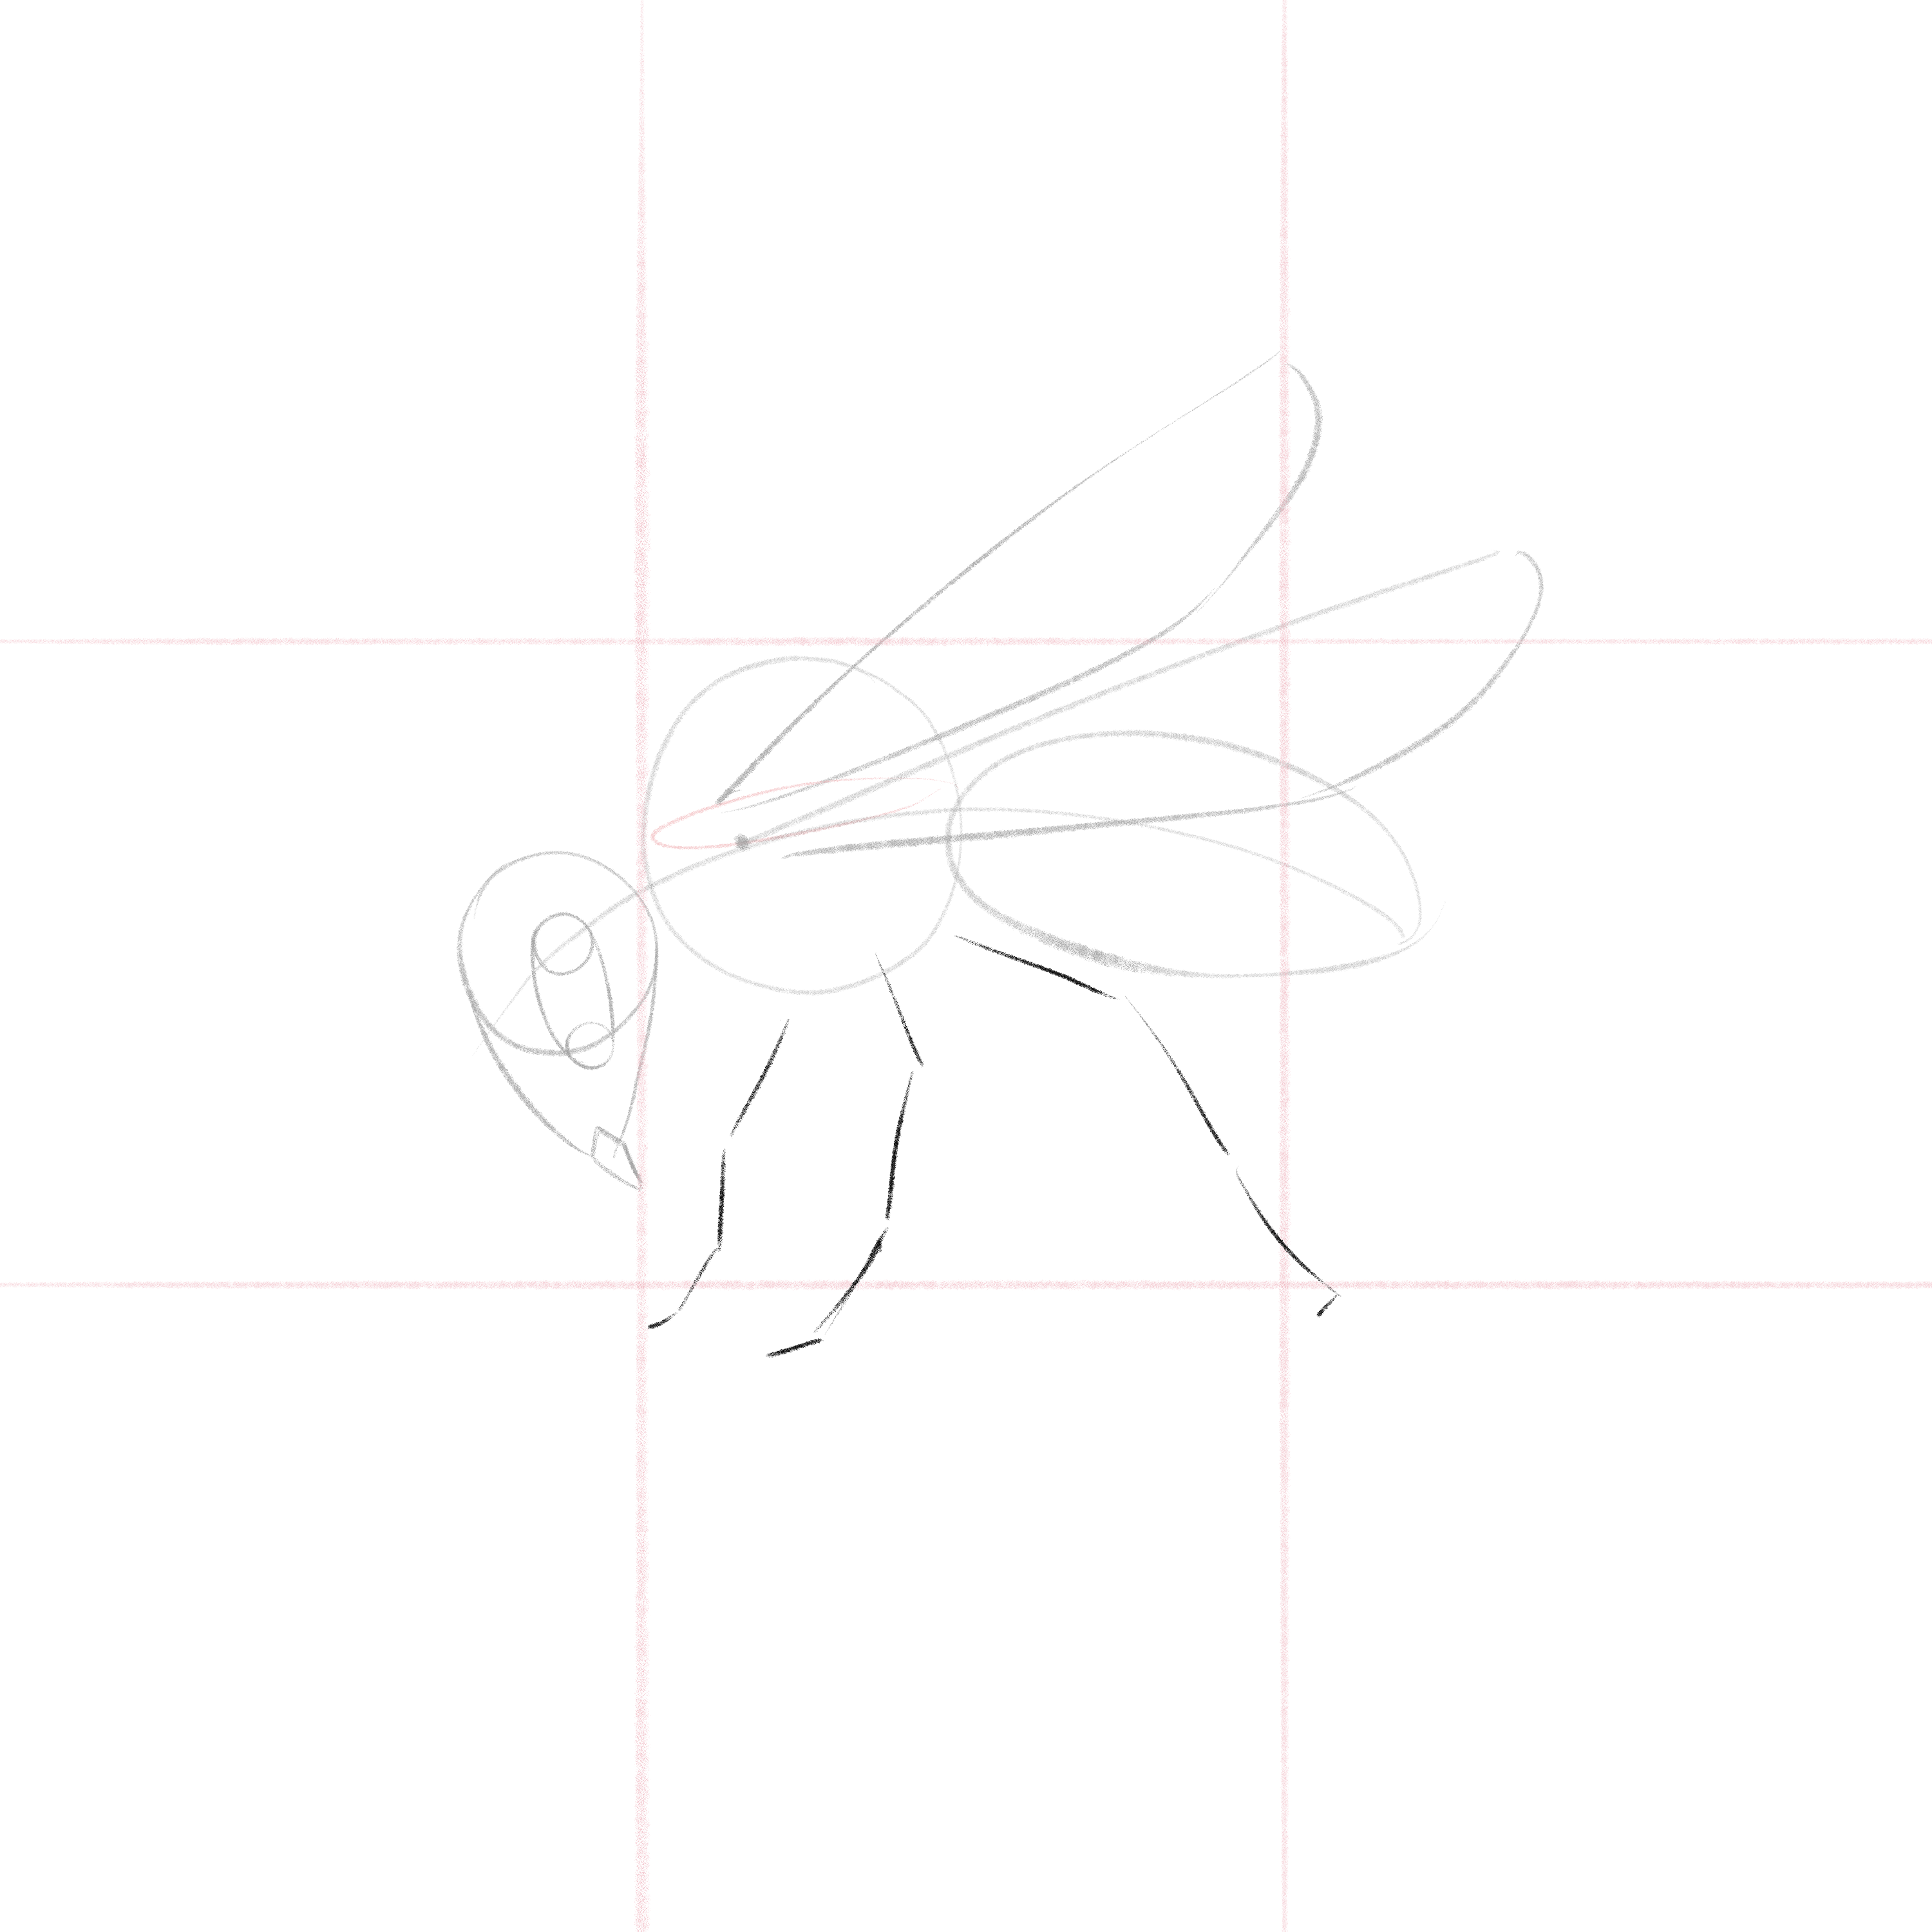
Repeat the process for the legs that are on the far side and hidden by the bee’s body, considering the perspective.
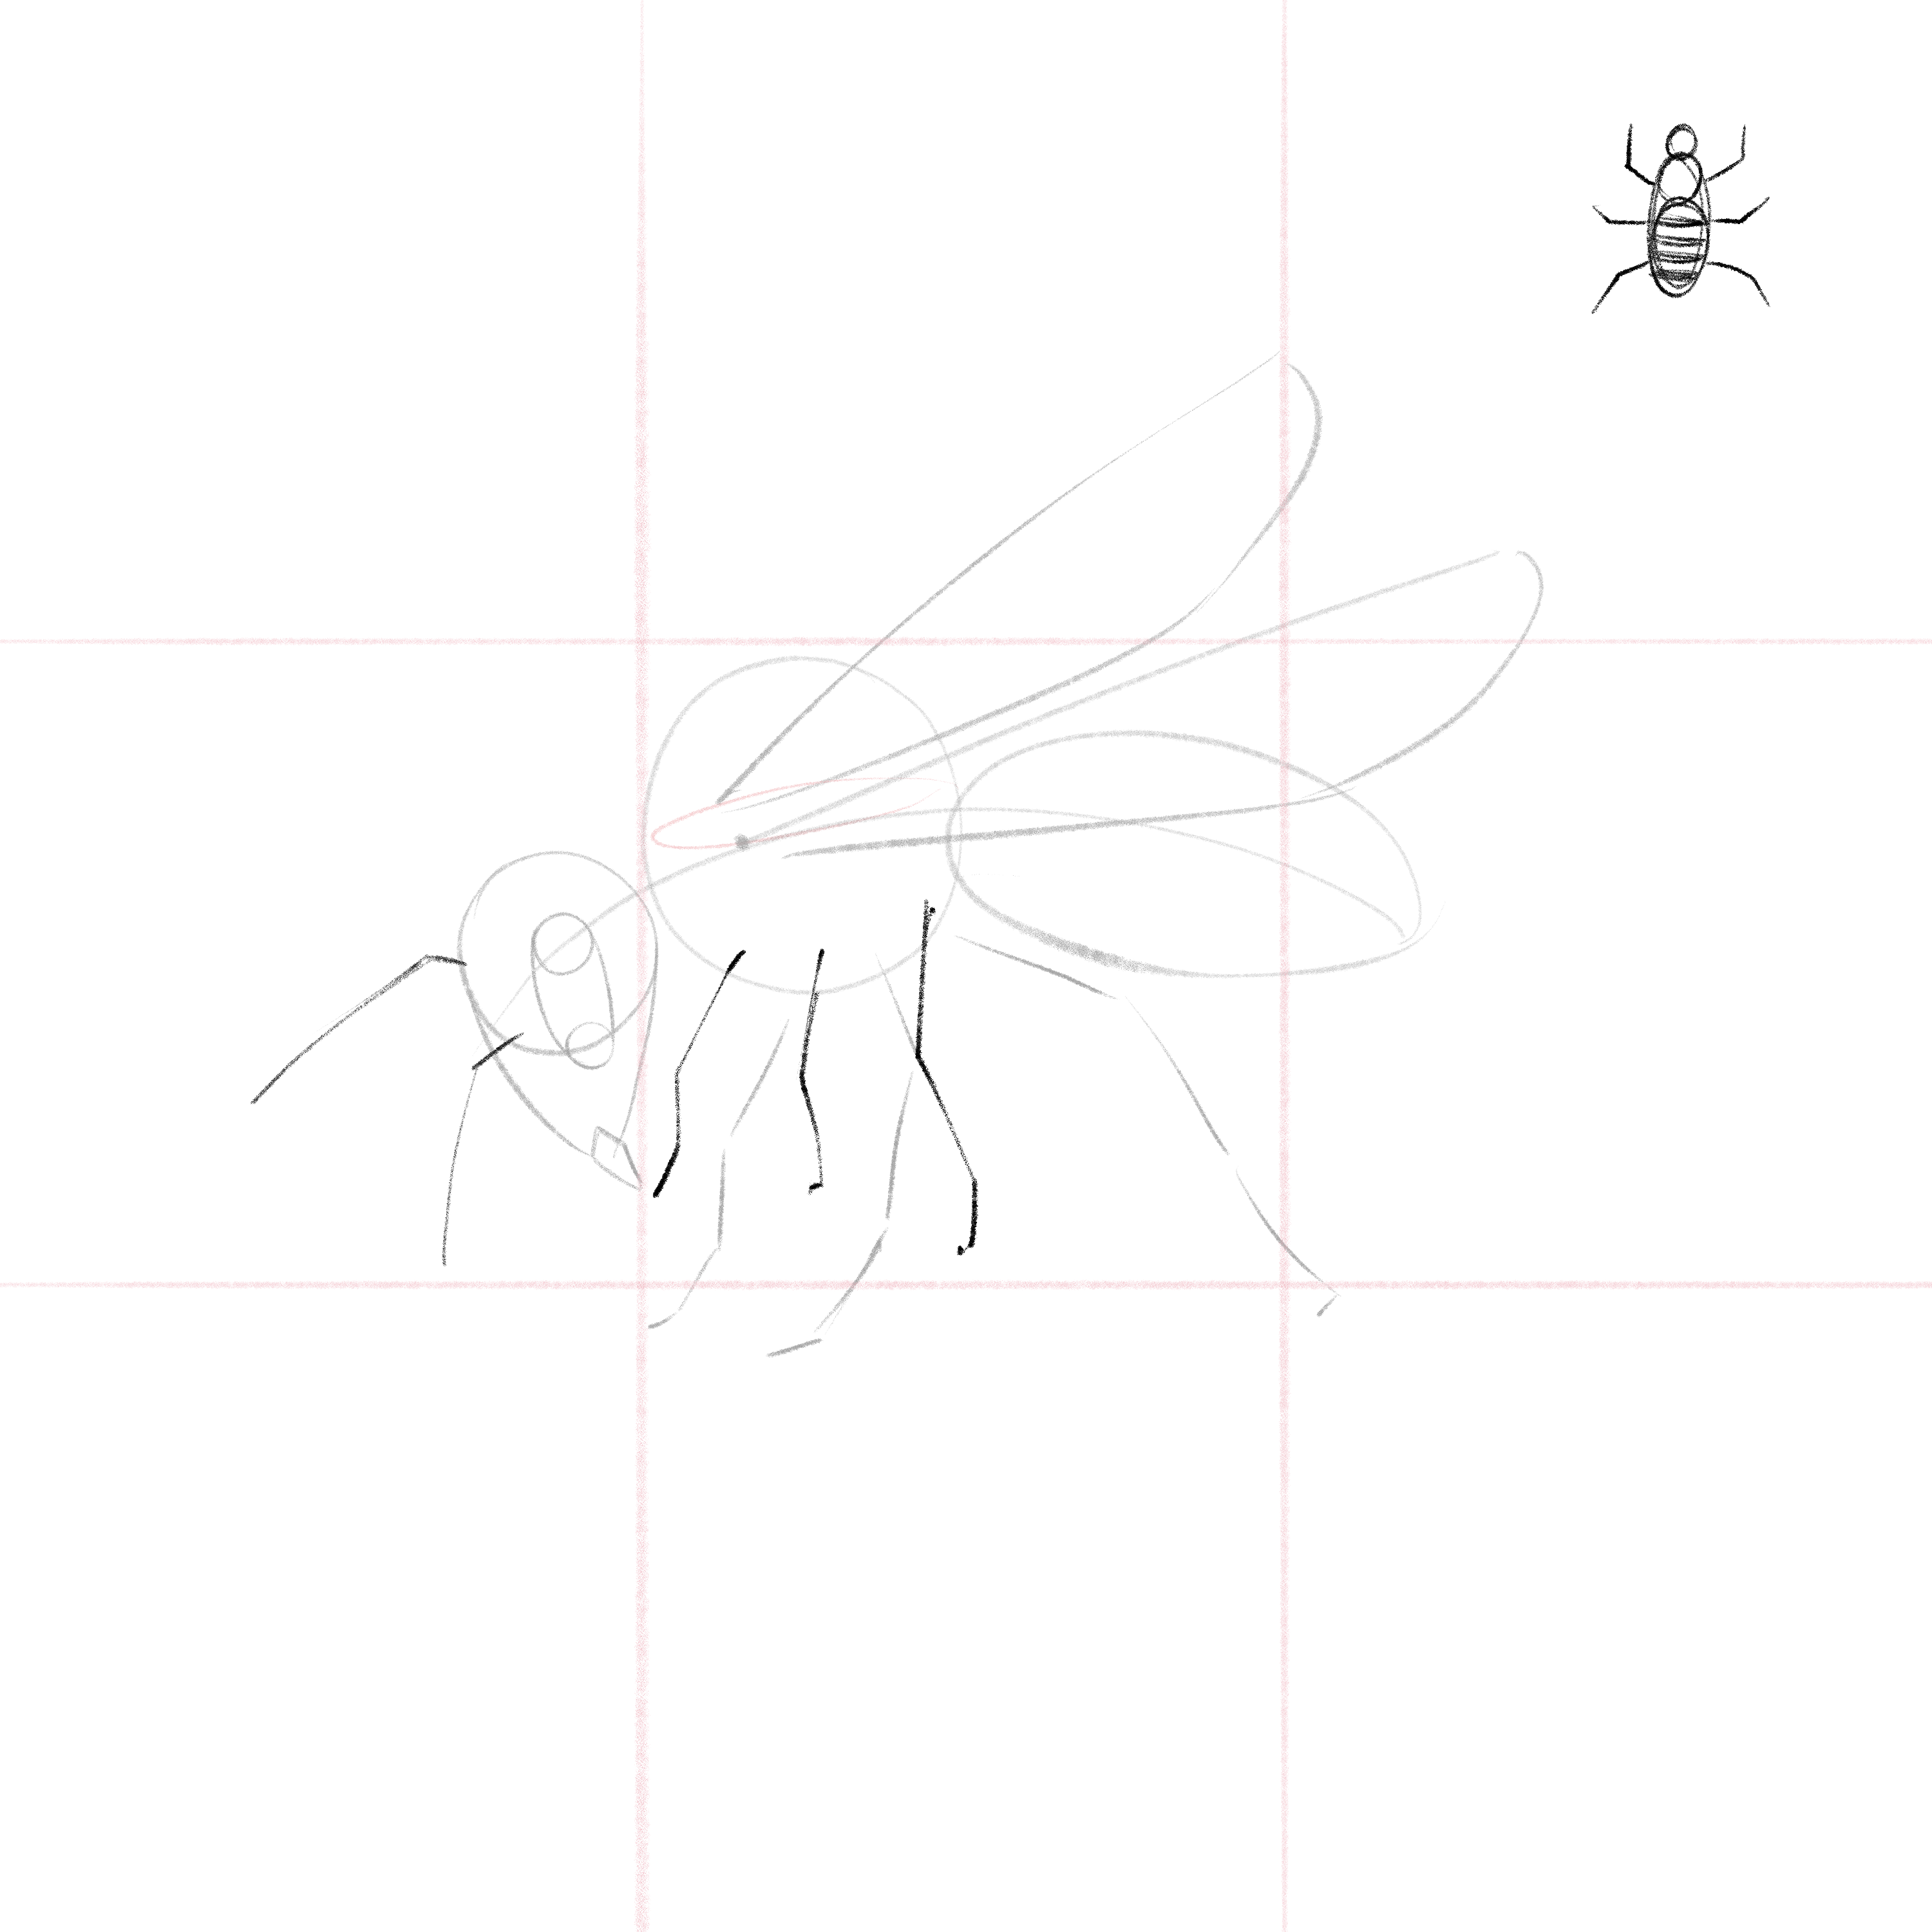
Step 10: Antennas Sketching
Sketch the antennas using two lines, one short and one long, for each antenna. Draw them in different directions to depict movement.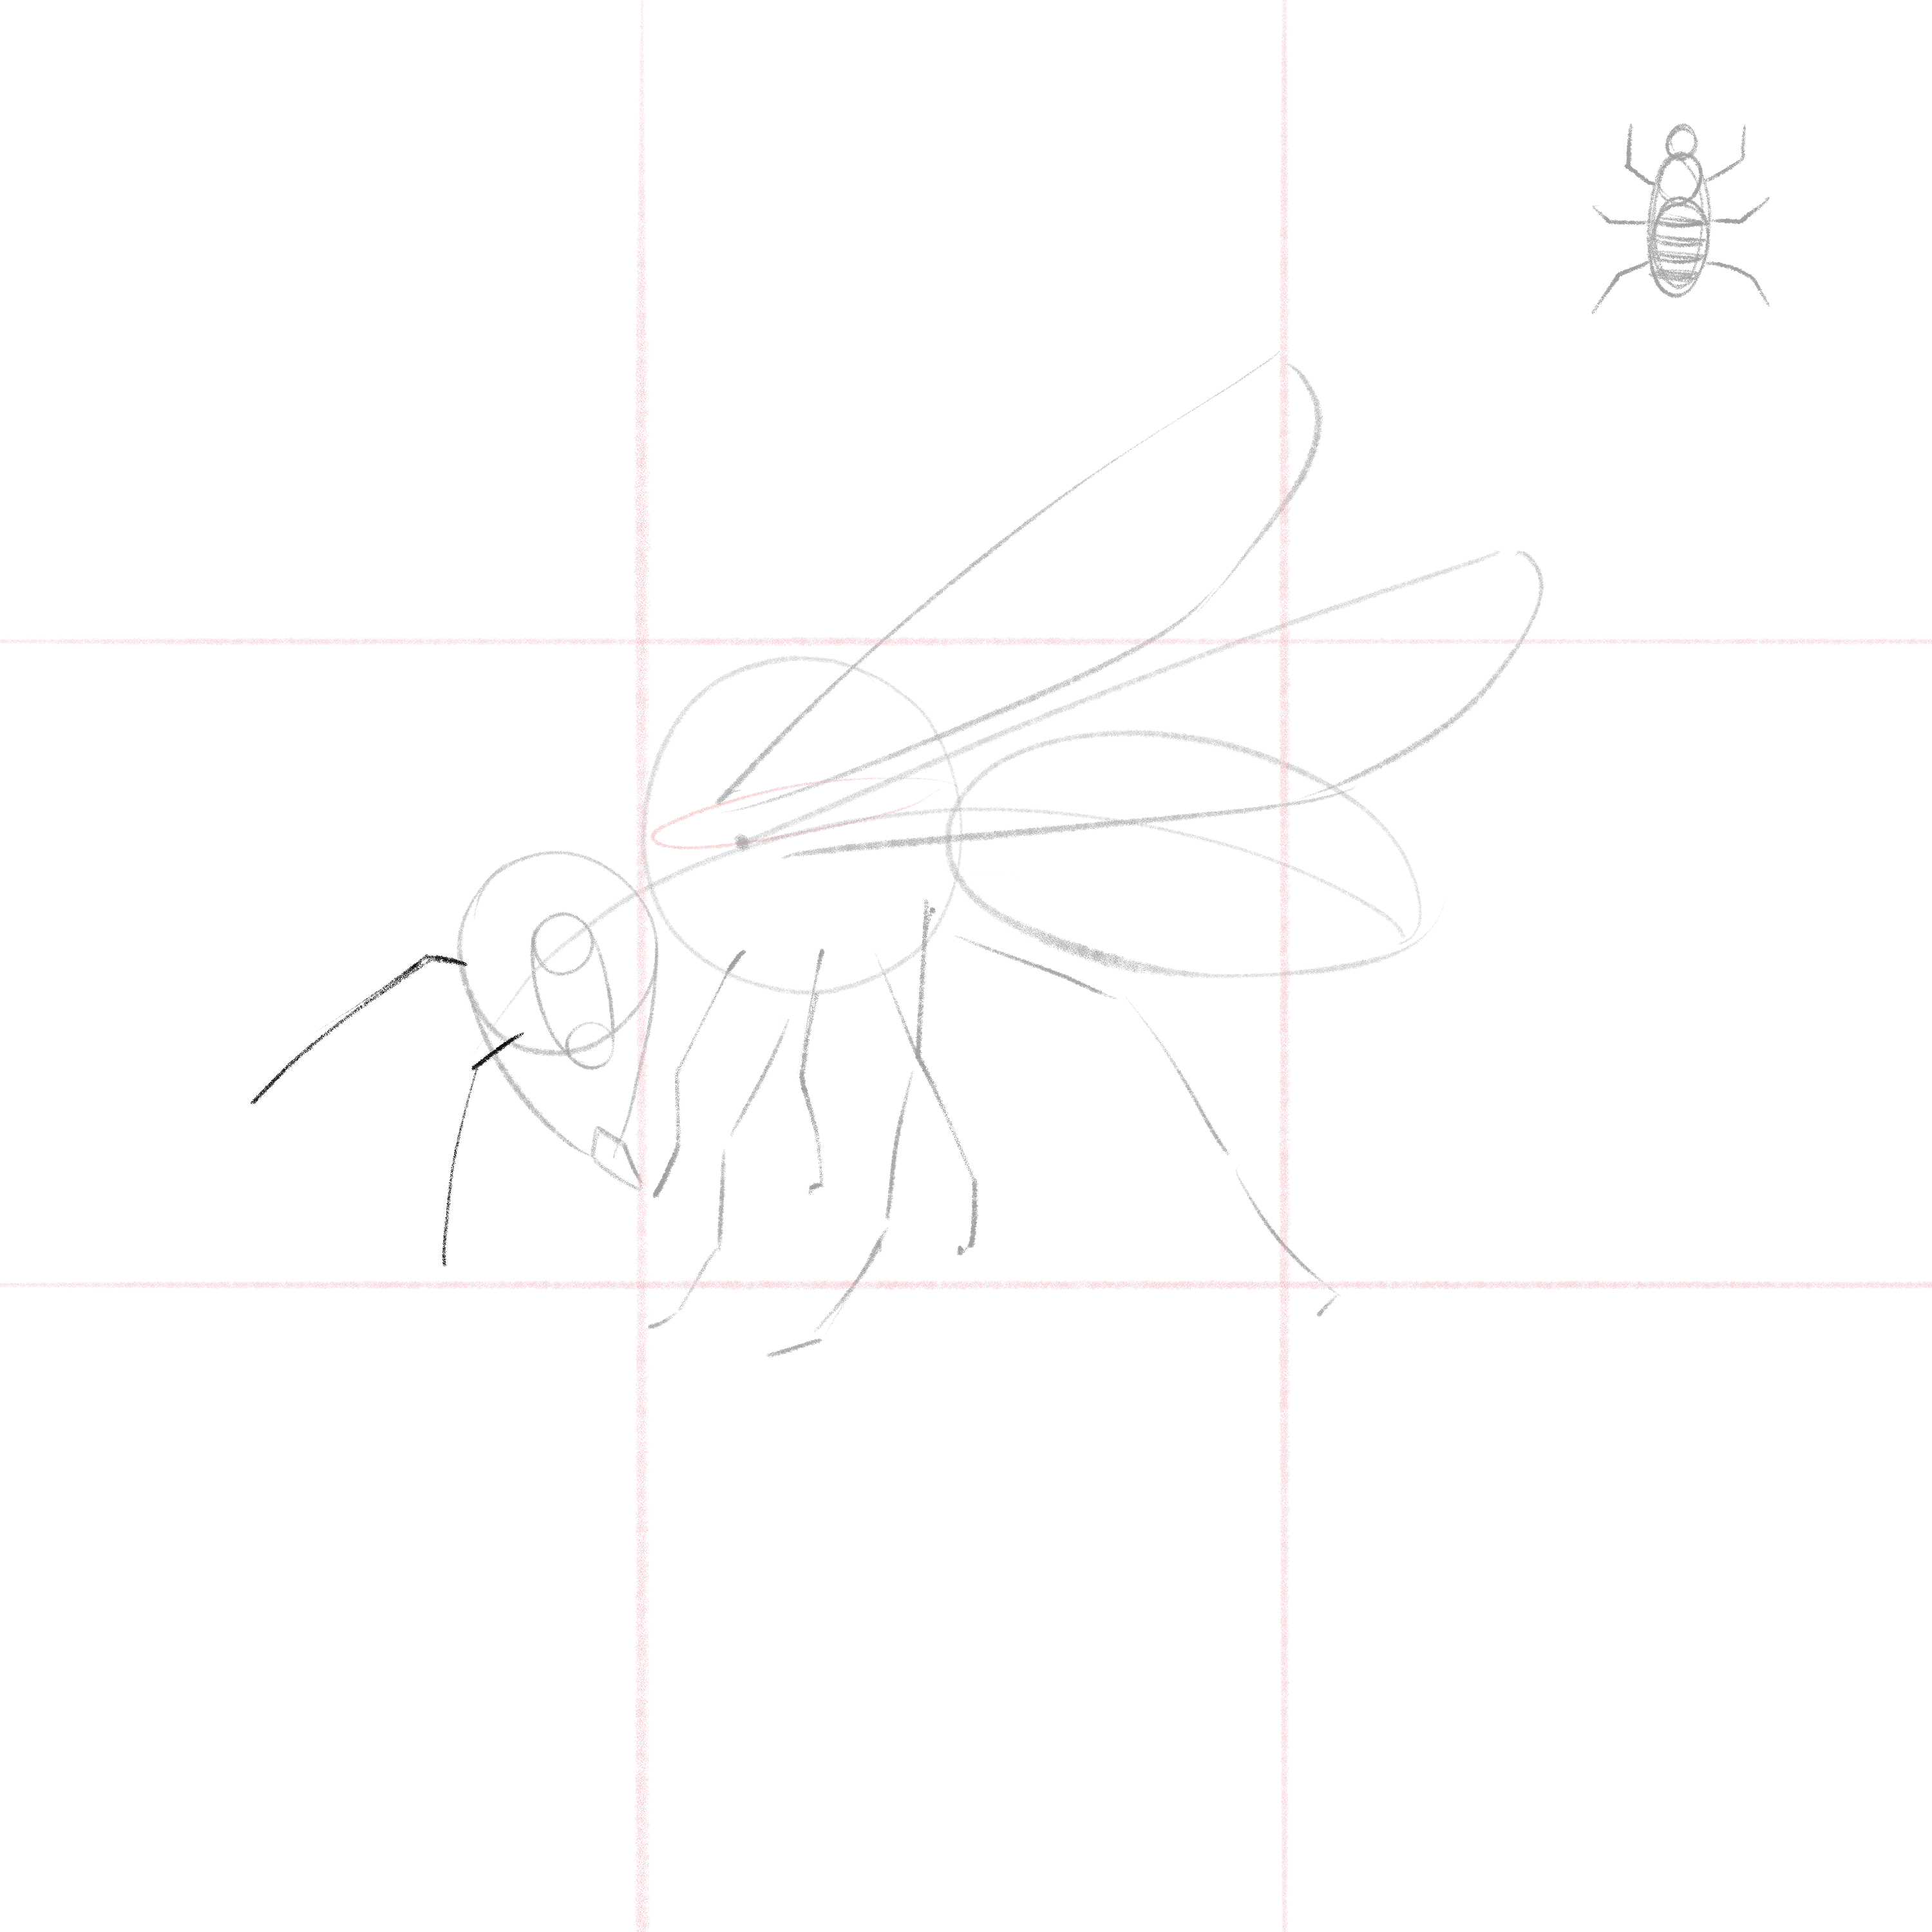
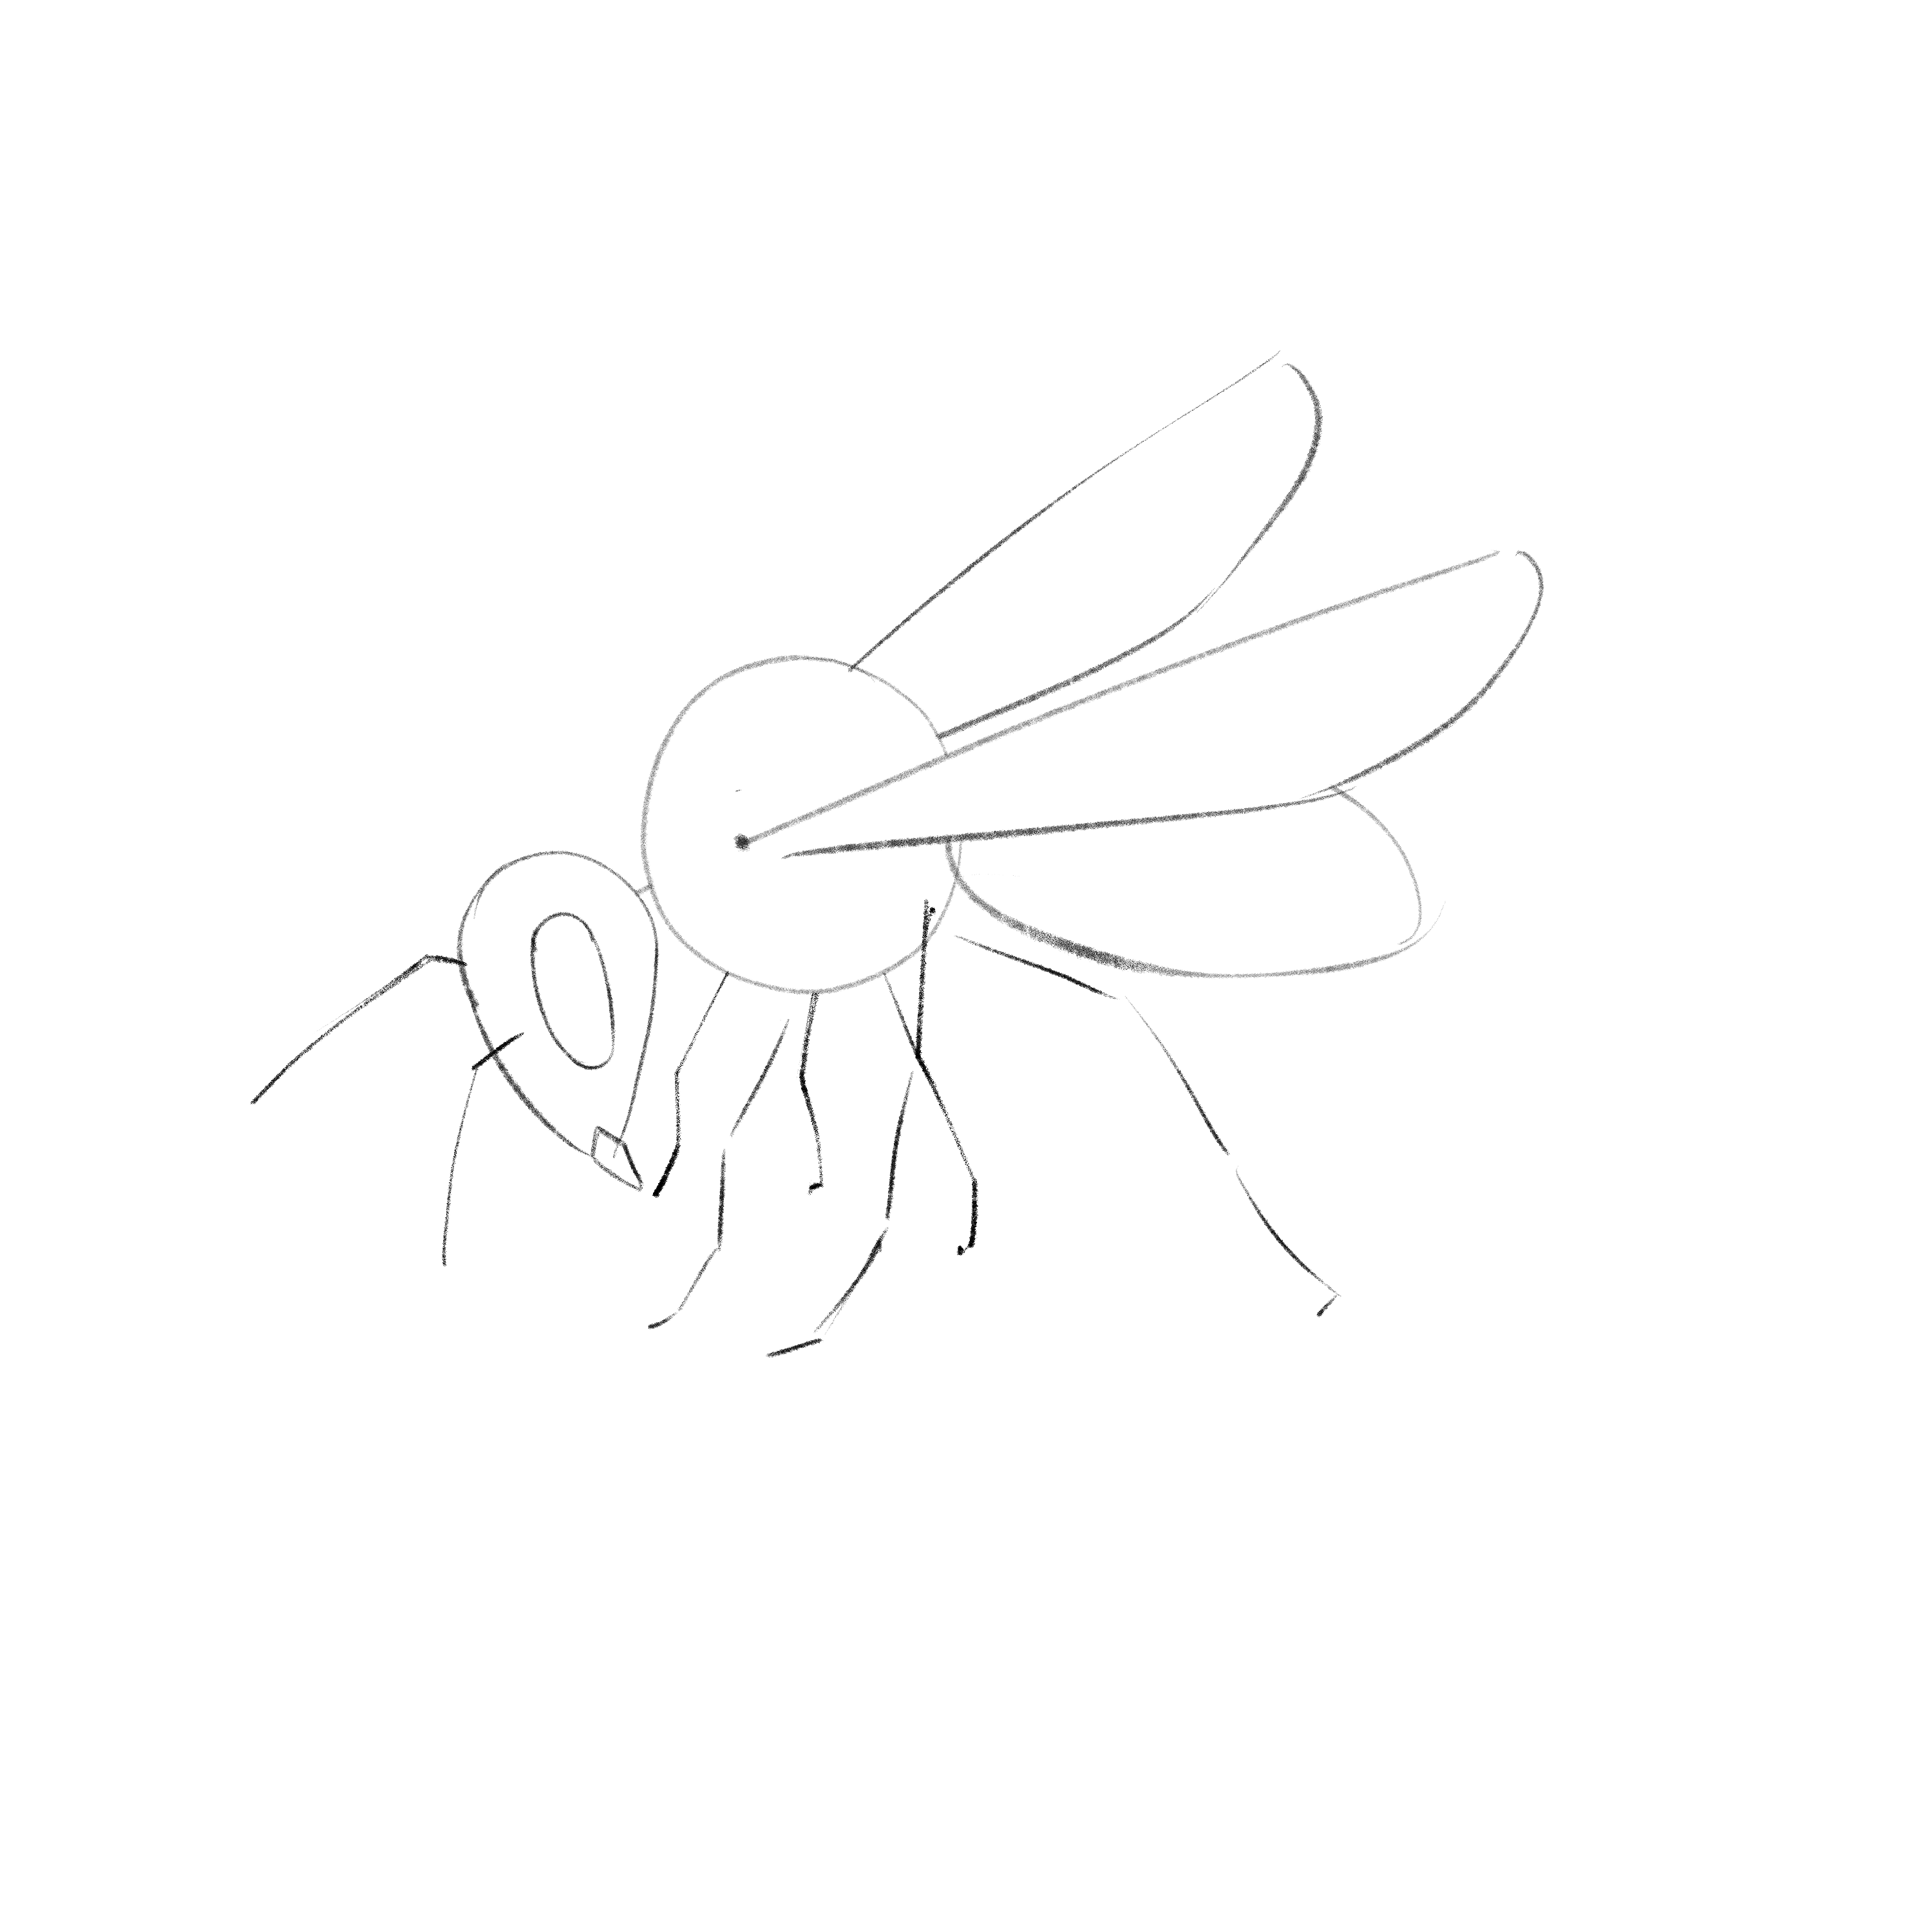
Step 11: Clean-up Time
We now have the basic structure of our bee. Erase the grid guide lines and the overlapping lines in the body structure.
Section 2.- How to Shade a Bee
Step 12: Adding Fur
Remember that bee bodies are “furry and fluffy”. Cover your bee drawing with small hairs all over its body, especially on the head and torso. Be aware that the distribution of hair on the abdomen is more sparse. 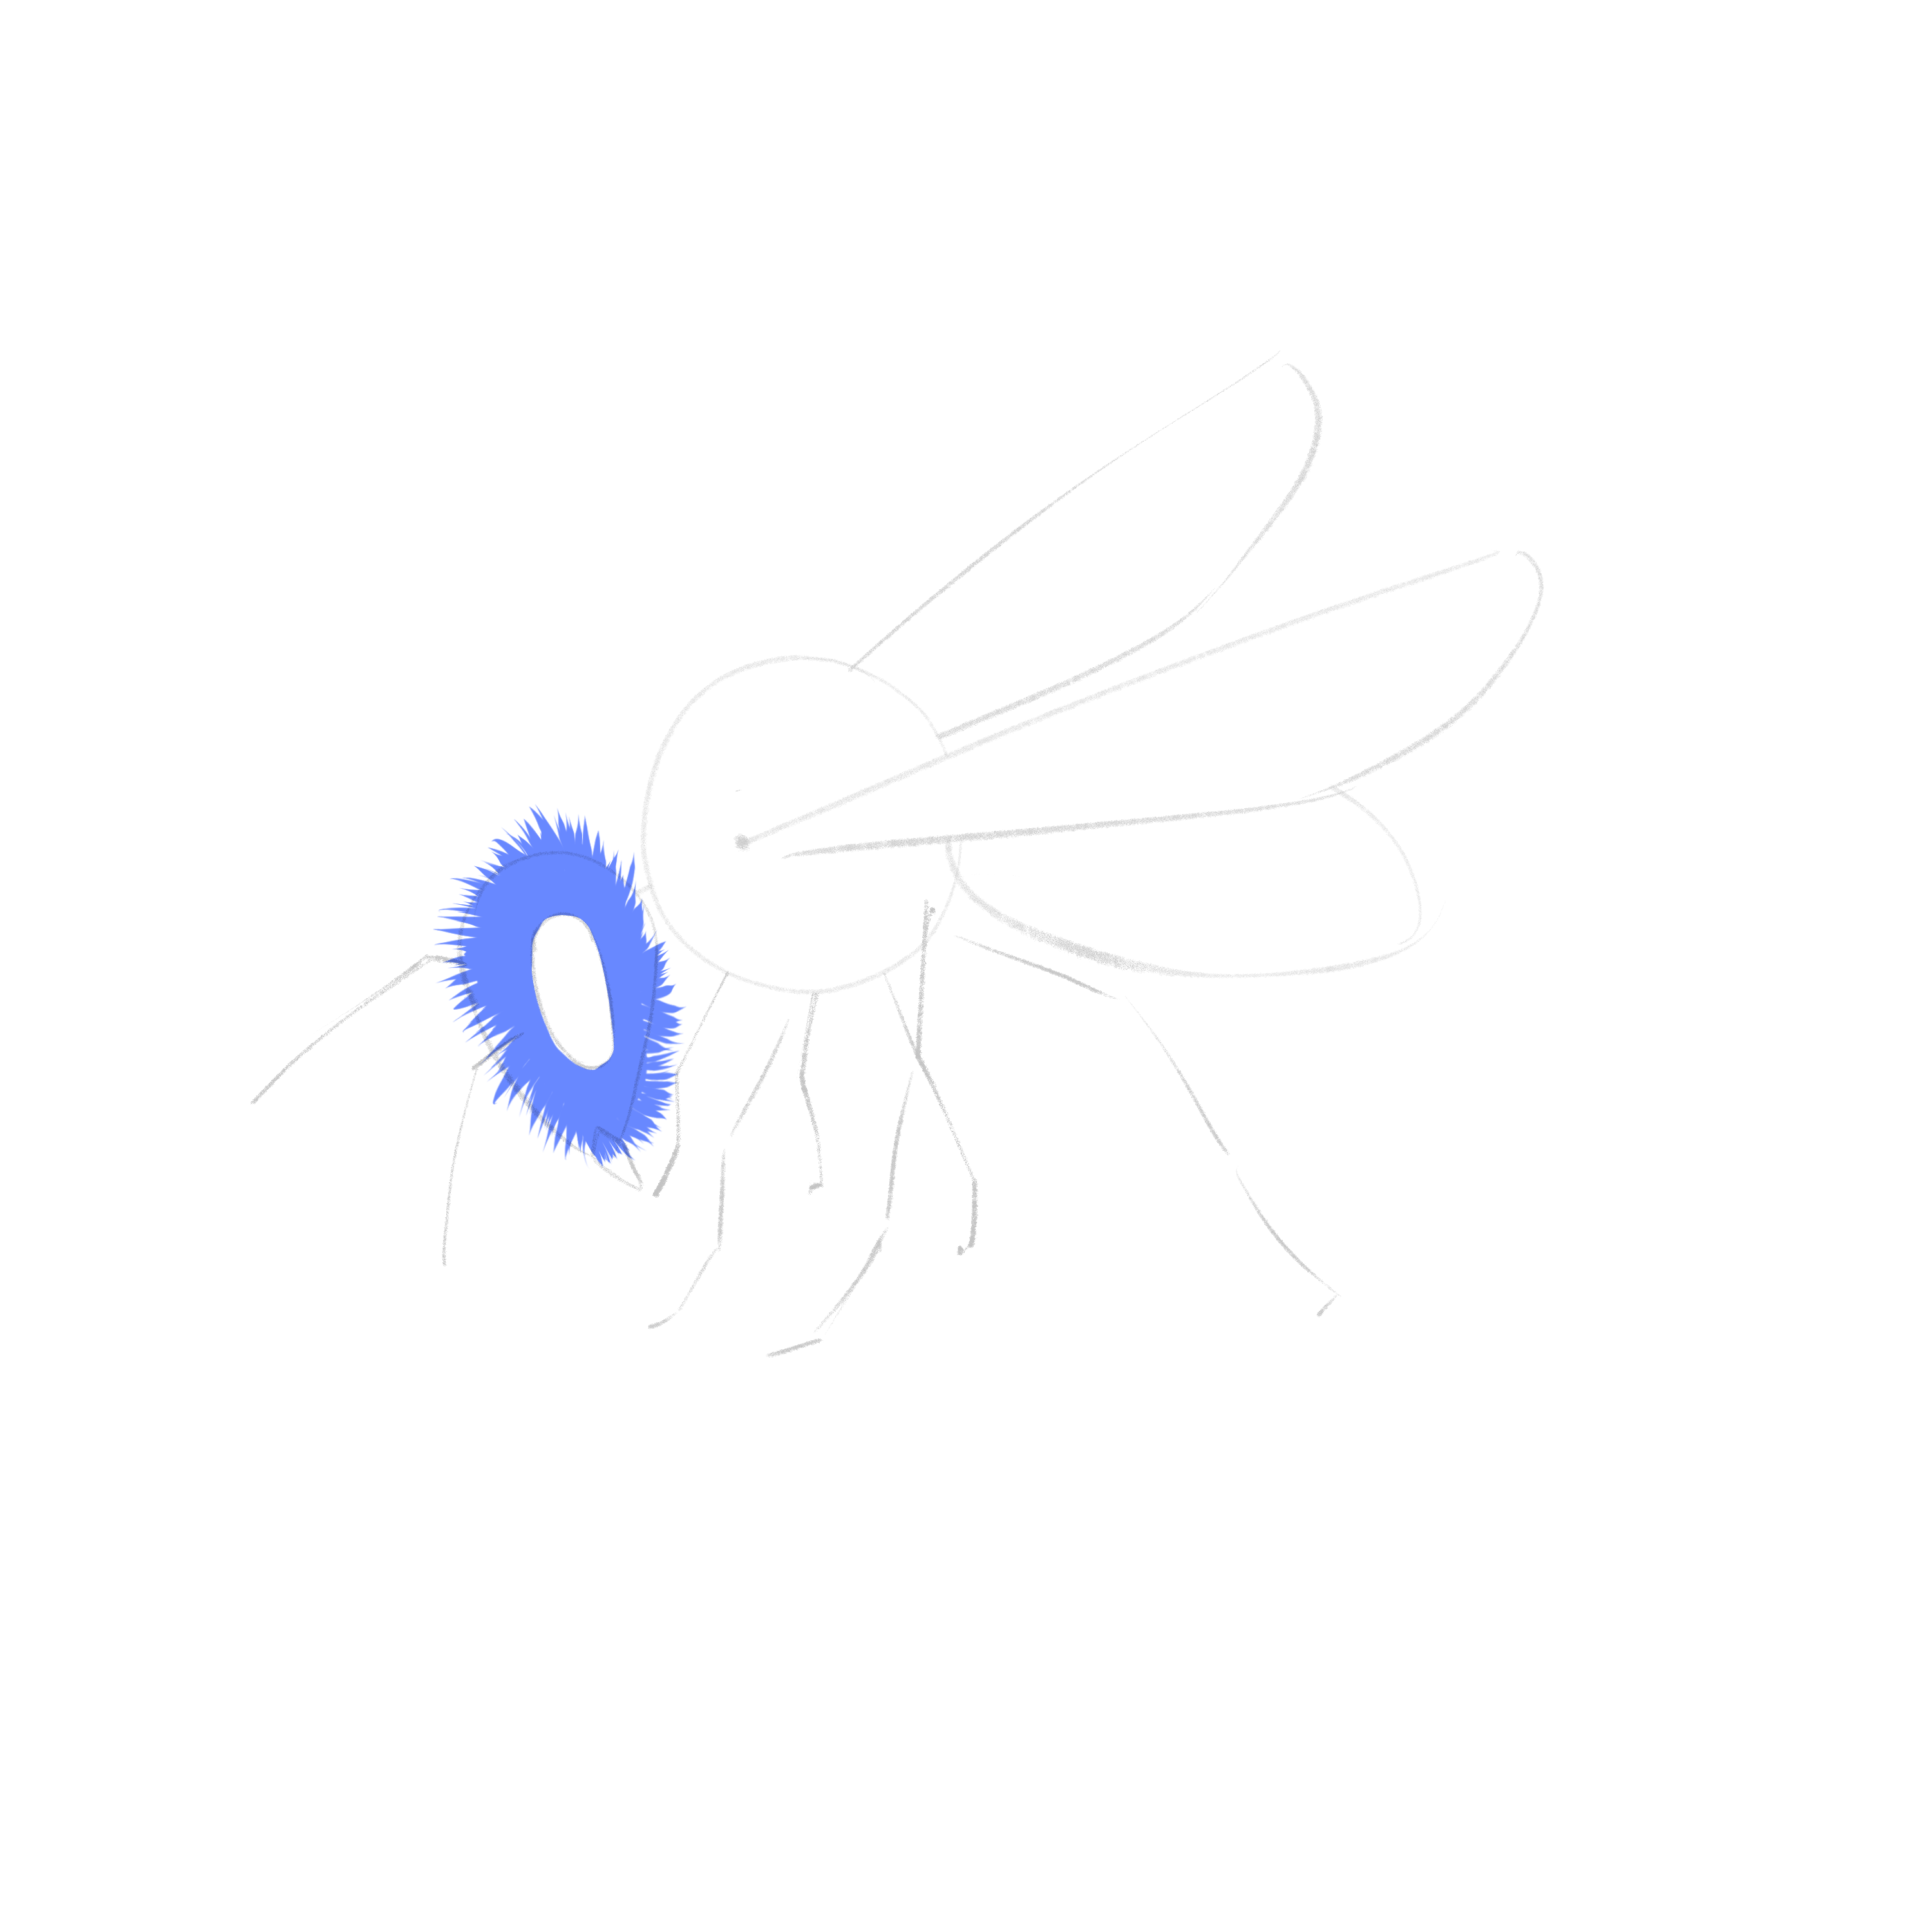
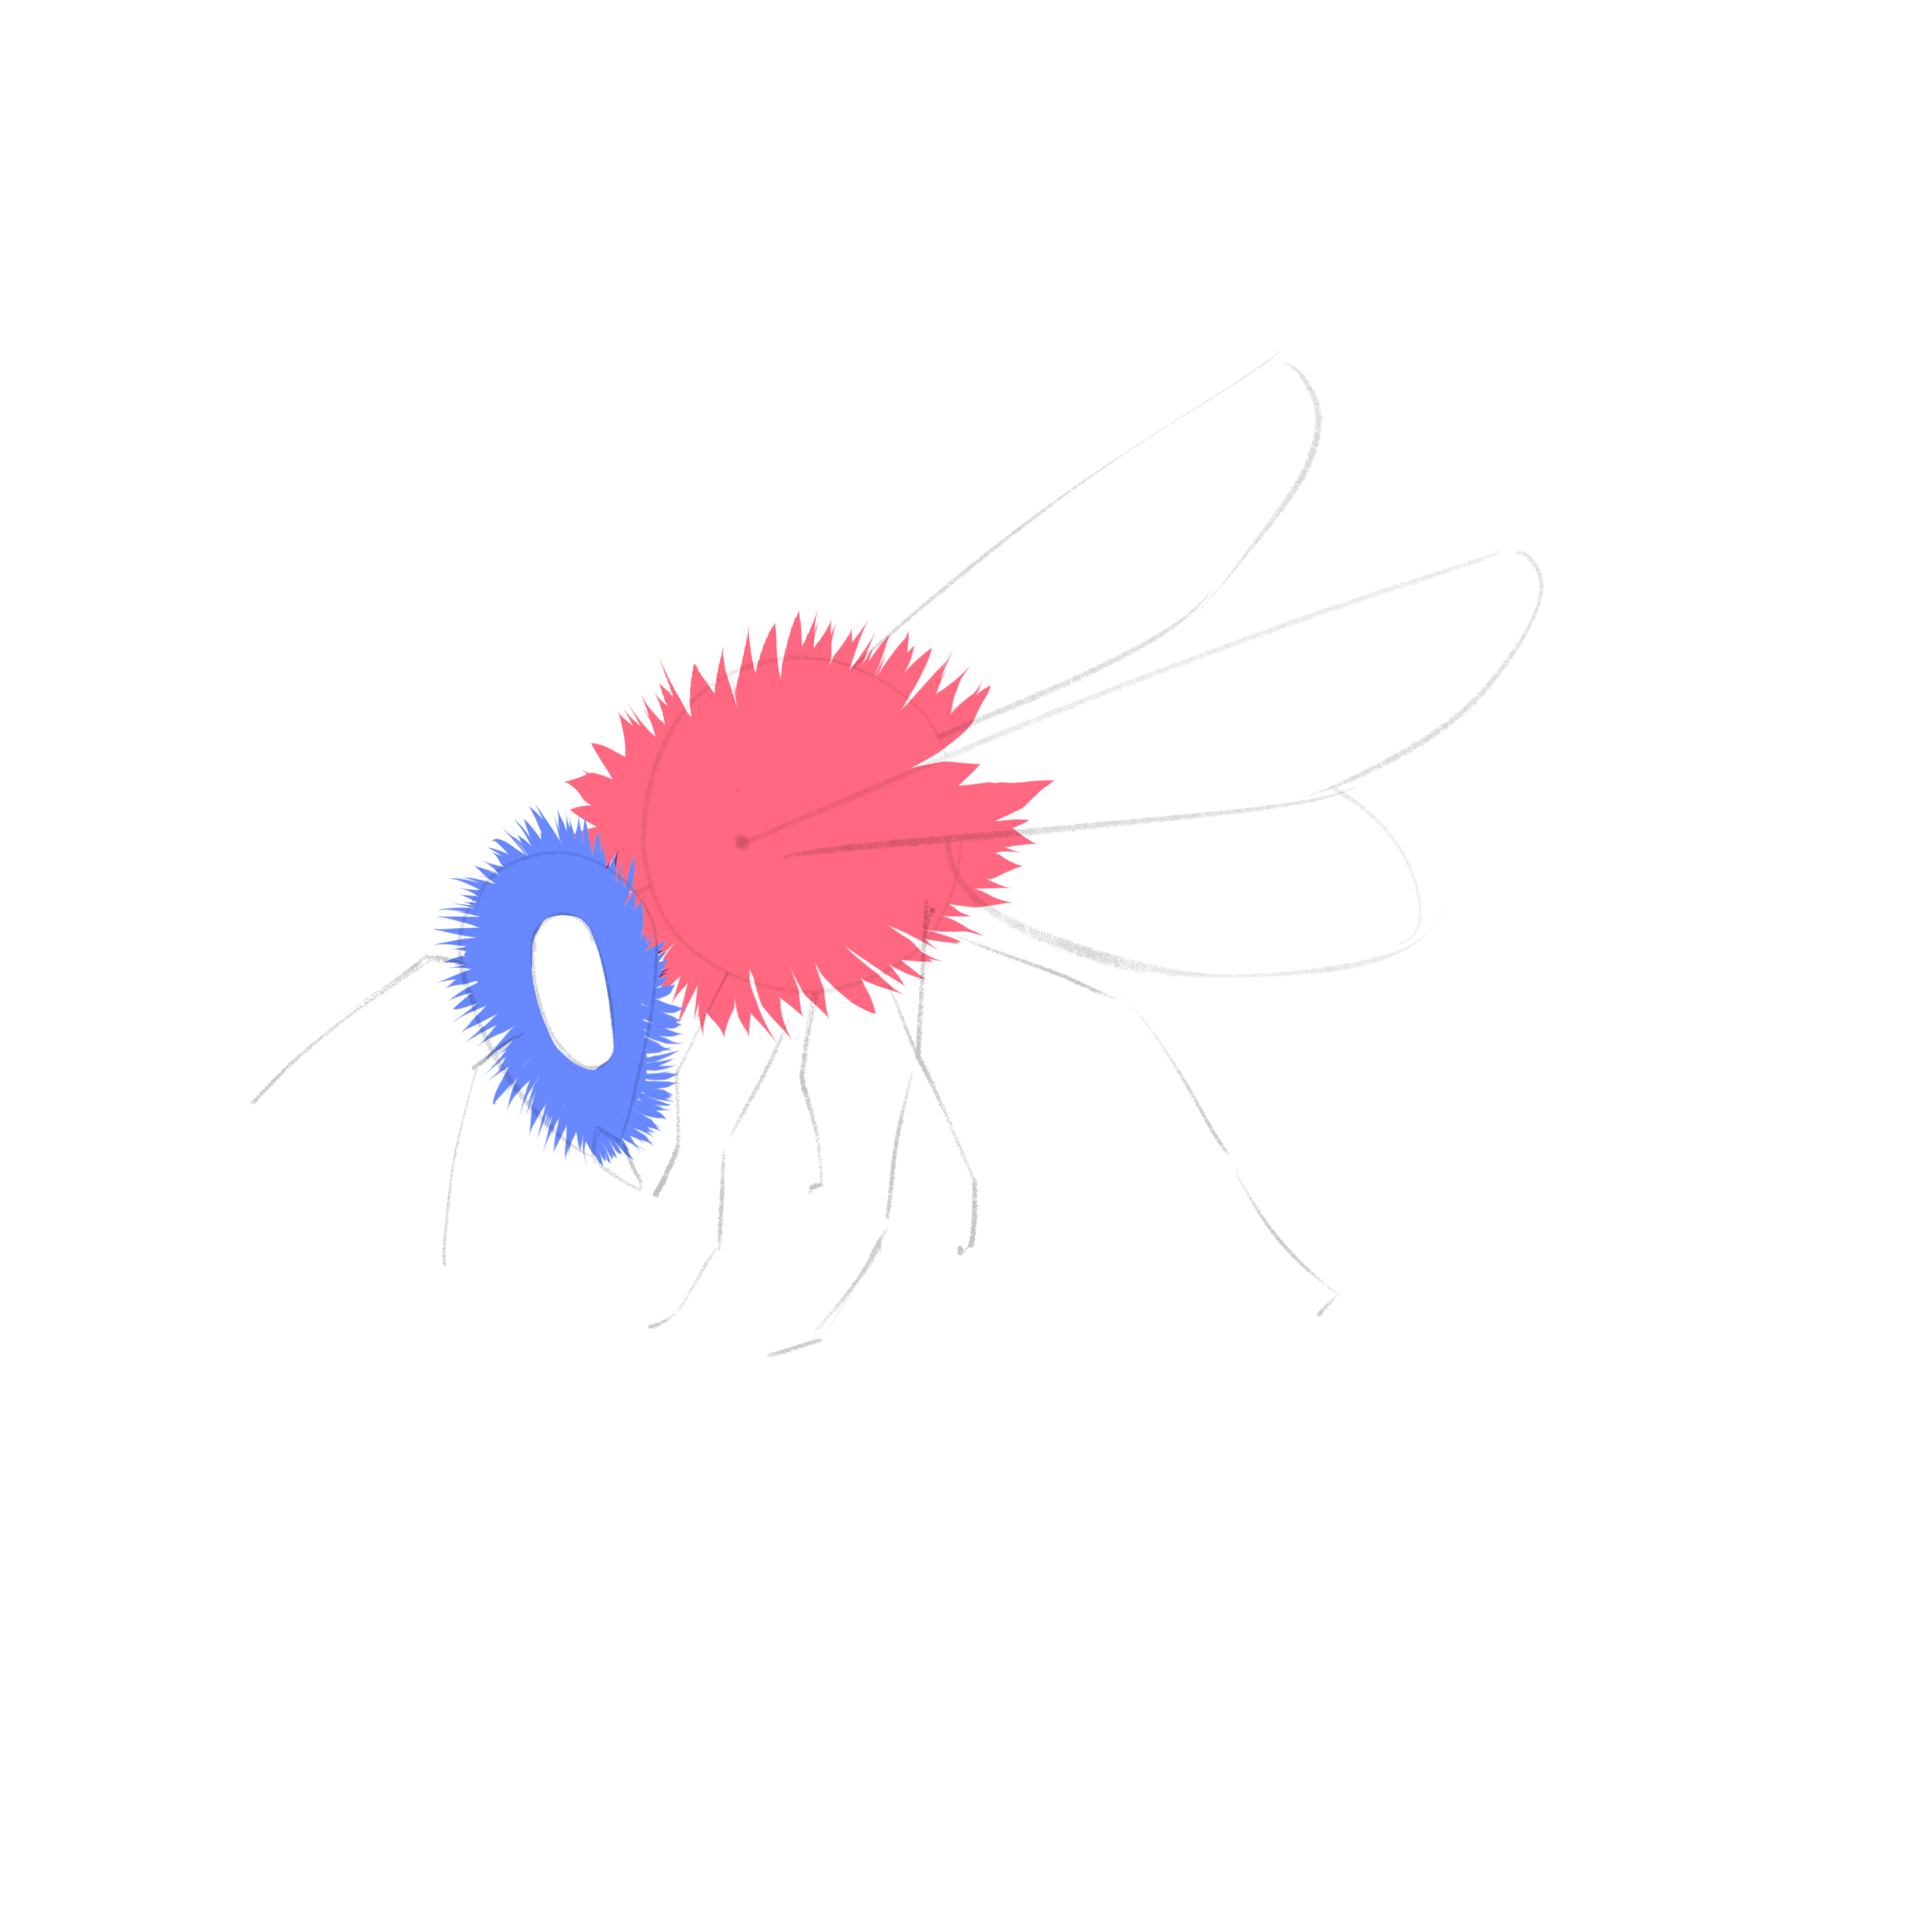
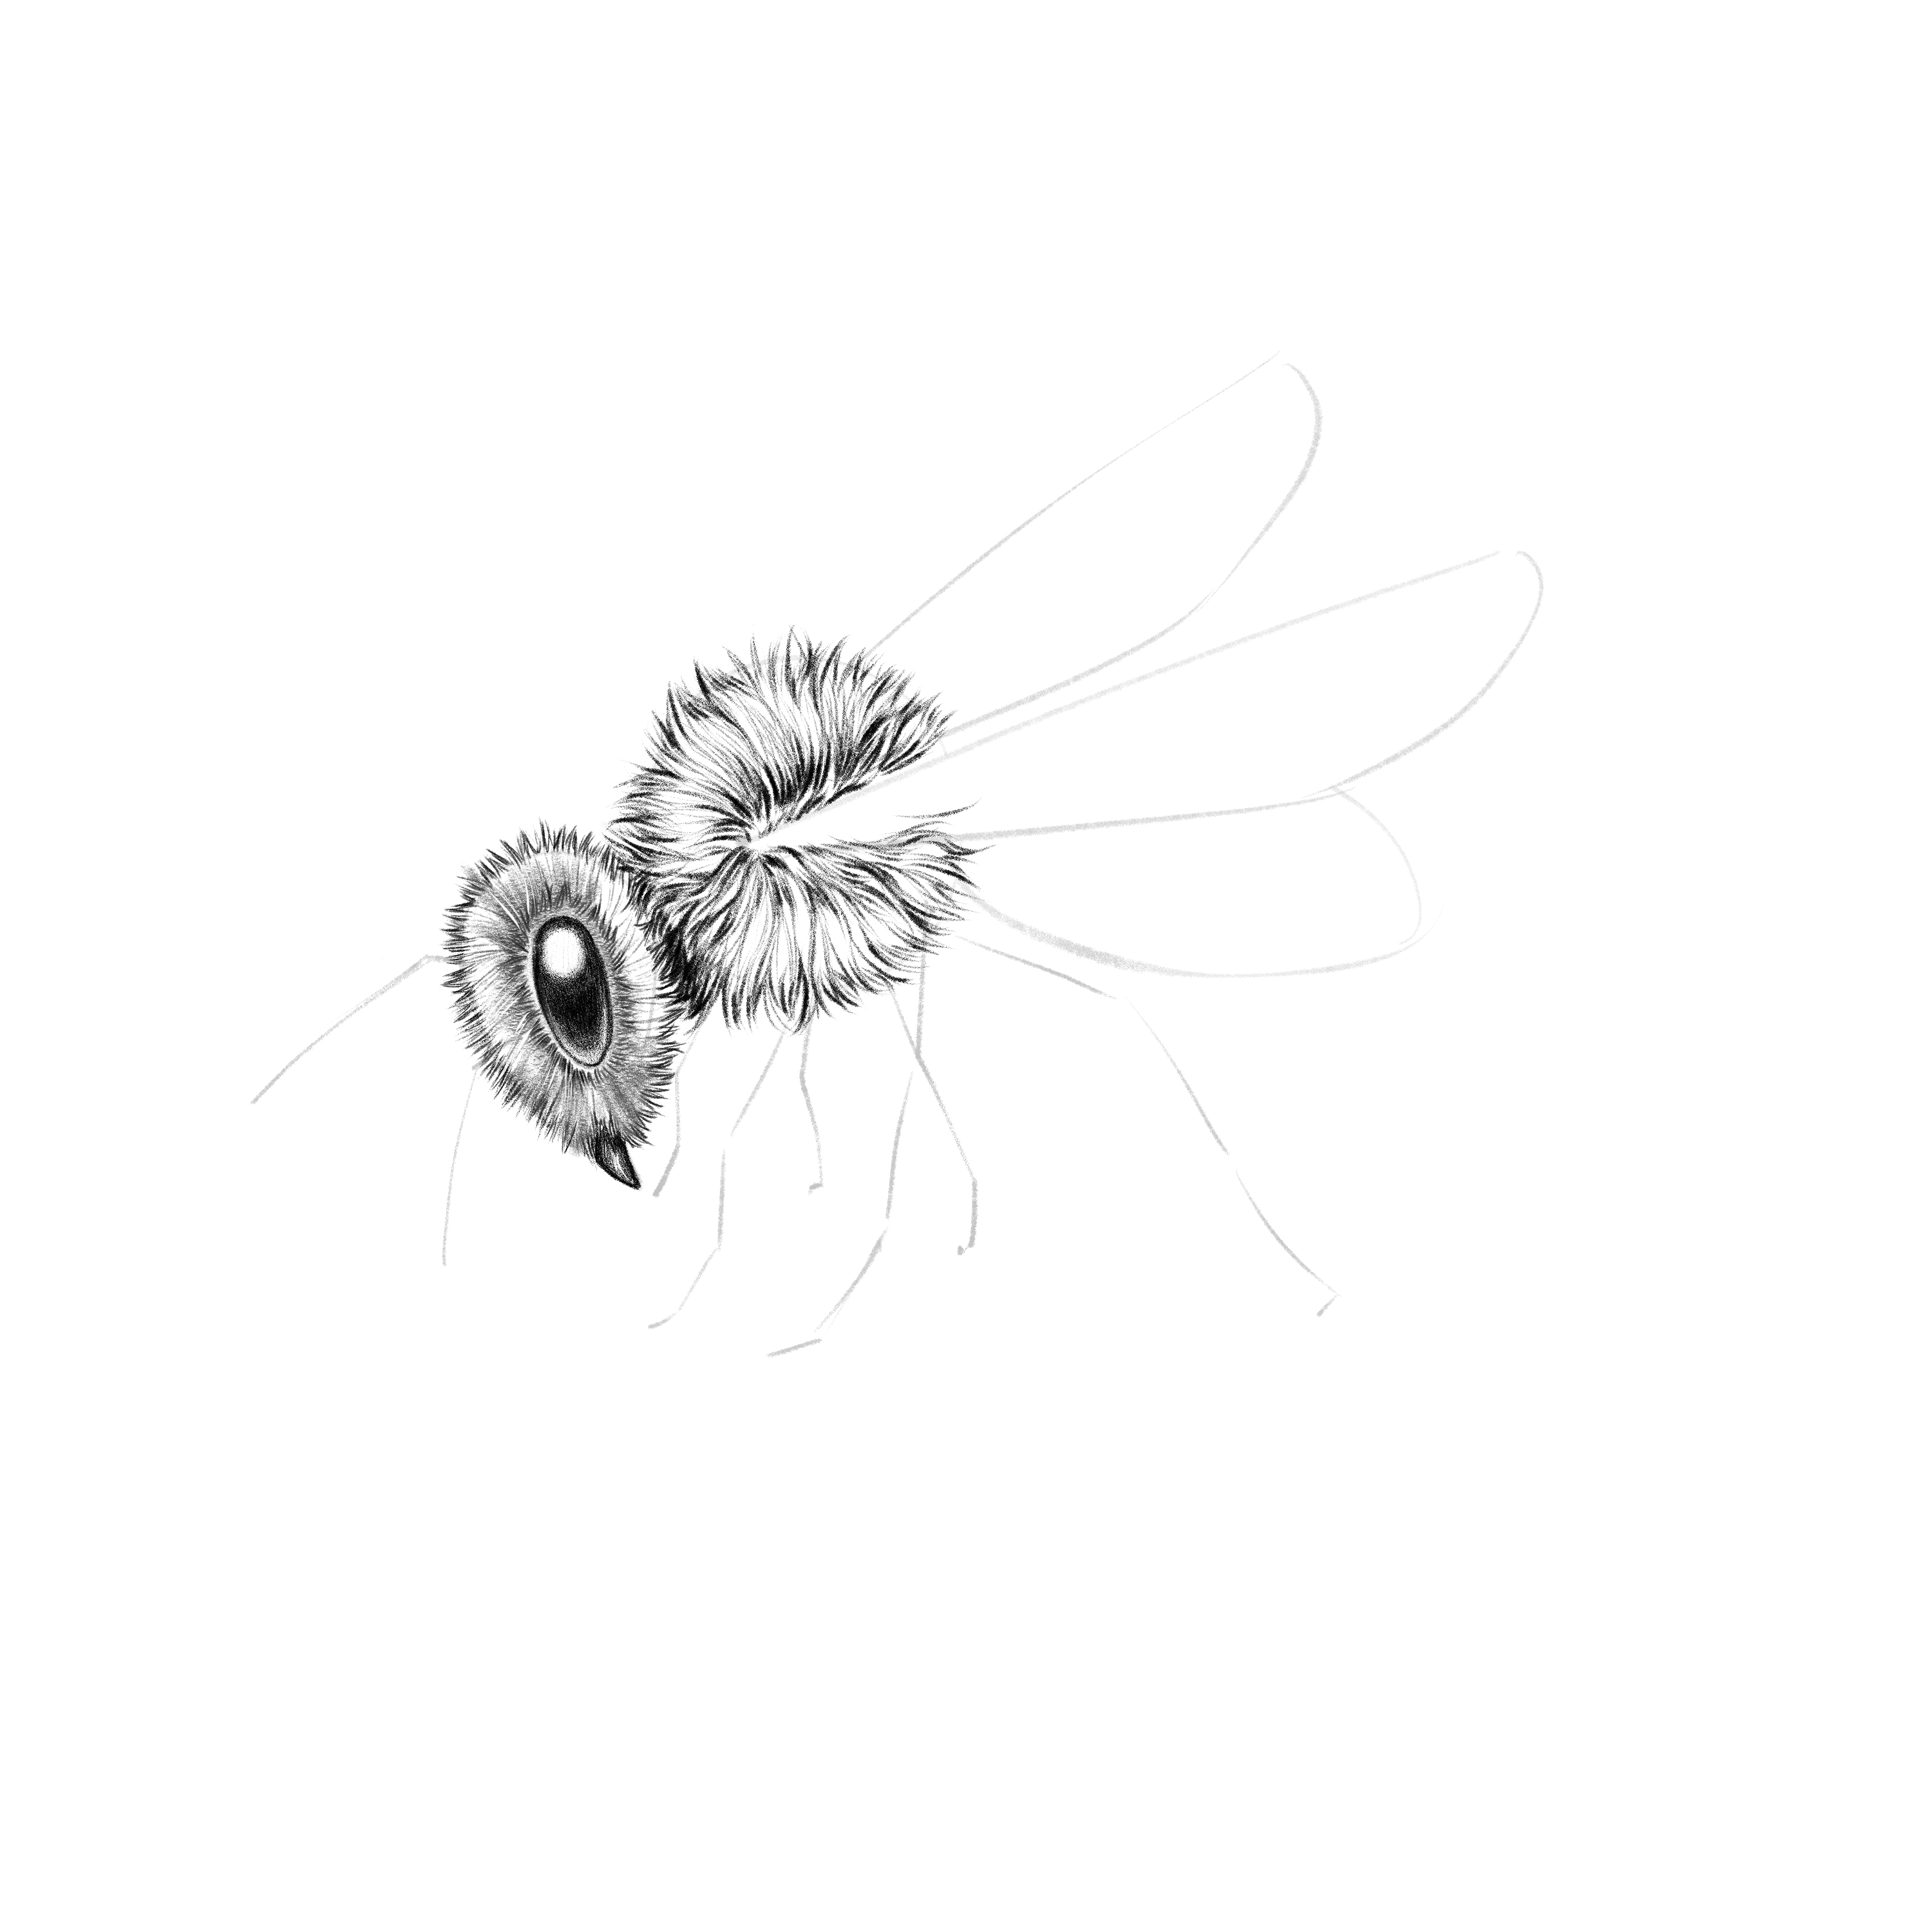
Step 13: Drawing Fur on the Head
Start by drawing the fur on the bee’s head. Use short, consecutive lines surrounding the head to create a fur pattern that’s easy to follow and goes towards the middle.  Using a 2H pencil, draw thin, soft, short lines following the fur’s direction towards the bee’s eye.
Step 14: Detailing the Eye
With a 6B pencil, draw even shorter lines emerging from the edge of the bee’s eye. 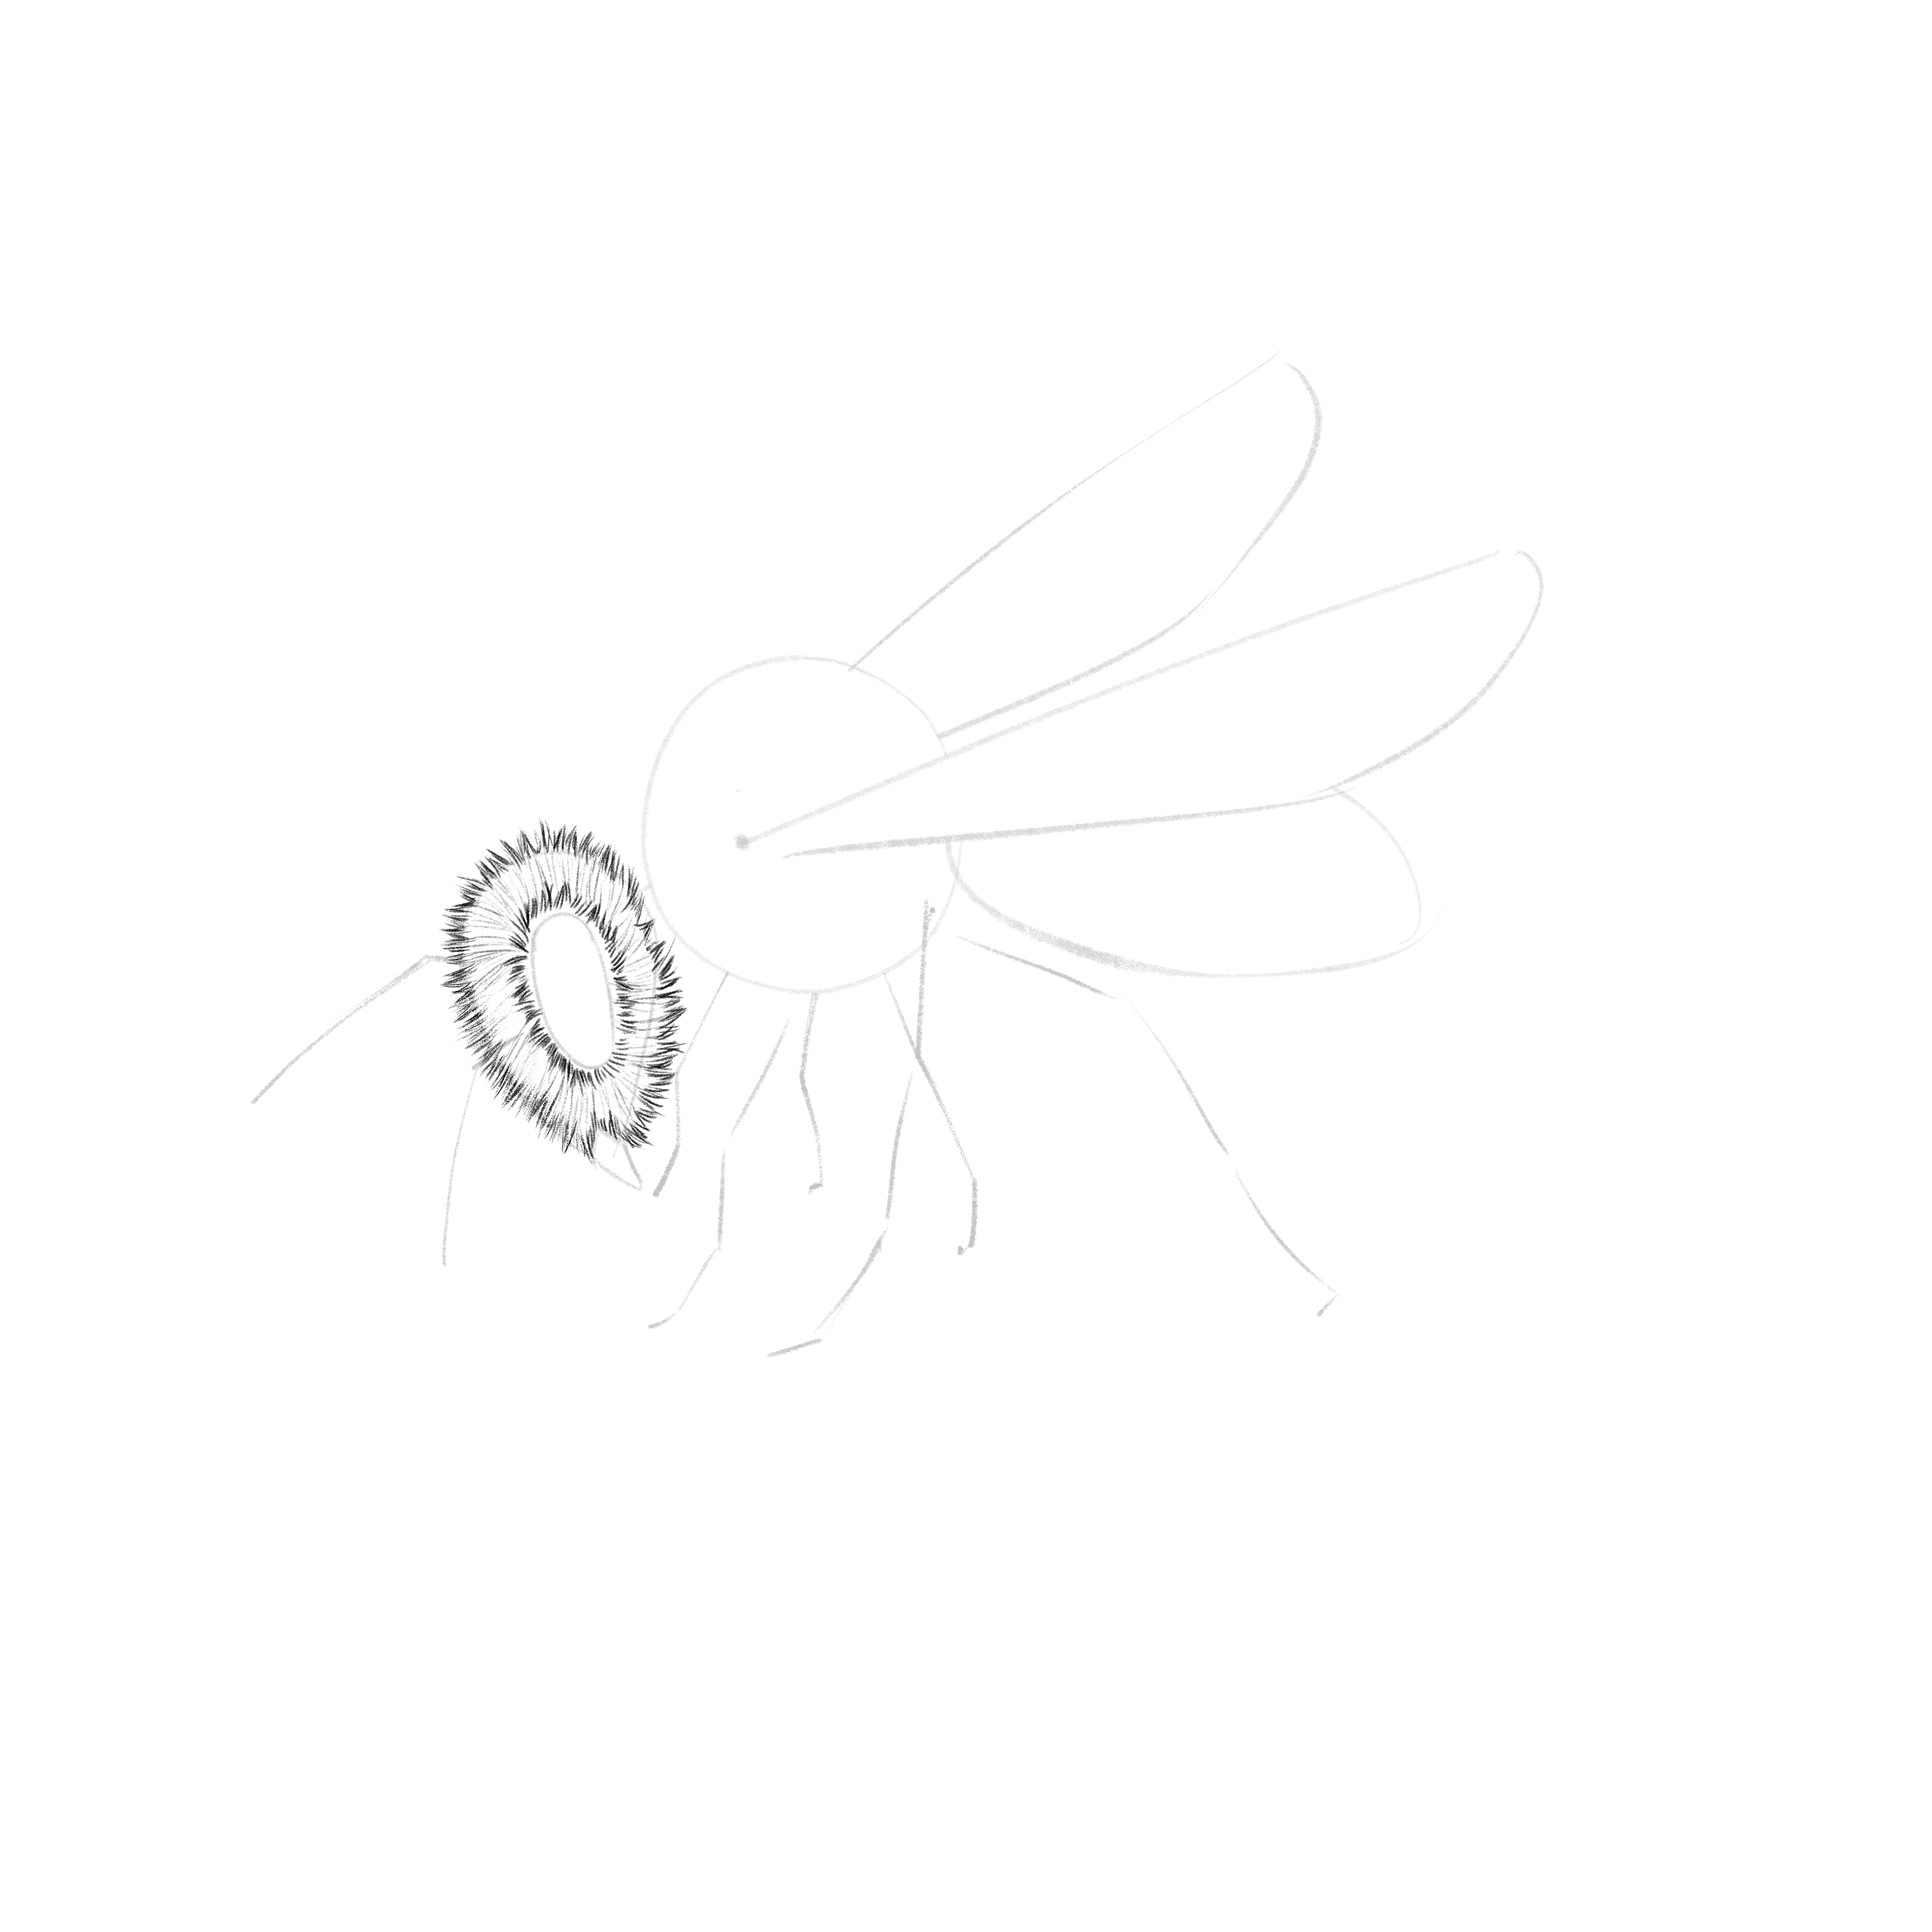
Use your blending stump to add a bit more contrast and your Tombow Mono Zero eraser to add some loose hairs on the bee’s head.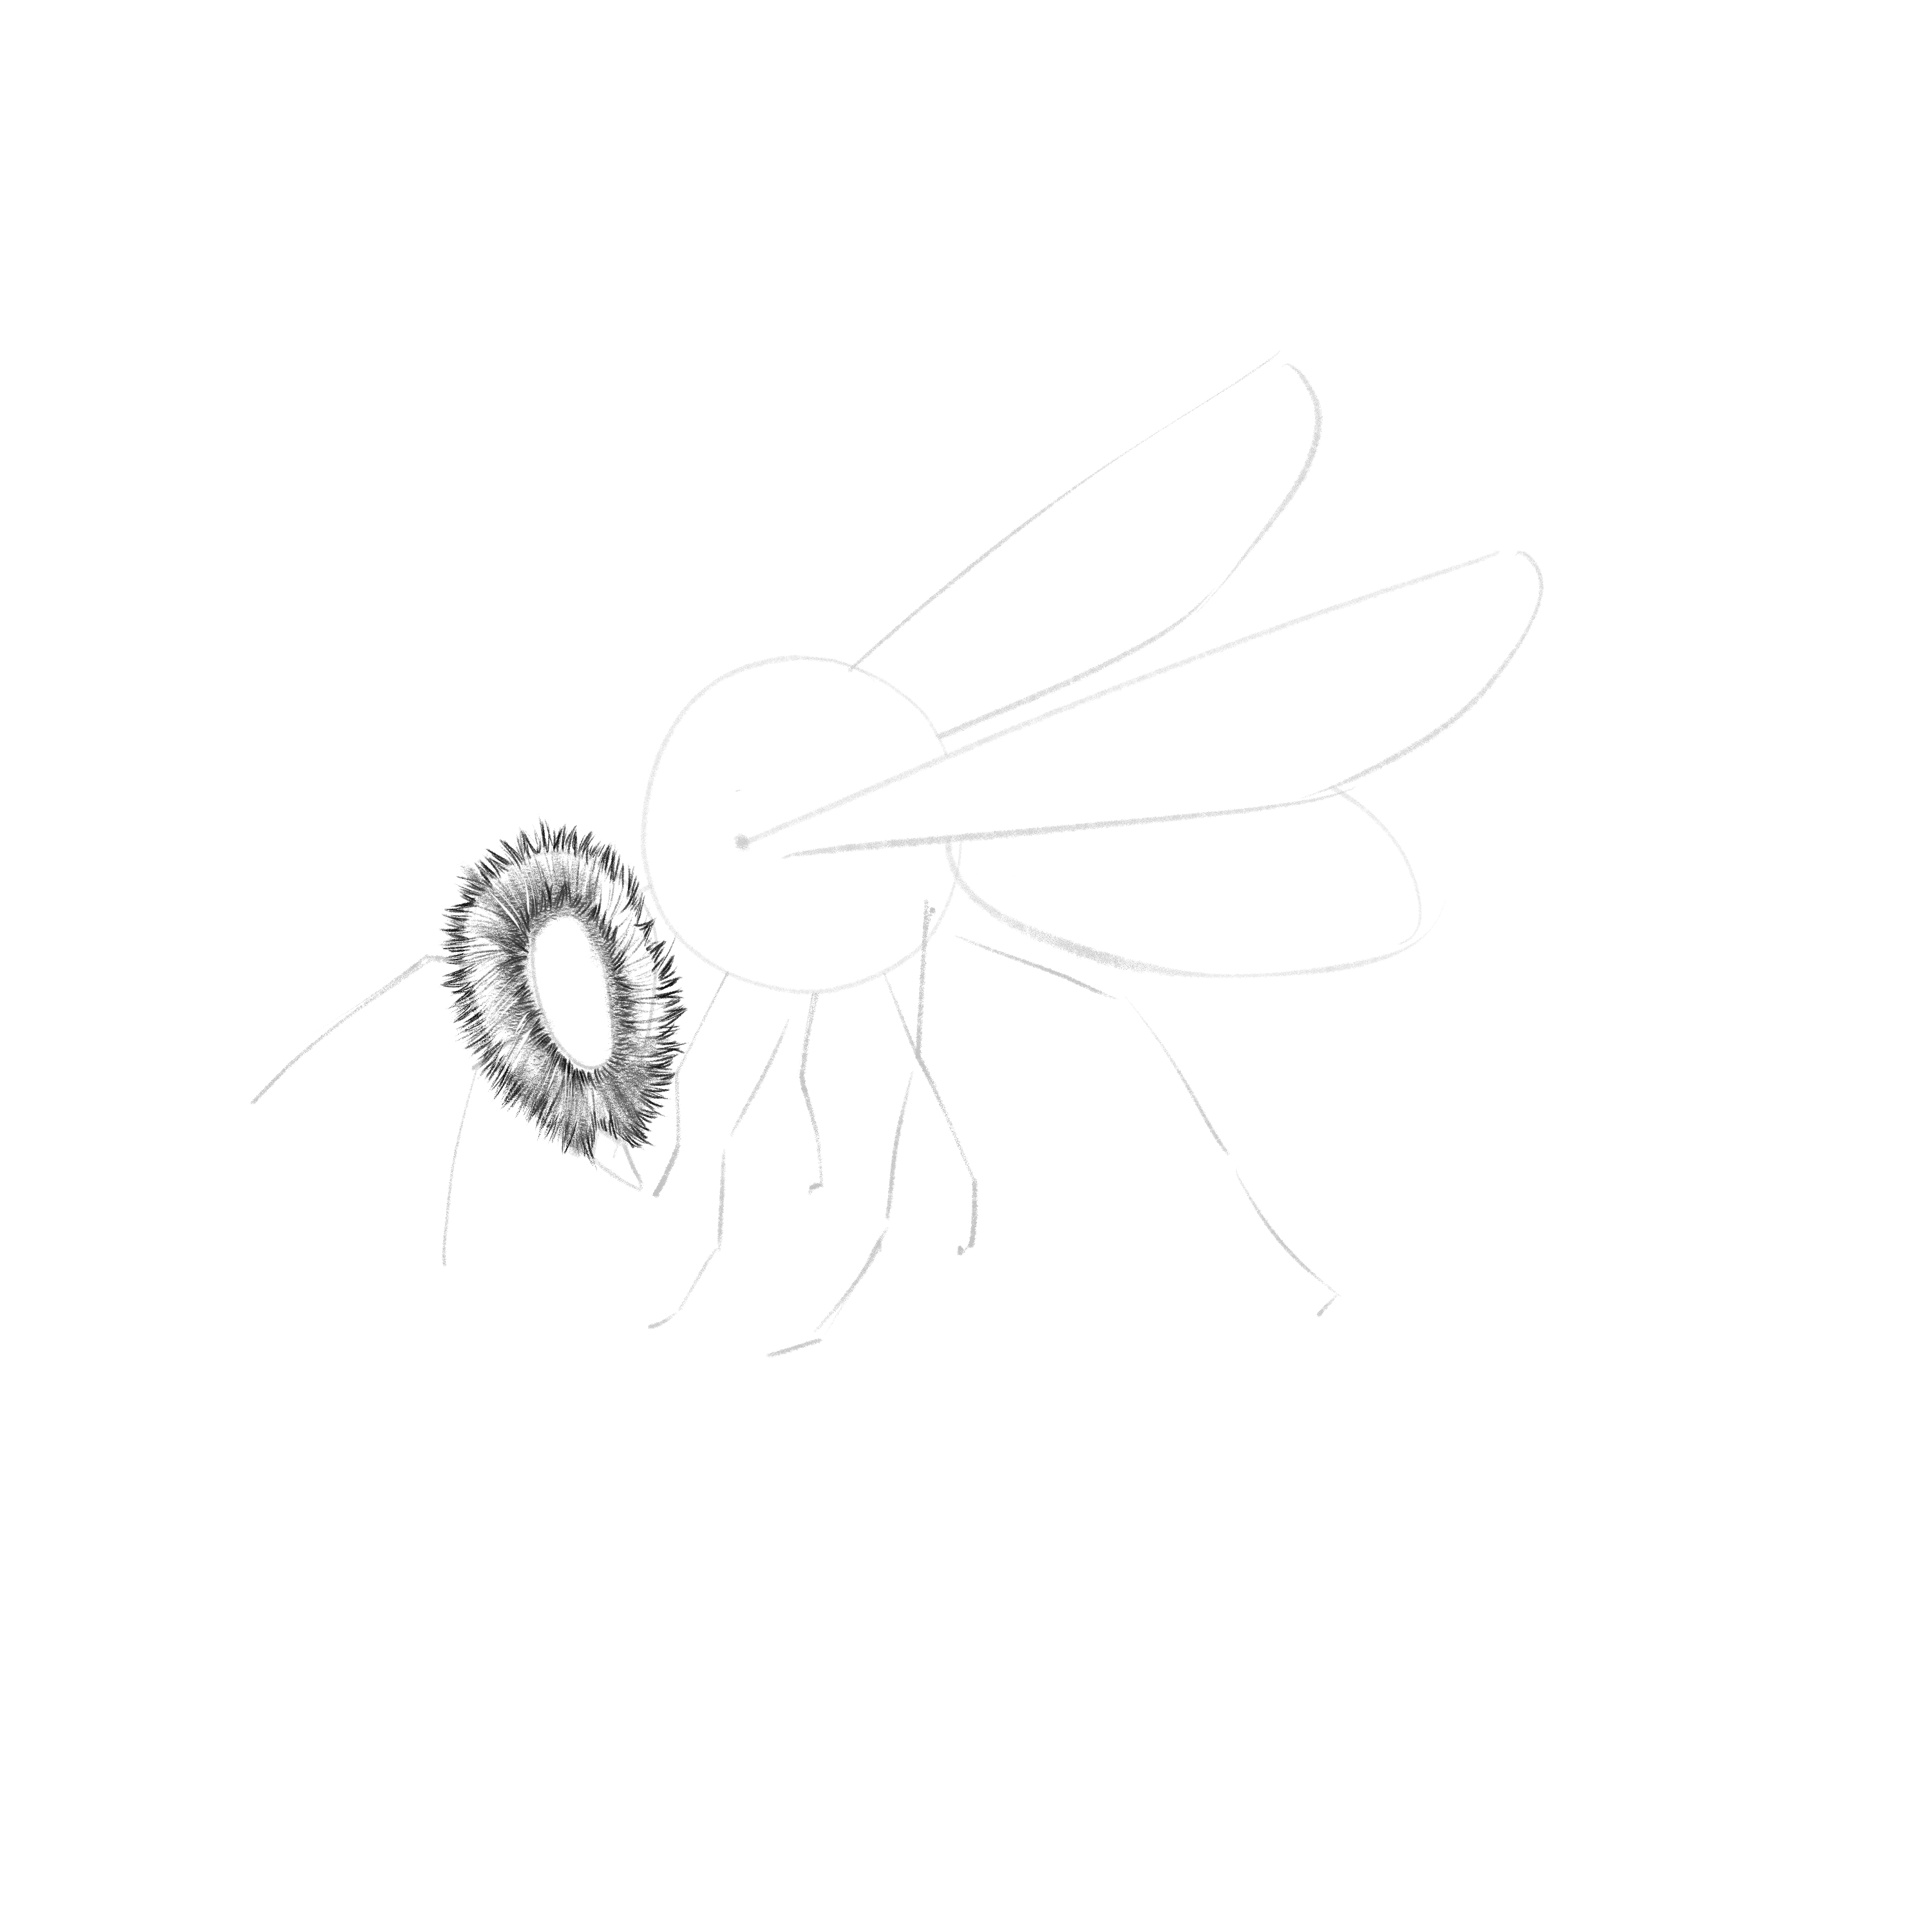
Step 17: Eye Shading
Bee’s eyes are not completely dark; they have a significant amount of brightness, primarily at one spot at the top (or according to the light source) and a secondary spot at the opposite side where the light reflects more softly, creating a gentle gradient at the eye’s base.
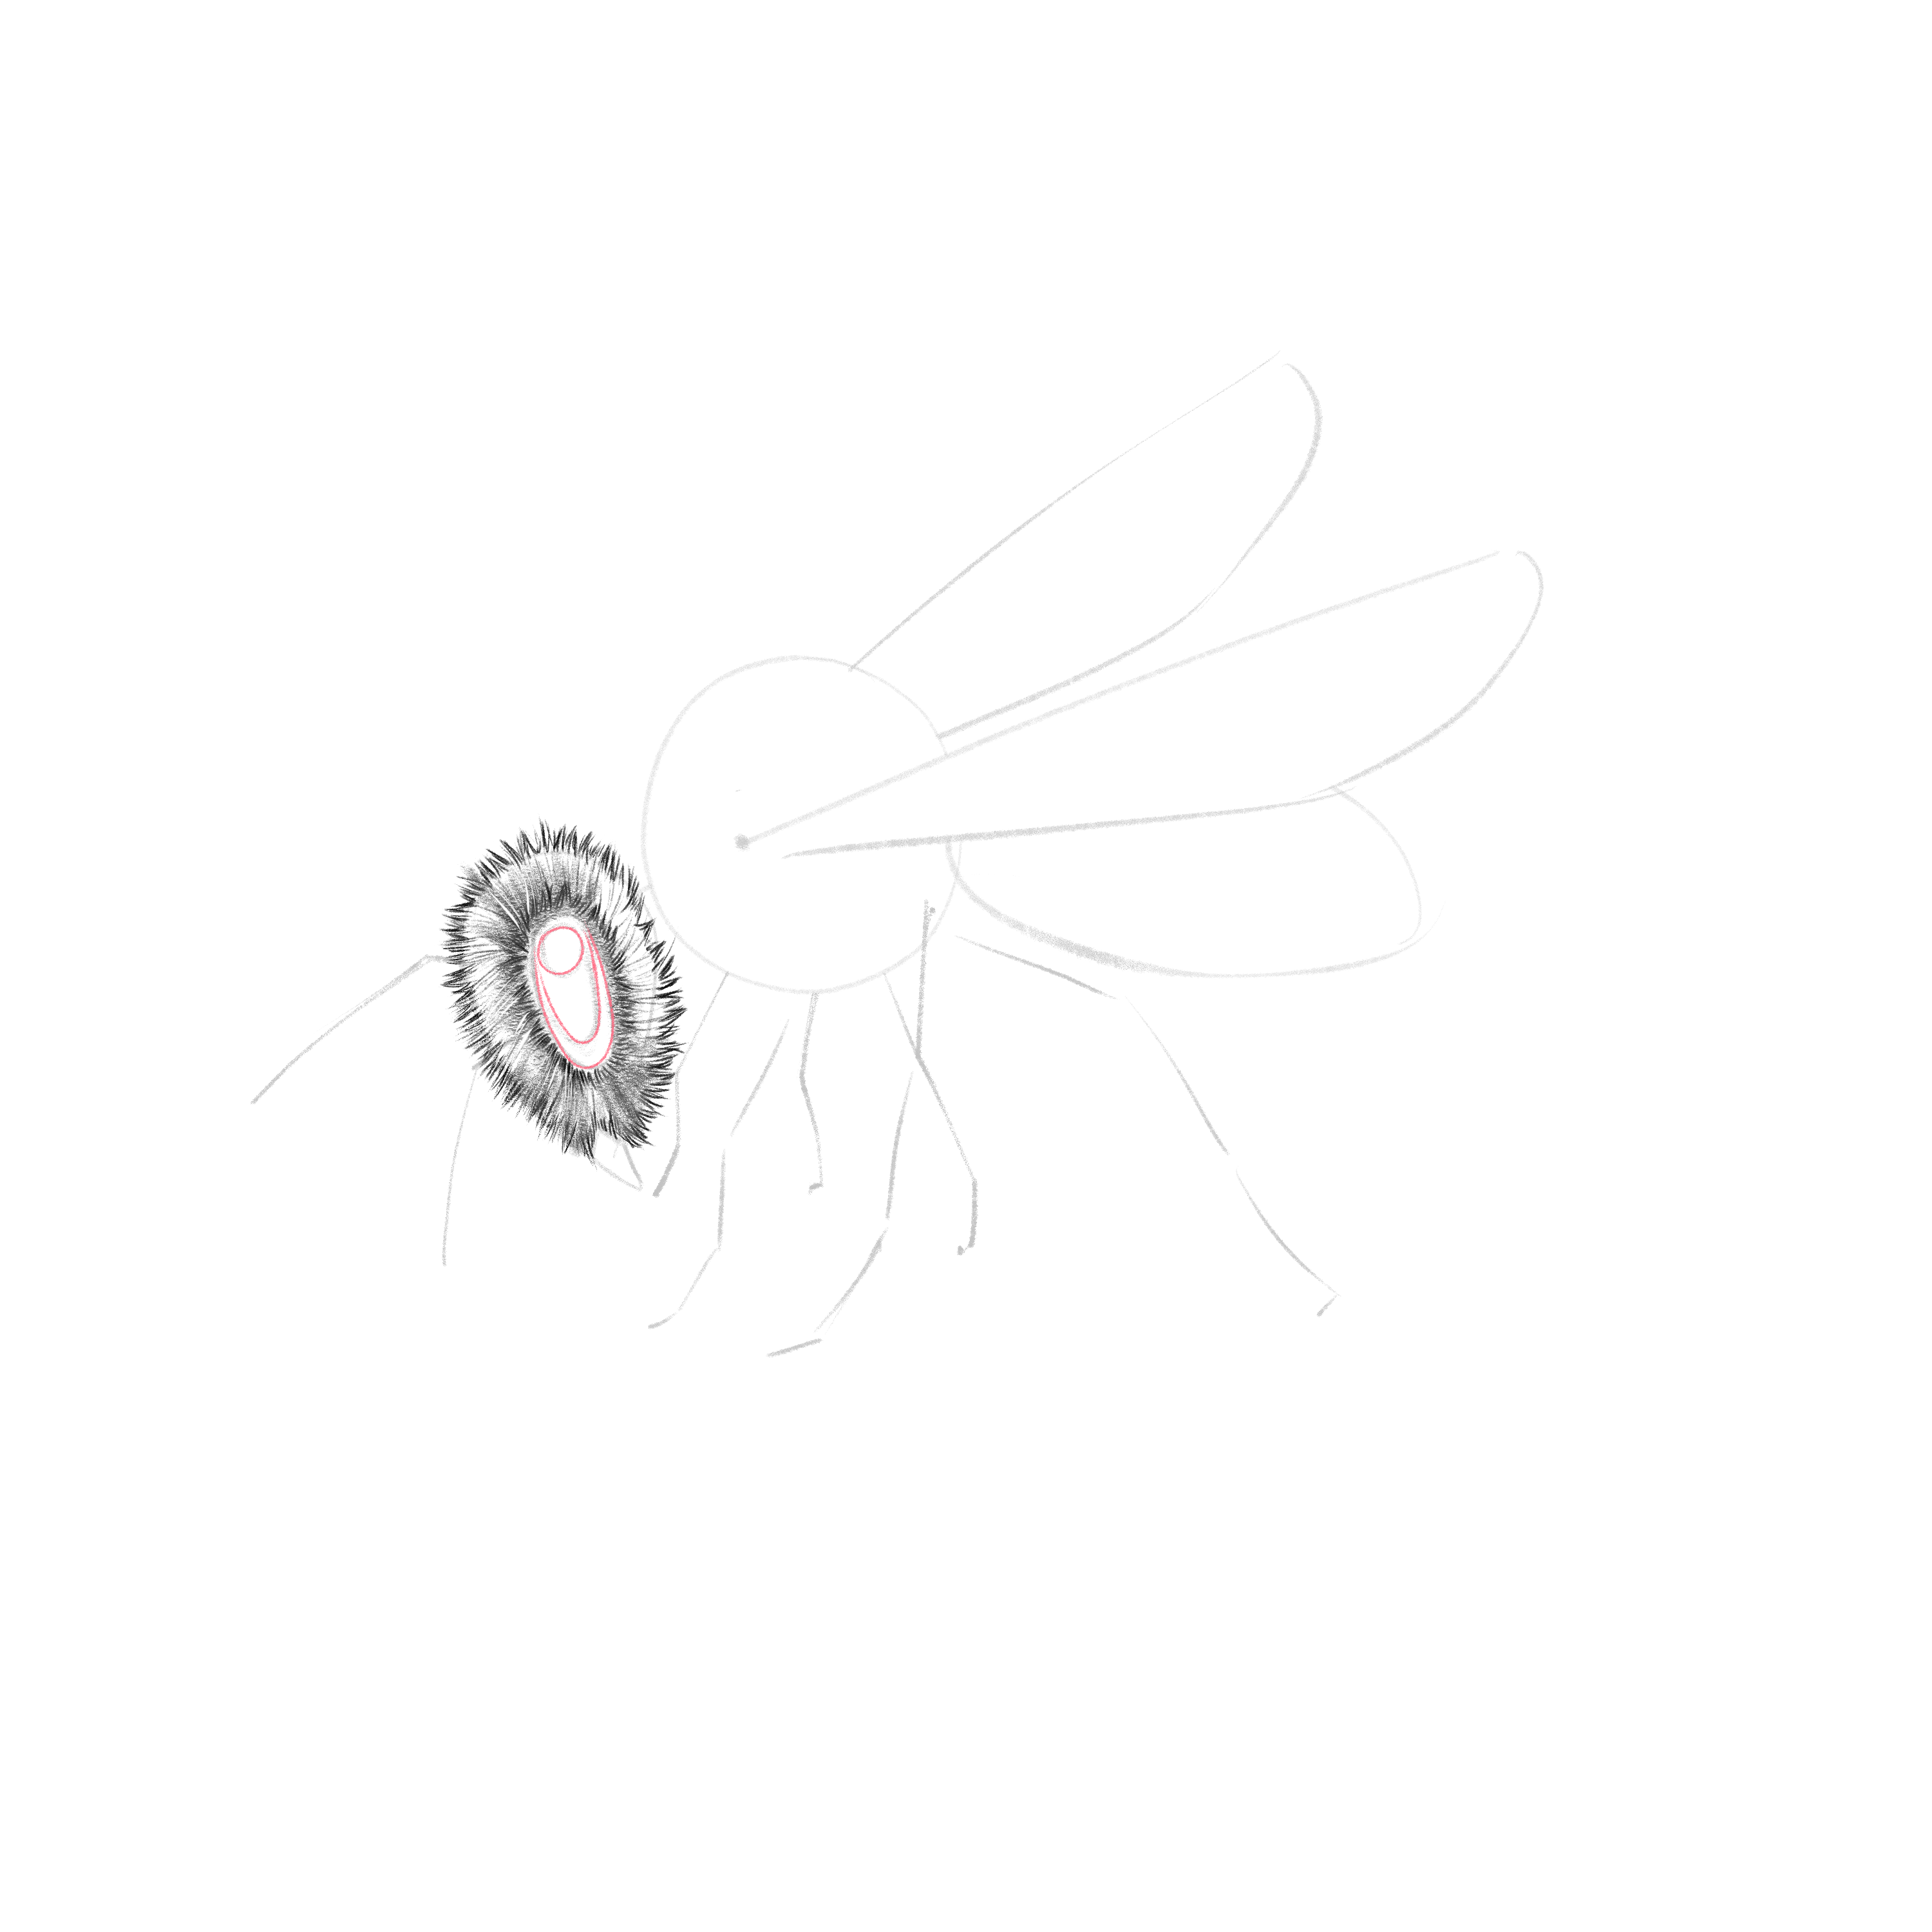
Use your 6B pencil to fill in the parts that aren’t marked and create a gradient around both highlights in the eye.

Shade the bee’s mandible as well. Step 18: Shading the Torso
Using the same steps we did for the head, shade the torso, keeping in mind that it’s much fluffier than the head and abdomen.
Apply a bit more pressure with your 6B pencil to add shadows at the base of the bee’s torso.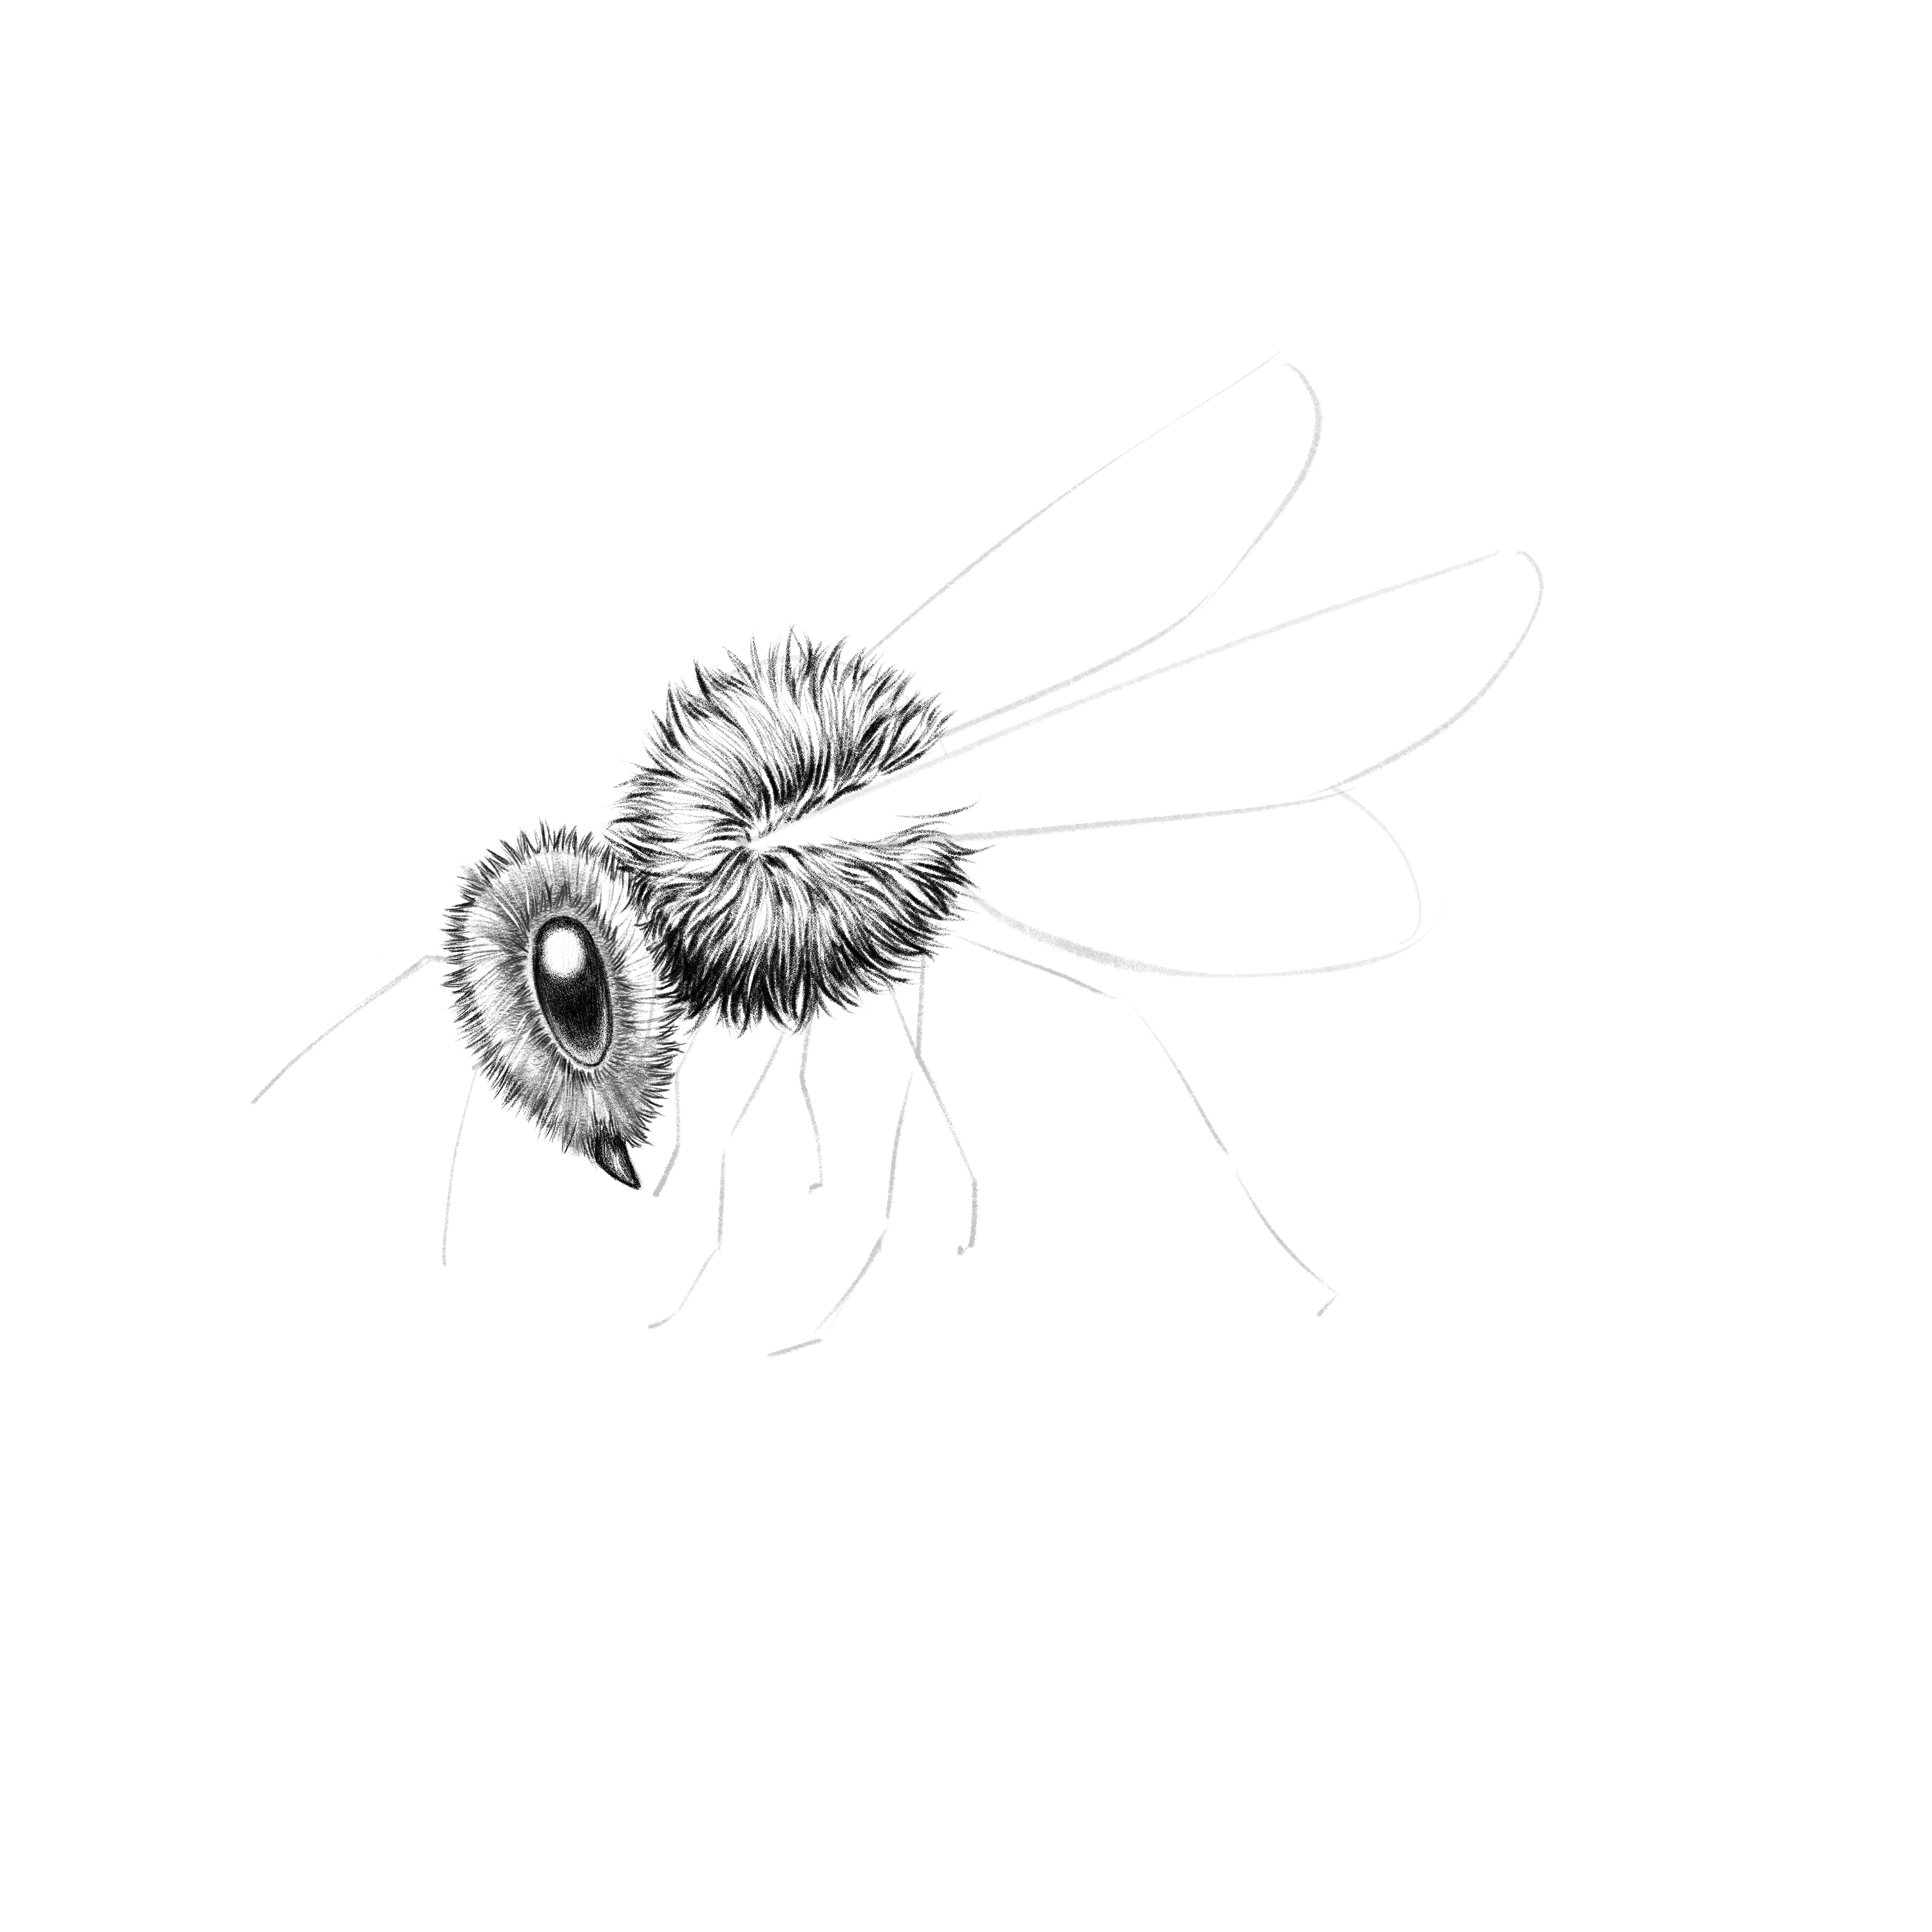
Step 19: Shading the Abdomen
Next, start shading the abdomen. Begin by gently shading the abdomen sections with our 6B pencil using soft strokes for the middle section and strong strokes for the division lines.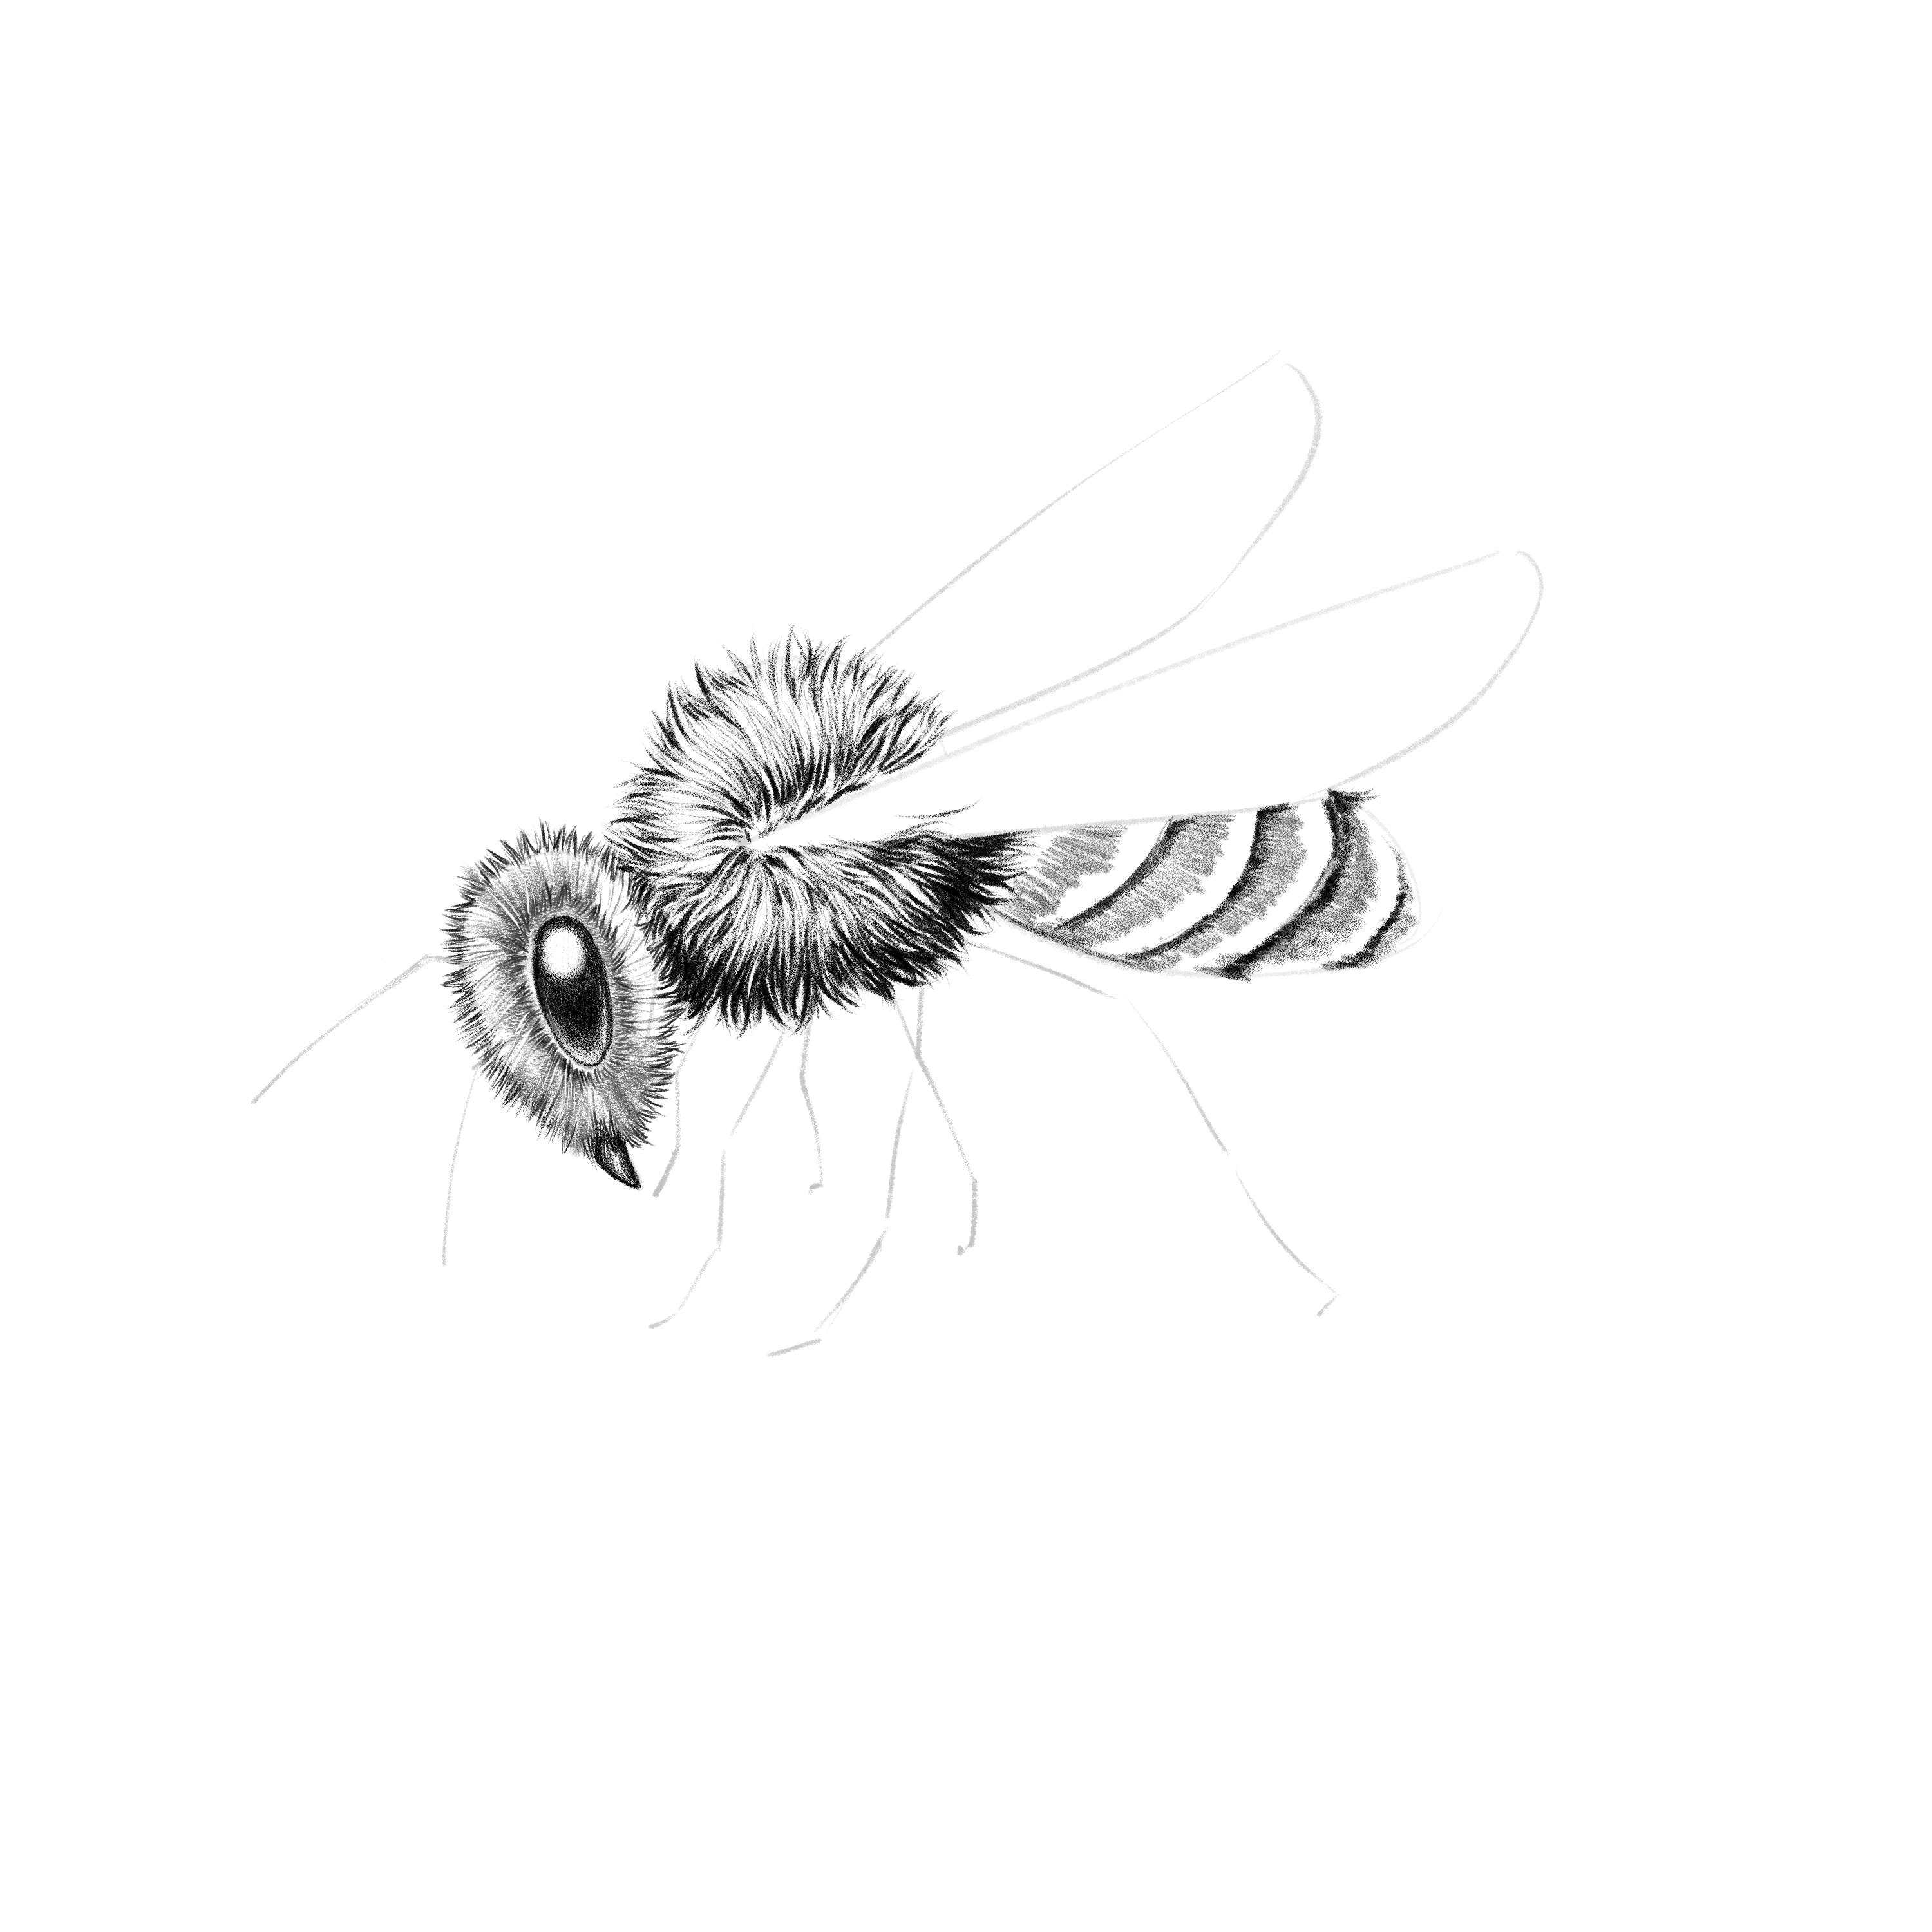
Add some fur following the diagram indicated at the start of the section, thereby finishing the bee’s abdomen. For this, layer more graphite and draw sime loose hairs using our 6B pencil.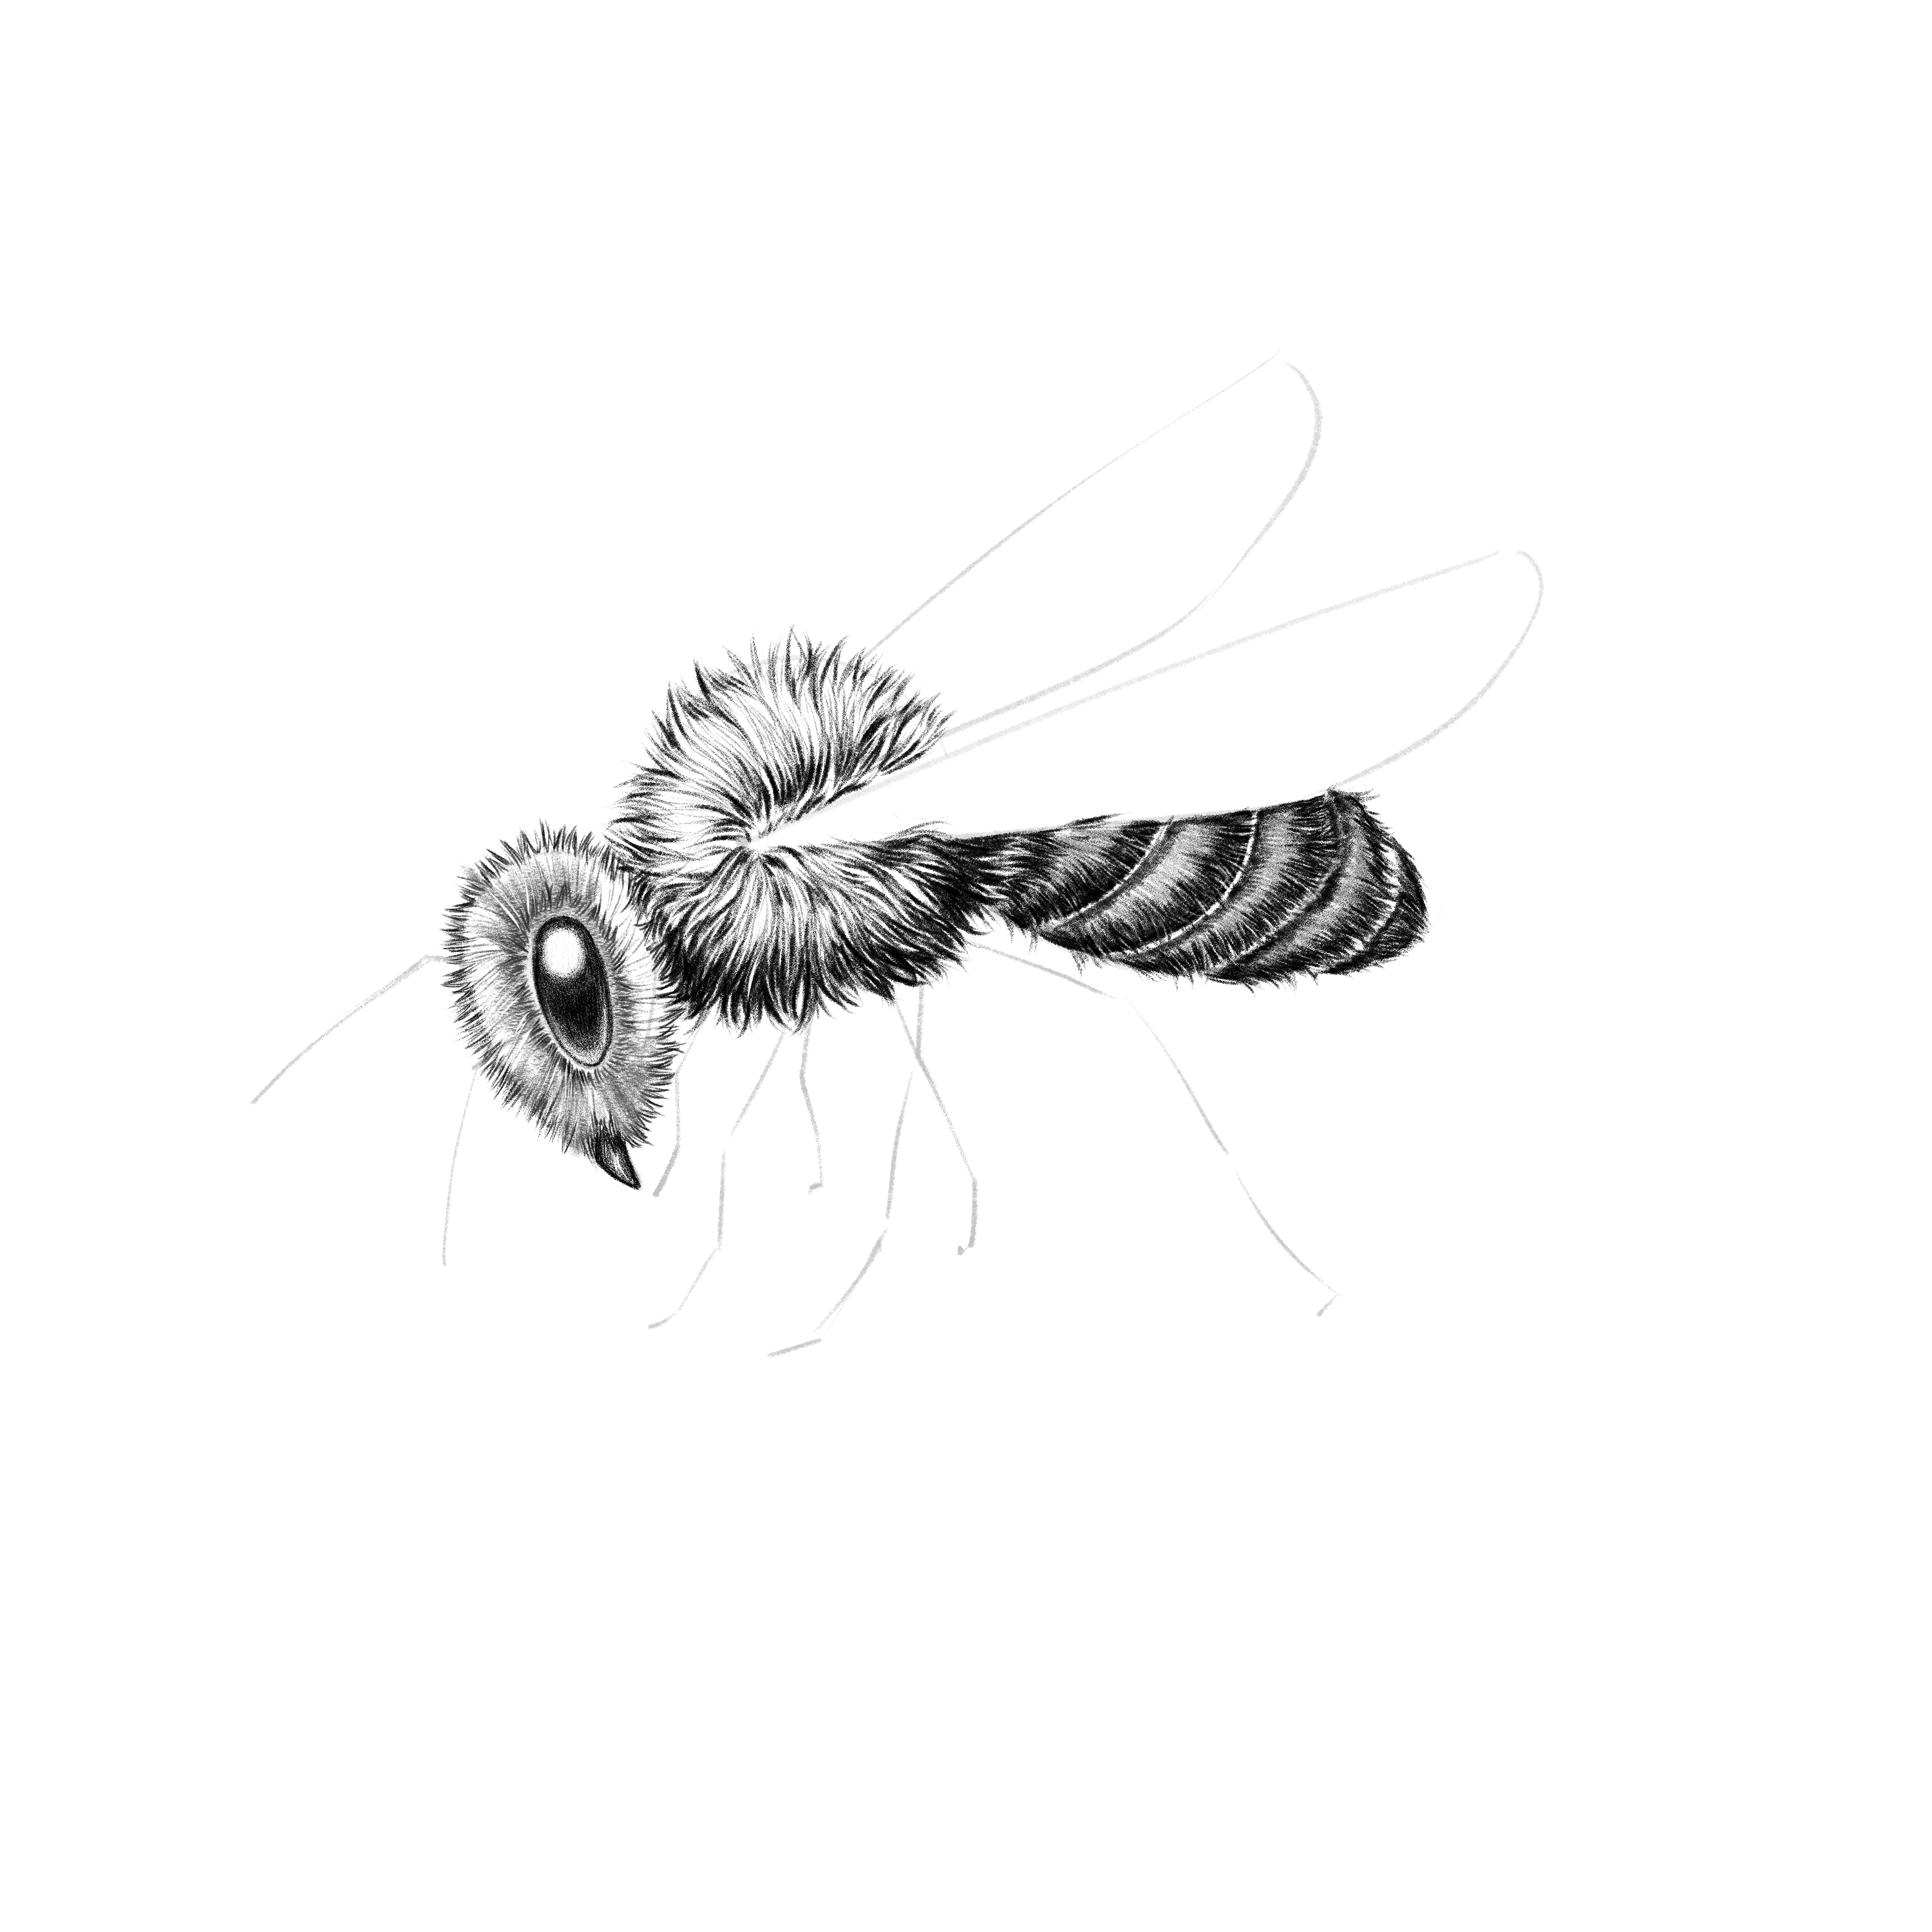
Step 20: Detailing the Wings
Now, outline the wings and draw lines in divided patterns to give the bee’s wings some realism. 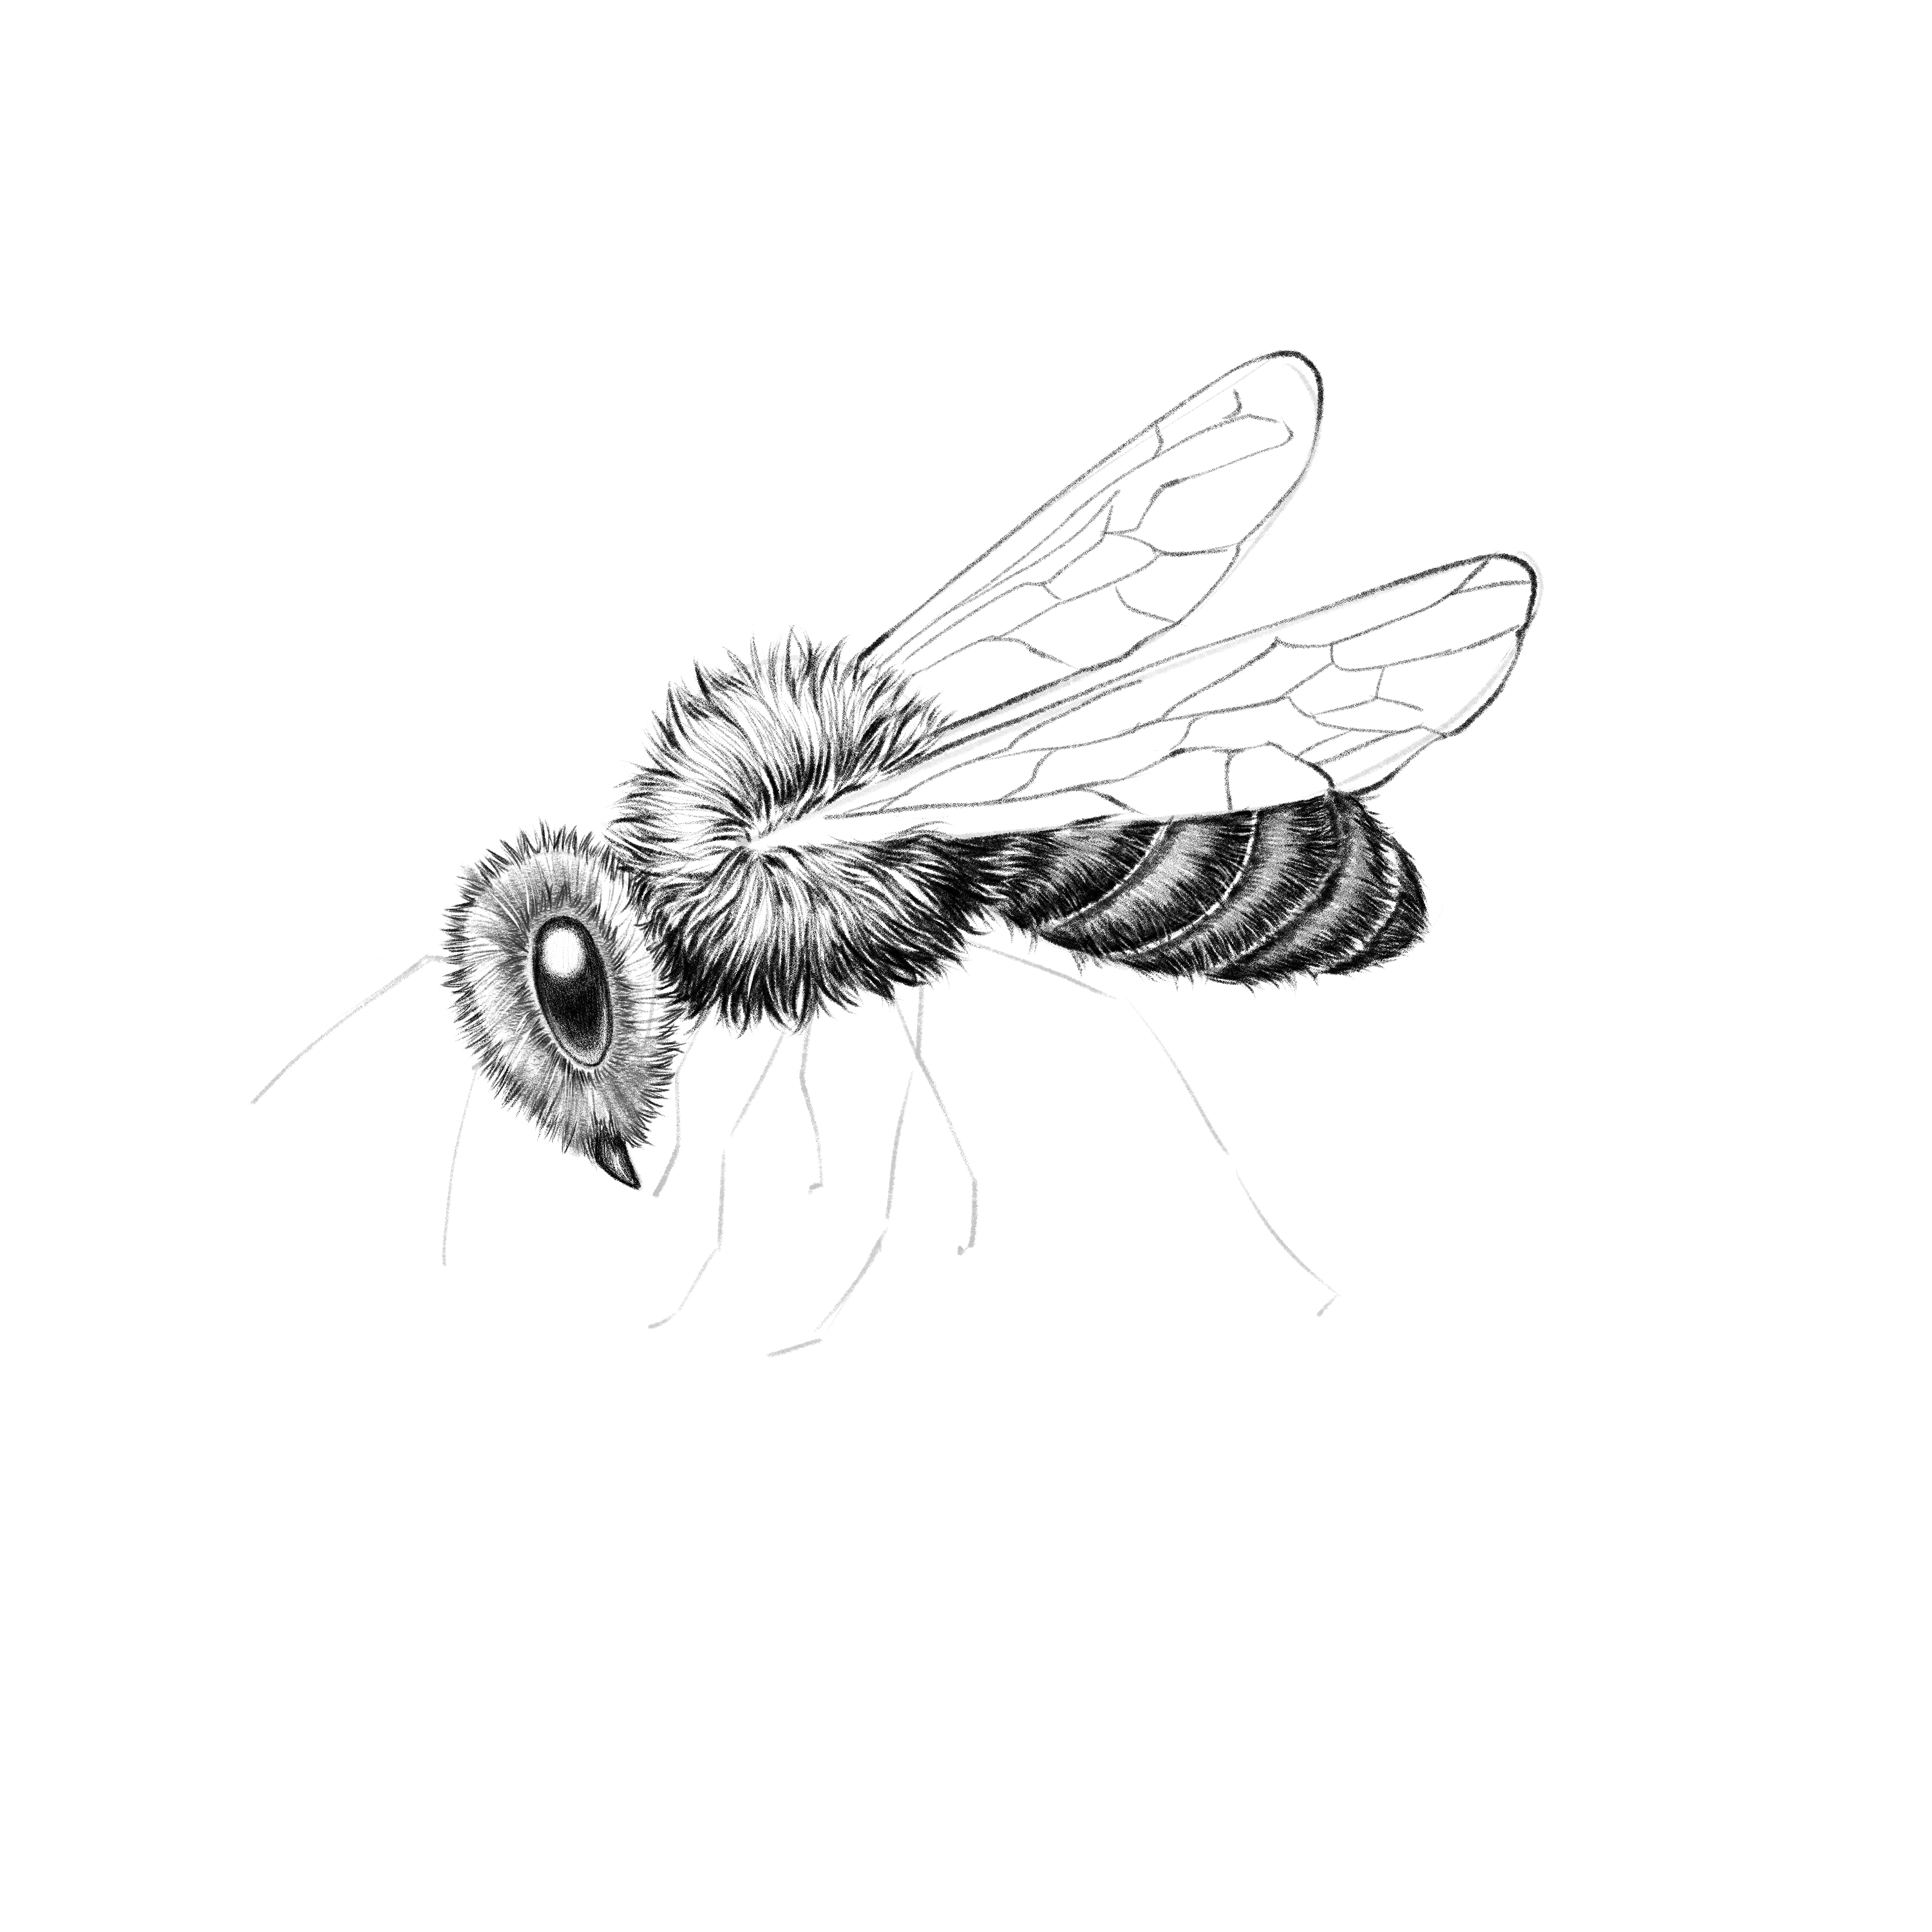 Shade the parts where the lines meet using your 6B pencil, as well as the base and edges of the wings.
 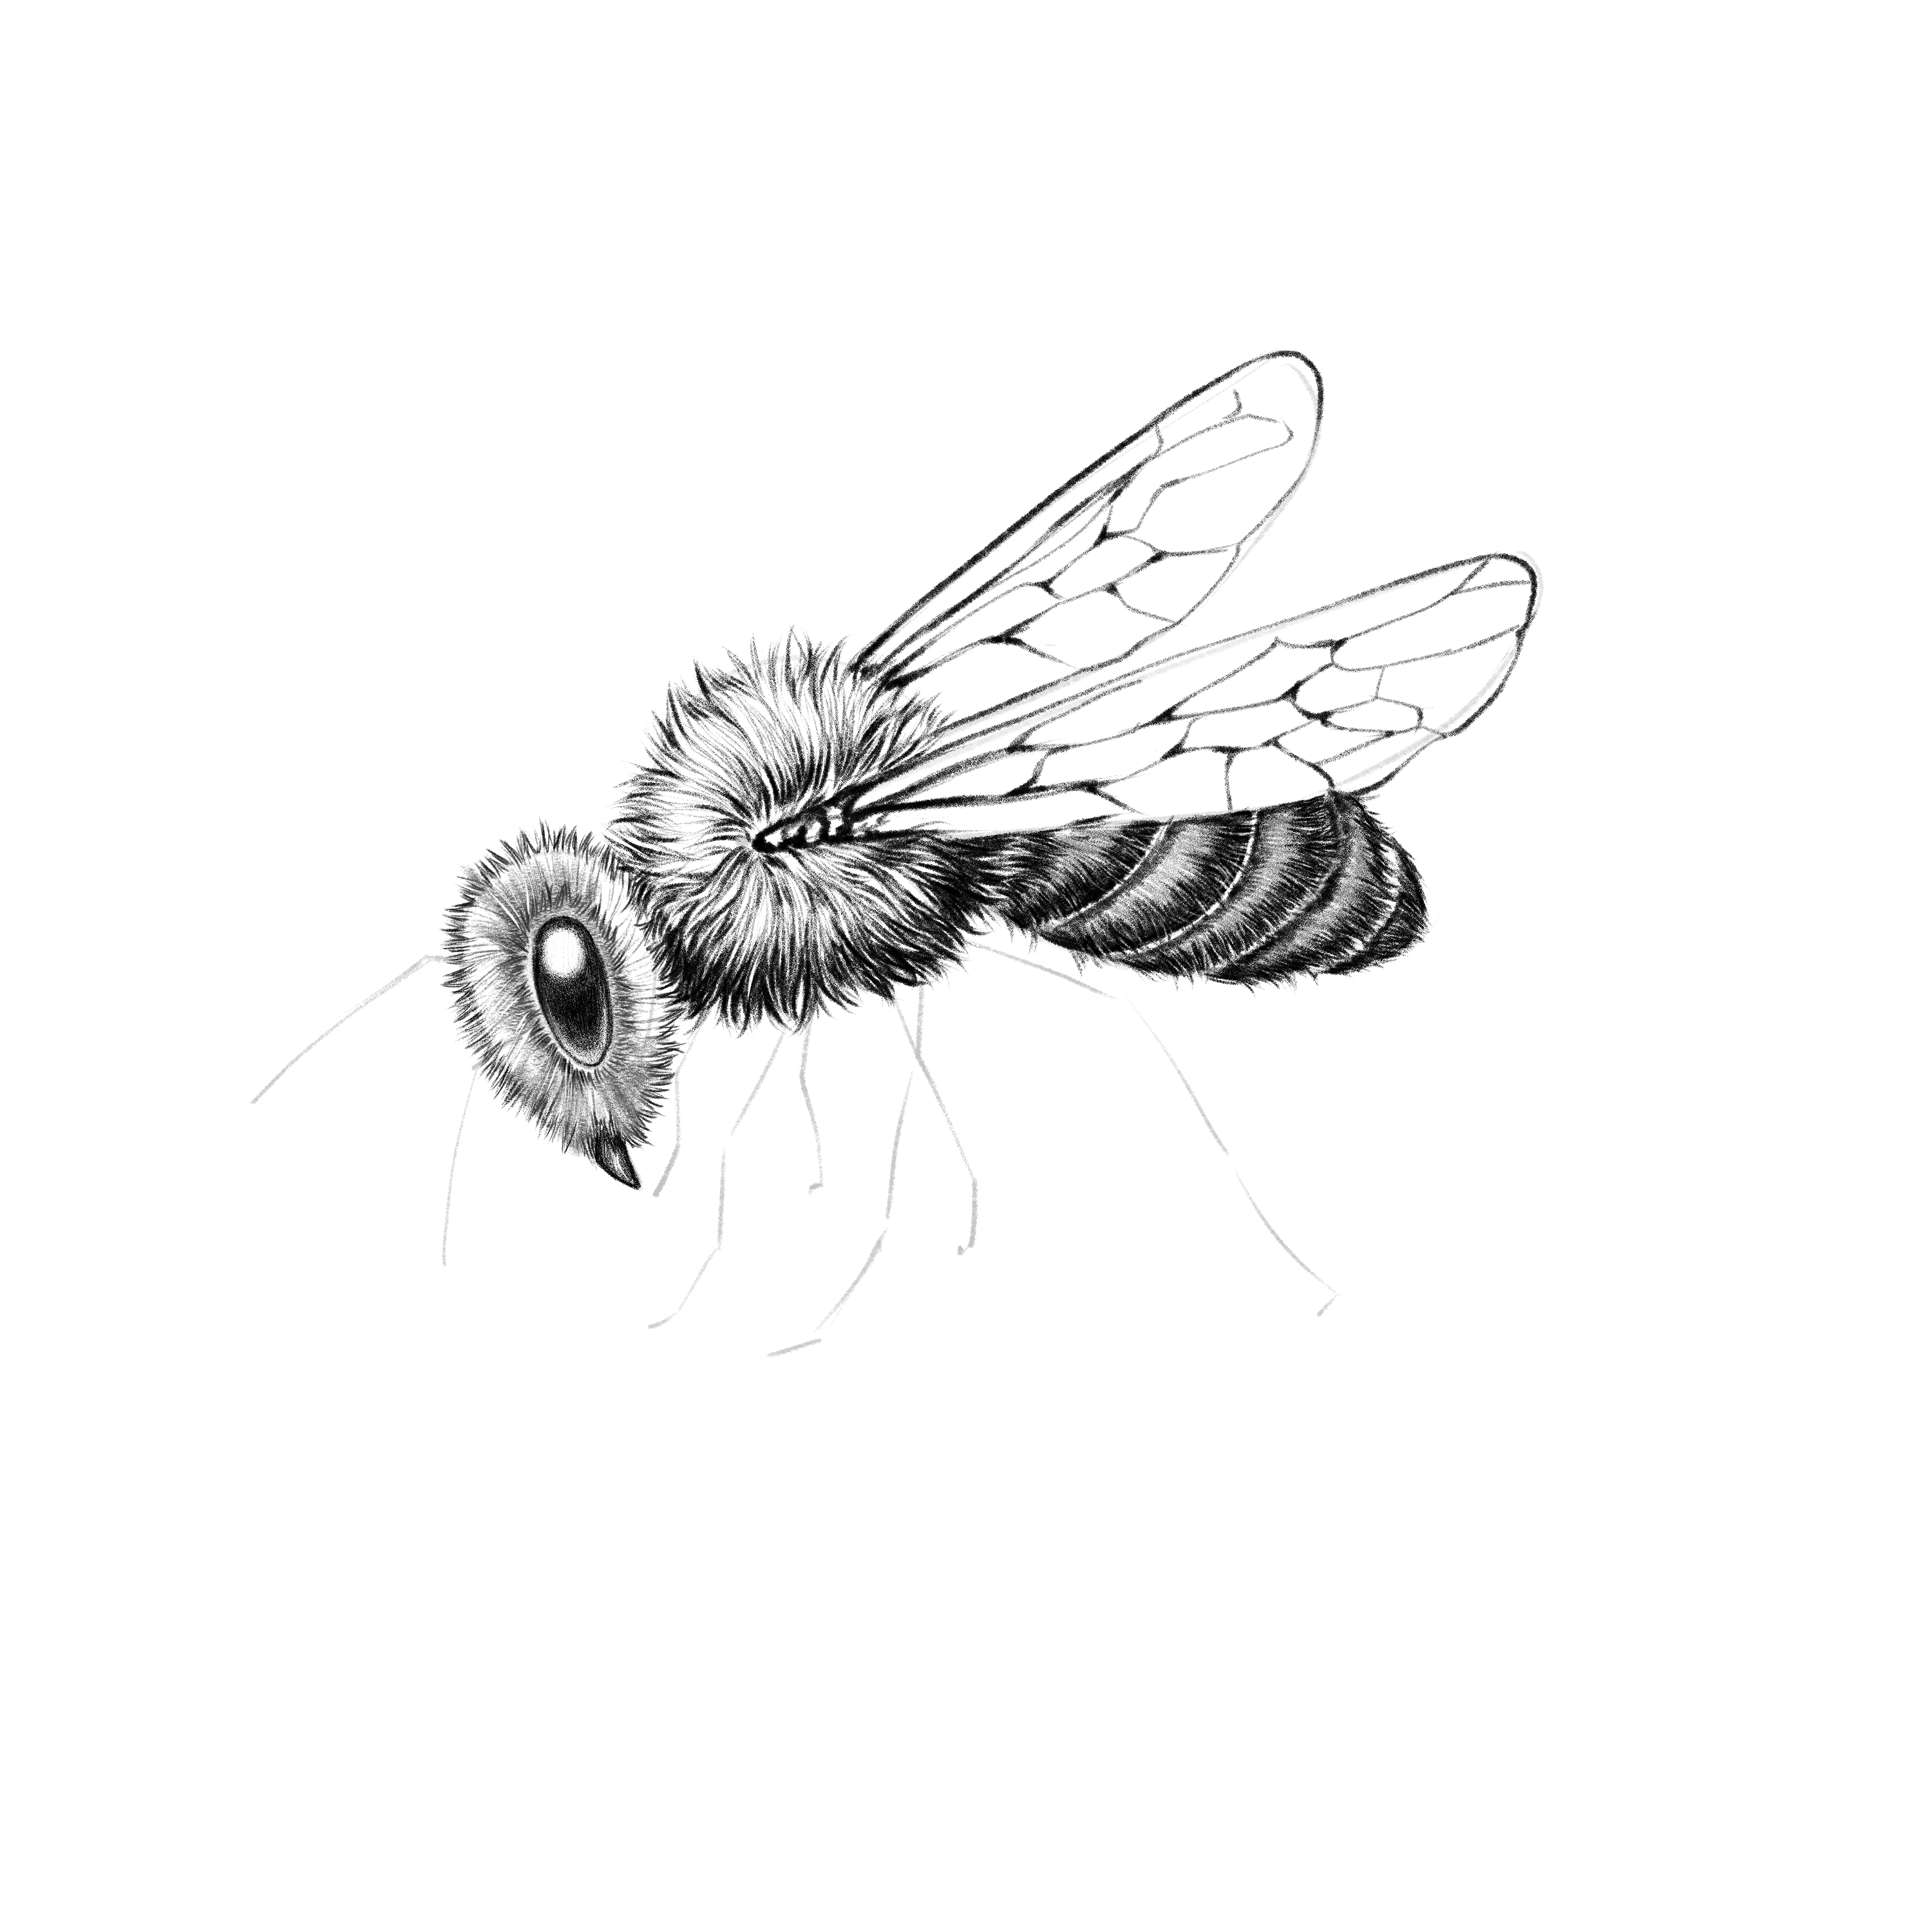 Using your blending stump, pull graphite from the base of the wings and blend around the lines of the wings, creating an illusion of transparency.
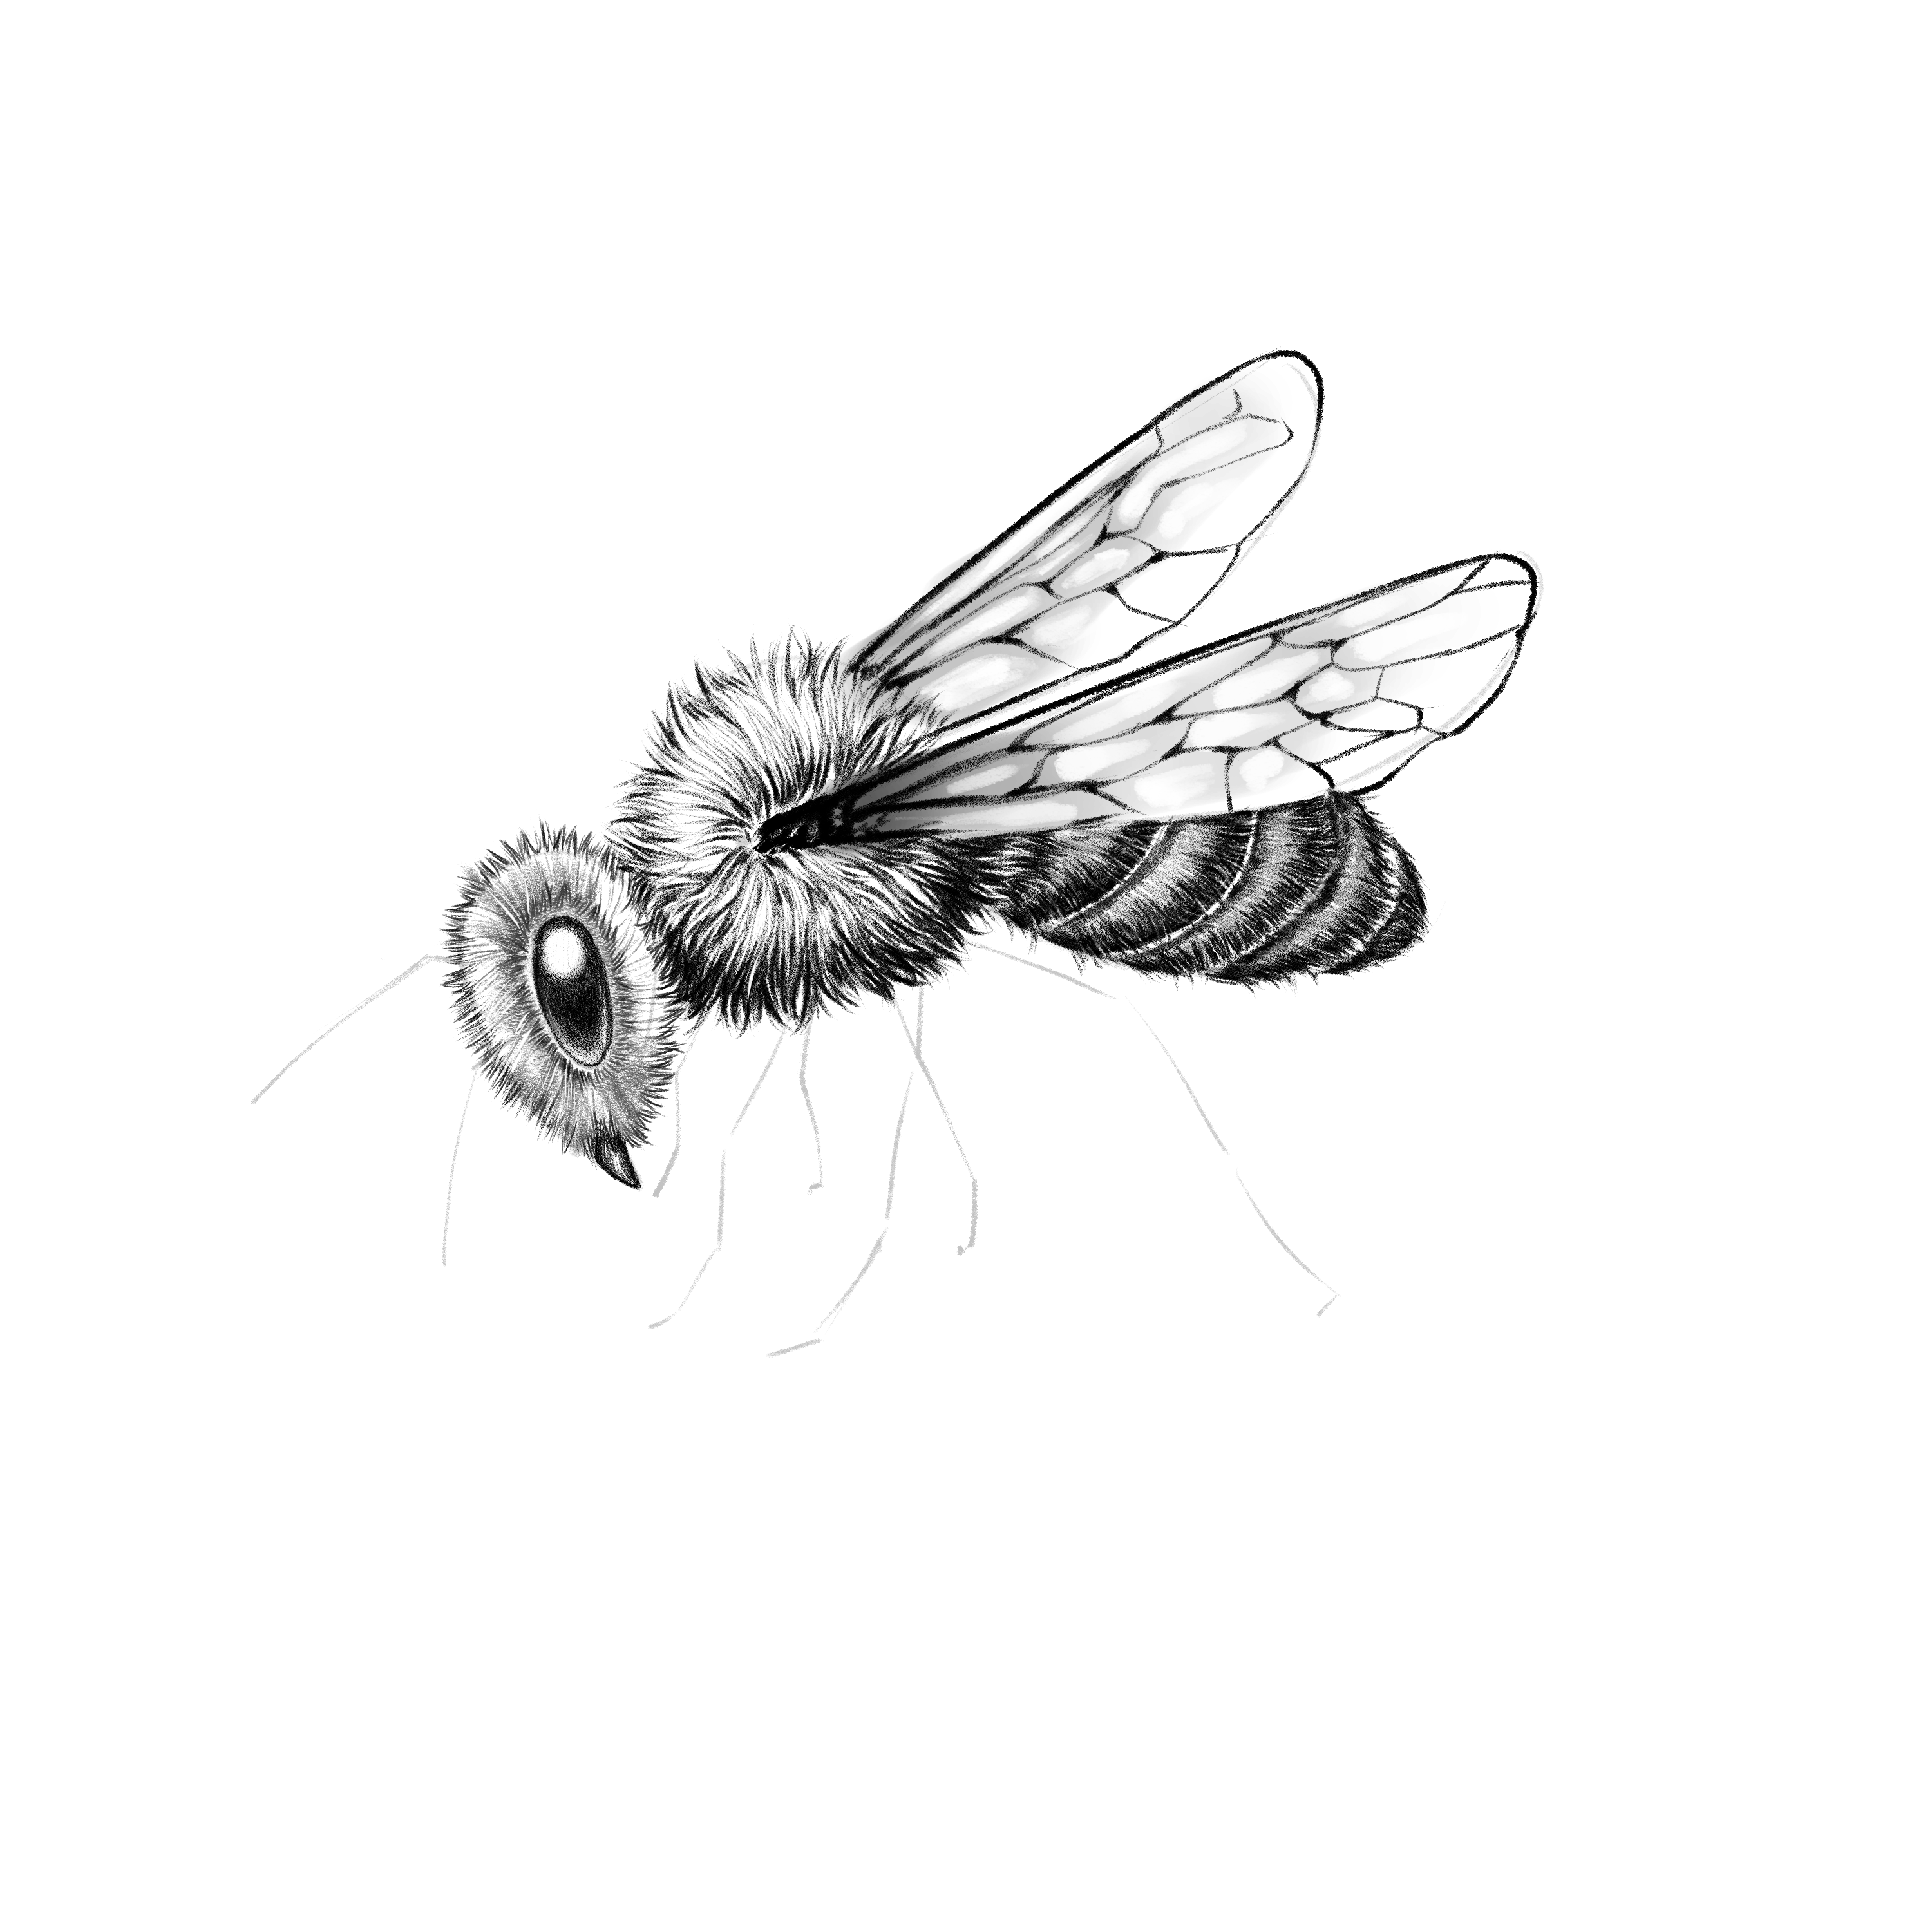
Step 21: Drawing the Legs
Begin drawing the bee’s legs, starting with those closest to us. Outline them and divide them into three sections. To add claws, use short, strong lines.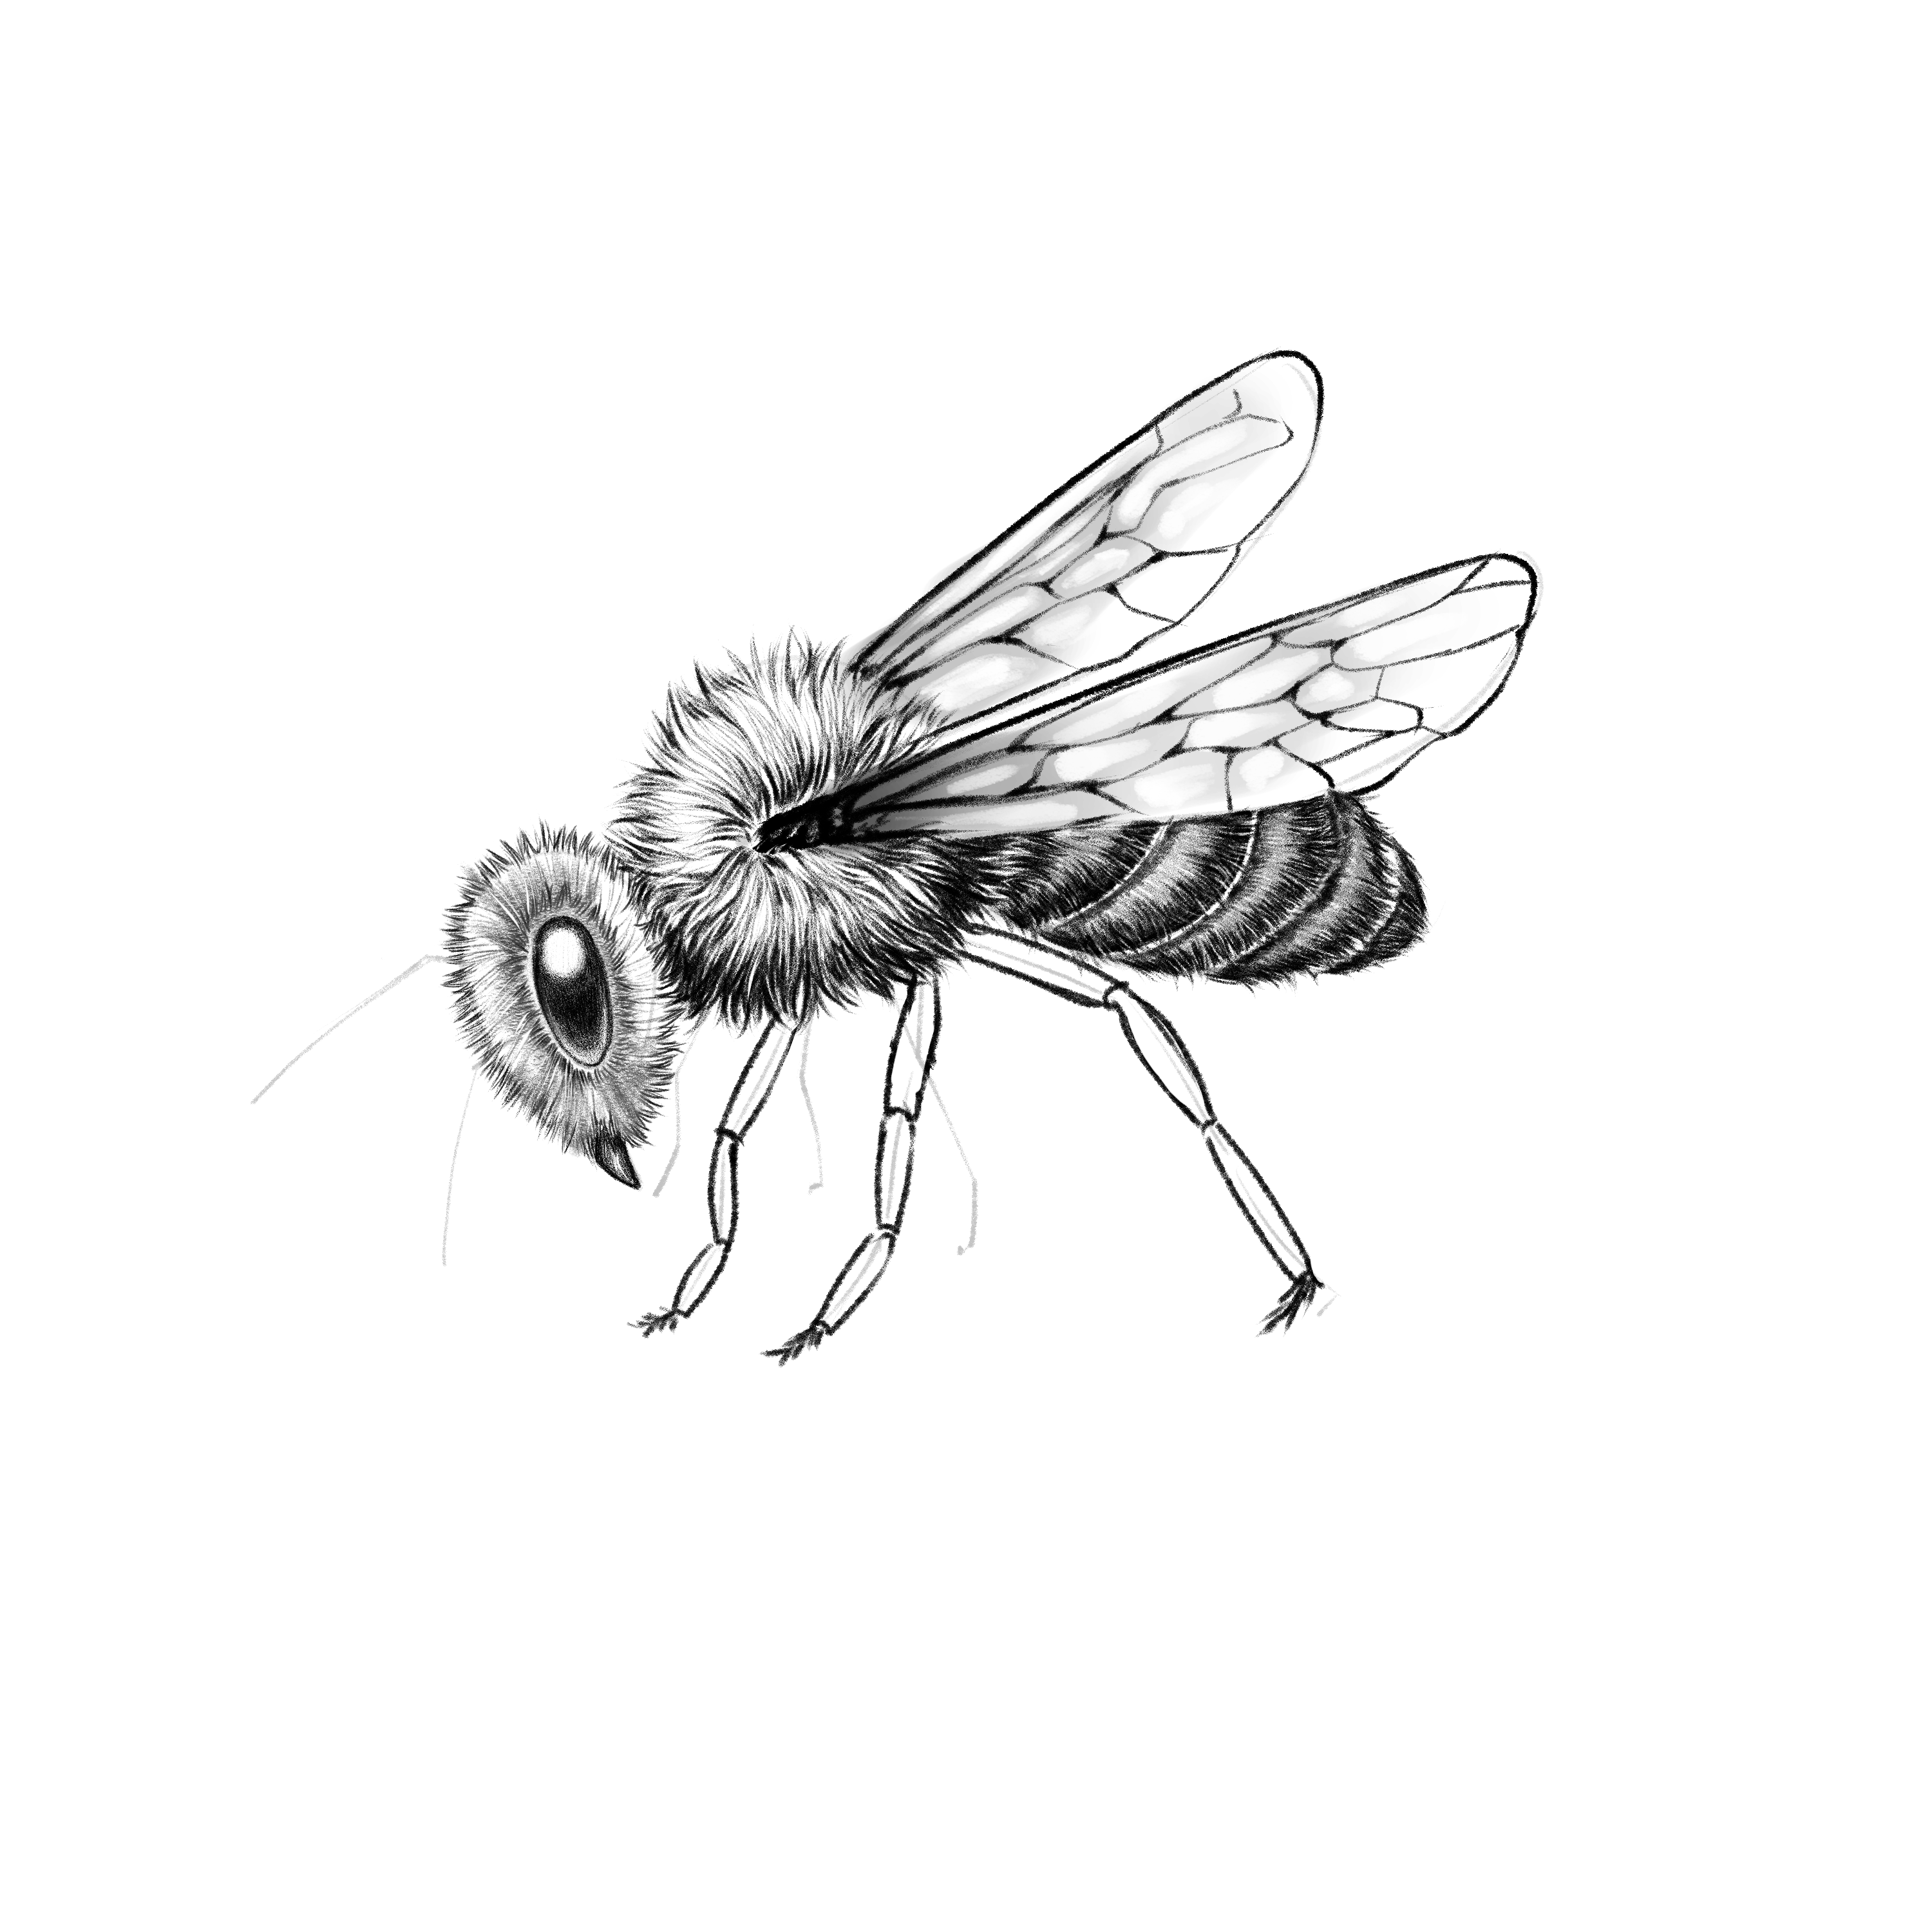
Step 22: Shading the Legs
Shade the bee’s legs, filling them with our 6B pencil and leaving a small line as a highlight. 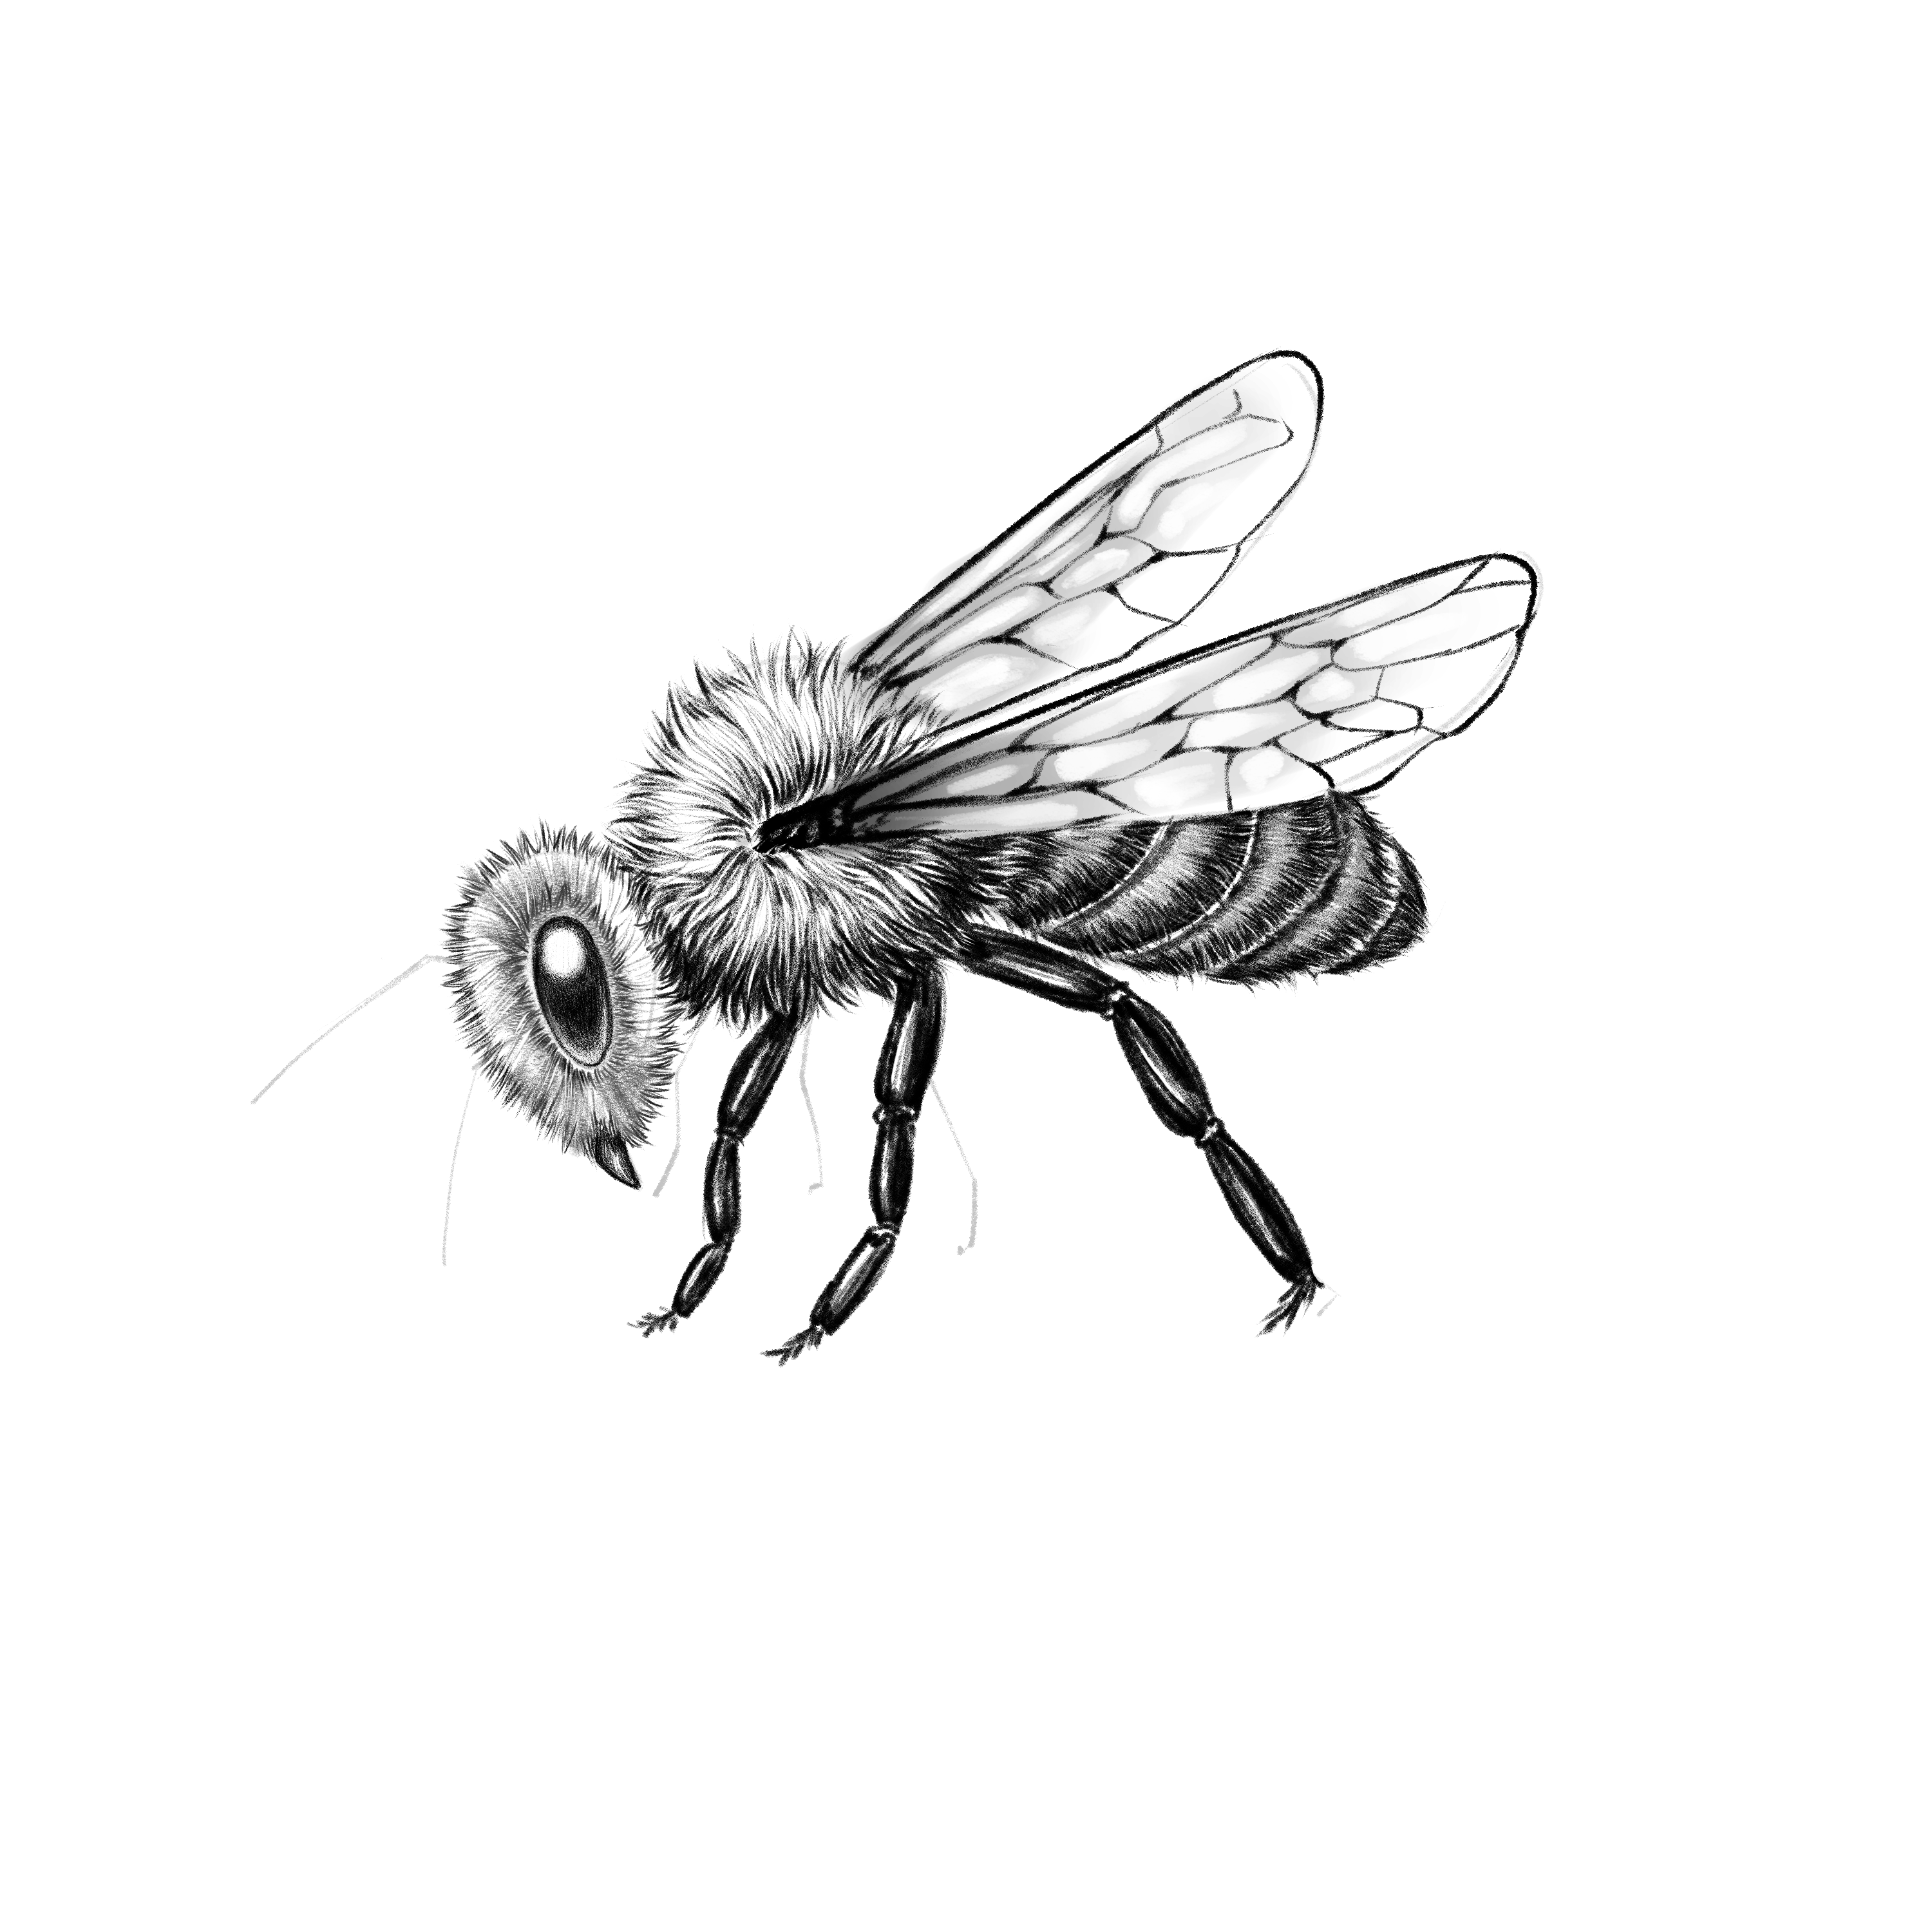
Repeat this step for the legs on the right side of the bee. Sharpen your pencils to a very fine point, and with that point, draw smaller hairs around the bee’s legs.
Step 23: Shading the Antennas
Shade the antennas, dividing them into small sections following the guide lines’ shape.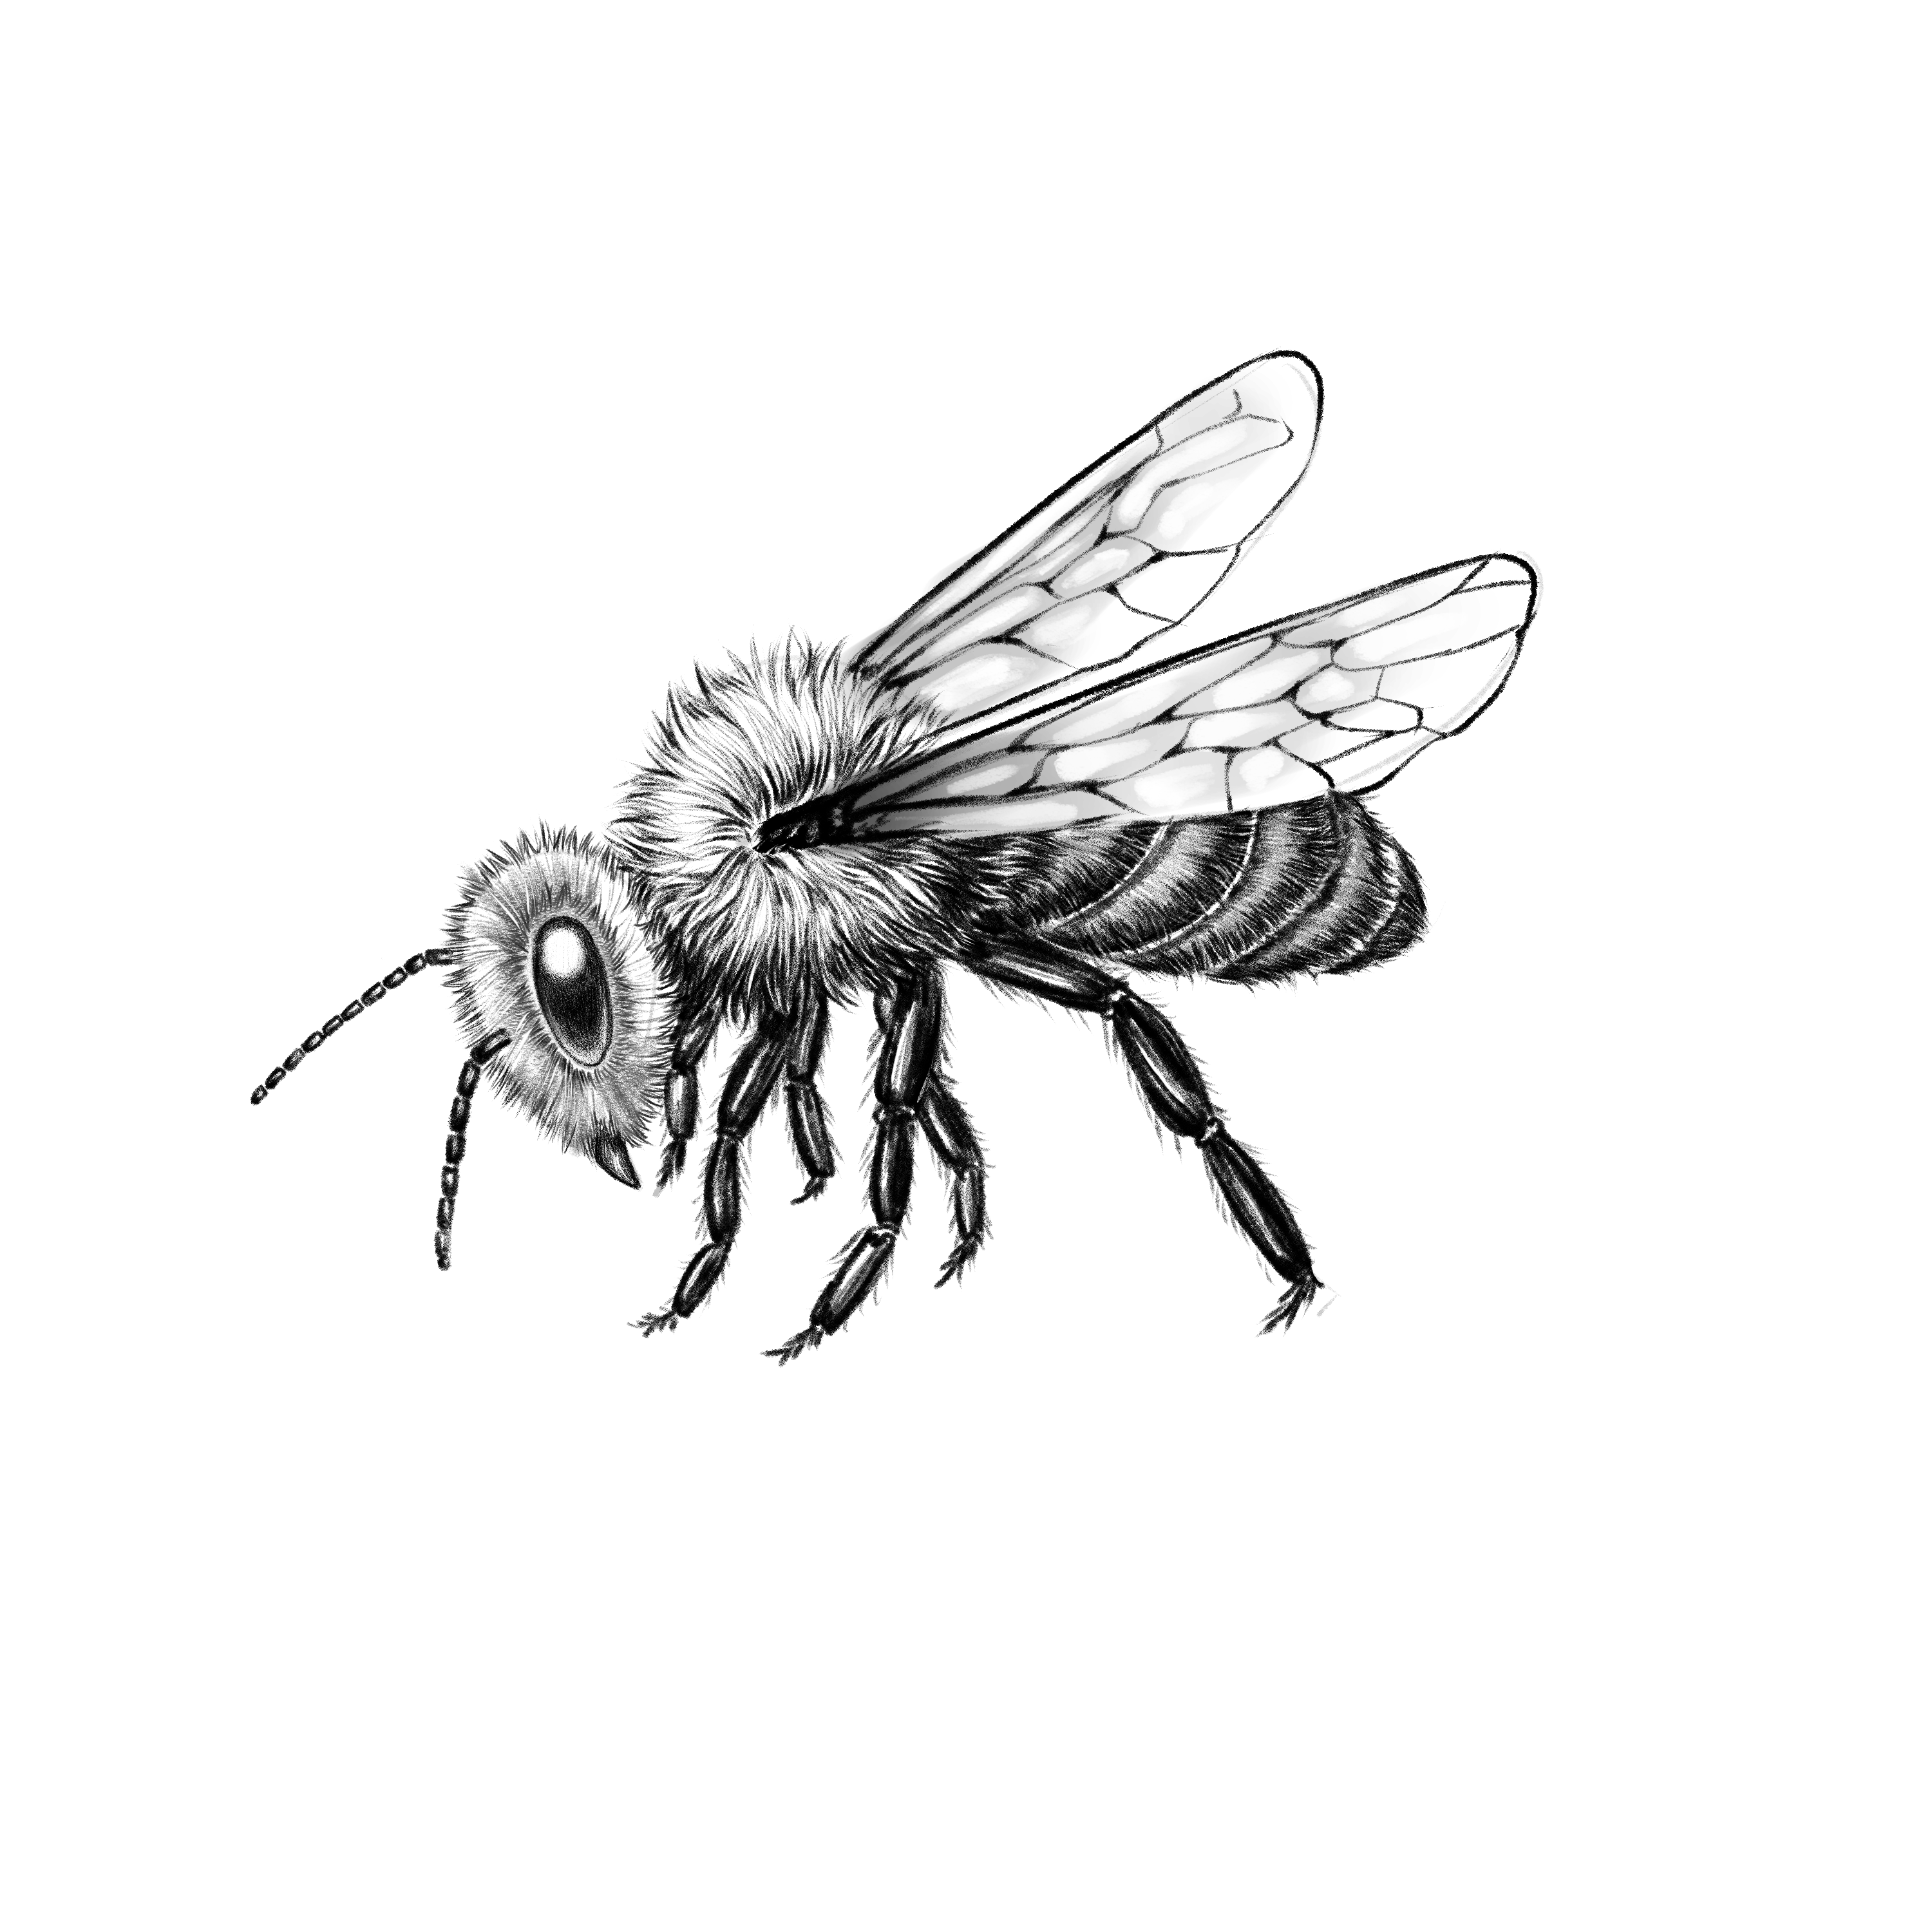
Step 24: Adding Shadows
Finally, using your blending stump, create a small shadow at the base of the bee to add a bit more realism to our drawing.
And there you have it!
I hope you had fun and gained a solid understanding of a bee’s body parts and structure. Drawing is a journey, not a destination – so it’s perfectly okay if your first few bees don’t look quite as you imagined. Just remember, every artist was once an amateur, and the key to improving is practicing consistently. I hope the techniques you’ve learned today will inspire you to explore more and apply them in your future artwork.
Thank you for following this tutorial, happy drawing, and until next time!