Acrylic paints are a versatile medium that can be used to create art in many ways. They are durable, easy to use, and have a wide range of colors.
Acrylics have been present in the art world since the late 1940s, when they were developed by industrial chemist Louis Arthur Bredemeyer (1892–1956).
It is one of the most accessible mediums for artists of any skill level. Nowadays, the new slow-drying formulas can be an excellent substitute for oil paints, especially for those who have misgivings about this material due to the fumes and its peculiar smell.
Some of the many characteristics that make acrylics an attractive medium to try are:
- Their water-soluble viscosity facilitates painting.
- Their variety of chromatic ranges allows you to expand the shades of your palette.
- Their resistance to humidity, which helps you to repaint small mistakes easily,
- And the quick-drying capacity, which allows faster results than oil-based paints.
The materials required to paint with acrylics are pretty basic. For example, the surface for its application can be a simple piece of cardboard, canvas, or a wooden board. Cheap synthetic bristle brushes in different shapes will do the job as long as we have a variety of shapes like round tips, flat tips, cat’s tongue, etc. A broad palette to be able to take advantage of the variety of chromatic ranges, a sprayer to moisten the surface to be painted and to avoid the drying of the acrylic of the palette, and optionally, a spatula or palette knife that is used in some techniques to scrape or to obtain 3D textures and shapes with different levels of layers, and of course, acrylic paint.
Before jumping into painting, it’s always a good idea to learn and try different techniques. Each medium has its own range of techniques, some exclusive to certain styles, some that can be applied in general. We could not cover all of them in a single article, but we can show you the most useful ones that will help you get started with the medium.
1. Dry Brush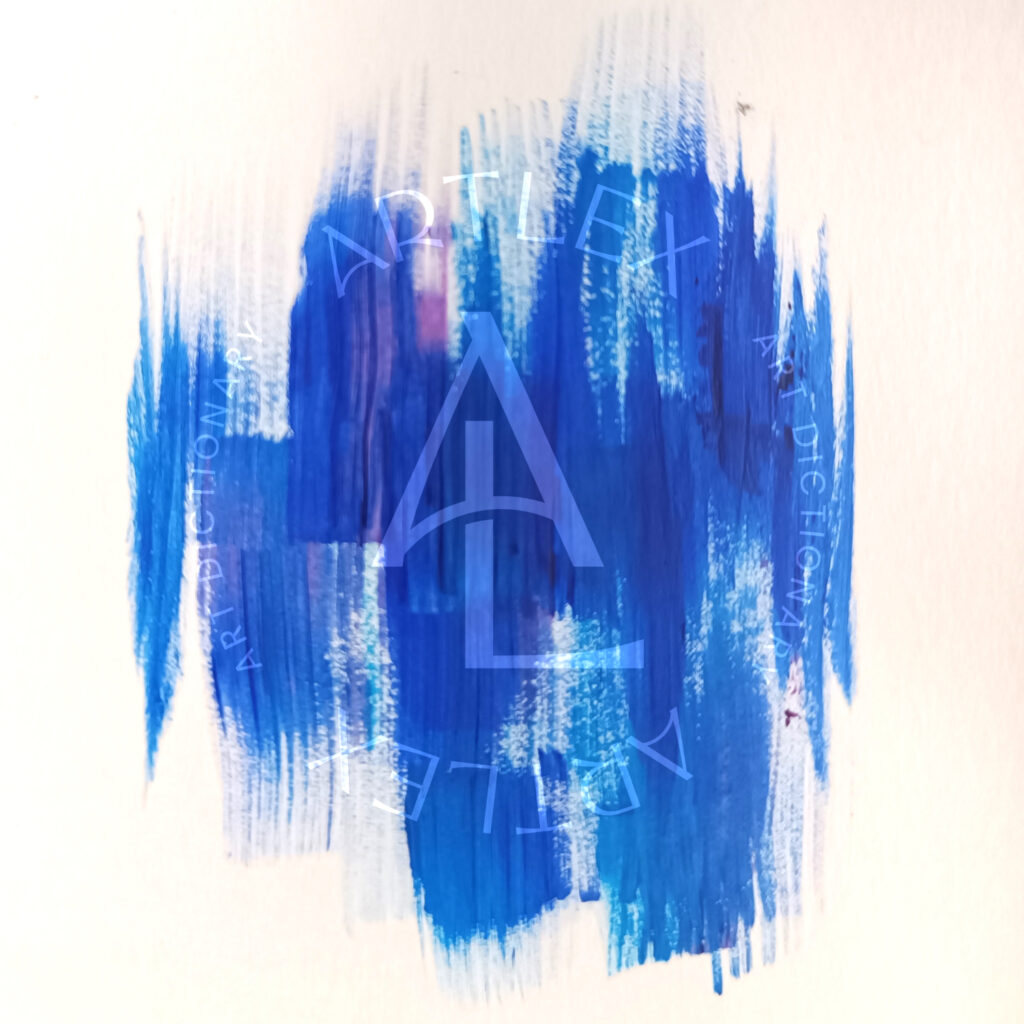
Dry brush simply consists of applying a minimum load of paint directly on the surface using a dry brush that has not touched water (hence the name) and non-diluted paint. The result will be fine, irregular strokes with texture since there is no water to smooth the edges.
These strokes have a “scratchy” look that is very dynamic and expressive. This technique requires you to work quickly since acrylic paint tends to dry much faster than other mediums.
If you are looking to capture light and dimension in your work and enhance the details of the work, this is the correct technique. You can use it to paint stars, clouds, grass, leaves, stones, or anything that requires a misty effect.
Tip: Fill the brush with paint and first test it on a separate sheet to test that you have an adequate amount of paint.
2. Acrylic Wash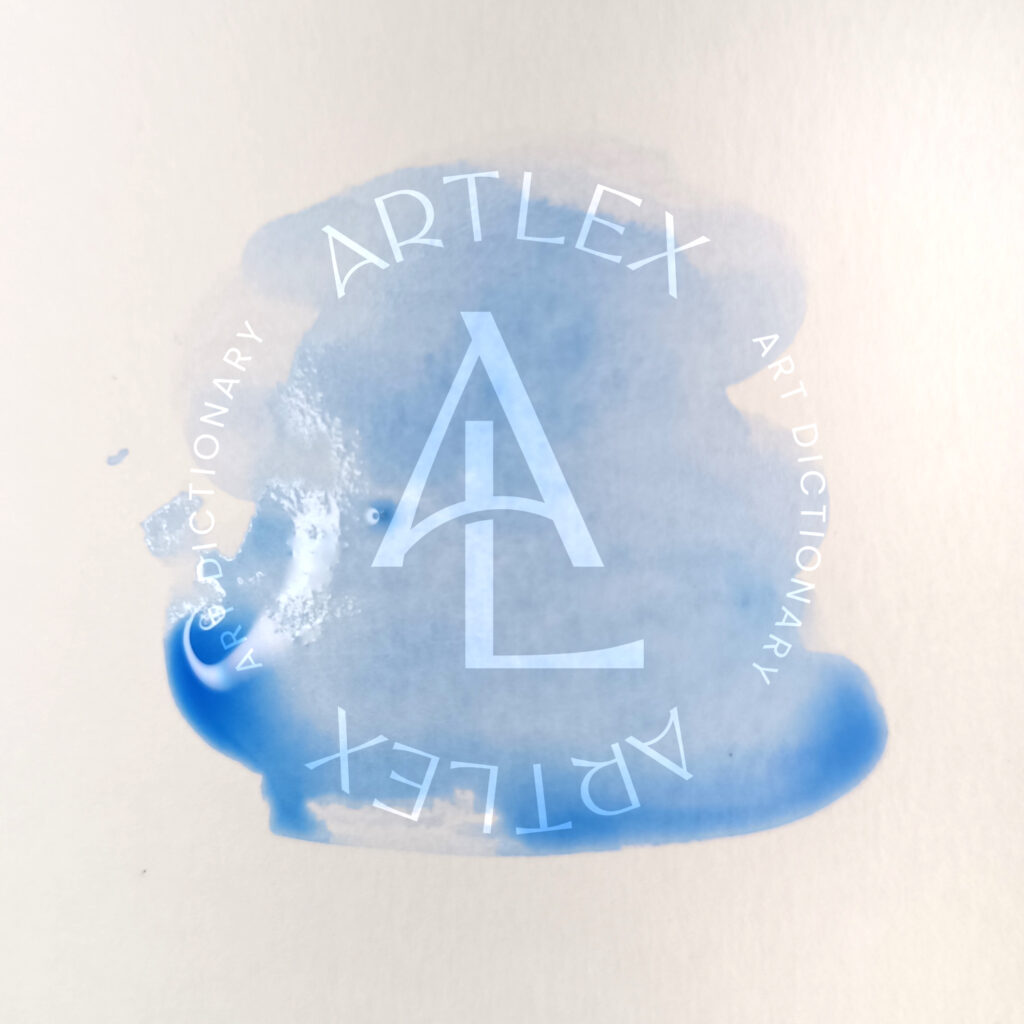
Acrylic wash consists of either using a brush soaked with water or a very diluted acrylic paint that spreads smoothly over the part of the canvas to be painted. Sometimes you even can moisten the surface only with the brush soaked in water to take advantage of its humidity.
This has an effect very similar to watercolors with the advantage that it will be permanently fixed, so it is quite handy when painting crevices, recesses, and accentuating shadows and details that can be lost when applying solid layers, creating a variety of textures.
Tip: The canvas to be used must be made of porous and absorbent material, and as a basic rule, do not add more than 30% of water so that you can maintain the pigmentation of the paint and its adhesive properties.
3. Dotting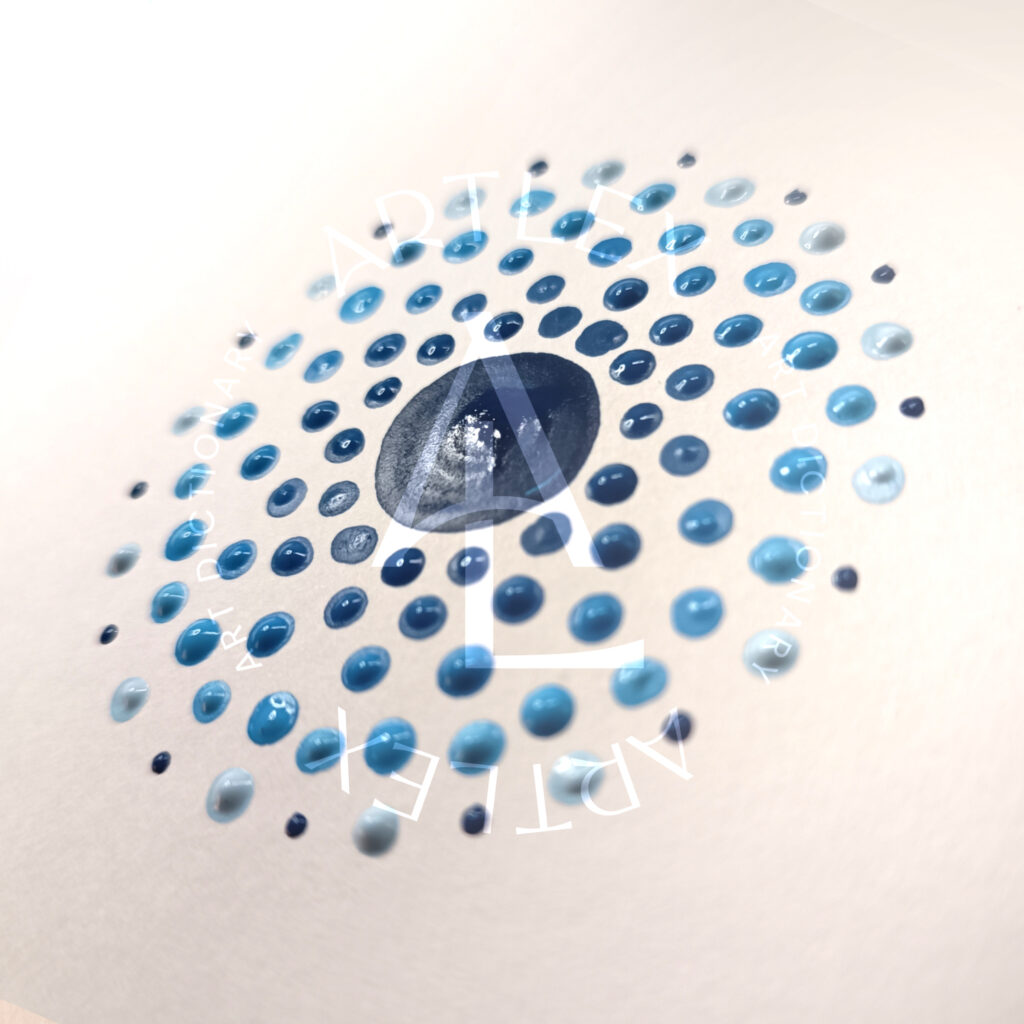
Dotting is one of the most straightforward painting techniques. It consists of taking a stiff brush with whose tip you can make a dot, get some paint on it, and make stitches in the area to work. This set of small overlapping dots can create vivid images with subtle but noticeable mixtures of color and add a new level of dimension and texture. Everything will depend on the location, size, and distance between the points.
It can be used throughout the entire work and is highly recommended when looking for depth effects since the different contrasts help to differentiate the distance and volume of the various elements of the work.
TIP: Define the color palette to use and play with the dispersion of the points. That way, it’ll be easier to capture the contrast between light and shadow.
4. Acrylic Pouring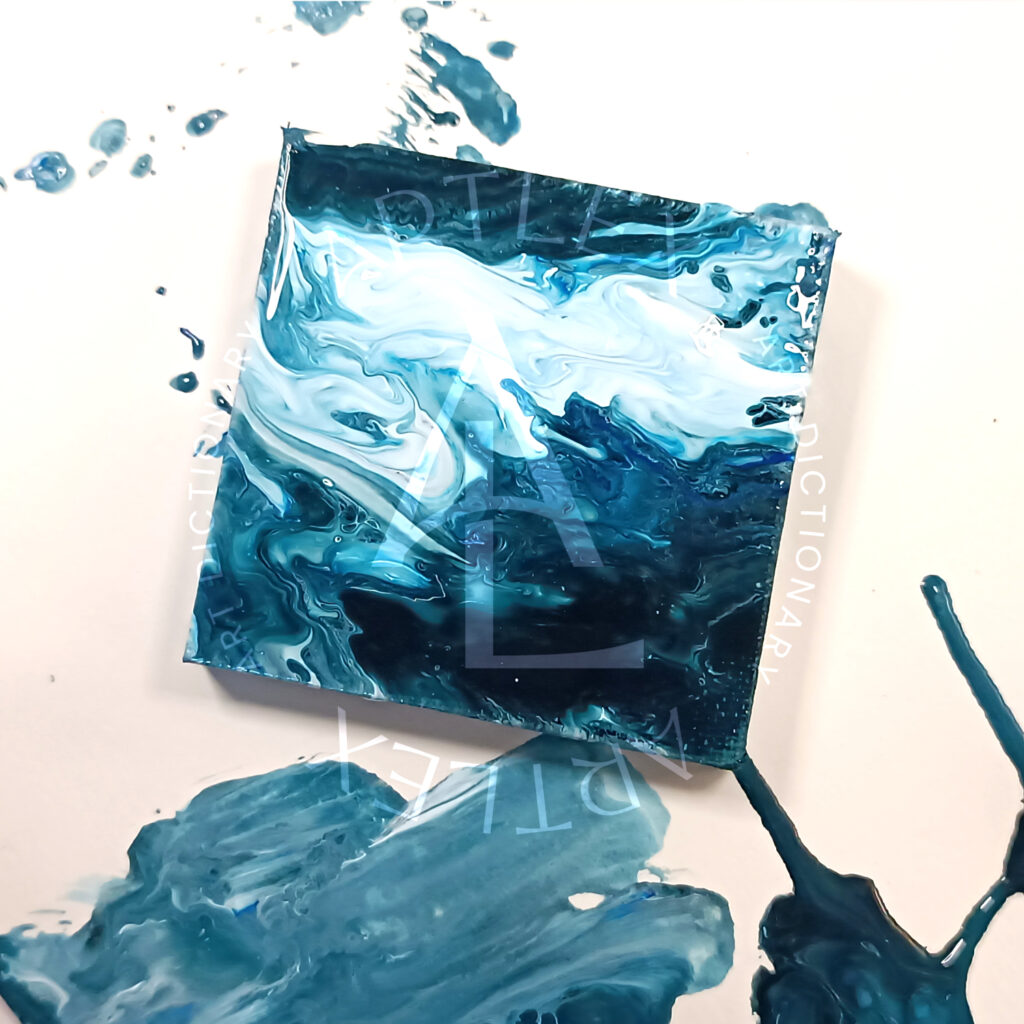
Acrylic pouring is one of the most modern and easy techniques since it only consists of pouring different controlled amounts of paint on the canvas, allowing the colors to spread and mix on their own.
It requires a casting medium, which is a self-leveling additive for the acrylic that allows uniformity, smoothness, and better adhesion to the canvas and, in turn, reduces the likelihood of trapped air pockets. Silicone oil can prevent the colors from mixing with each other, forming more marked cells at the time of application.
The result is fun and creative abstract artwork that anyone can try, no matter their age or level of expertise.
Tip: In order to apply this technique, it is advisable to use high-flow, soft-bodied paints because their consistency and low viscosity help the combination of colors.
5. Splattering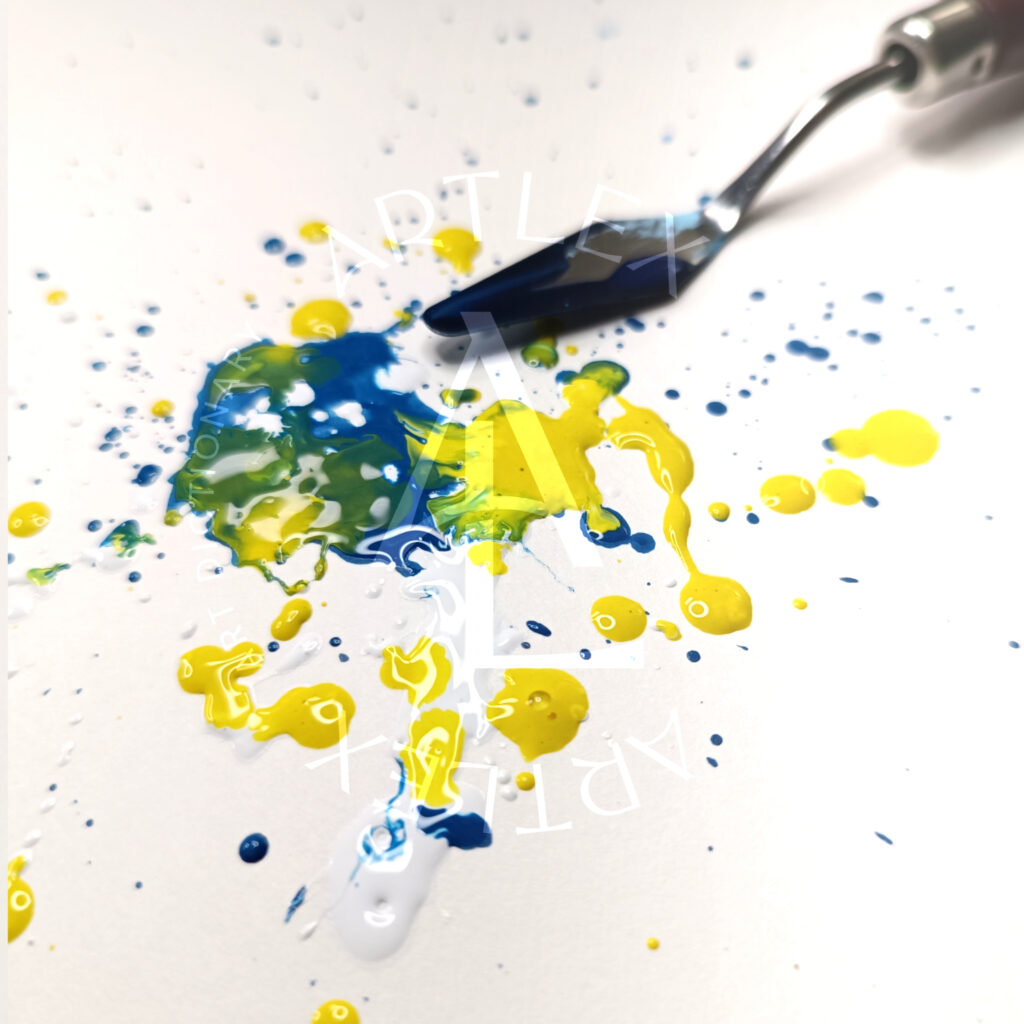
Splattering is another technique that works amazingly for abstract art. It is super simple. It is only necessary to load the brush with paint, and without draining the excess, splatter it around the canvas with soft or vigorous movements above the canvas or drip paint from the brush onto it.
Whether your goal is a stress-free art project or a professional masterpiece, learning to paint with the splattering technique can give you some calming creativity. It just takes a basic understanding of the splatter painting style and a surface. With the right supplies, you can start practicing this abstract painting technique.
Tip: It is best to have a brush for each color and allow the colors to dry between splashes for clean, rich tones.
6. Sponging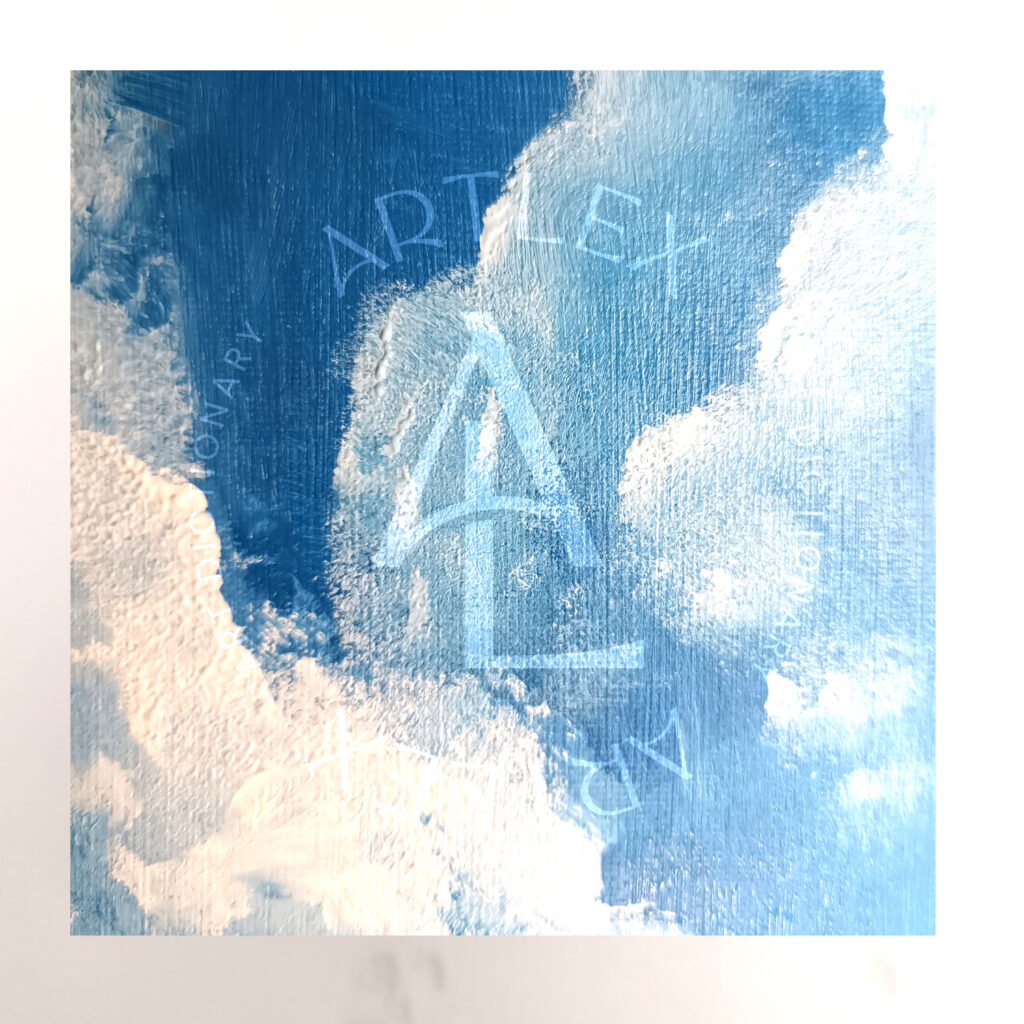
Sponging consists of taking a sponge, putting paint on it, removing the excess, and making small and soft touches on the surface, thus achieving textures that cannot be replicated with a brush. As a result, a soft bokeh-like effect is obtained.
This technique emphasizes the appearance of volume, lights, and shadows; when working in layers, the sponge will subtly blend the colors and give depth to the canvas.
This technique is useful when we want to create a sense of movement in our work, as it allows you to play with different textures. For example, you can use it to paint clouds that seem to be displaced by the wind or trees that seem to be swaying in the breeze.
Tip: for a correct application, it is best to start from the upper corner, turn the wrist from left to right, and leave some areas unapplied to create a clean relief effect.
7. Impasto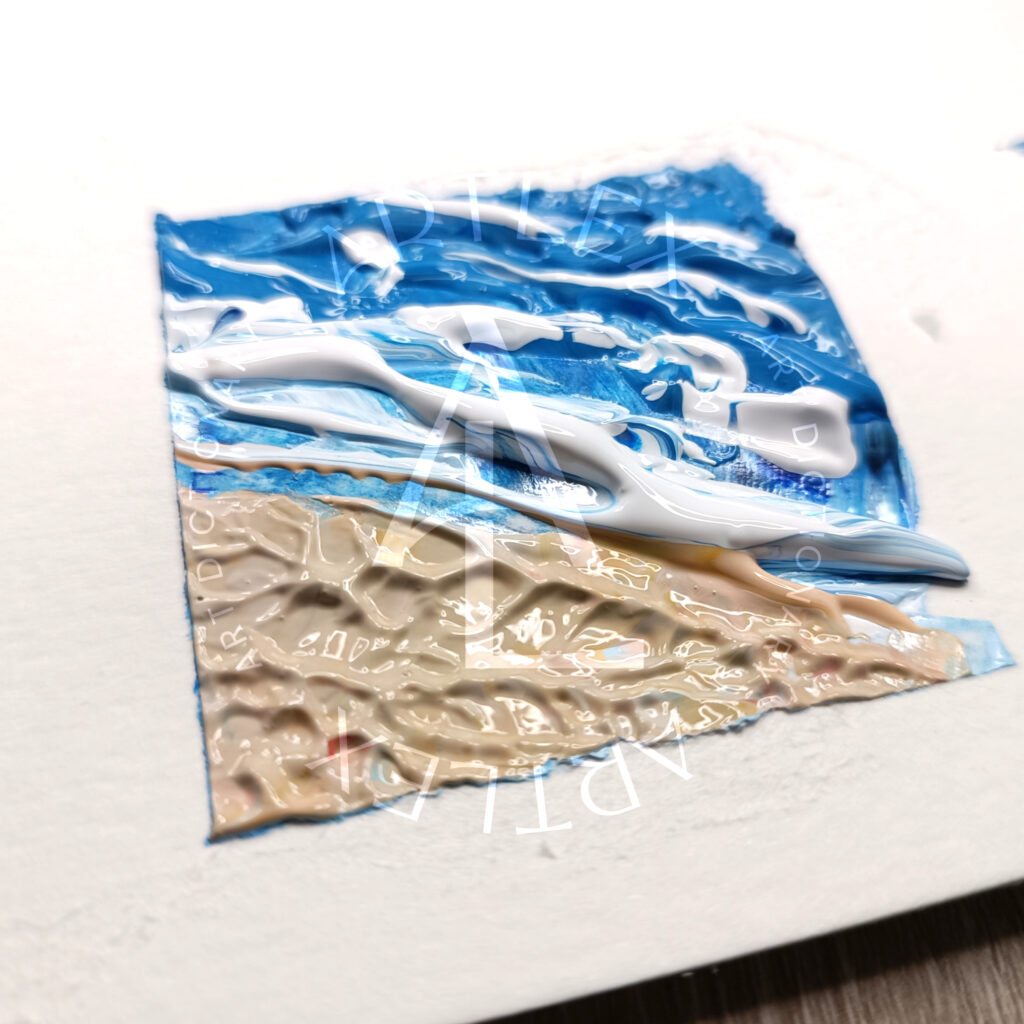
Impasto is about applying paint in thick layers and spreading them with a spatula or with thick brush strokes. This technique gives character and exalts the strokes as the shapes of the brushstrokes are visible, giving it a three-dimensional aspect that shows rhythm and spontaneity in work.
This technique adds an additional element that can’t be achieved with others since the light reflection on the reliefs adds another dimension of depth and vividness to the painting.
Tip: Heavy body acrylics are perfect for impasto. However, you can use a modeling paste or a texturizing gel to achieve the right thickness.
8. Sgraffito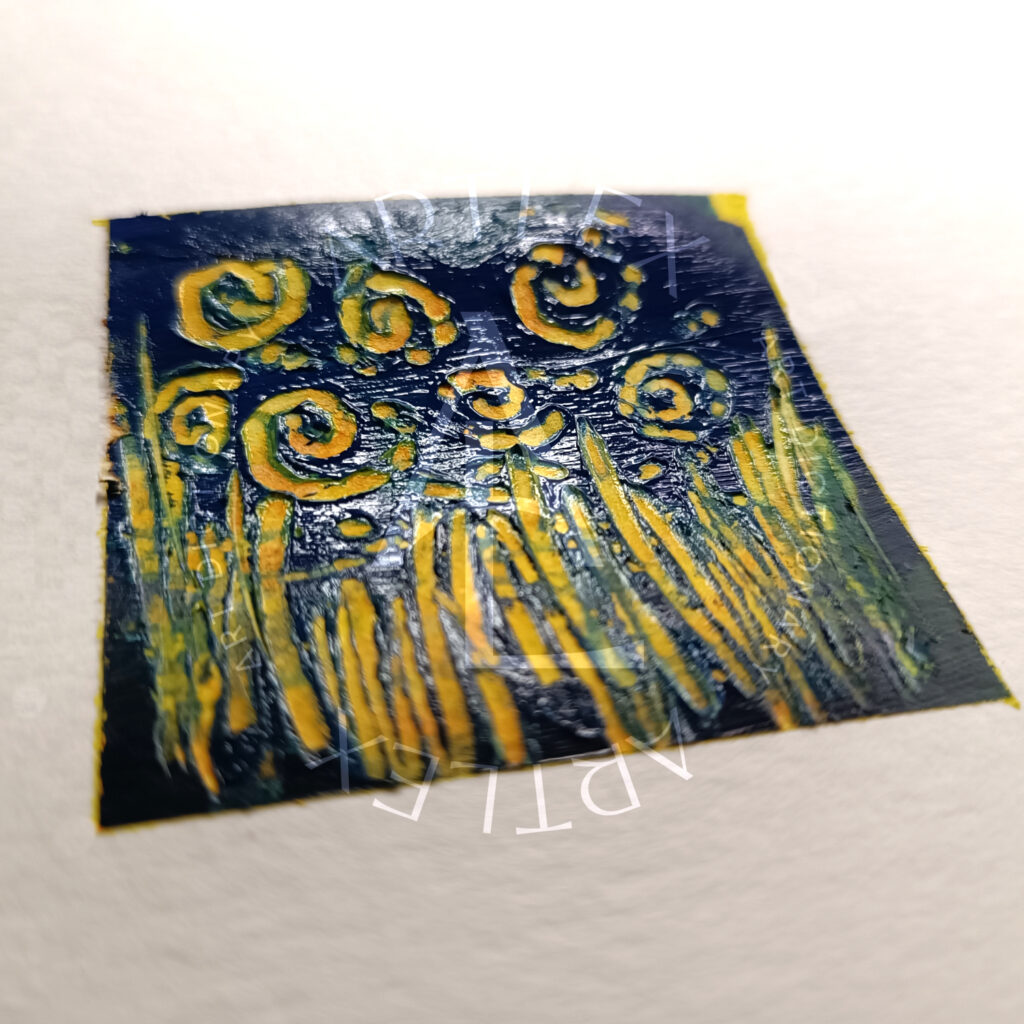
Sgraffito involves applying a base color and letting it dry before painting a contrasting coat. While the second layer is still wet, you can use a tool. It can be the tip of the brush, a palette knife, or an awl to scrape the surface, exposing the bottom layer. Sometimes the scraping is done on the first layer revealing the canvas below.
It is useful when capturing detail with many patterns, such as lace on clothing, creating a very fine but striking contrast in the details.
Tip: If you need more time to work on the second coat (the wet coat), a medium can be added to extend the drying time.
9. Glazing
Glazing is a famous technique that consists of using very thin layers of color to increase the depth and complexity of the work. Very useful when creating overlay effects, it brings light and brightness to the finish of a specific piece by subtly adding colors, particularly in landscapes and grisaille paintings.
Tip: The paint is usually thinned with a small amount of water or a glazing medium to achieve the desired effect.
10. Scumbling
Scumbling is a technique that consists of the use of discontinuous layers of paint so that the lower layers stand out through them. In order to achieve this, a brush or a dry cloth is used to rub a small amount of dry paint without using thinner on a previous dry layer, thus exposing the color underneath.
It is useful for creating smoke effects and subtle color blends.
Tip: The key is for the layers to be dry as you scrub; otherwise, they will blend together and ruin the effect.
11. Underpainting
Underpainting is a technique where the sketch is done directly on the canvas with paint instead of a pencil. This allows the base paint to be completely covered, so it is not visible in the final product. For this, it is necessary to use colors that contrast with your final color palette to let some parts shine through, giving it a more realistic and dynamic color effect.
This technique is used to give a wide depth and texture to the painting and to balance the colors with their complementary parts in order to neutralize them.
Tip: It is advisable to use monochromatic paints for the base paint. This will help to define the color values for the subsequent painting.
Conclusion
Now that you know in depth many of the techniques that the masters use for acrylic painting, you have new ways to unleash your creativity, so don’t be afraid to experiment and try any of them. I am sure you will have a great time, and your work and skills will improve.
You are ready to start creating! Happy painting!