Trees are an essential part of our existence. As humans, we need them for multiple reasons, and as artists, we can’t help but admire them.
At some point in our life, we all probably have tried to draw a tree, some of us have miserably failed the task, and some might’ve opted for the easiest path and removed the simplified form of a tree that we learned in school.
Drawing a tree might not seem like an easy task. However, using the proper techniques, you’ll see that it is simpler than you ever thought.
In this tutorial, you’ll learn:
- Structure of a tree.
- How to shade using graphite in powder.
- How to create textures with different grades of graphite pencils.
- How to draw a realistic tree step by step.
The materials you’ll need:
- Graphite powder (or a file and an oh HB pencil)
- A soft brush
- A 2H graphite pencil
- A 6B graphite pencil
- A ruler
- A blending stump
- A precision eraser
- A kneadable eraser
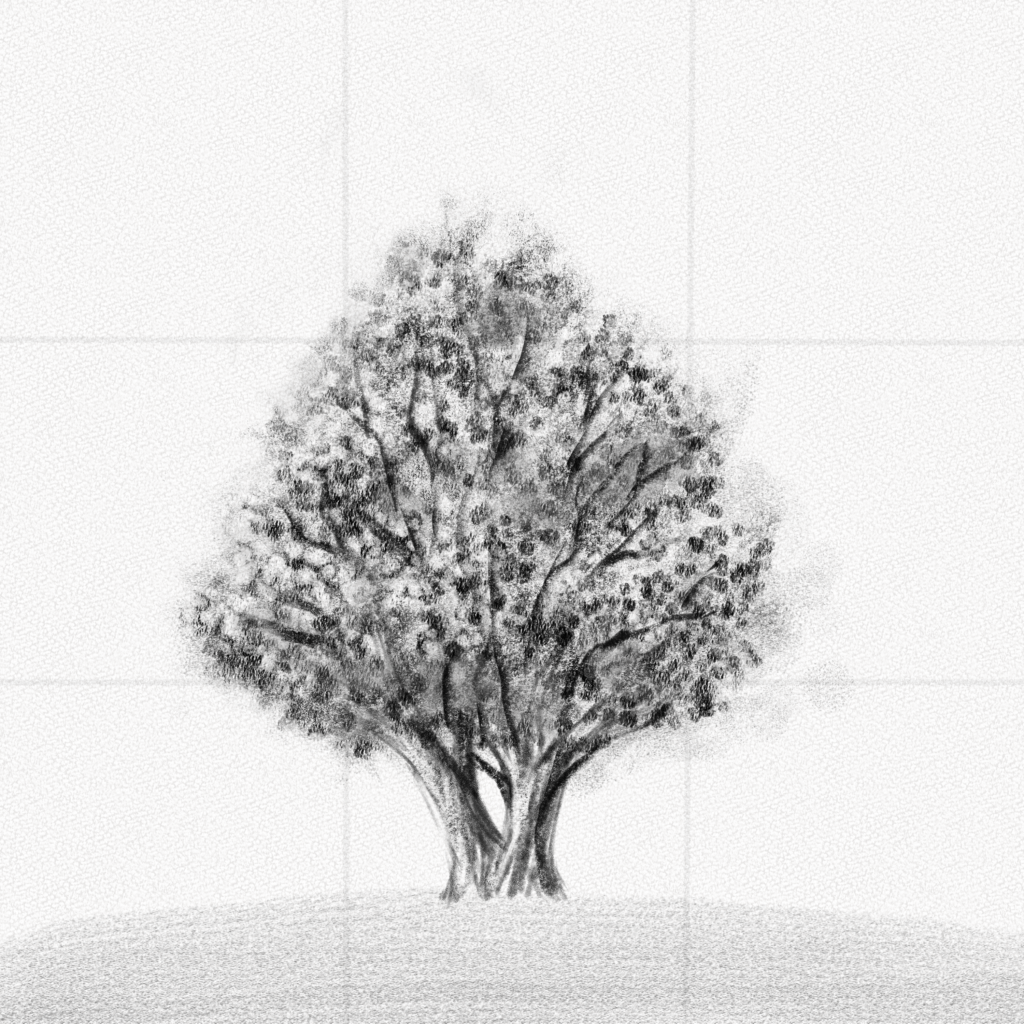
The tree you’re going to draw:

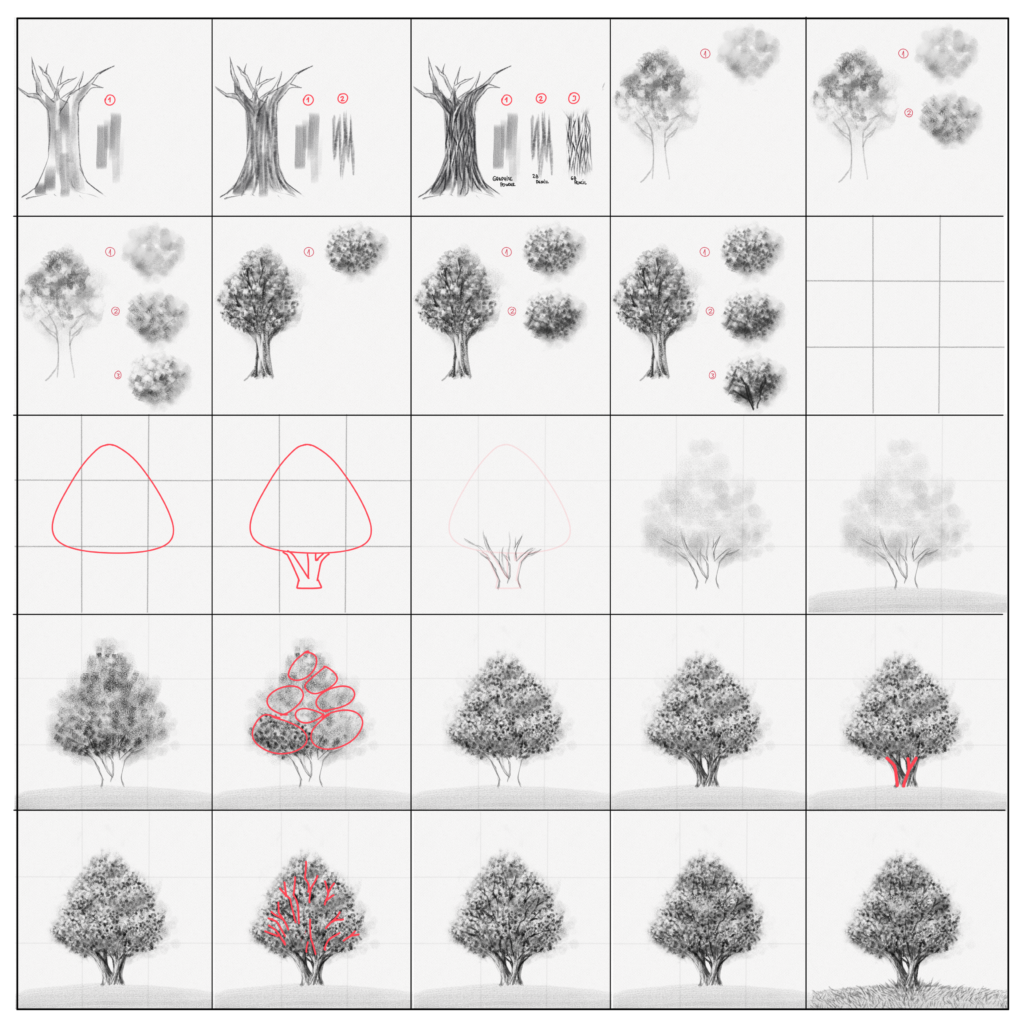
And these are all the steps we’ll walk you through!
Section 1: Structure of a tree
1.- Gather References
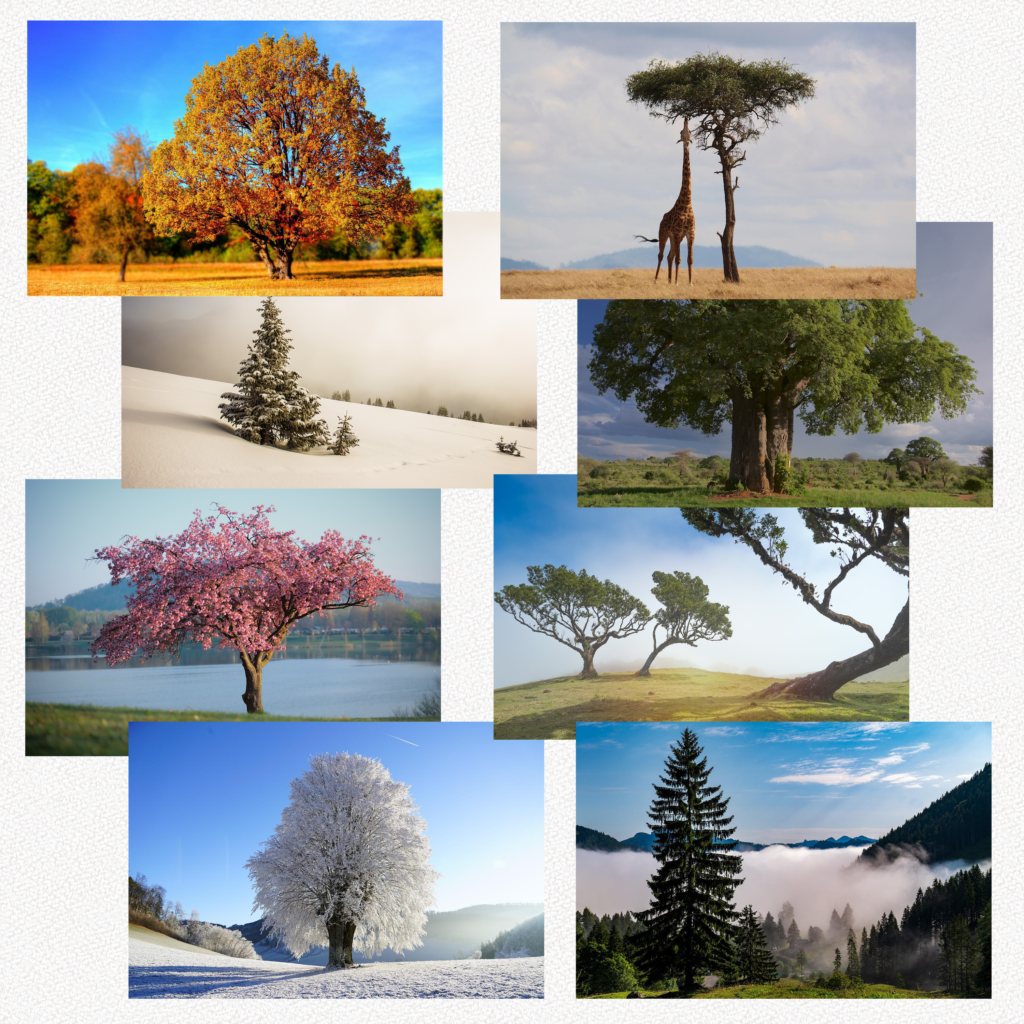
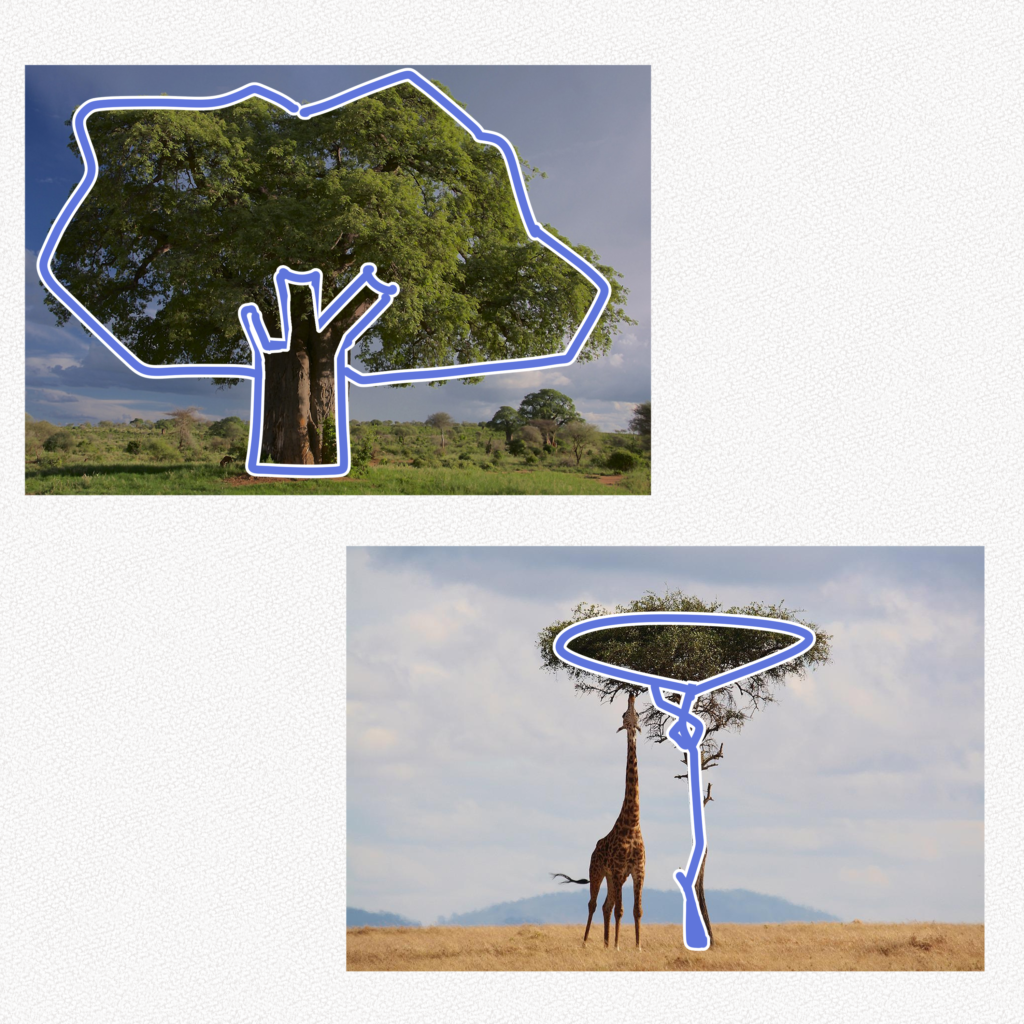
We all know that a tree is composed of three main parts: the crown, the trunk, and the roots. However, not all trees are the same. Some trees are round, some have irregular shapes, some are pointy, and let’s not talk about leaves.
Learning the structure of a tree is not about working on every single detail but identifying the most notorious factors and breaking them down into simple shapes.
But first, let’s gather some references:
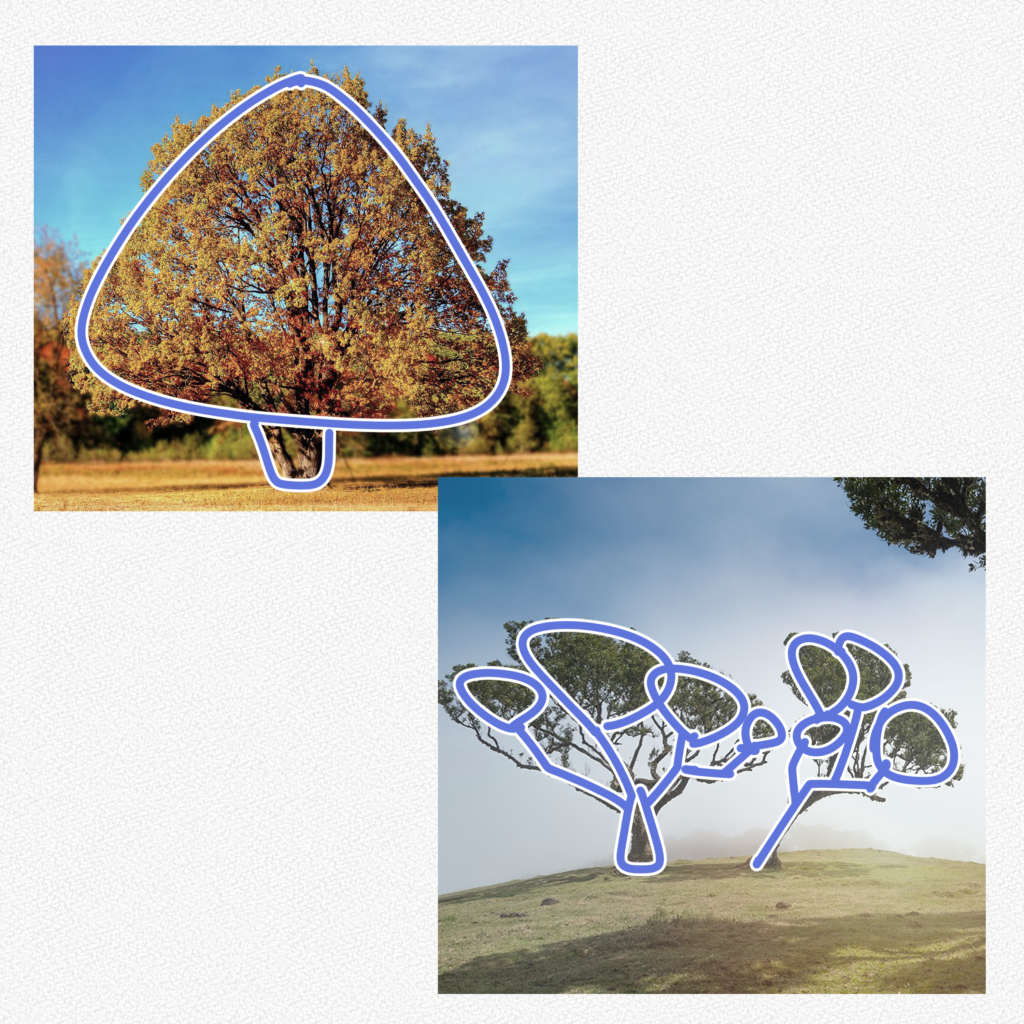
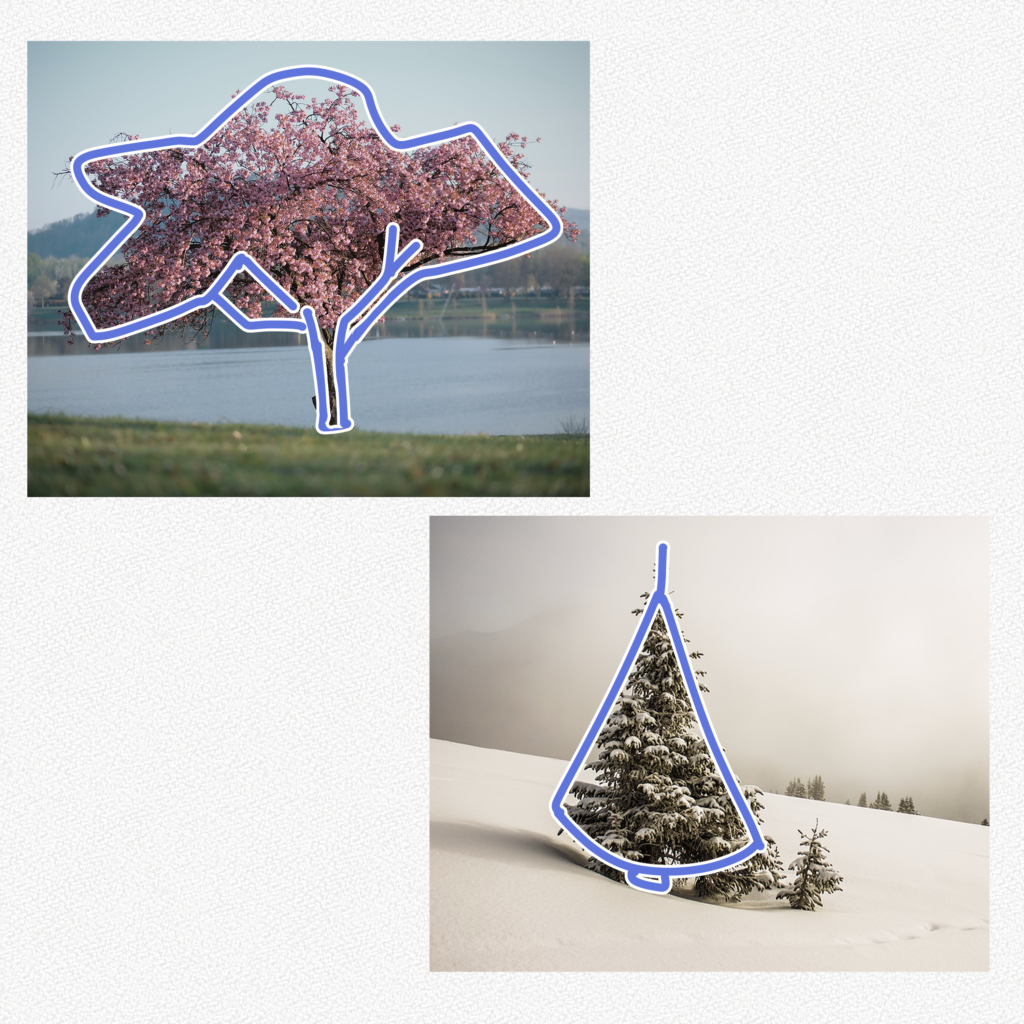
2.- Break the references down
For this step, we’re going to make a quick study of the references we gathered, find the shapes of the crown, the trunk, and the roots (if they’re visible), and roughly outline them to identify the basic shapes behind our tree.
3.- Trace the outlines on a piece of paper
Once we’re done with that, on a separate piece of paper, we’re going to trace those same outlines the best we can. That way, we’ll have a clearer vision of the shape of our tree.
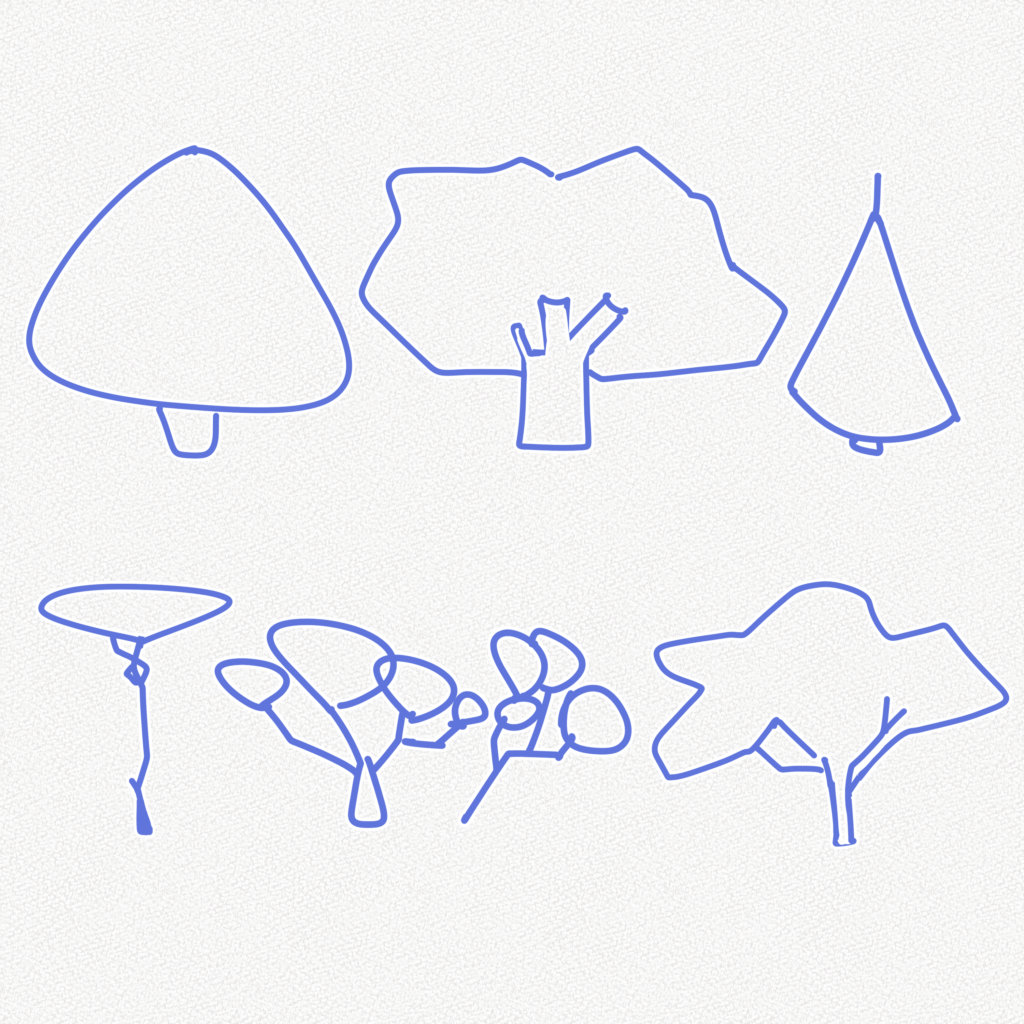
Now, we’re going to choose the tree we’re going to draw. In my case, it will be the very first one.
But why choose when we can make our own?
Because, yeah… It is possible to draw trees from imagination, like pretty much anything can also be drawn from imagination; however in order to do it correctly, first you need to build a visual library of references and this exercise will for sure help you do that.
Section 2: How to create textures using graphite pencils.
Now we’re going to learn how to create a trunk-like texture using powdered graphite, graphite pencils, and a blending stump.
Before drawing our tree, we’re going to practice a little bit, so you can apply this same technique to your other drawings!
1.- Sketch the outline of a tree
For this step you need to make a simple outline of a tree’s trunk, we’re going to use it as our base to practice the texture of our tree.

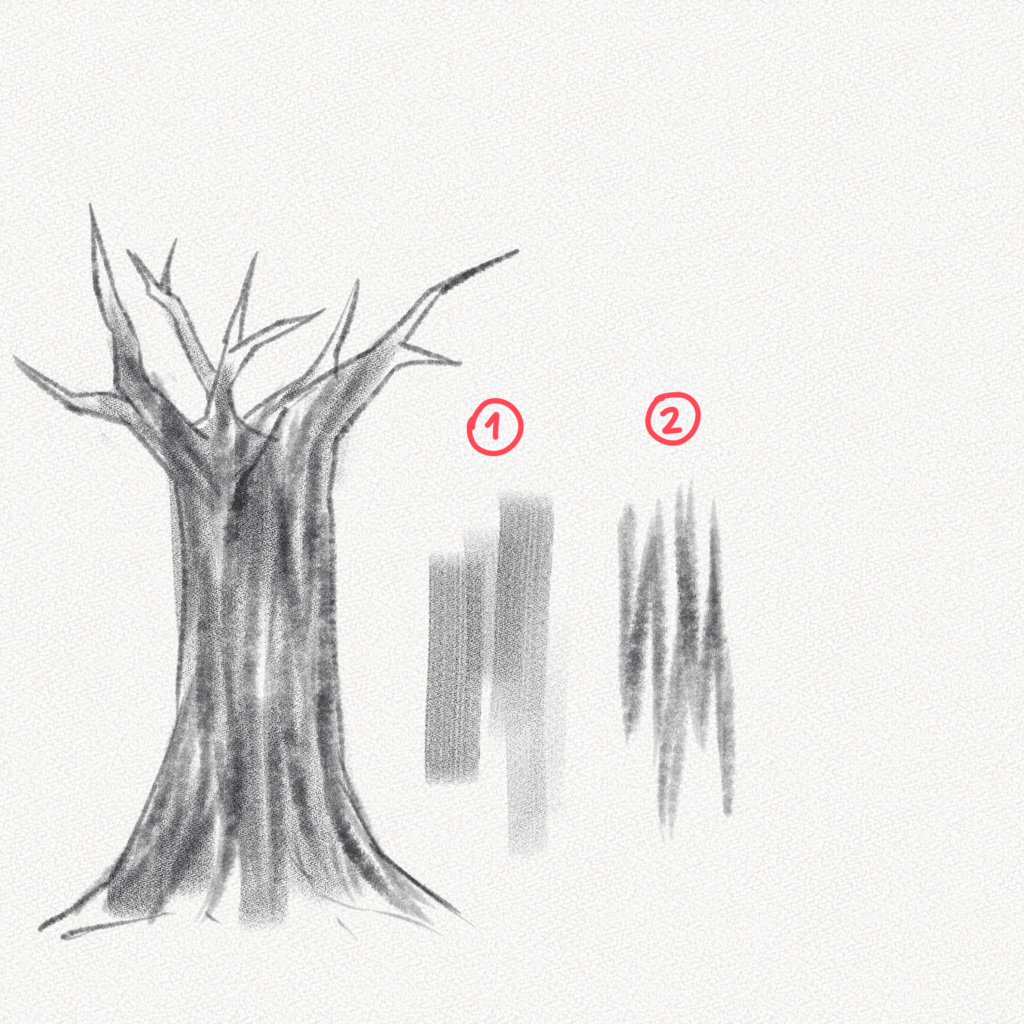
2.- Fill the outline
We’re going to grab some powdered graphite with the side of our blending stump, and apply it to the paper as shown in the diagram. That way we’ll have long and thick traces without the need of using the tilted pencil technique and without scratching our paper.
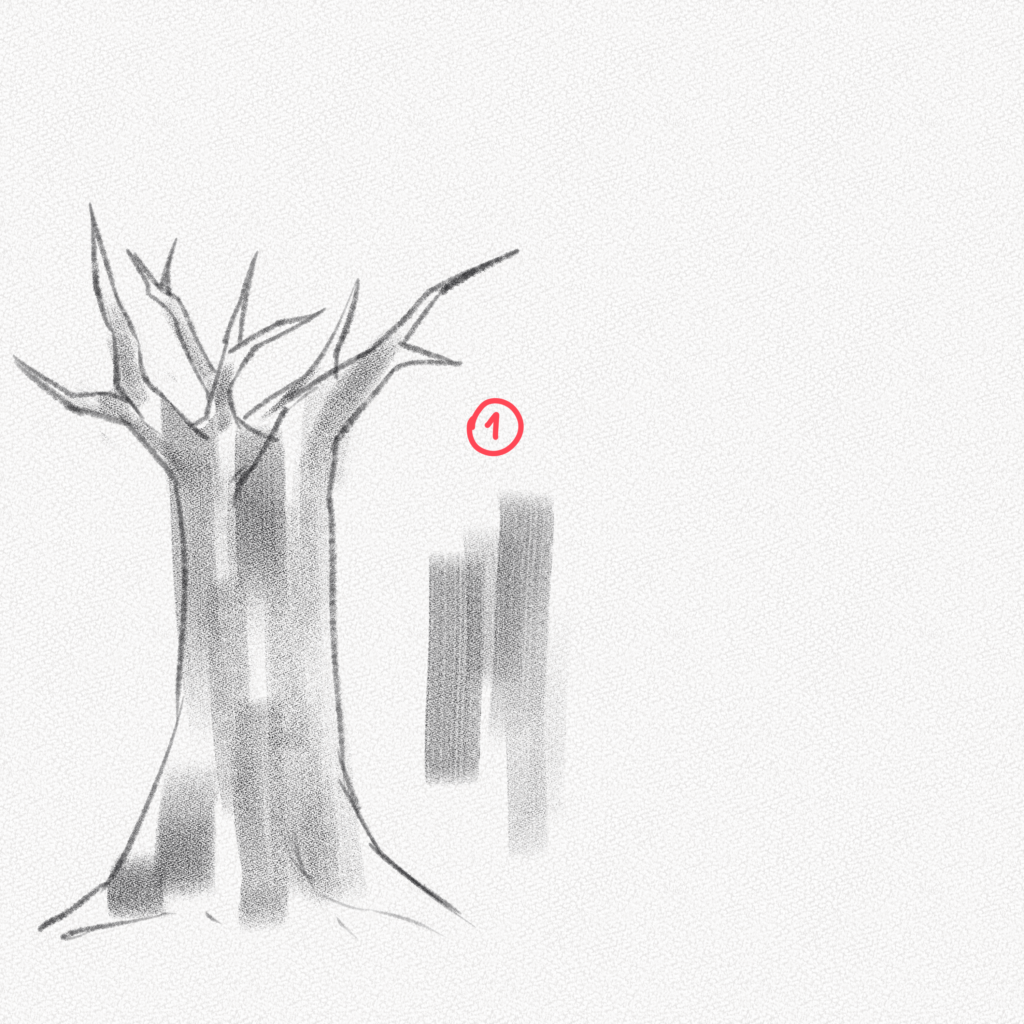
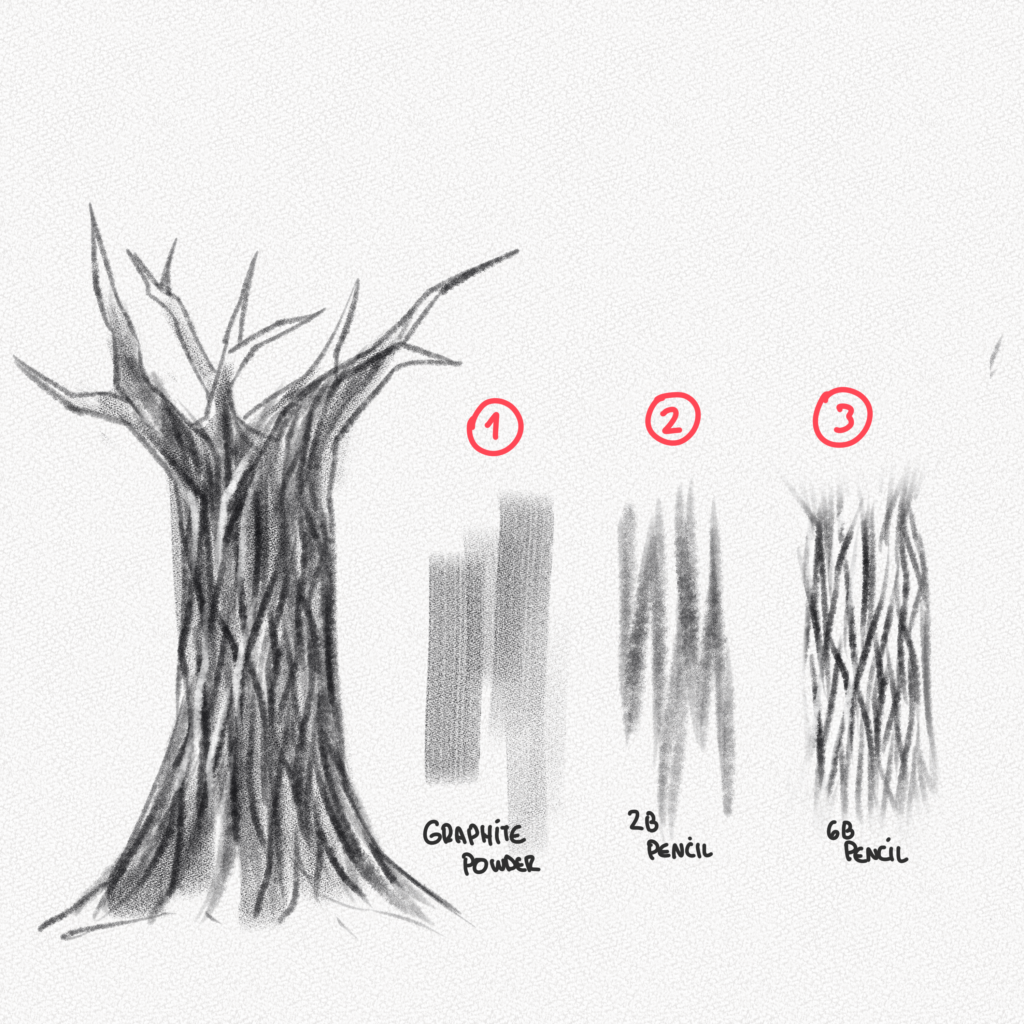
3.- Make the base traces
Now with our file, we’re going to dull our 2B pencil tip in order to achieve those thick strokes, then we’ll make vertical traces to build some of the texture.
4.- Details
With your 6B pencil and your precision eraser you’re going to make irregular fine traces to define the trunk’s texture and also the light source.
Section 3: How to Shade Using Graphite Powder
For this section we’re going to use graphite powder. Since it might be a little hard to find, we are going to learn how to make our own using an old HB pencil and a nail file or fine sandpaper.
1.- Base
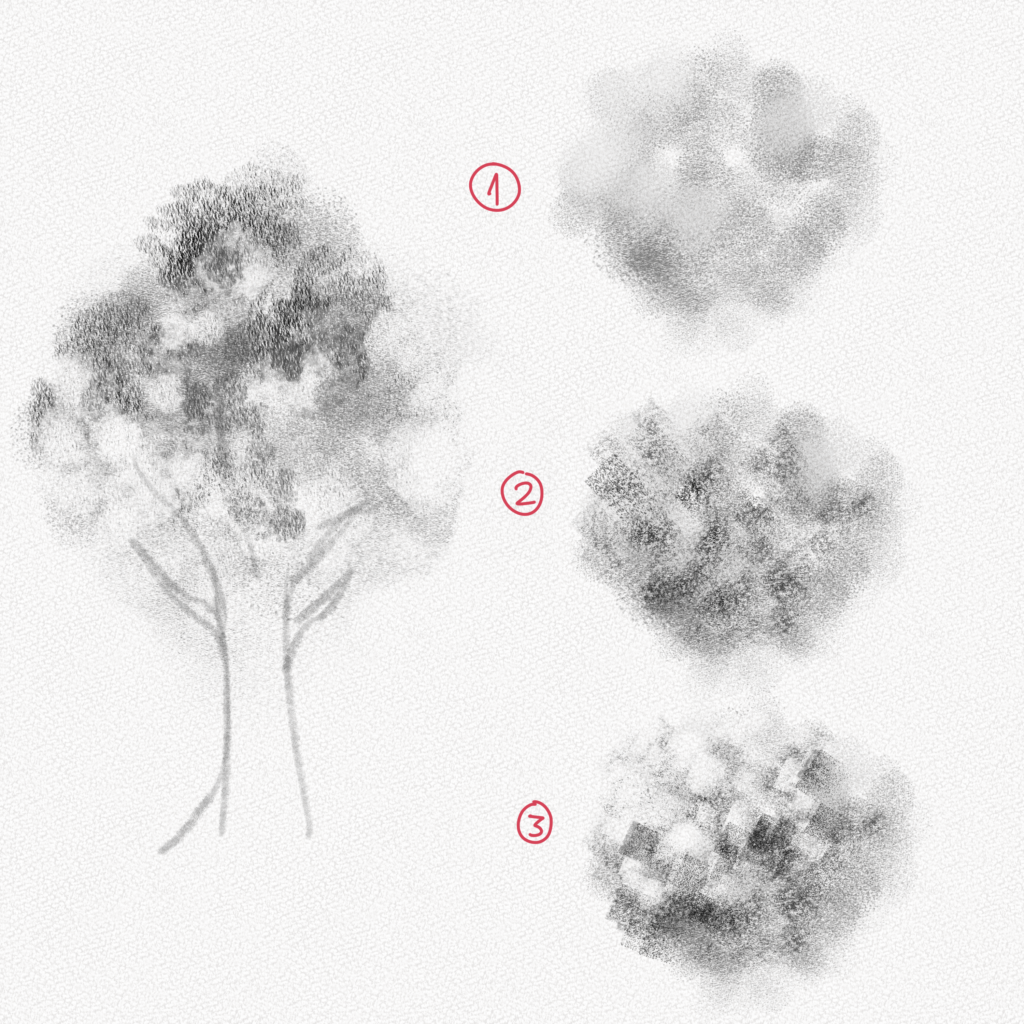
In a small recipient we’re going to gather the graphite powder and with a soft brush we’re going to grab some and gently tap on our paper, making the shape of our tree (it doesn-t have to be perfect since we’re only practicing)
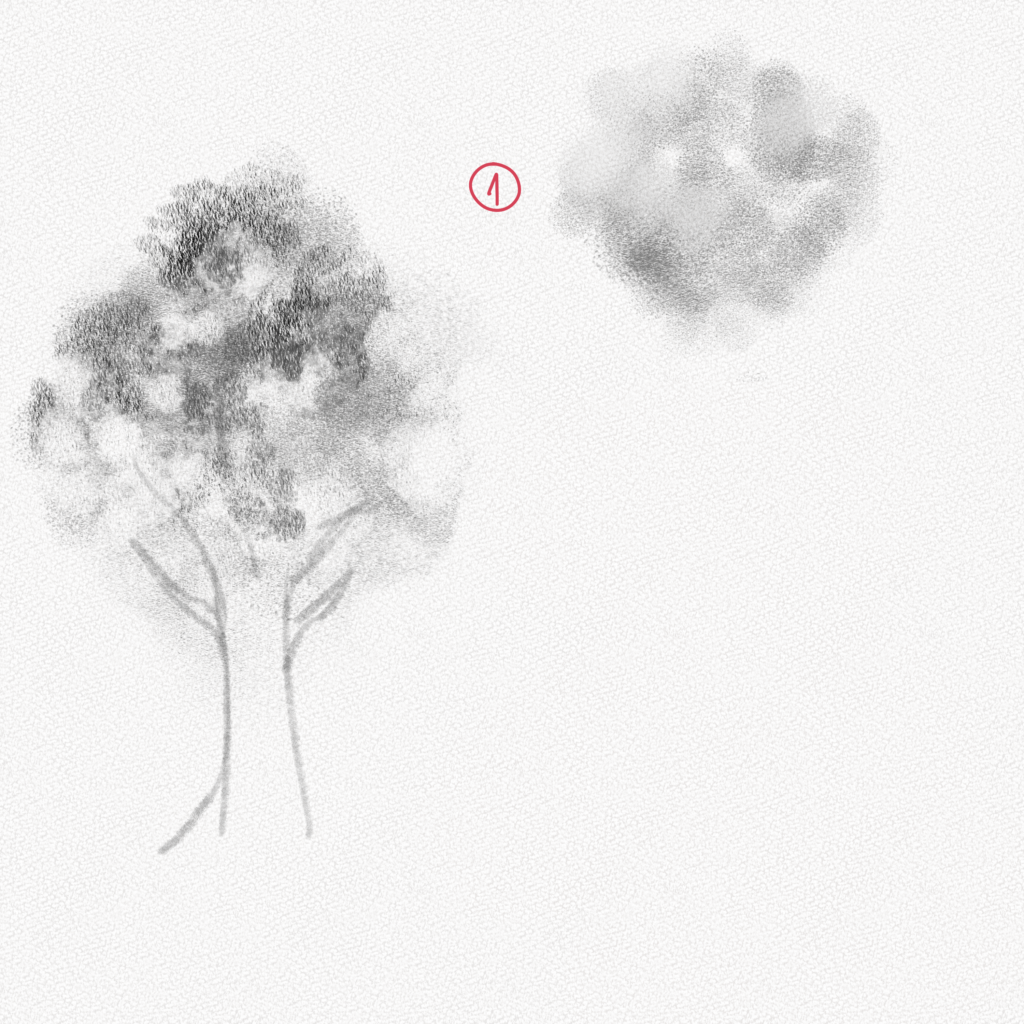
2.- Values
You should’ve probably noticed already that there is more graphite in some places than others, here’s when we’re going to use our blending stump to create the base values of the leaves.
It is important to create values in order to define where the light is hitting and where the shadows are. In the areas with more graphite, applying light pressure we’re going to softly smudge the graphite in order to define those shapes better.
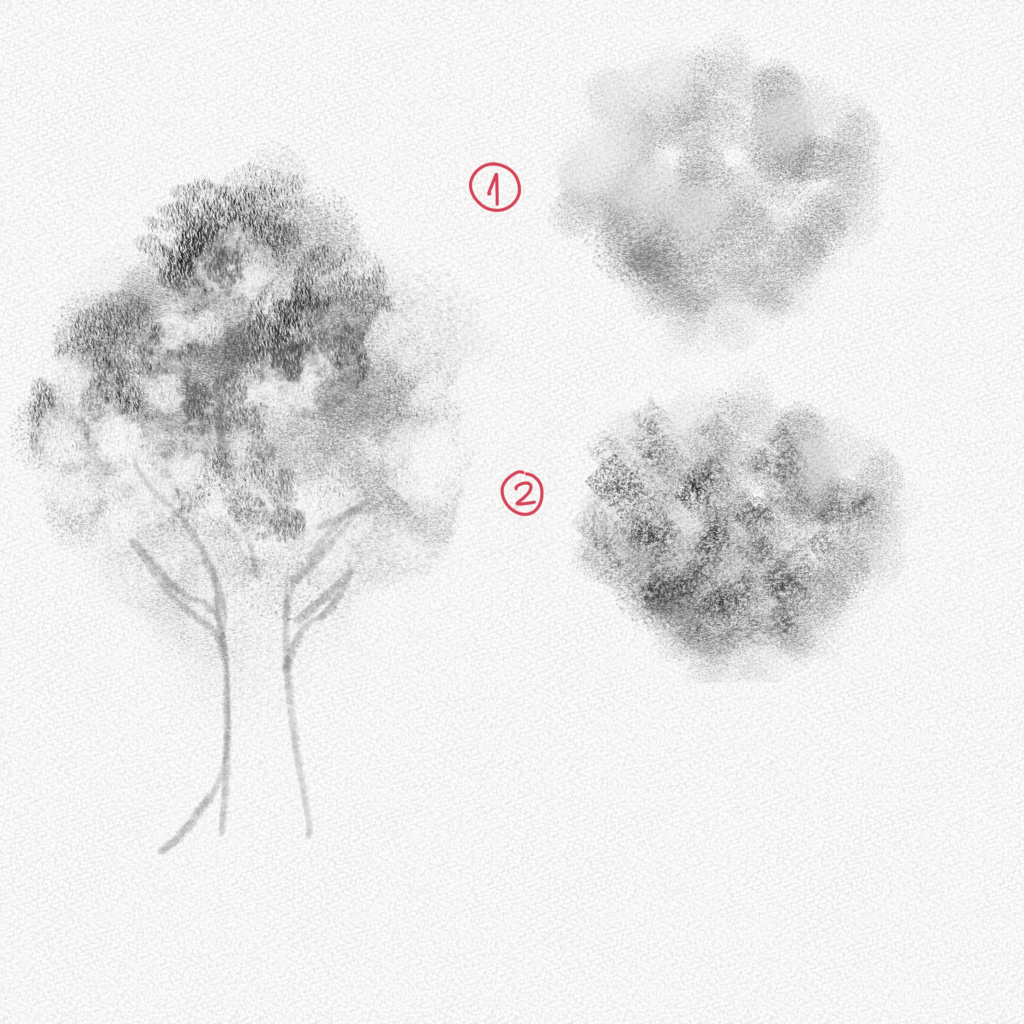
3- Contrast
Now, with our kneadable eraser we’re going to take away graphite from the places where we want to have a lighter value. It doesn’t have to look perfect, since this is only the base, but you should be able to identify the shape of our tree after this step.
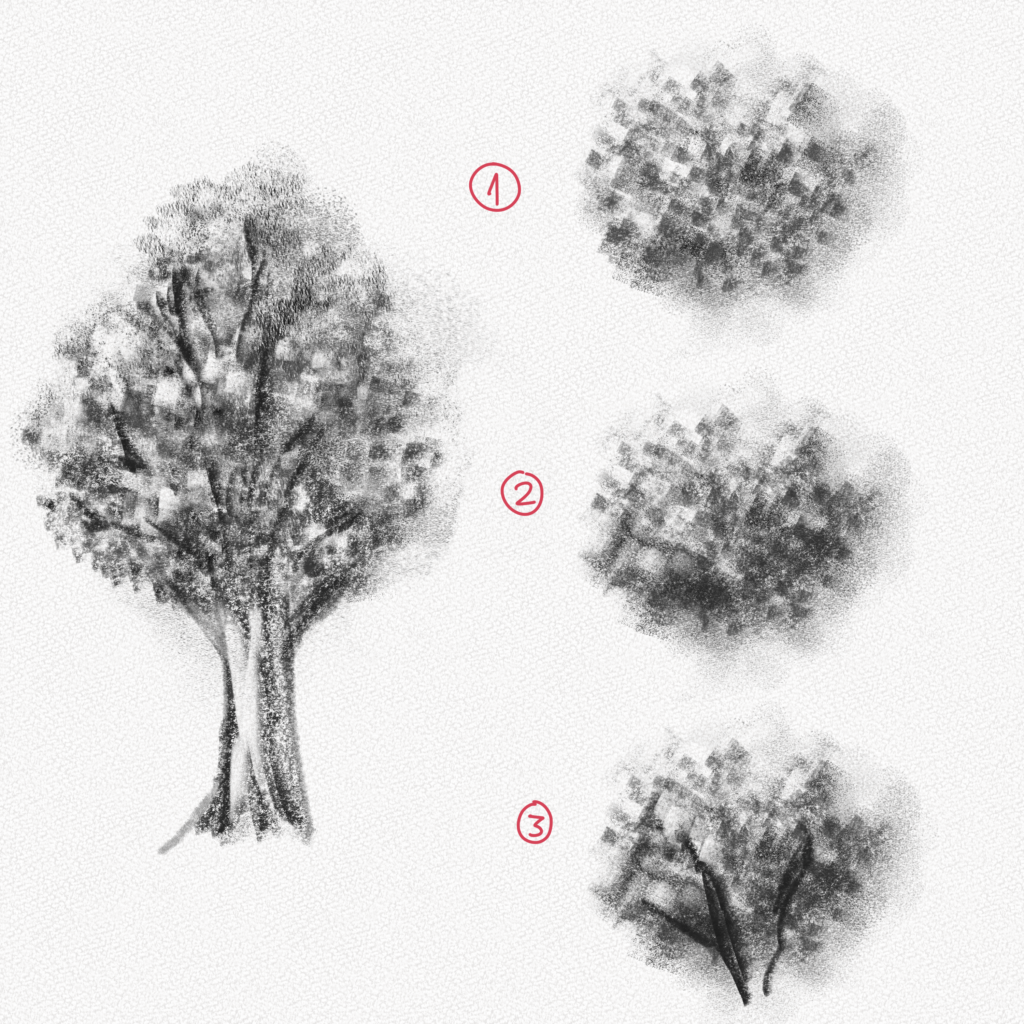
4.- Details
For this step, with your 6B pencil we’re going to darken the areas where our leaves will be, since it is hard to draw each single leaf, we’re only going to shade and smudge them in order to create more contrast.
Don’t apply too much pressure and make sure to work with your graphite pencils in layers.
Use your precision eraser to erase some leaves, that will make your drawing pop and will also help you make it more realistic.
Don’t forget to add the branches, you can use your reference or your imagination for this step.
How To Draw A Tree Step By Step
Step 1 – Composition
This might be a foreign step since we haven’t really talked about composition in our other tutorials, however, since we’re going to draw an irregular shape might as well do the basics.
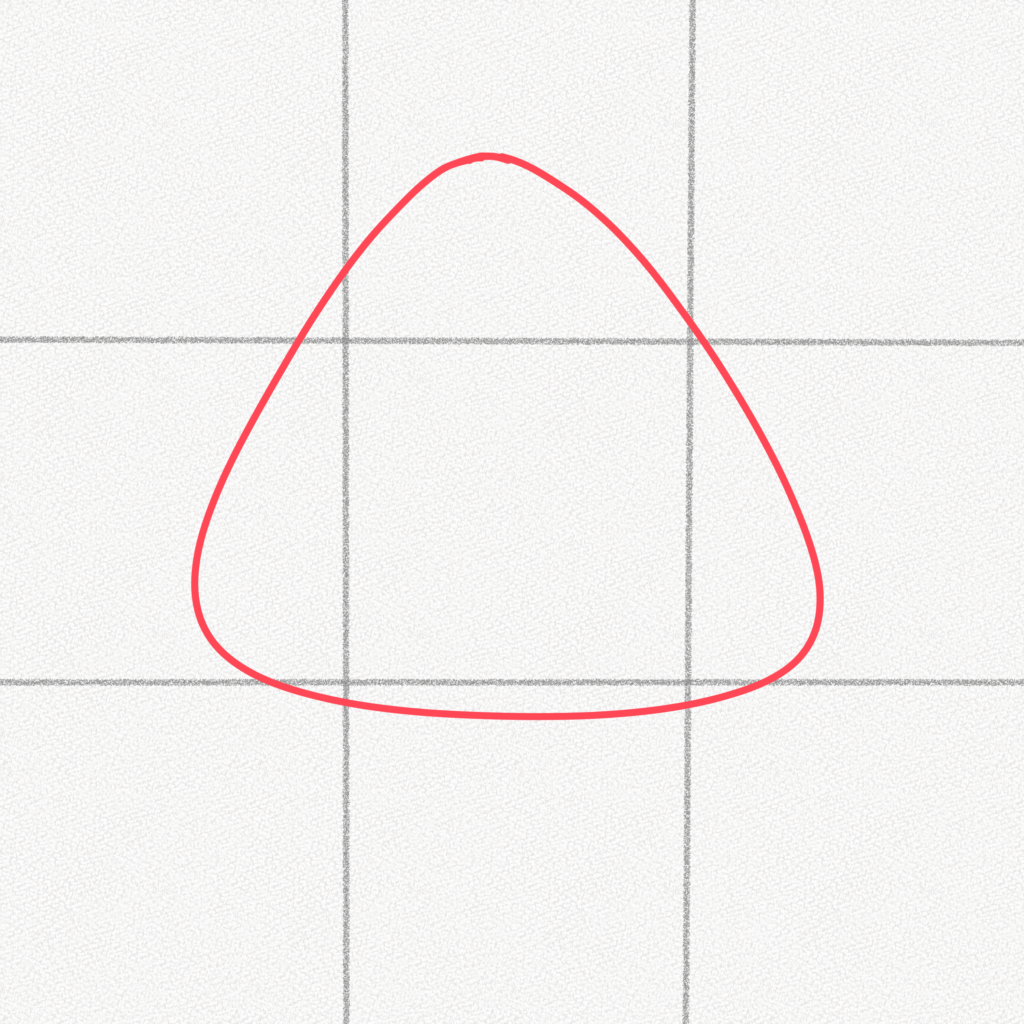
With a ruler and our 2H pencil, we’re going to divide our paper in thirds. Those will be our guidelines to properly center our tree and make it look proportionate.

Step 2 – Sketch the Crown’s outline.
As we’ve practiced, now we’re going to softly draw an outline for the crown of our tree, it doesn;t have to be overly detailed, just some shape to place our tree in the middle of our canvas.
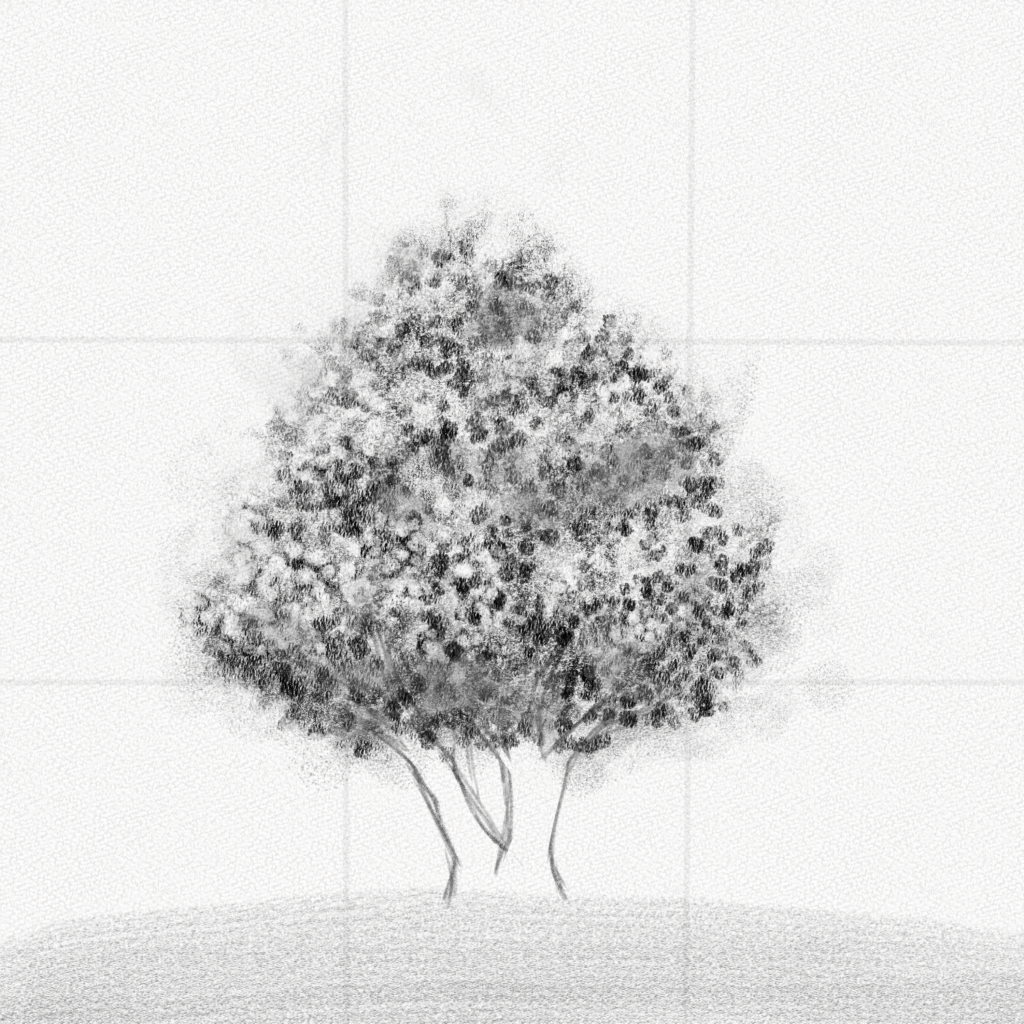
Step 3 – Sketch the Trunk’s Shape
Let’s do the same for the trunk, try using the least detail possible and focus on centering your tree and making it look proportionate.
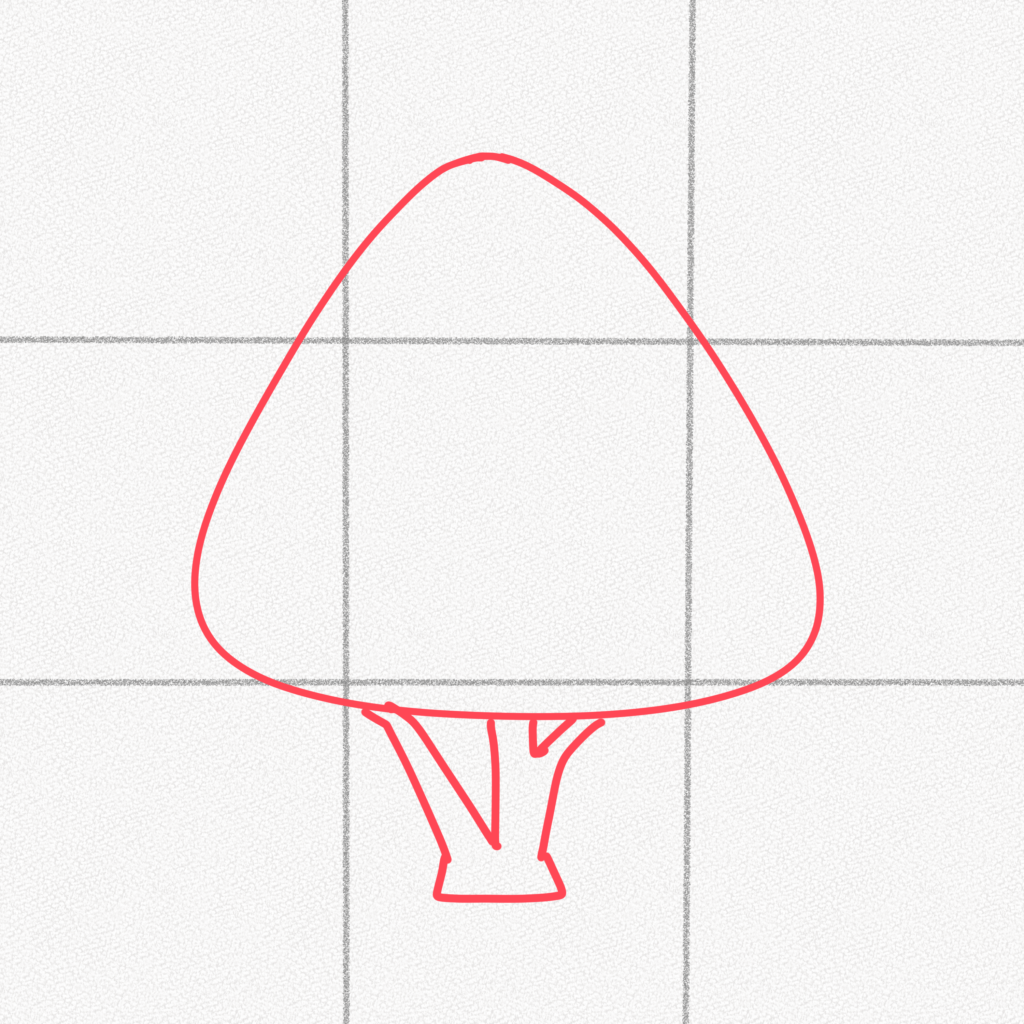
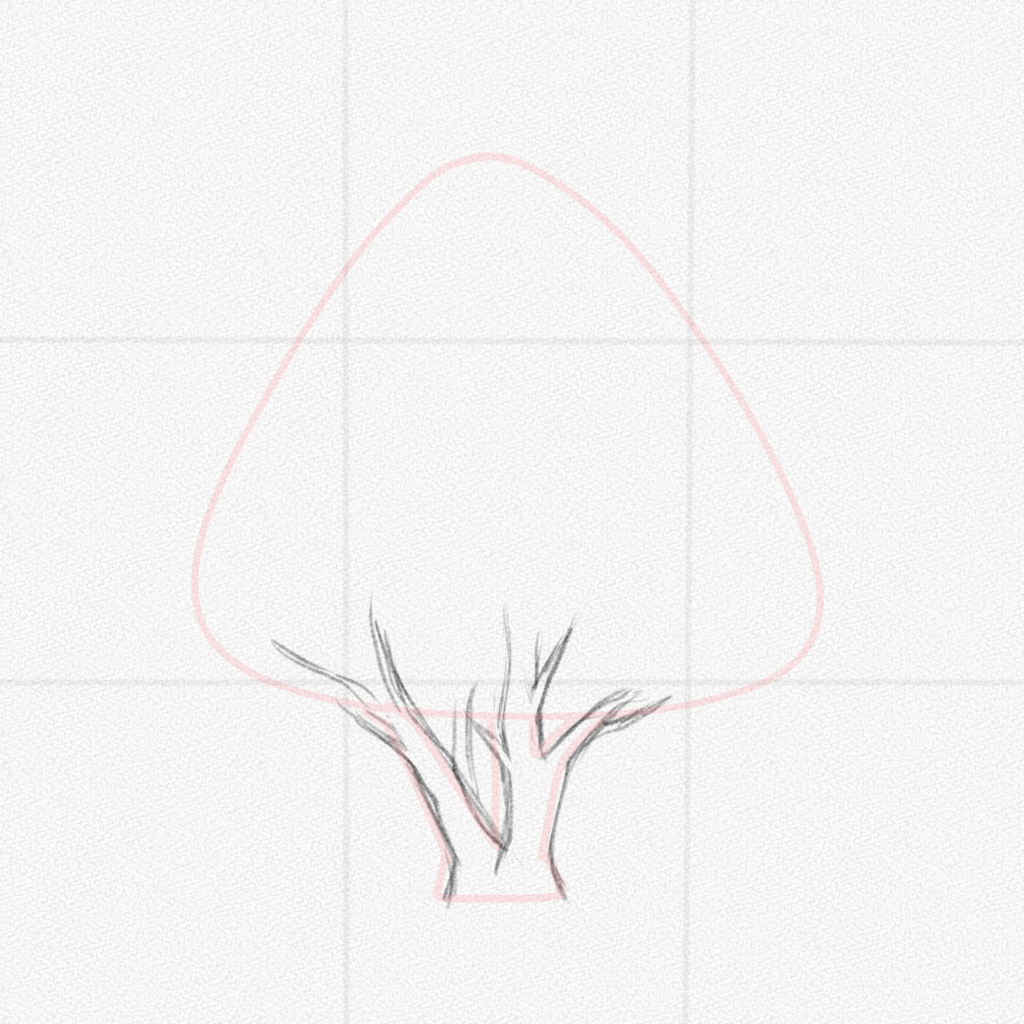
Step 4 – Erase your guidelines and outline the trunk
Now that we have our sketch centered, we’ll erase the guidelines enough to make them barely visible and start working in our tree by outlining the trunk with more organic lines and focusing on the shape of the trunk and some visible branches.
Step 5 – Add the graphite powder
Using the graphite powder technique, we’re going to fill our tree, applying more graphite in the places where the light is not hitting directly.
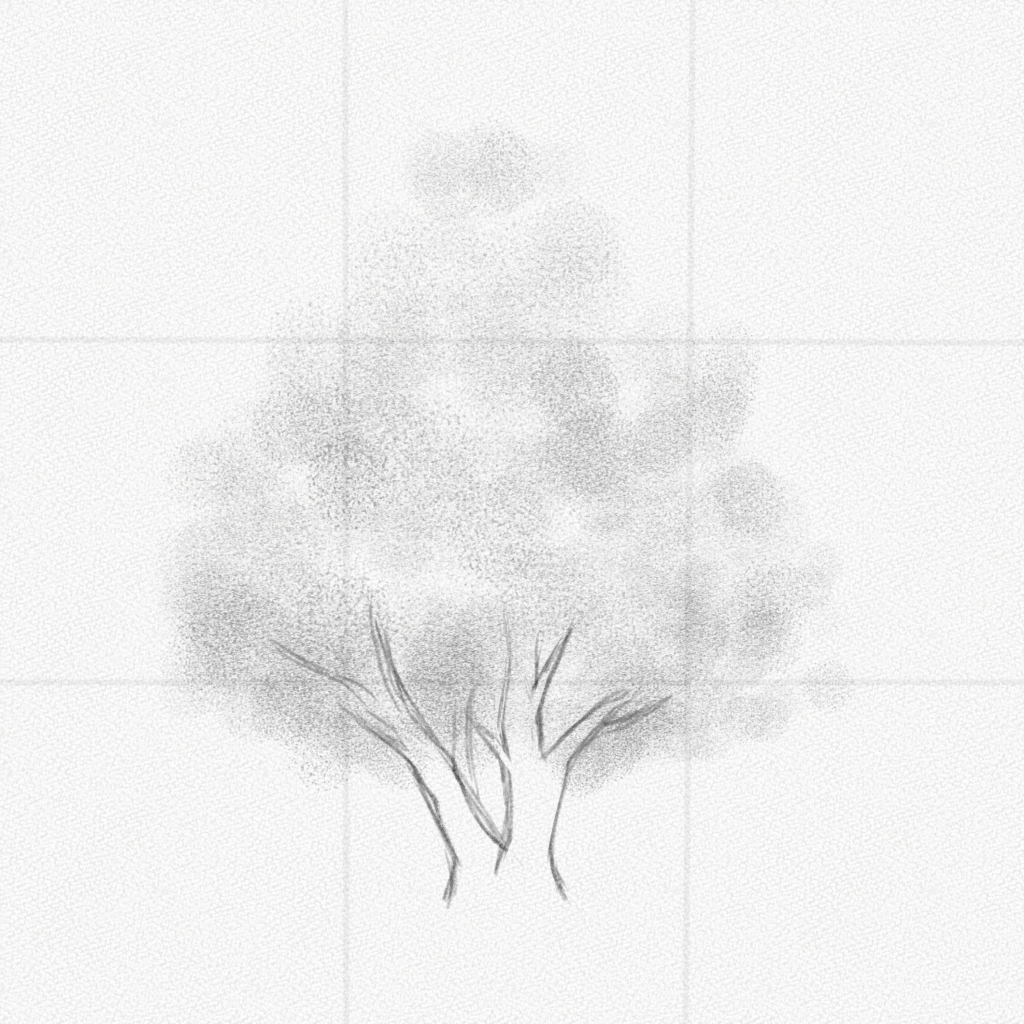
Step 6 – Add the ground
Because we can’t have our tree floating, we’re going to add the ground with soft brushstrokes of powdered graphite.
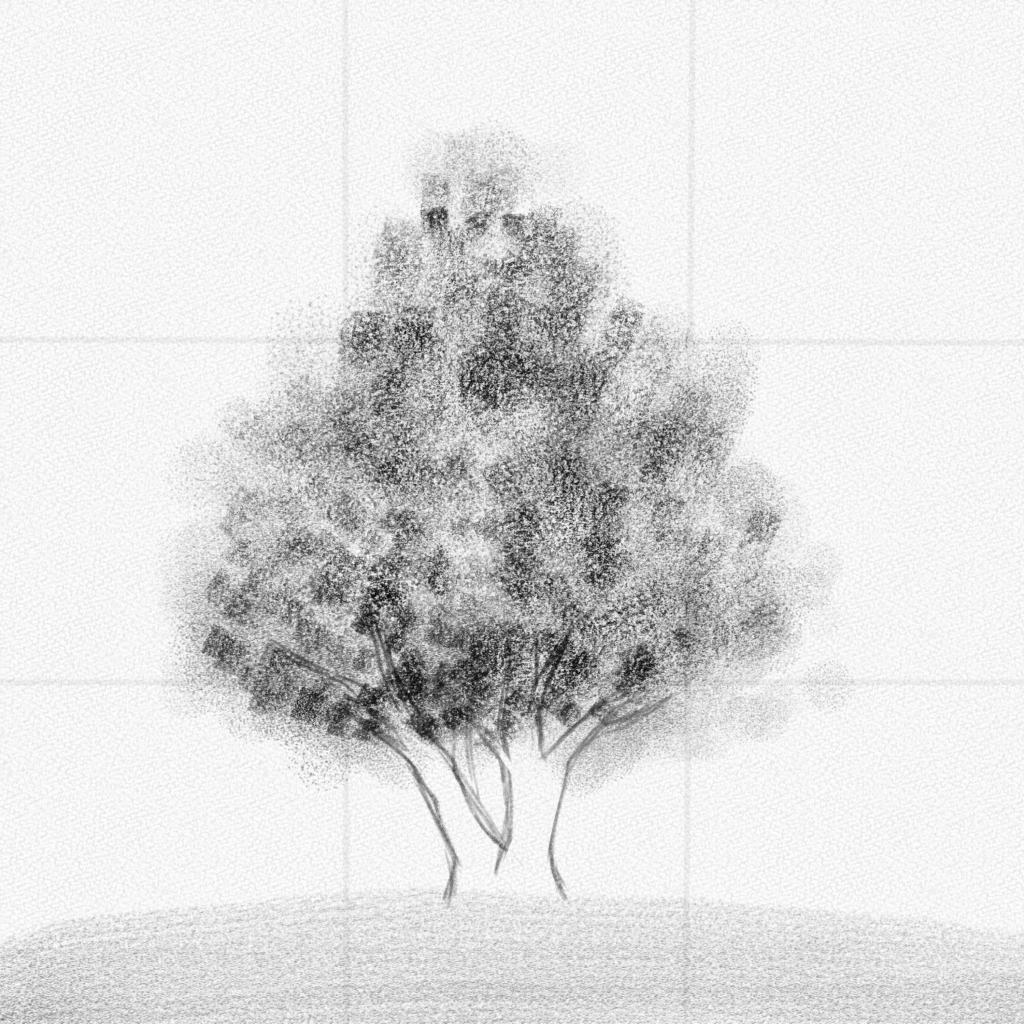
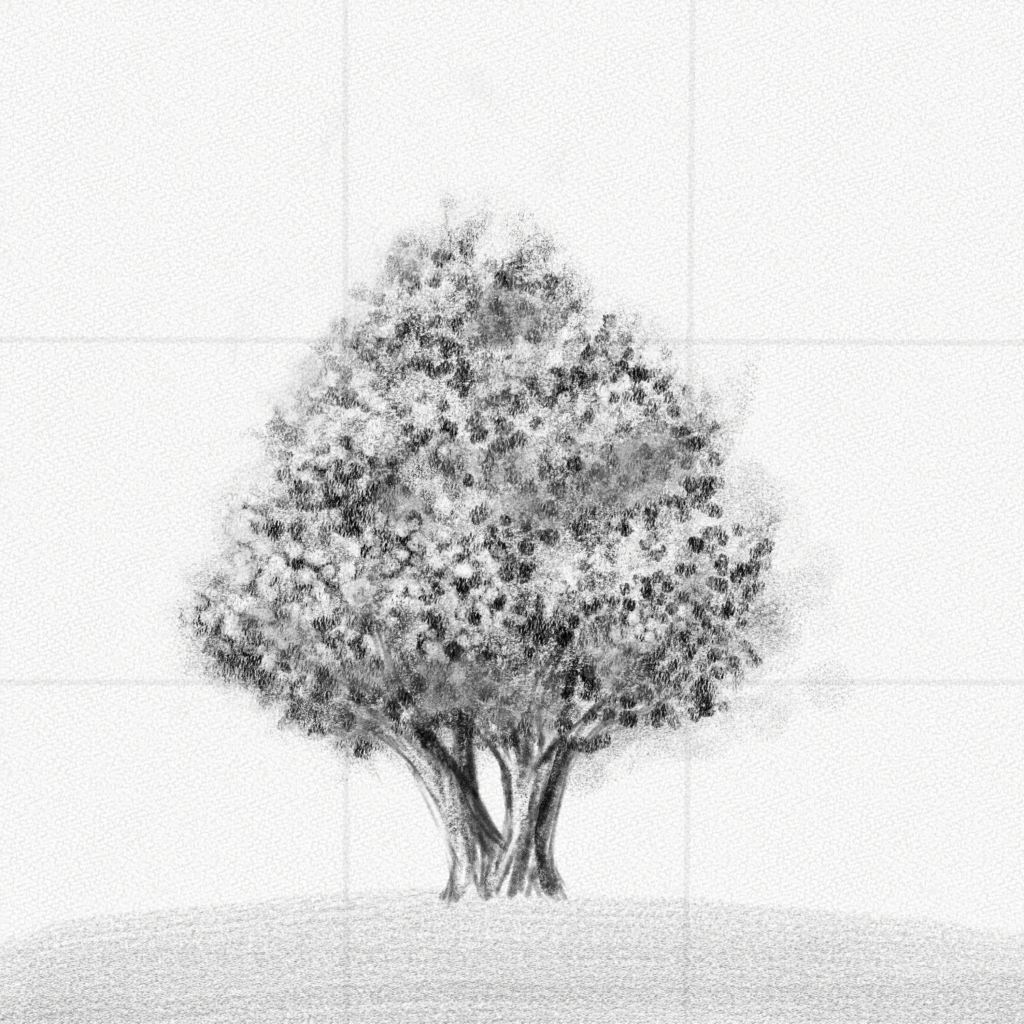
Step 7 – Define the Values
With the technique learned above, we’re going to start working on defining our values by darkening and smudging the areas where the shadows lie.
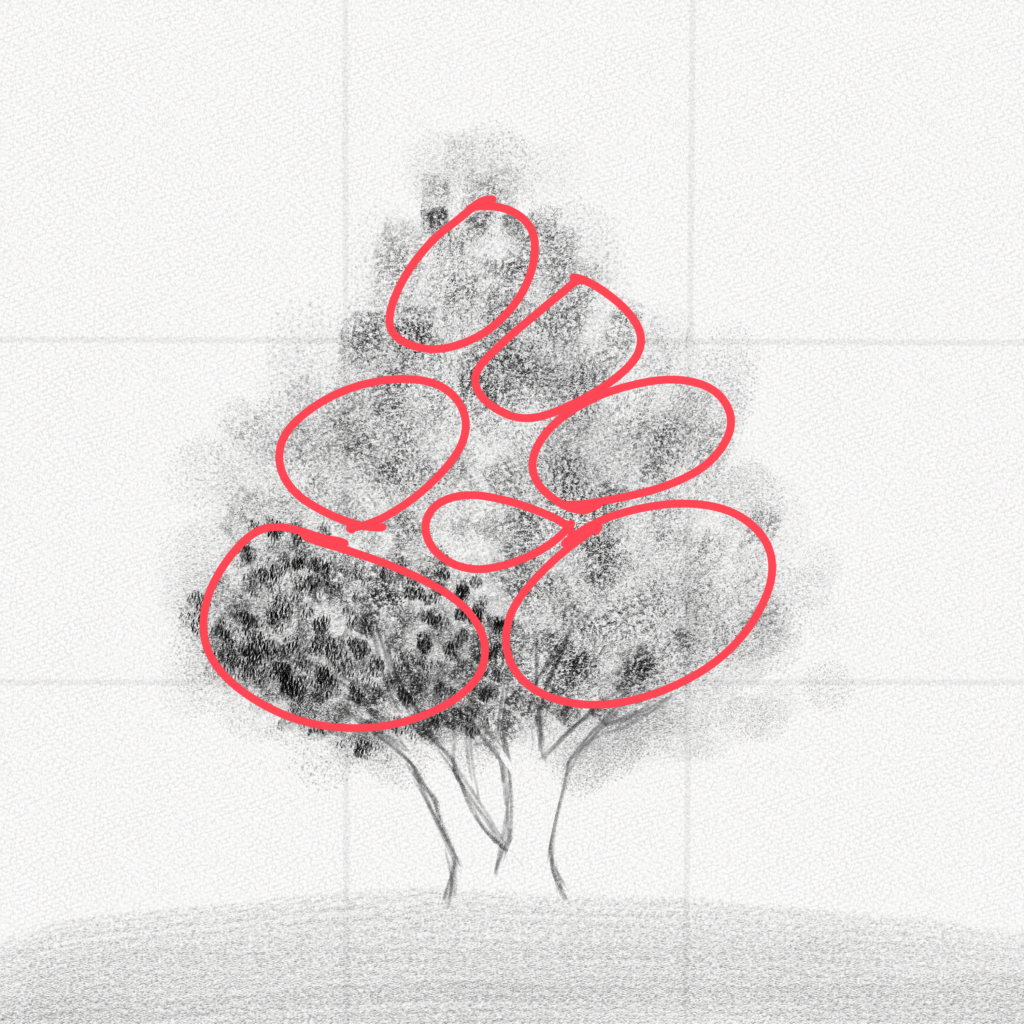
Step 8 – Identify the Tree’s Divisions
The crown of a tree is always divided into elliptical-like sections, identify them and start working in the values section by section.
Step 9 – Create Contrast
With your kneadable eraser, take some of the graphite away from the lighter areas from each section.
Step 10 – Shade the trunk
With the technique learned above, shade and add texture to the trunk.
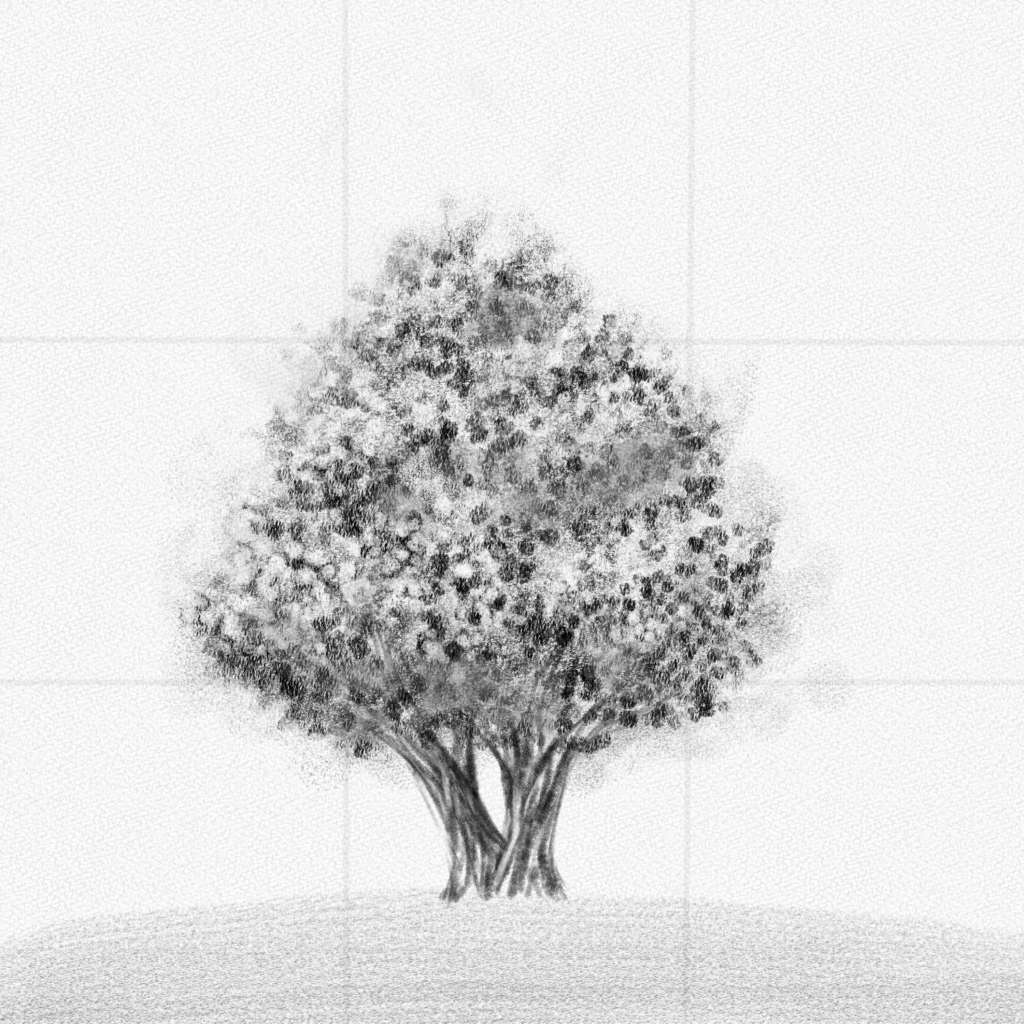
Step 11 – Identify the trunk lighter areas
Following your reference, identify the trunk’s lighter areas and create a mental image of where they are.

Step 12 – Define the trunk’s lighter areas
With your precision eraser, take away some graphite from the trunk lighter areas, and apply another layer of graphite in the darkest to create more contrast.
Step 13 – Visualize and sketch the branches
For this step, we’re going to look at our reference and start adding the branches to our tree. Sketch them lightly since some will show more than others.
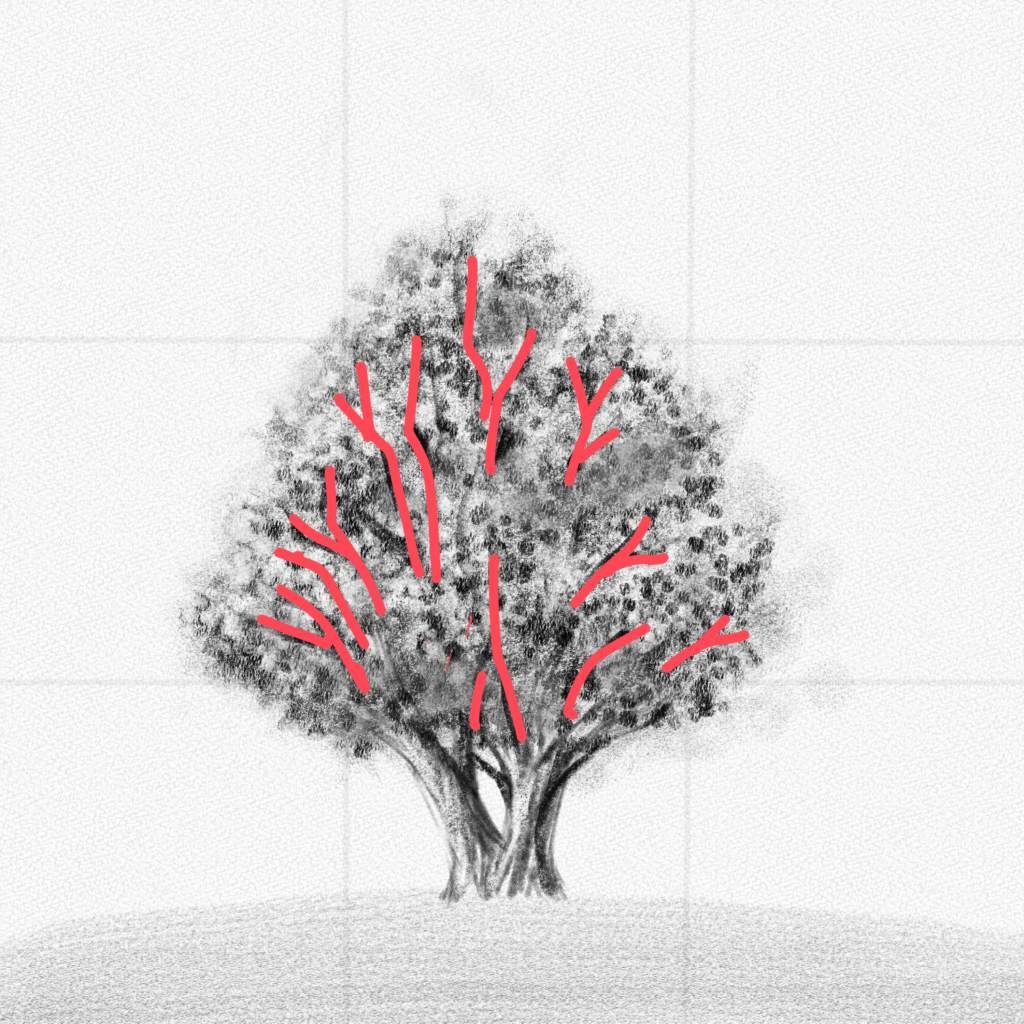
Step 14 – Shade the branches of our tree
Now, taking into account the light source and the visibility of the branches, we’re going to add more layers of graphite to our sketch. If we feel like we’re going too dark we can always use our precision eraser, our blending stump or our kneadable eraser to fix it.
Step 15 – Add some small highlights
With our precision eraser, we’re going to erase all we can in the parts where the light hits the most, since we used powdered graphite it will be easy to fully erase those parts, which will give our drawing more sense of realism.
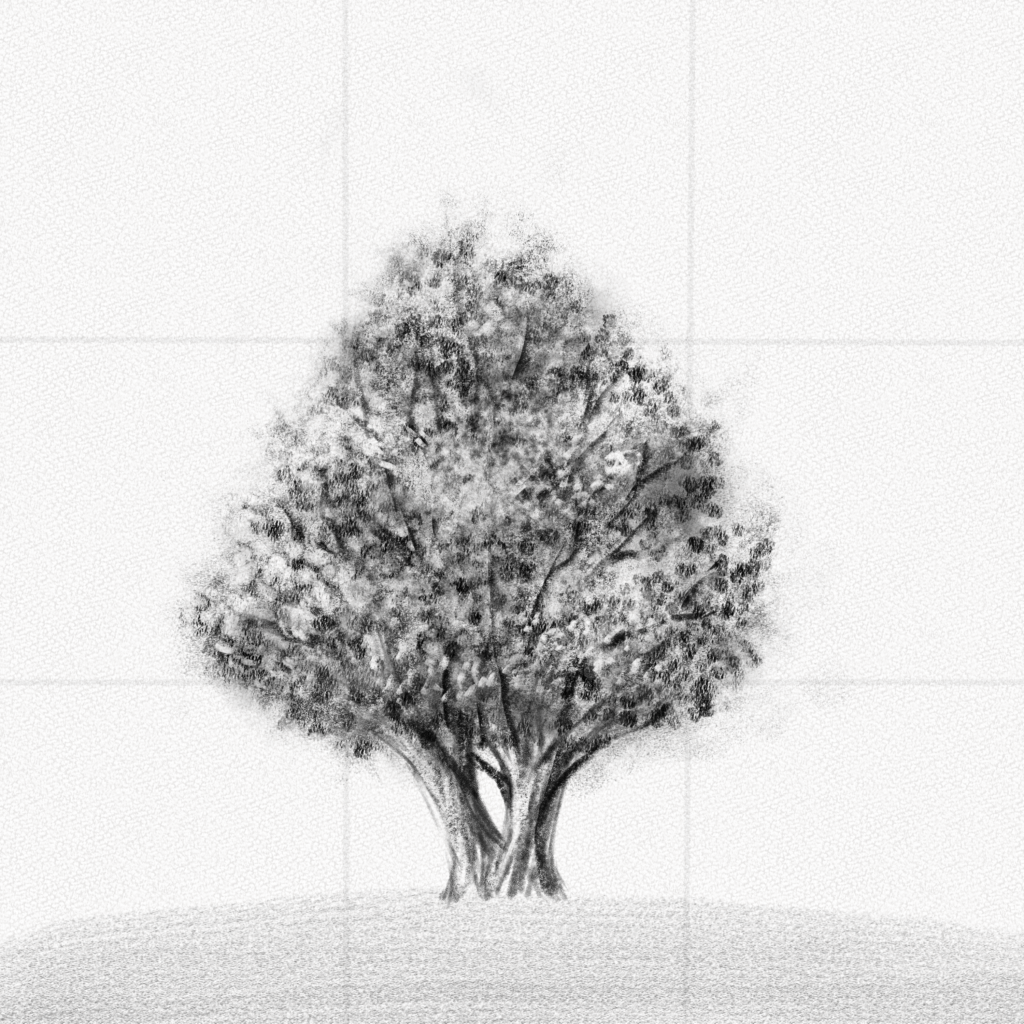
Step 16 – Detail the ground
Now it’s time to erase what’s left of our guidelines, after that, with our blending stump and our 2B pencil, we’re going to start detailing the grass around our tree. You can also use the precision eraser to add highlights to the grass.
And you’re done! Thank you for following this tutorial you’ve done great!
I hope you learned some new techniques and that you had fun drawing your tree!
Until next time 😀