Rabbits are one of the cutest animals in the world. Unlike adult rabbits and hares, bunnies are small and fluffy, making them extremely adorable.
Present in different styles and artistic mediums, rabbits have been the object of inspiration for many throughout time.
Drawing a rabbit is not as easy as it looks. The artist needs to understand how the animal looks from all angles, what kind of fur it has, and how it moves.
However, since this tutorial is beginner-friendly, just make sure to follow the steps, and you’ll have a cute rabbit drawing in the end.
What you’ll learn:
- The structure of a rabbit’s body
- The structure of a rabbit’s face
- How rabbit fur works and how to shade it.
Materials needed:
- A piece of paper
- Graphite powder
- A soft brush
- A 4B graphite pencil
- A Kneaded eraser
- A mechanical pencil
- A compass or a circle tool
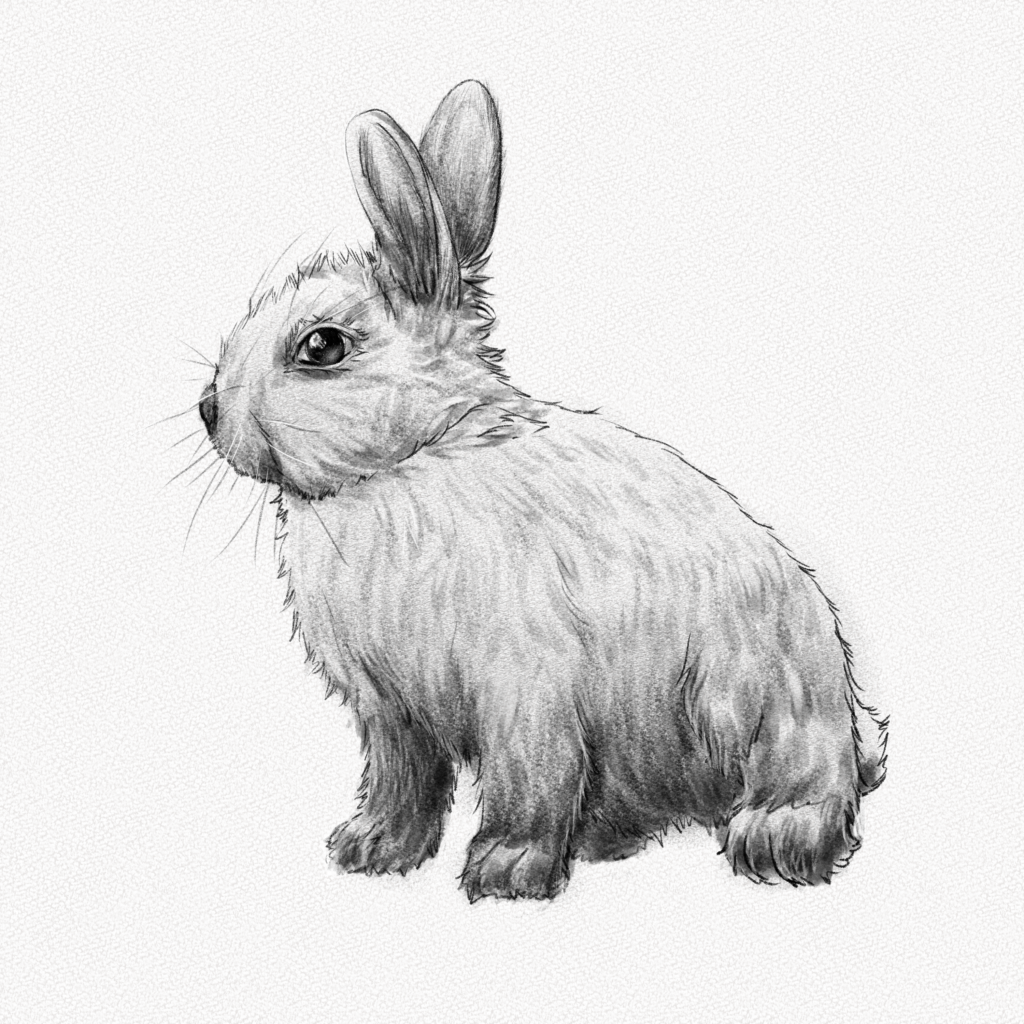
This is the rabbit you’re going to draw:
And these are all the steps we’ll walk you through: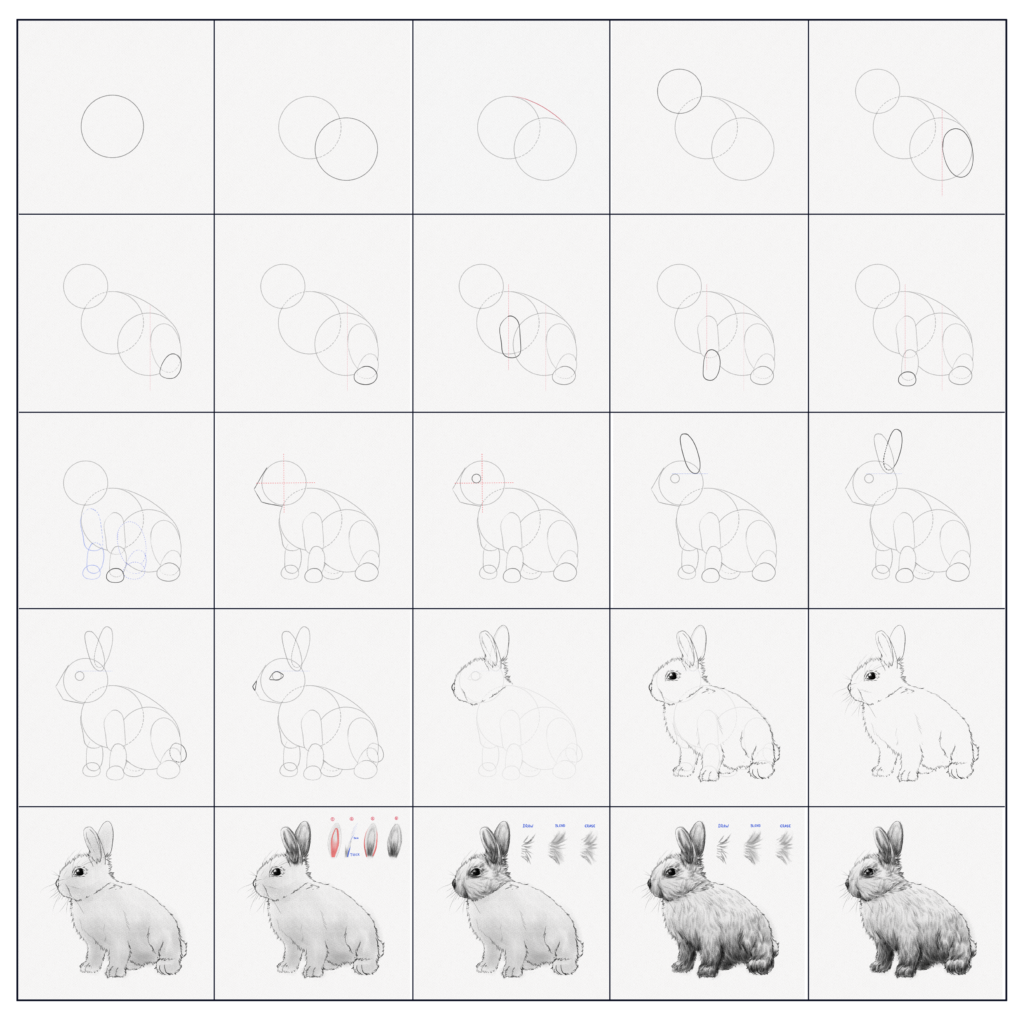
Section 1.- Structure of a rabbit’s body
Step 1: Draw a circle
Draw a circle around the middle of your paper. That circle will be the upper part of the rabbit’s body, so make it as big as you want your rabbit to be.
Step 2: Draw another circle
Draw another circle of the same size below the first one. These will be the tummy and leg areas.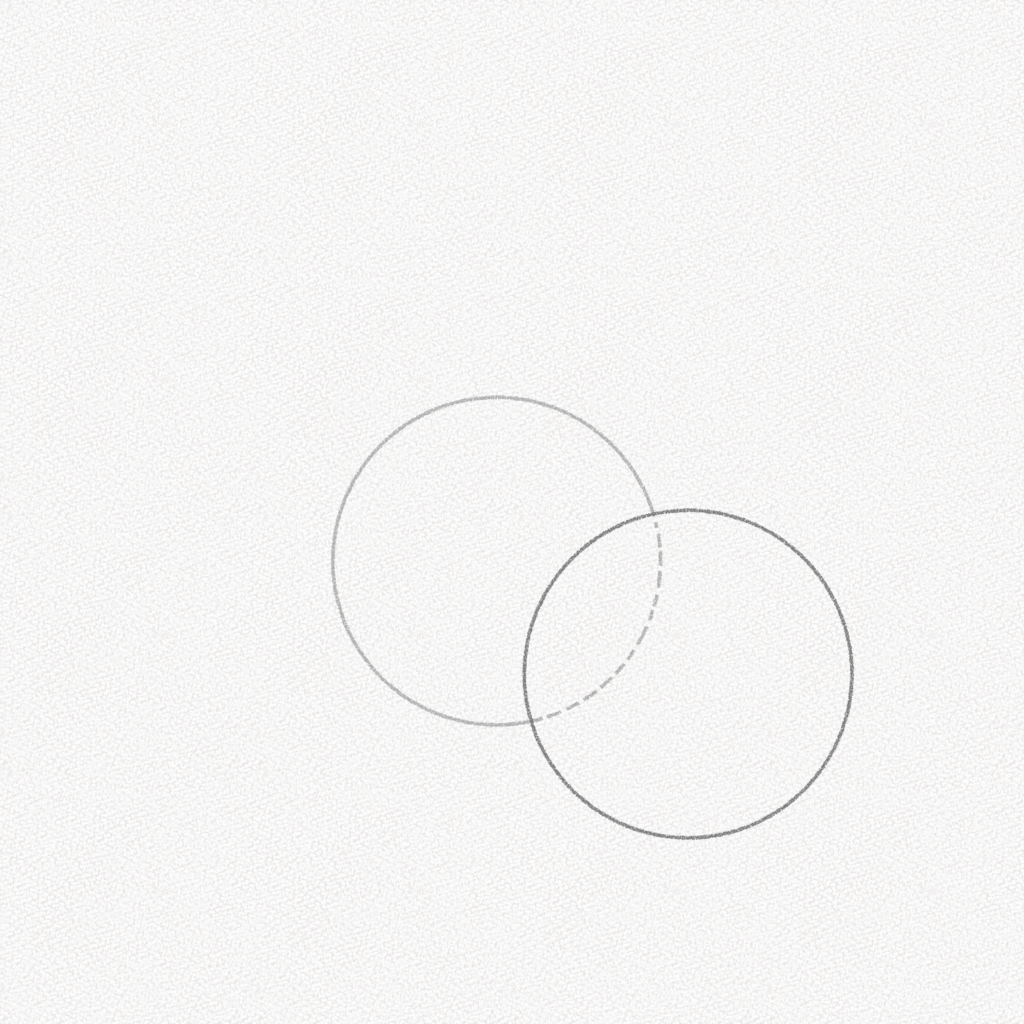
Step 3: Connect both circles
With a curved line, we are going to connect our circles. This curved line will represent the spine of our rabbit.
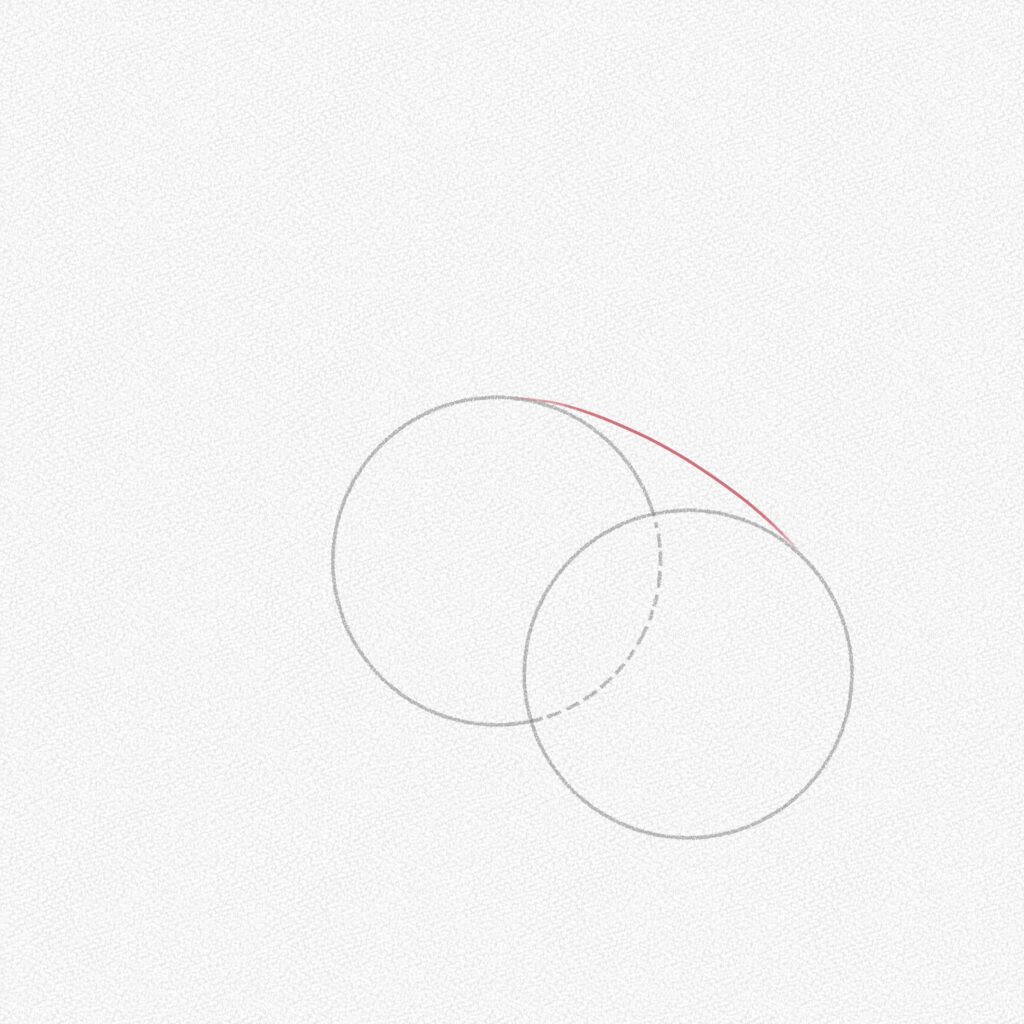
Step 4: Draw a third circle
Draw a third smaller circle on top of the other two. This will be our rabbit’s head. Follow the diagram if you’re unsure about the position.
Step 5: Draw an oval
Split the base circle in half and draw a slightly tilted oval. This oval represents the upper leg of our rabbit.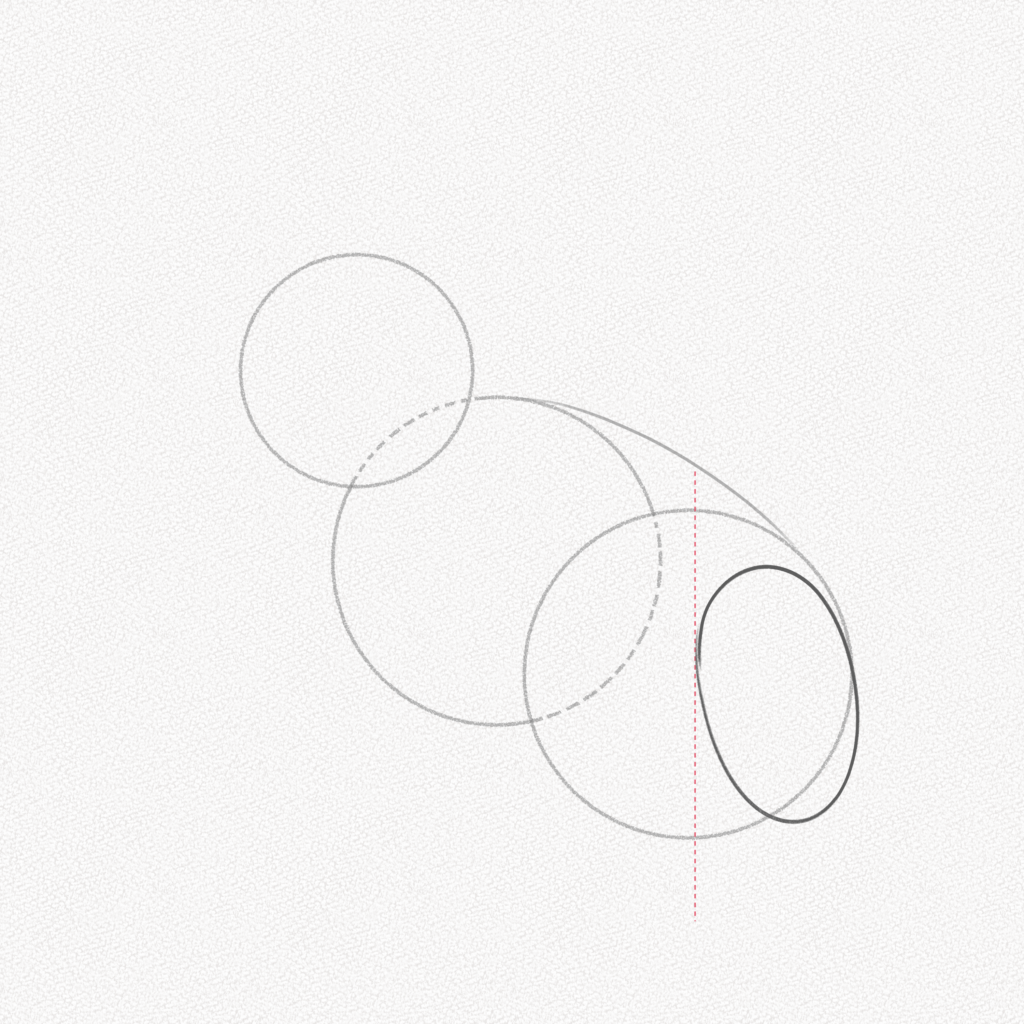
Step 6: Draw a bean
With a bean-like shape, draw the lower part of the leg. It should be slightly lower than the tummy and upper leg.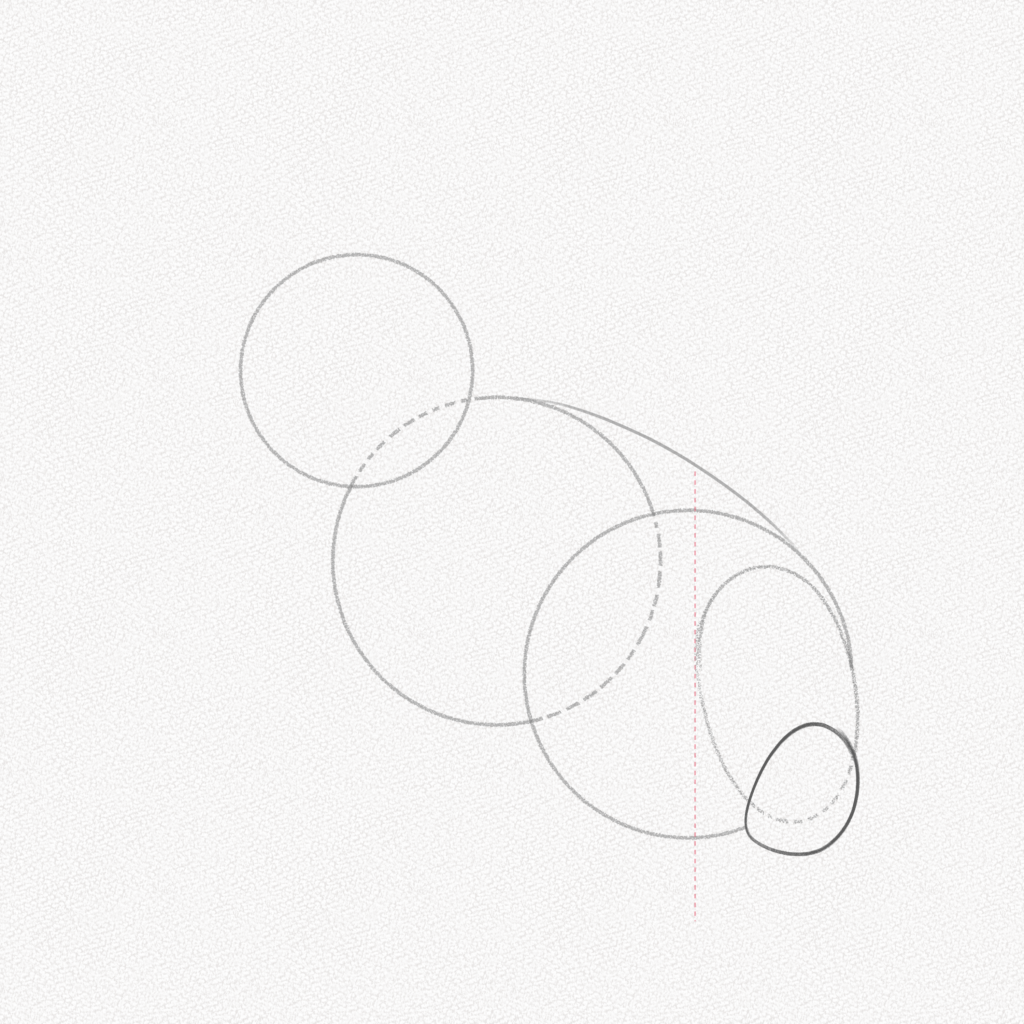
Step 7: Draw the paw
With another bean-like shape, draw the paw of our rabbit. Bunnies’ back feet are bigger than the front ones.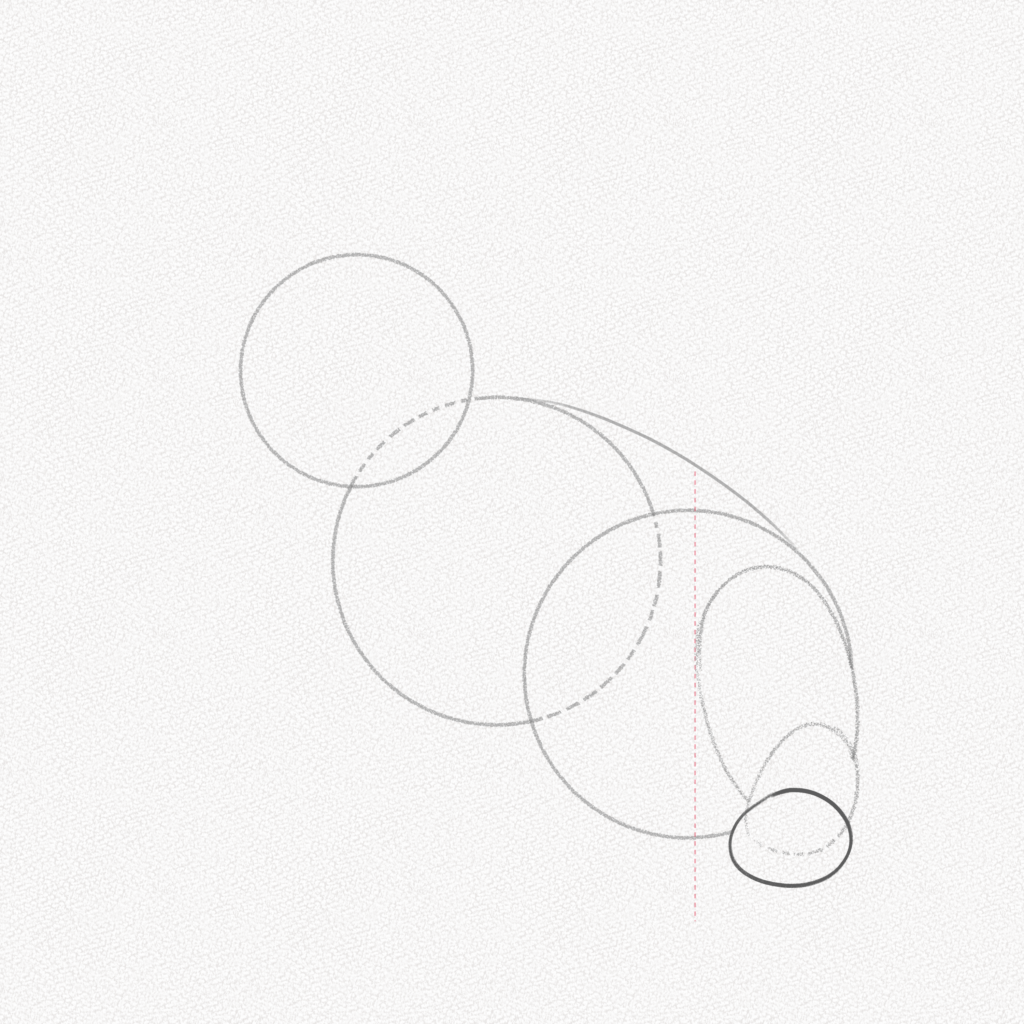
Step 8: Draw the front leg
With an elongated bean-like shape, draw the upper part of the front leg.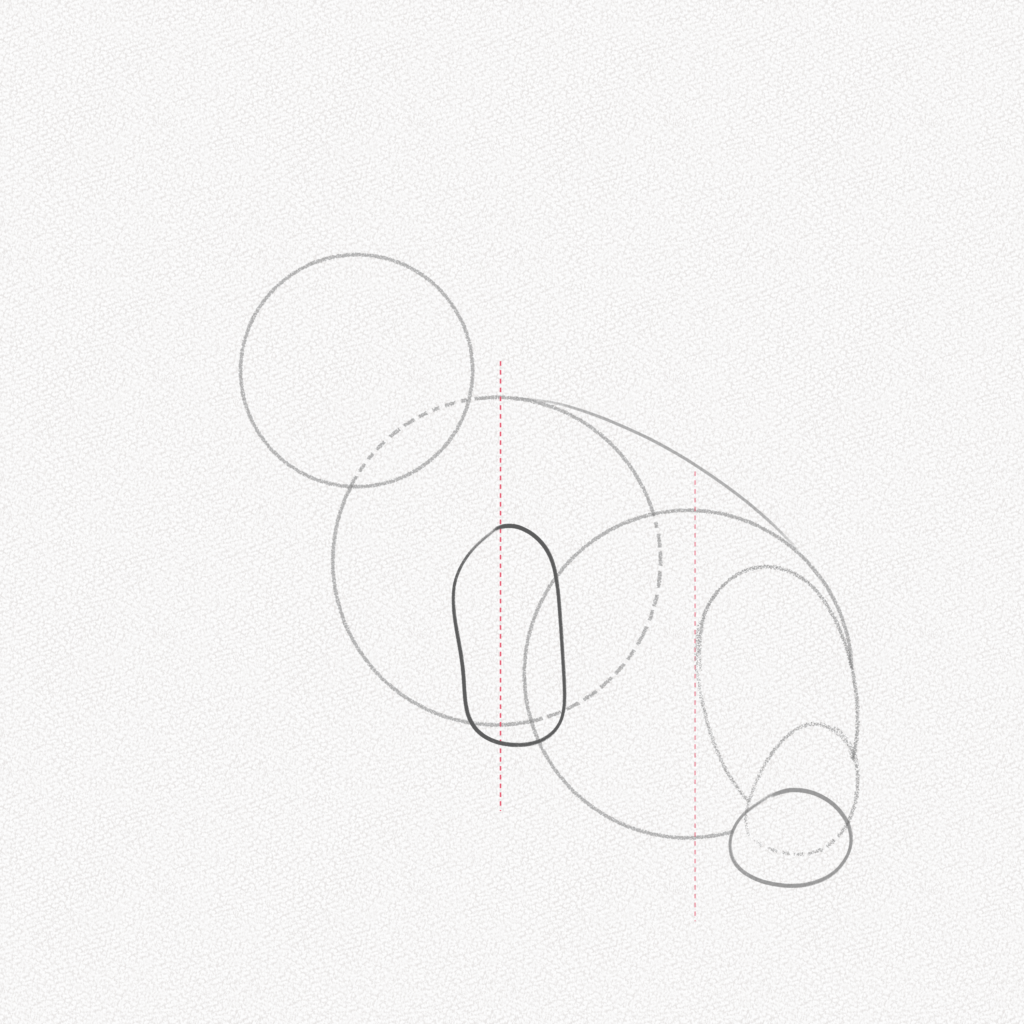
Step 9: Draw the front leg p.2
Draw another bean shape for the lower leg, and tilt it slightly to make it look more natural.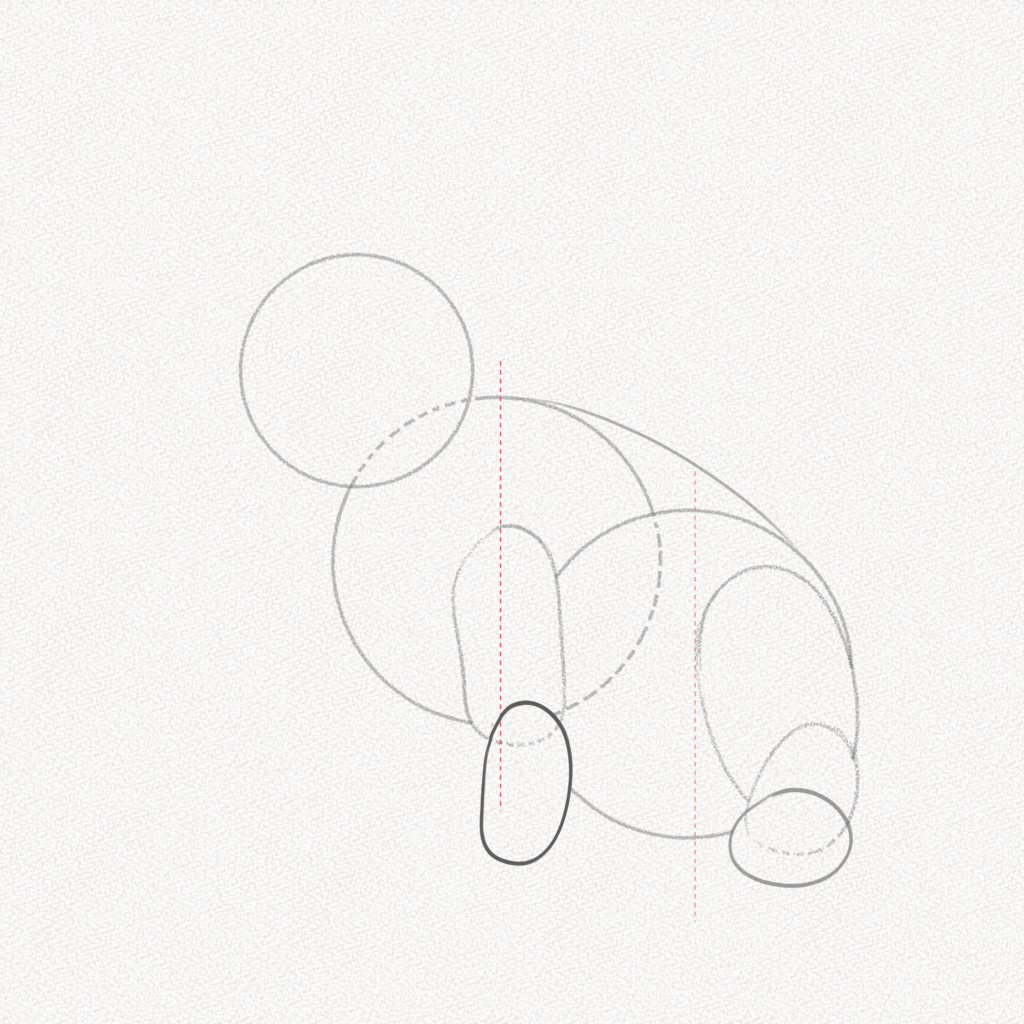
Step 10: Draw the front paw
Draw the paw, make it smaller than the other one, and that’s it! You’ve got both legs down!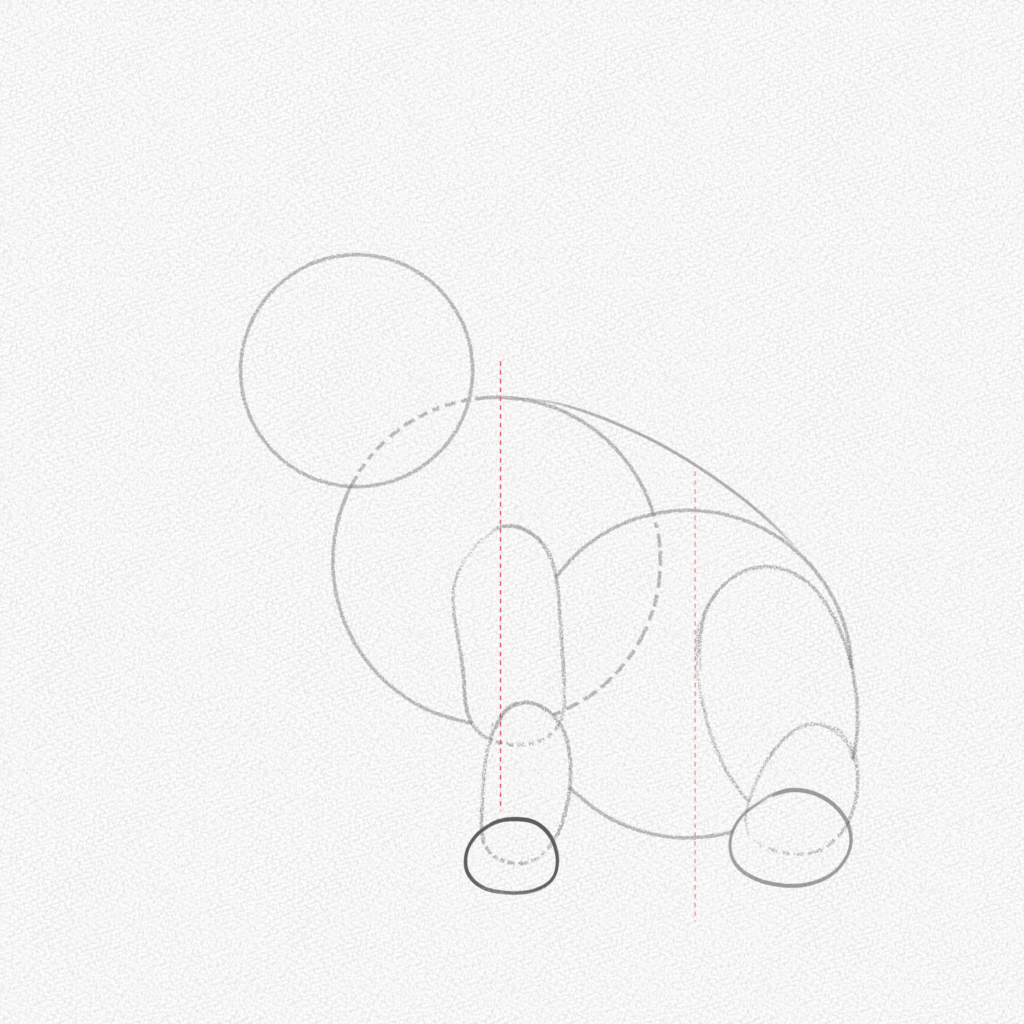
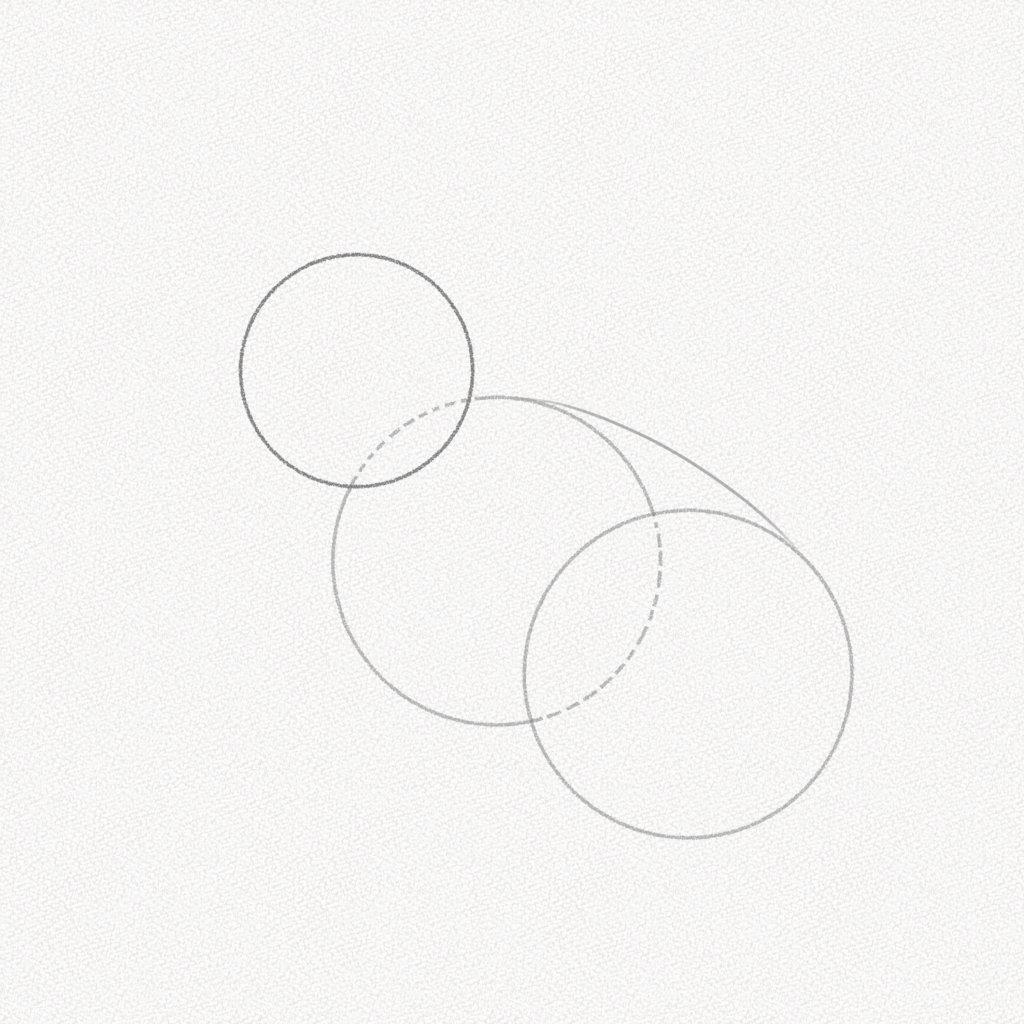
Step 11: Draw the other side
As you can see, here we added the other two legs by repeating the steps above for each one, the rabbit’s tummy will cover the back leg, and the rabbit’s chest will partially cover the front leg. Erase the overlapping guidelines, and you’re done drawing the body’s structure!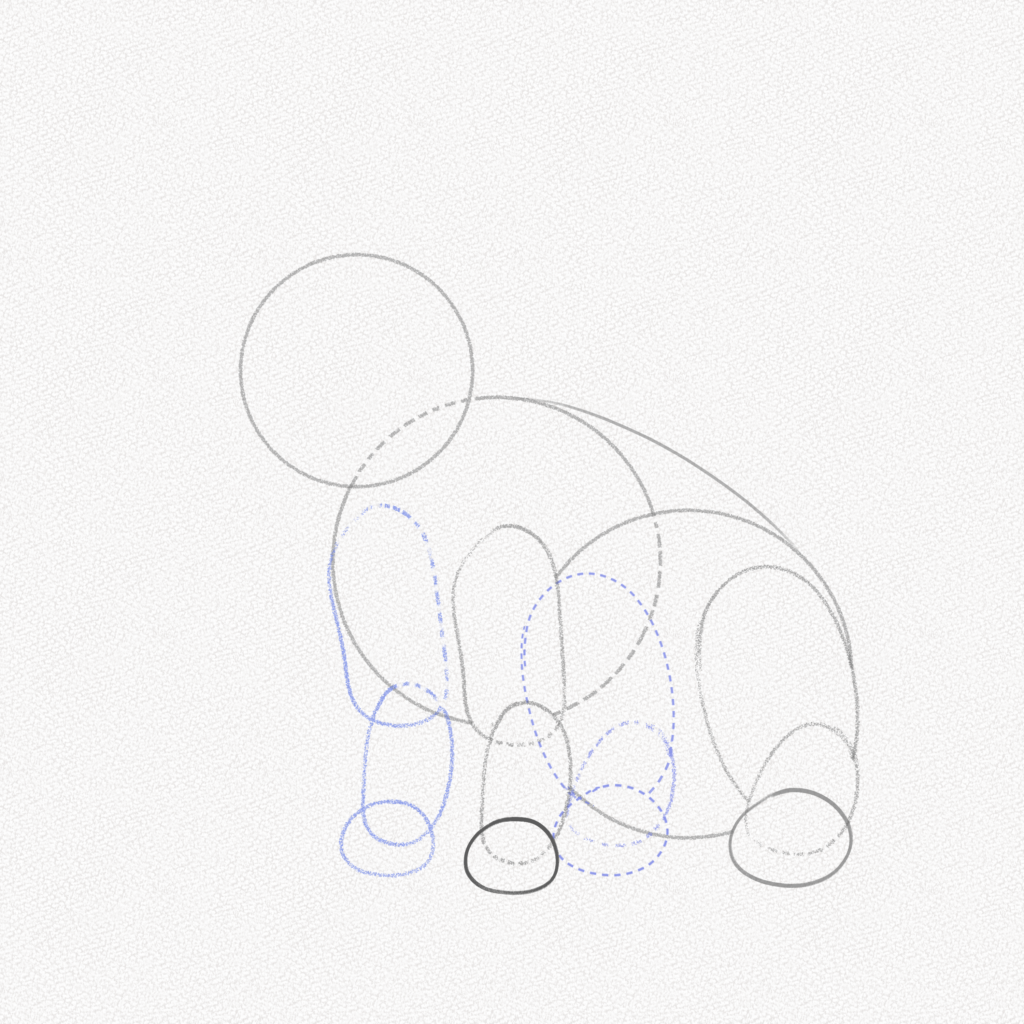
Section 2.- Structure of the rabbit’s face
Step 12: Draw the face structure
With three straight lines, draw the structure of the face as shown in the diagram. Split the top circle in half, both horizontally and vertically, to place the eyes.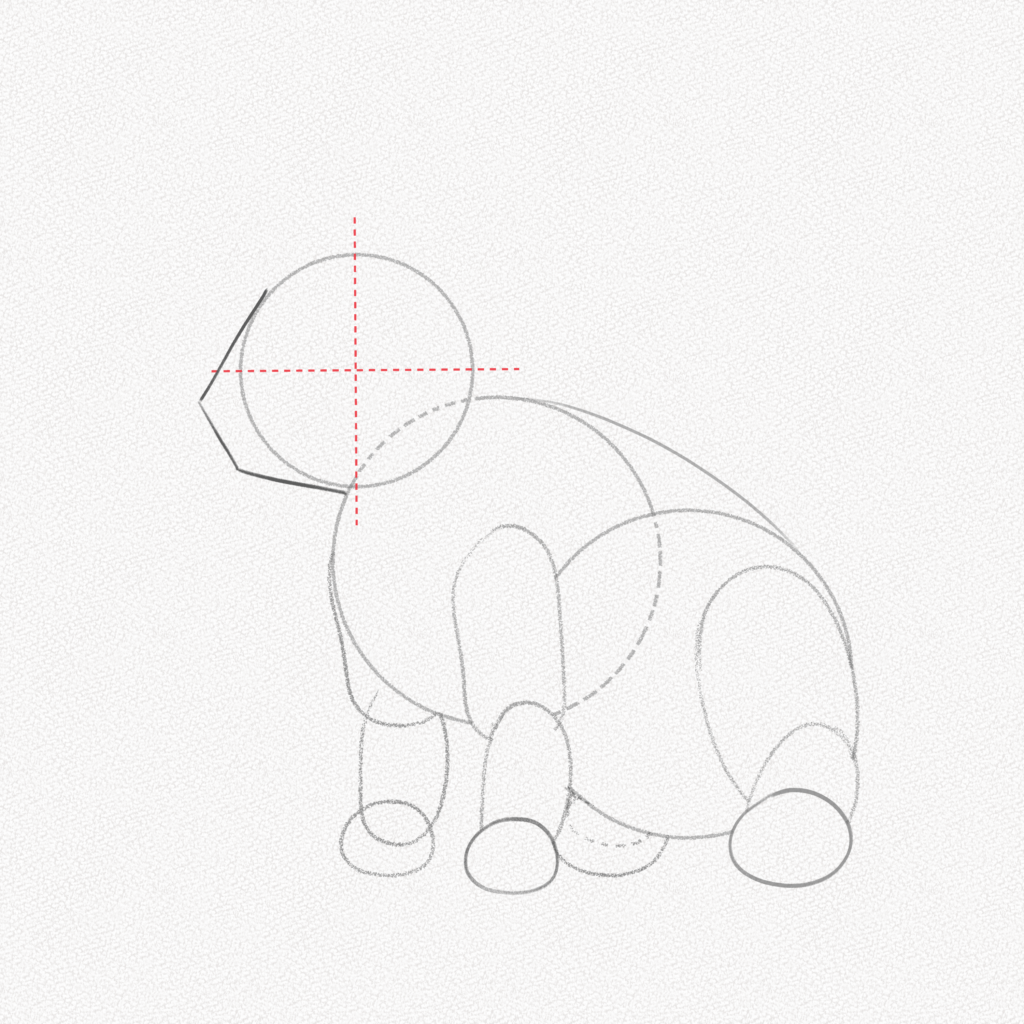
Step 13: Mark the eye position
On top of the guidelines that you drew in the previous step, draw a small circle to mark the eye. 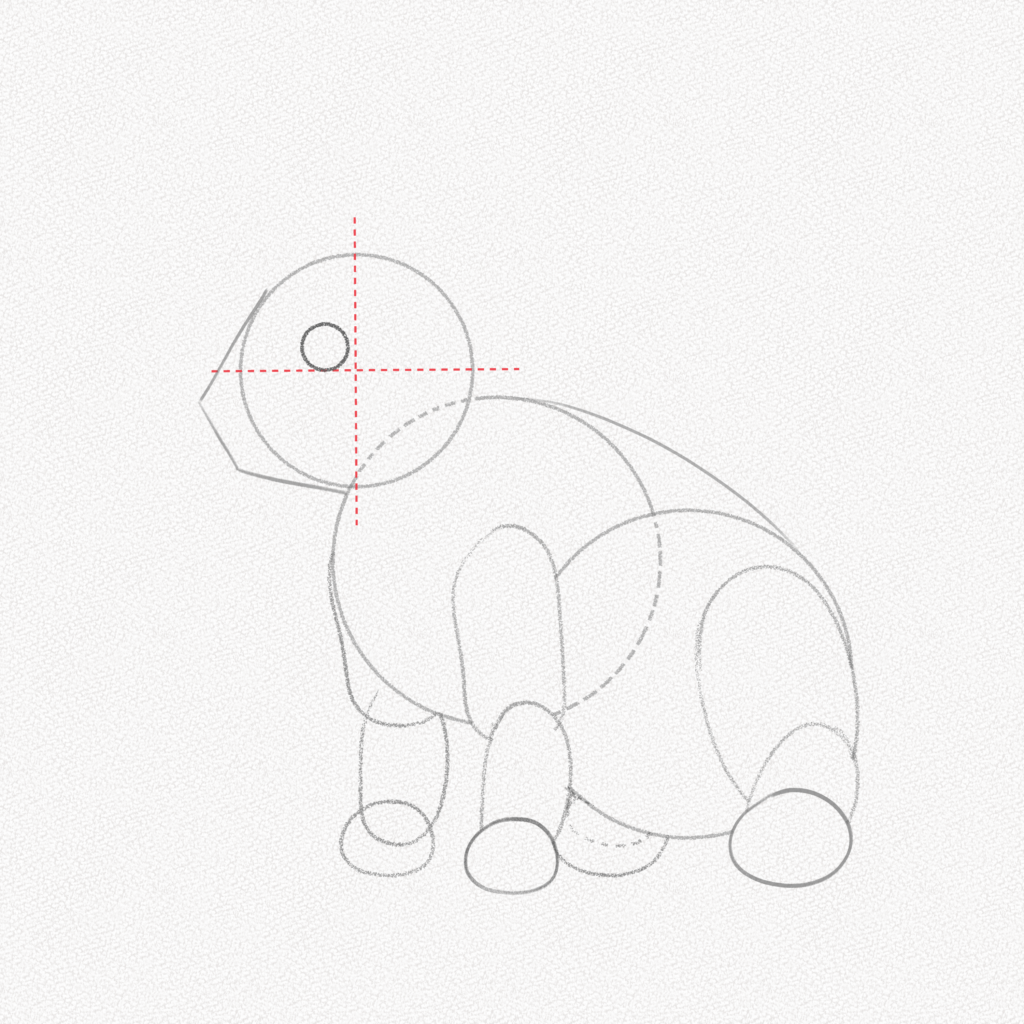
Step 14: Add the ears
Draw an elongated oval that begins at the same height as the eyes. This will be the first ear.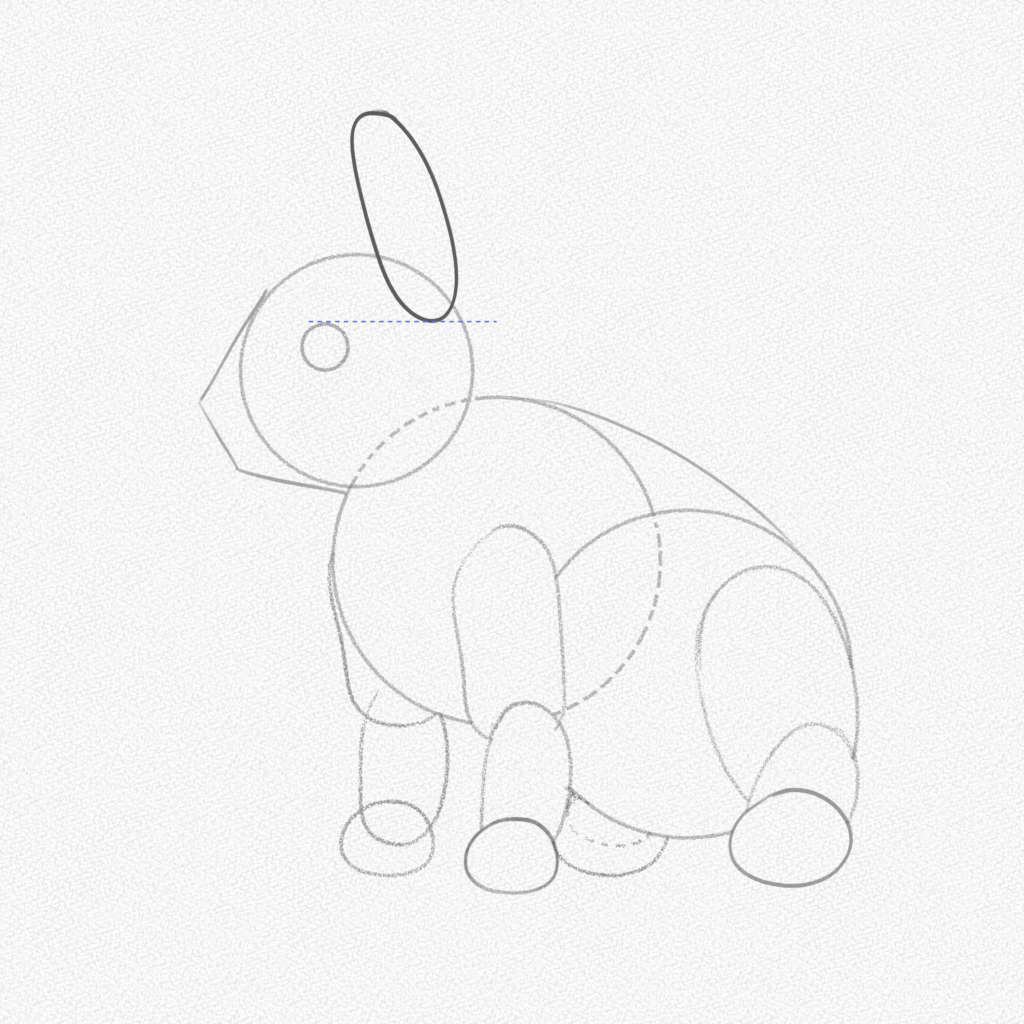
Step 15: Repeat
Repeat the step above for the other ear, drawing it in the opposite direction. Remember, this ear is behind the first one, so a part of it won’t fully show.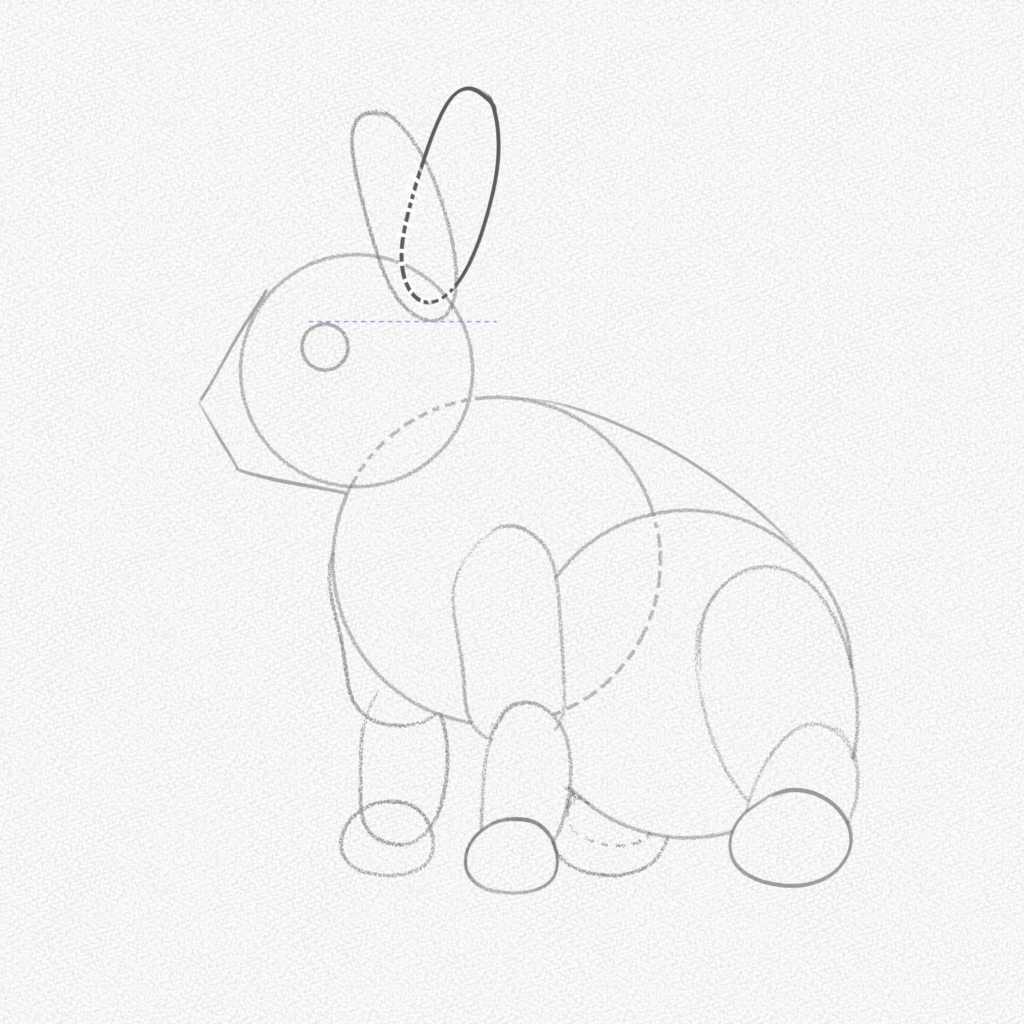
Step 16: Add the tail
With a small oval, add the tail at the very back of our rabbit, making it small and round. 
Step 17: Add the nose and draw the eye shape
Add a small triangle for the nose and the corners of the eye, and that’s it! You’re done drawing the structure of the rabbit’s face.
Section 3.- How rabbit fur works and how to shade it
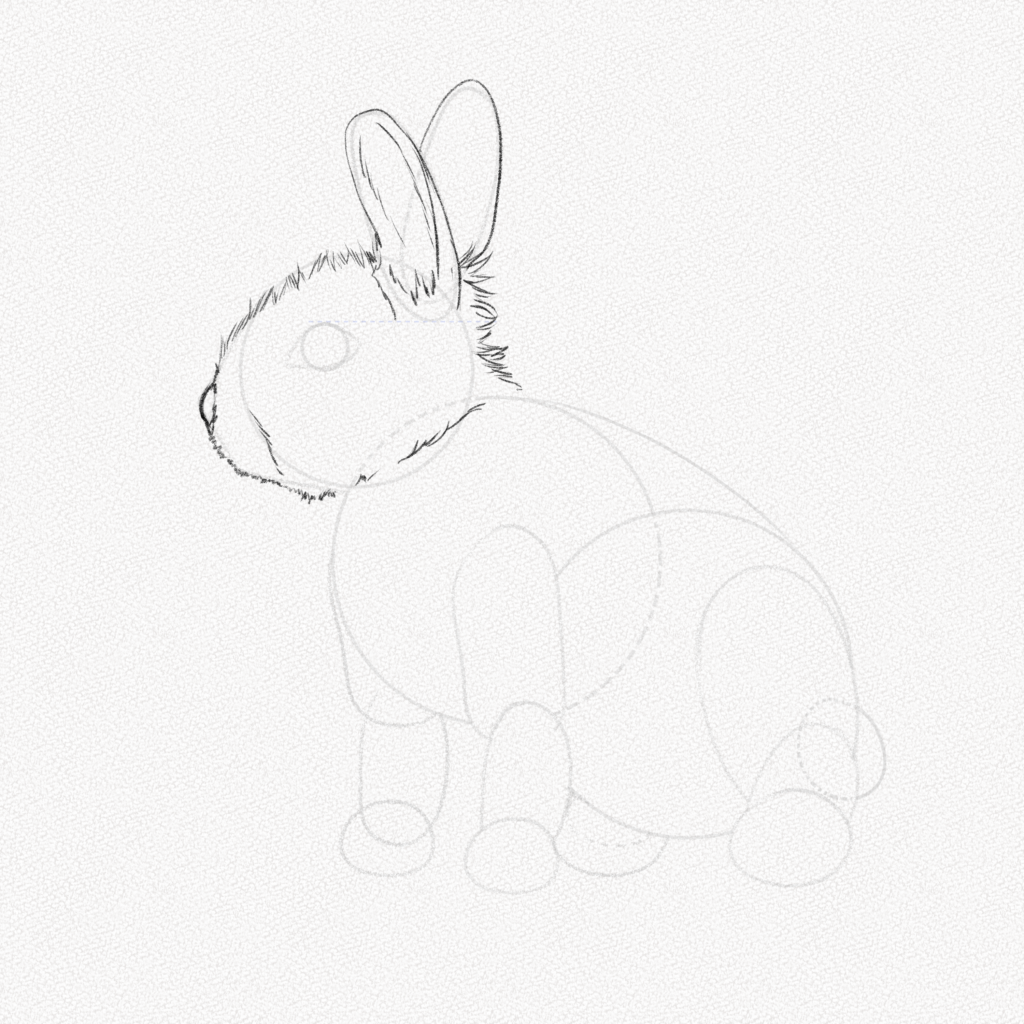
Step 18: Outline the rabbit’s head
Here we can appreciate three main types of traces we can use with fur. The first one is the “messy fur” on the back of the head, made with long, irregular traces going “up and down.”
The short and “thin fur” for the mouth and under the nose should be made with small traces and interrupted lines.
Thin, longer fur for the top of the head should be made using a more “uniform fur.” Use straighter lines and a couple of curves here and there.
Step 19: Outline the rabbit’s body
Using the “messy fur” technique, draw the rest of the rabbit’s body except for the back. For the back, we are going to use the “uniform fur.” Draw the eye and some fluff around.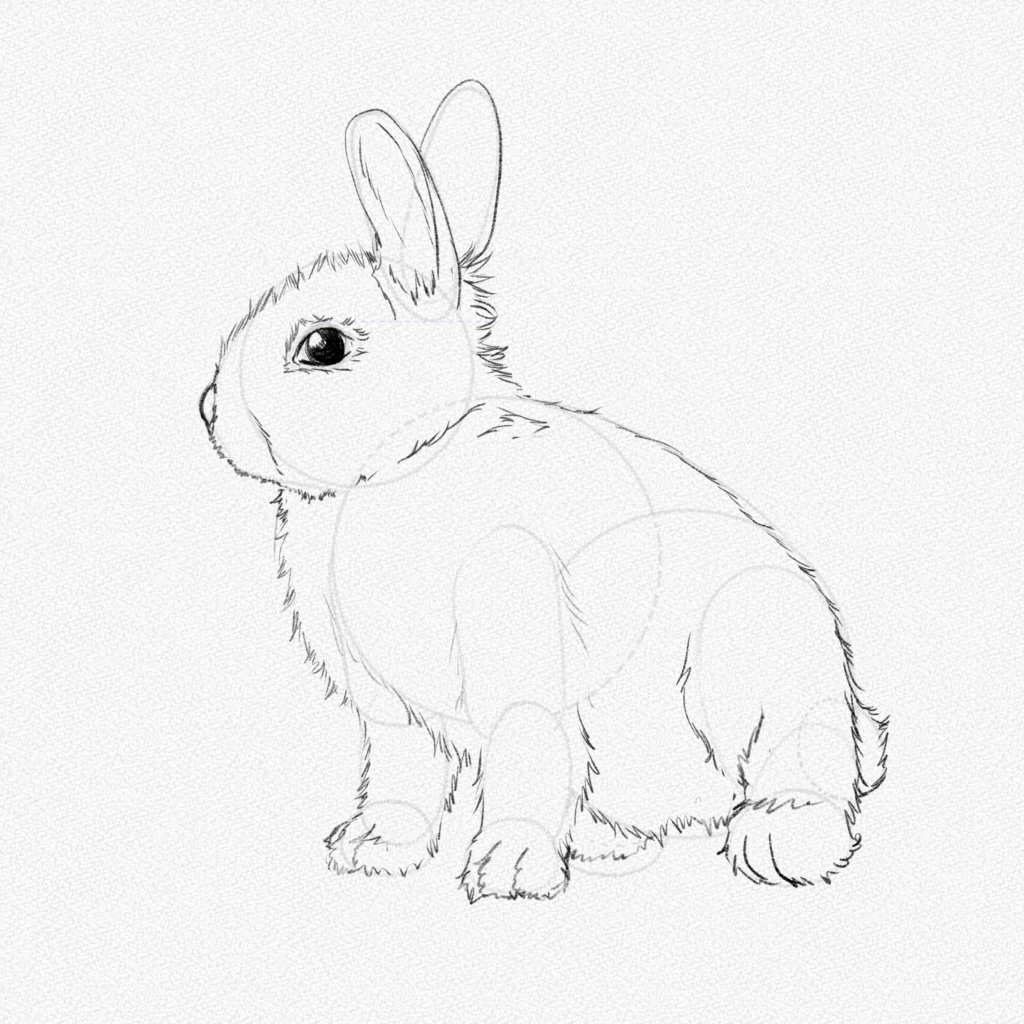
Step 20: Erase the guidelines and add the whiskers
Carefully erase the rest of your guidelines and add some whiskers on the nose and on top of the eyes.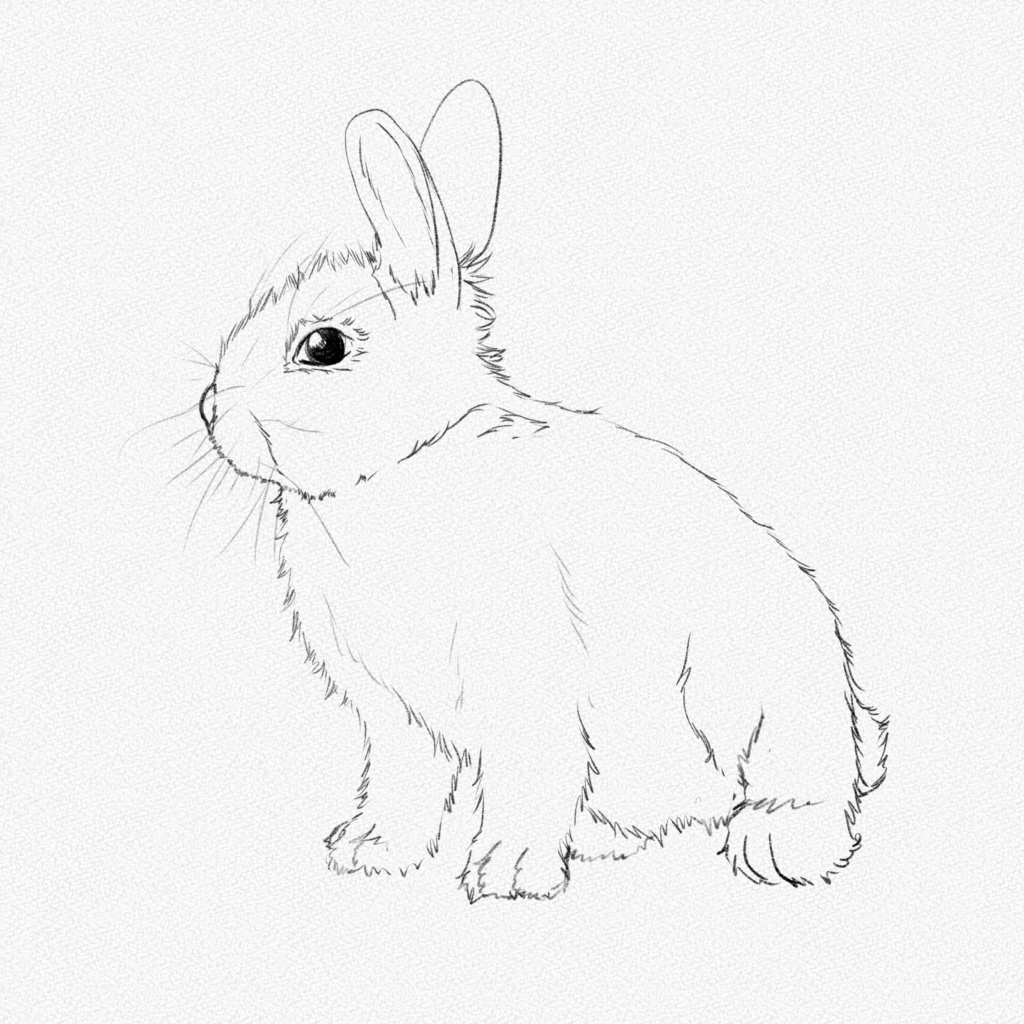
Step 21: Fill the rabbit with graphite
For this step, you’re going to need powdered graphite and a soft brush. You can also fill it with a graphite pencil, but it will be much more quick and easy with powdered graphite. Fill your rabbit with a uniform layer of graphite, and get ready to start shading.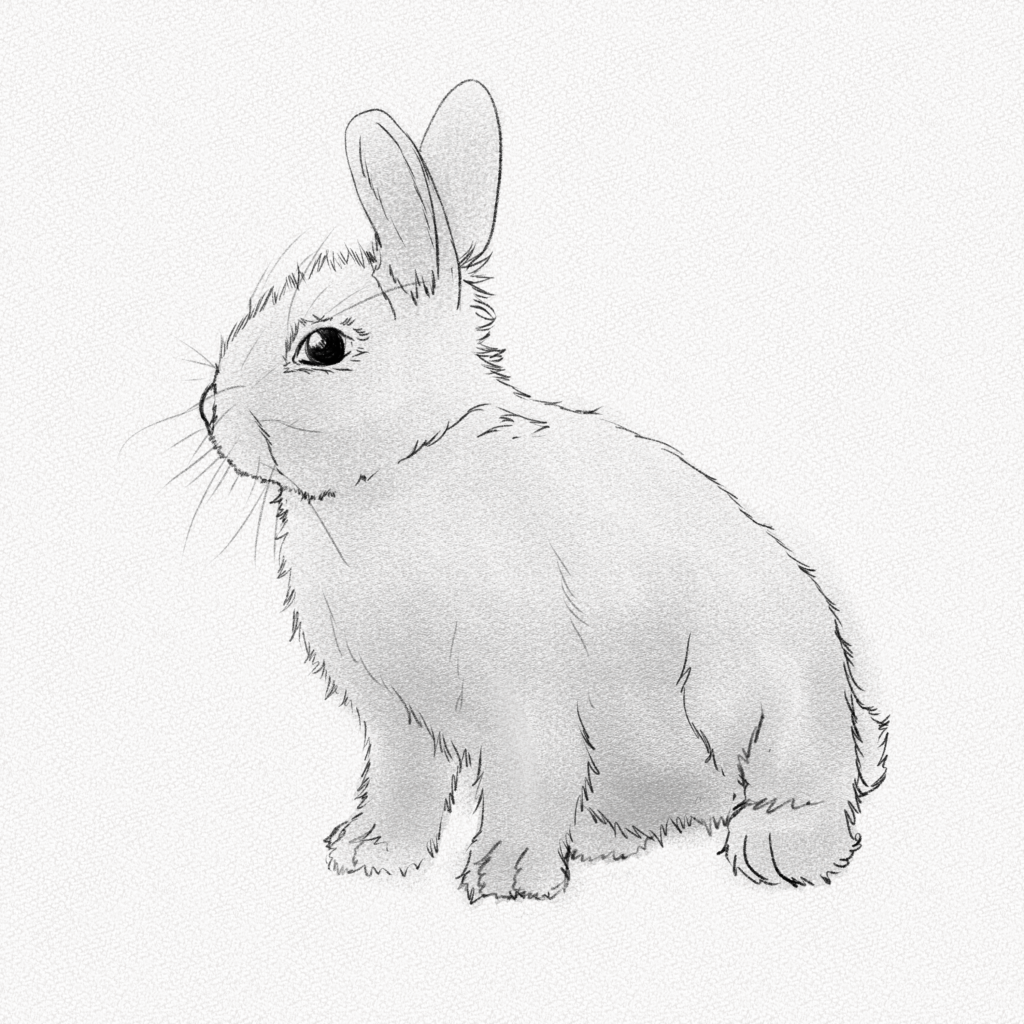
Step 22: Shade the ears
Shade the ears of the rabbit following the steps above. Use your 4B pencil for the tick traces and your mechanical pencil for the thin ones.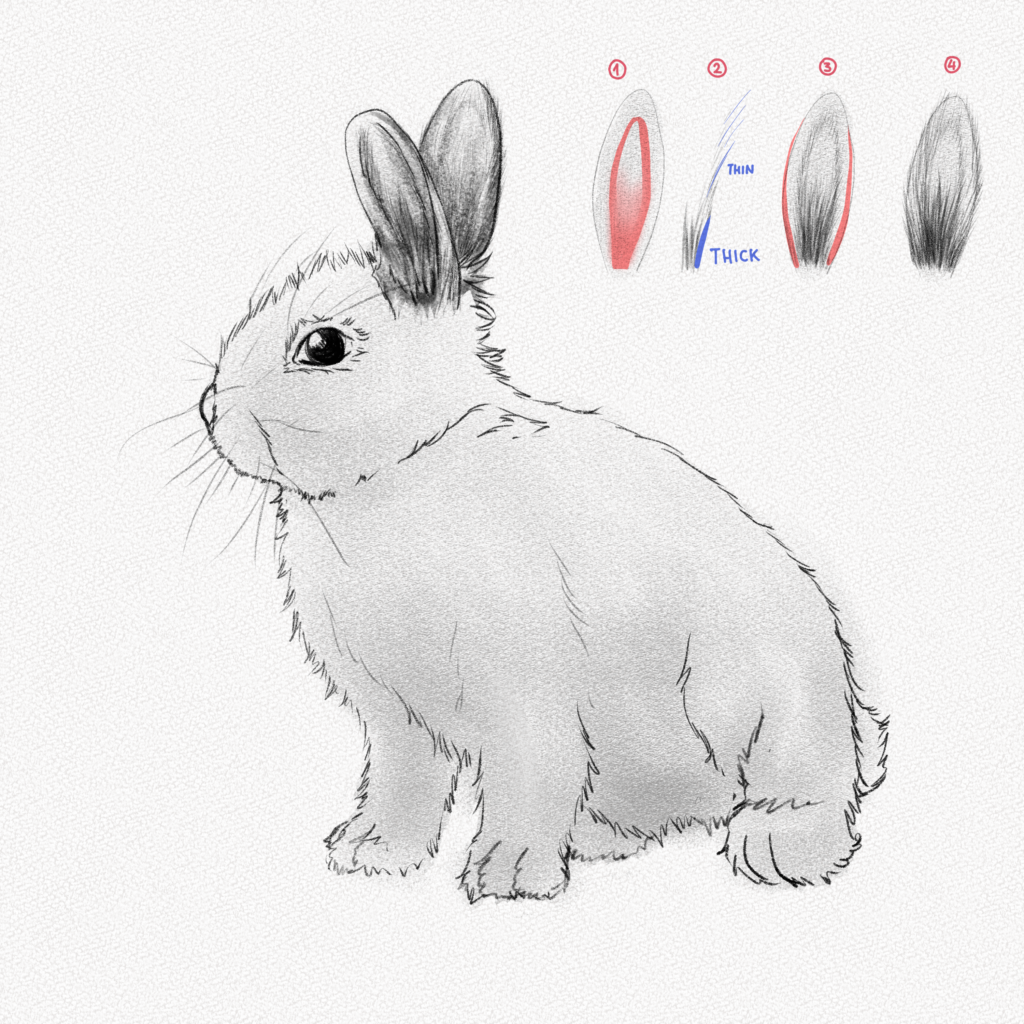
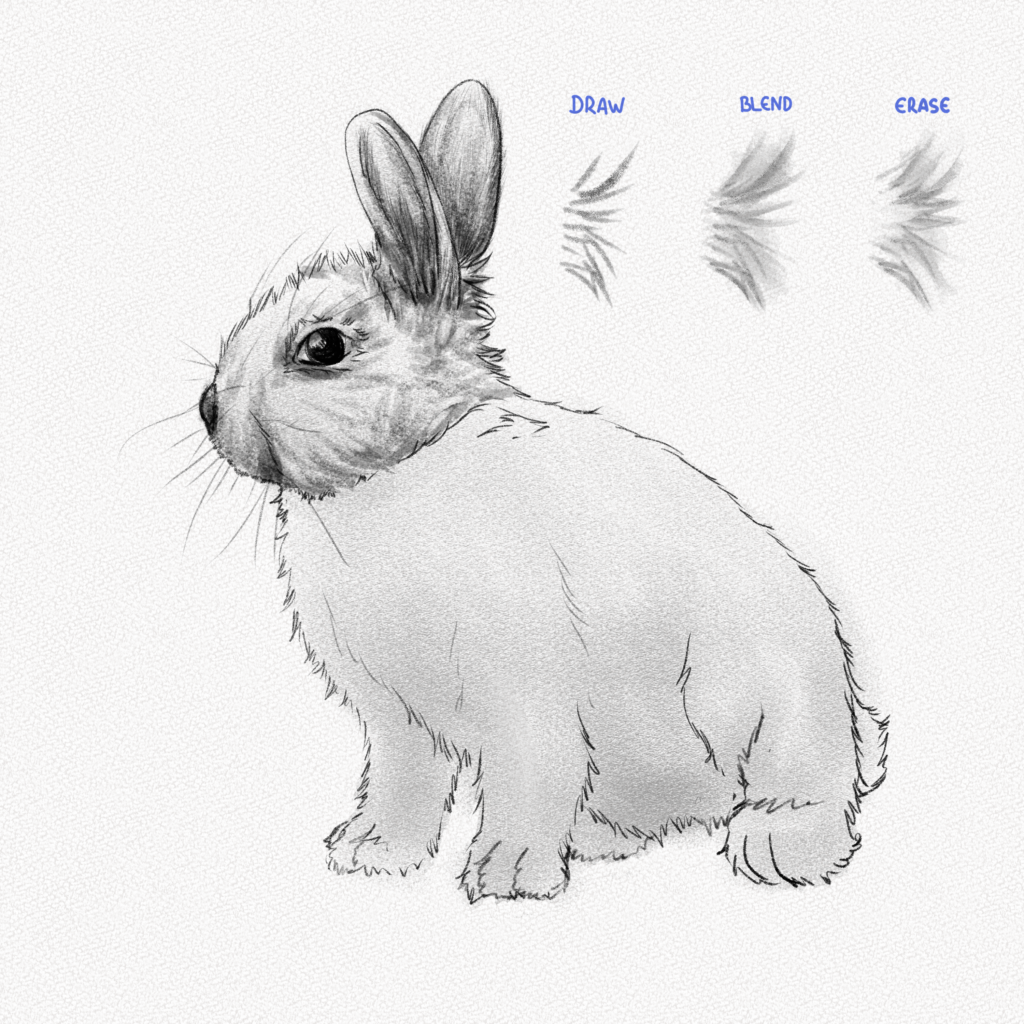
Step 23: Shade the head
Using your 4B pencil, add fur to the rabbit’s head, use your blending stump to soften the traces, and then your kneaded eraser to create that fur-like effect.
Step 24: Shade the body
Use the technique above for the rest of the body, adding more graphite to the lower part of the legs and tummy.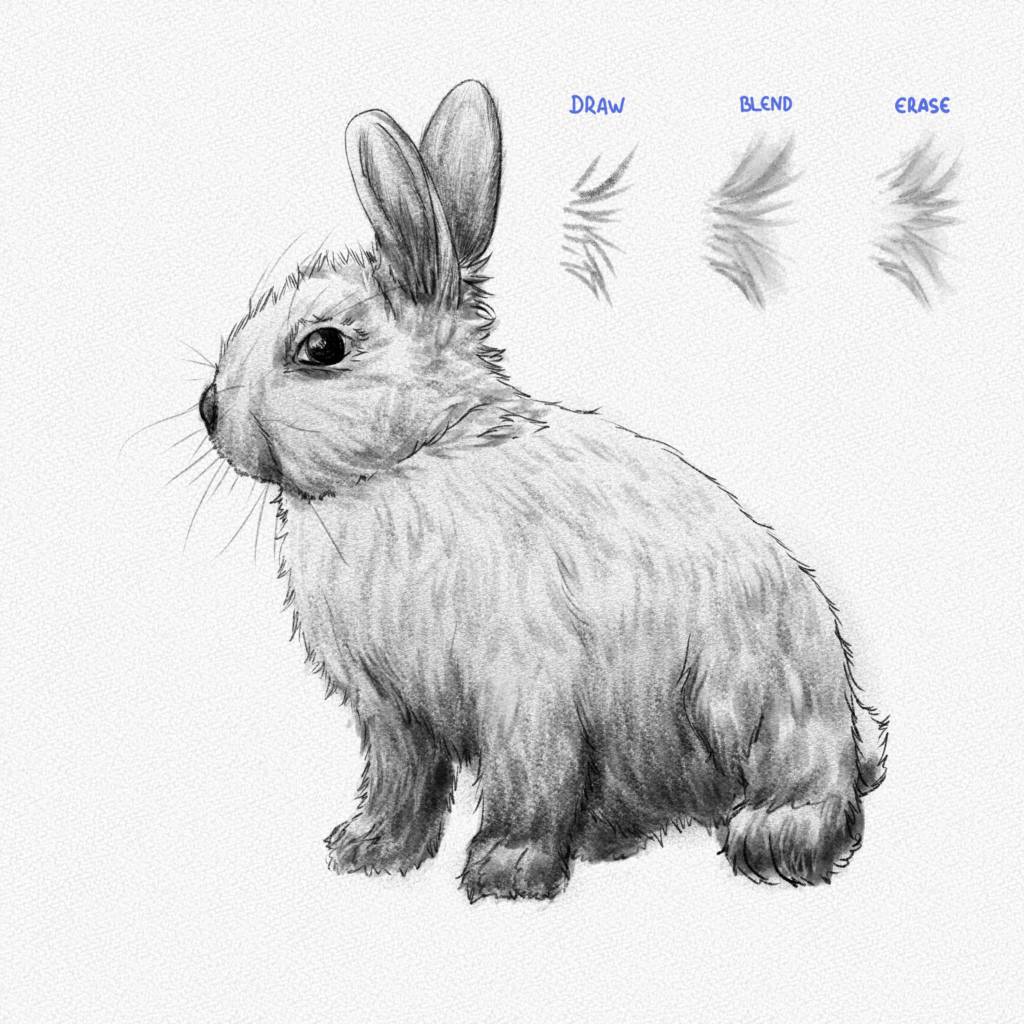
Step 25: Add details
Add some details on the legs, eyes, and whiskers with your precision eraser.
And that’s it. You’re done.
Thank you for following this tutorial. You did great!
I hope you learned something new today and that now you have a clearer notion of how to draw and shade a rabbit.
Until next time!