Puppies are undoubtedly one of the most adorable creatures on the planet, with their fluffy fur, big eyes, and playful personalities. They come in various breeds and sizes, each with unique characteristics that can make for a fun and challenging drawing experience. From the wrinkly folds of a Shar Pei to the long ears of a Basset Hound, there is no shortage of features to capture on paper.
Drawing a puppy is not only a fun and enjoyable activity but can also be a great way to improve your artistic skills. Whether you are a seasoned artist or just starting out, drawing a puppy is a great subject to practice with.
In this step-by-step guide, we will walk you through the process of drawing a puppy from start to finish. With easy-to-follow instructions and helpful tips, you will be able to create a cute and realistic drawing of a puppy in no time. So grab your pencils and paper, and let’s get started!
What you’ll learn:
- Structure of a puppy’s body
- How to draw and shade a puppy
Materials needed:
- A piece of paper
- A 2H graphite pencil
- A 4B graphite pencil
- A 0.5 2B mechanical pencil
- A Tombow Mono Zero 2.3mm
- A Kneaded Eraser
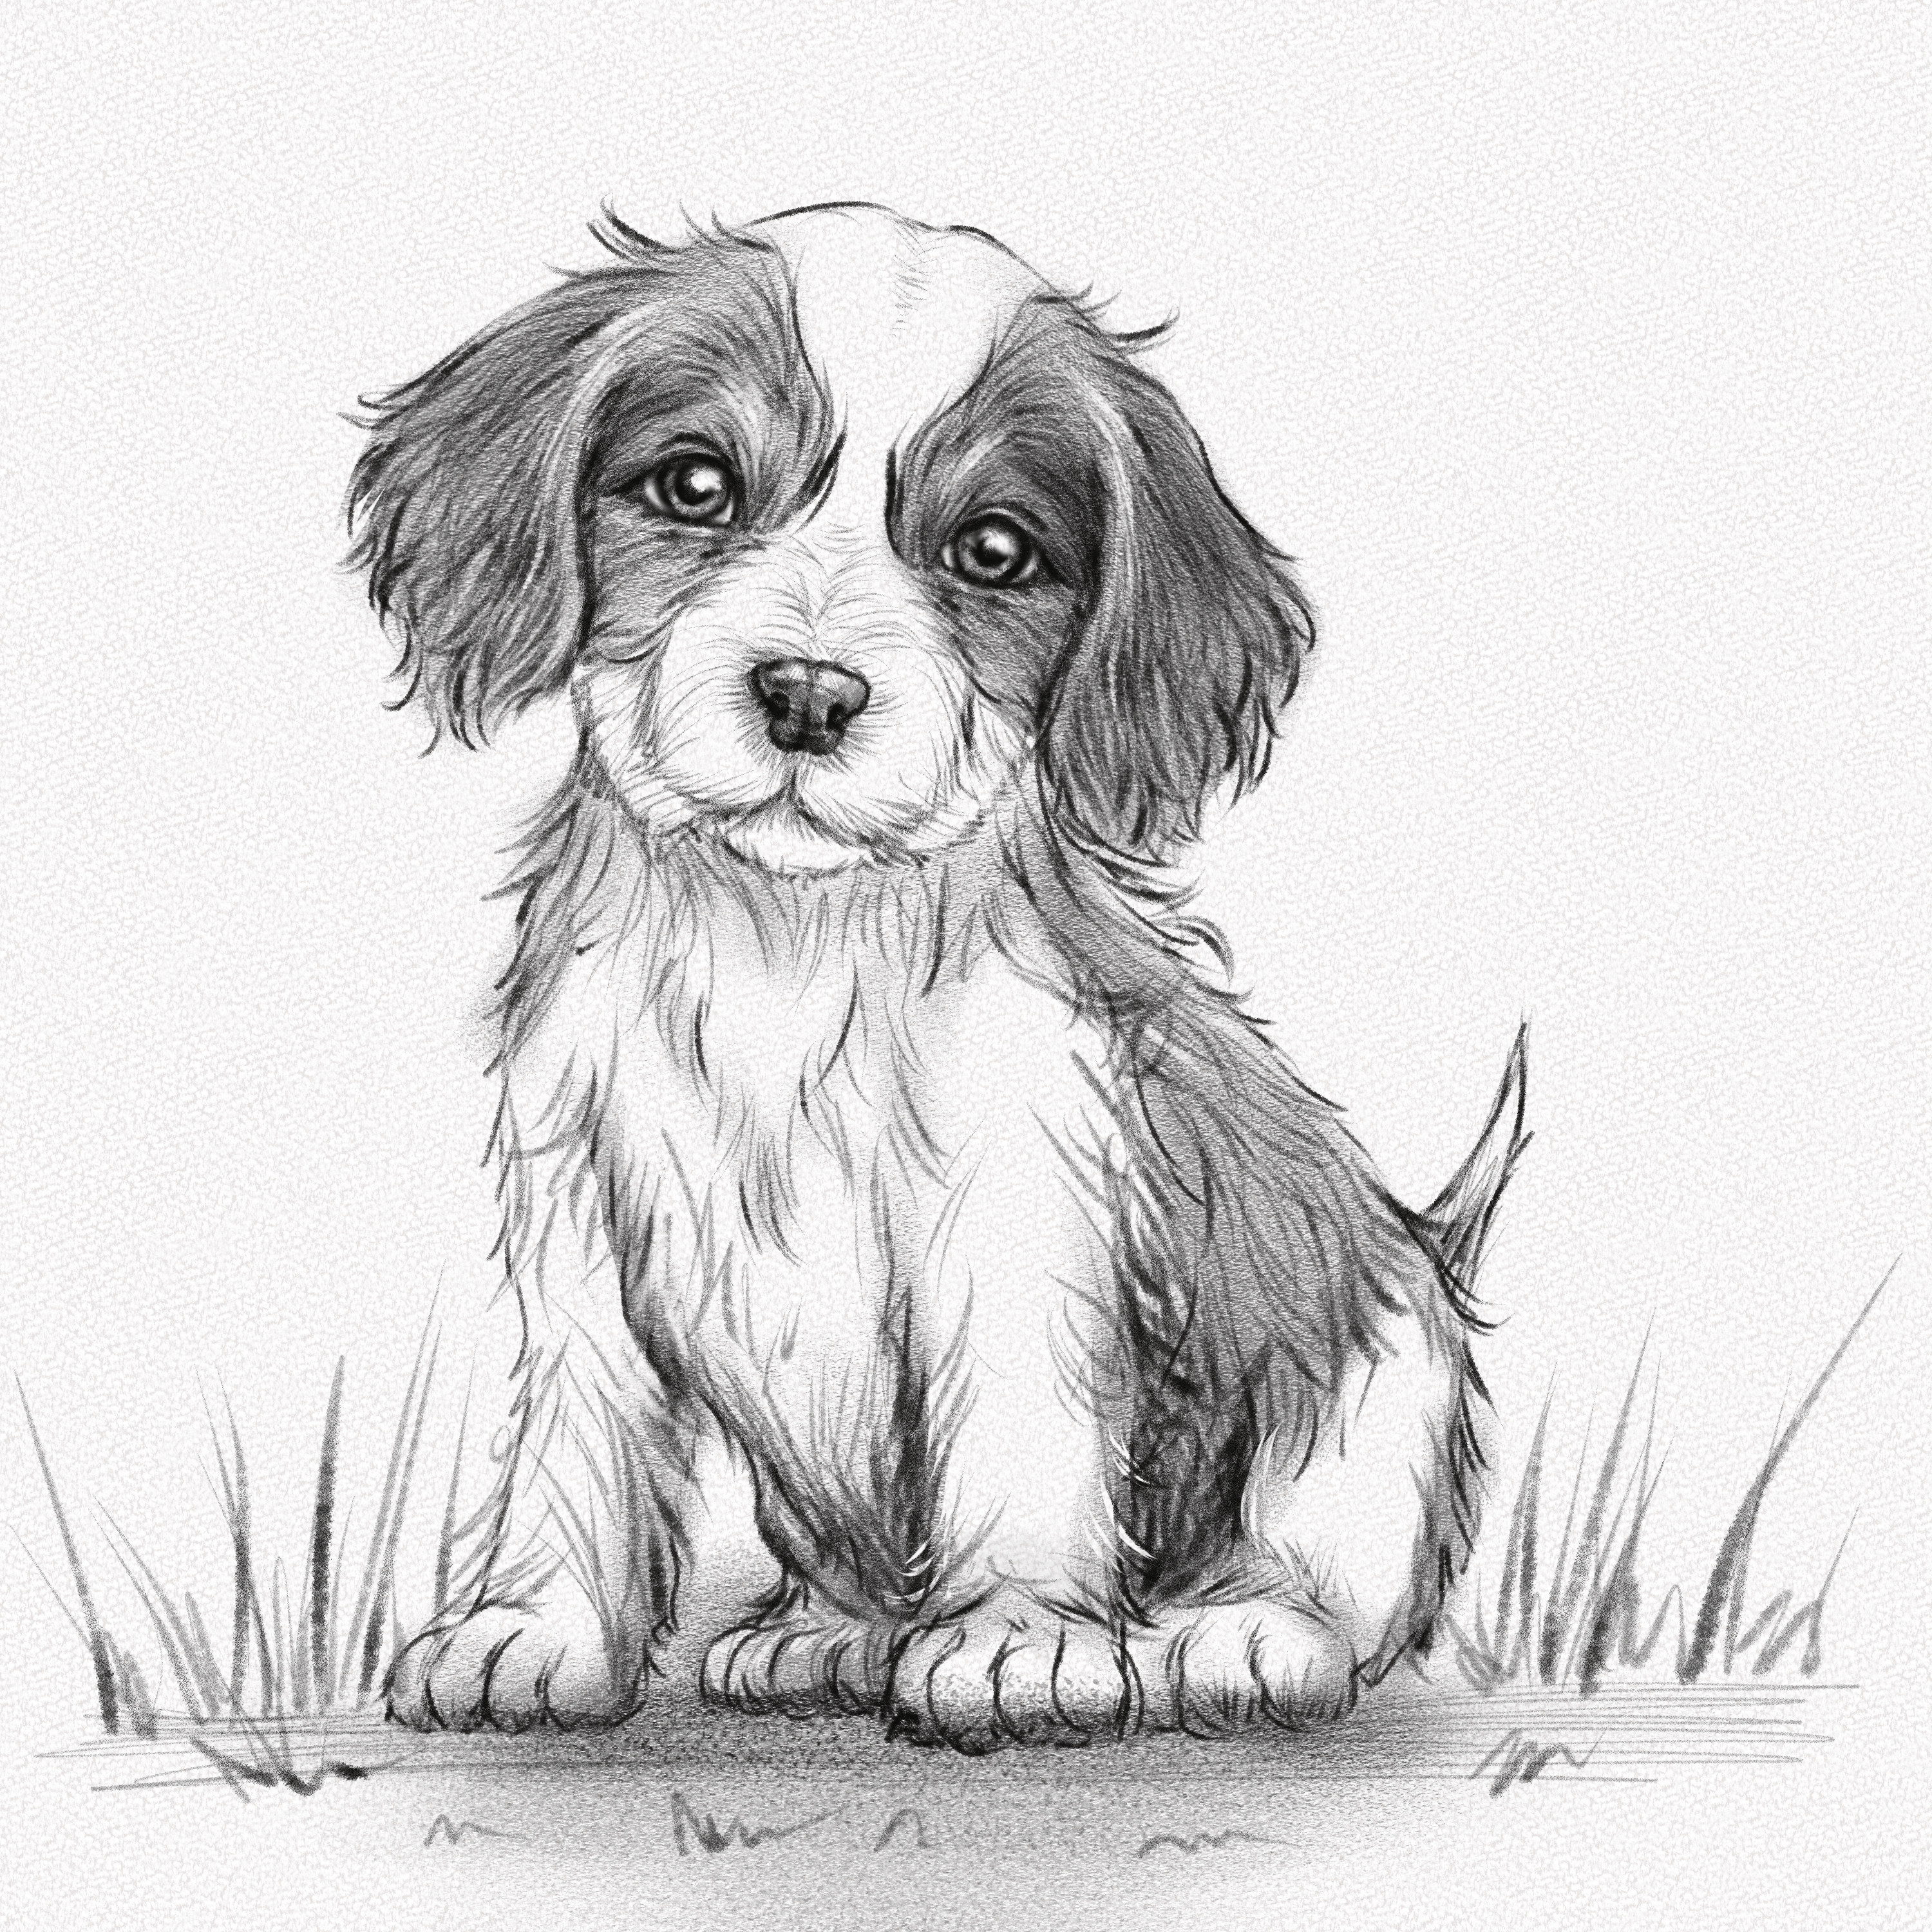
This is the puppy you’re going to draw:
And these are all the steps we’ll walk you through: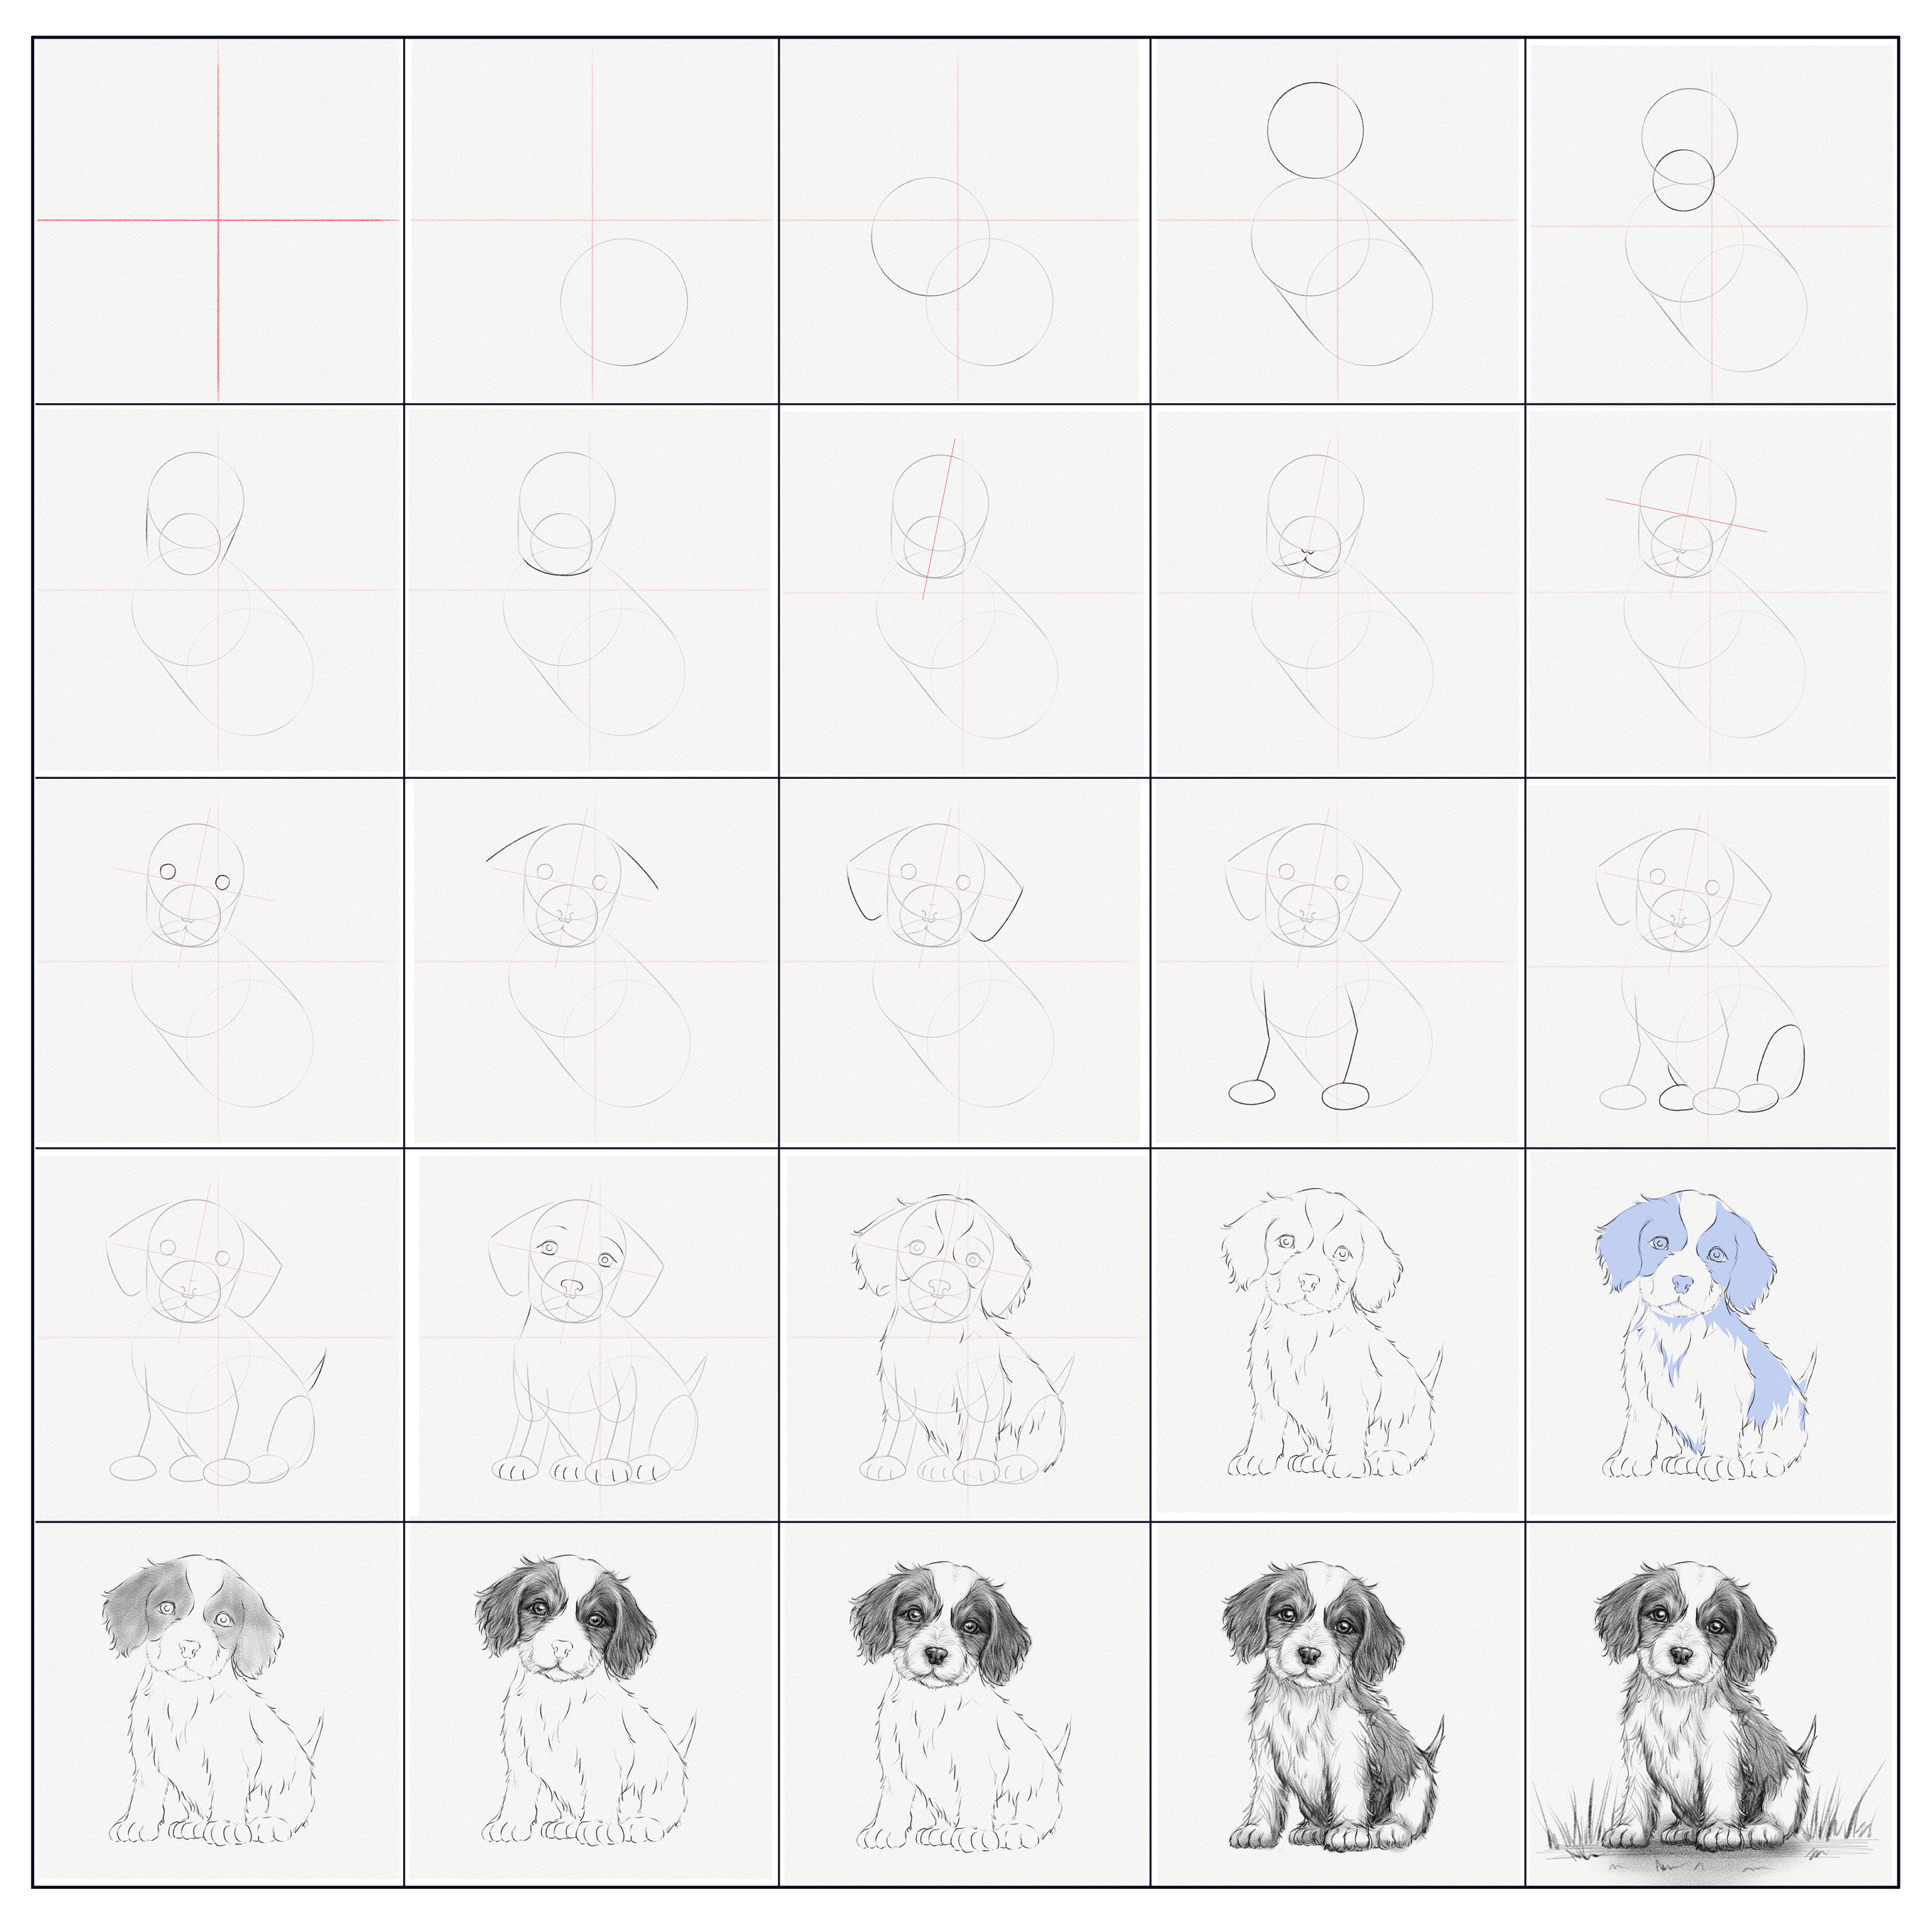
Section 1.- Drawing the structure
Drawing the structure of a puppy’s body is essential for creating a realistic and believable final drawing. Without a clear understanding of the underlying structure, the drawing can look flat or disproportionate.
For this section, we are going to learn how to draw the structure behind a puppy’s body with simple shapes.
Step 1: Split your canvas into four
Split your canvas into four equal parts.
Step 2: Draw a circle
Draw a circle in the lower-right part of your canvas. This will be our puppy’s lower body. Make sure to leave enough space above for the upper part of the body and the head.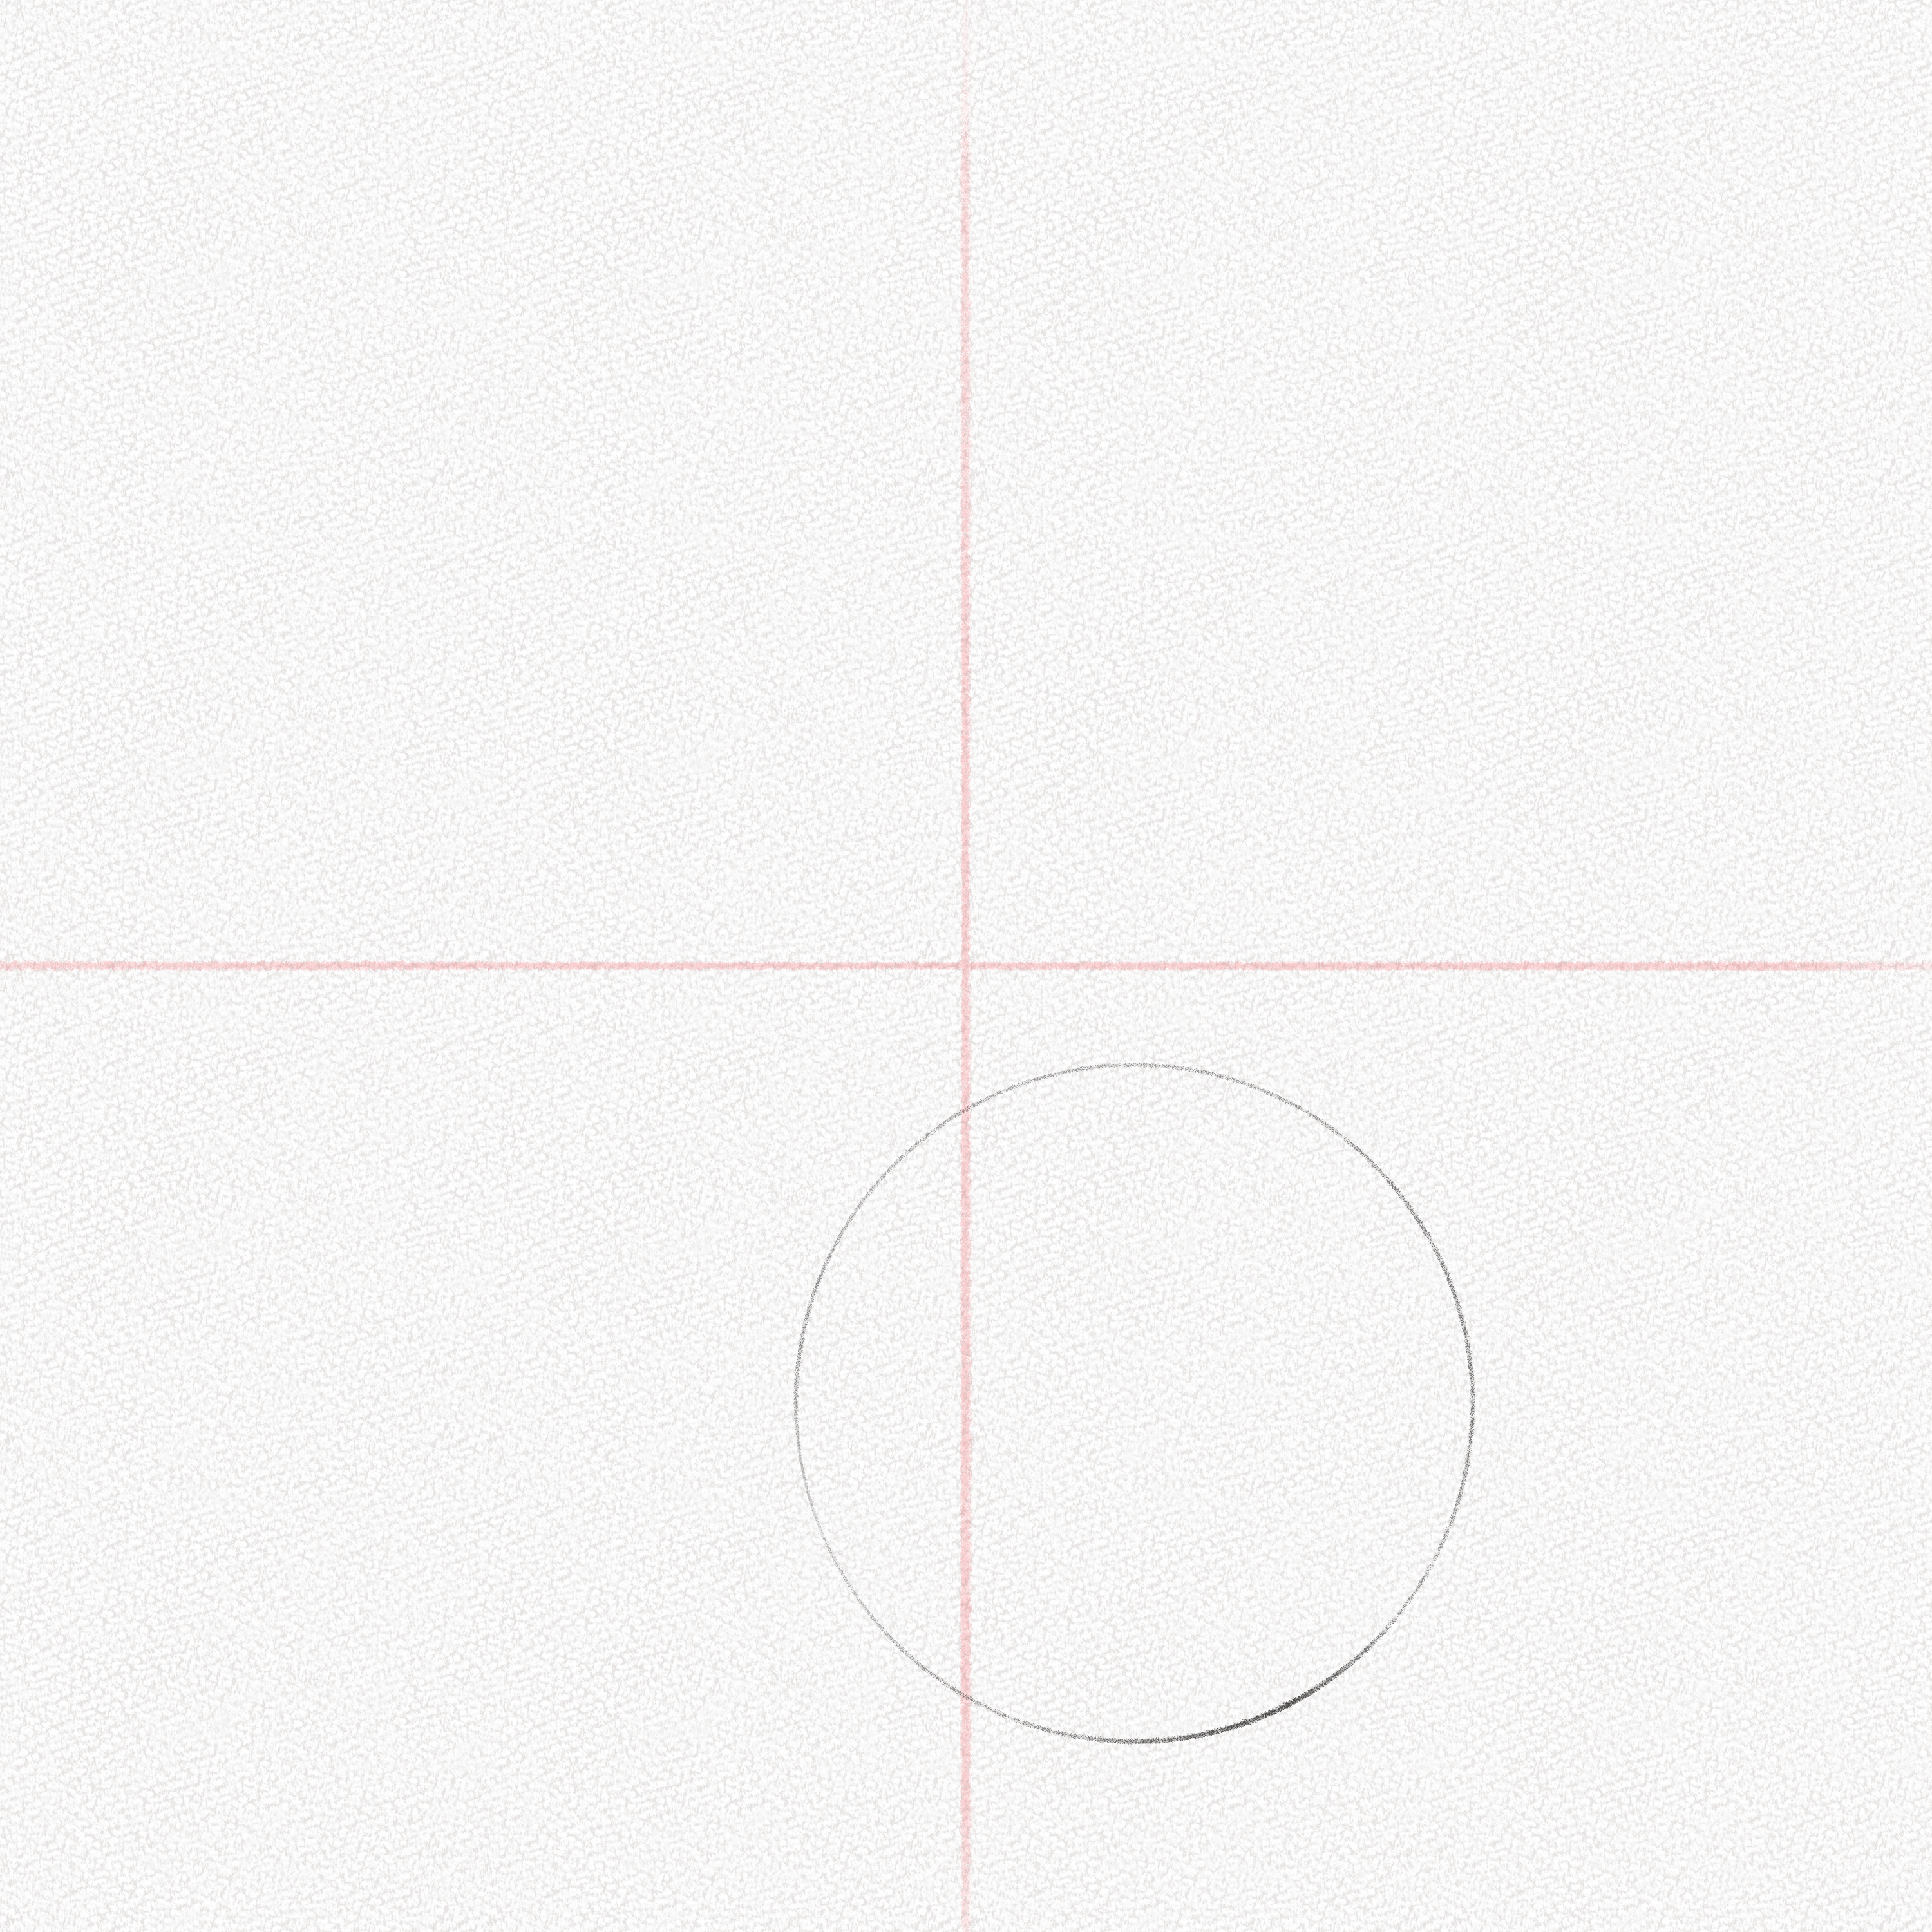
Step 3: Draw another circle
Draw another slightly smaller circle for the upper part of our puppy’s body.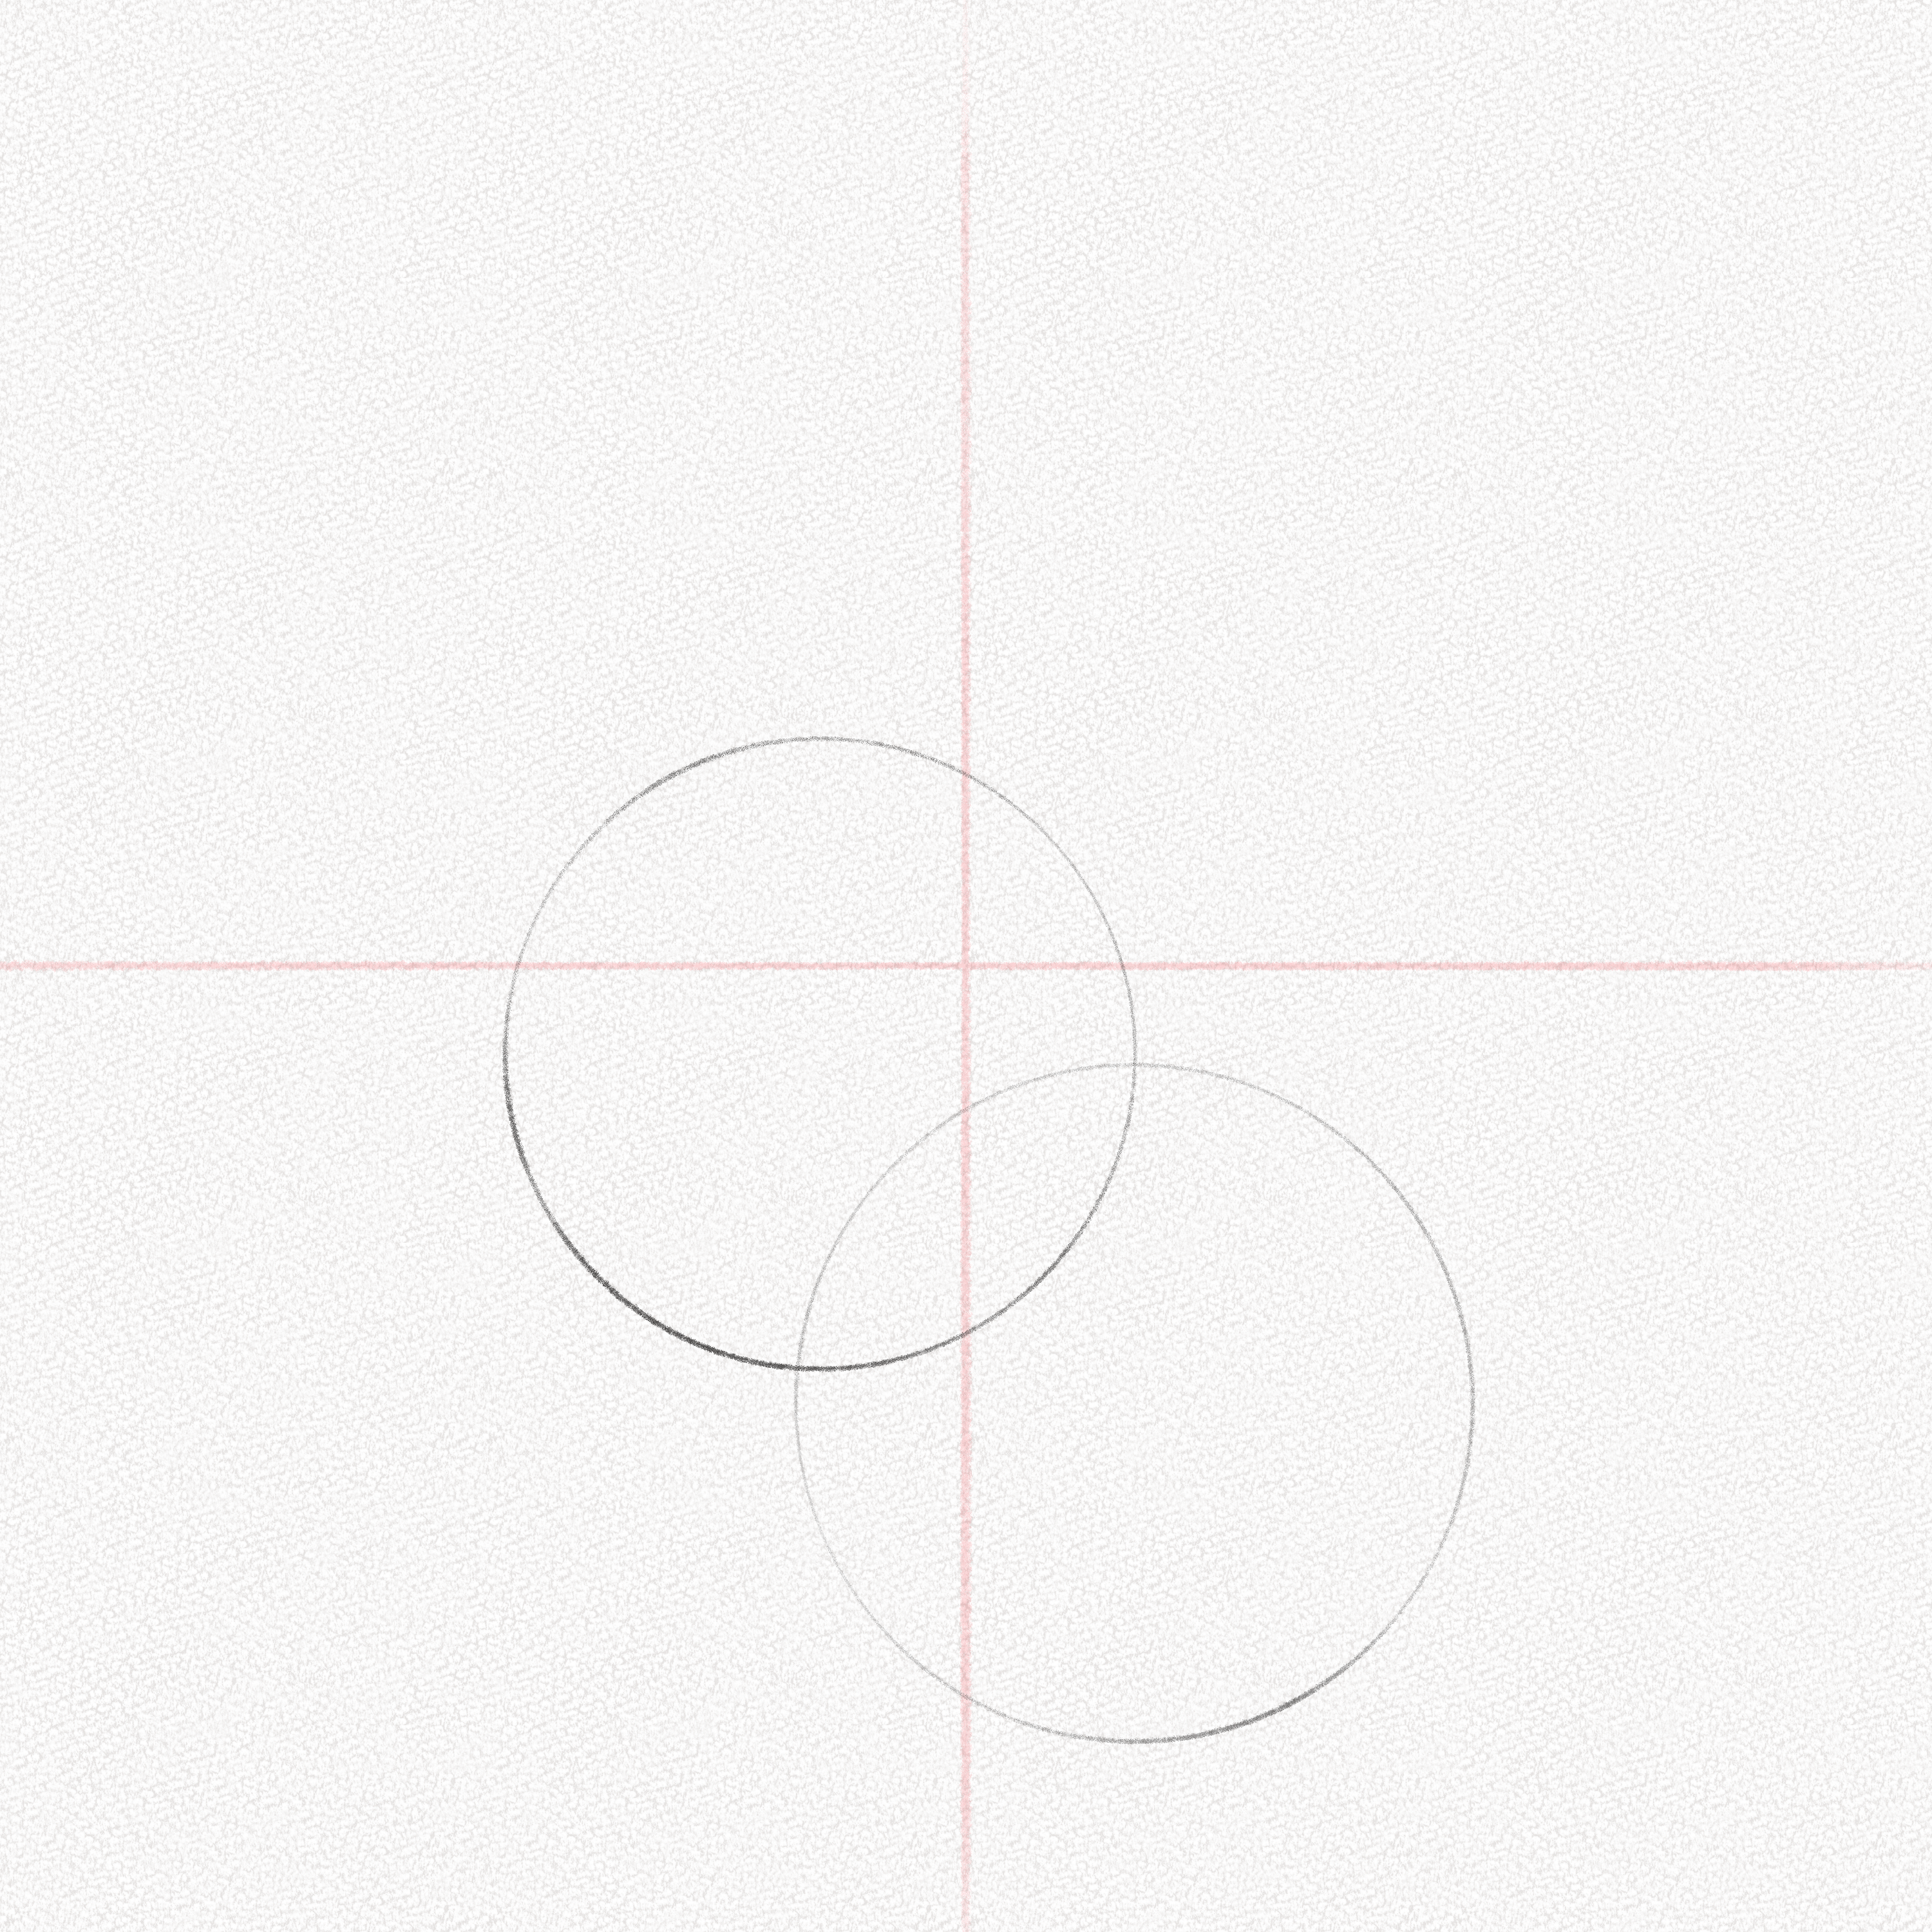
Step 4: Connect them
Since we’re going to draw our puppy sitting, the circles might overlap each other, connect both circles with two lines, and we’ll have the torso of our puppy.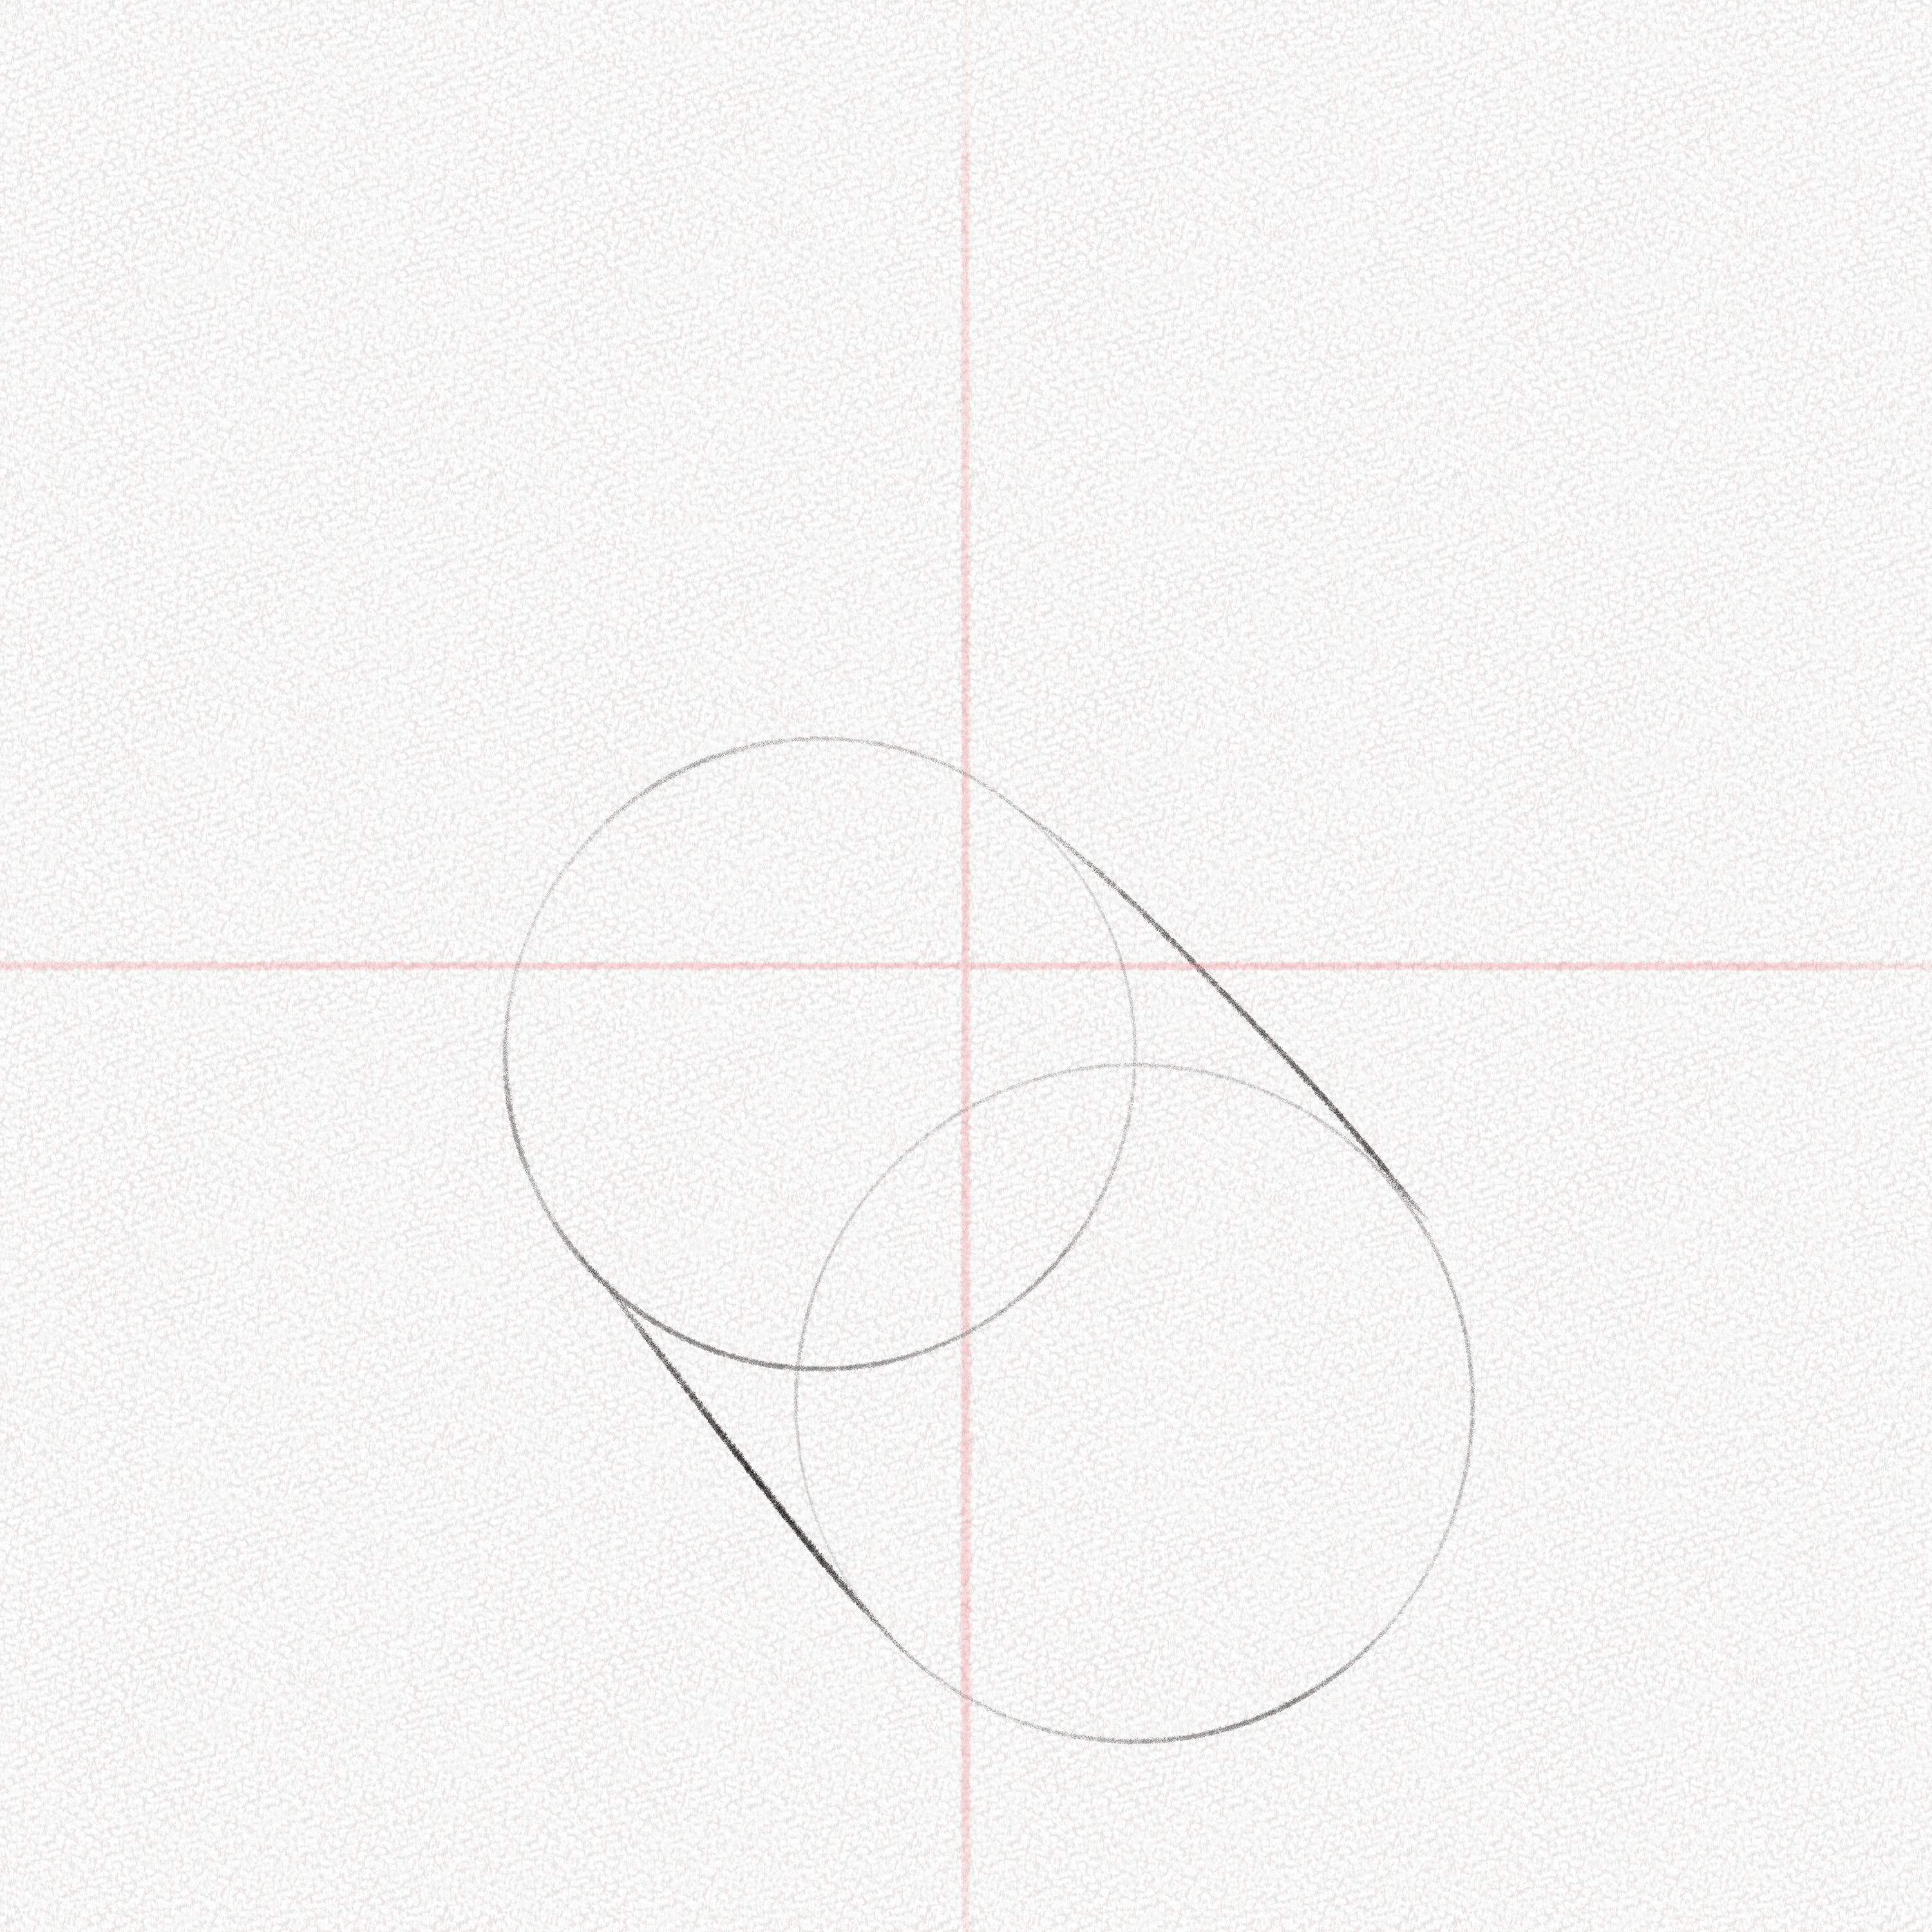
Step 5: Draw another circle
Draw another smaller circle on top of the torso structure; this will be our puppy’s head.
Step 6: Draw a smaller circle
Too many circles? I know, however, this is the simplest way to draw and learn the body and head’s structure. This smaller circle will be the nose and mouth of our puppy.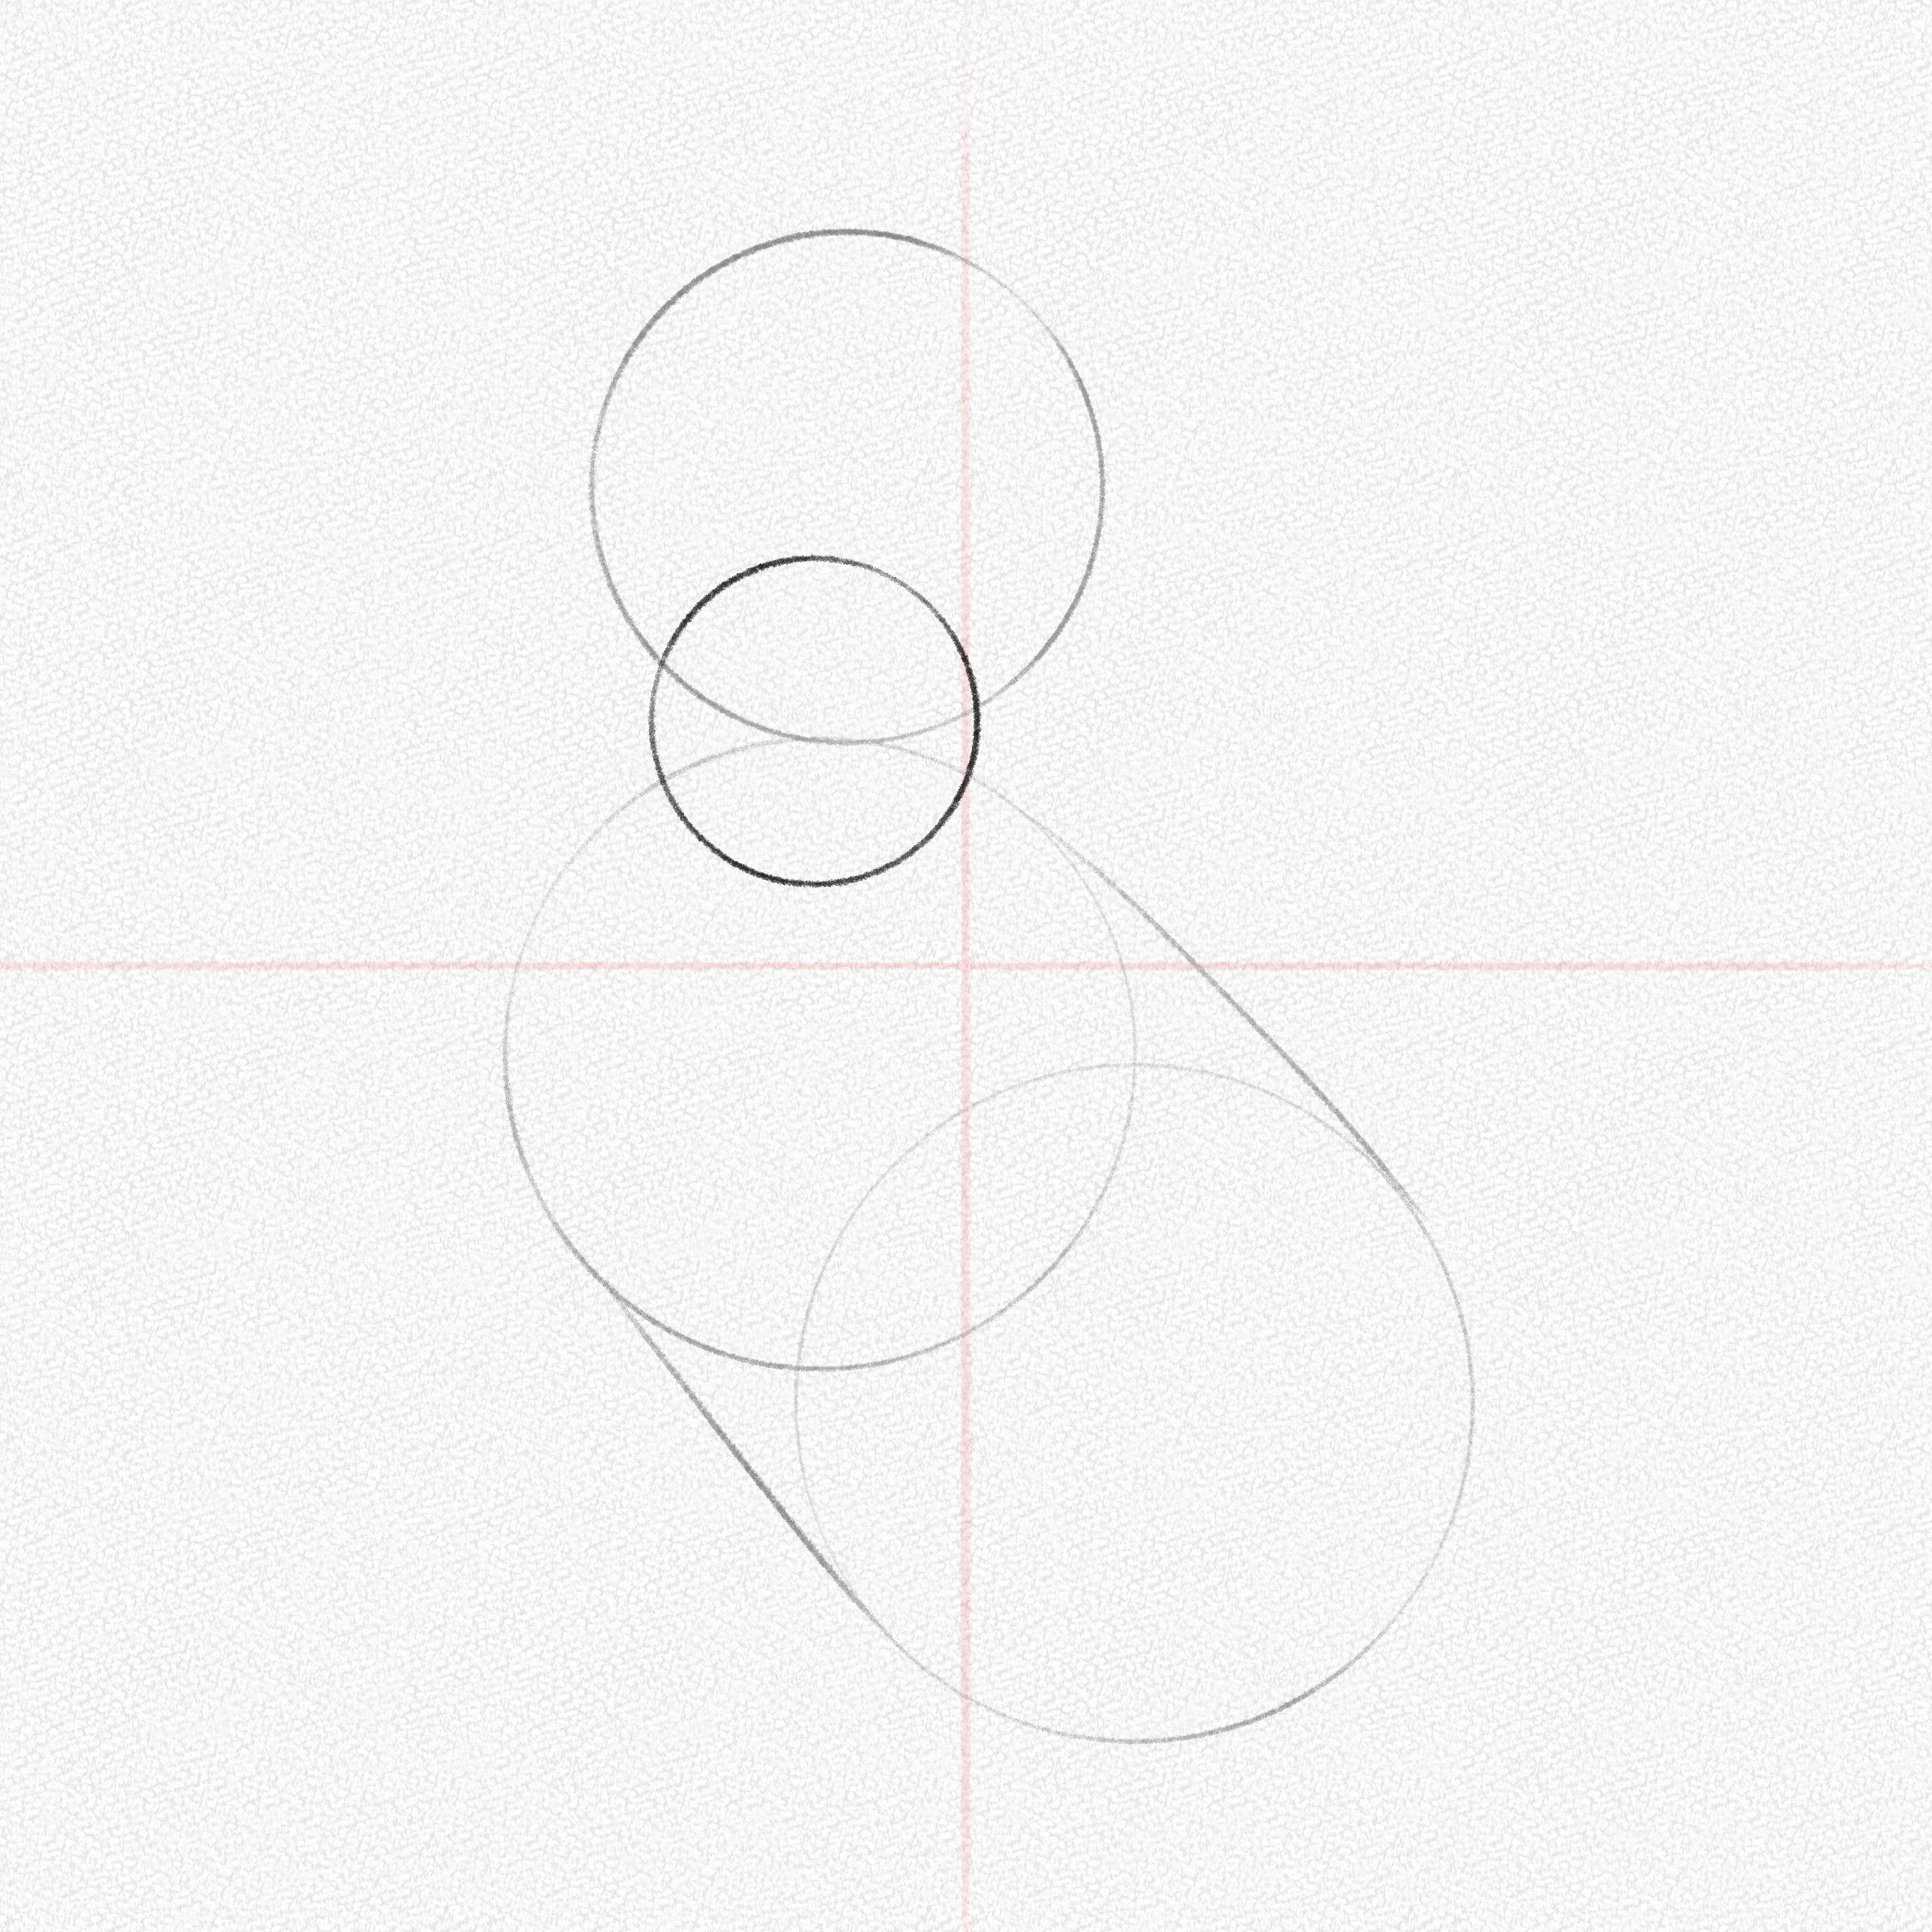
Step 7: Draw two lines
Draw lines coming from the head circle, and make them slightly diagonal so they fall close to the mouth. 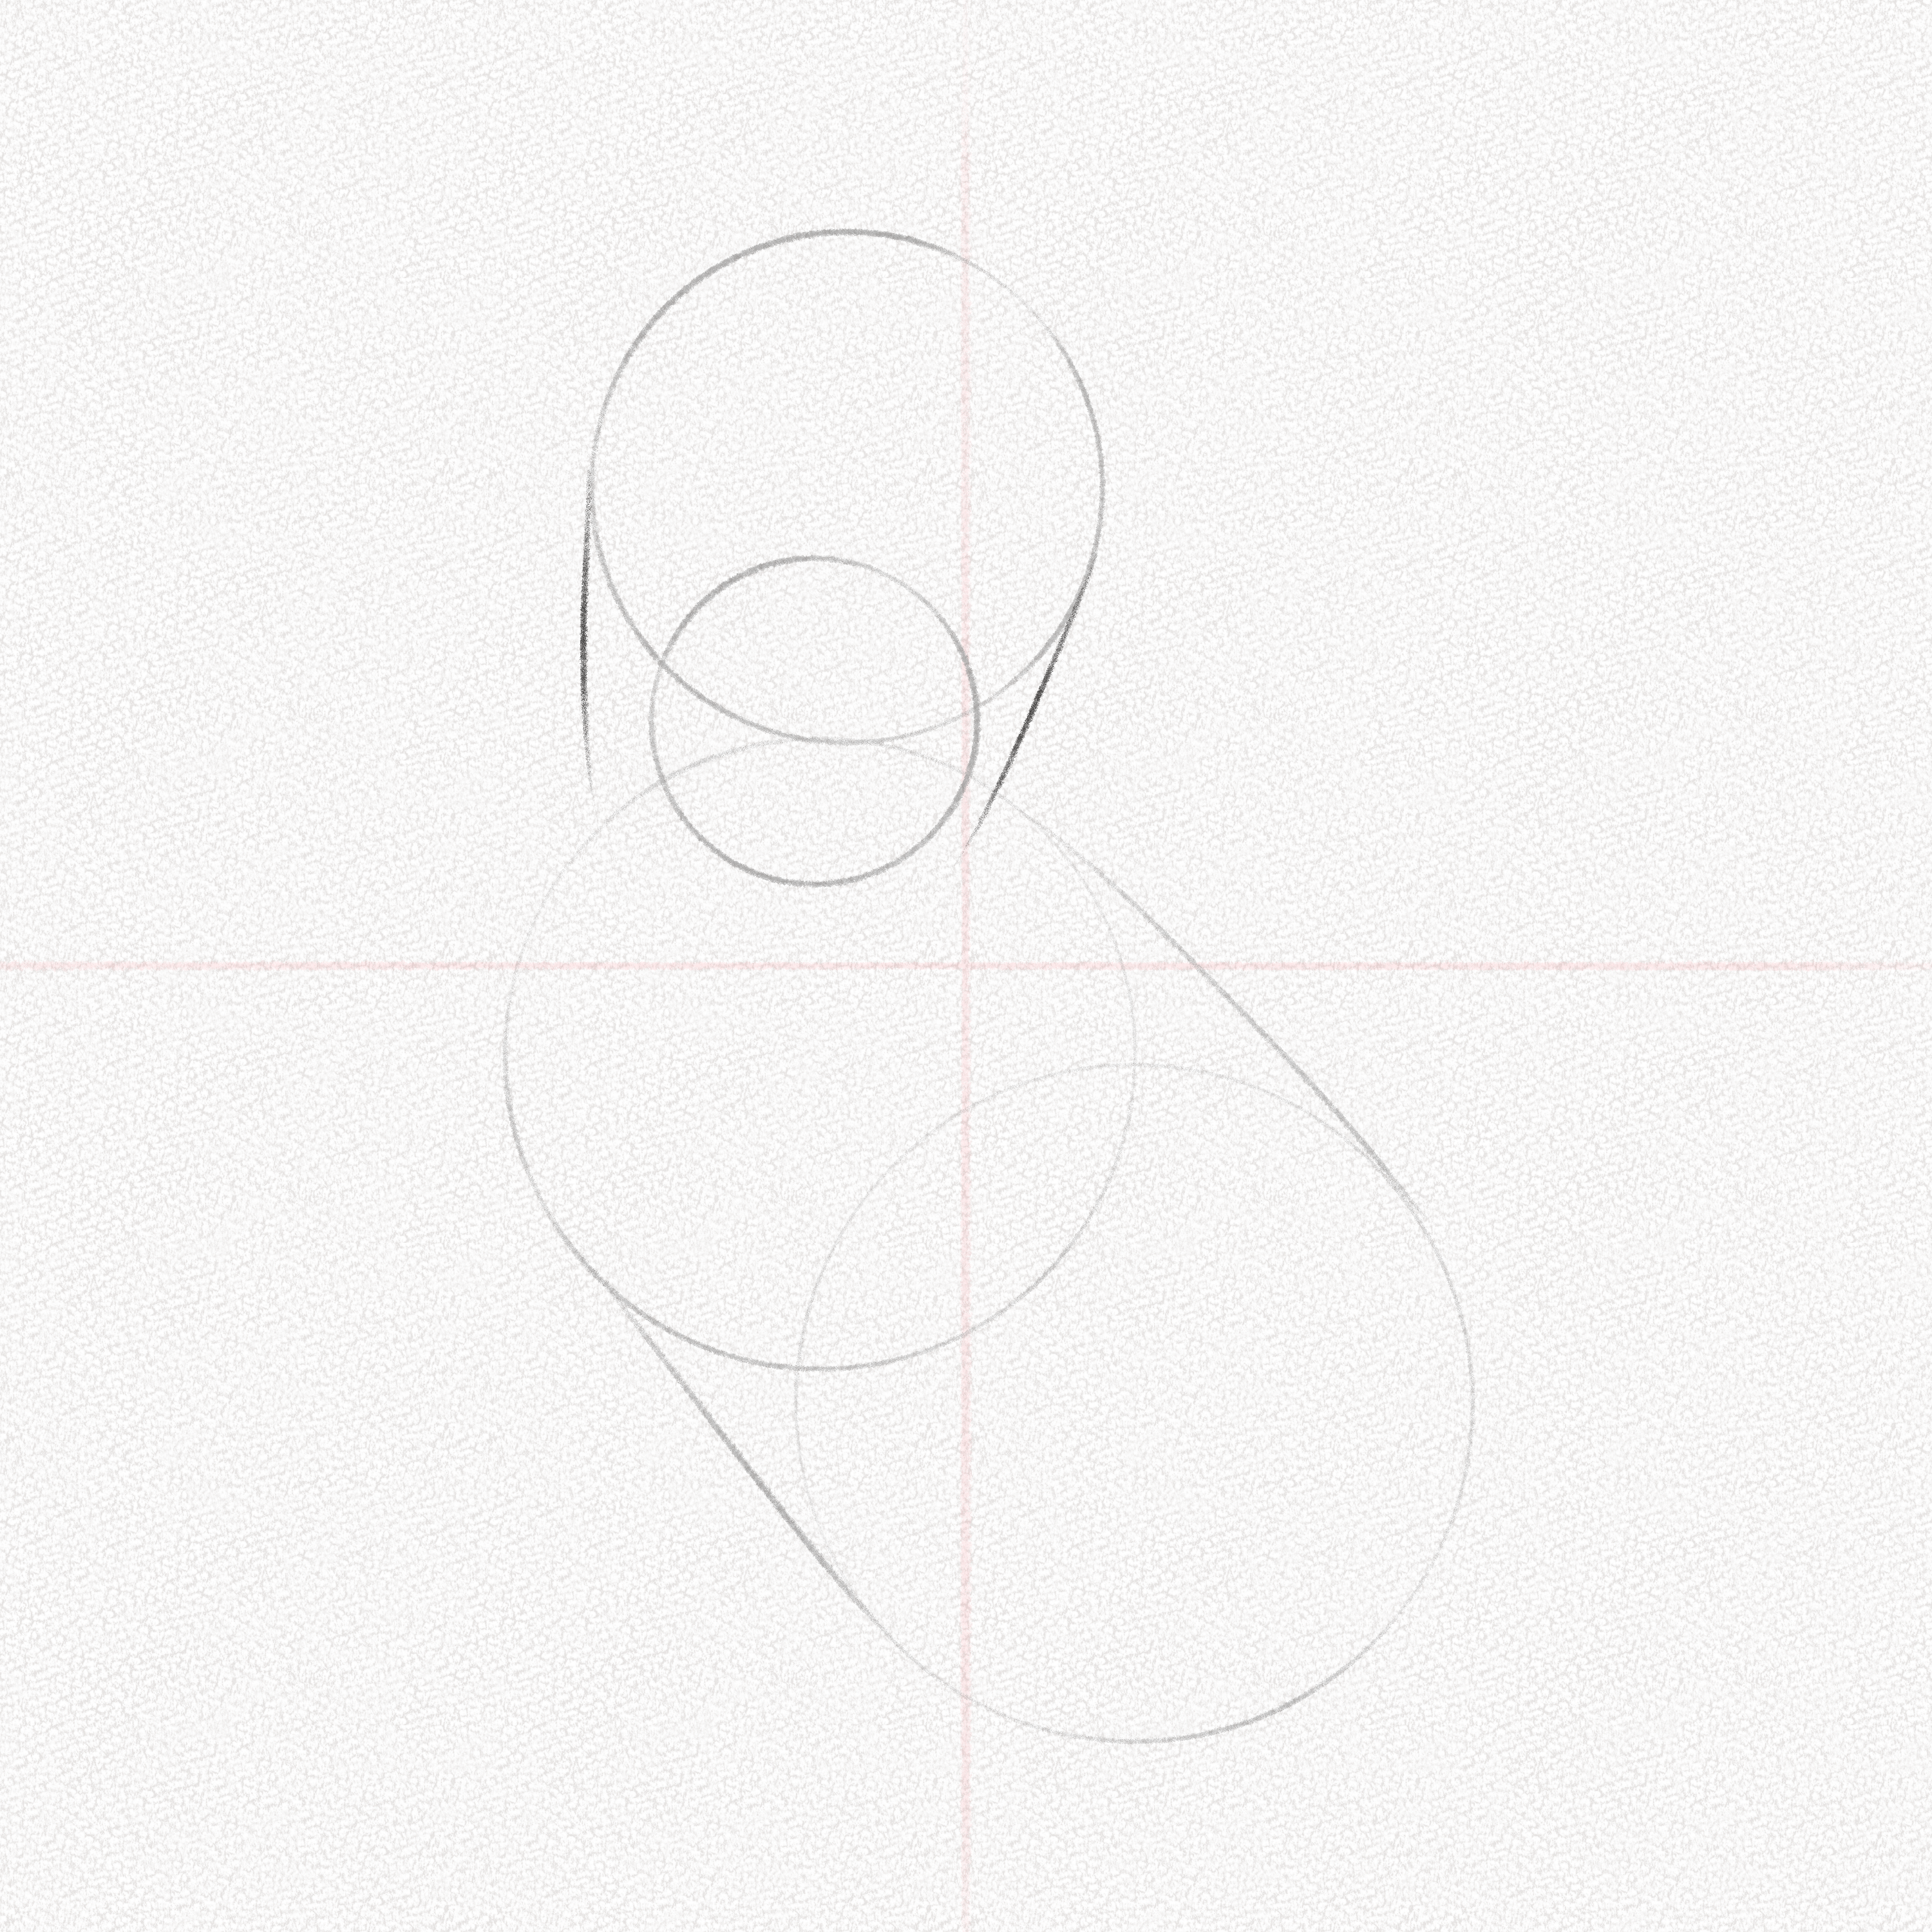
Step 8: Connect the lines
Following the mouth’s curve, connect the lines of the face sides with a soft curved line.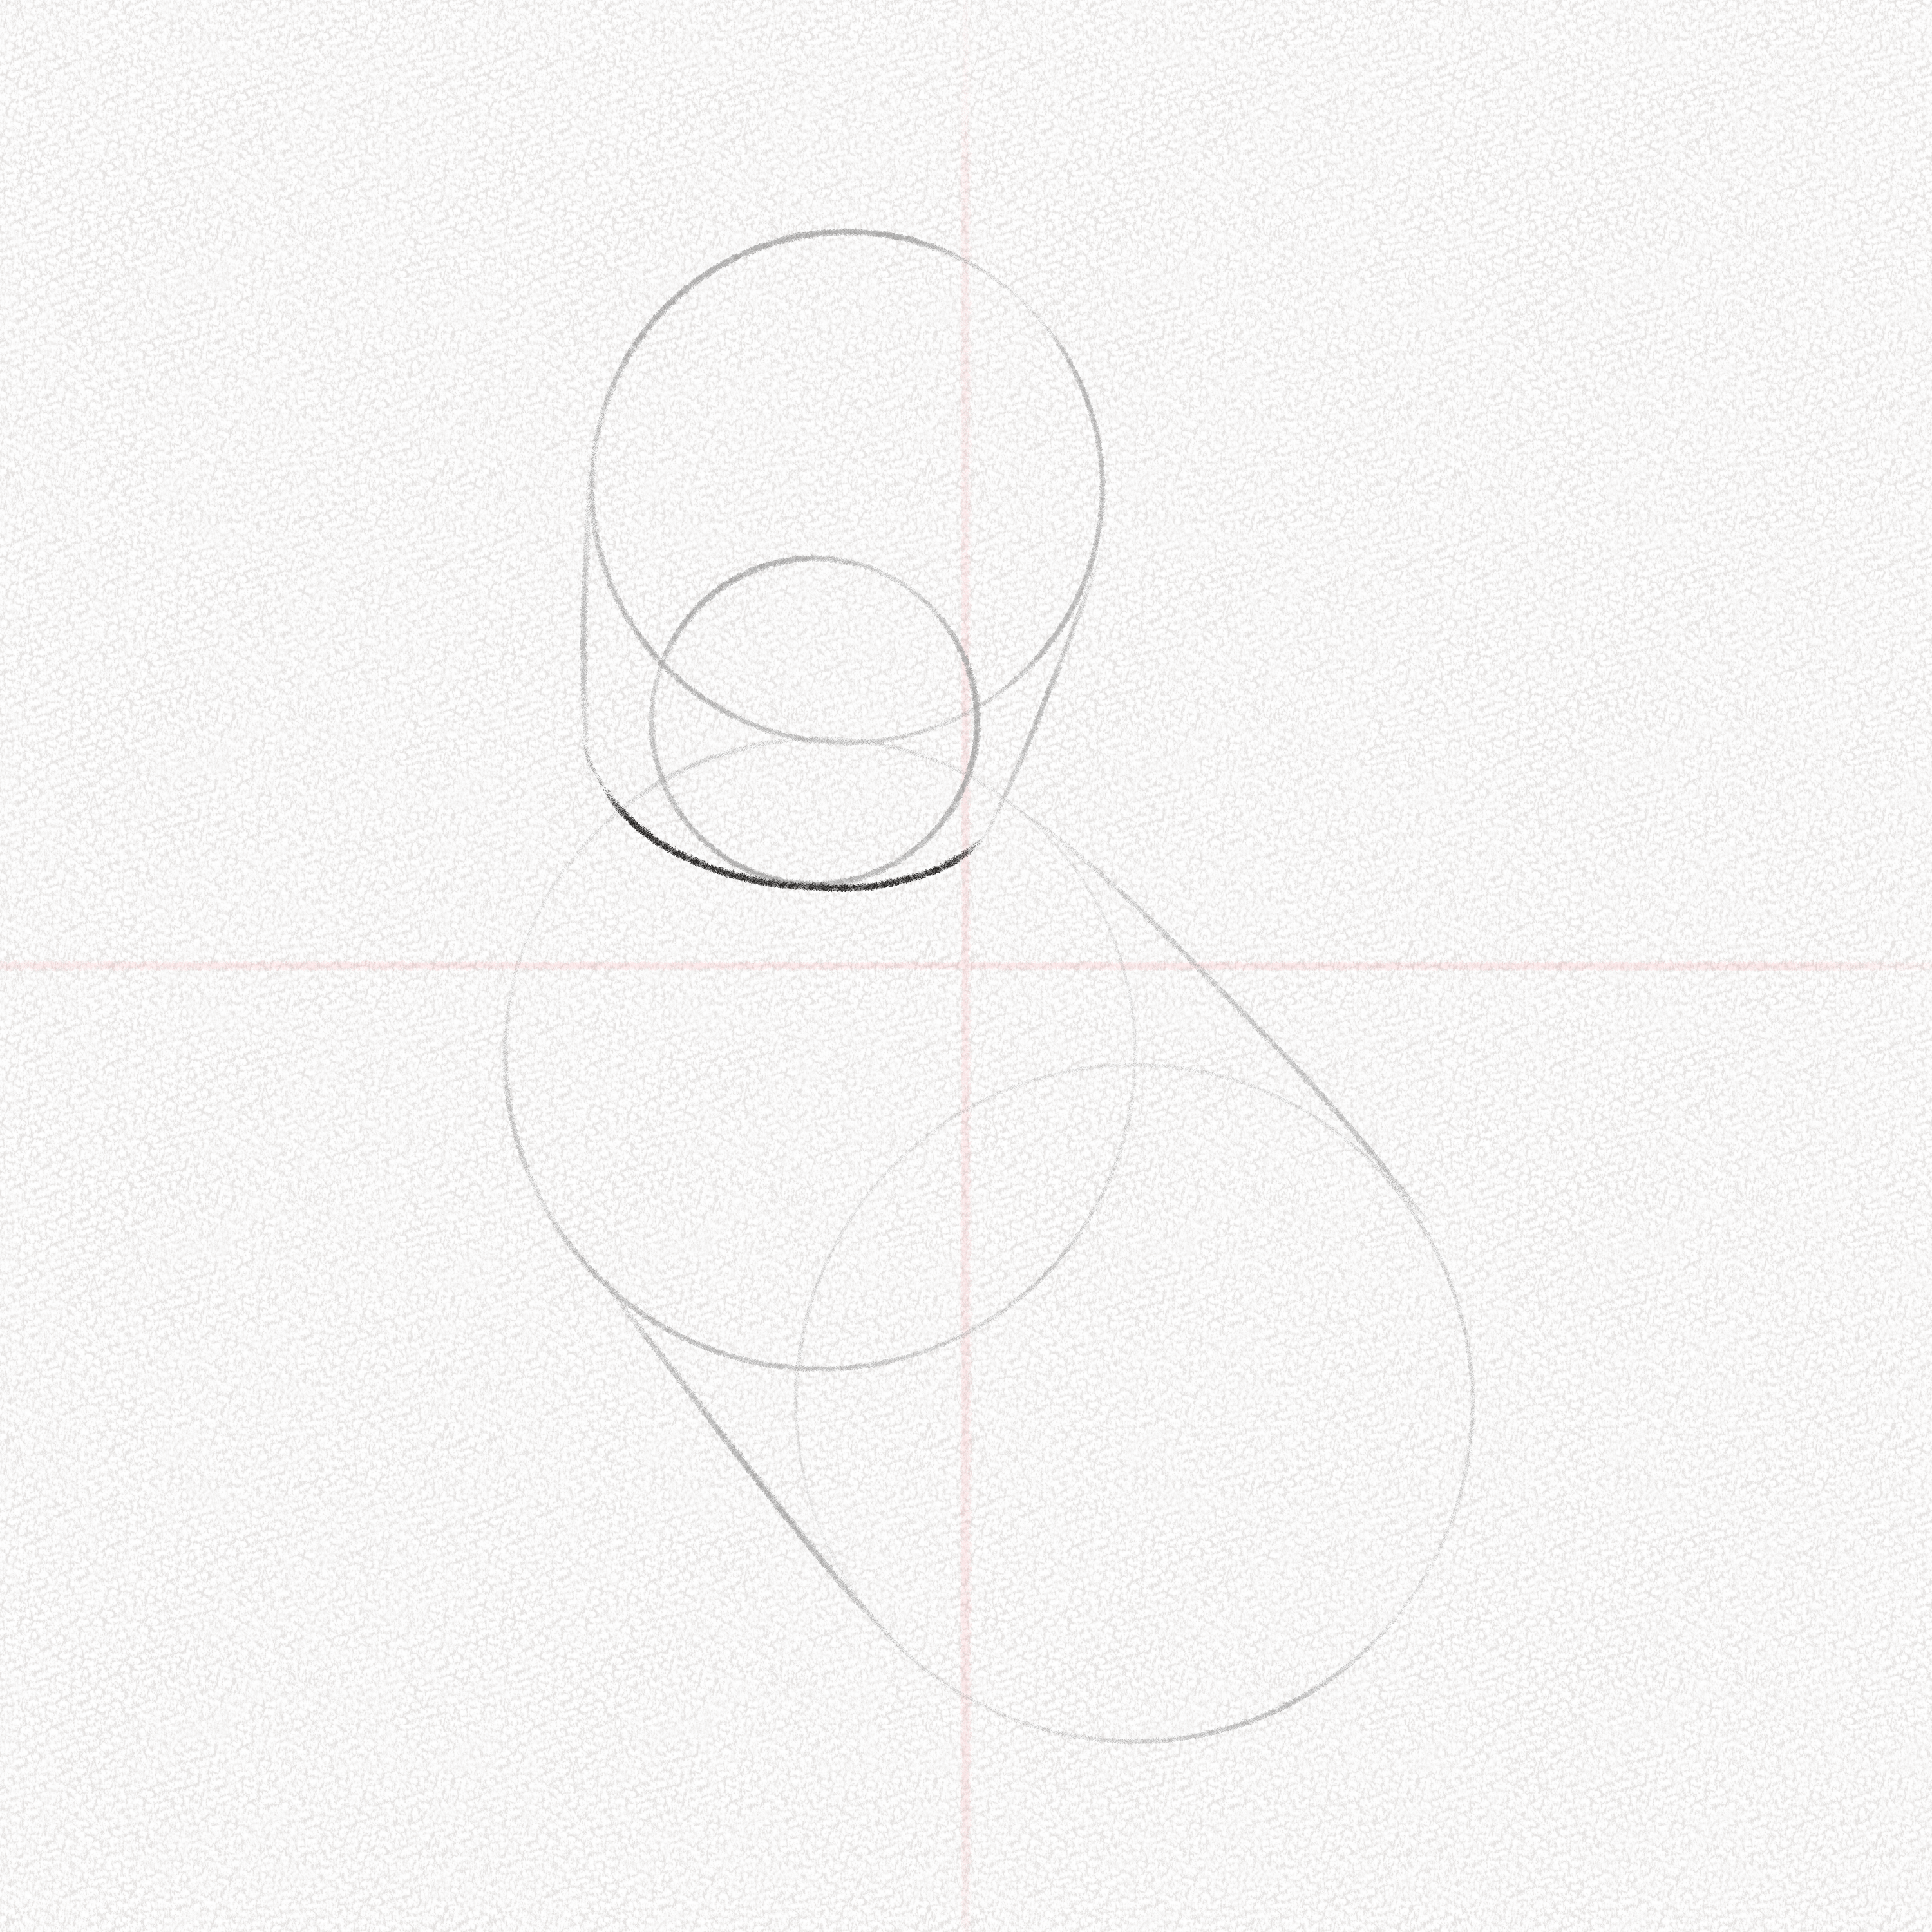
Step 9: Split the head in half
Split the head’s circle in half with a very soft, barely noticeable line.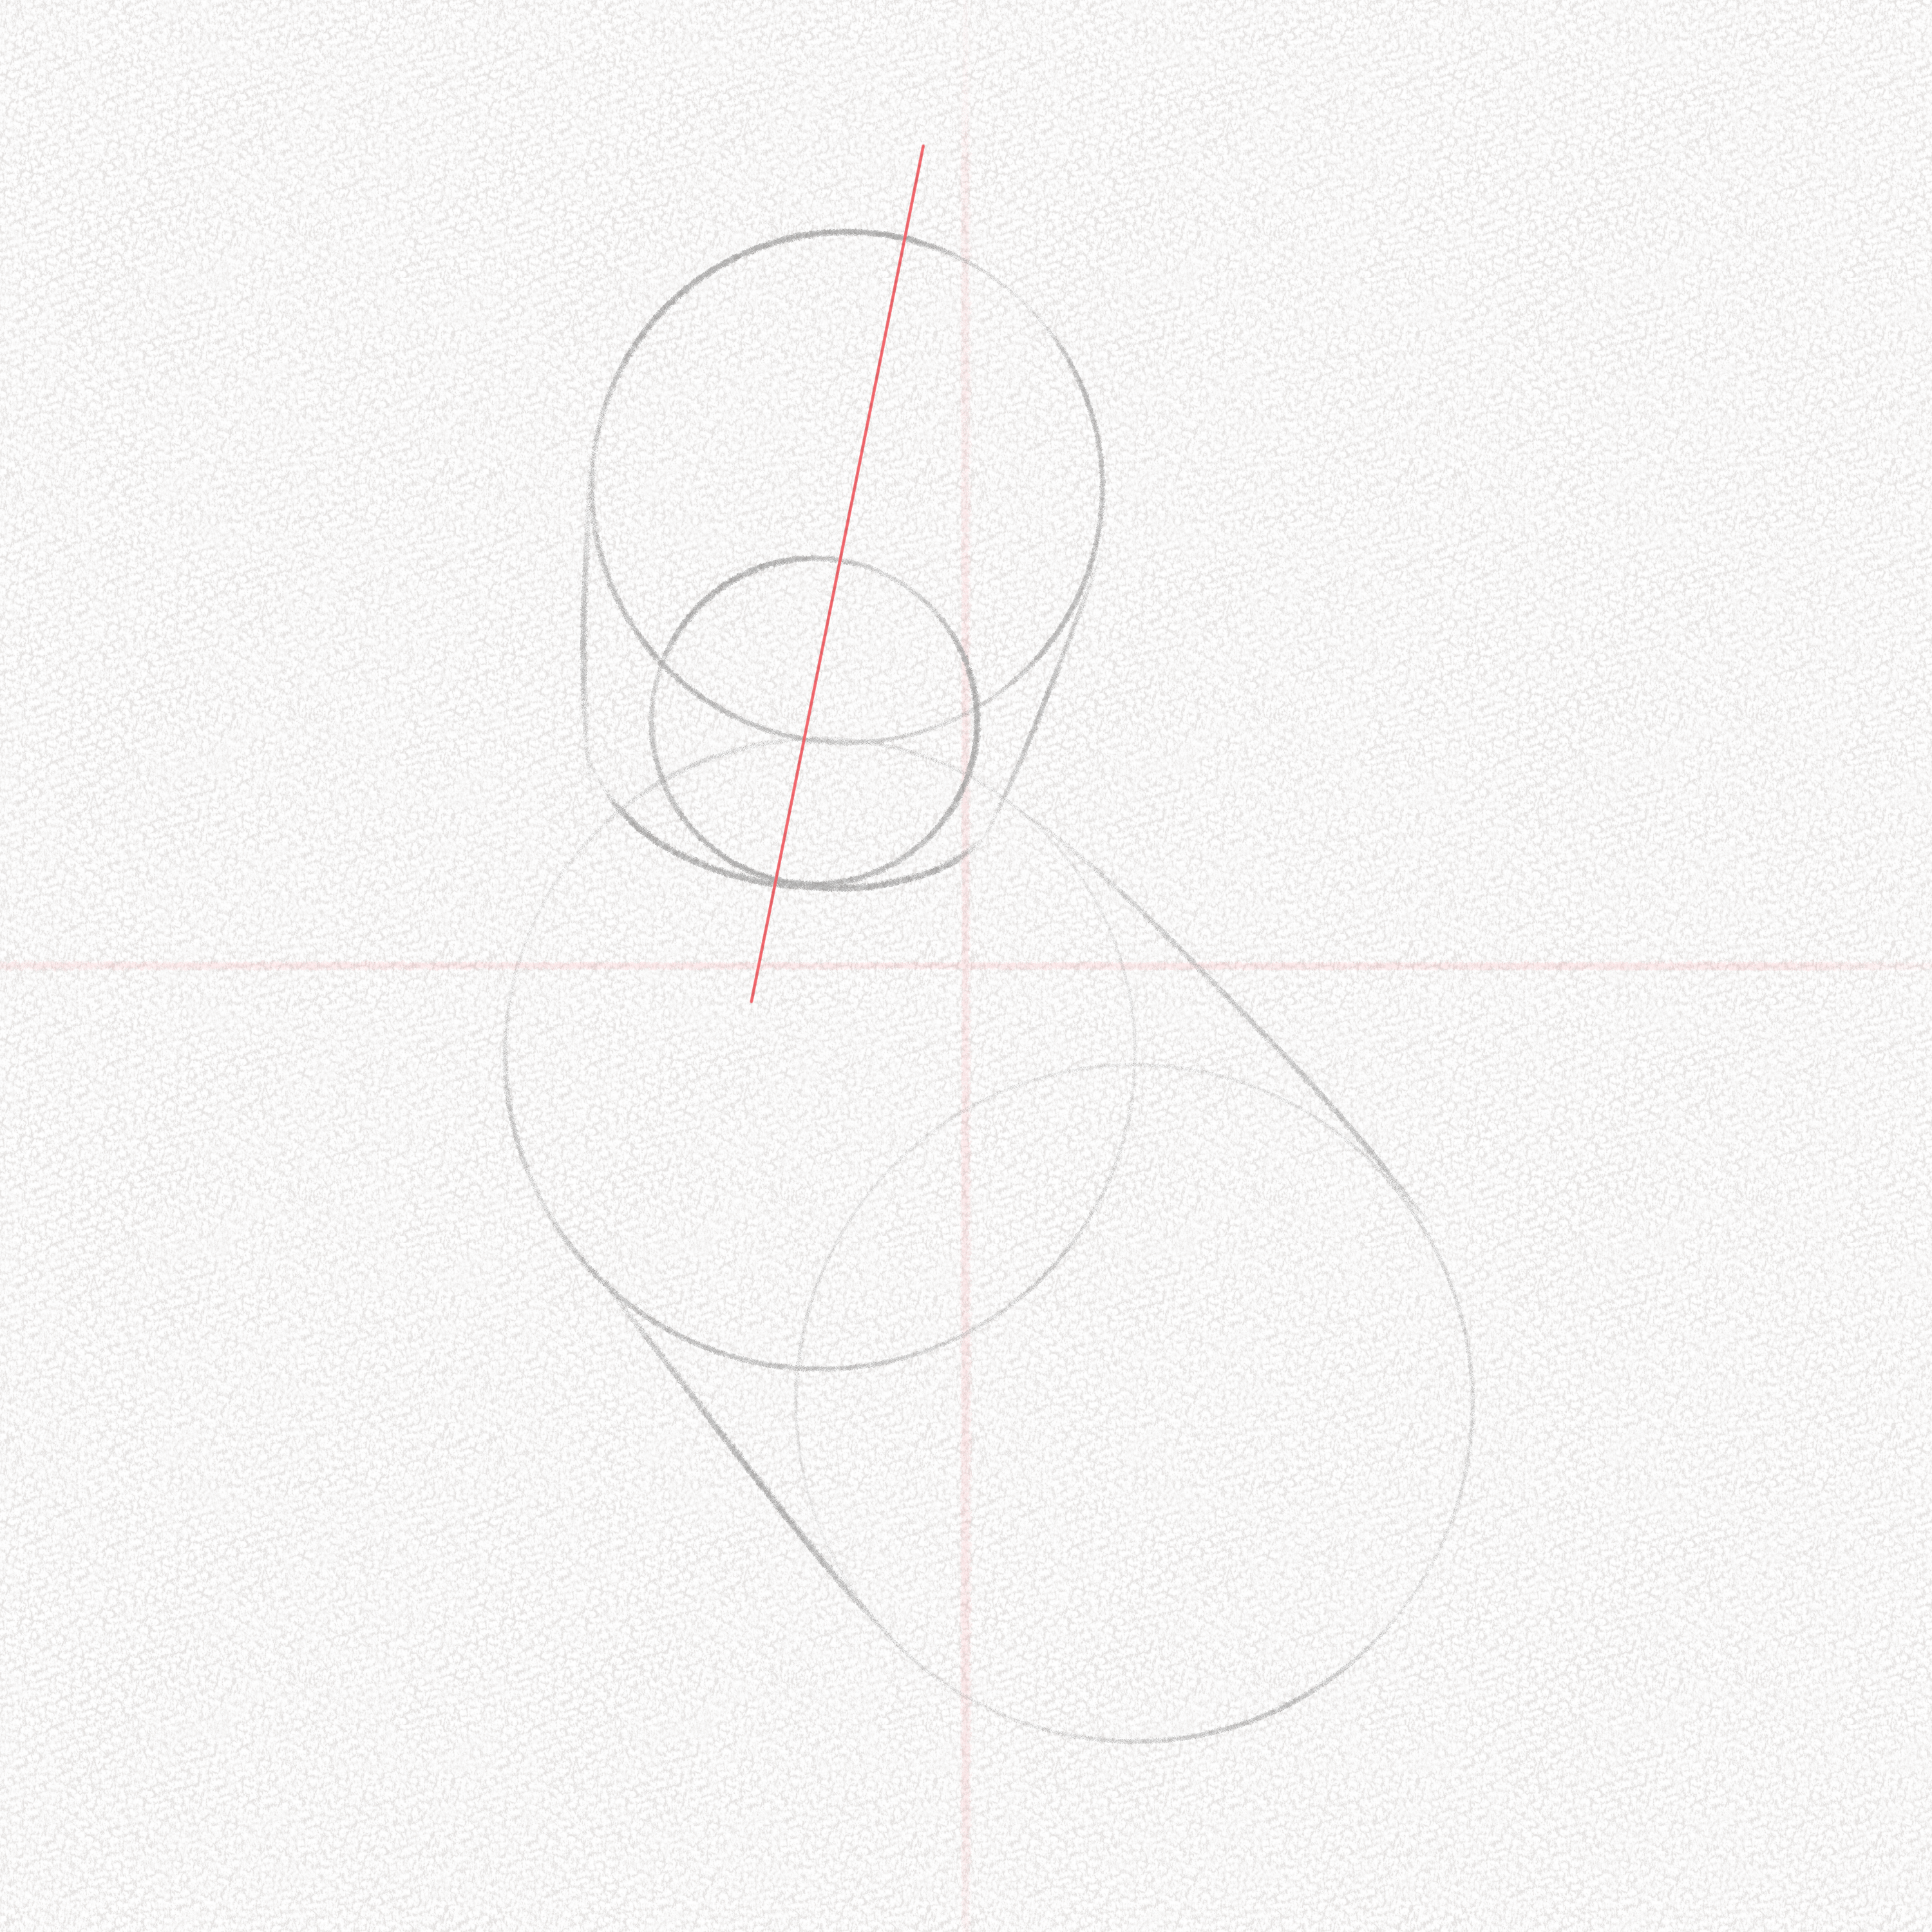
Step 10: Draw the nose and mouth
In the intersection between the head circle and the torso circle, draw a “W” shape for the base of the nose. Connect the sides of the face to the line we drew in the previous step to make the mouth.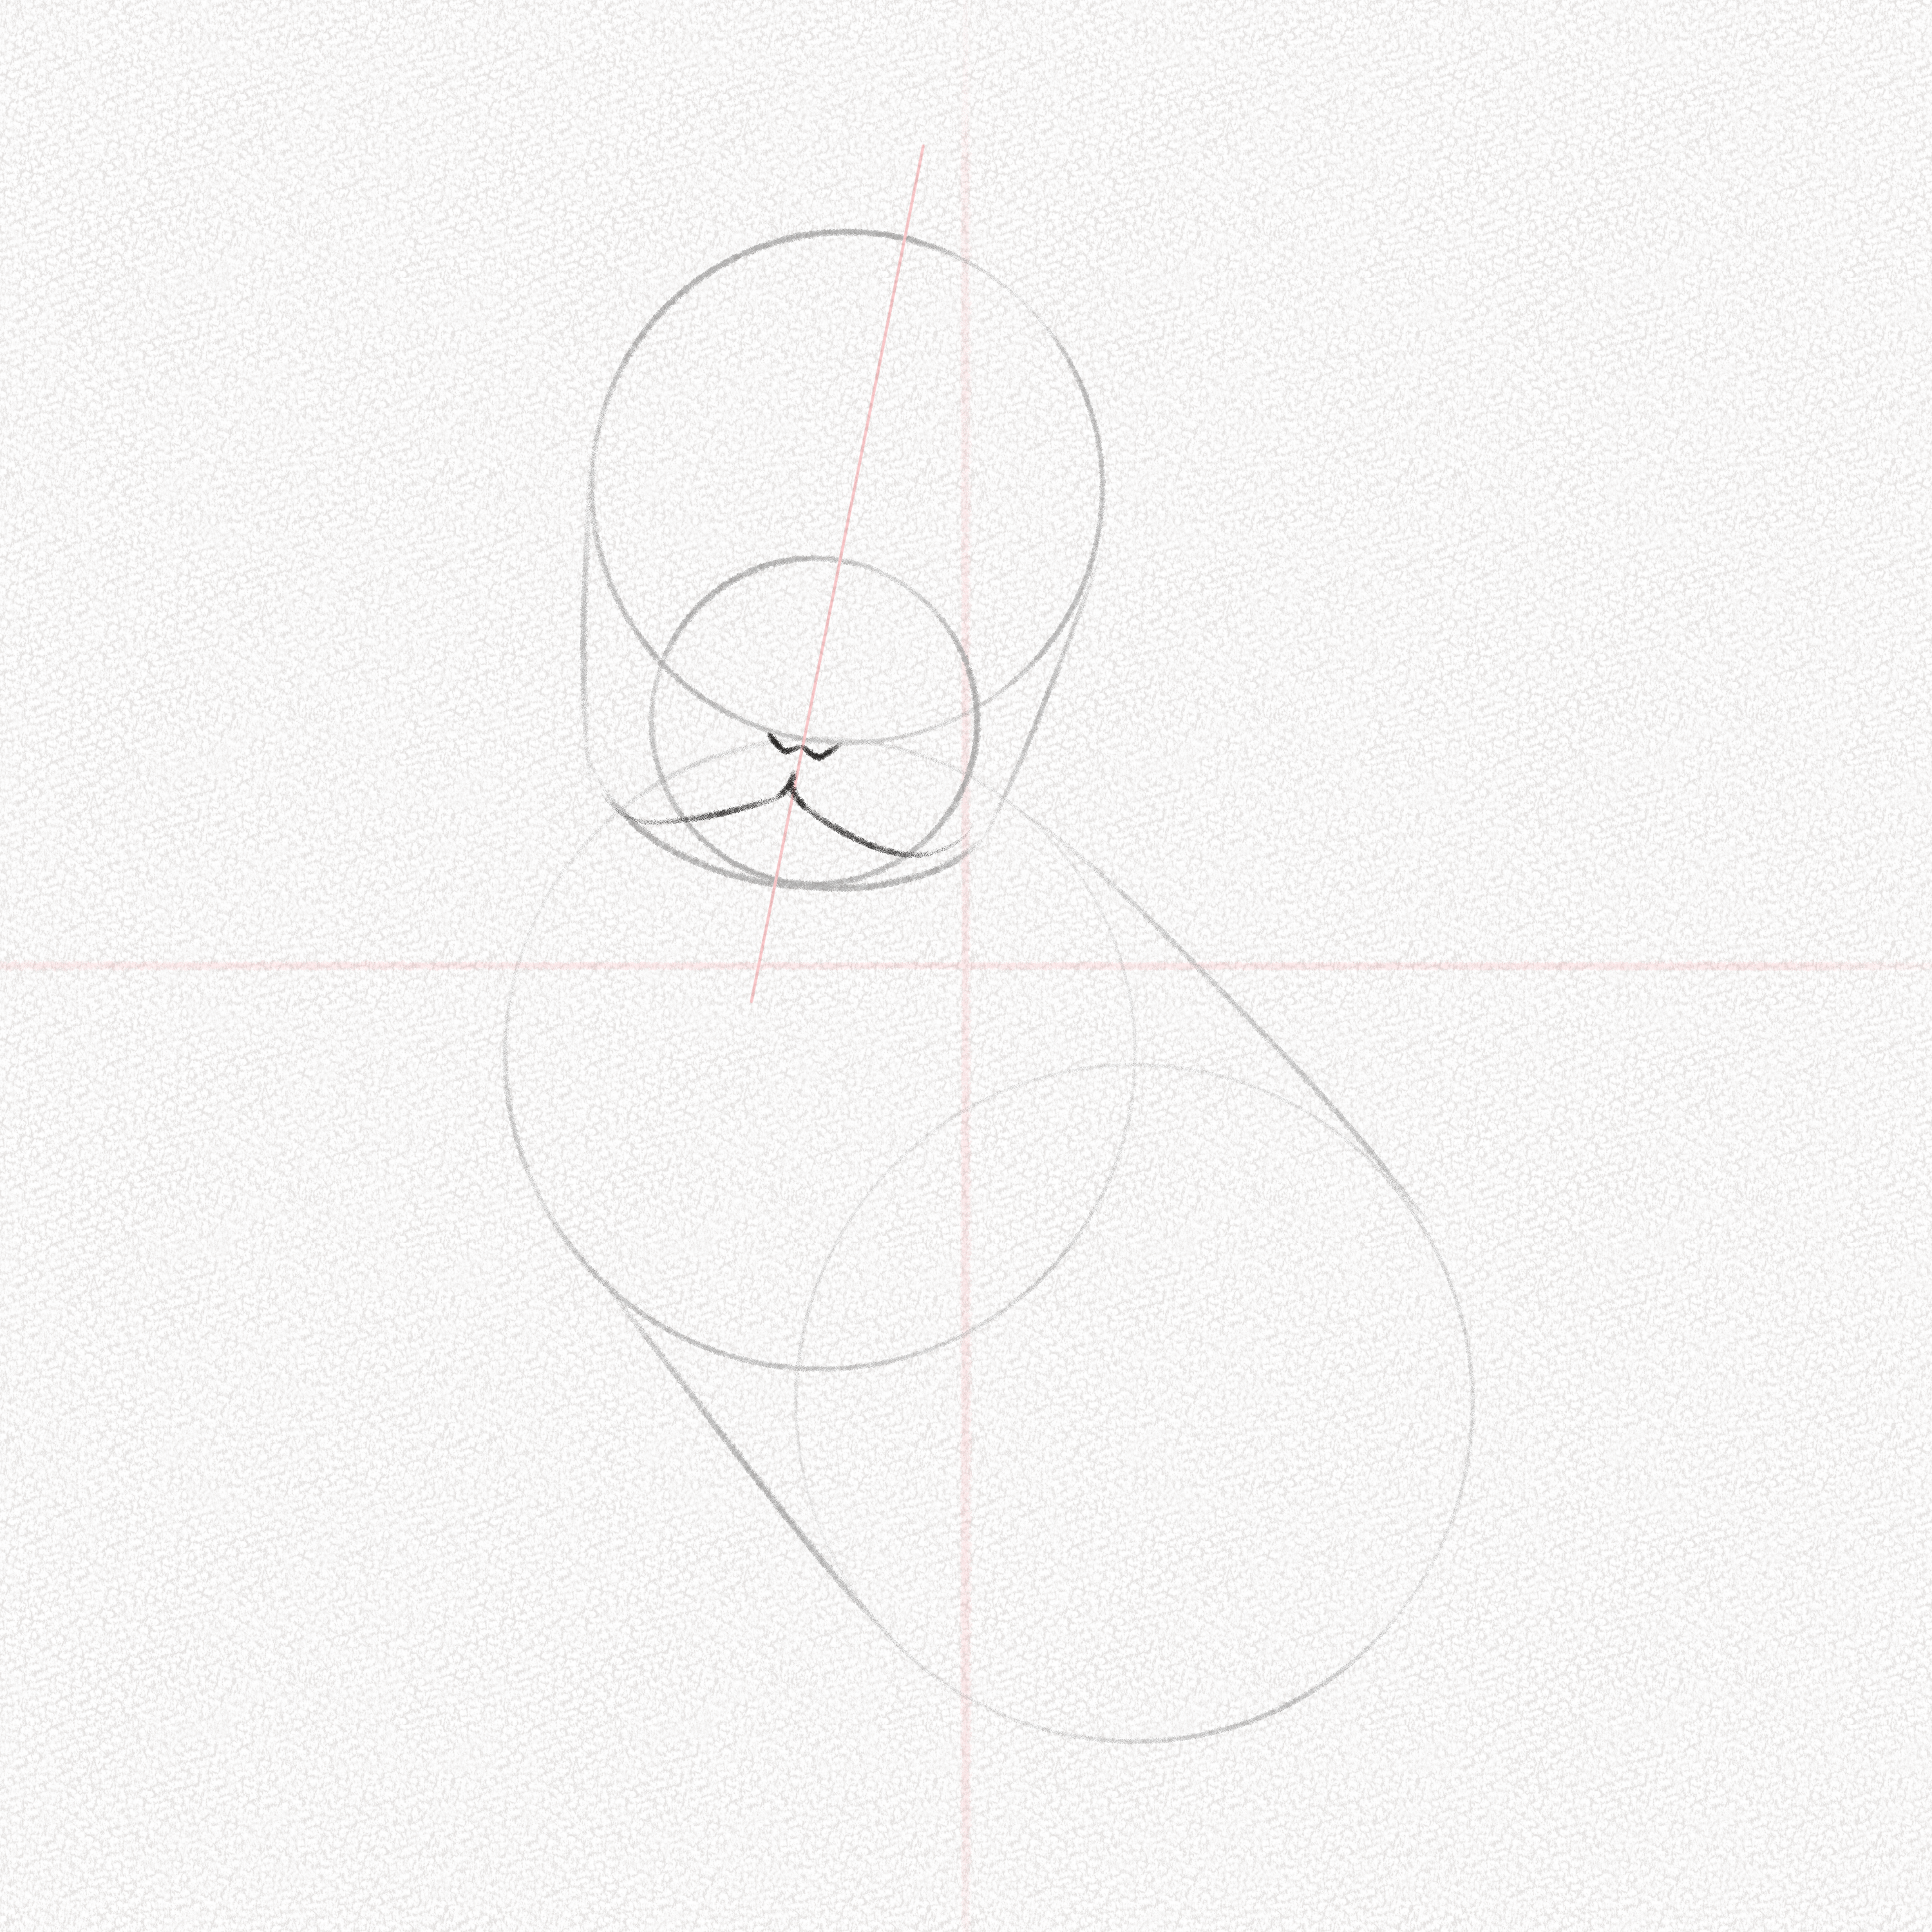
Step 11: Draw a straight line above the mouth
Draw a horizontal line above the mouth, and try to apply the less amount of pressure possible since this will be another guideline.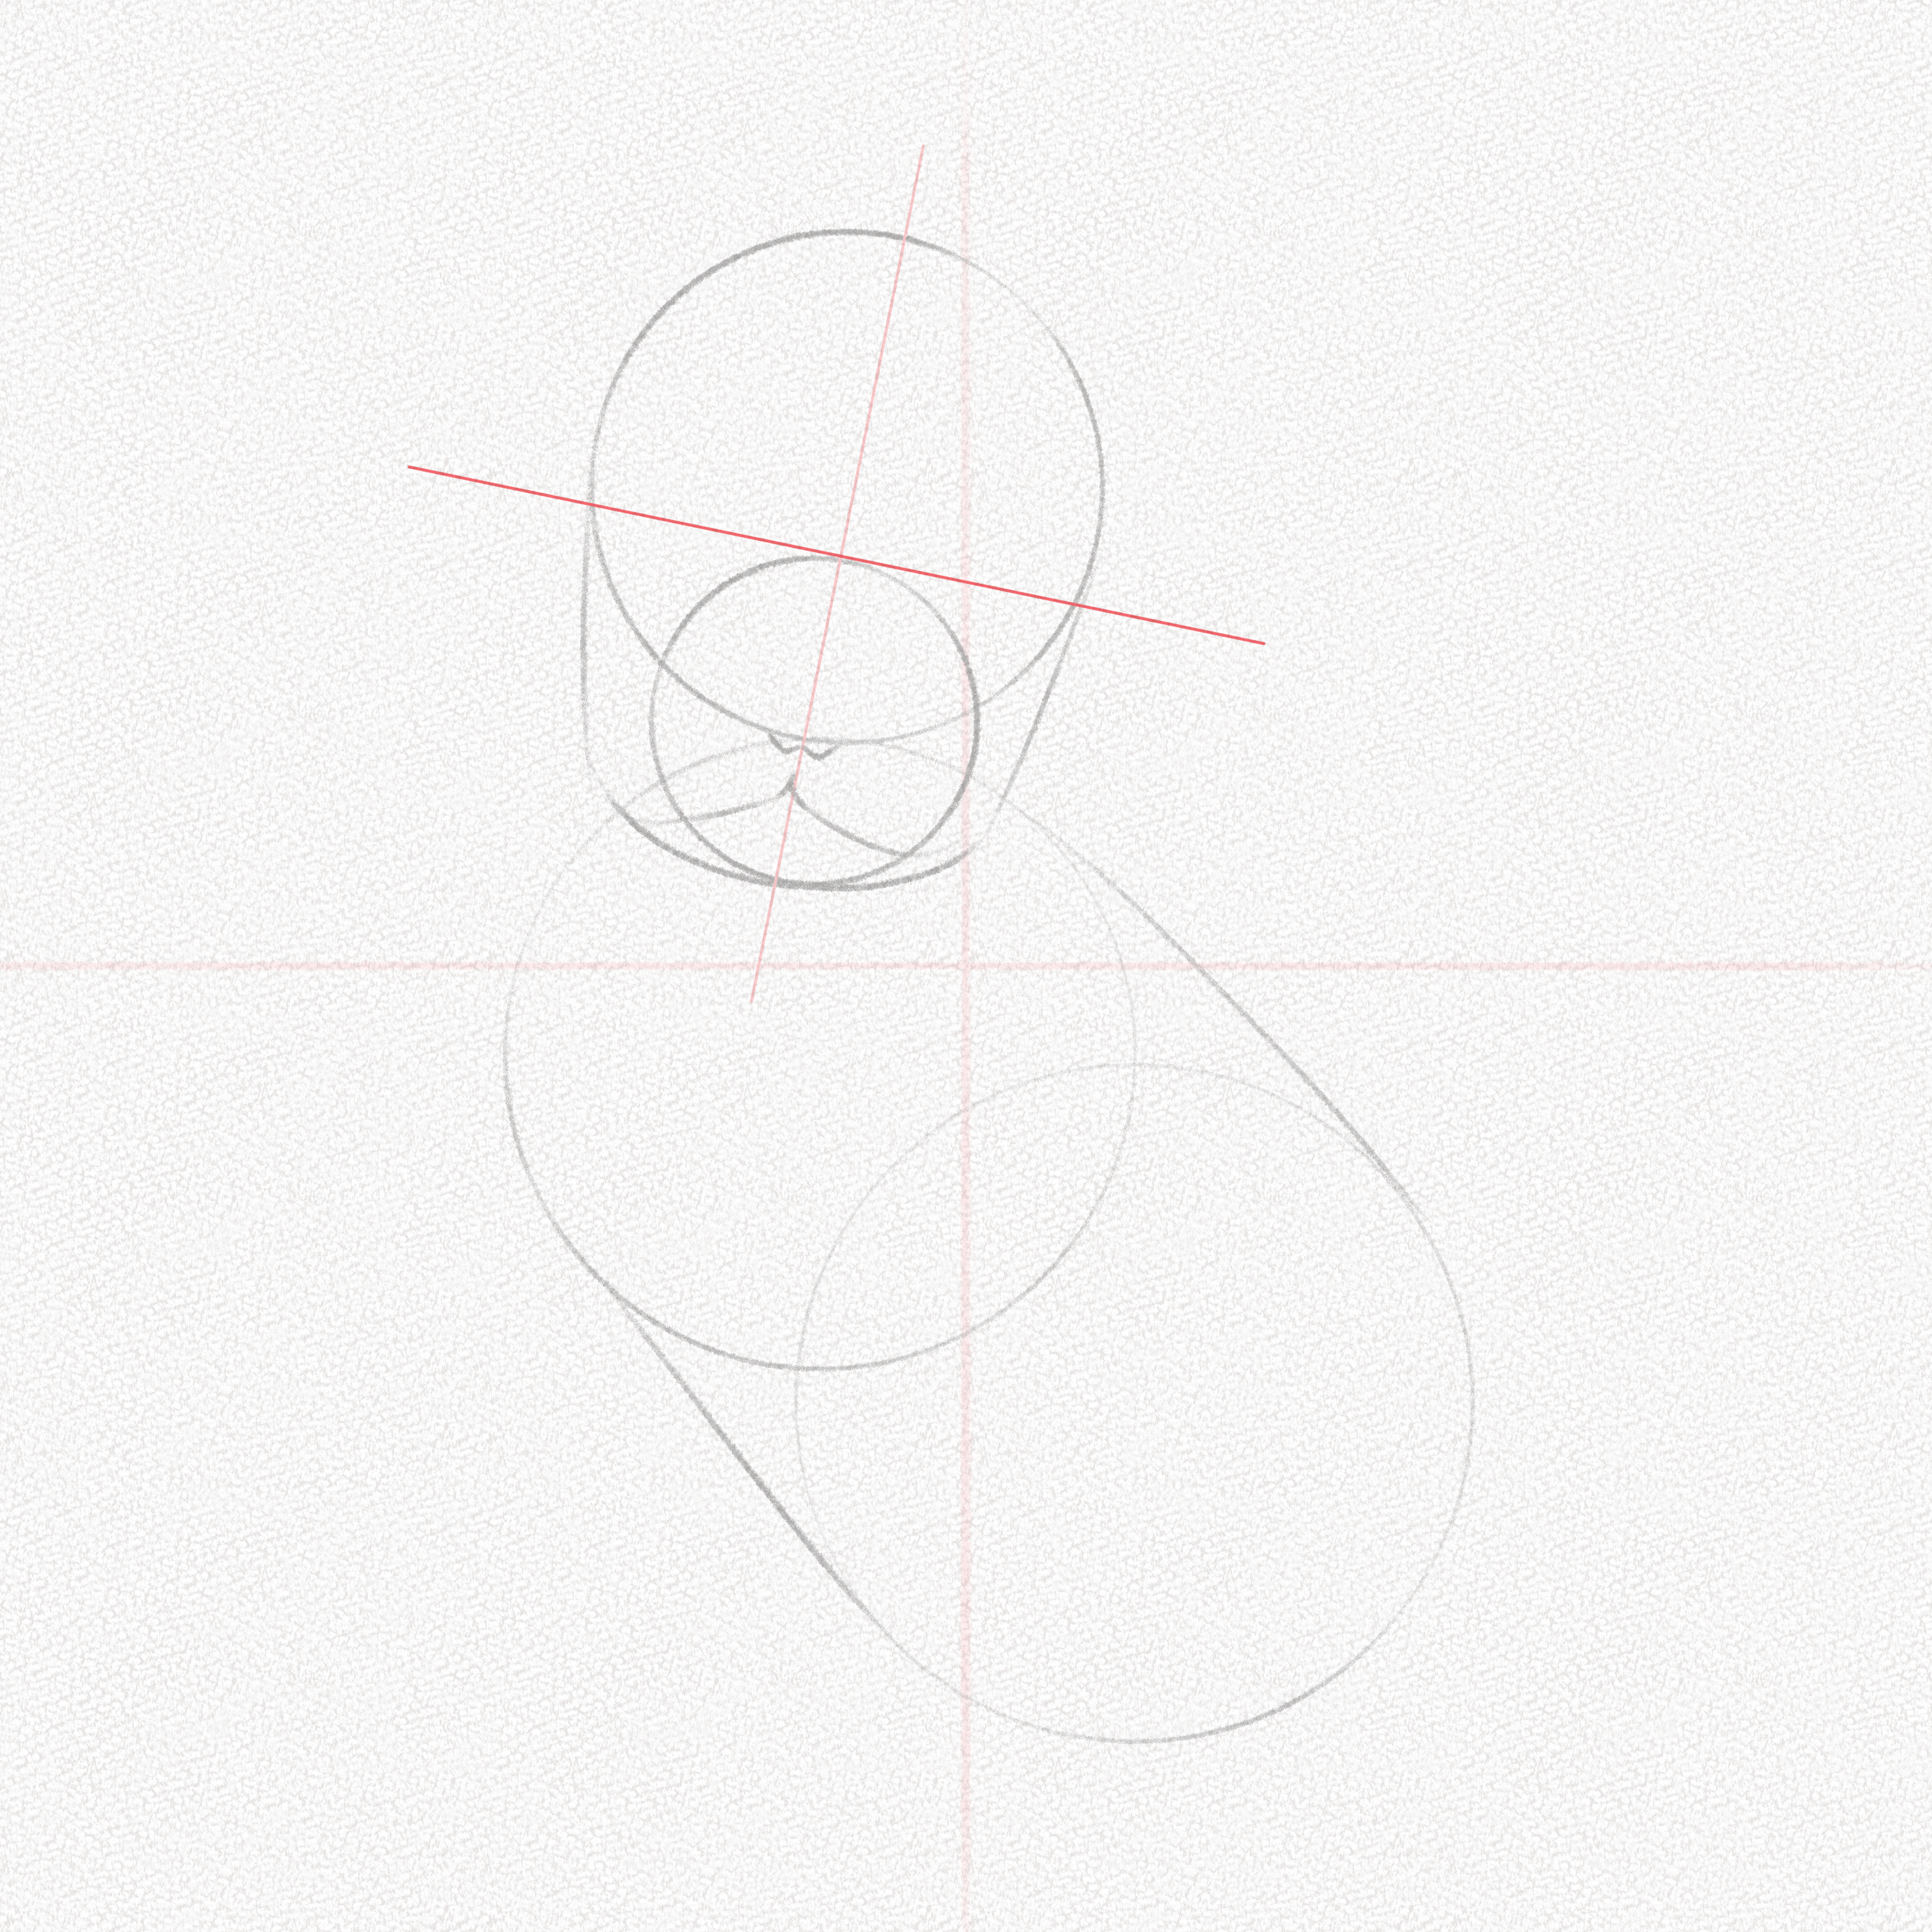
Step 12: Draw two small circles
Draw two small circles on top of the line we drew in the previous step. Make them evenly spaced and of the same size. These will be our dog’s eyes.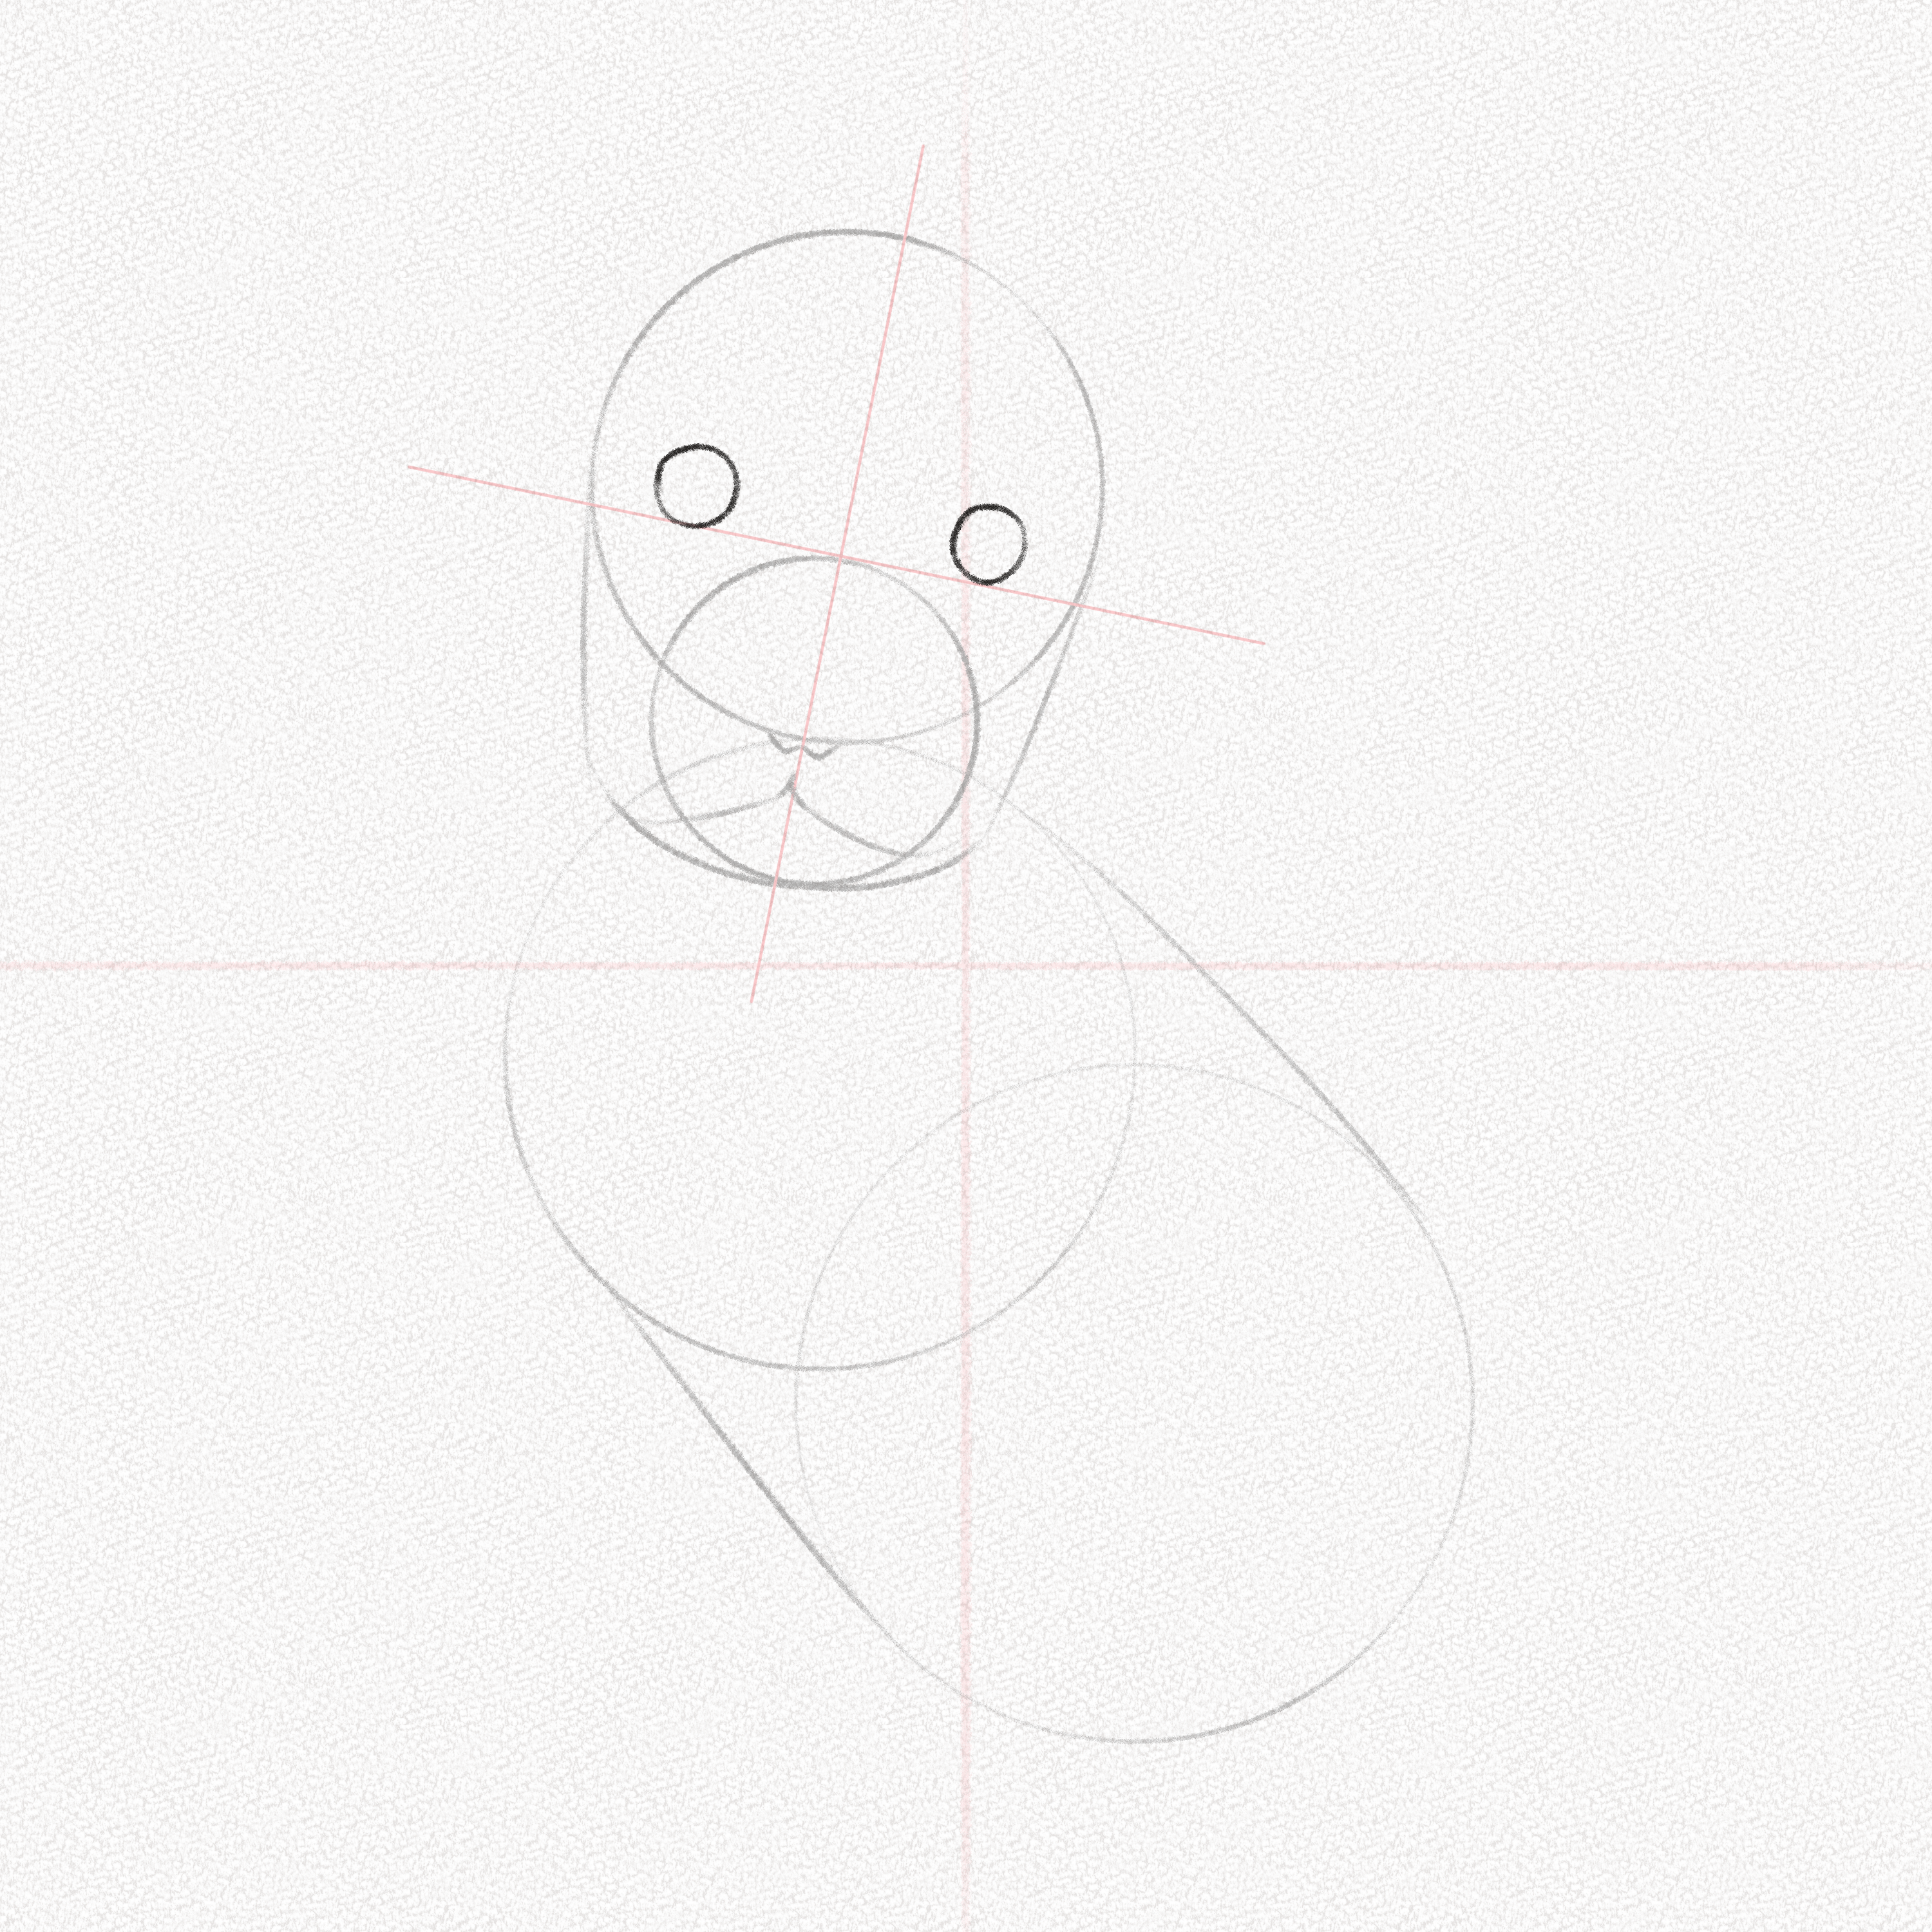
Step 13: Mark the nose position
Mark the nose position with a straight line about ⅓ below the border of the mouth circle, then slightly above the lower border of the mouth circle, and draw two small “C” shapes mirroring each other. These will be the nostrils of our puppy.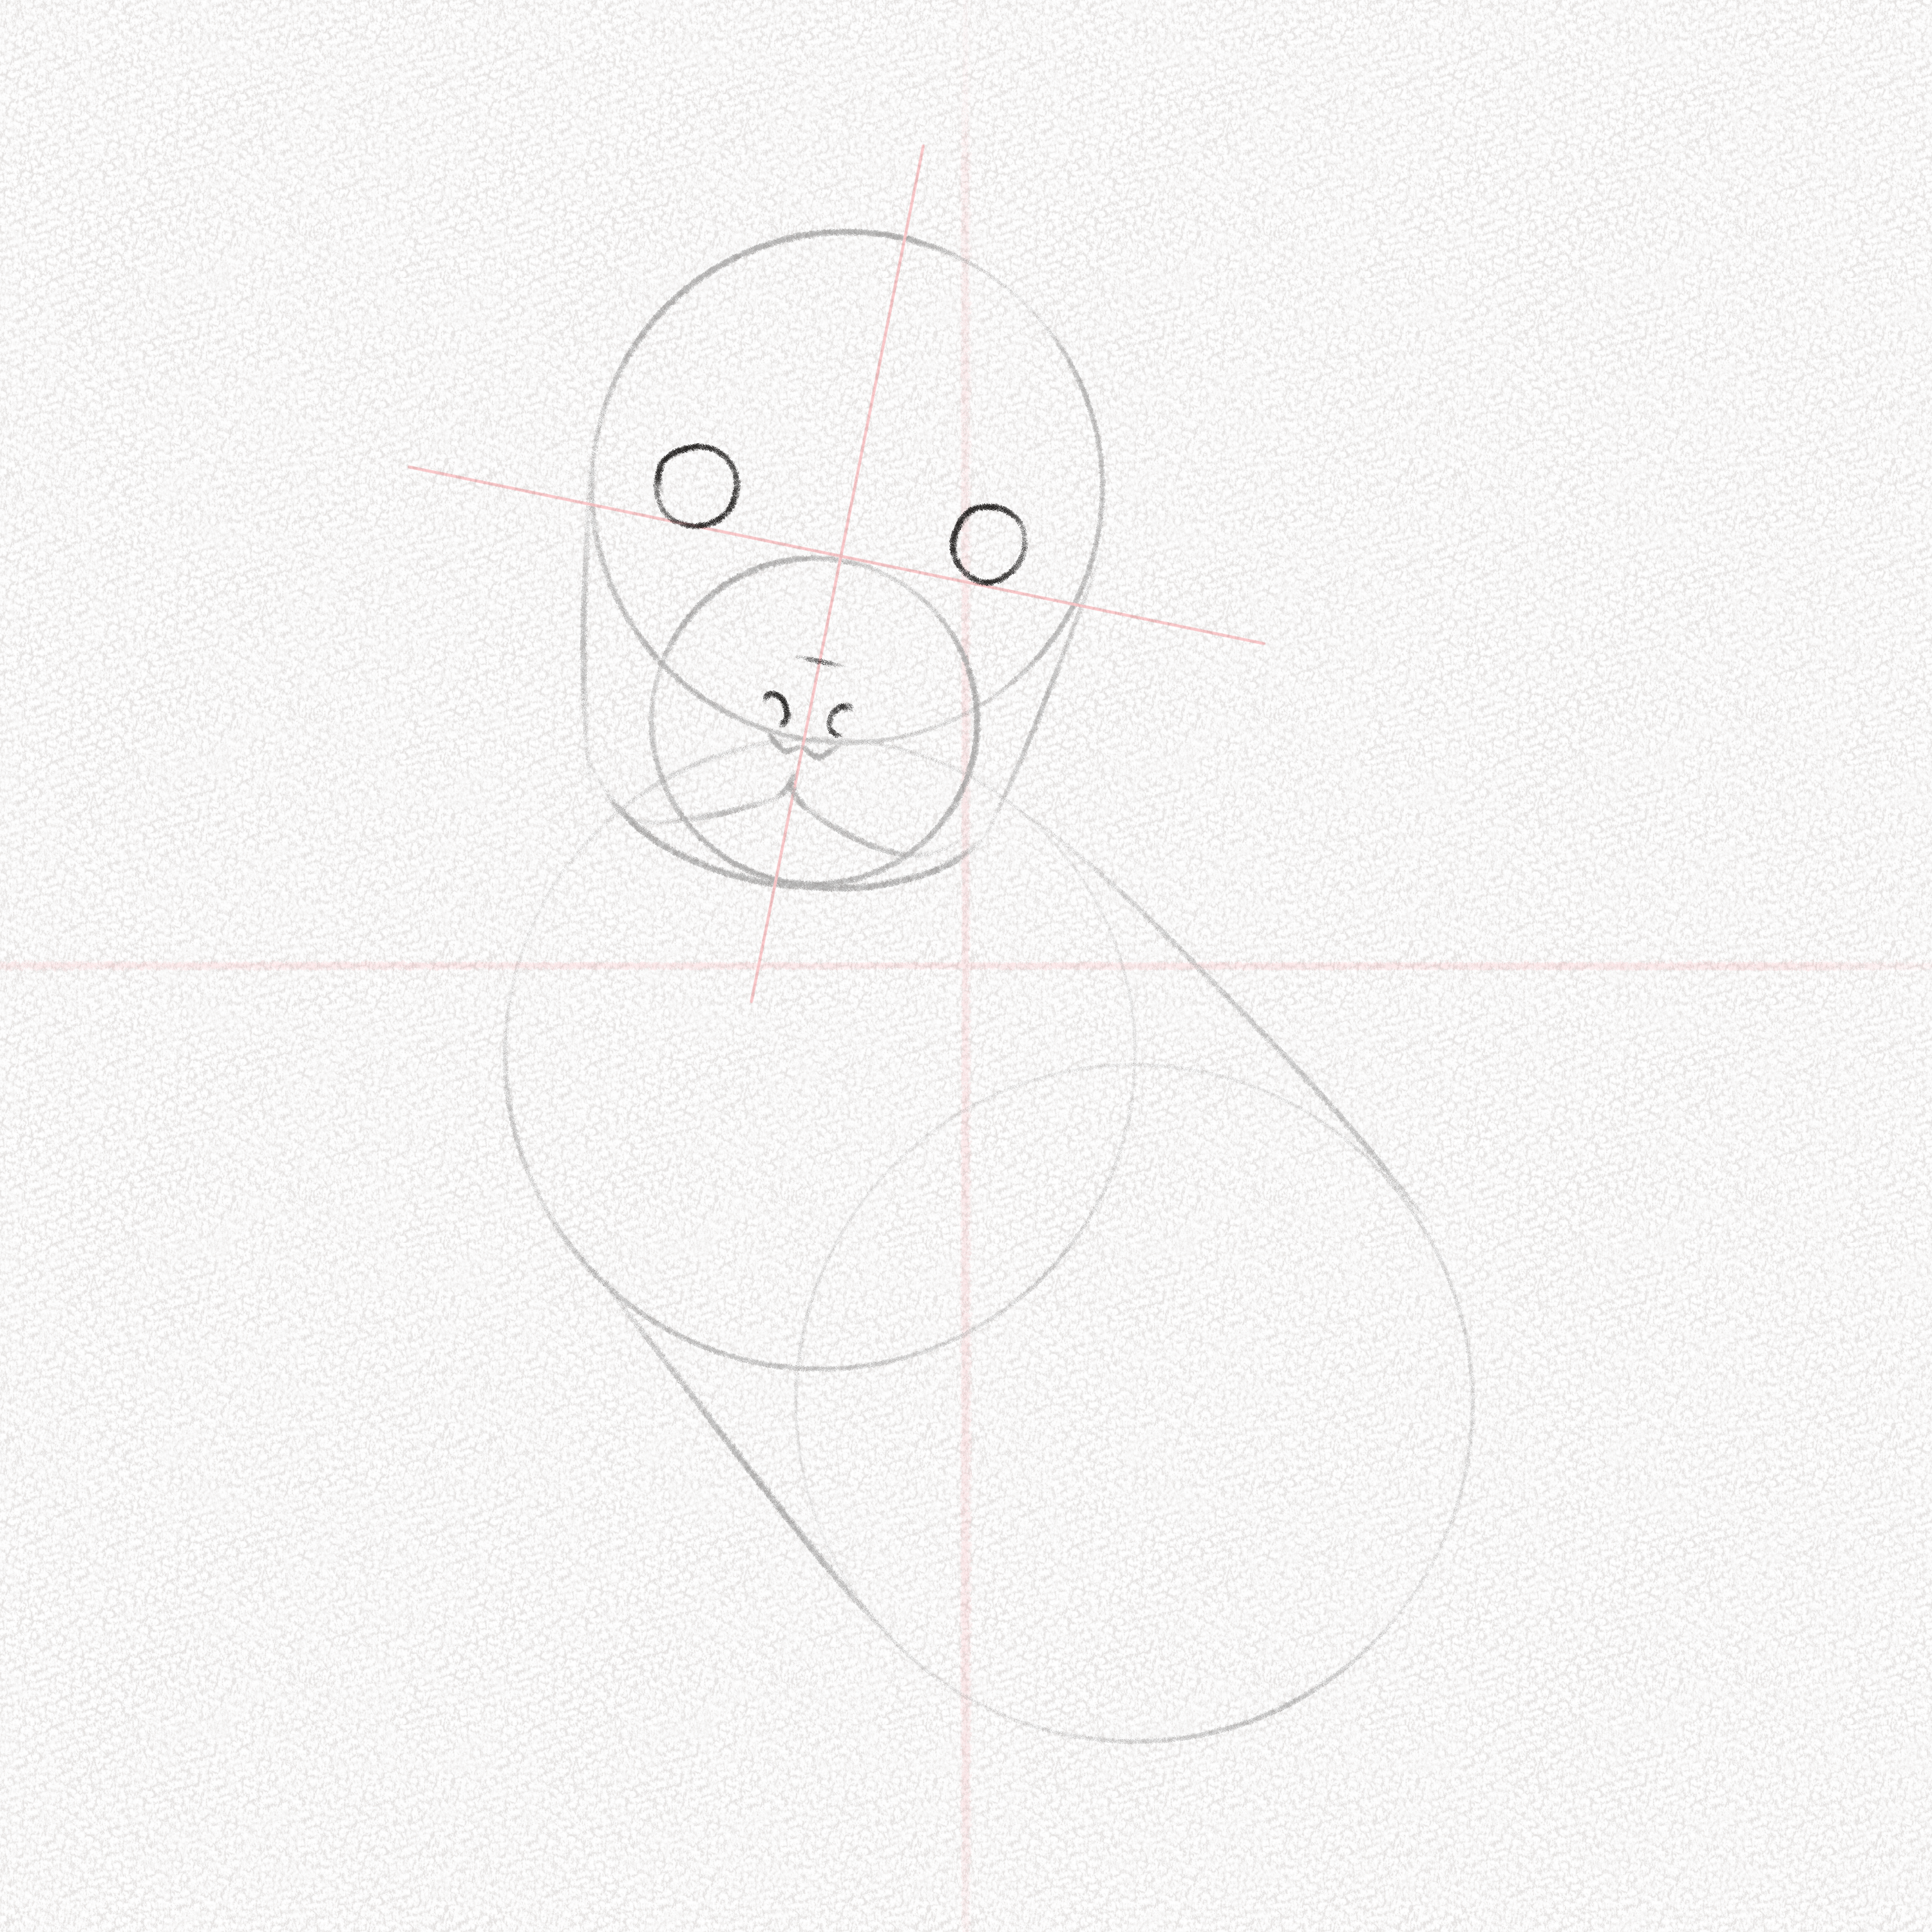
Step 14: Draw two lines
Pull two lines of the same size from the top of the puppy’s head, and at about the same angle, those will be our puppy’s ears.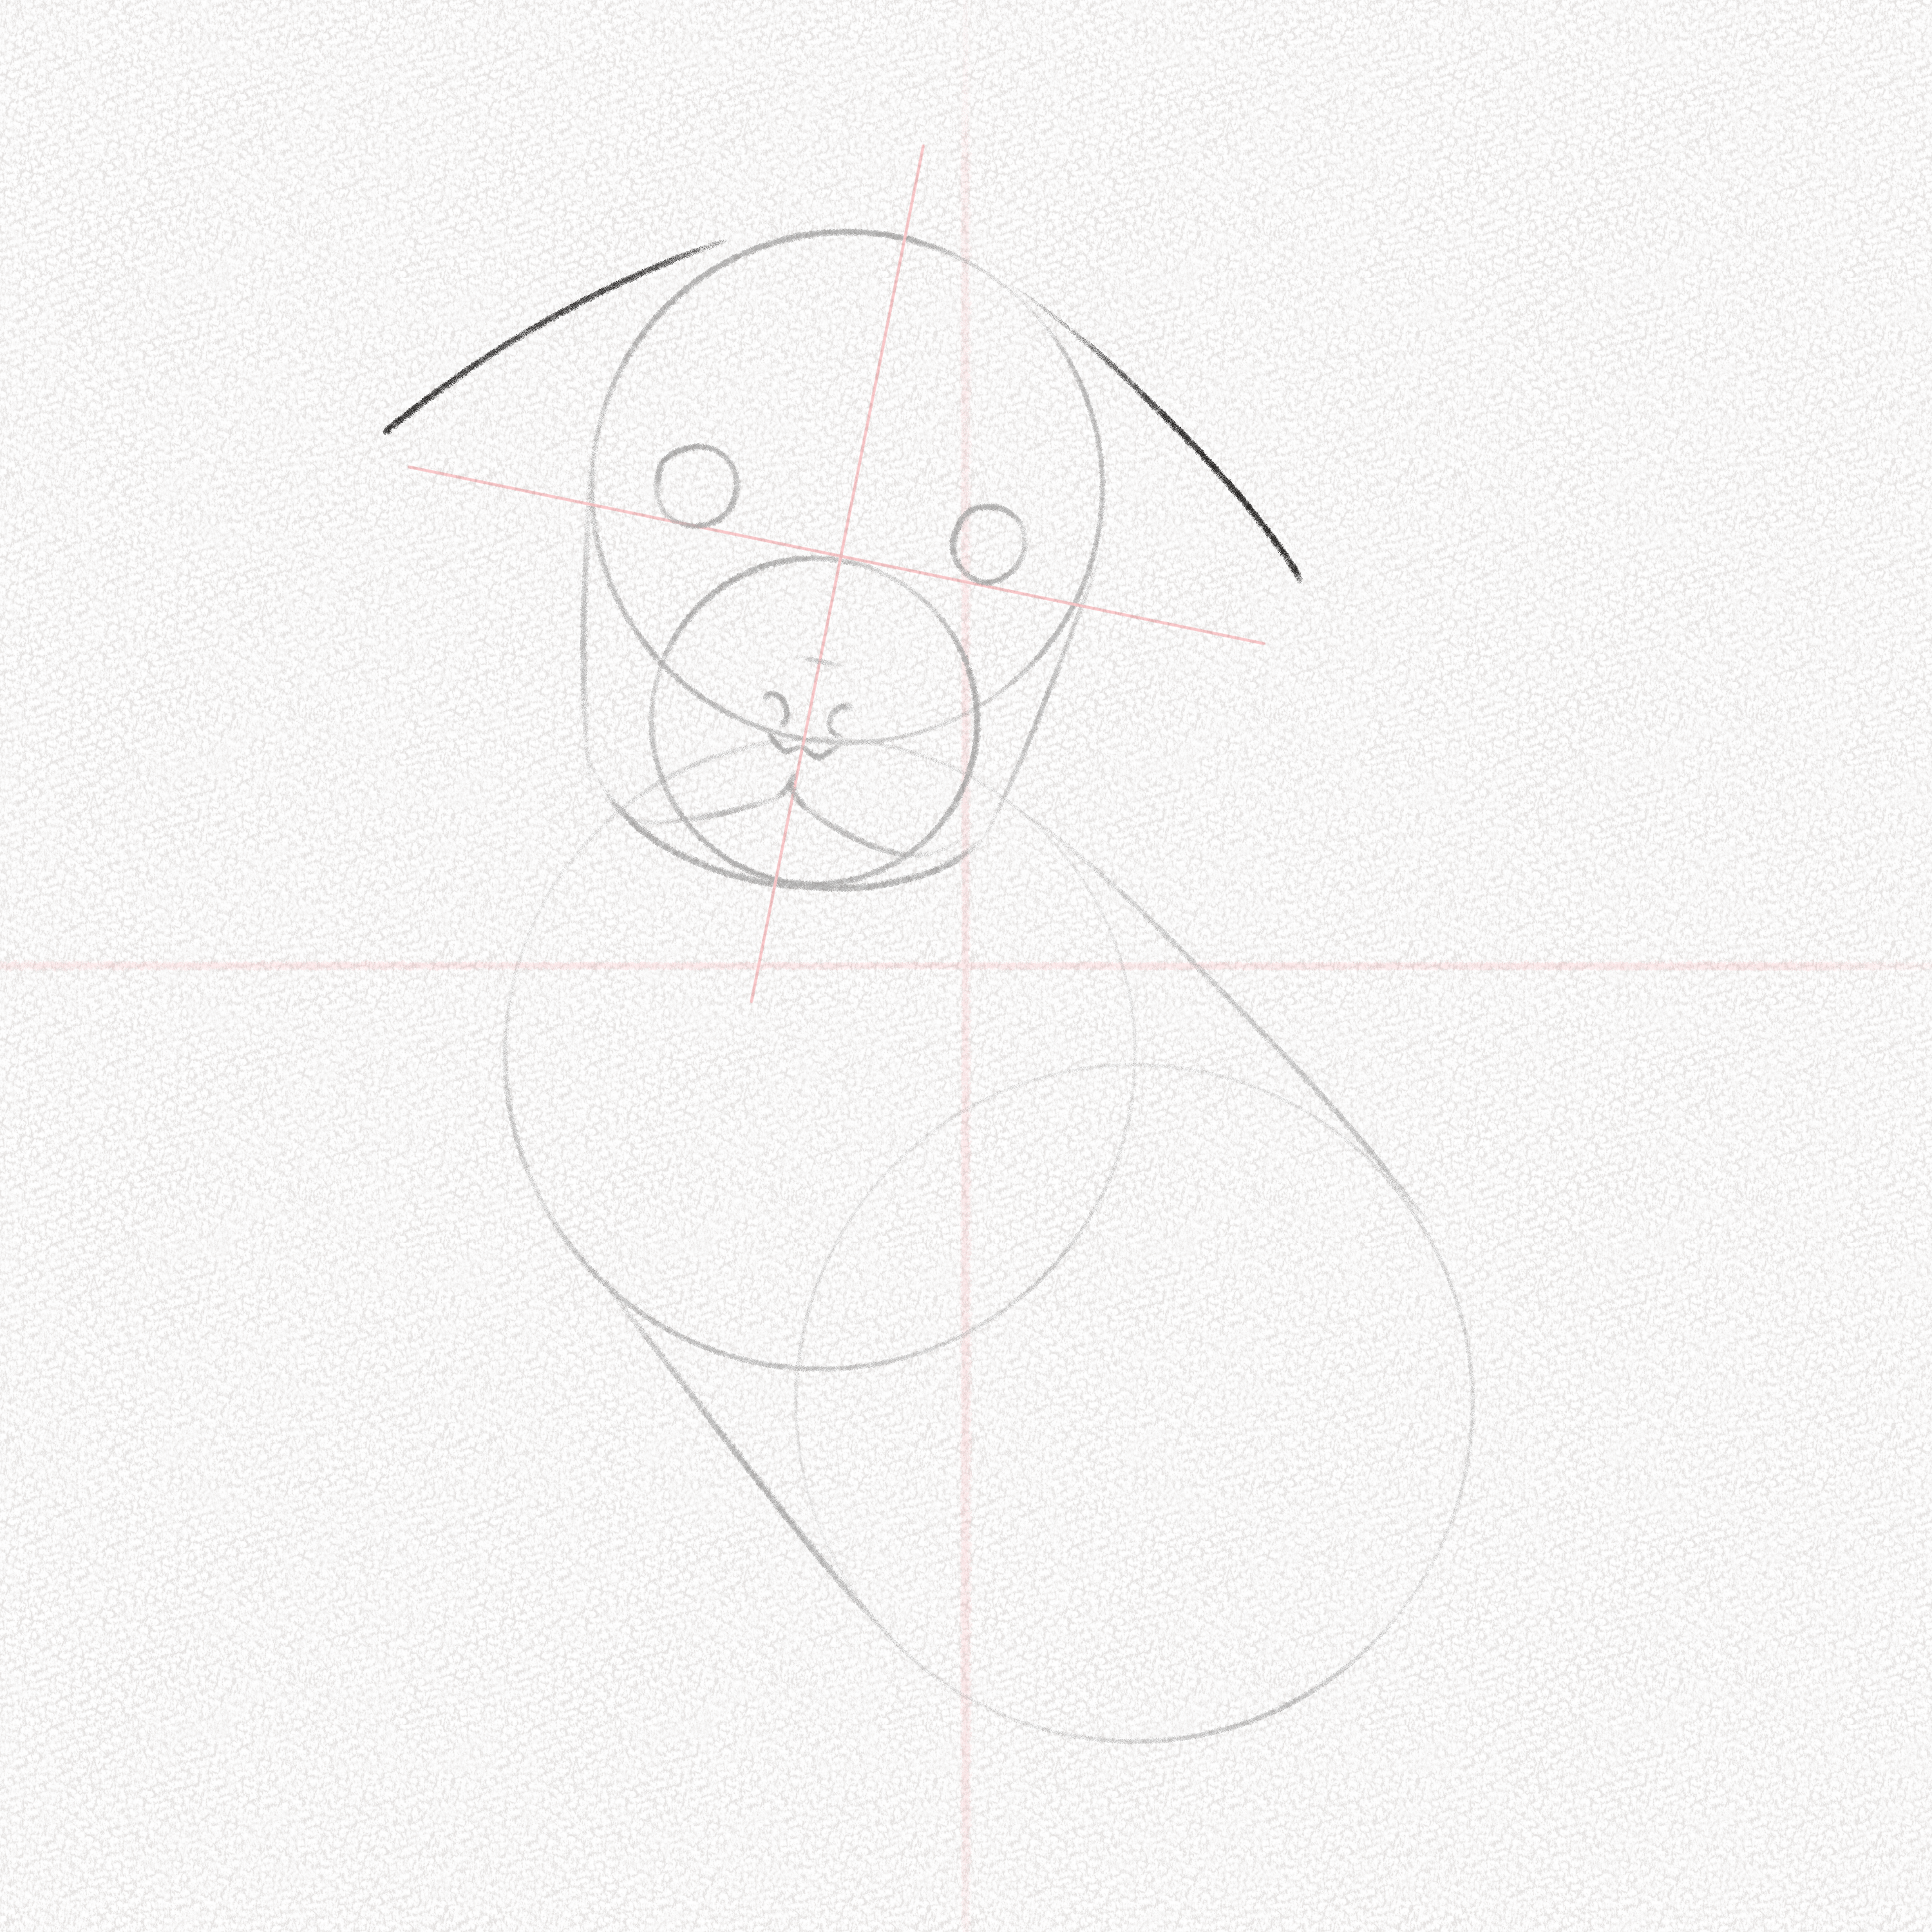
Step 15: Complete the ears
Pull two curved lines from the sides of the face towards the lines you drew in the previous step, completing the ears’ shape.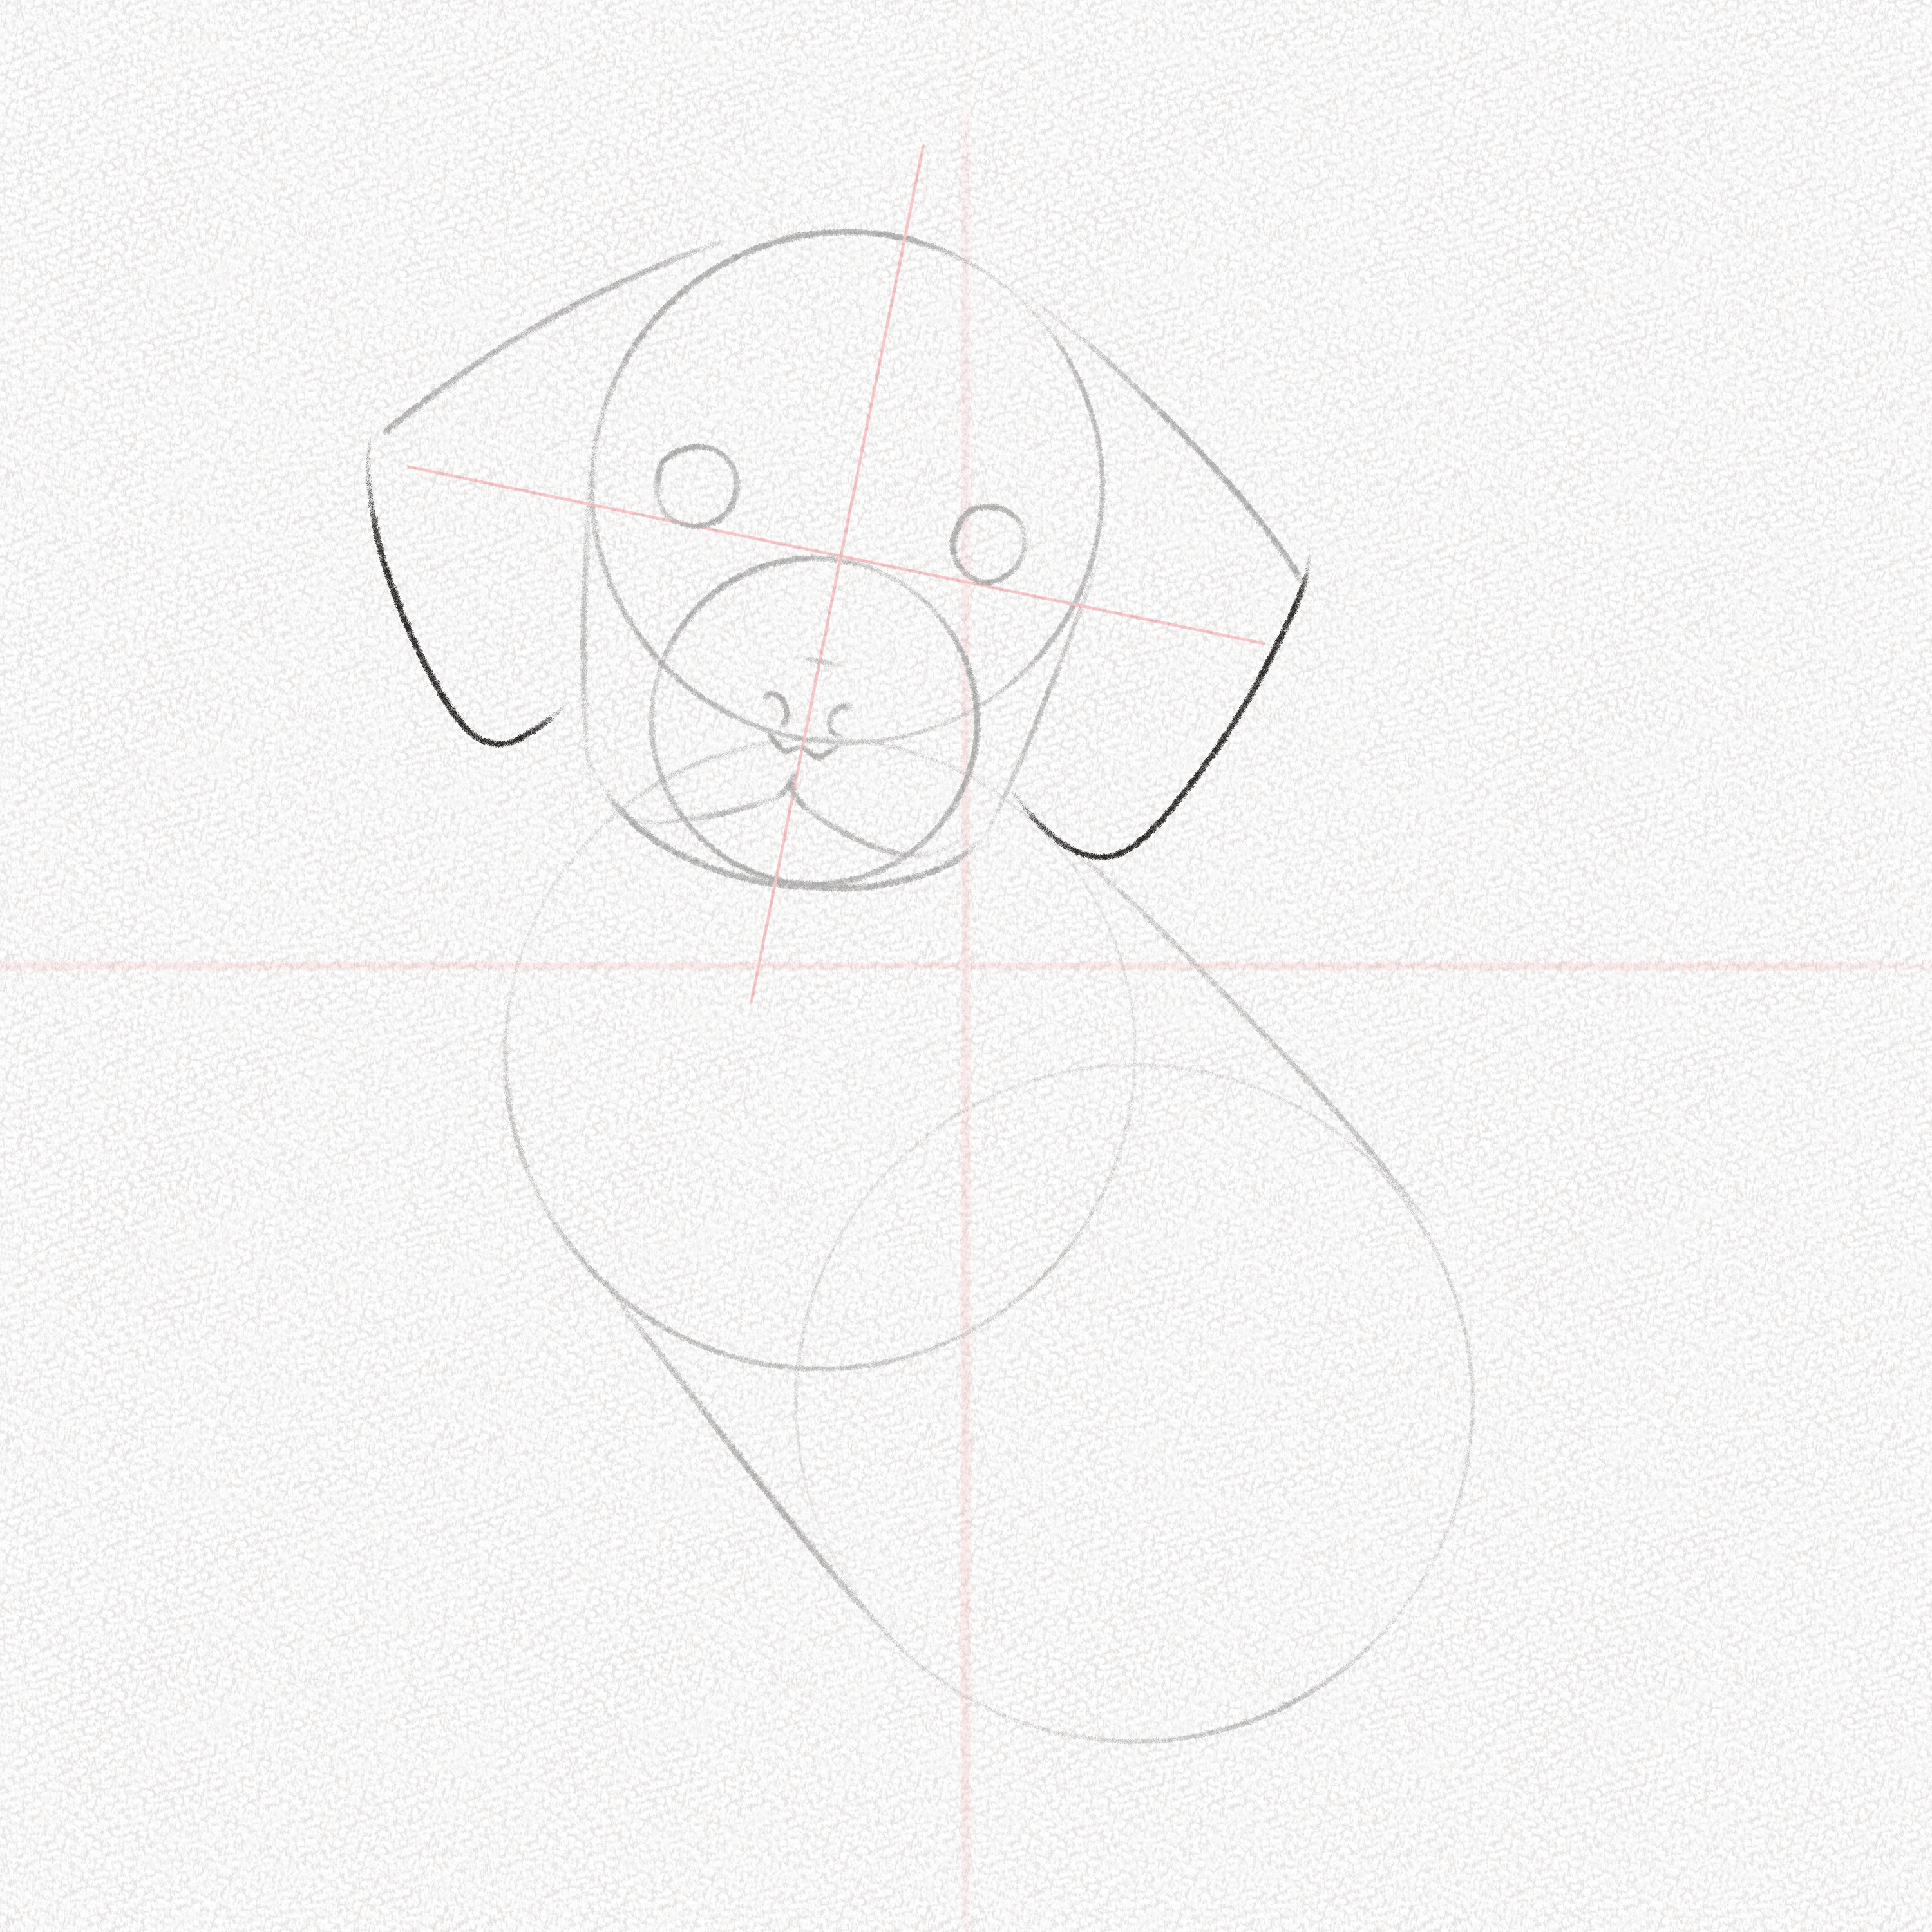
Step 16: Draw the legs’ structure
Draw the front’s legs structure using two lines and a bean-like shape. 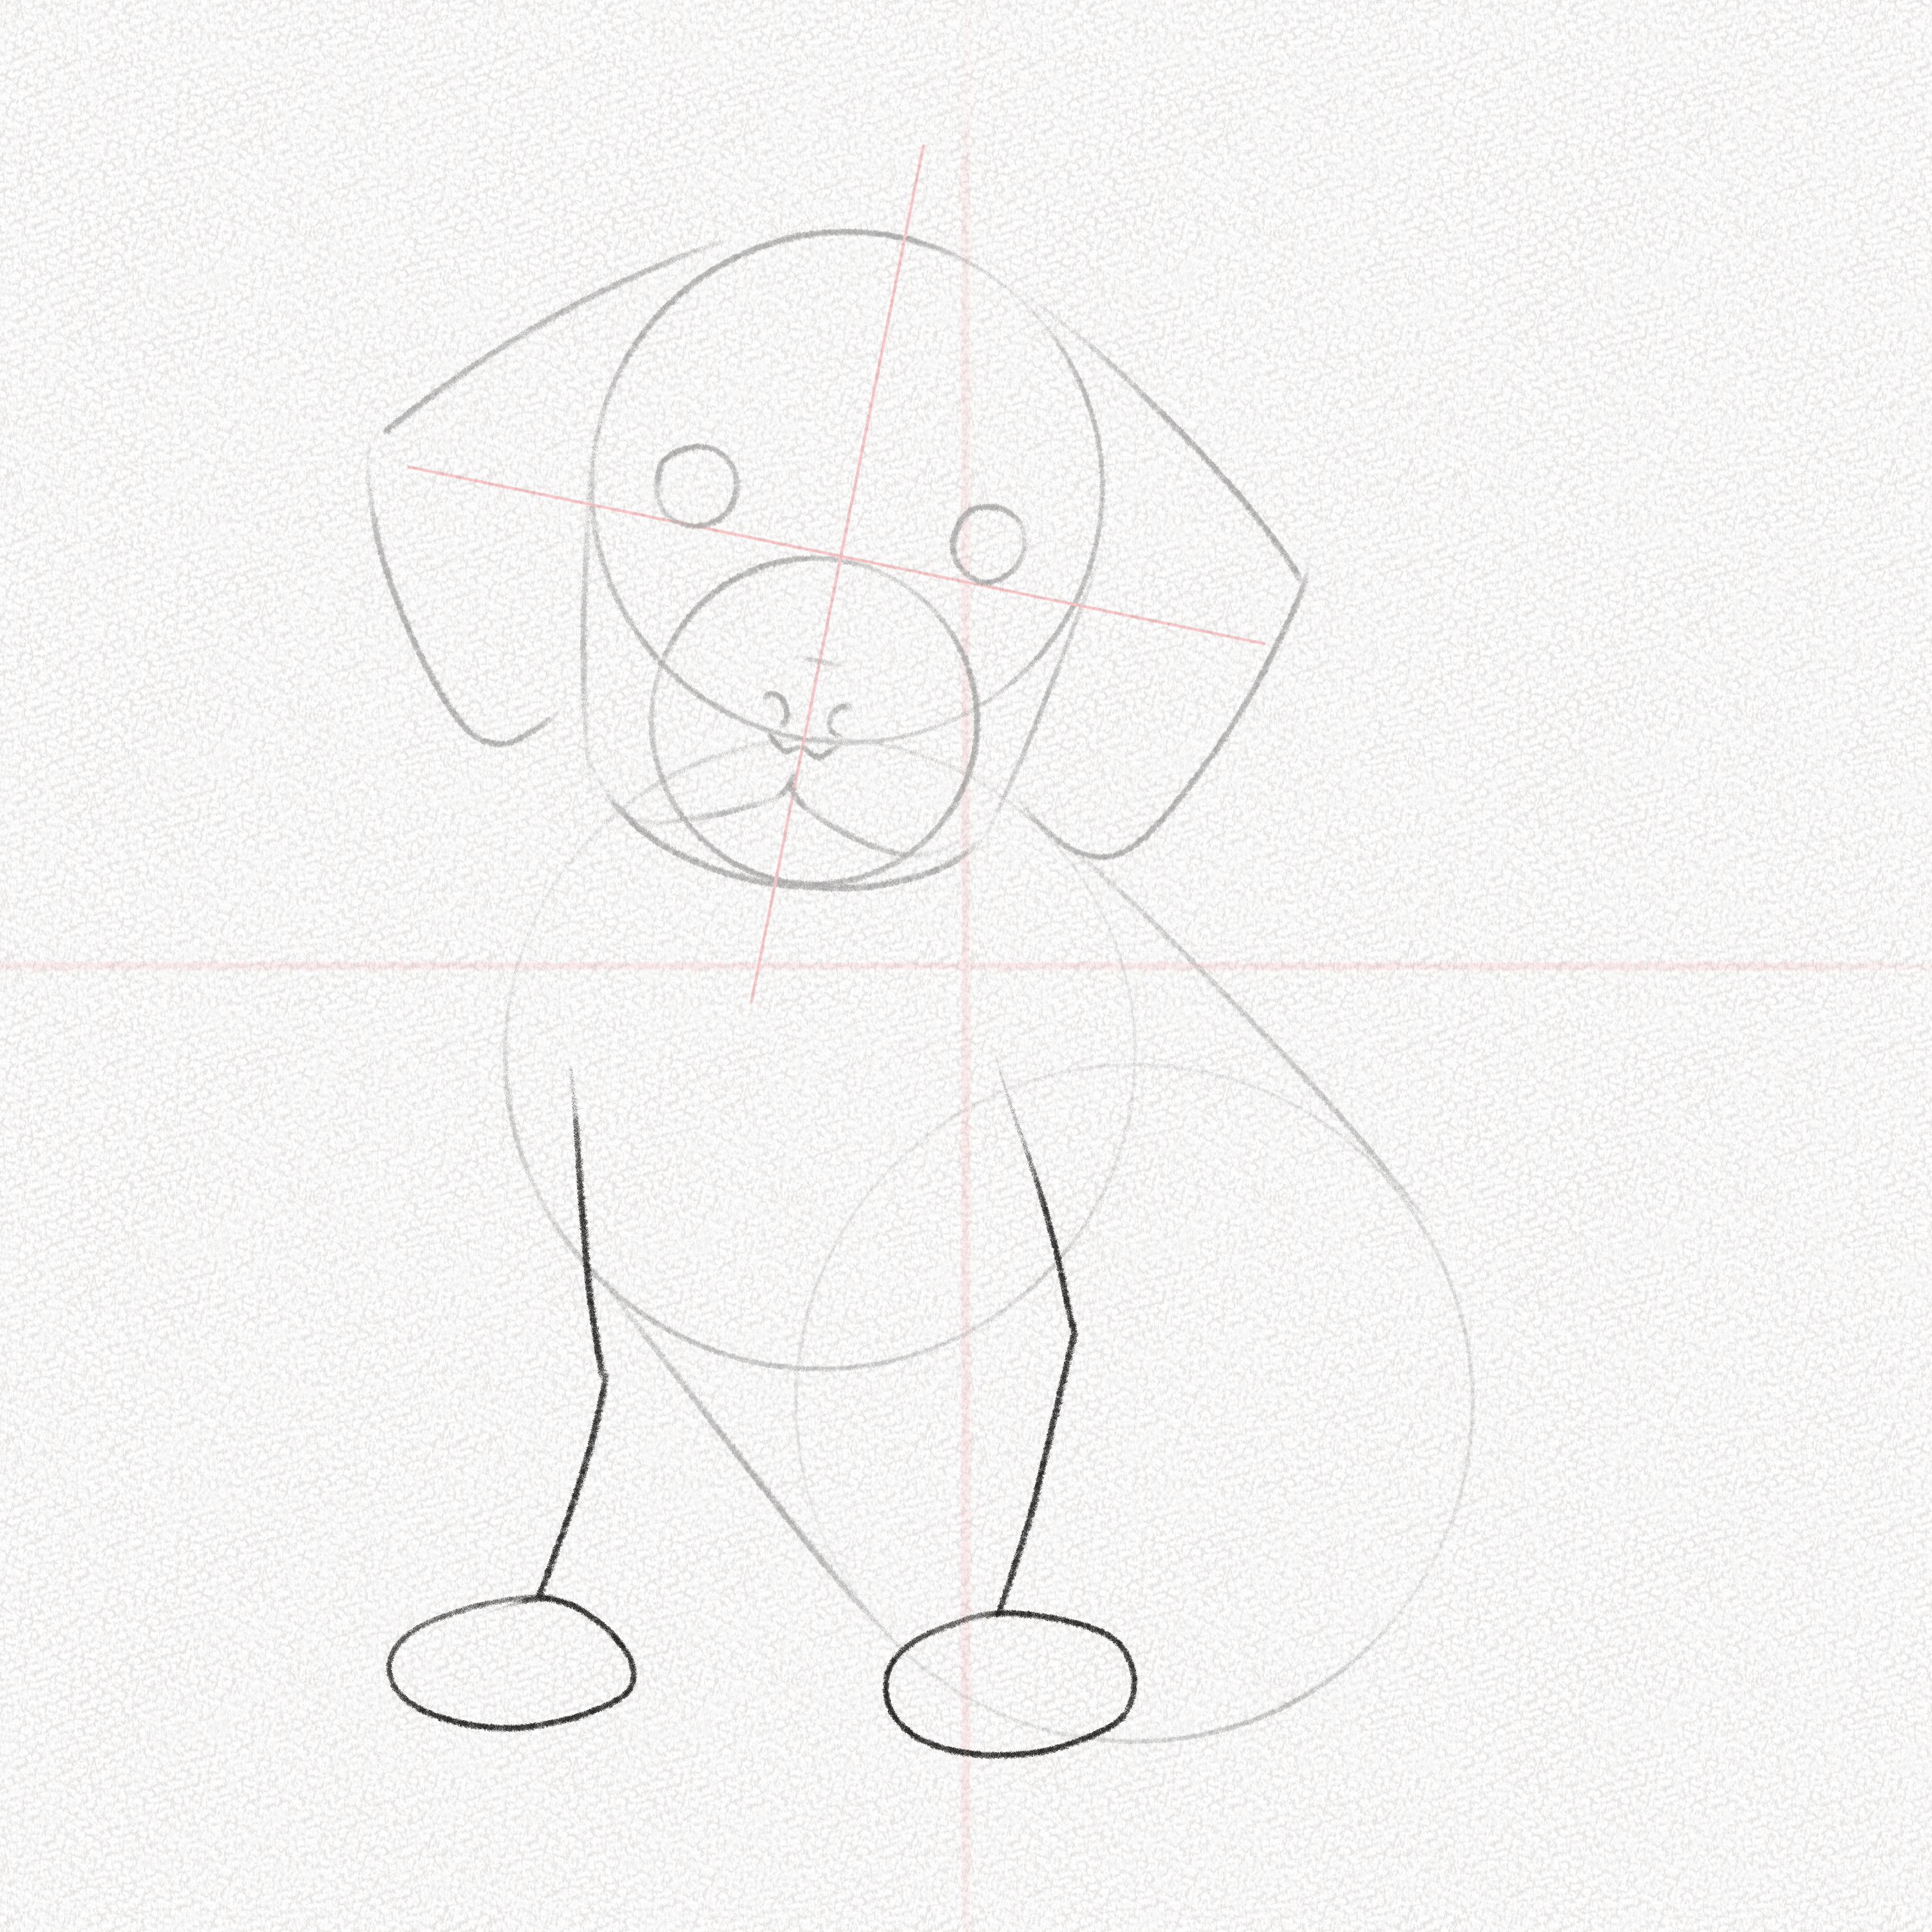
Step 17: Draw the back legs’ structure
Since our puppy will be sitting, draw the visible thigh outline and another bean for the back paw, do the same for the other leg, but remember that it will be hidden since the body overlaps the leg, so draw only the visible parts.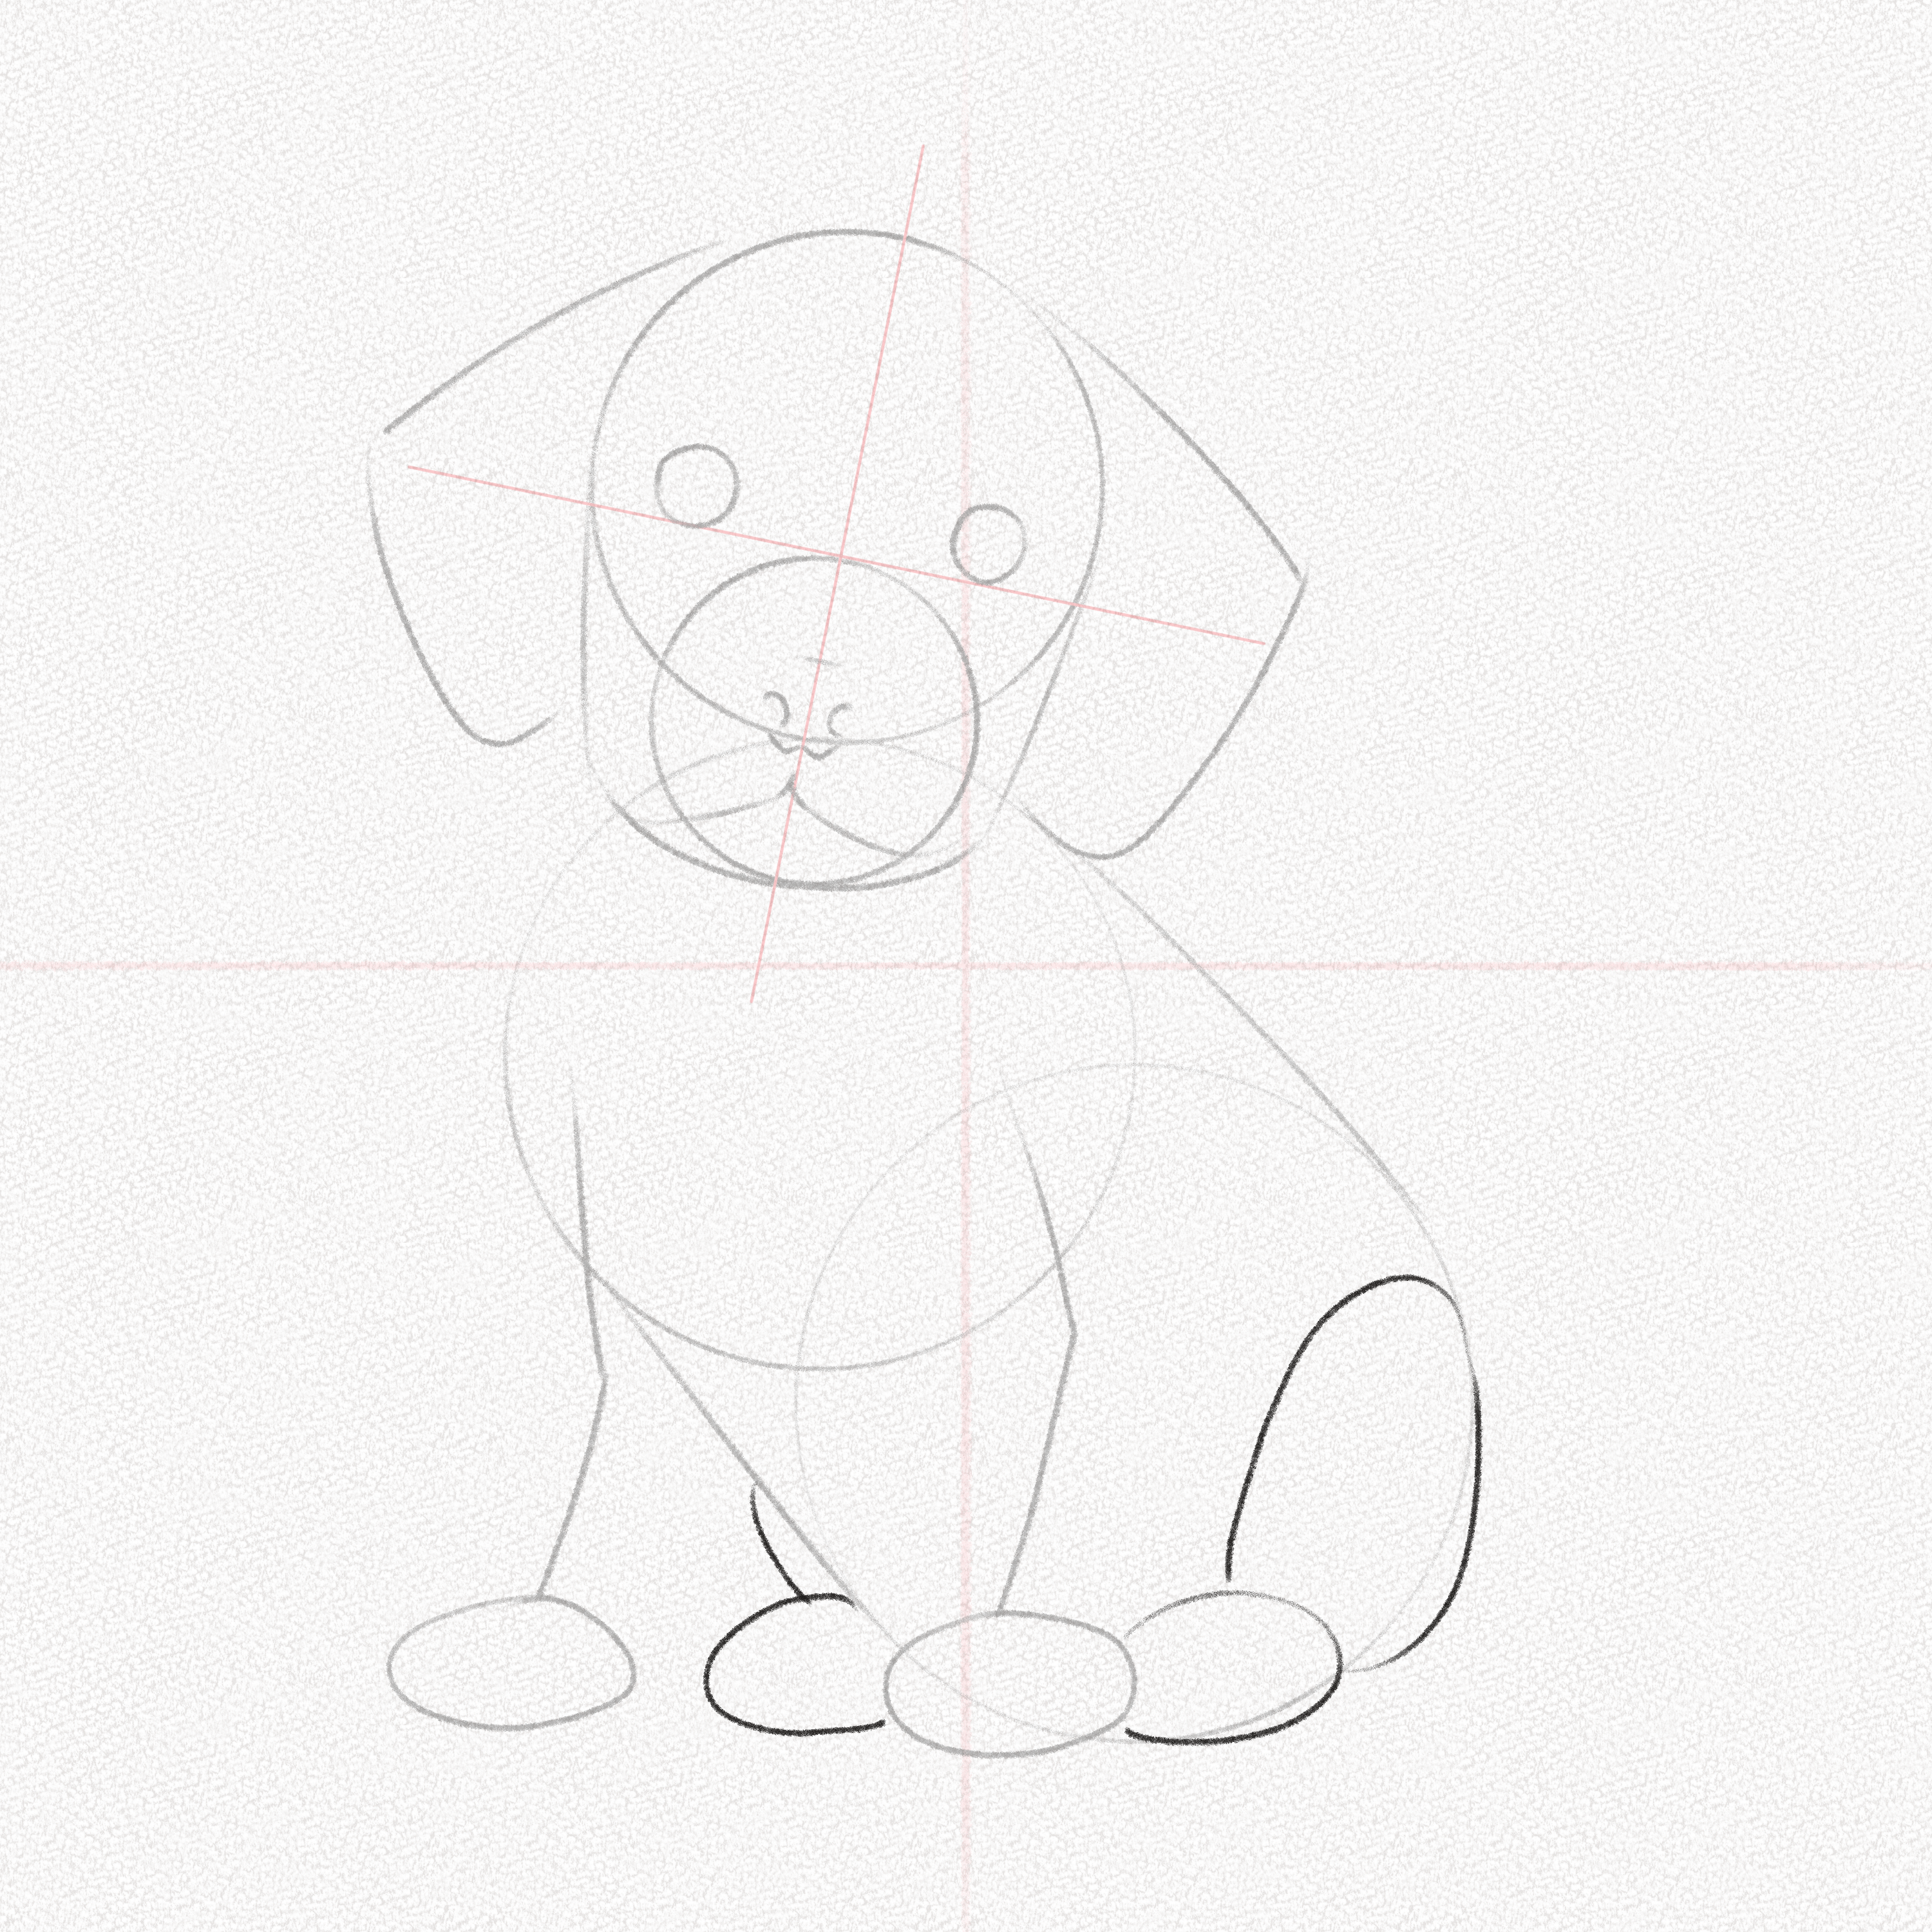
Step 18: Draw the tail
Draw a small tail coming from the back of our puppy. 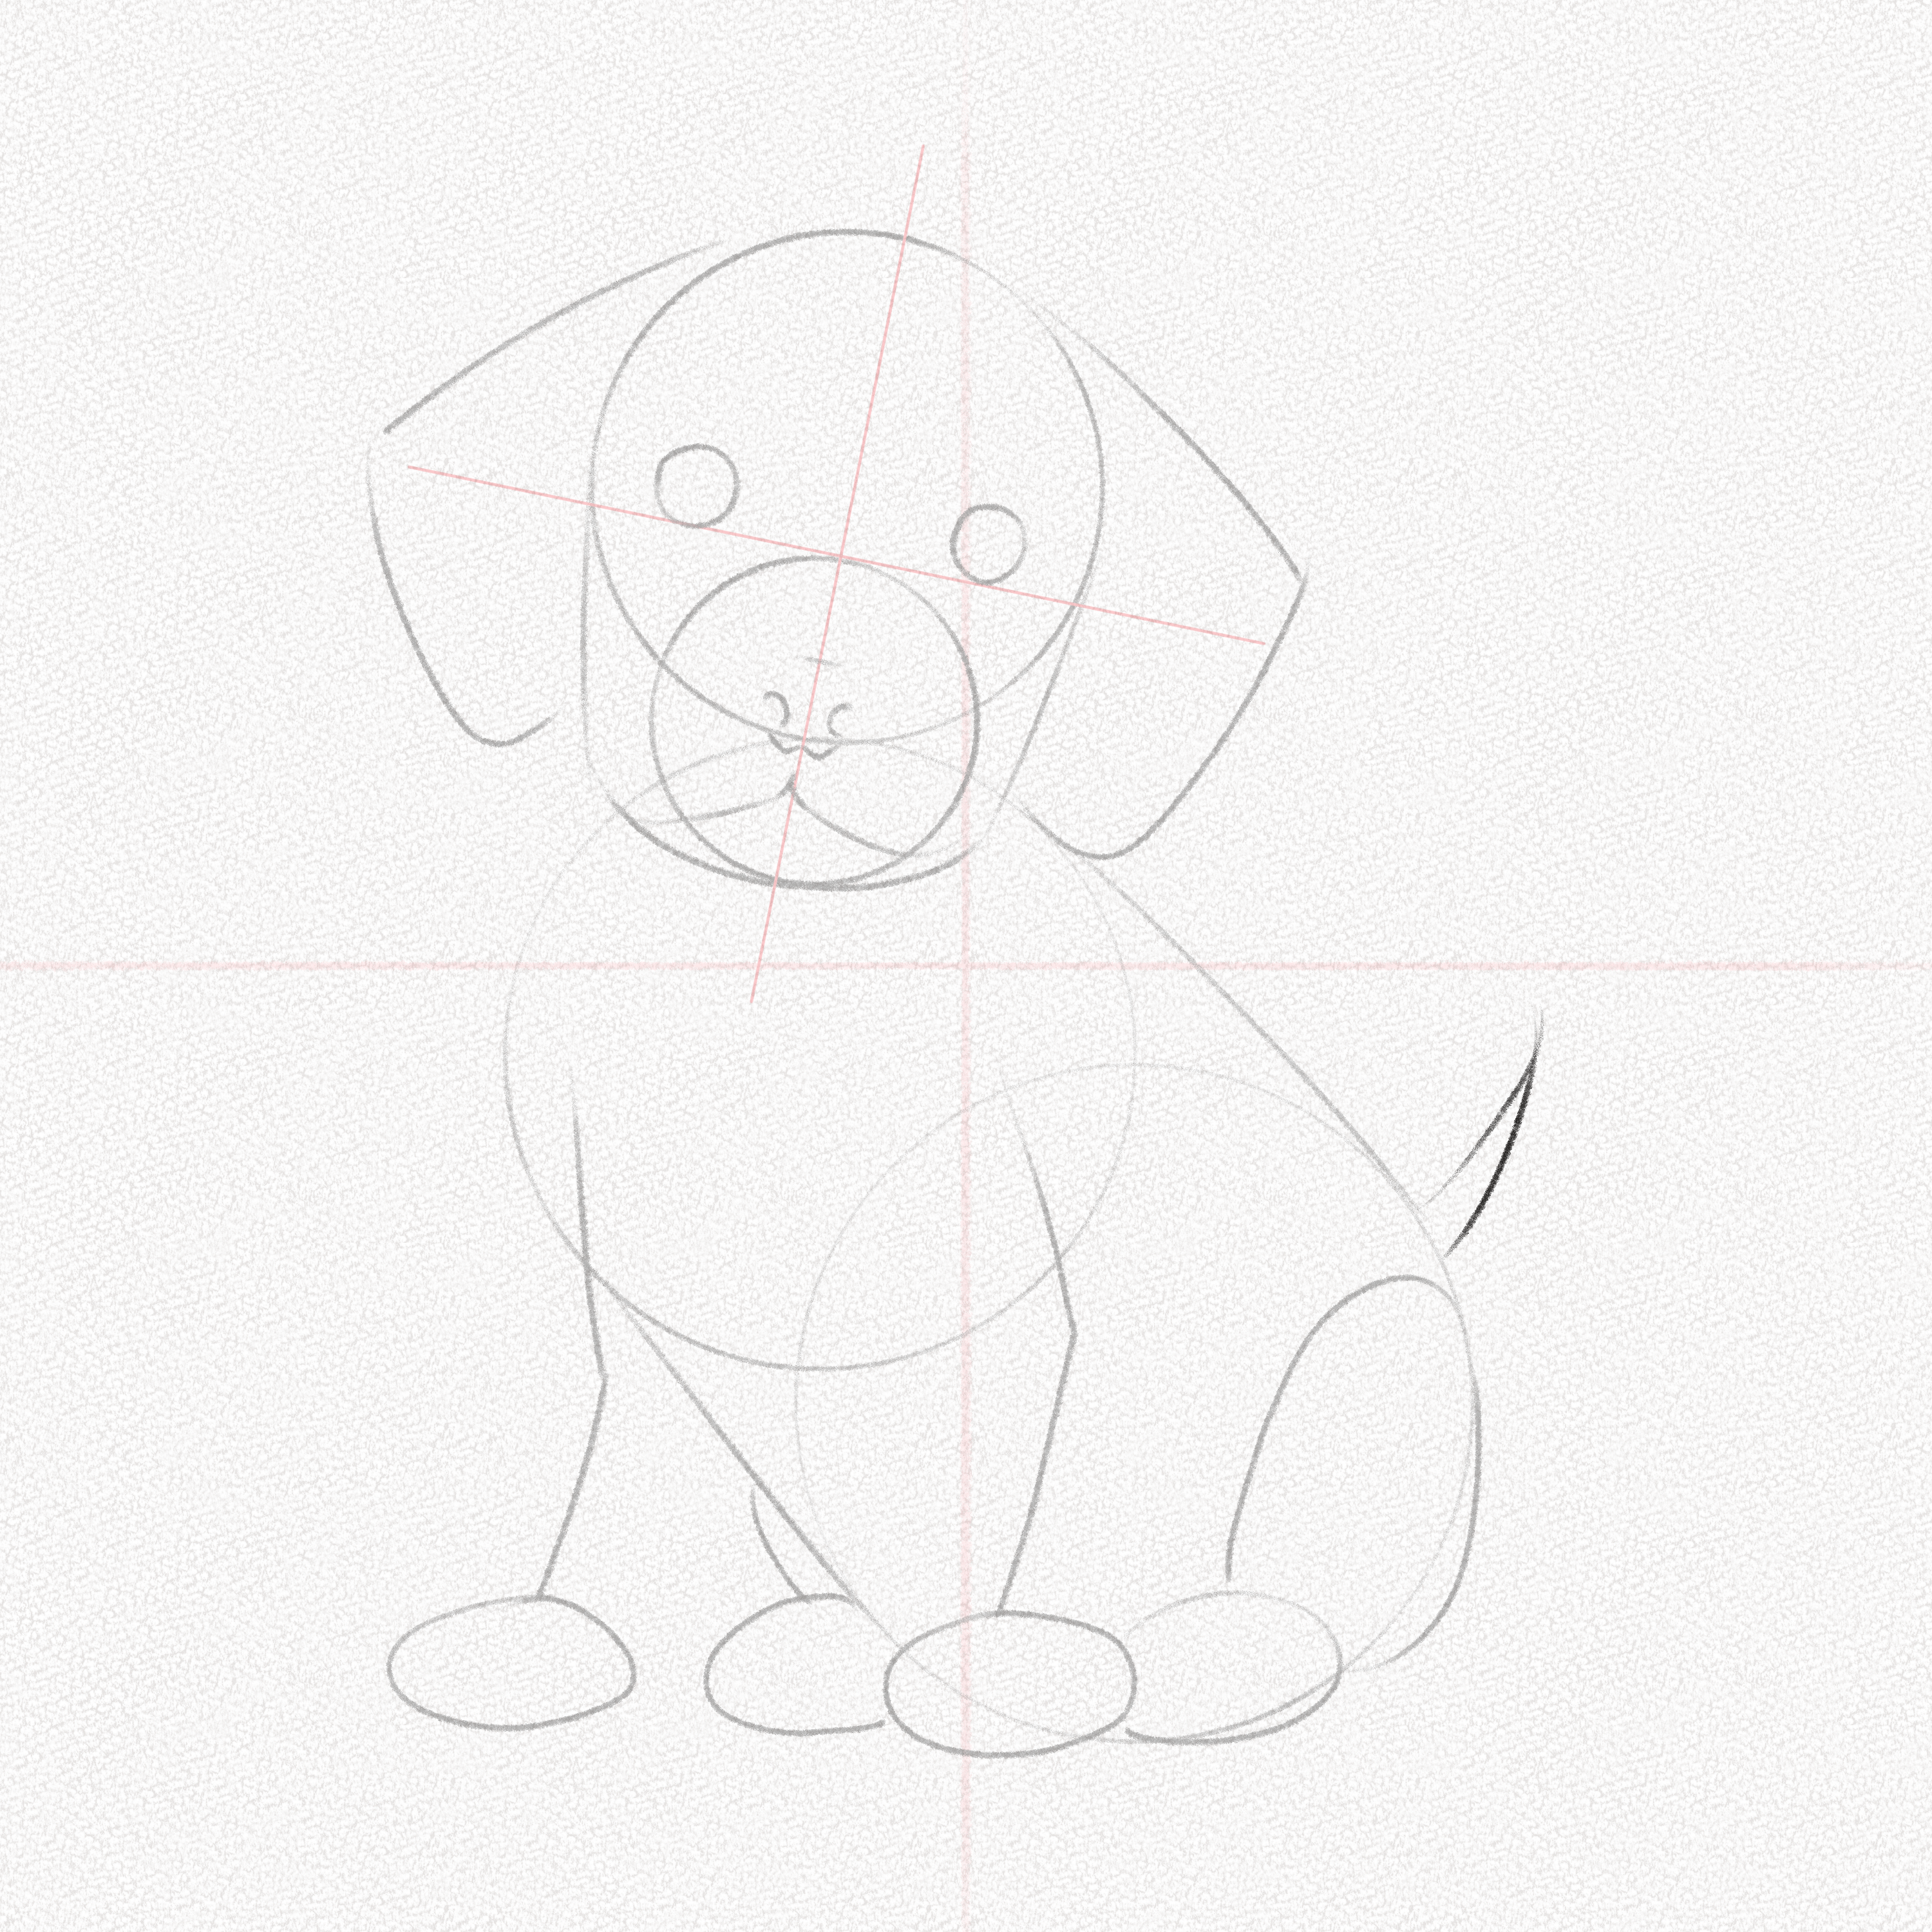
Step 19: Complete the front legs structure
Puppies’ legs are thicker in comparison to their grown-up versions, so make sure to draw thick blocks representing the legs. 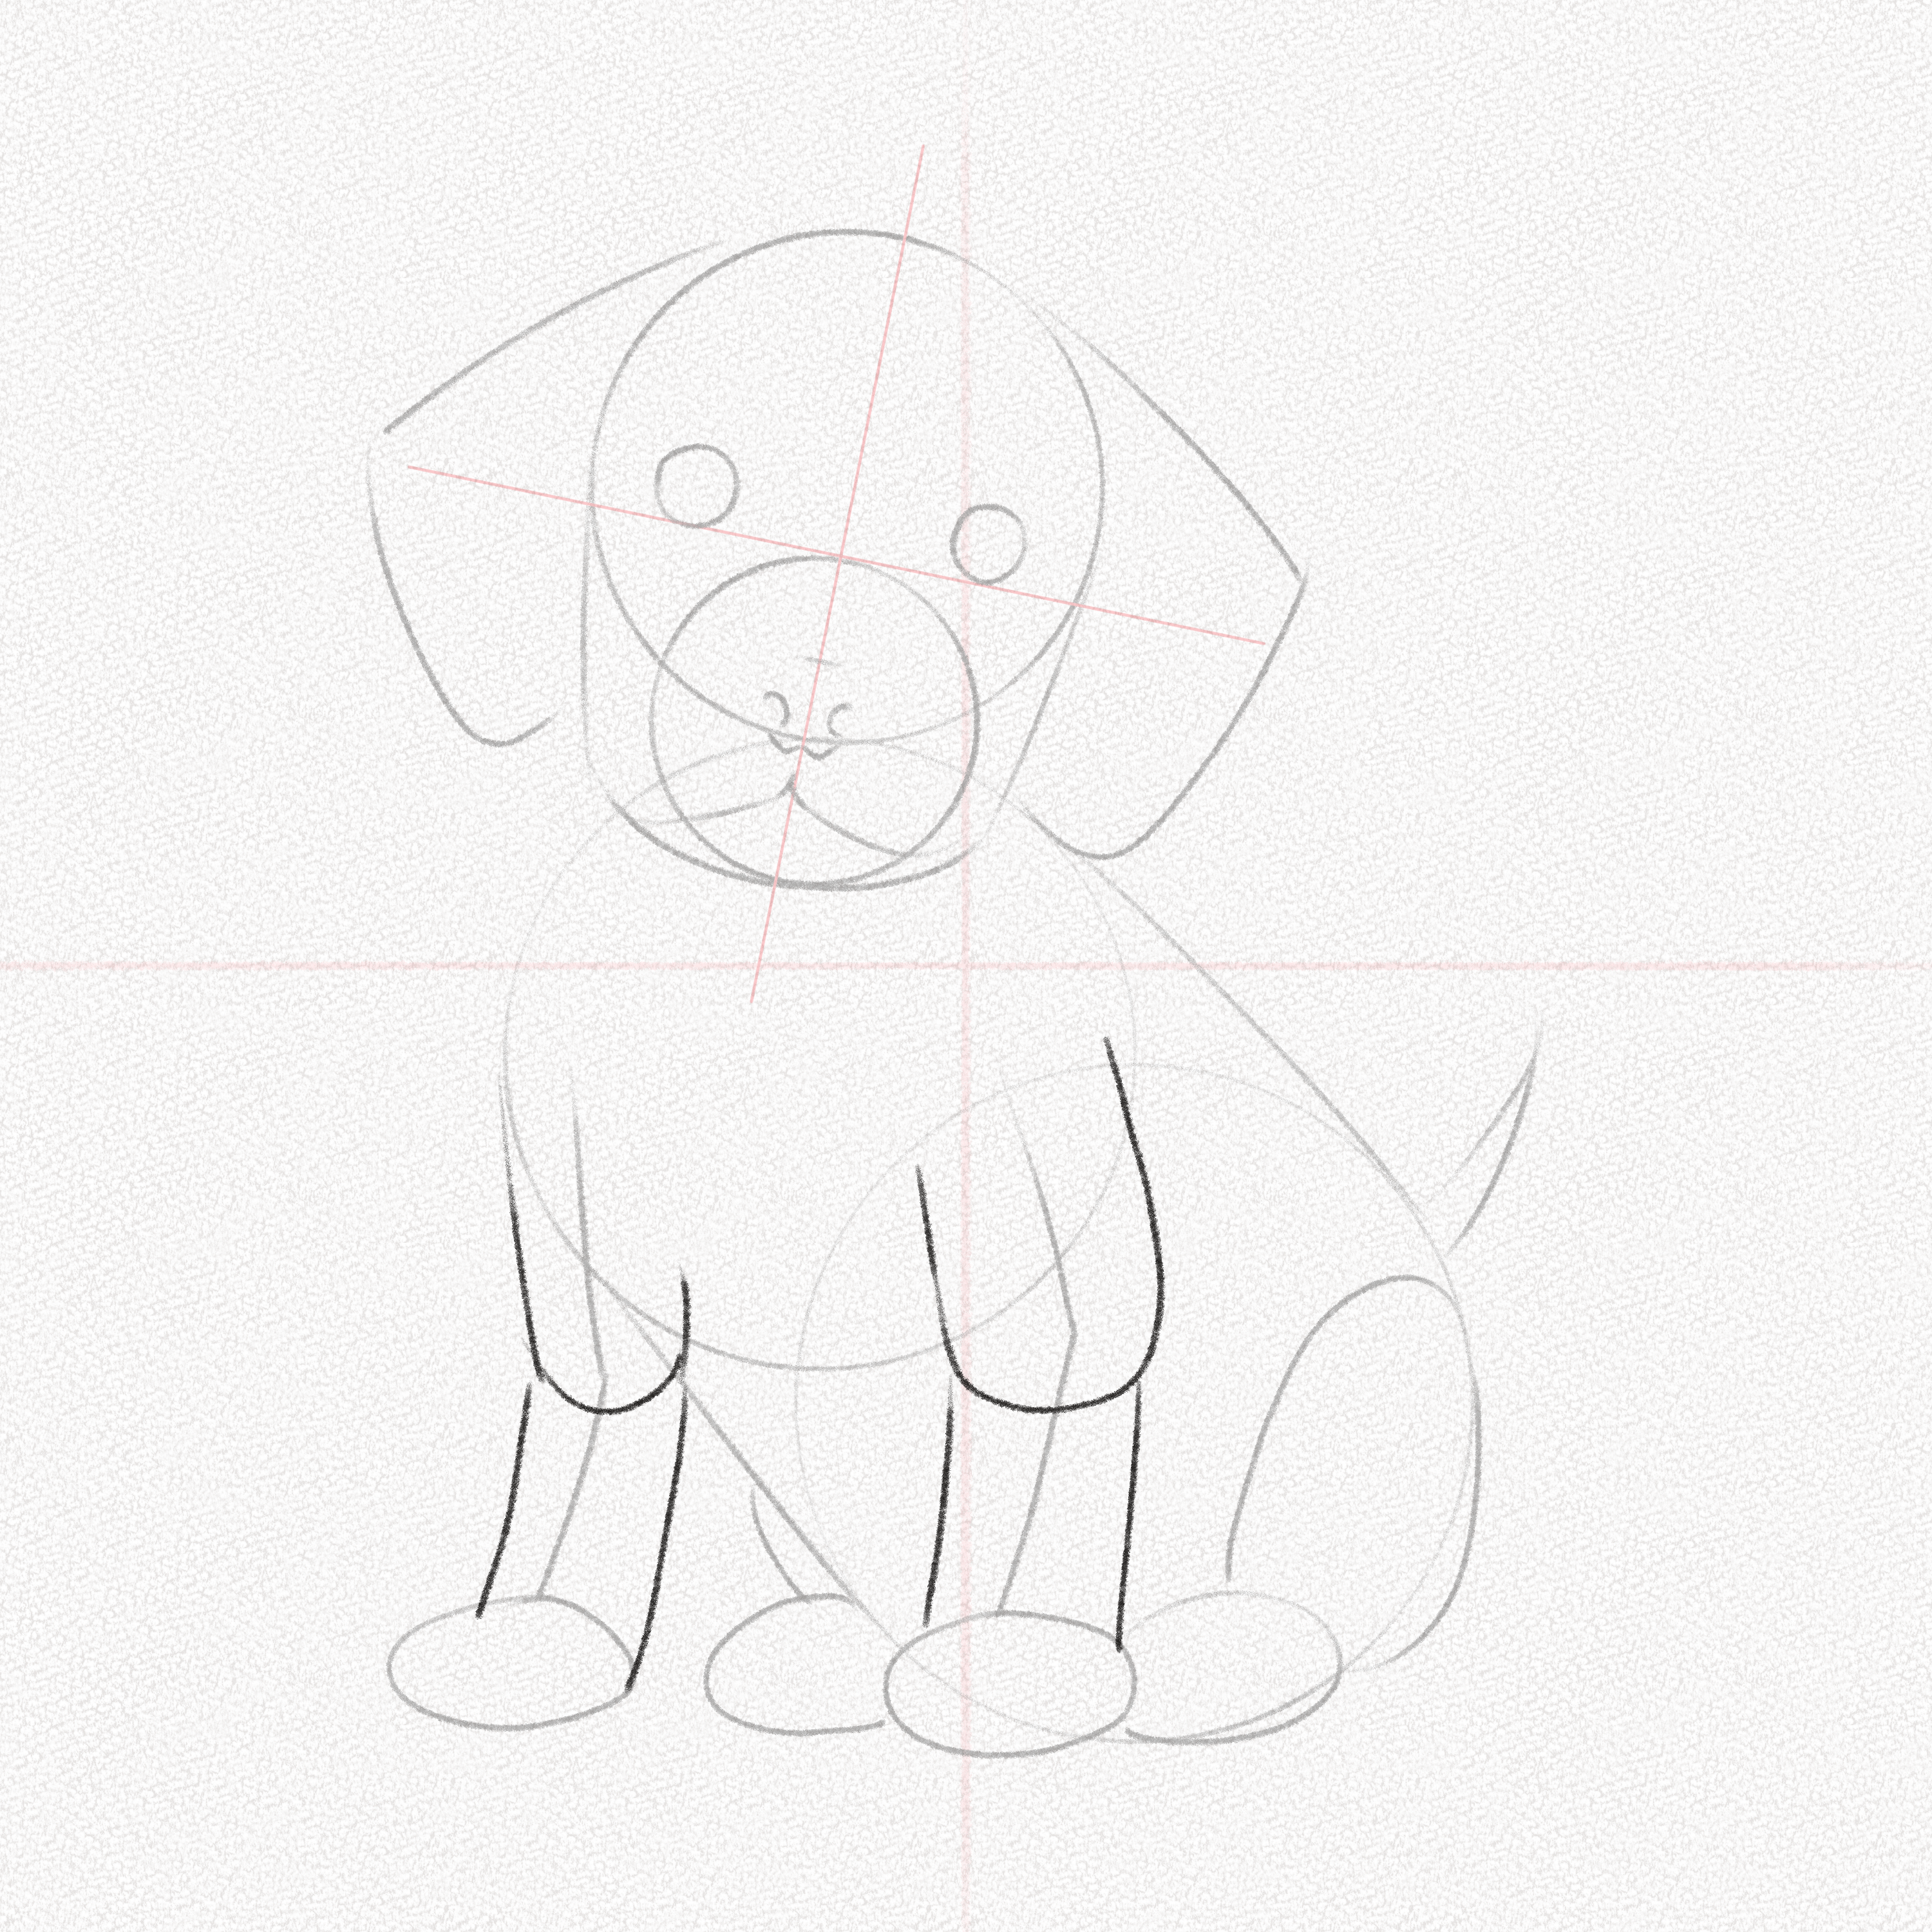
Step 15: Complete the nose and eyes
Complete the nose’s shape and draw the eyelids and pupils. Draw the separations in the paws as well. 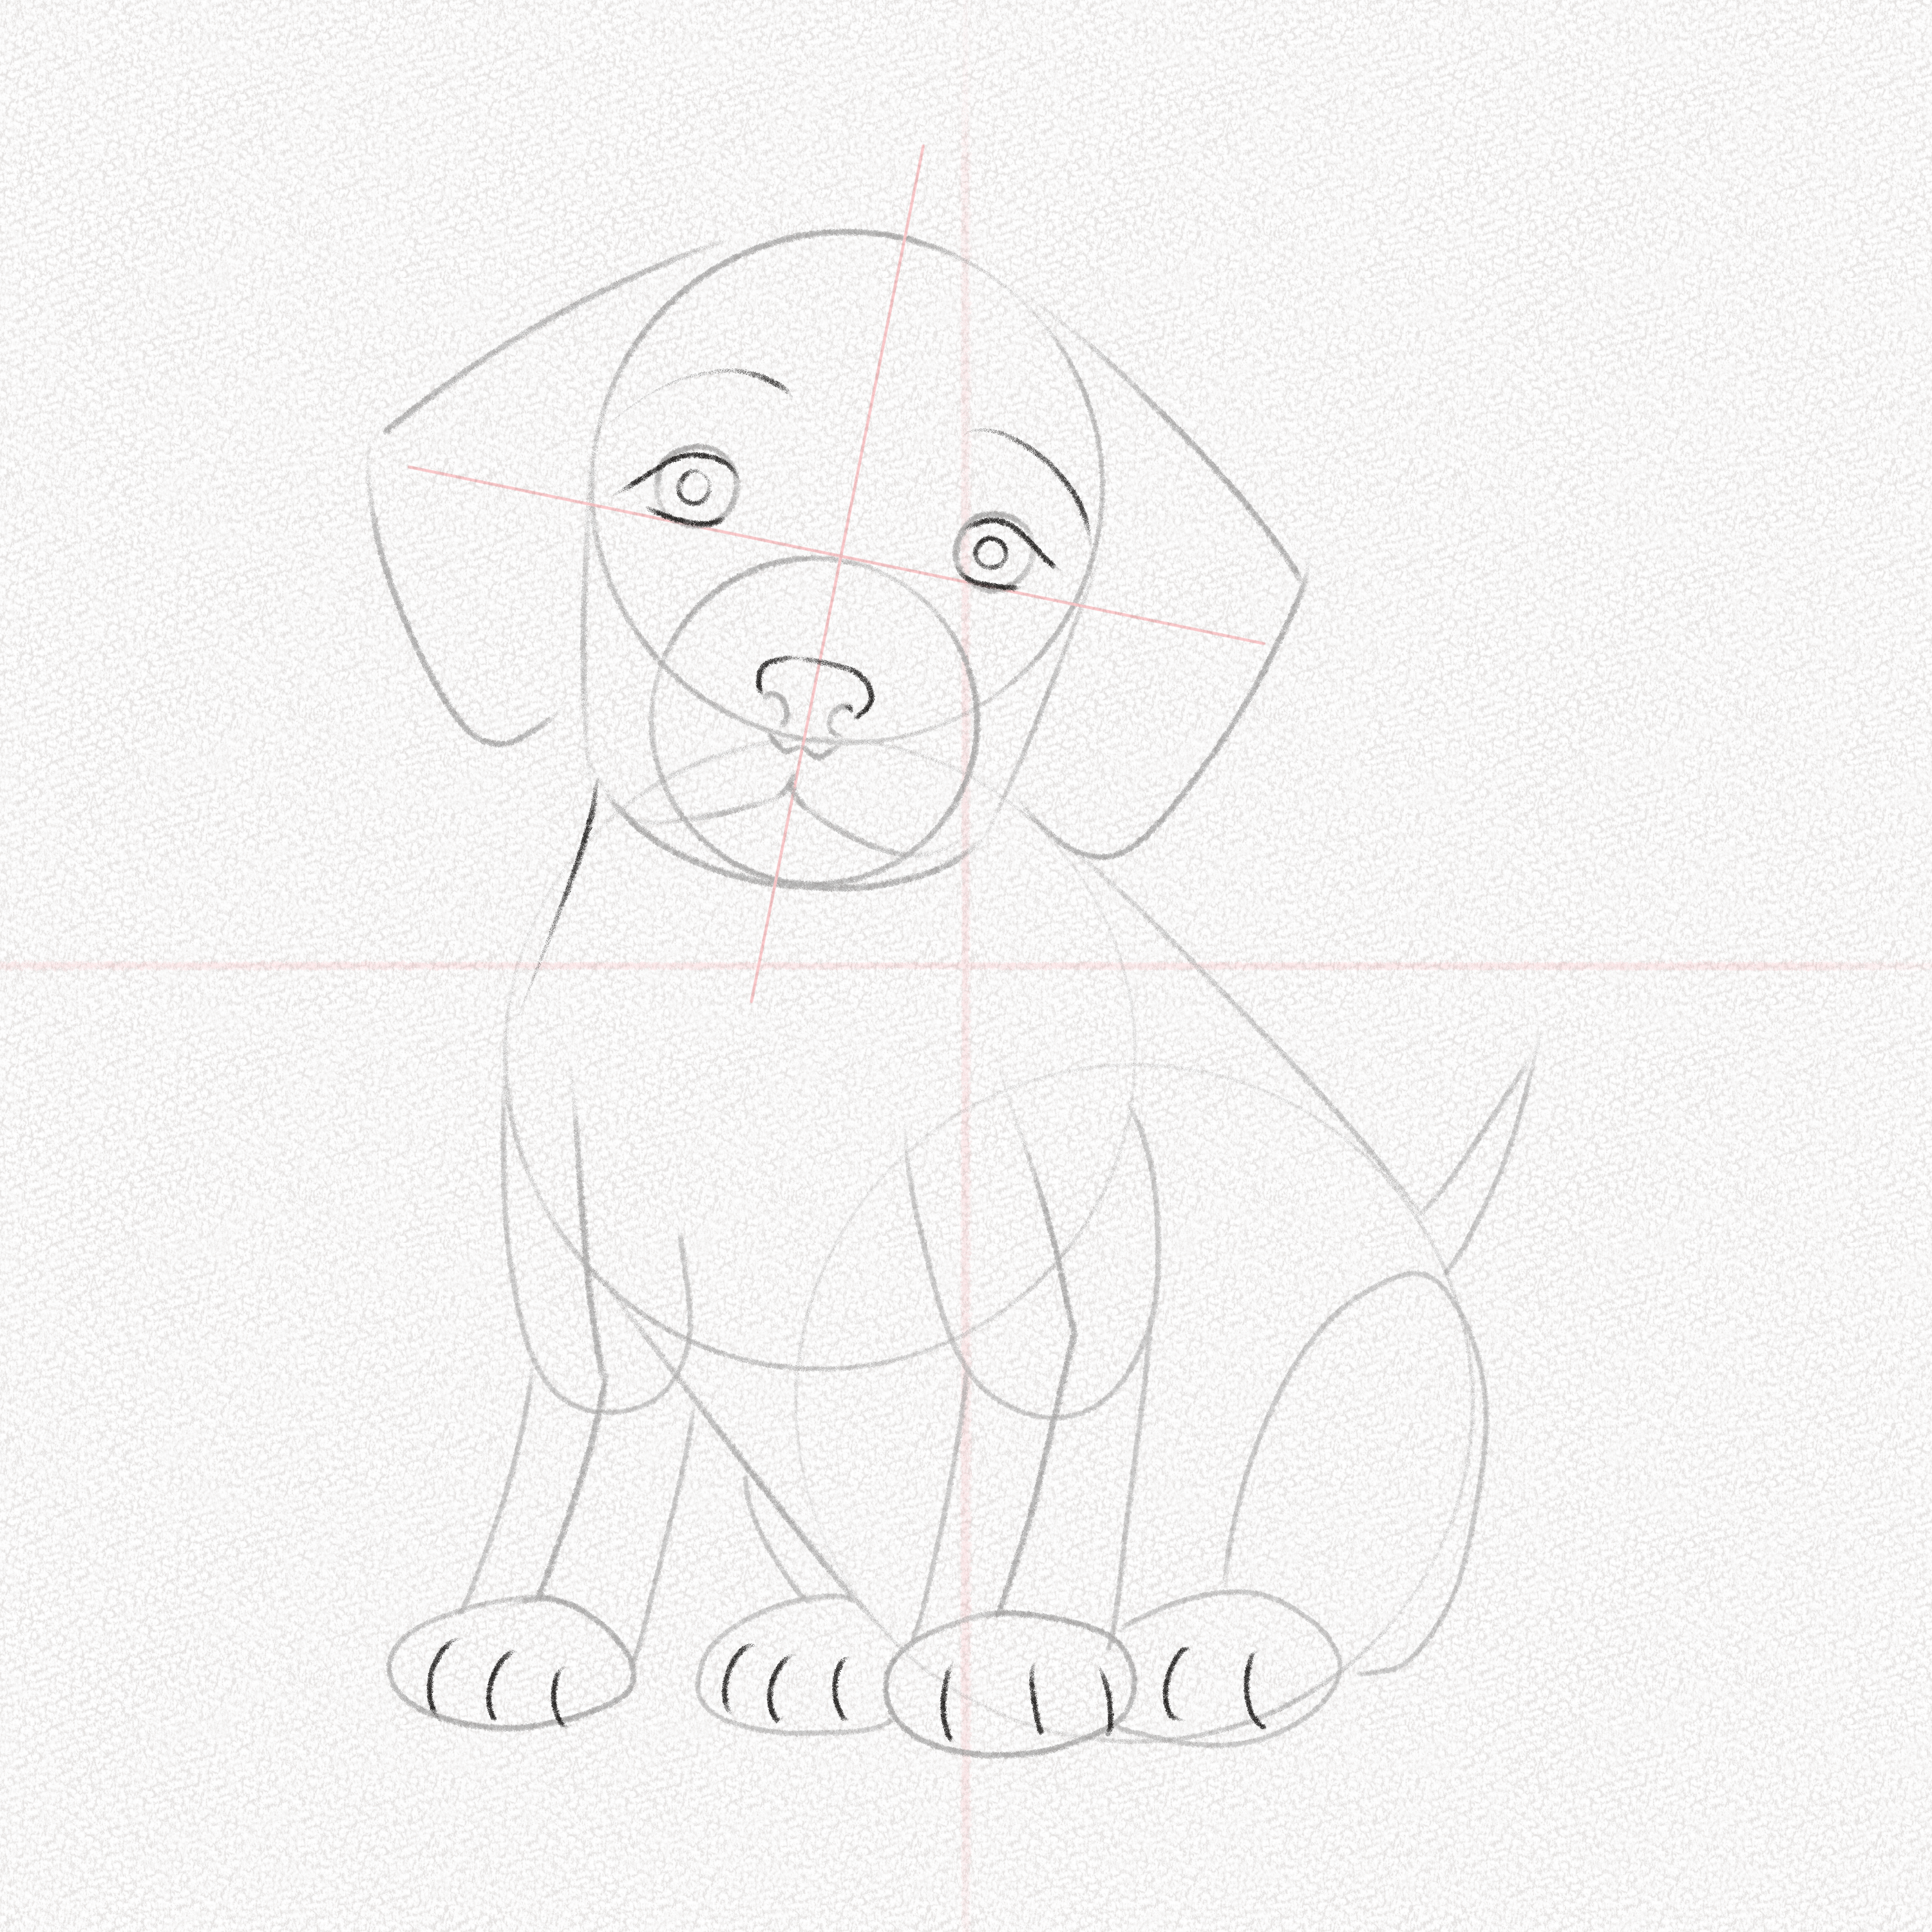
Section 2.- How to Draw And Shade a Puppy
Step 1: Outline the fur
On top of your base, sketch the fur following the basic shapes we drew in section one.
Step 2: Erase your guidelines and outline your puppy
With your kneaded eraser, erase your guidelines. Feel free to use another hard eraser or your Tombow mono eraser; make sure to leave a mark noticeable enough and outline your puppy with your 4B pencil. 
Step 3: Define the areas to be shaded
Dogs come in many different colors and shapes; some have only one fur color, others have spots, and others don’t have hair at all. You can choose the ones you like the most, but remember to follow the head and body’s shape. In this tutorial, we are going to determine the areas where the spots of our puppy will be beforehand.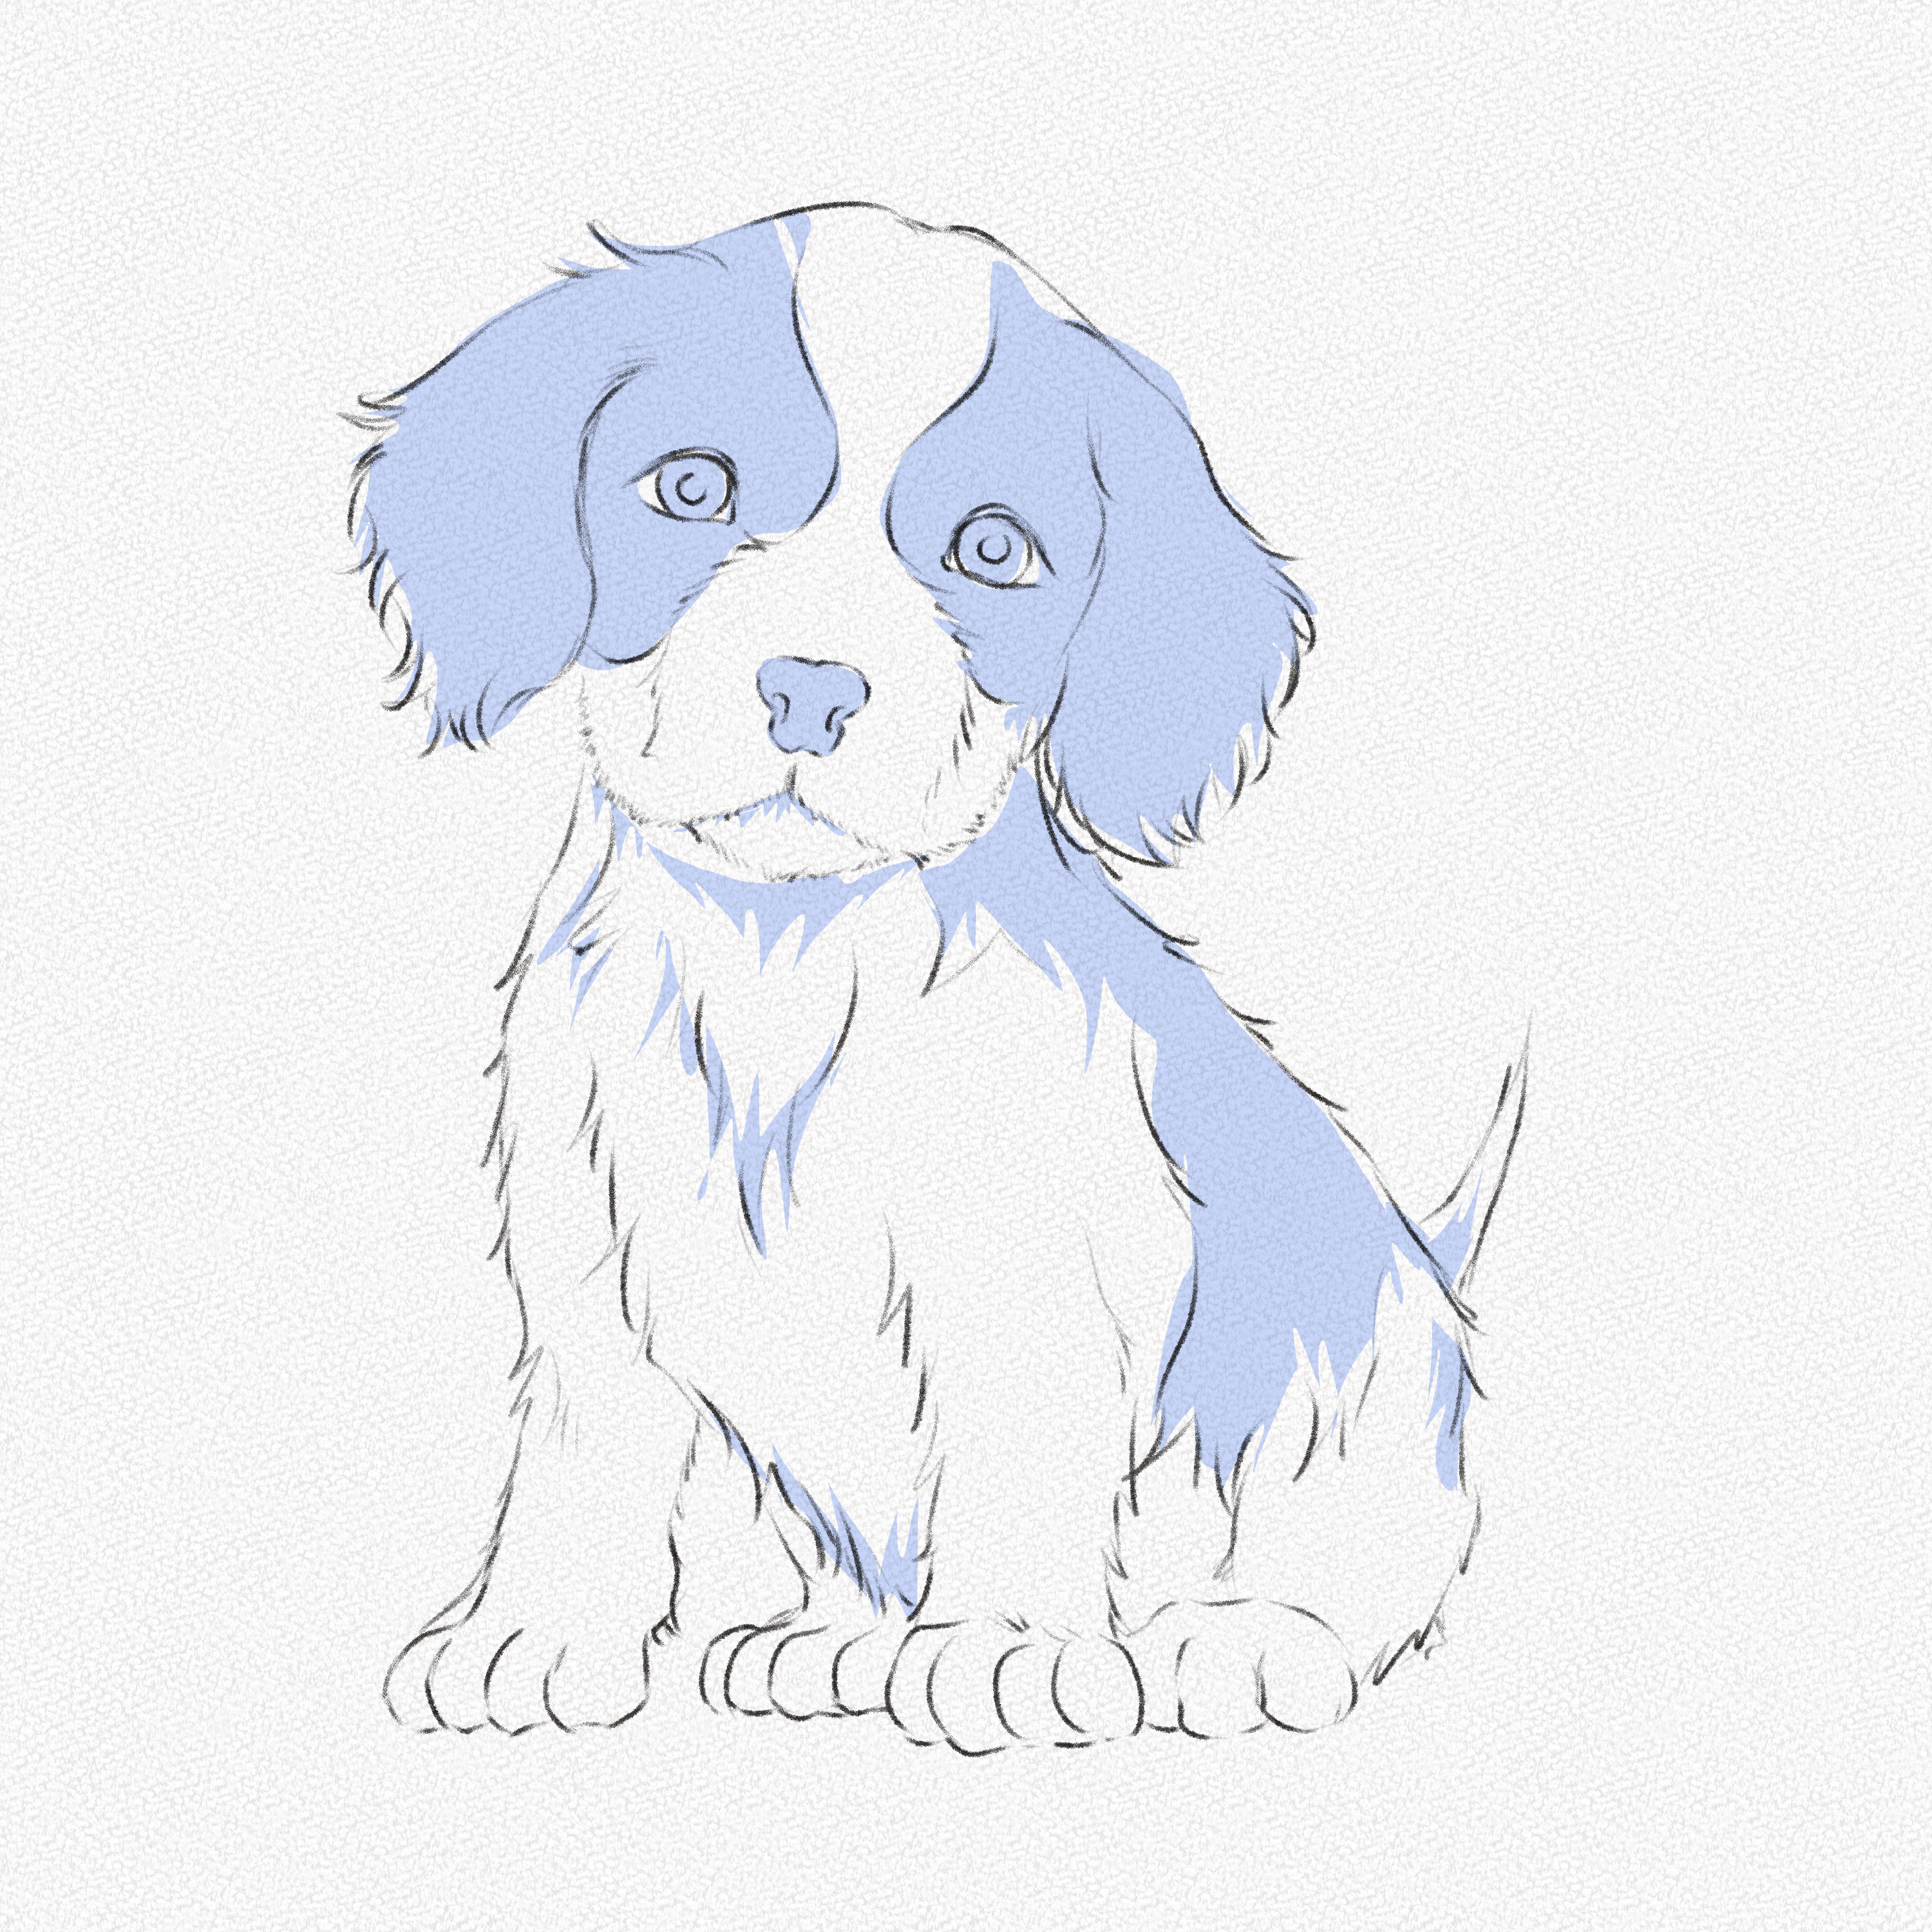
Step 4: Star shading the head
Start with the puppy’s head, in this case, the eyes and ears. Fill the area softly with graphite. You can use your 4B pencil, a graphite bar, or even powdered graphite to do it quickly.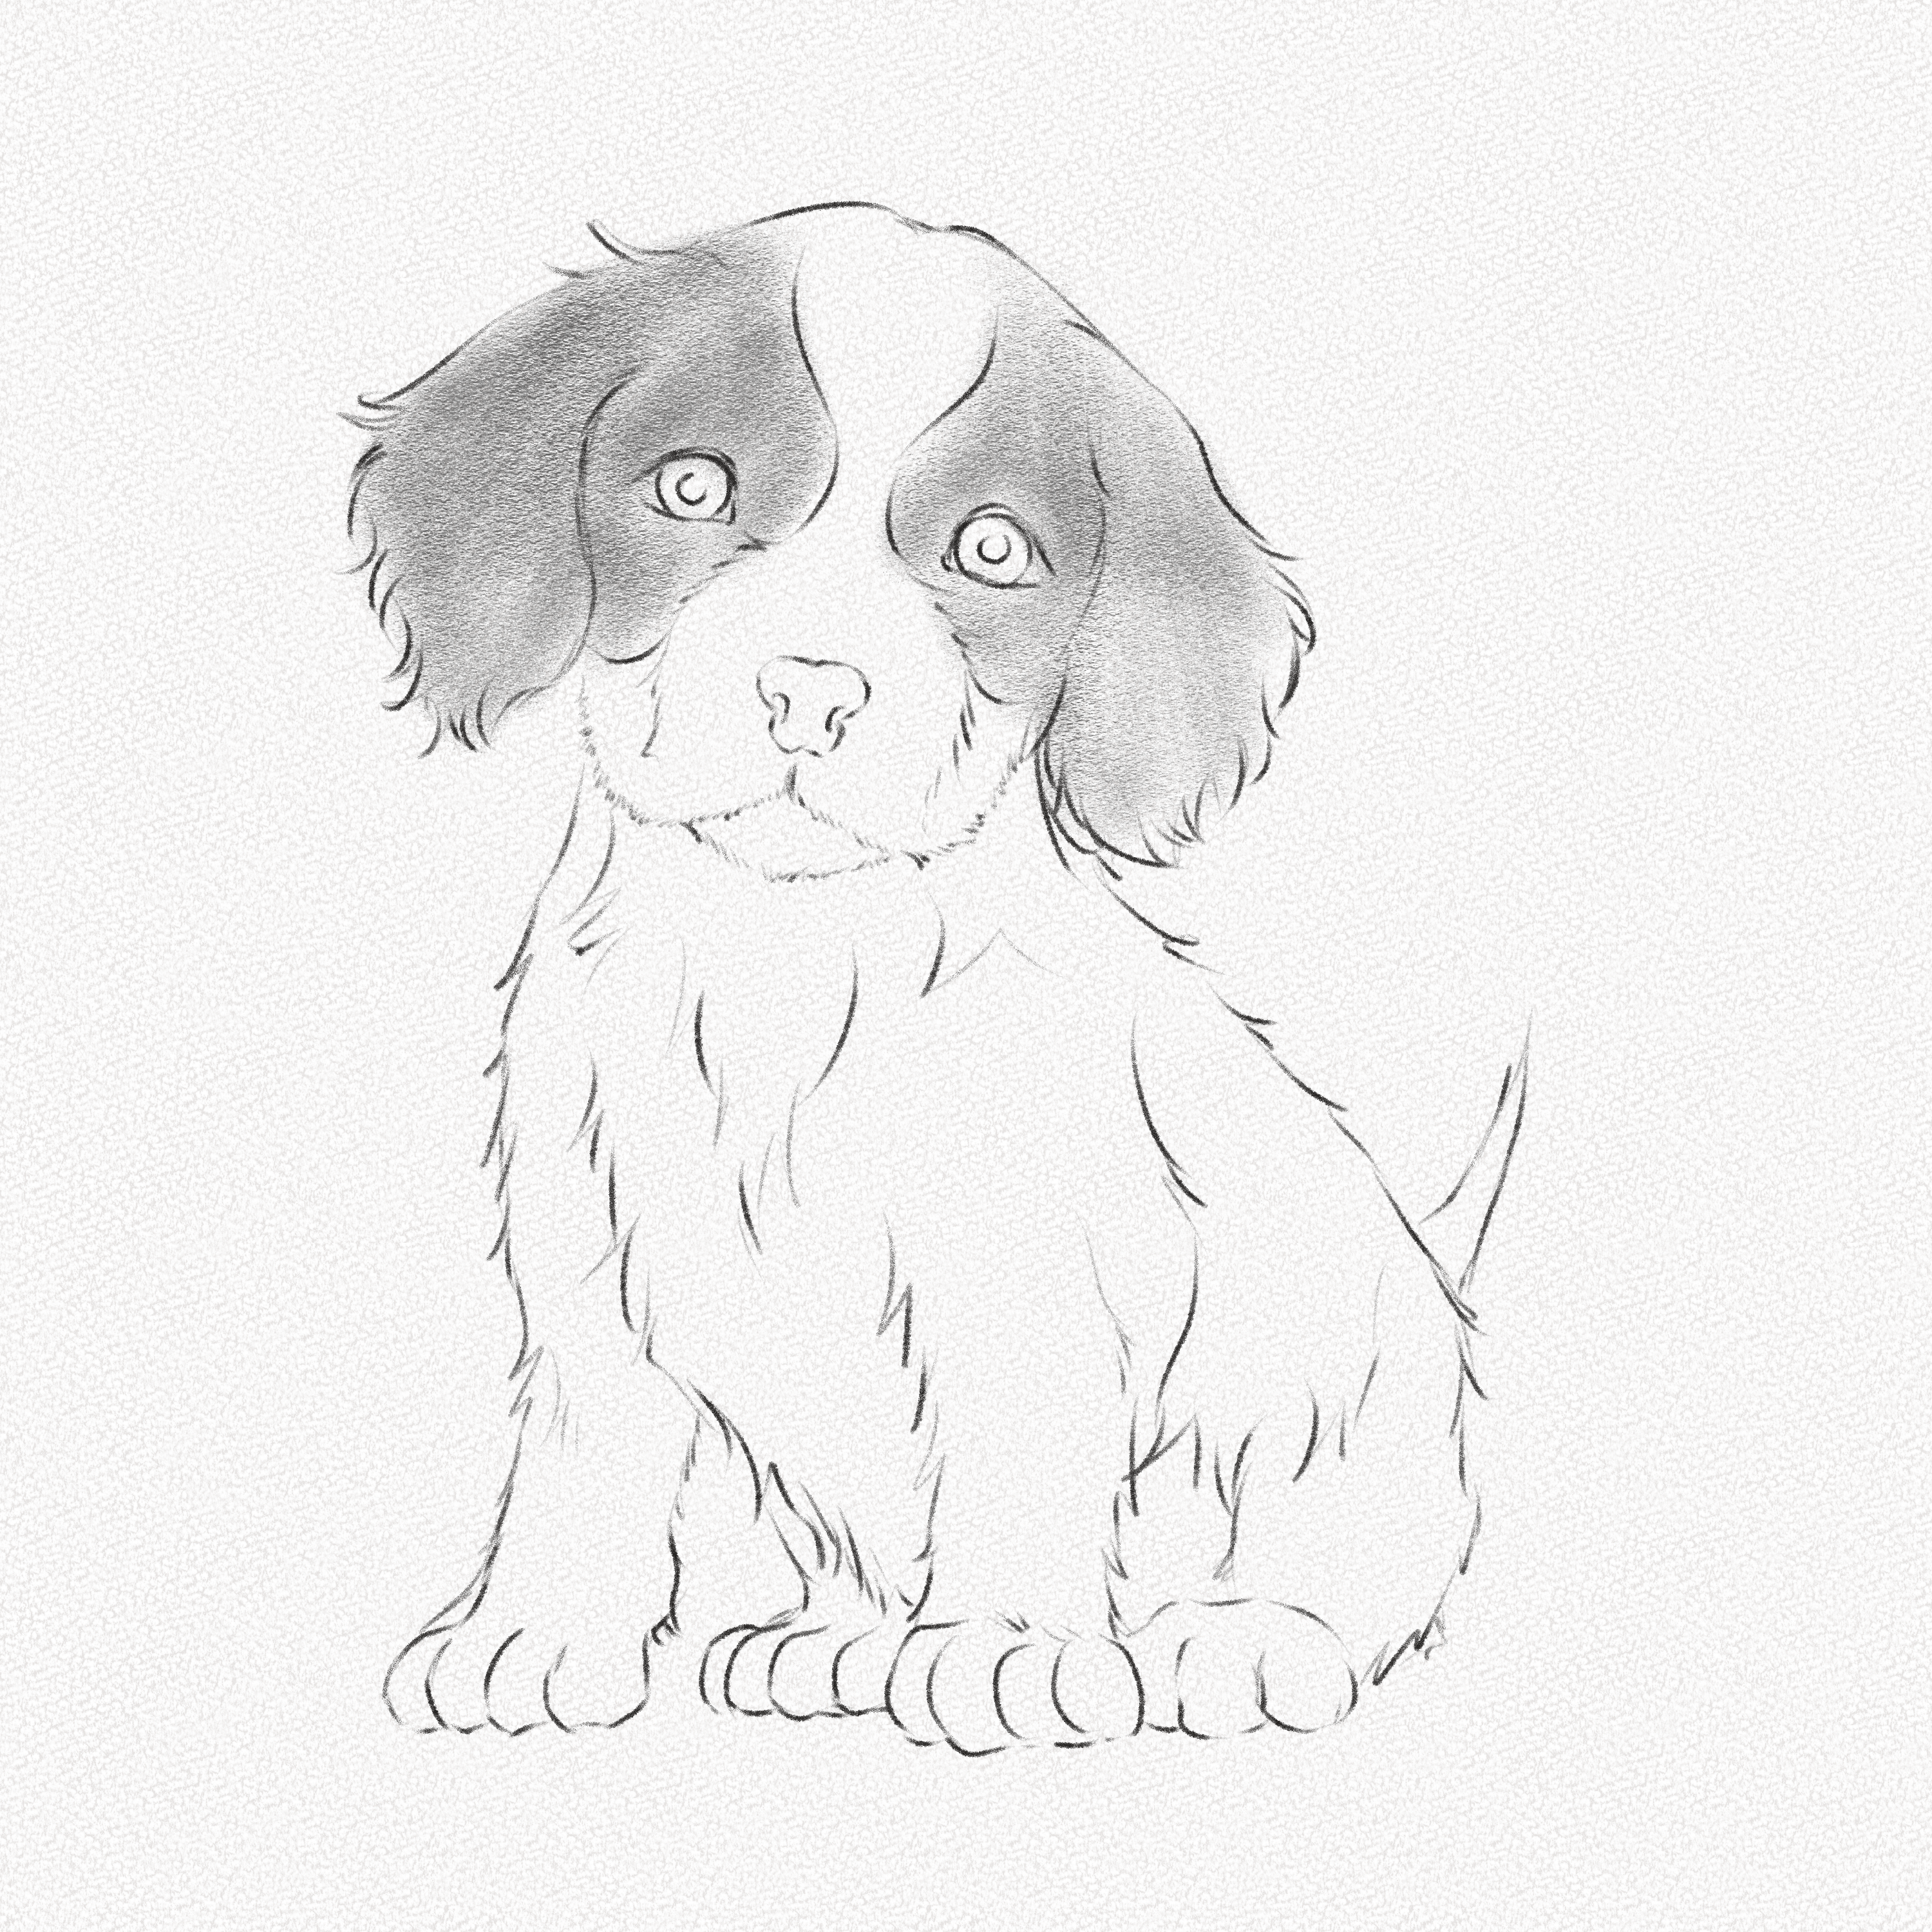
Step 5: Start shading the head’s fur
Following the shape and volume of the head and ears, start shading, making small but quick lines in the fur’s direction. Shade the eyes making sure to leave a white spot for the highlights.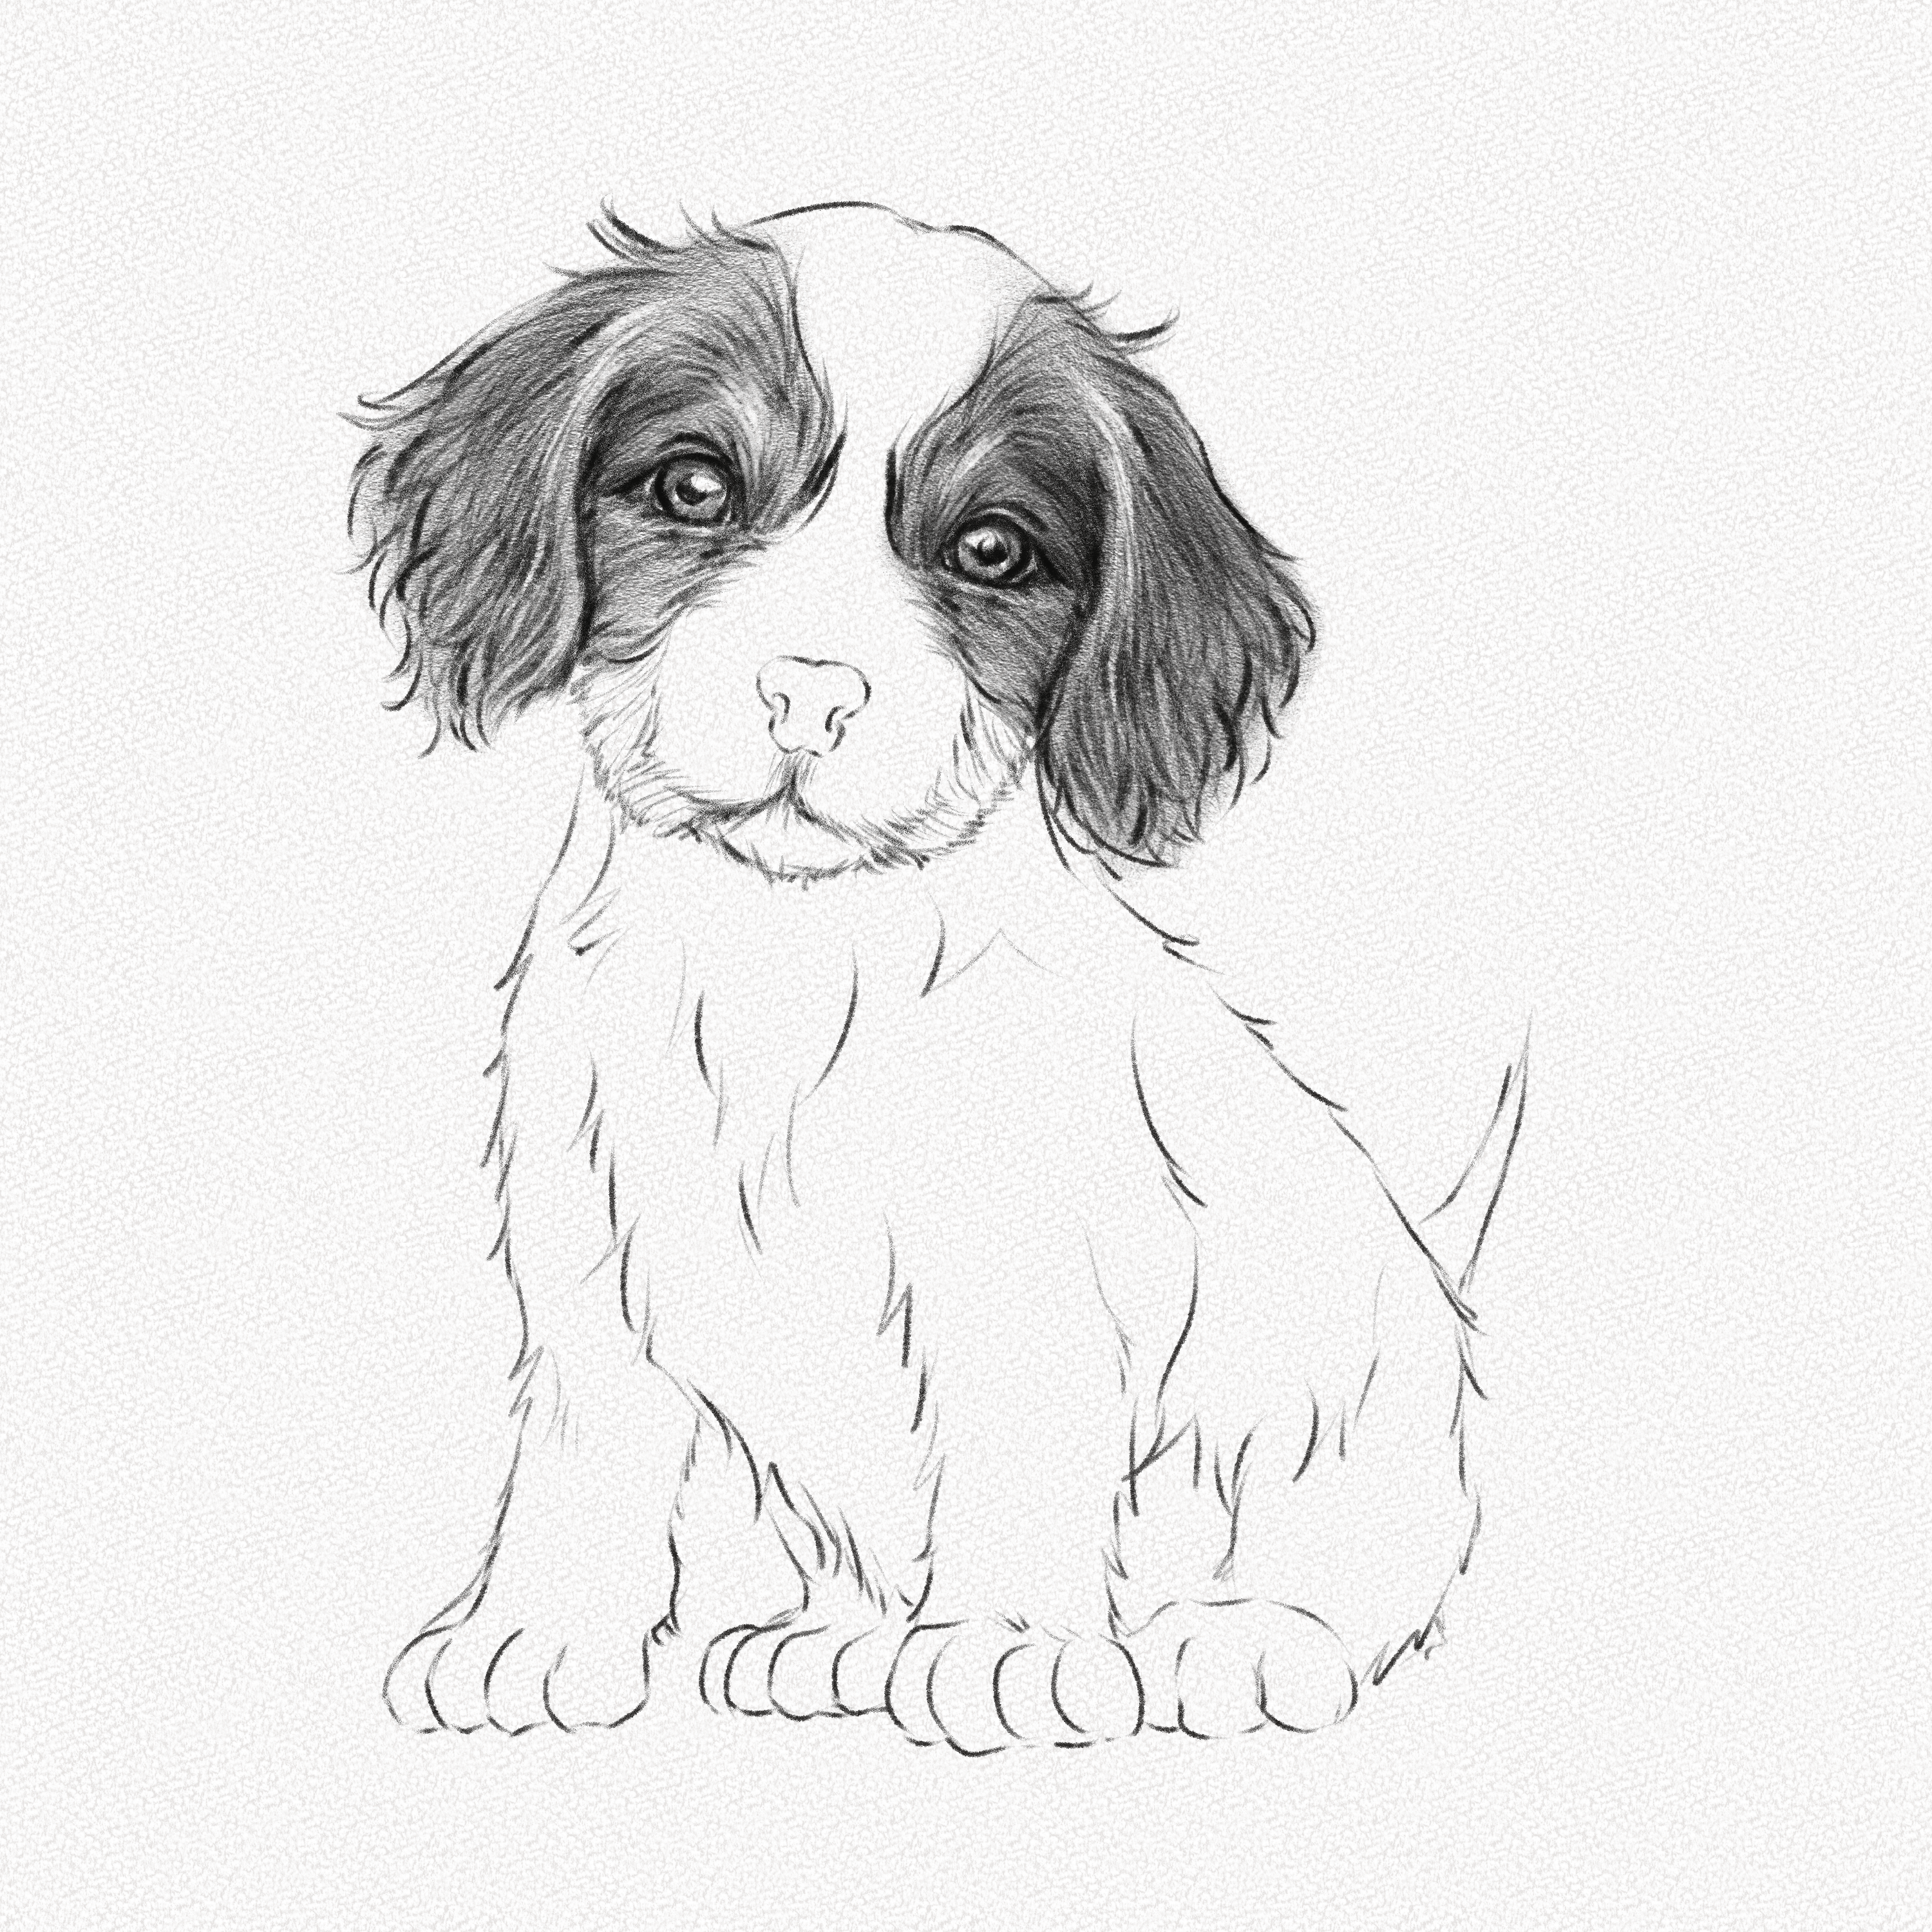
Step 6: Complete the face
Shade the nose, which is mostly dark, and add some soft pencil traces to the mouth and face. Use your Tombow or kneaded eraser to pull some graphite away and mark some highlights in the puppy’s fur.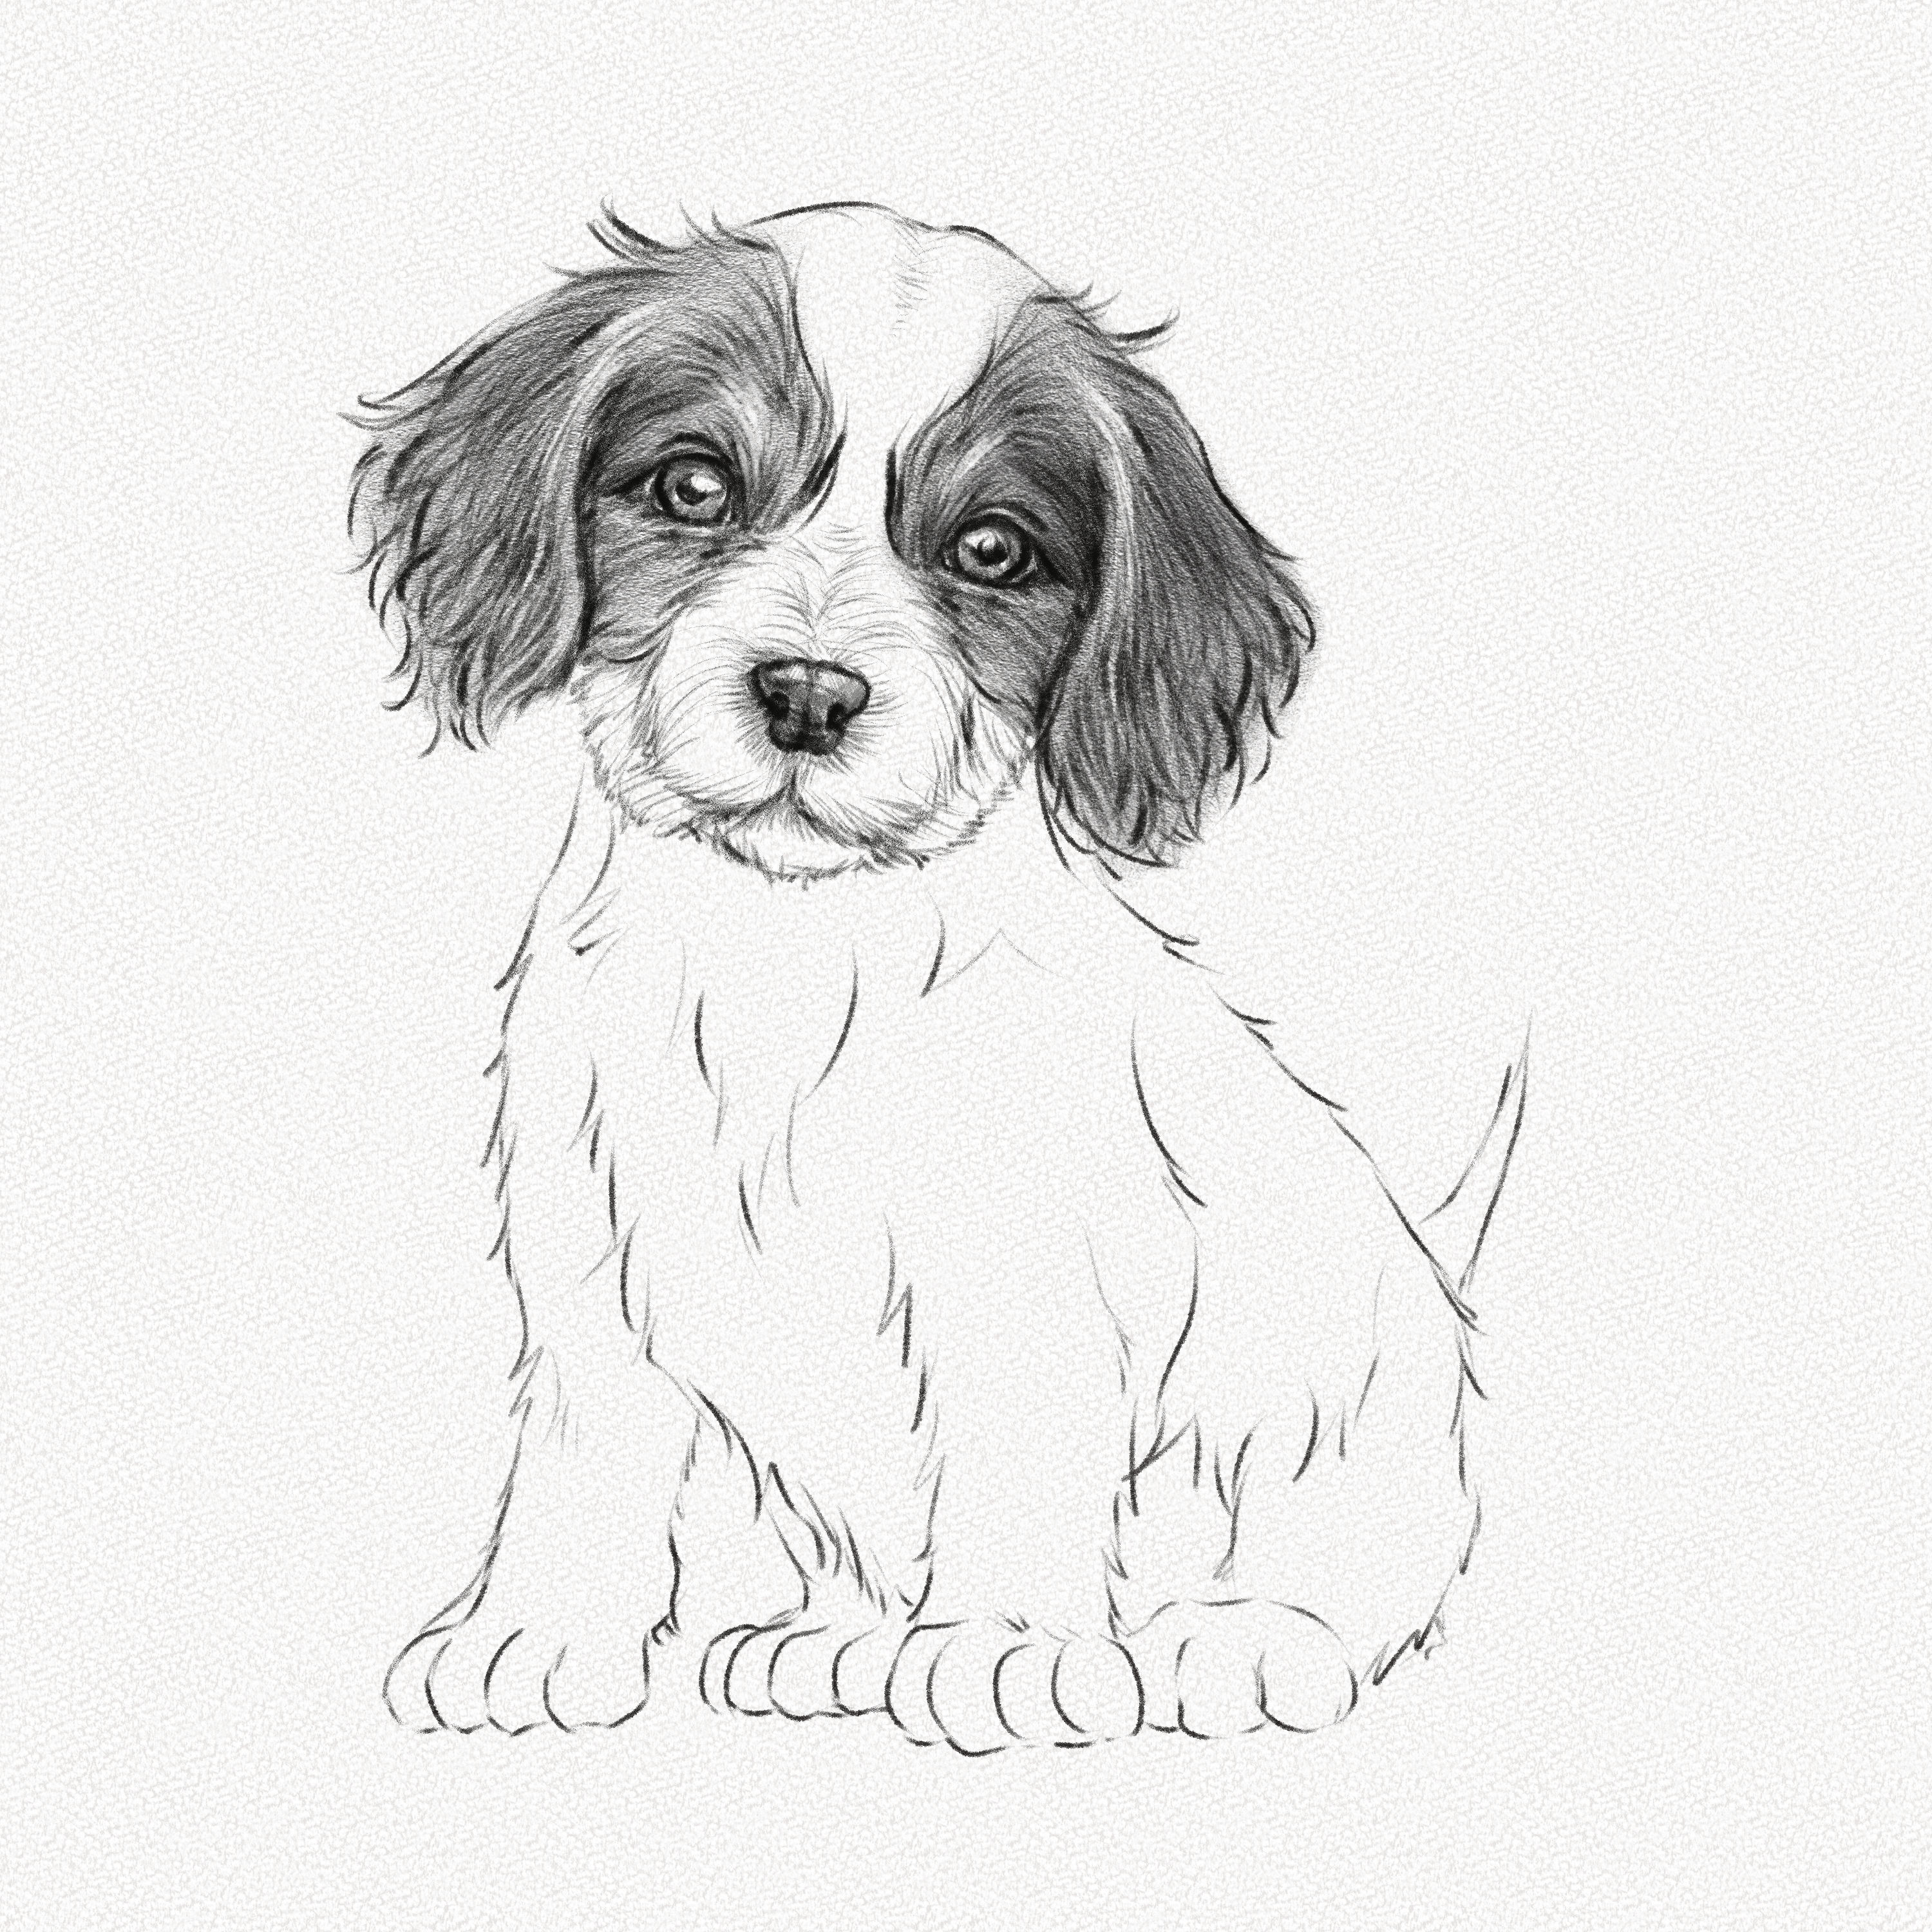
Step 7: Shade the body
Taking into consideration the diagram in step 3, shade the body of the puppy. You don’t need to work on every hair on the puppy’s body, but making strong and dark hair marks and adding some light ones (with your eraser) will surely make a difference.
Step 8: Add some grass
Your puppy is already complete; however, taking it a bit of a step further, we are going to add the ground and grass where our puppy sits. This will add a nice touch and an additional level of realism to your drawing.
And that’s it. You’re done!
Drawing a puppy can be a fun and rewarding experience for artists of all levels. By following a few simple steps, artists can capture the playful and cute spirit of these little guys.
Let me know in the comments if you want a more detailed tutorial on how to shade fur, and I’ll do my best to deliver!
Remember that drawing is a skill that requires time and practice to perfect. So, if your first attempt turns out differently, keep practicing and experimenting!
Thank you for joining us on this adventure, and happy drawing!