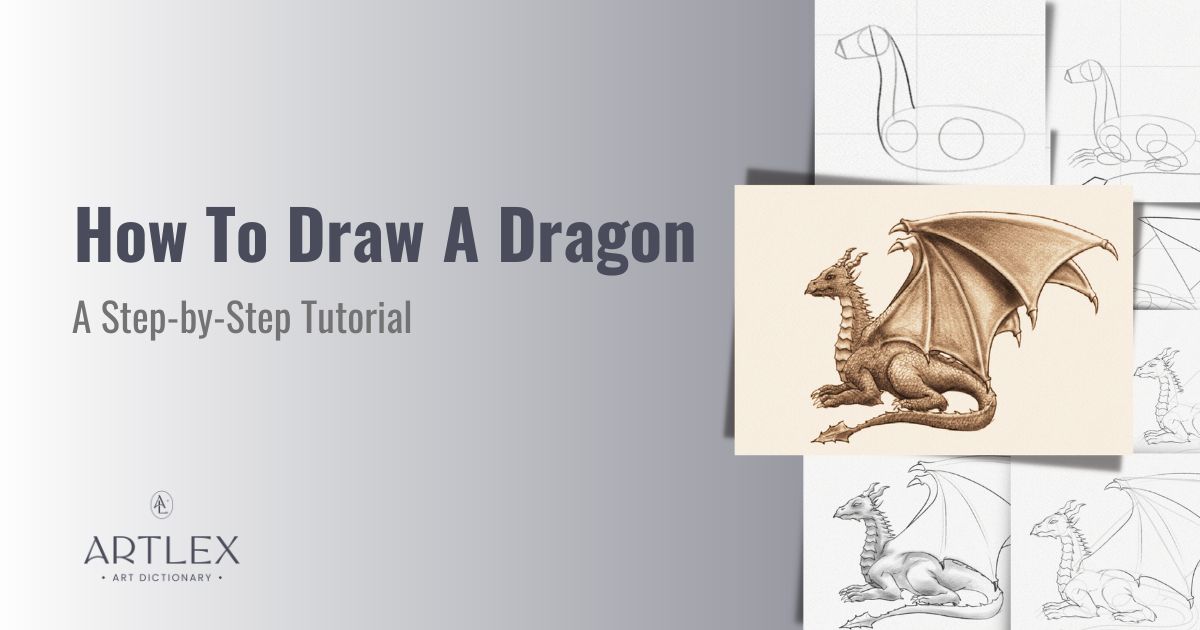
Dragons are one of the most iconic creatures in fantasy. They have been present in folklore and art for centuries. They are a popular creature in art, present in paintings, tapestries, sculptures, and even stained glass windows.
The popularity of dragons has grown over the years, with many people seeing them as symbols of power and strength or evil creatures that need to be conquered, especially in books, comics, fantasy video games, and role-playing games.
You can find several pieces of art with dragons as a theme, and each one will be different from the other. Since dragons are fantastic creatures, how do we know their characteristics, colors, and shapes? Some dragons are giant, some are small, some have a long body, some don’t, some have horns, and some have wings, but how do we know all of this?
The answer: We don’t.
Dragons have a set of characteristics that, although they make up a unique appearance, actually come from different animals, especially reptiles.
And that’s the fun part. Because dragons don’t have an established look, we can use our imagination to fill the gaps and create our own fantastic creatures.
What you’ll learn:
- Structure of a dragon’s body
- How to draw a dragon
- How to shade a dragon
Materials needed:
- A piece of paper
- A 0.5mm 2B mechanical pencil
- A 0.5mm HB mechanical pencil
- A 2.3mm Tombow Mono Zero eraser
- A blending stump
- A ruler
- A white gel pen
- An eraser or a kneaded eraser
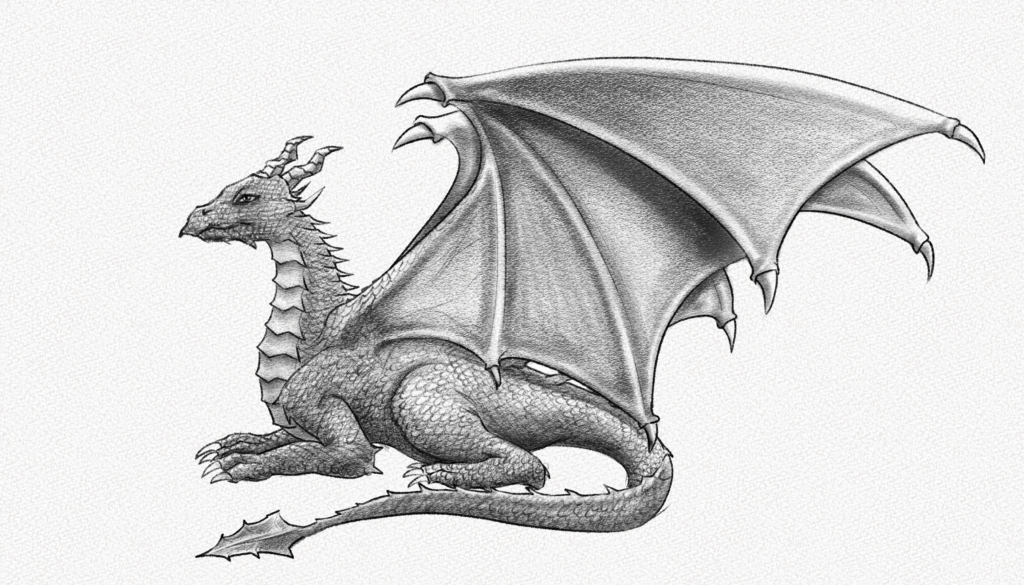
This is the dragon you’re going to draw:
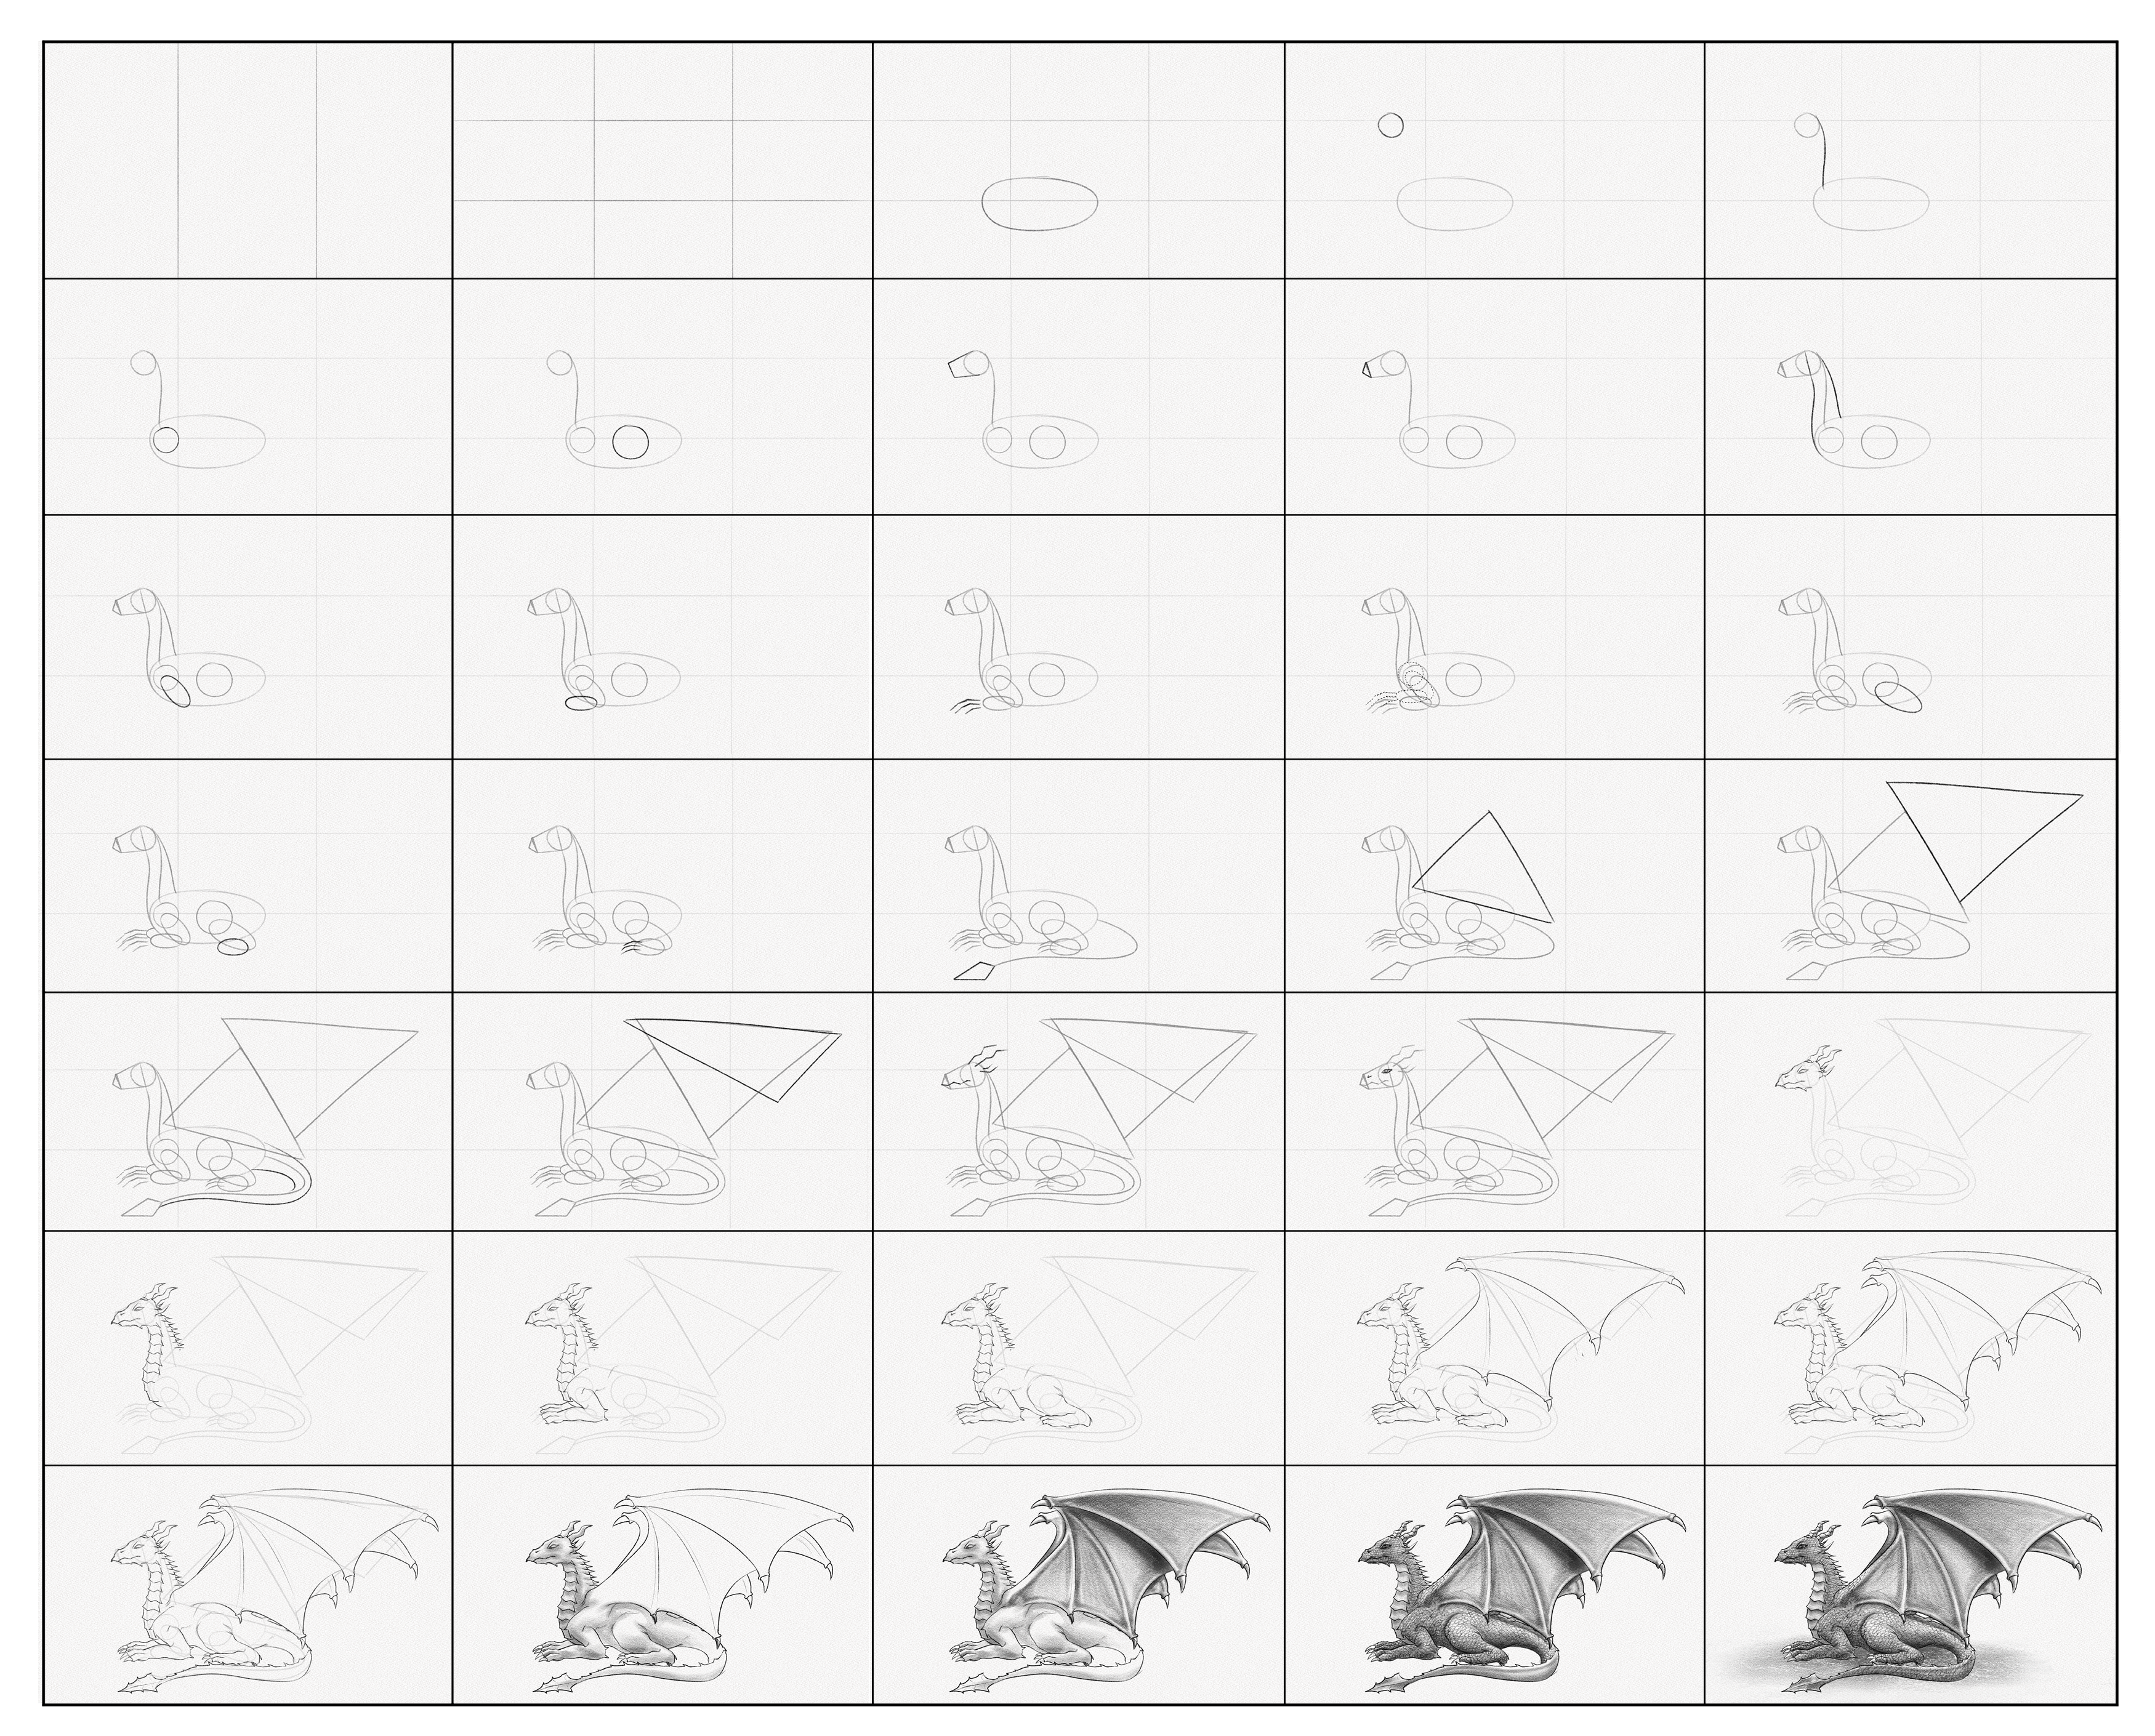
And these are all the steps we’ll walk you through:
Section 1.- Structure of a dragon
Dragons come in many kinds and shapes, and depending on the region, some might not have wings, and some might not have legs. For this tutorial, we will draw a traditional western dragon with two wings and four legs.
Step 1: Split your canvas vertically
Dragons have unusual proportions and complex bodies. Given that we are going to draw the dragon’s entire body, we’ll use a trick to get everything right in place. Let’s take it slow and go step by step.
Use your ruler to measure and split your canvas into three equal parts.

Step 2: Split your canvas again
Split your canvas into three equal parts horizontally. Now we’ll have a very well-known composition grid and the perfect aid for drawing complex pieces.

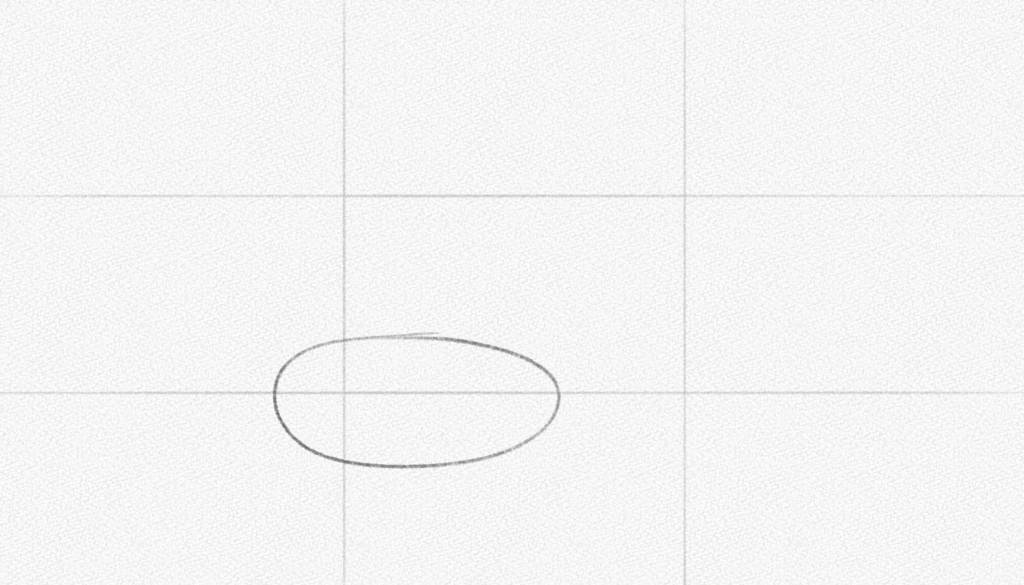
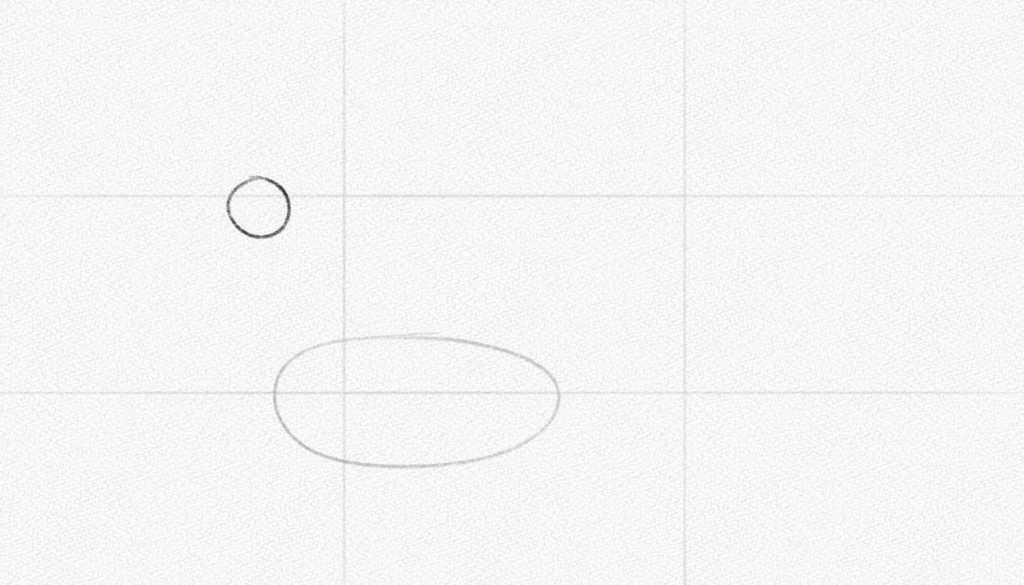
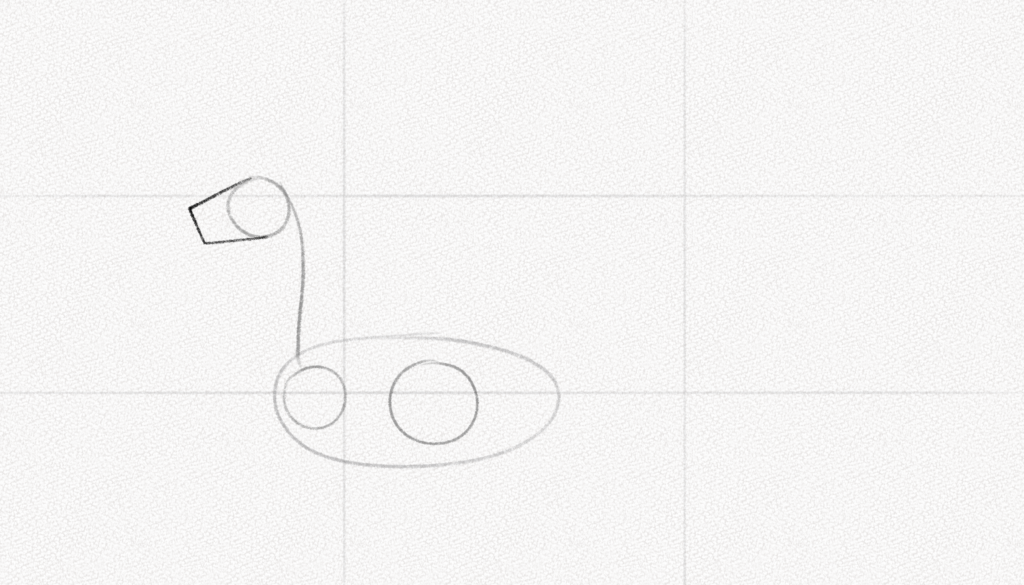
Step 3: Draw an ellipse
Draw a moderately big ellipse on your canvas’s lower left side. This will be the central part of our dragon’s body.
Step 4: Draw a circle
In the upper left part of our canvas (remember to follow the guidelines), draw a small circle. This will be our dragon’s head.
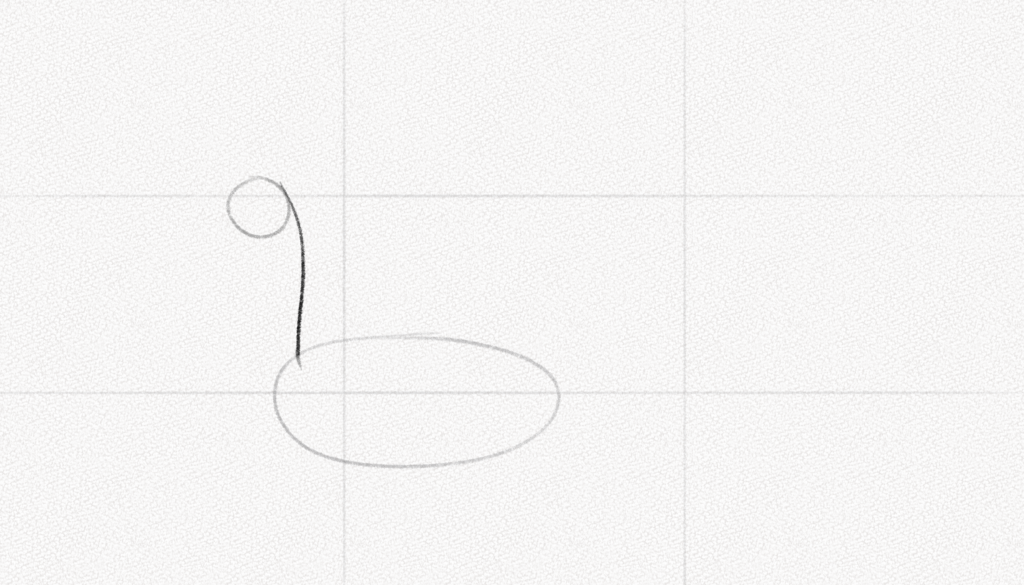
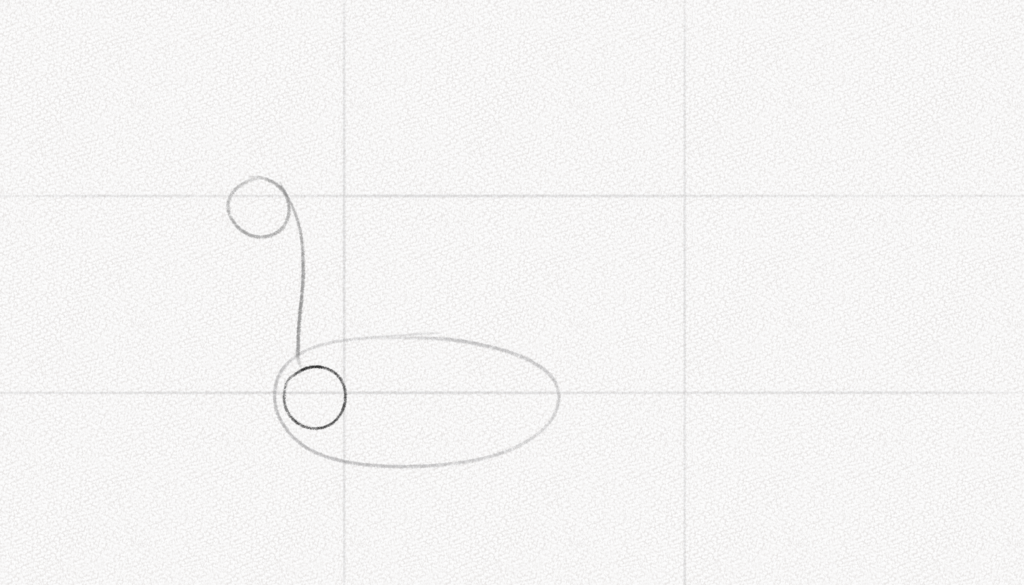
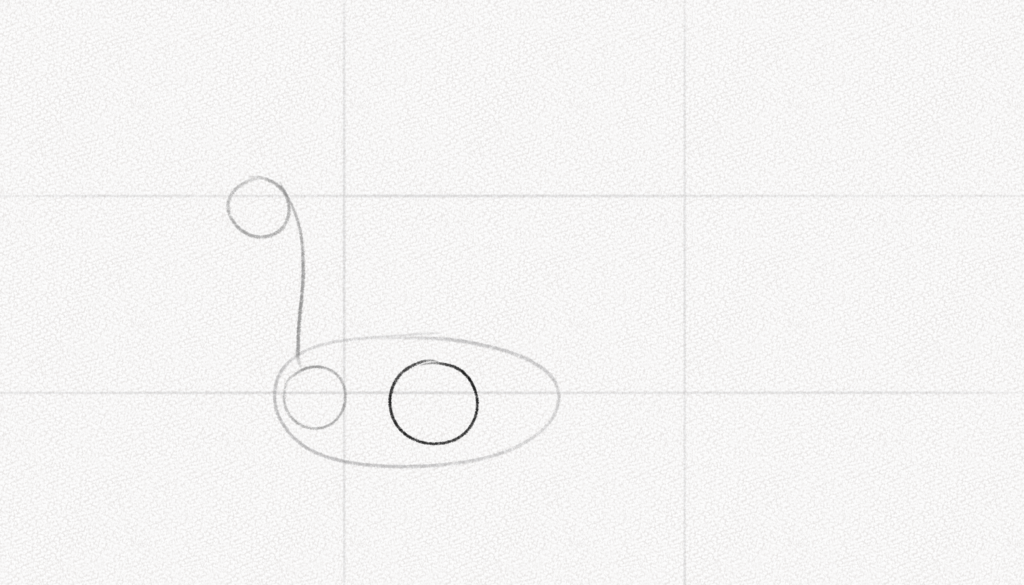
Step 5: Connect the body and head
With a long curved line, connect the head and body of our dragon. Draw another two circles to mark the limbs’ position, as shown in the diagram.
Step 6: Draw a distorted rectangle
Now we’re going to draw the structure of the head. Add a distorted rectangle to set the shape of the head, then add a small triangle right next to it.

Step 7: Complete the neck
With another two lines, complete the dragon’s neck. Make sure one of them connects the middle of the head’s circle with the left side of the body, and the other goes from the right side of the head to our left guideline.
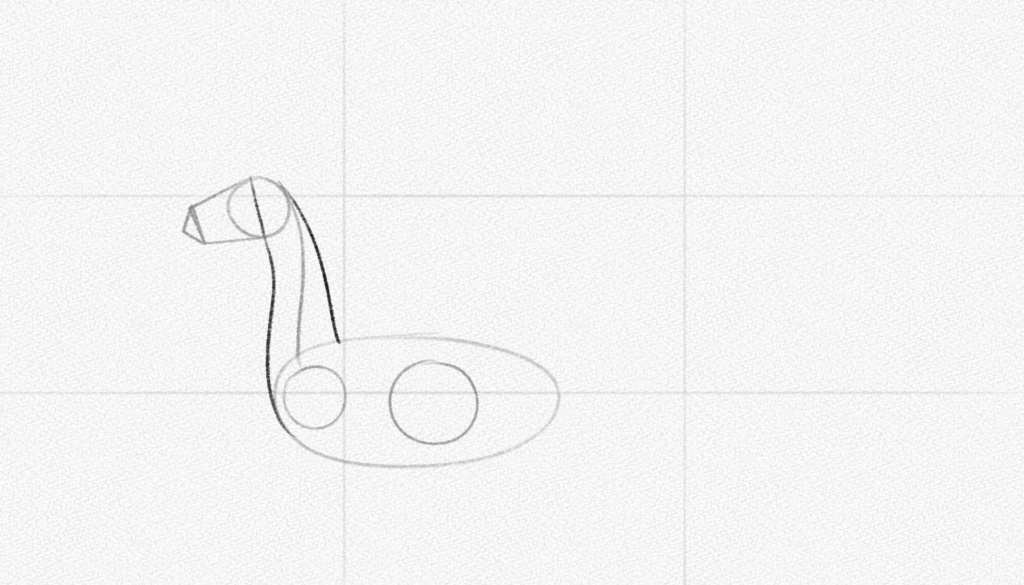
Step 8: Draw the front leg
With two bean-like shapes, draw the leg of our dragon. Our dragon will be sitting, hence the limbs’ position.
Step 9: Add the claws
Now we are going to add the claws. Use three lines of different sizes to indicate the claws.
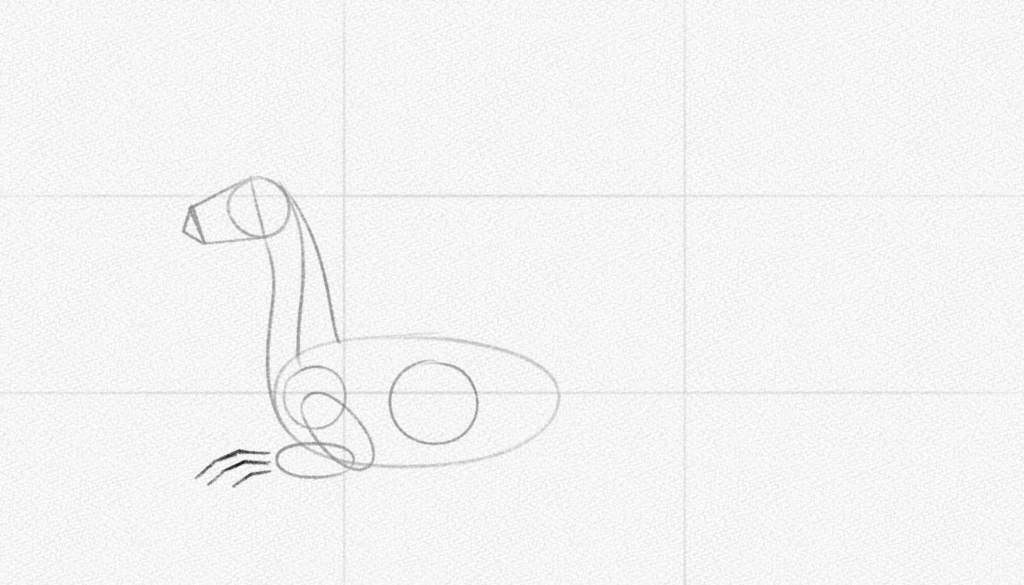
Step 10: Repeat
Repeat the steps above for the other leg, consider the overlapping shapes, and erase any unnecessary lines.
Step 11: Draw the other leg
Use two ellipses to draw the other leg. The back legs are thicker than the front legs, and their claws are shorter.
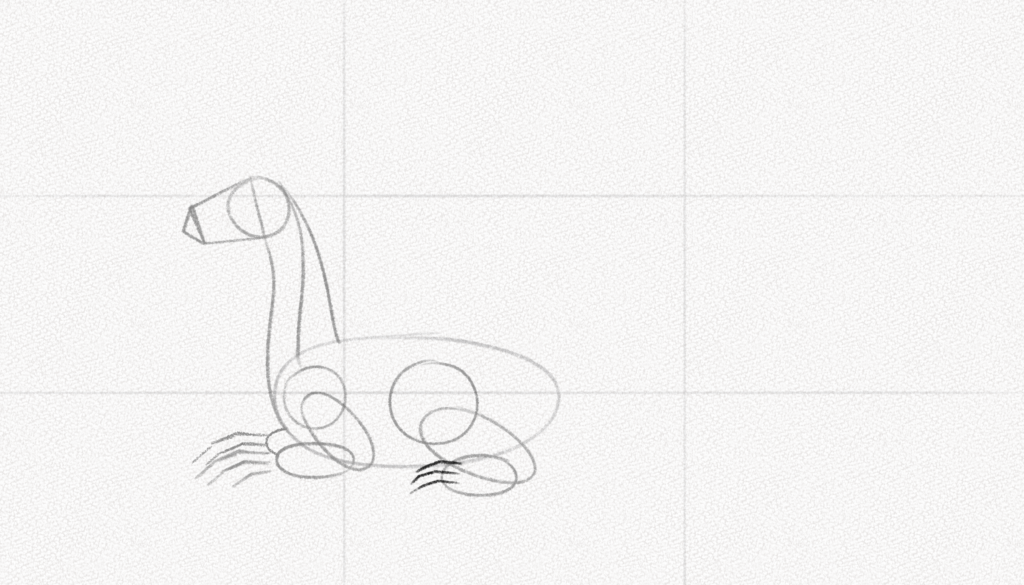
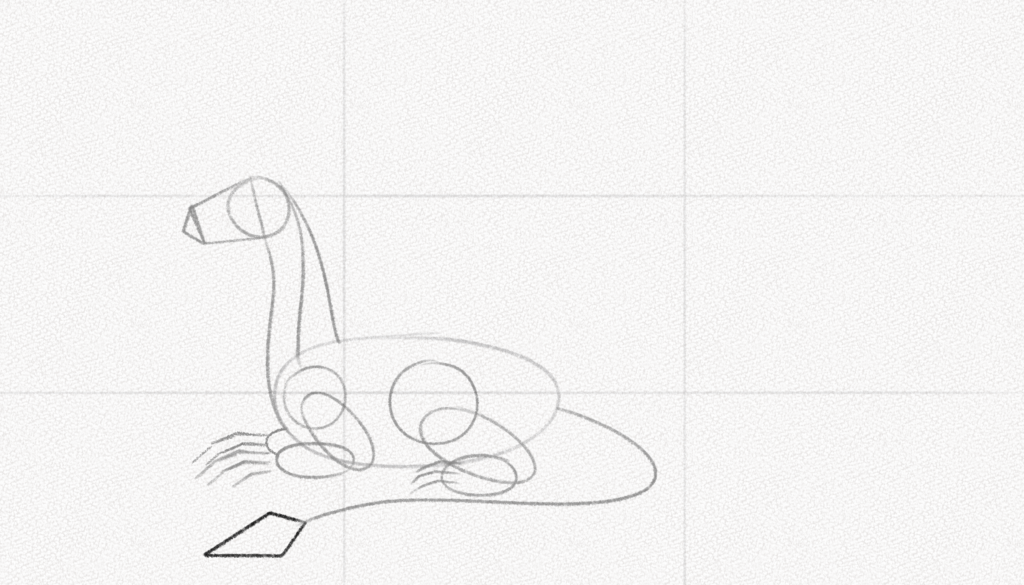
Step 12: Add the tail
Use the guidelines as a reference for the position. With a curved line, sketch the tail and draw the end of it with a rhomboid.
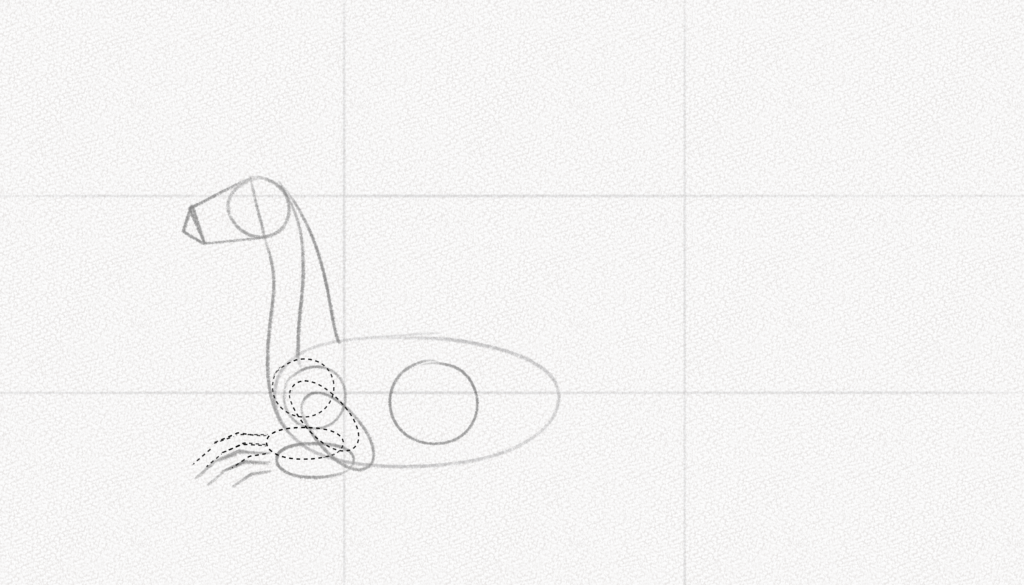
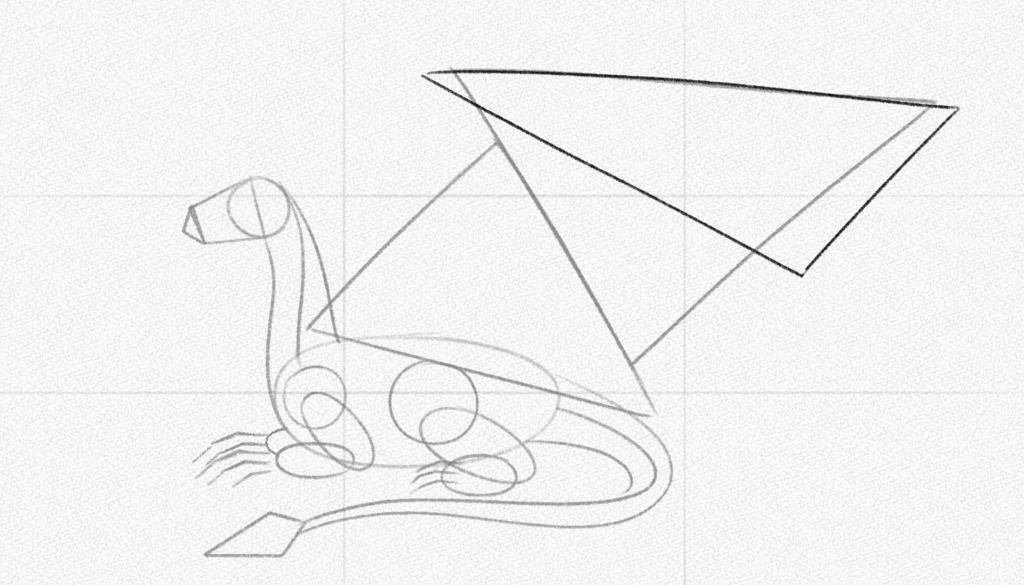
Step 13: Draw two triangles
Now we are going to start drawing the wings. We are going to draw the first part with a triangle and the second with an inverted triangle, as shown in the diagram. The position of our dragon’s wings will be half-open as if it were about to stand.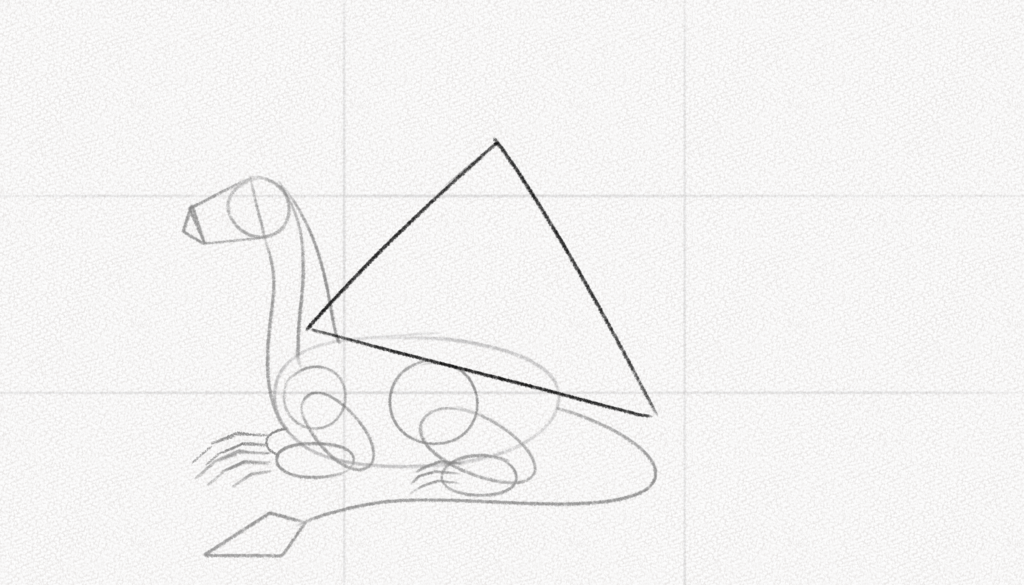
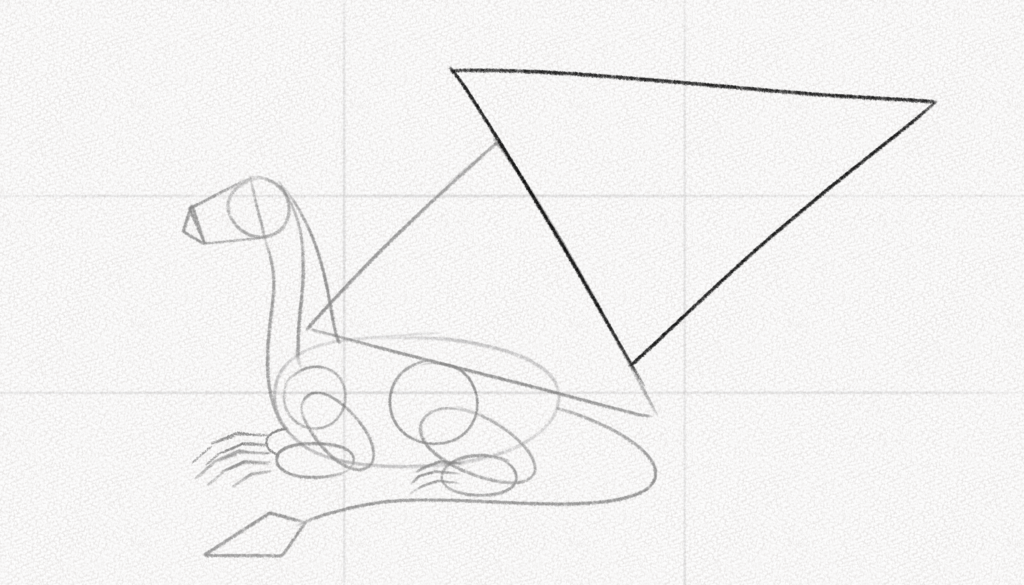
Step 14: Complete the tail
With a couple of curved lines, complete the shape of the dragon’s tail.

Step 15: Finish the wing
Since the wing will be a little bit bent, draw the fold with another triangle, a smaller one.
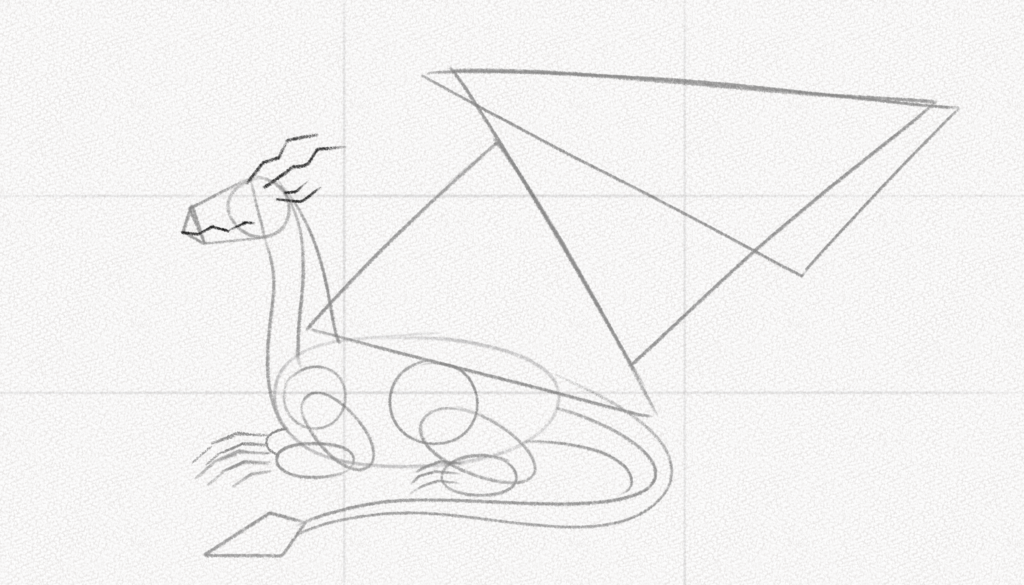
Step 16: Draw the mouth, eye, and horns
Add the mouth with an elongated “W” shape that begins at the tip of the triangle and ends near half of the head’s circle. Add the nose with a small “V” shape.
Draw the eye with another rhomboid and draw a semicircle in it. Use our guidelines as a reference for the position.
For the horns, you can use shapes like these or choose your own. It’s important to remember that horns are symmetrical most of the time and that both sides should look the same.
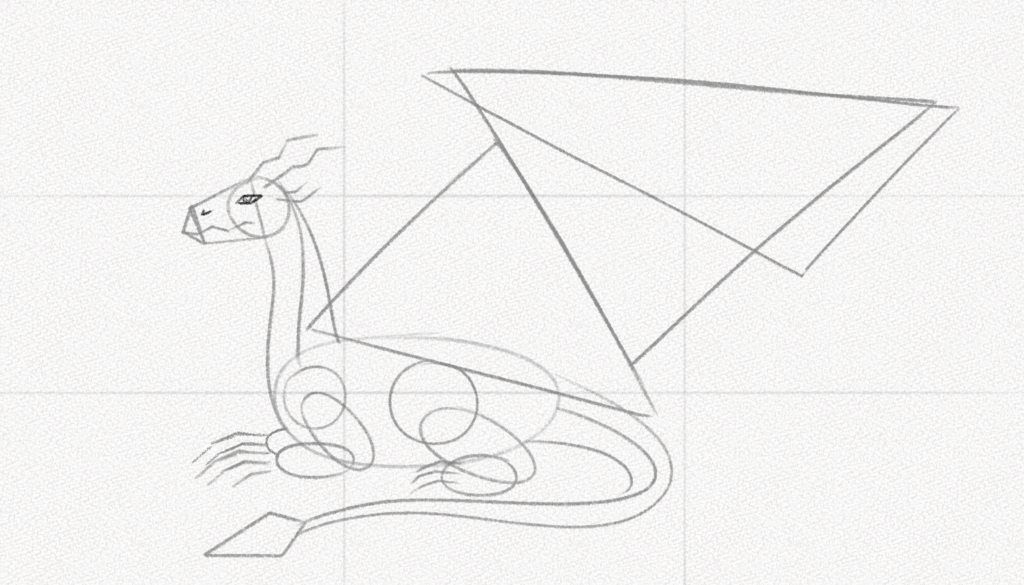
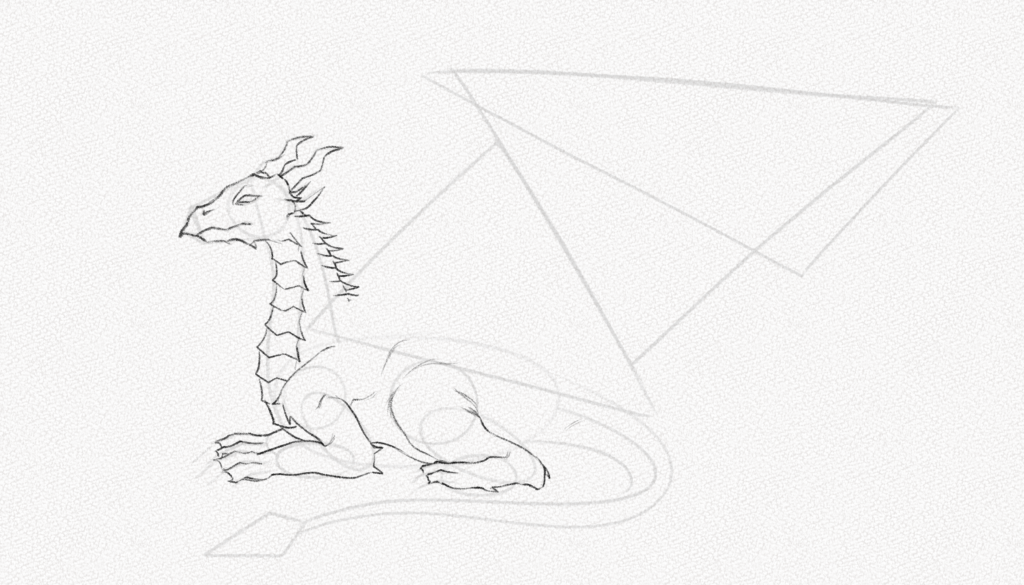
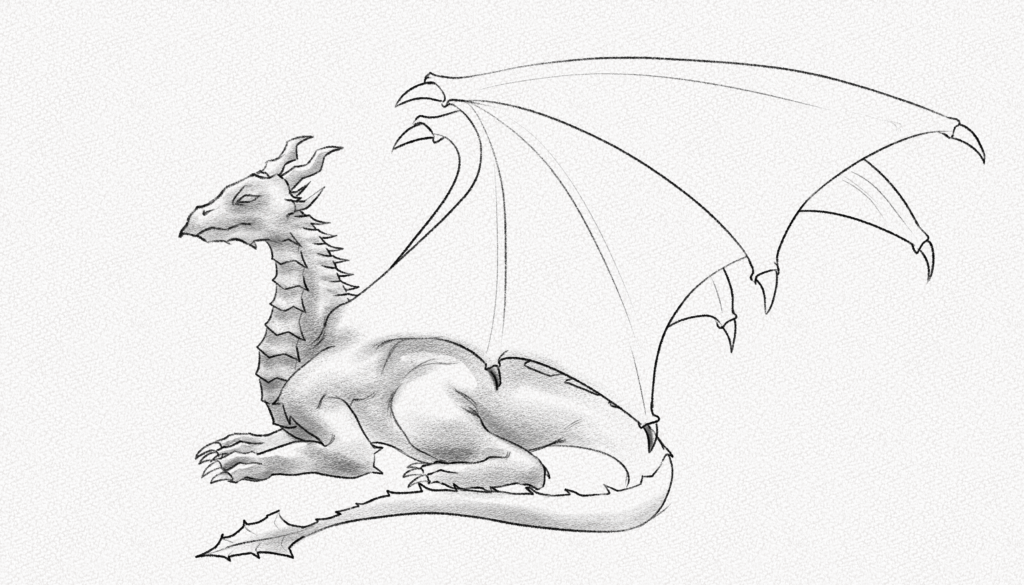
Section 2: How to Draw a Dragon
Before starting this section, erase your guidelines carefully, don’t eraser them completely since we’re using them as a base for our dragon.
Step 17: Draw the head
For this step, you can use your imagination. Dragon heads come in many forms and shapes, so you can make them bigger, larger, smaller, etc. Keep in mind that dragons are inspired mainly by reptiles, so the lines in the head won’t be smooth or curved but rough and irregular.
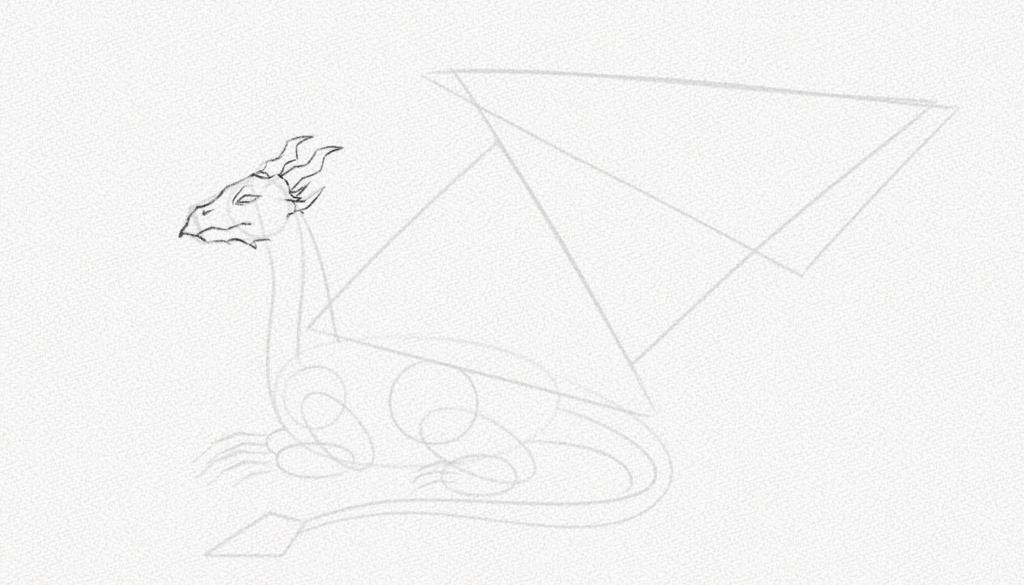
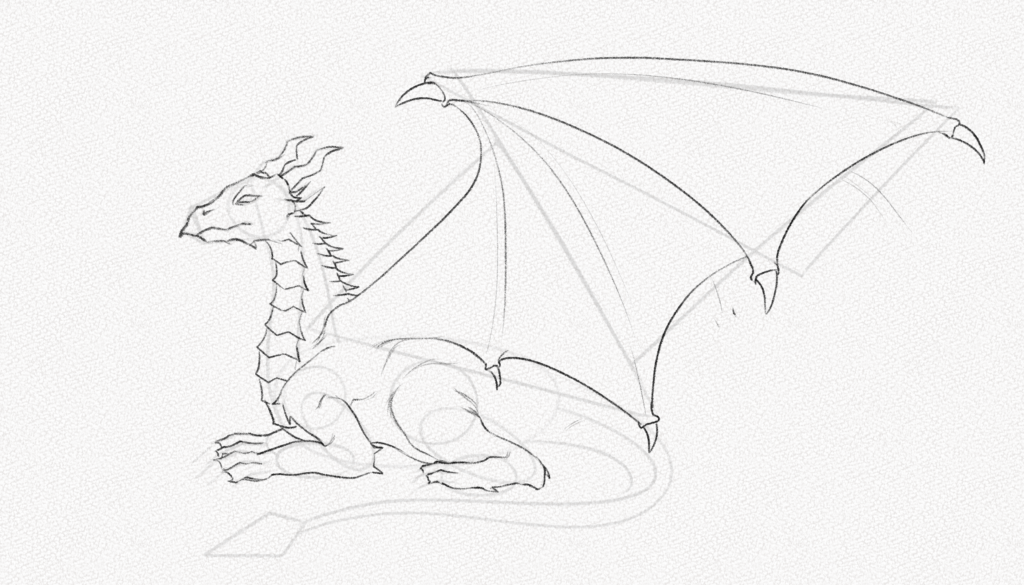
Step 18: Draw the neck
The neck has larger overlapping scales at the front and, in many cases, protrusions in the form of spines on the back.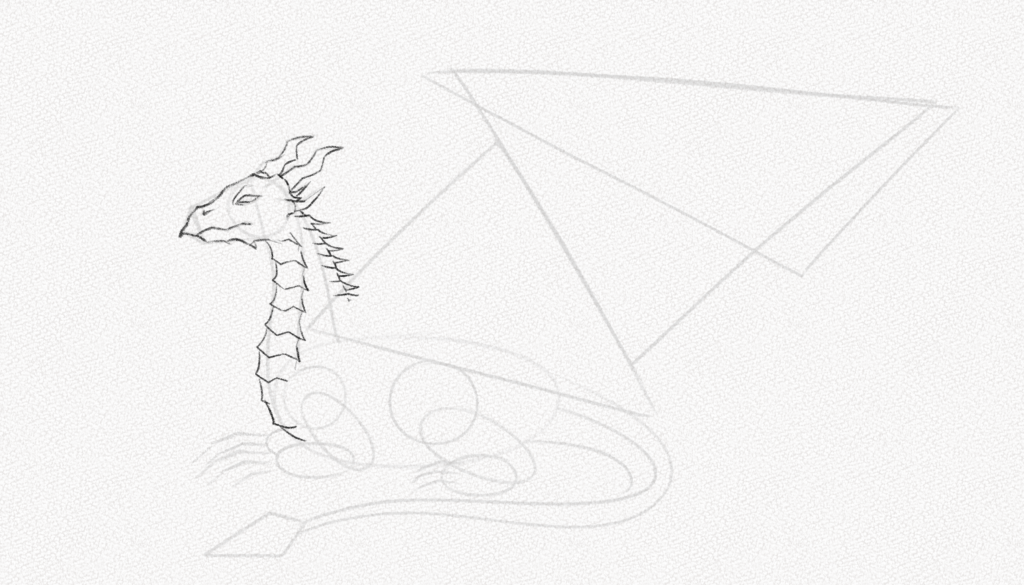
Step 19: Draw the legs
Now, draw the legs, and add small spiky bumps near the joints to add more detail to the drawing. 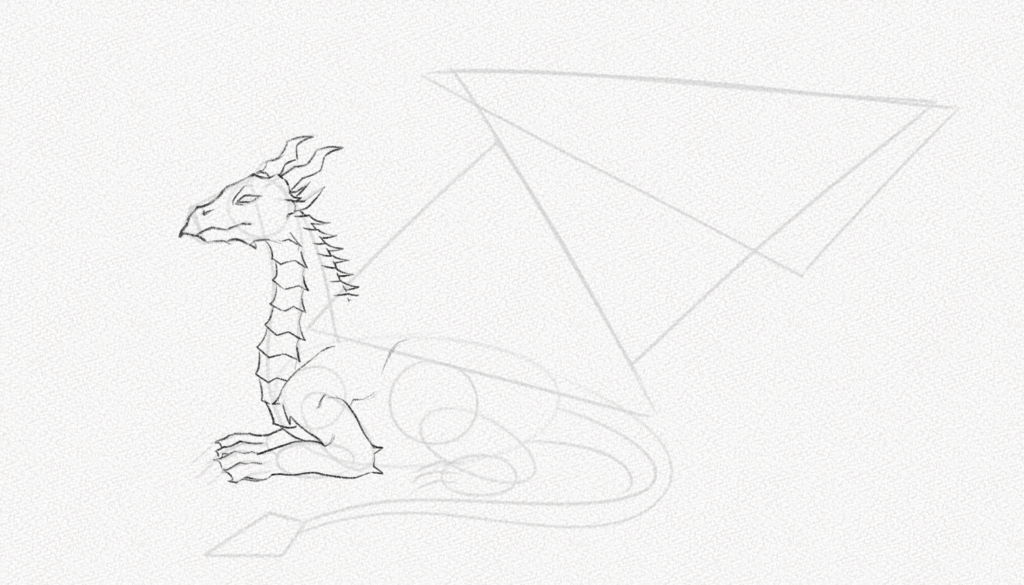
Step 20: Draw the wings
For the wings, we are going to use fruit bat wings as a reference and add claws at the end of the divisions, as shown below.
Step 21: Add the tail and claws
Draw the tail and add the claws. Draw the visible part of the other wing as well. Remember to keep adding the spine protrusions on the tail. Once you’ve finished, erase the still visible parts of your guidelines.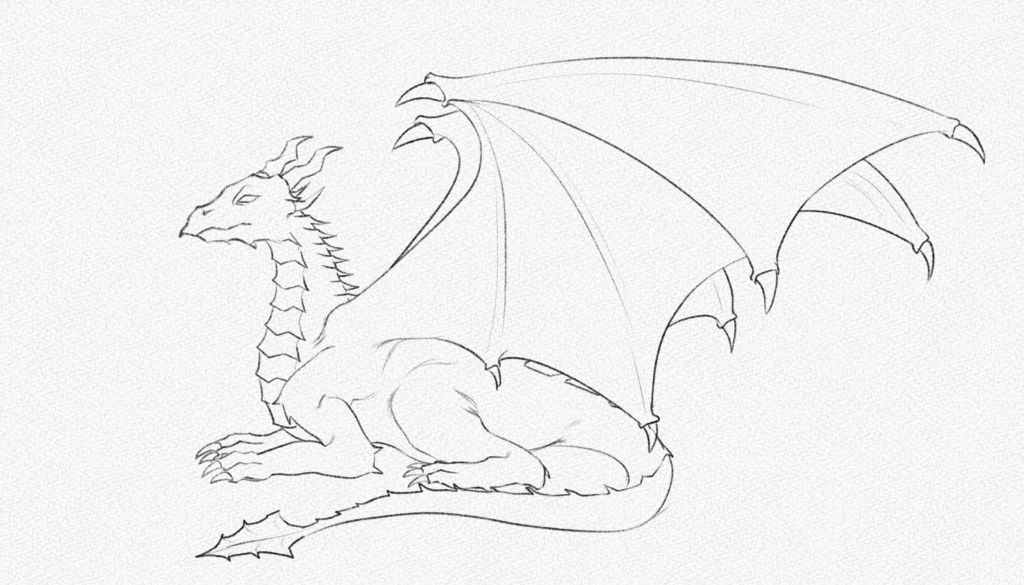
Section 3: How to shade a dragon
Step 22: Add a base of graphite
With your 0.5mm mechanical pencil, shade your dragon softly. In this case, the light will come from above, so the parts shaded the most will be closer to the ground.
Step 23: Shade the wings
Now shade the wings, fill them with graphite, and blend them. Remember to let the divisions have a lighter value. Shade more intensely under the overlapping wing.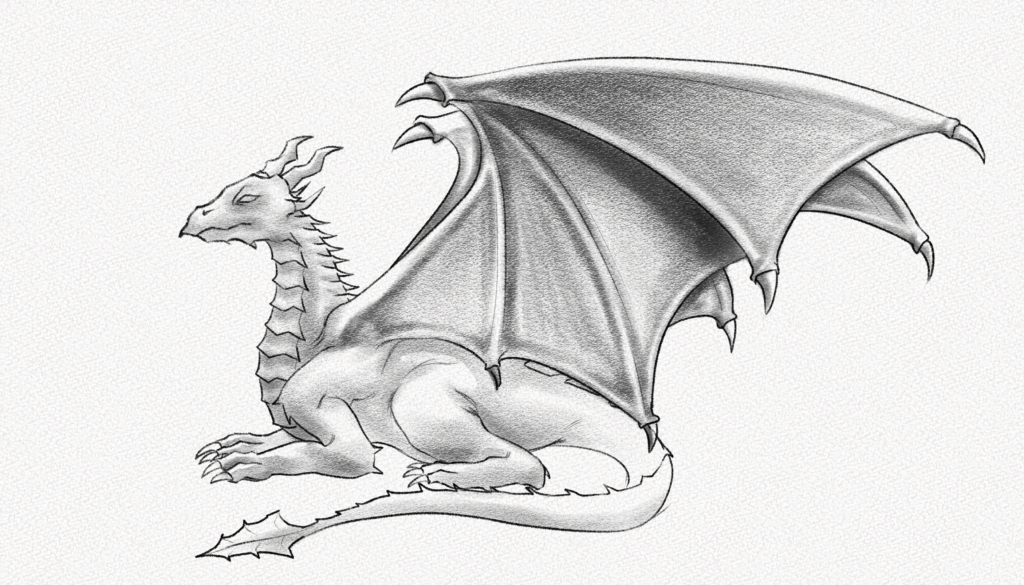
Step 24: Add the scales
Now, this part will be the most time-consuming. You can choose to add some scales here and there if you don’t want to spend a long time doing all of the dragon’s body; however, a handy trick is to sketch several crossed lines as a base with your 0.5mm HB and then draw the actual scales with your 2B mechanical pencil. Do the same for the tail, the part that connects the wings to the body, and you’re done.
To make the scales pop, use your Tombow Mono Zero to erase some of them and your white gel pen to add some highlights on top.
Step 25: Draw the ground
Add soft traces under your dragon and blend them to mimic the ground.
And that’s it. You’re done.
Thank you for following this tutorial. You did great!
I hope you learned something new today and now have a better grasp on how to draw a Dragon.
Until next time!