Drawing feet can be a challenging task for many artists. Alongside hands, they are often considered the artist’s worst nightmare. The reputation of feet is so notorious that many artists tend to avoid drawing them altogether, either by excluding them from their work or hiding them beneath clothing.
However, drawing and painting beautiful feet can be seen as an art form in itself. At Artlex, we believe that nothing is impossible, and although feet may pose difficulties, there are ways to overcome them. In this guide, we present a fool-proof method to draw feet that not only teaches you how to depict them accurately but also provide insights into their anatomy, movement, and the ability to create them from scratch in various angles.
So, gather your art supplies and prepare yourself to embark on this journey of mastering the art of drawing feet!
What you will learn:
- Structure and Anatomy of the Feet
- How to Shade Feet
Materials needed:
- Multiple pieces of paper (for practice)
- A 2B and 6B graphite pencil
- A blending stump
- A Tombow Mono Zero 2.3mm eraser
- A kneaded eraser
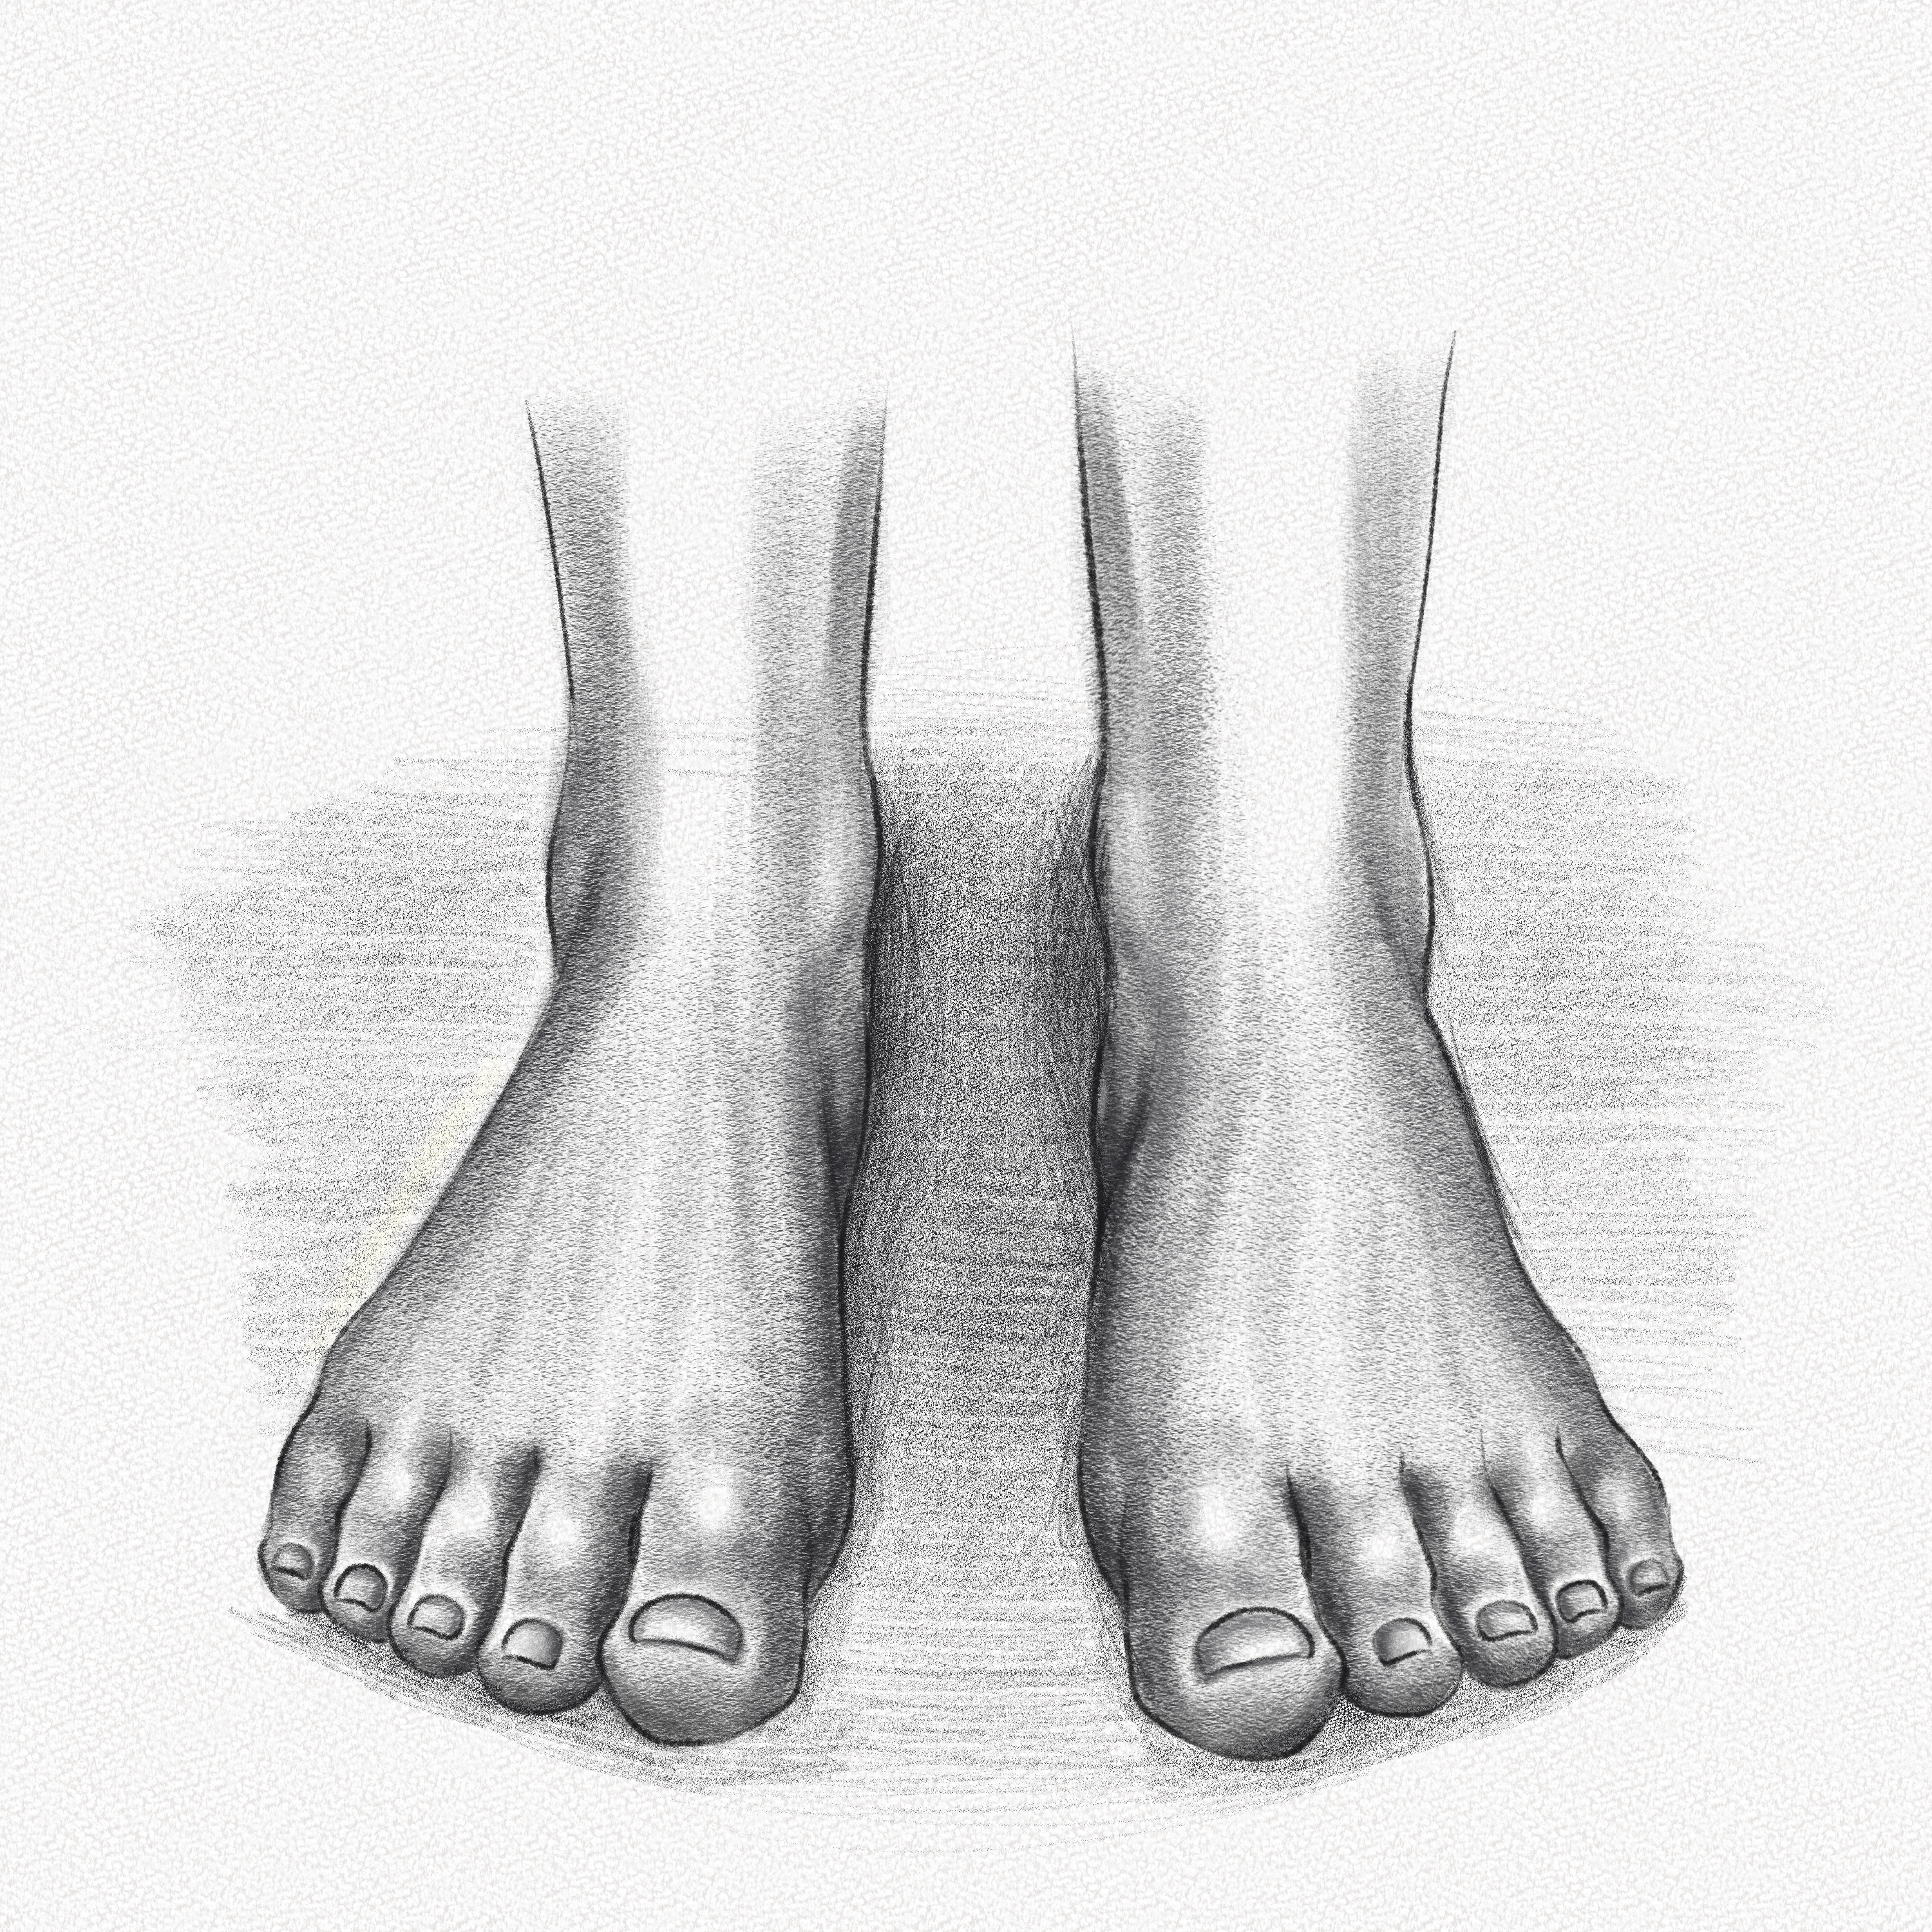
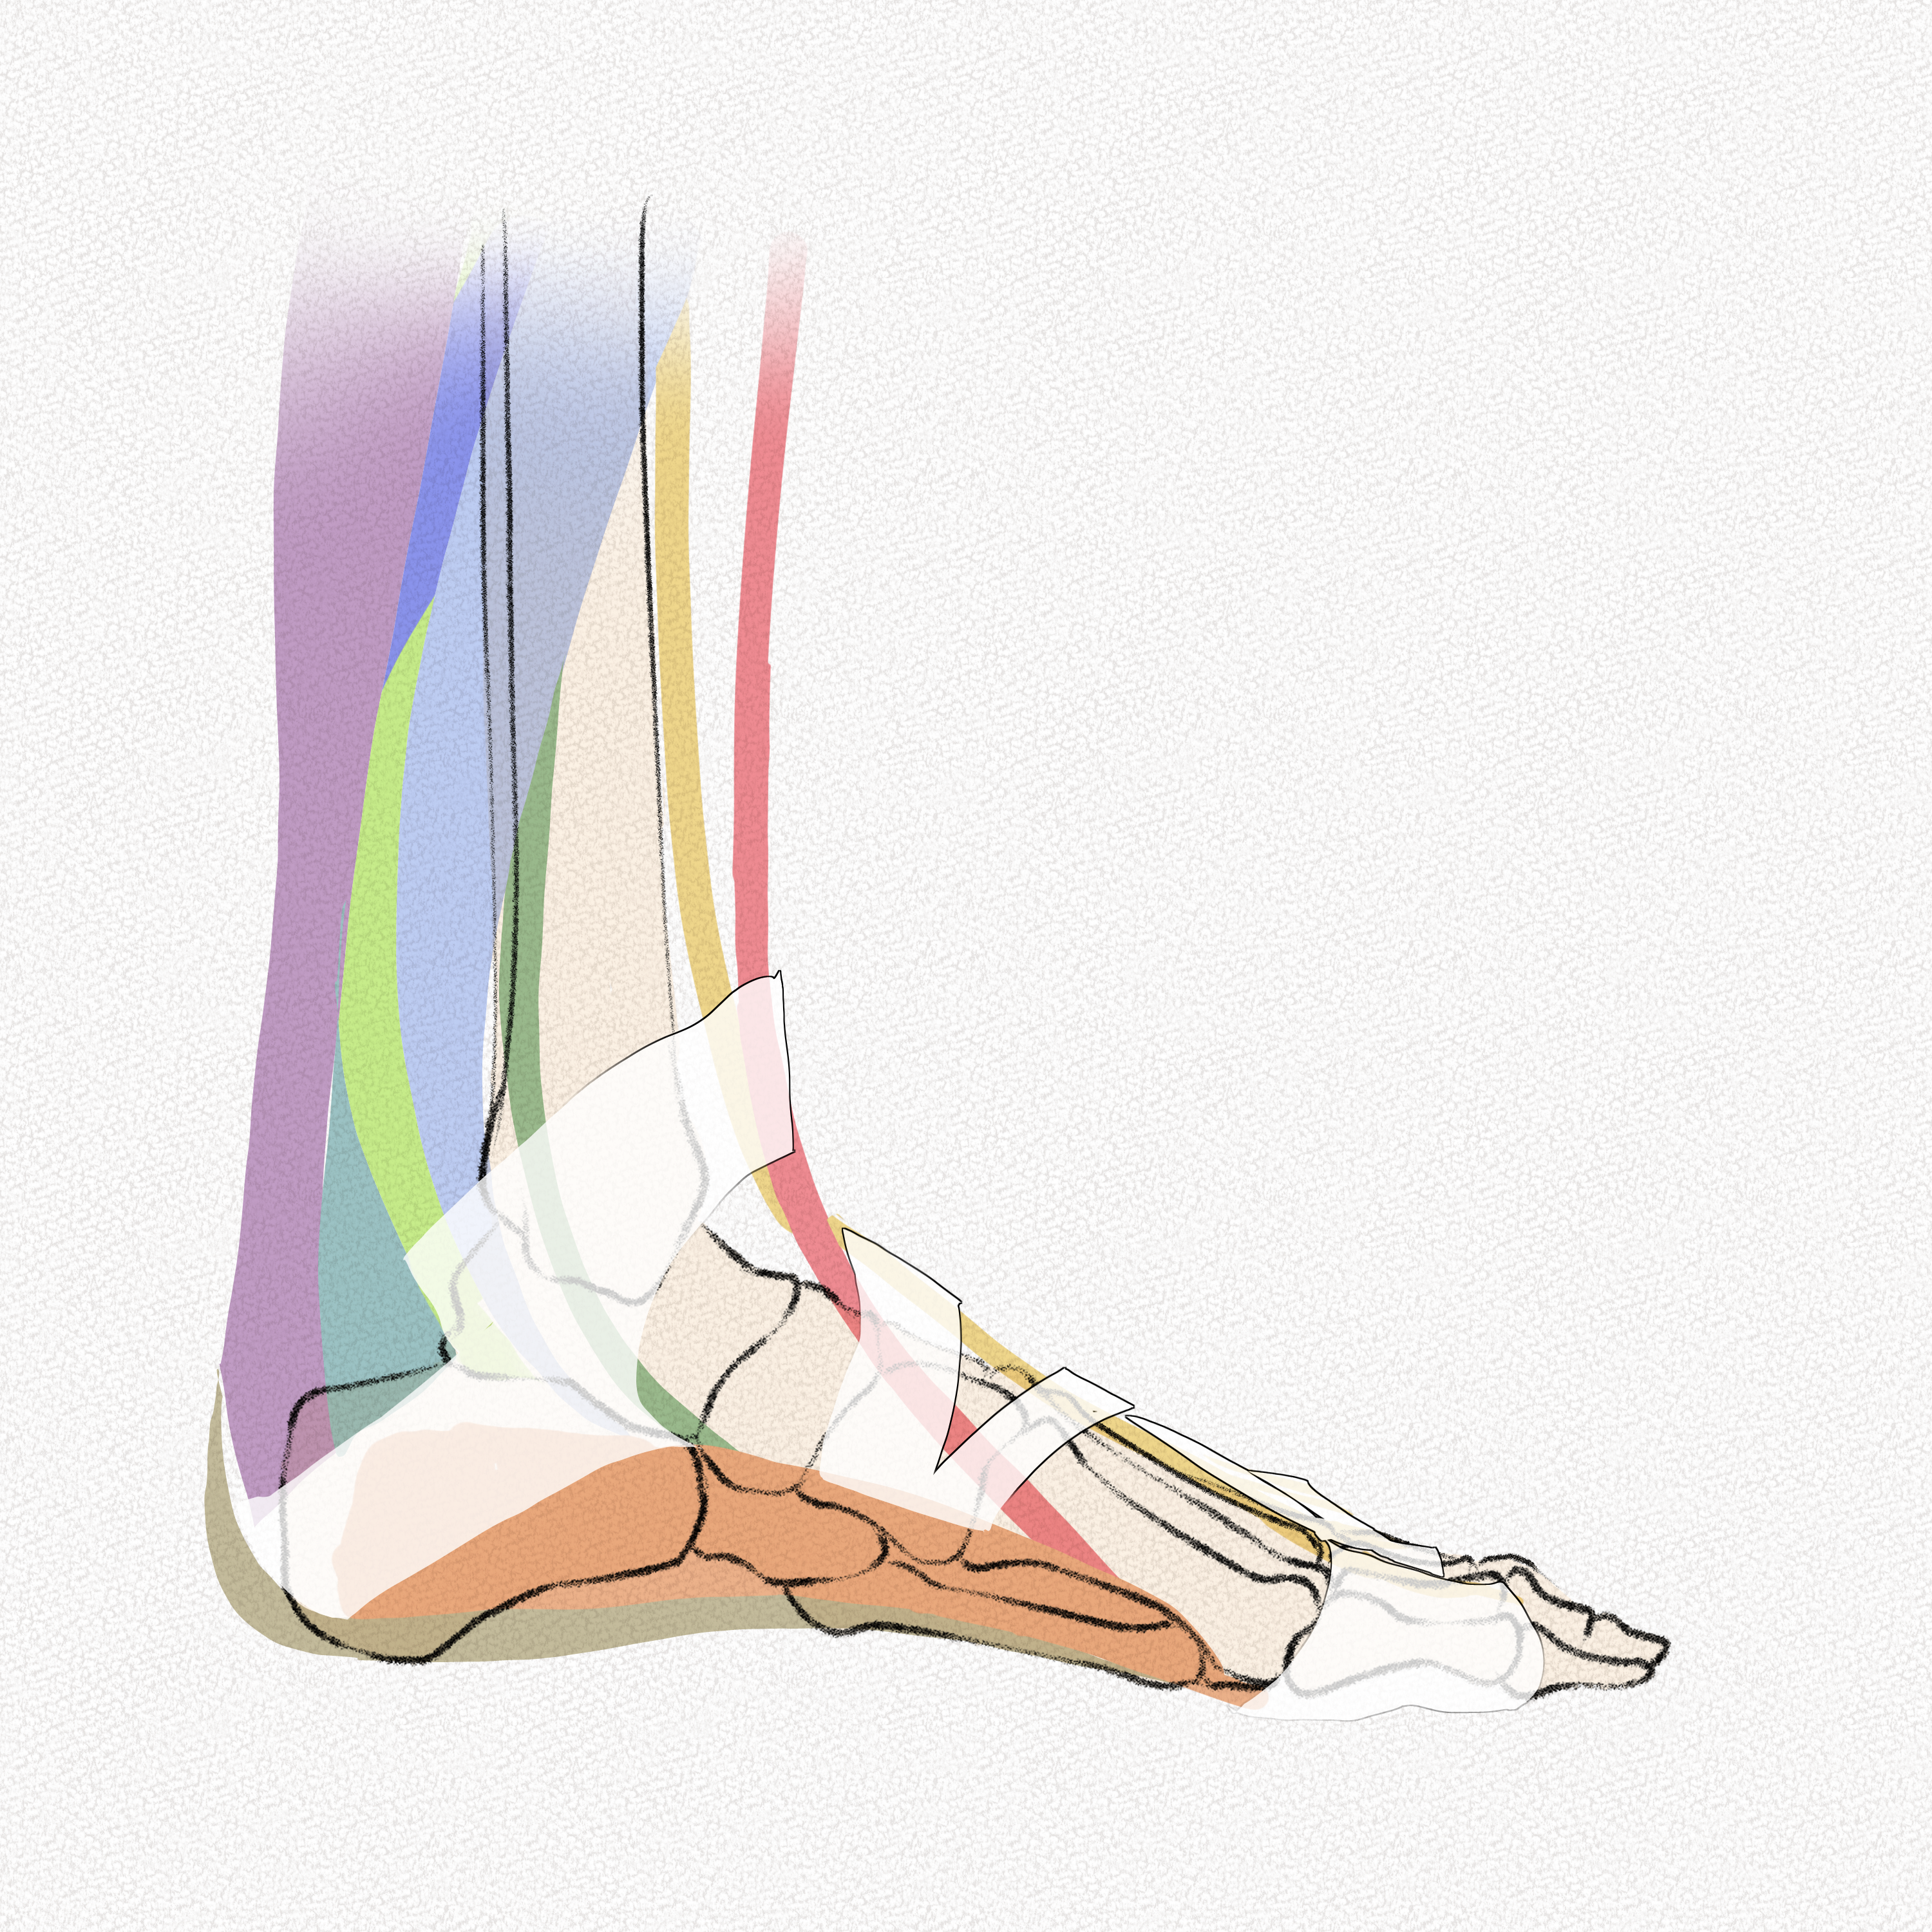
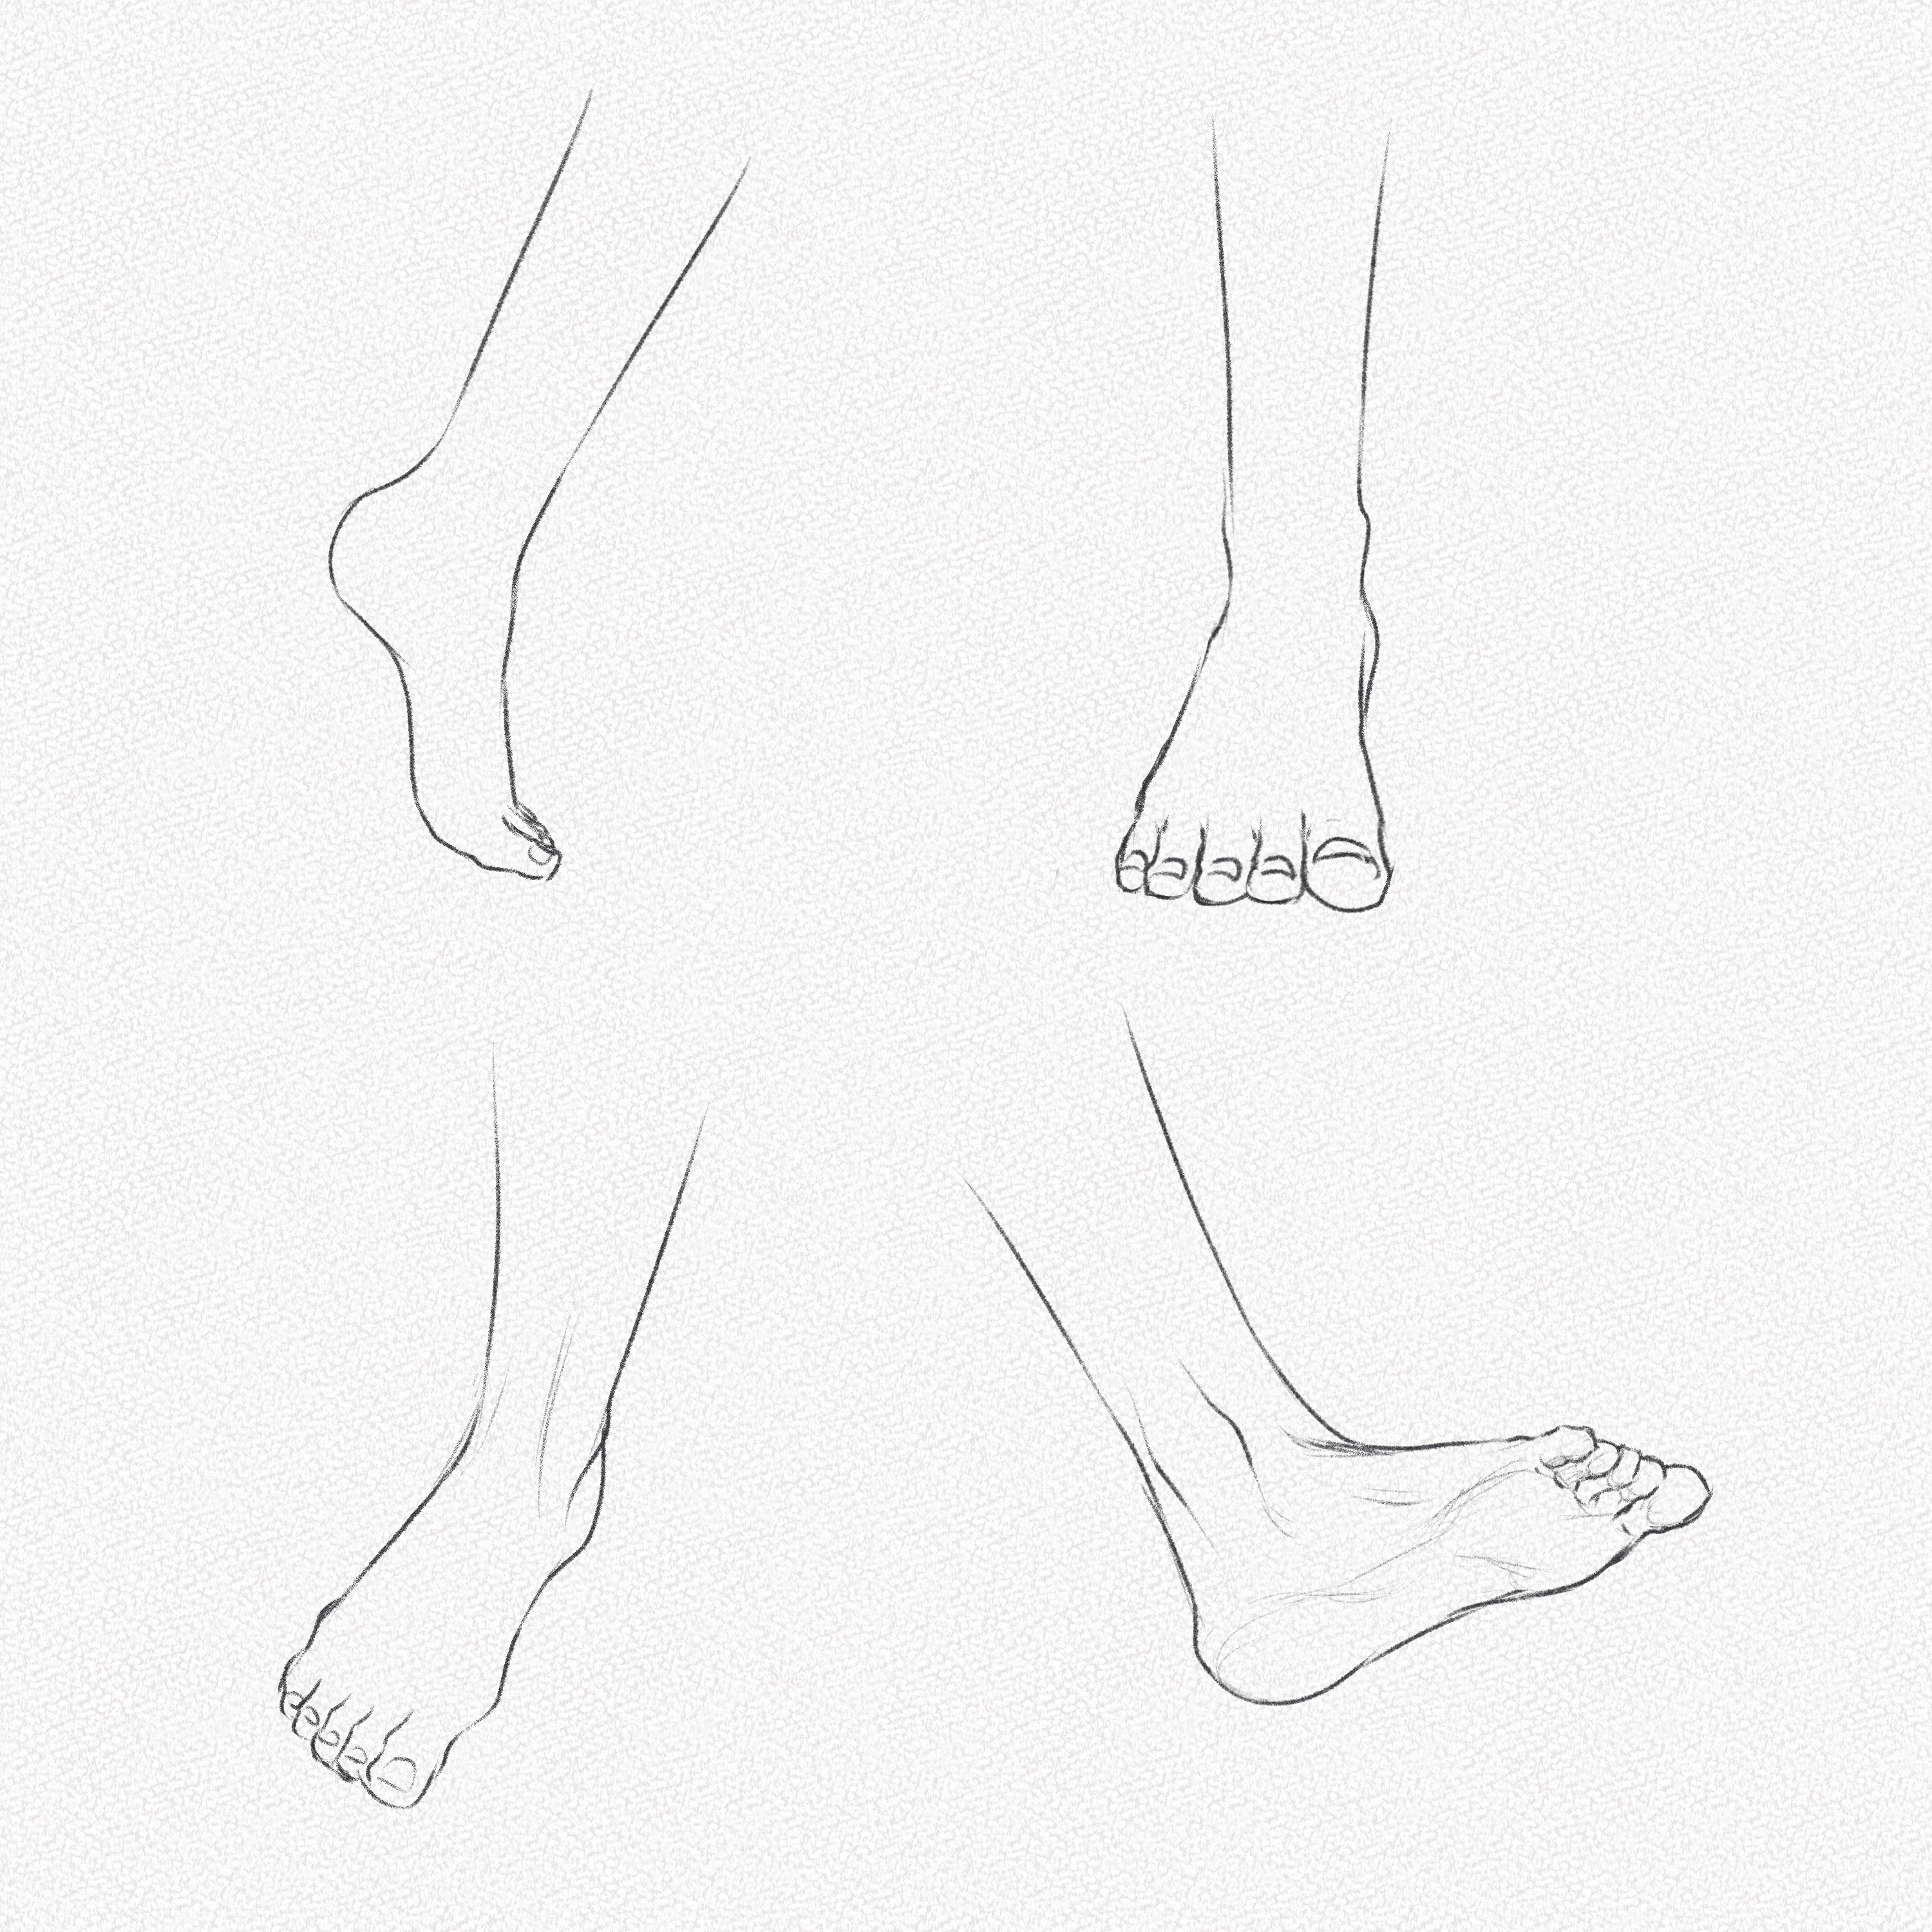
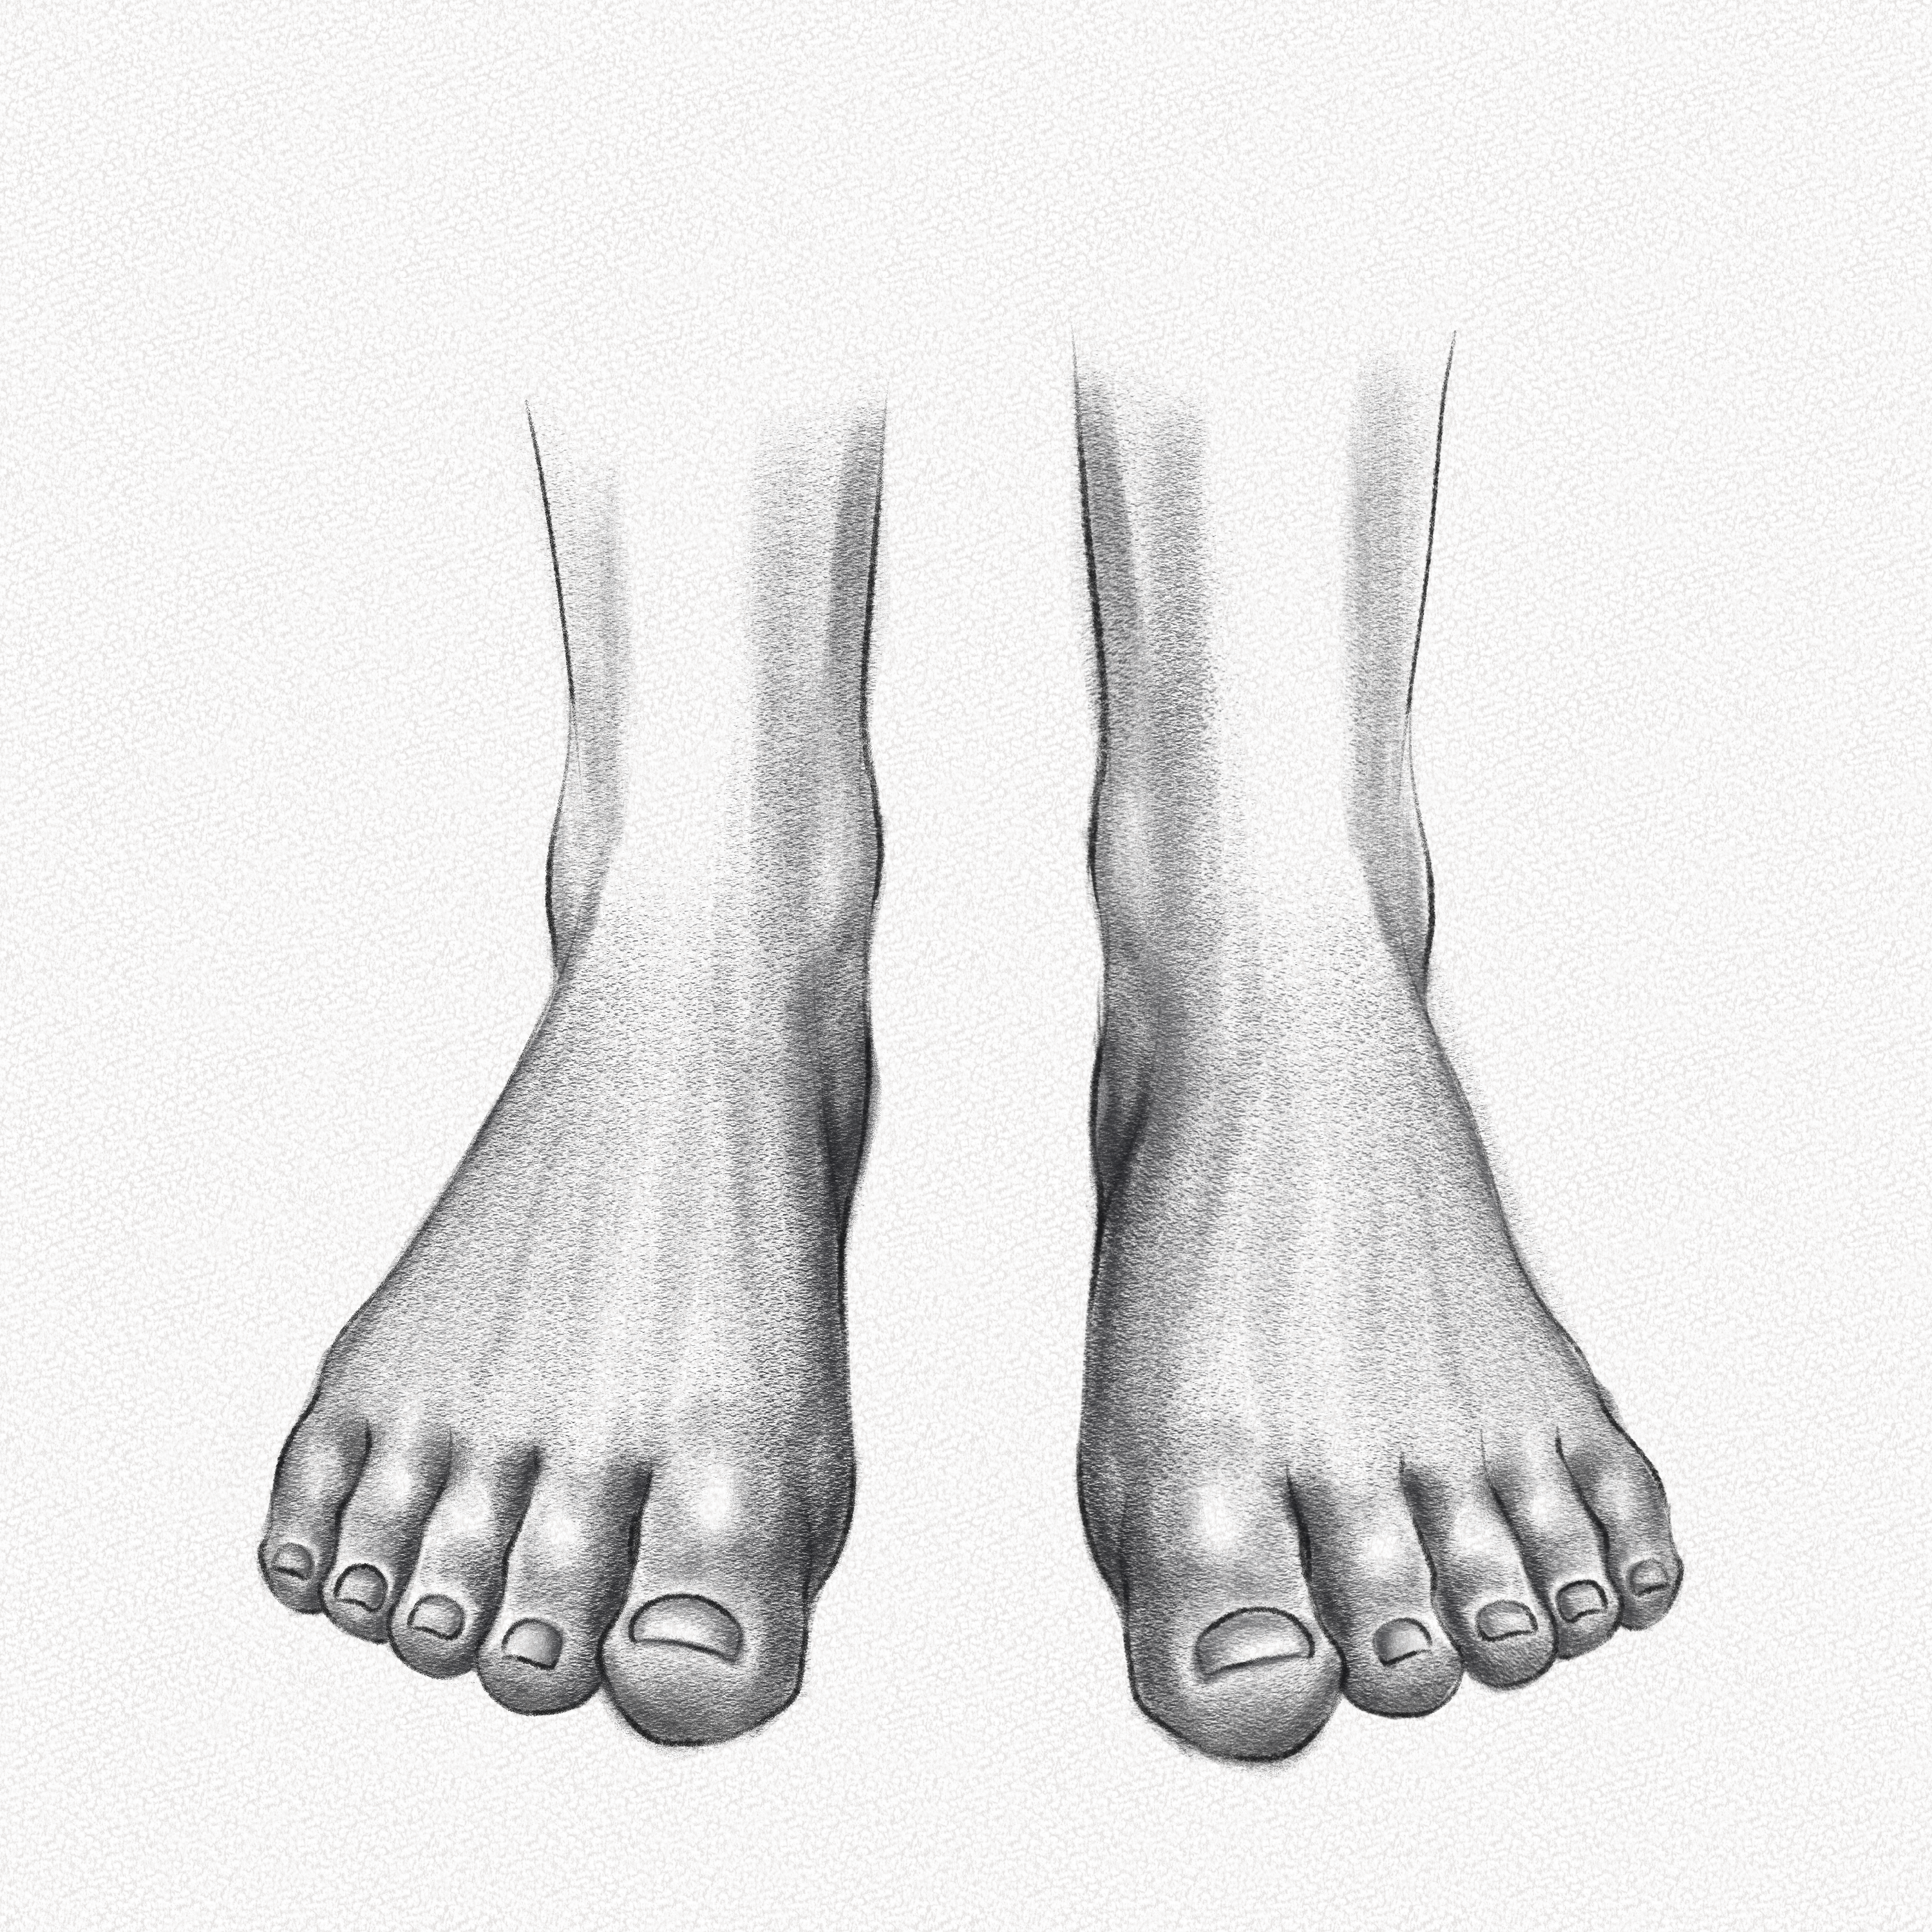
These are the feet you will be drawing:
And these are all the steps we’ll guide you through:
Section 1.- Structure and Anatomy of the Feet
Everything is easier after studying anatomy right? Although many will disagree with me, you’ll know I’m in the right. Anatomy is basic for an artist, and although it’s not the greatest subject to study, having a general base is imperative o draw complex structures or understand how some body parts work.
The same goes for the feet. Although their shape might look quite simple, their range of movement is wide and in contrast with hands, you must get your perspective right when drawing feet.
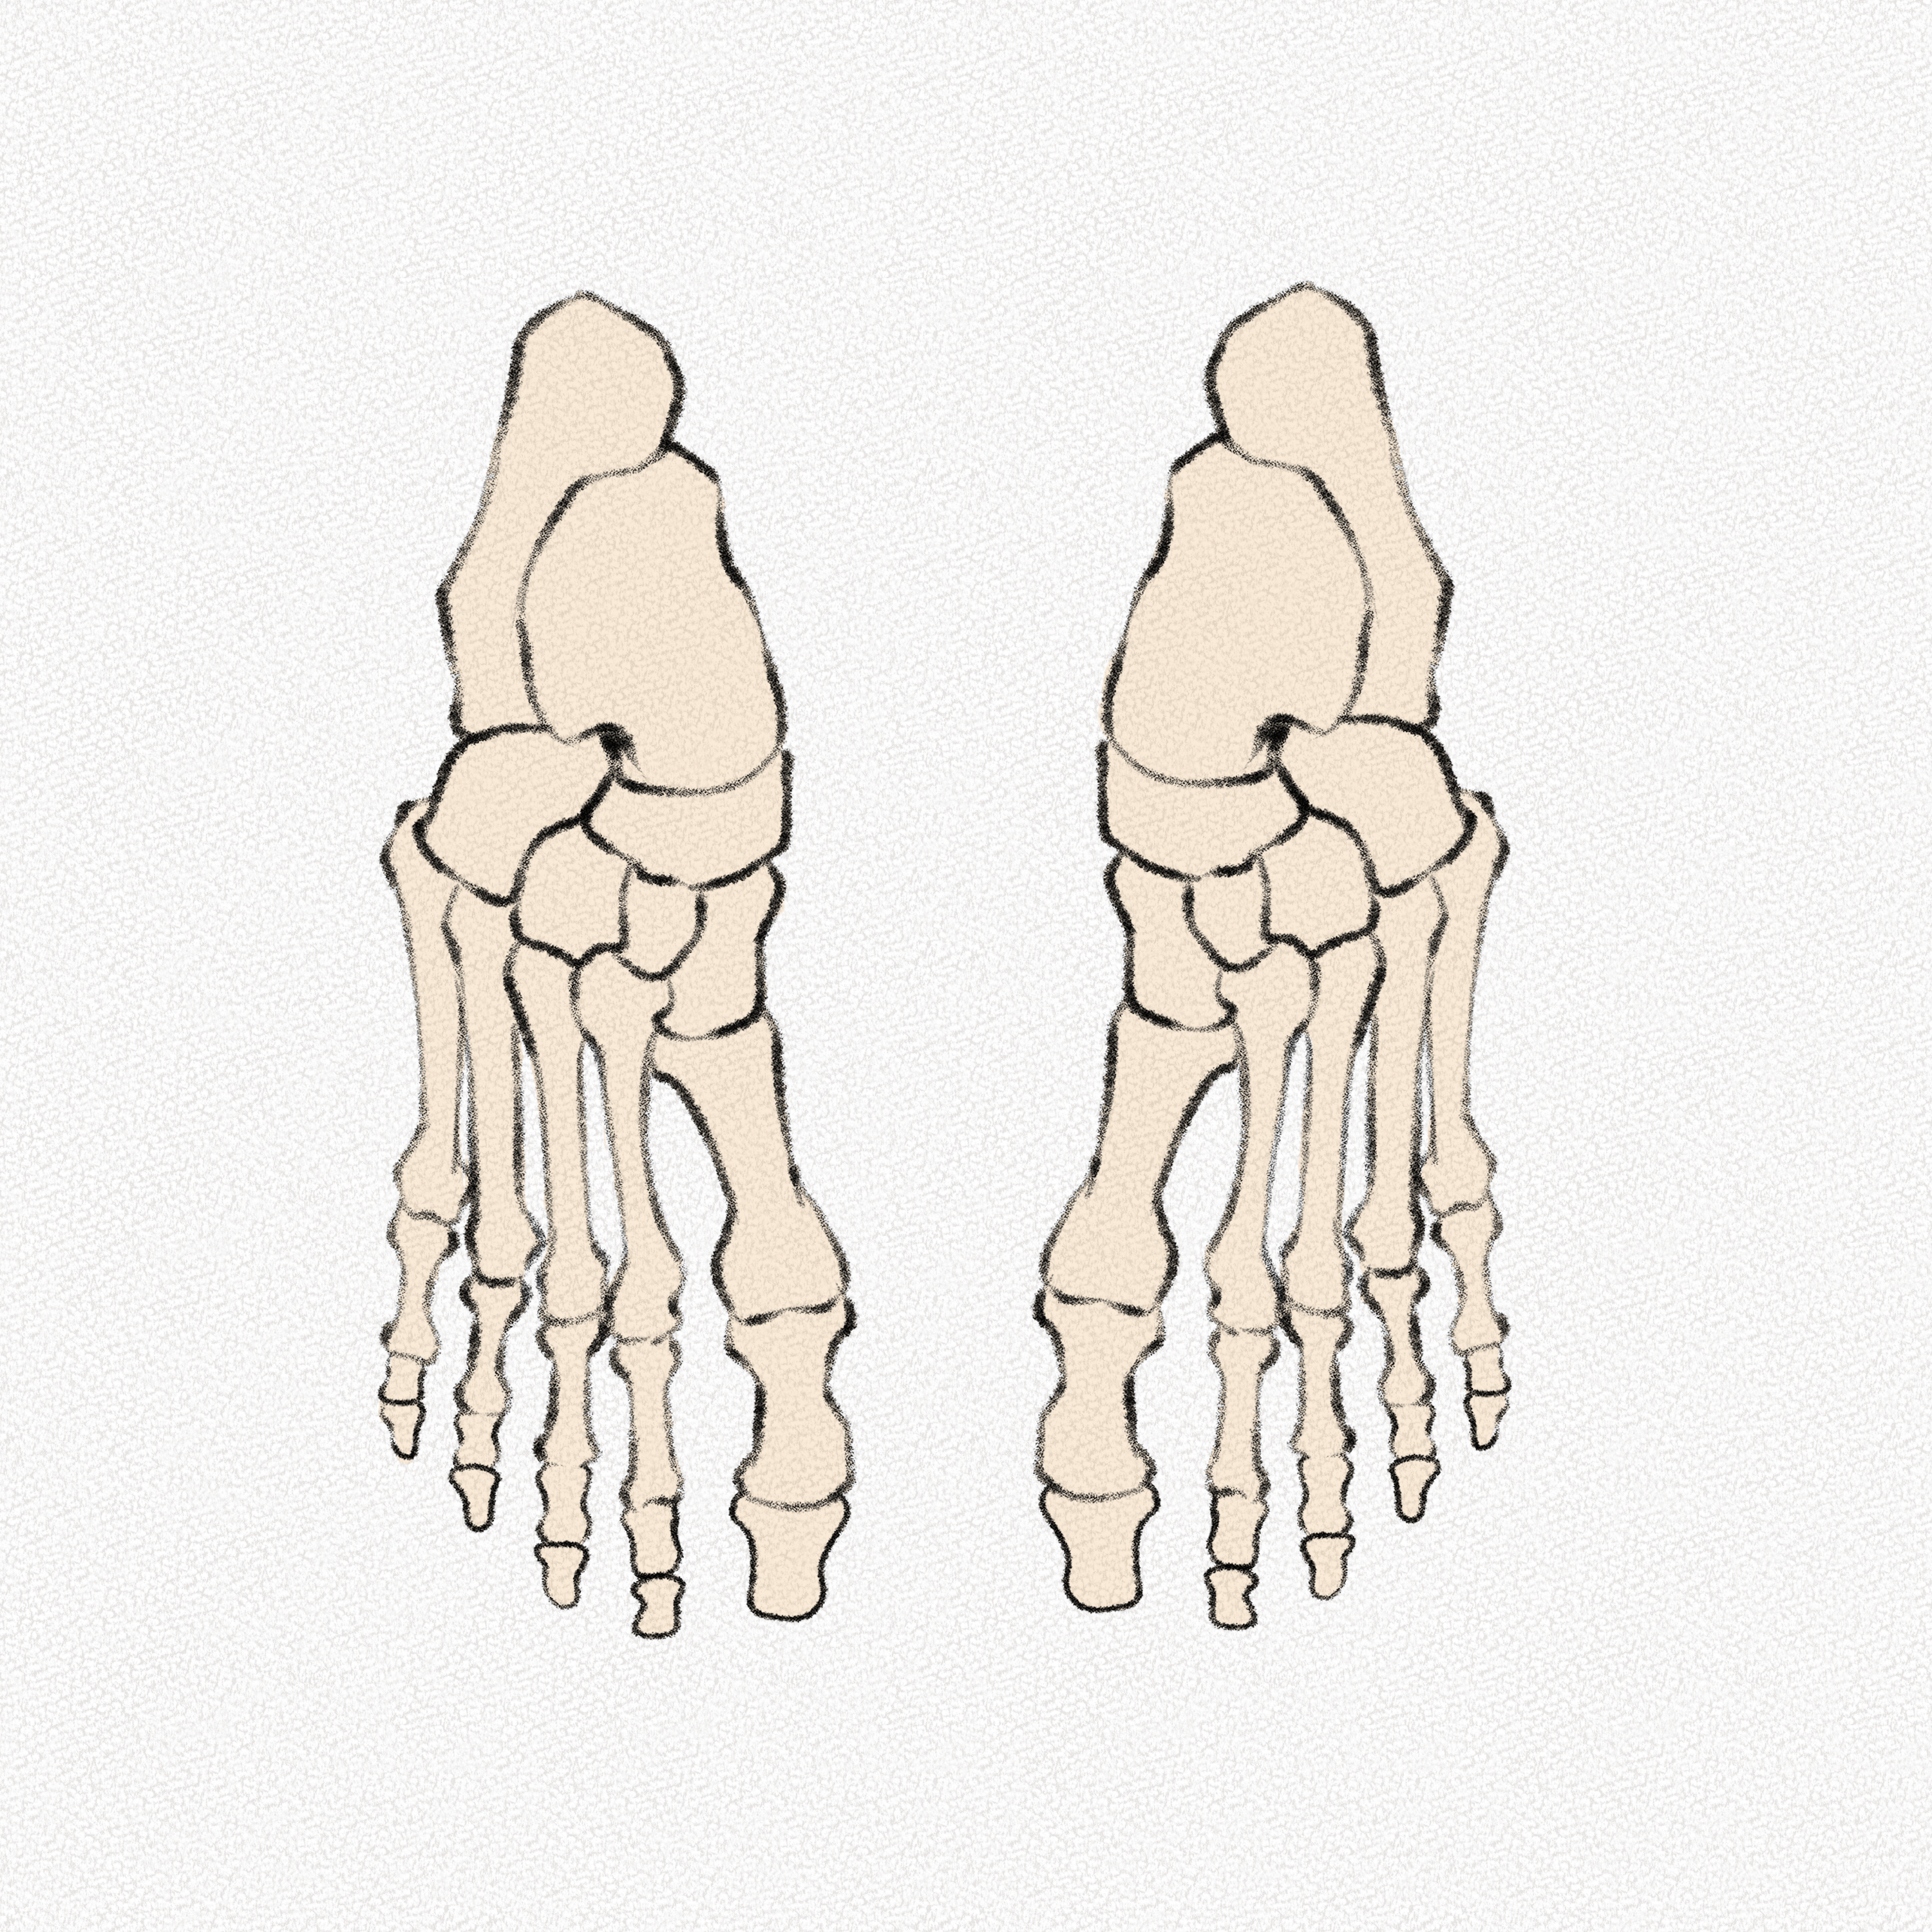
When examining feet from above, all we can see is a somewhat flat shape with small knobs for fingers, however, when we look at the structure under them, we’ll see a more complex bone structure that gives the feet their shape.
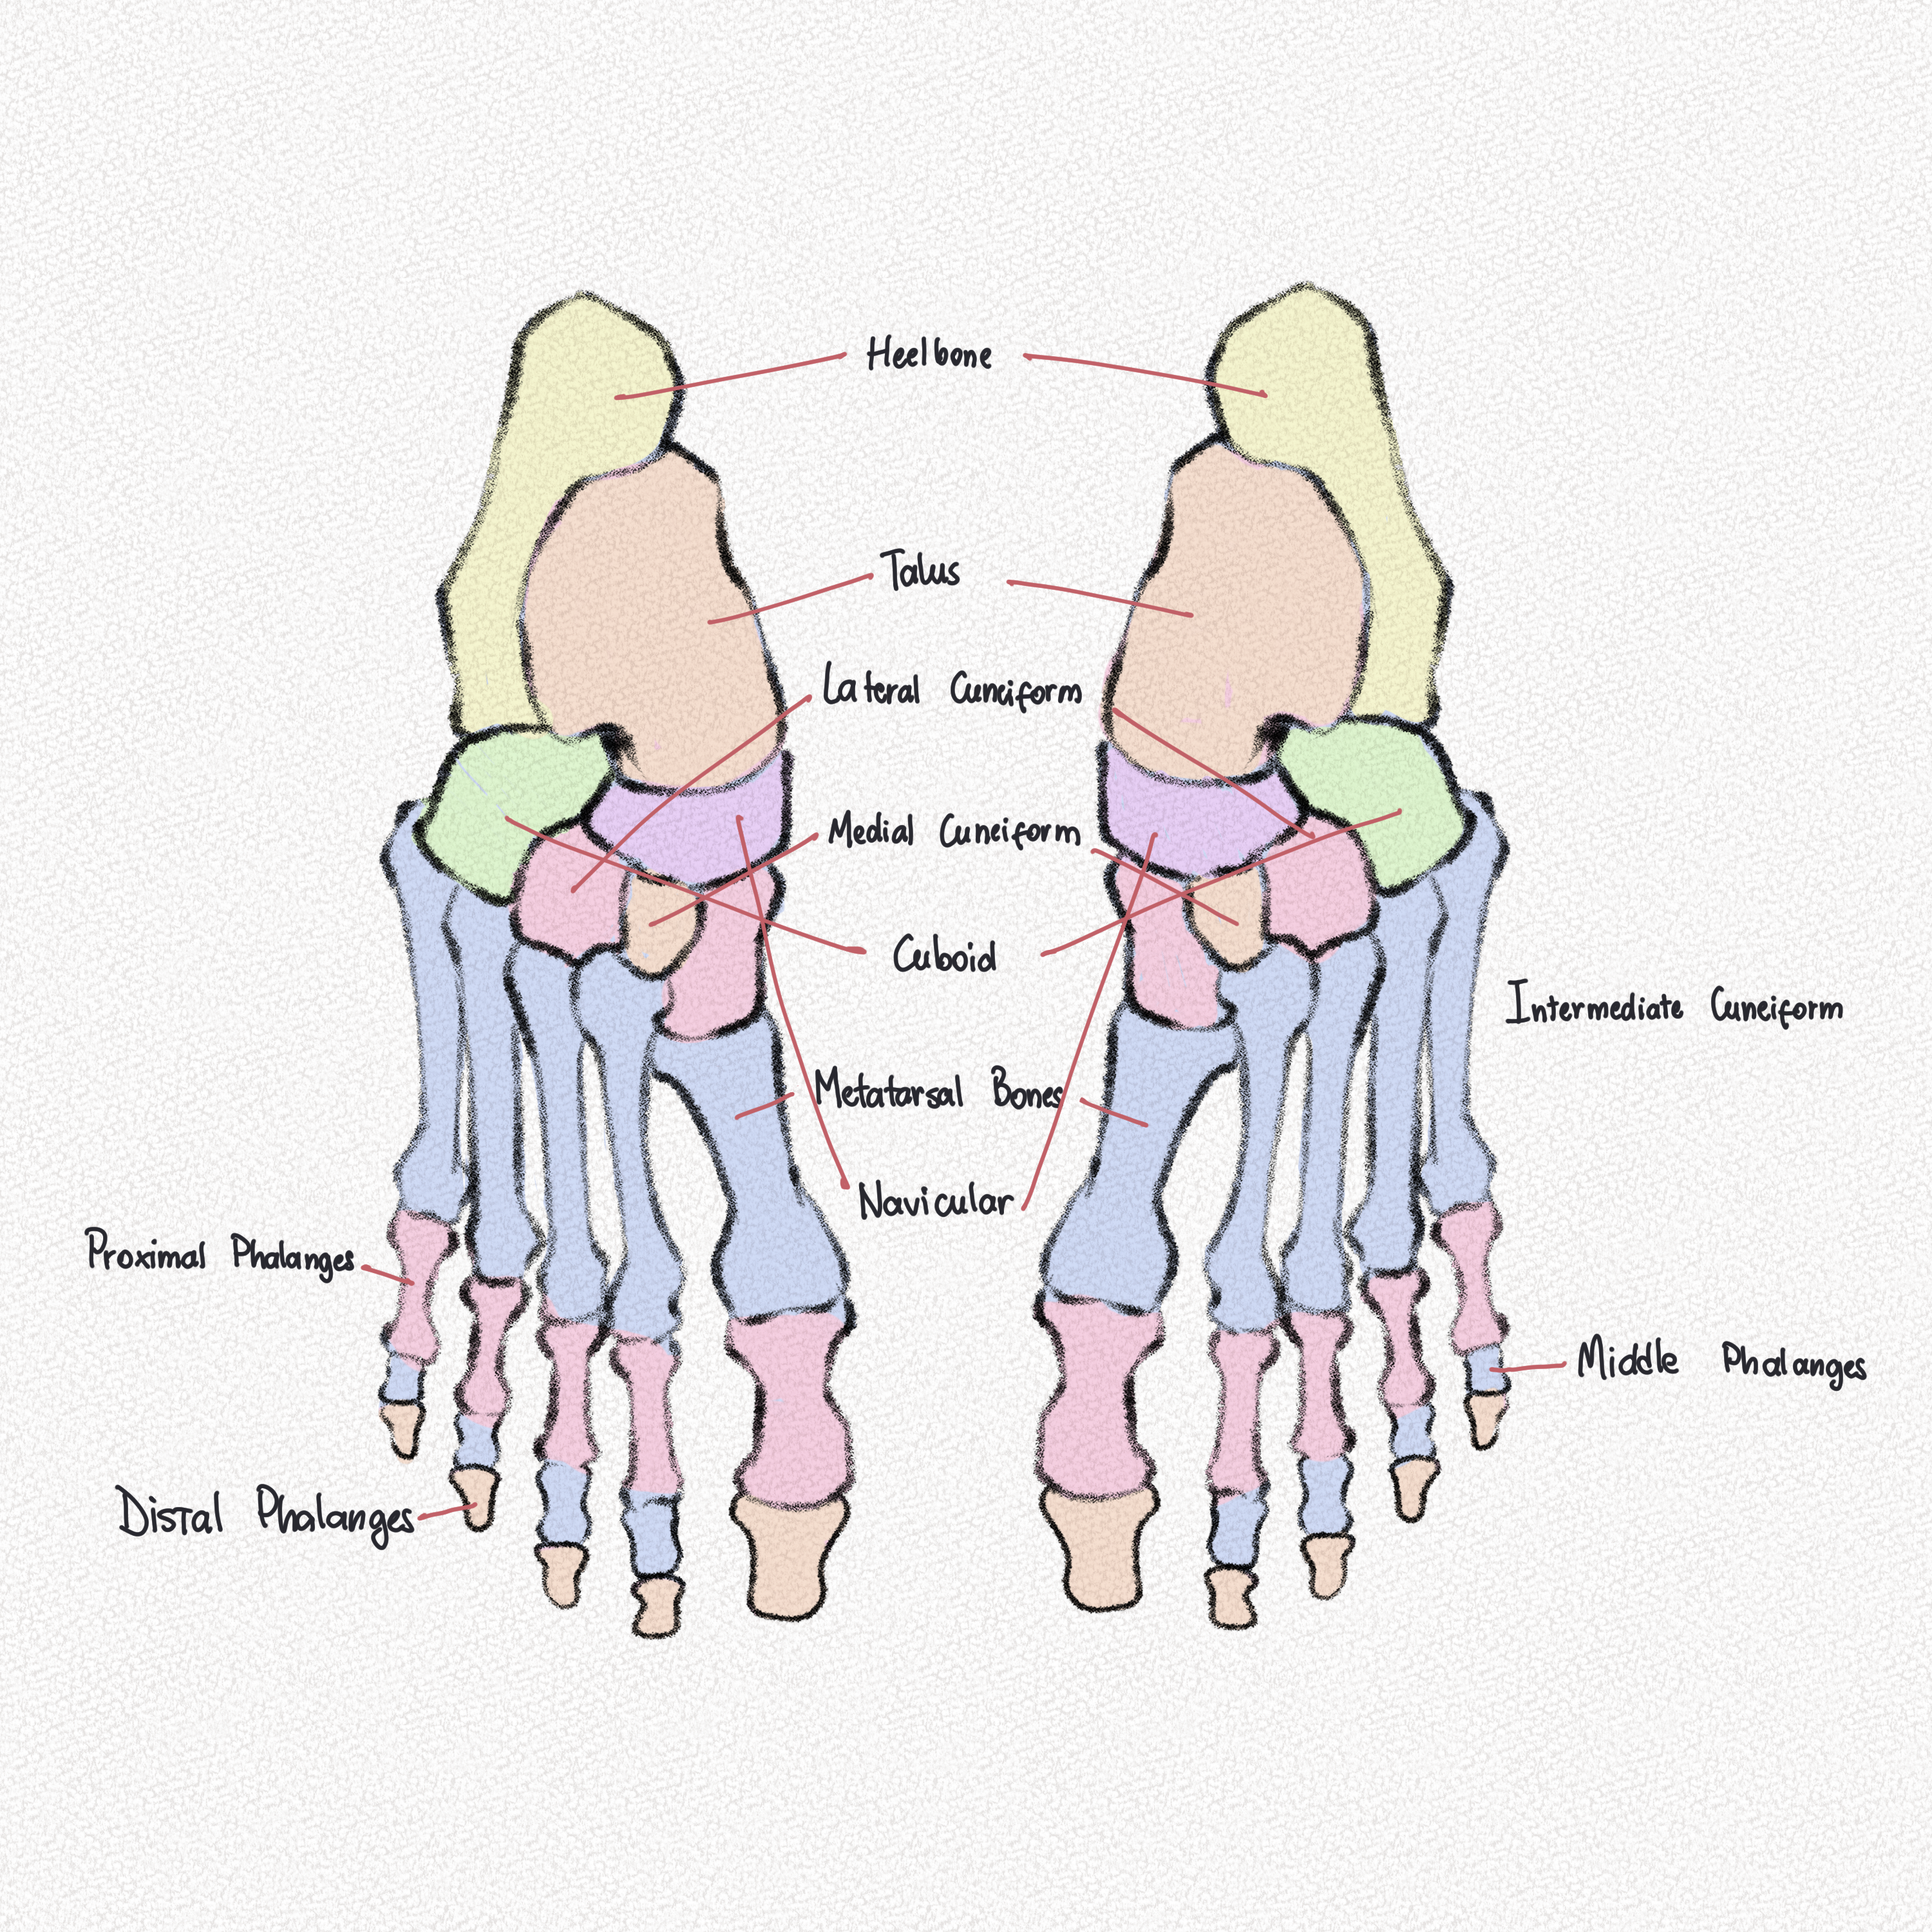
When looking at them from the side, we see a triangular shape that is connected to the calf bones. We can notice a major bone structure on the heel that protrudes noticeably, while the other bones align around it.

However, when we stop looking at the bones only, we notice the system is much more complex, especially if we consider muscles, tendons, and veins.
All that sounds like a hassle, nevertheless, we can easily break this structure into simple shapes and build the details afterward.
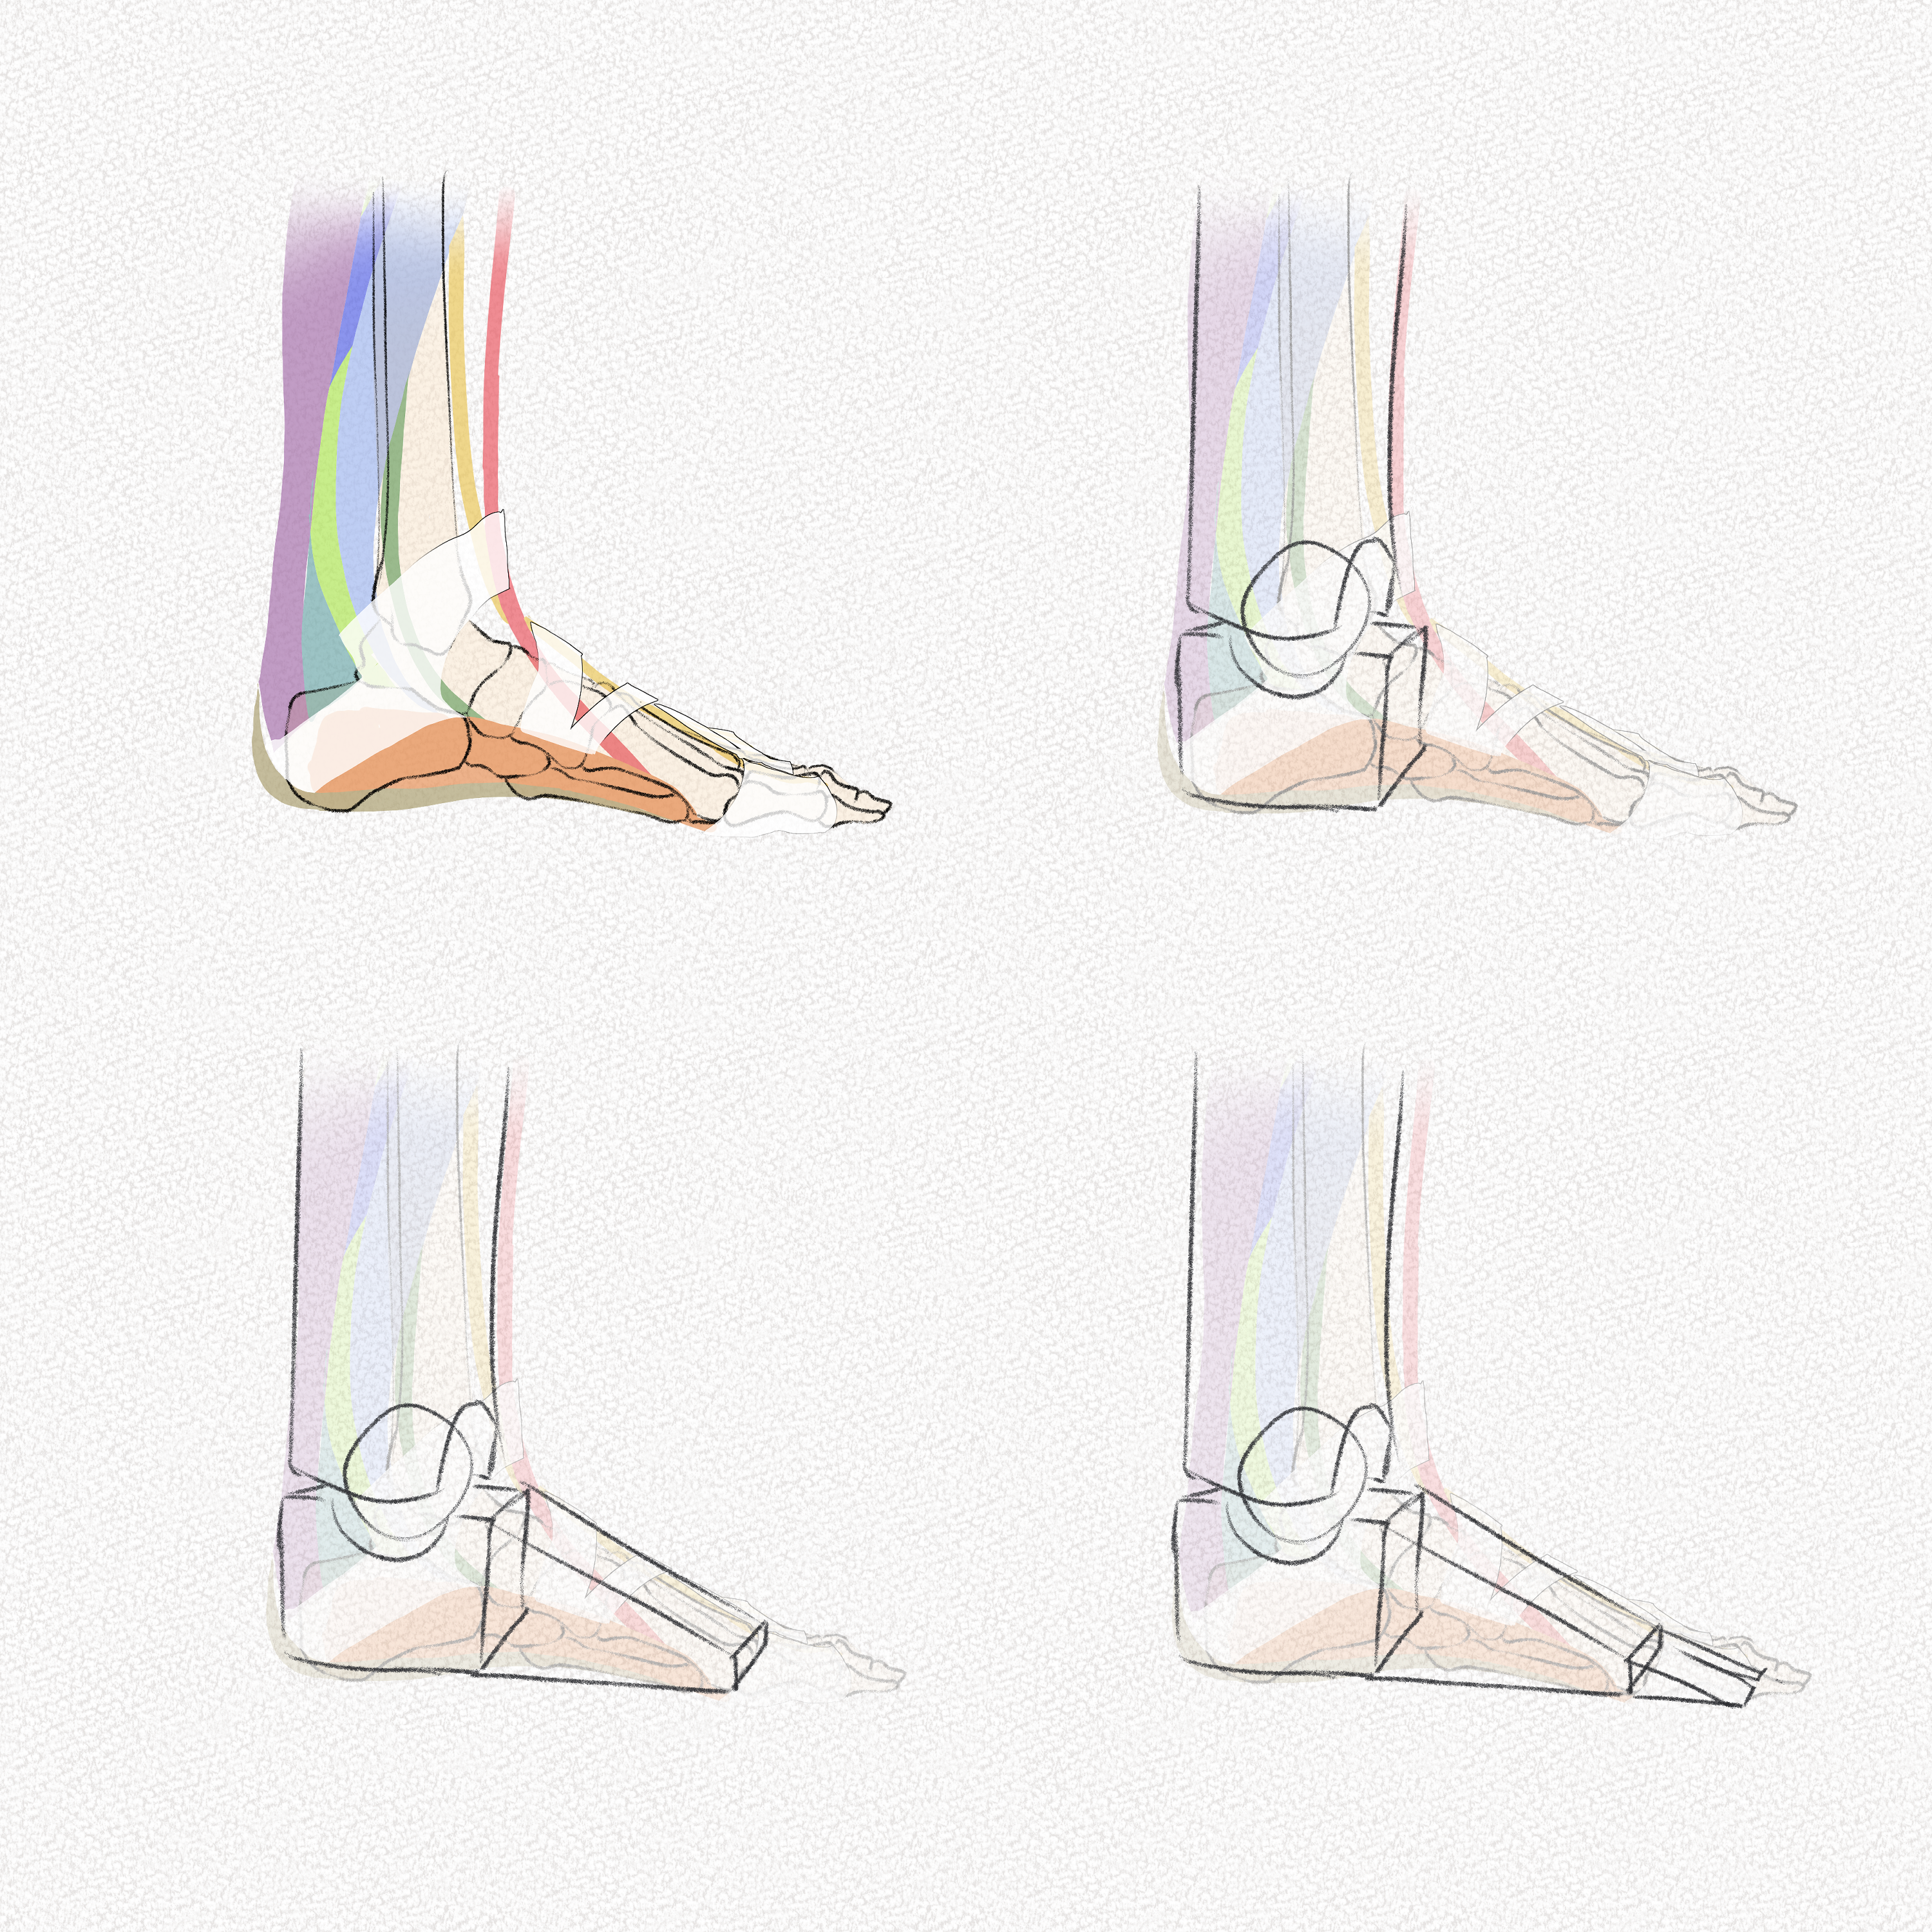
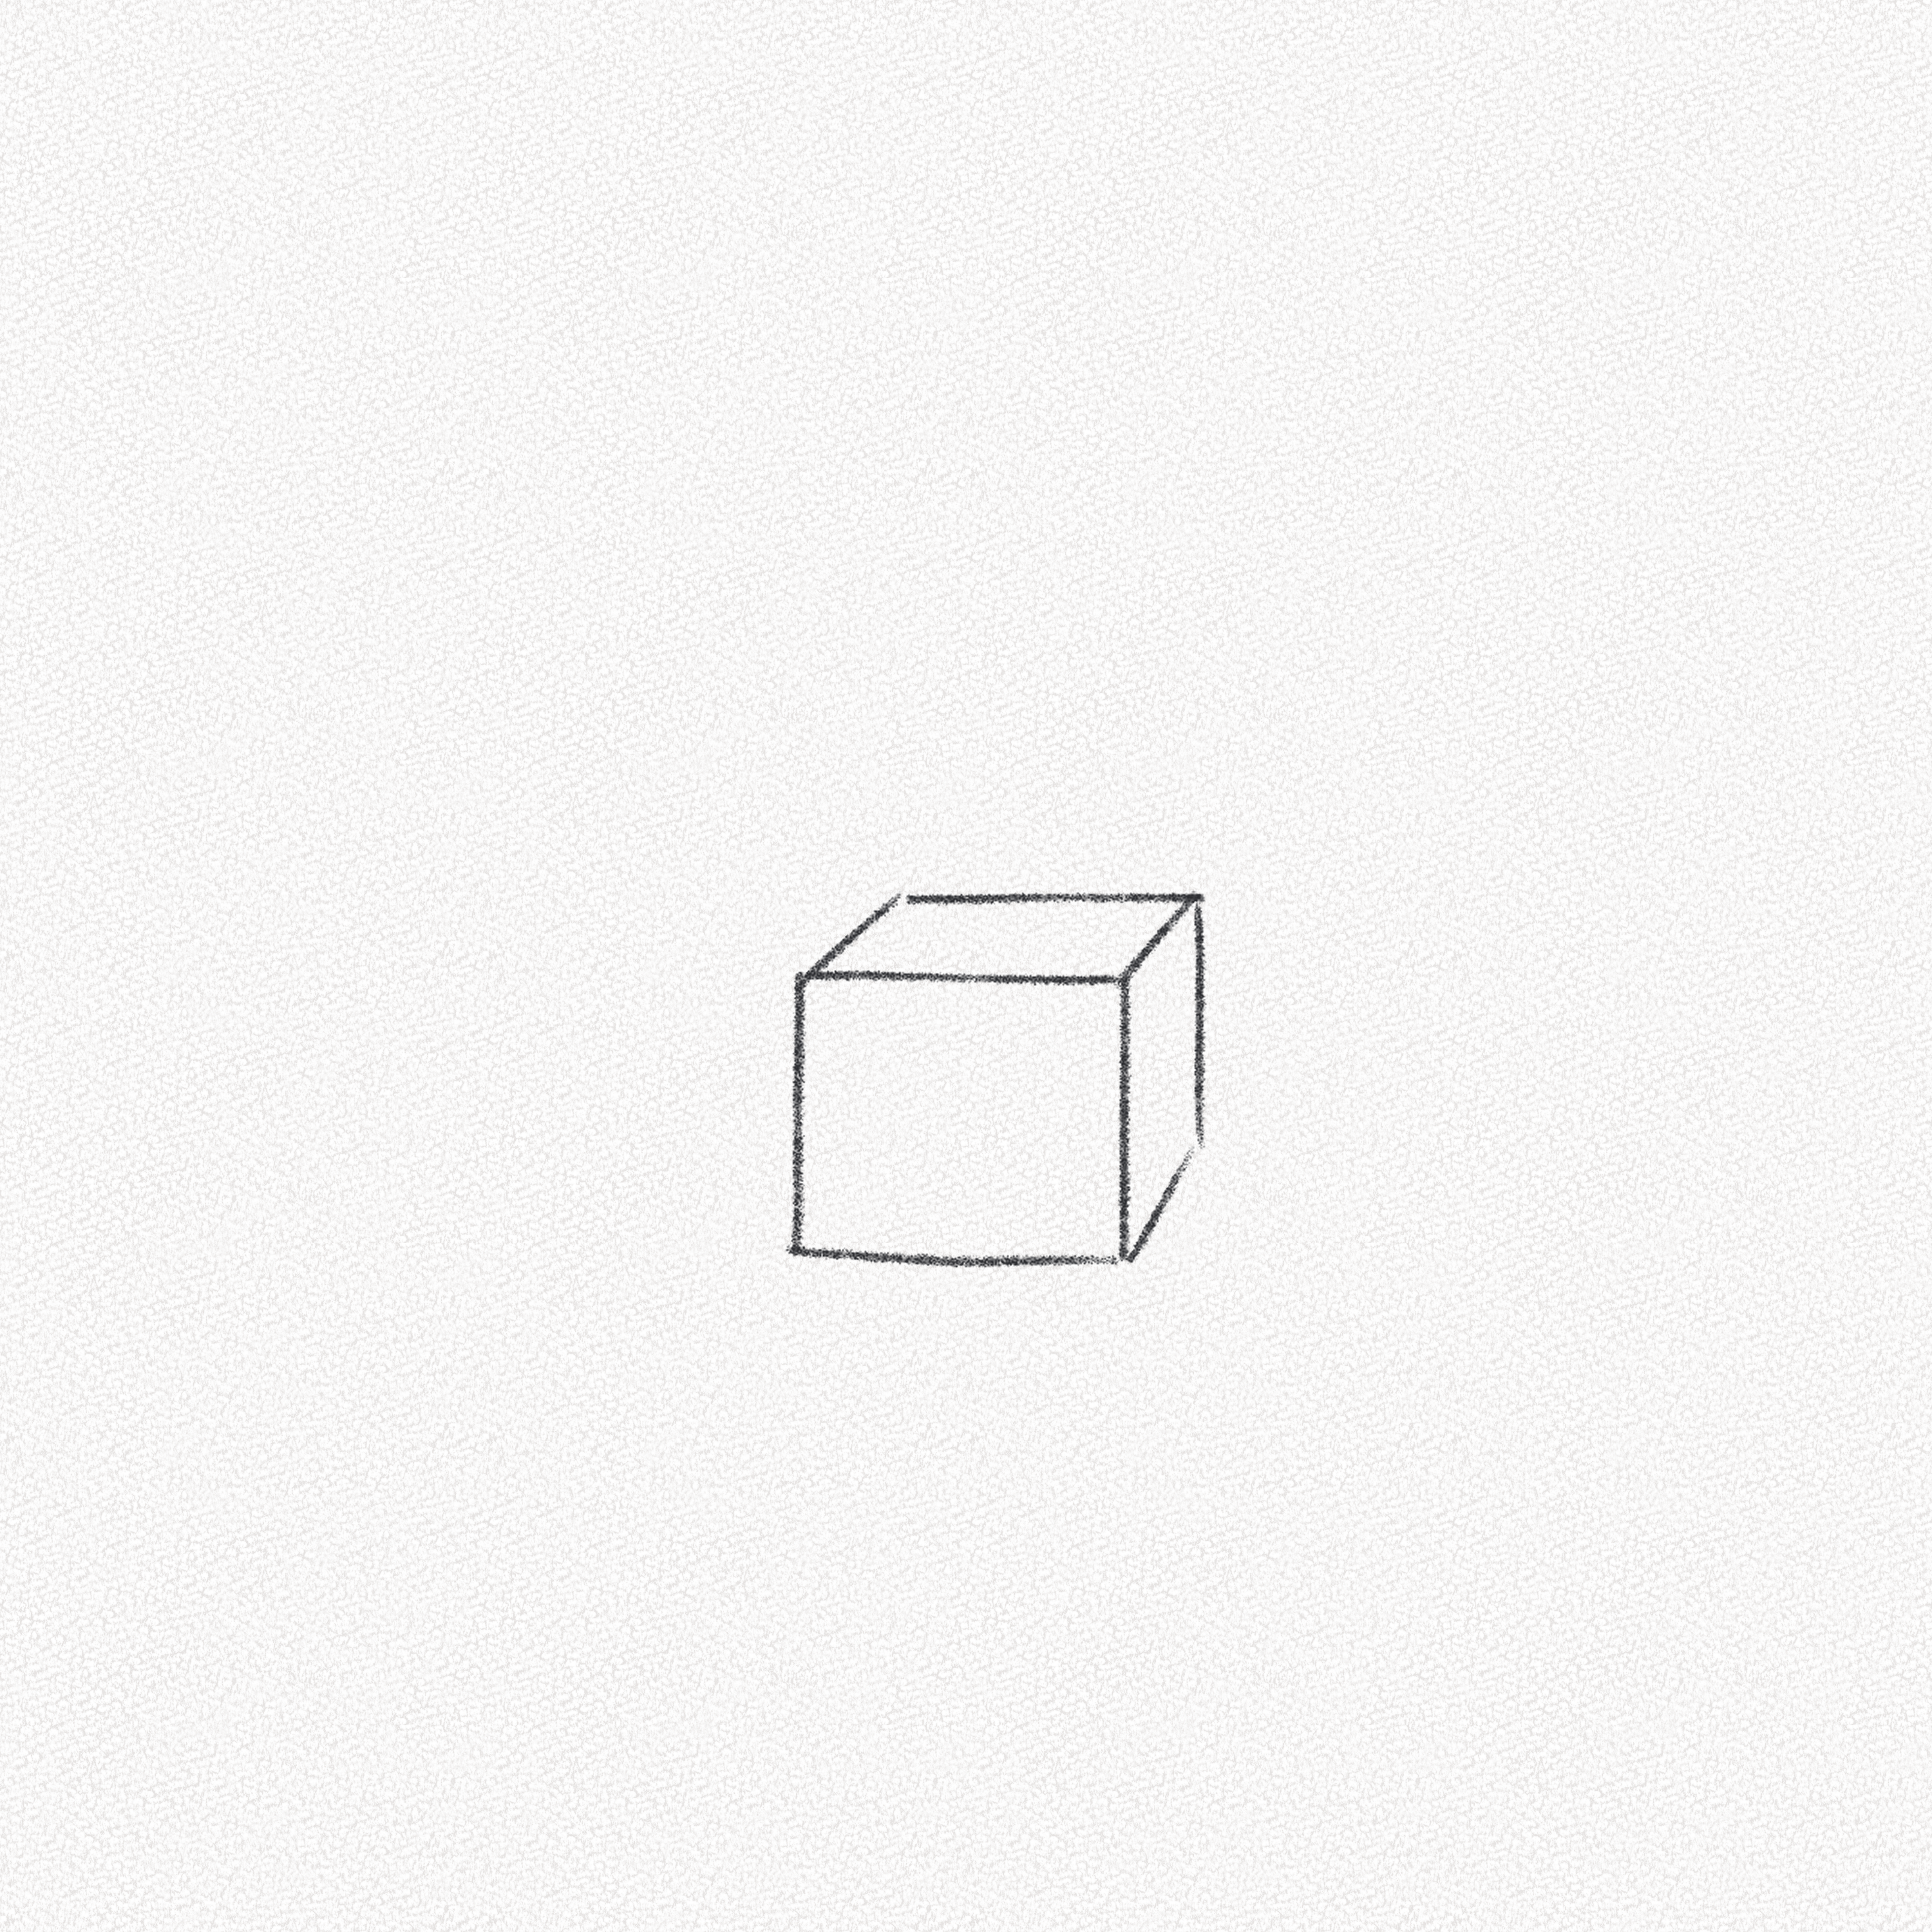
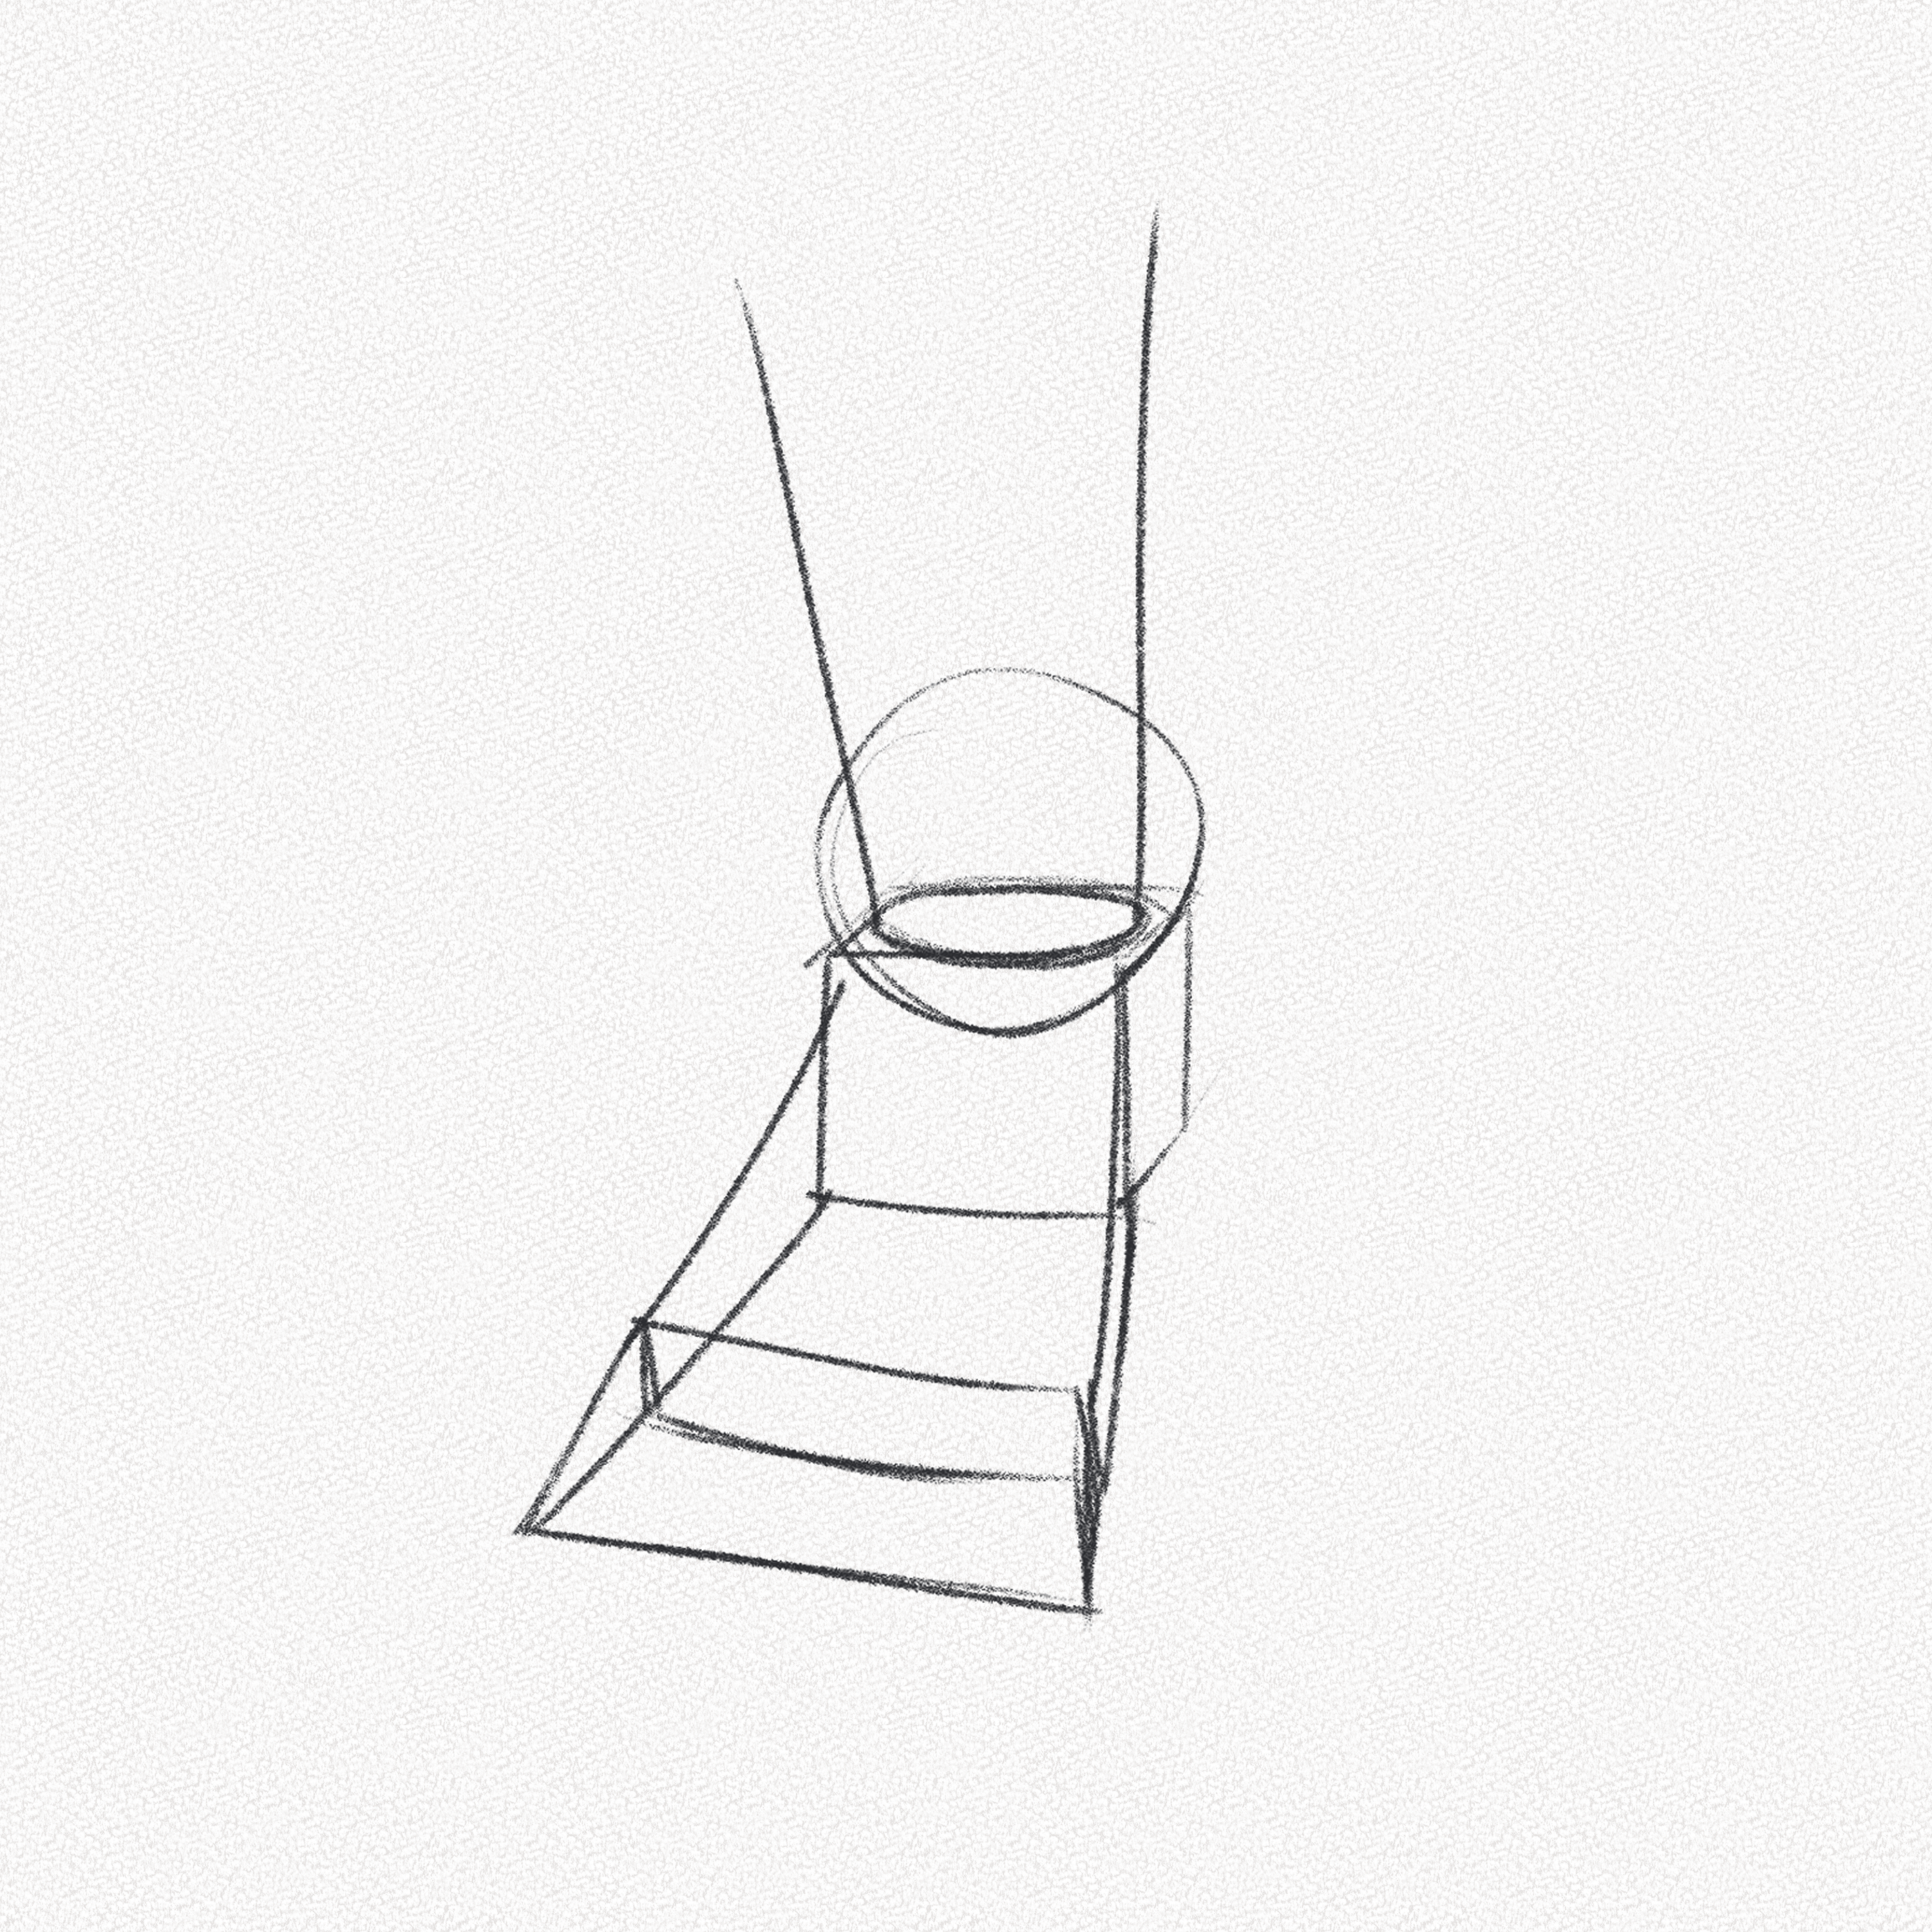
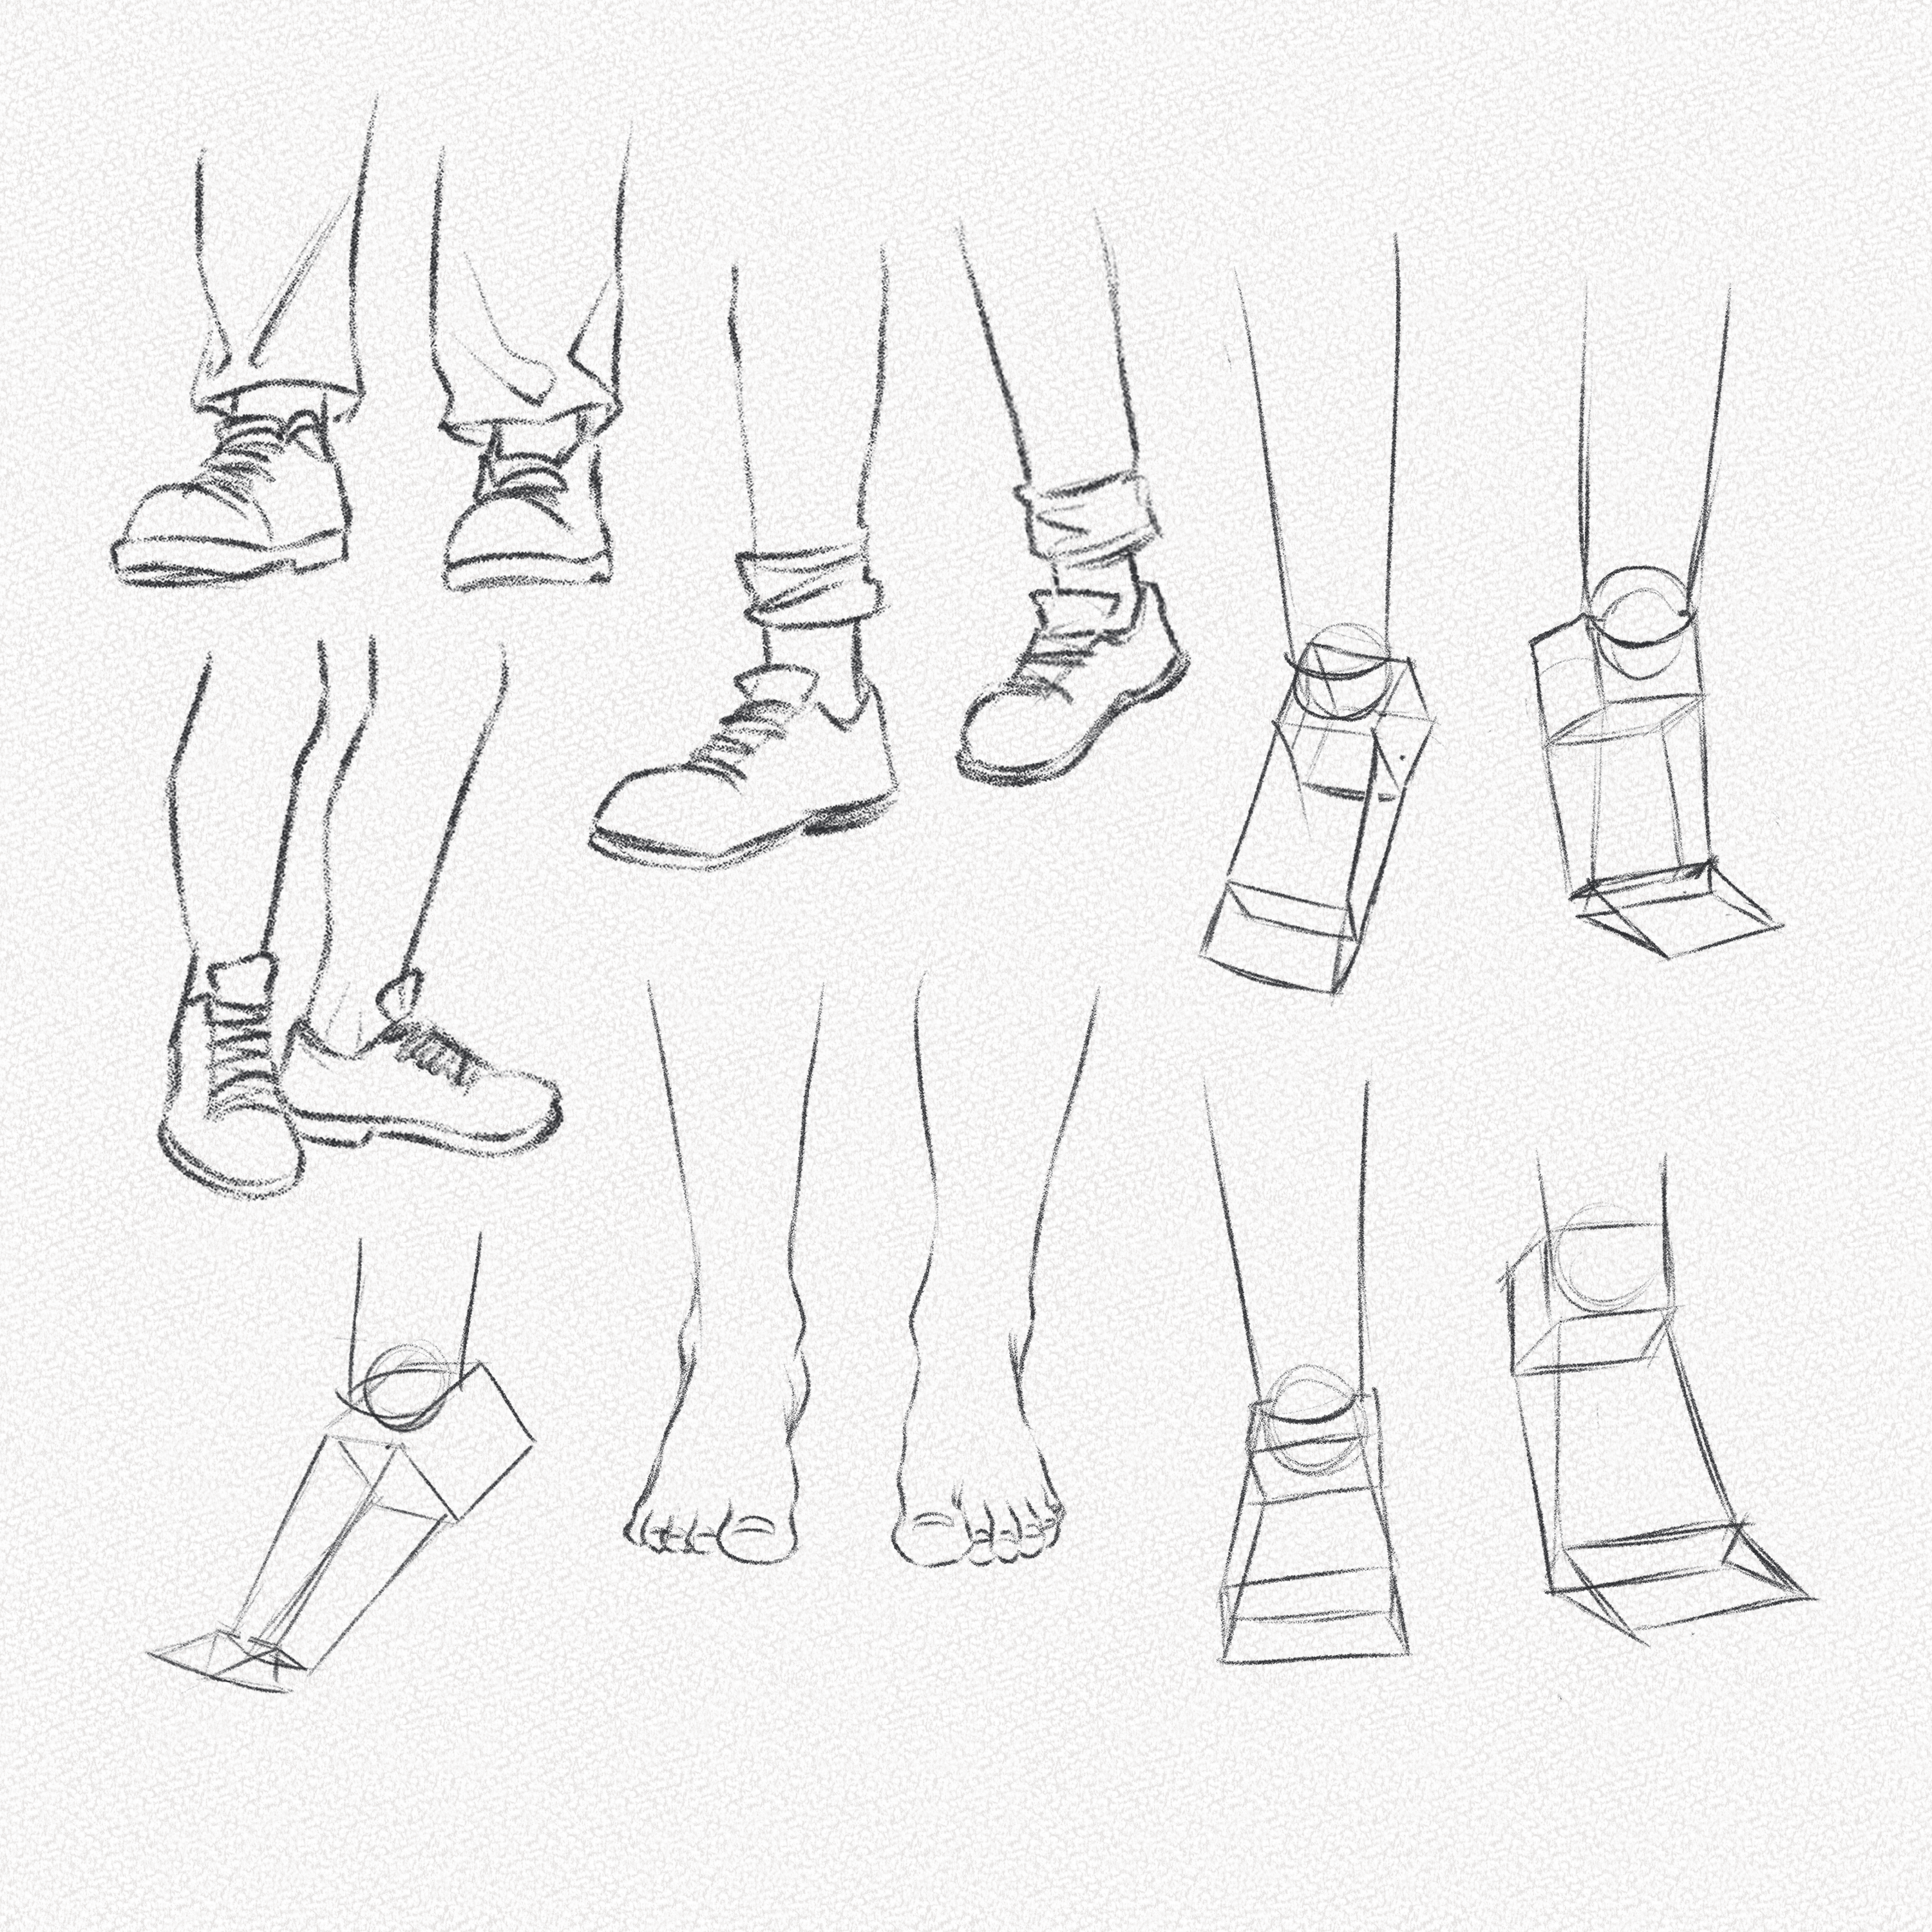
Step 1: Draw a cube
In order to build this shape, we must first set the perspective right. Many use a sphere for the heel, however, I believe that the best way to set the perspective from the beginning is to start with a cube.
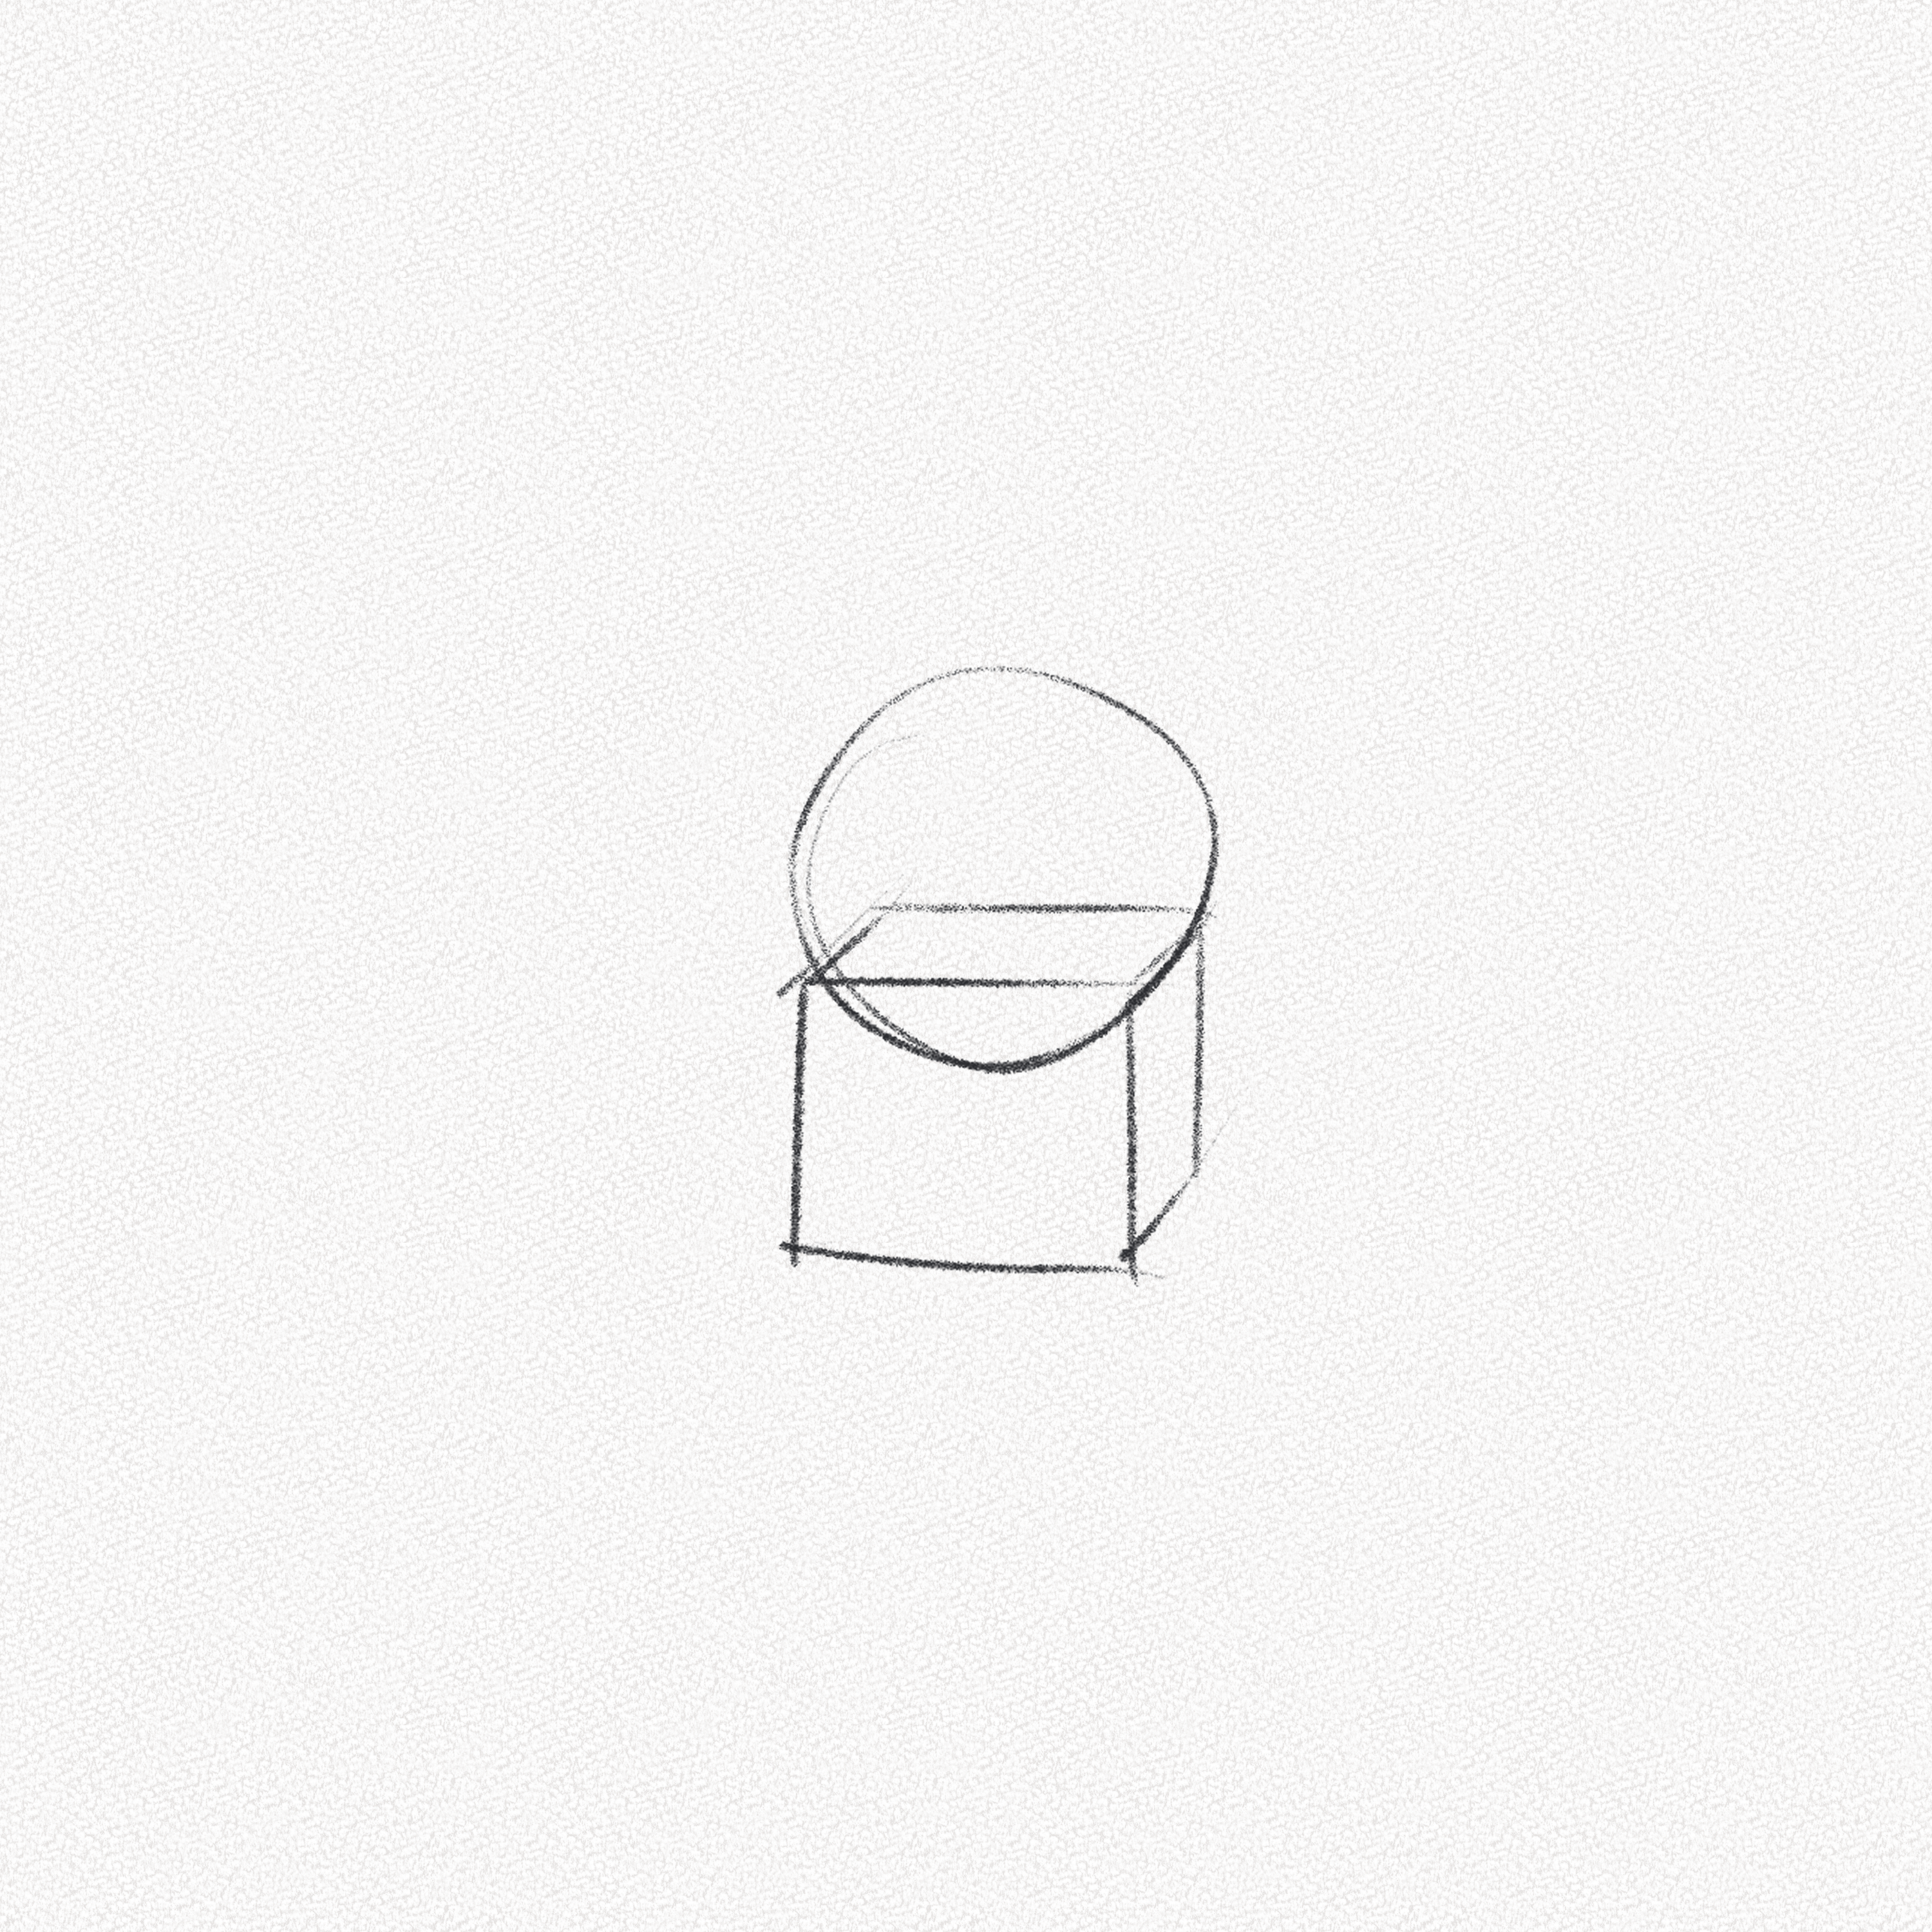
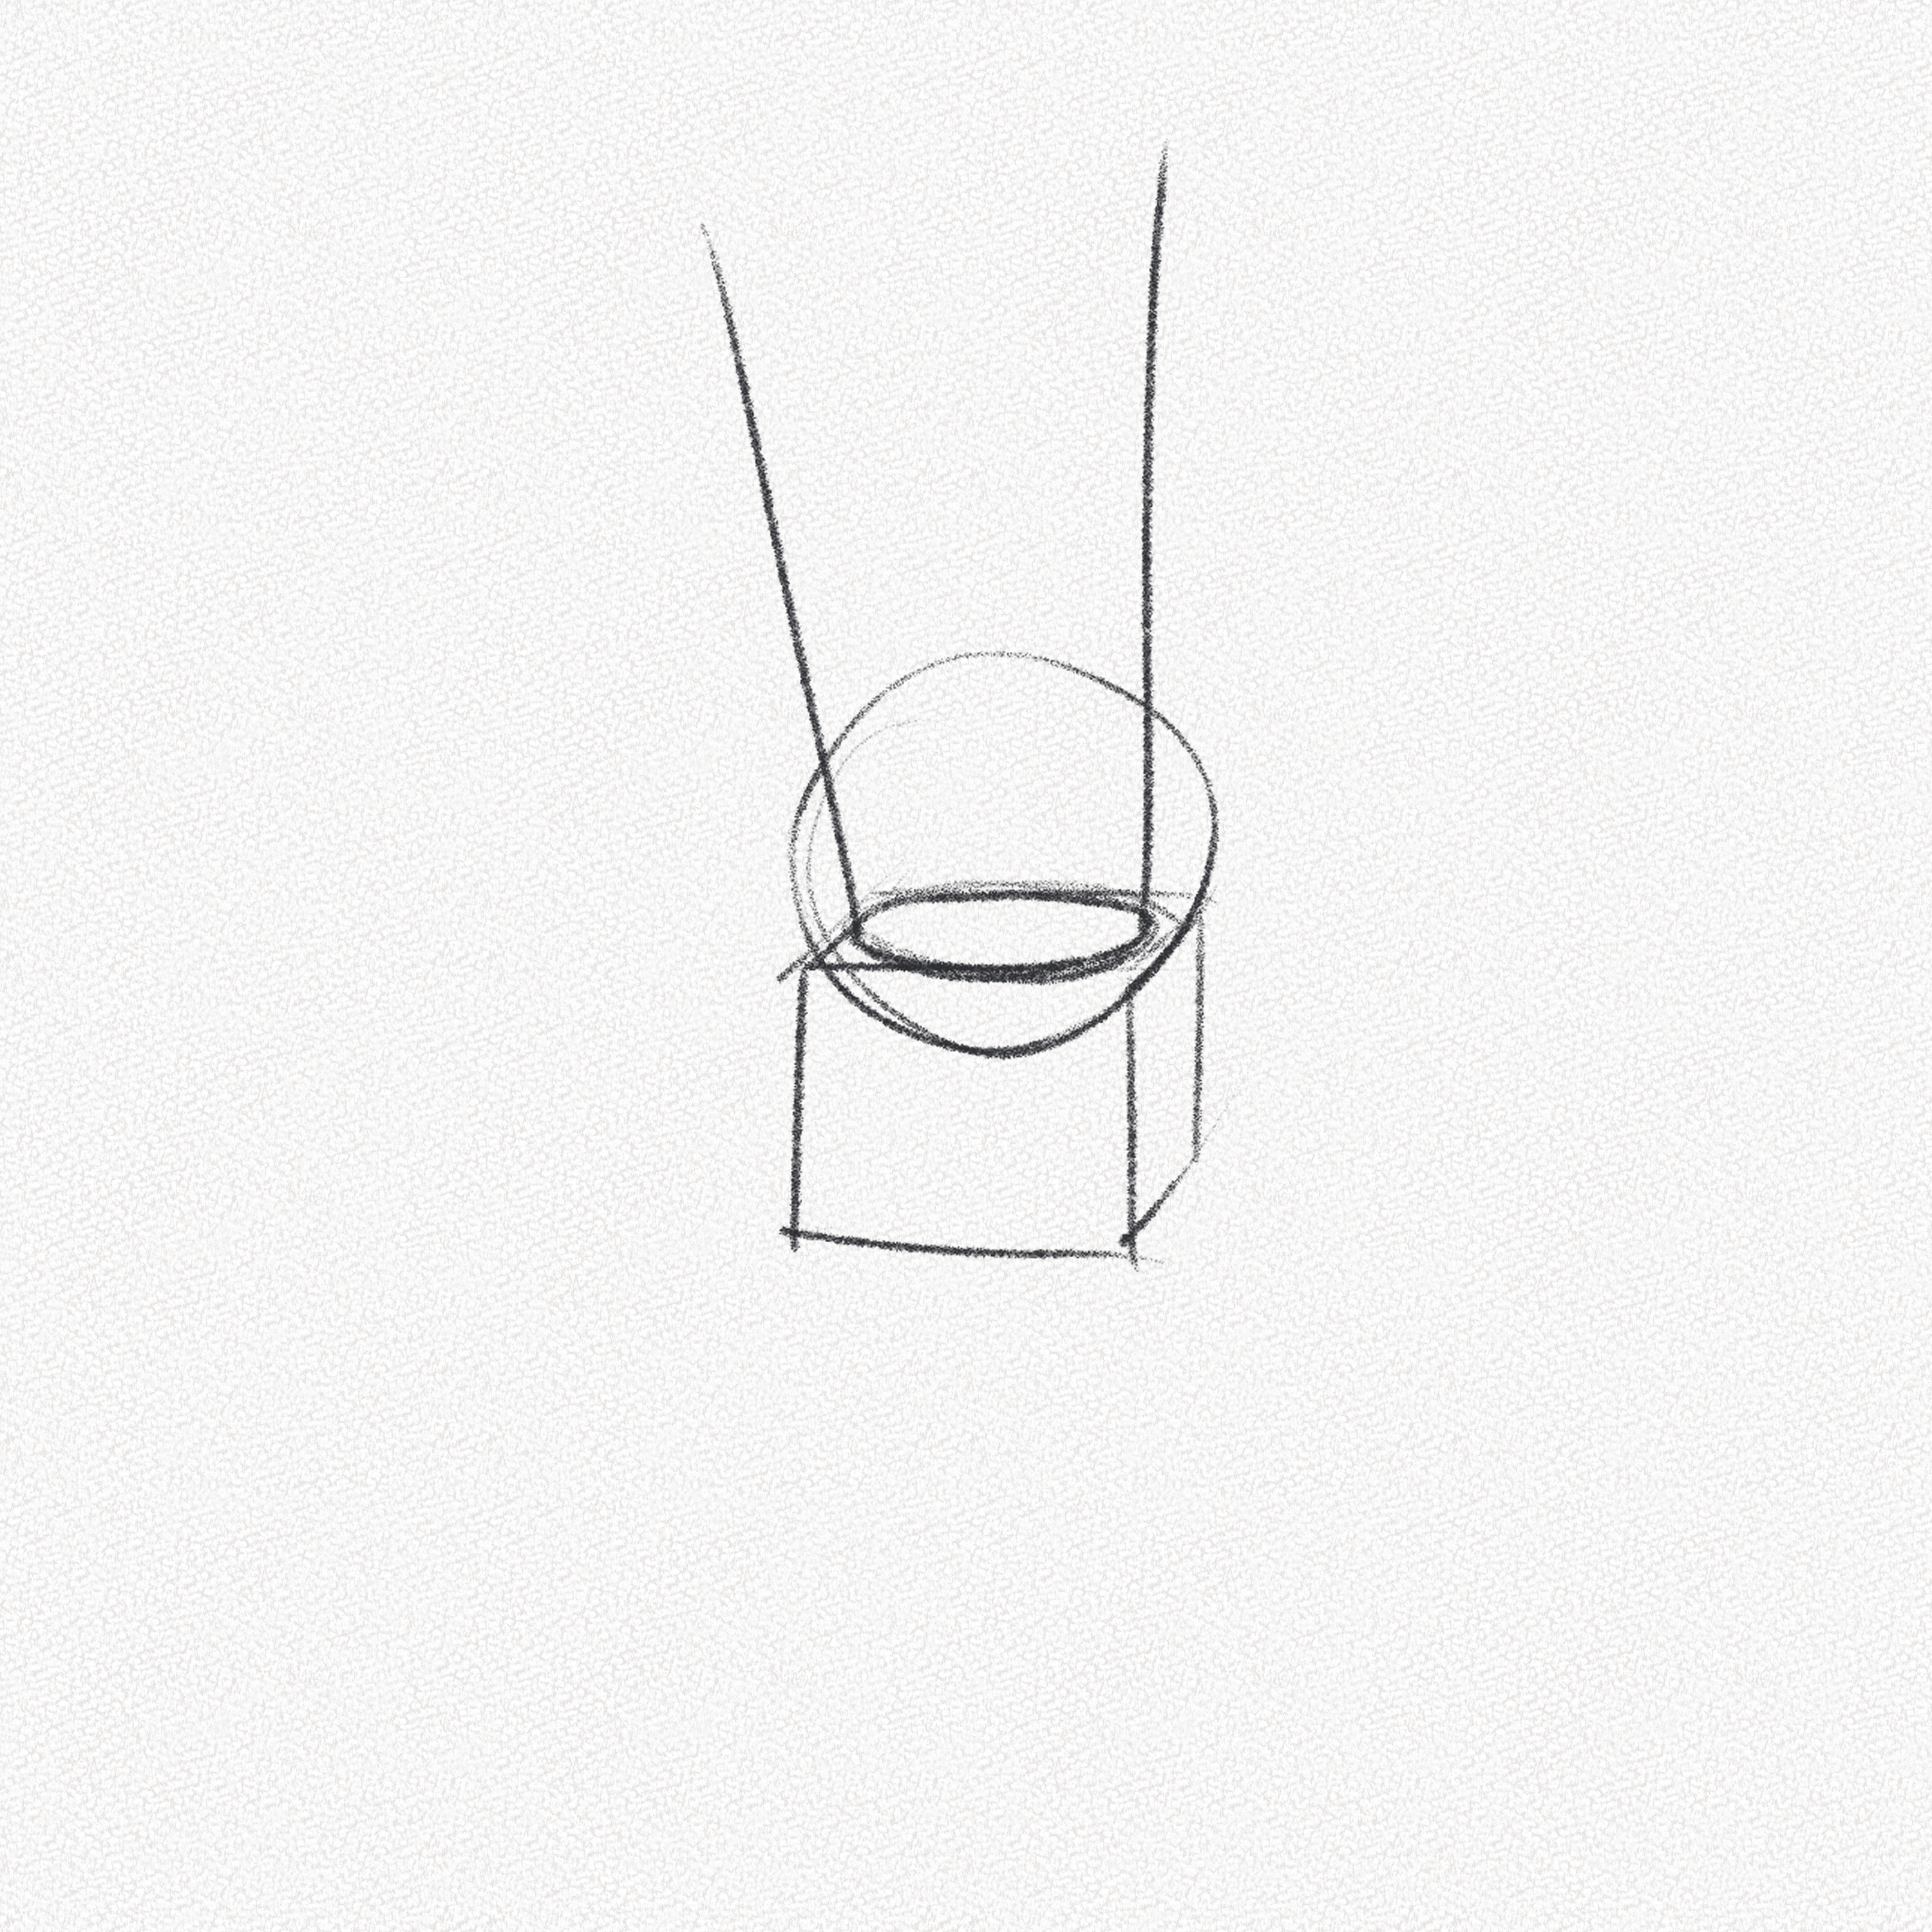
Step 2: Draw a Sphere
By adding a sphere on top of the cube, we won’t be able to forget the bones that protrude on top of the heel which are sometimes easily forgotten by even professional artists.
Step 3: Draw a Cylinder
Then, we’ll add an irregular cylinder for the calf that parts from the cube’s base following the feet’s perspective.
Step 4: Draw a Prism
Next, we’re going to pull a triangular prism shape that will end up being cut right before finishing it.
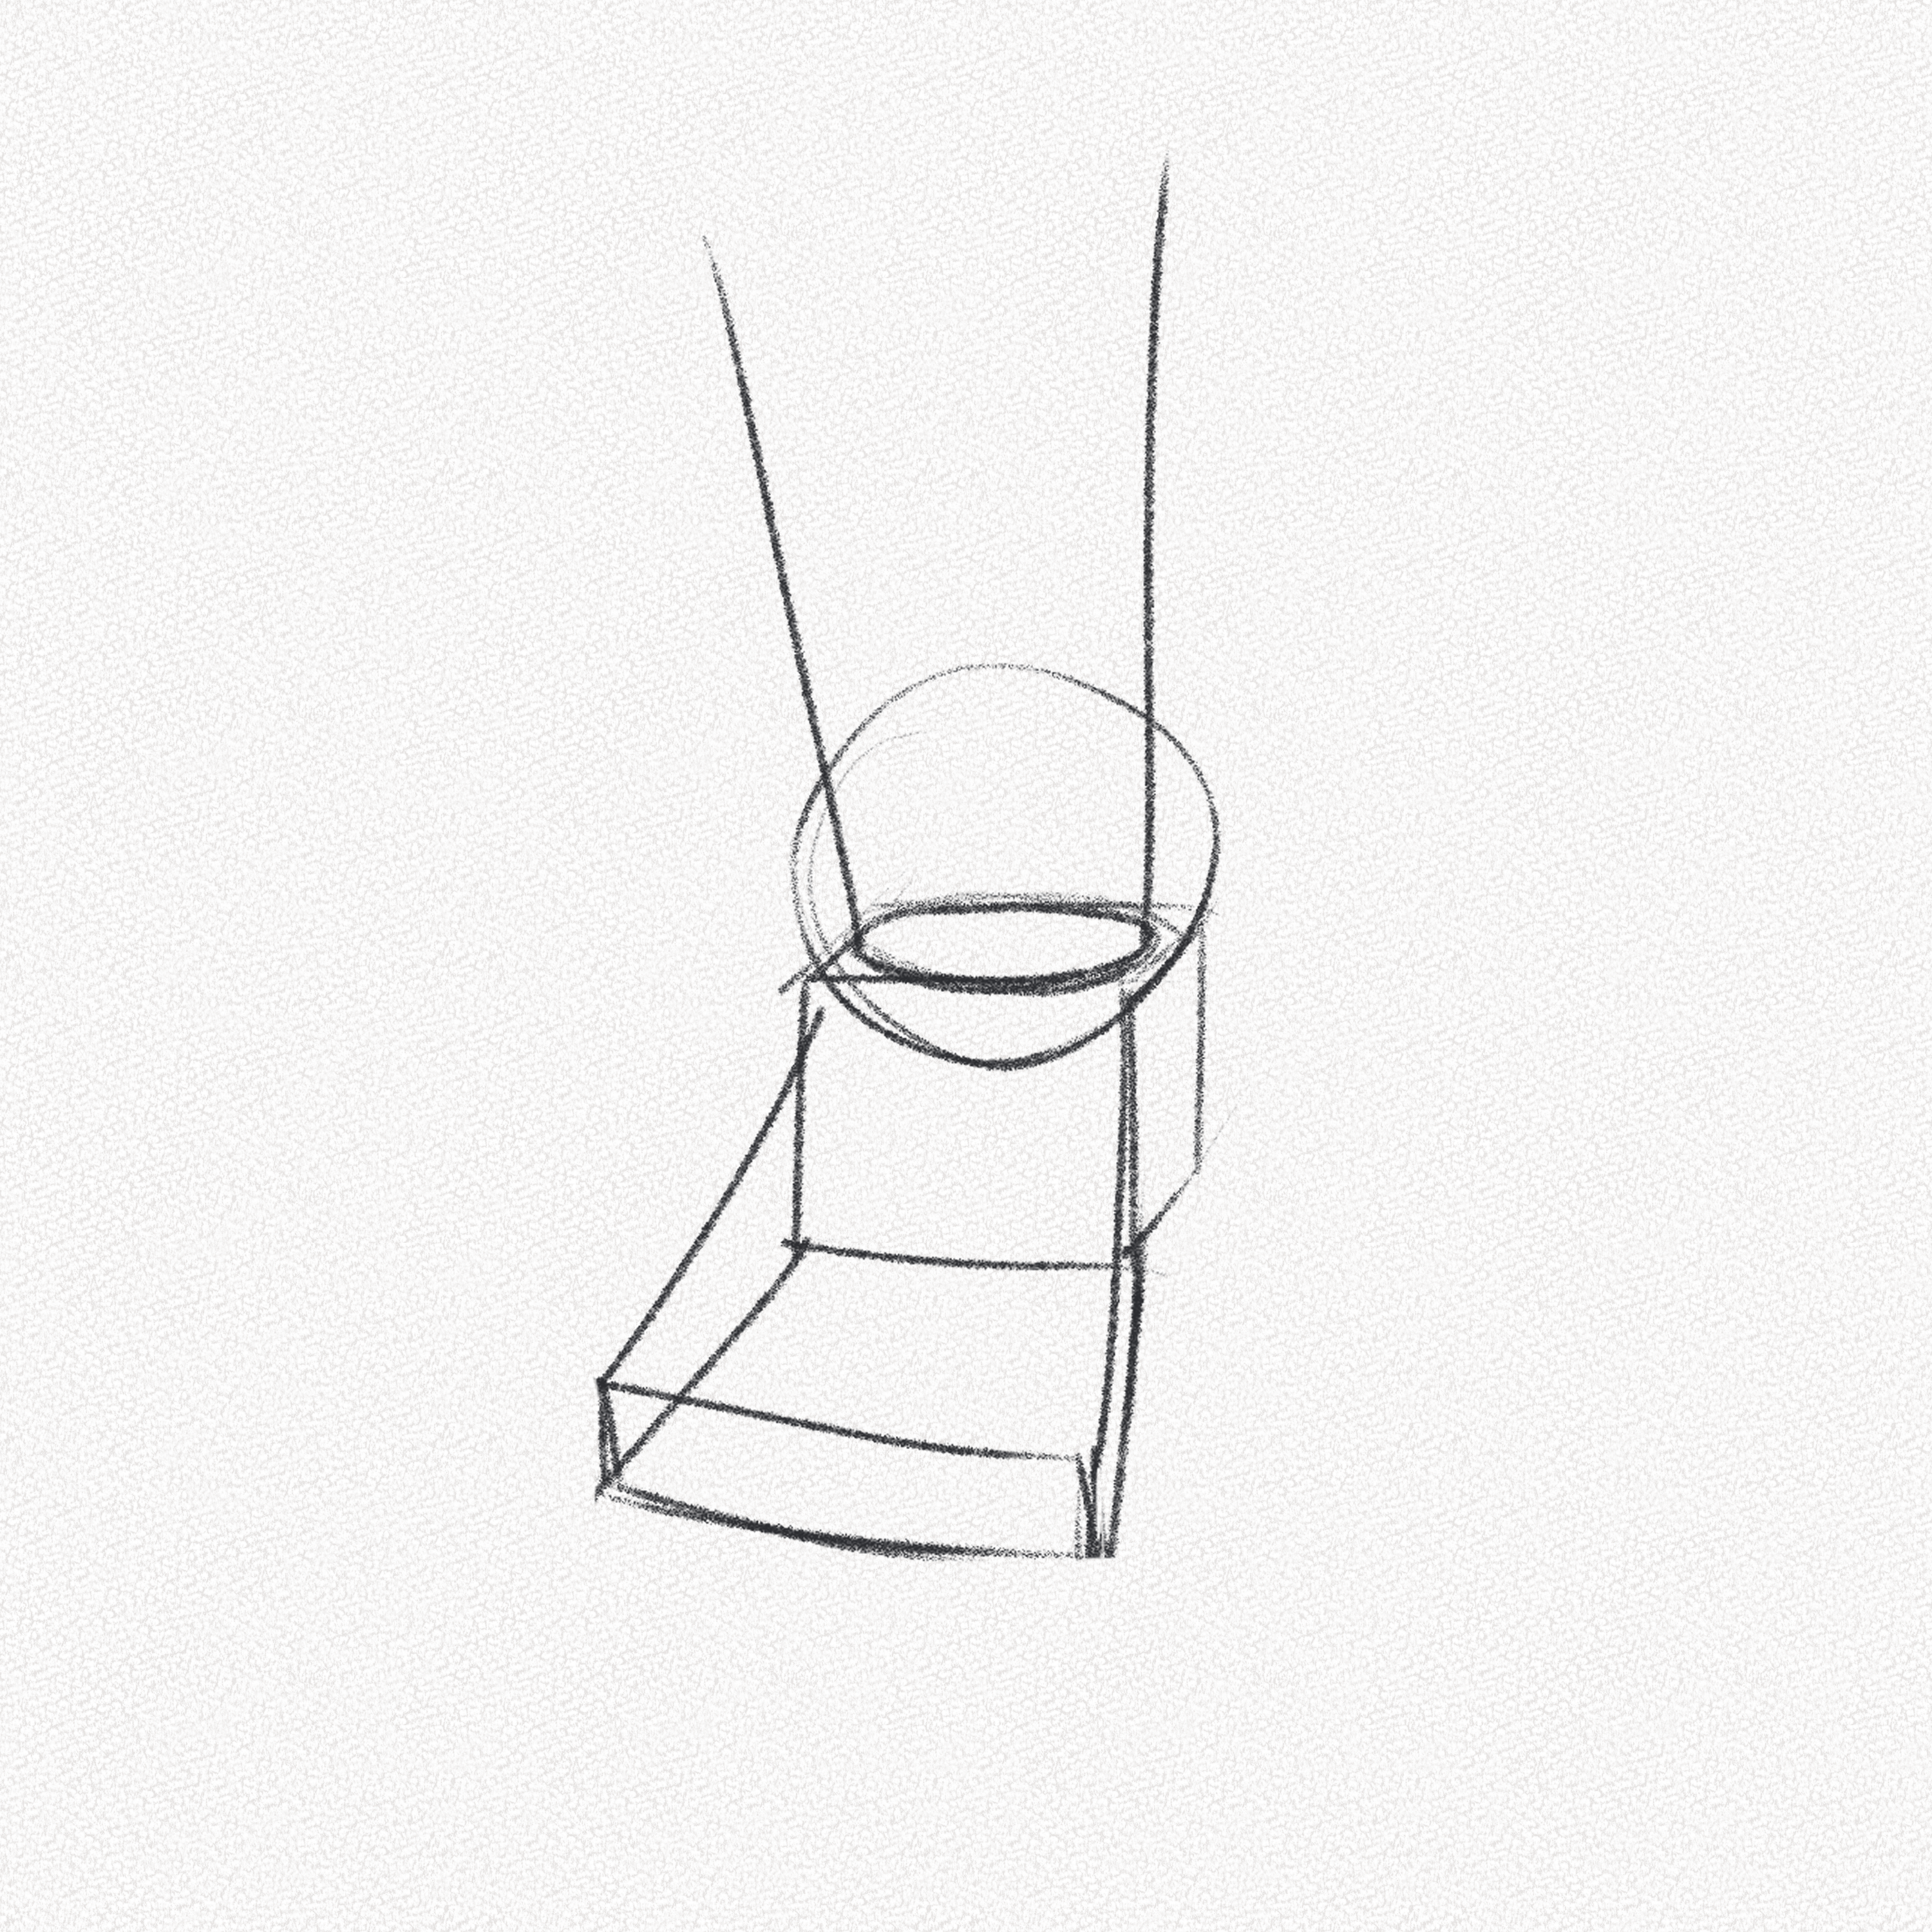
Step 5: Finish the Prism
We’ll now finish the triangular prism shape finishing this way the structure of our foot.

Now you should probably already know why we didn’t finish the triangular prism in the first place, and that is because the tip will serve as the structure for the toes, and since we’re able to move and angle our toes however we like, it wouldn’t make sense to draw a static shape that restricts the movement to a single position.
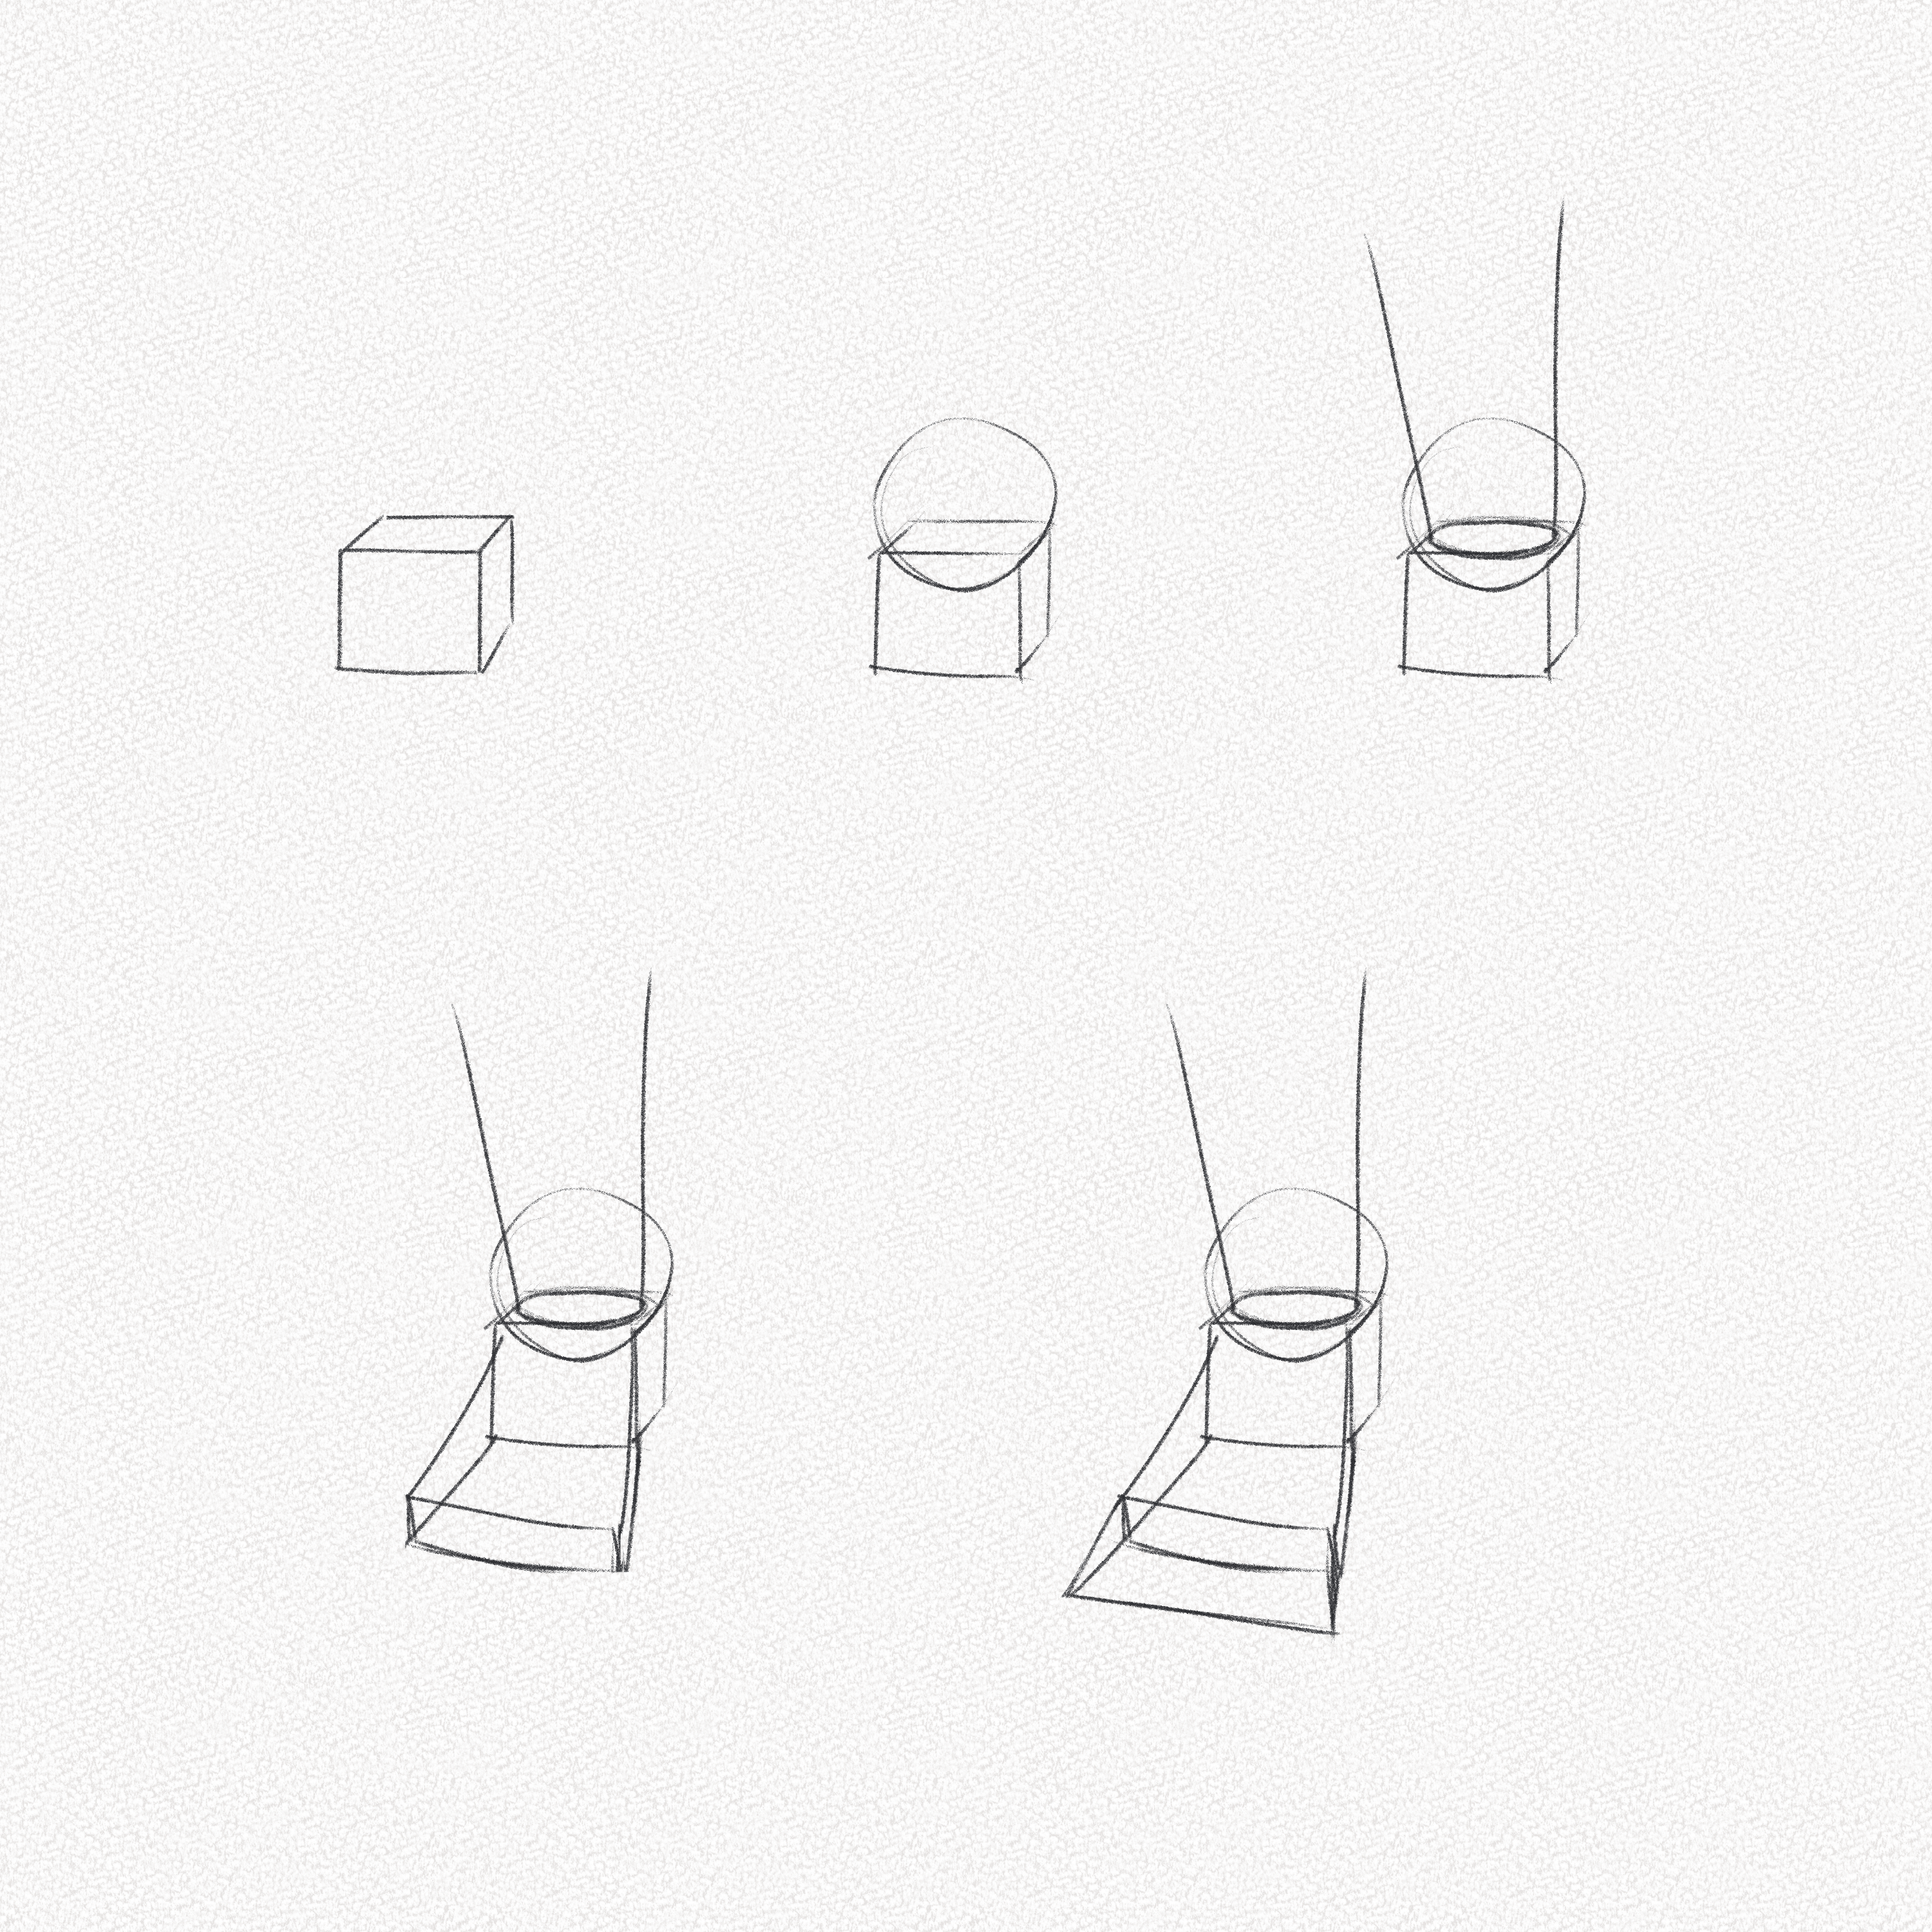
Here you can see how I apply the structure to different angles, poses, and perspectives by simply changing the cube’s perspective and angle.
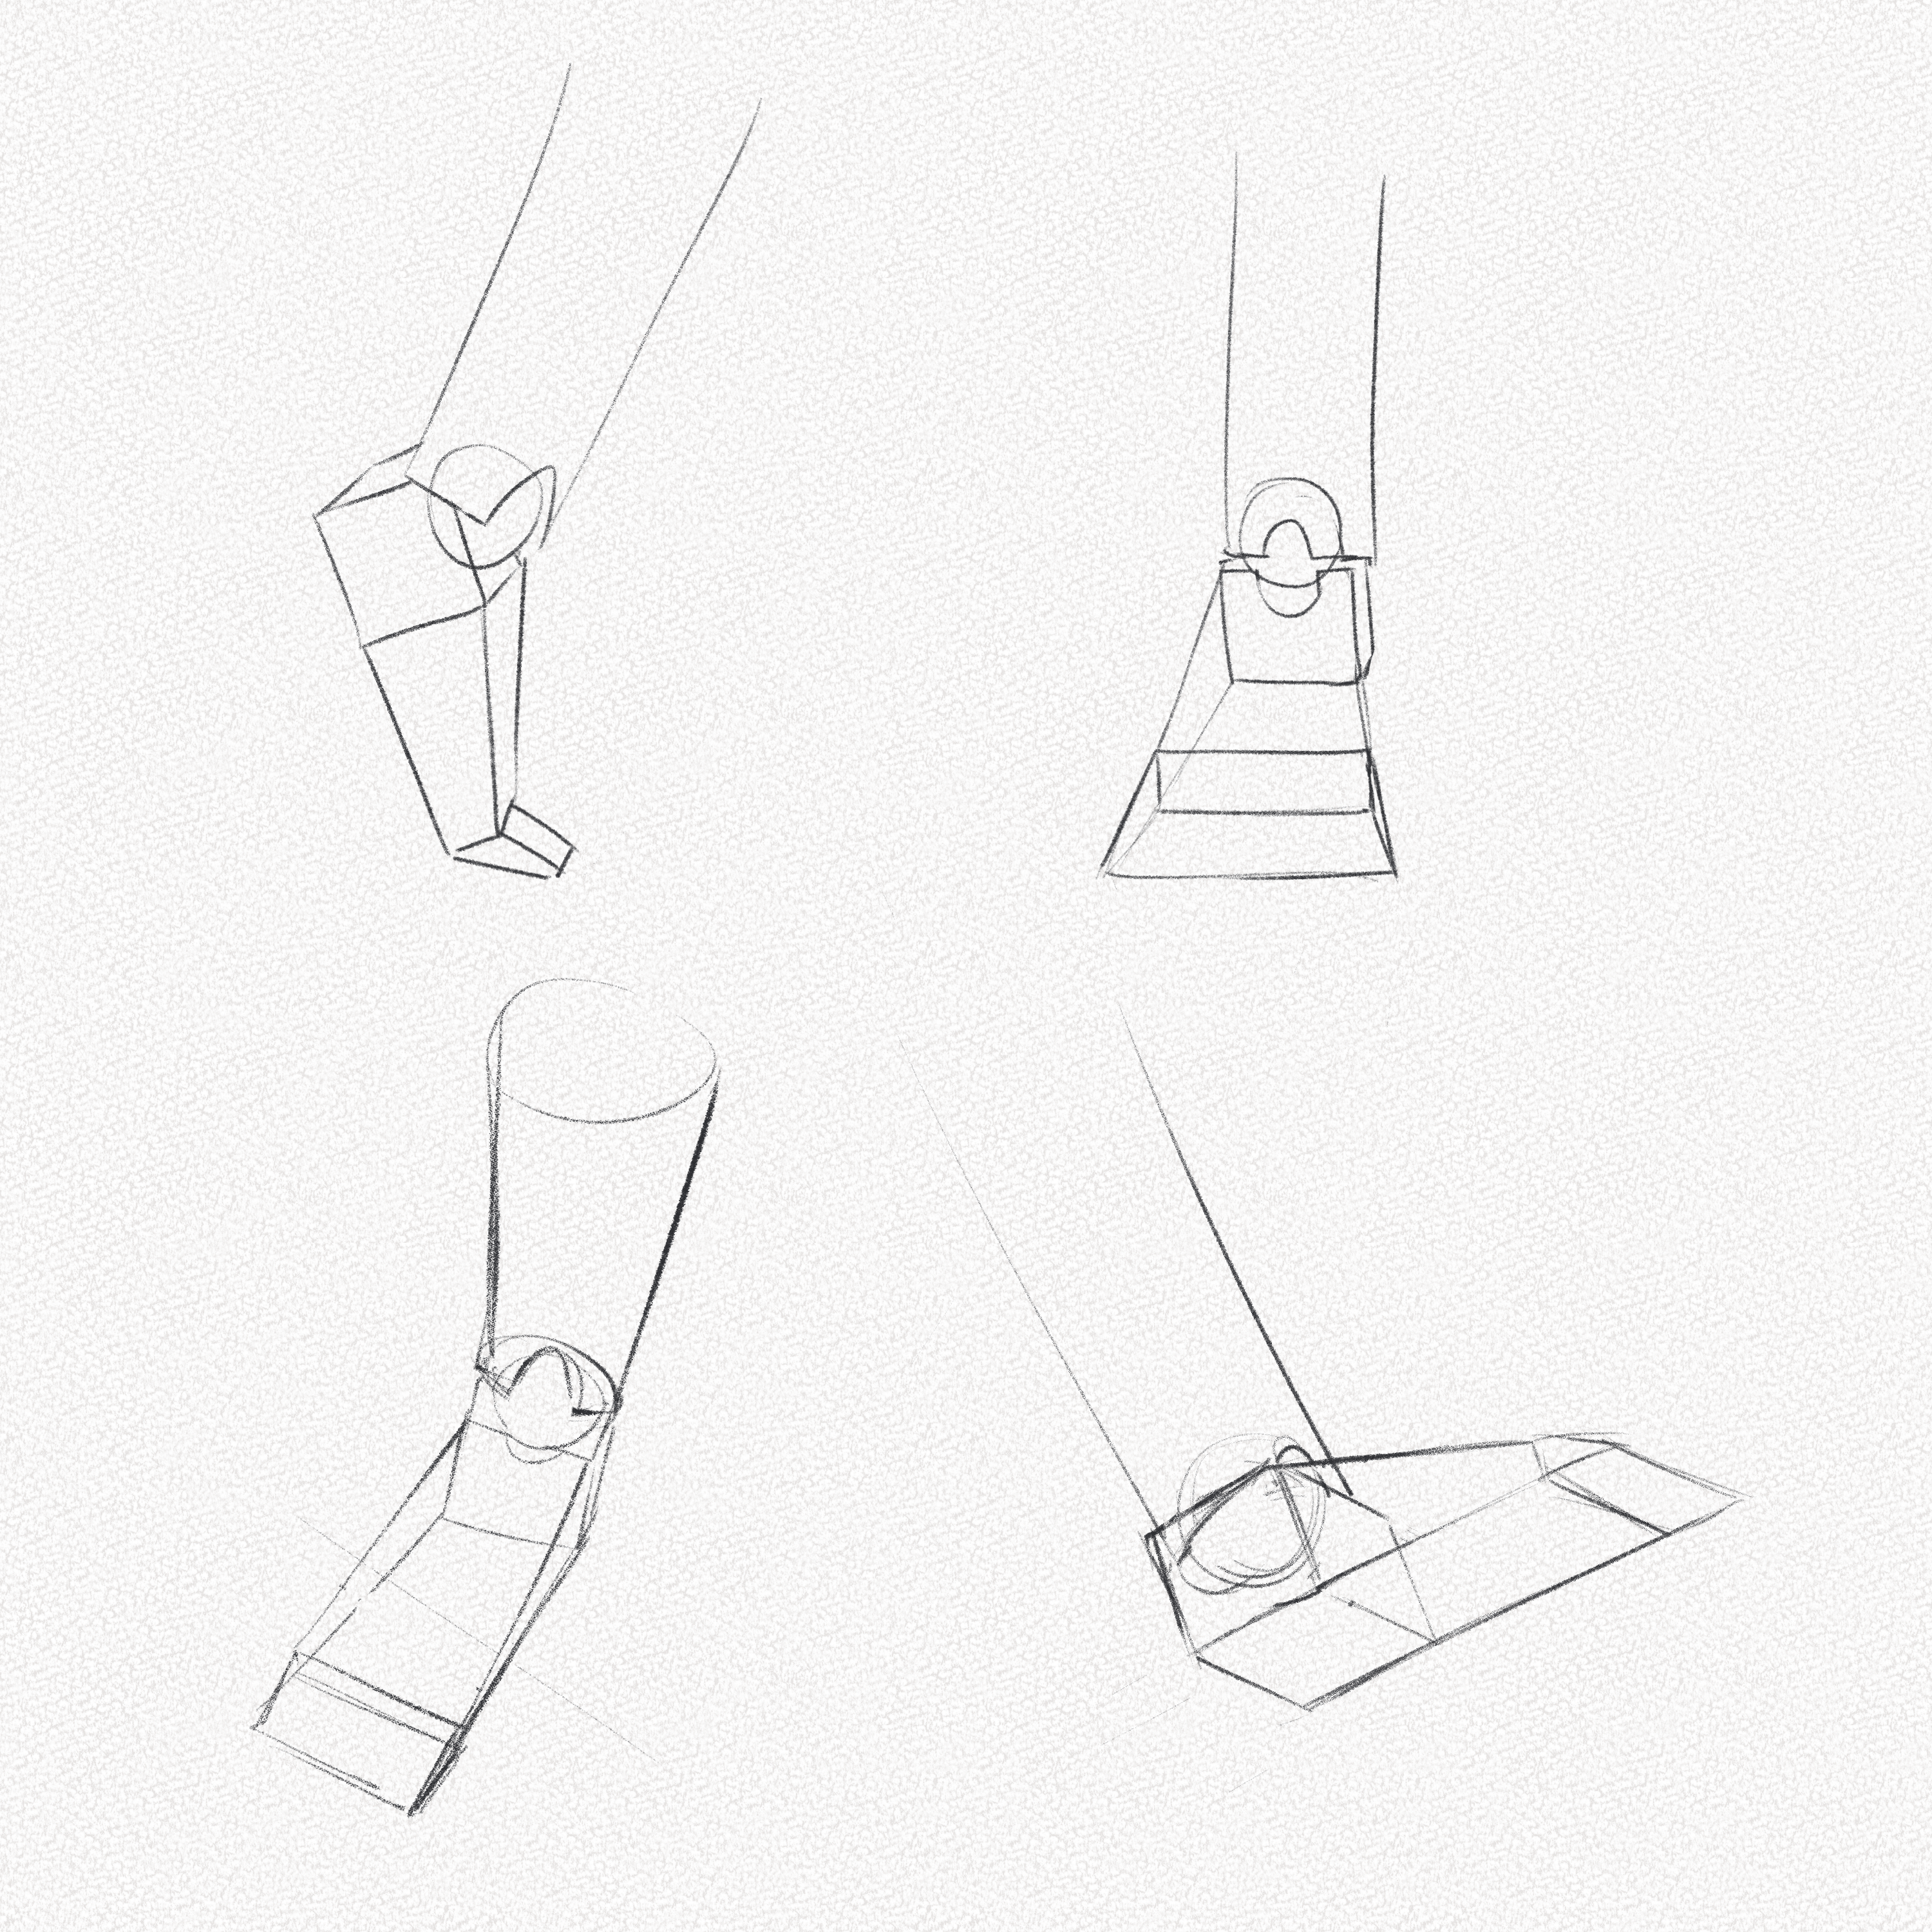
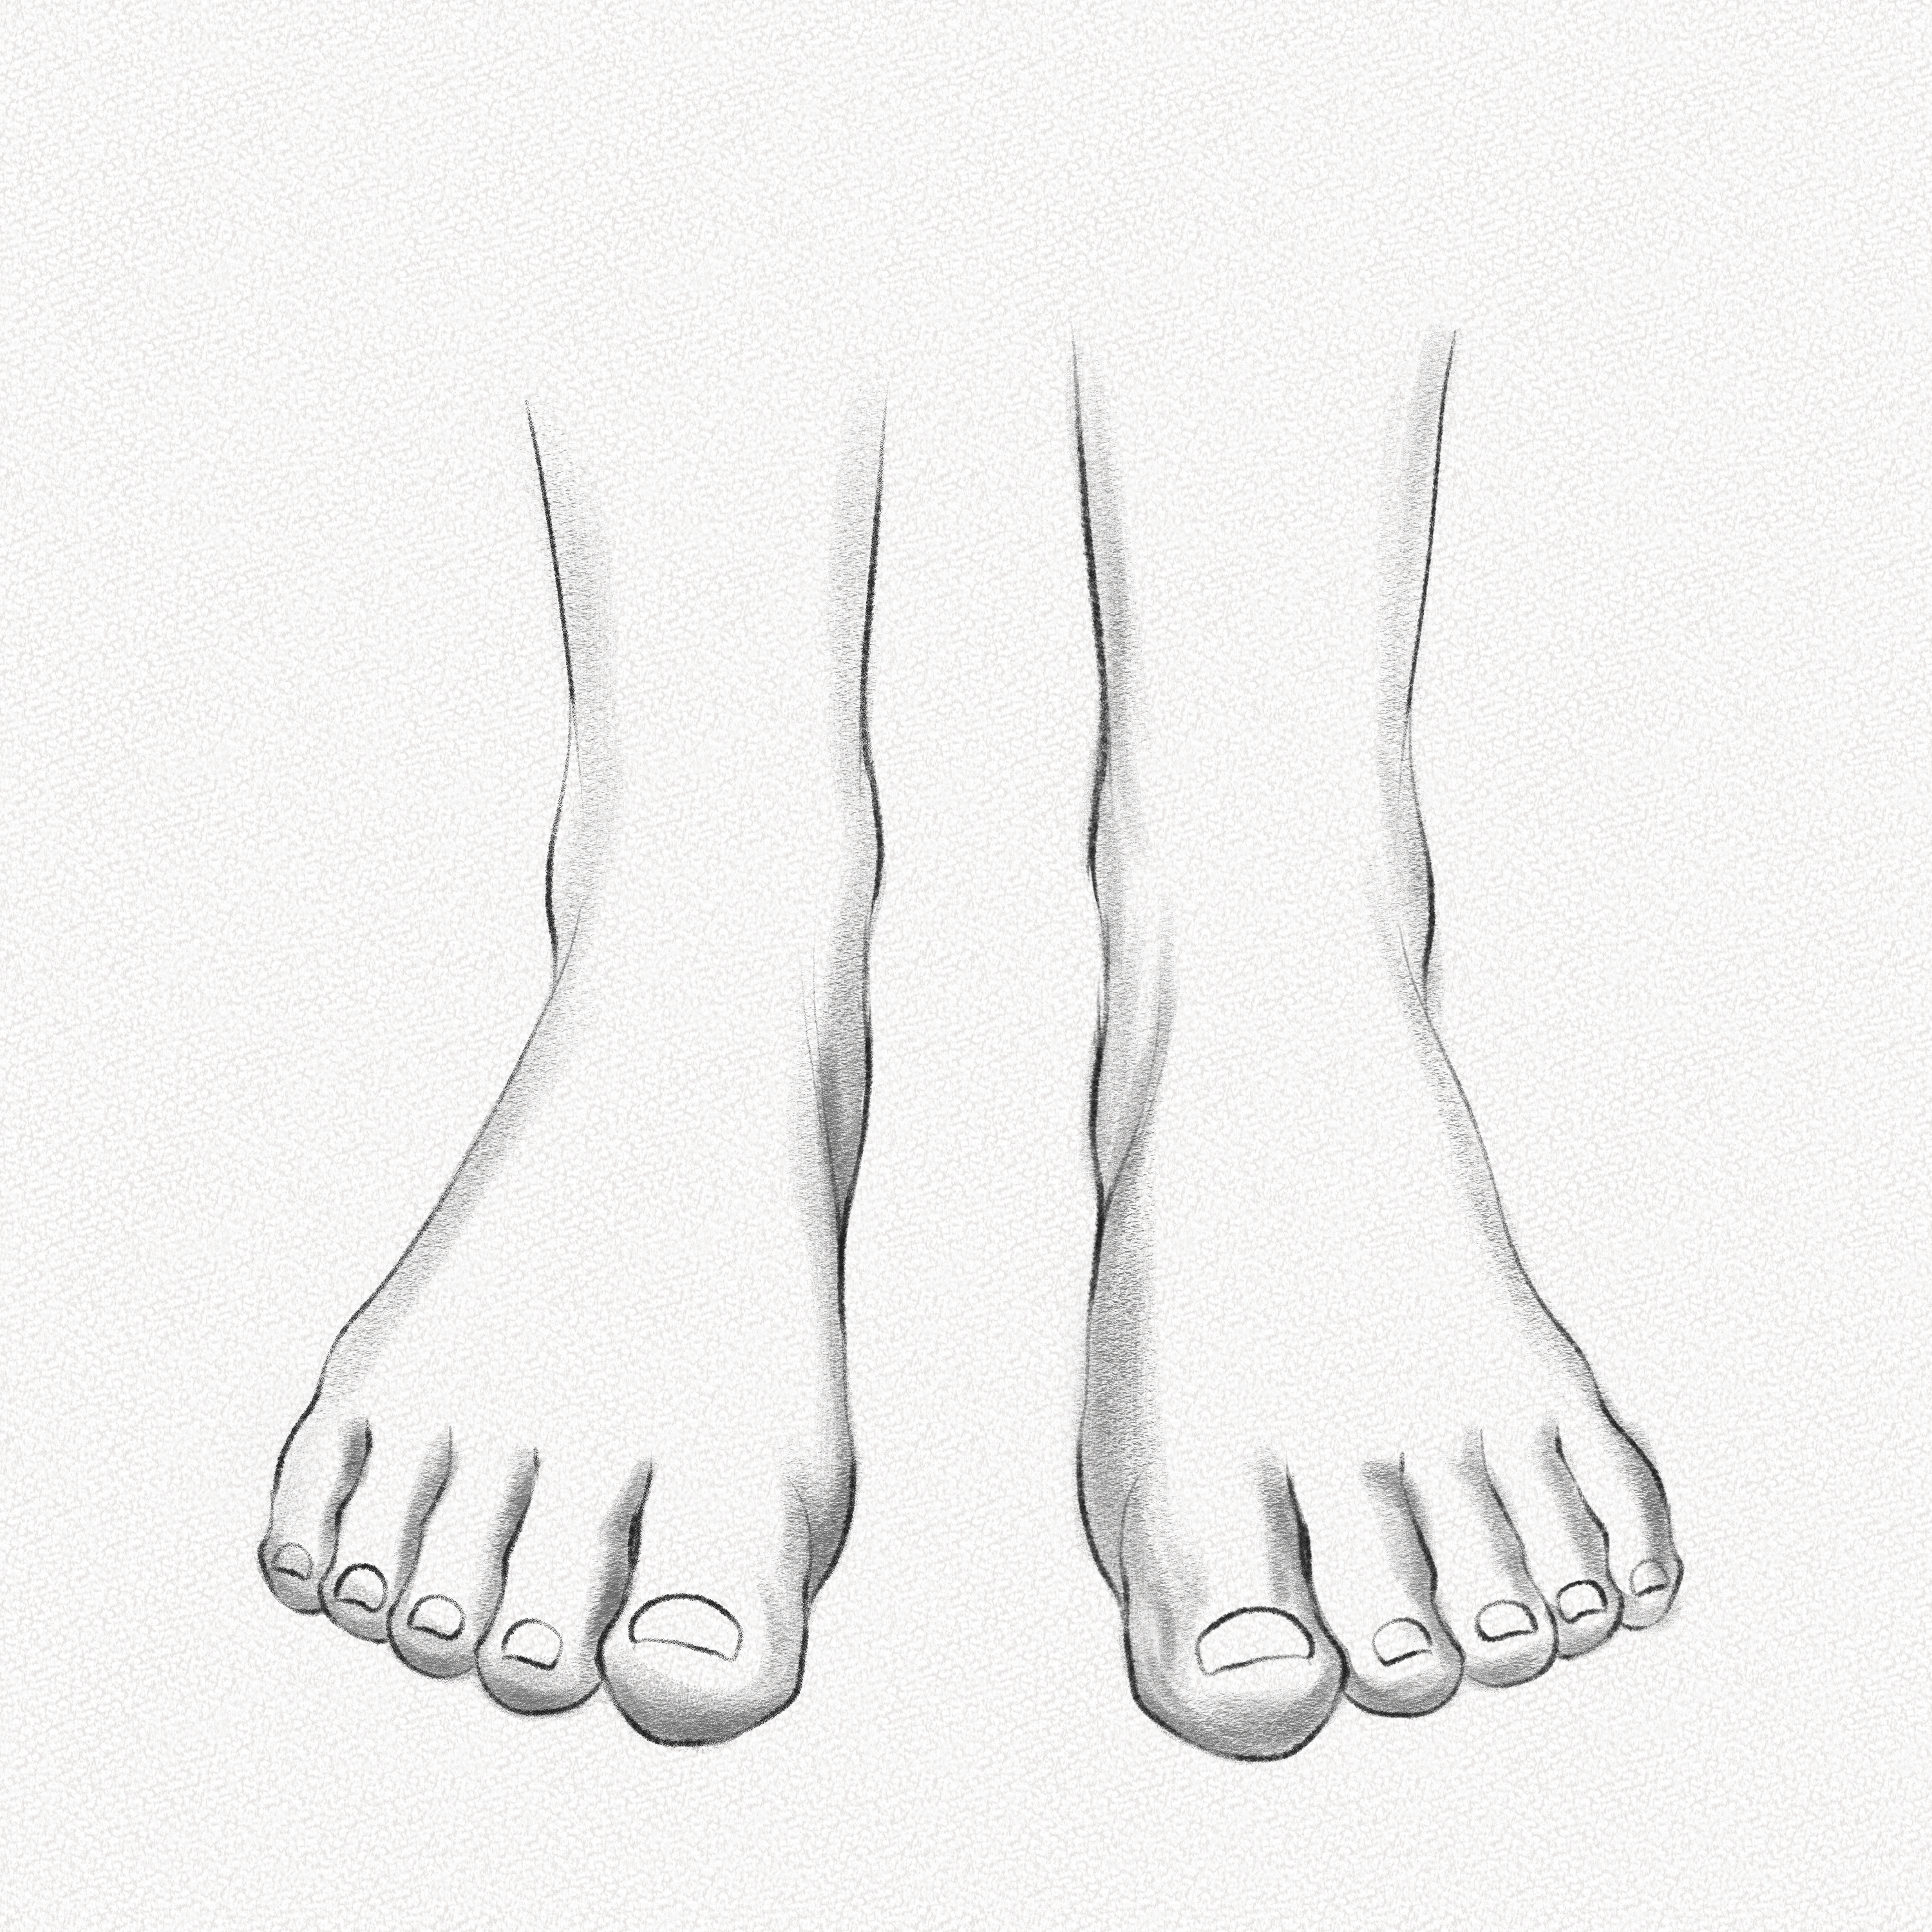
Using the base as a reference, building a foot becomes a not-so-difficult task, however in order to build the actual foot shapes, we need to think in curve.
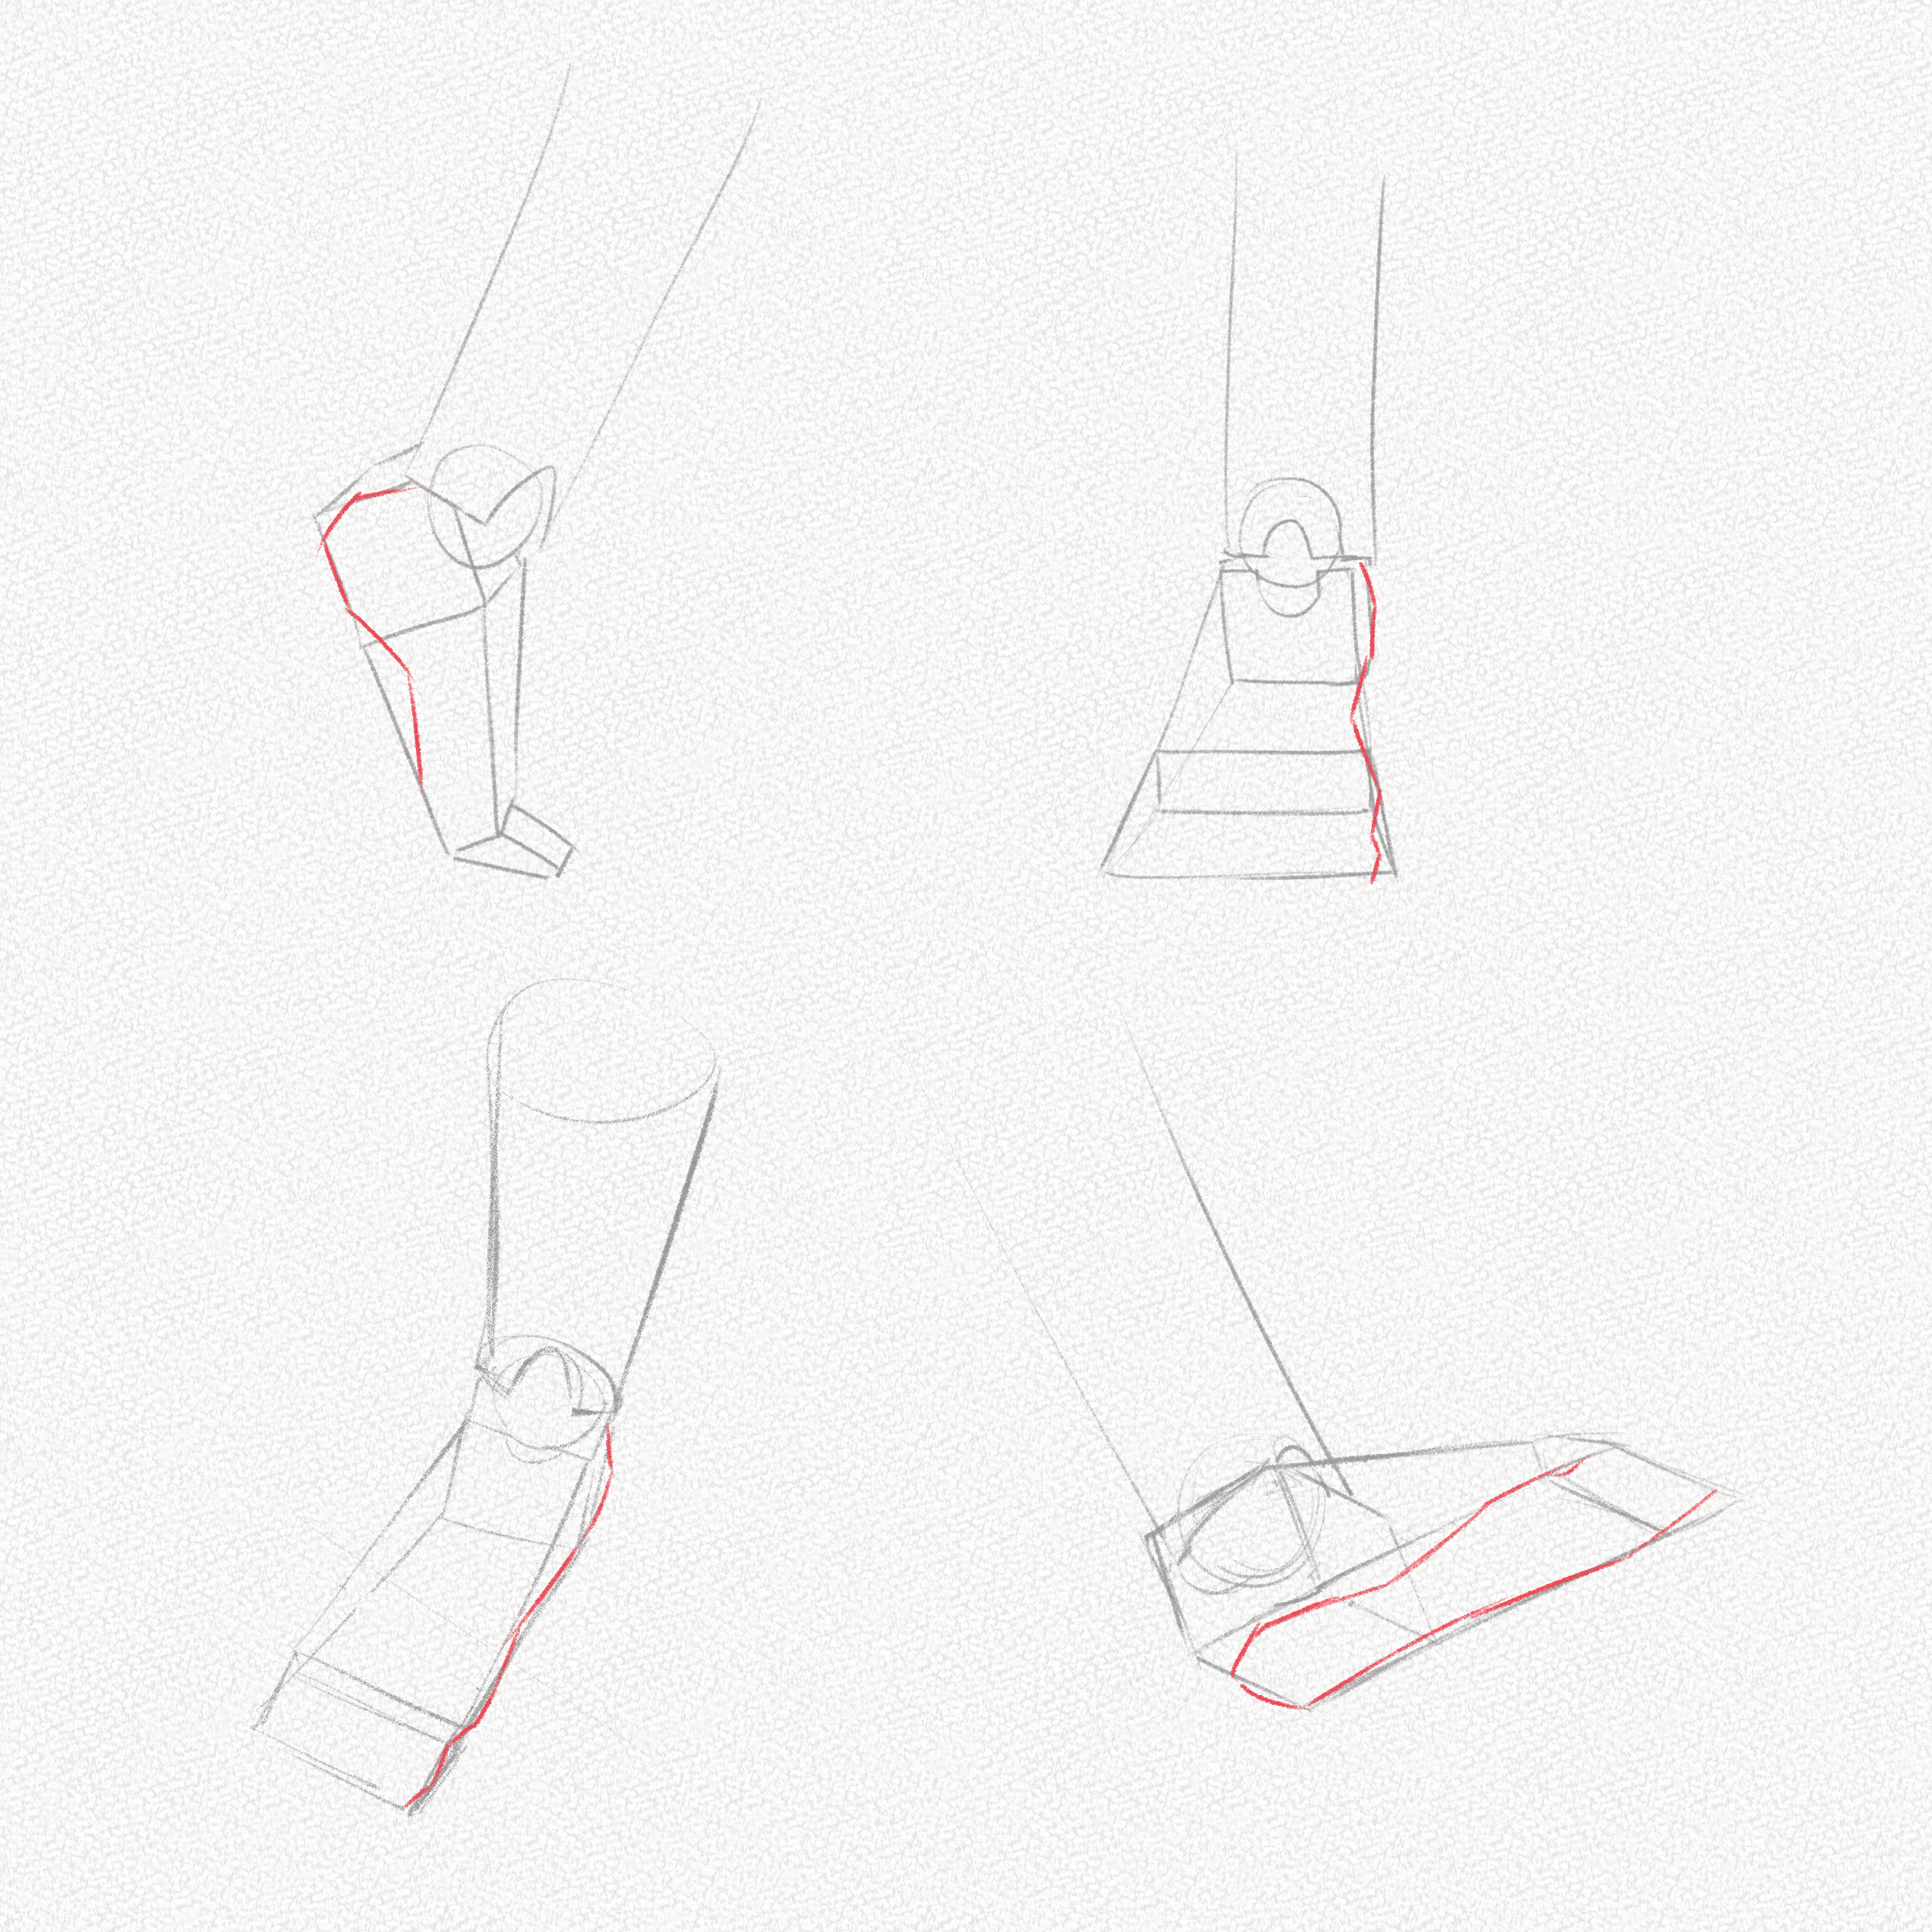
The curves that the feet have are very distinctive and will serve as a base to draw the feet’ skin, muscles, and tendons. Although going into deep detail is not mandatory, hinting at the basic forms and shapes like the calf’s bones and the fingernails can give our feet enough structure to look good and still be accurate anatomy and perspective-wise.
But how do we get to that? how do we draw the toes and nails?
Well, let’s go back to our basic structure:
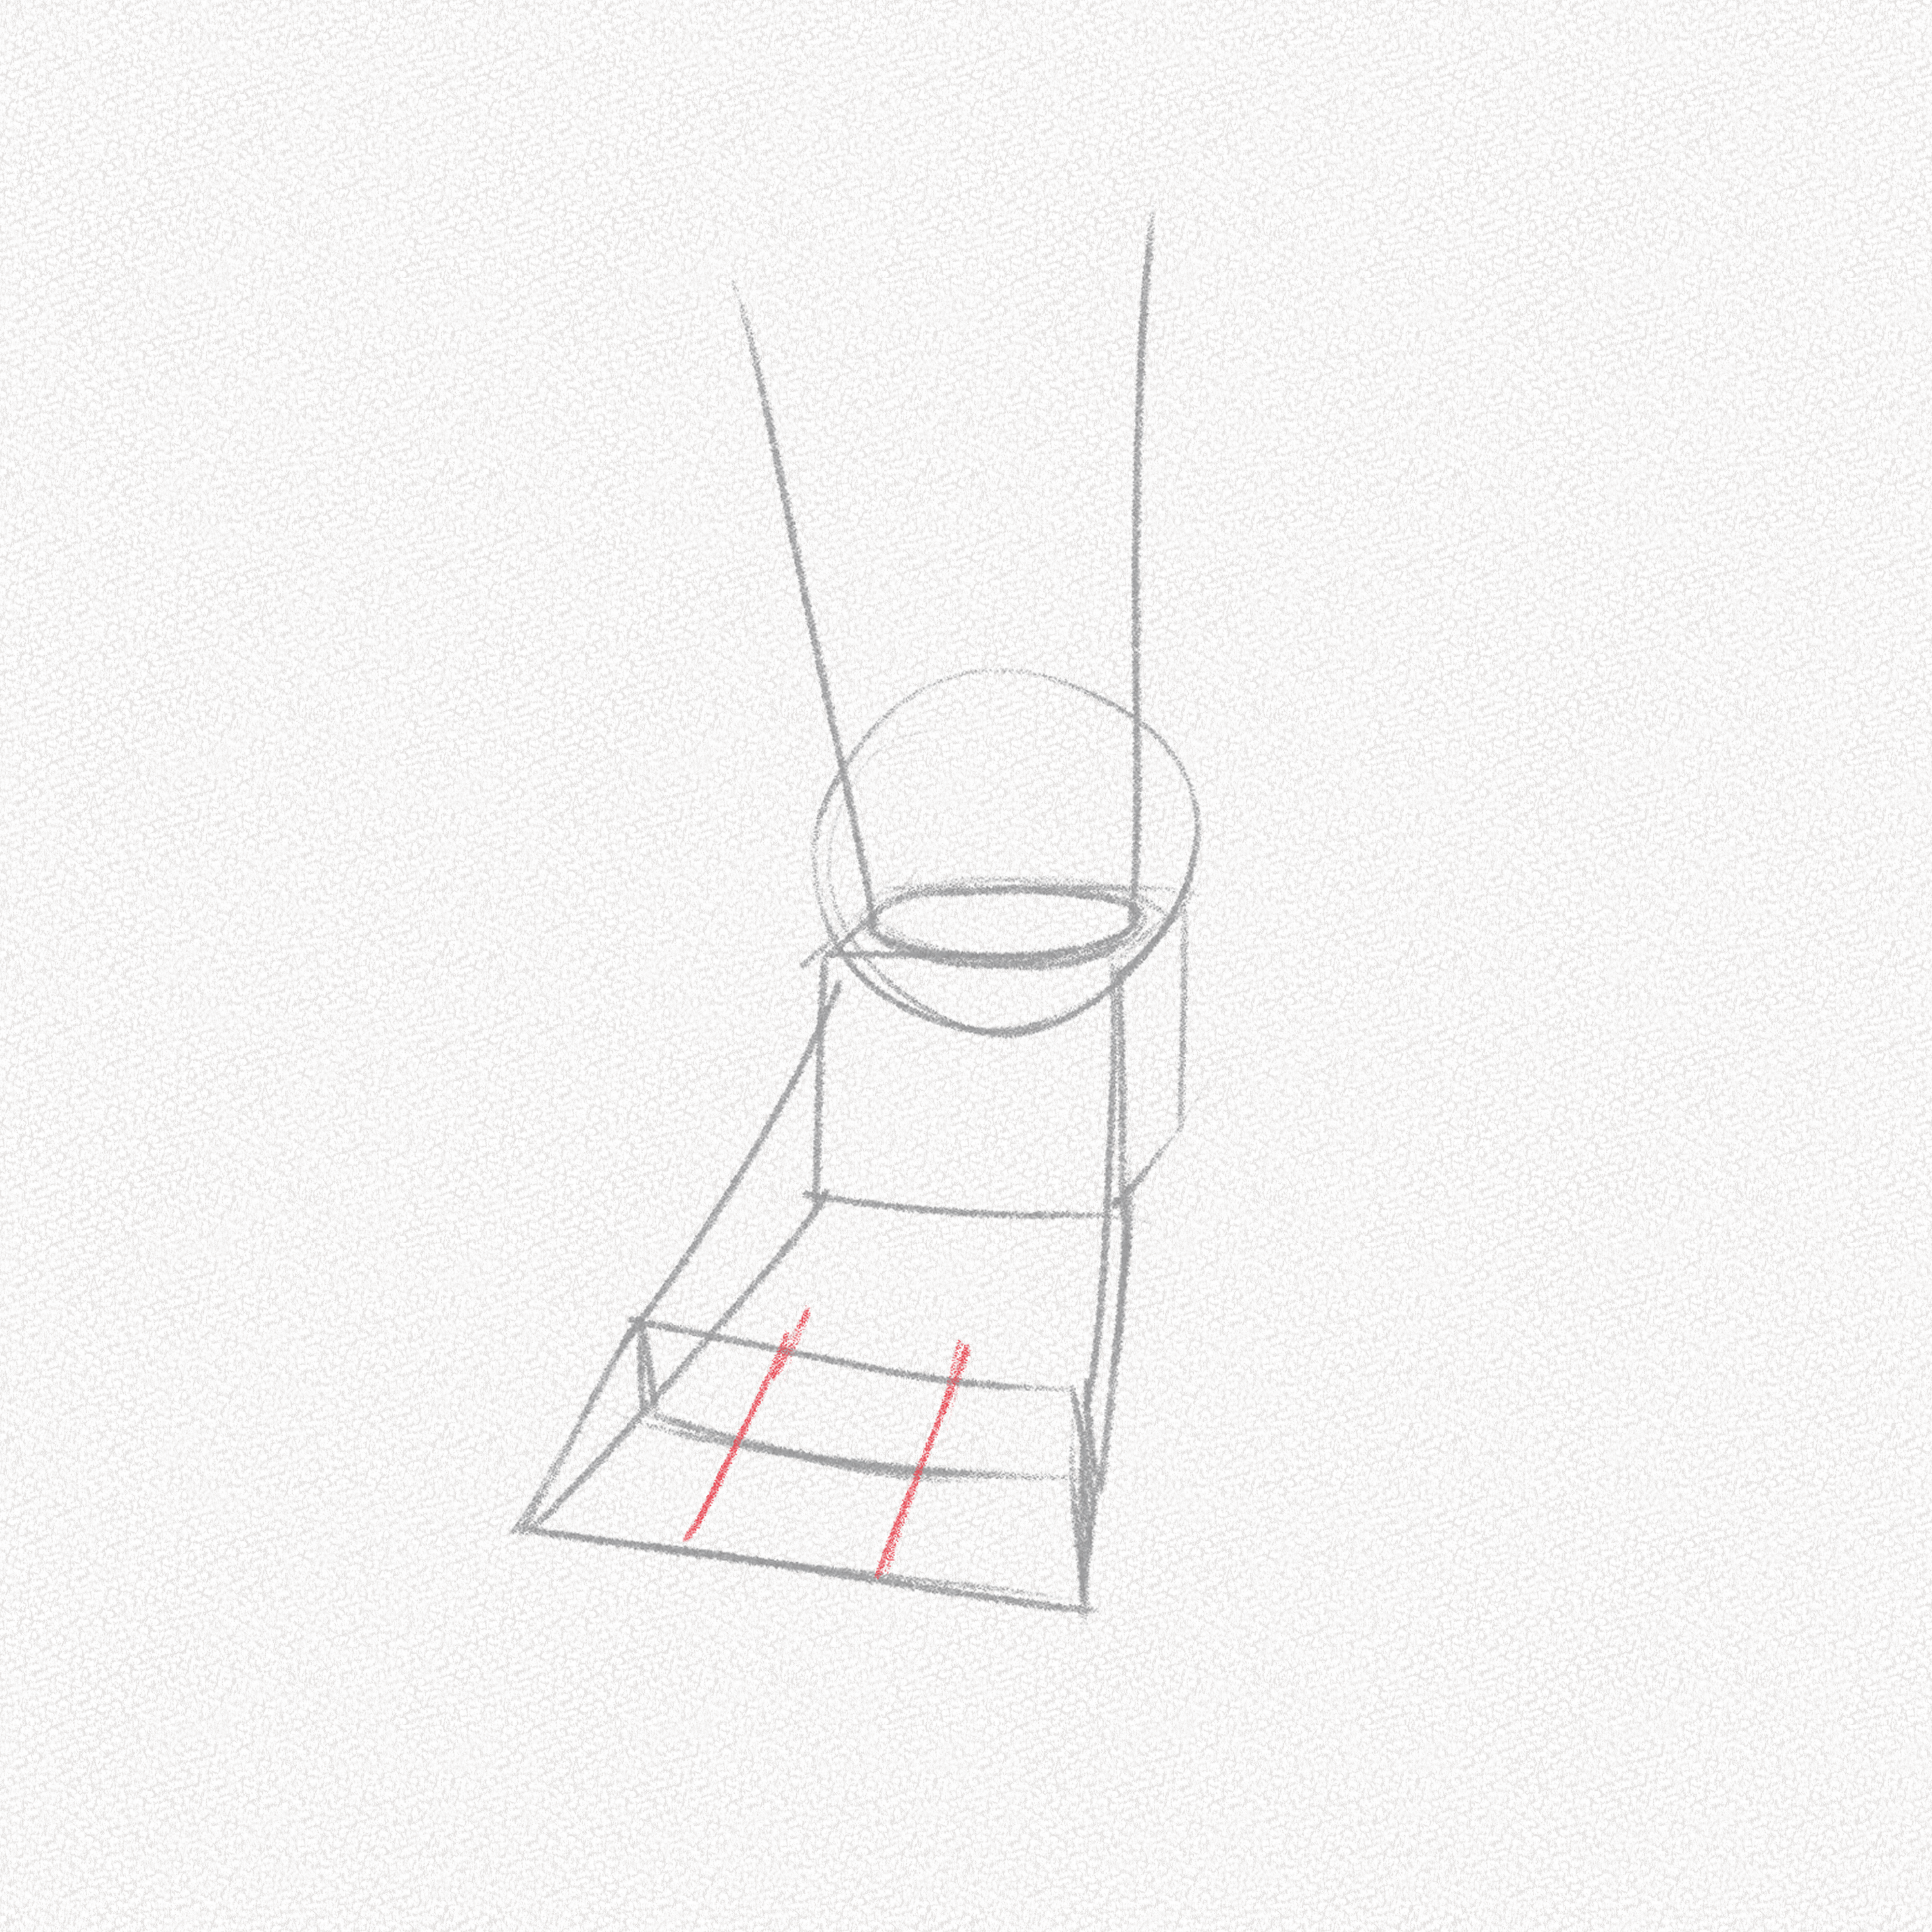
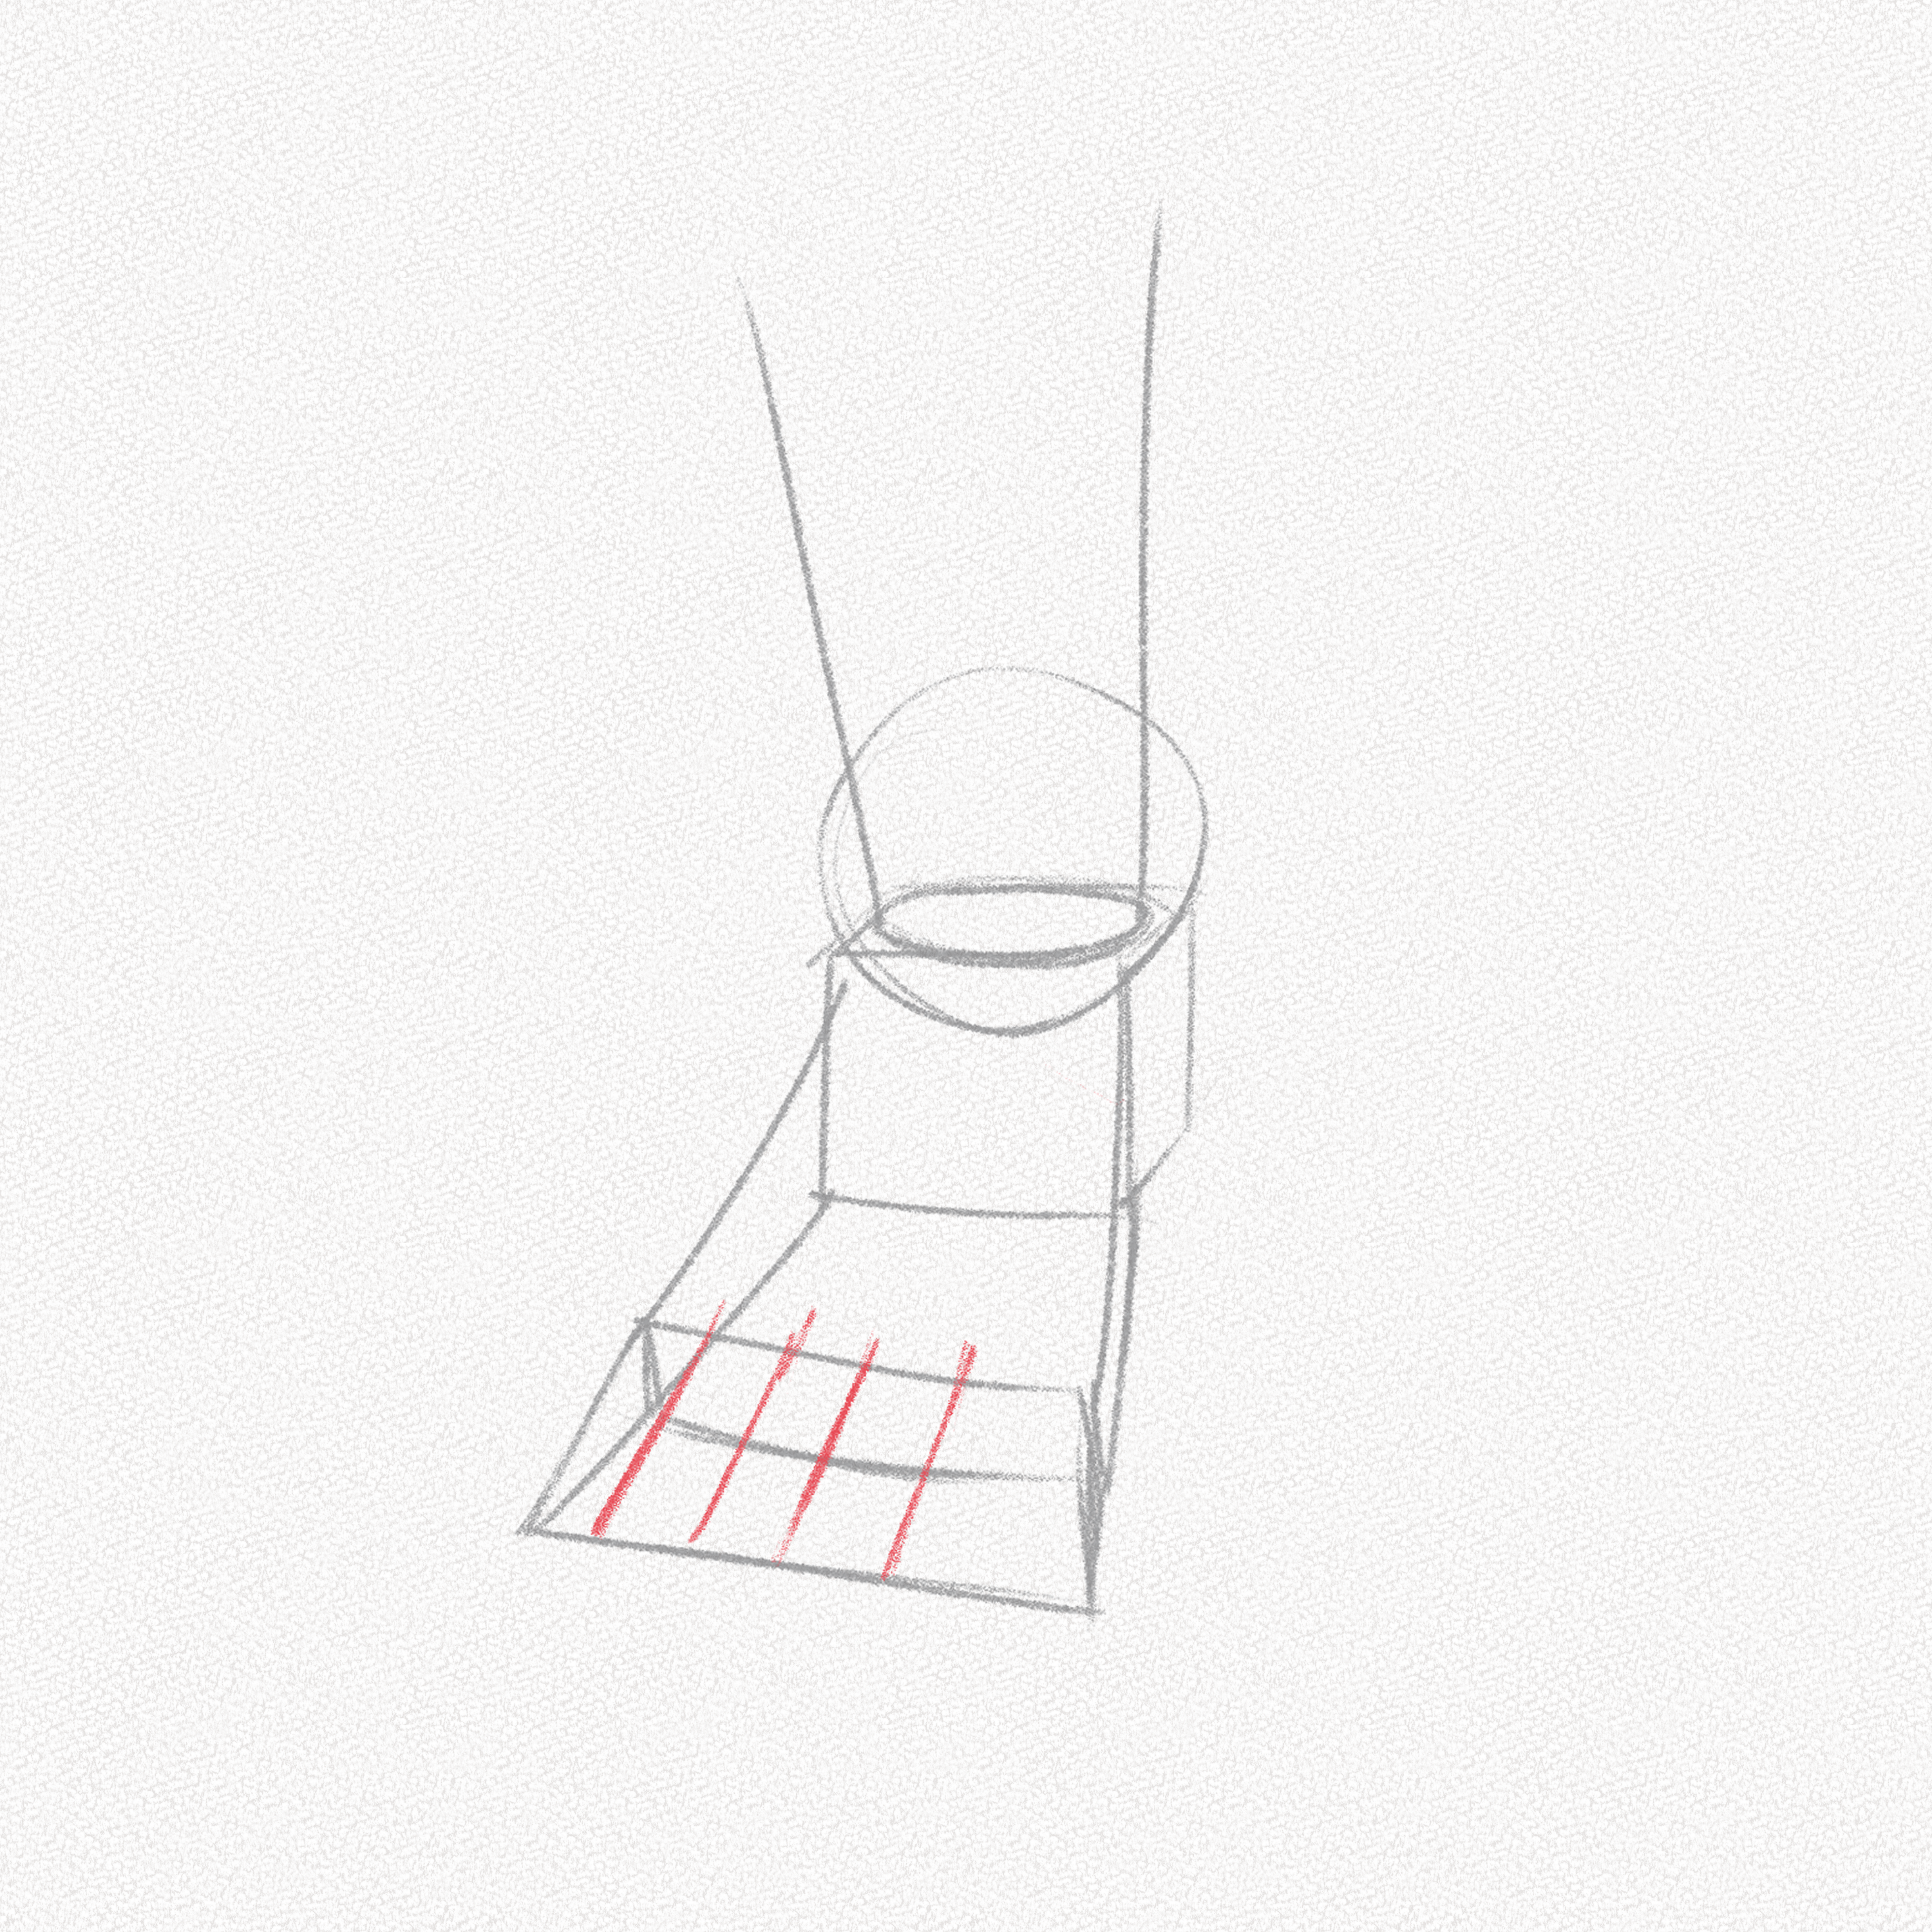
Step 6: Draw three lines
The toes are not regular, which means some are larger and thicker than others, but you already know that right? The trick to finding the right proportions when drawing is to split the toes’ shape into three equal parts.
Step 7: Draw two lines
Now we are going to take the two outer parts and split them into half each. This way we’ll have the width proportions of the toes. But what about the length?
Step 8: Draw a curved line
For a beginner, drawing the shapes of each toe is hard enough, so to make it easier, we’re going to pul a curved line from the inner big toe to the outer little toe. this line will define the toes’ shape.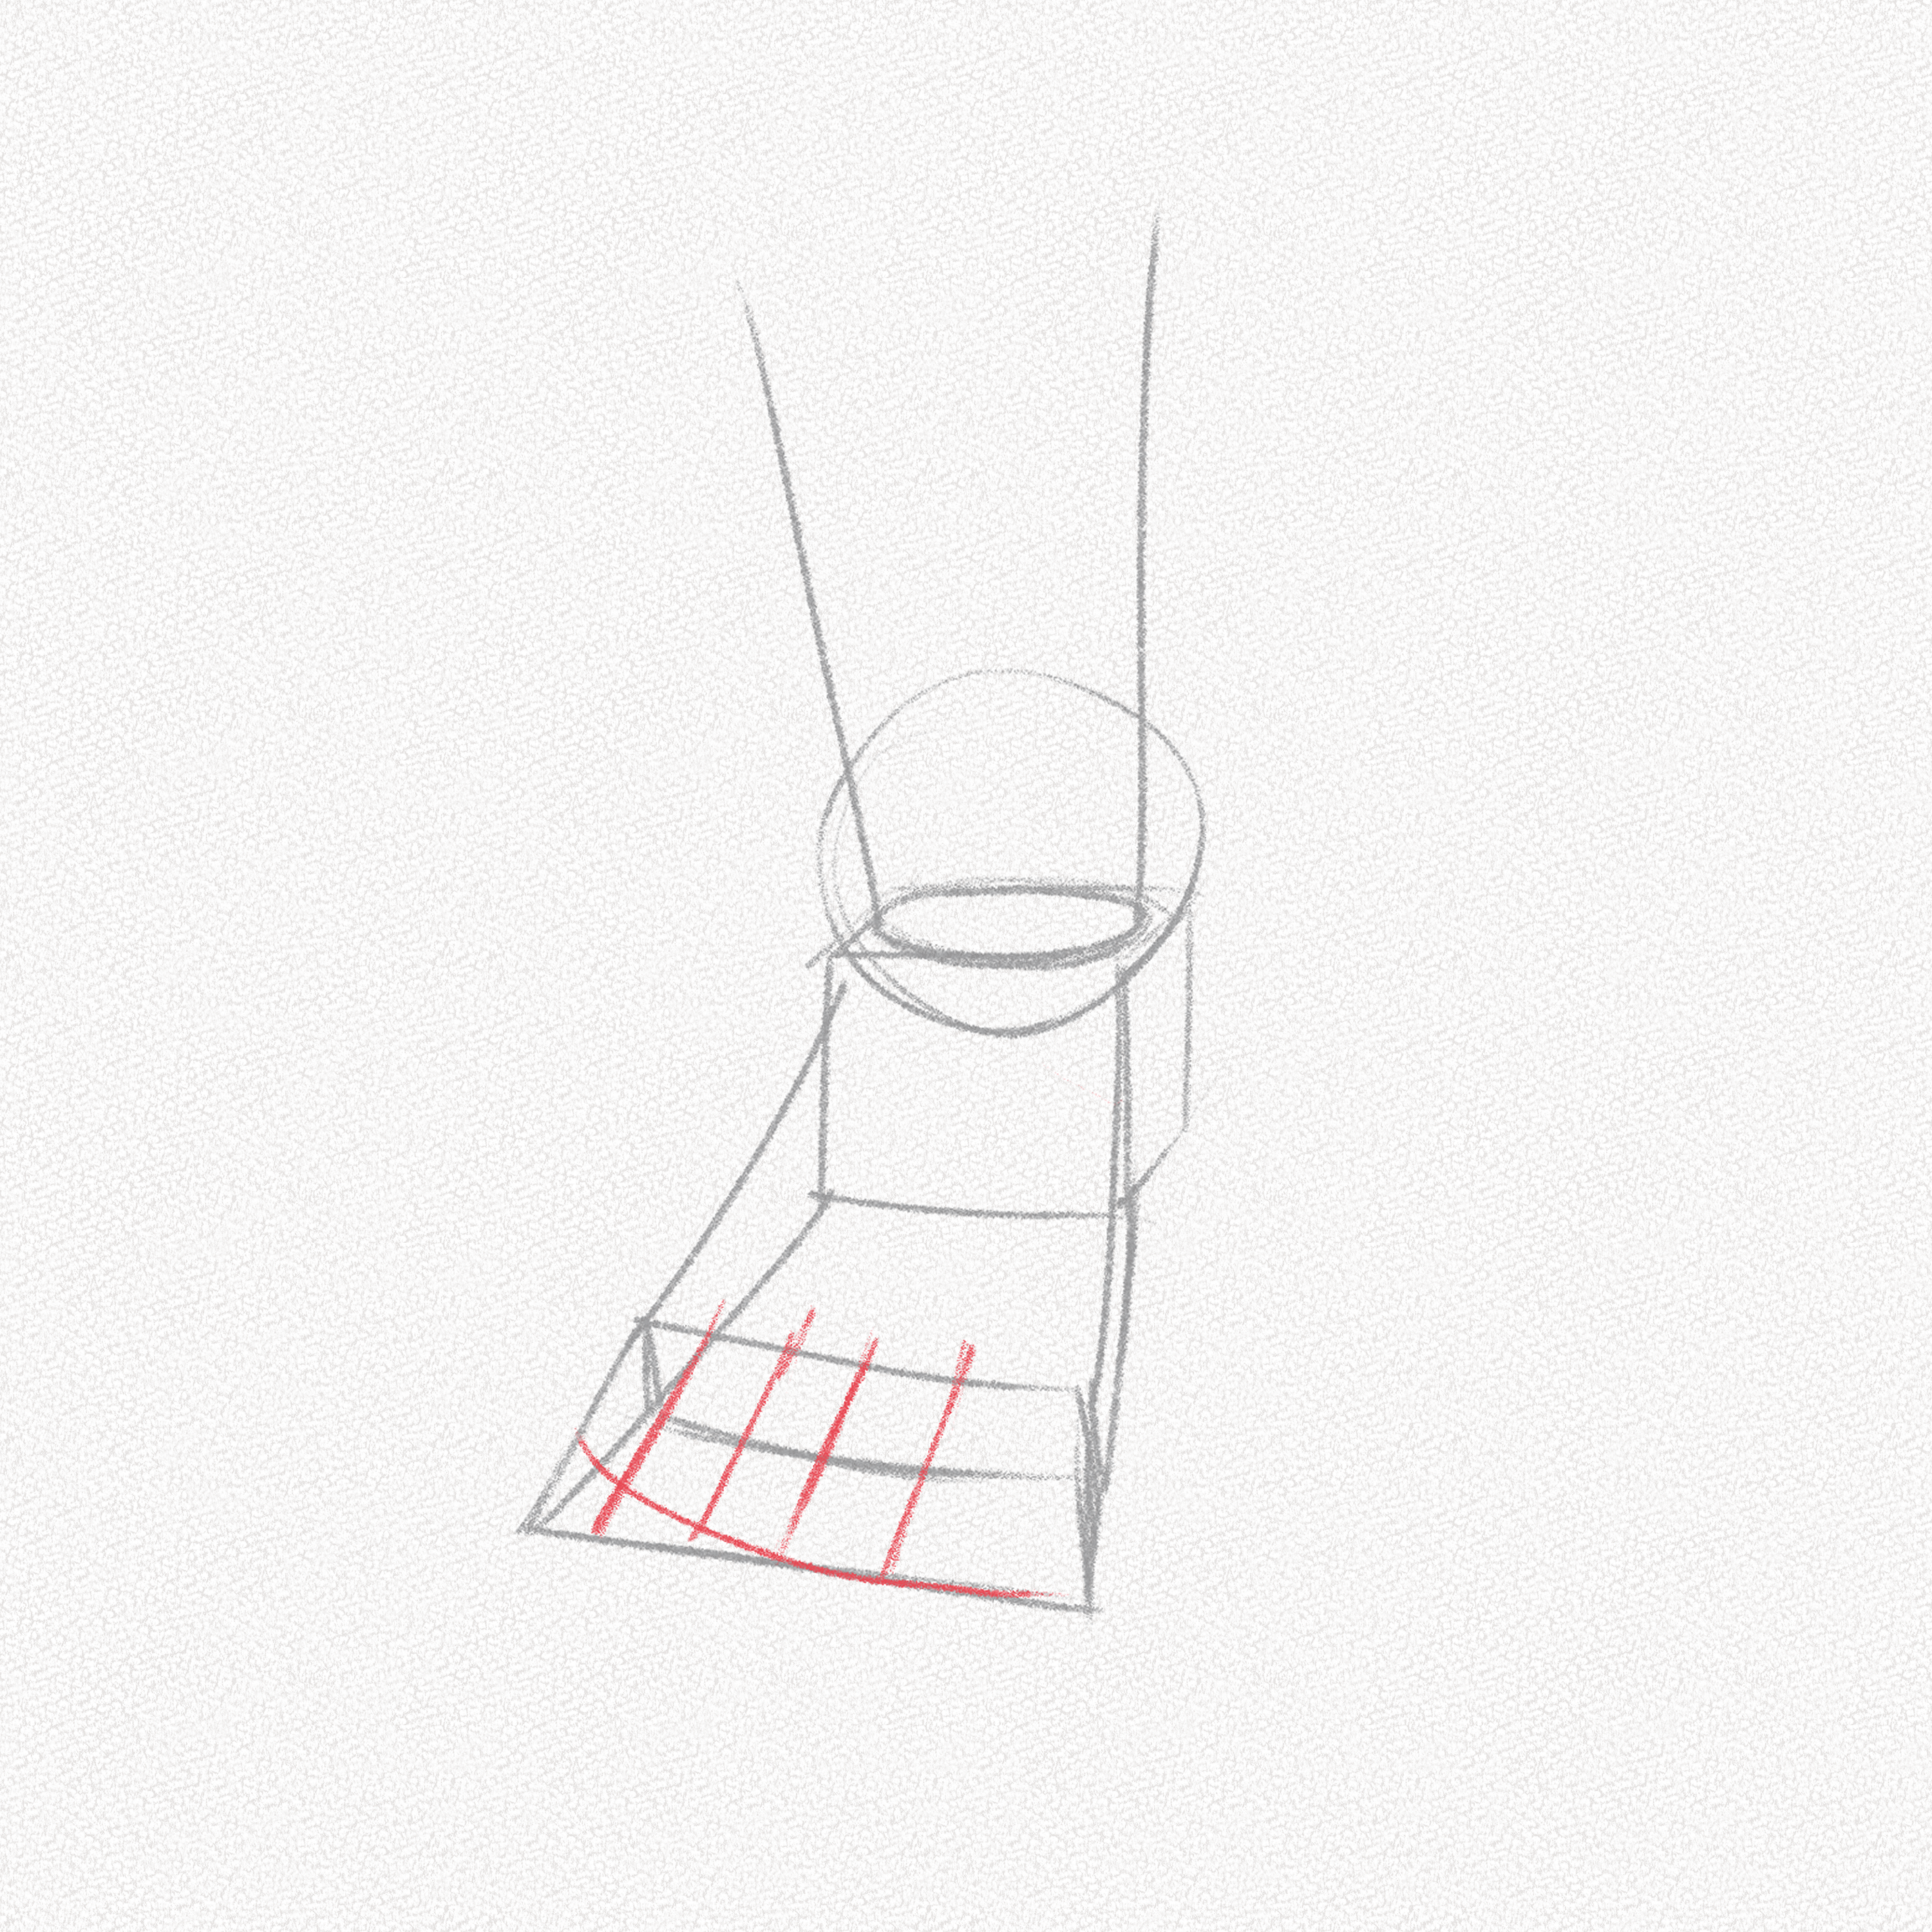
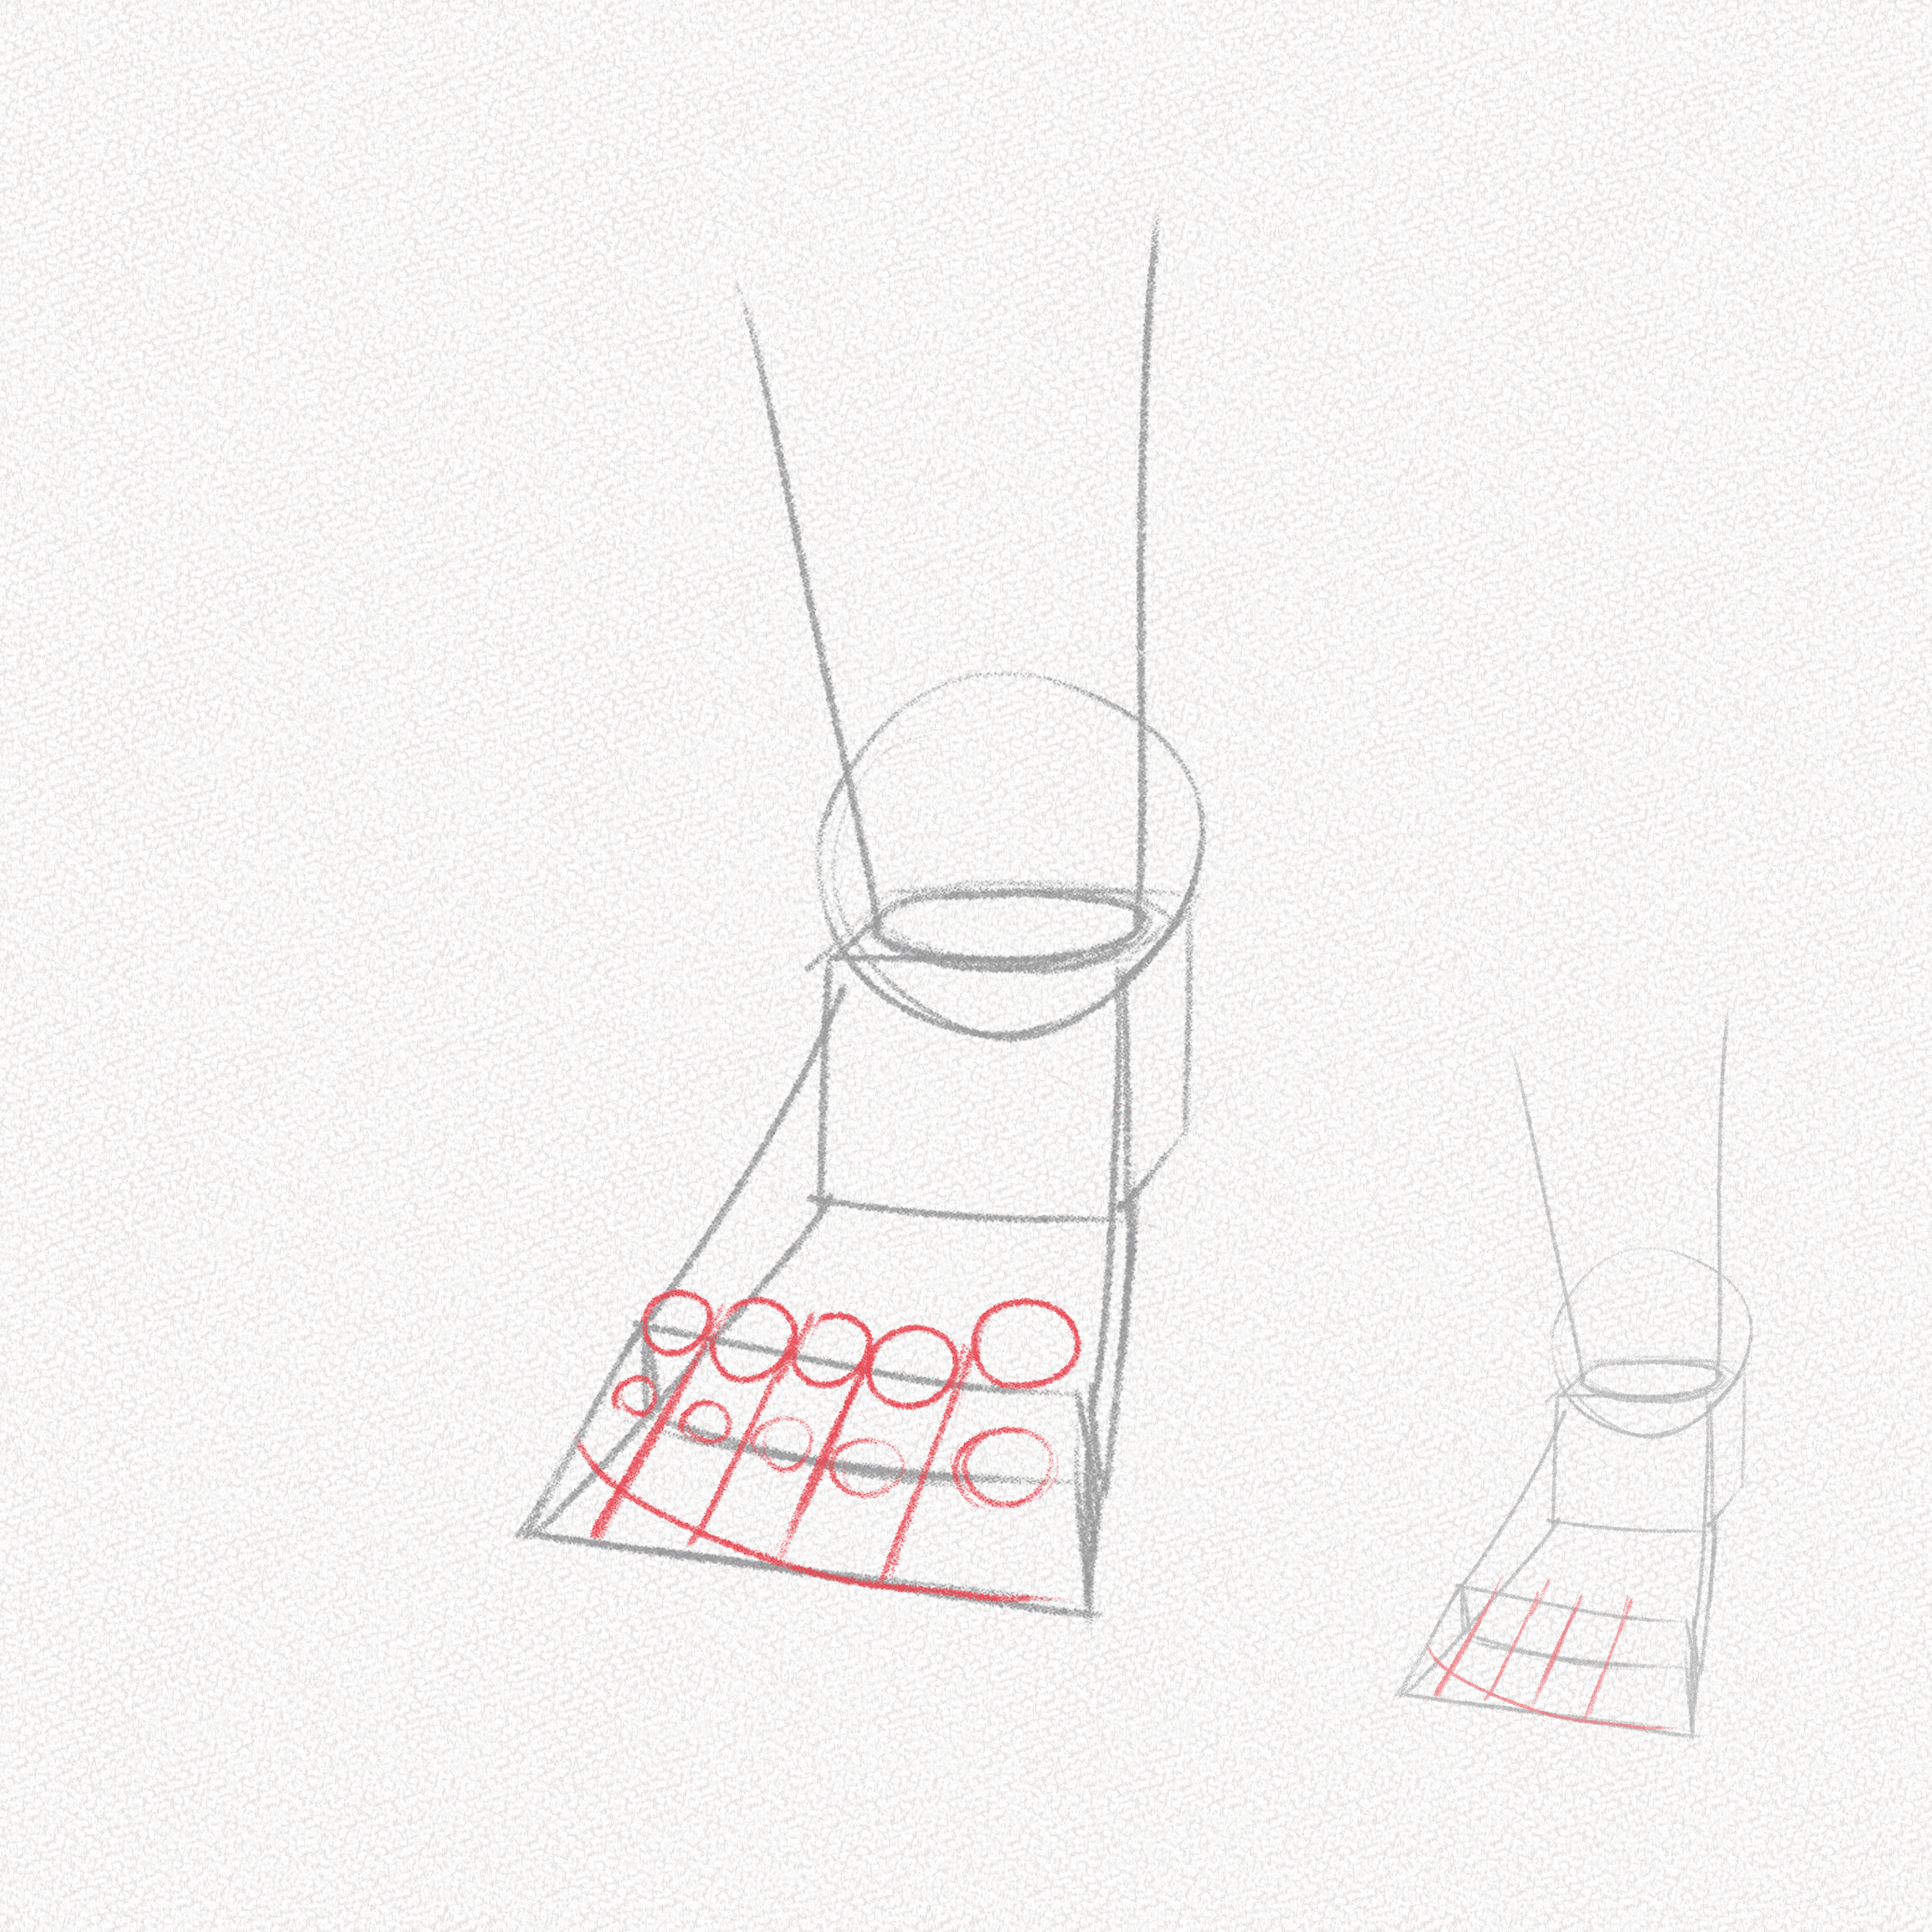
Step 9: Draw the knuckles
Now, to better shape the toes, we’re going to draw two rows of circles on our structure, these circles will help us give volume to the toes and to correctly place the fingernails.
Step 10: Repeat
Now we have our foot. But we can’t have only one right? repeat the steps above in the opposite direction and you’ll have your feet done!

Use this technique and practice drawing feet at different angles and perspectives.

You can use the same technique to draw not only bare feet but feet with shoes. Though you’ll have to squeeze the toes a bit to make them fit the shoe shape you wanna draw.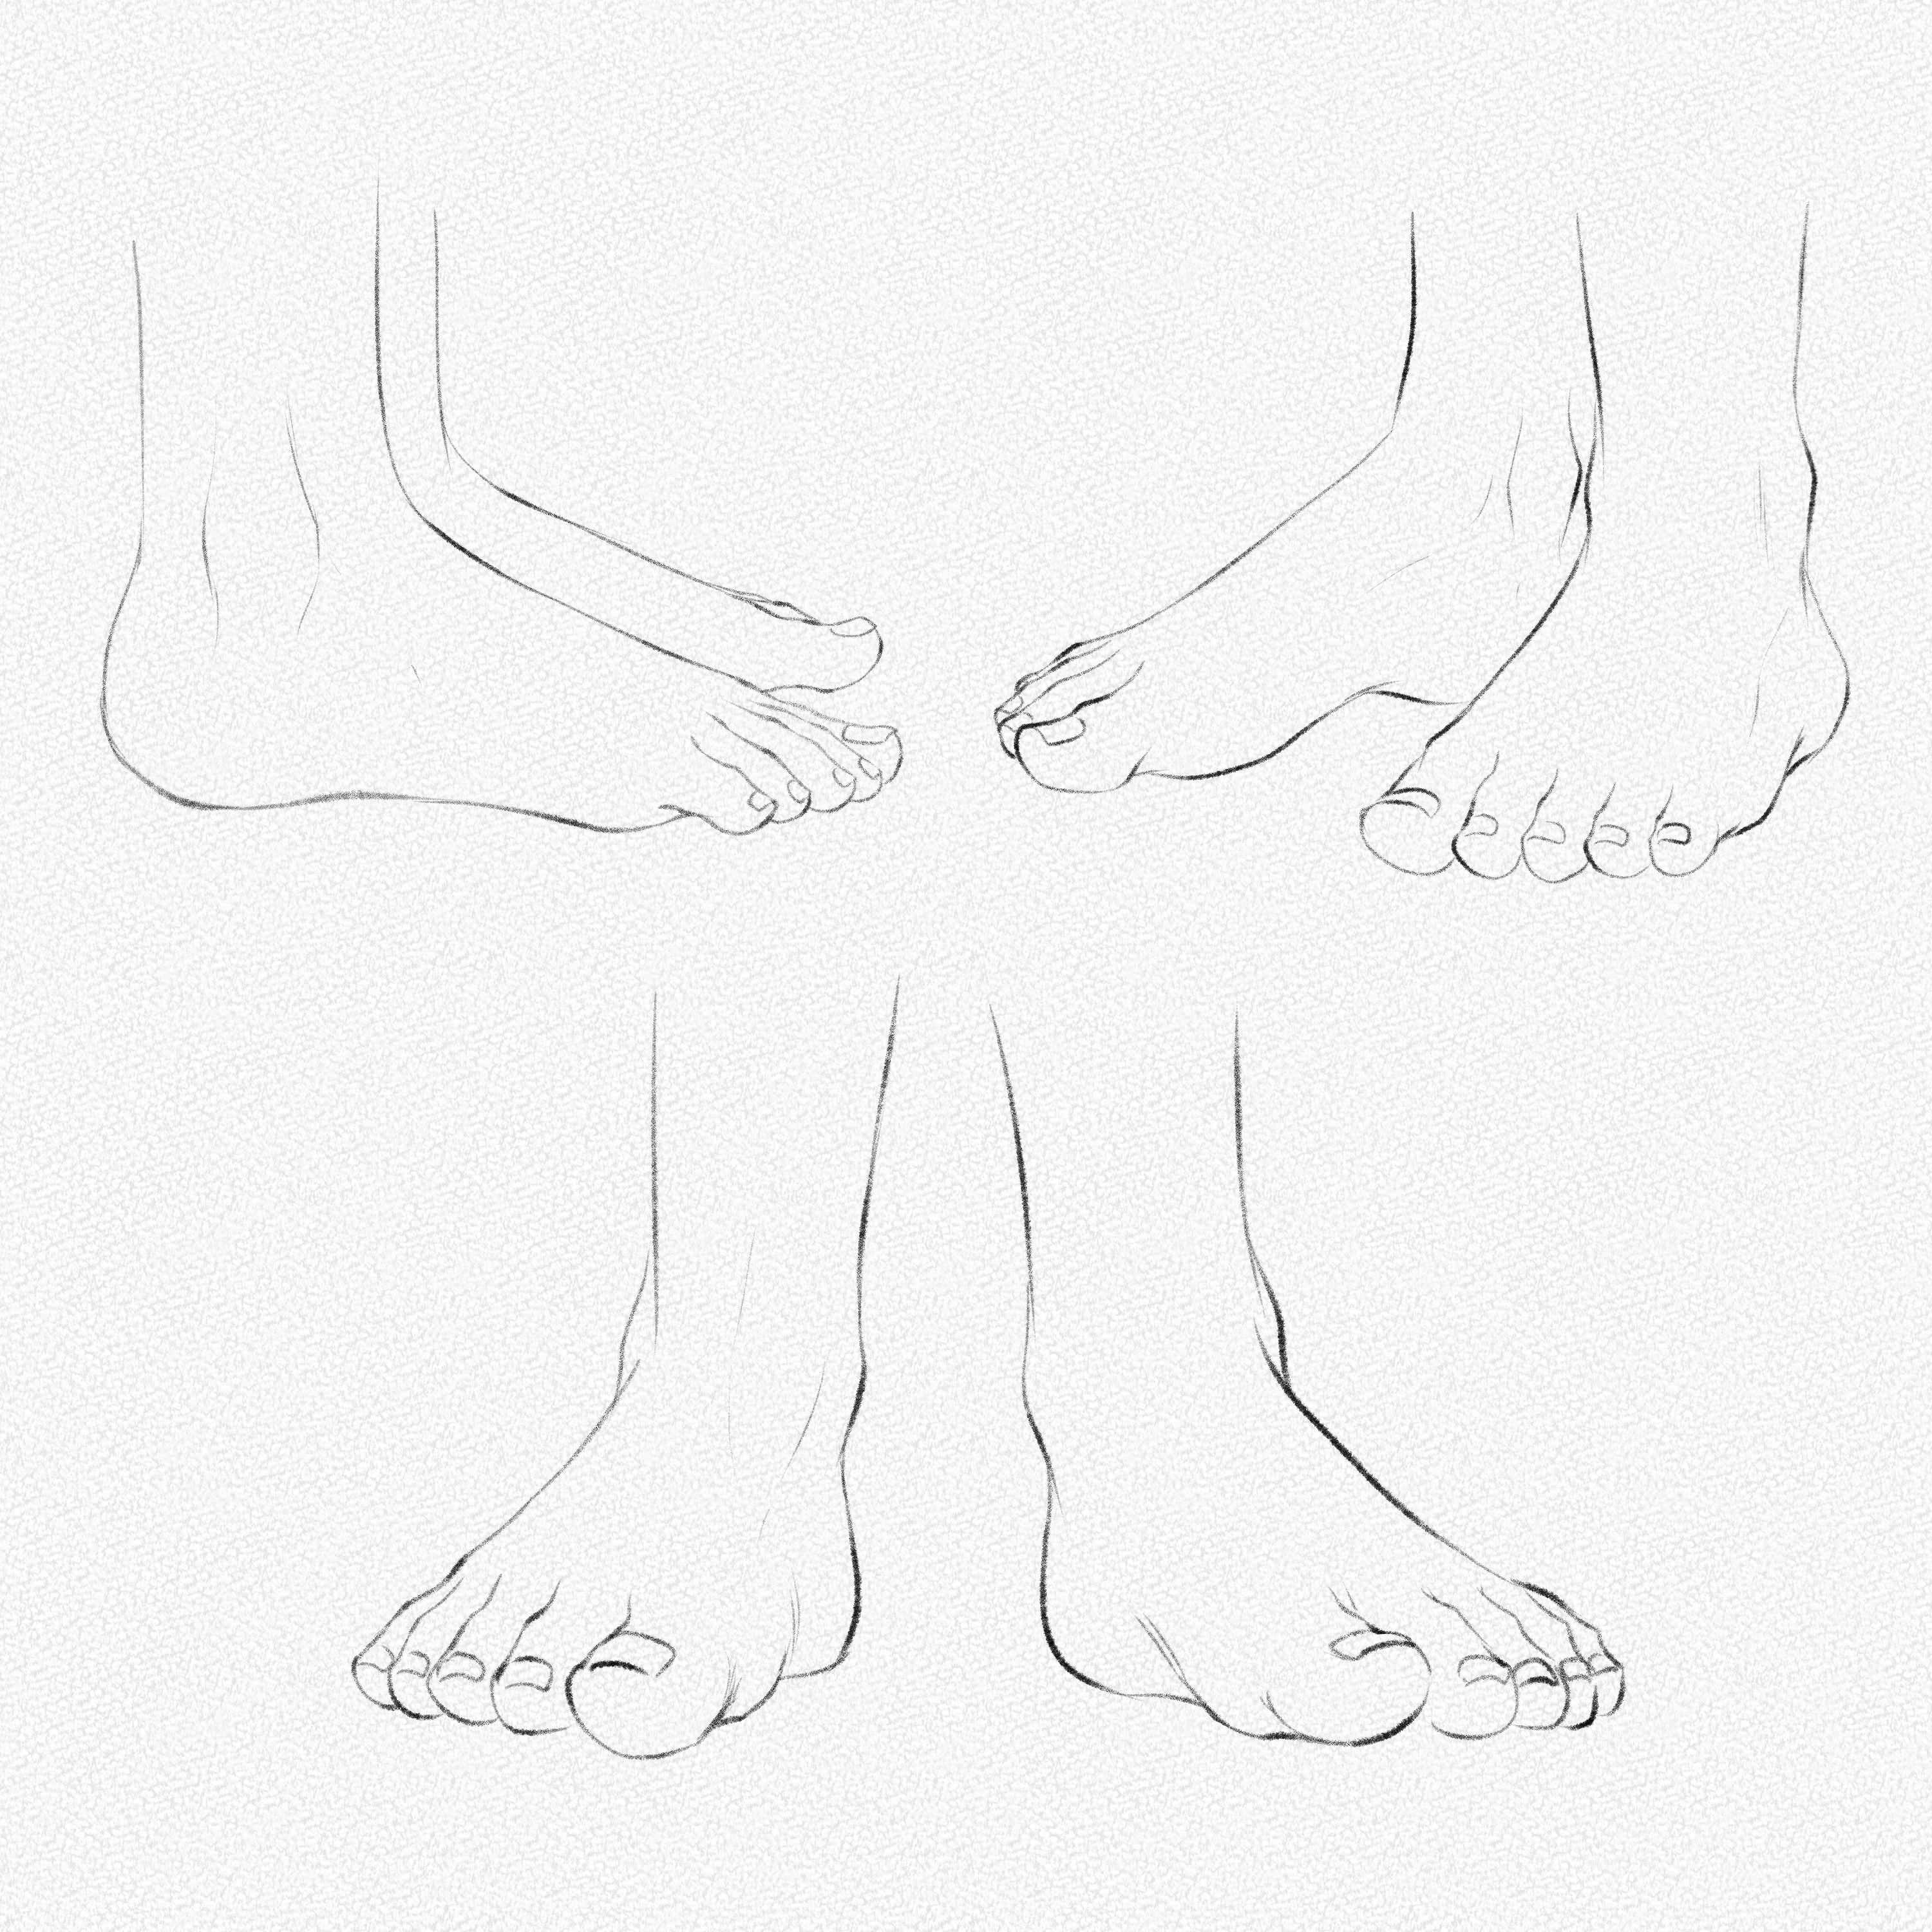
Use references from life and from the internet. Don’t aim for feet that are still, but for movement, that way you’ll understand how feet actually work and how they look from different angles.
Section 2.- How to Shade Feet
Now, onto the shading.
Shading feet is not difficult at all, what’s really difficult is to shade them under different light settings. For this example, we’re going to do some basic shading in a default position, to comprehend the feet structure.
Step 1: Shade the outline
Let’s start by shading softly the outline of the feet. Give emphasis to the heel and to the toes base, as well as to the toes’ separation lines.
Step 2: Shade the toes and knuckles
Next, following the circles we drew in Section #2, shade around the circles we drew, and also shade the toenails, creating a small gradient to give the illusion of volume.
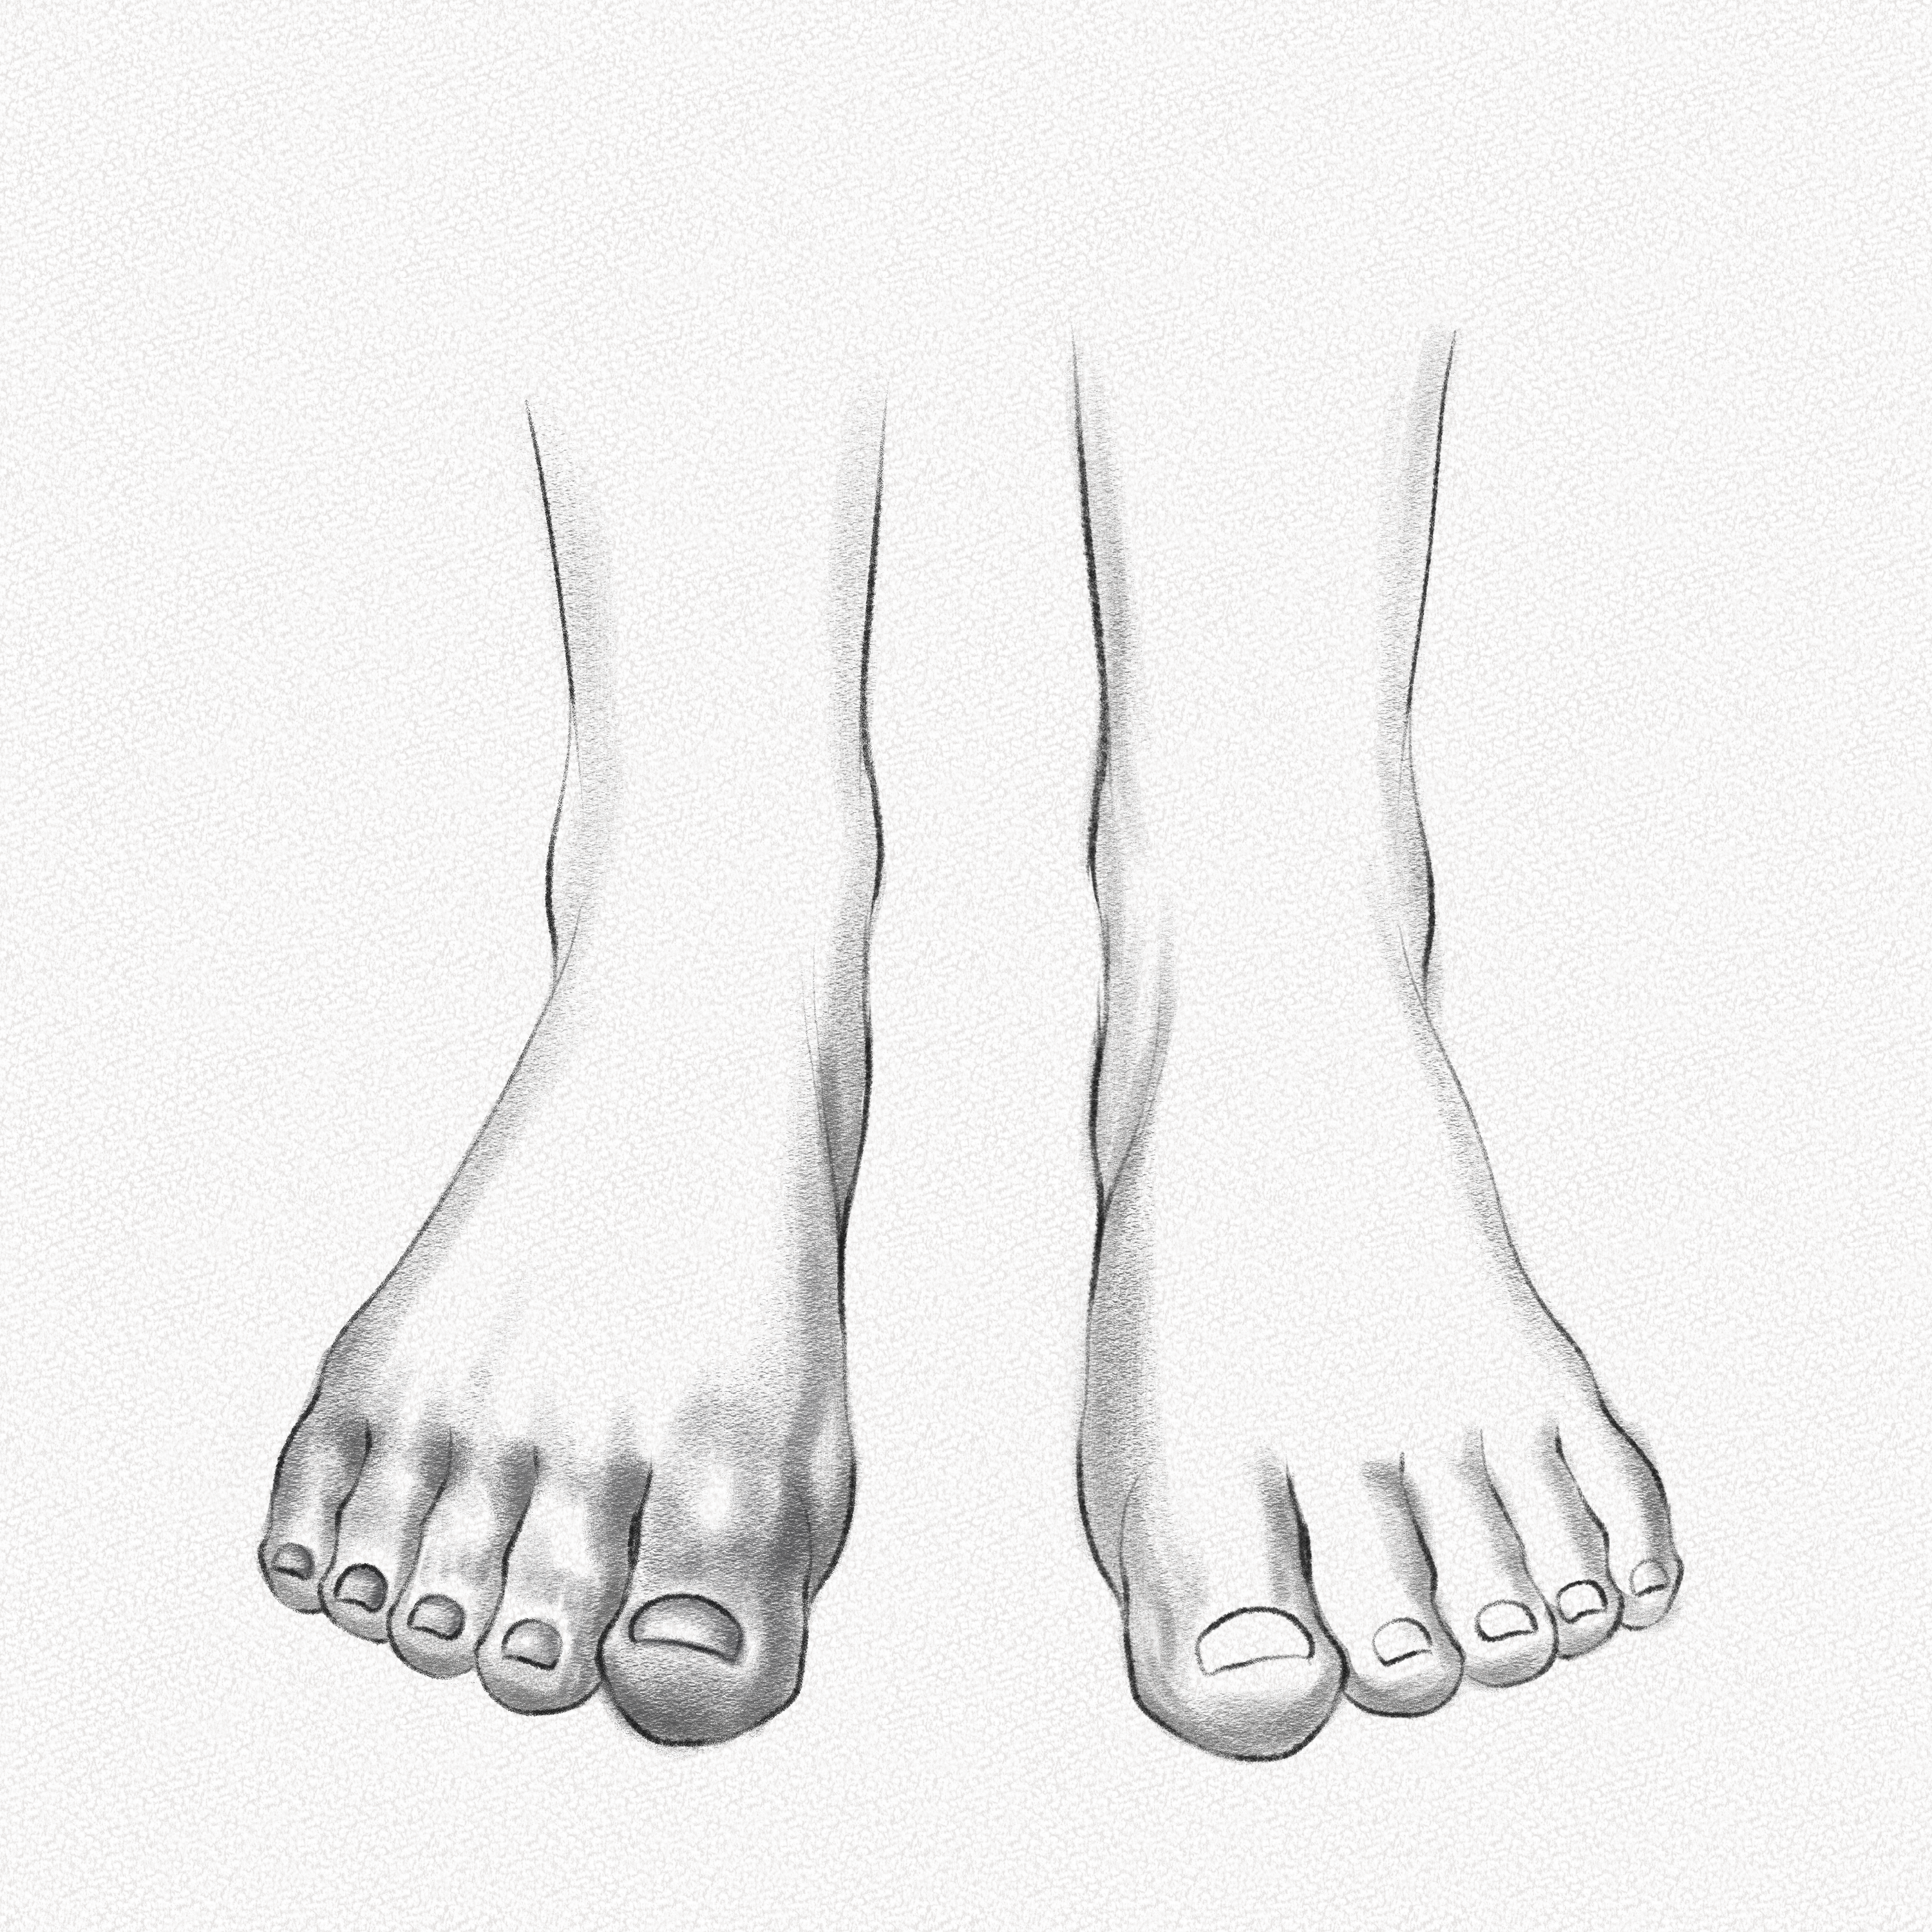
Step 3: Shade the rest of the feet
Shade the rest of the feet’ soft movements, and with your kneaded eraser, pull some lines from the fingers to the outer part of the calf joint, to simulate the tendons and ligaments present in the feet.
Step 4: Repeat
Do the same for the other foot, and make sure to shade the visible part of the calf as well.
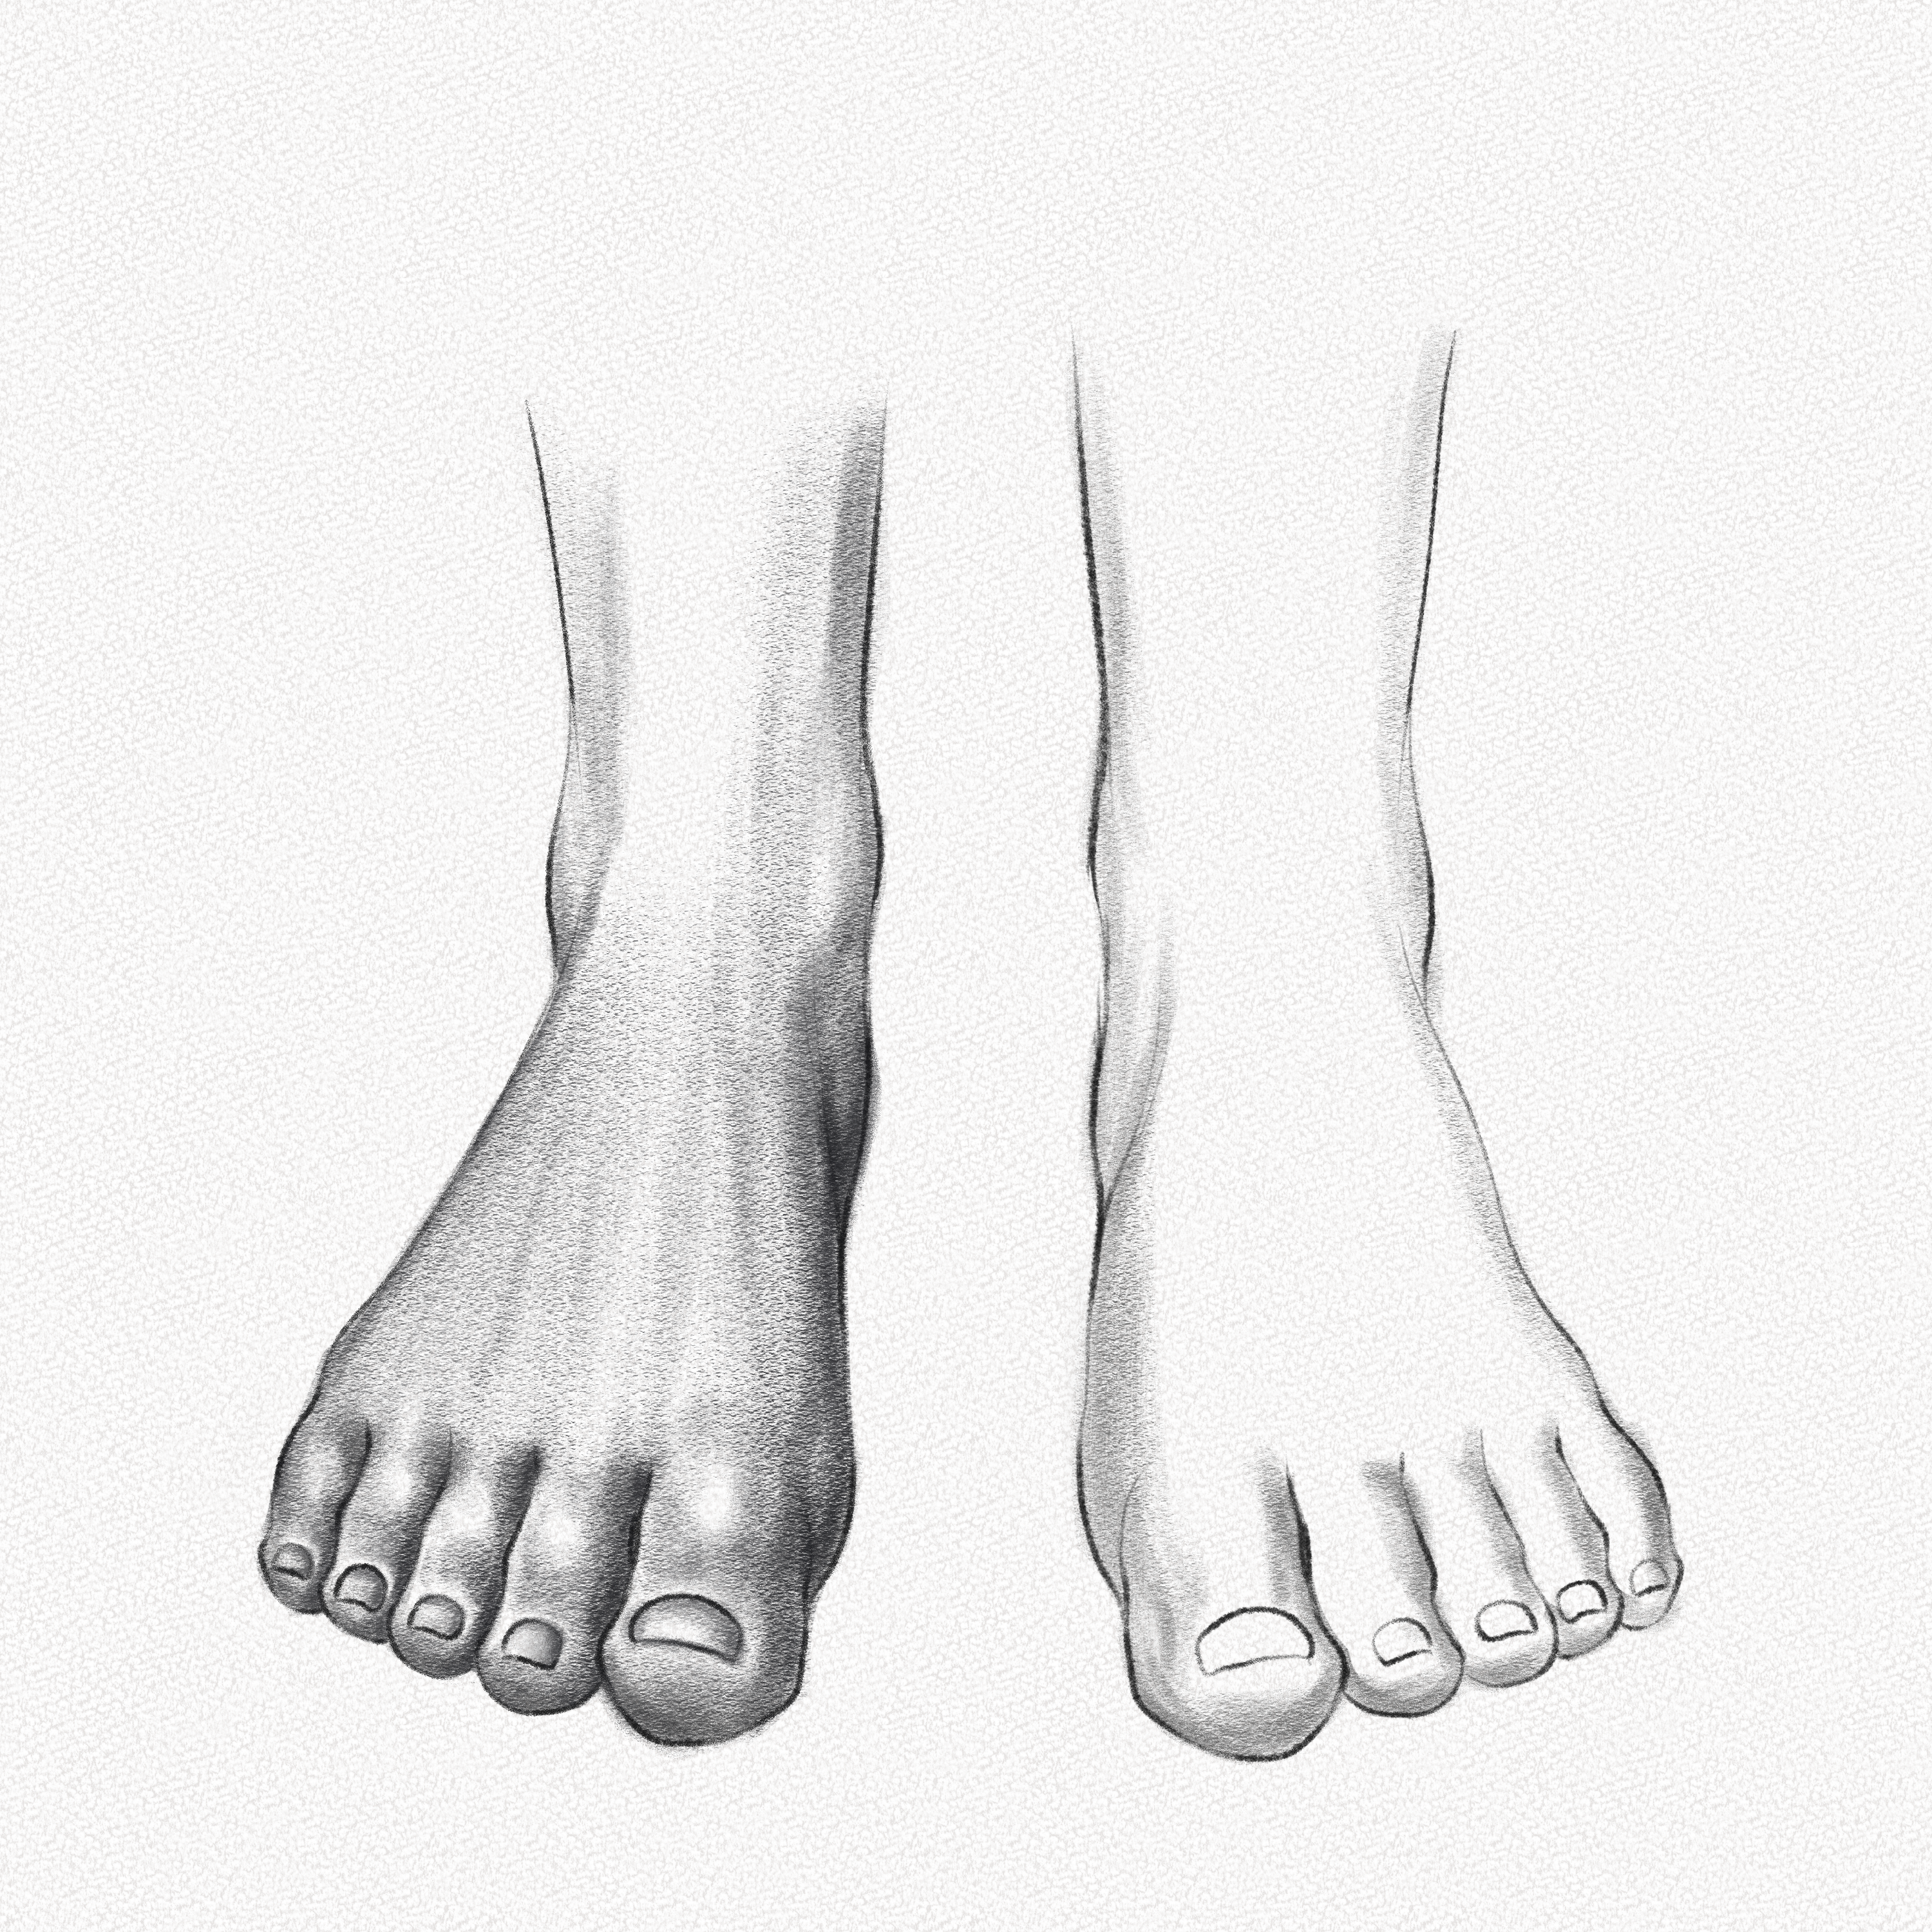
Step 5: Add shadows
Add a shadow under the feel by creating a soft gradient that fades in the front and back. Then add a contrasting shadow close to the soles and toes.
And that’s it. This tutorial is intended to be a starting point for those who wish to learn how to draw feet correctly. If you want to see a more in-depth tutorial where we explore different angles, light settings, and poses, let me know in the comments and I’ll do my best to bring it to you!
Remember, feet don’t always make sense, so don’t overthink it, and just go with your pencil’s flow, when adding the legs or the rest of the body, then everything will take place. Practicing is always more important than getting something right on your first try, so don’t give up and keep on drawing even if you’re not getting the result you want.
Thank you for following this tutorial and, happy drawing!