Welcome to this tutorial on how to draw a shark step by step.
Sharks are fascinating and feared creatures by many due to their reputation as ferocious predators. However, it is important to remember that these animals play a crucial role in the ocean’s food chain, and their preservation is essential for the health of our planet.
When drawing a shark, we are not only exploring its anatomy and body structure, but also learning about its behavior and distinctive features, which will help us create a more realistic and authentic representation.
Additionally, practicing drawing complex animals like sharks can be a challenge, but it is also an opportunity to improve our drawing techniques, from shading to perspective and proportion.
So, grab your pencils and paper, and let’s explore the fascinating anatomy of sharks through the art of drawing.
What you will learn:
- The body structure of a shark.
- How to draw and shade a shark.
Materials needed:
- A piece of paper
- A 2H graphite pencil
- A 4B and 8B graphite pencil
- Powdered Graphite
- A soft brush
- A Tombow Mono Zero 2.3mm eraser
- A kneaded eraser
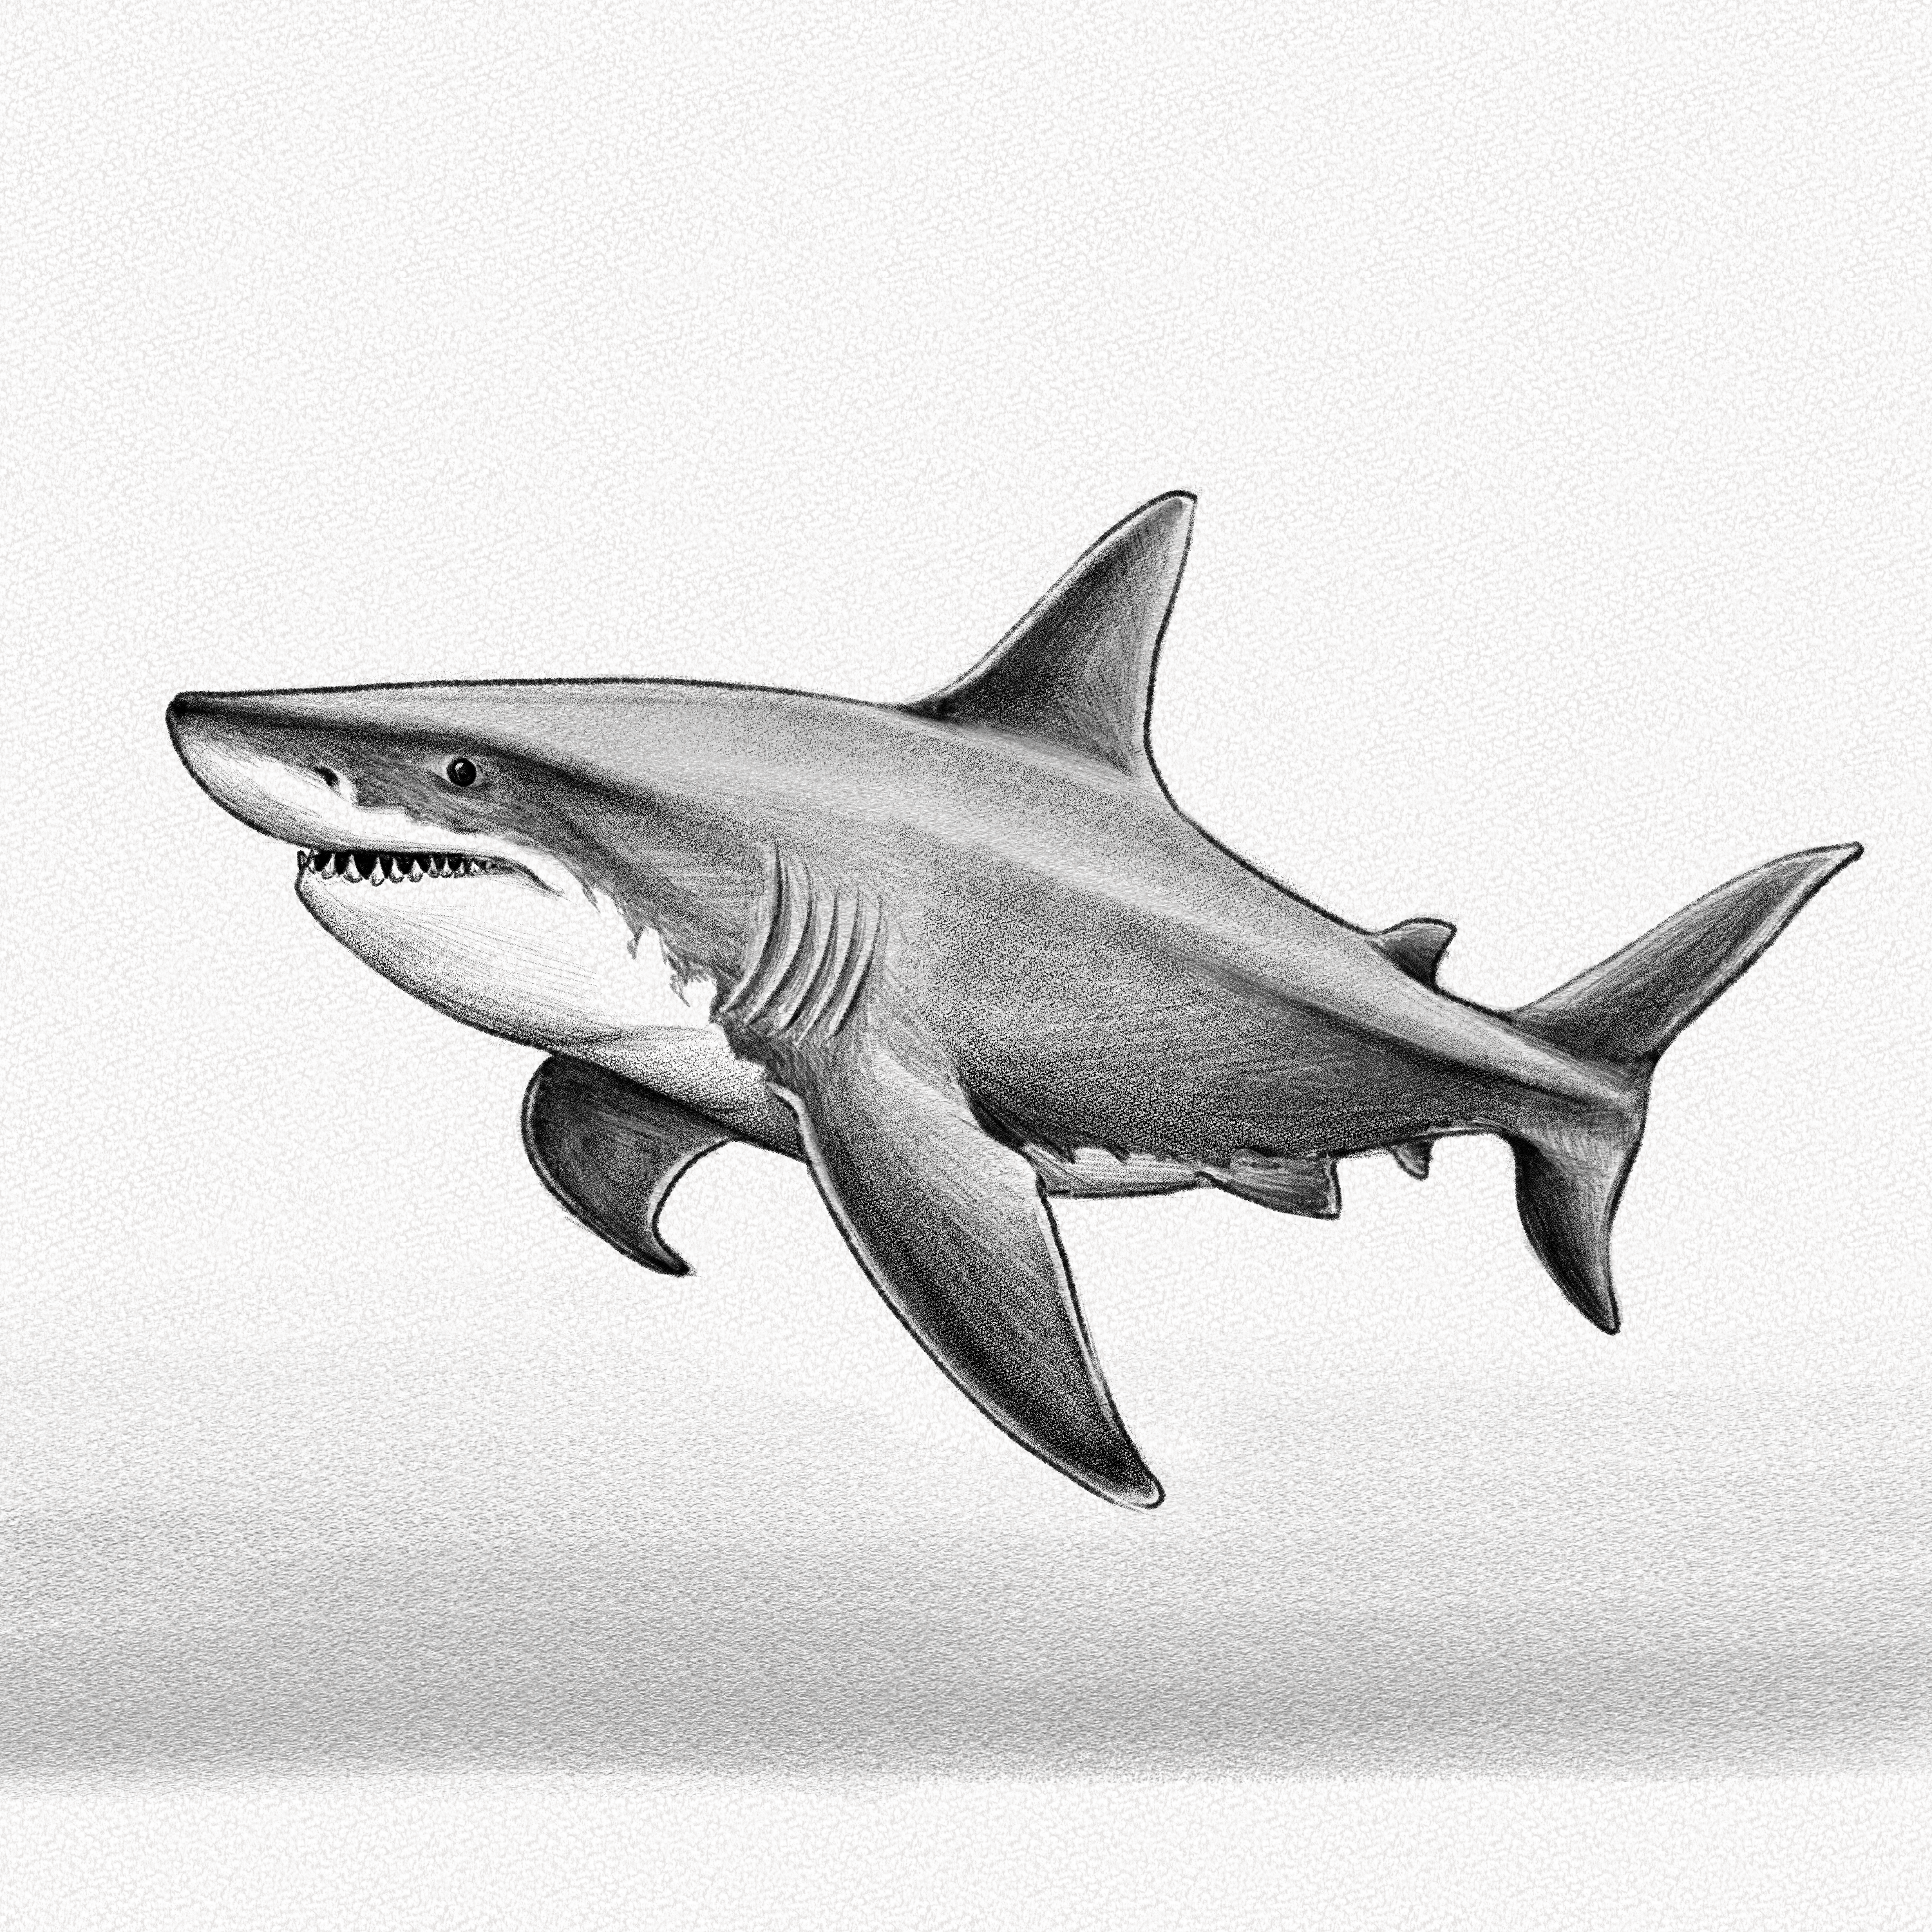
This is the shark you will be drawing:
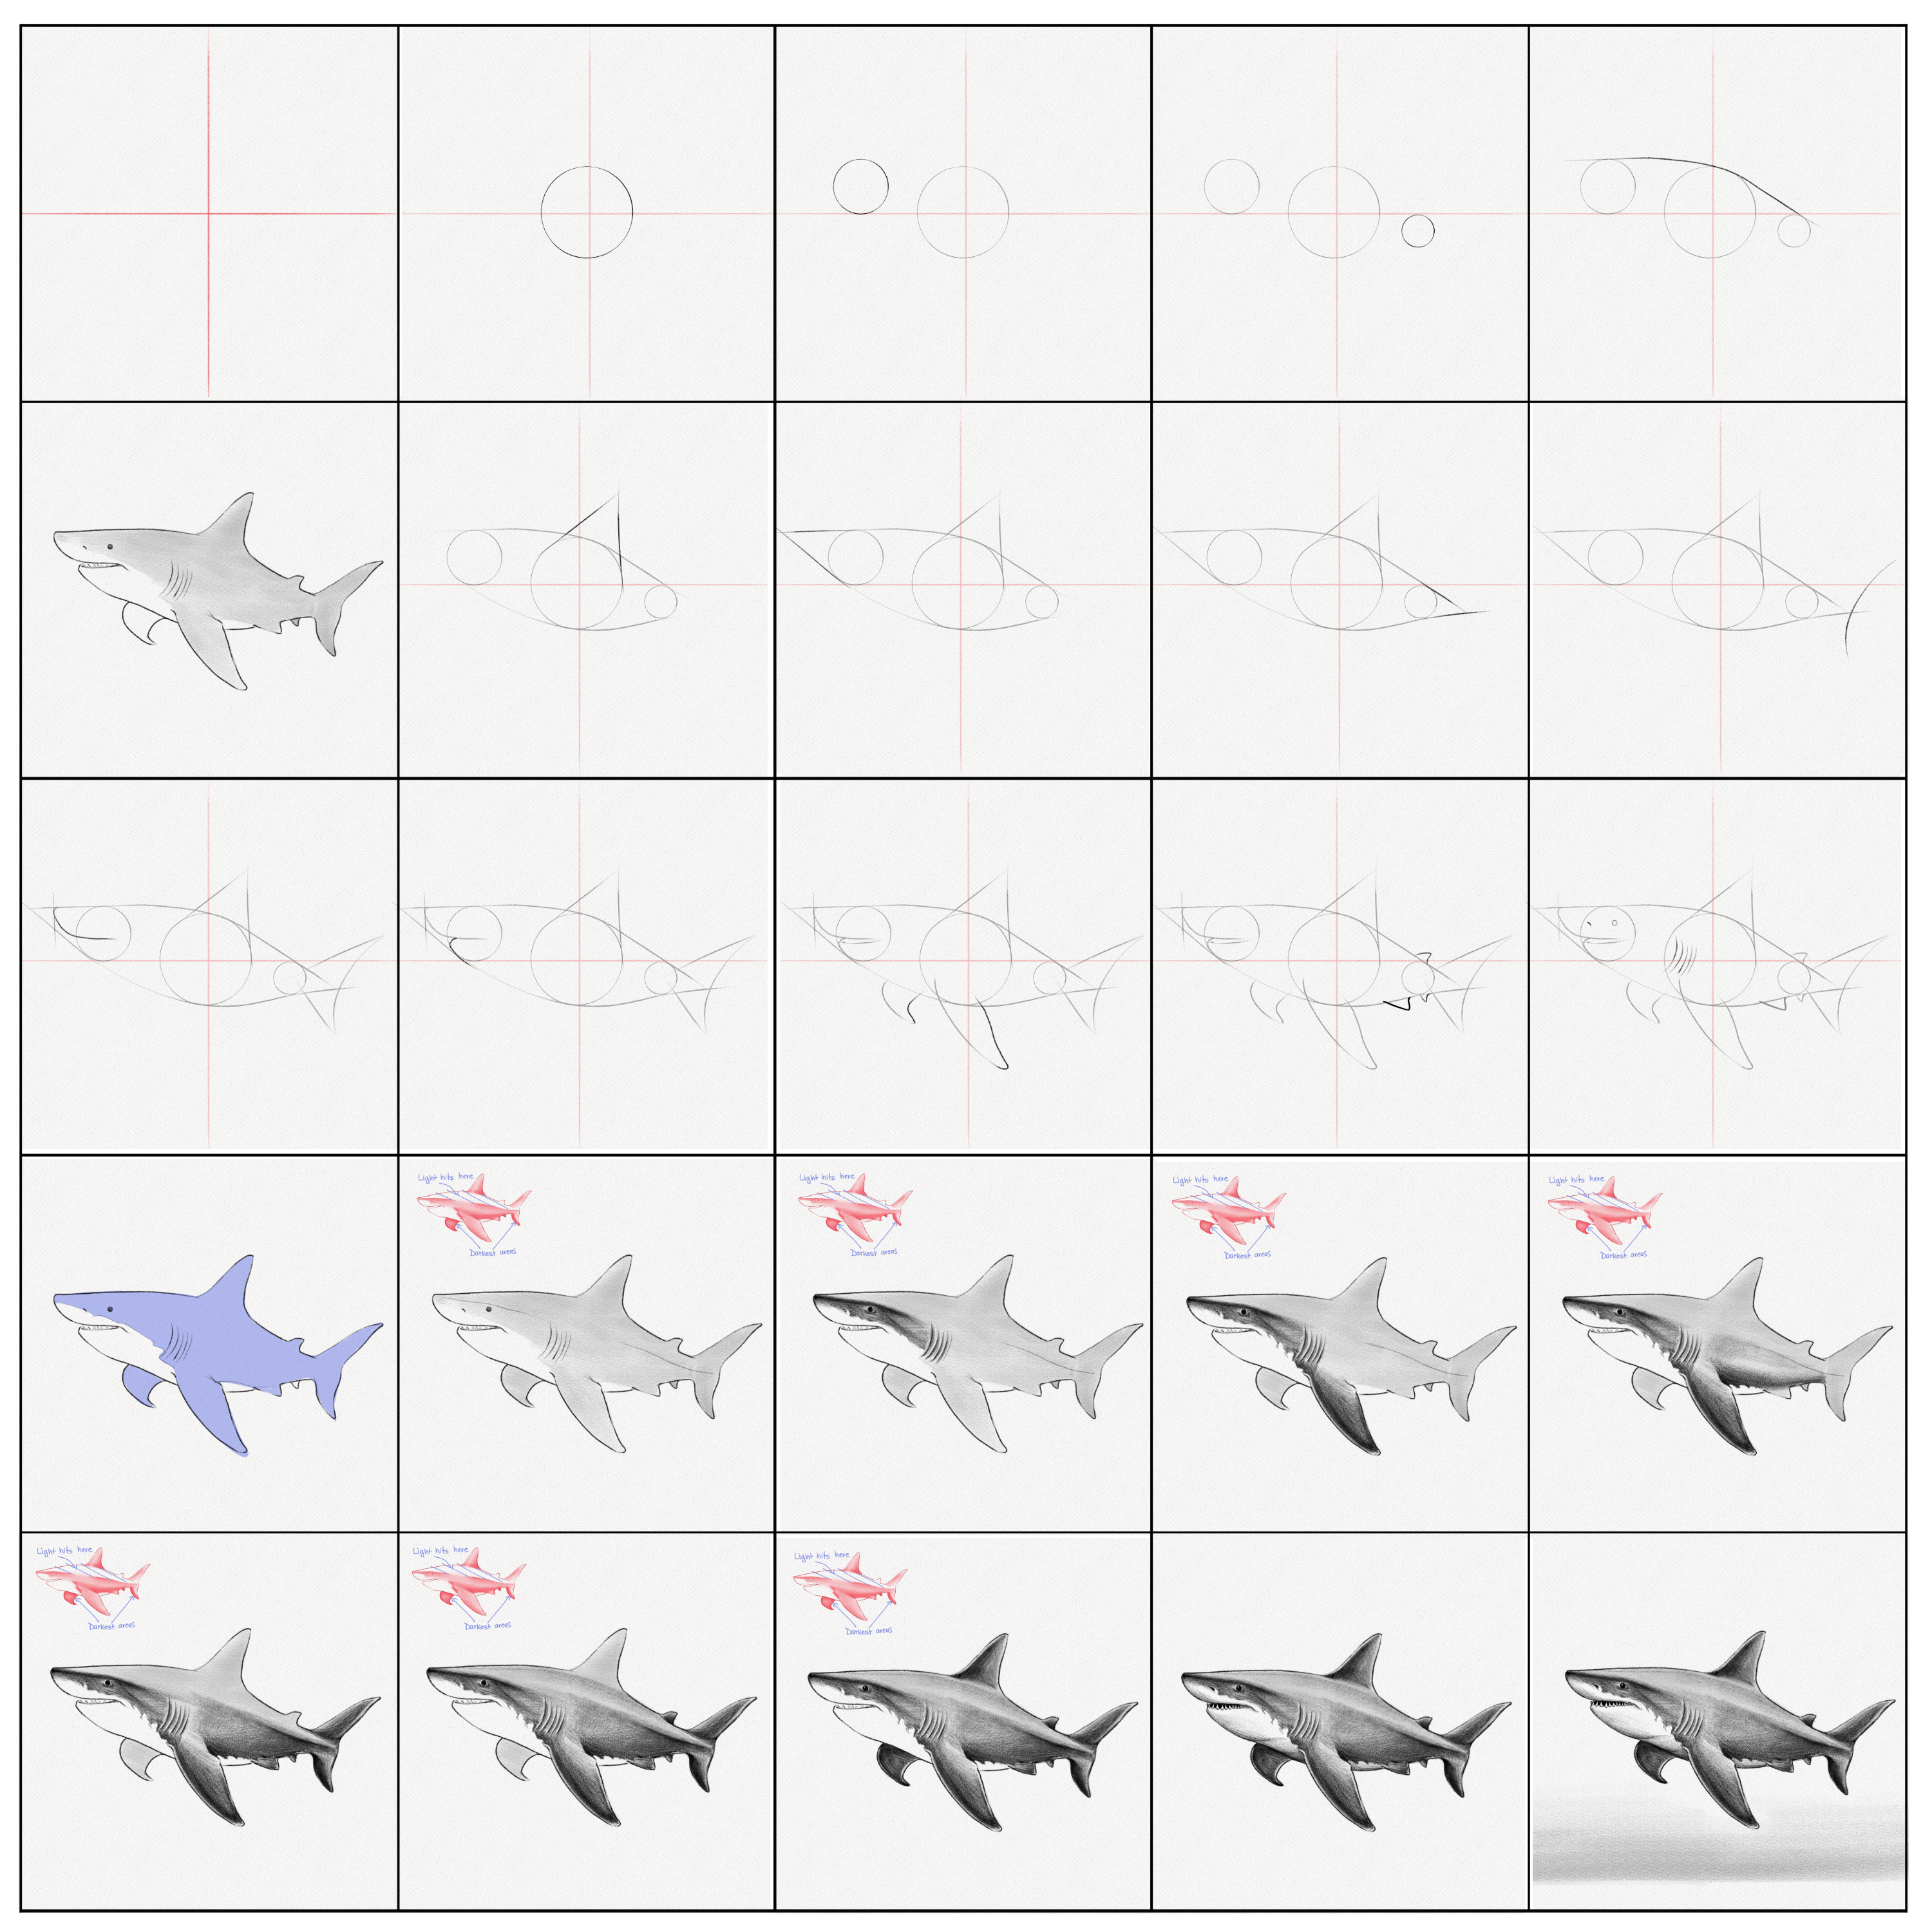
And these are all the steps we’ll guide you through:
Section 1.- Drawing the structure
Understanding the structure behind a shark’s body is essential to be able to draw it from scratch in the future, that’s why in this section we’ll be learning how to draw the structure of a shark’s body. Use your 2H Graphite pencil applying low pressure to make soft marks and not scratch your paper,
Step 1: Divide your canvas
Draw two lines, one horizontal and one vertical, so that they intersect in the middle of our canvas, as shown in the image.
Step 2: Draw a circle
Draw a circle in the center of our canvas, using the lines drawn earlier to help you locate it correctly. This circle will determine the diameter of the shark’s abdomen and will also have a direct impact on the final size of our drawing. You can use a compass to ensure that the circle has the correct diameter.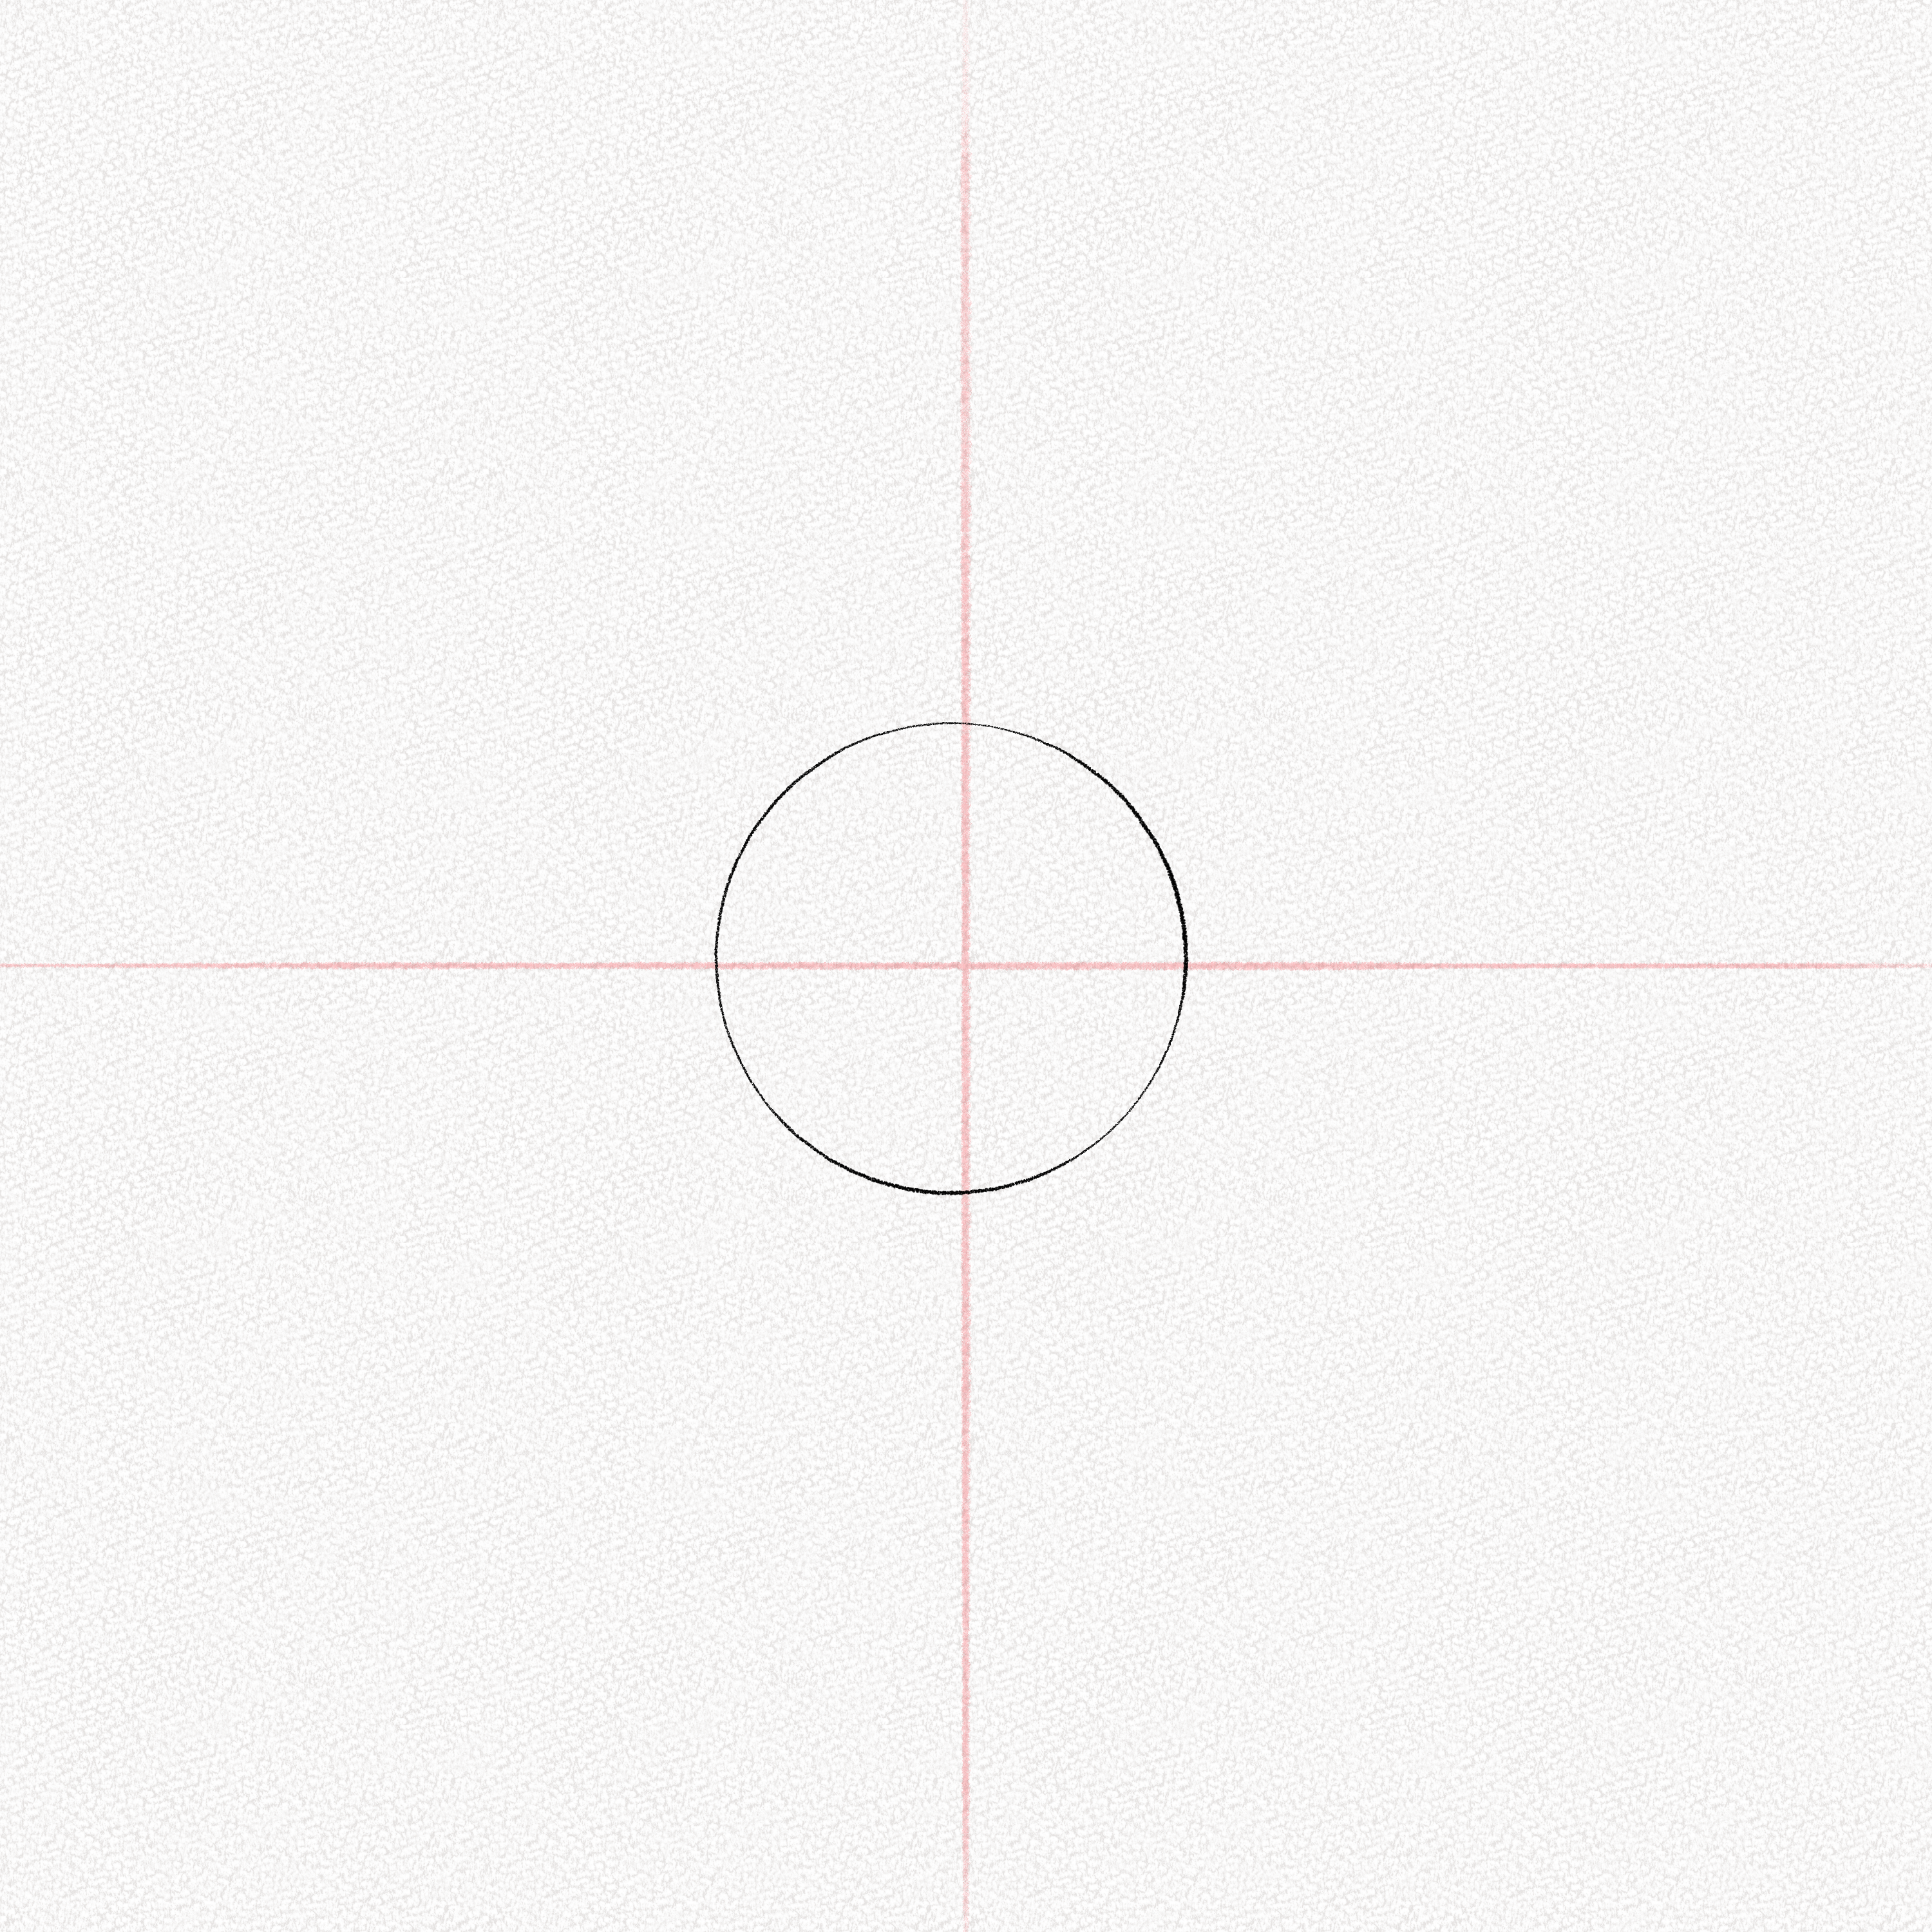
Step 3: Draw another circle
In the next step, draw a second circle with half the diameter of the first one, placing it on top of the baseline and in the center of the first quadrant. This second circle will represent the shark’s head in your drawing.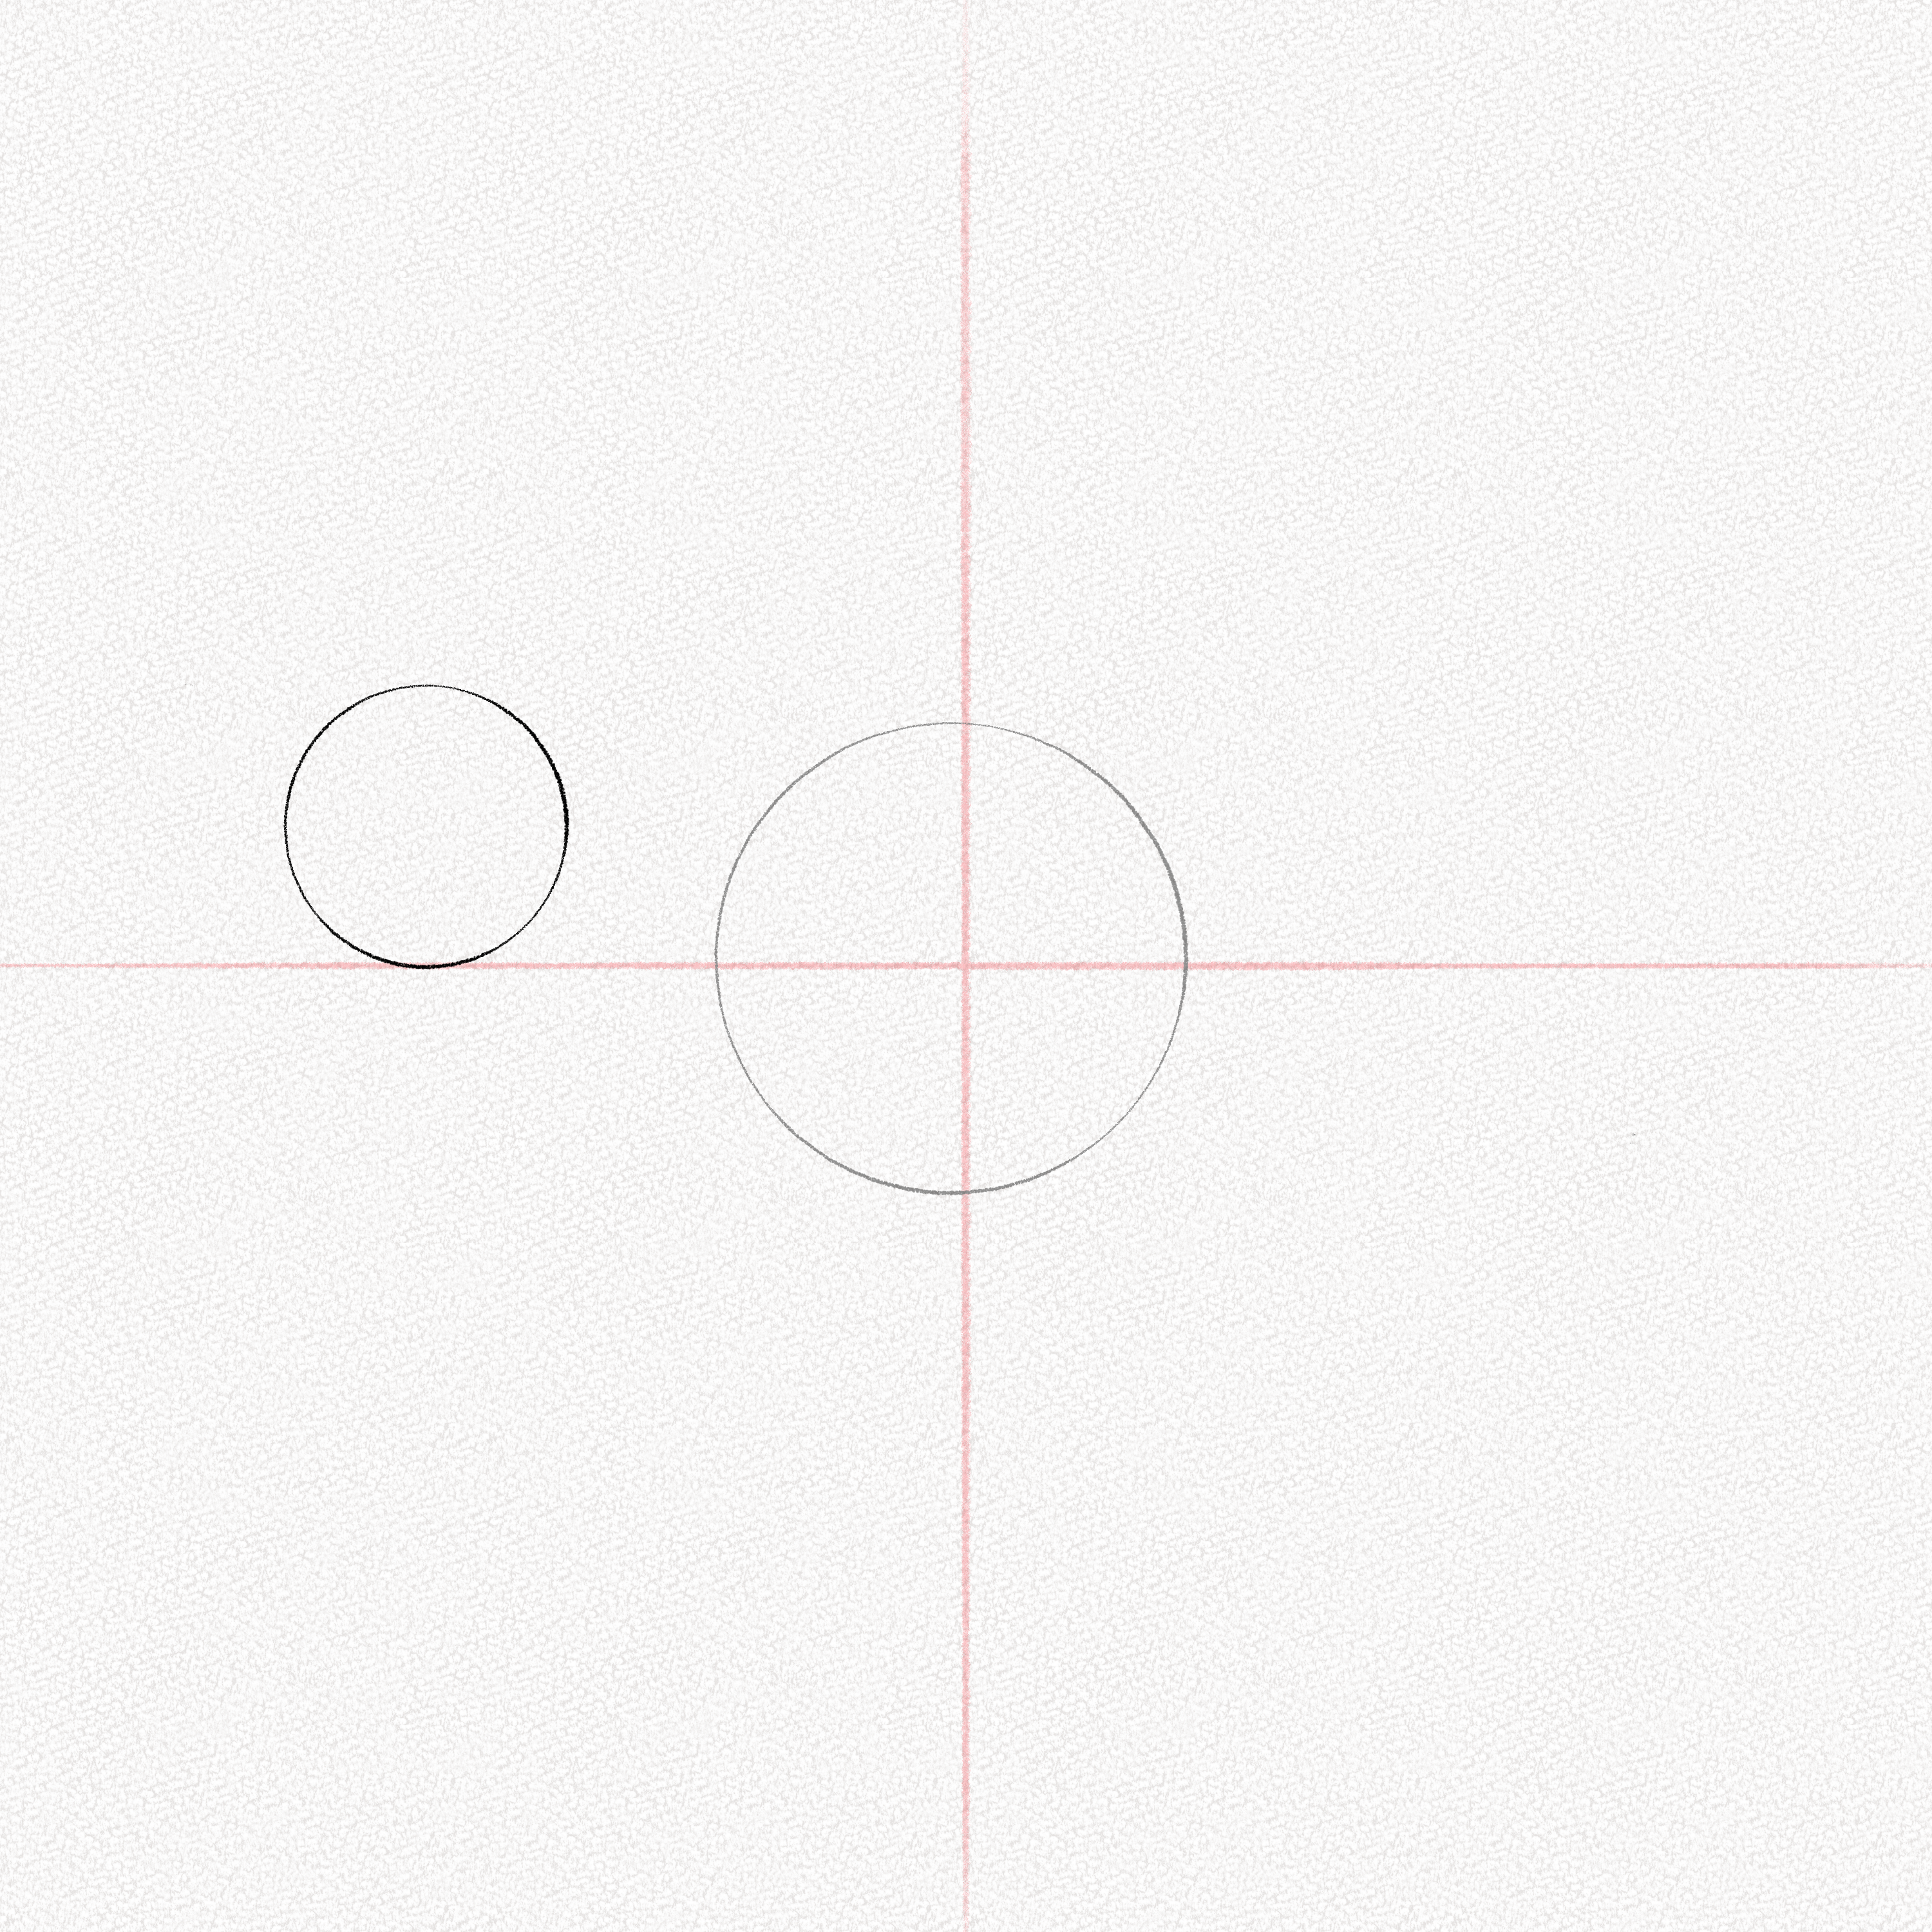
Step 4: Draw a smaller circle
Draw a third circle with an approximate size of one-third of the diameter of the first one, placing it below the baseline at a nearly equal distance to the second circle.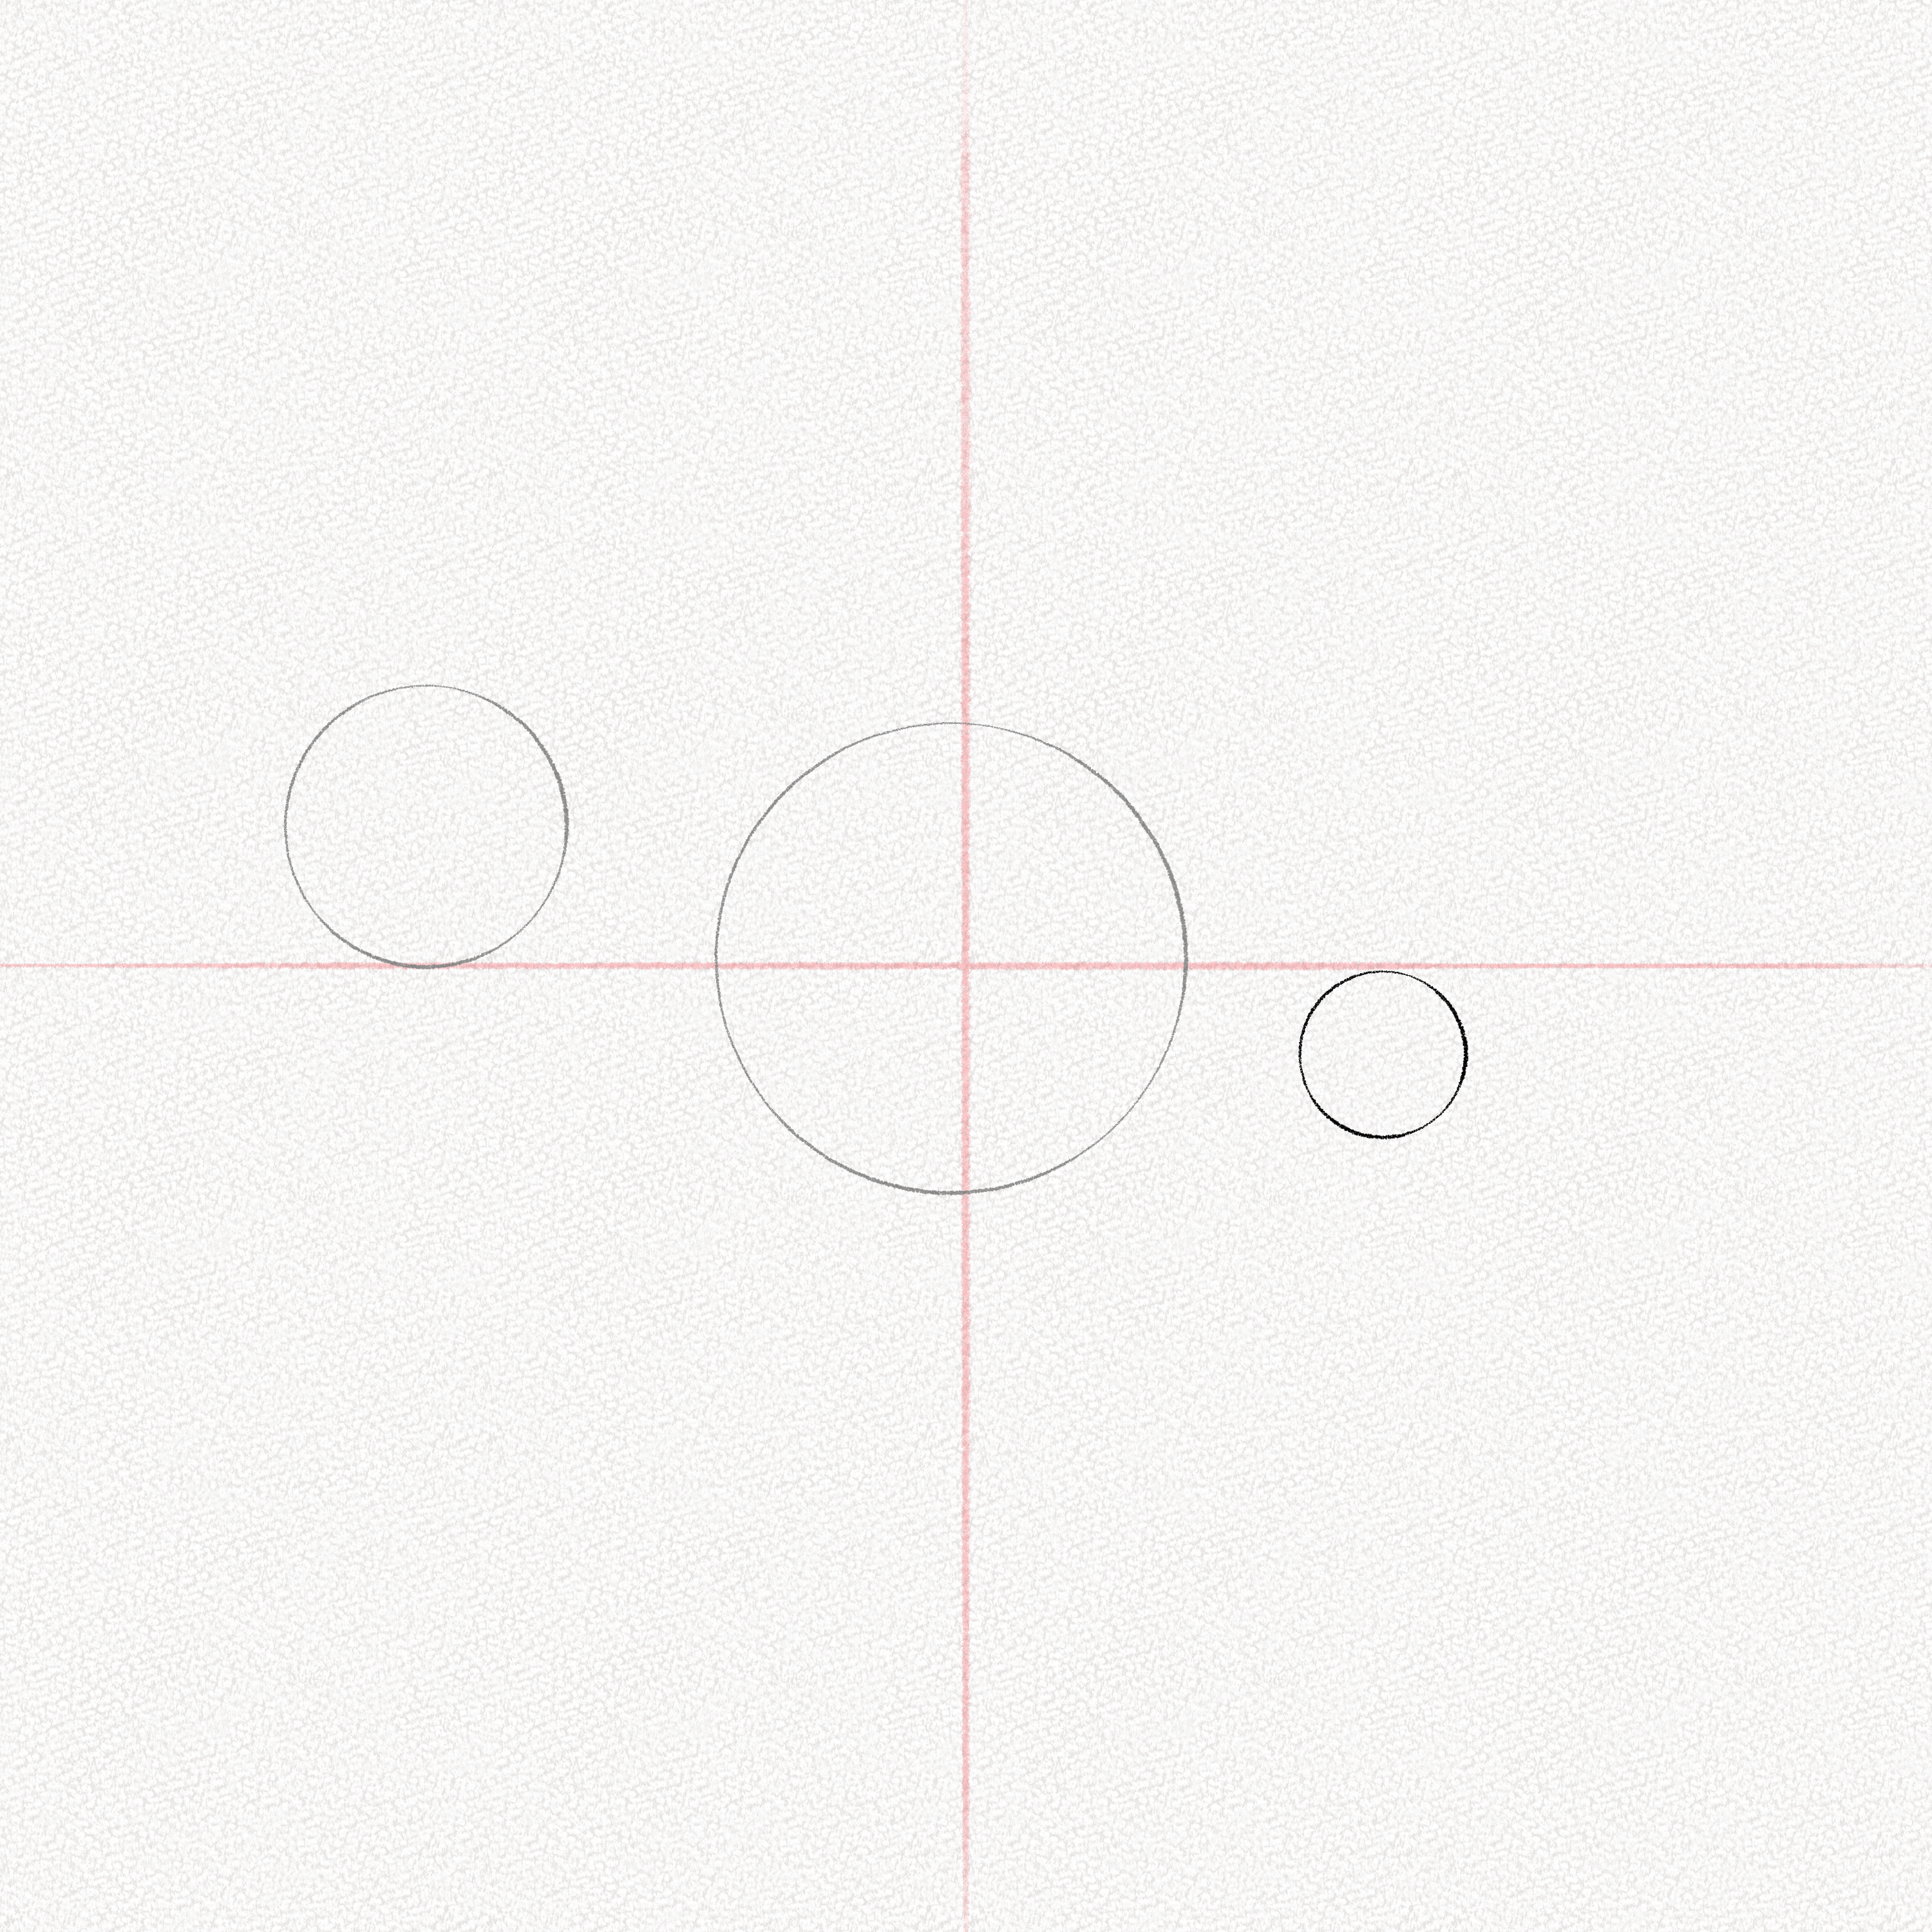
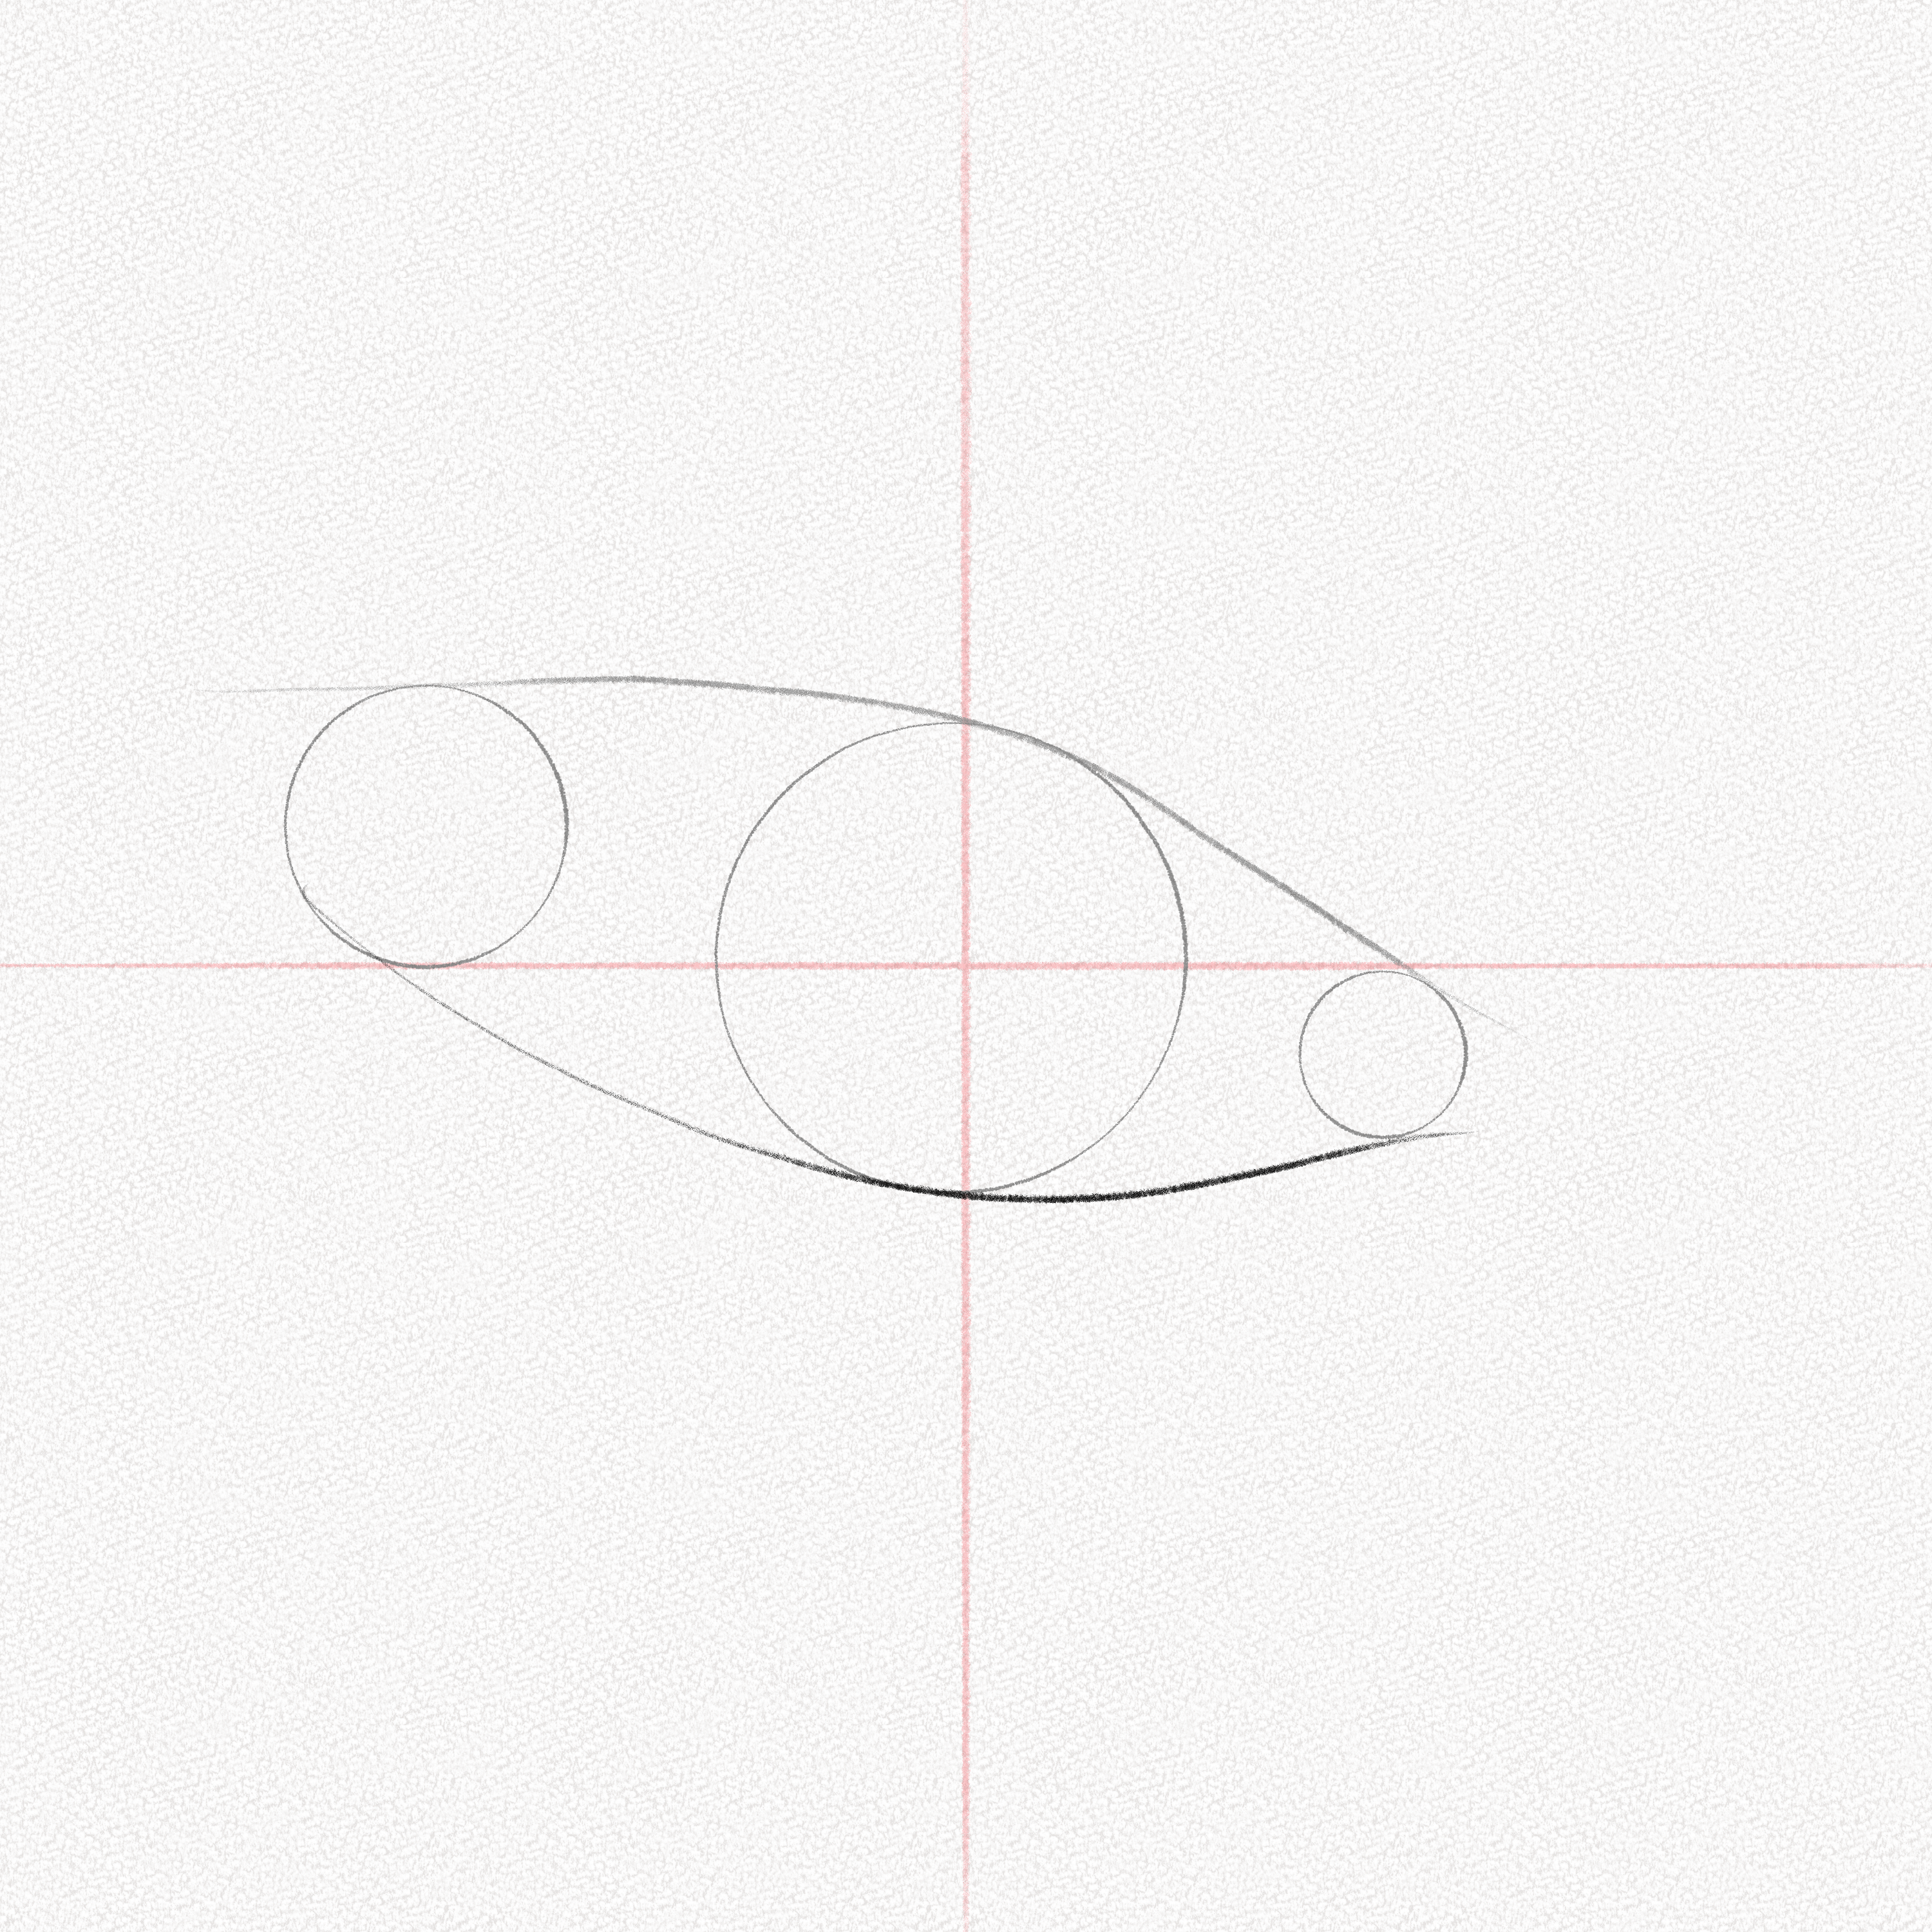
Step 5: Connect them
Draw a line connecting the three circles, as shown in the image. Repeat this step for the bottom of the circles.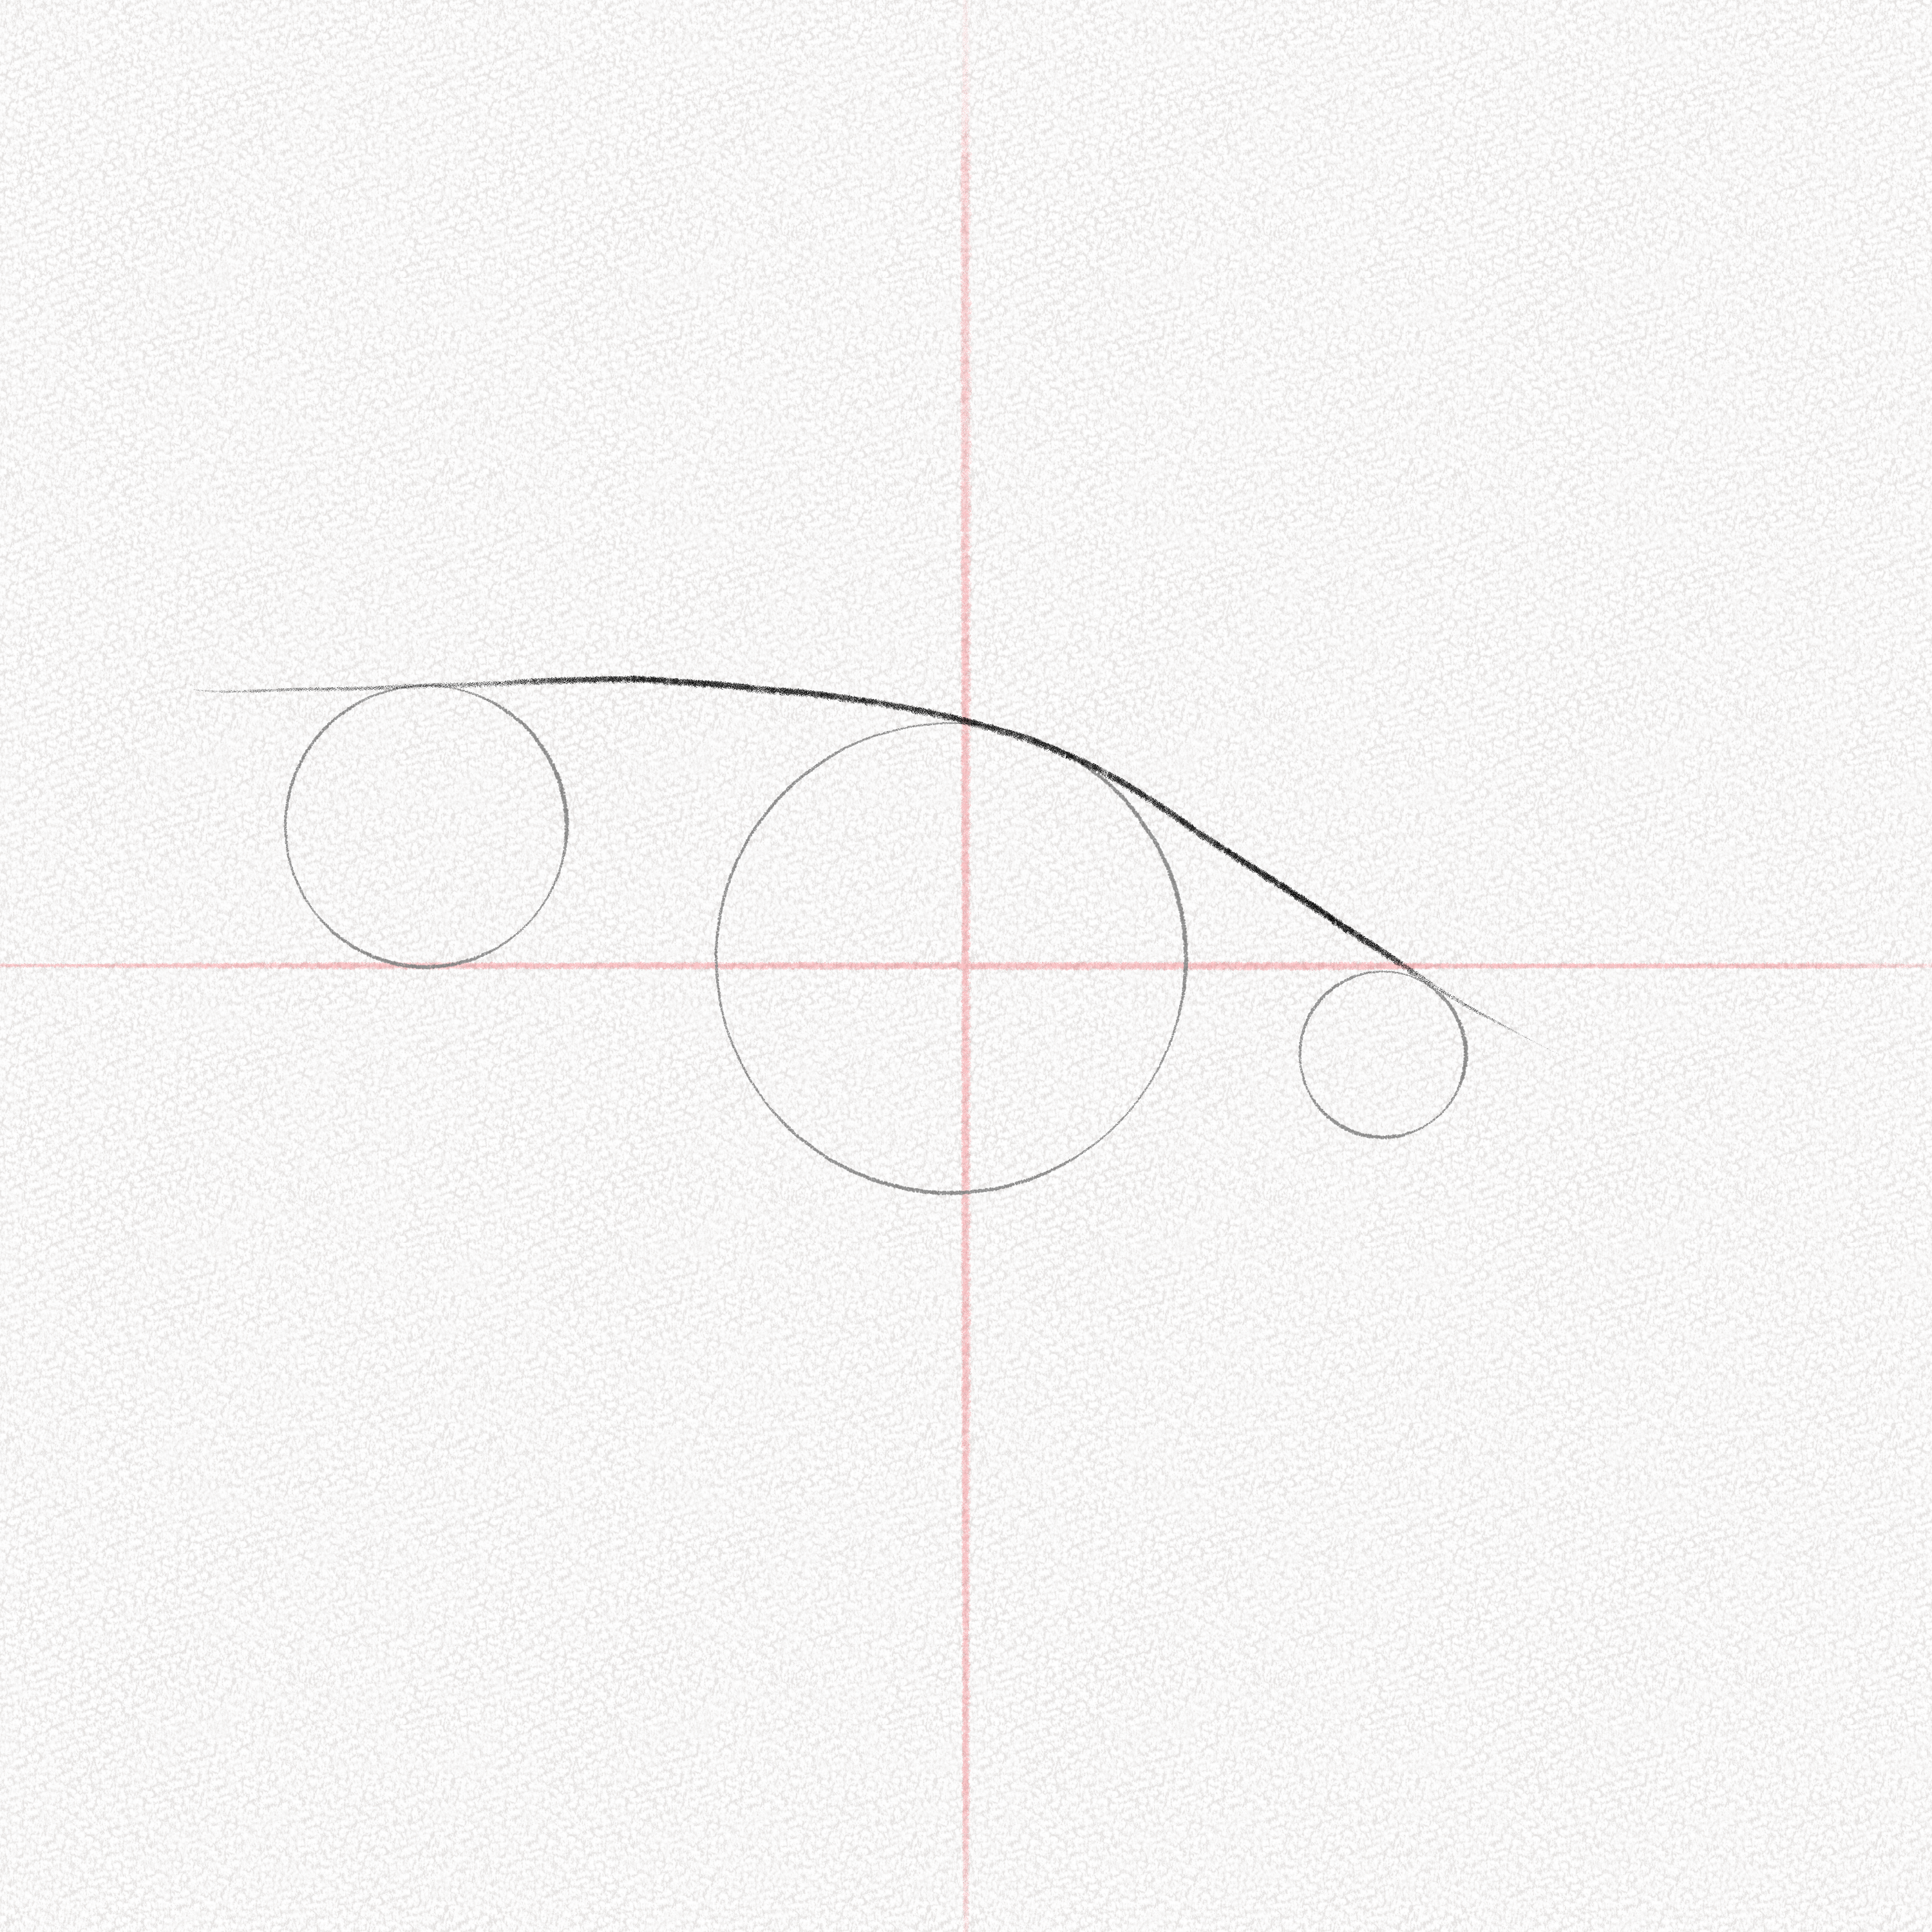
Step 6: Draw two lines
Draw two diagonals projecting upward from the largest circle and connecting to each other, as shown in the image; this will be the structure and position of the upper fin.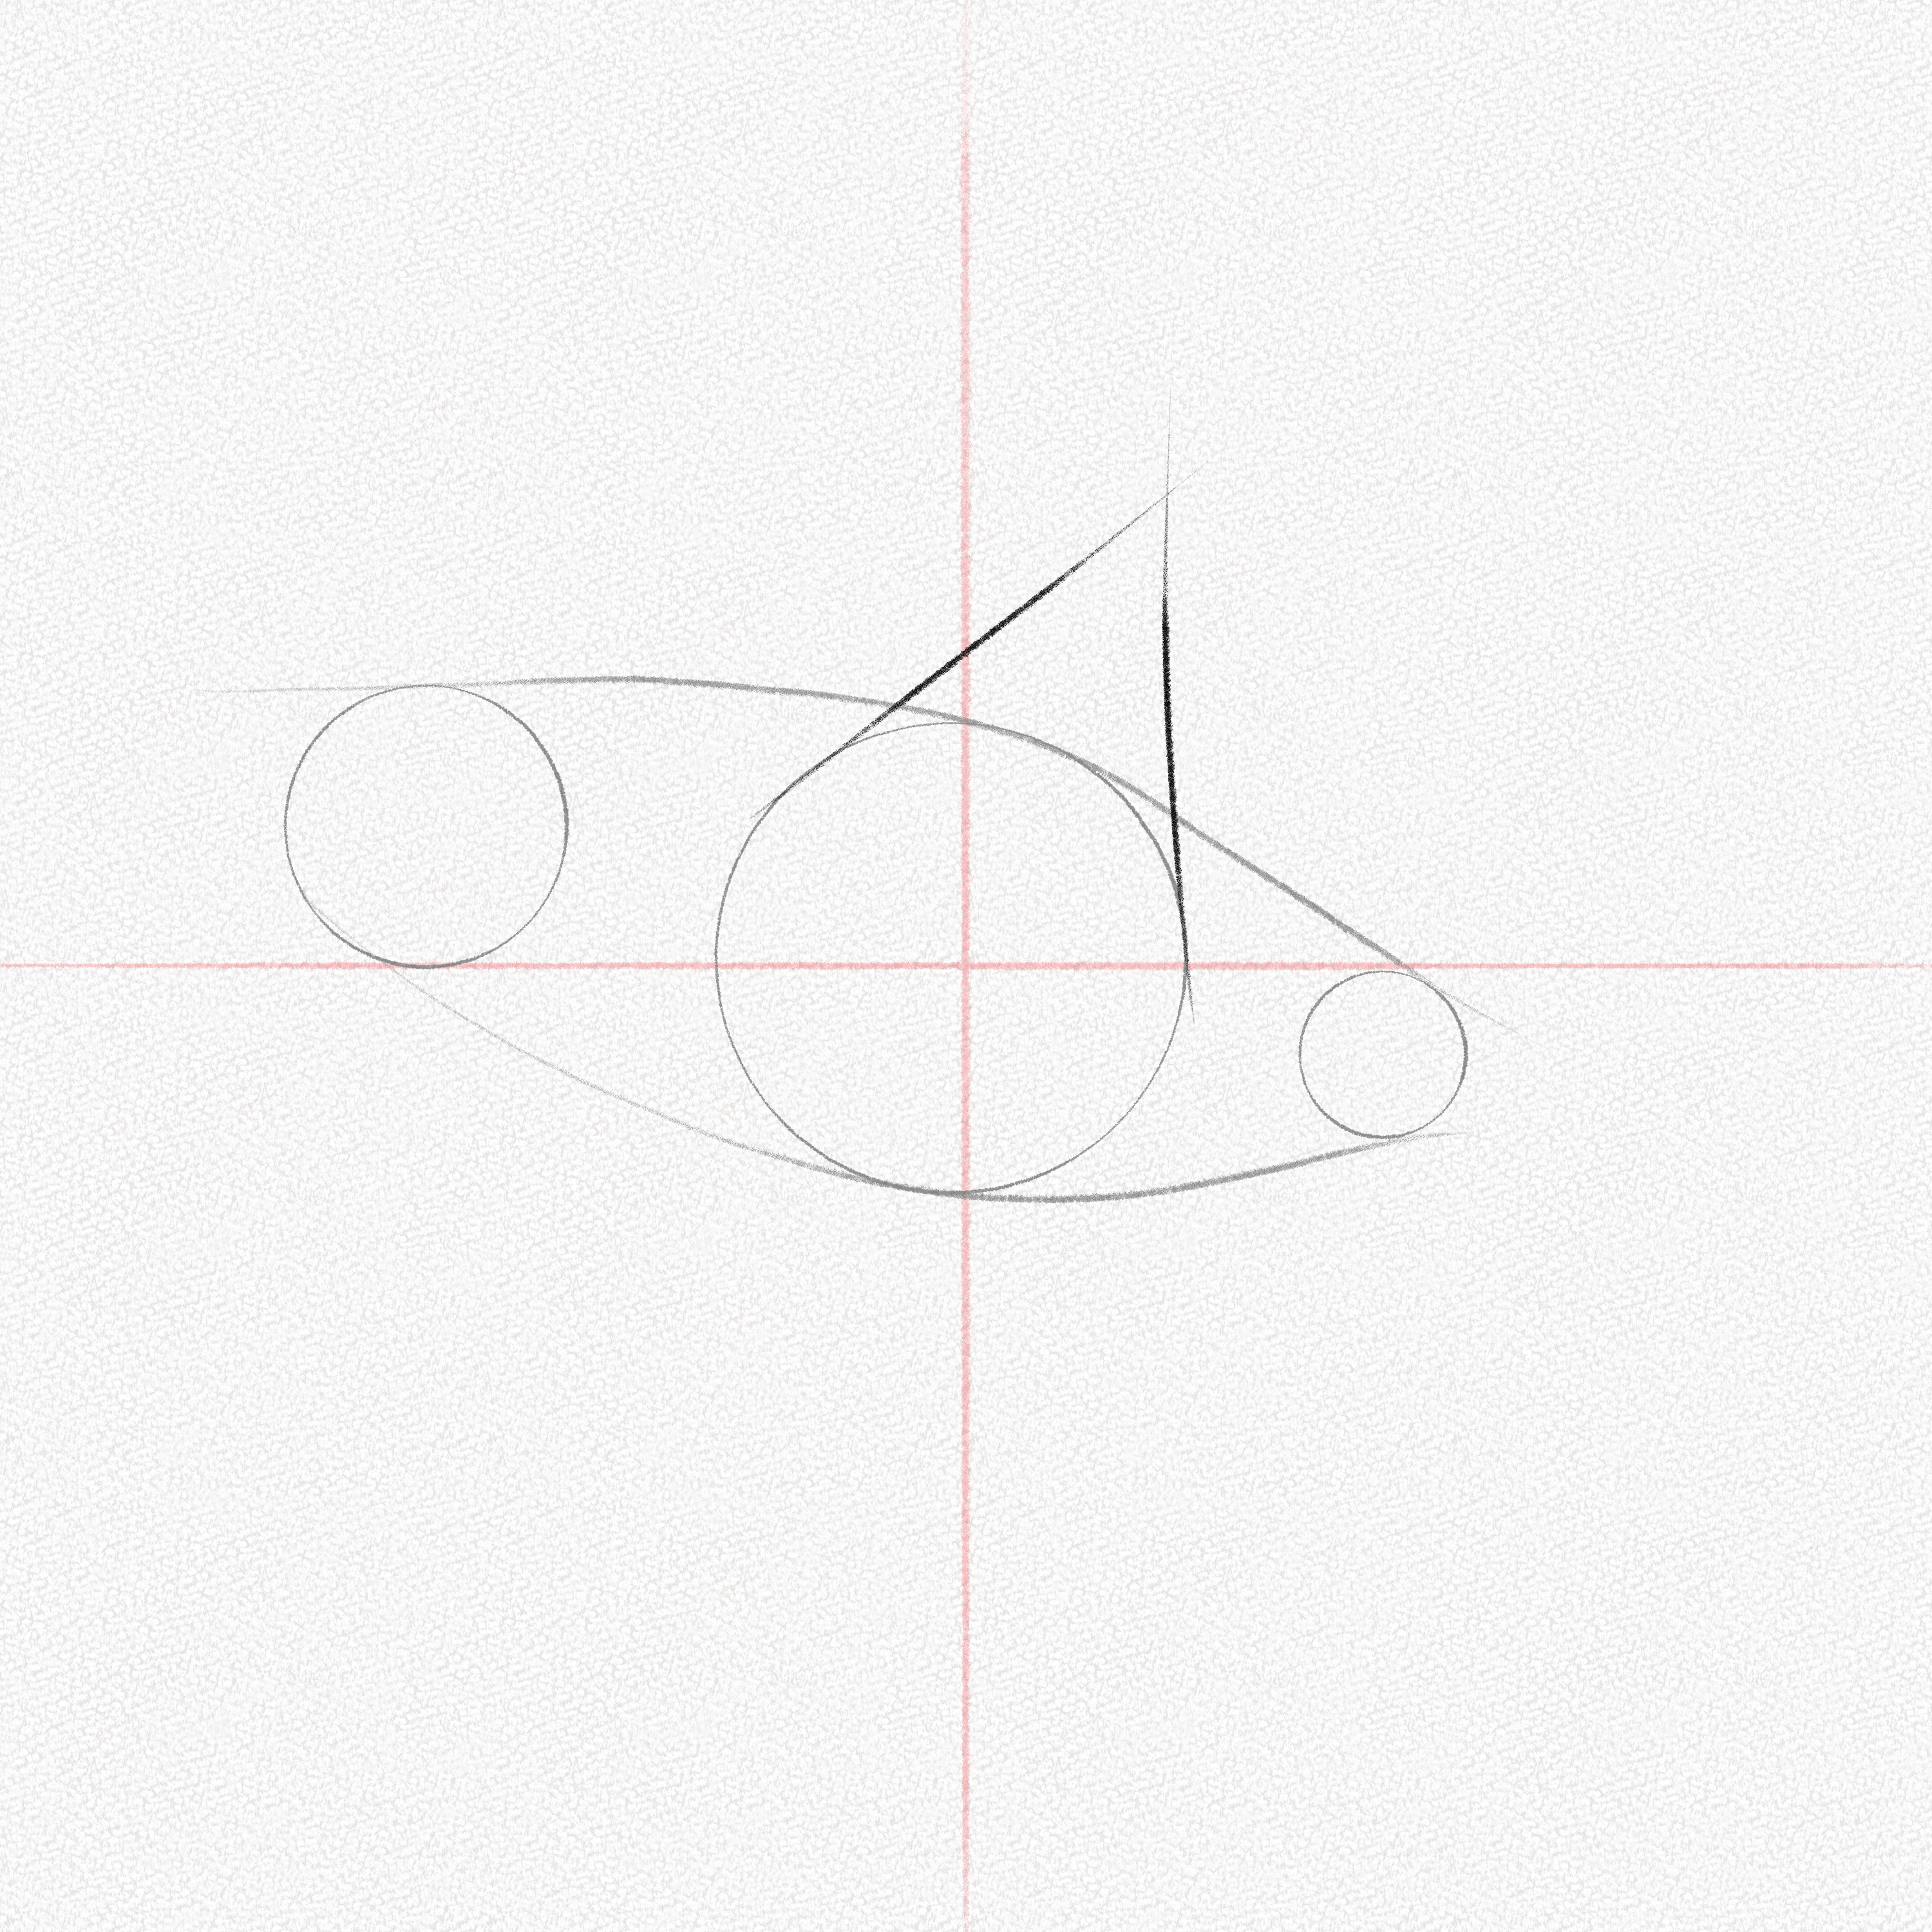
Step 7: Repeat
Repeat the step above for the left and right circles, pulling straight lines from the sides of the circles while following the directions of the lines we drew in step 5. 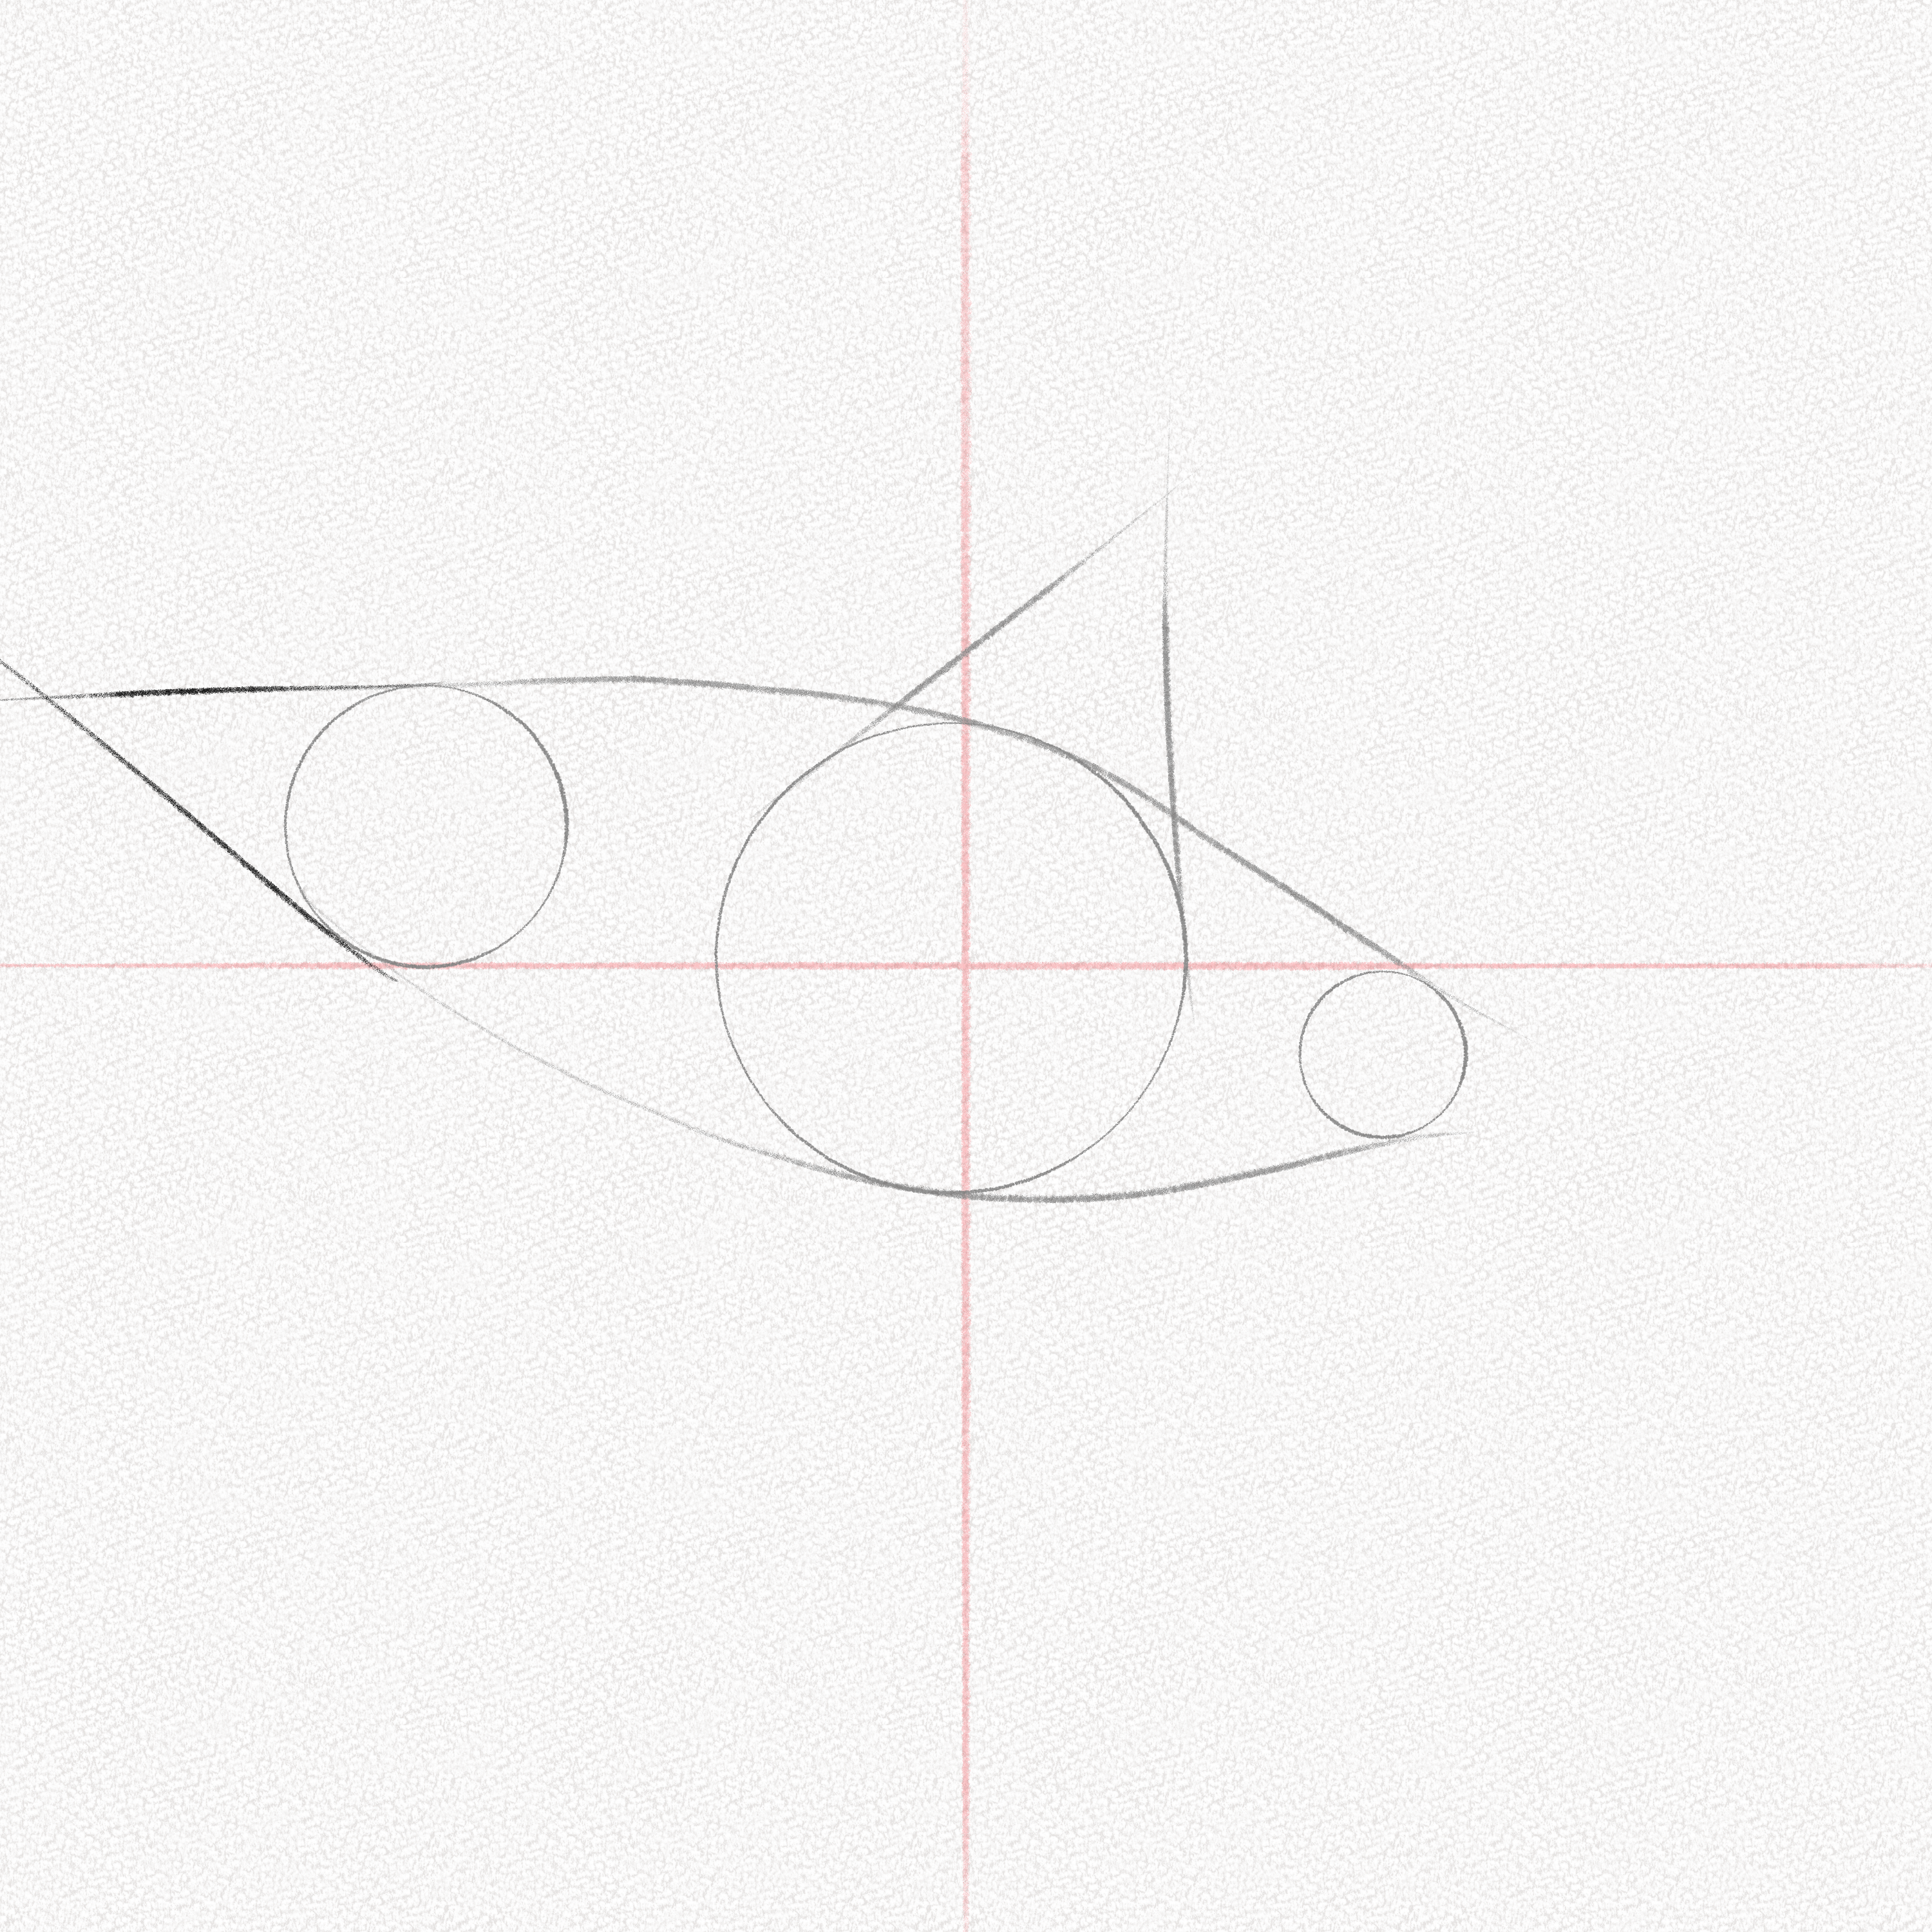
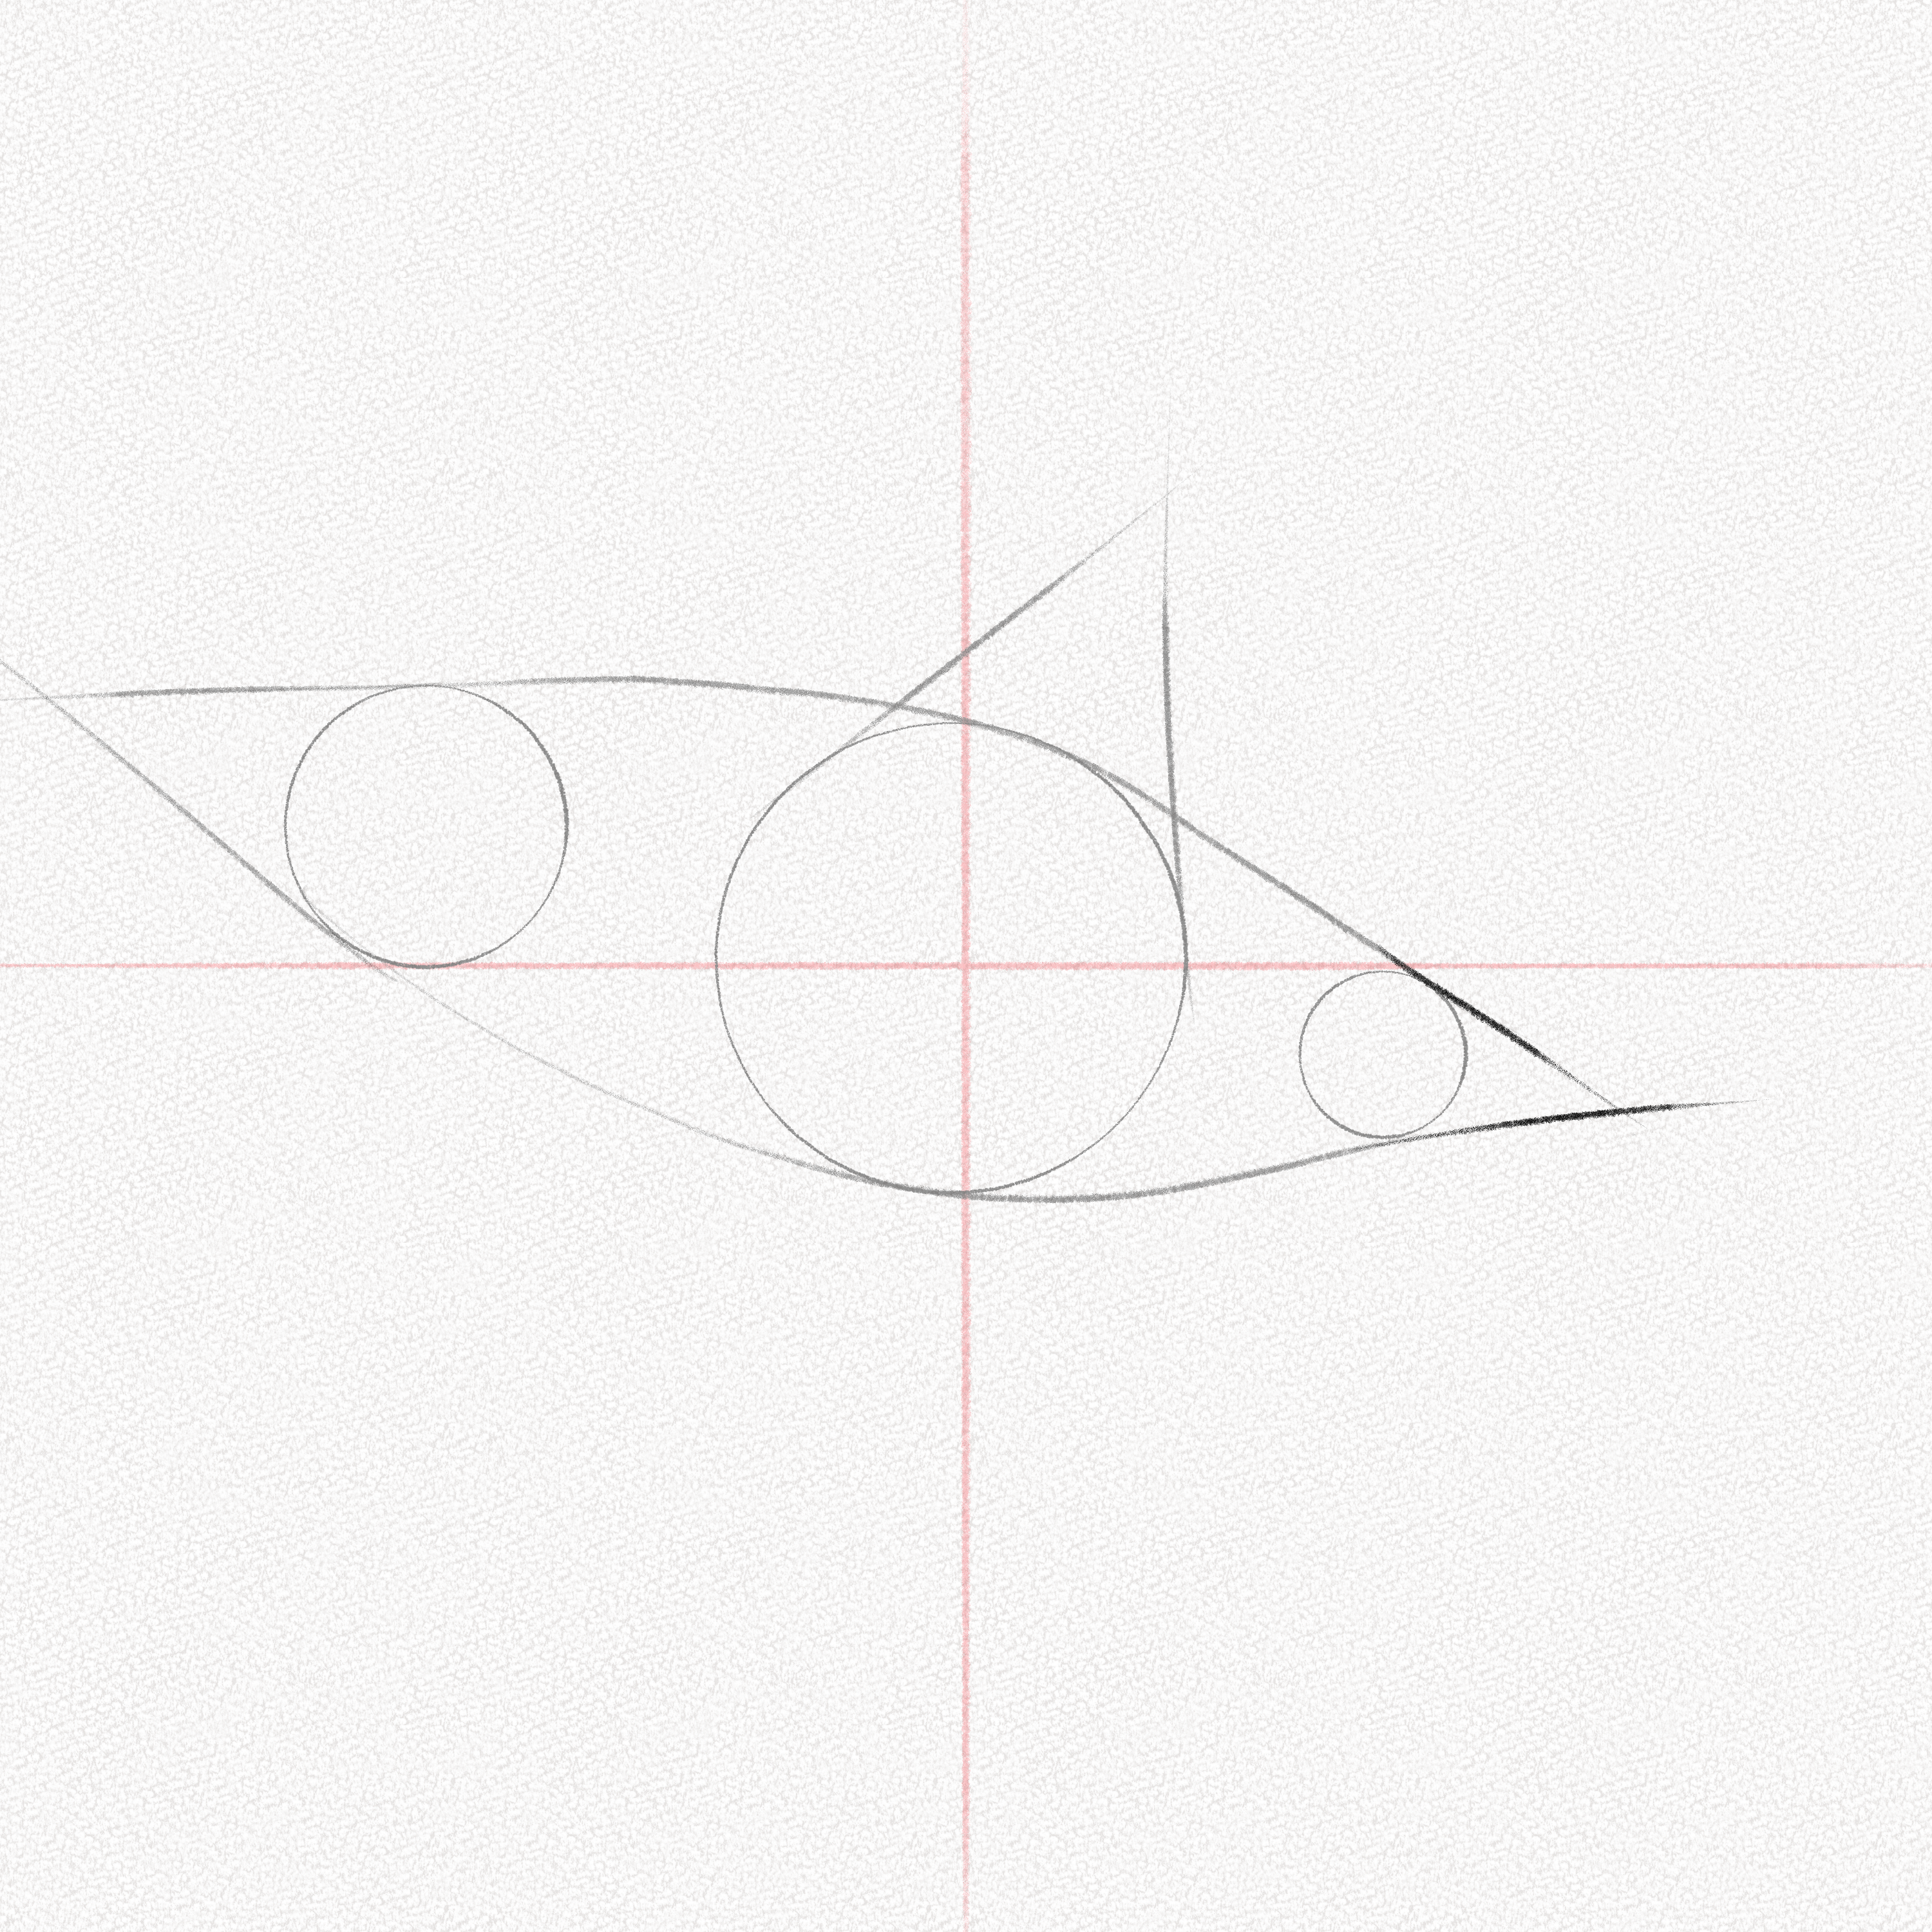
Step 8: Draw a curved vertical line
To start drawing the shark’s tail, make a smooth stroke at the intersection closest to the smaller circle. This stroke will serve as a reference to define the shape and proportions of the tail, which is a key part of the shark’s figure.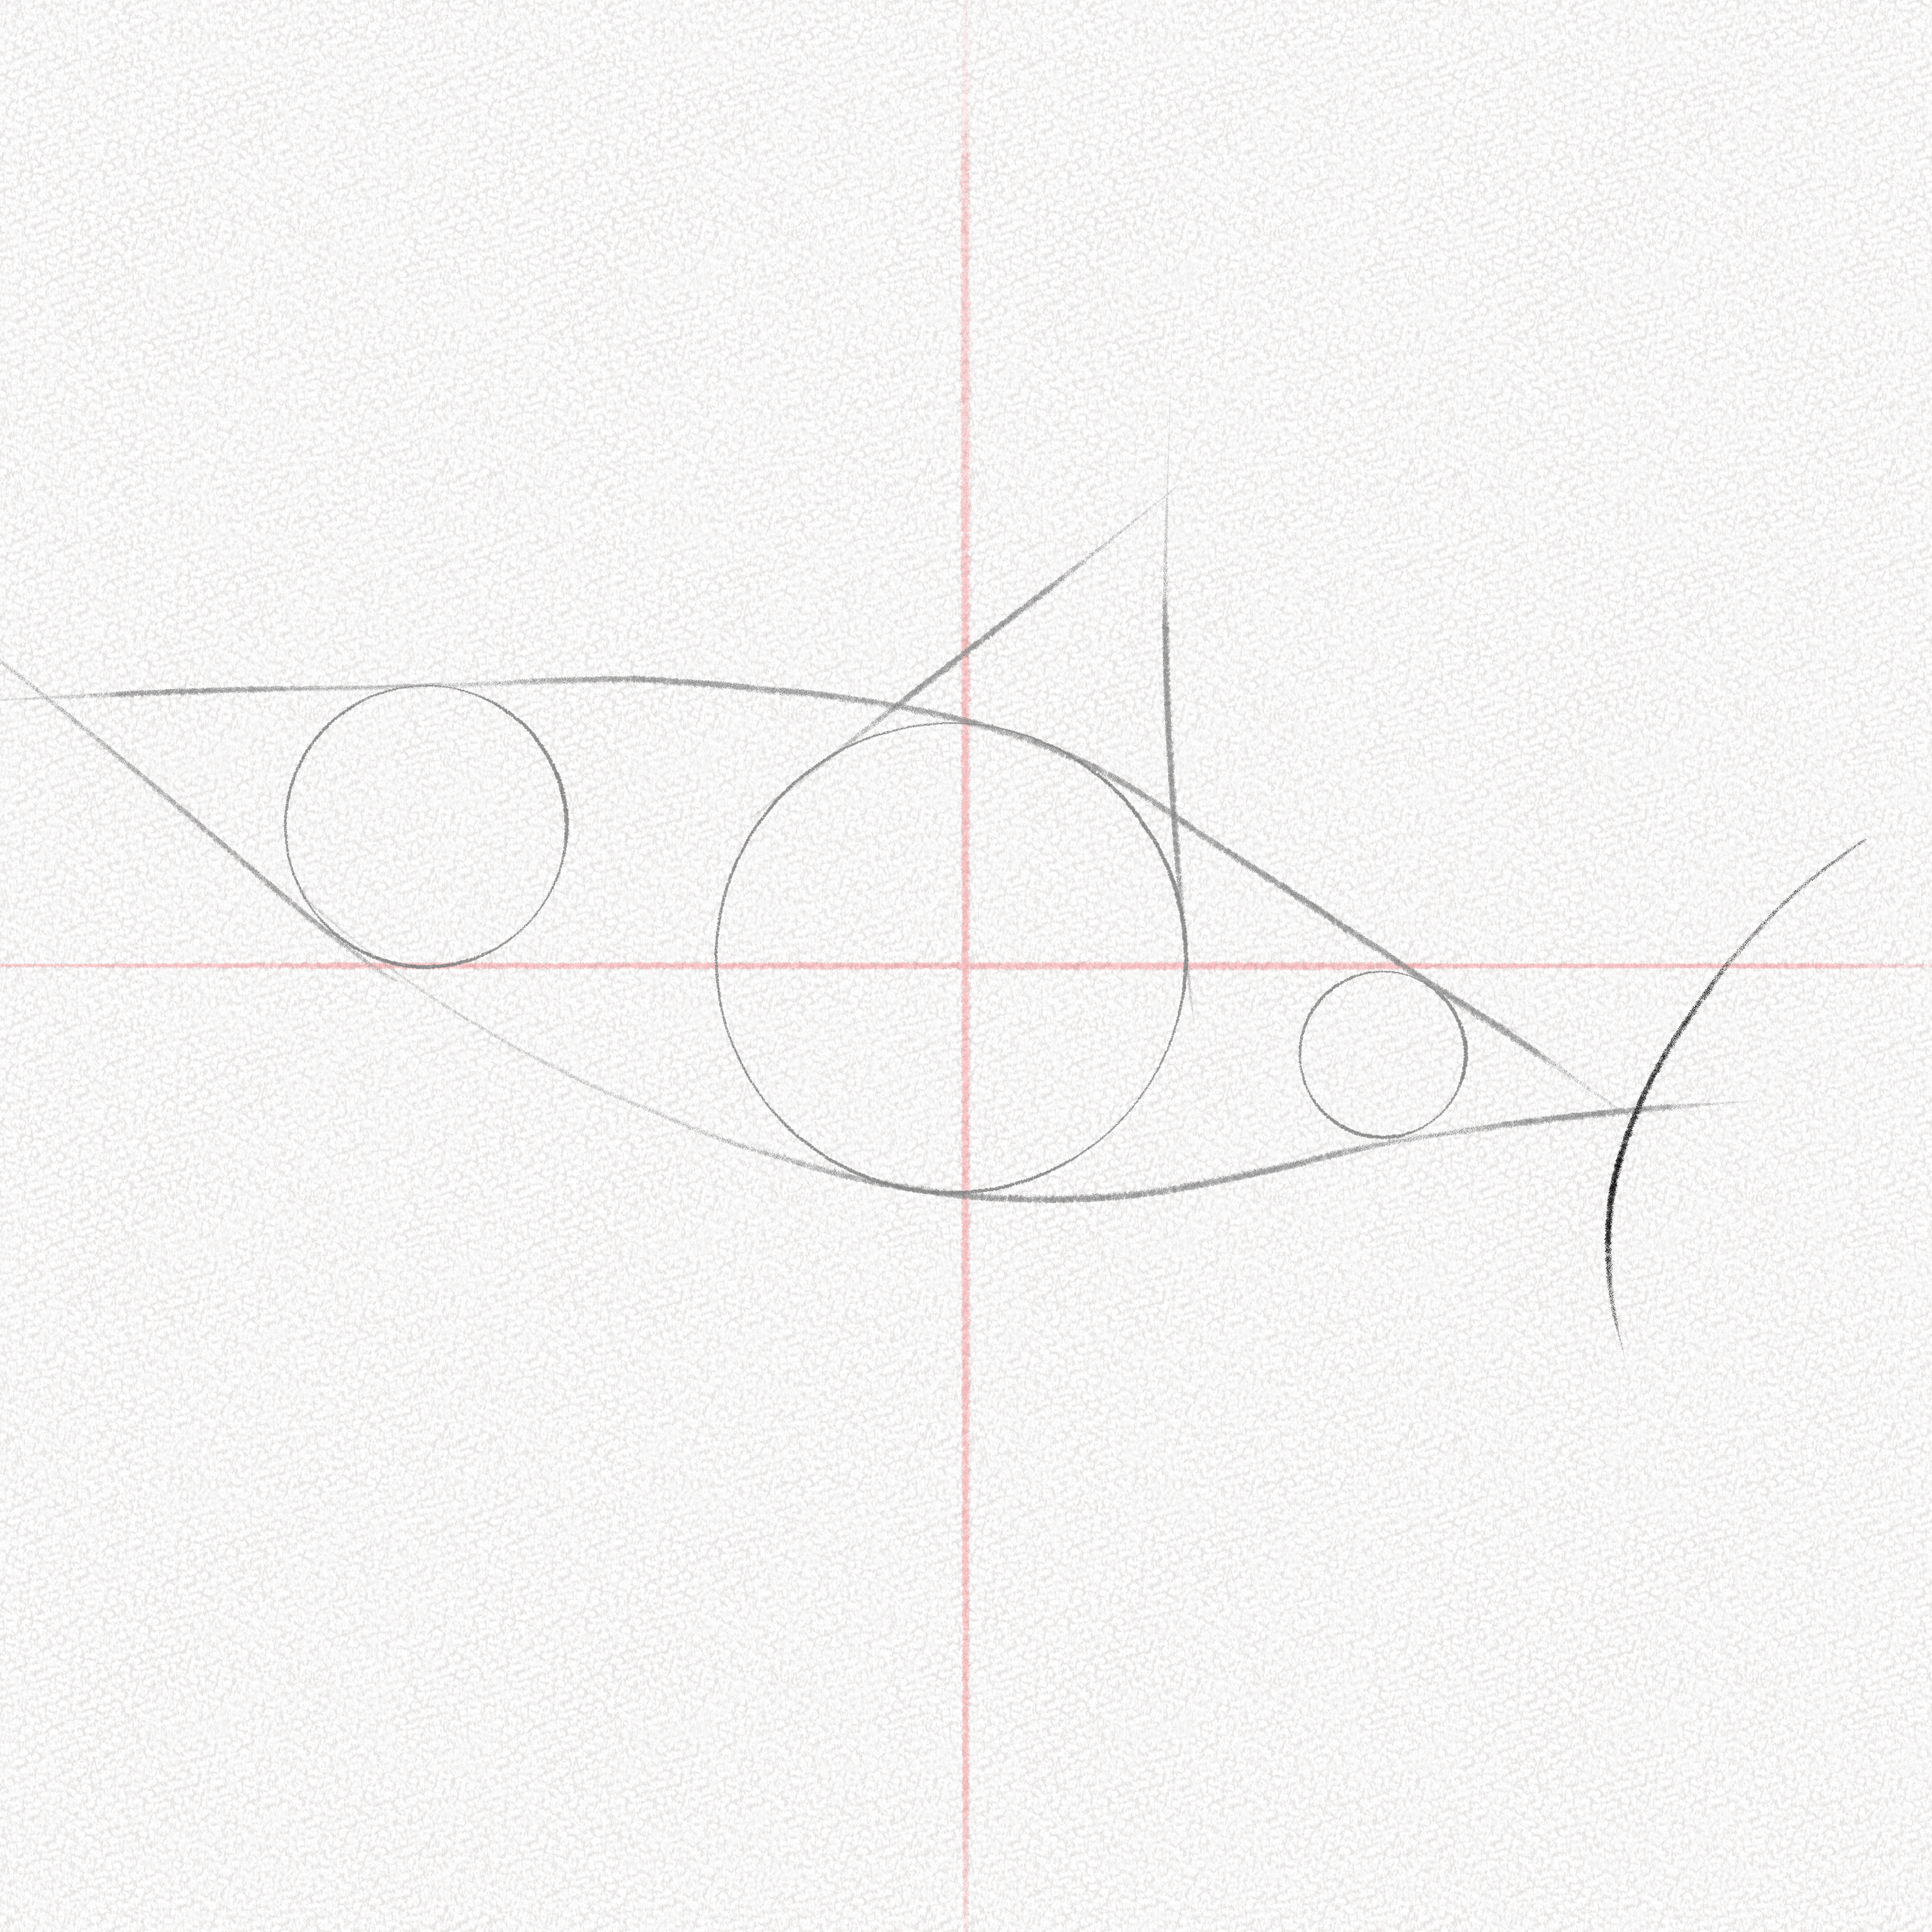
Step 9: Define the tail
Continuing with the drawing of the shark’s tail, draw two diagonals that start from the middle of the smaller circle, separated by a 90° angle. The separation angle doesn’t have to be perfect, but by elongating the lines, they should connect with the tail’s curved line you drew in step 8, and you will see how the shark’s tail gradually takes shape.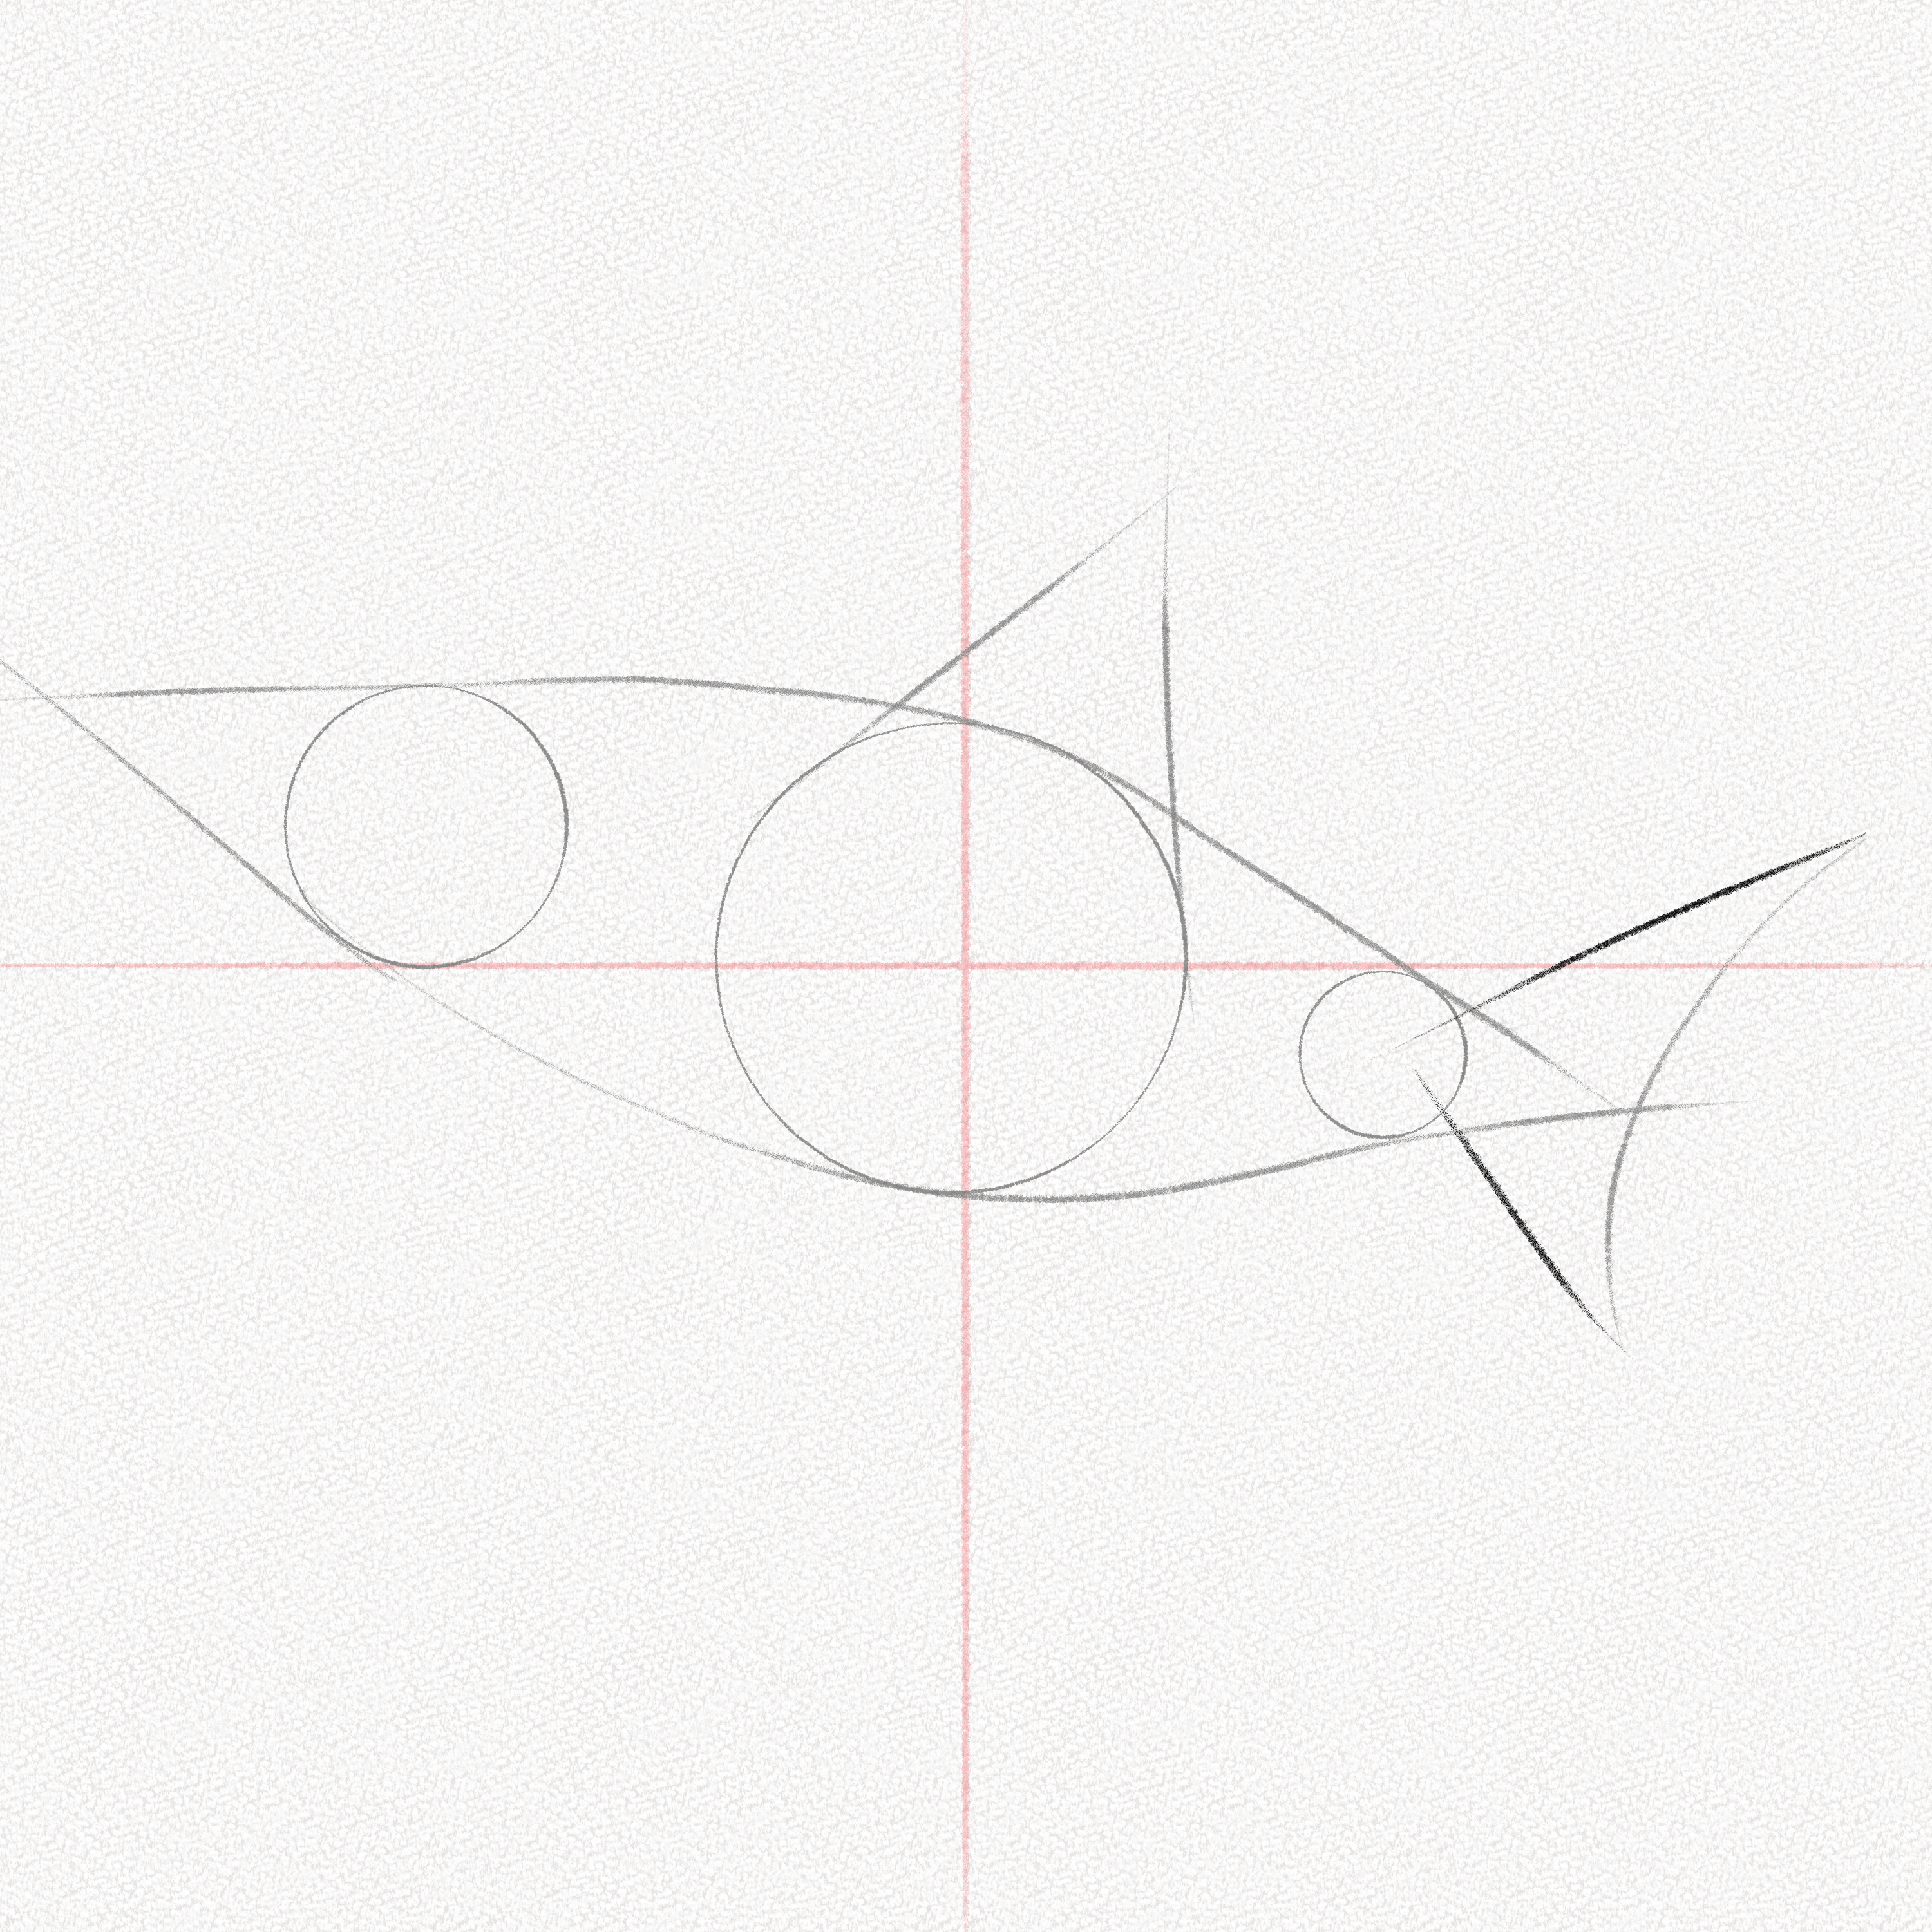
Step 10: Let’s start shaping the mouth
The shark’s mouth has a very distinctive and peculiar shape; follow the diagram below to draw the shark’s “nose” and mouth.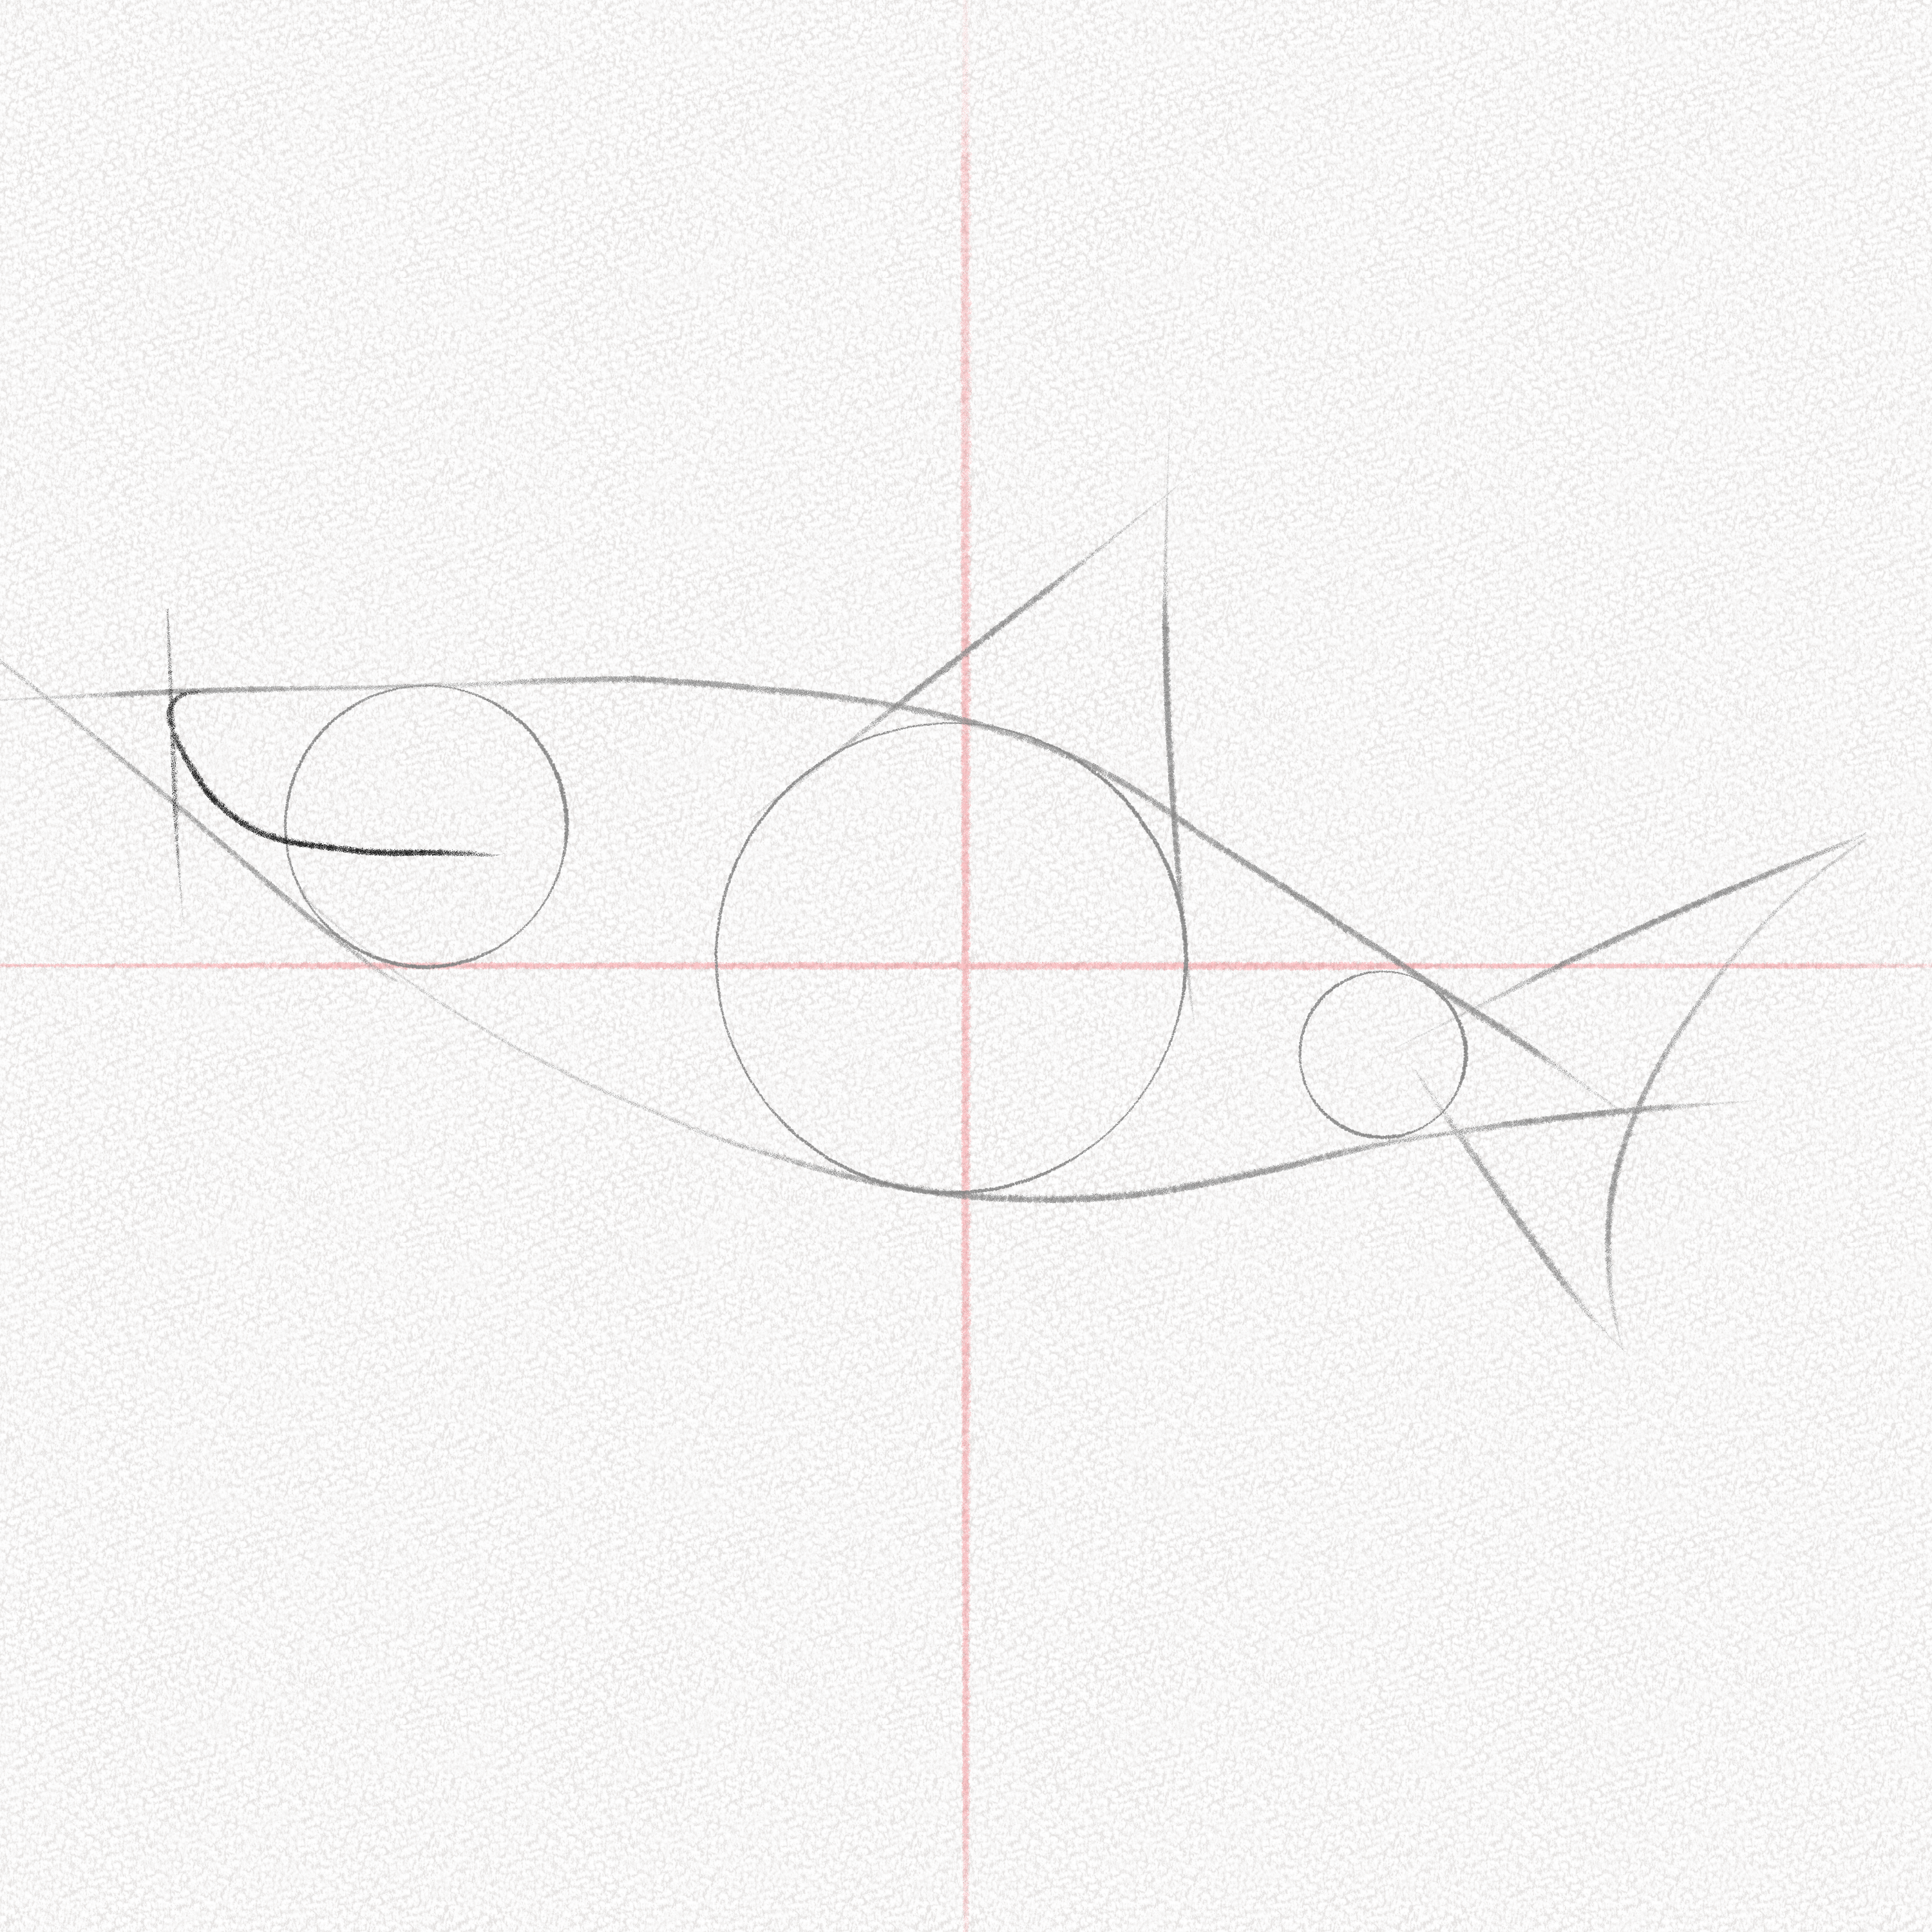
Step 11: Lower jaw
Using the circle you drew in Step 2 as a guide, draw the corresponding line for the shark’s jaw. Look at the image to get a better visual reference.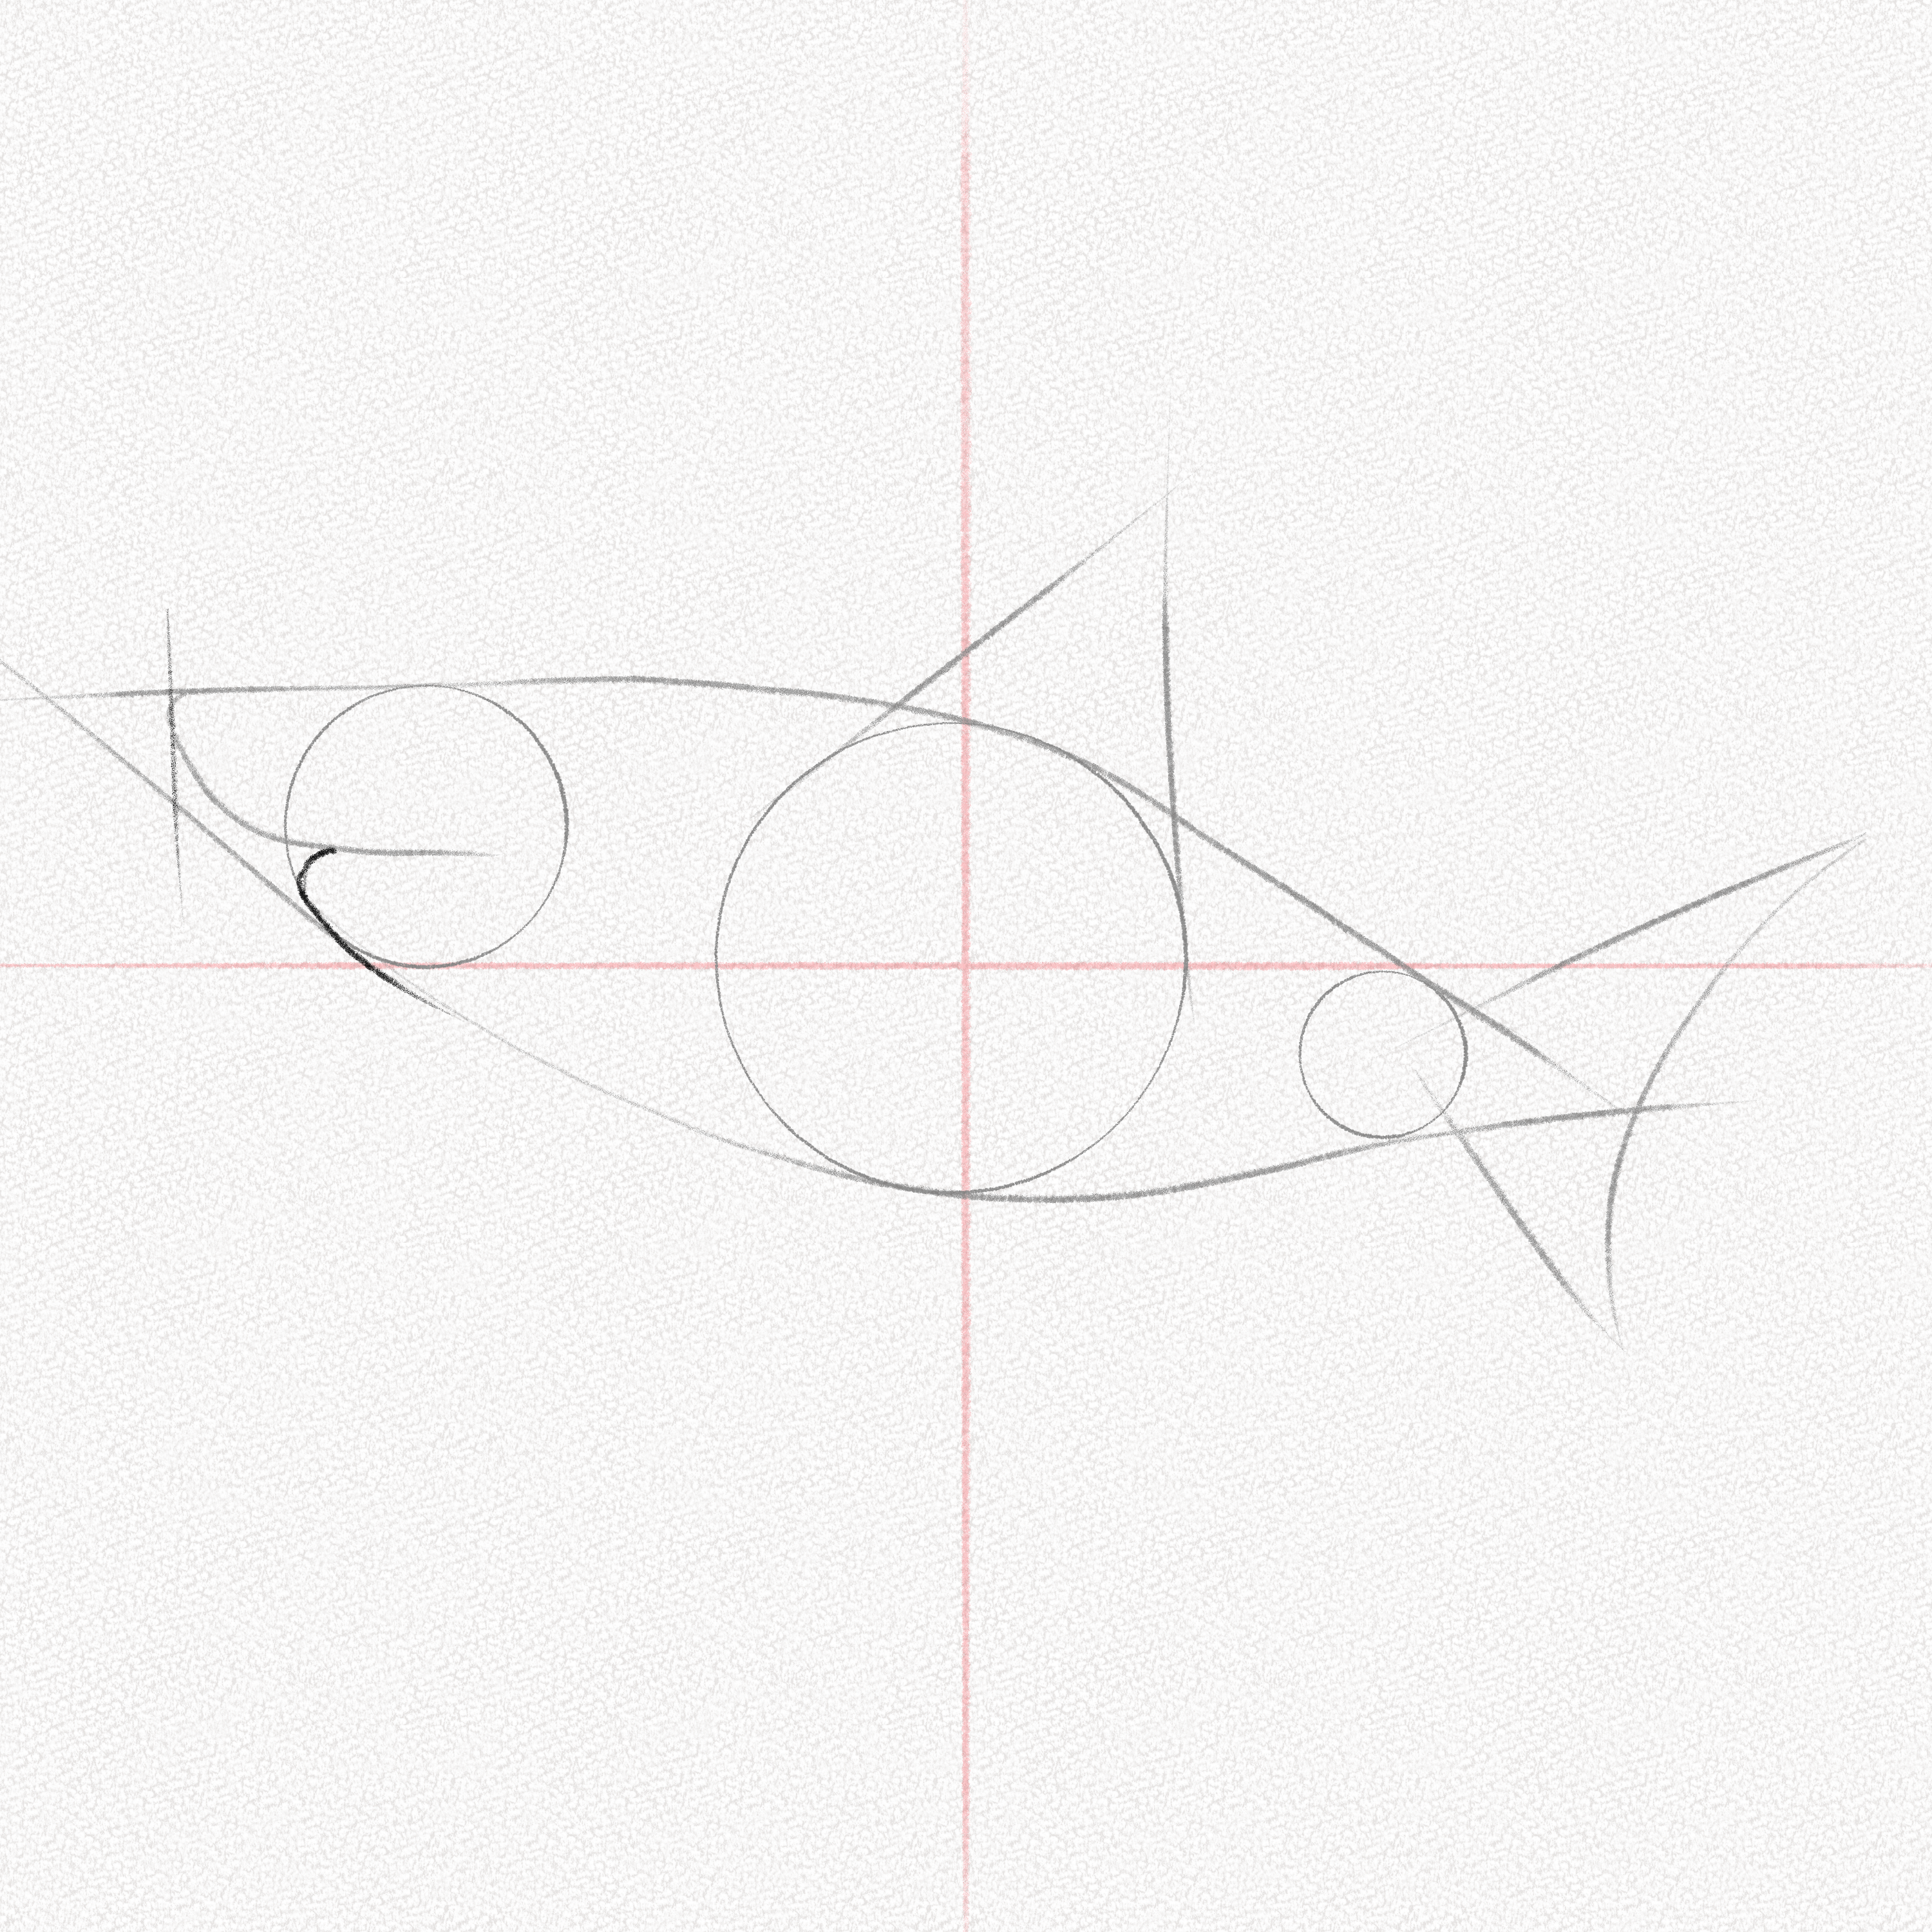
Step 12: Let’s start with the fins
As we progress in the drawing, it is important to remember that we are only representing one side of the shark. Therefore, the right fin of the shark is not fully visible and appears to be further away. To create the sensation of closeness in the image, draw two curved strokes like the ones shown in the image, with the left fin longer than the right. In this way, you will achieve a greater depth effect in your shark drawing.
Sharks tend to swim with their mouth open, so draw a small curved line to indicate the opening of the mouth.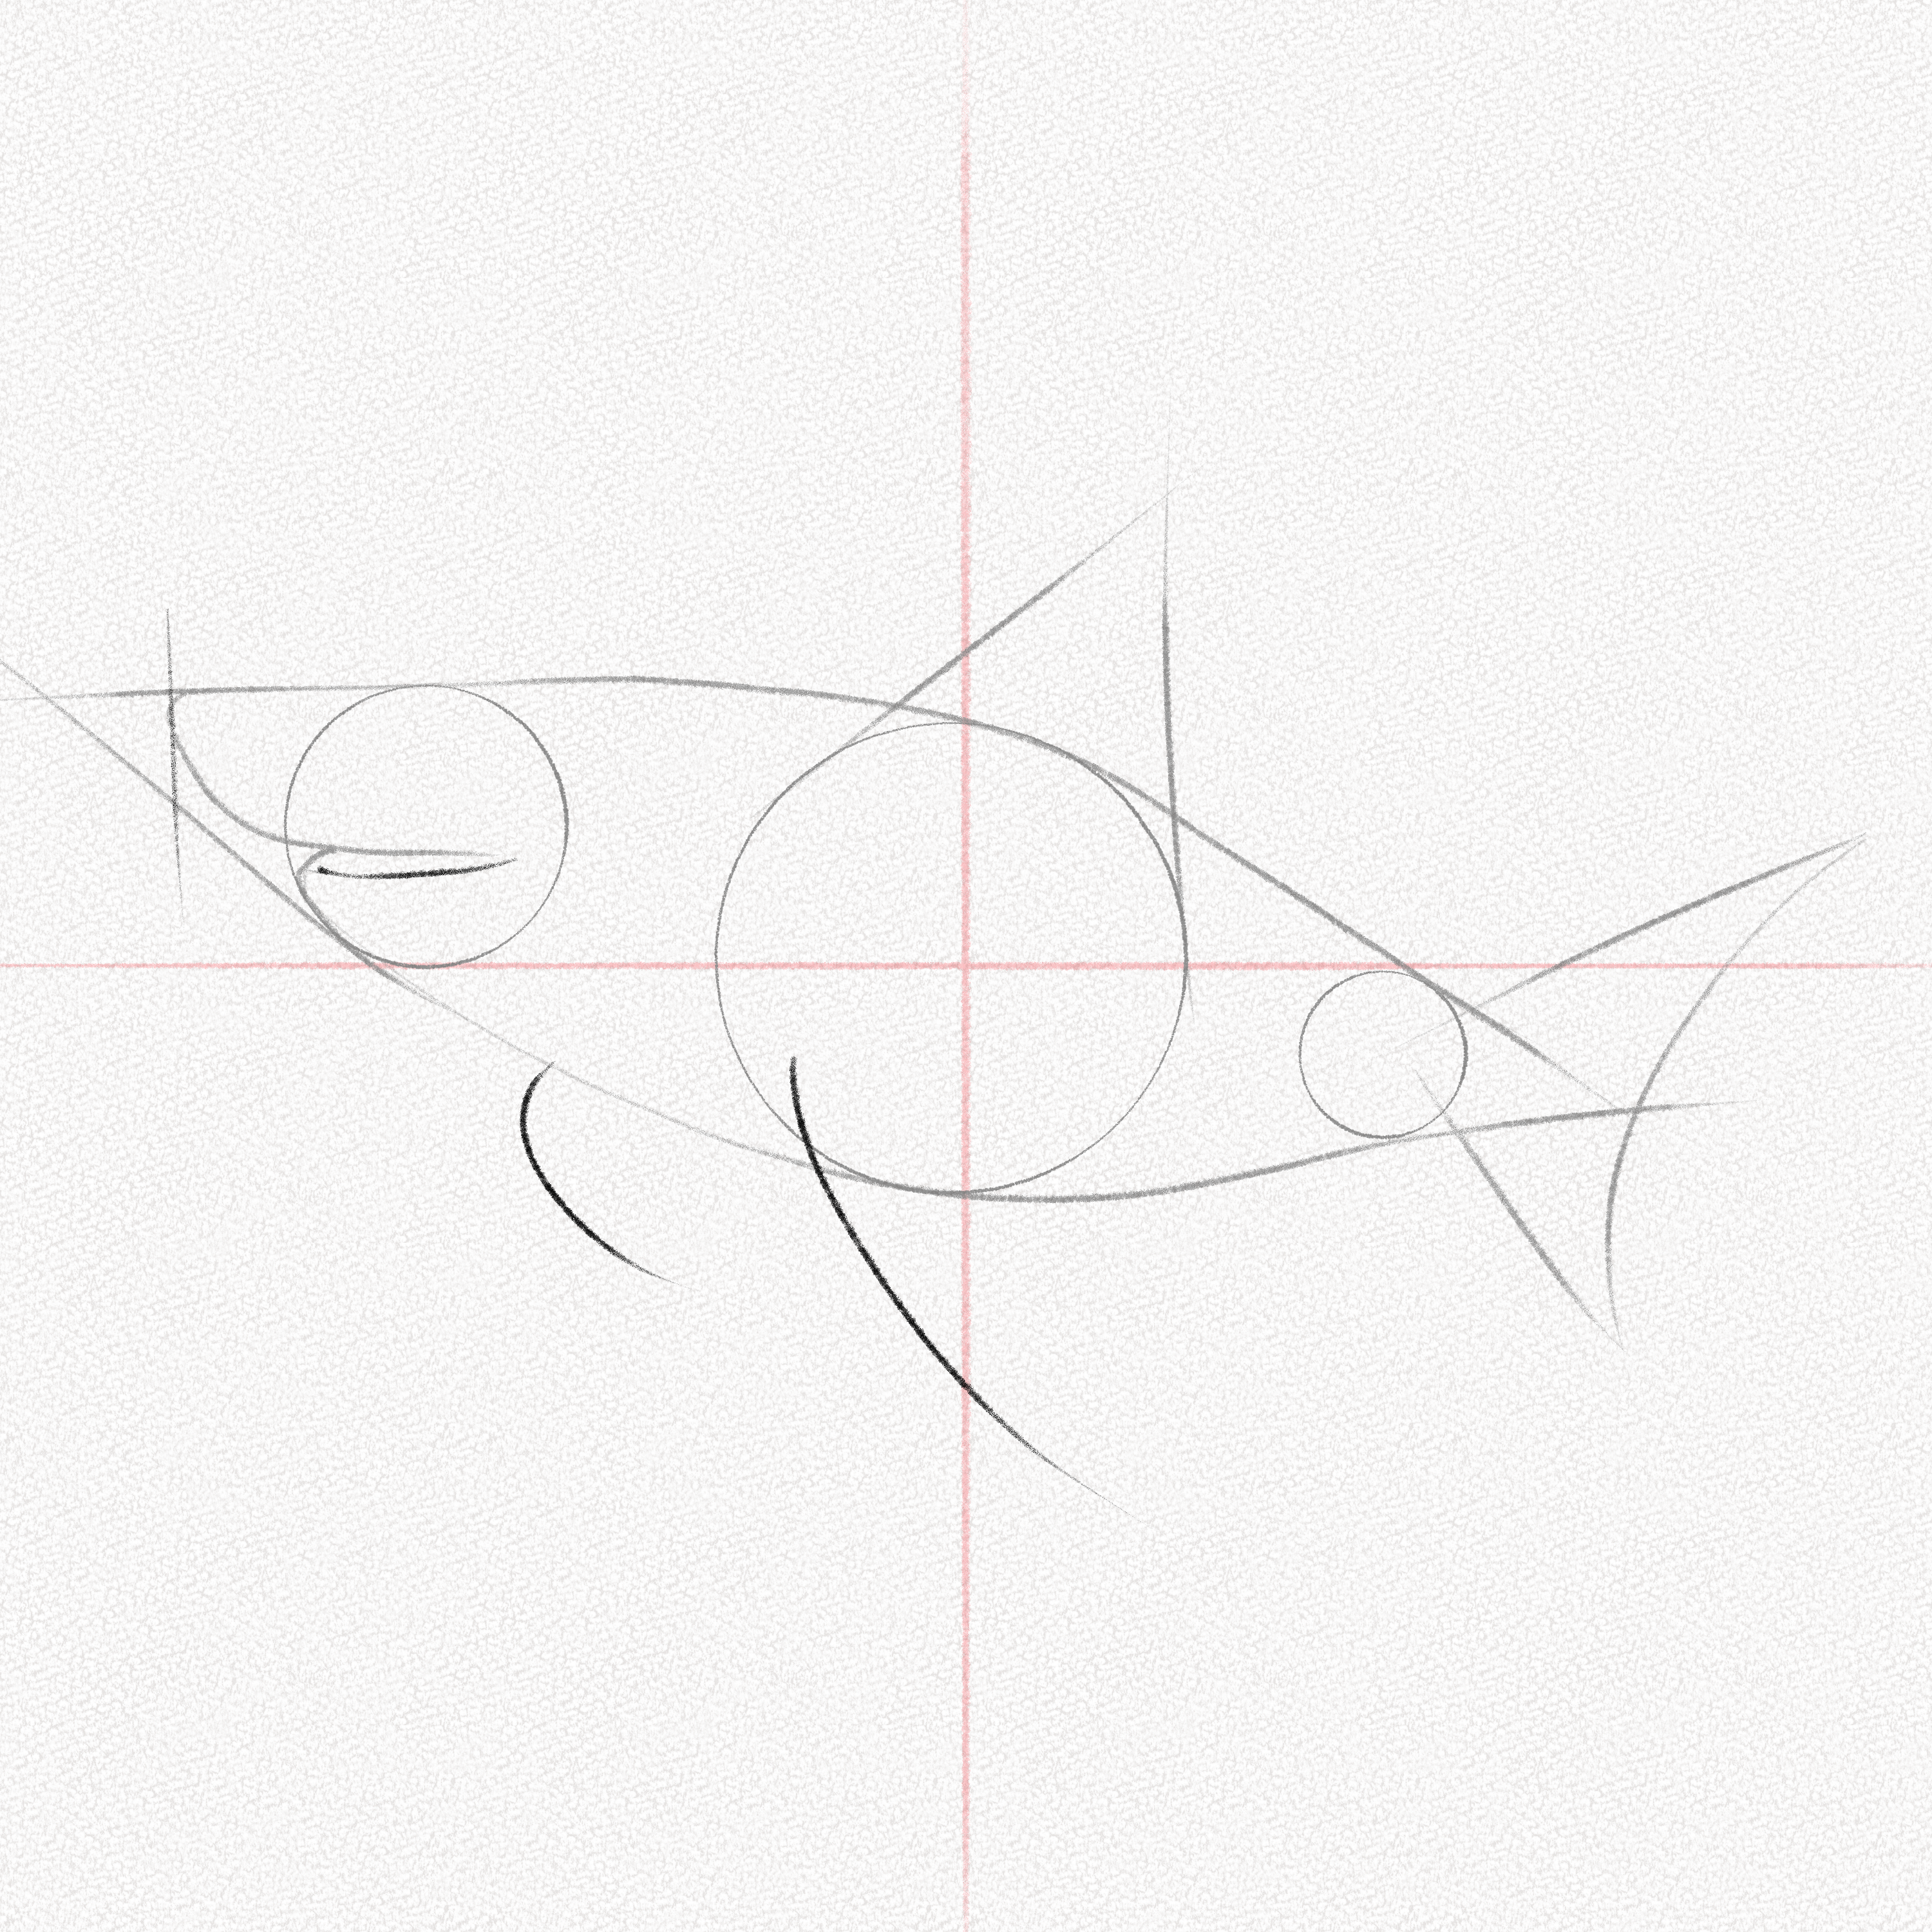
Step 13: Finish the contour of the fins
Draw two curved lines around the tips of the fins. These lines should follow the circular and elongated shape of the fins and connect with the body of the shark.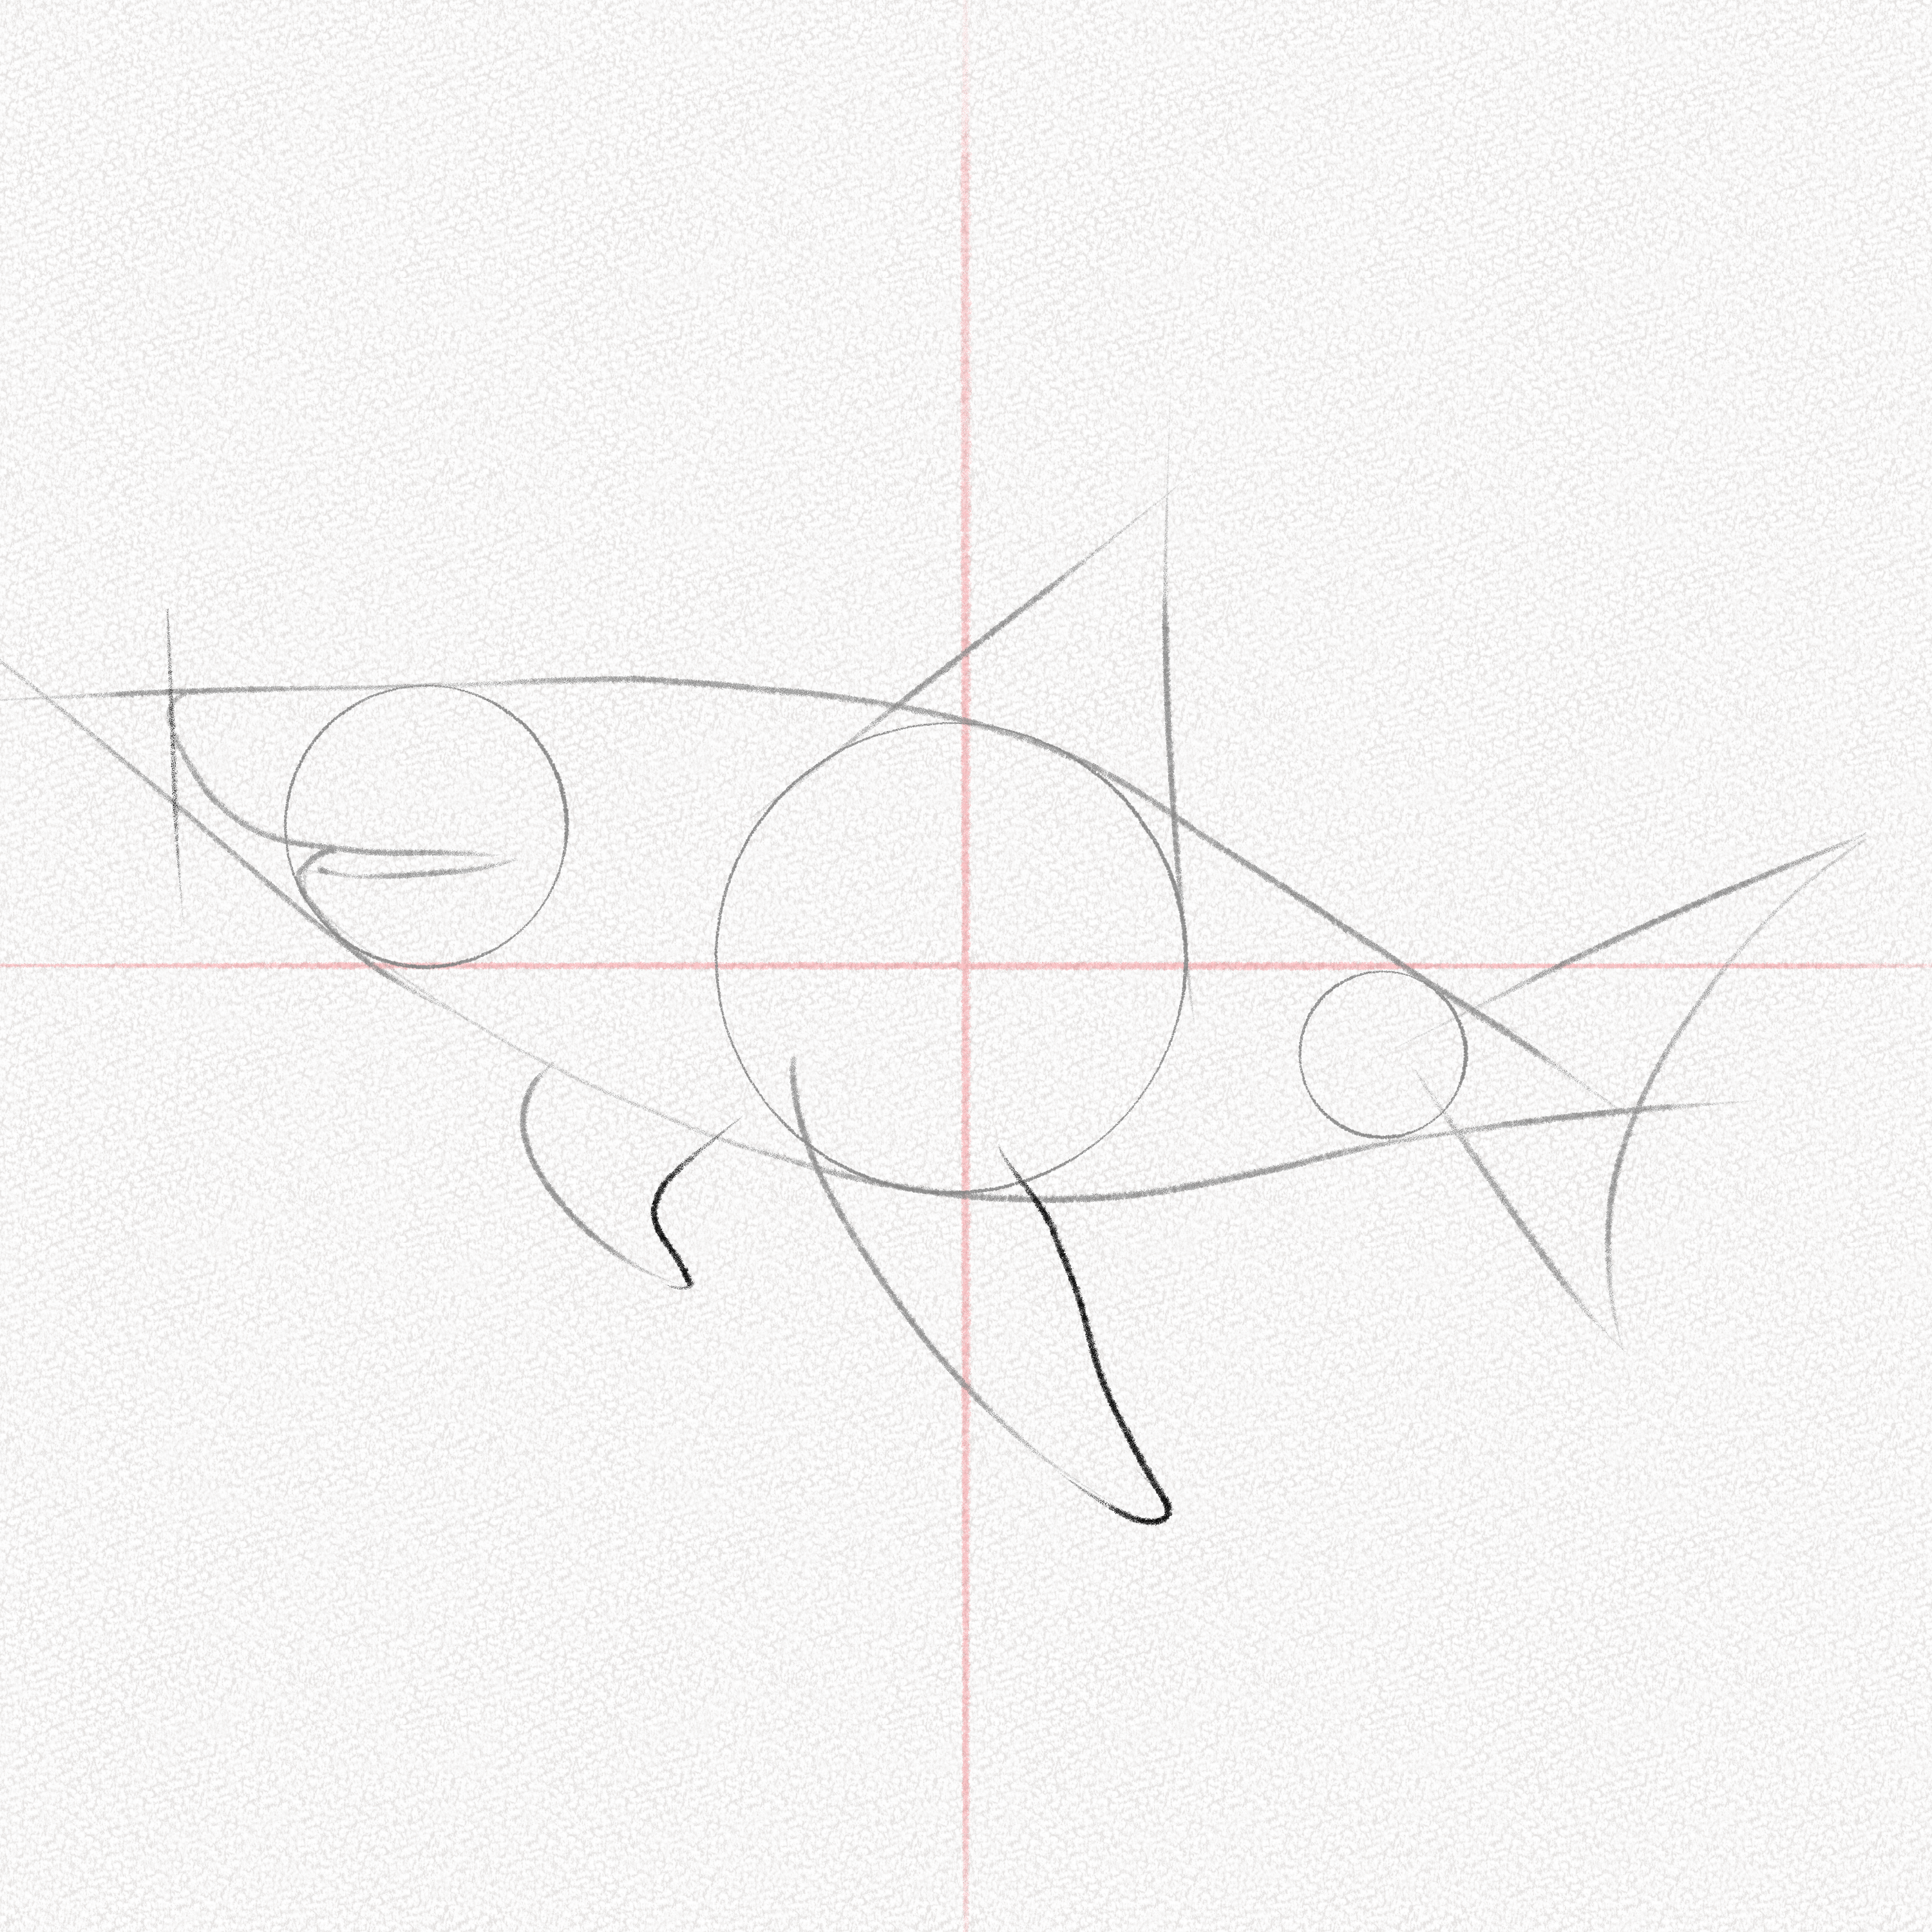
Step 14: Draw the other fins
Sharks have another two sets of fins, two small upper and lower fins, and two pelvic fins (on the sides). The right pelvic fin would be hidden by the shark’s body, but the left one is visible and flatter than the upper and lower smaller fins.
Step 15: Draw the eye, nose, and gills
draw the shark’s eye, visible nostril, and gills, and start erasing your guidelines with your kneaded eraser.
Step 16: Outline your shark
Using your 4B pencil, outline your shark and draw the teeth. You can leave your shark drawing here, but if you’re up for a challenge, then graph your pencils and get ready!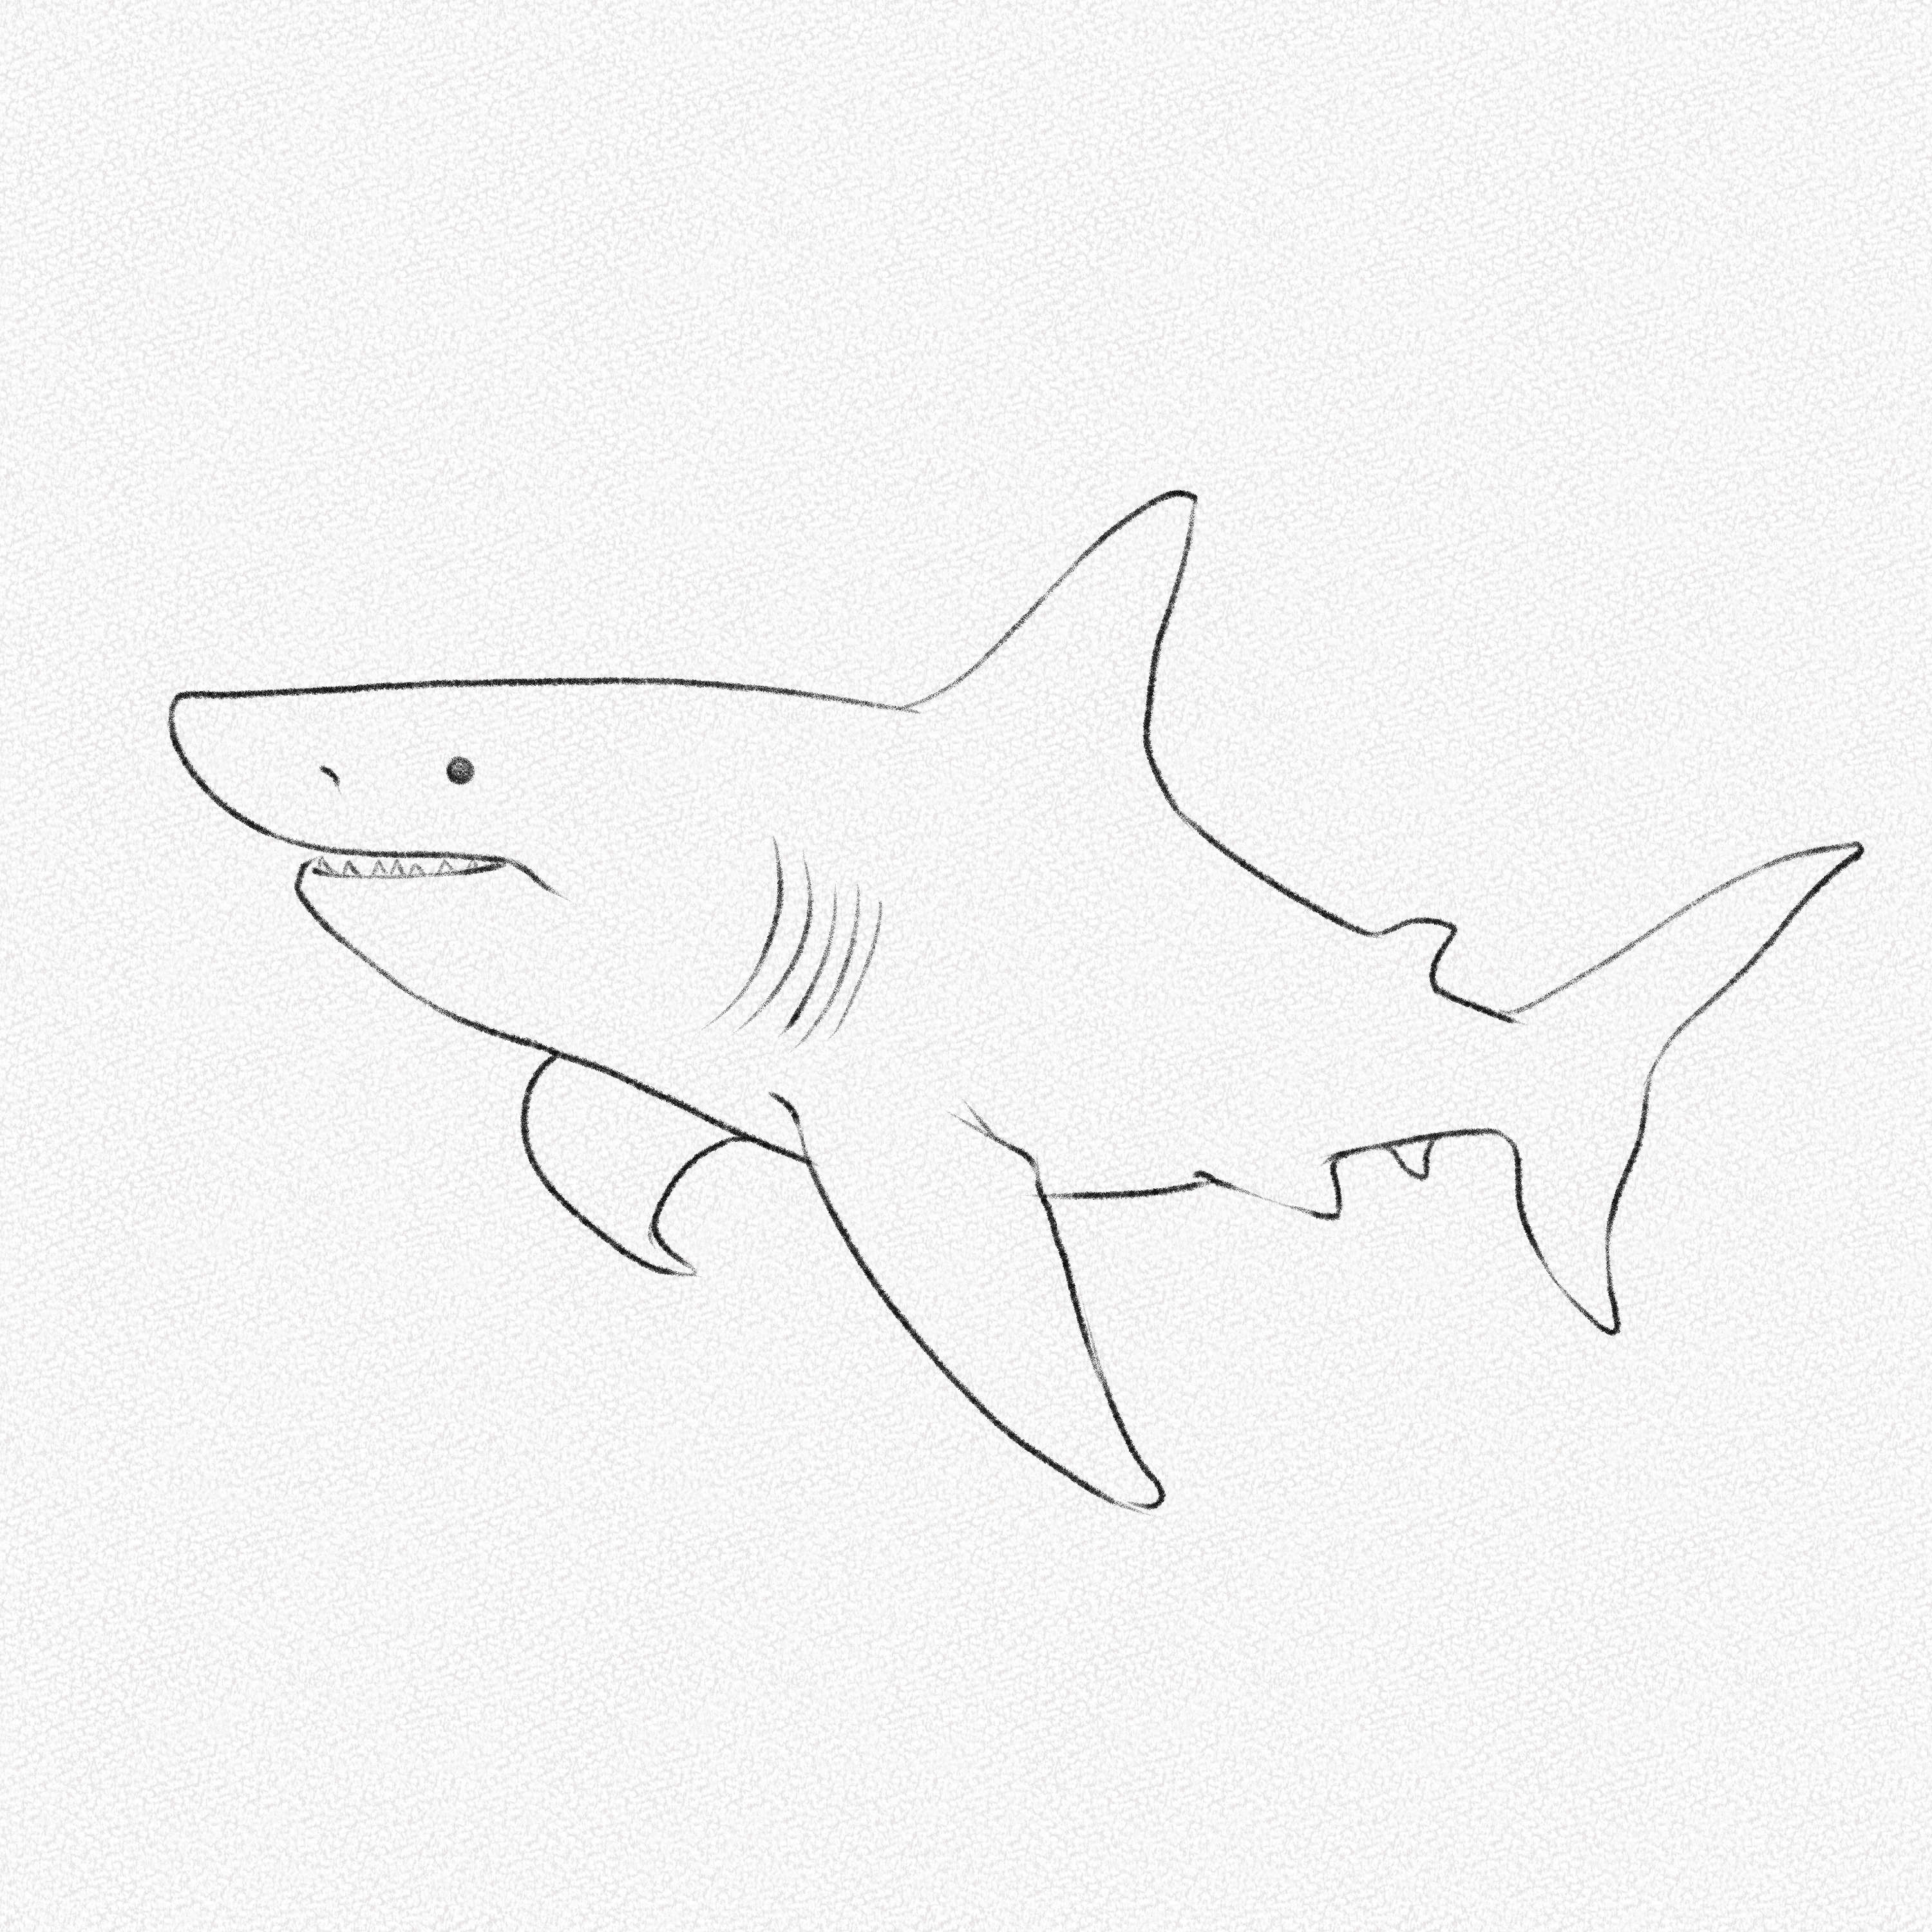
Section 2.- How to Shade a Shark
For this section, we’ll use powdered graphite, your 4B and 8B pencil, and your kneaded eraser as well. Shading a shark’s body is not as easy as it might seem since light doesn’t directly hit the shark’s body but spreads in water, creating forms and volumes in the shark’s body.
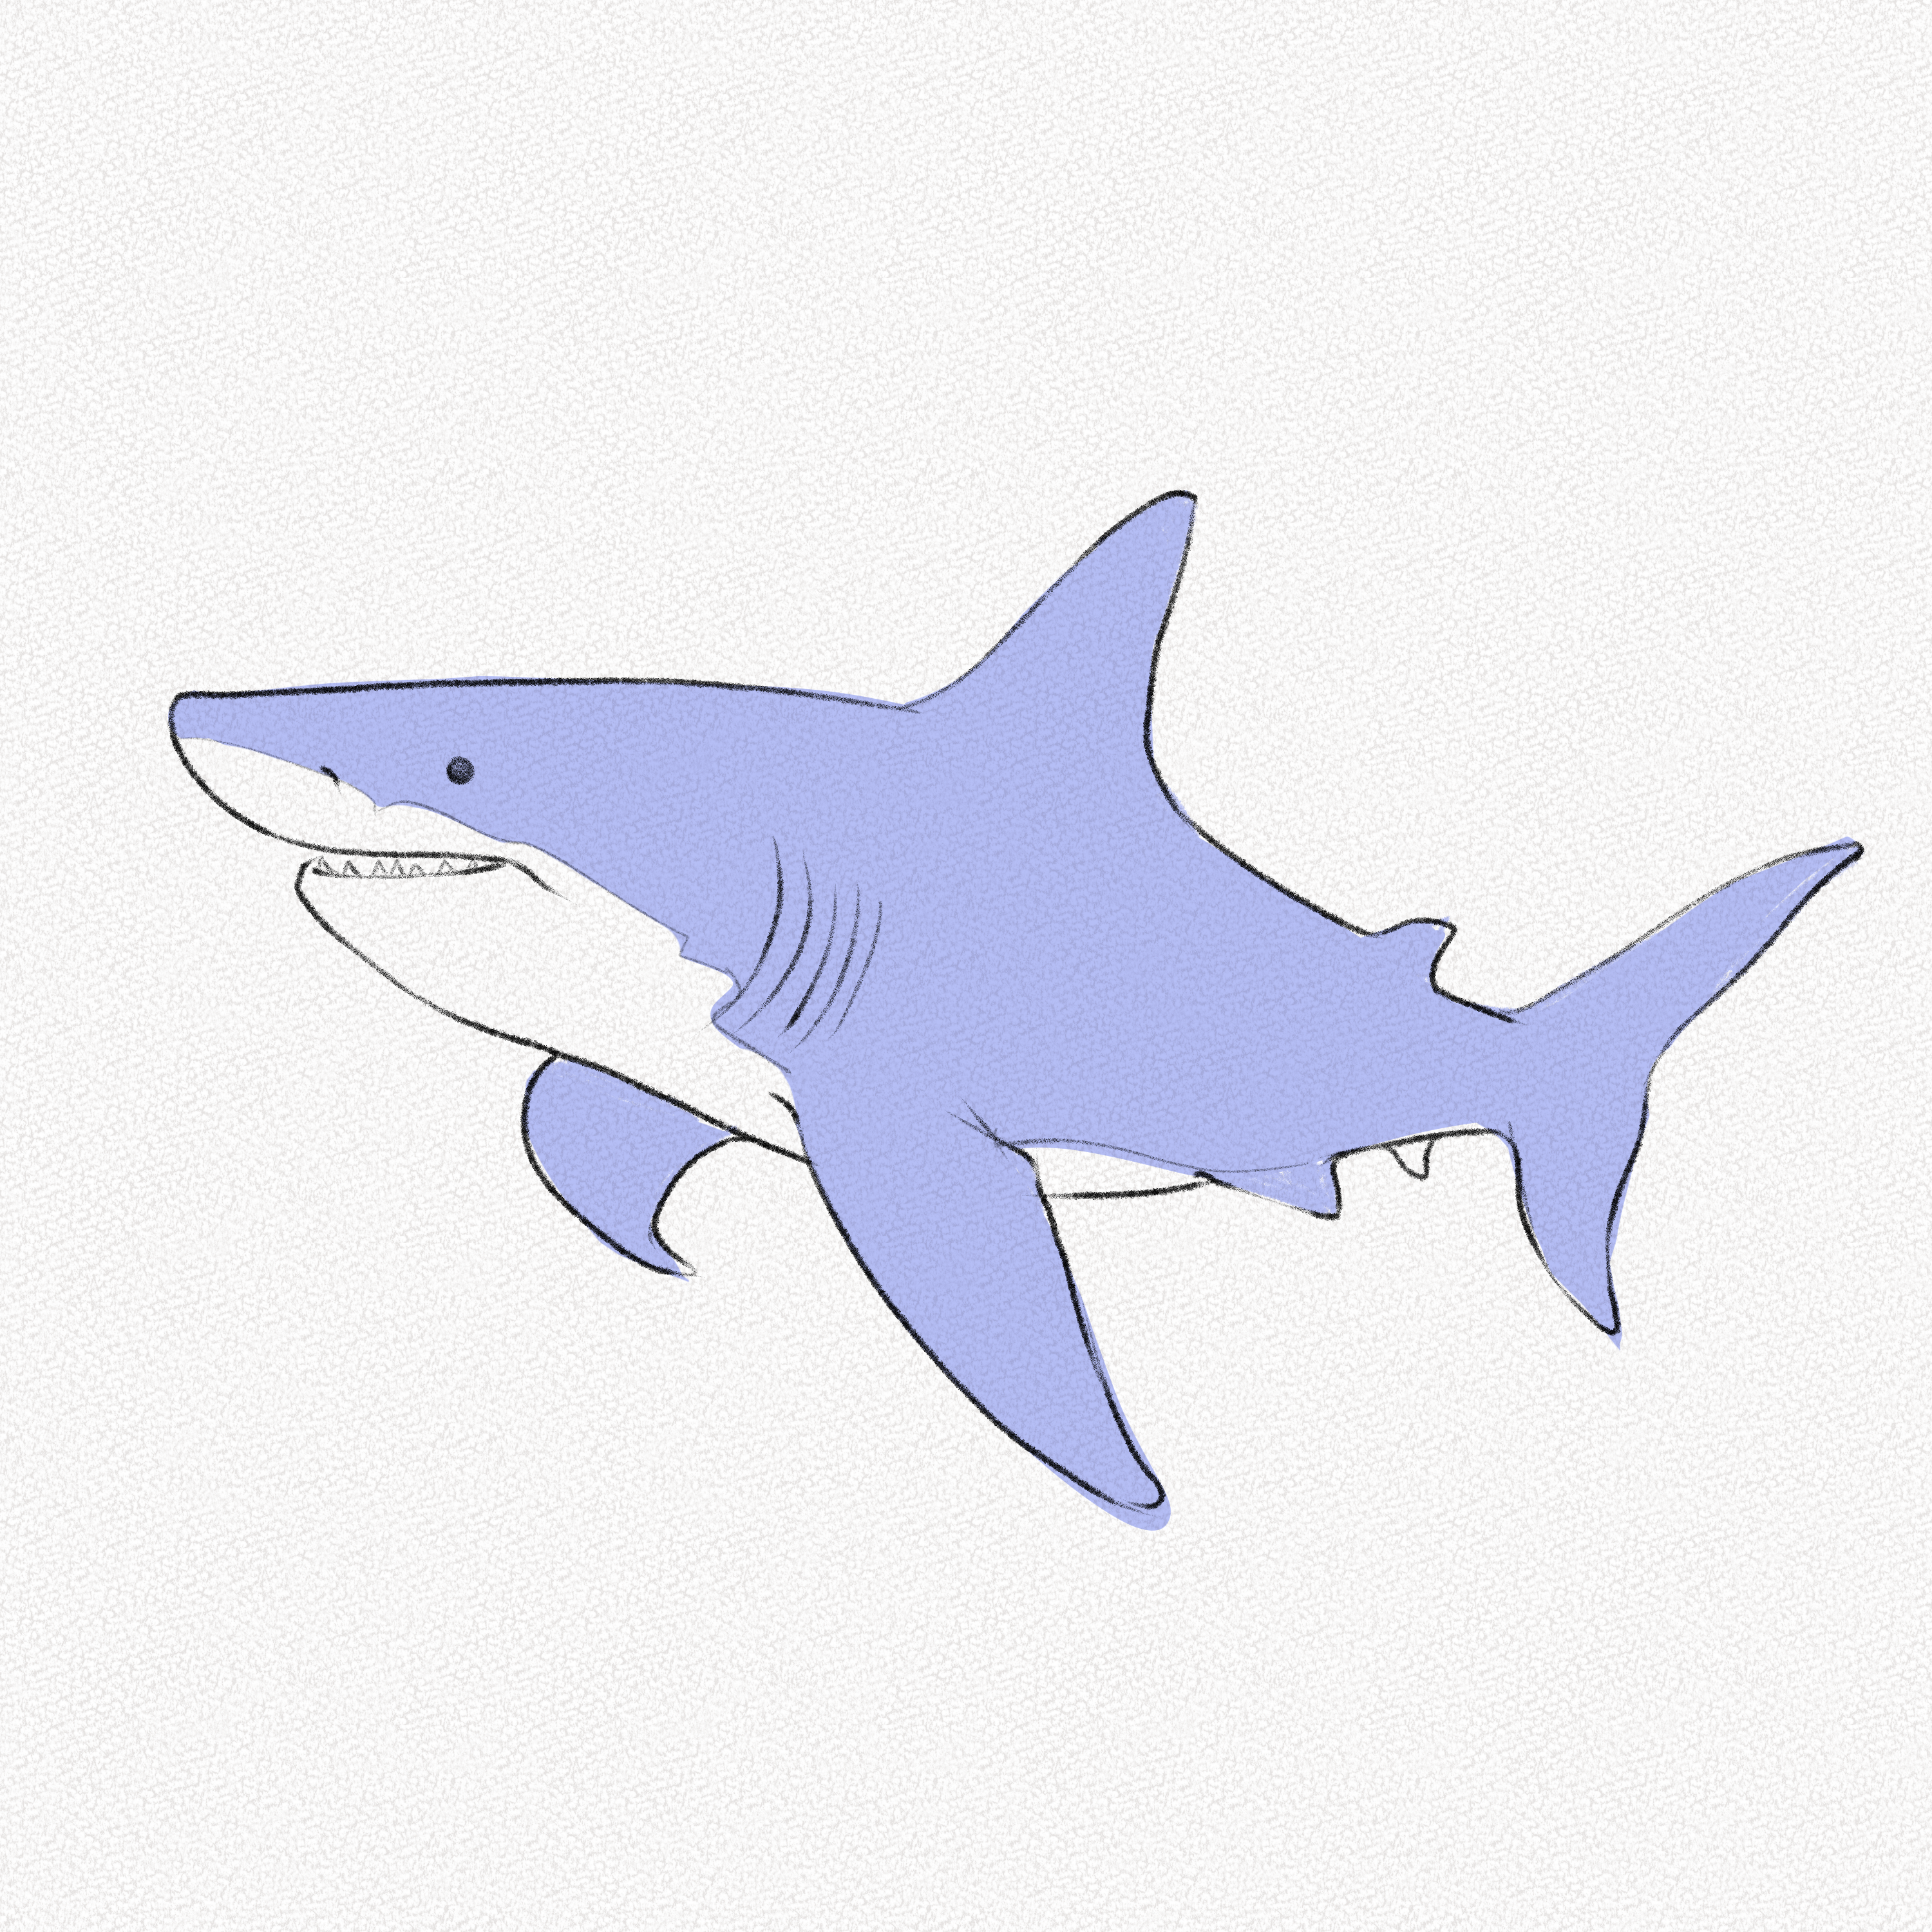
Step 17: Define the values
Sharks tend to have two distinct colors in their bodies, dark gray on the back and white on the belly. Separating and defining these two values from the beginning will be extremely useful, so using your 2H pencil, softly mark the color change. 
Step 18: Fill the area with graphite
Using powdered graphite (or your 4B pencil with soft, small movements) fill the highlighted area with a soft graphite layer.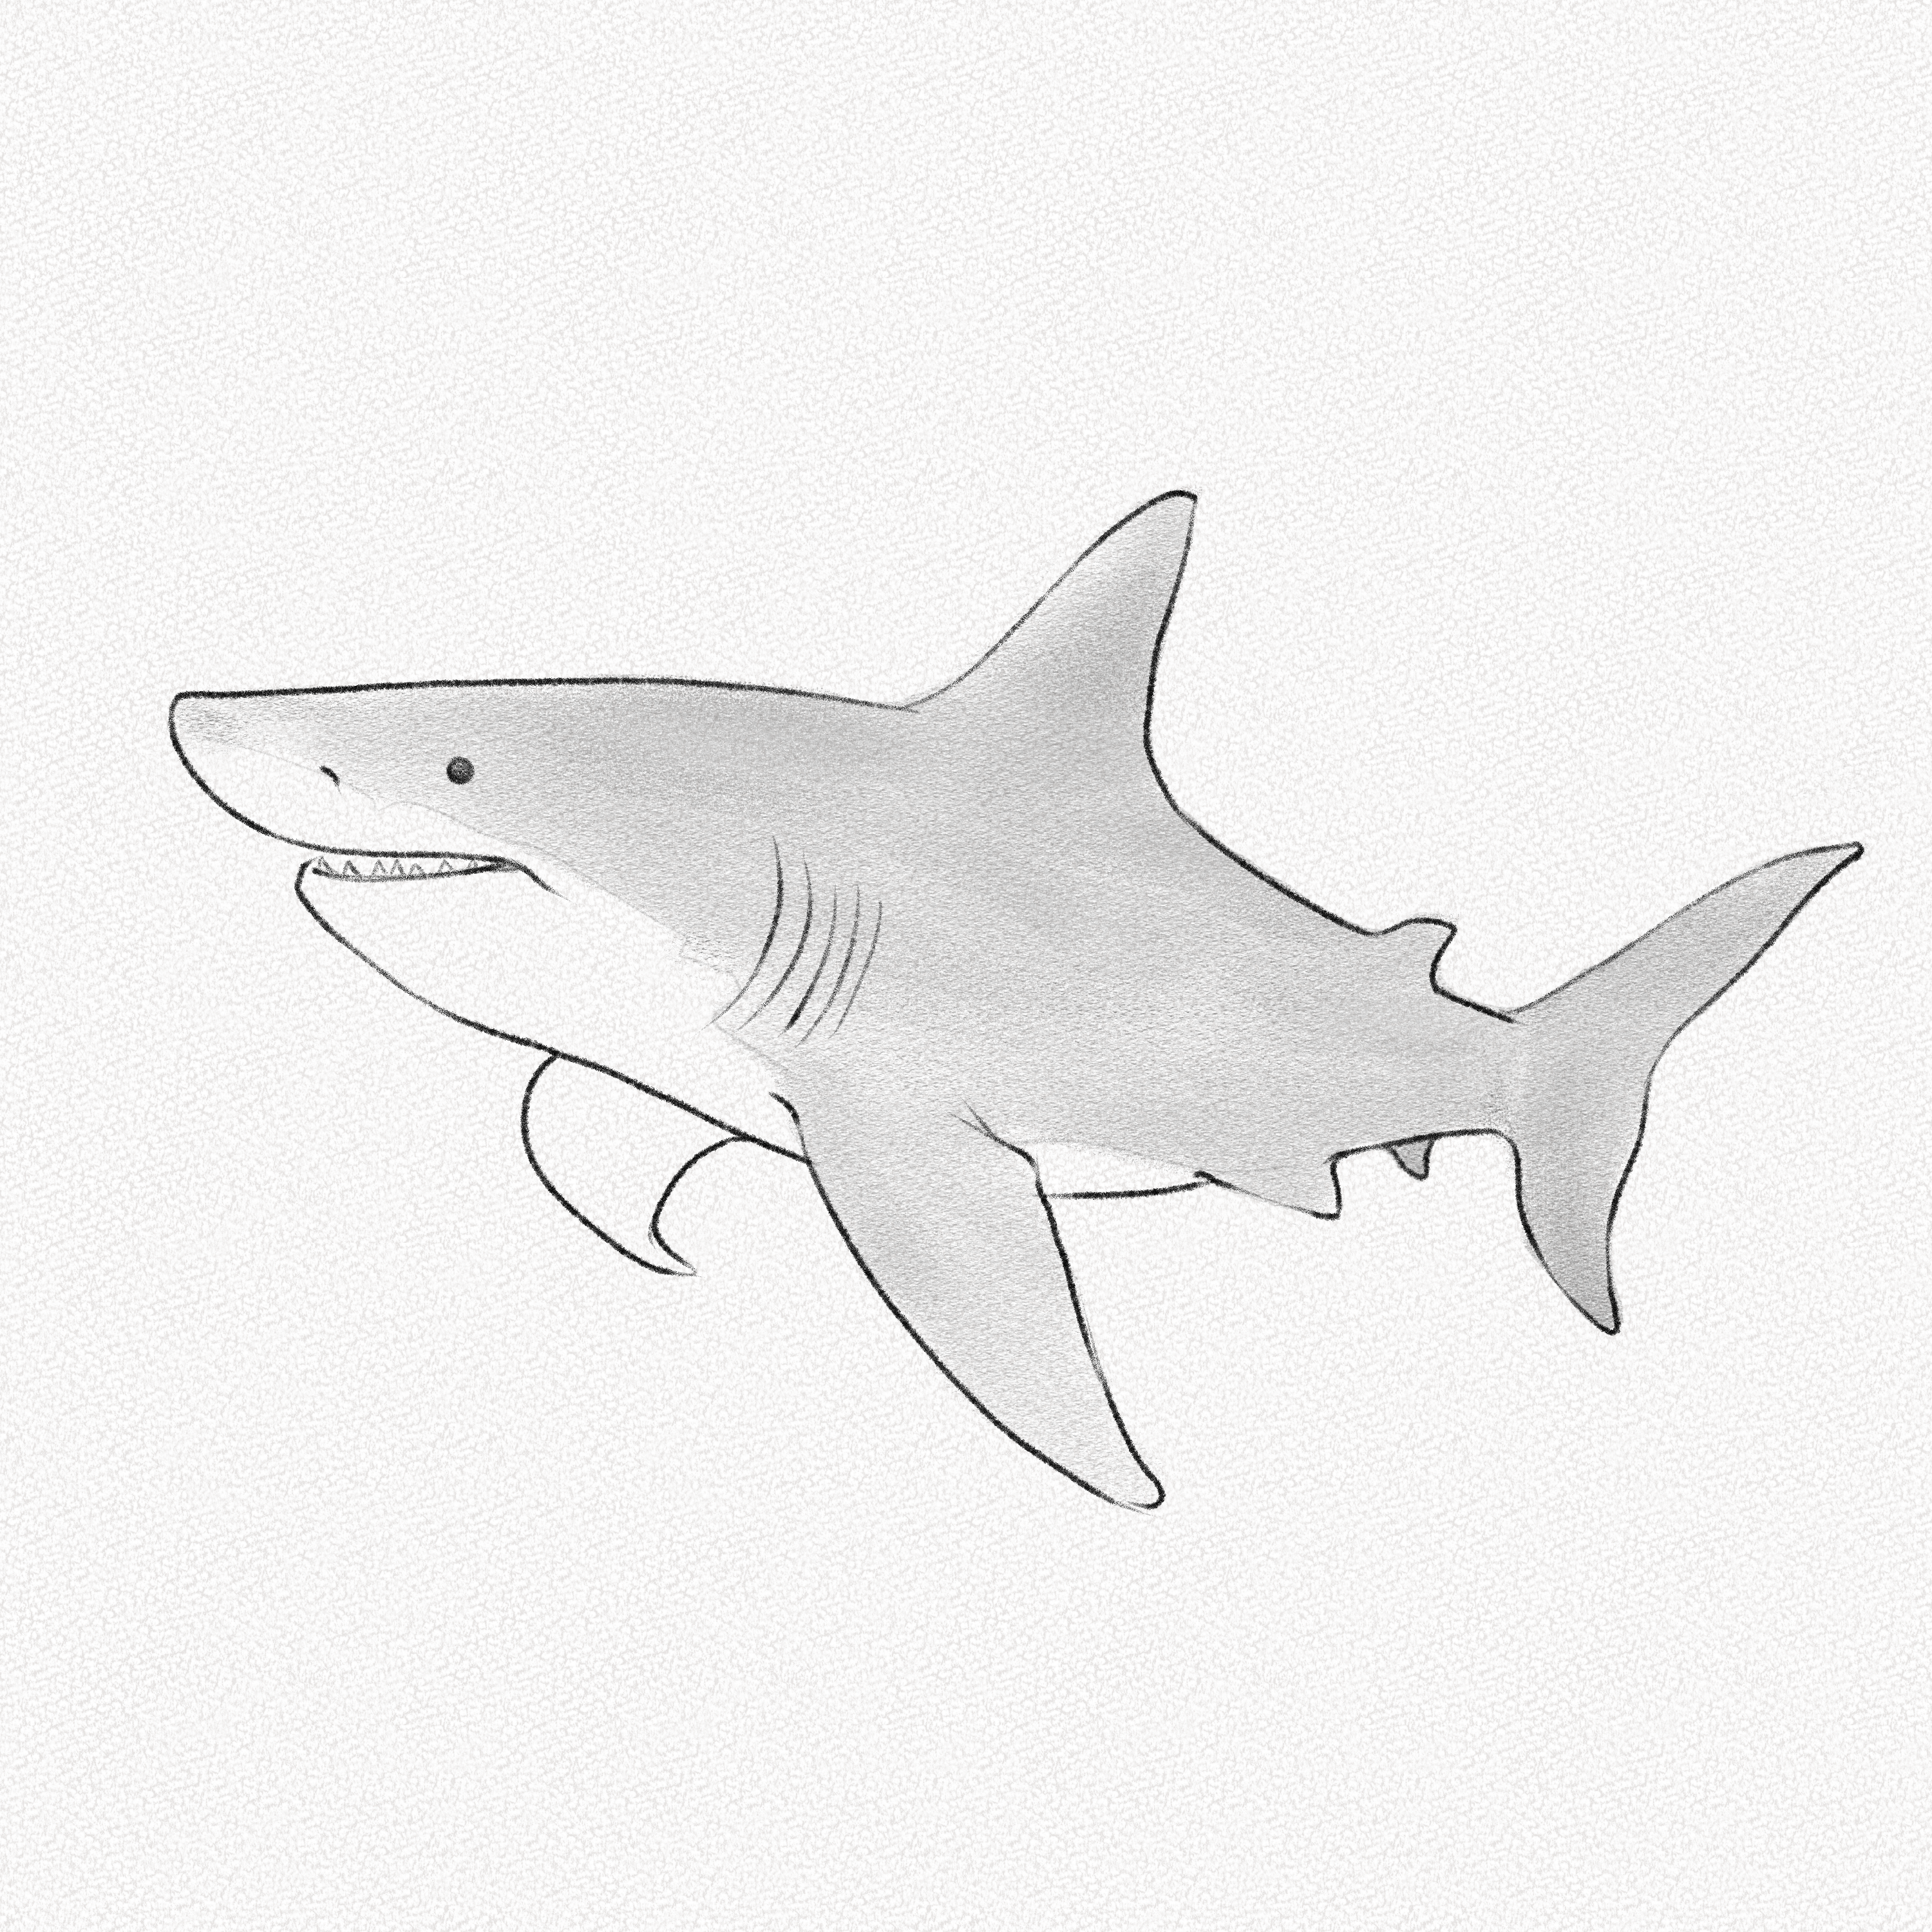
Step 19: Draw two lines
Due to the light underwater and the peculiar shape of the shark’s body, there is a distinct shading style we must follow, but before doing that, we’re going to separate the body into two parts using two lines coming from the nose and tail.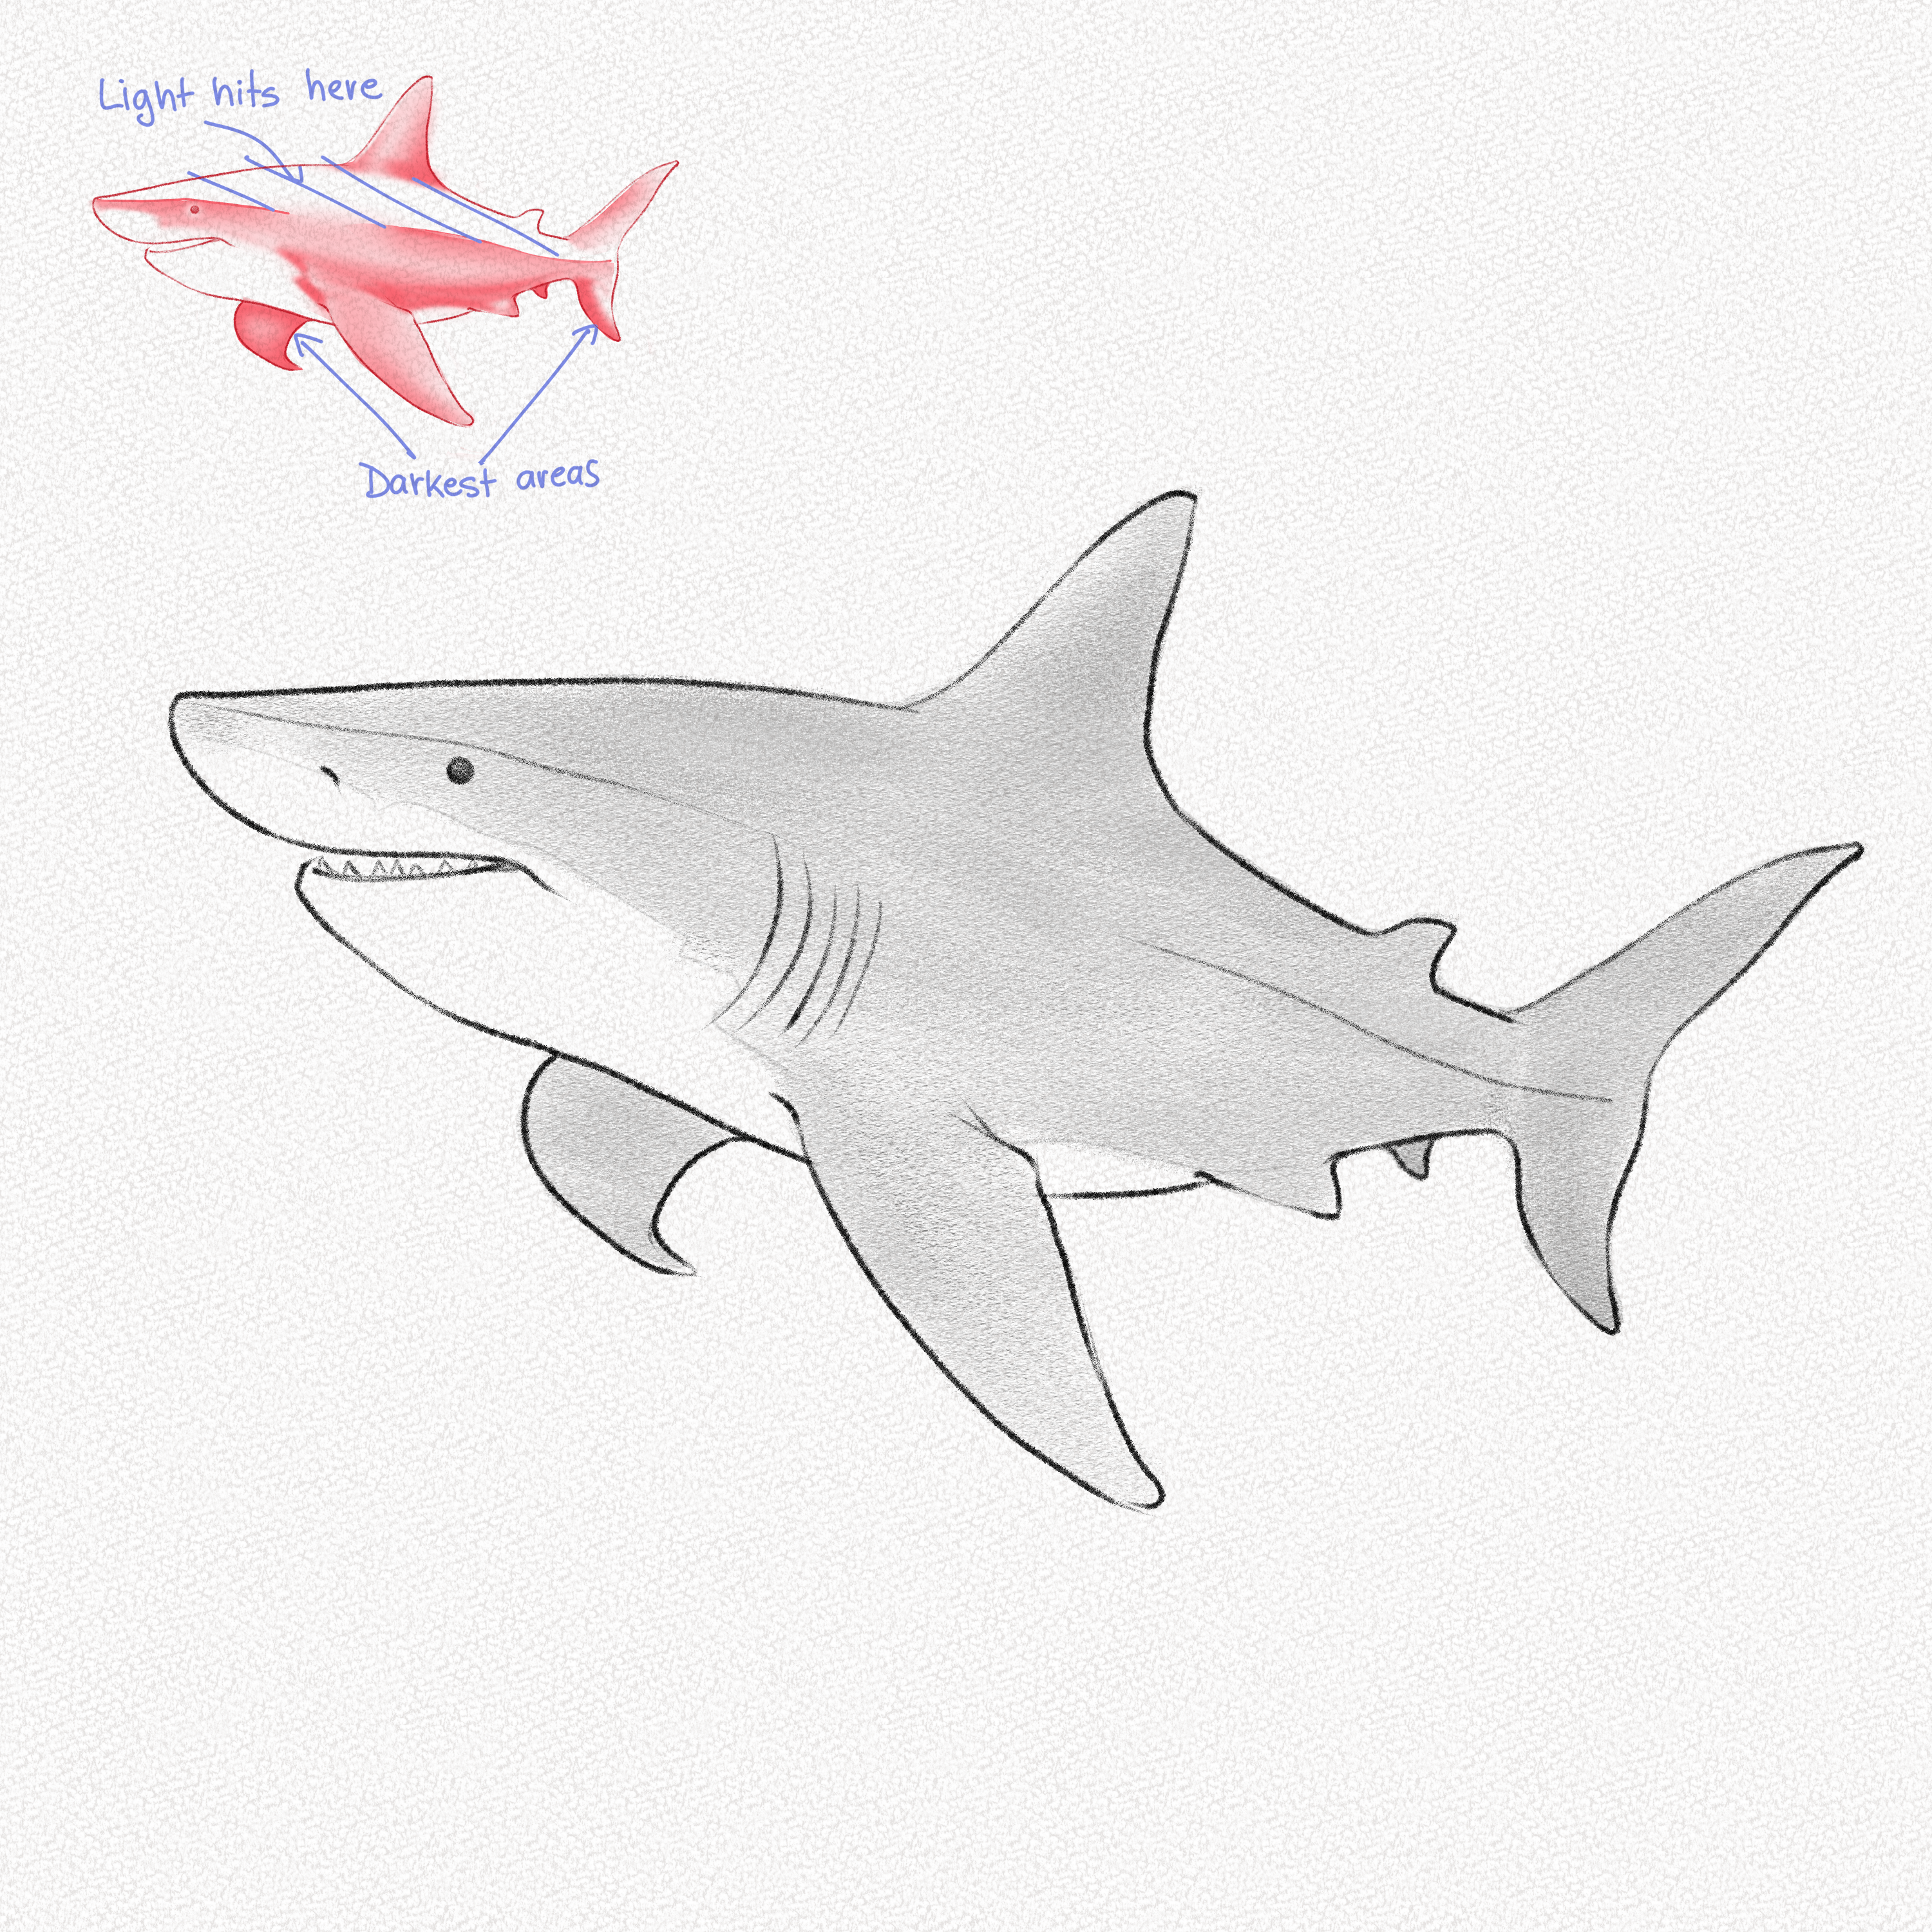
Step 20: Start shading
Let’s start with the head; with small and repetitive movements, darken the area marked with the line, creating a quick and short gradient between the two sections. Leave the borders of the eyes white but add some contrast to the base of the eye so that it seems like the shark’s skin is sinking.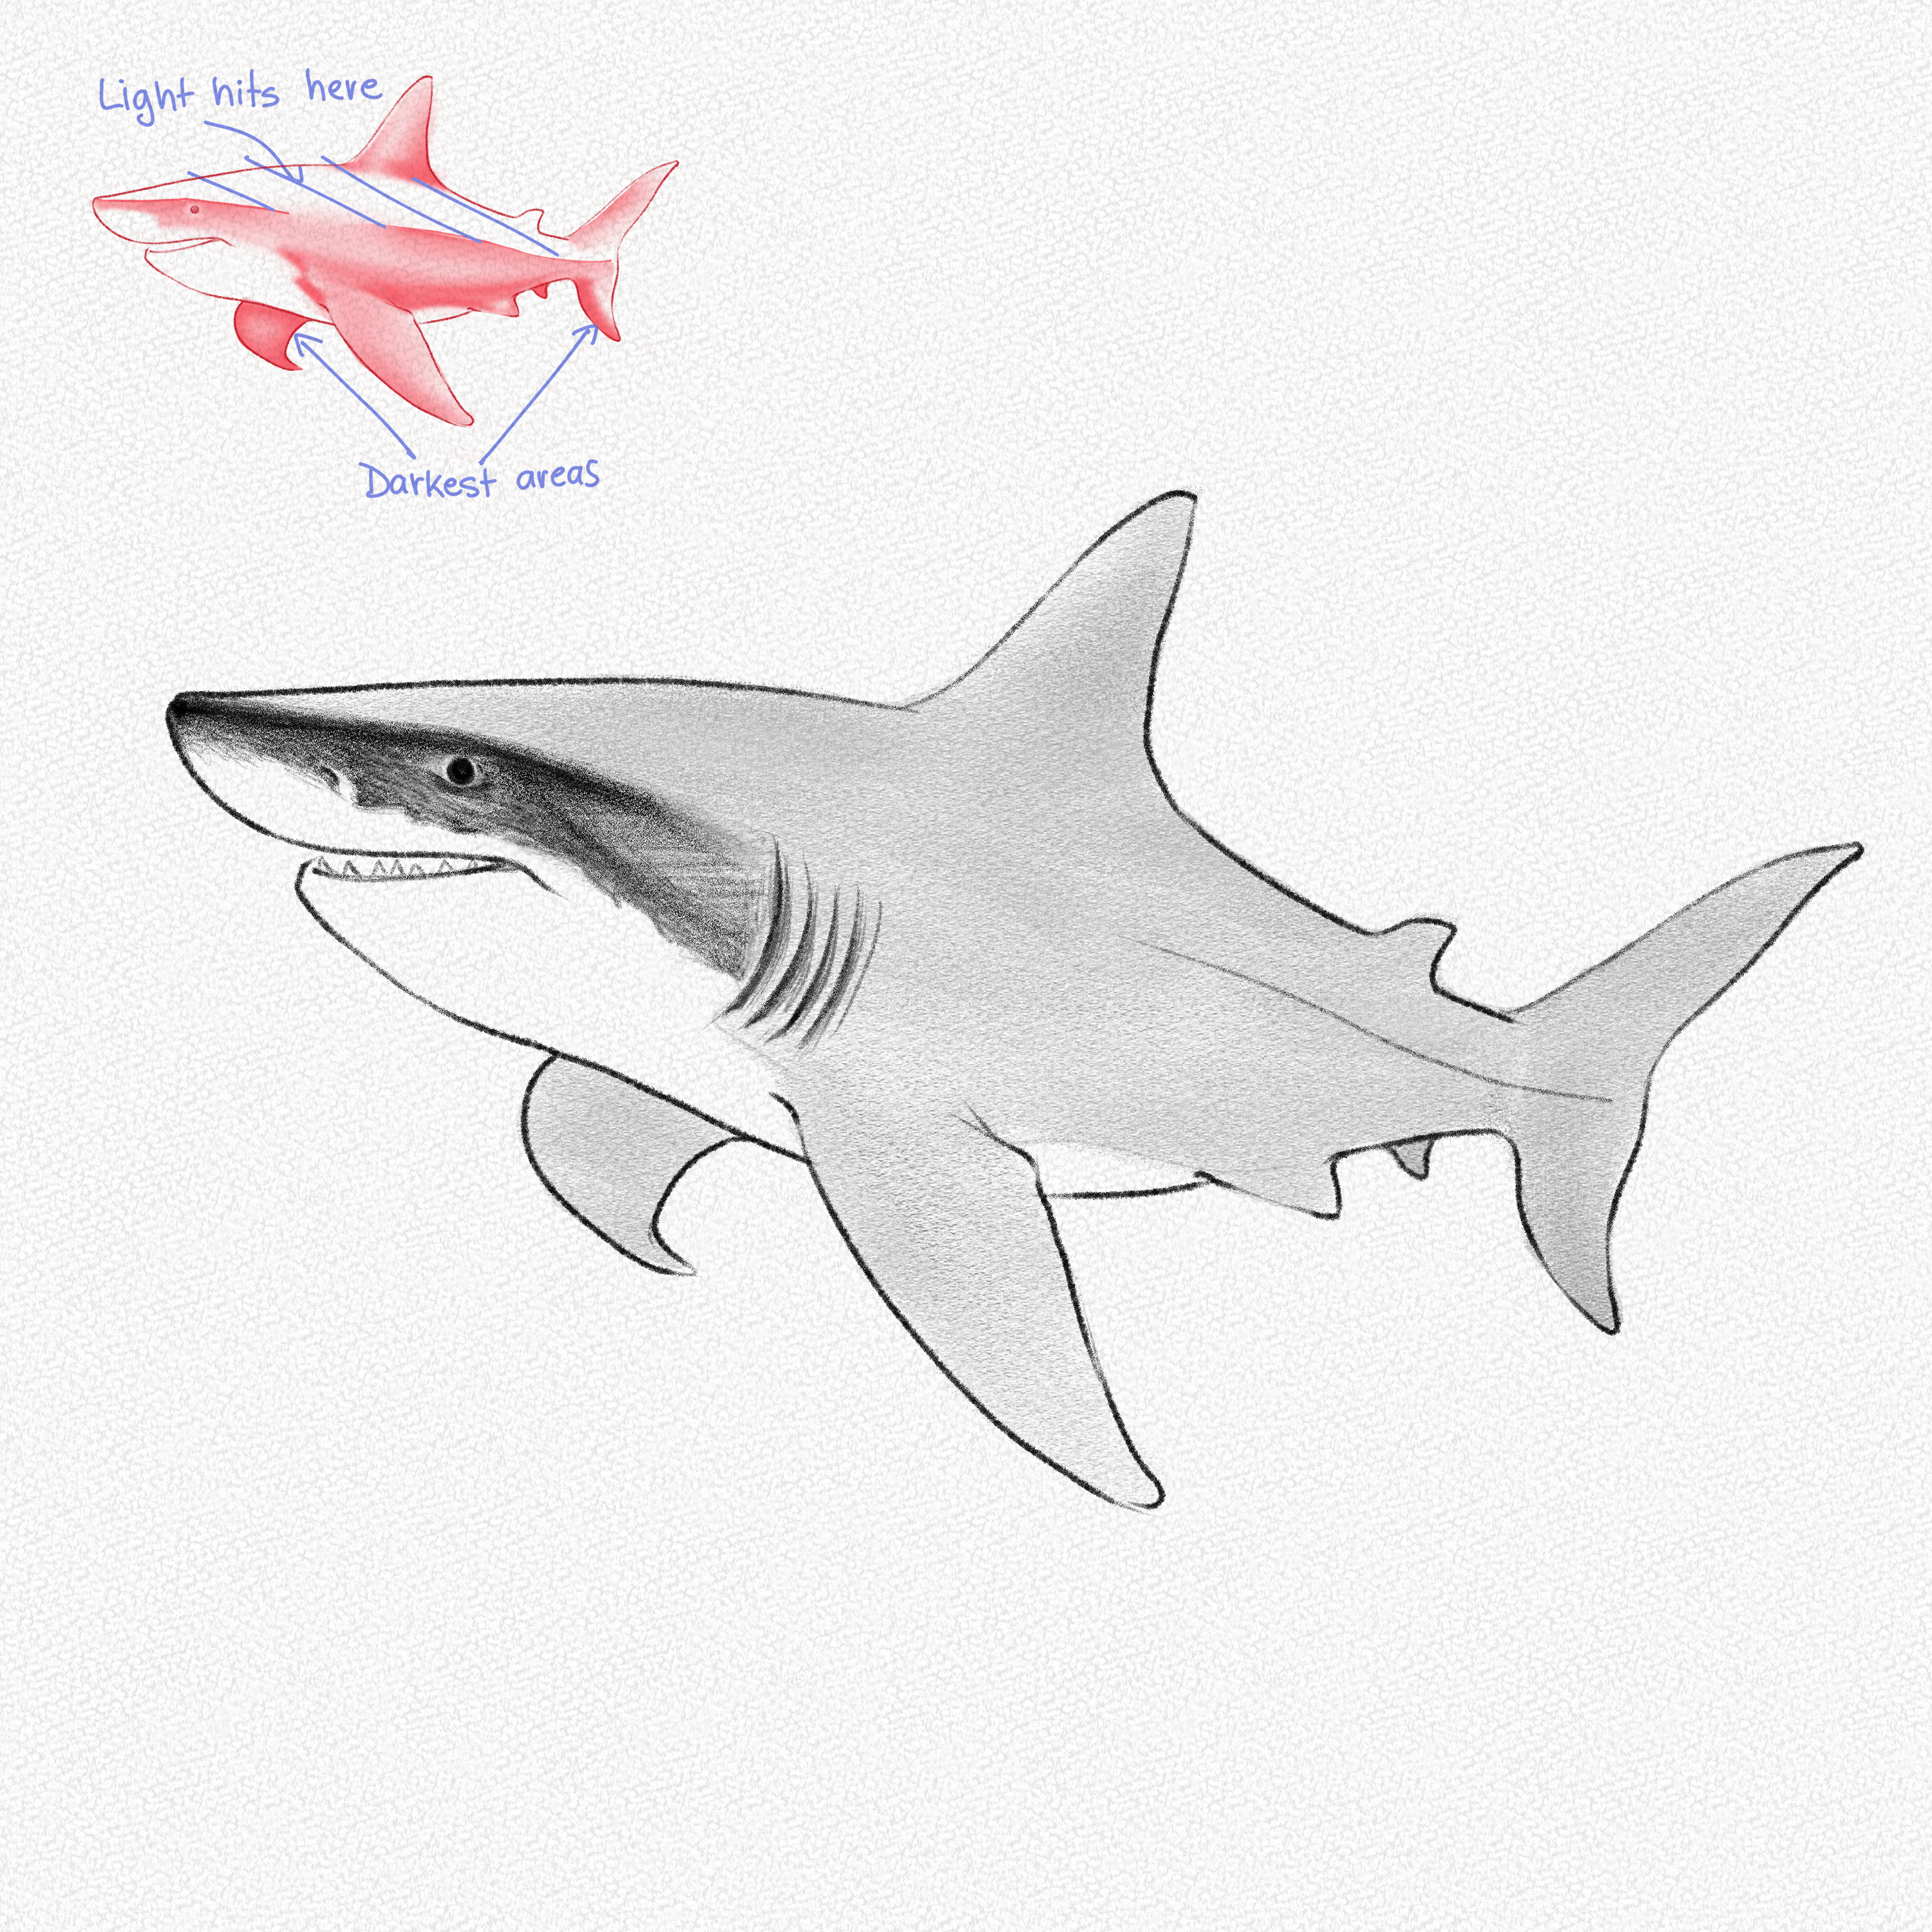
Step 21: Shade the left fin
Shade the fin using the same technique, but leave the borders white and lighten the value near the part where the fin connects with the body.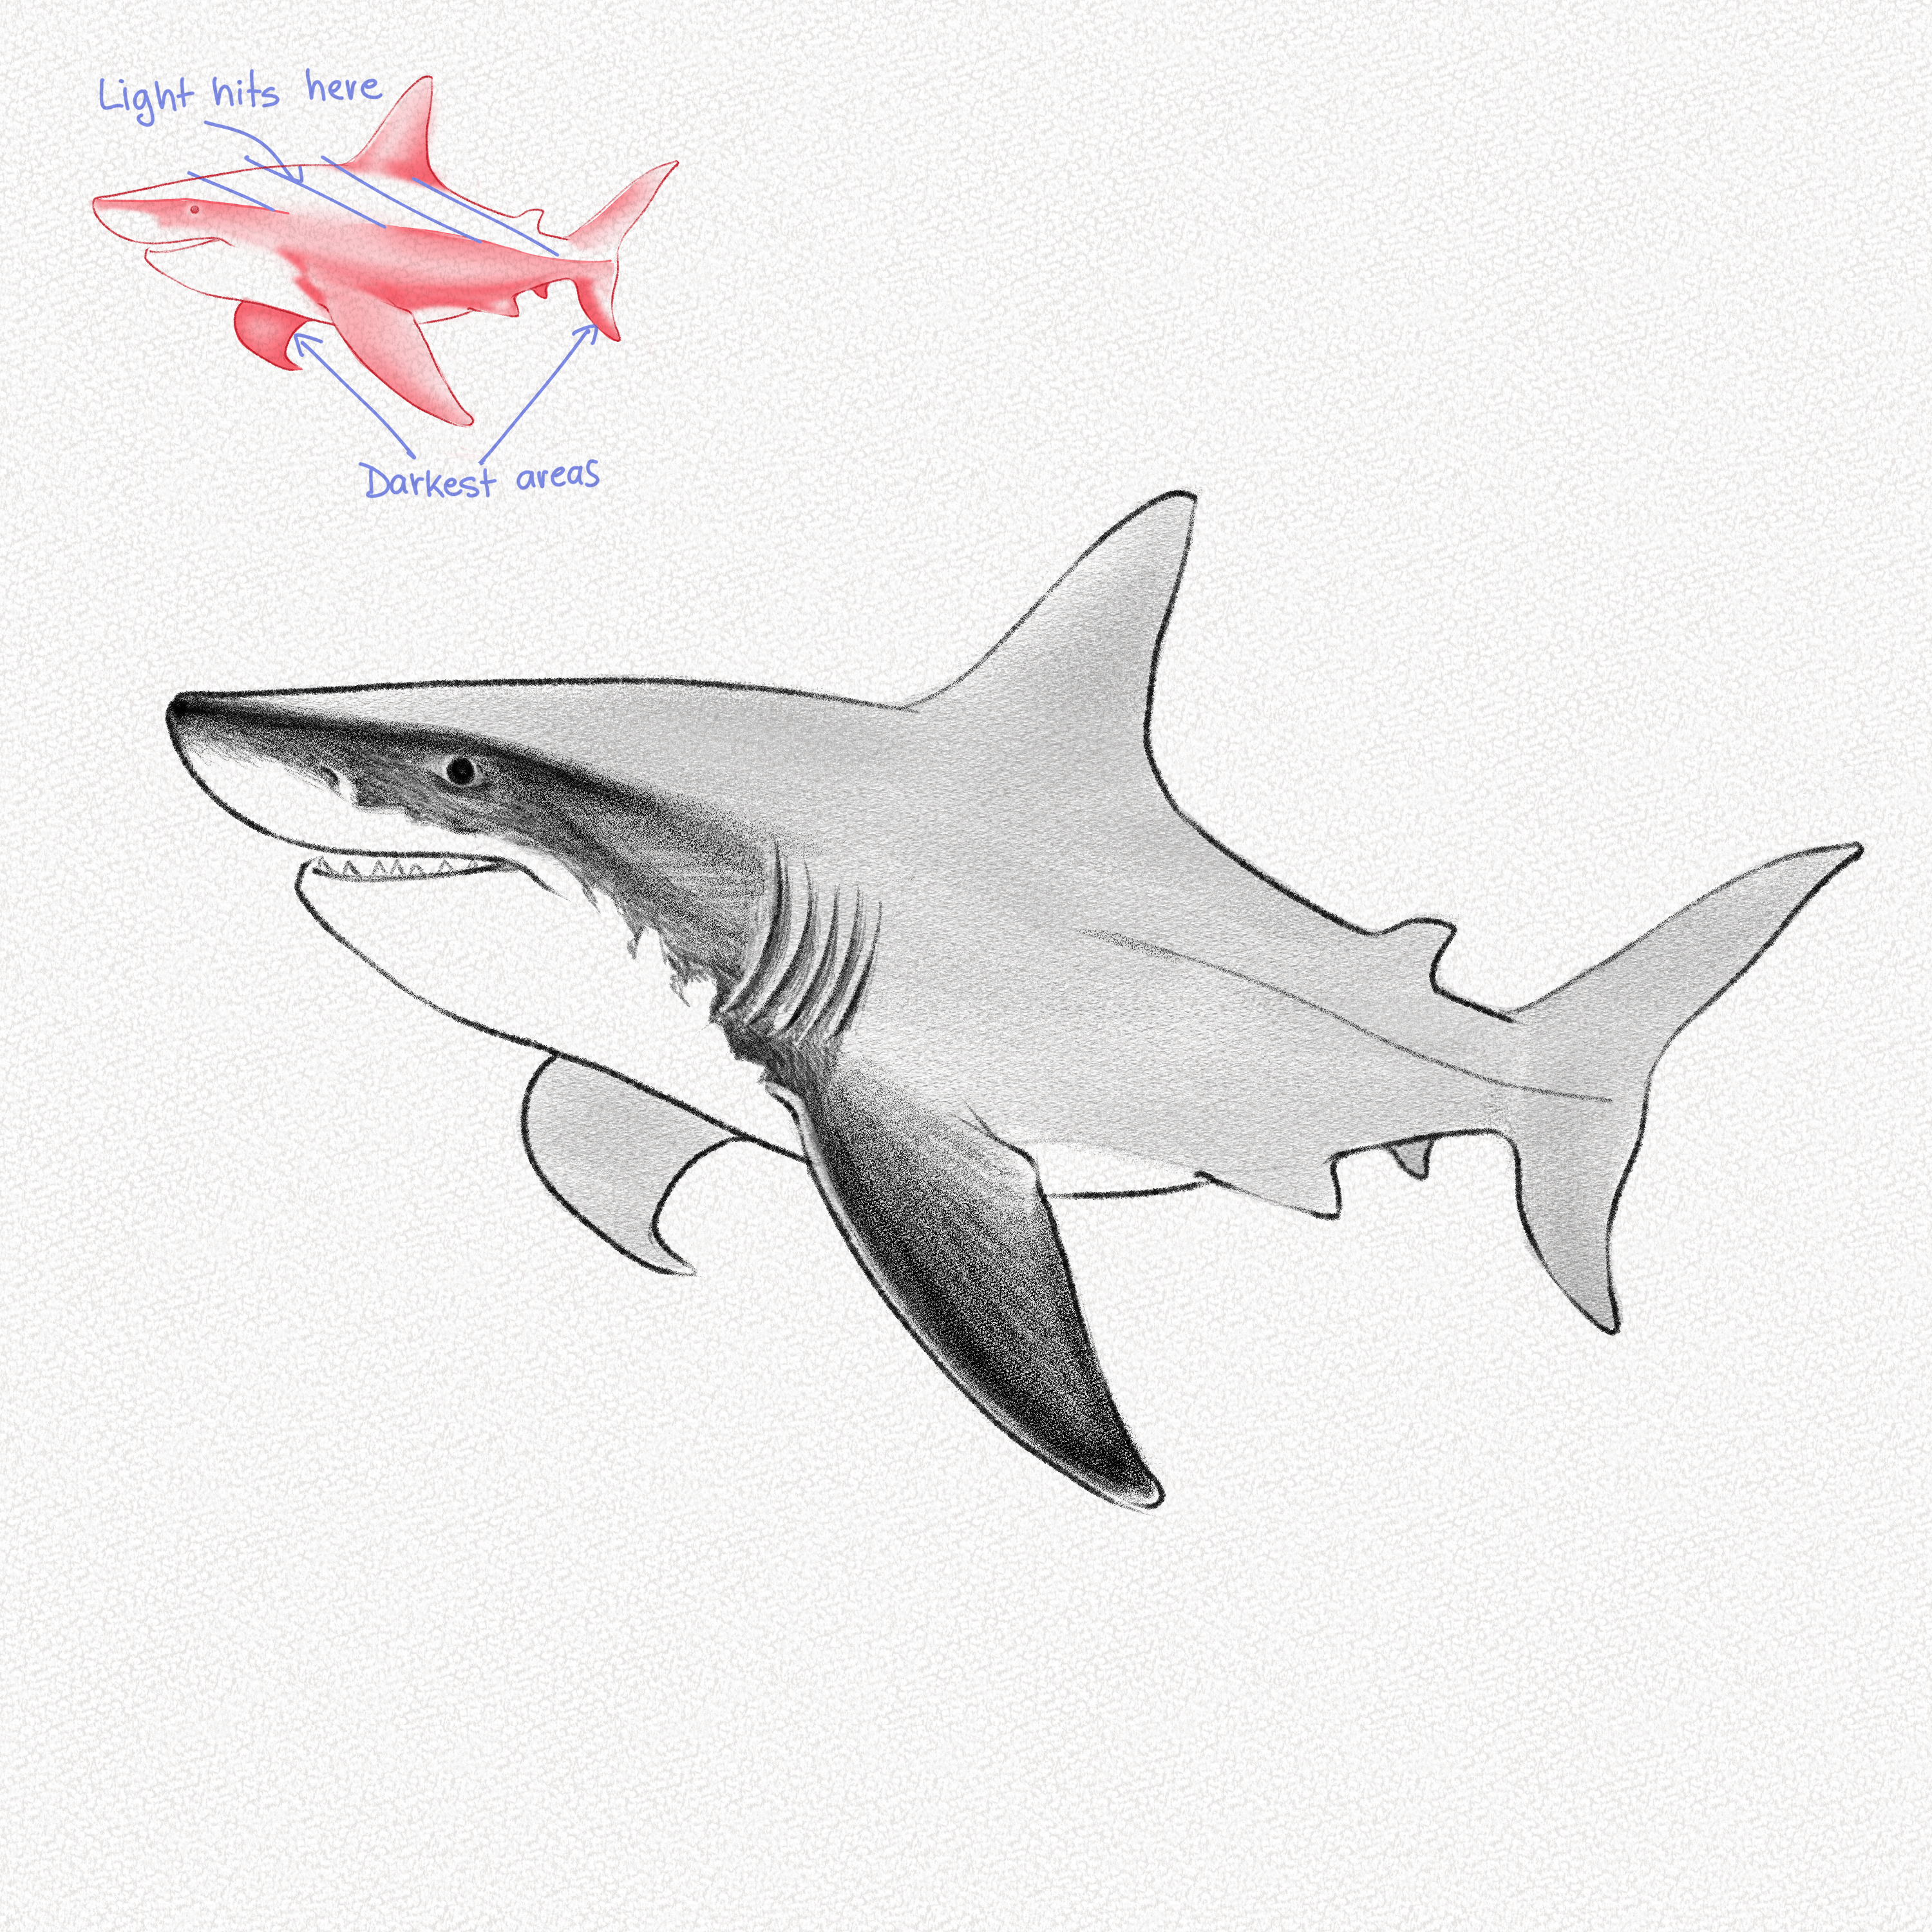
Step 22: Shade the body
Shade the shark’s body by doing the same gradient we did in Step 16. Lighten the values when reaching the middle part of the shark’s body (near the left fin) since, due to the fin’s movements, that part is more curved and receives more light than the rest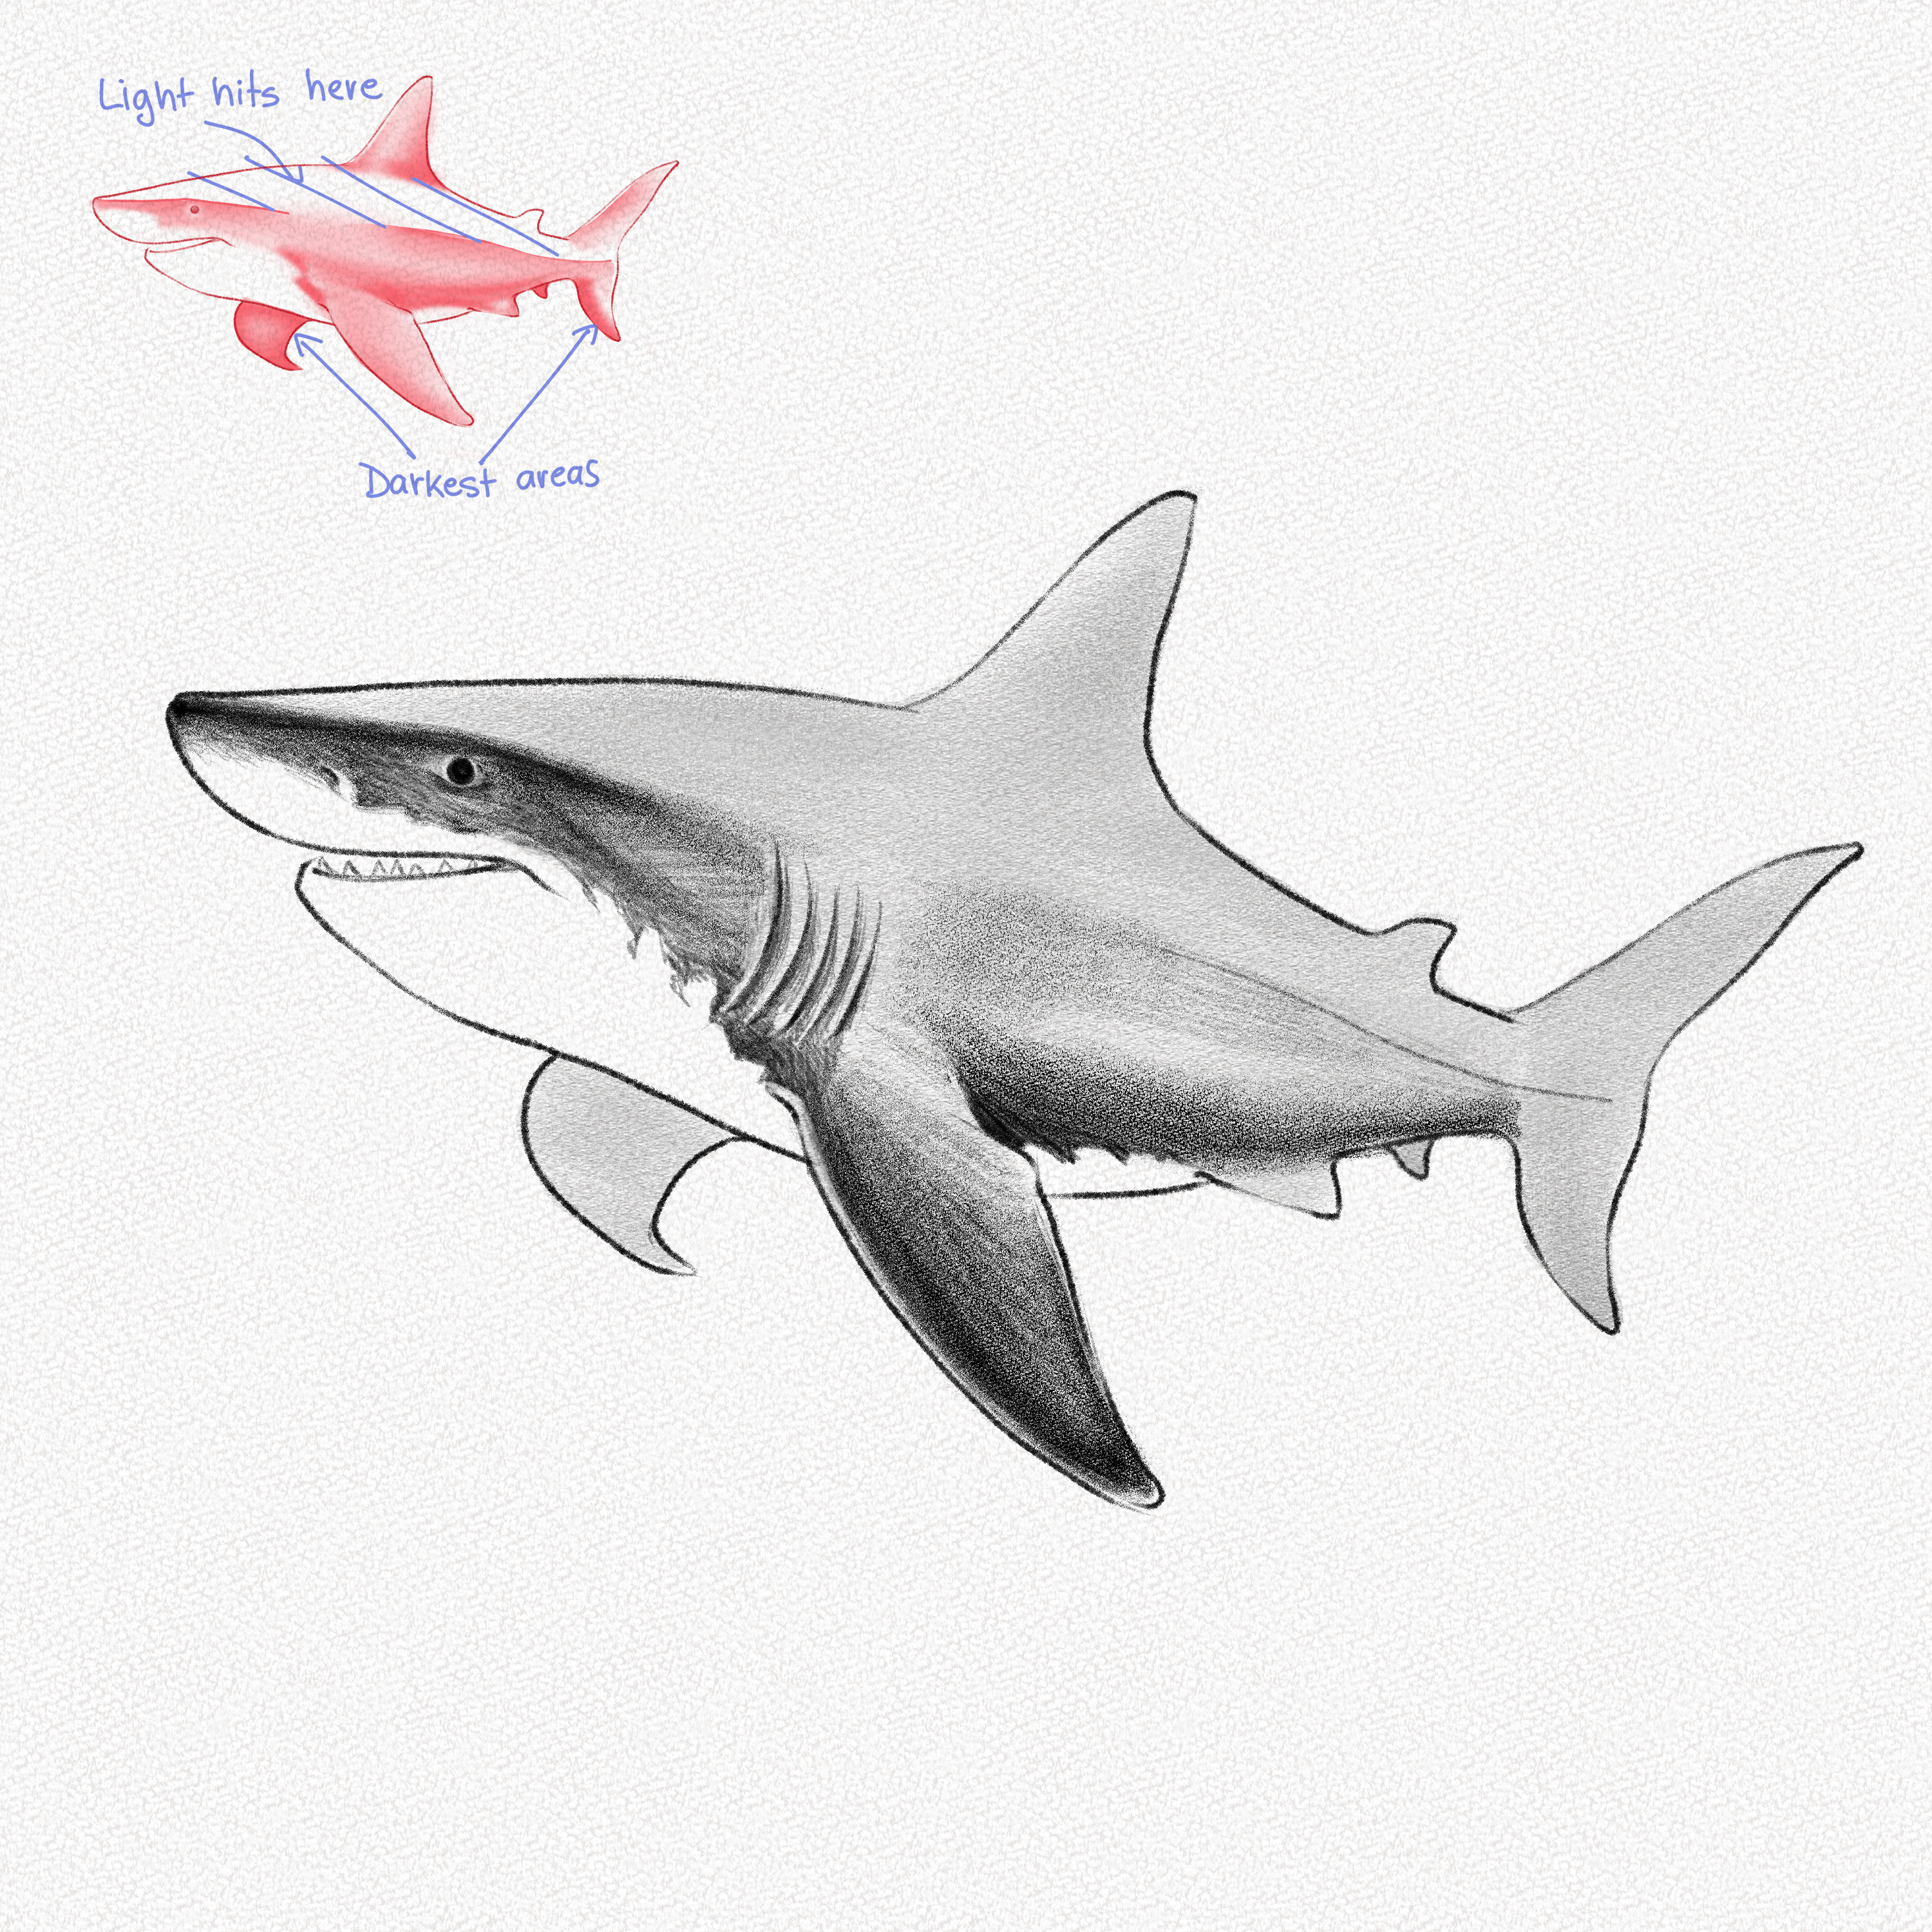
Step 23: Shade the Tail
Follow the red diagram below to shade the tail, leaving the borders lighter than the rest. Remember to use the darkest values for the base of the tail since the light is not reaching that part.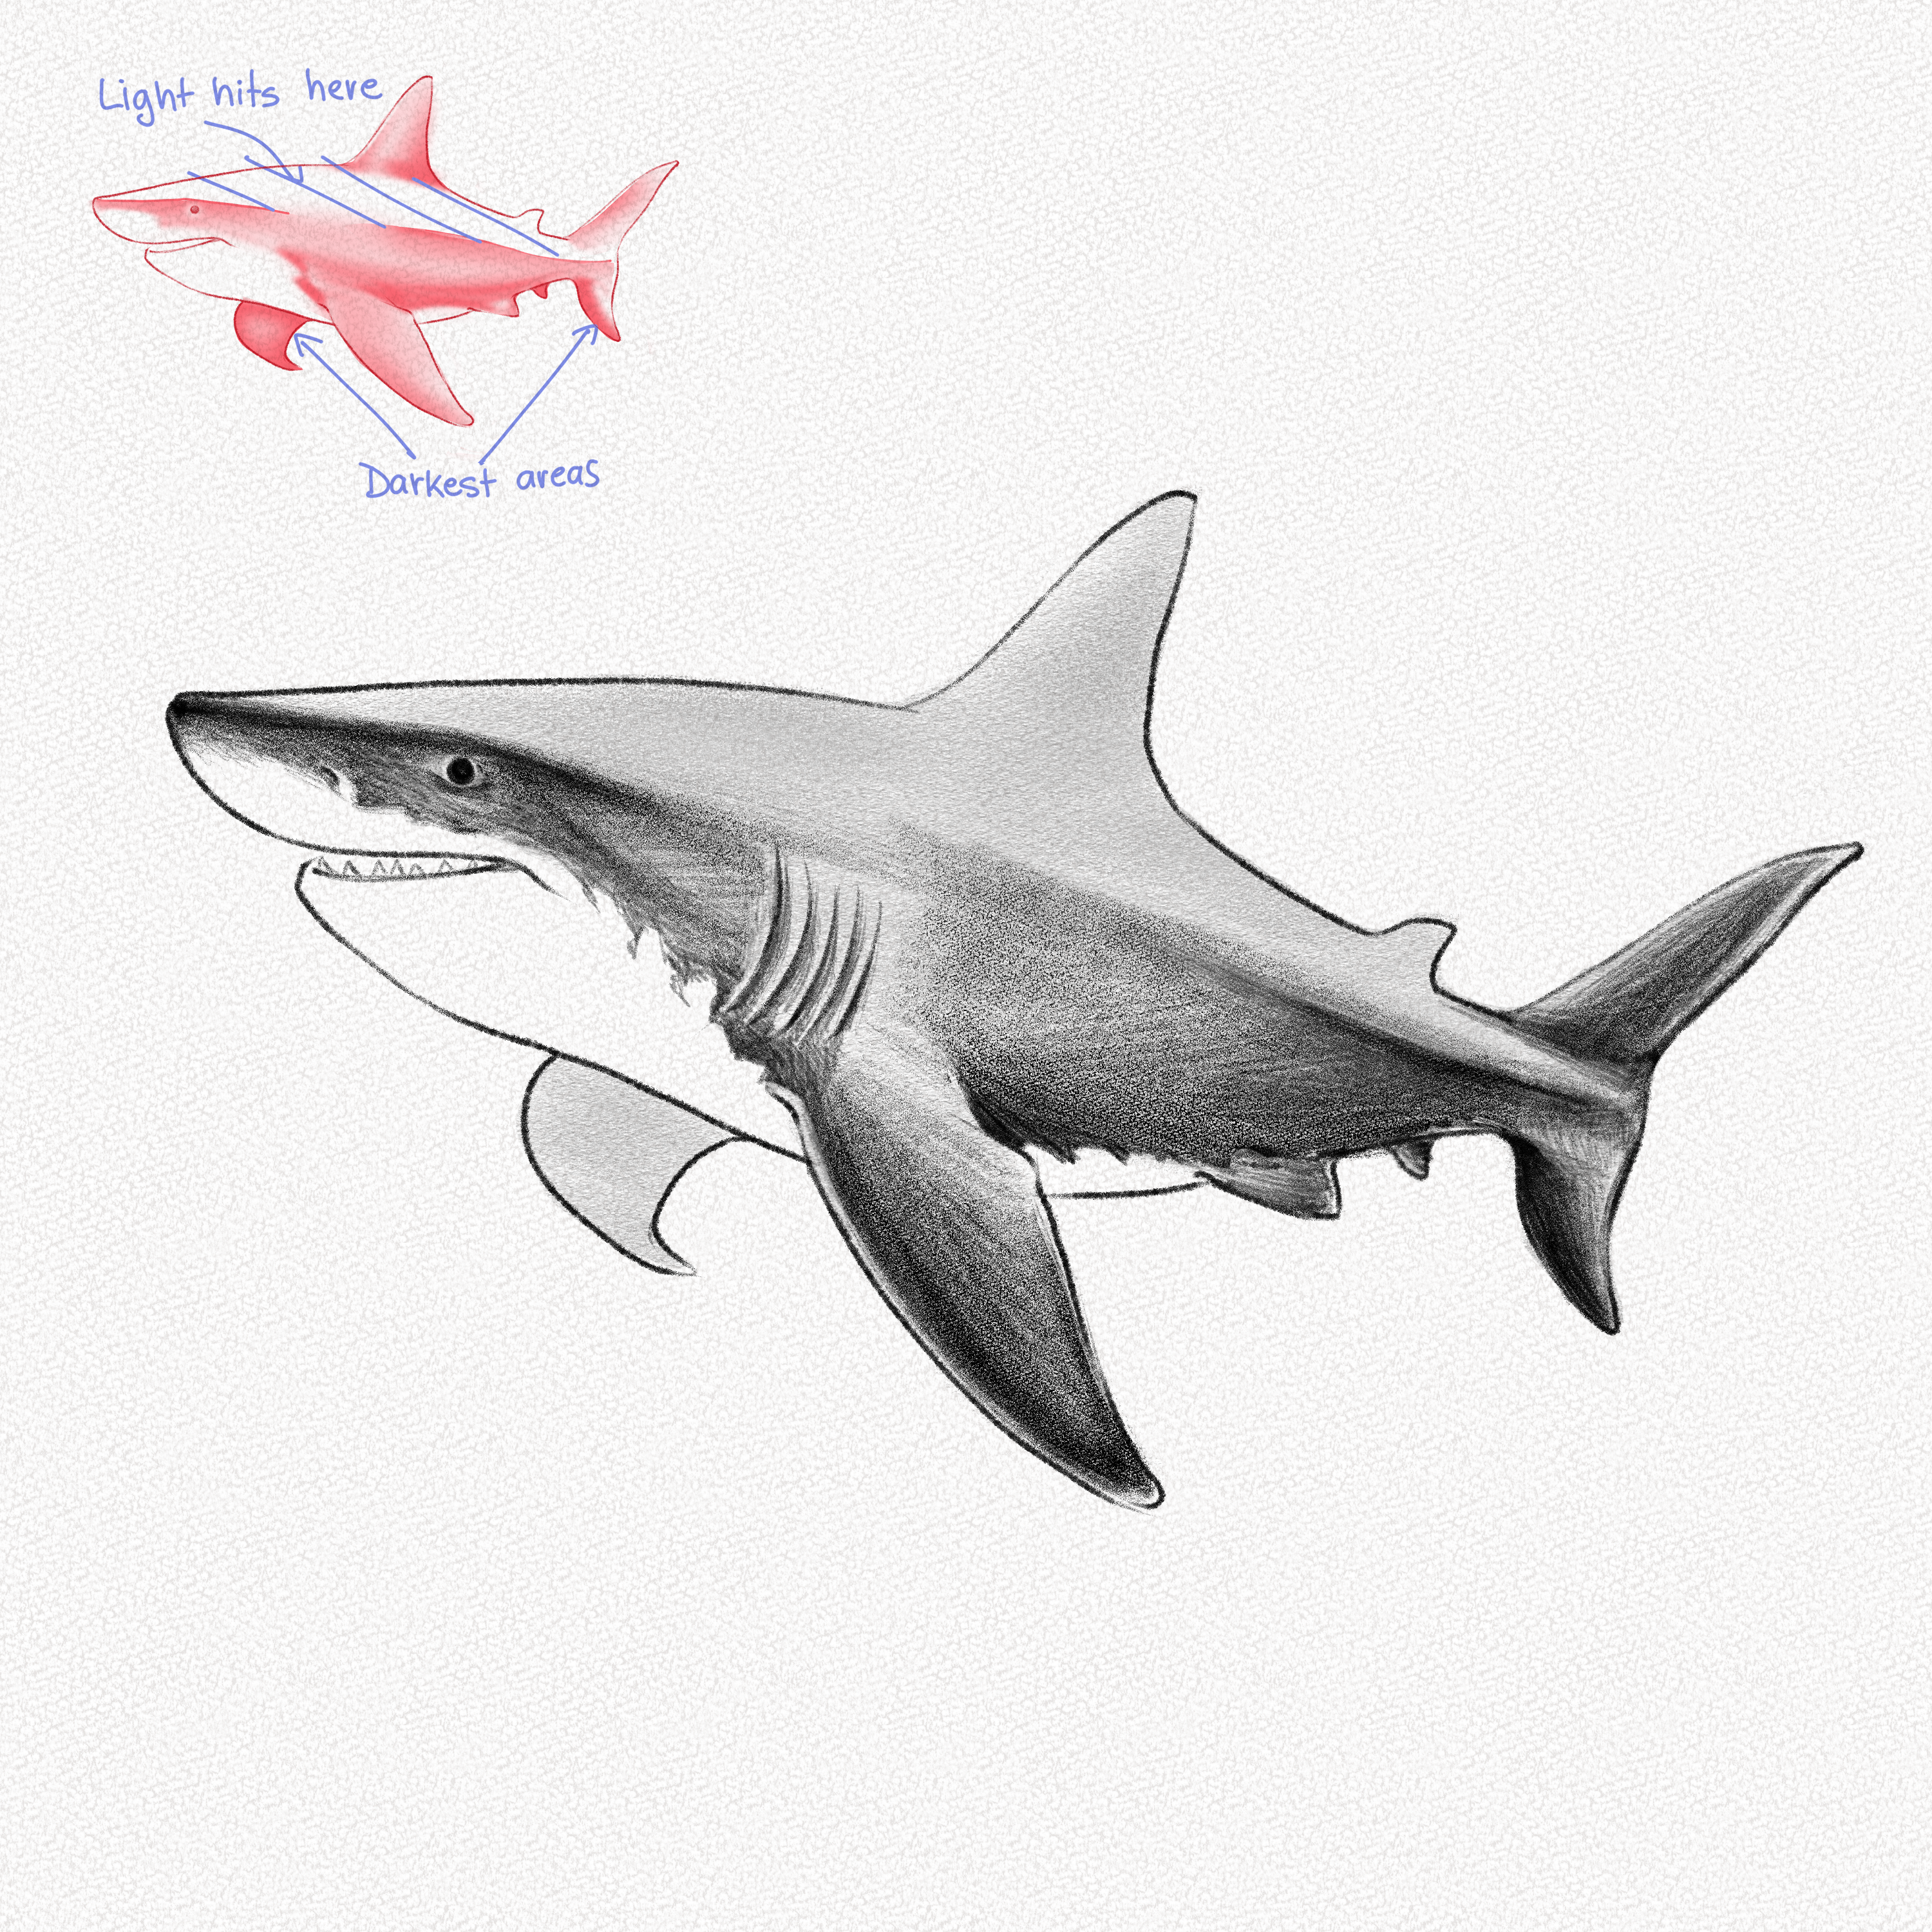
Step 24: Shade the upper body
With your 4B pencil, softly shade the upper part of the shark’s body.
Step 25: Shade the upper and left fin
Shade the upper fin, darkening the value in the part that is closest to the head. Leave a white border, or use your Tombow mono zero to add highlights to that part. Shade the right fin, too; remember that the visible part of this fin doesn’t receive direct light, so it’s one of the darkest parts of our shark.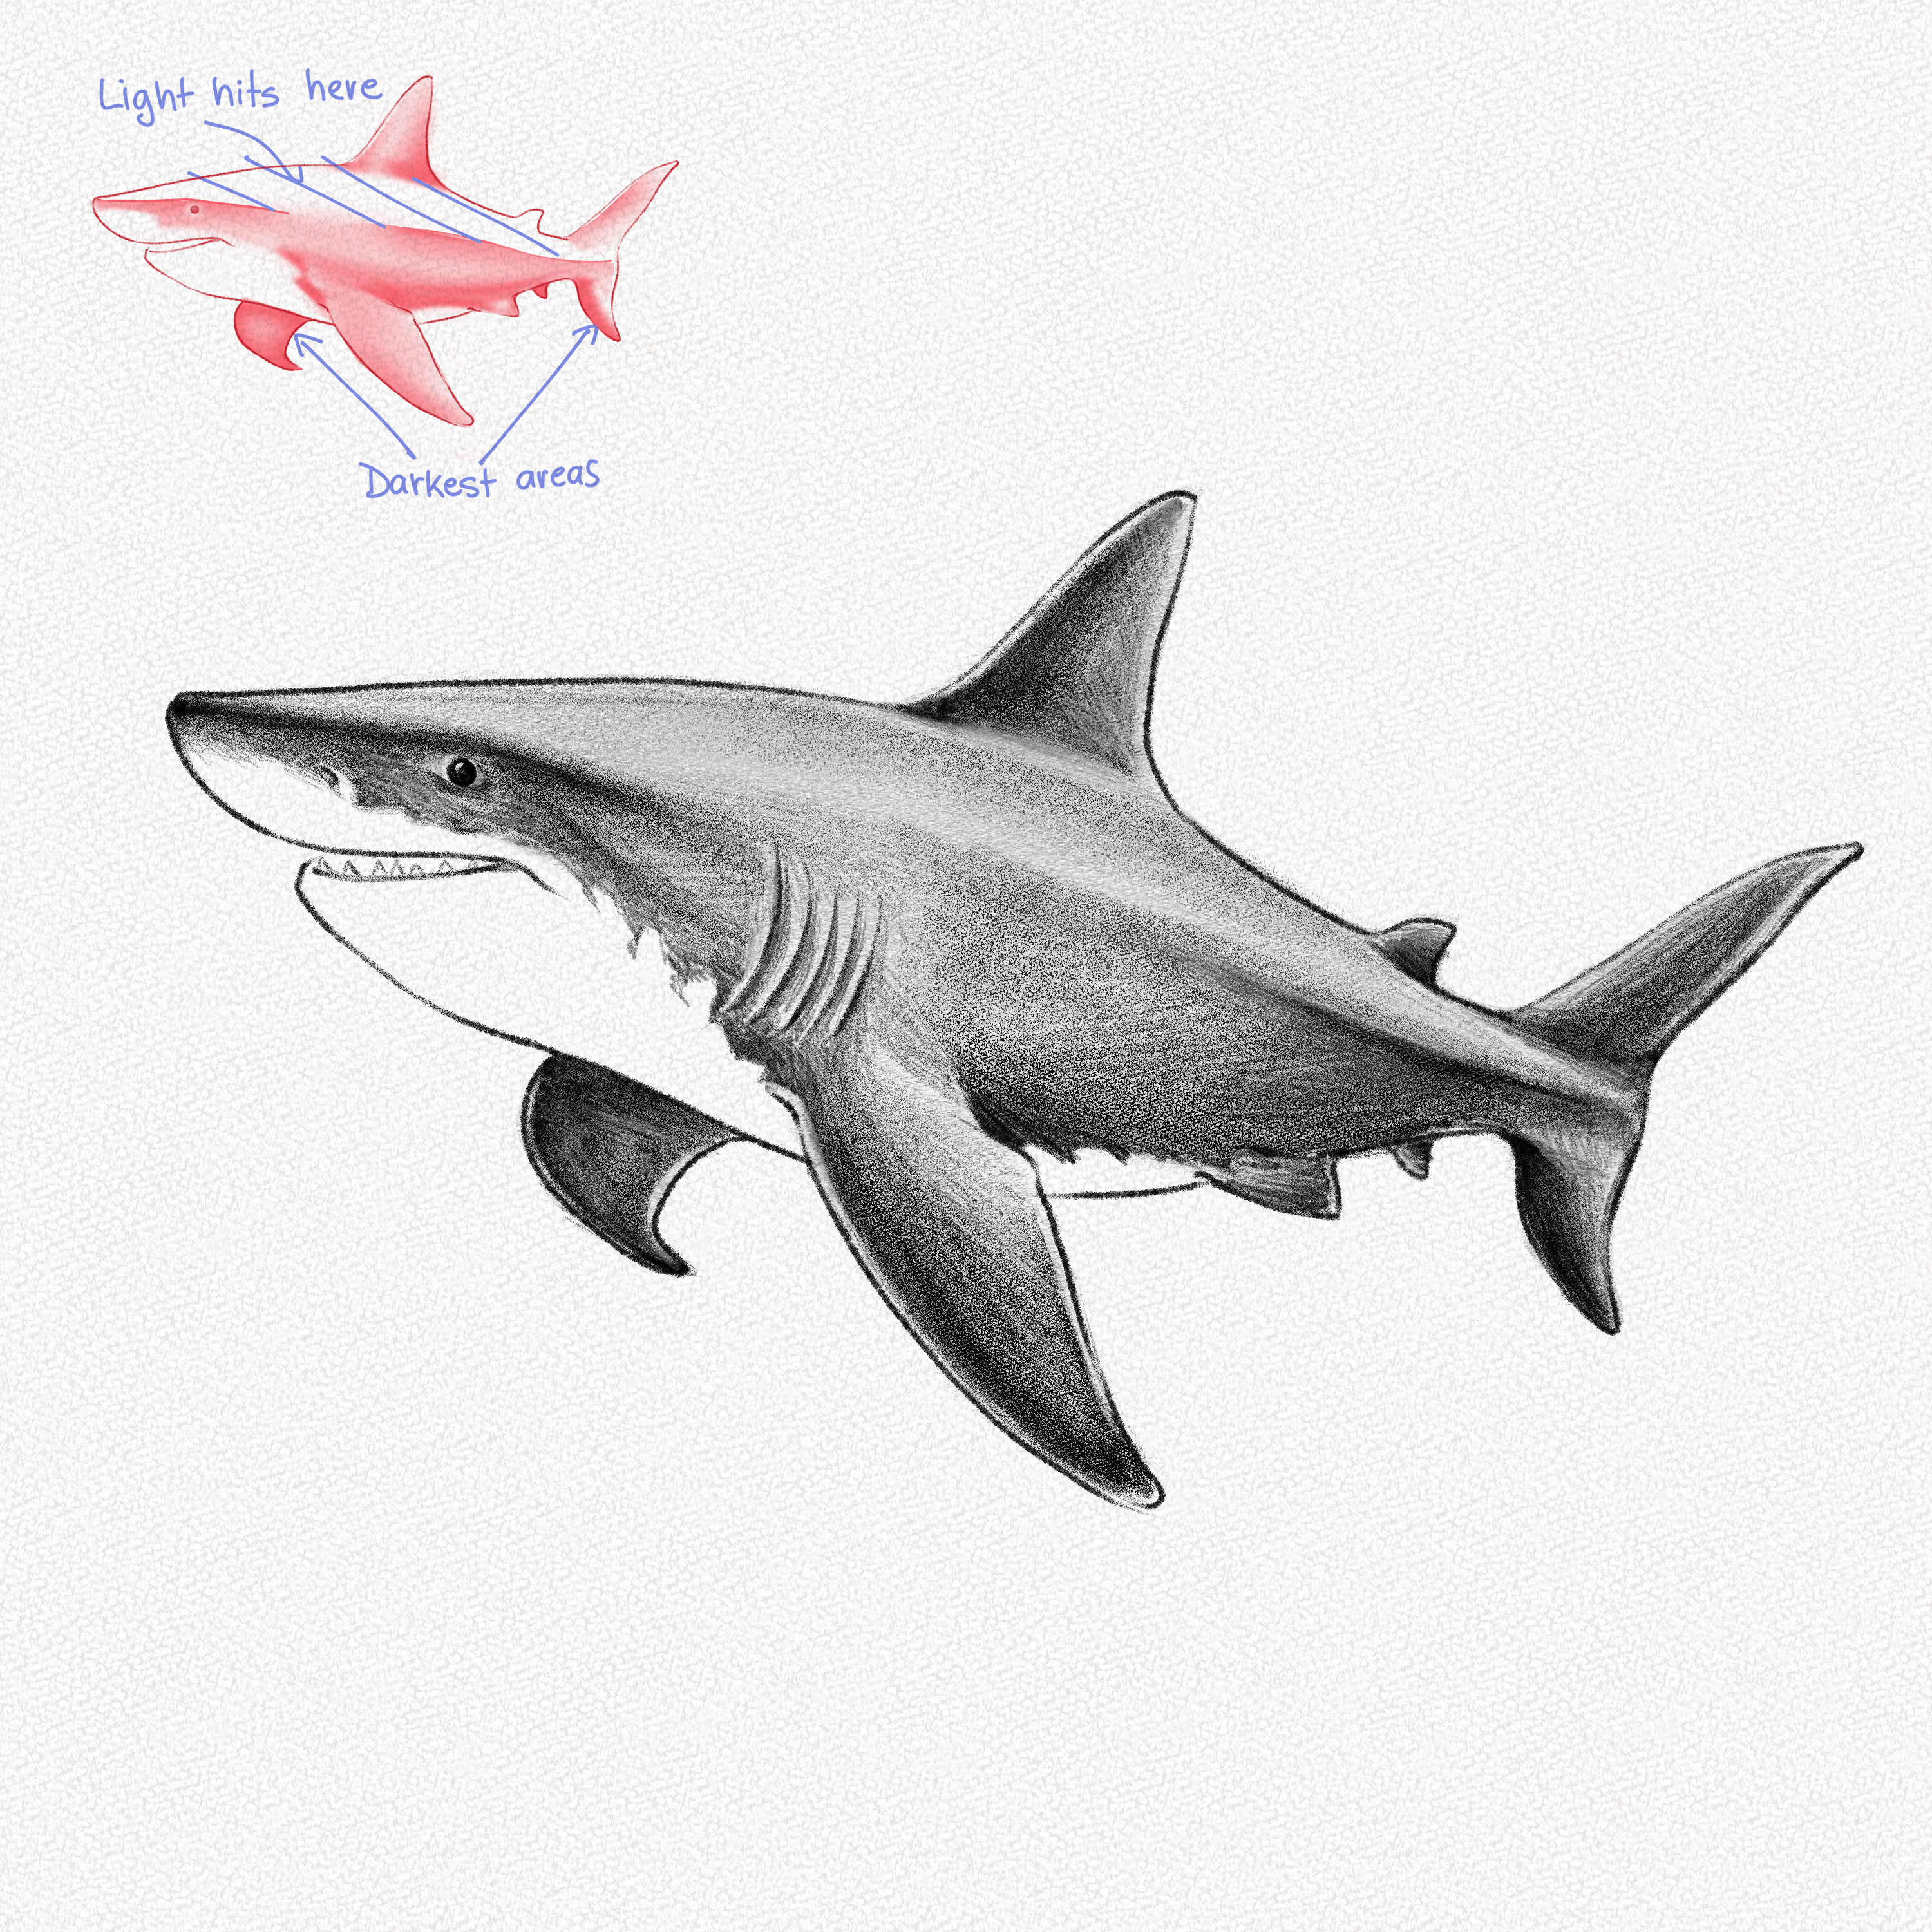
Step 26: Shade the belly
The belly is white; however, since it’s affected by light and the shark’s position, we are going to shade it with our 4B pencil creating a soft gradient, leaving only the sides of the shark with the lightest values.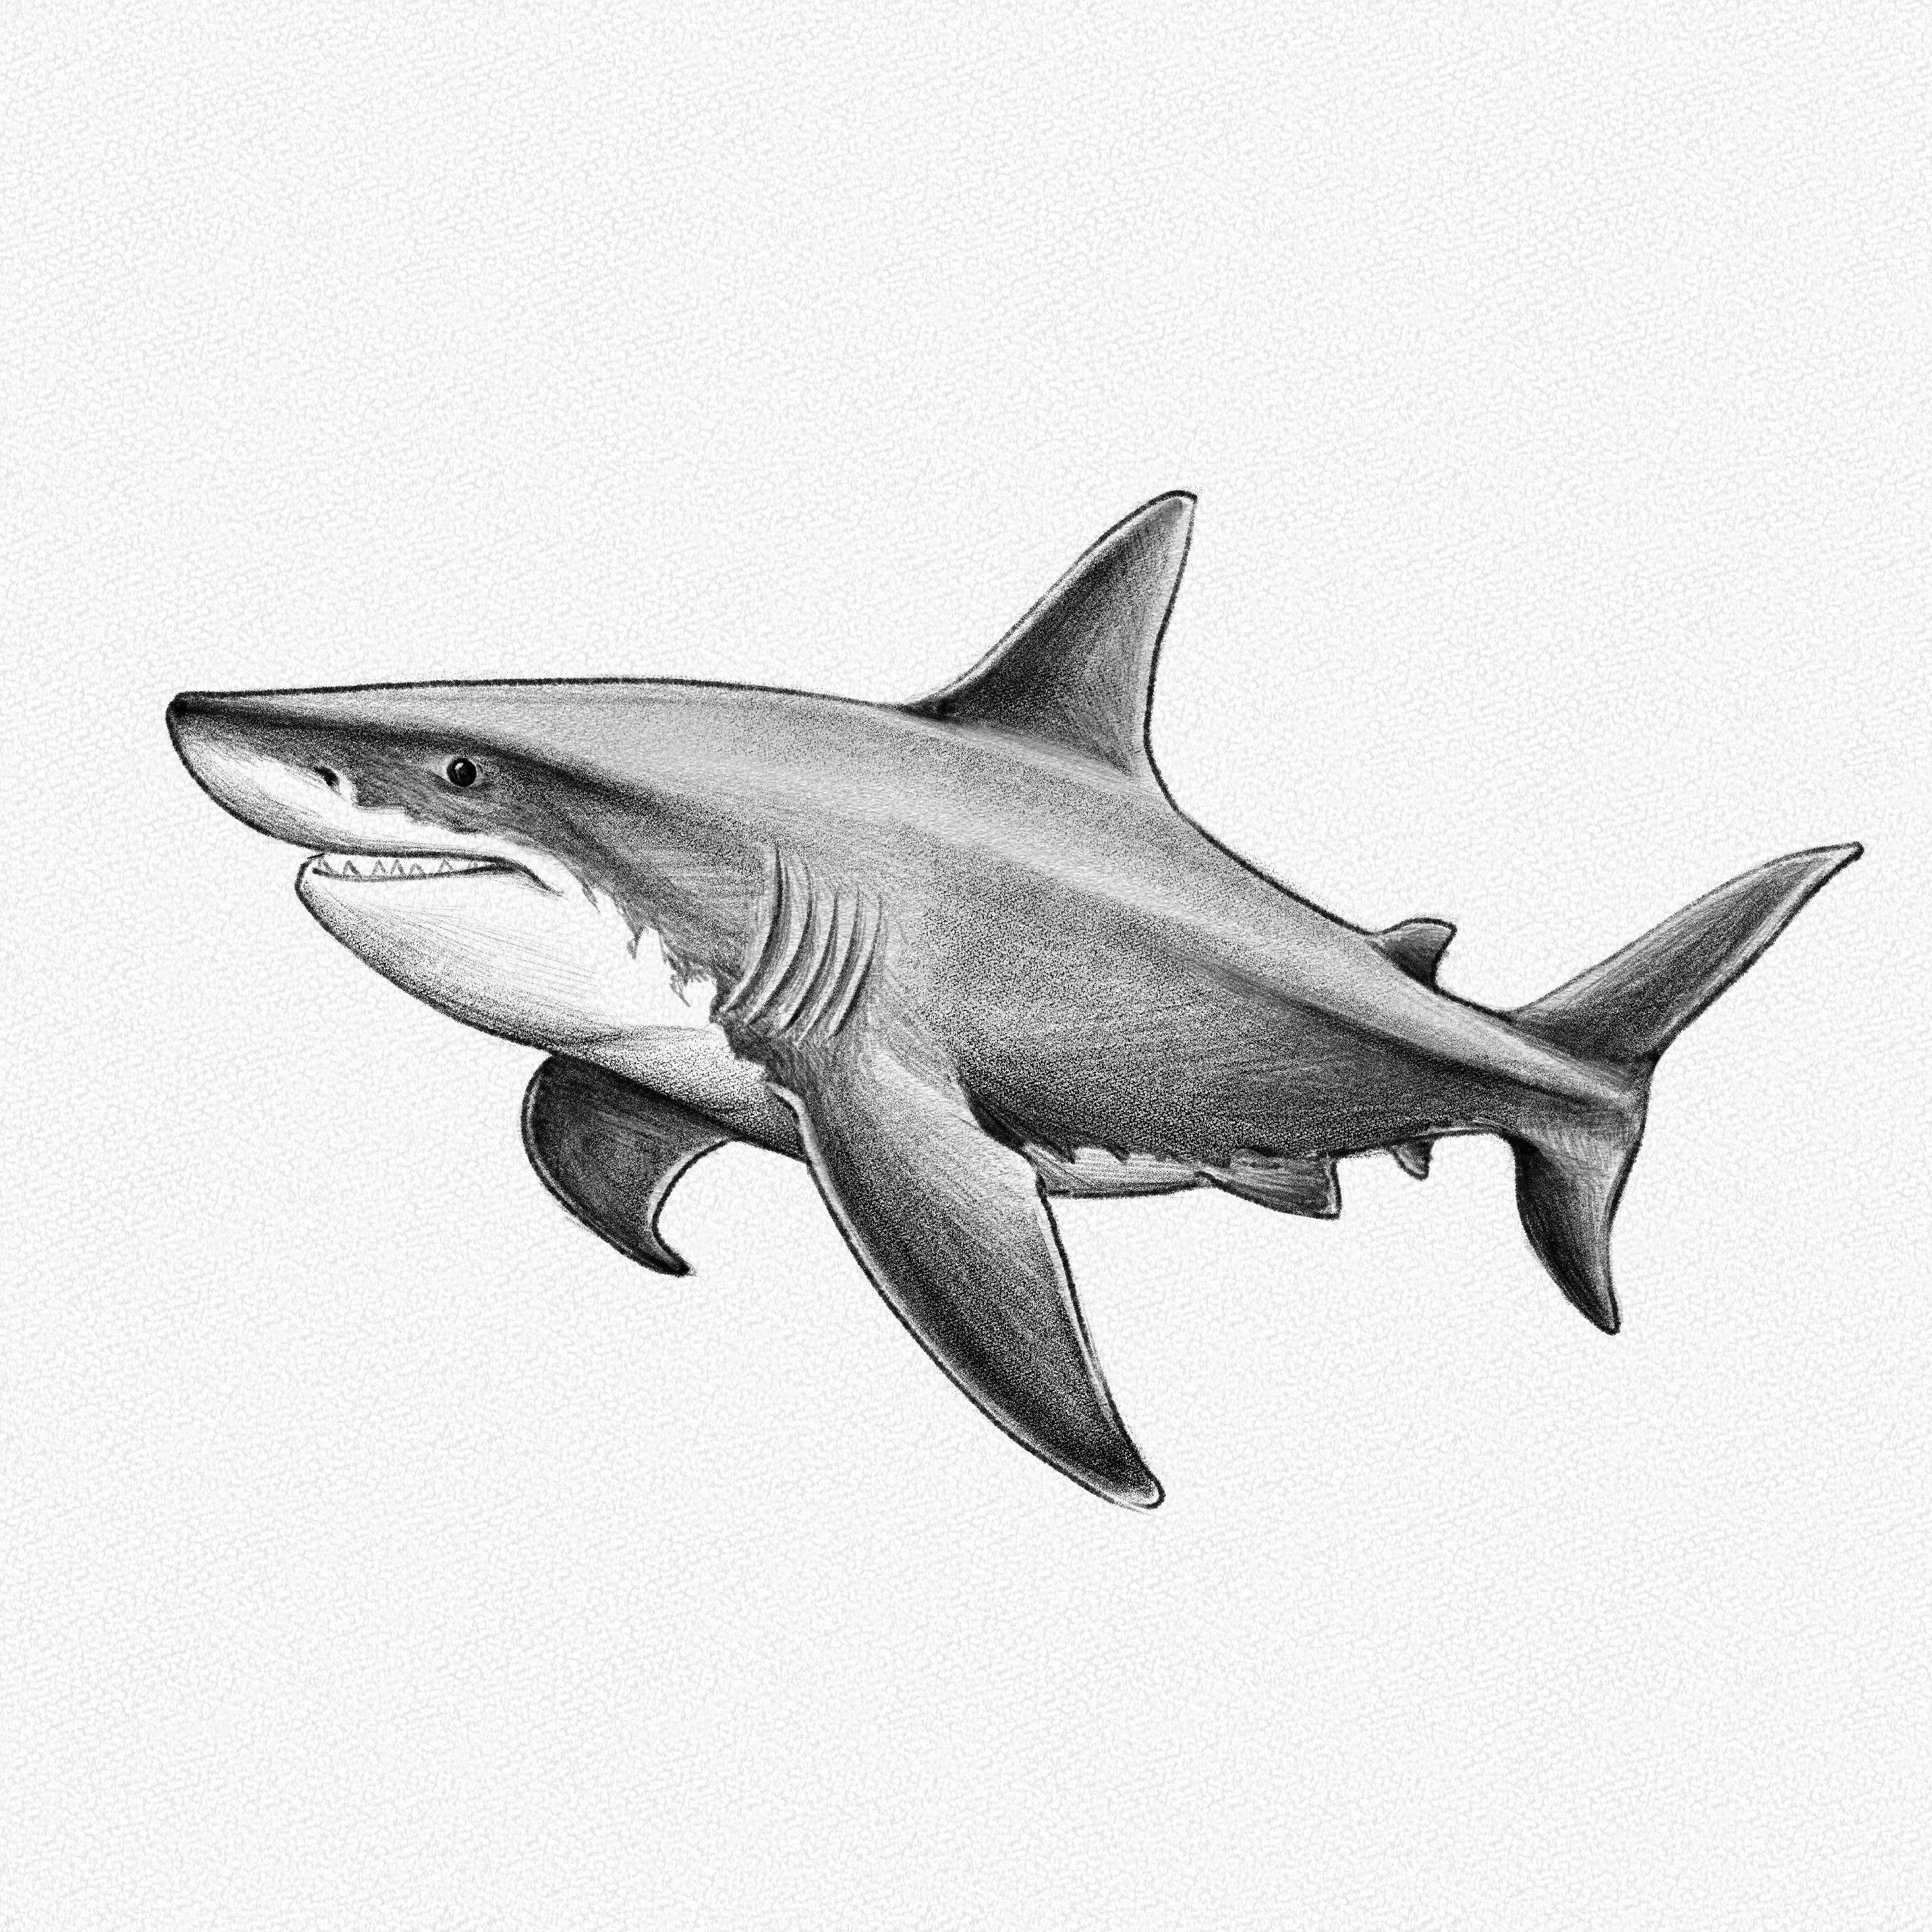
Step 27: Shade the mouth
Shade the shark’s mouth by applying enough pressure and graphite layers to create a very dark shade; leave the teeth white but shade the bases following the curved teeth’s volume.
Step 27: Add water
With powdered graphite and a soft brush or a cotton ball, create a gradient that mimics water. Add some highlights with your kneaded erasers, and you now have a beautiful shark swimming underwater.
That’s it. You’re done!
Congrats! We hope you had a good time and enjoyed the tutorial!
Working with shapes underwater can be tricky, especially if those shapes are not smooth and uniform; however, almost nothing in nature is completely smooth or uniform, so learning how to shade and create volume with your pencils is a great exercise for artists of any level.
Remember that making mistakes is part of the learning process, so if you don’t do perfectly on your first couple of tries, it’s totally ok. You can read and visit our other tutorials to learn more about drawing and shading techniques.
Thank you for joining us on this adventure, and happy drawing!