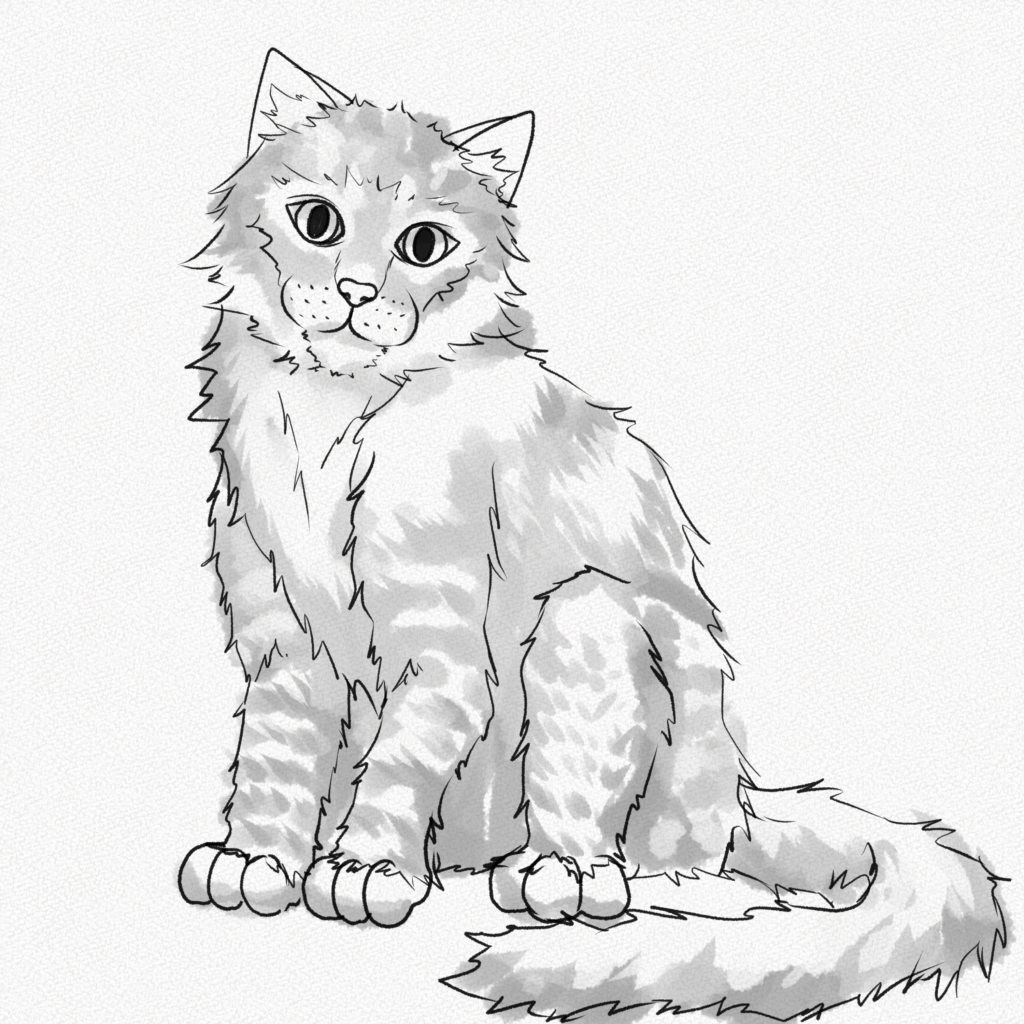
Do you want to learn how to draw a realistic cat? Then you’re in the right place! I’m going to show you step by step how to draw a cat from the basic shapes to the final details.
Here’s the final result! Make sure to follow the step by step to do a drawing like this!
 What you’ll learn:
- The structure of a cat’s body
- The structure of a cat’s face
- How does cat fur works and how to shade it?
Materials needed:
- A piece of paper (any paper will do in a pinch, but we really like these papers from Fabriano)
- A graphite pencil
- Eraser
- Fine Liner
Video Tutorial
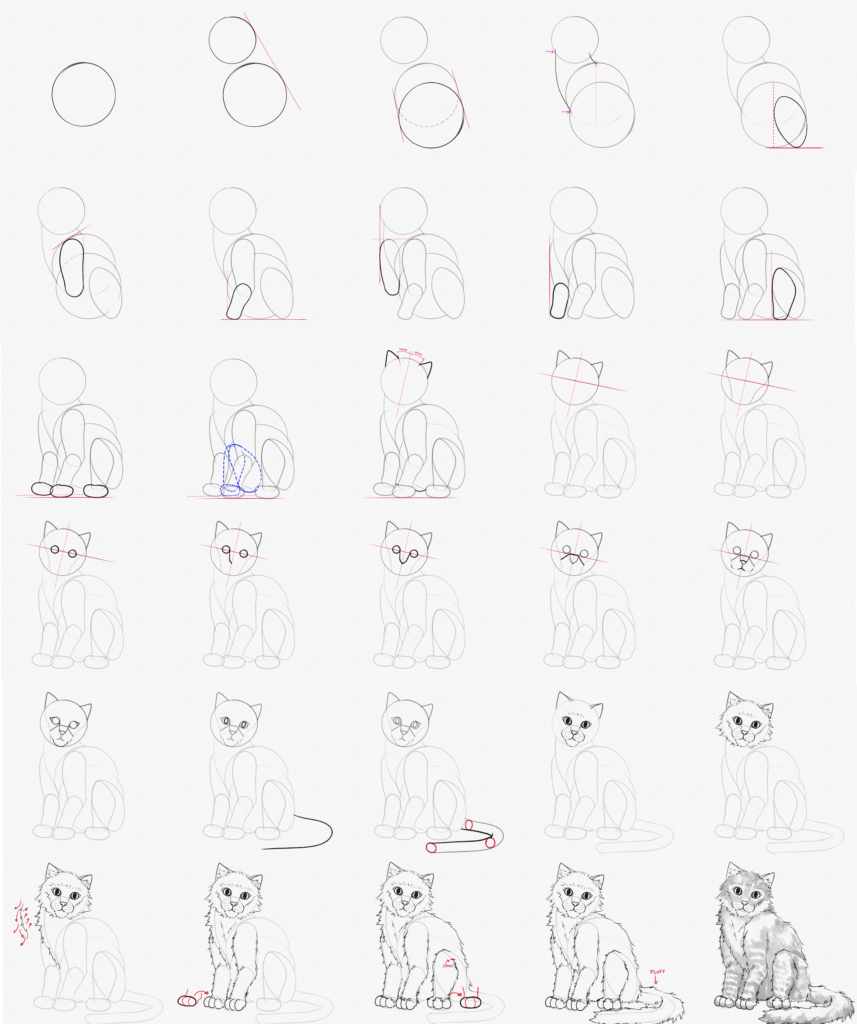
You’ll follow simple step by step instructions that will make this drawing easy and fun. Take a look at all of our steps here:
Let’s begin!
Section 1: Drawing a Cat’s Body Structure
For these steps, we’re going to use a piece of paper (we recommended these Fabriano Papers), a soft graphite pencil (either a mechanical drawing pencil or classic wood pencil is fine) from the gradation HB to 4B, and an eraser.
Step 1: Draw a circle
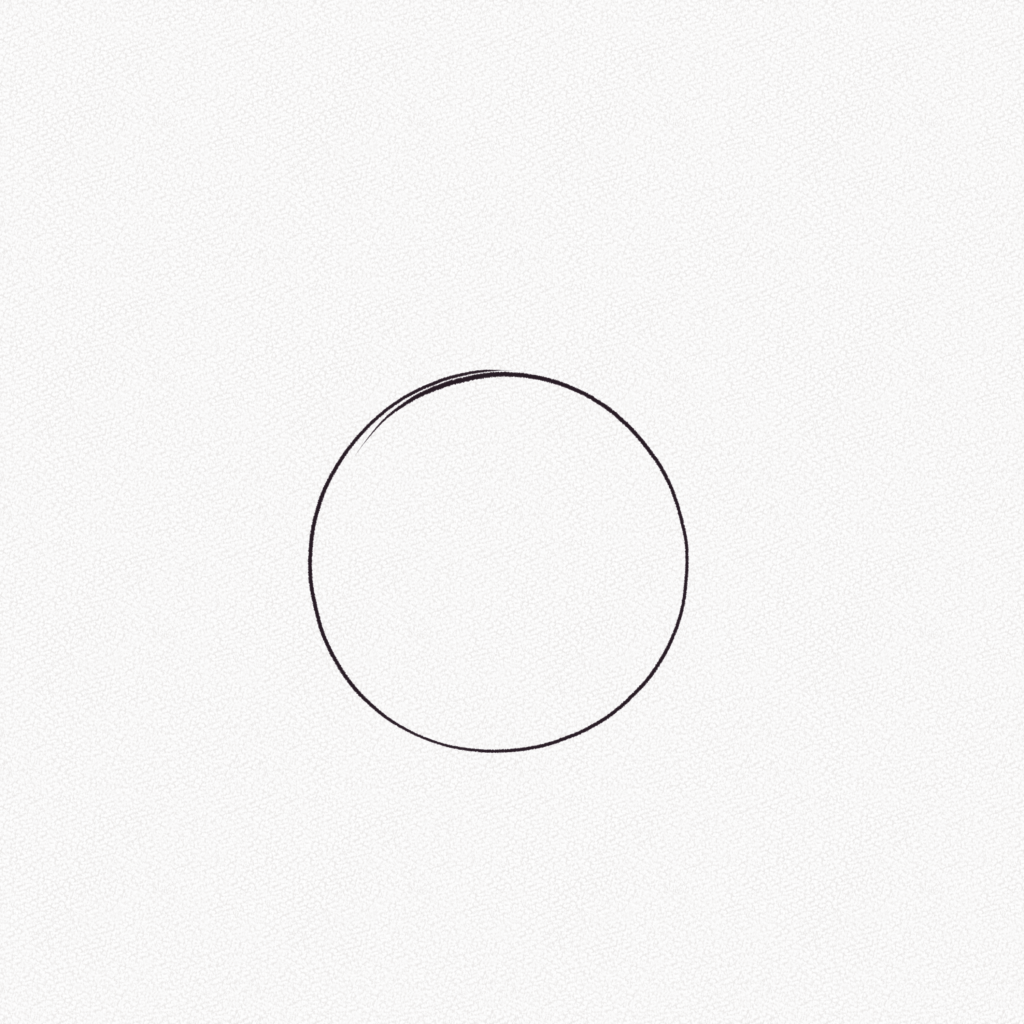
In the lower middle of our canvas, we’re going to draw a big circle, this will be the middle part of our cat’s body so we’ll have to make it according to the size you want your cat to have.
Step 2: Draw a smaller circle above
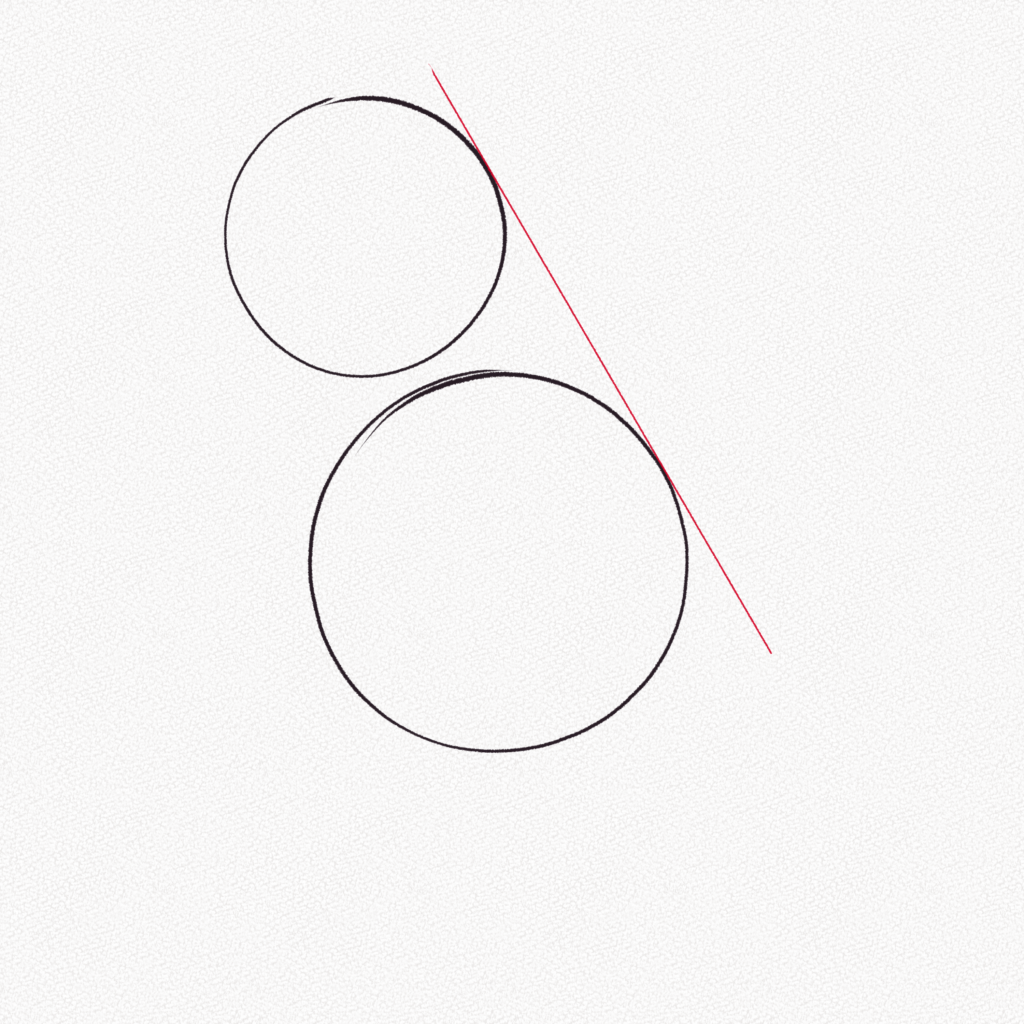
This will be our cat’s head, the smaller circle is about ⅔ of the first one we drew, we’ll have to place it on top of our first circle making sure the side edges of the circles are in line with each other.
Step 3: Draw another big circle under
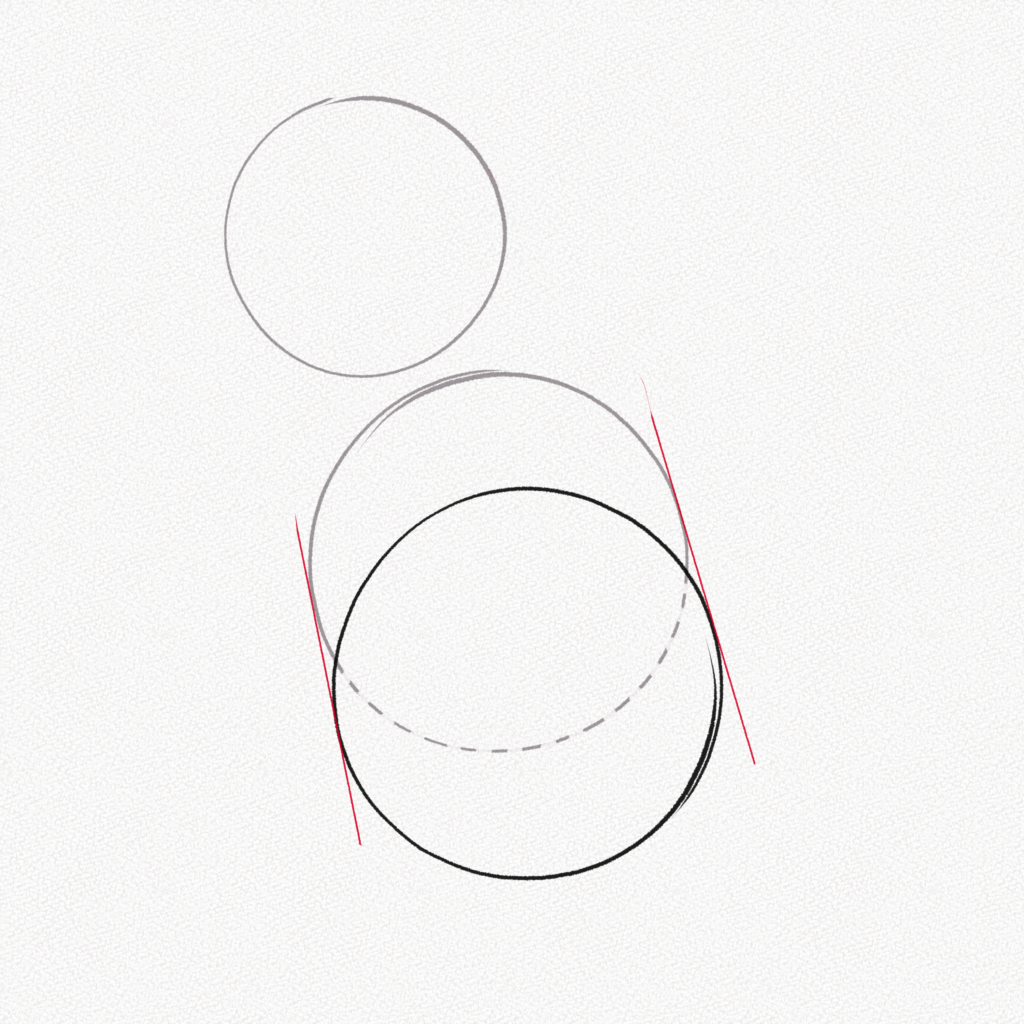
This circle will be our cat’s lower part and will be as big as we want our cat’s belly to be. The circle should be slightly moved to the right so our cat’s pose won’t look stiff.
Step 4: Draw two curved lines for the cat’s neck
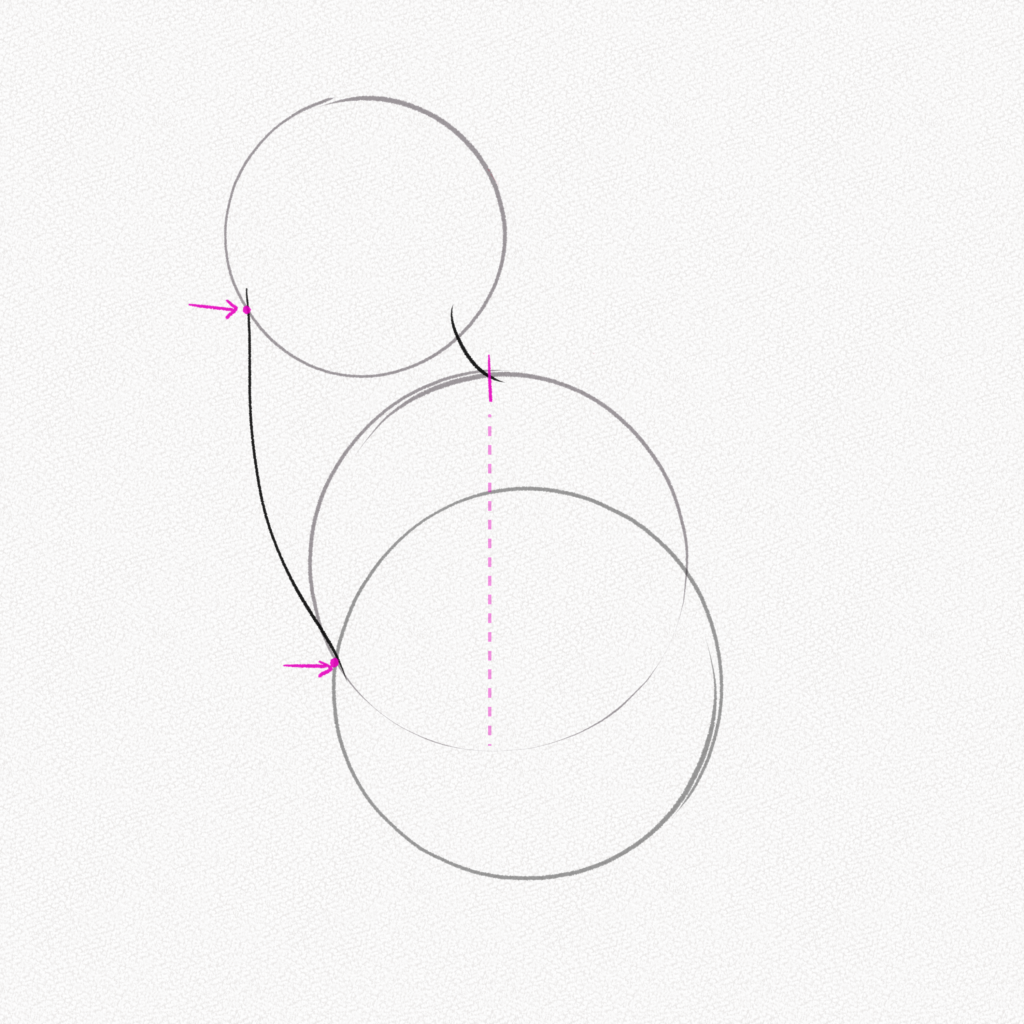
For this step, it’s very important that we connect the intersection between our two circles with the right side of our cat’s head (our left) with a curvy line. we’ll have to do the same for the other side of the neck, drawing a short but curve line to connect the middle of our first circle with the head.
Step 5: Draw a football-like shape
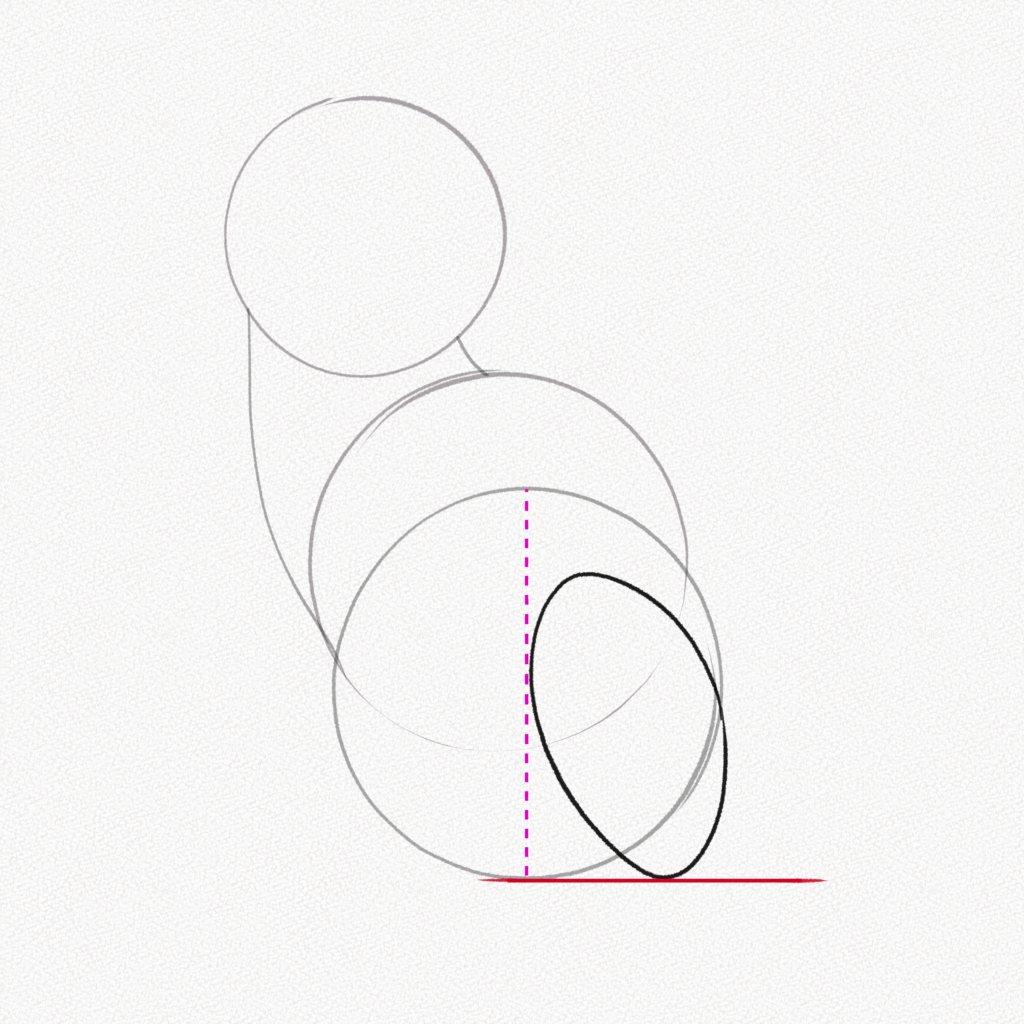
This shape will be the back leg of our cat (the other one is hidden by the fur) make sure not to make it wider than half of the size of our third circle, and it should align with the base of it.
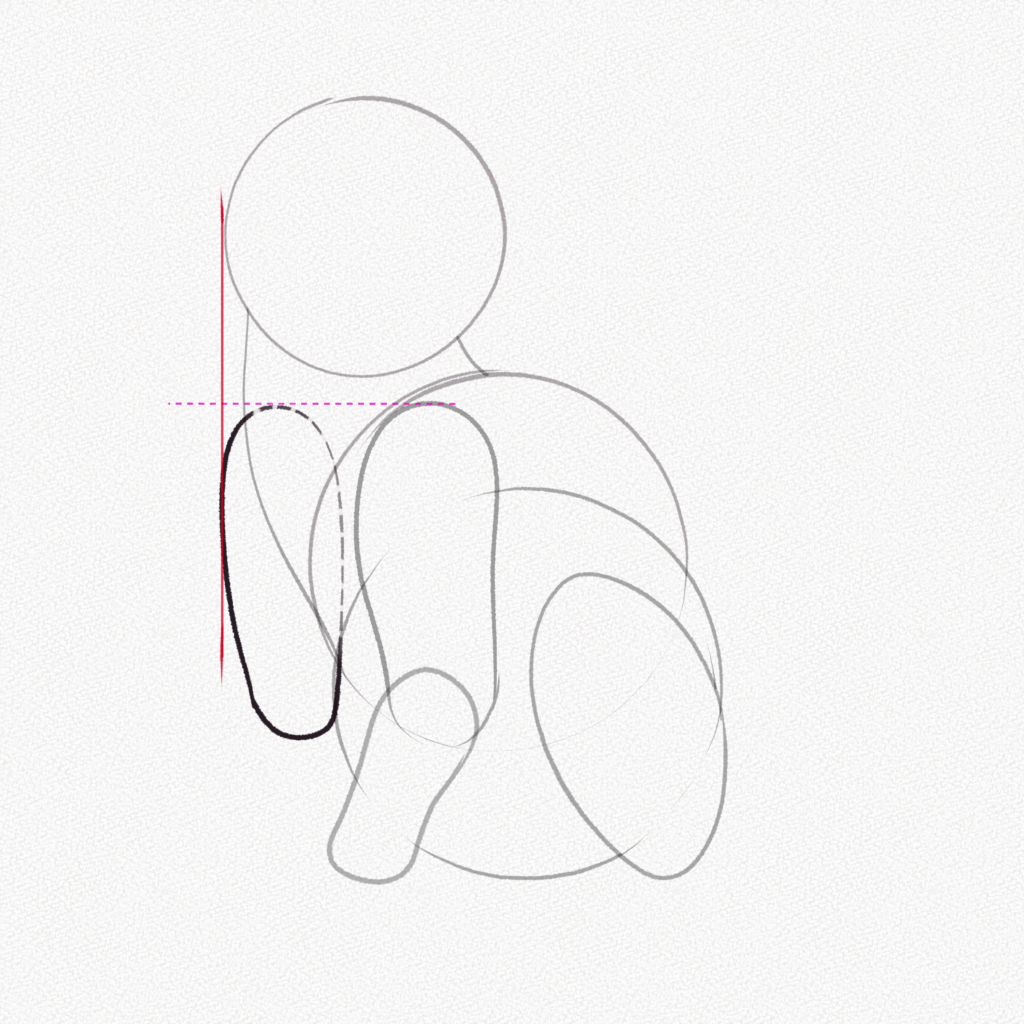
Step 6: Draw a cucumber-like shape
This shape will be the structure for the upper arm of our cat, make sure that it aligns with our first circle top as shown.
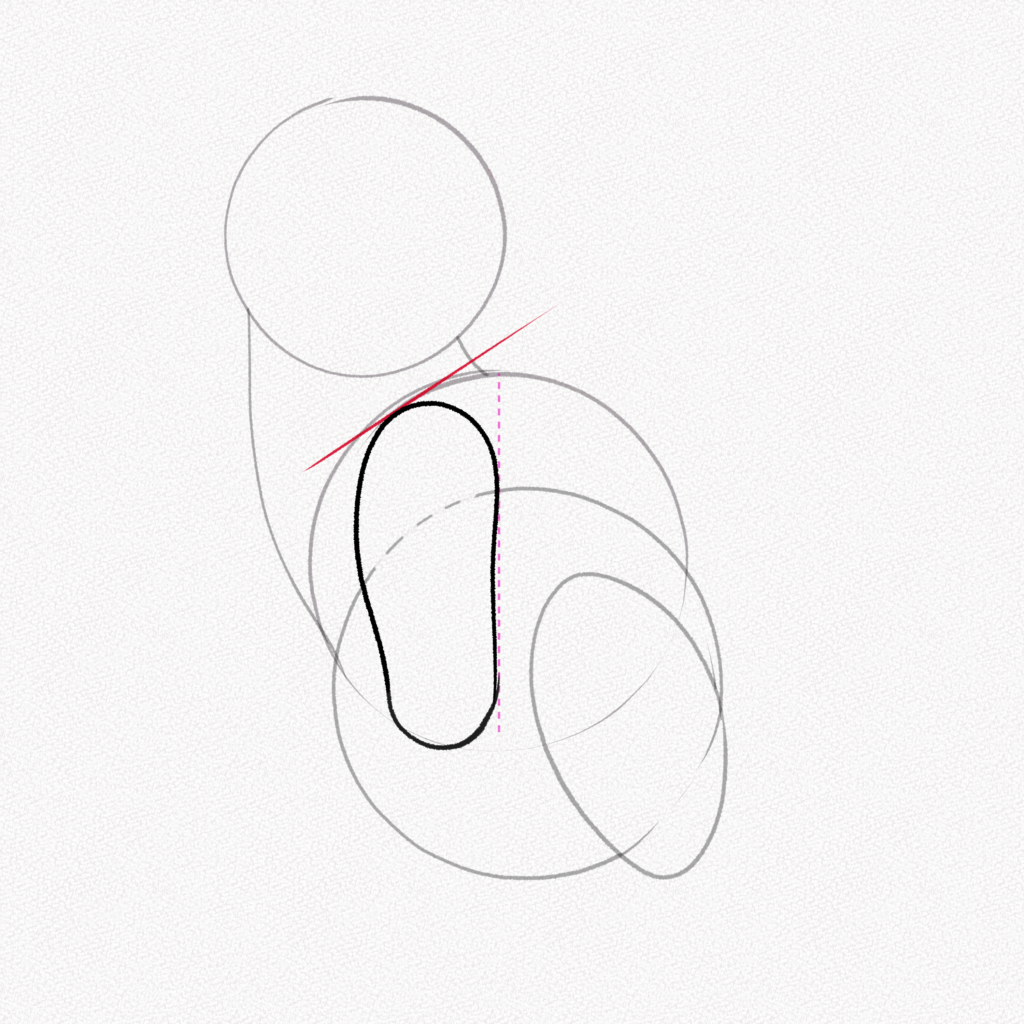
Step 7: Draw an elongated bean-like shape
This will be our cat’s forearm, make sure to make it slightly turned in the opposite direction of the upper arm shape since our cat is in repose.
Step 8: Repeat Step 6
Yes, draw another cucumber-like shape to make the other upper arm of our cat, take into consideration that some part of it will be hidden from our view by the fur and the cat’s body.
Make sure to align it with the side of the head and the other arm.
Step 9: Repeat Step 7
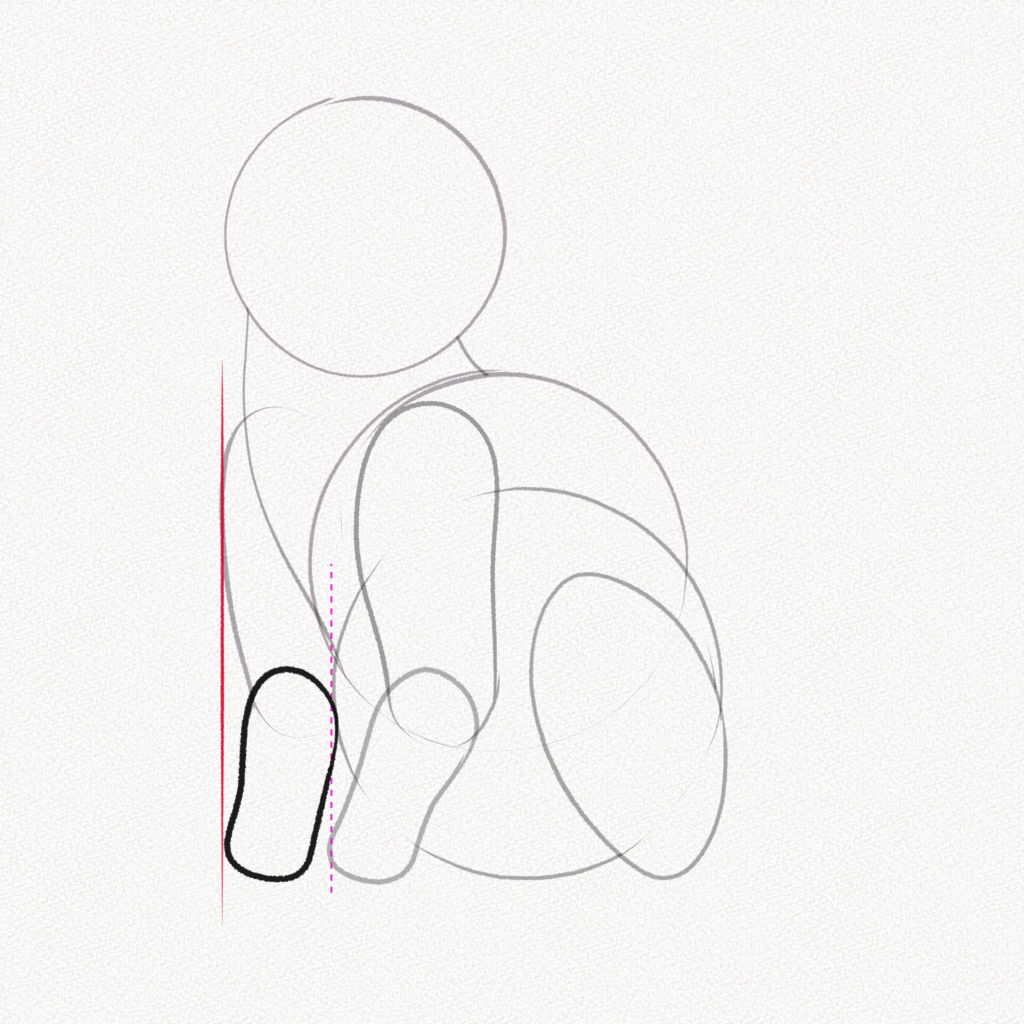
Yes, make another elongated bean-like shape to form the other forearm of our cat.
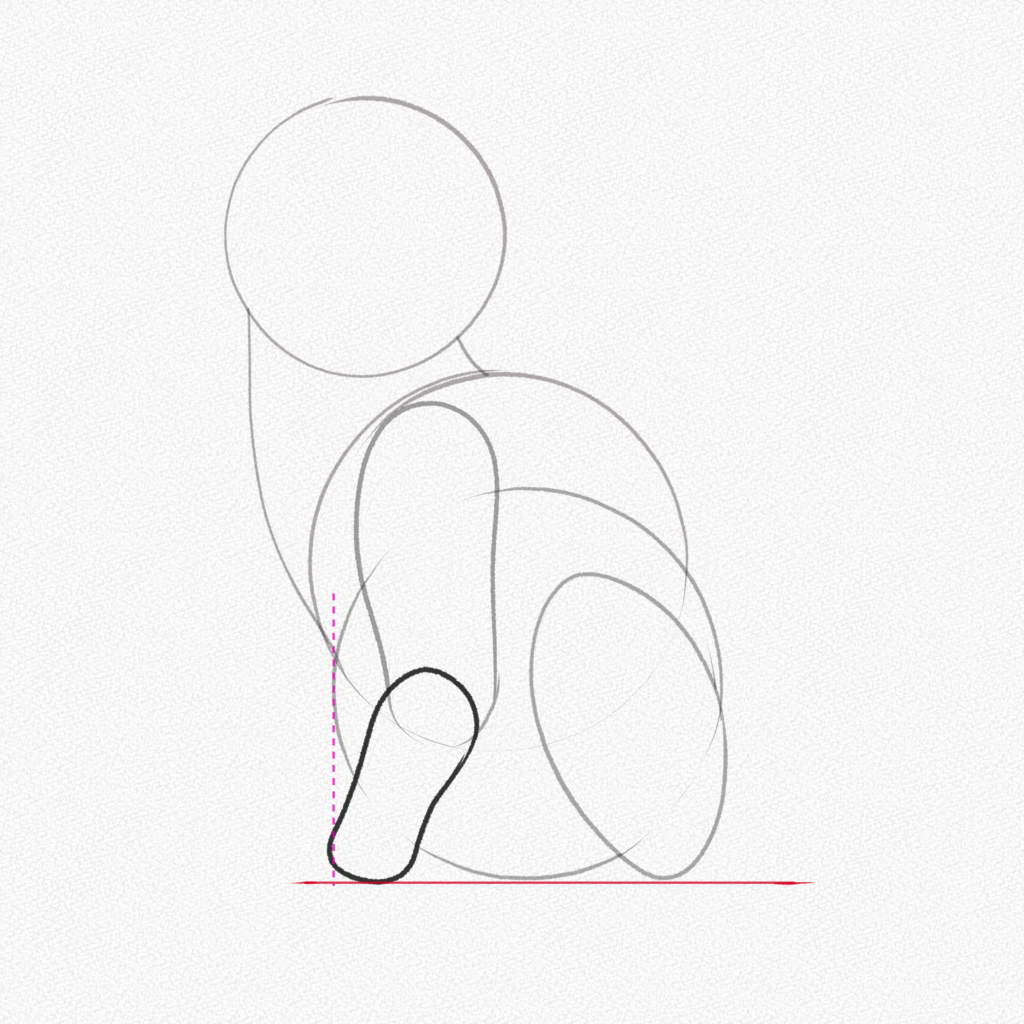
Step 10: Draw a triangle-like blob
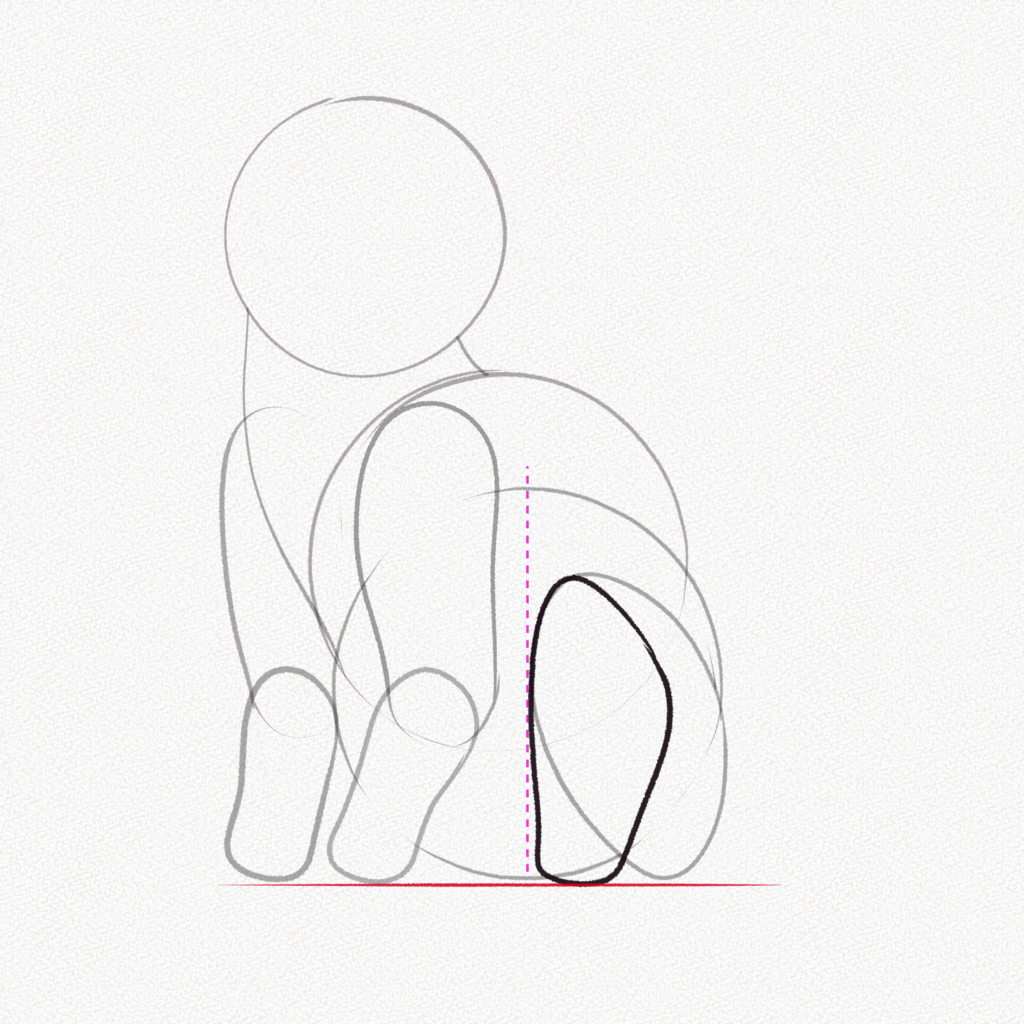
This will be our cat’s lower leg. make sure it’s aligned with the thigh that we drew in step 5 and that it doesn’t go below the cat’s body level.
Step 11: Draw three horizontal bean-like shapes.
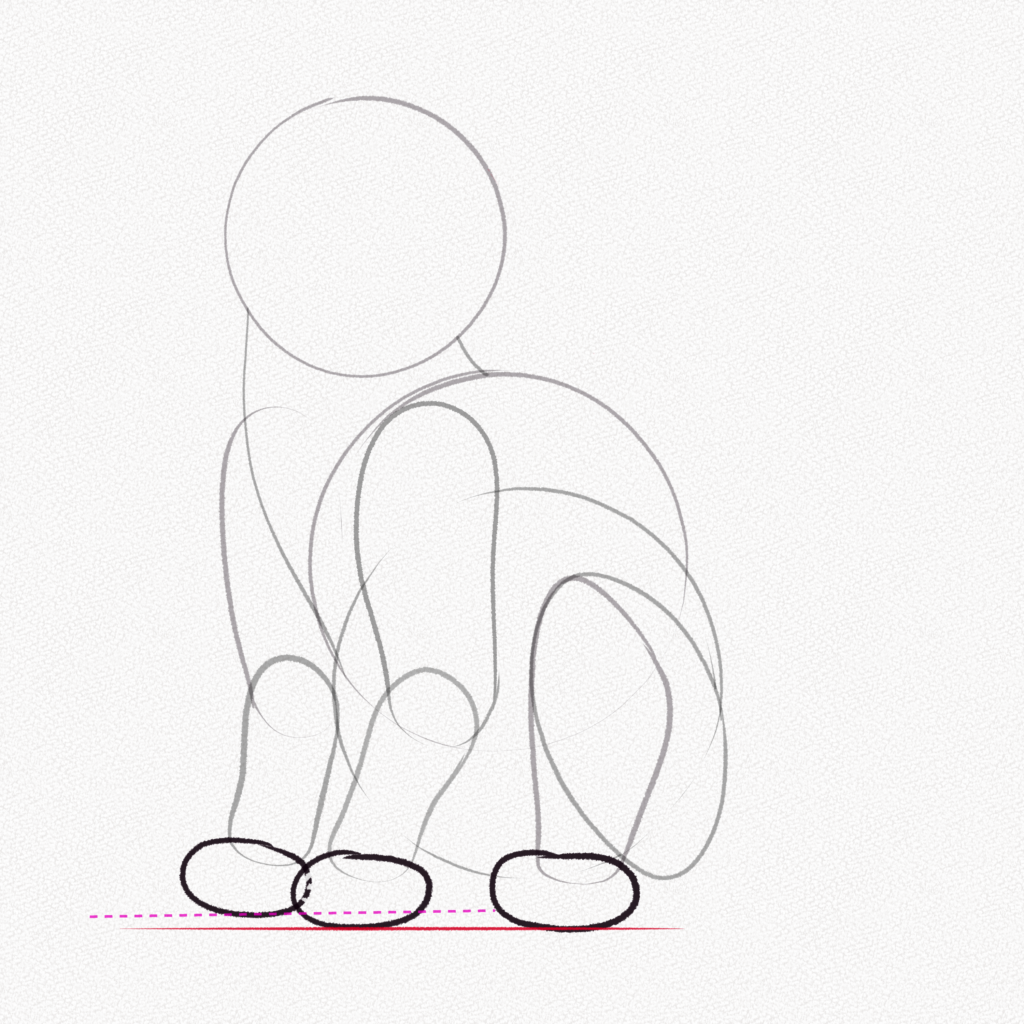
These will be our cat’s feet and paws, draw the front ones the same size and the back one slightly larger.
Step 12: What about the other leg?
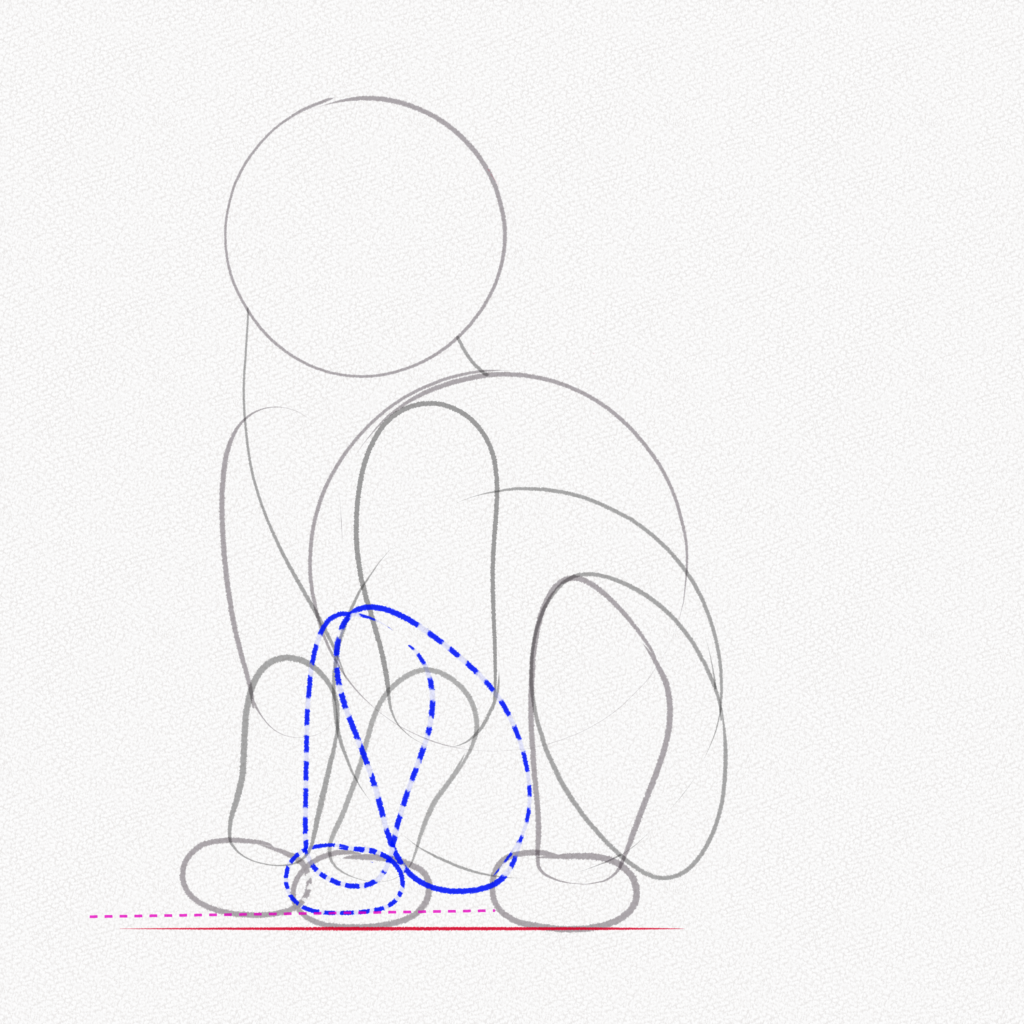
To figure out how the hidden leg will change our drawing, let’s imagine a leg shape (like the one we already drew) and erase the parts that are either hidden by the body or paws, that way we’ll be able to know what to shade and what to line.
Step 13: Let’s draw the ears!
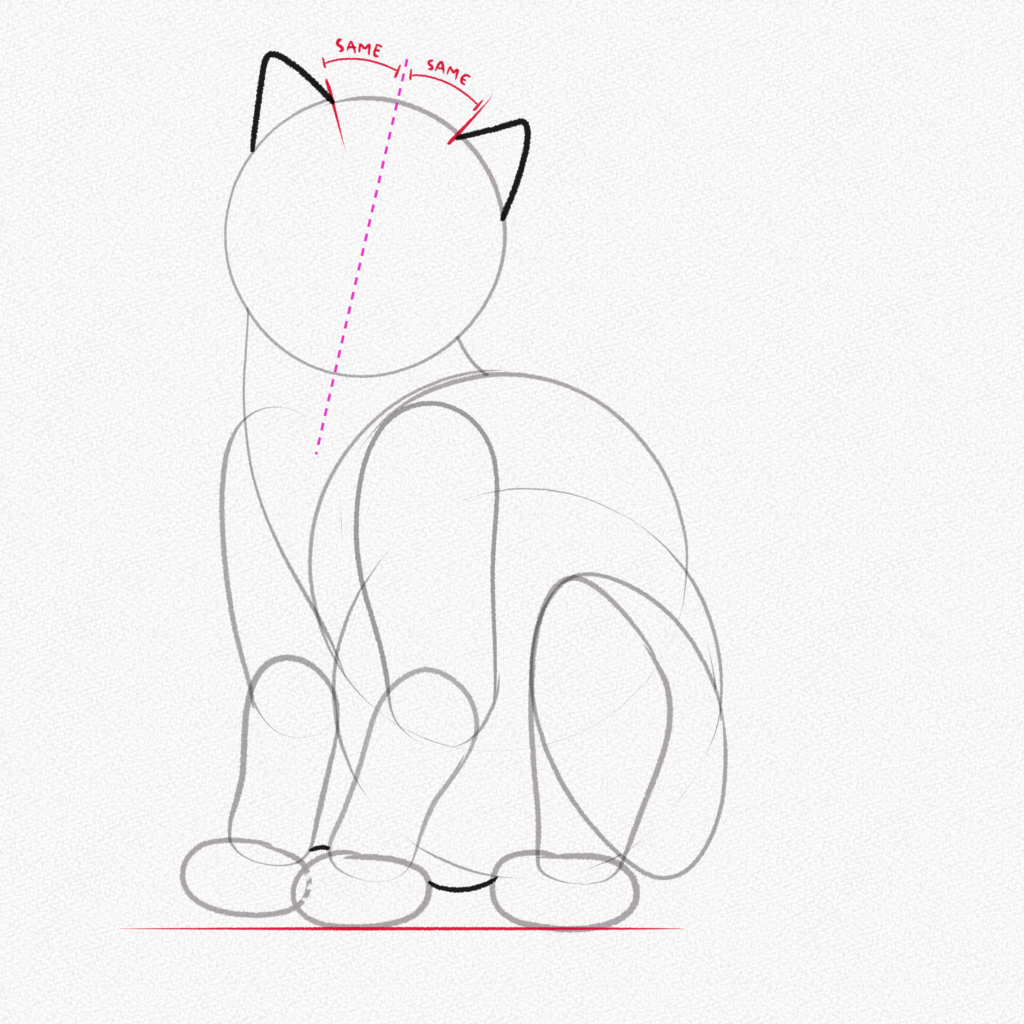
For this step, we’ll have to find the middle of our head, and calculate where our ears will go. Remember, the size of the space between the middle of our head and each ear needs to be the same.
Section 2: Drawing a Cat’s Face Structure
In this section we’re going to focus on the cat’s face and establishing it’s structure.
Step 14: Find the center of the cat’s head.
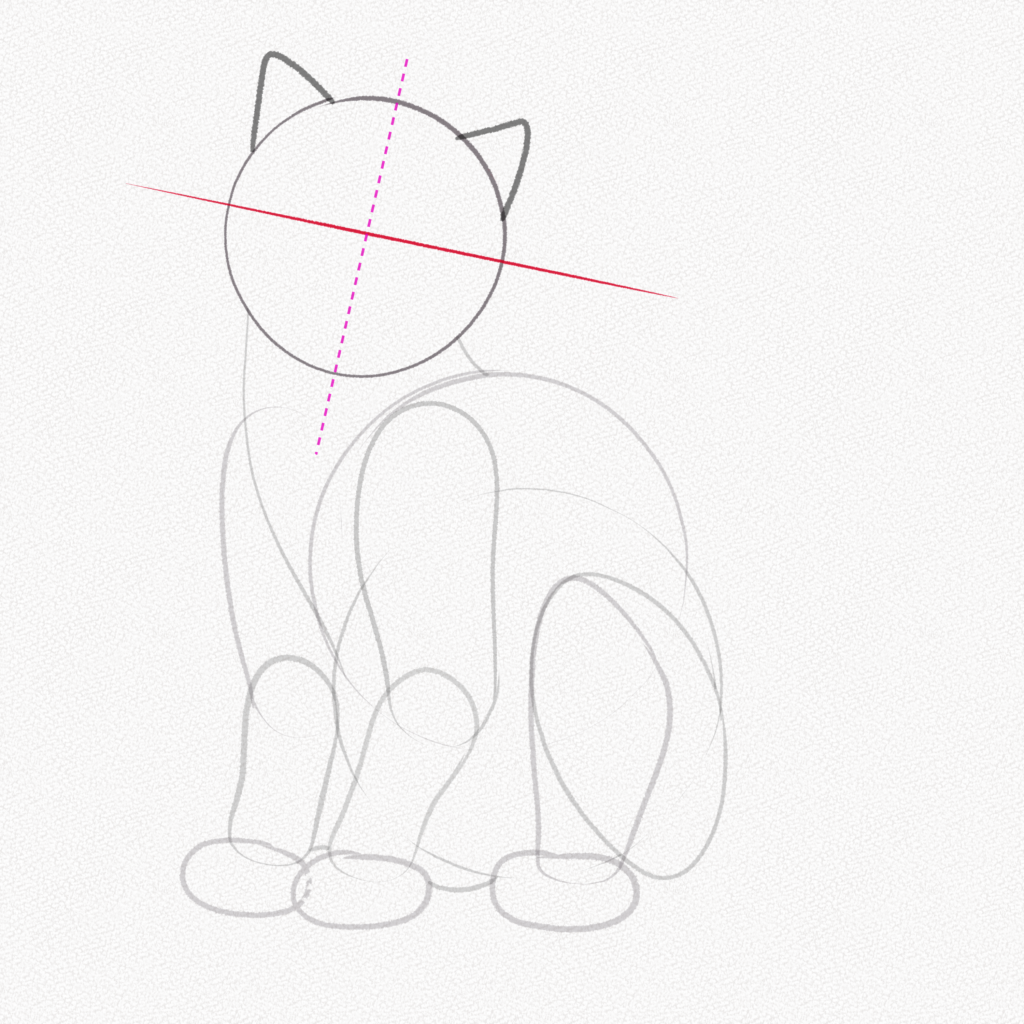
Find the center of our cat’s head and draw another line parallel to the one we already drew.
Step 15: Pull two soft lines from the ears to the bottom of the head.
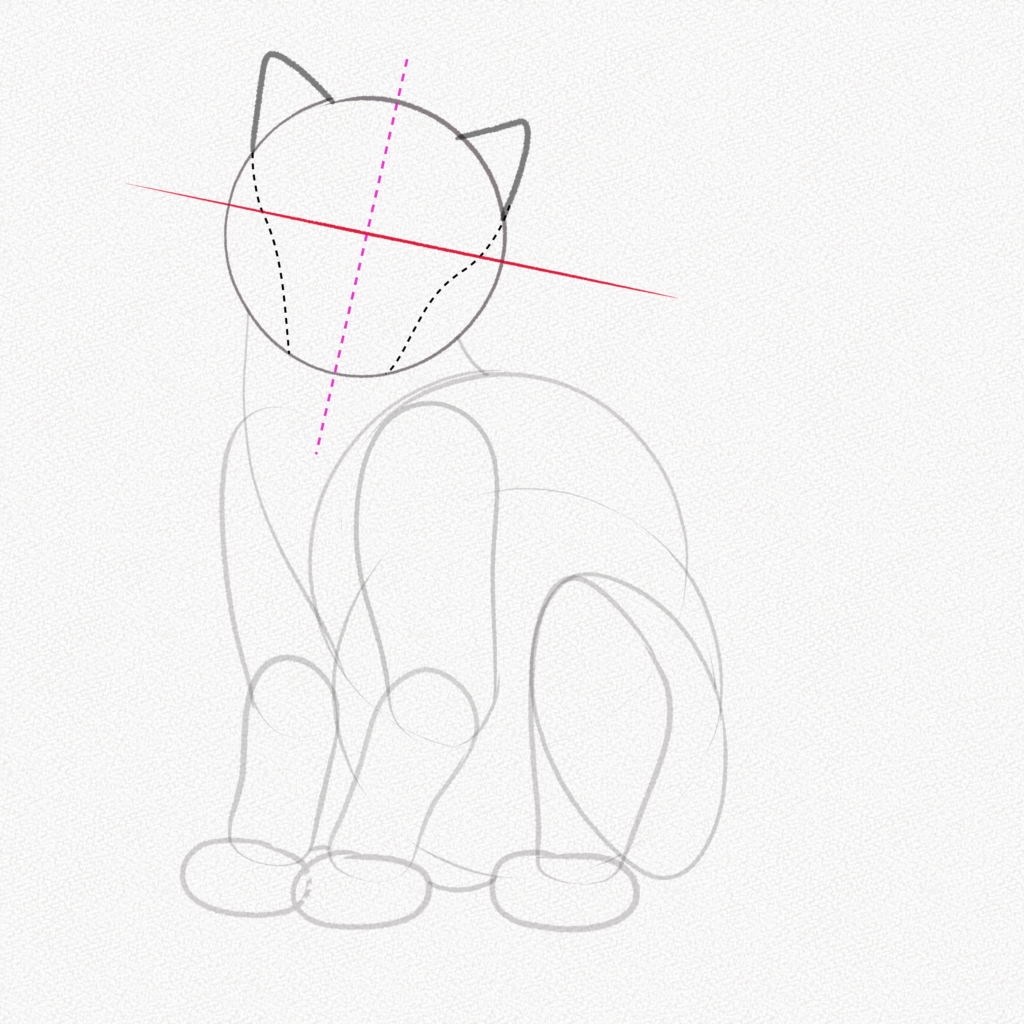
All the cats are different, some have bigger ears, some have bigger jaws, so depending on the face of the cat we want to draw, we need to pull two lines from the ears to the bottom of the face, making the space between them as broad as we want or cat’s jaw to be.
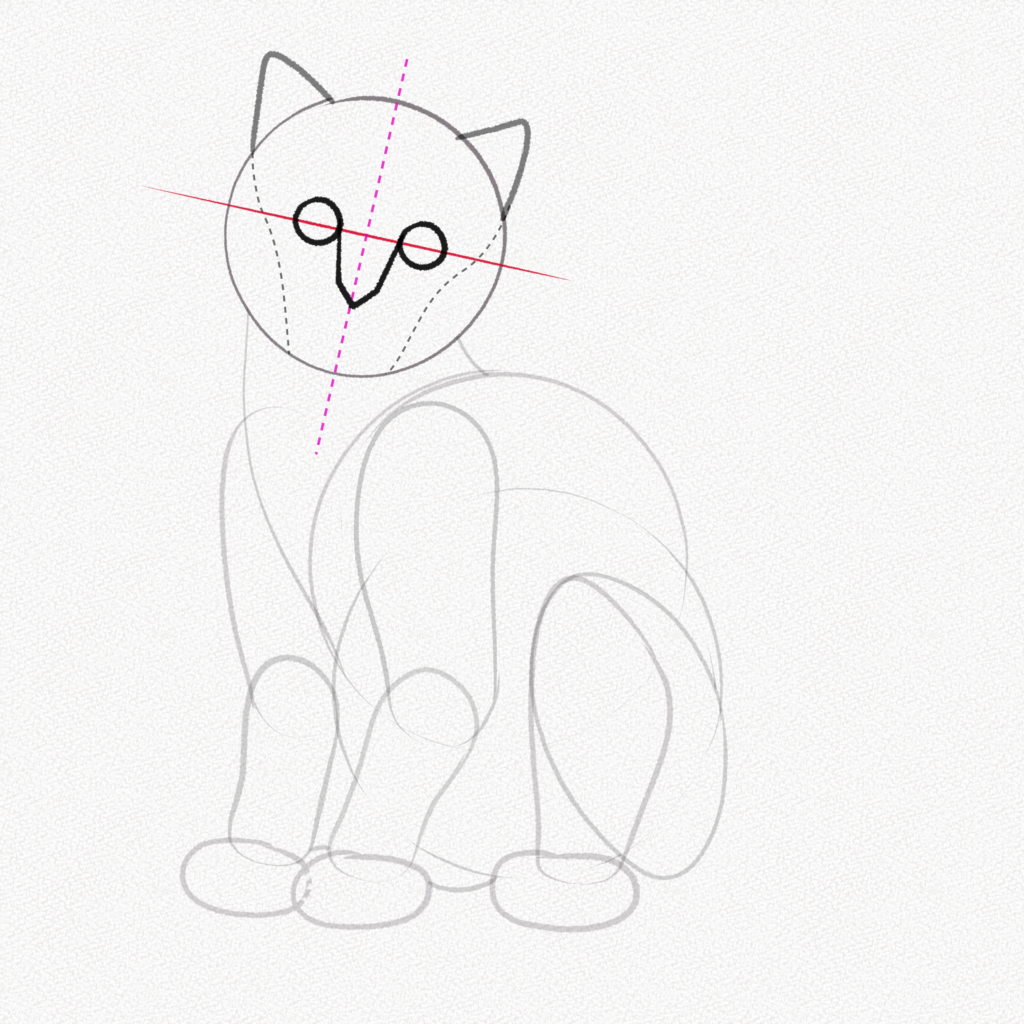
Step 16: Draw the eyes
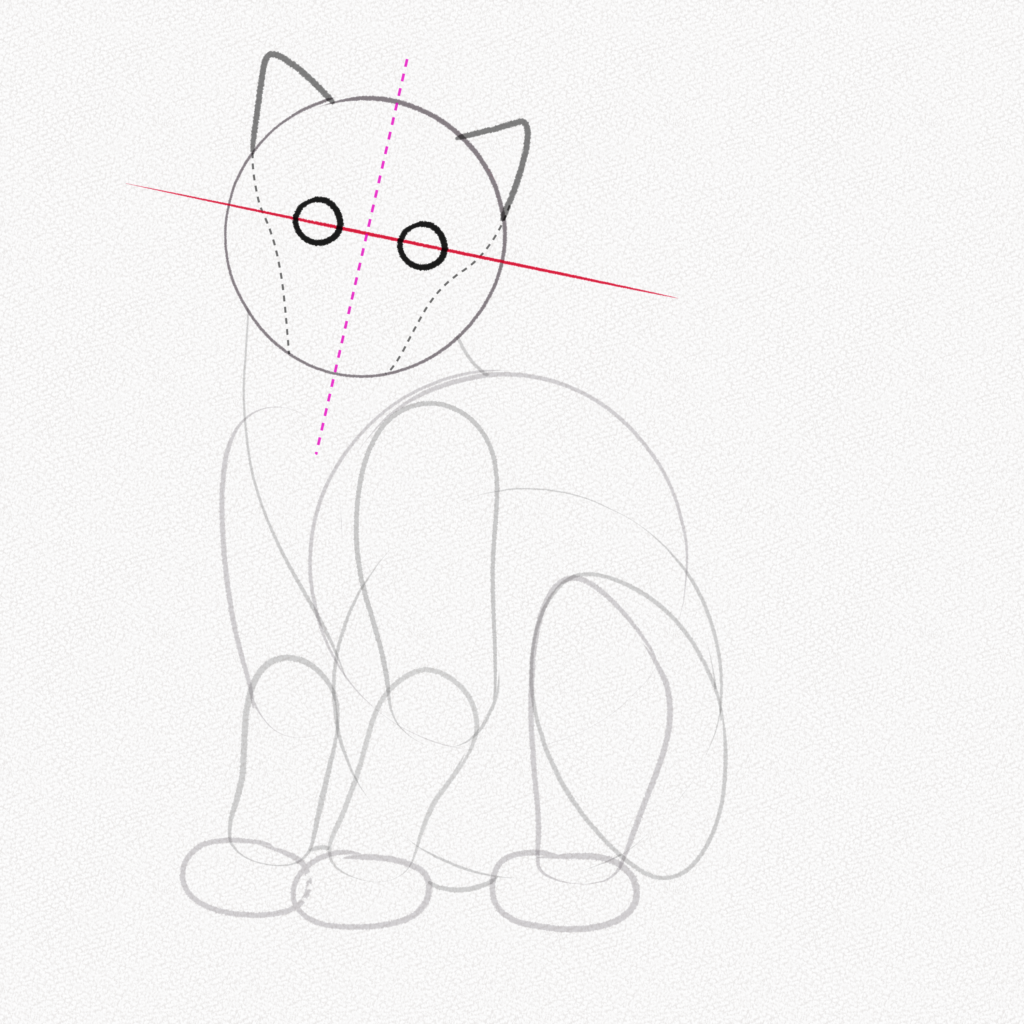
Equally distanced from the center and slightly close to the lines we drew, we draw two big spheres (also according to the eye size we want our cat to have) that will be the base for our eyes cat.
Step 17: Draw half of the nose
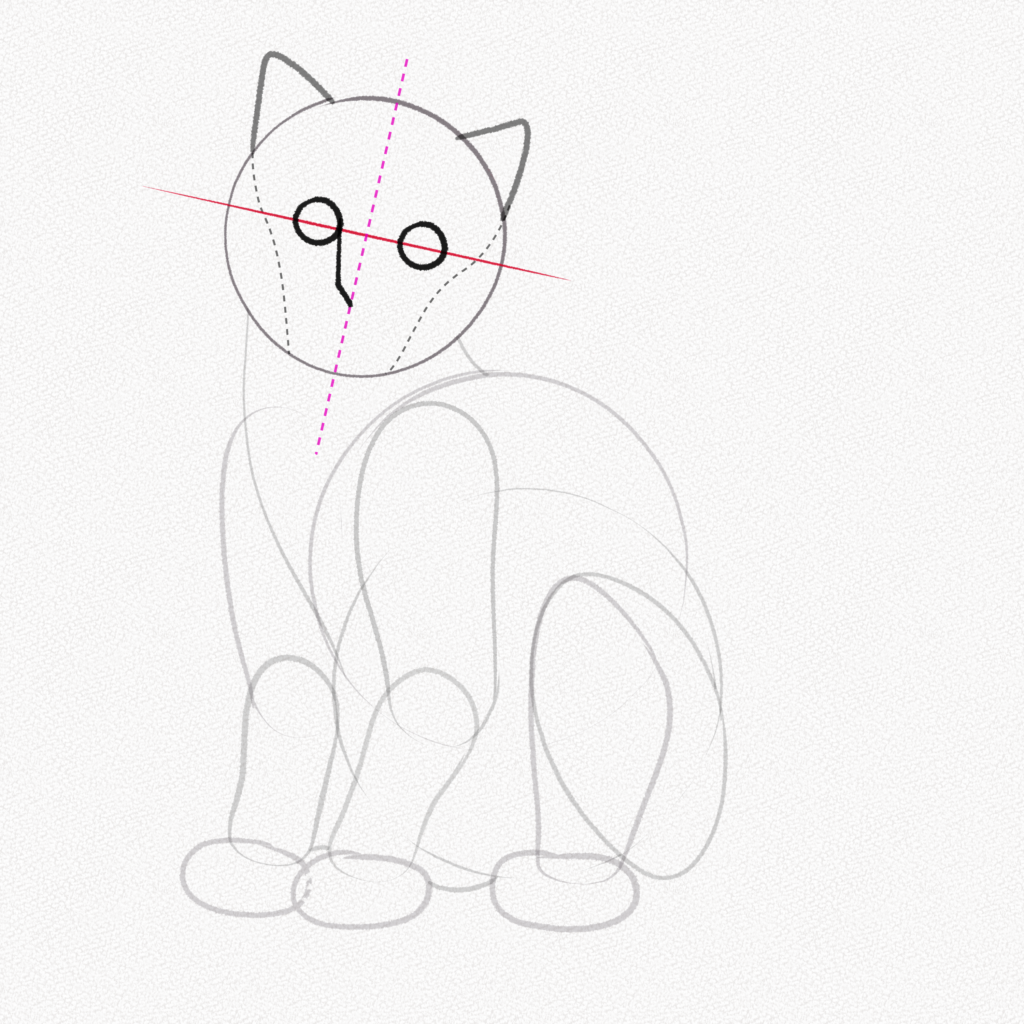
From the side of the eyes we drew, pull two small diagonal lines one bigger than the other, the longer one will be the nose bridge and the smaller will be the nose.
Do these lines accordingly to what you want the cat to look like.
Step 18: Draw the Other Half of the Cat’s Nose
Repeat step 17 in the opposite direction to complete the nose shape of our cat.
Step 19: Draw the Upper Mouth Lines
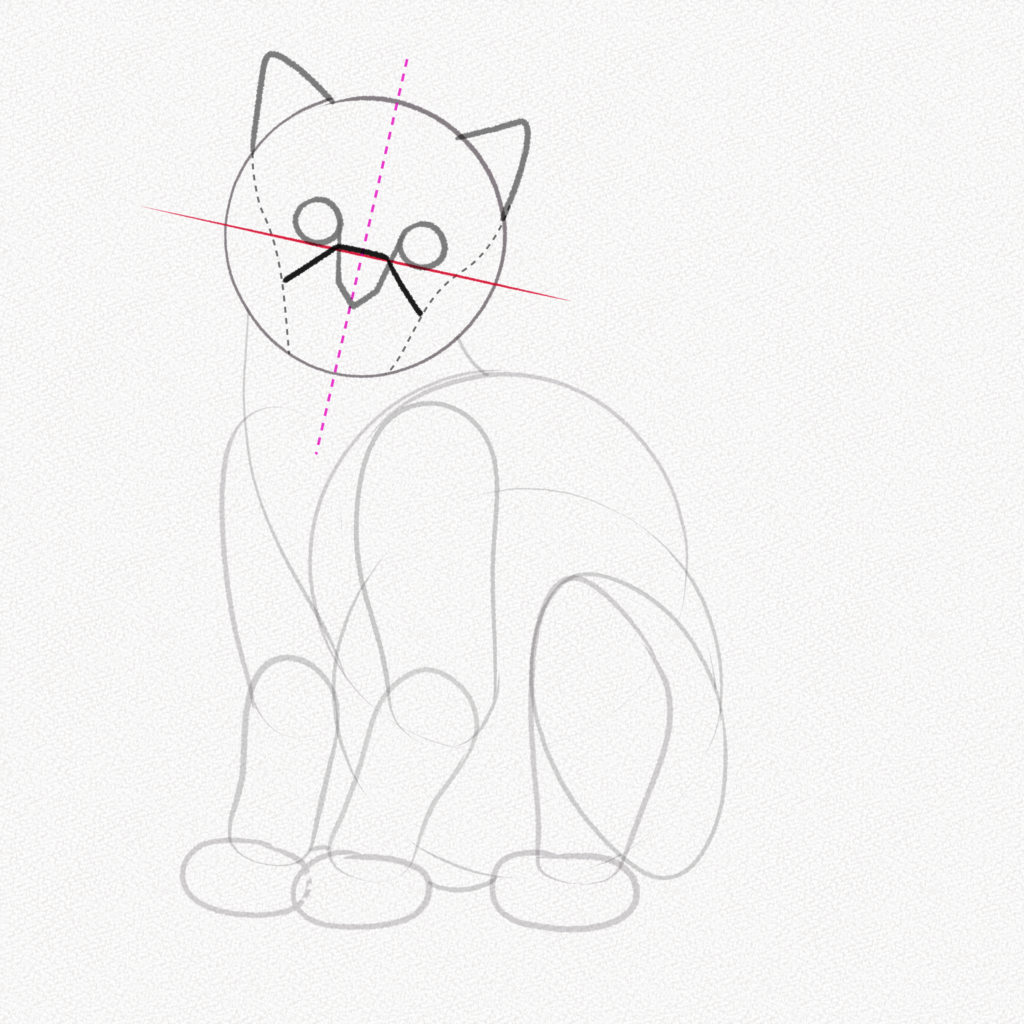
Trace a small line between the eyes right in the center of our cat’s face (the line we drew in step 15) and pull two diagonals down connecting them to the curves we drew in step 16. That will be the upper lines for our cat’s mouth.
Step 20: Complete the nose and define the mouth lines.
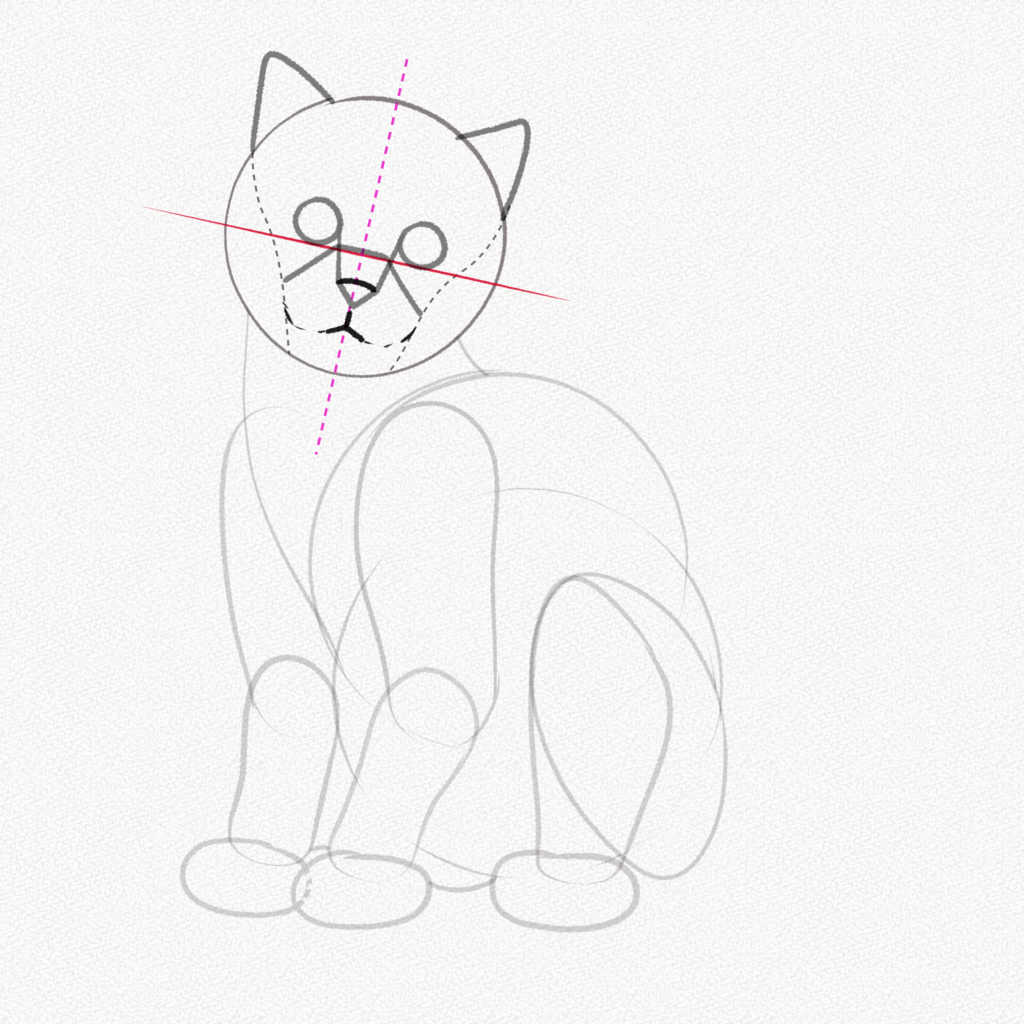
Draw a small line on the top of the nose shape we drew before and complete the mouse with an inverted “Y” shape, making also two curved lines that connect with the upper mouth lines from step 18.
Step 21: Draw the Jawline and the Corner of the eyes
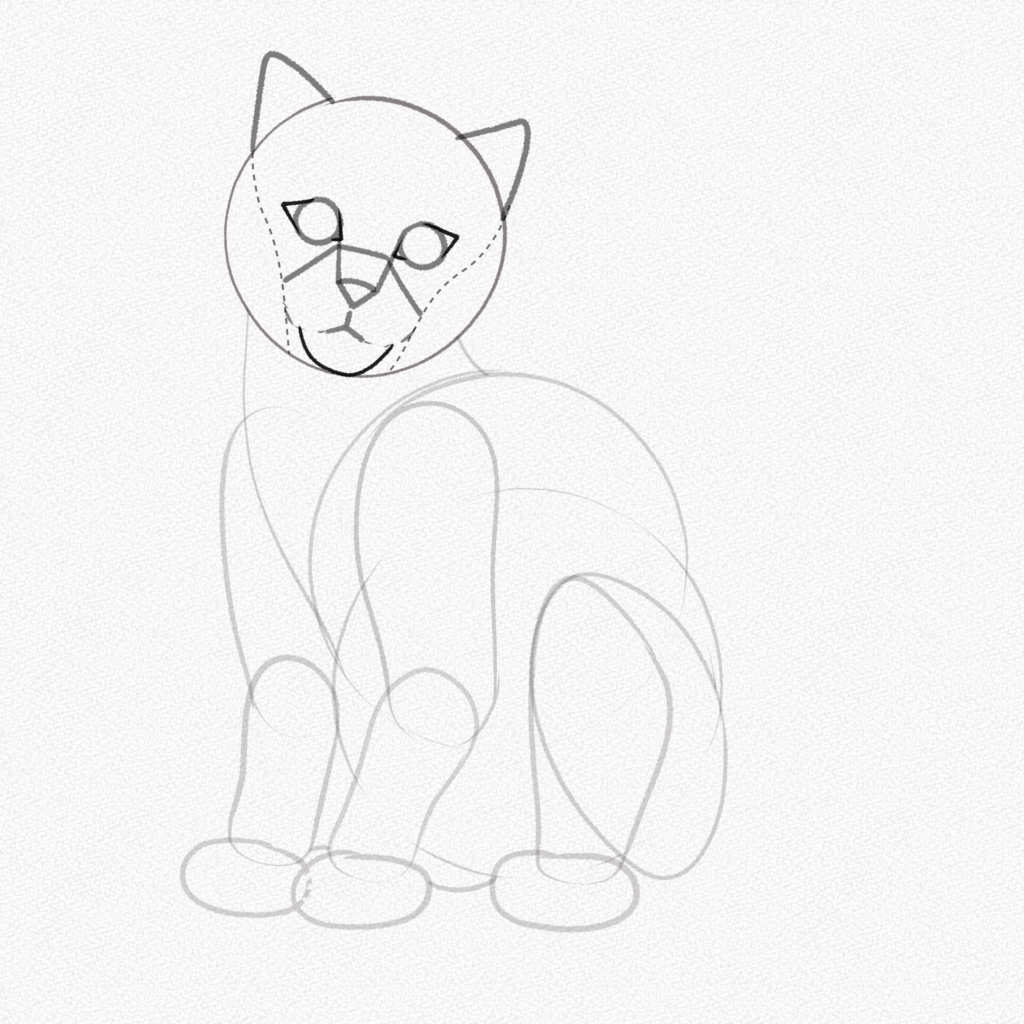
Now it’s looking more and more like a proper cat! draw the upper and lower corners of the eyes and draw a small curve for the lower jaw of our cat.
Step 22: Draw the pupils and hint at the tail shape
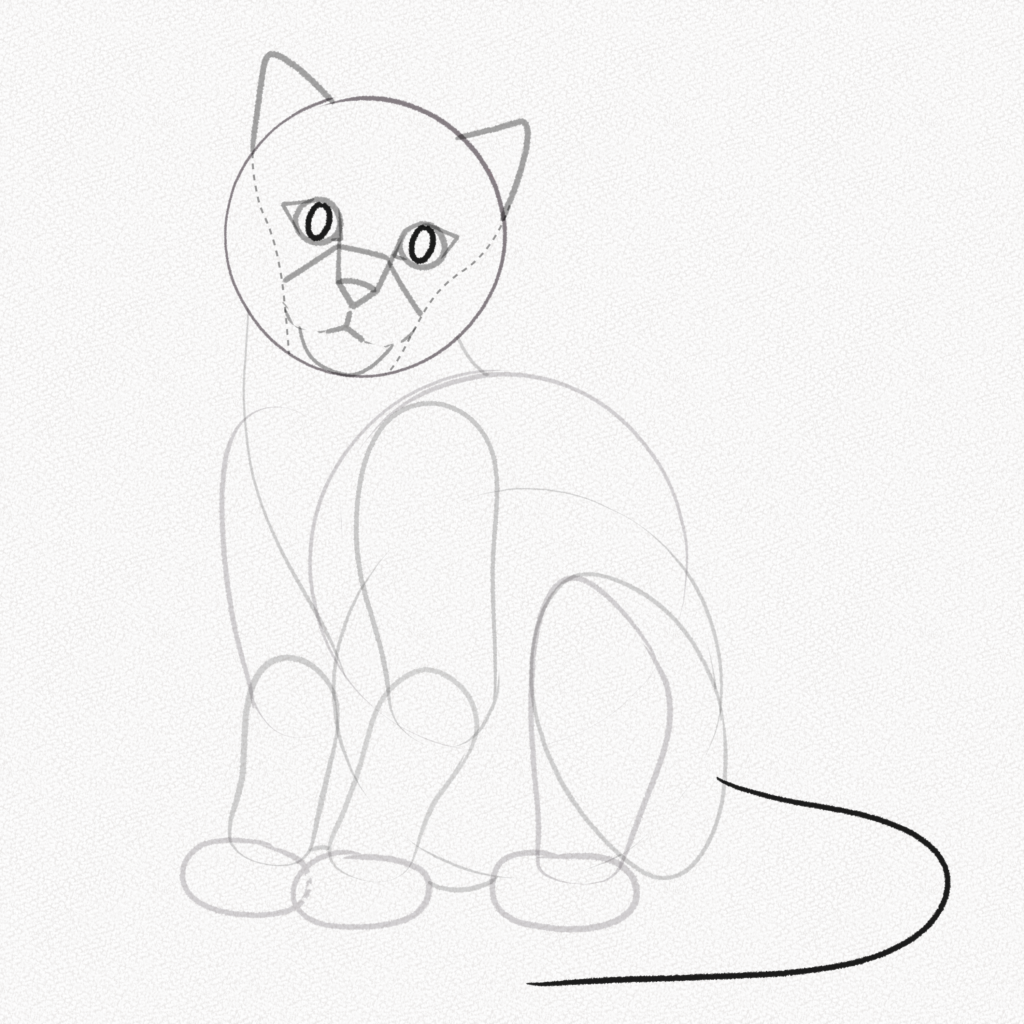
Draw two small ovals in the cat’s eyes where you want the pupils to be and make a curve to hint where the tail of our cat should be.
Step 23: Define the tail shape
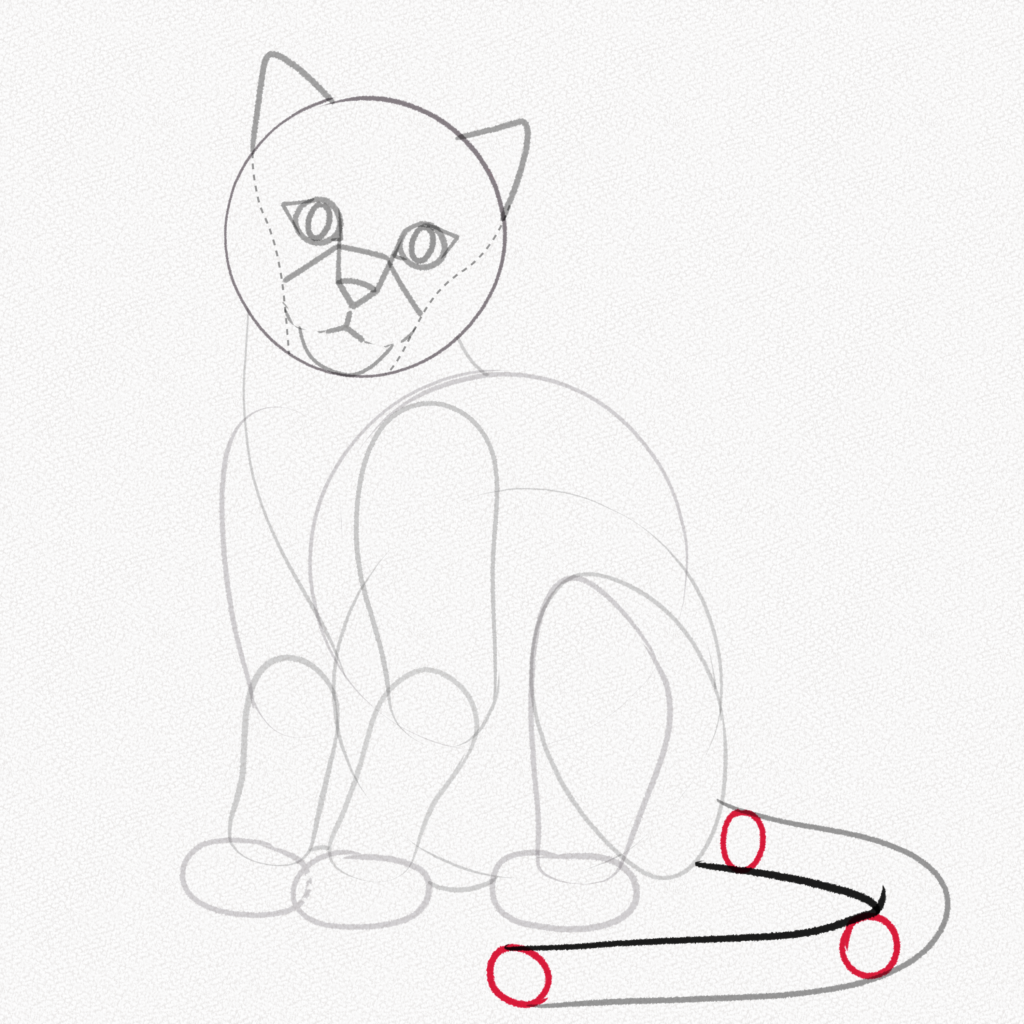
Draw three circles at the beginning of the tail, at the middle, and at the end, then connect them with lines to make the tail’s structure.
Section 3: How to Draw and Shade a Cat’s Fur
For these steps, we’re going to use a permanent marker/fine liner to do the definitive lines of our cat.
Step 24: Clean and detail your cat’s face.
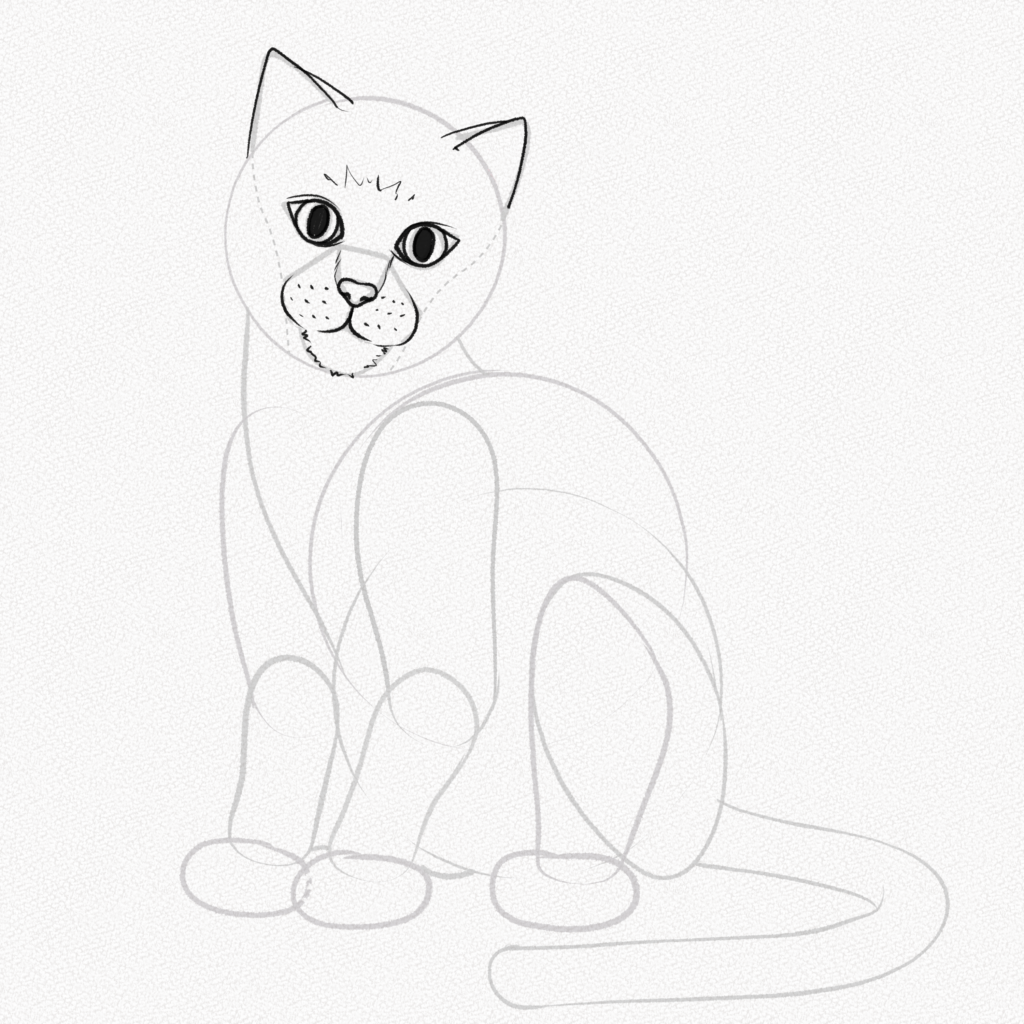
For this step, we are going to softly erase the lines of our cat’s structure and start making the lines we’re going to use and some details. Trace carefully over your sketch lines, defining the shape of the eyes, ears, nose, and mouth, don’t forget to use small lines to resemble the fur on the cat’s mouth, and don’t forget to place the whisker roots.
Step 25: Fur of the Cat’s Face
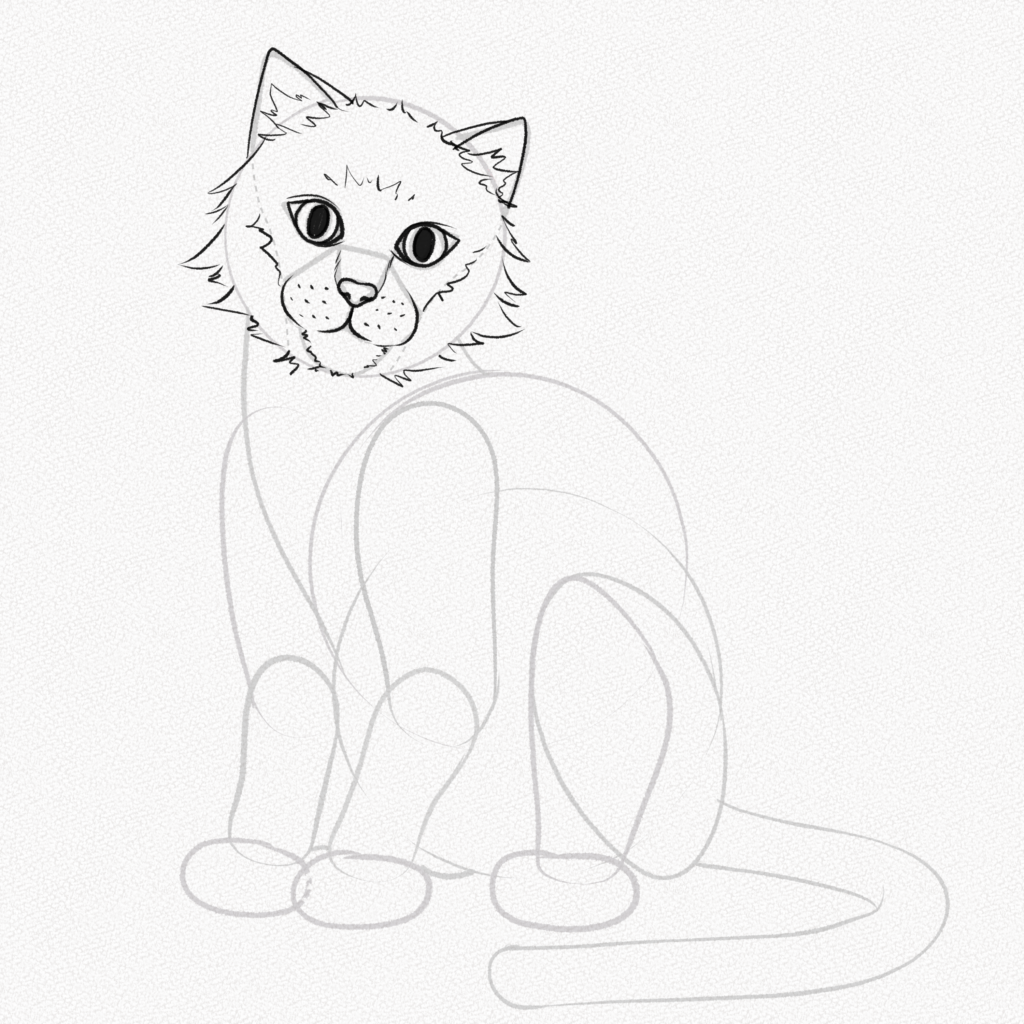
As every cat is different, we need to see the cat we’re going to draw and try and mimic the shape of their fur, in this case, making it a little flat on the top of his head and more fully on the sides. Keep reading to see what kind of trace is better to draw fur!
Step 26 – Fur is Affected by Gravity
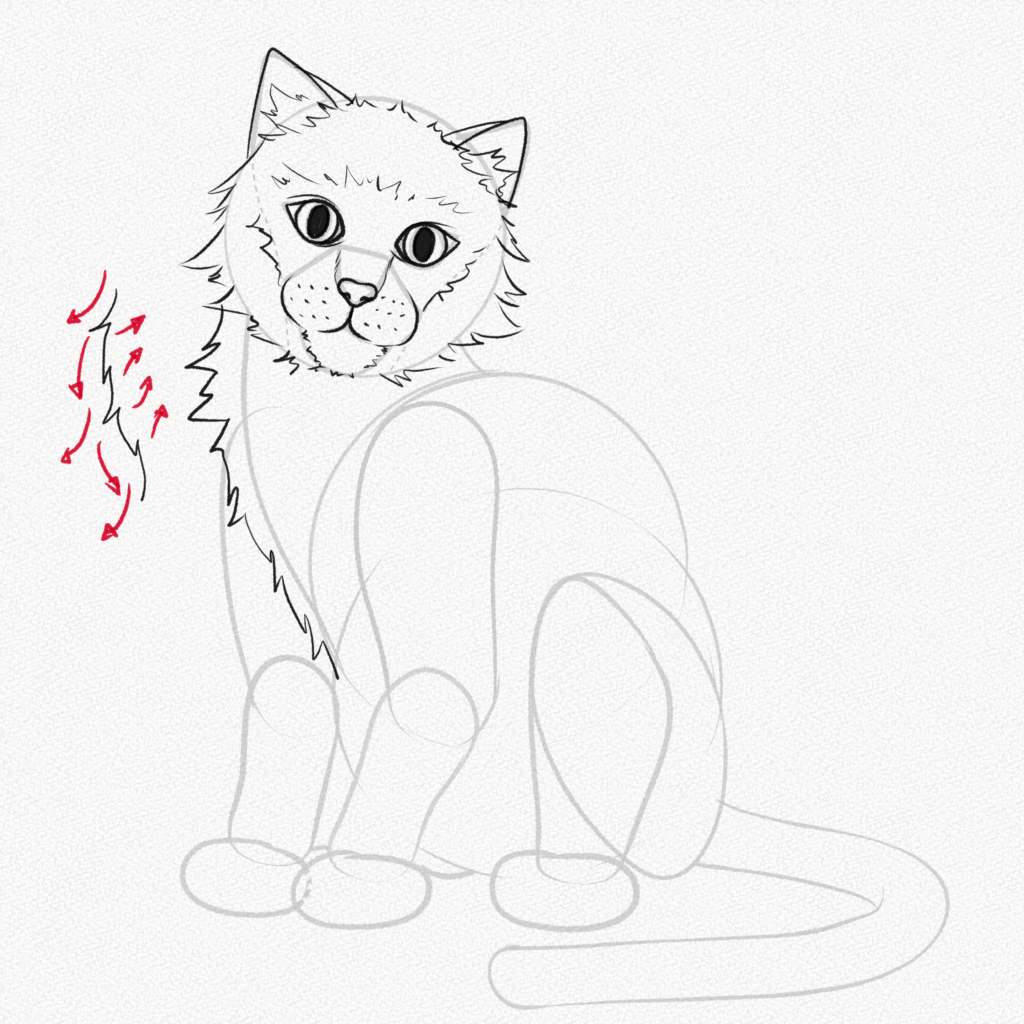
Yes, Fur as every other thing on earth is affected by gravity, so if you’re drawing a cat (especially a fluffy one like this) his hair is most likely to go down. Practice a bit this kind of big down small up trace, leaving some pointy shapes to give dynamism to our drawing.
Step 27: Defining the Paws

For this step we’re going to define the shape of the front paws, dividing our circle structure in three and making bumpy lines on each finger.
Step 28: The Back Paw
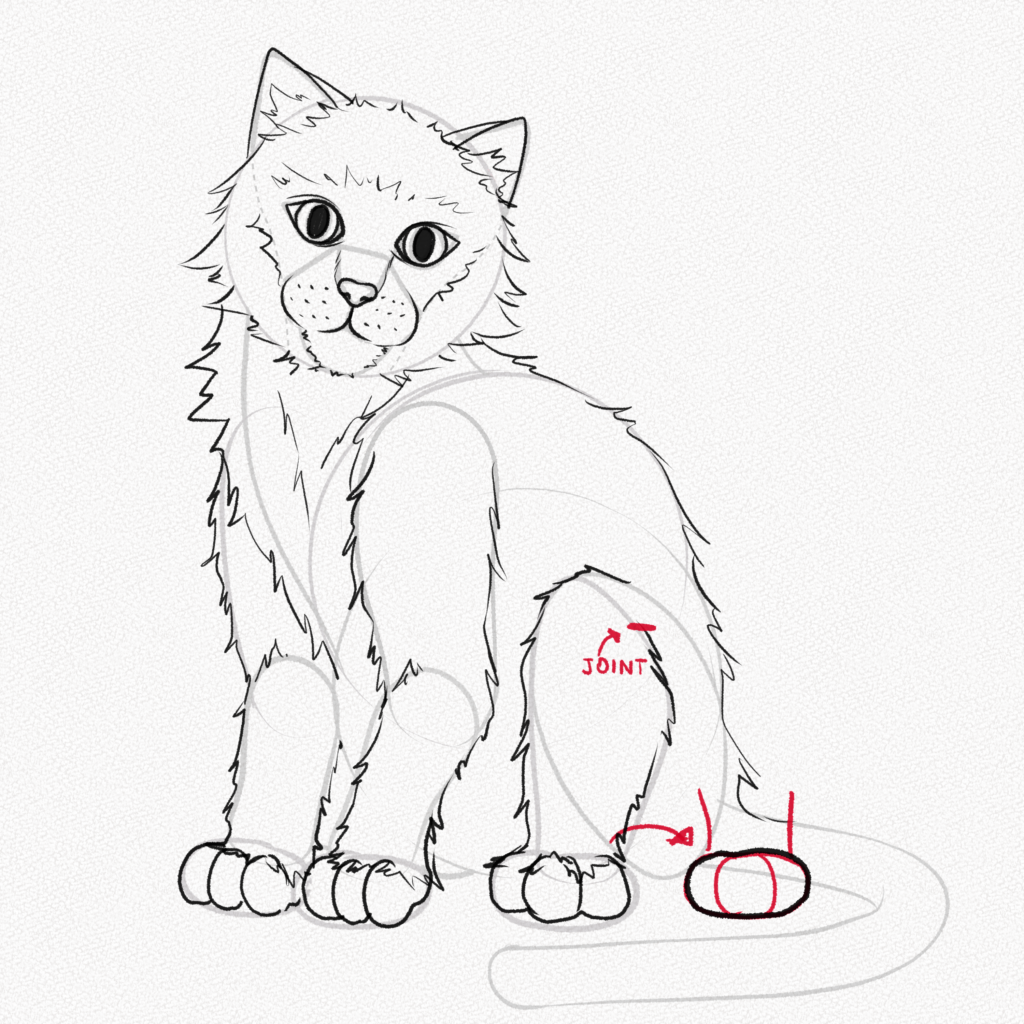
In this particular pose, we’re going to do the same as in step 25 but slightly bigger and a little bit turned to the front. As we add more fur, we have to be cautious to not overextend the fur in the back leg like in the diagram, since there’s where the leg bends.
Step 29: The Tail
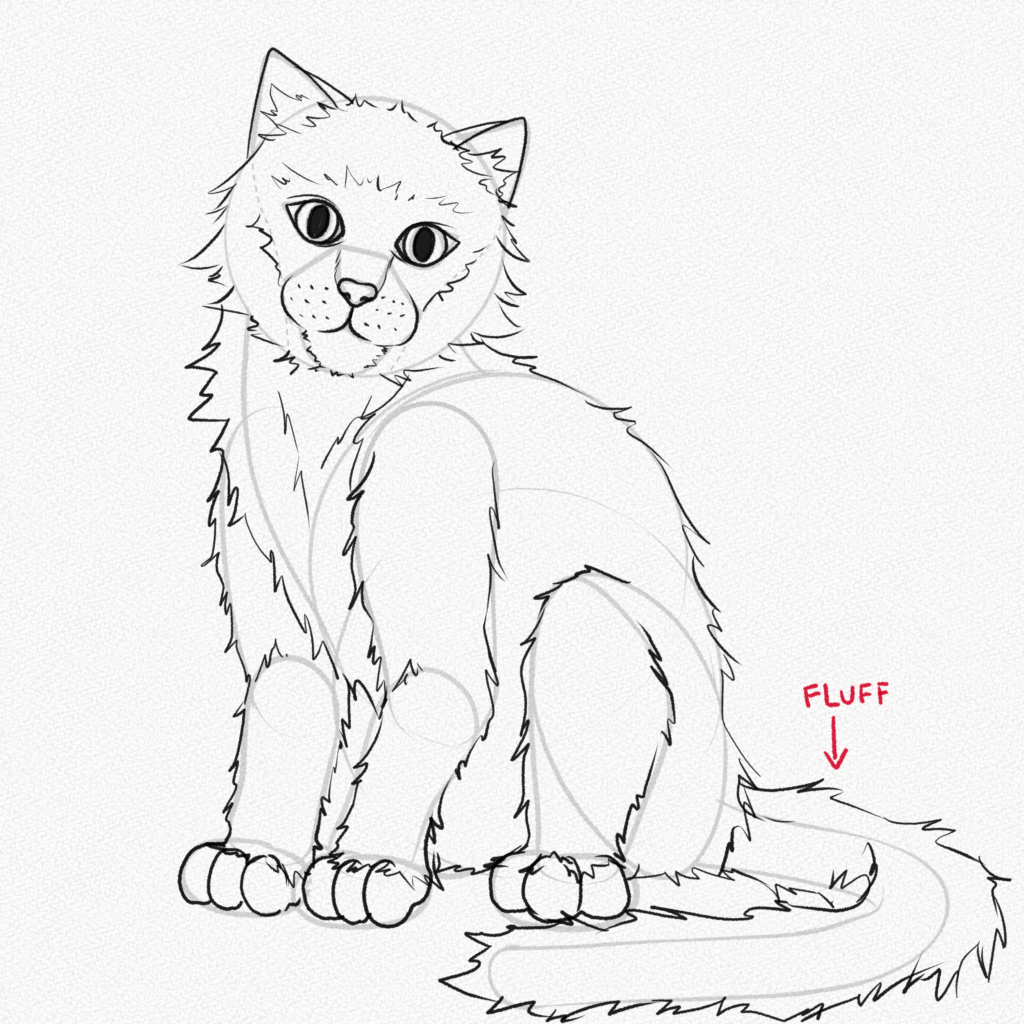
Using our tail structure as a reference, we’re going to add fluff with longer lines since our cat has fluffier fur on the tail, you can adjust it as what you want your cat to look like since the structure is there.
Step 30 – Final Step – Shade the cat
With a strong eraser, very carefully erase the guidelines and once you have a clean drawing, with multiple soft and small traces, shade the cat according to what his fur looks like (fur pattern). We applied more shadows to the lower part of our cat since the light is hitting from above, but you can always try new lighting setups!
And that’s it! Thank you for following this tutorial! I hope you had fun drawing your cat!
References
How to Art – Drawing & Painting Tutorials